
Swivel hub rebuild
Needing to refresh your kingpins and kingpin bearings? Got a CV joint/front axle issue that needs solving? Here’s how you refresh your gen4 Jimny JB74’s swivel hubs. It would apply to a JC74 5 door as well, although some of the parts are different.
Sections
Things you’ll need
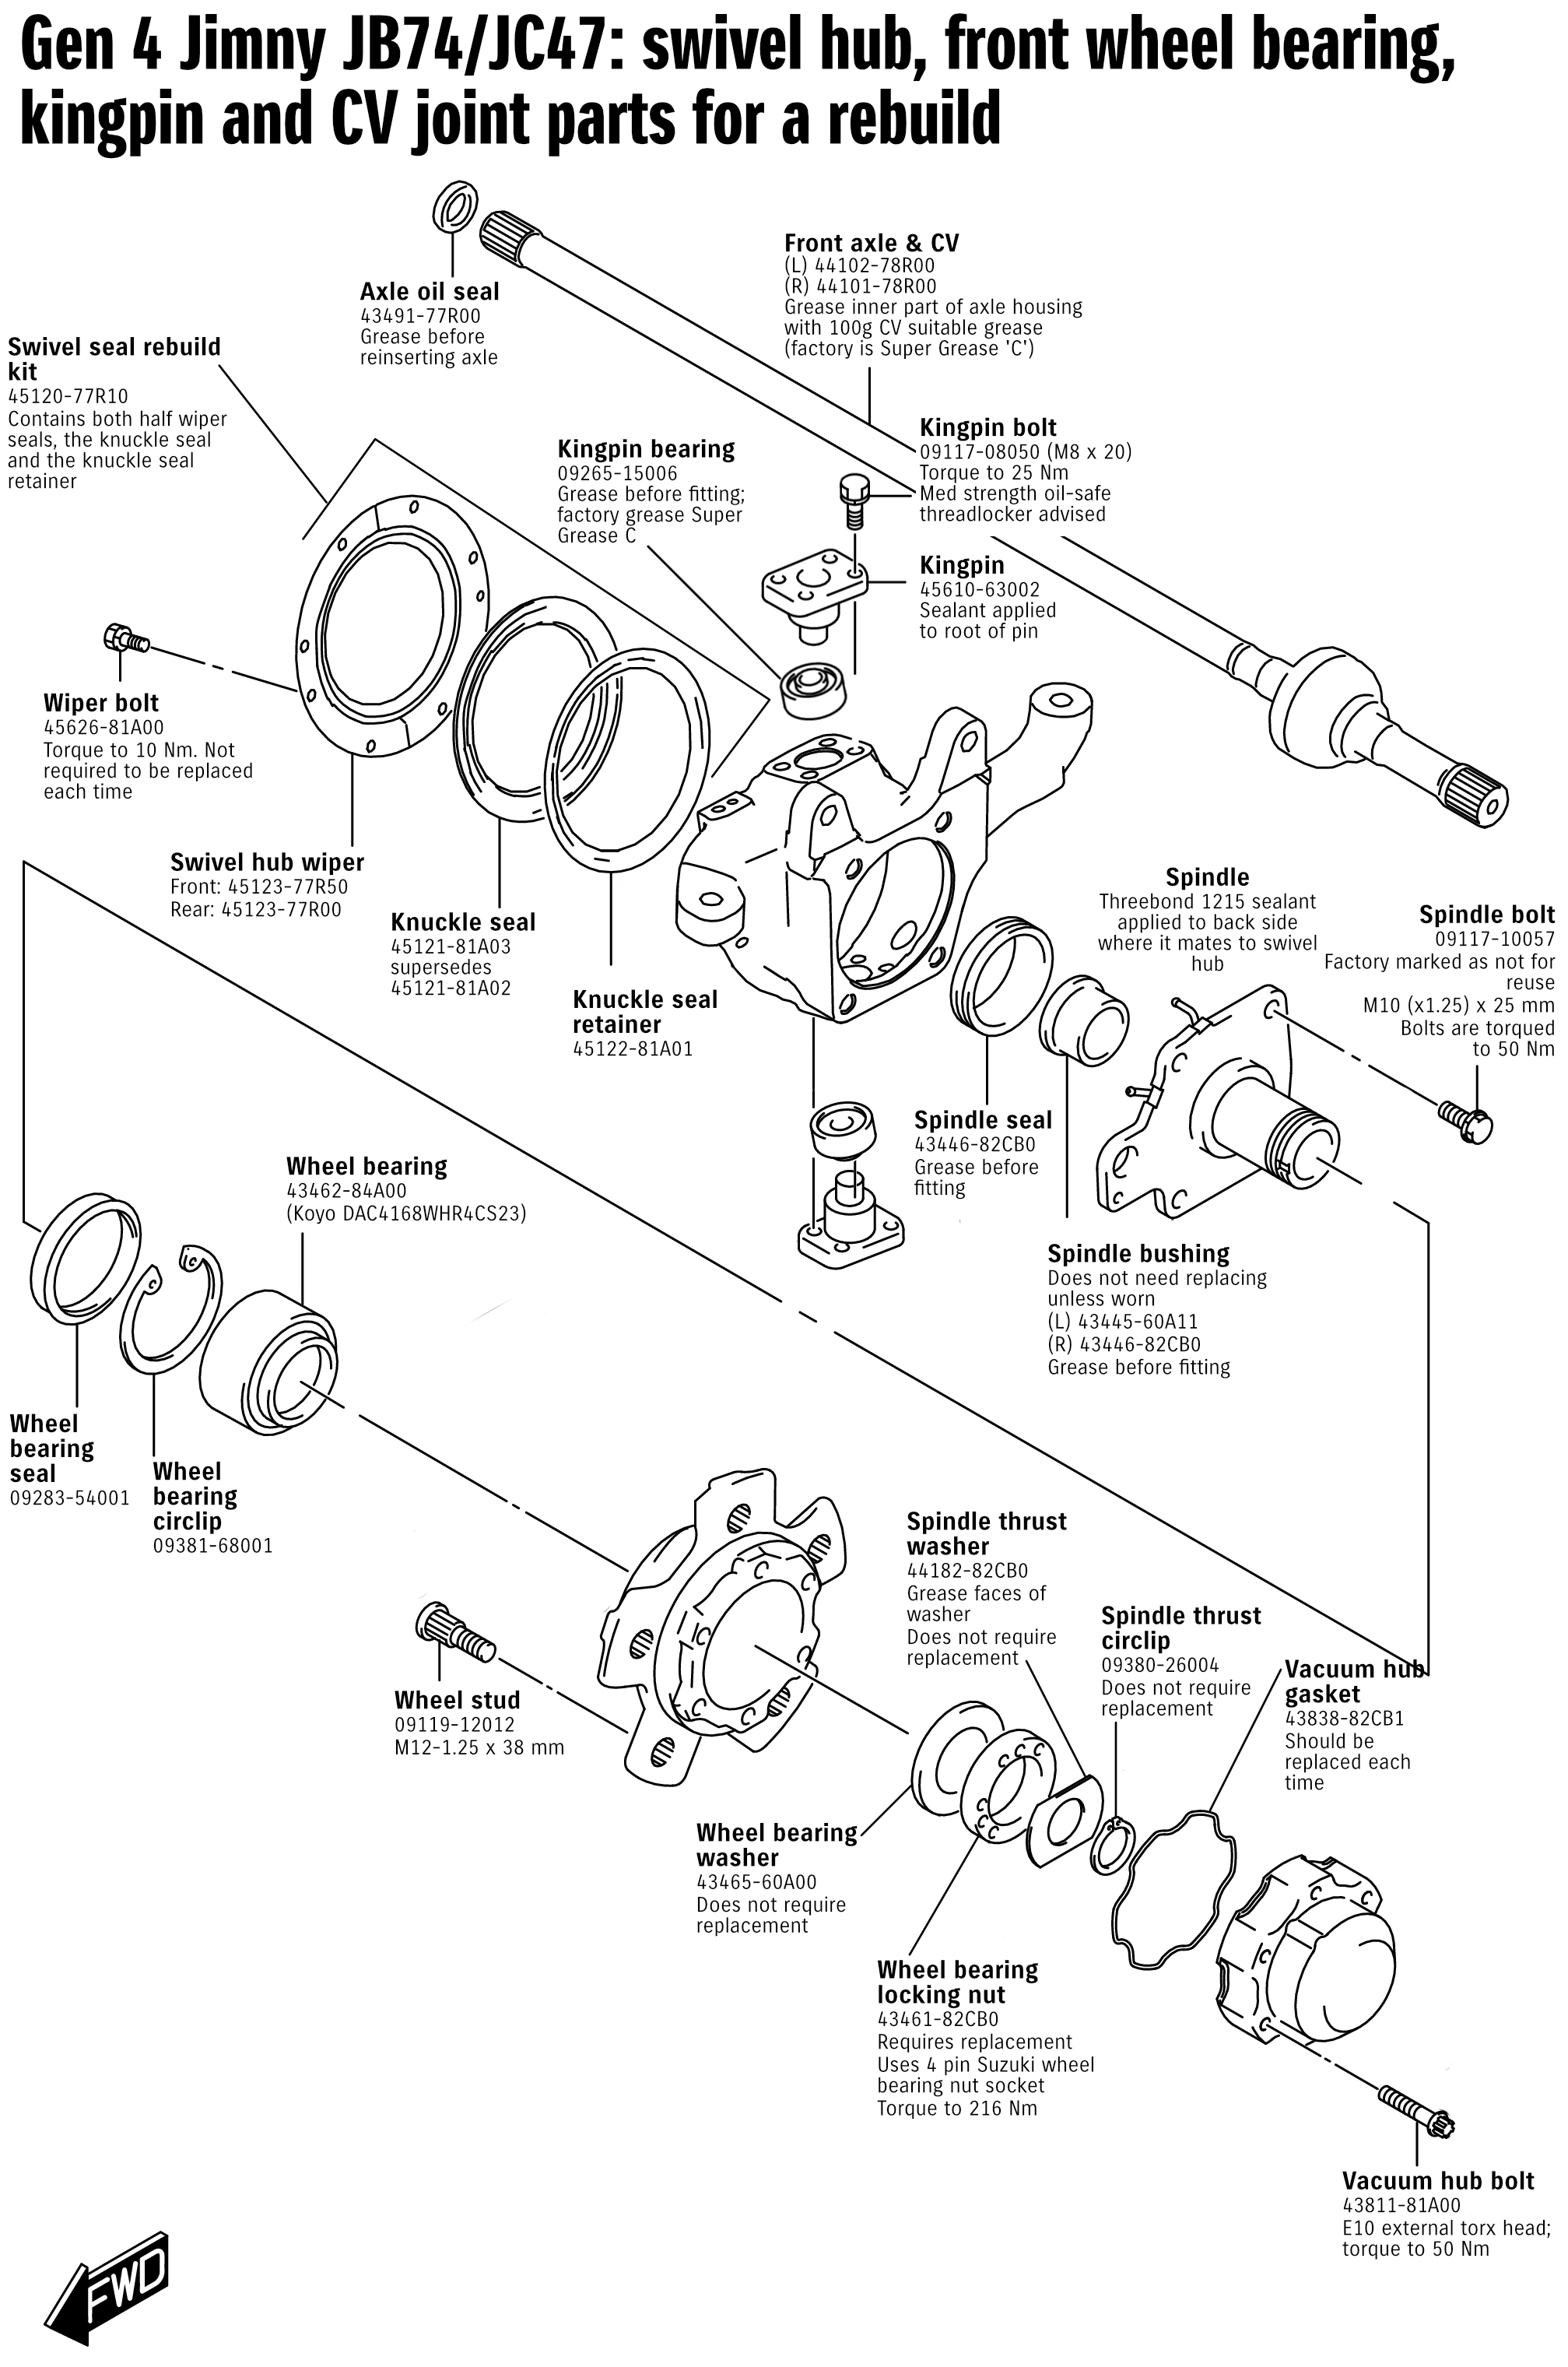
Swivel hub rebuild parts
My parts writeup contains all of the part numbers and further info
- Swivel wiper cover
- Swivel seal
- Swivel seal retainer
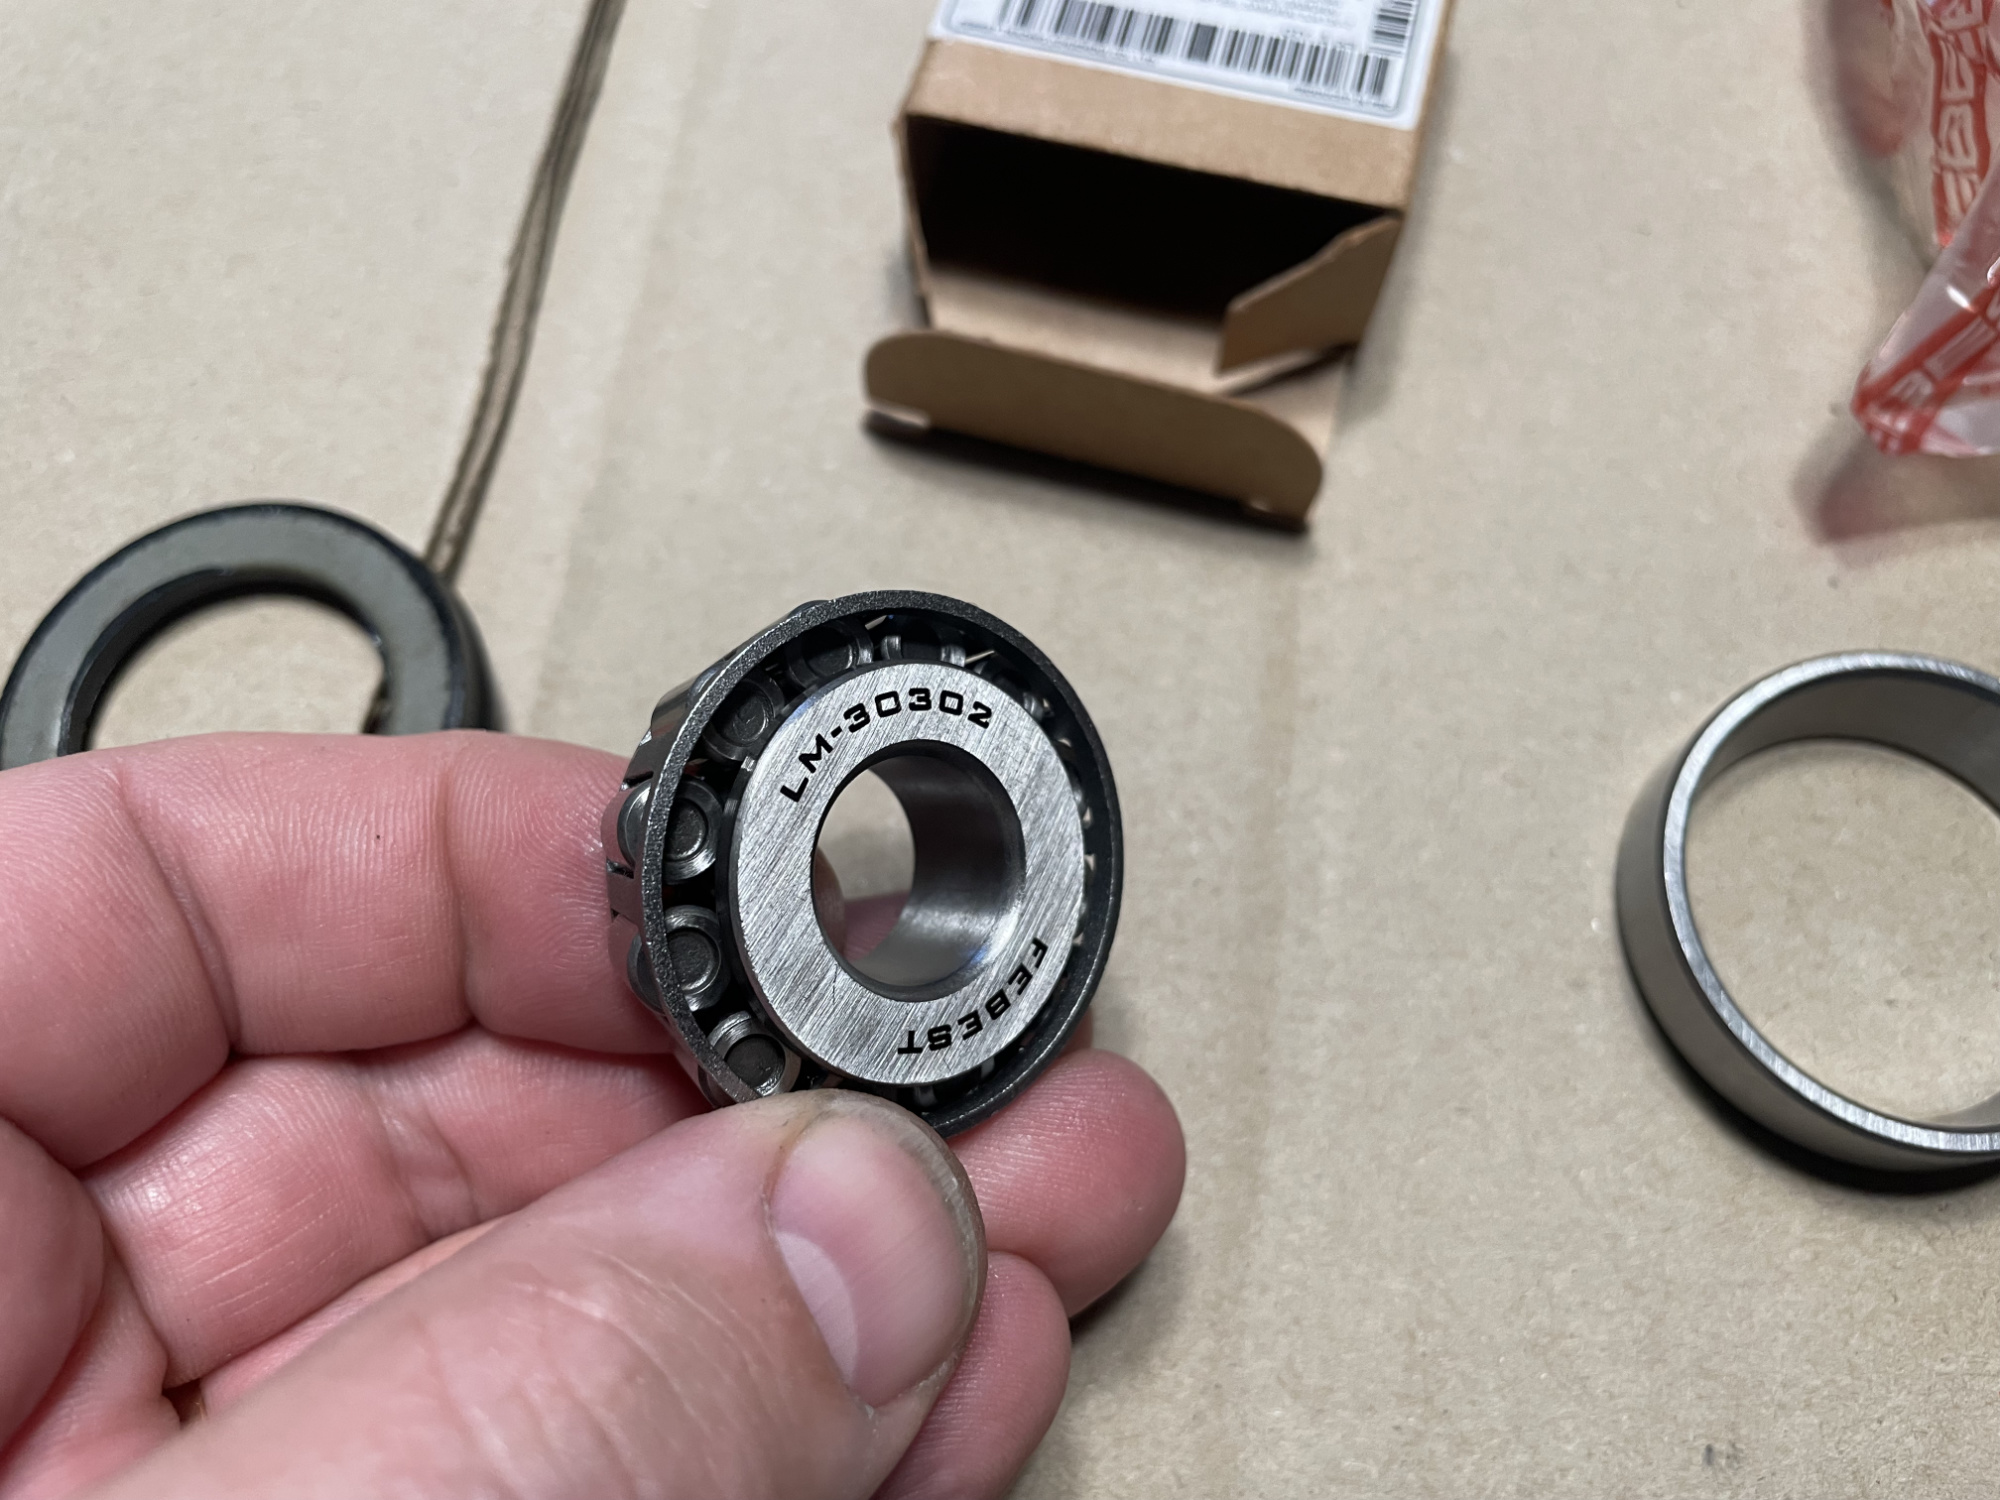
- Kingpins (2 per side)
- Kingpin bearings (2 per side)
- Axle oil seal
- Spindle oil seal
- Gasket for vacuum hub
- Replacement wheel bearing nut (ideally)
- Replacement axle half shaft per side, if you need CVs
In diagram form it looks like this:
Tools
- 10 mm, 12 mm, 14 mm, 17 mm and external torx E10, sockets, plus a loooooooong breaker bar to suit your sockets
- Square 10 mm socket (or risk it for the biscuit with 3/8″ drive ratchet)
- Jack and jackstand
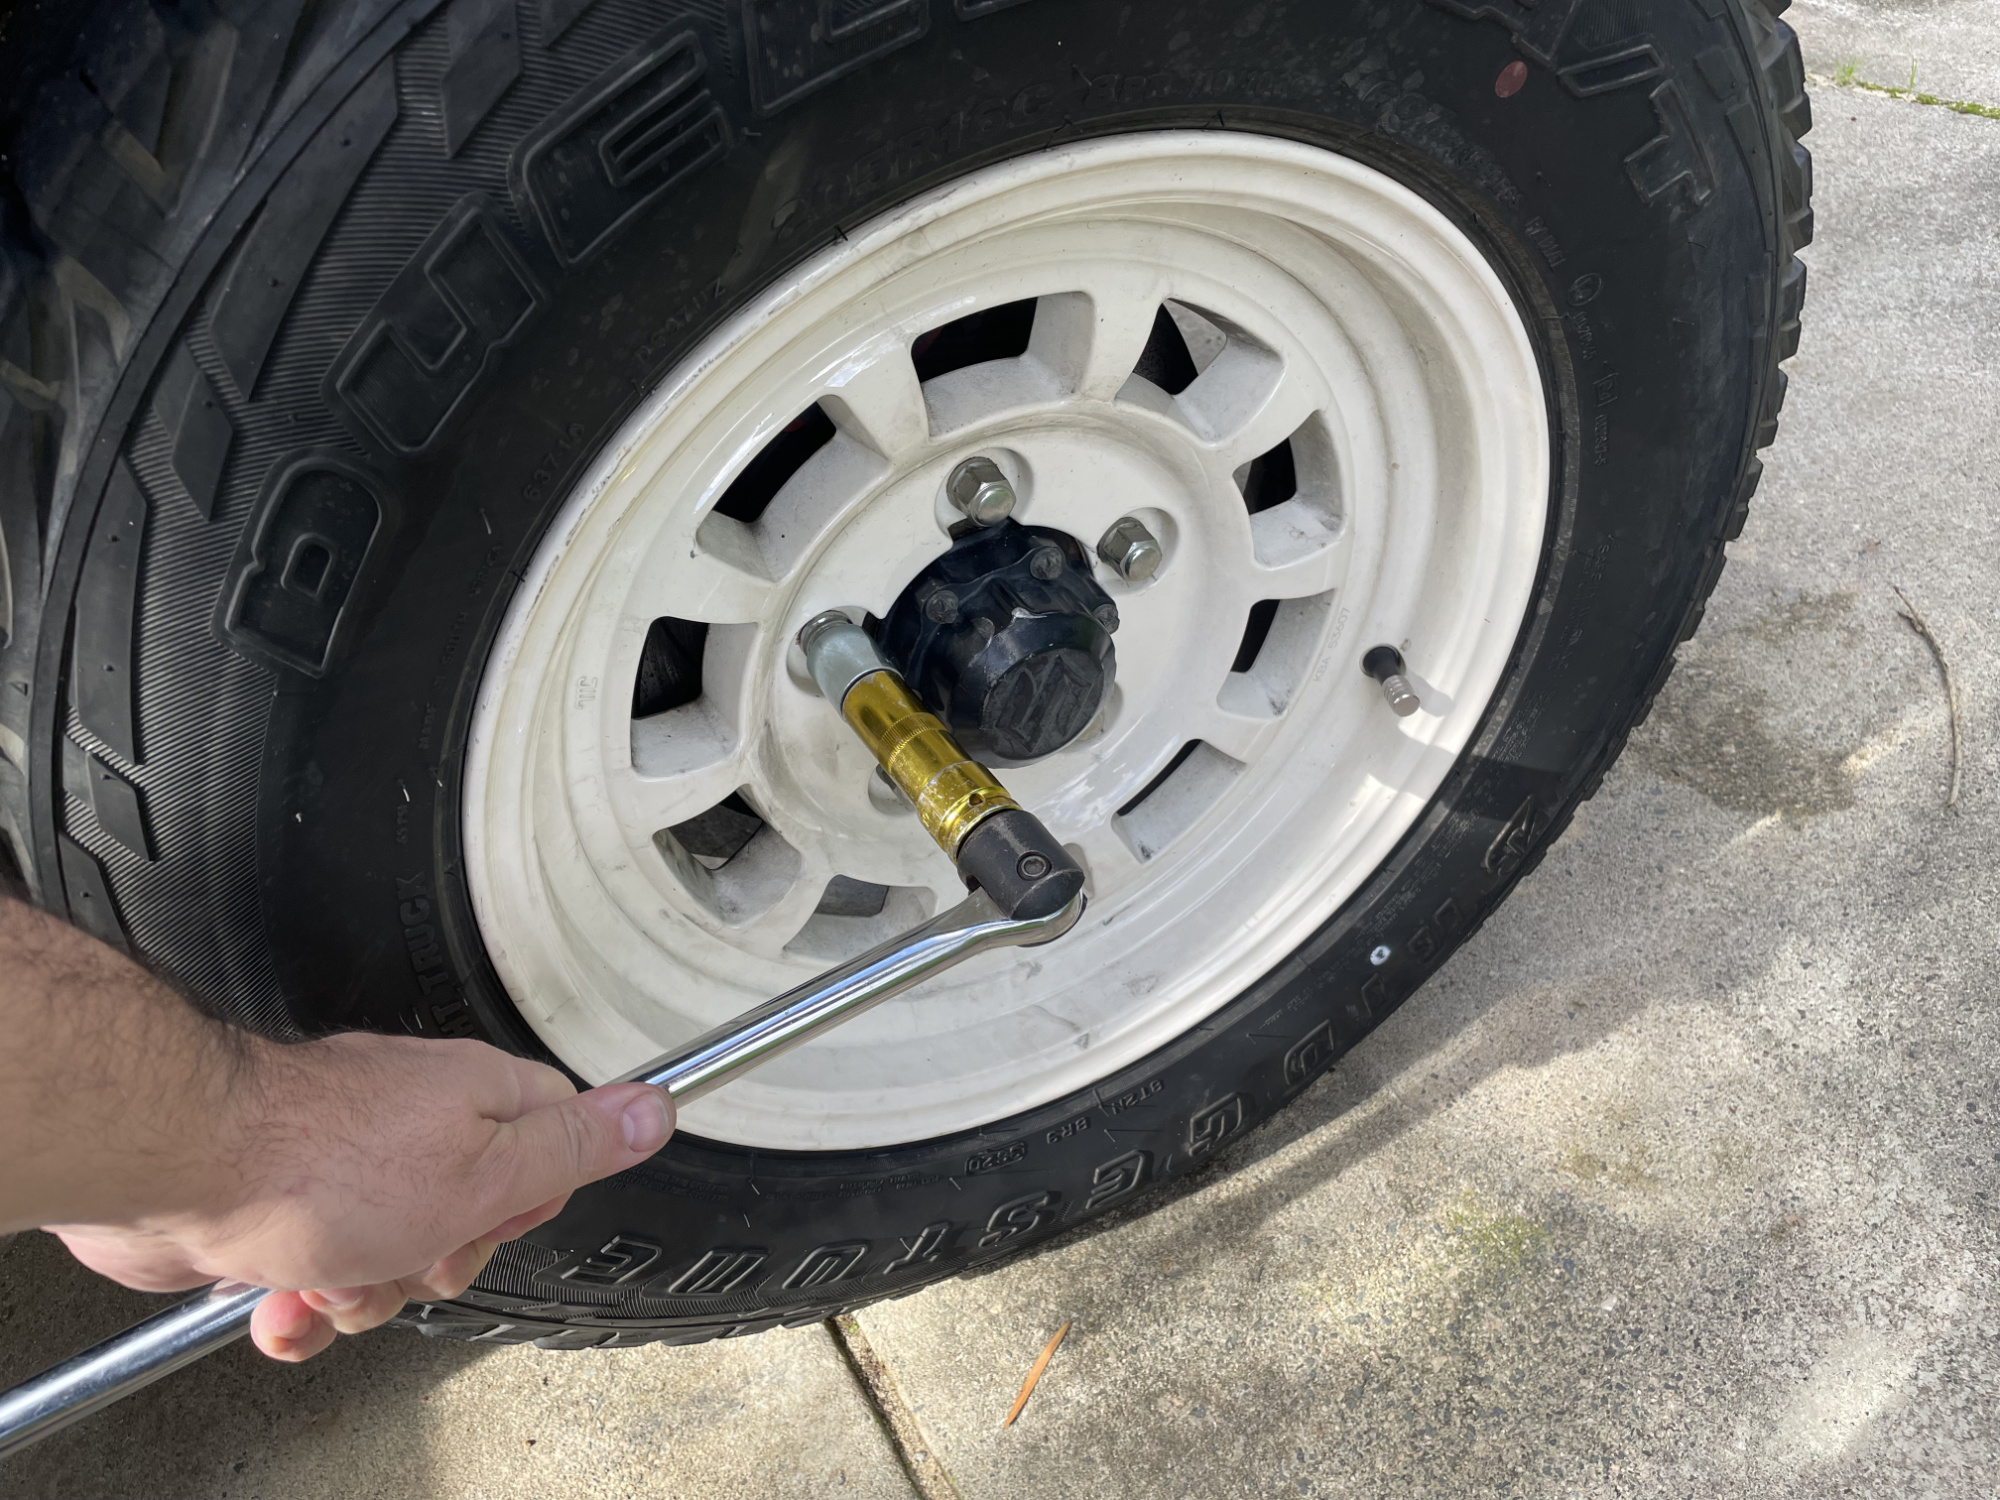
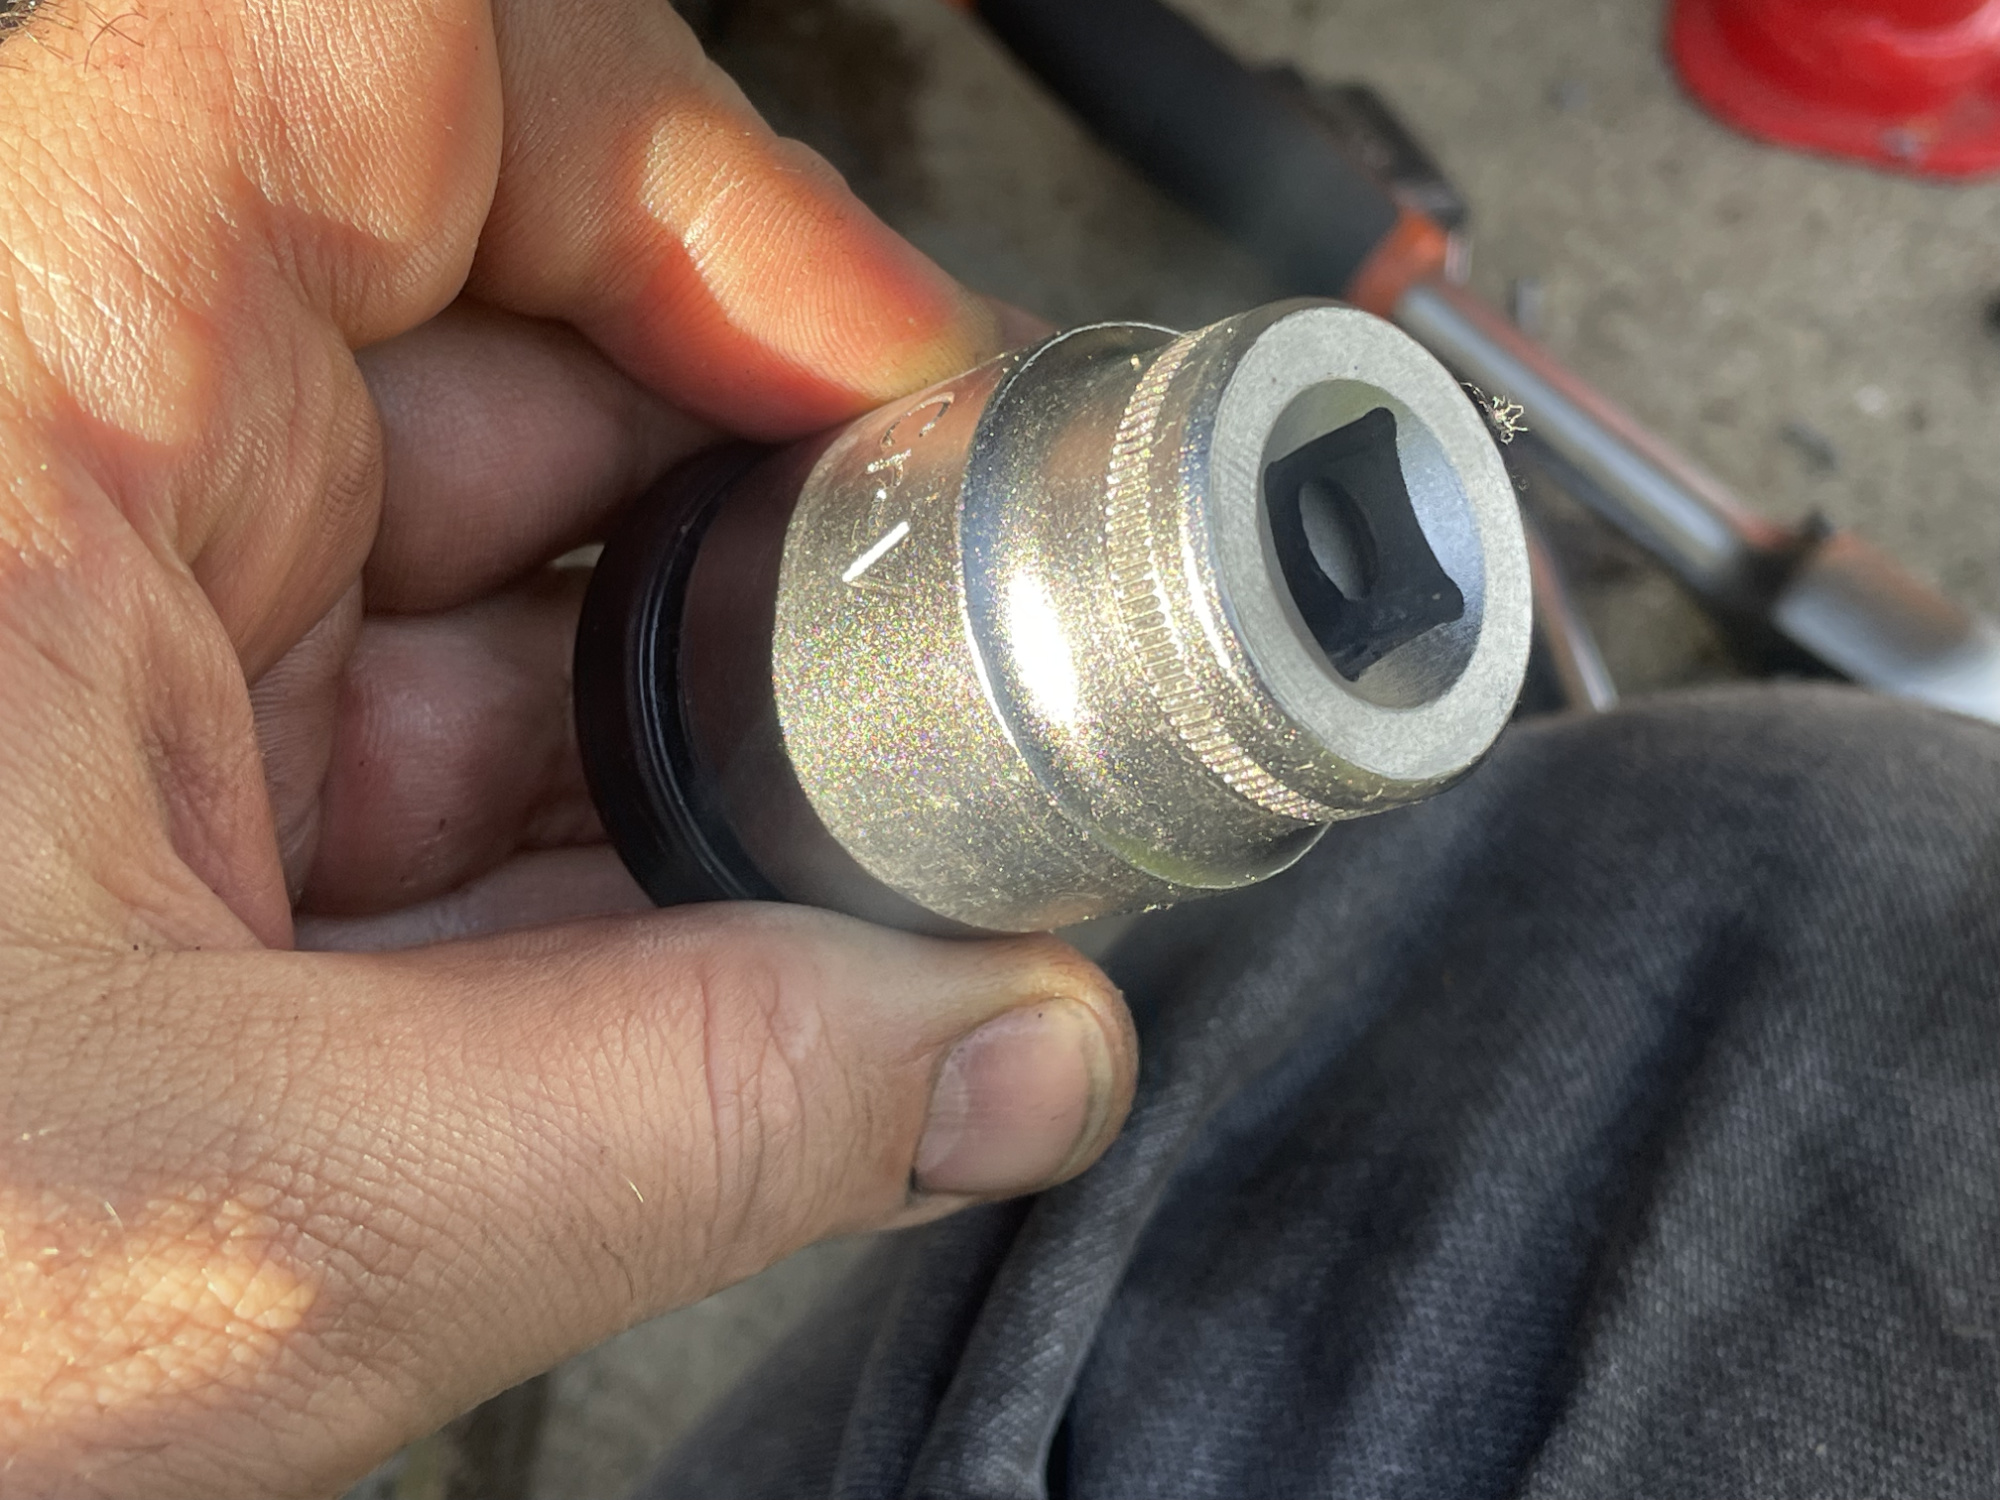
- Jimny front wheel bearing nut tool
- External circlip pliers (with quite fine tips!)
- Punch or thin chisel to unstake/stake wheel bearing nut
- Hammer
- Ball joint removal tool if you can’t swing a hammer to break a balljoint taper
- Torque wrenches capable of 10 Nm through to 220 Nm
Other supplies
- RTV sealant
- Rags
- Brake cleaner. Lots of brake cleaner.
- Grease. Lots of grease.
I like Penrite molygrease EP3 for this task; a 500 g tub should do both sides - Differential oil
This article isn’t for an oil argument, but the correct 75W-85 GL-5 diff oil is necessary for a refill - Paint if you want to make the swivel hub look good
and who doesn’t want their undercarriage to look good?
Removal
Start by undoing the wheel nuts on the ground to make it easier to loosen the wheel…
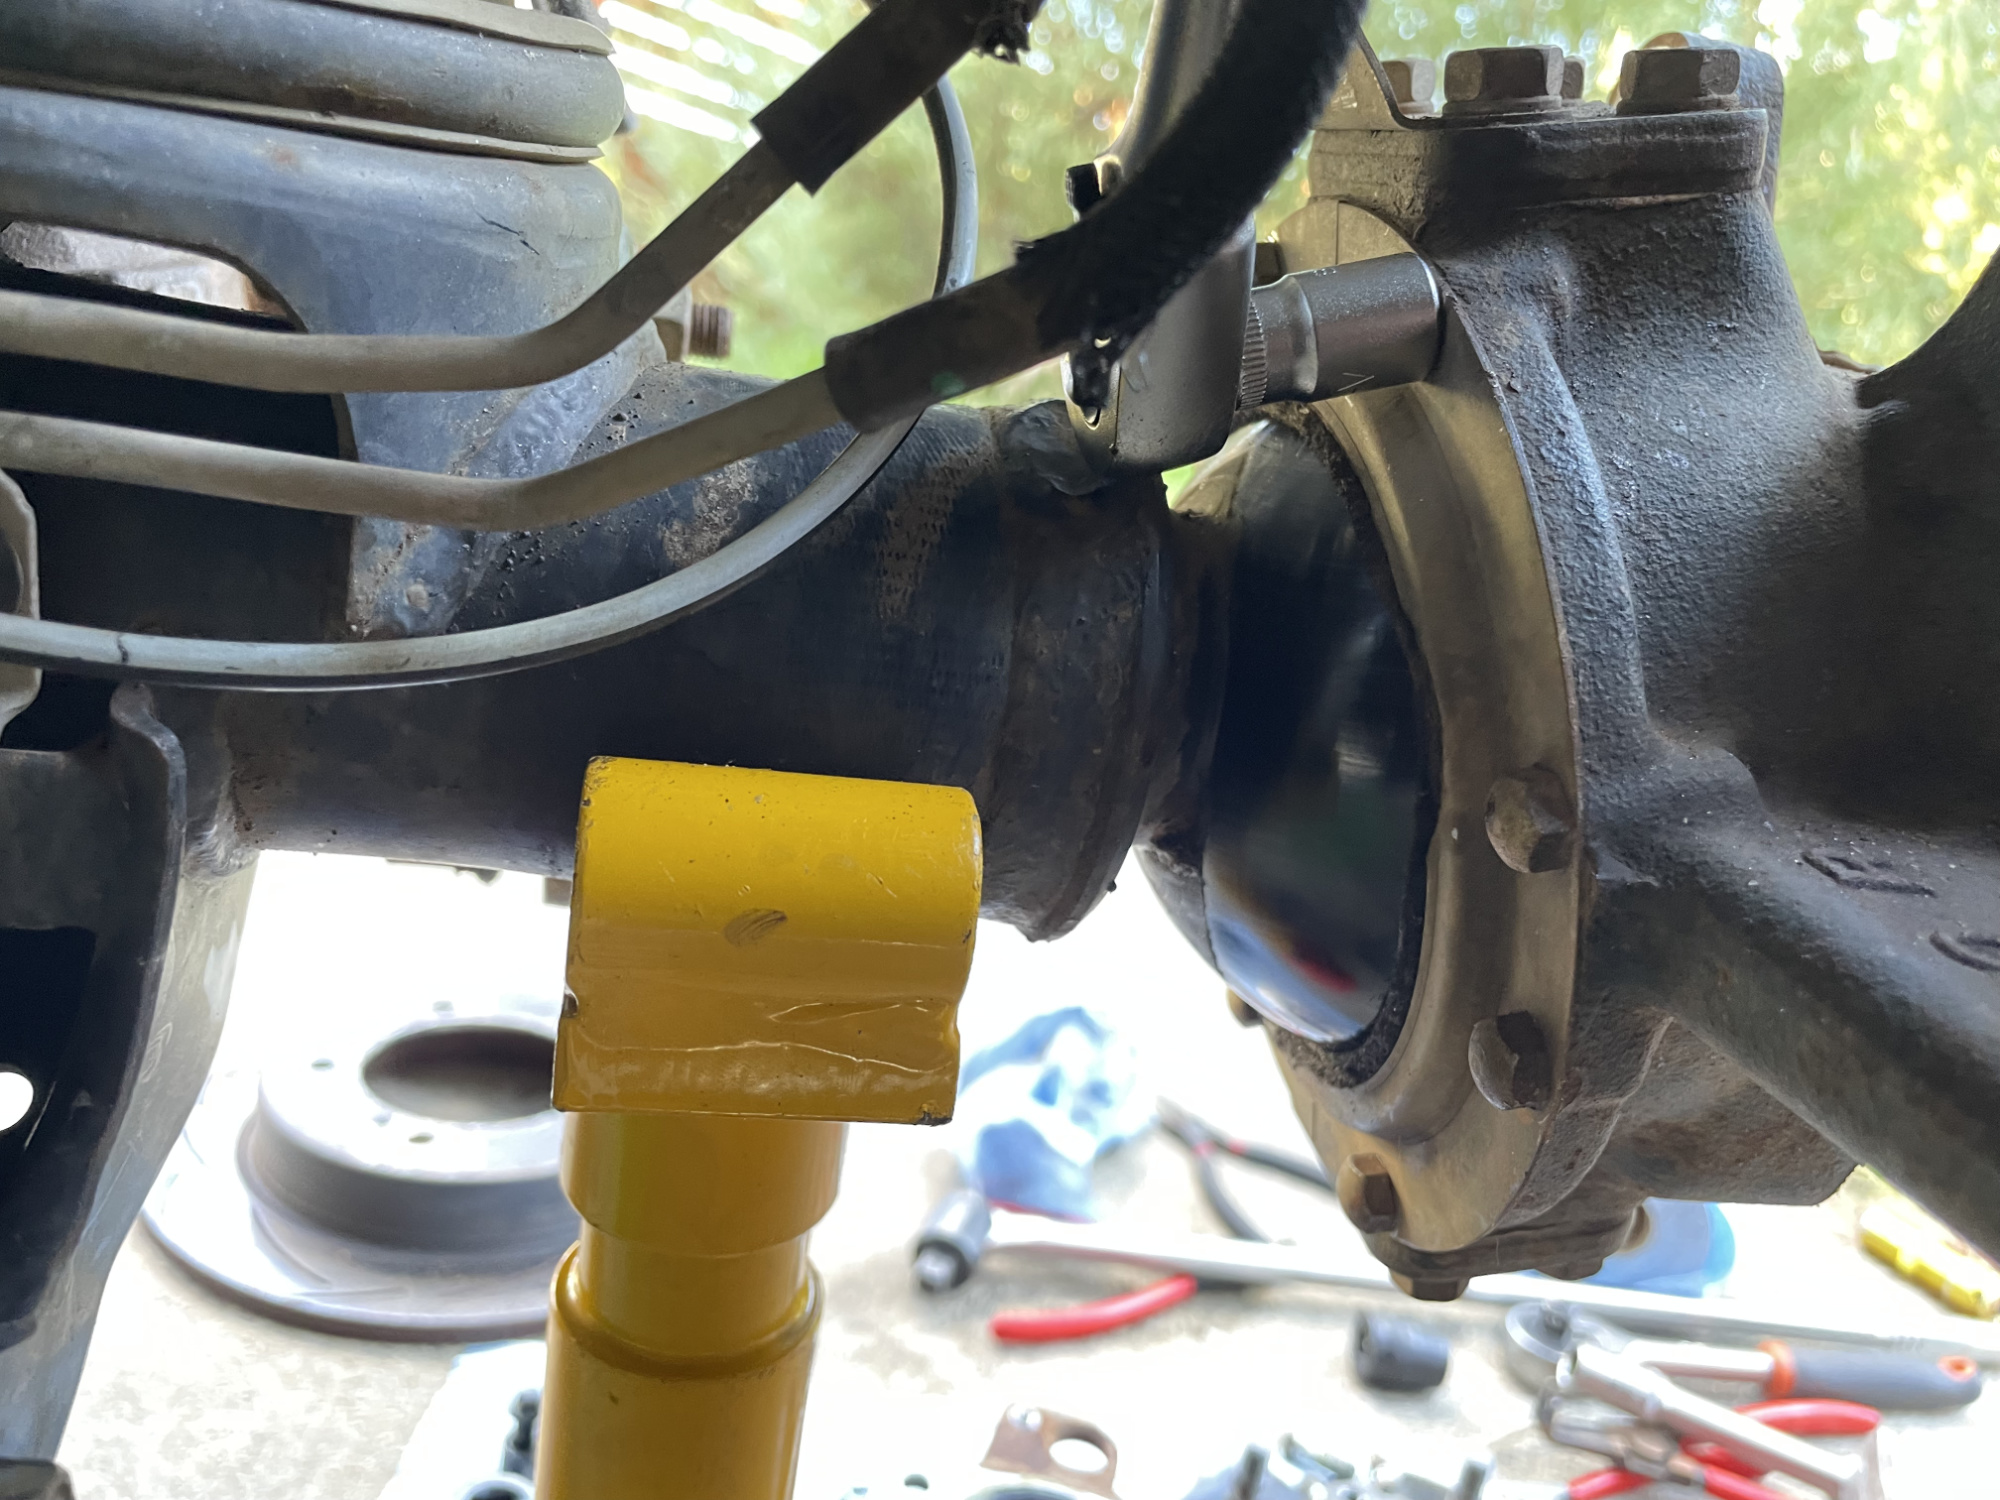
… and do the same with the E10 bolts on the vacuum hub.
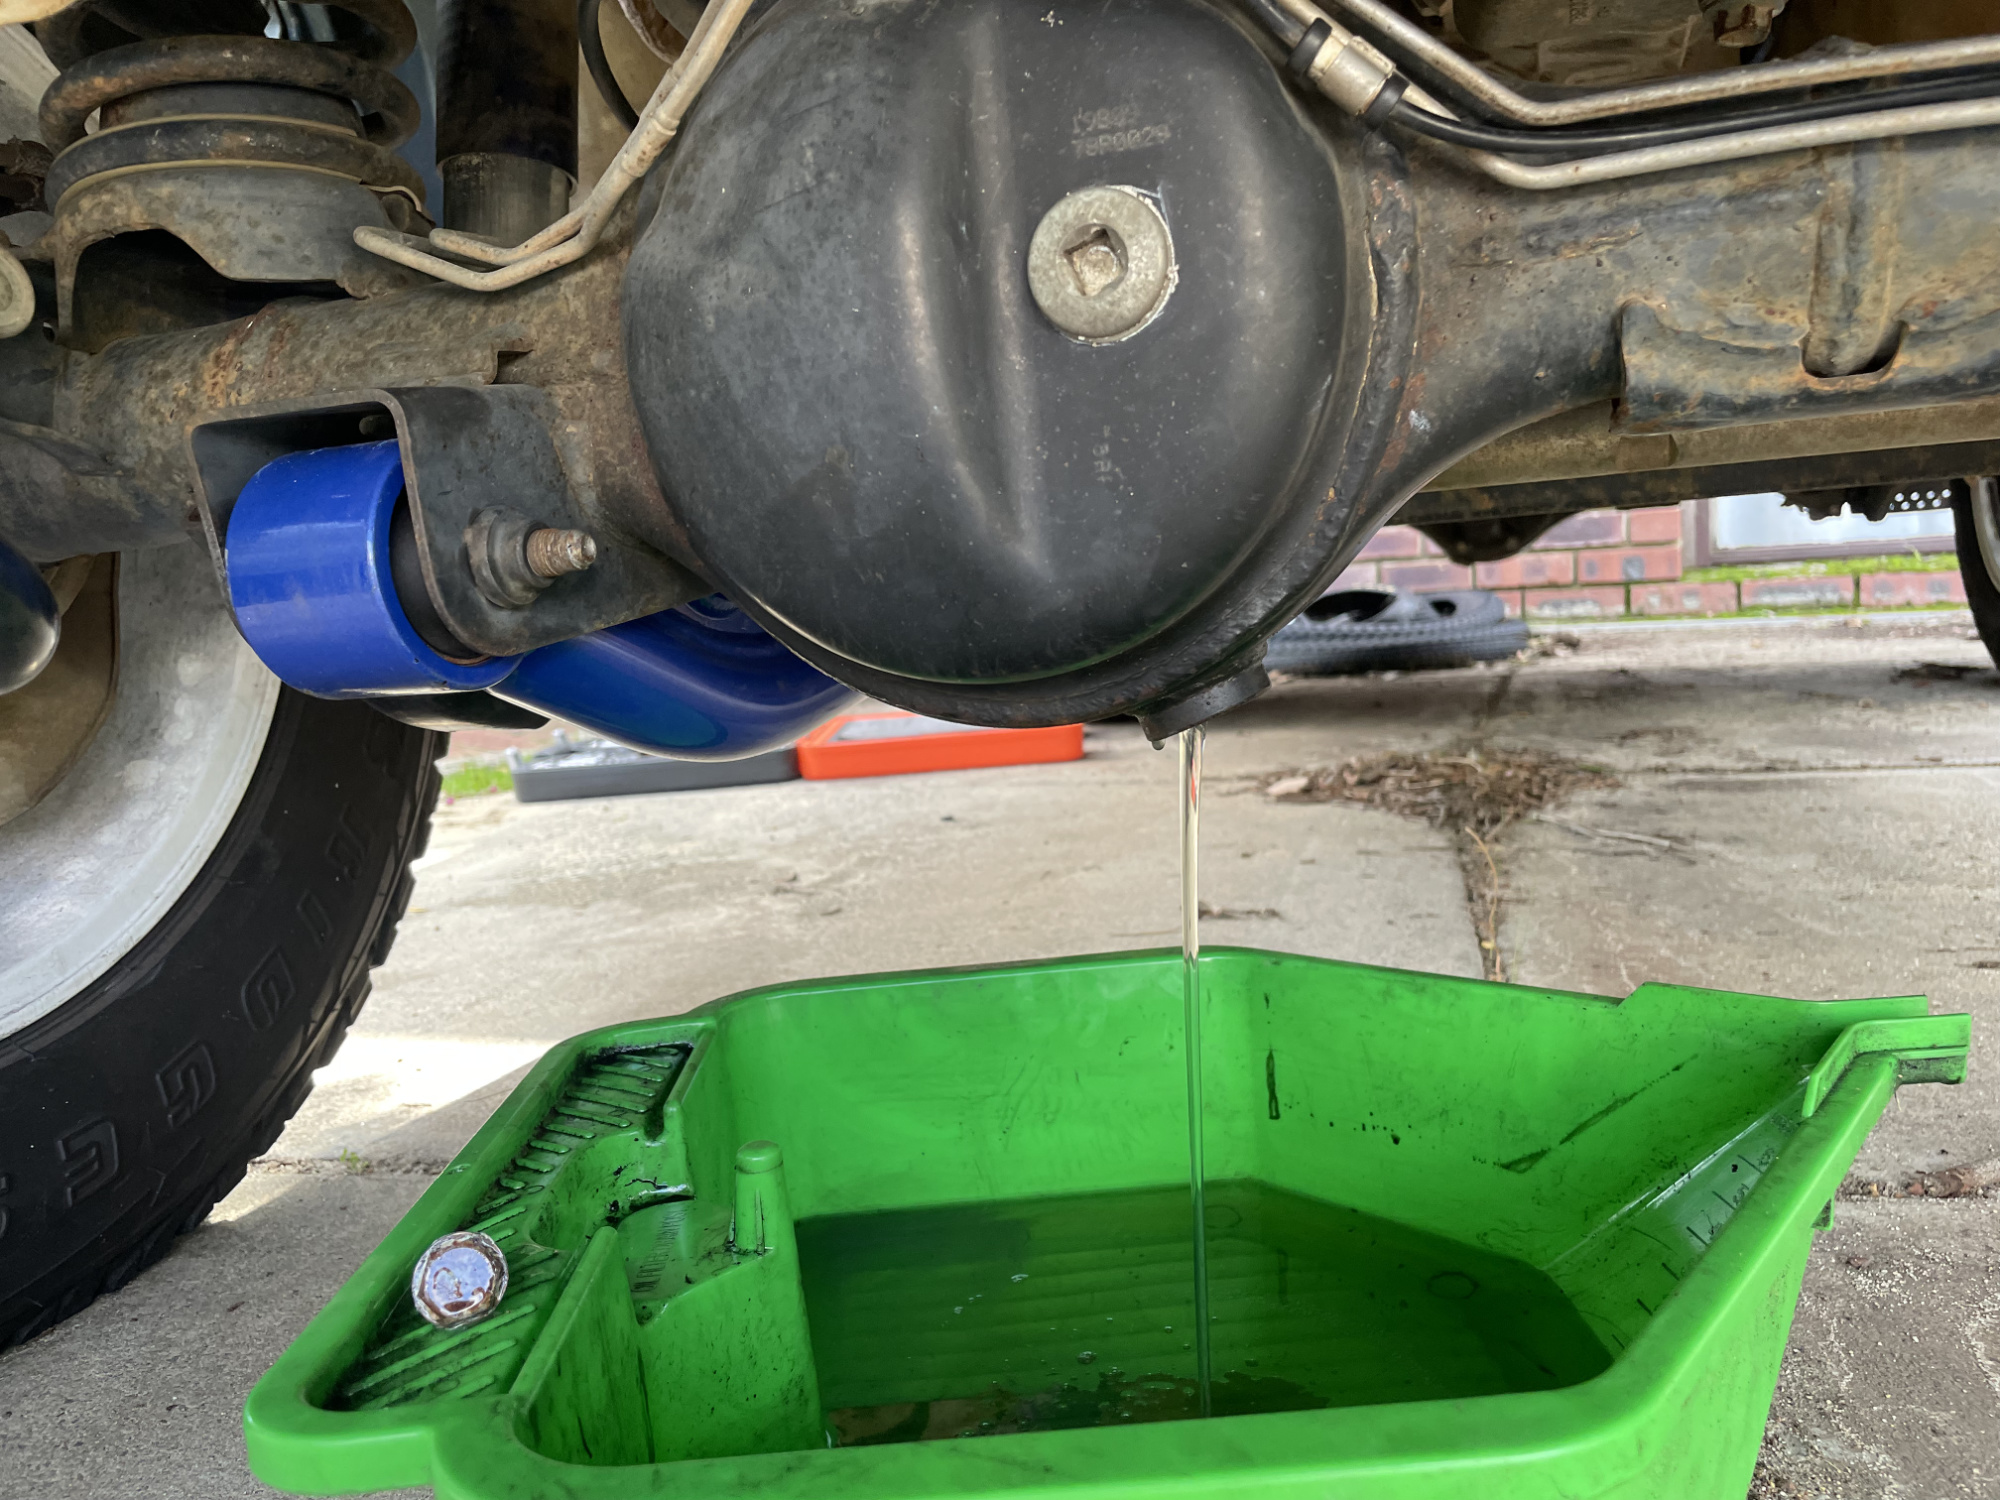
Drain the front diff oil (after undoing the fill point to make sure you can put oil back in it when you’re done)
Jack the car up using the suspension and support the axle (minimises the height you have to have everything at)
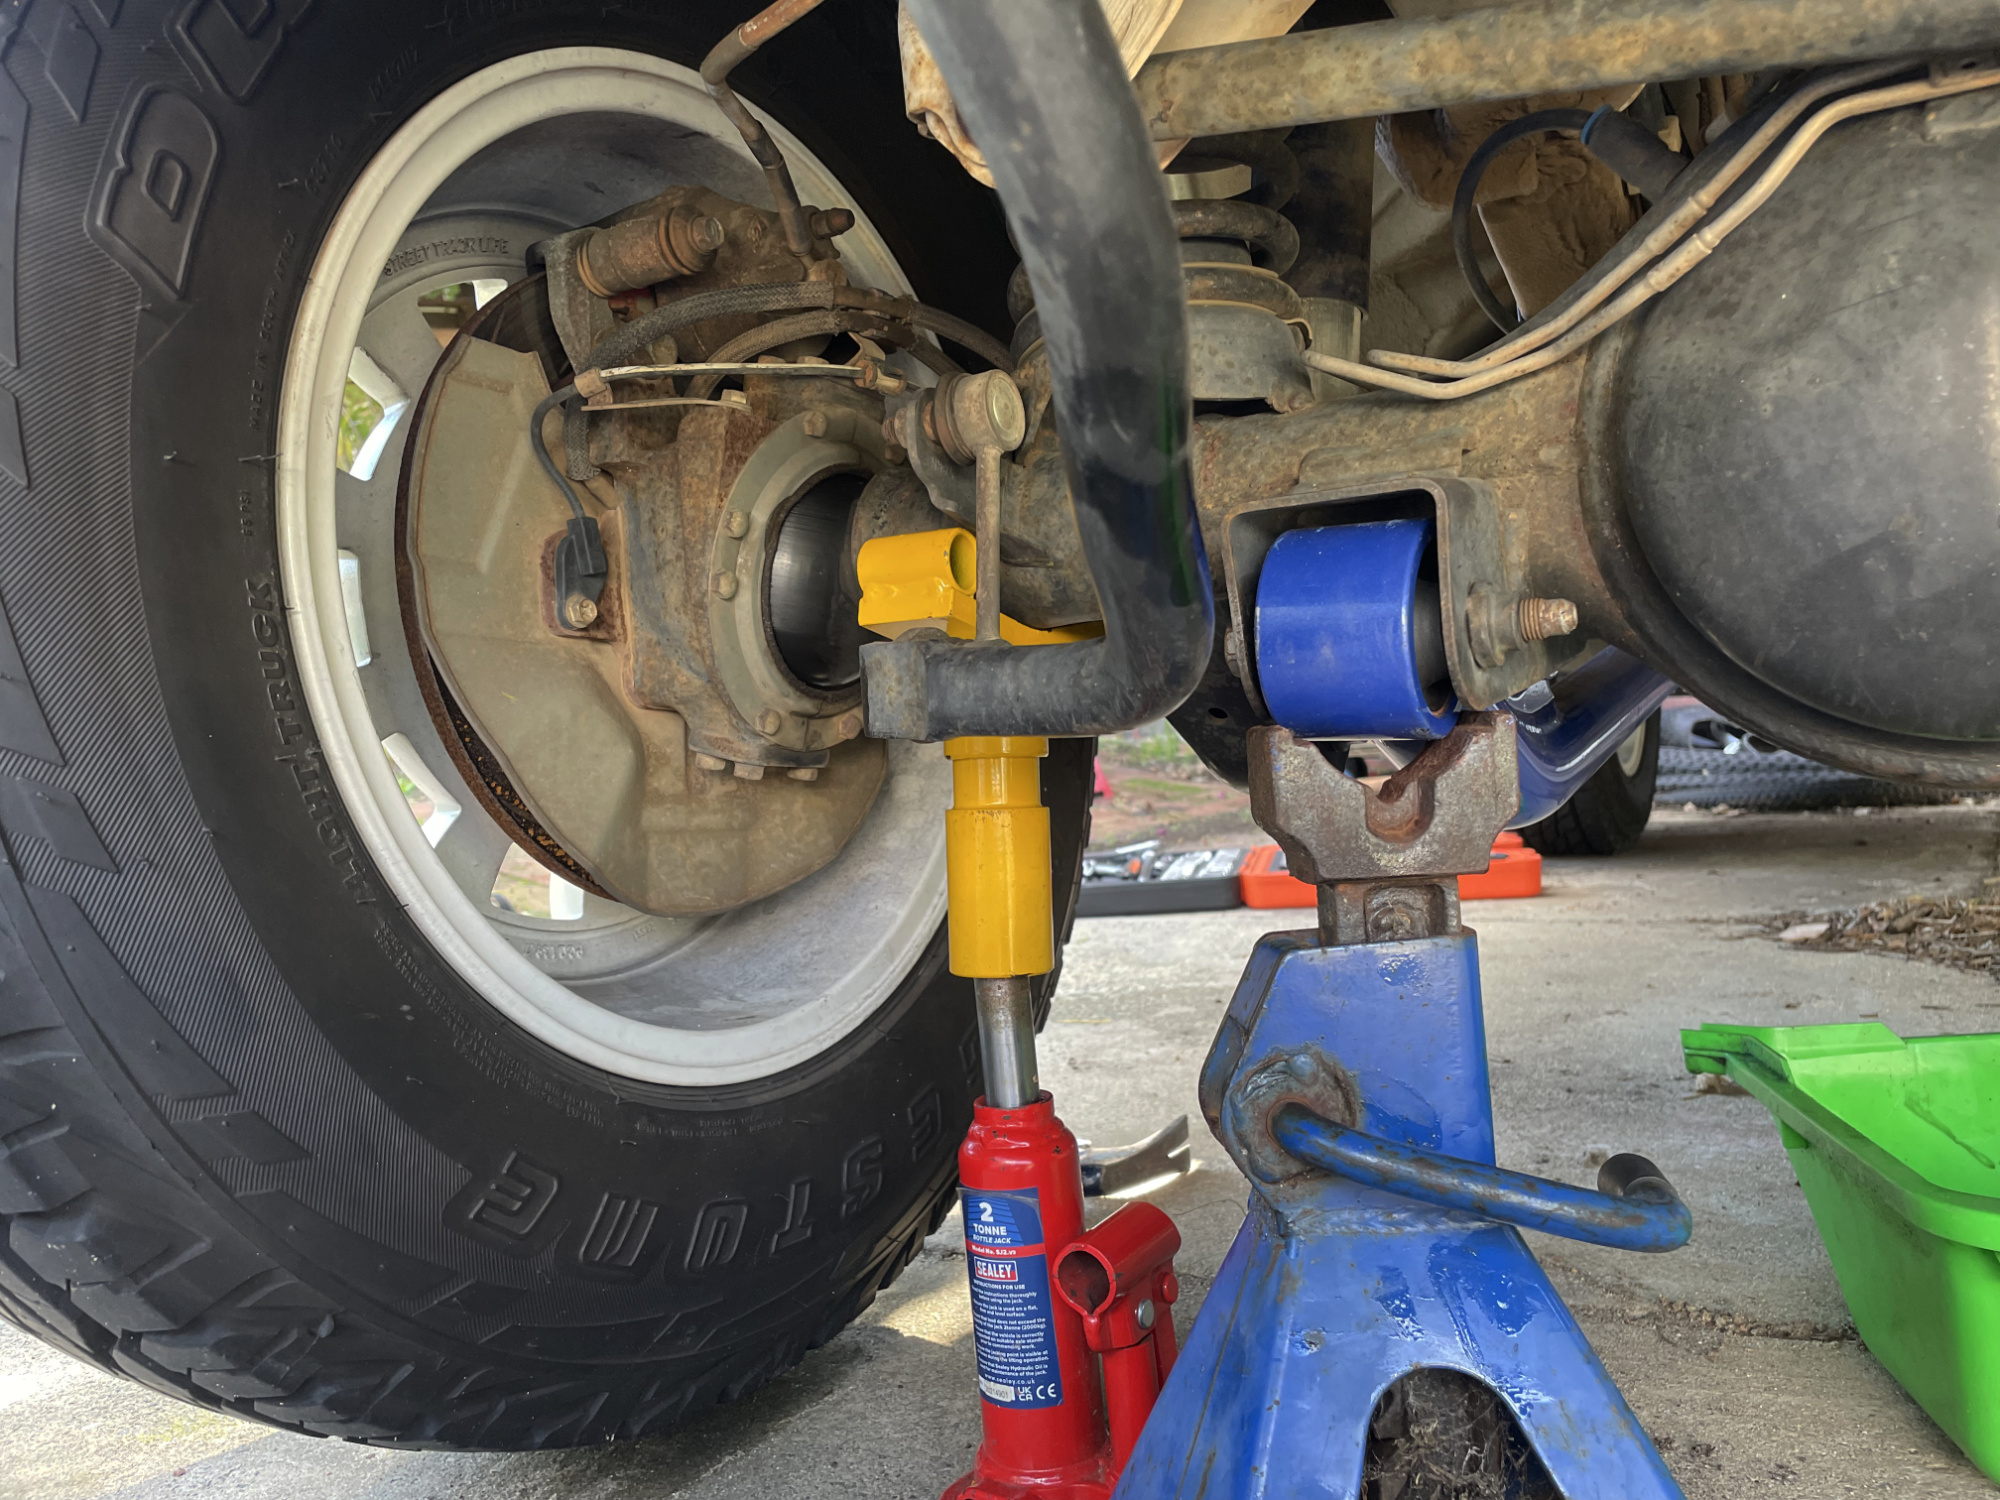
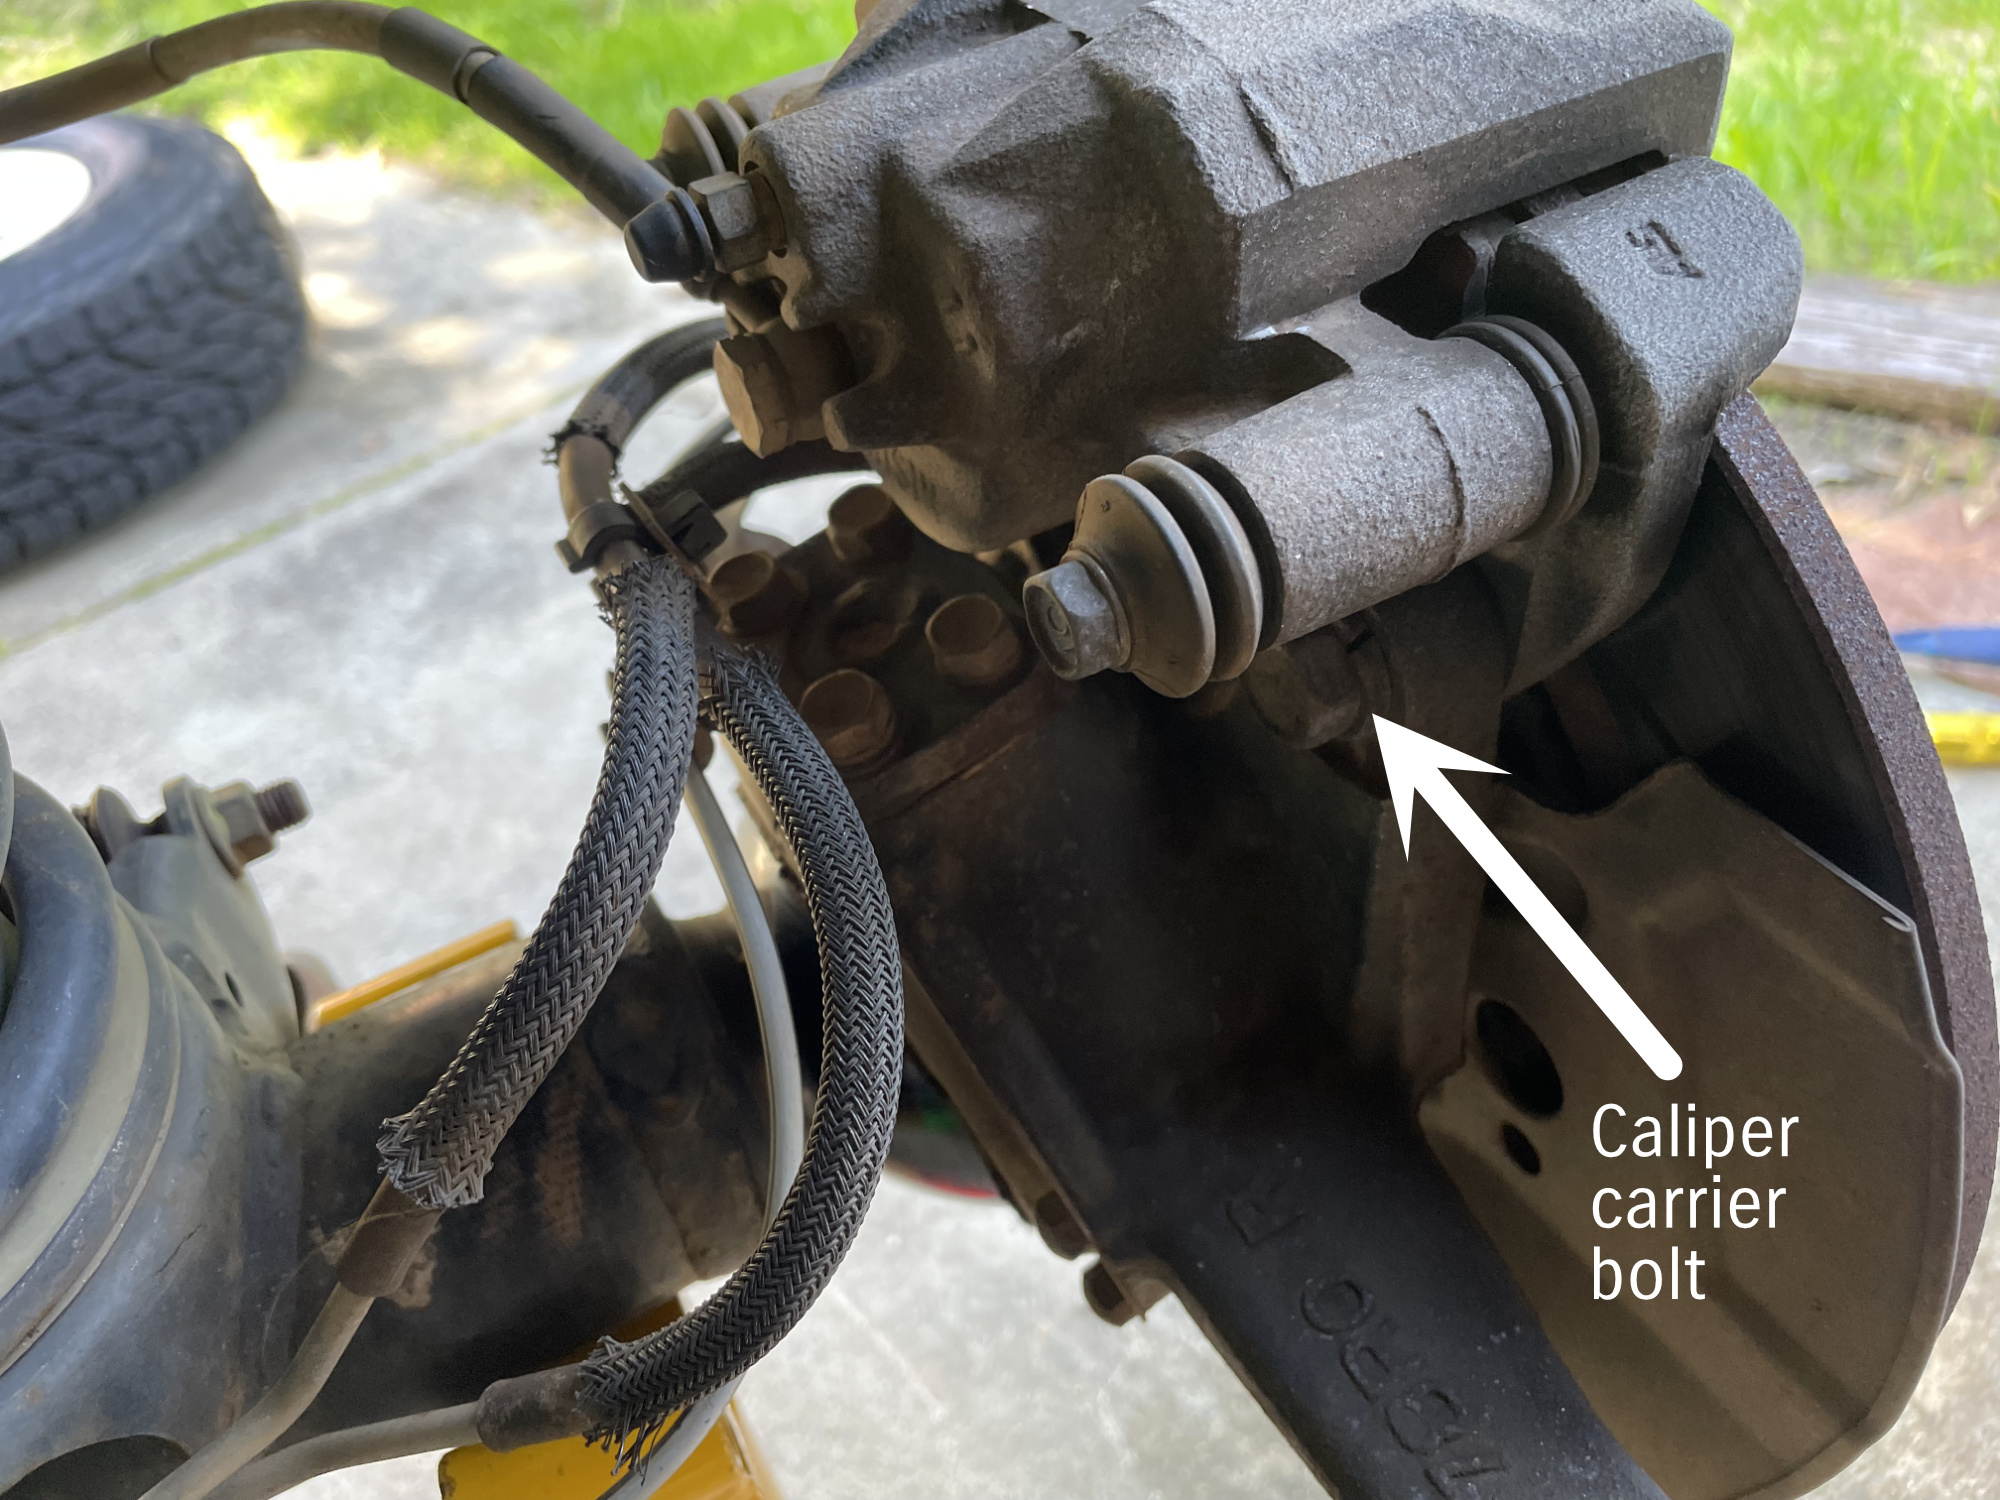
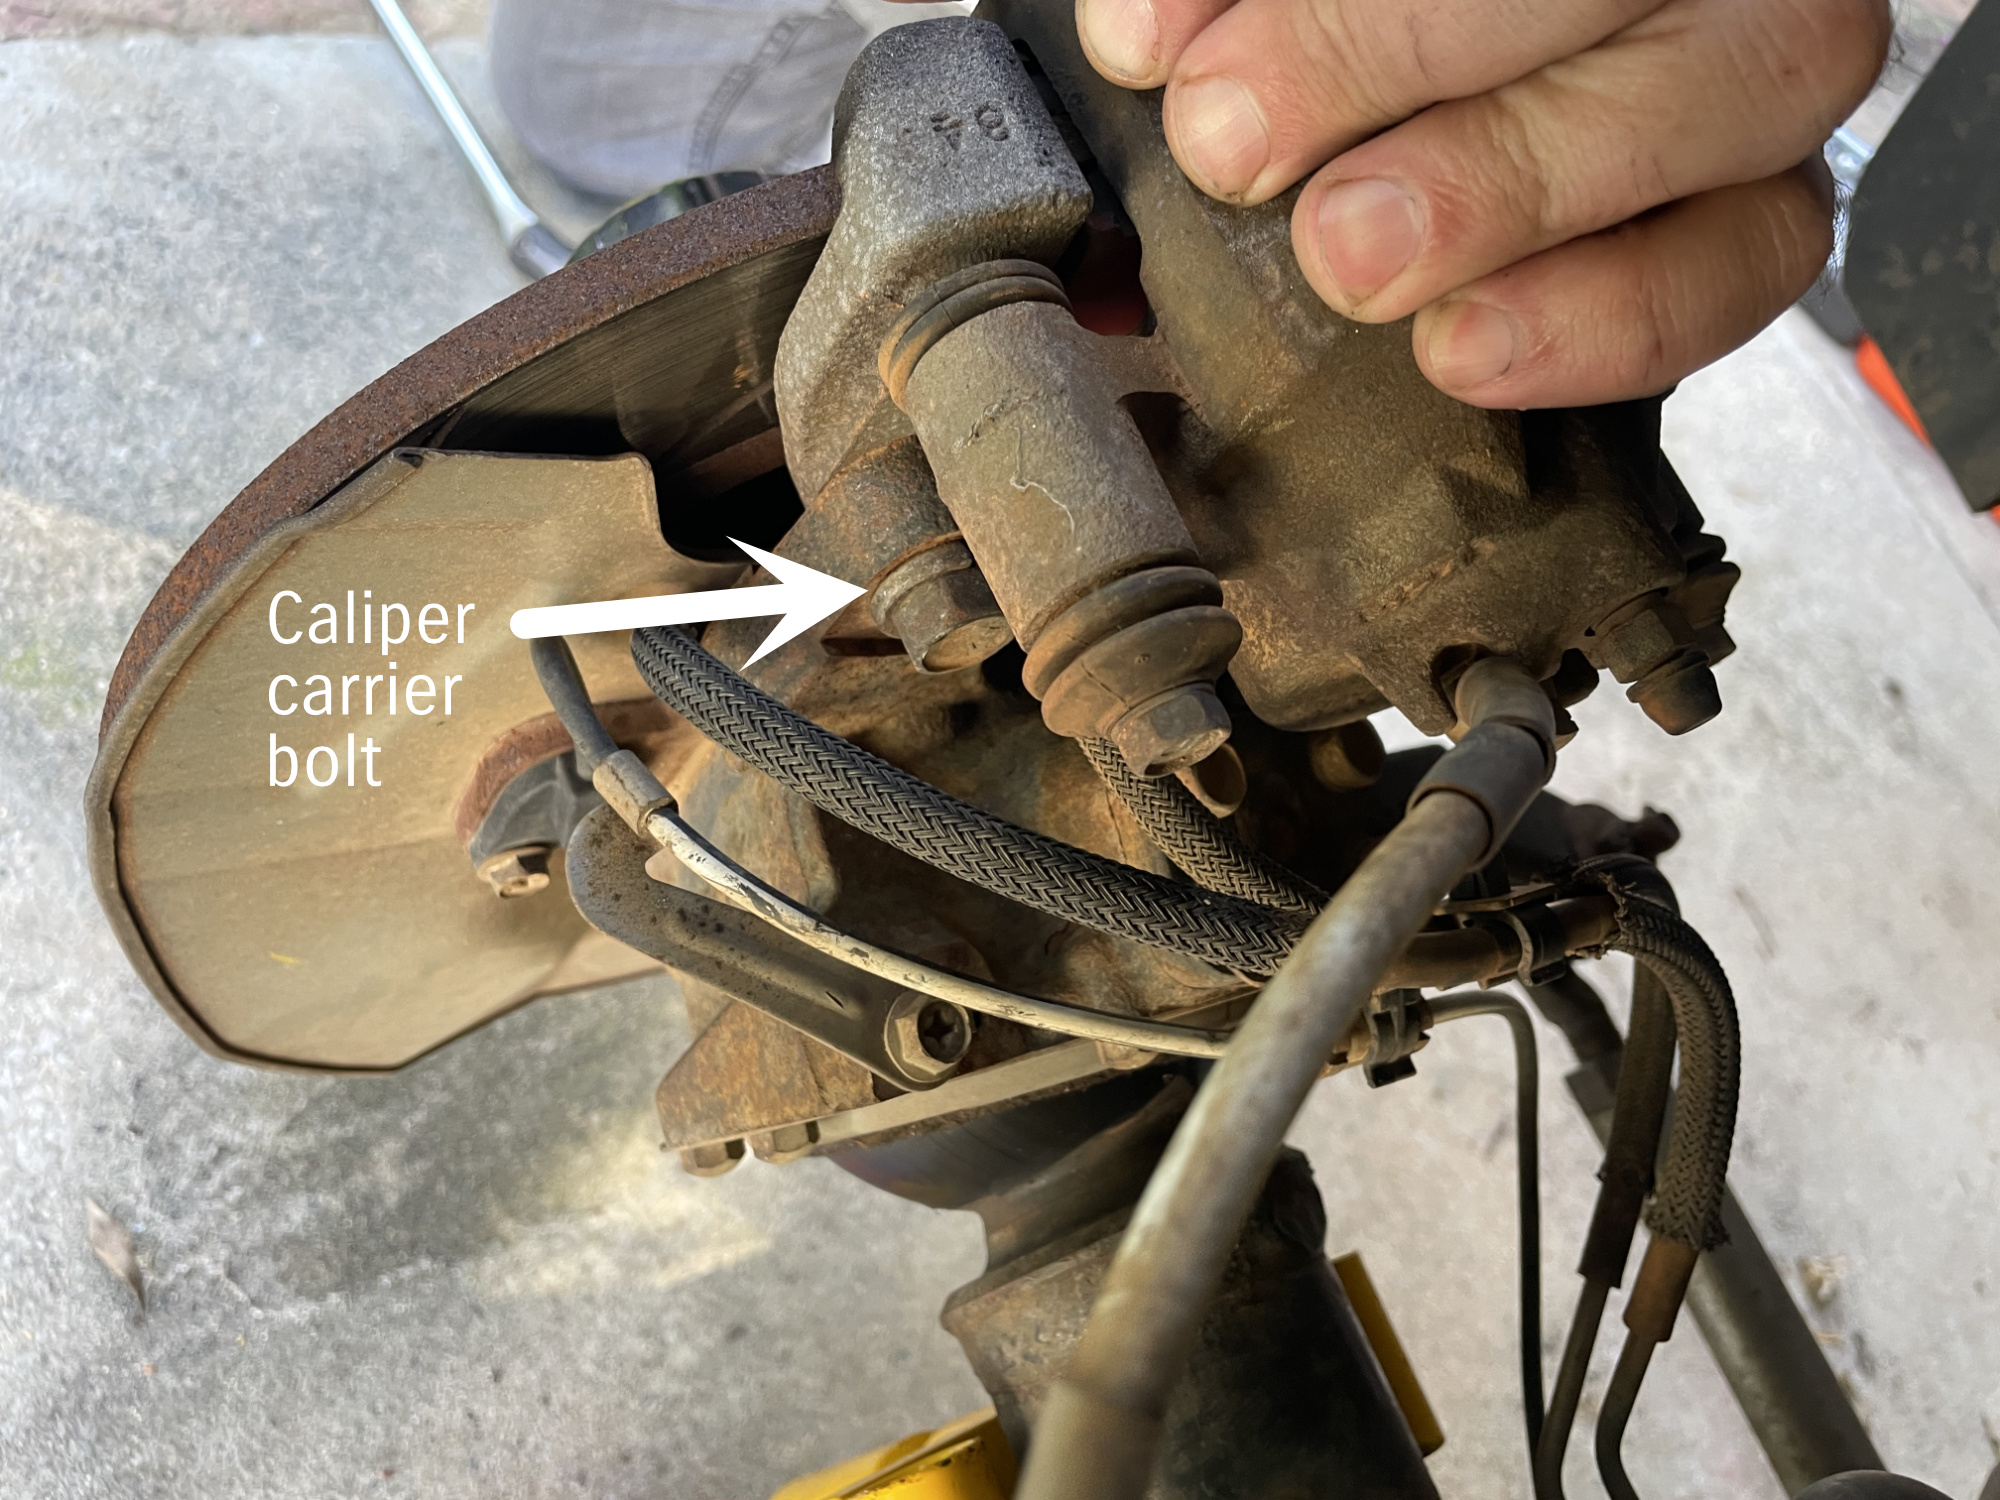
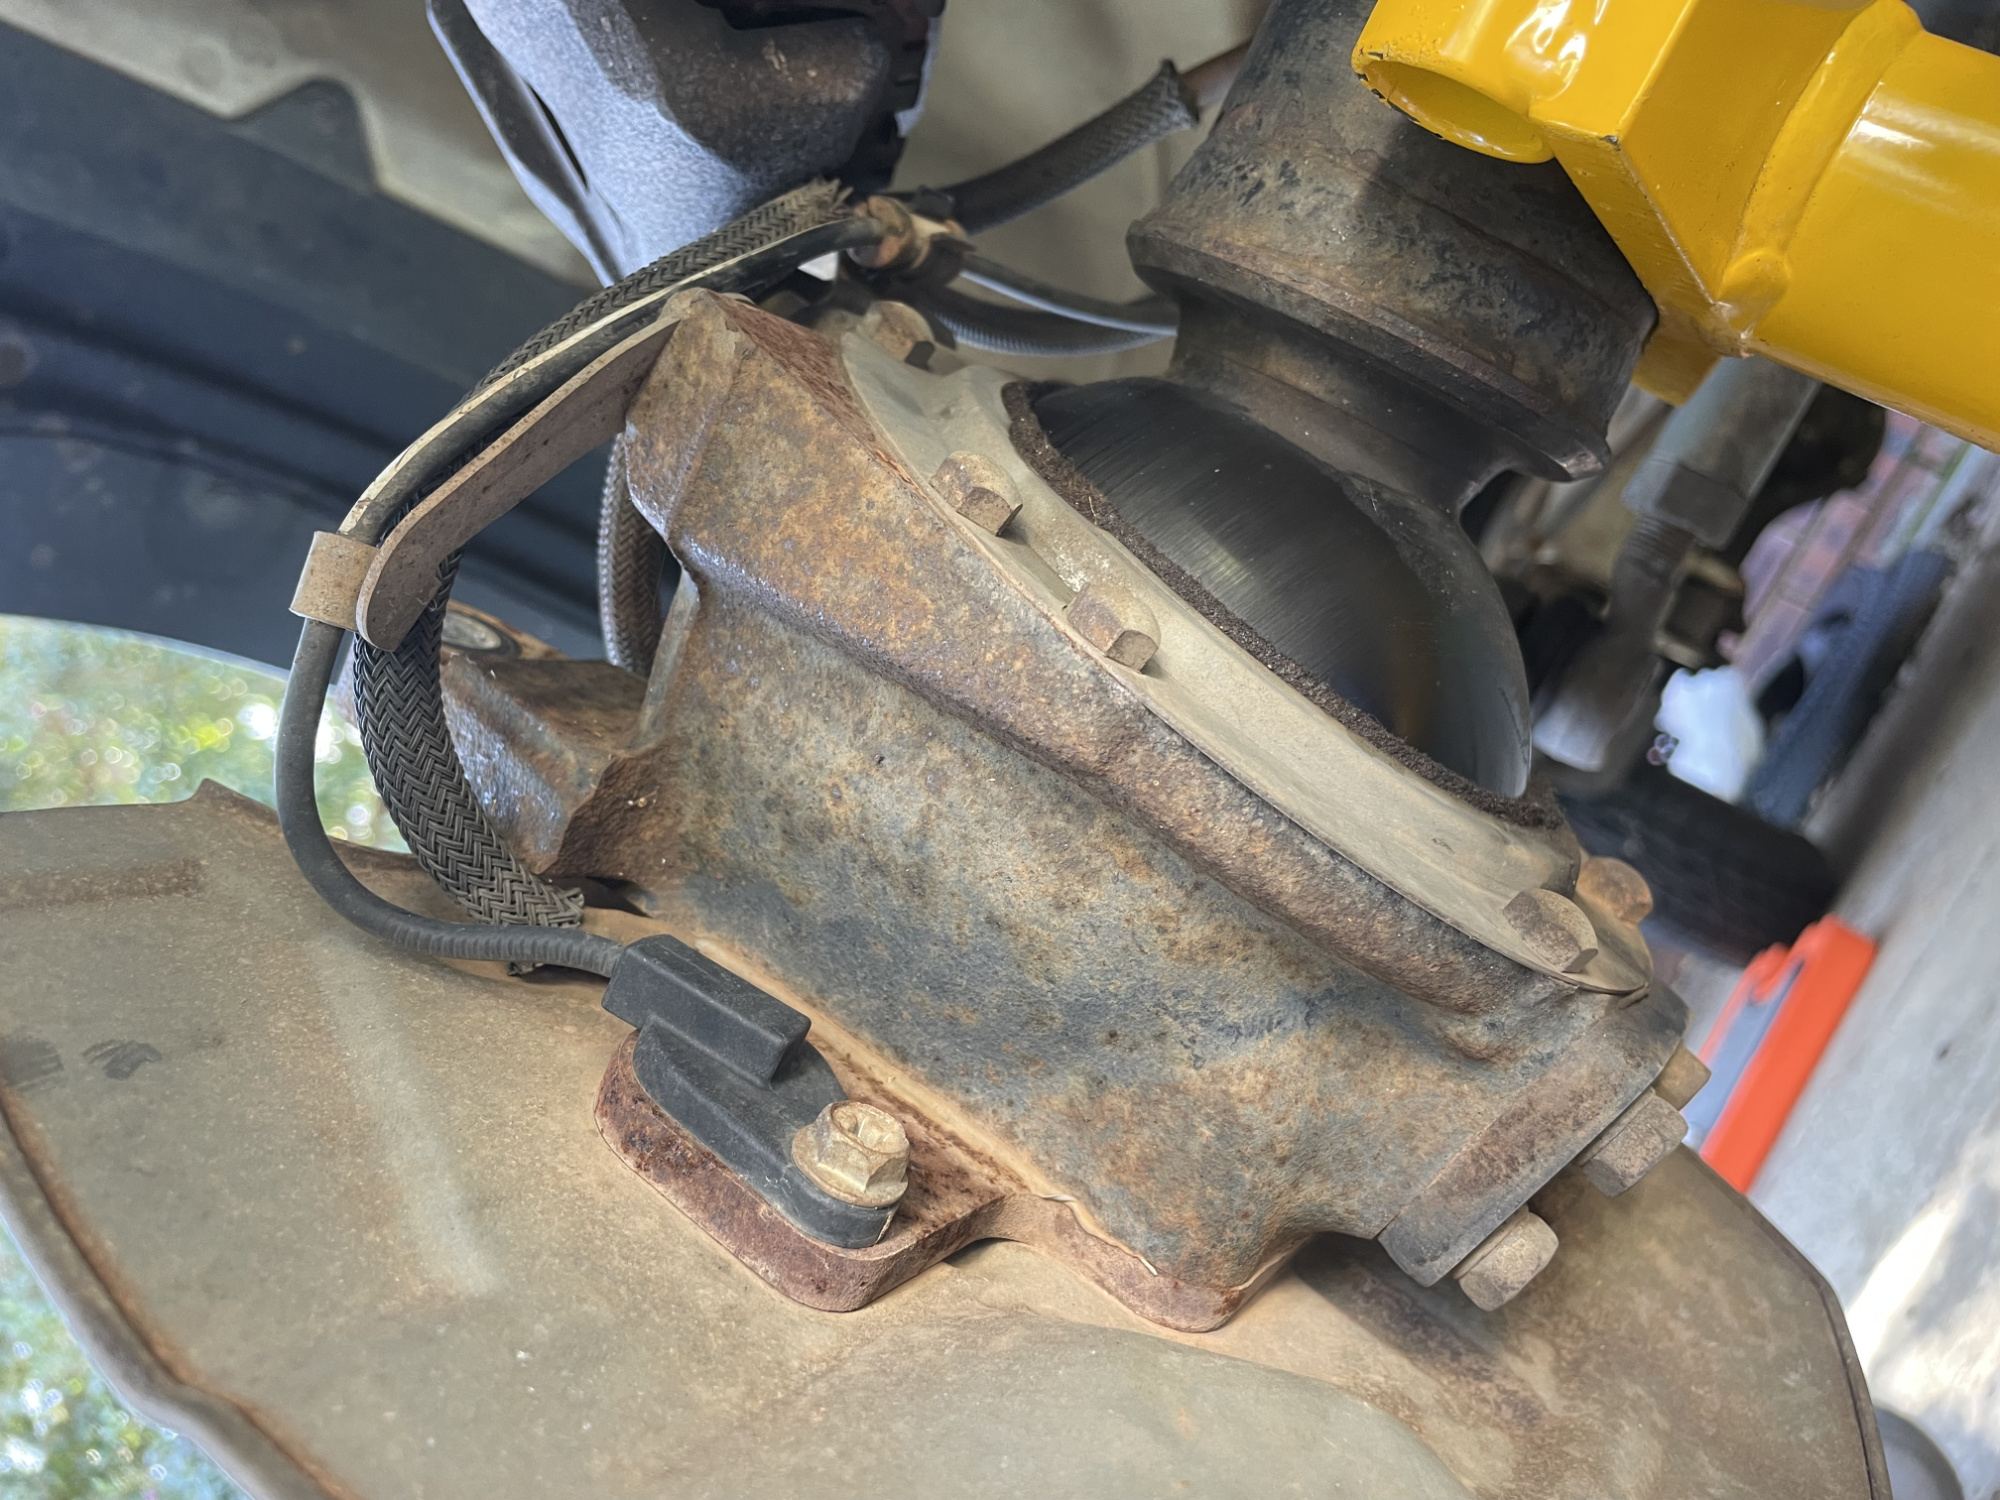
Remove the wheel now it’s off the ground and remove the brake caliper: just undo the brake carrier bolts and take the whole thing off, supporting it somewhere so it isn’t hanging by the brake hose
Now remove the brake disk. If it’s hard to get off then you can use an M8 bolt to help pull it off using the small hole beside one of the wheel studs. Just make sure the bolt is engaging with the hub immediately behind; sometimes they can be offset from the hub and end up munting the backing plate/spindle itself.
Mine came straight off, but probably cause of the small amount of antiseize I used on the hub when I replaced my brakes.
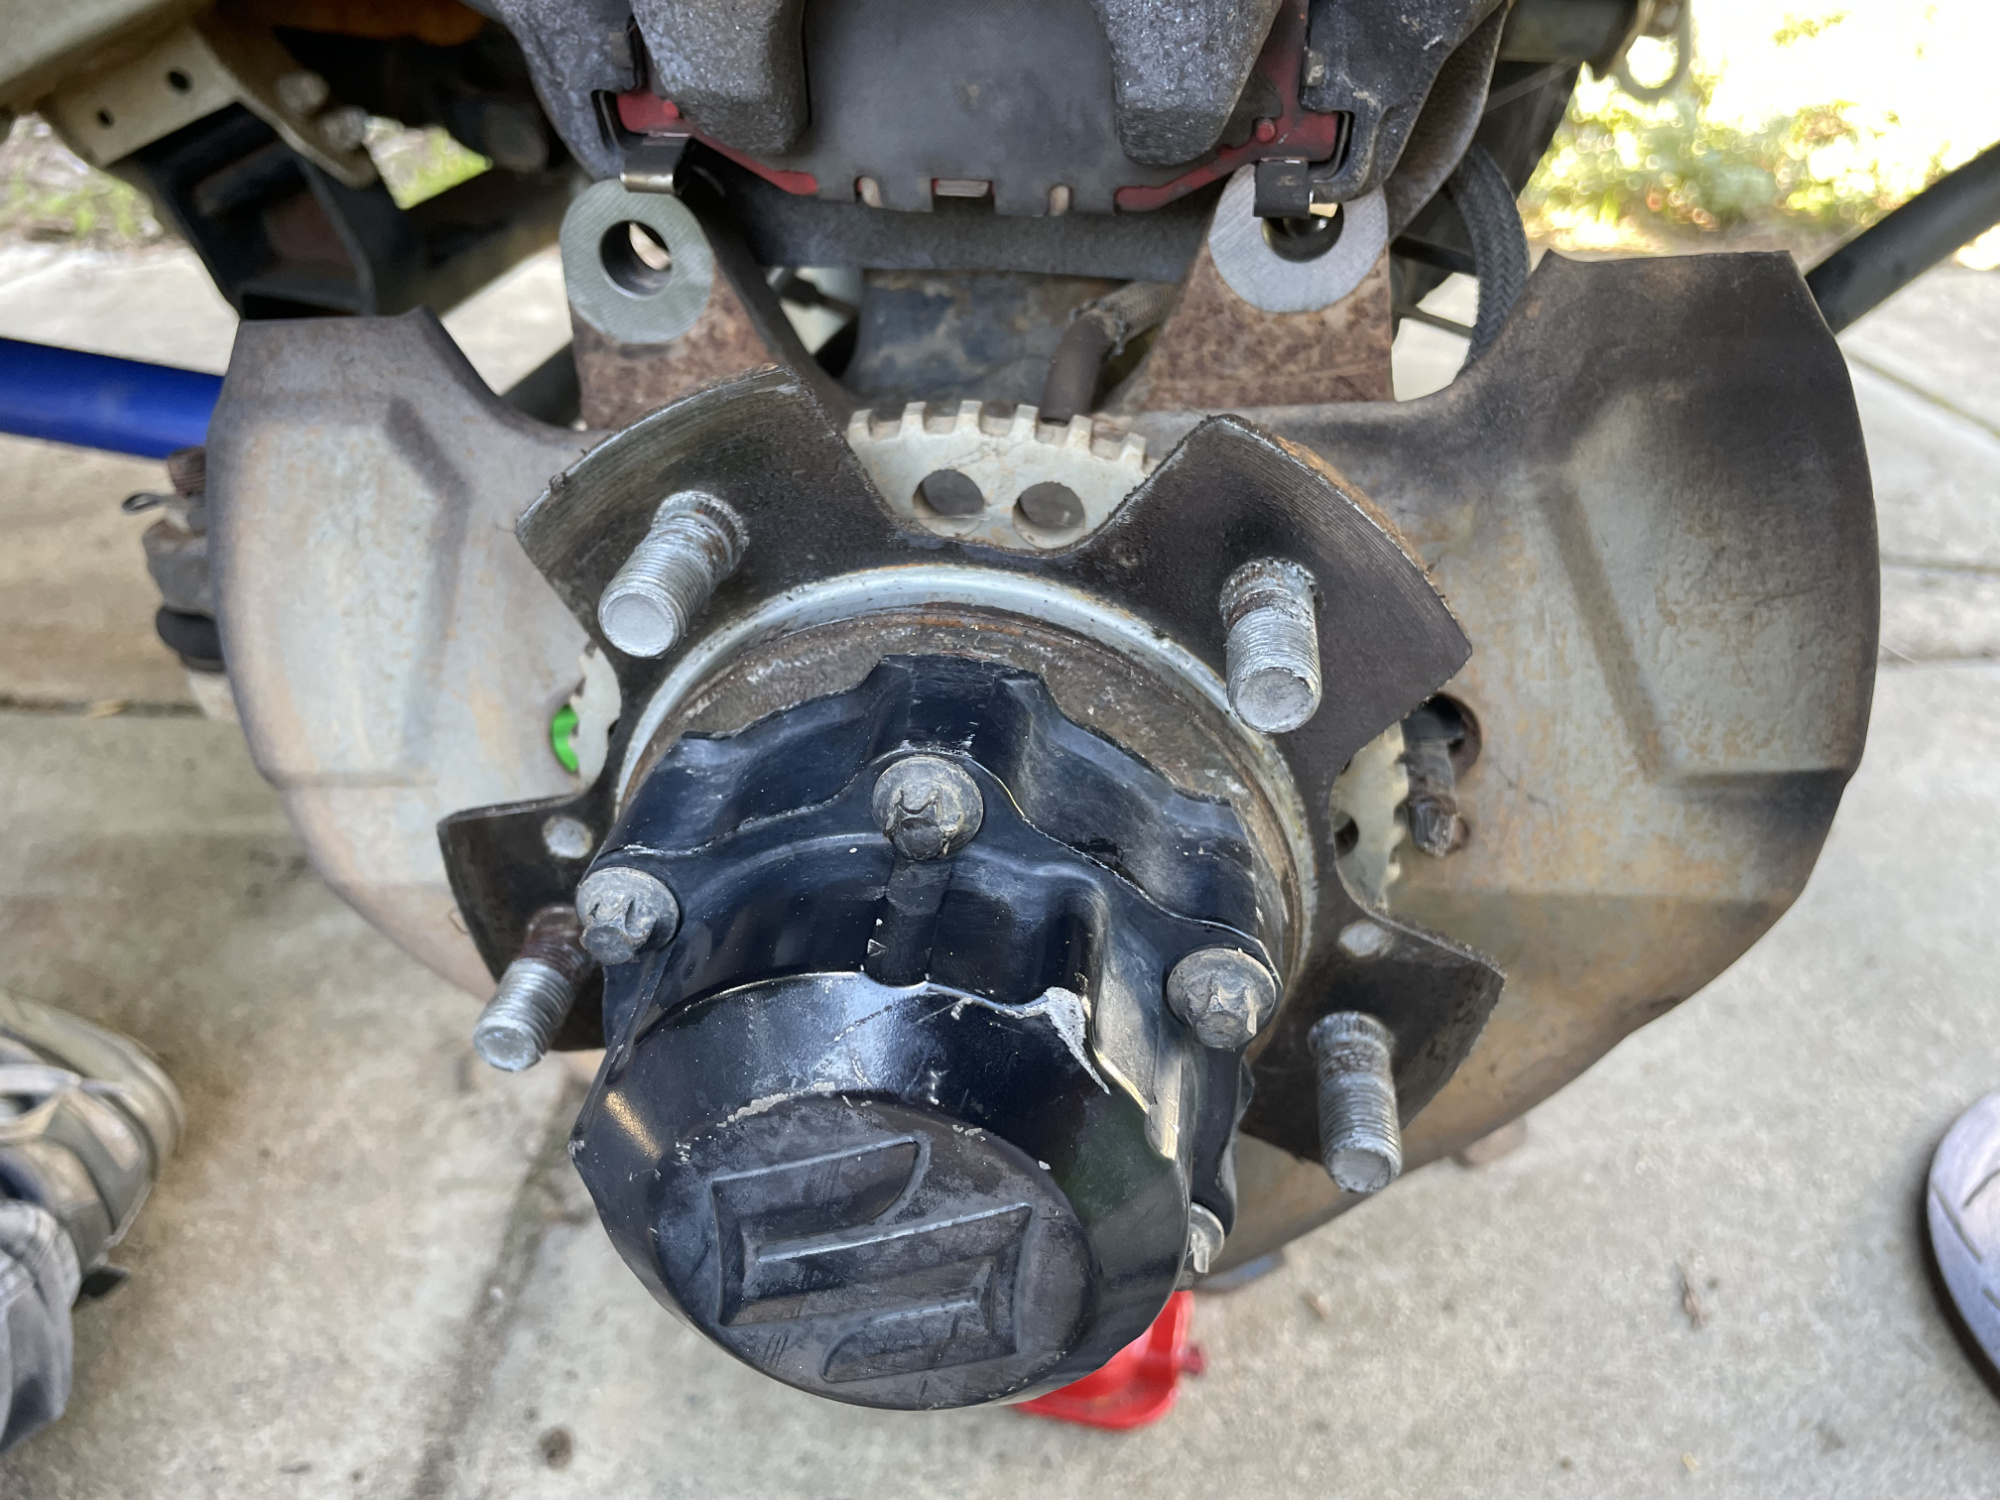
Undo the bolts on the vacuum hub that you loosened when the car was still on the ground, and remove the vacuum hub: with the bolts undone it just pulls away from the hub.
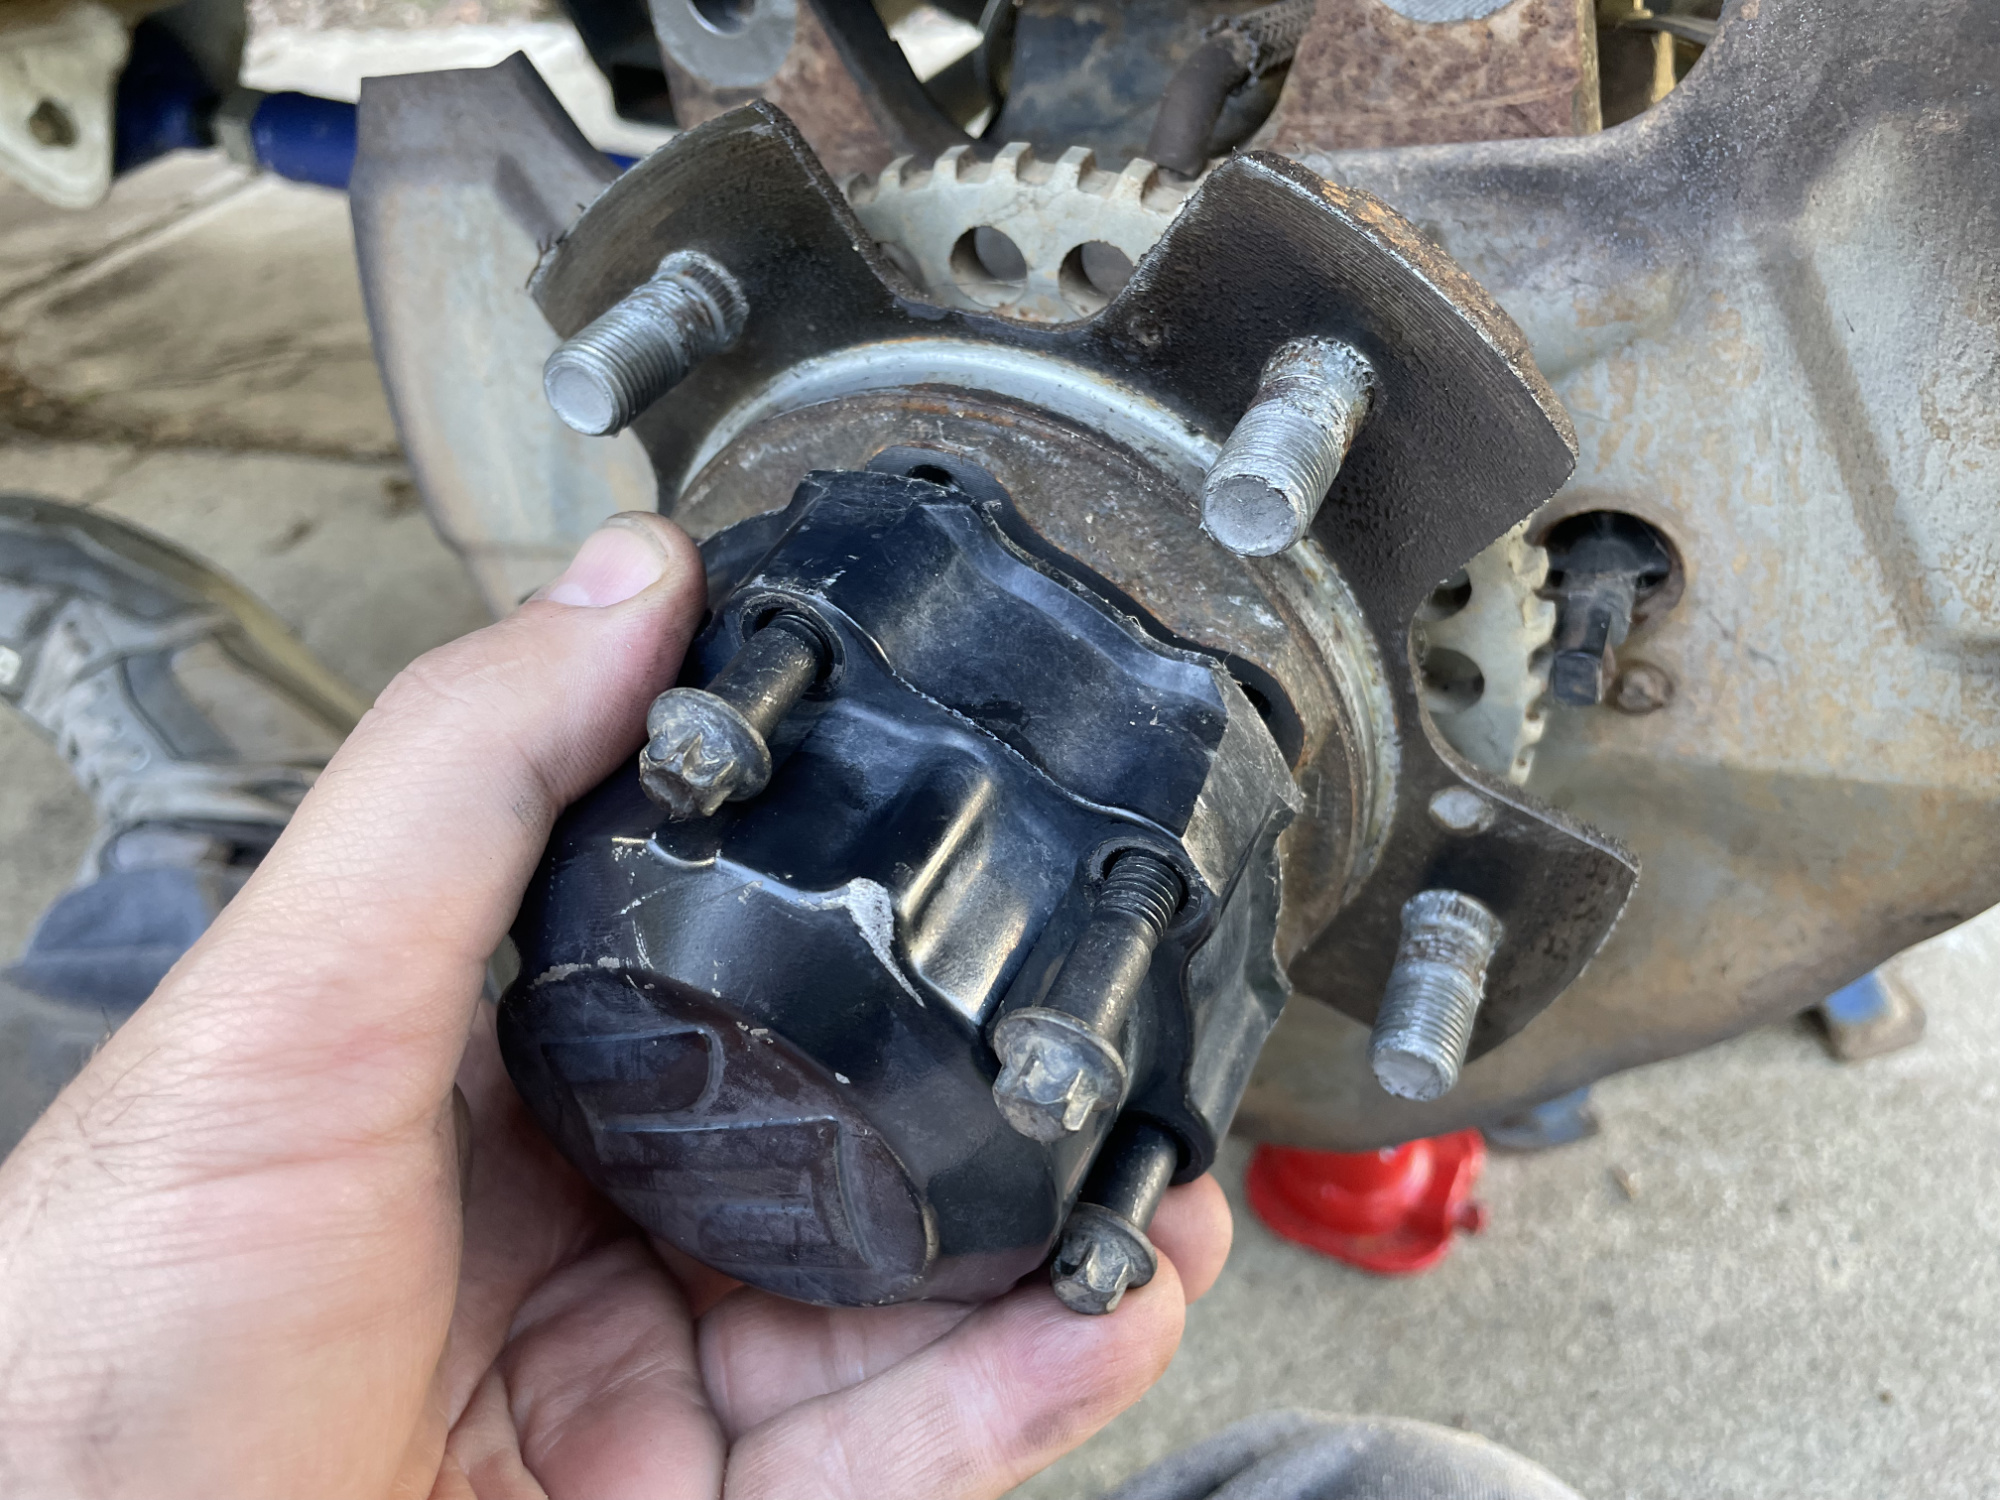
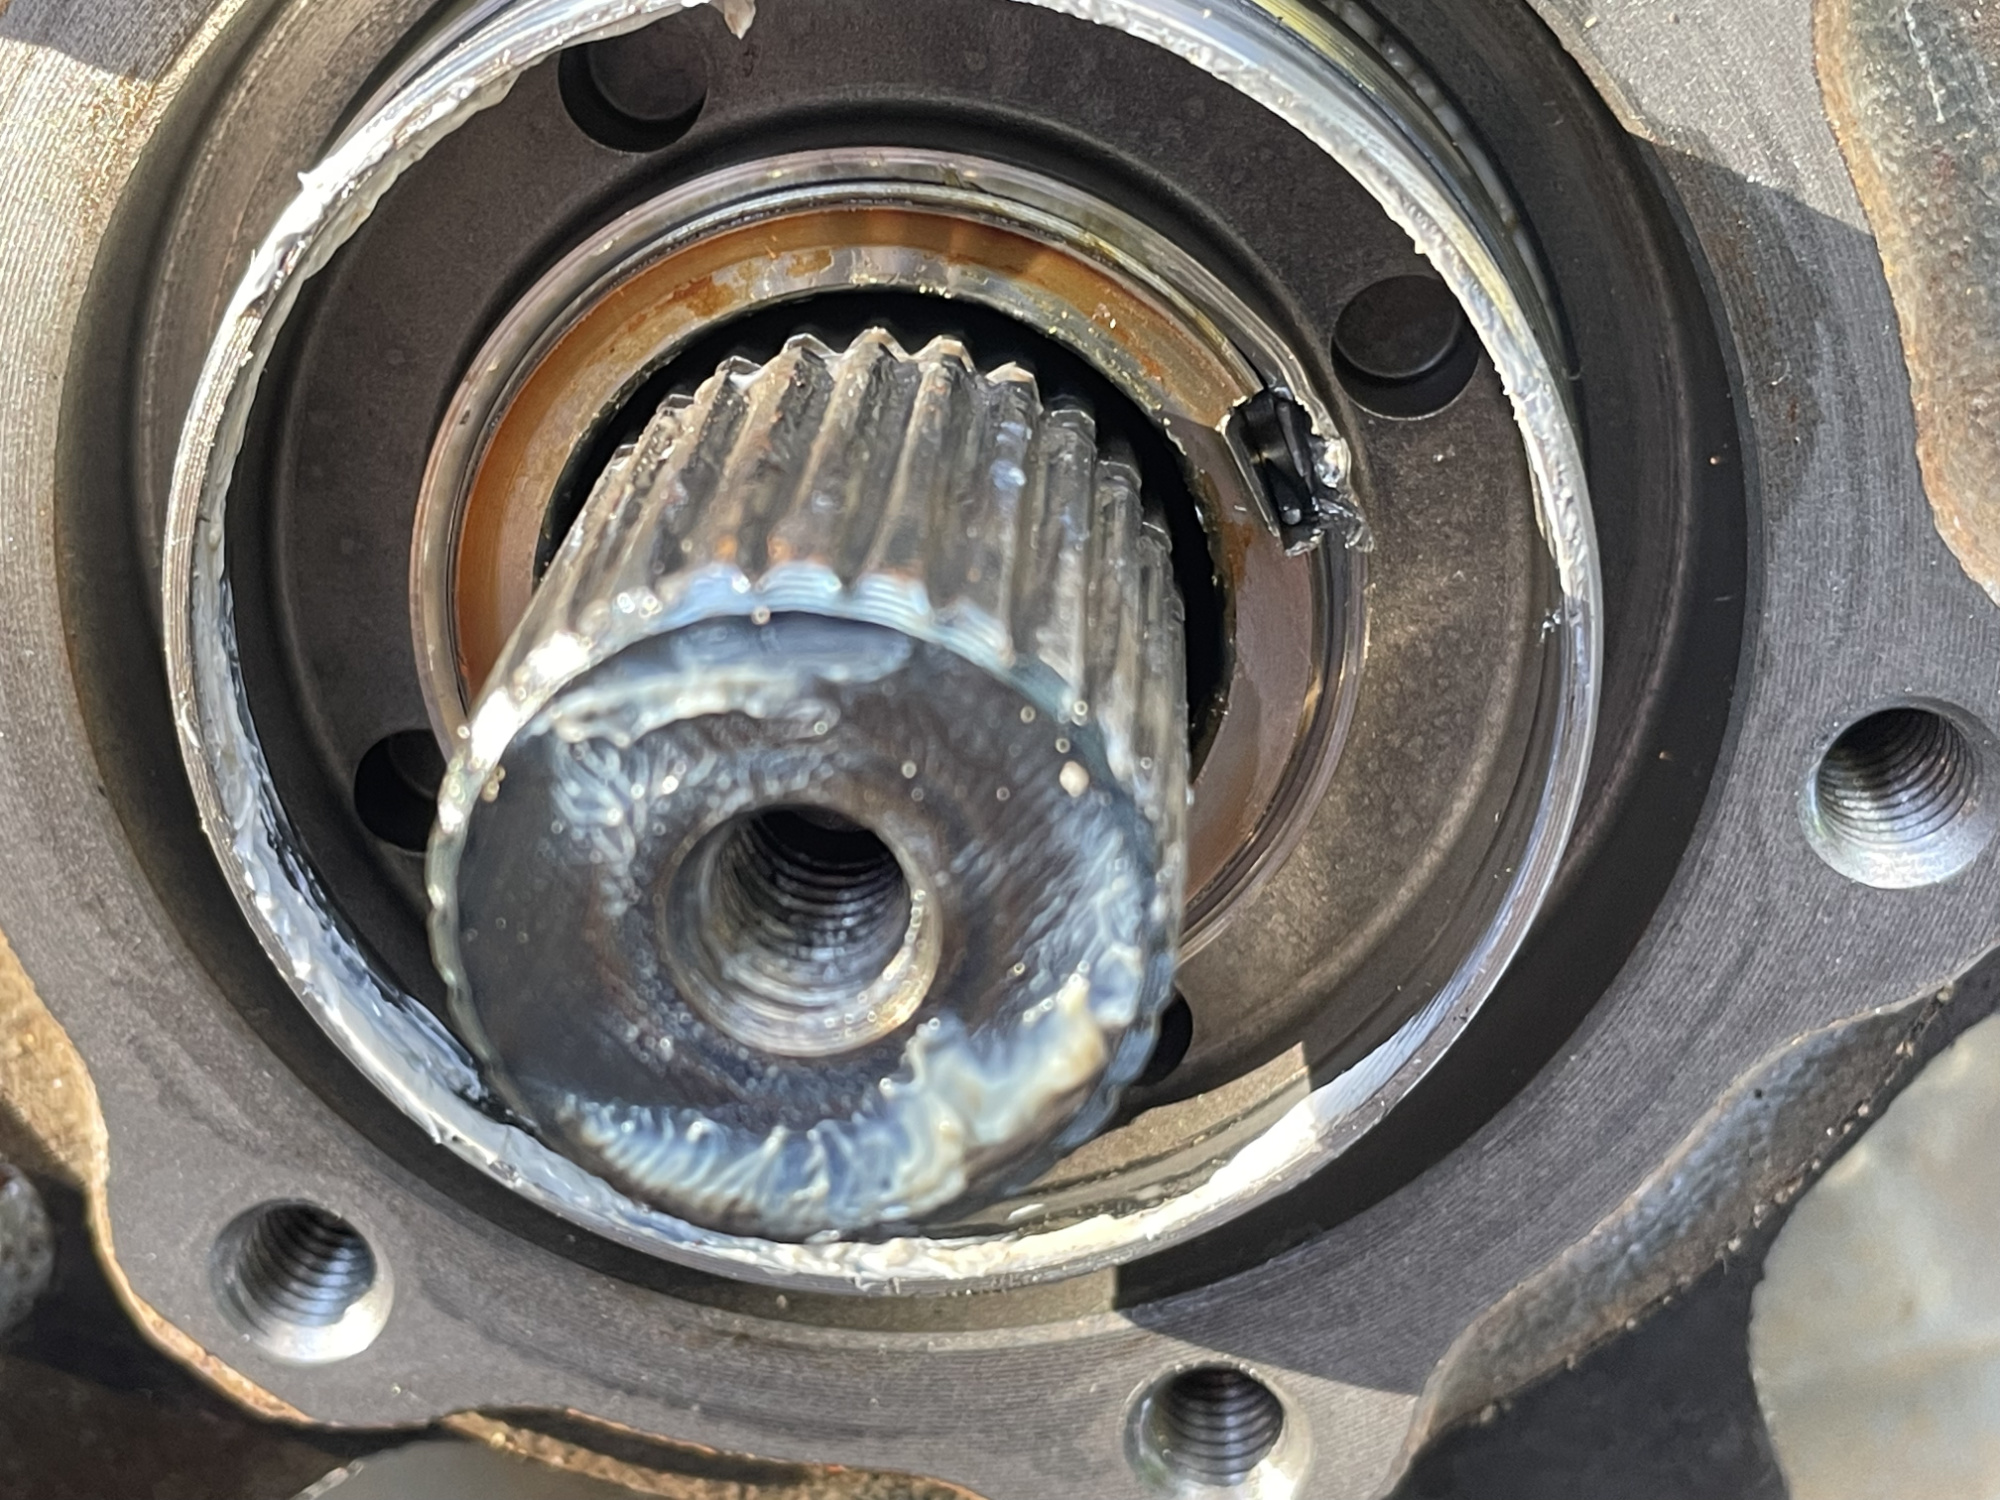
Now you get the fun of removing the axle circlip. Although it is a relatively large external circlip, it uses some quite small holes so you’ll need good circlip pliers with relatively small tips.
With good external circlip pliers though it’s relatively easily done.

Then remove the thrust washer that sits between the circlip and the wheel bearing retaining nut.
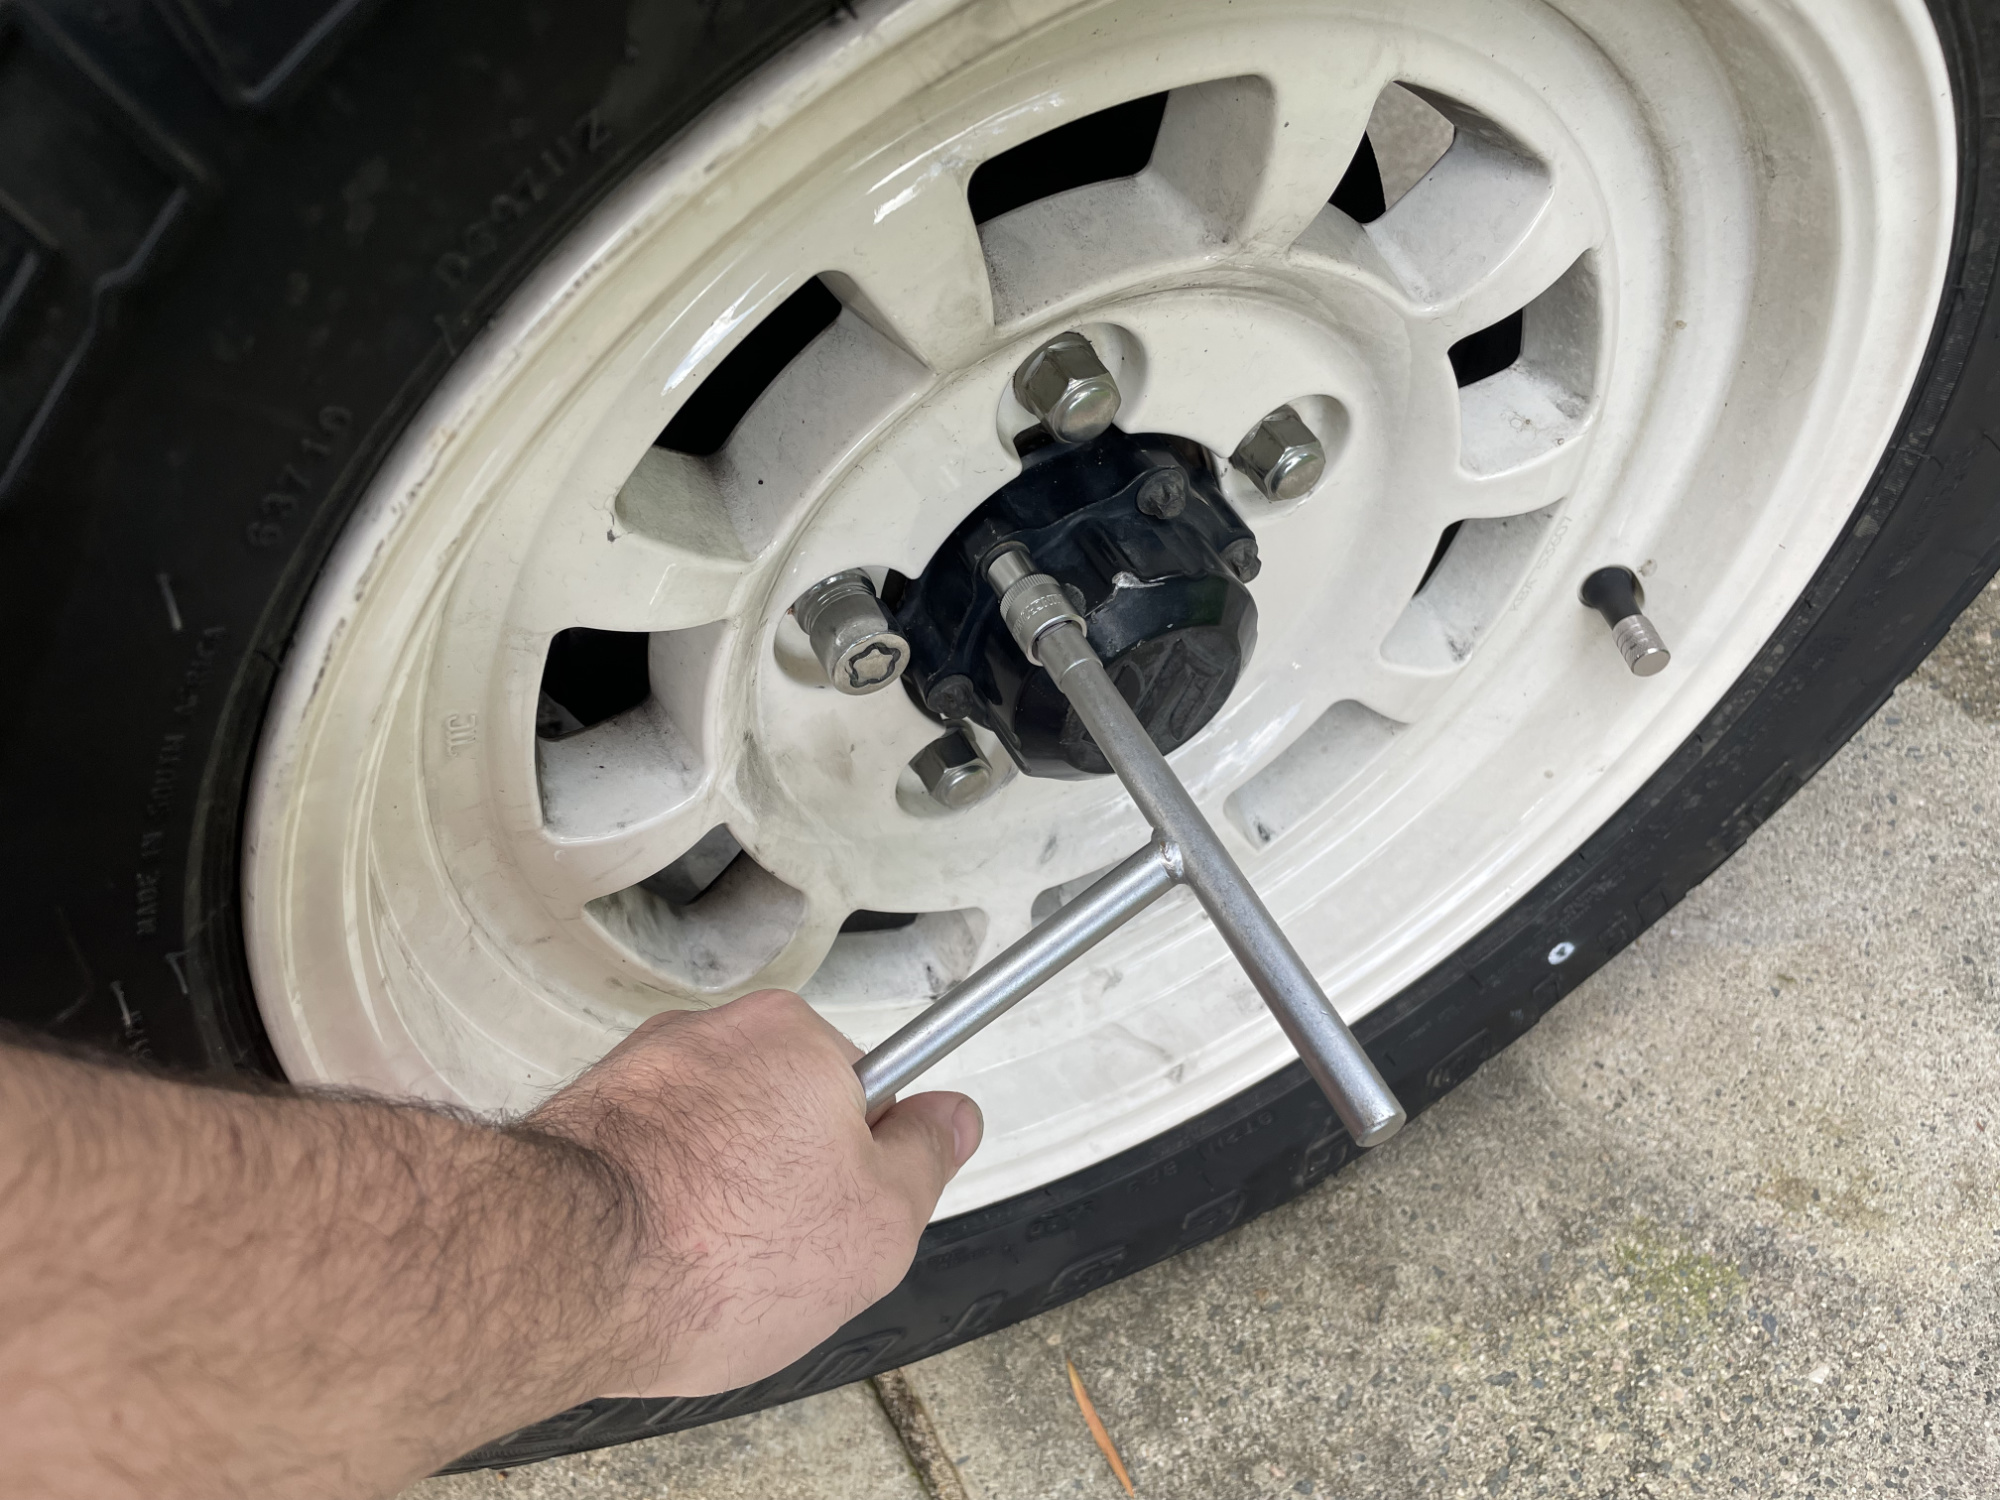
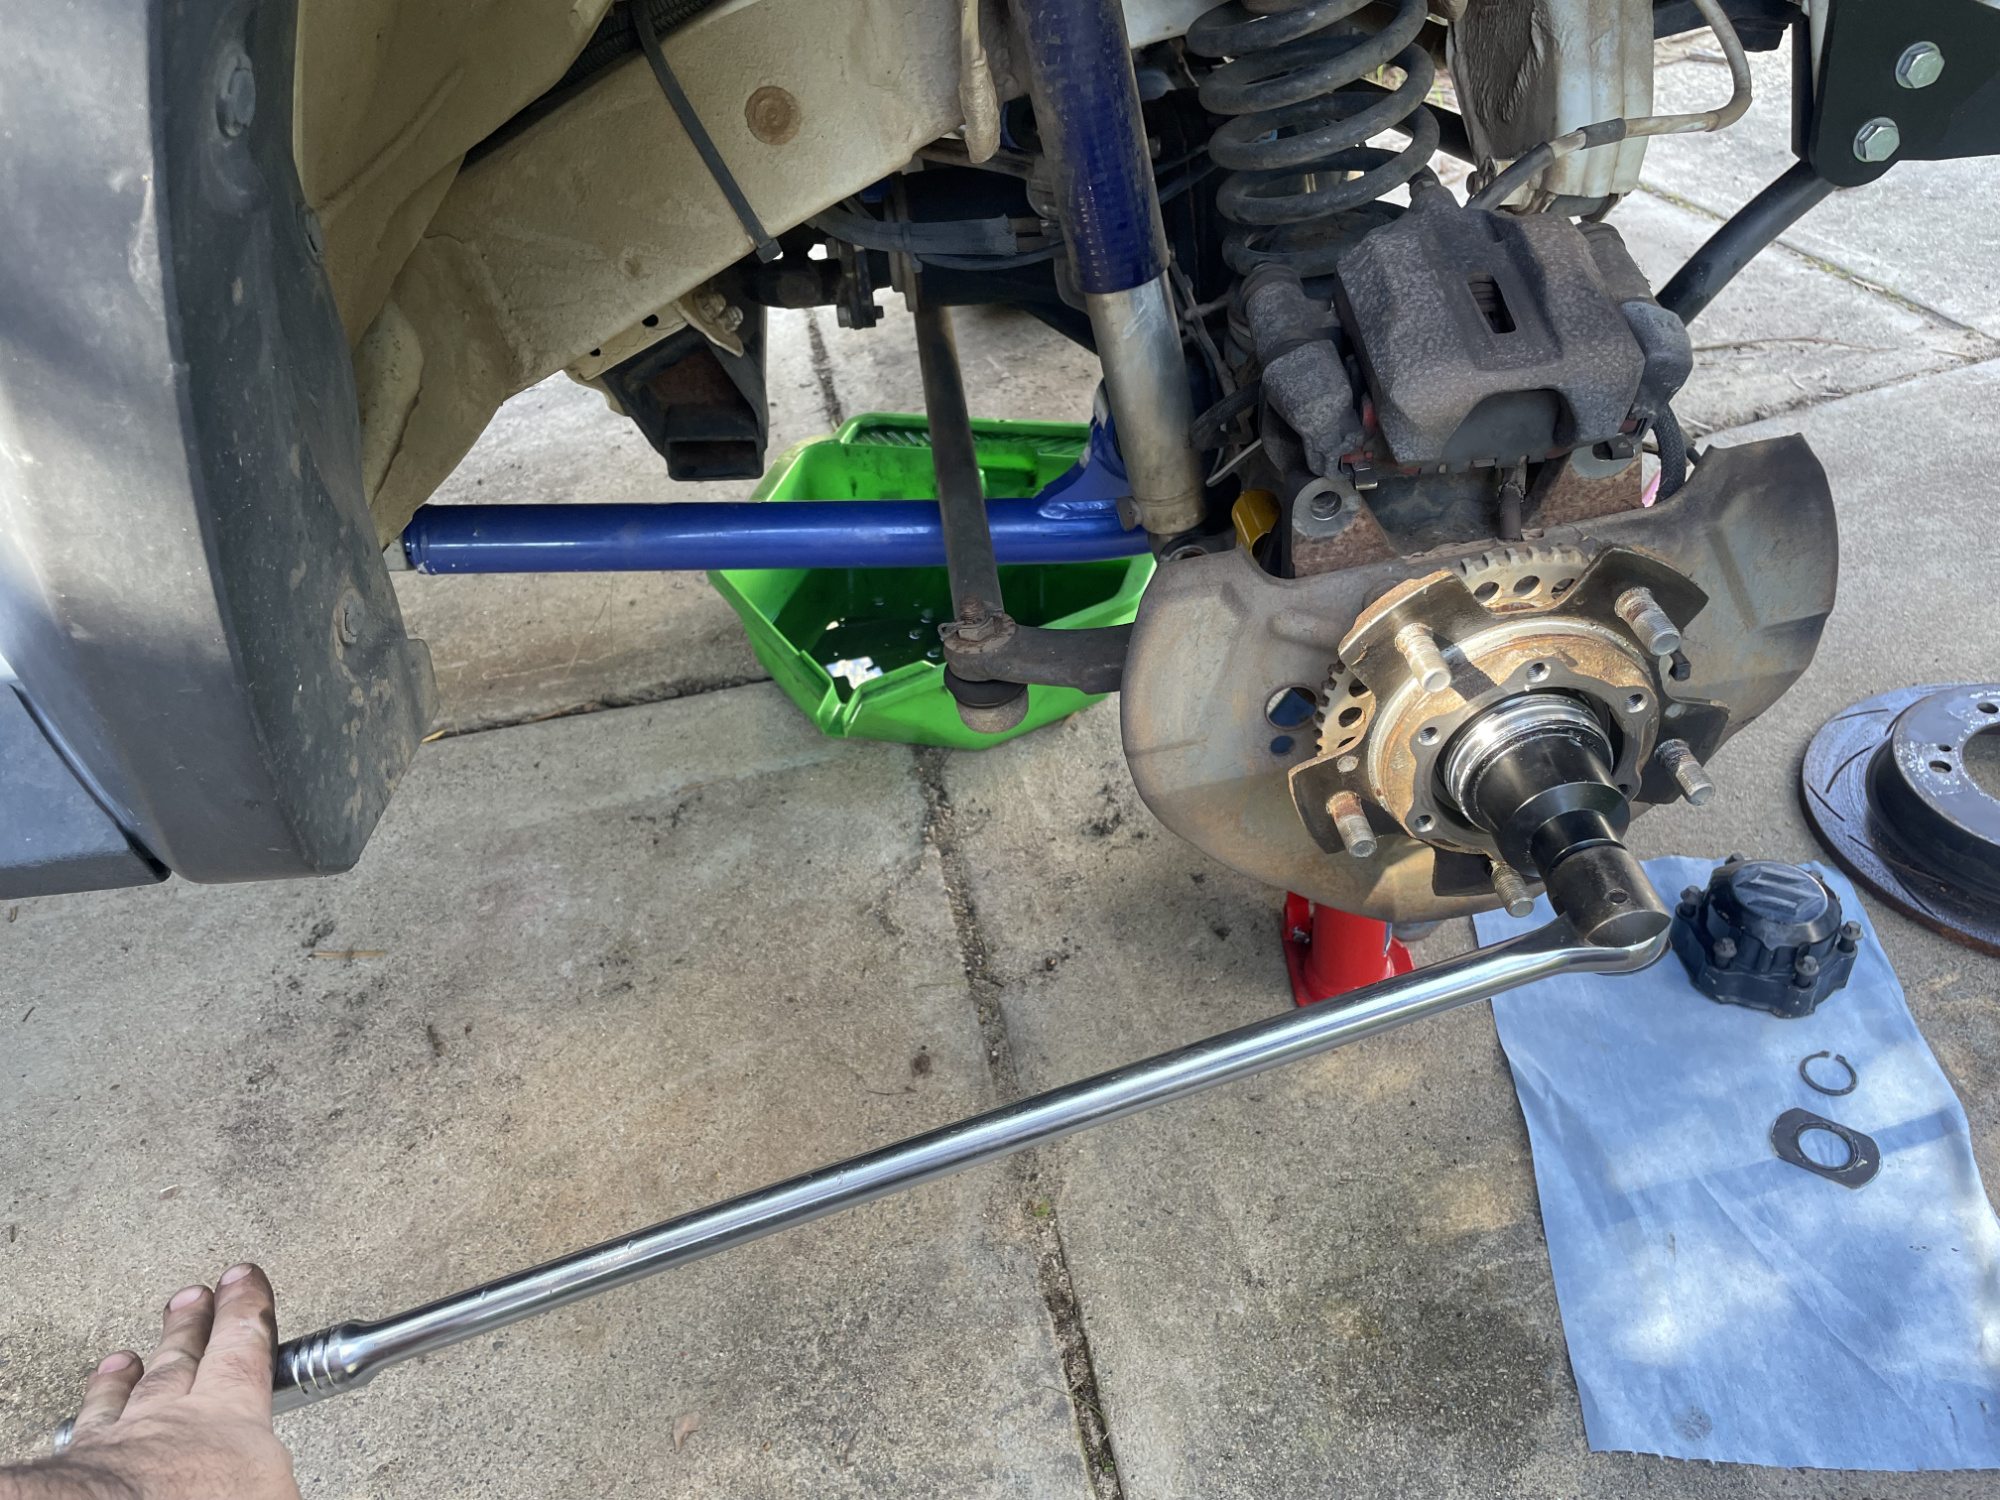
Now you have to un-stake the staked wheel bearing nut. This is how the nut stays on even under acceleration and braking forces.
You need to punch this bit of metal back out so the nut can turn.
Using the wheel bearing nut tool and a biiiiiiig breaker bar and it’s not too bad to undo. Bear in mind the axle nut is torqued to 216 Nm so be prepared for that level of undoing.
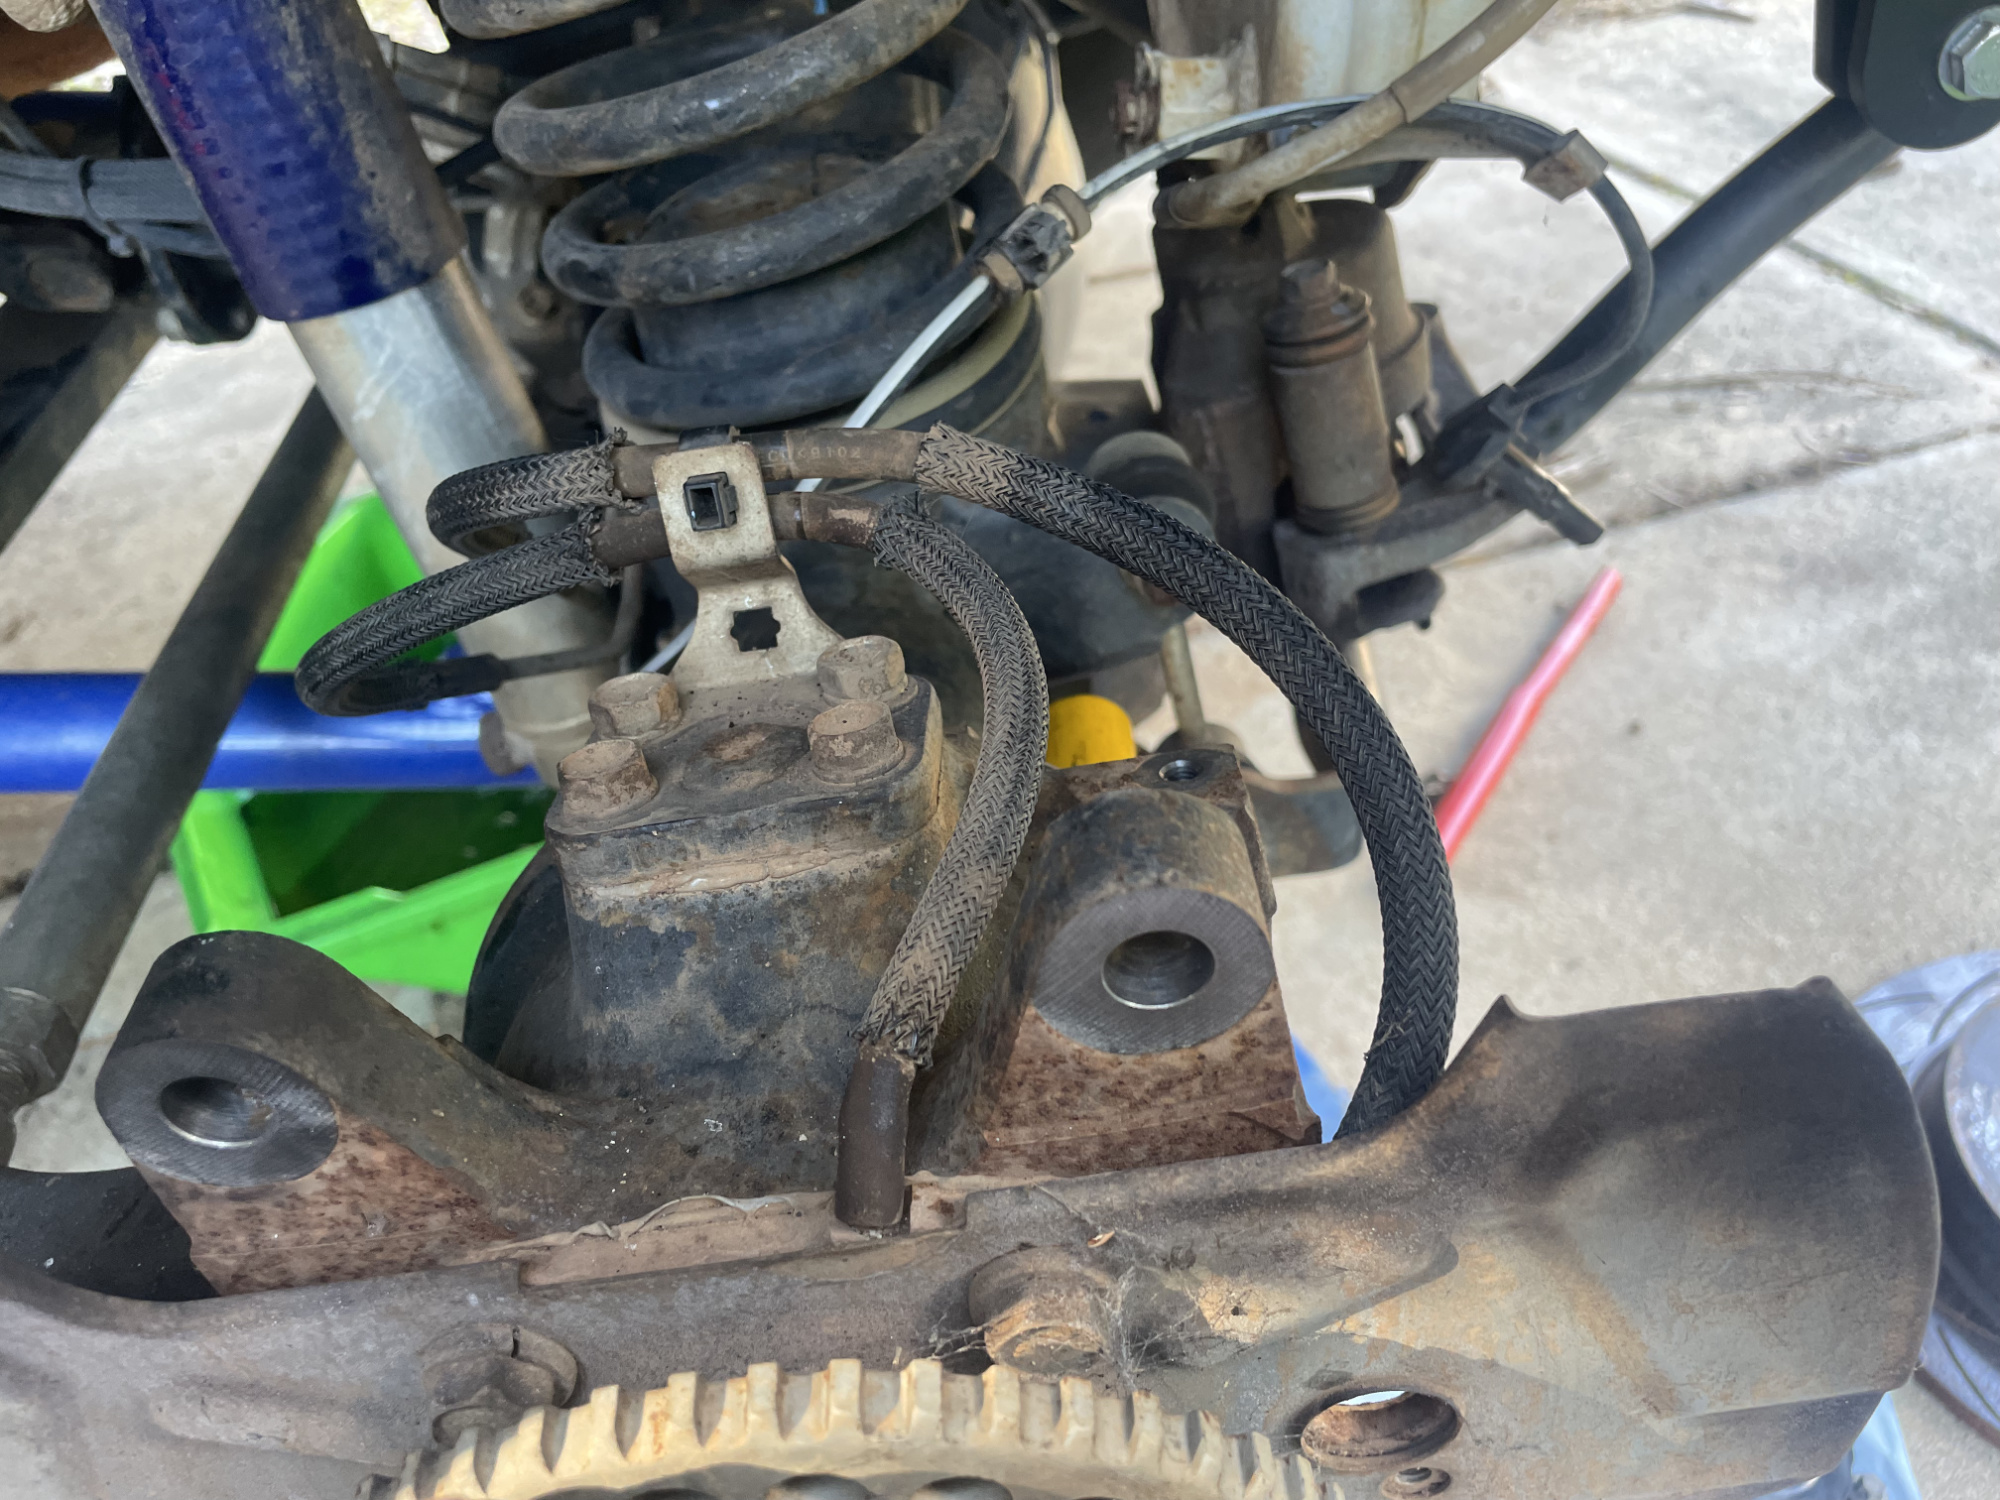
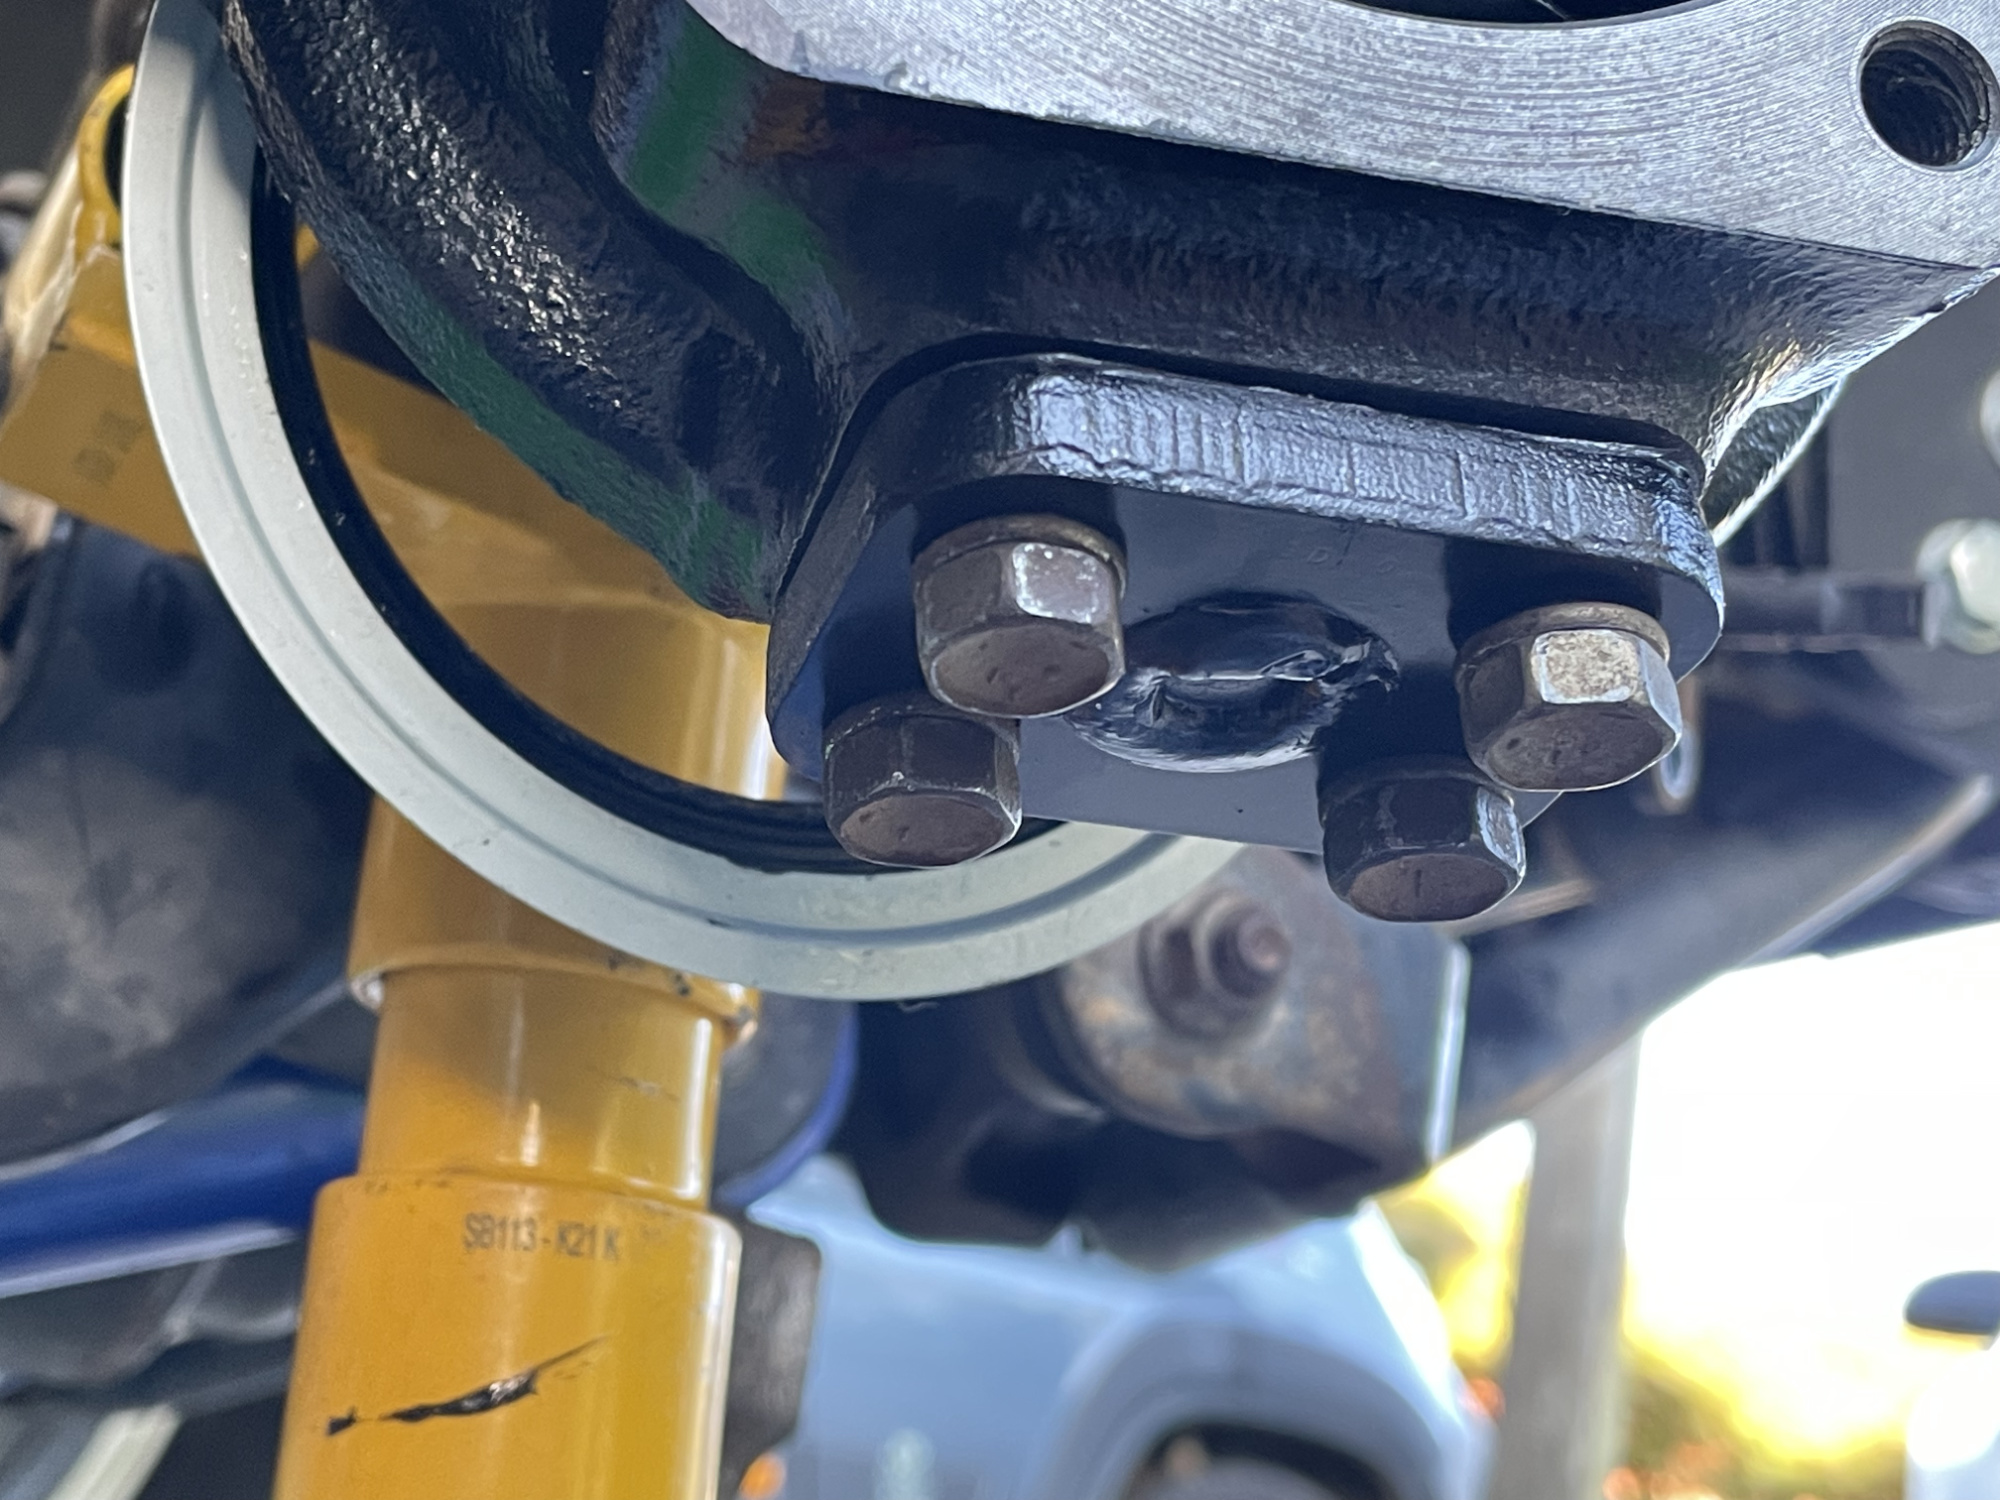
I then turn my attention to dealing with the vacuum hoses and the wheel speed sensor wiring.
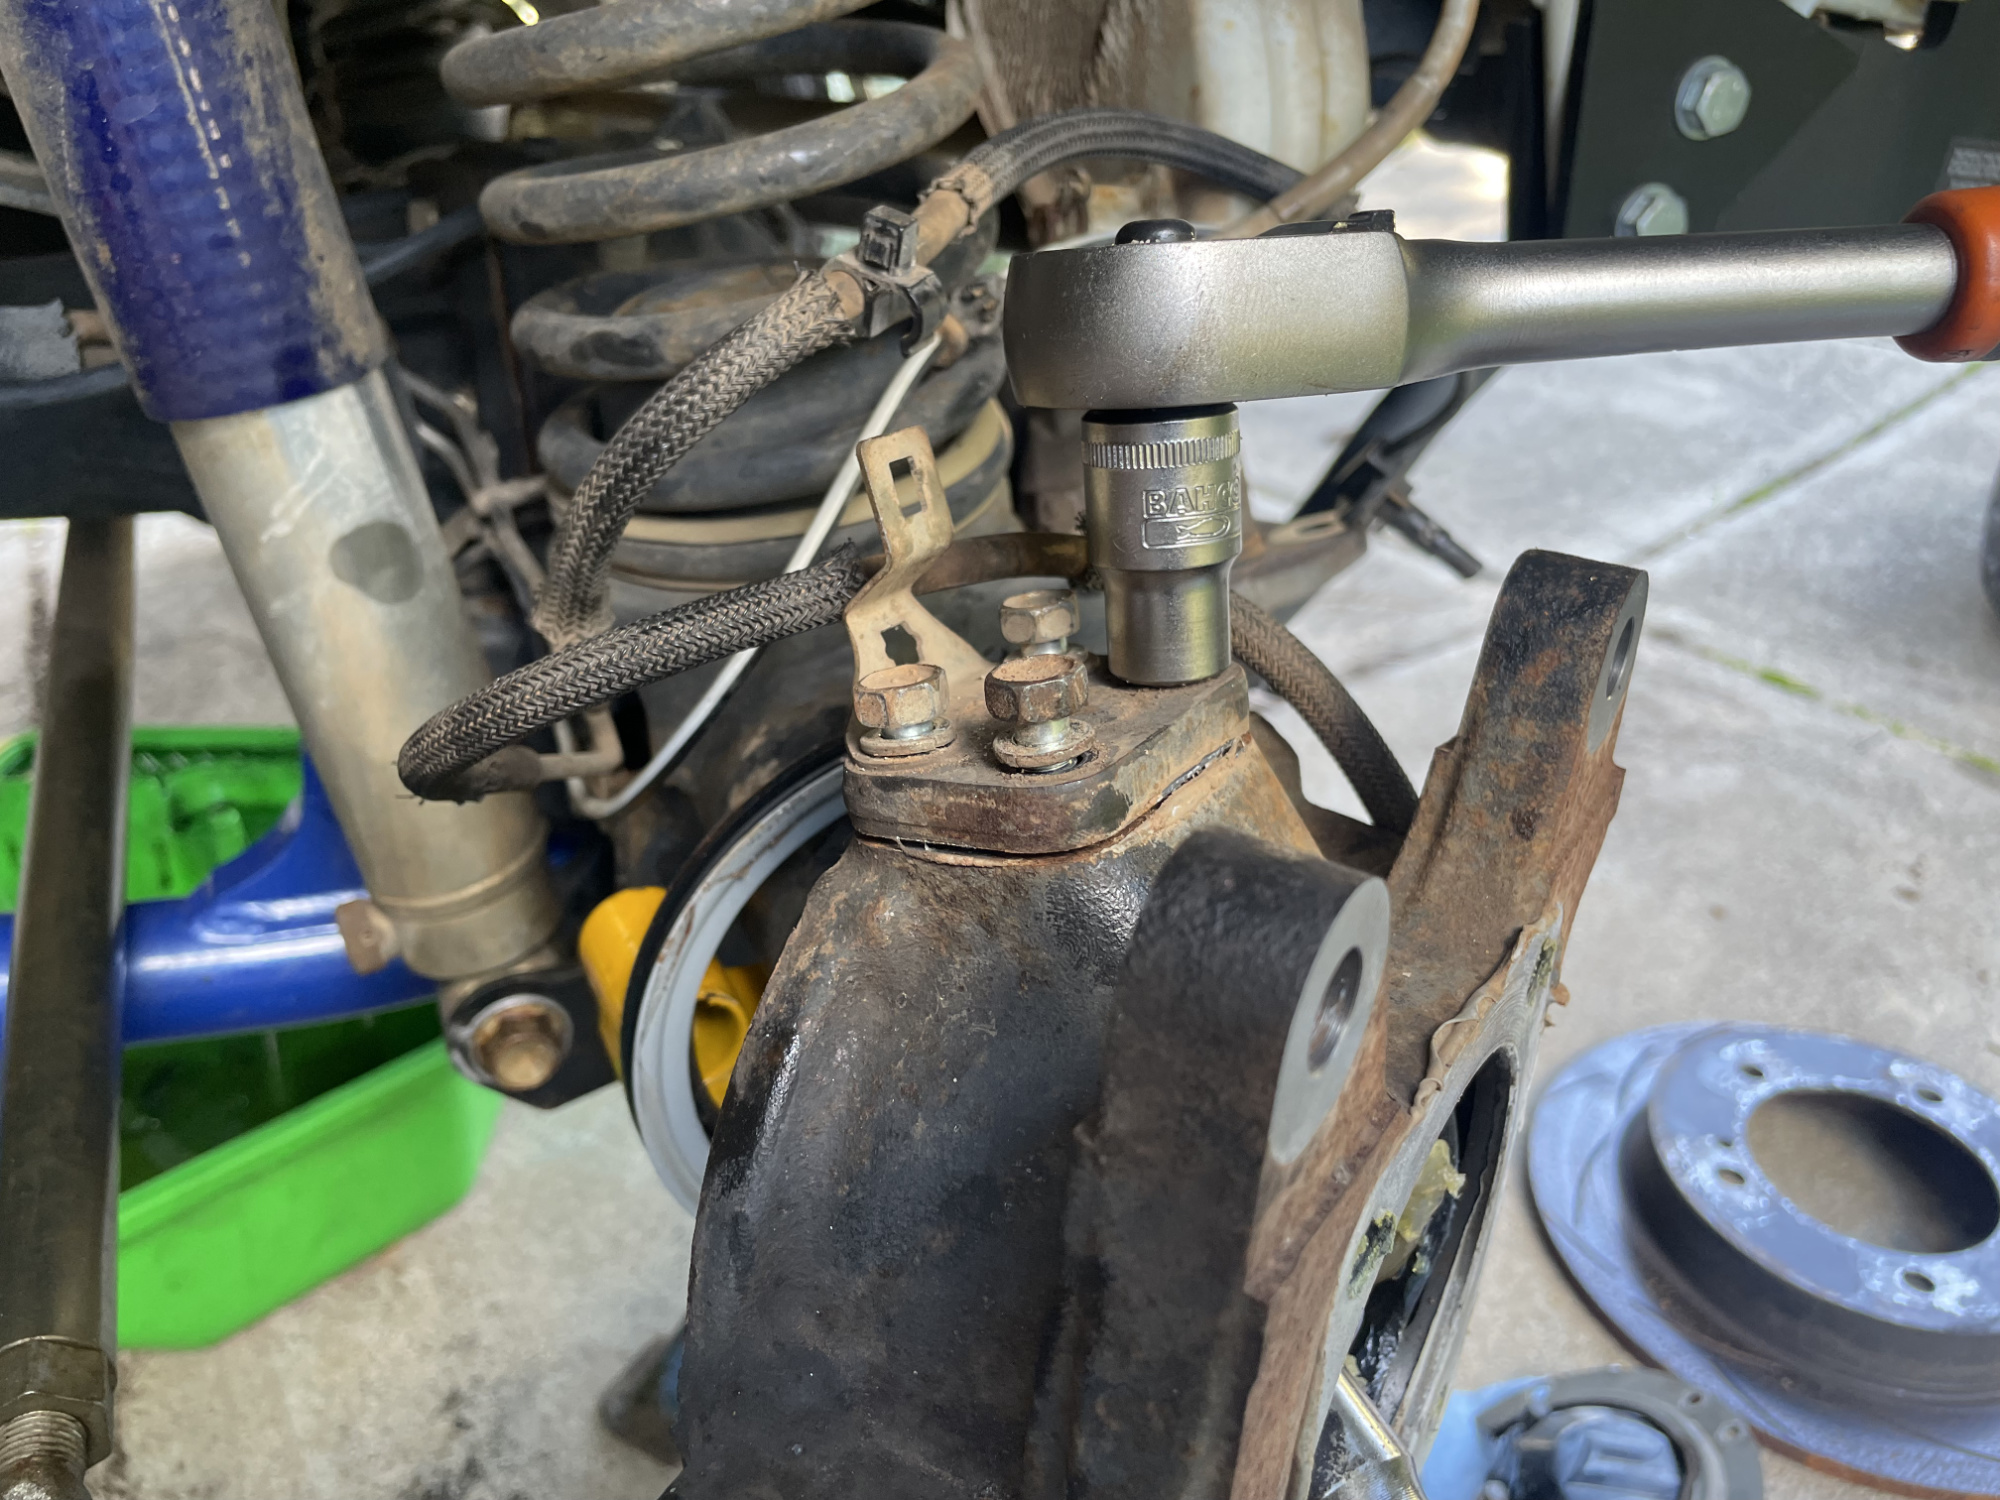
Starting with the speed sensor, there is one bolt on the front of the hub assembly you access from the back of the brake backing plate…
… and the other bolt is for a bracket that holds the wheel speed sensor wiring in place and mounts to the top of the swivel hub.
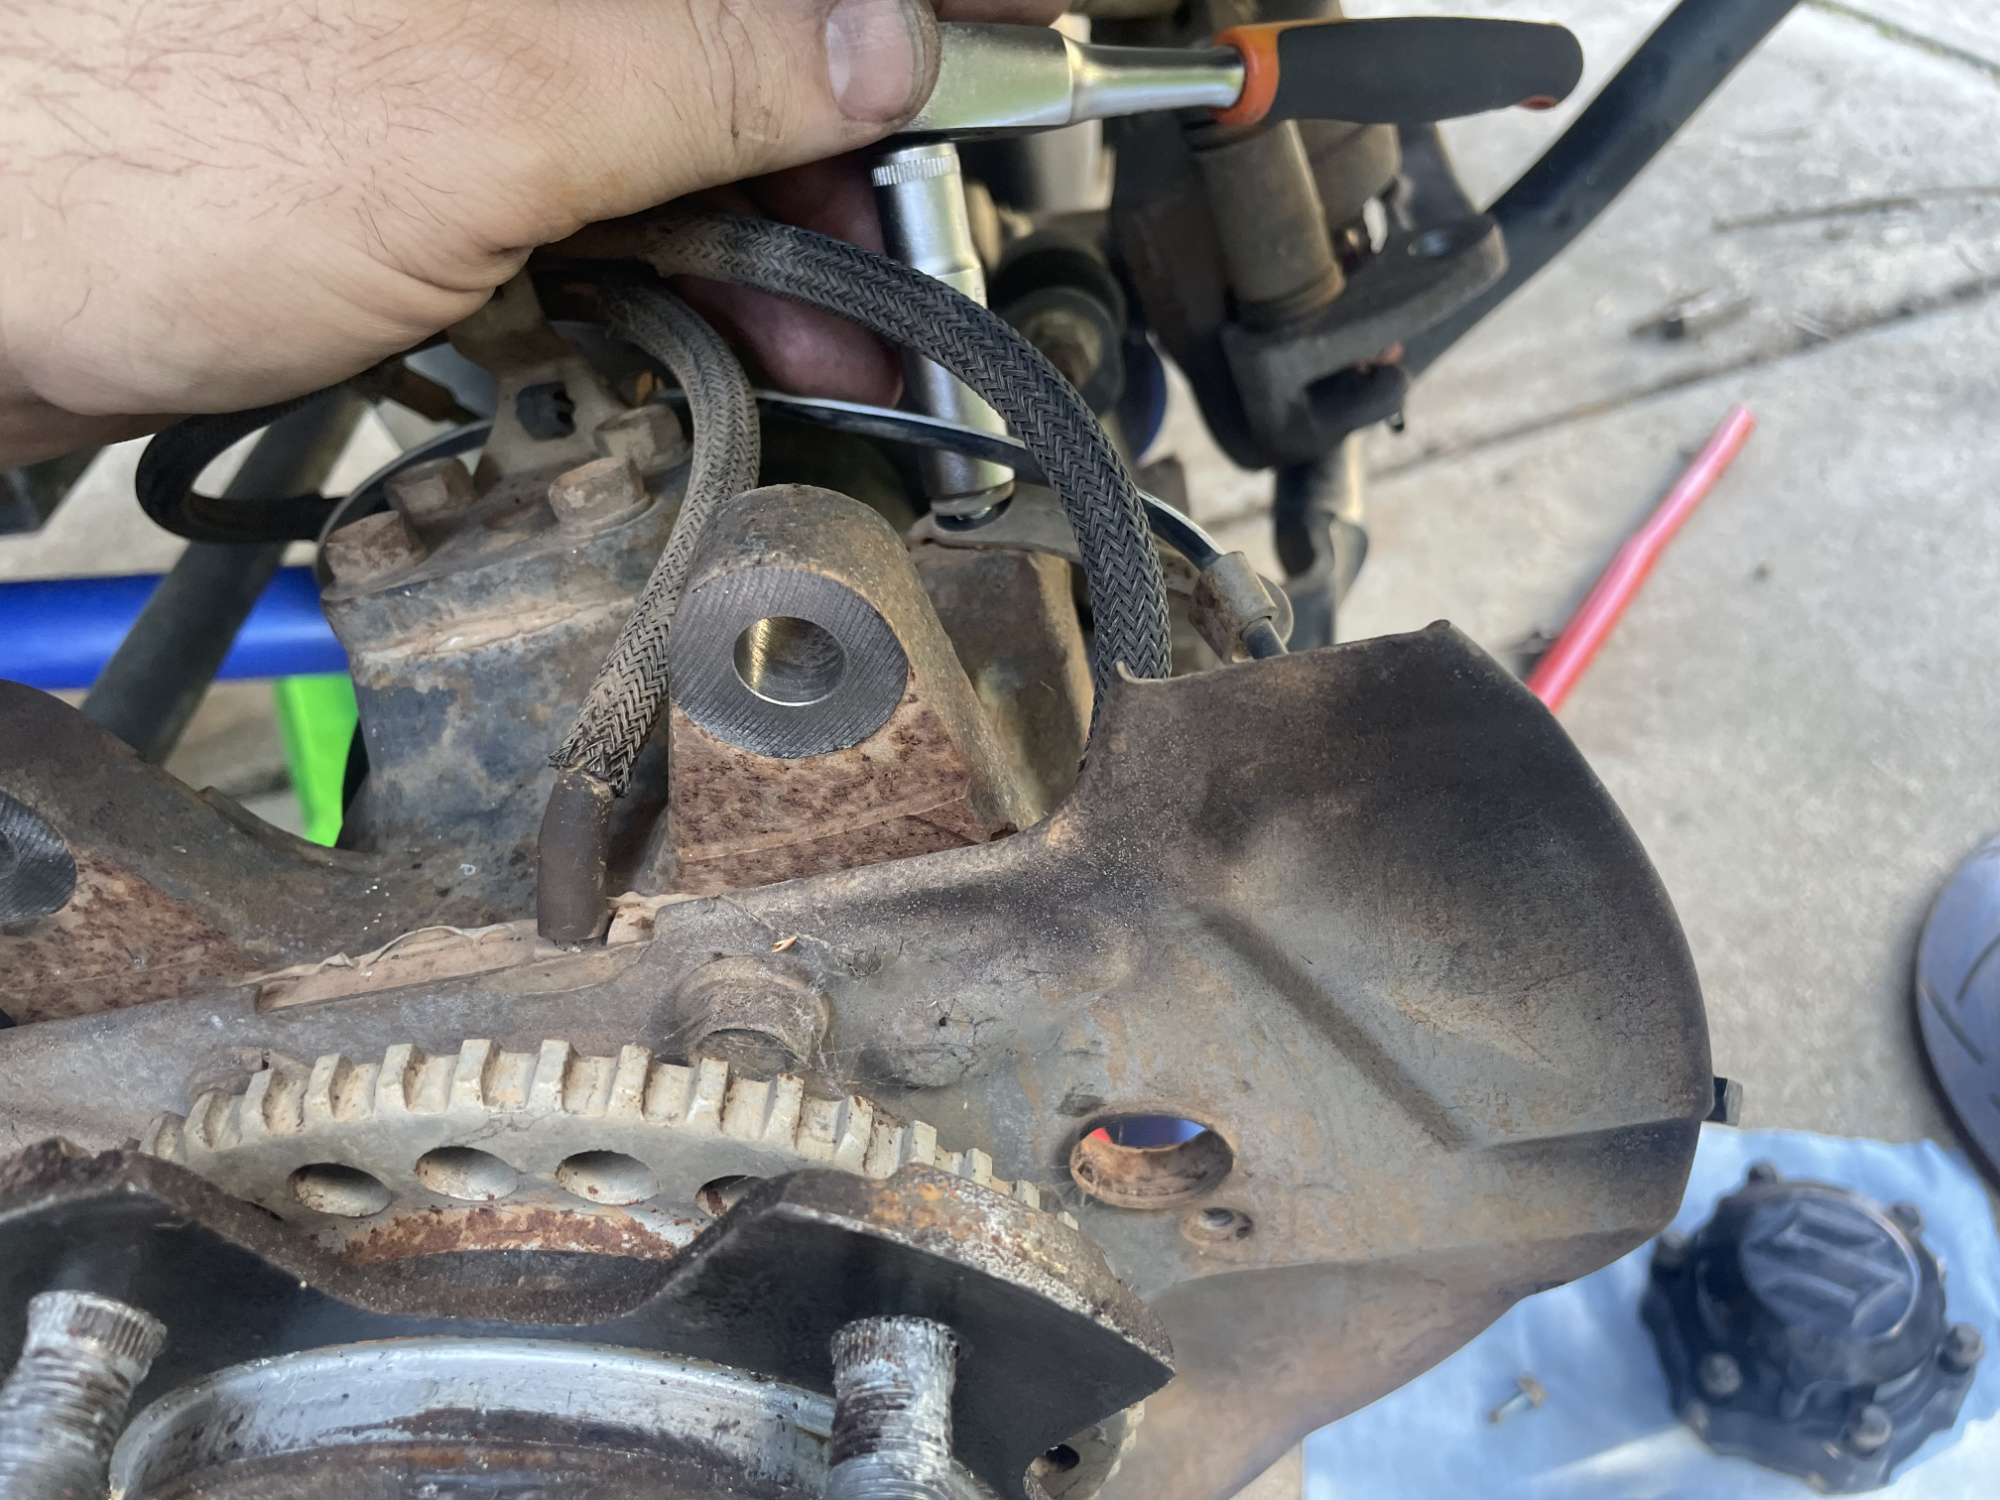
With that done you can then use the little tabs on the plastic clip on the speed sensor wiring and release it from the bracket beneath the vacuum hoses and get it well out of the way. They’re expensive if you have to replace the wiring for these!
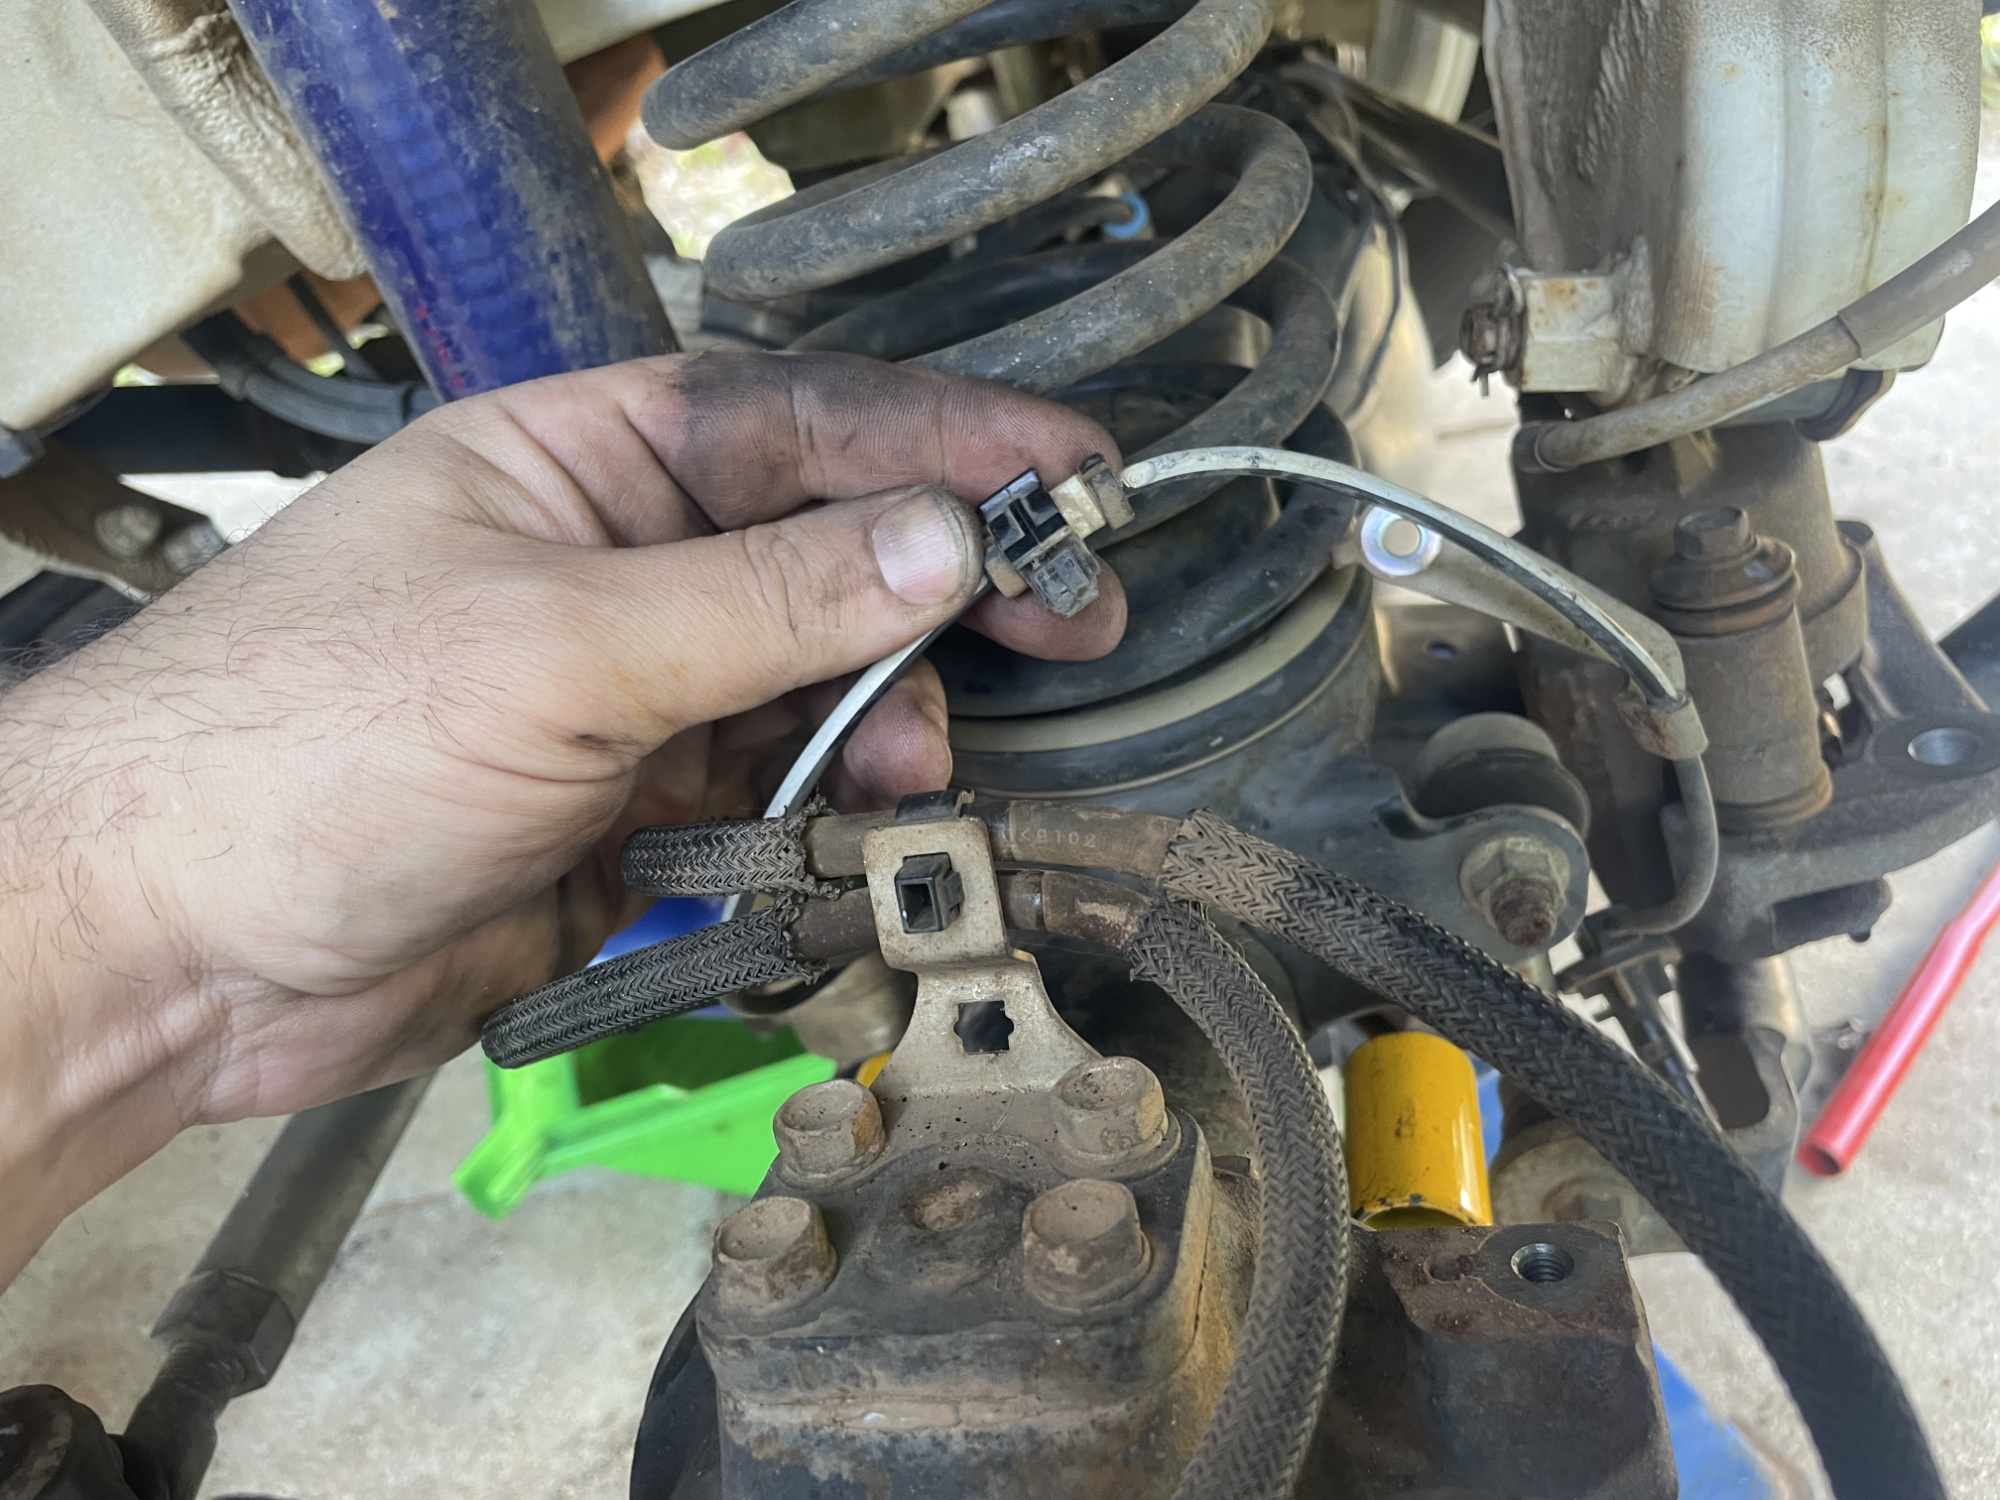
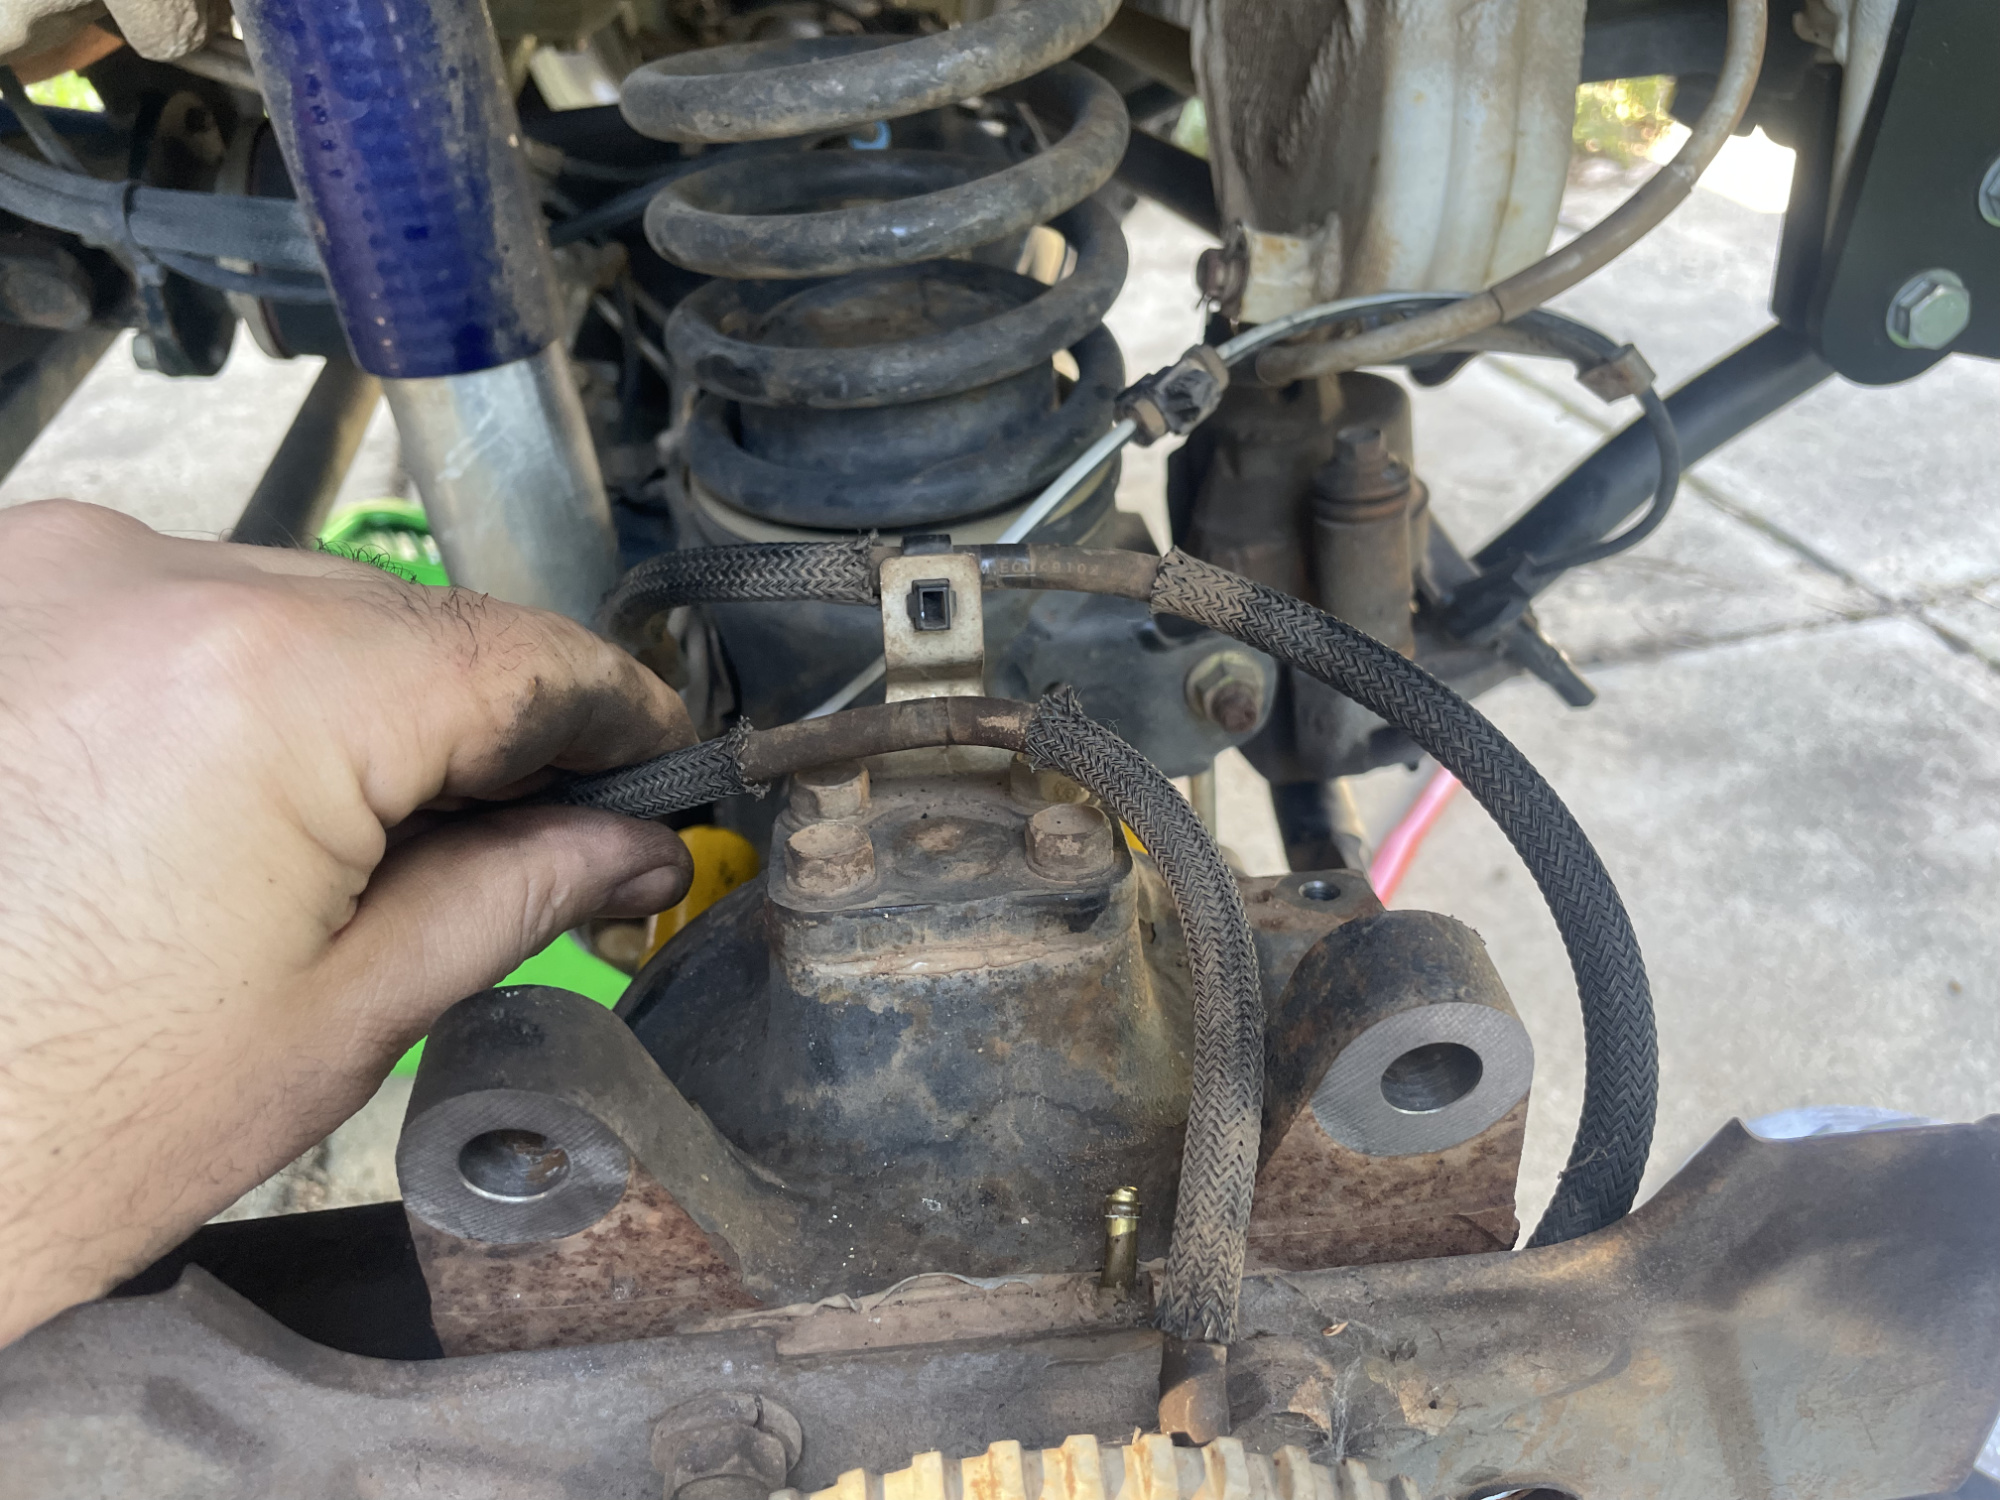
Next to release are the vacuum lines. It’s easier to get the ‘lower’ of the two hoses, which attaches in the middle upper part of the wheel spindle now; get the other one later when you release the spindle.
You don’t want to just tug on these hoses, you lever up at the base of the hose with something like a screwdriver or even the tip of the circlip pliers you used on the axle circlip.
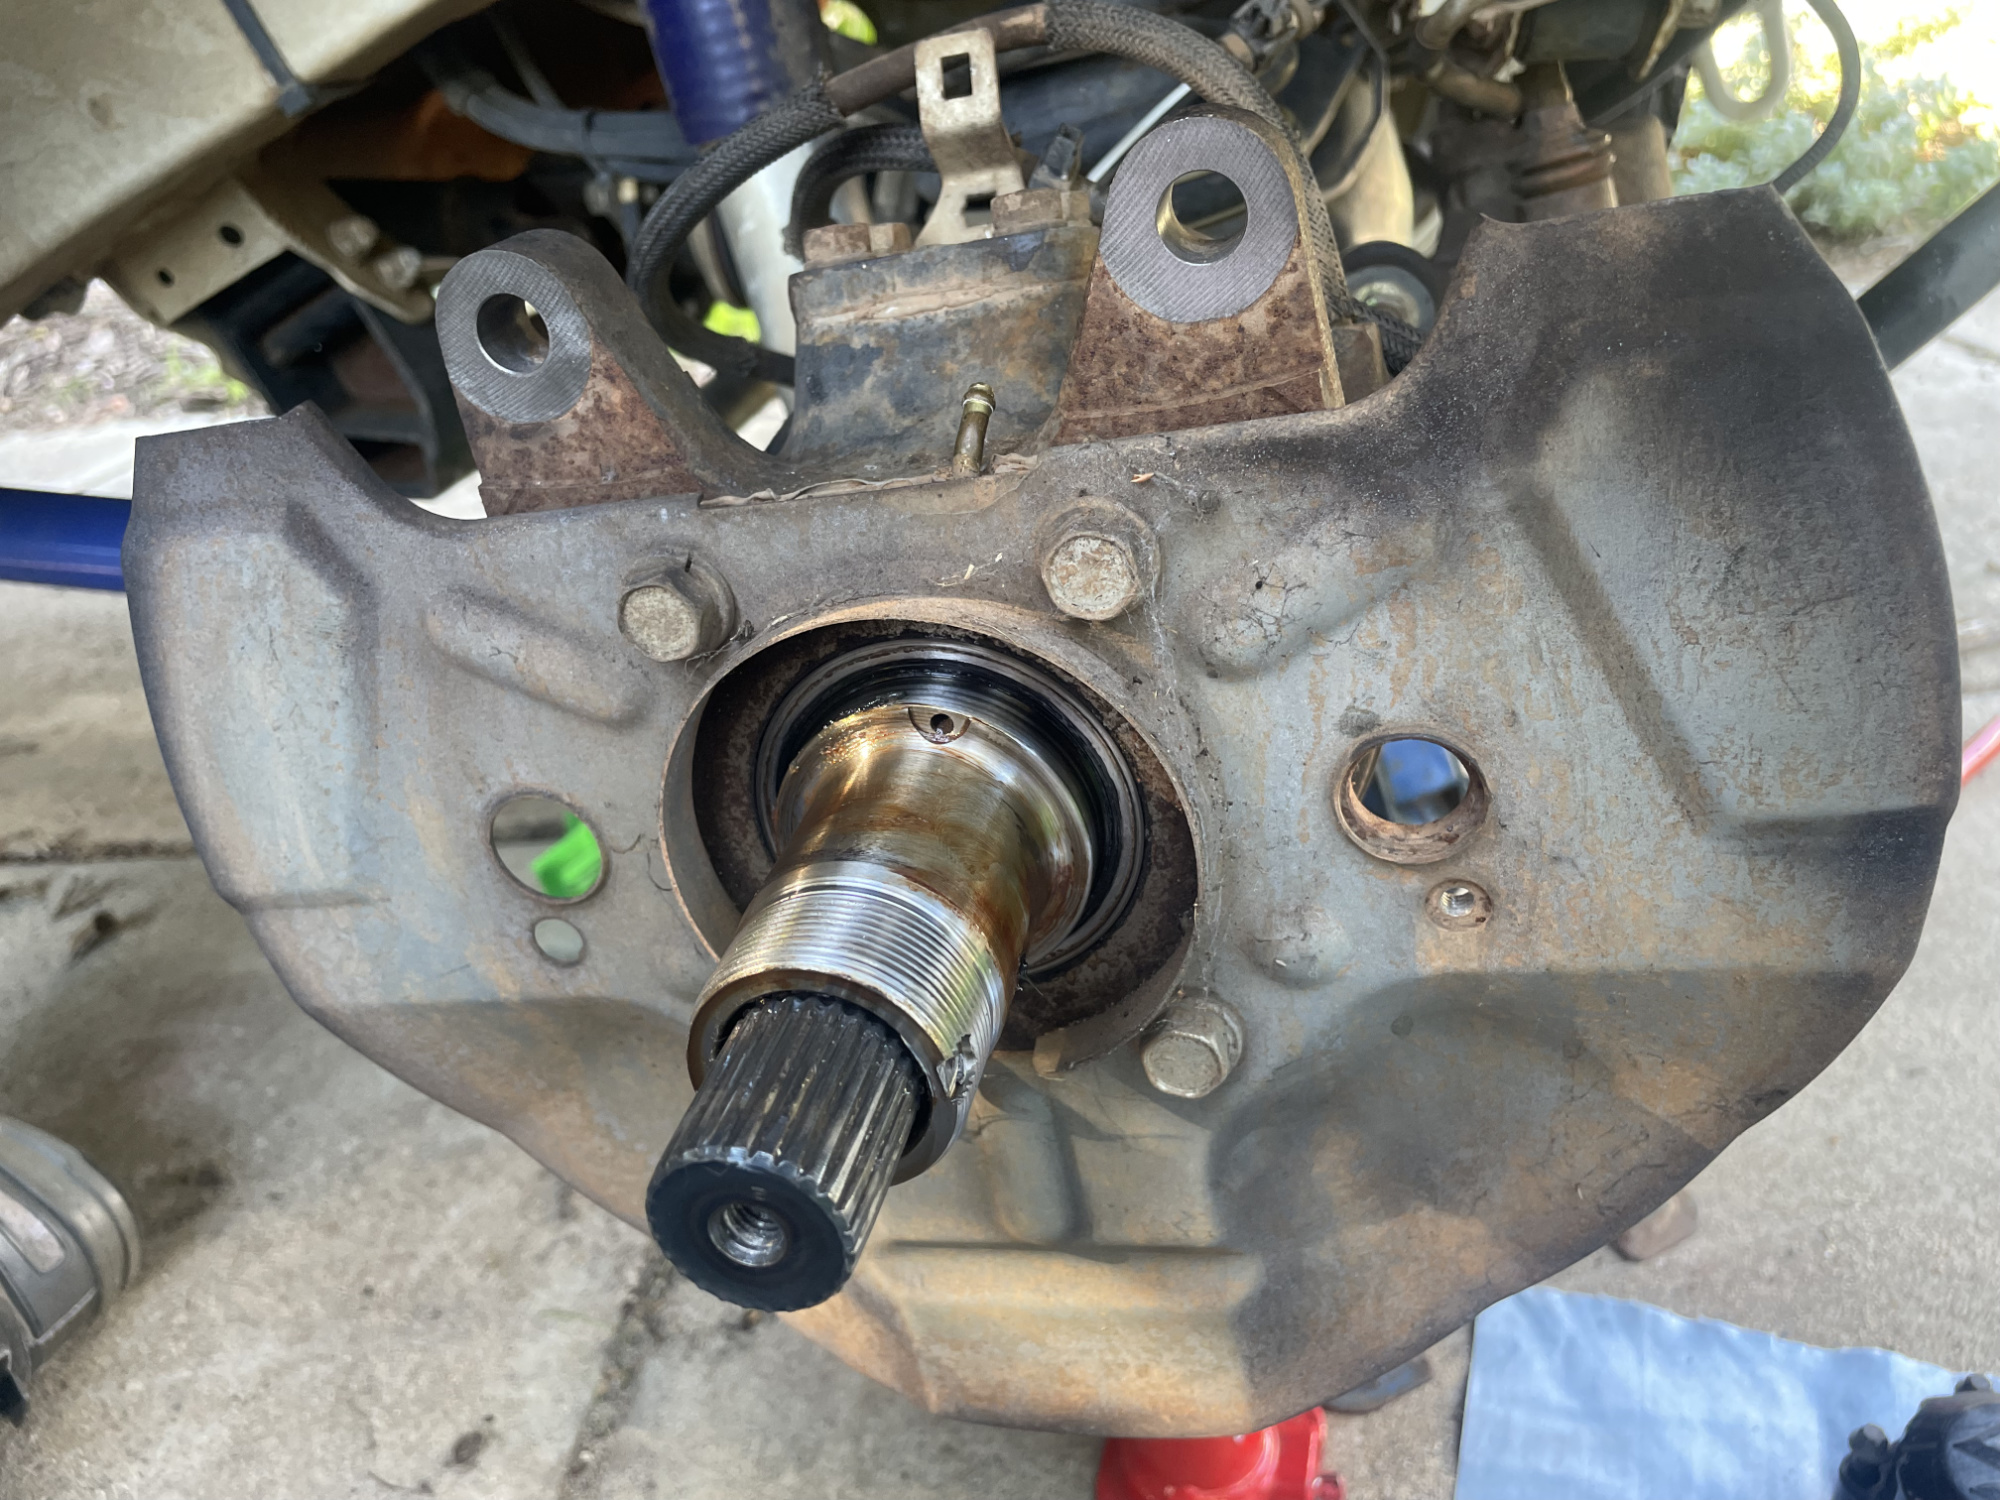
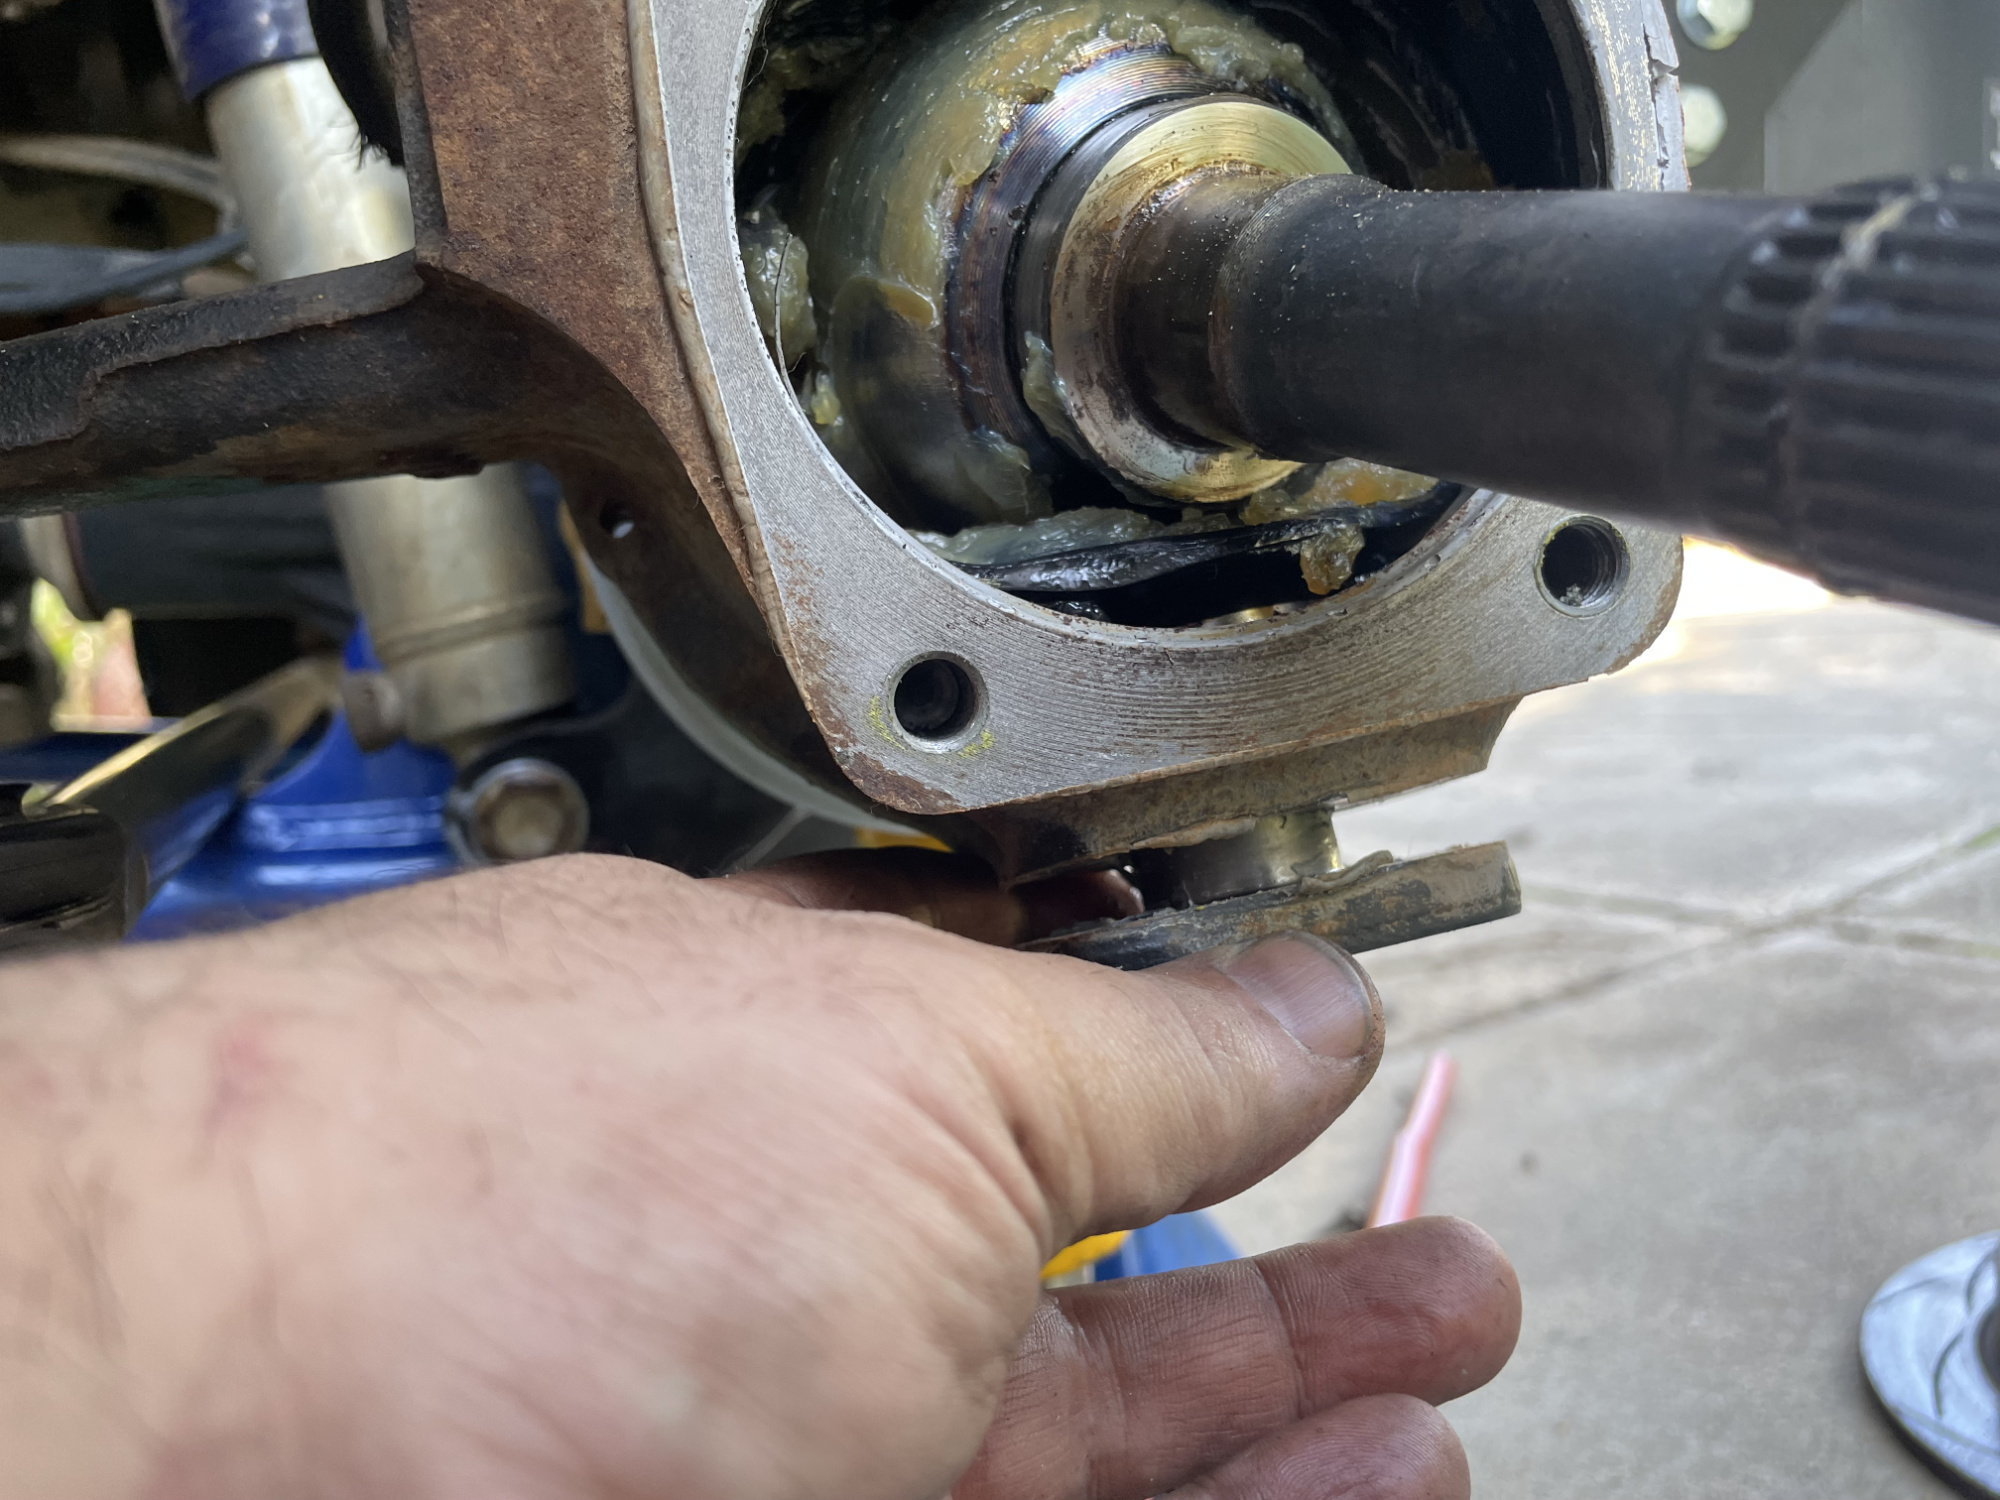
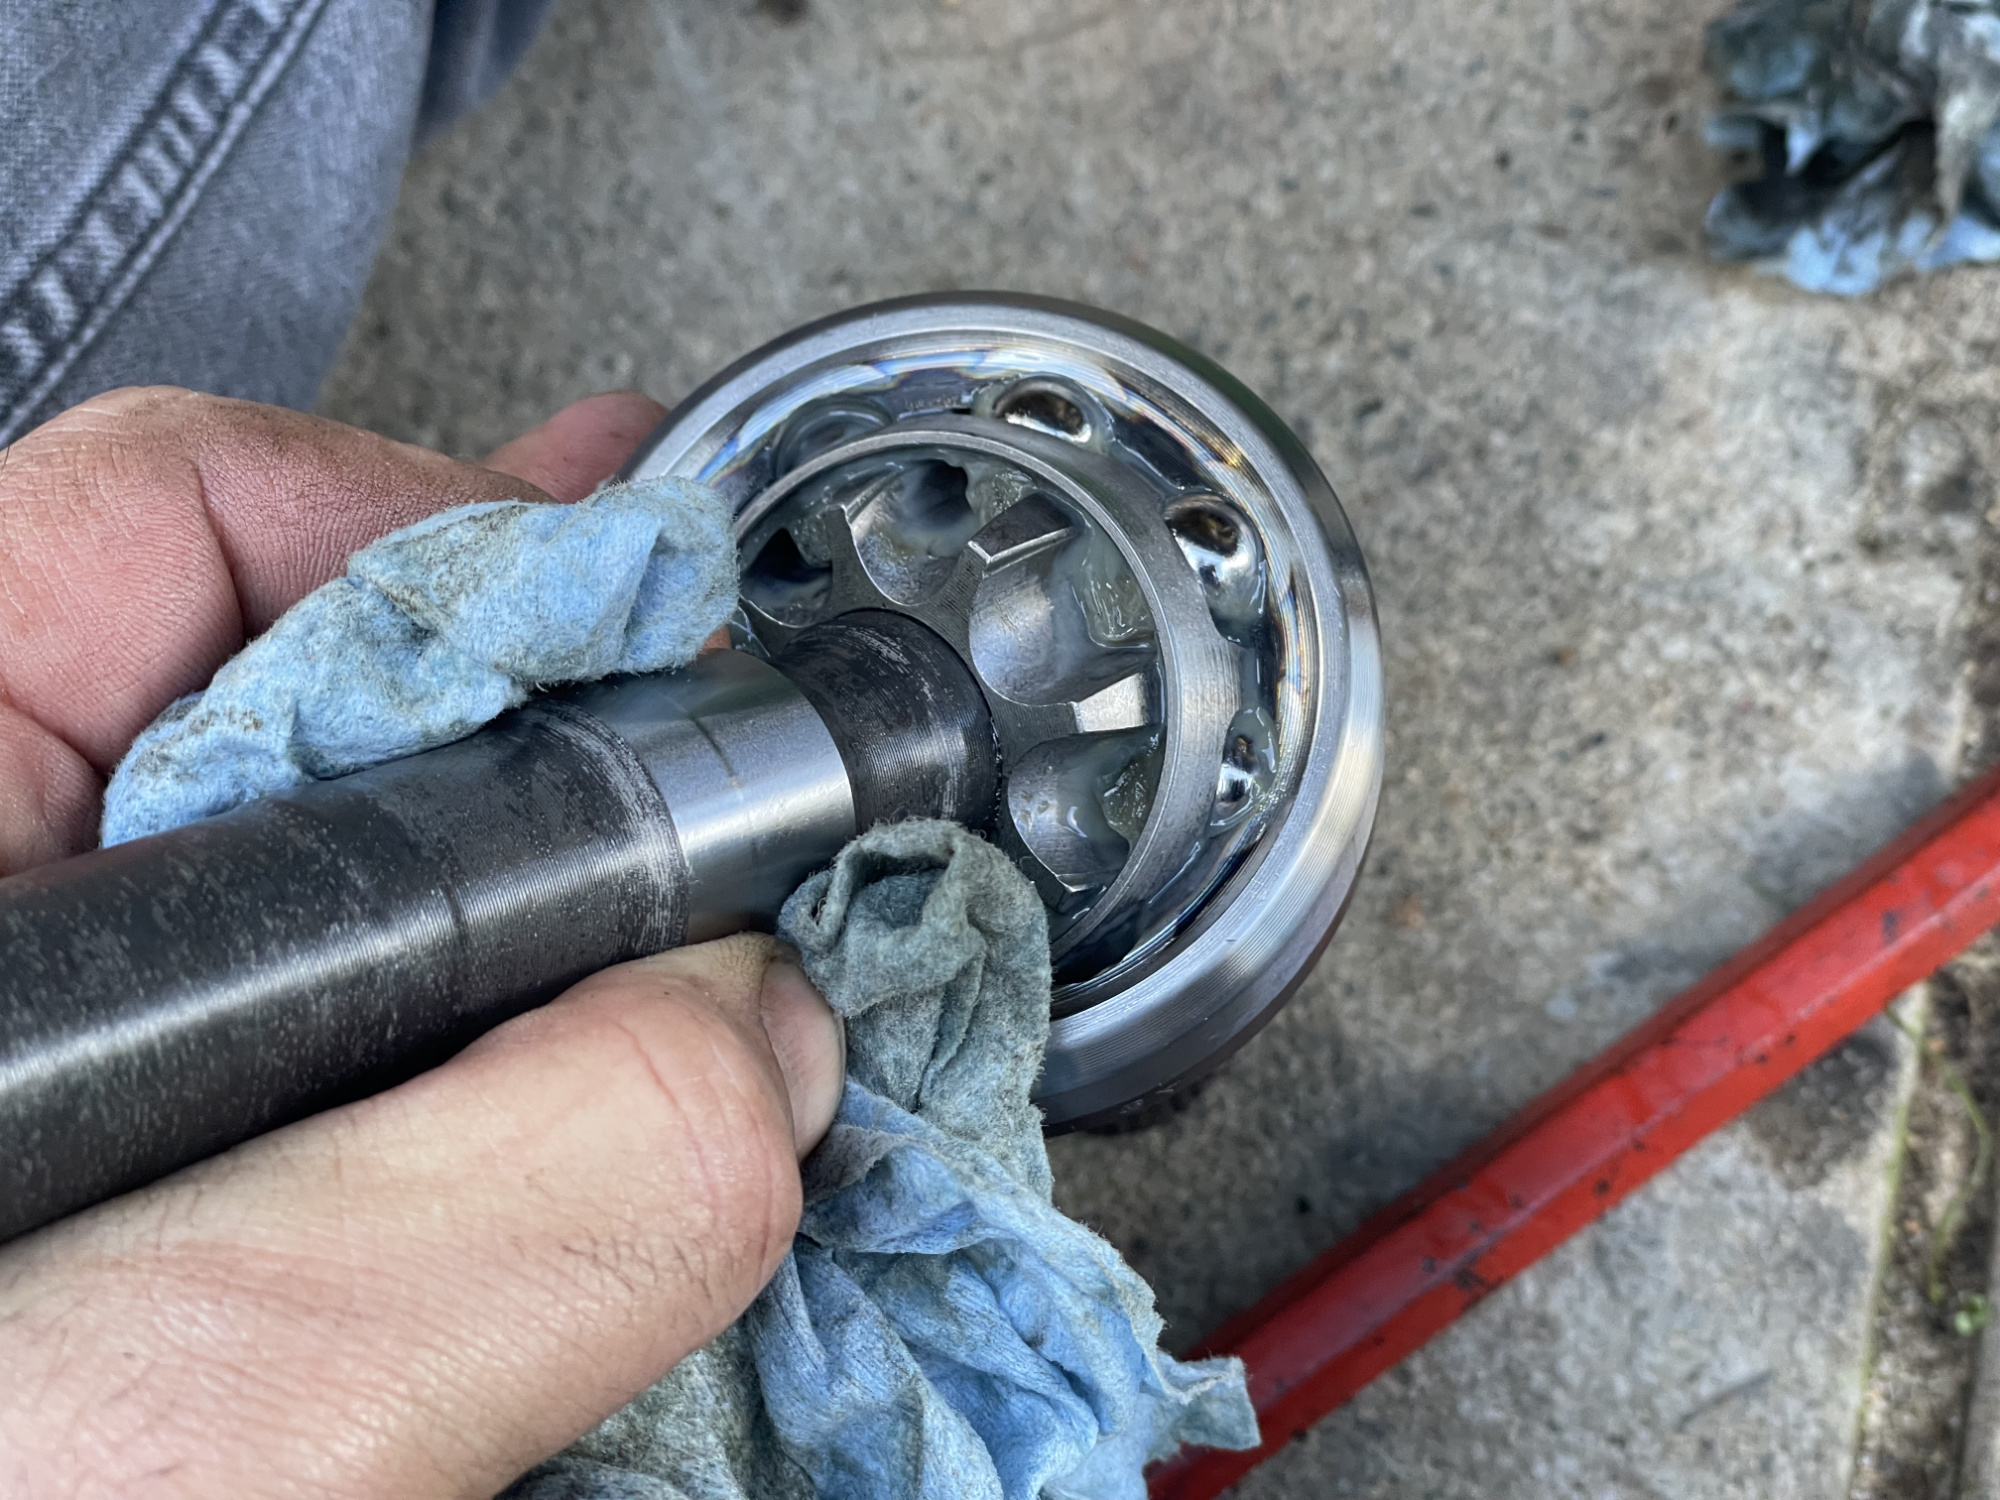
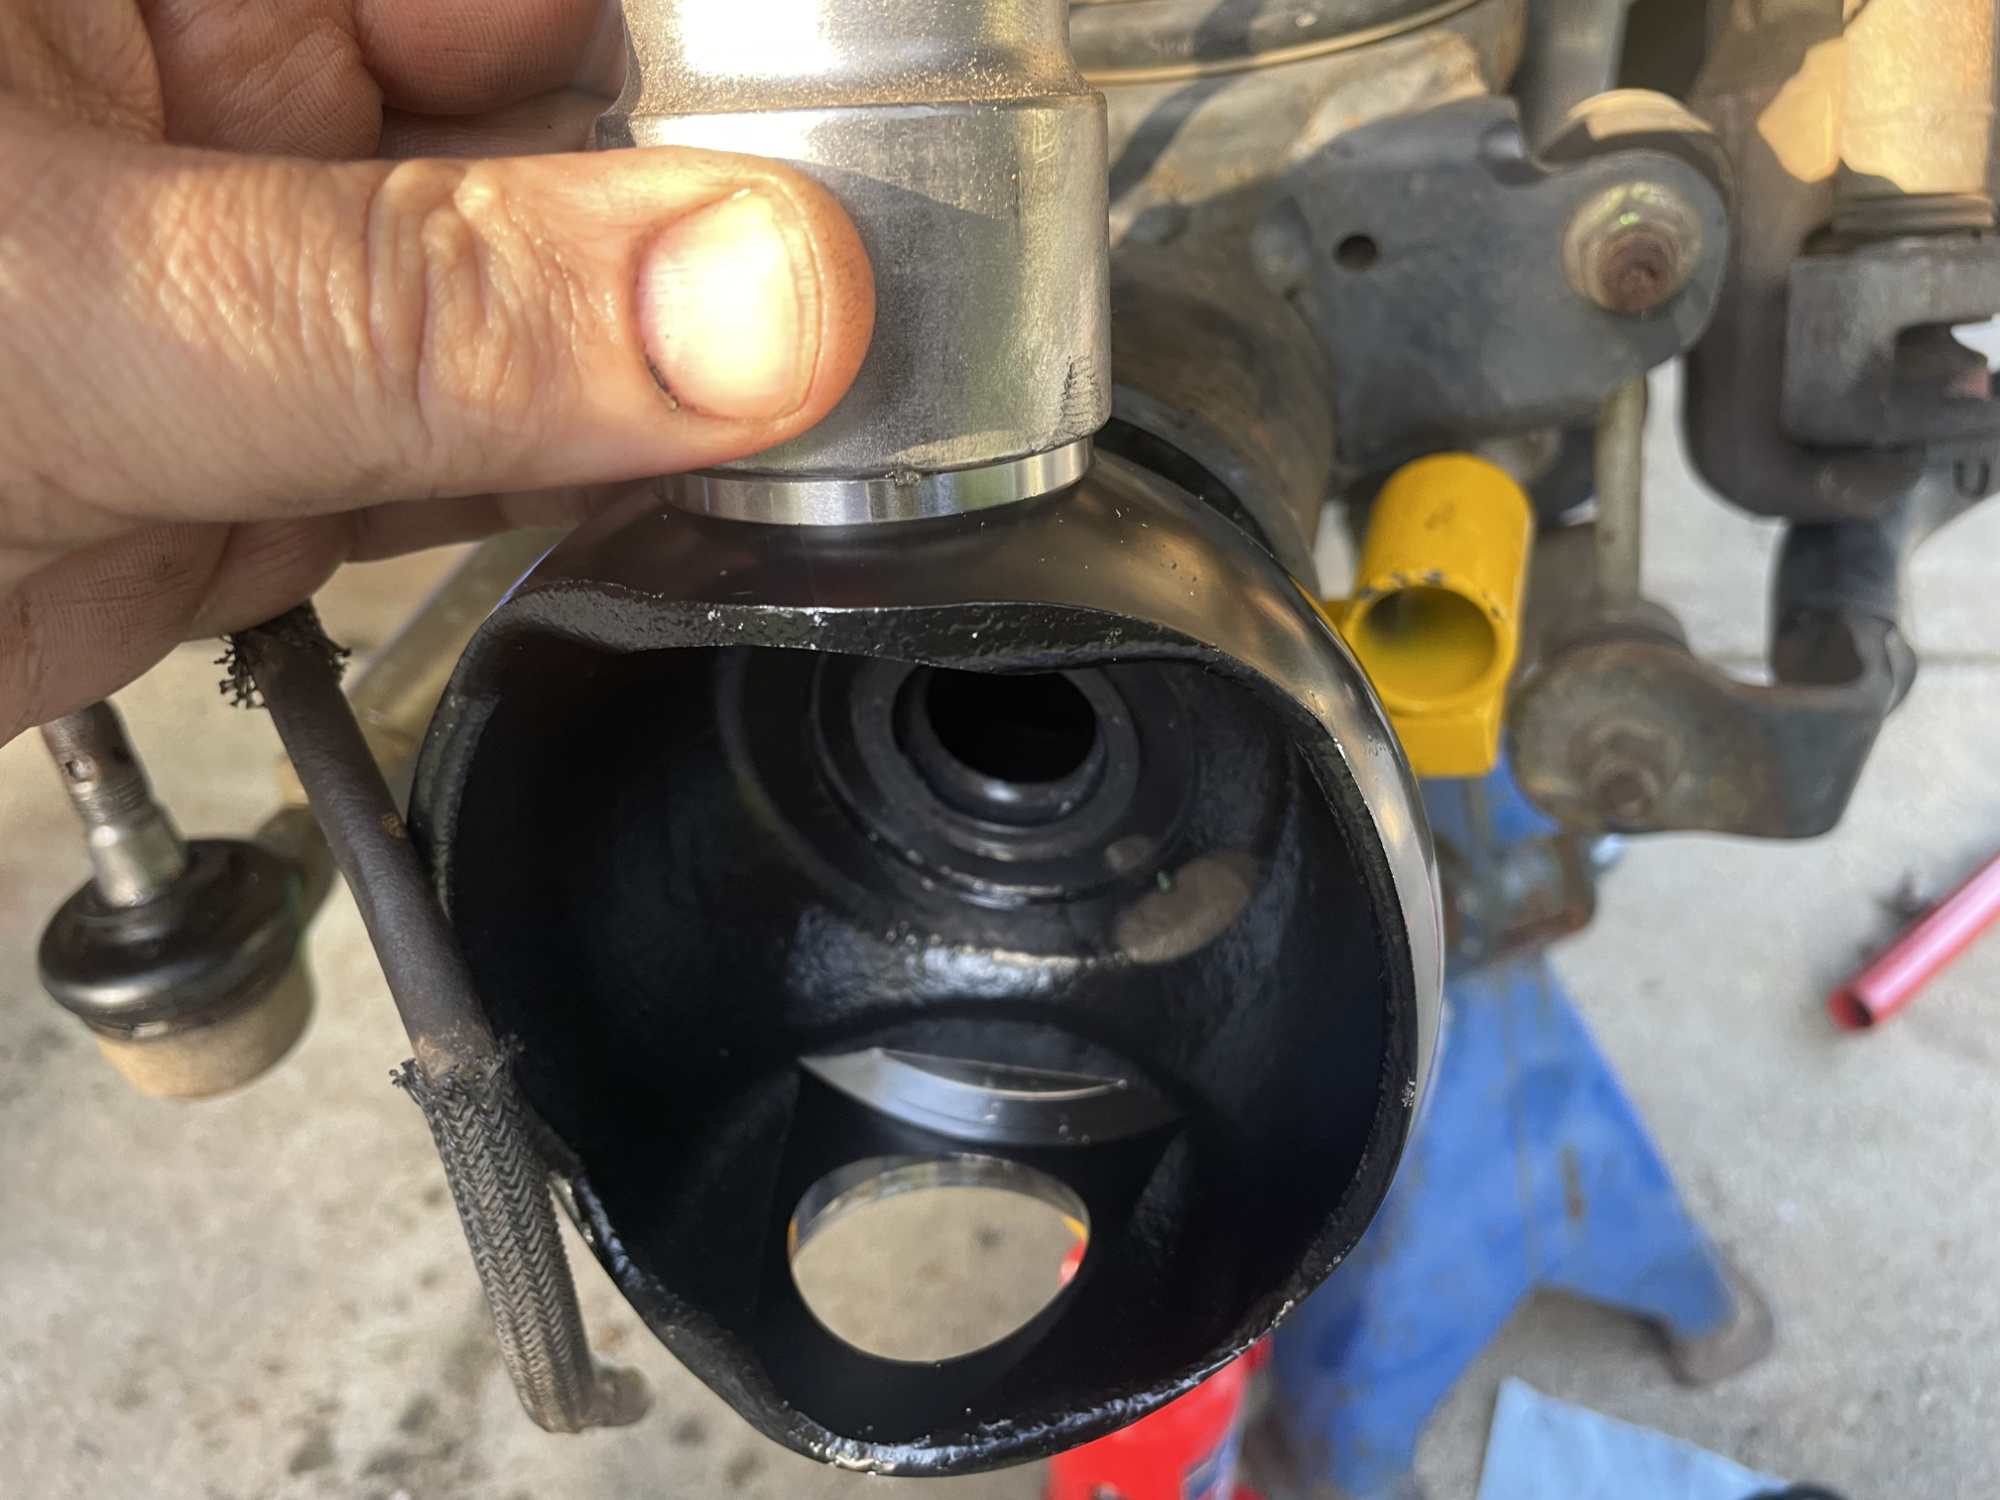
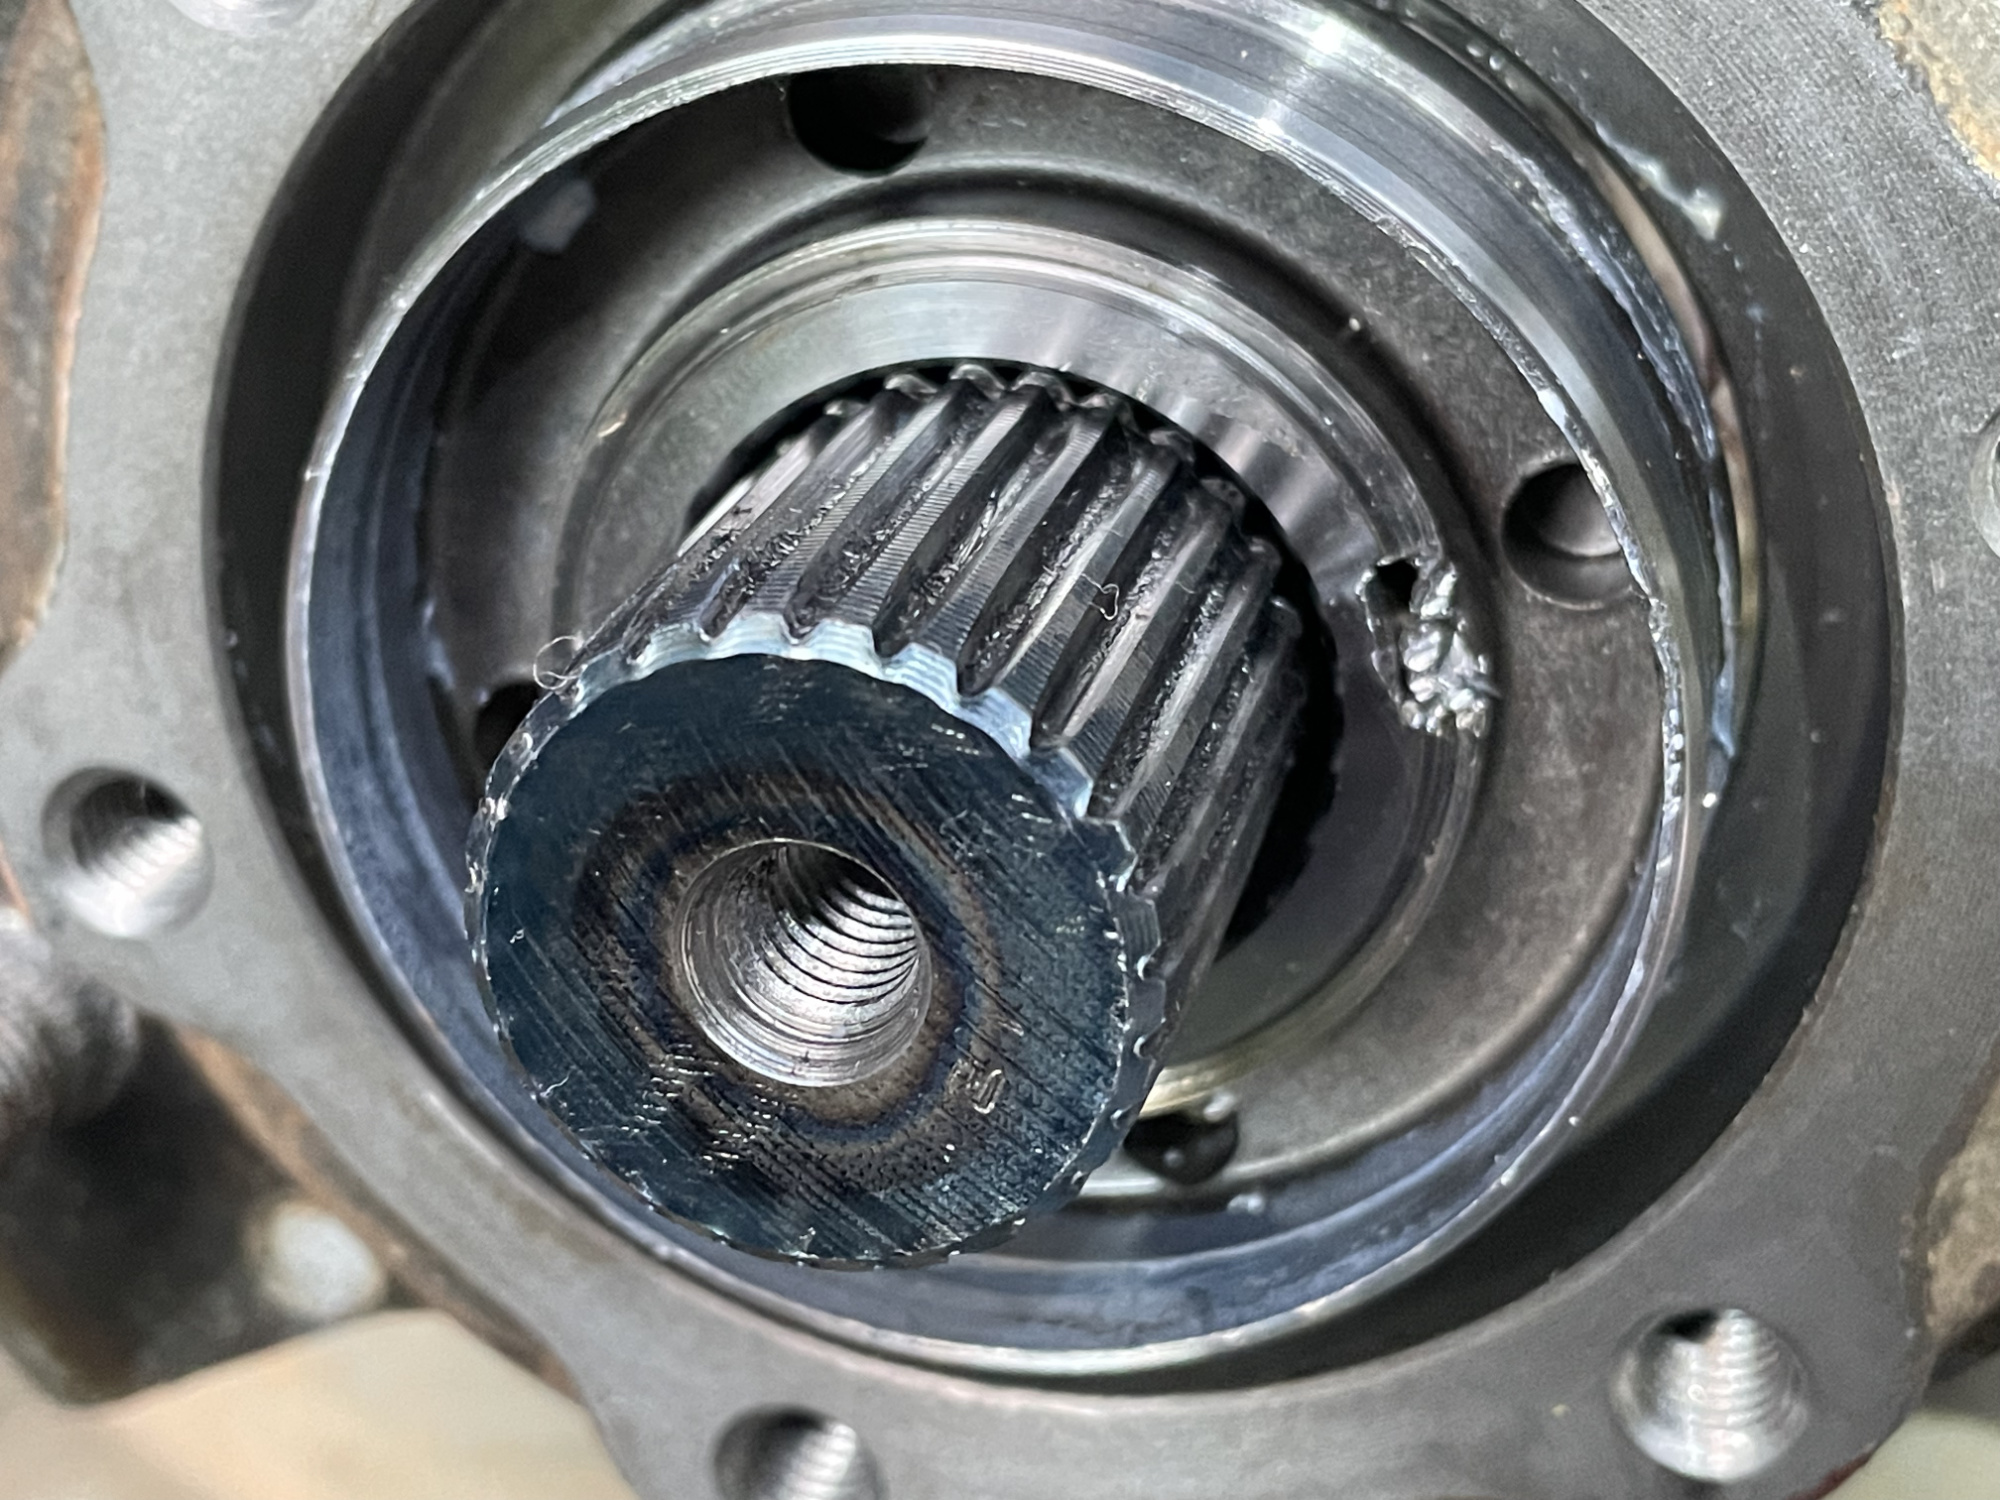
Now you can pull off the wheel hub. Mine came off easily, but if there’s a lot of corrosion the inner race for the wheel bearing can remain stuck to the wheel spindle.
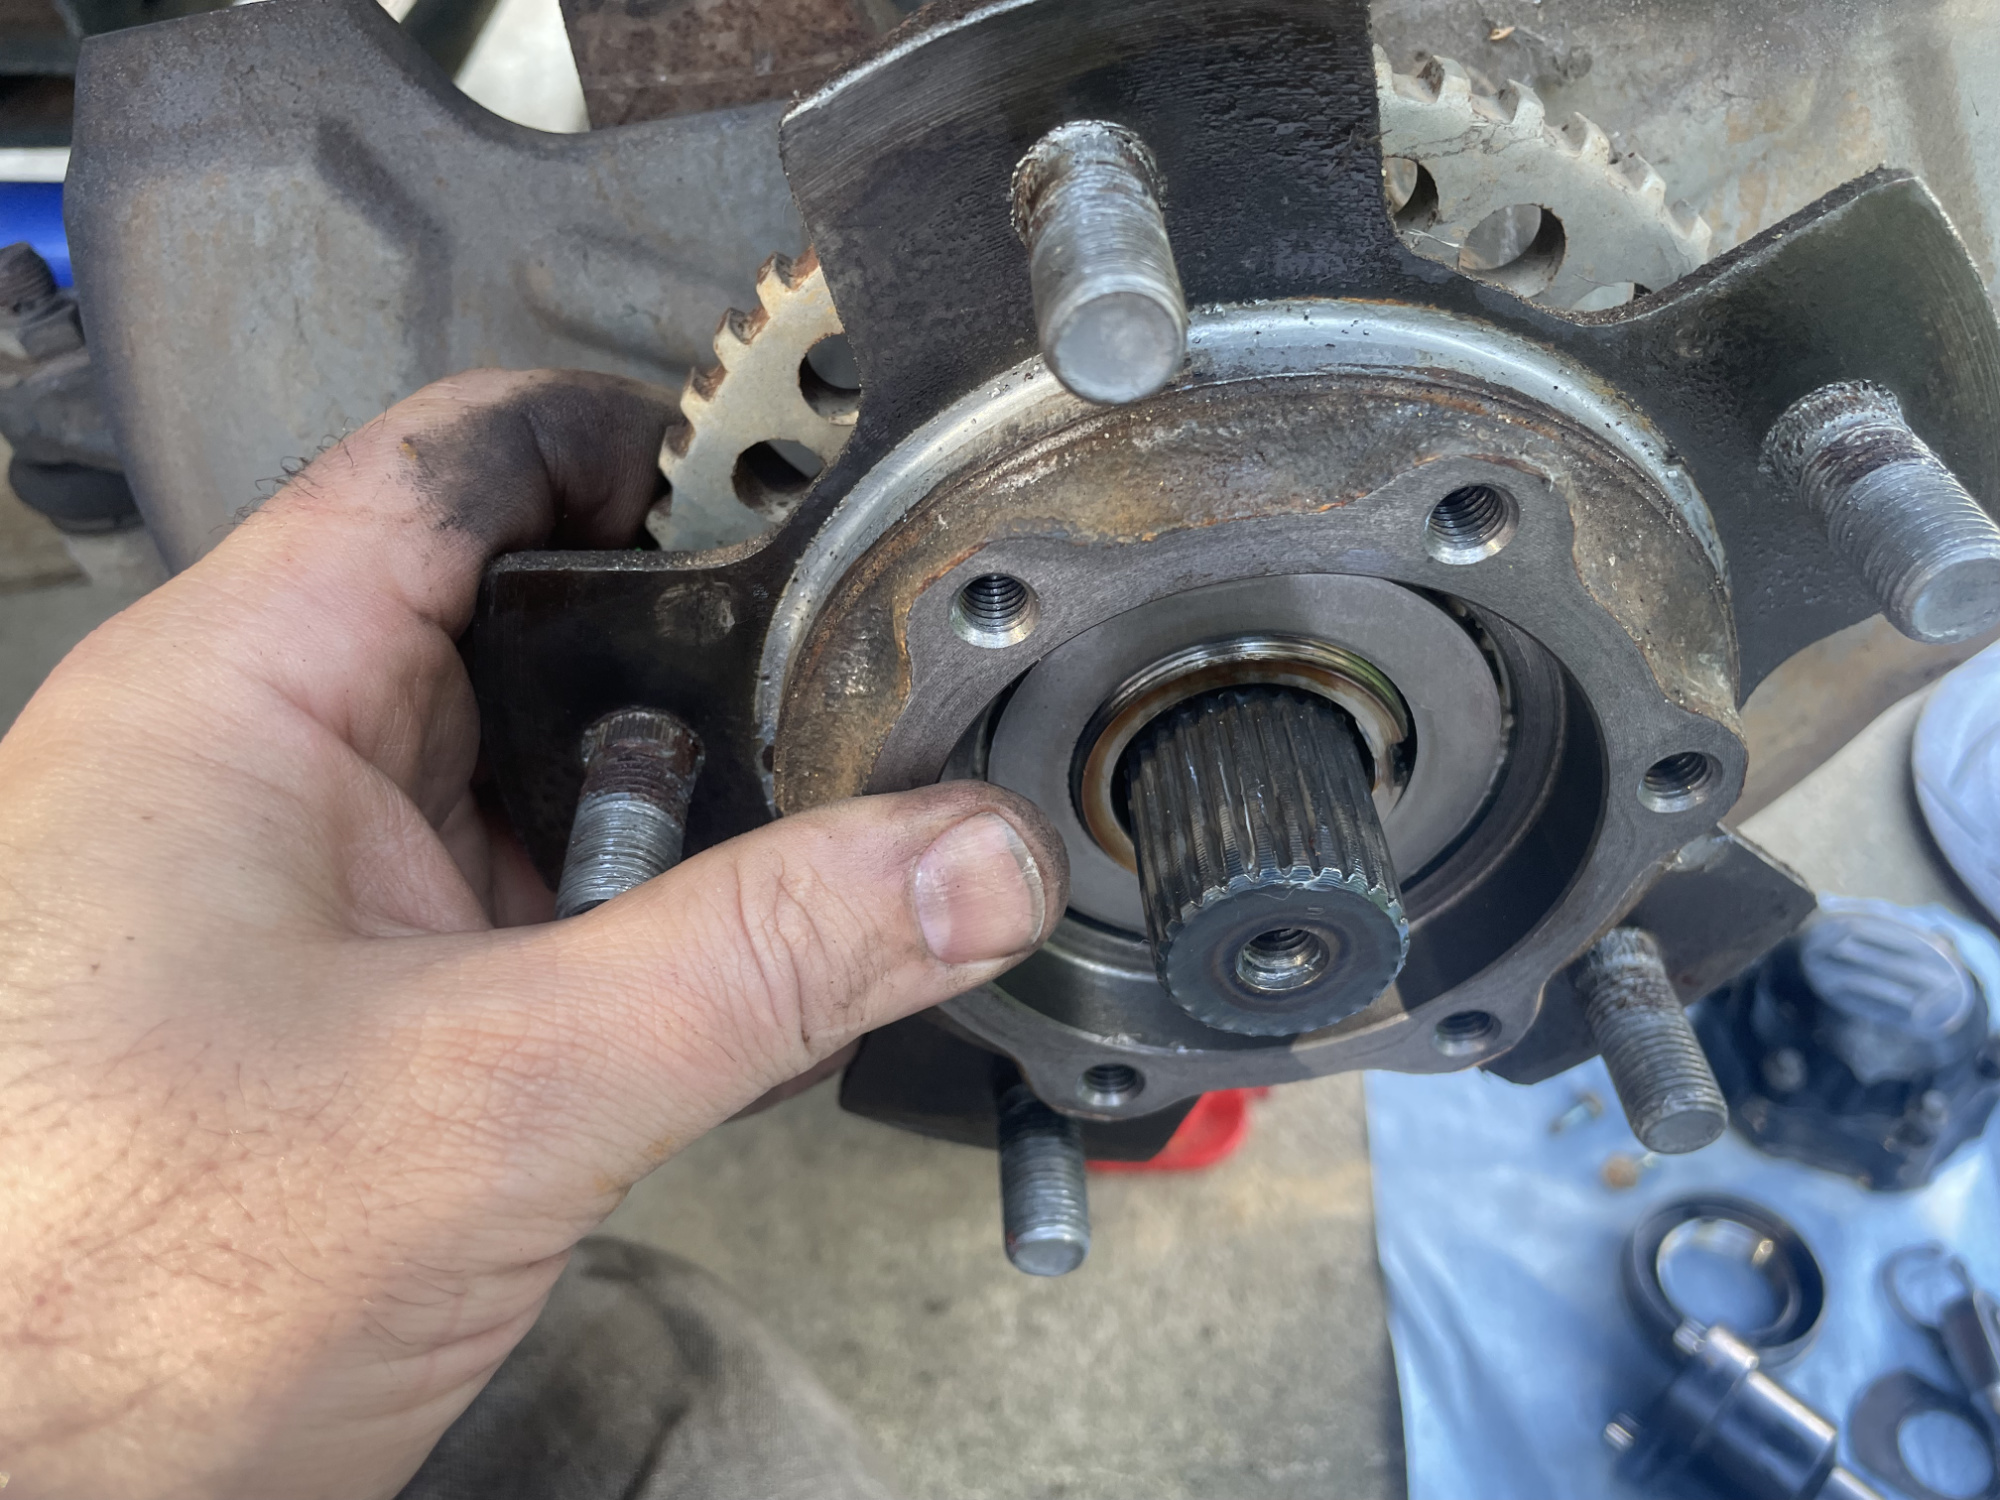
There was the smallest sign of corrision here (the red marks on the spindle) but otherwise all pretty ok still. My front wheel bearings were still happy so I chose not to replace them, but with the hub off this is when you’d do it.
At this point you undo the 4 bolts that hold on the brake backing plate and remove the backing plate.
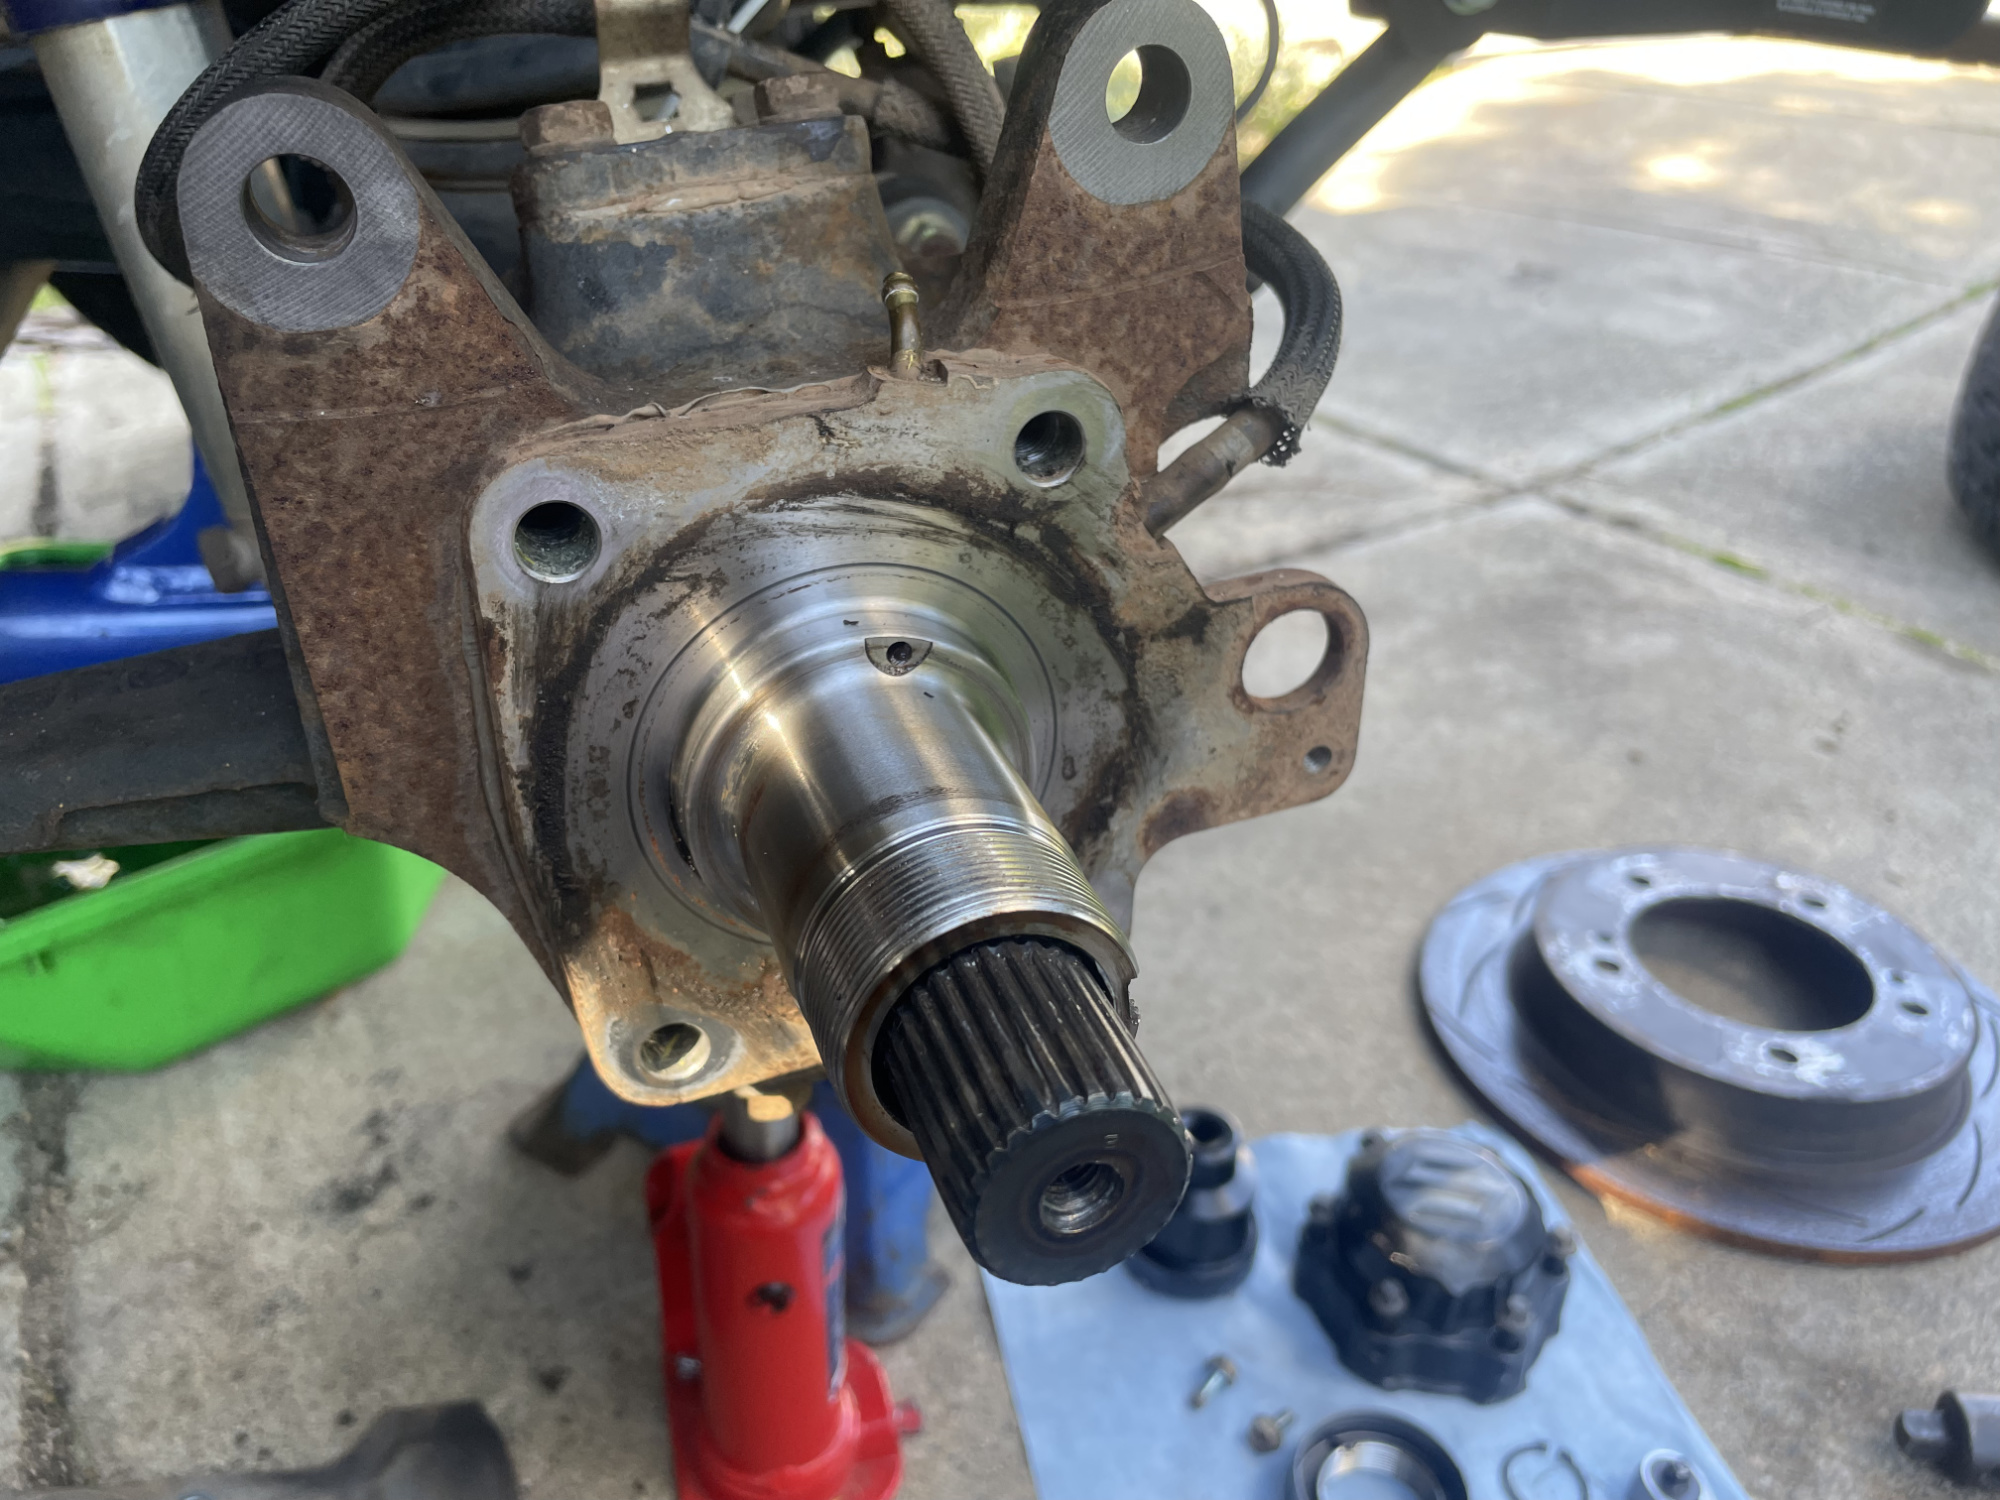
I didn’t picture it but after the backing plate was off I released the other vacuum hose (much easier to get to it now!) and then the spindle is ready to come off.
I only needed to give my wheel spindles a gentle tap to release them, but depending on how well stuck on they are they might need more persuasion.
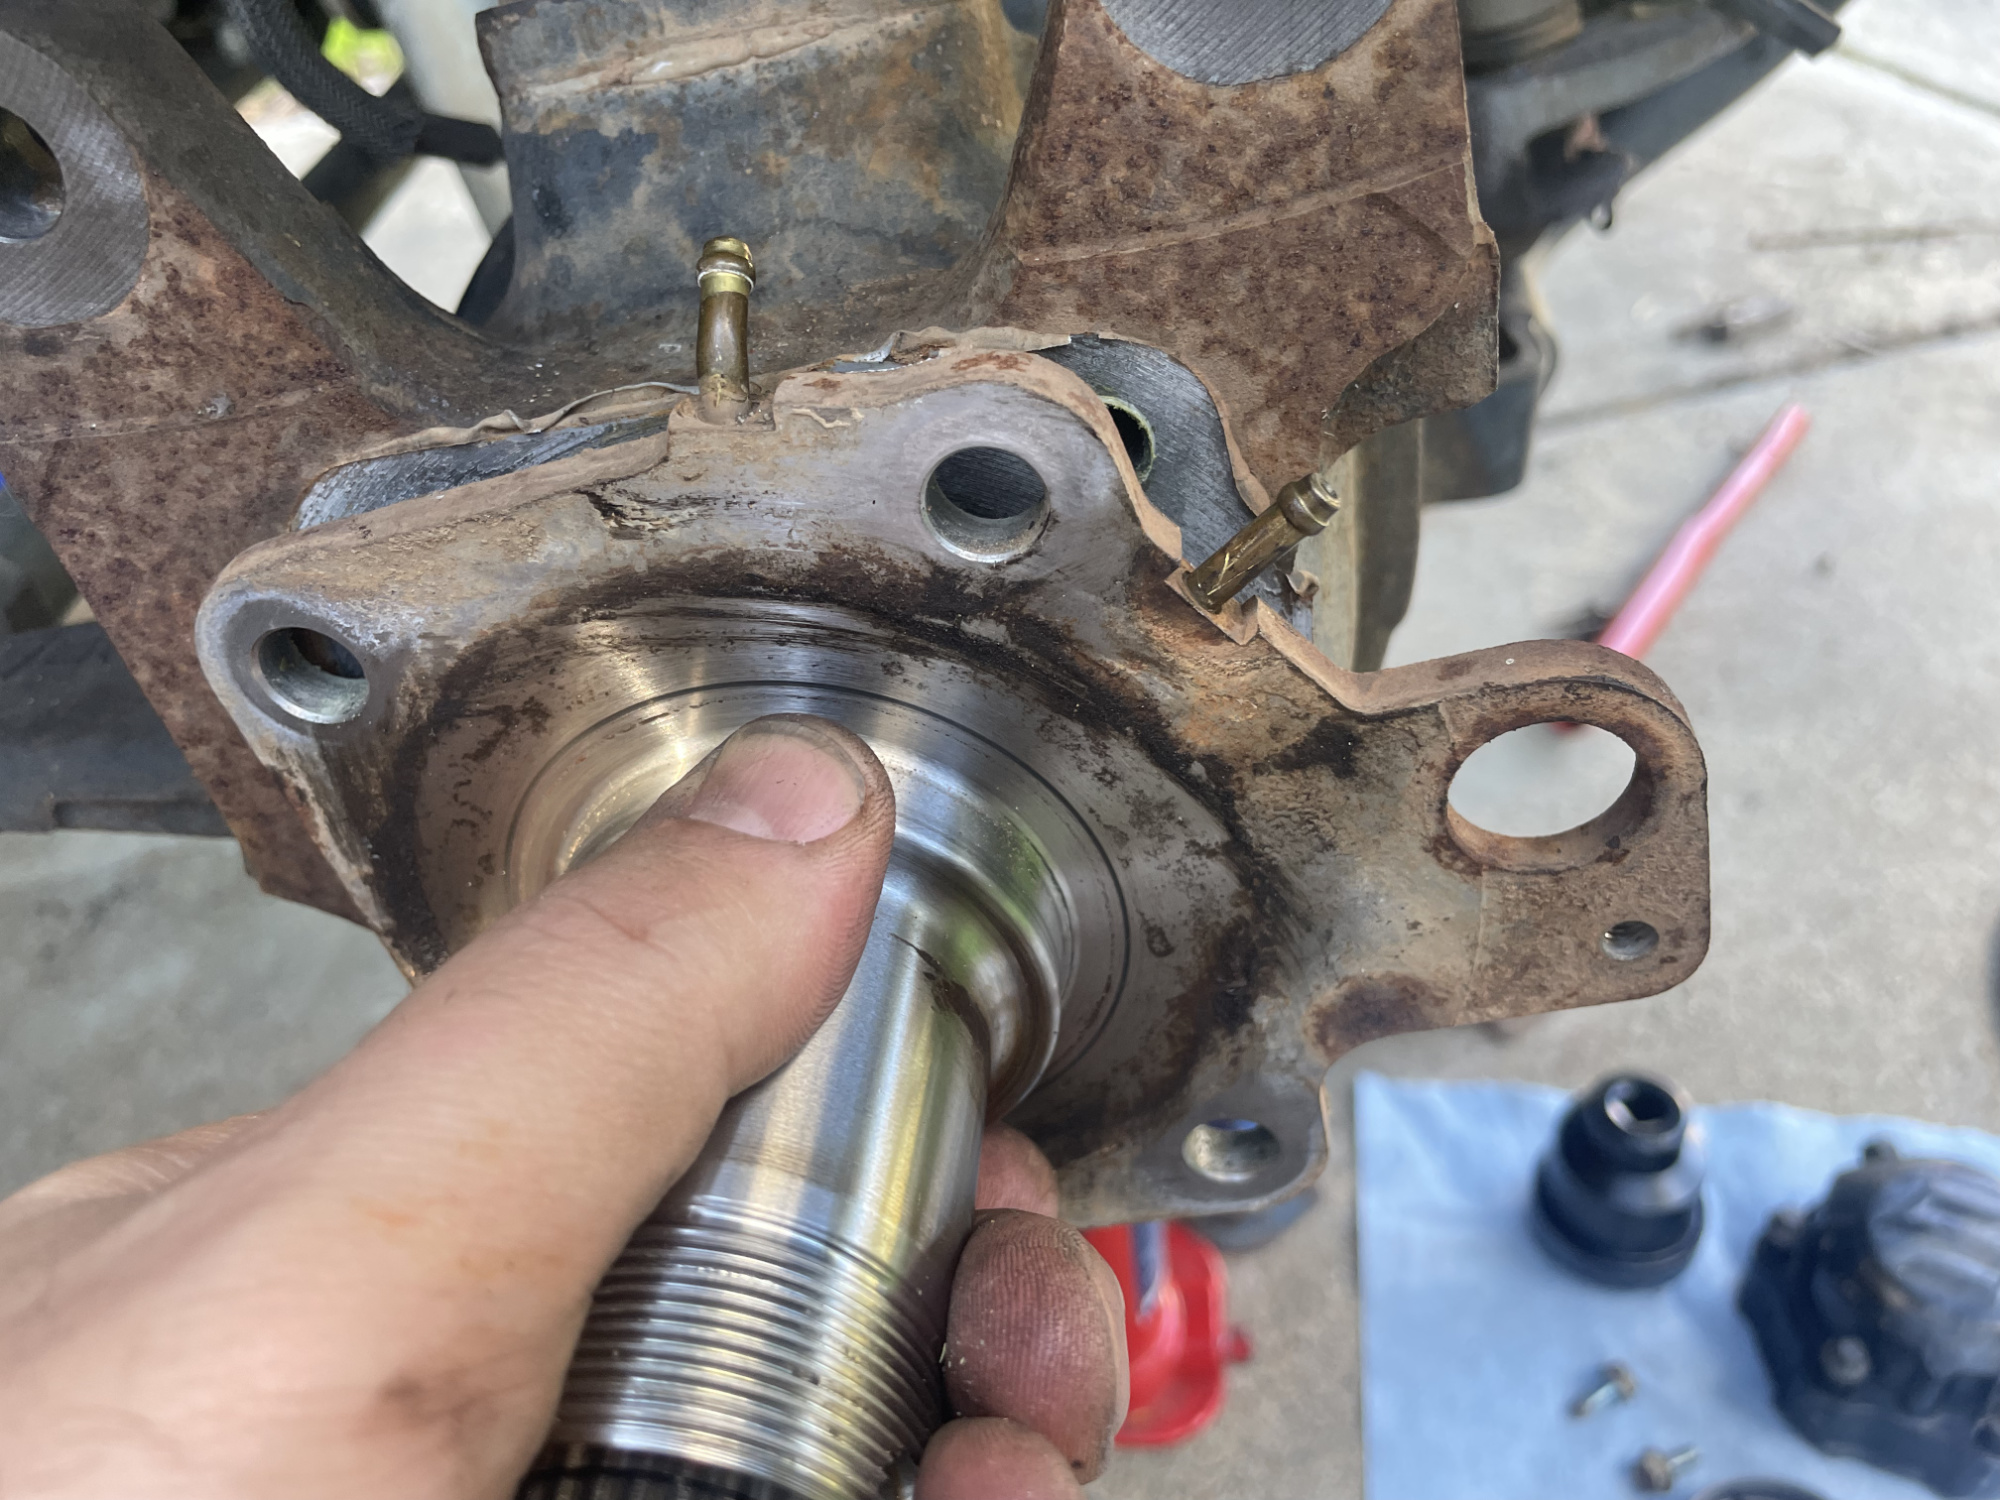
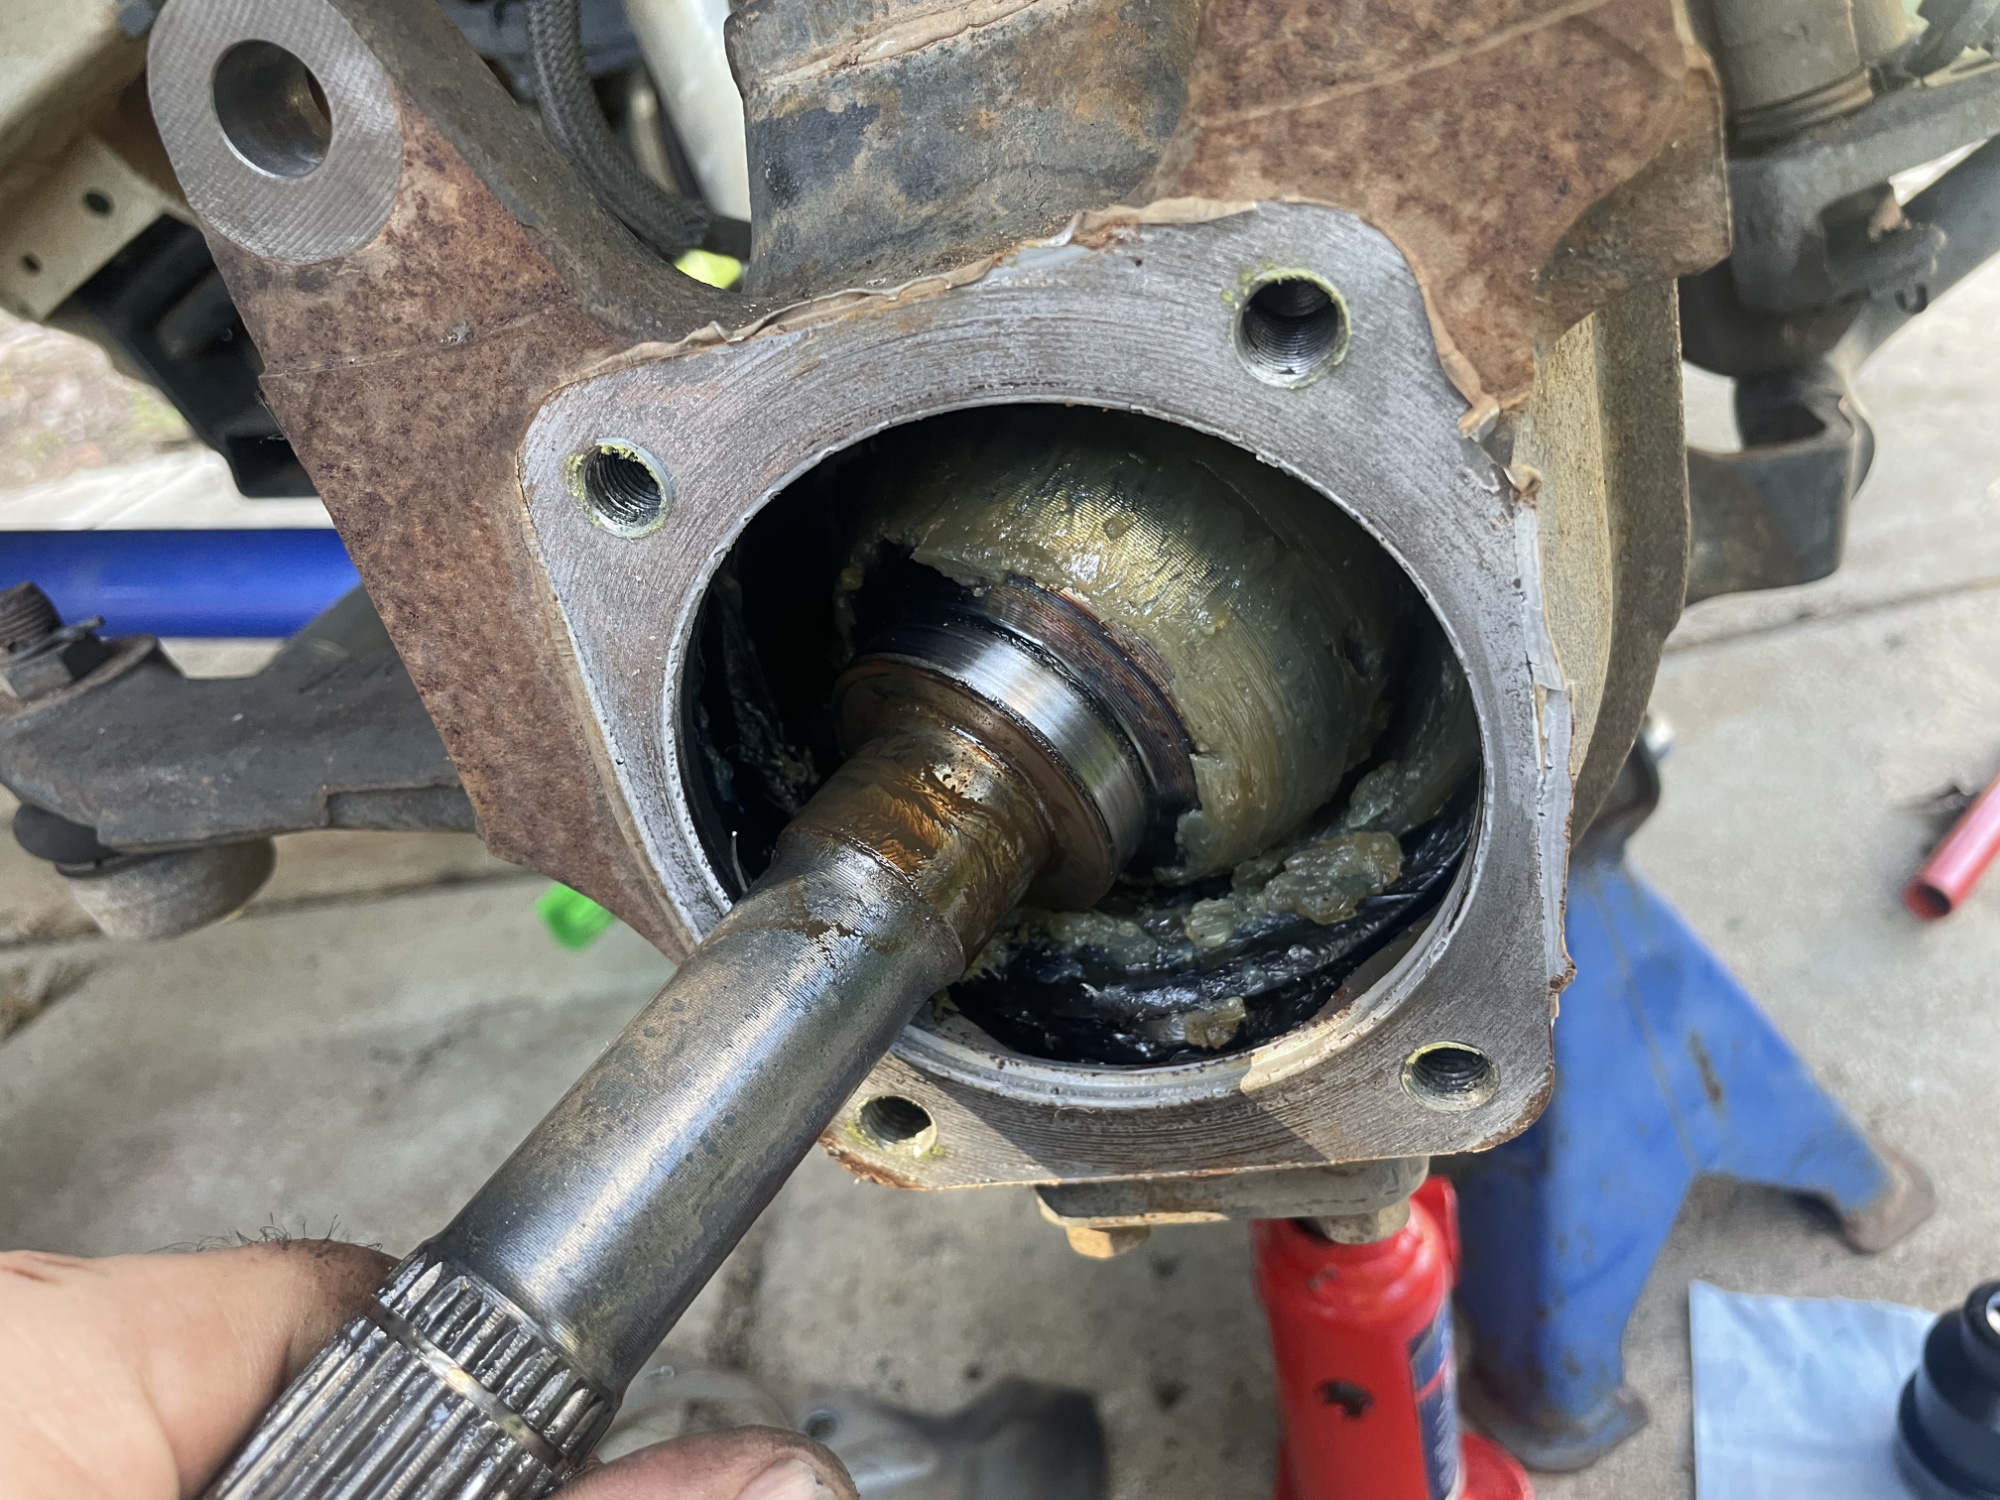
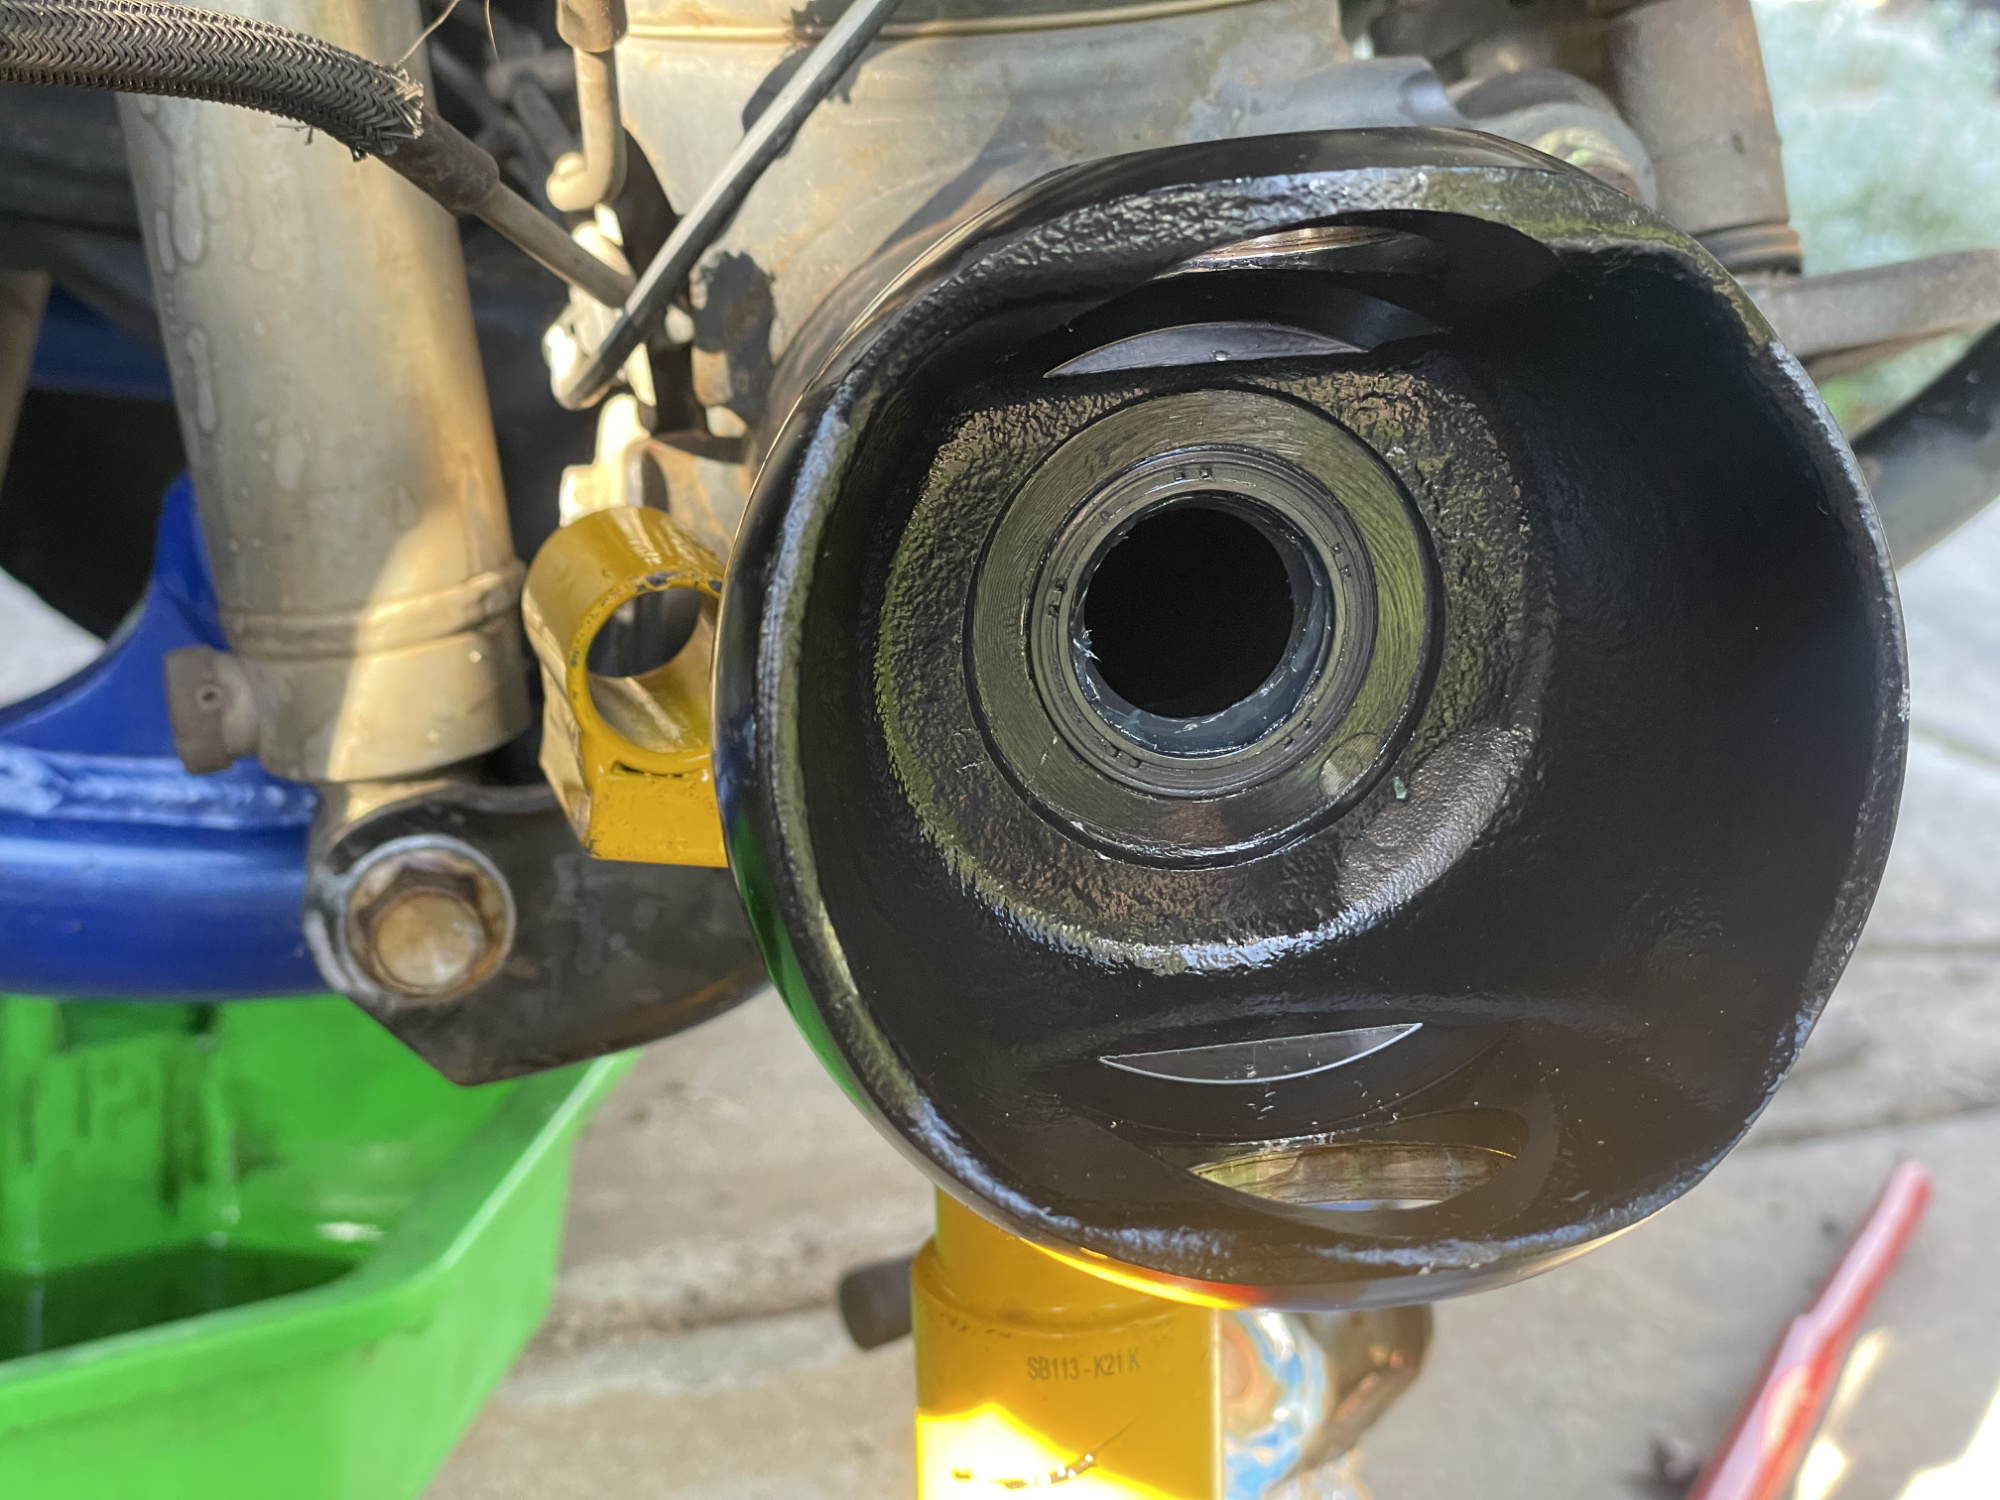
You’ll then be greeted by the CV joint and the grease. If you’ve done a lot of mud and water crossings, congratulations, you’ll now have a mess. Mine wasn’t too bad but there were a few signs of water ingress into the grease.
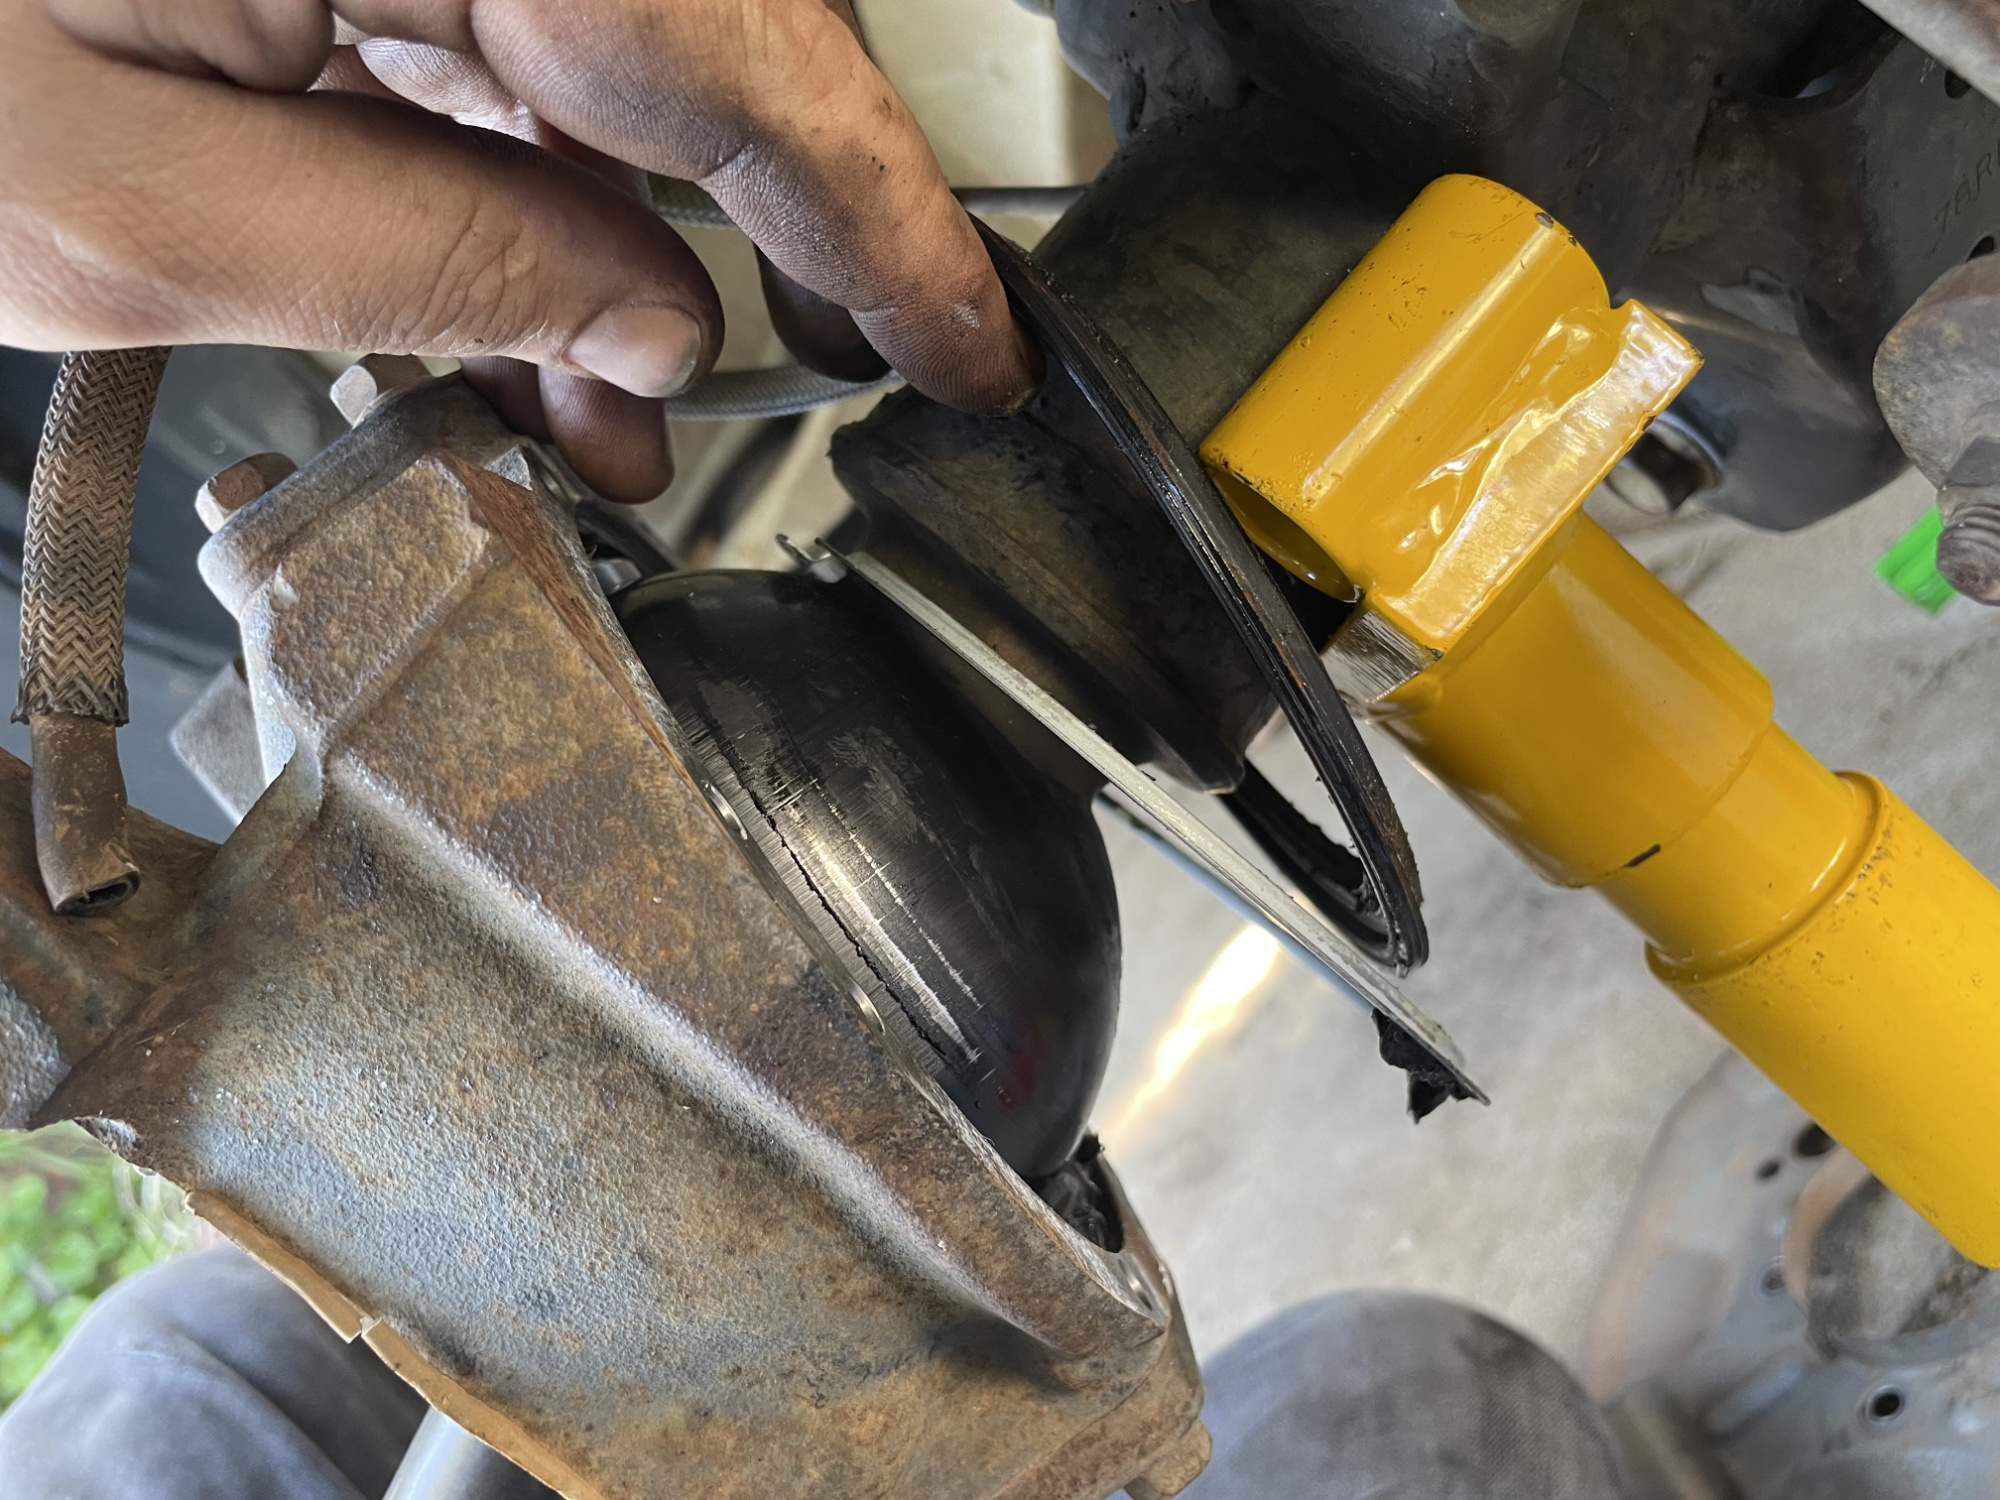
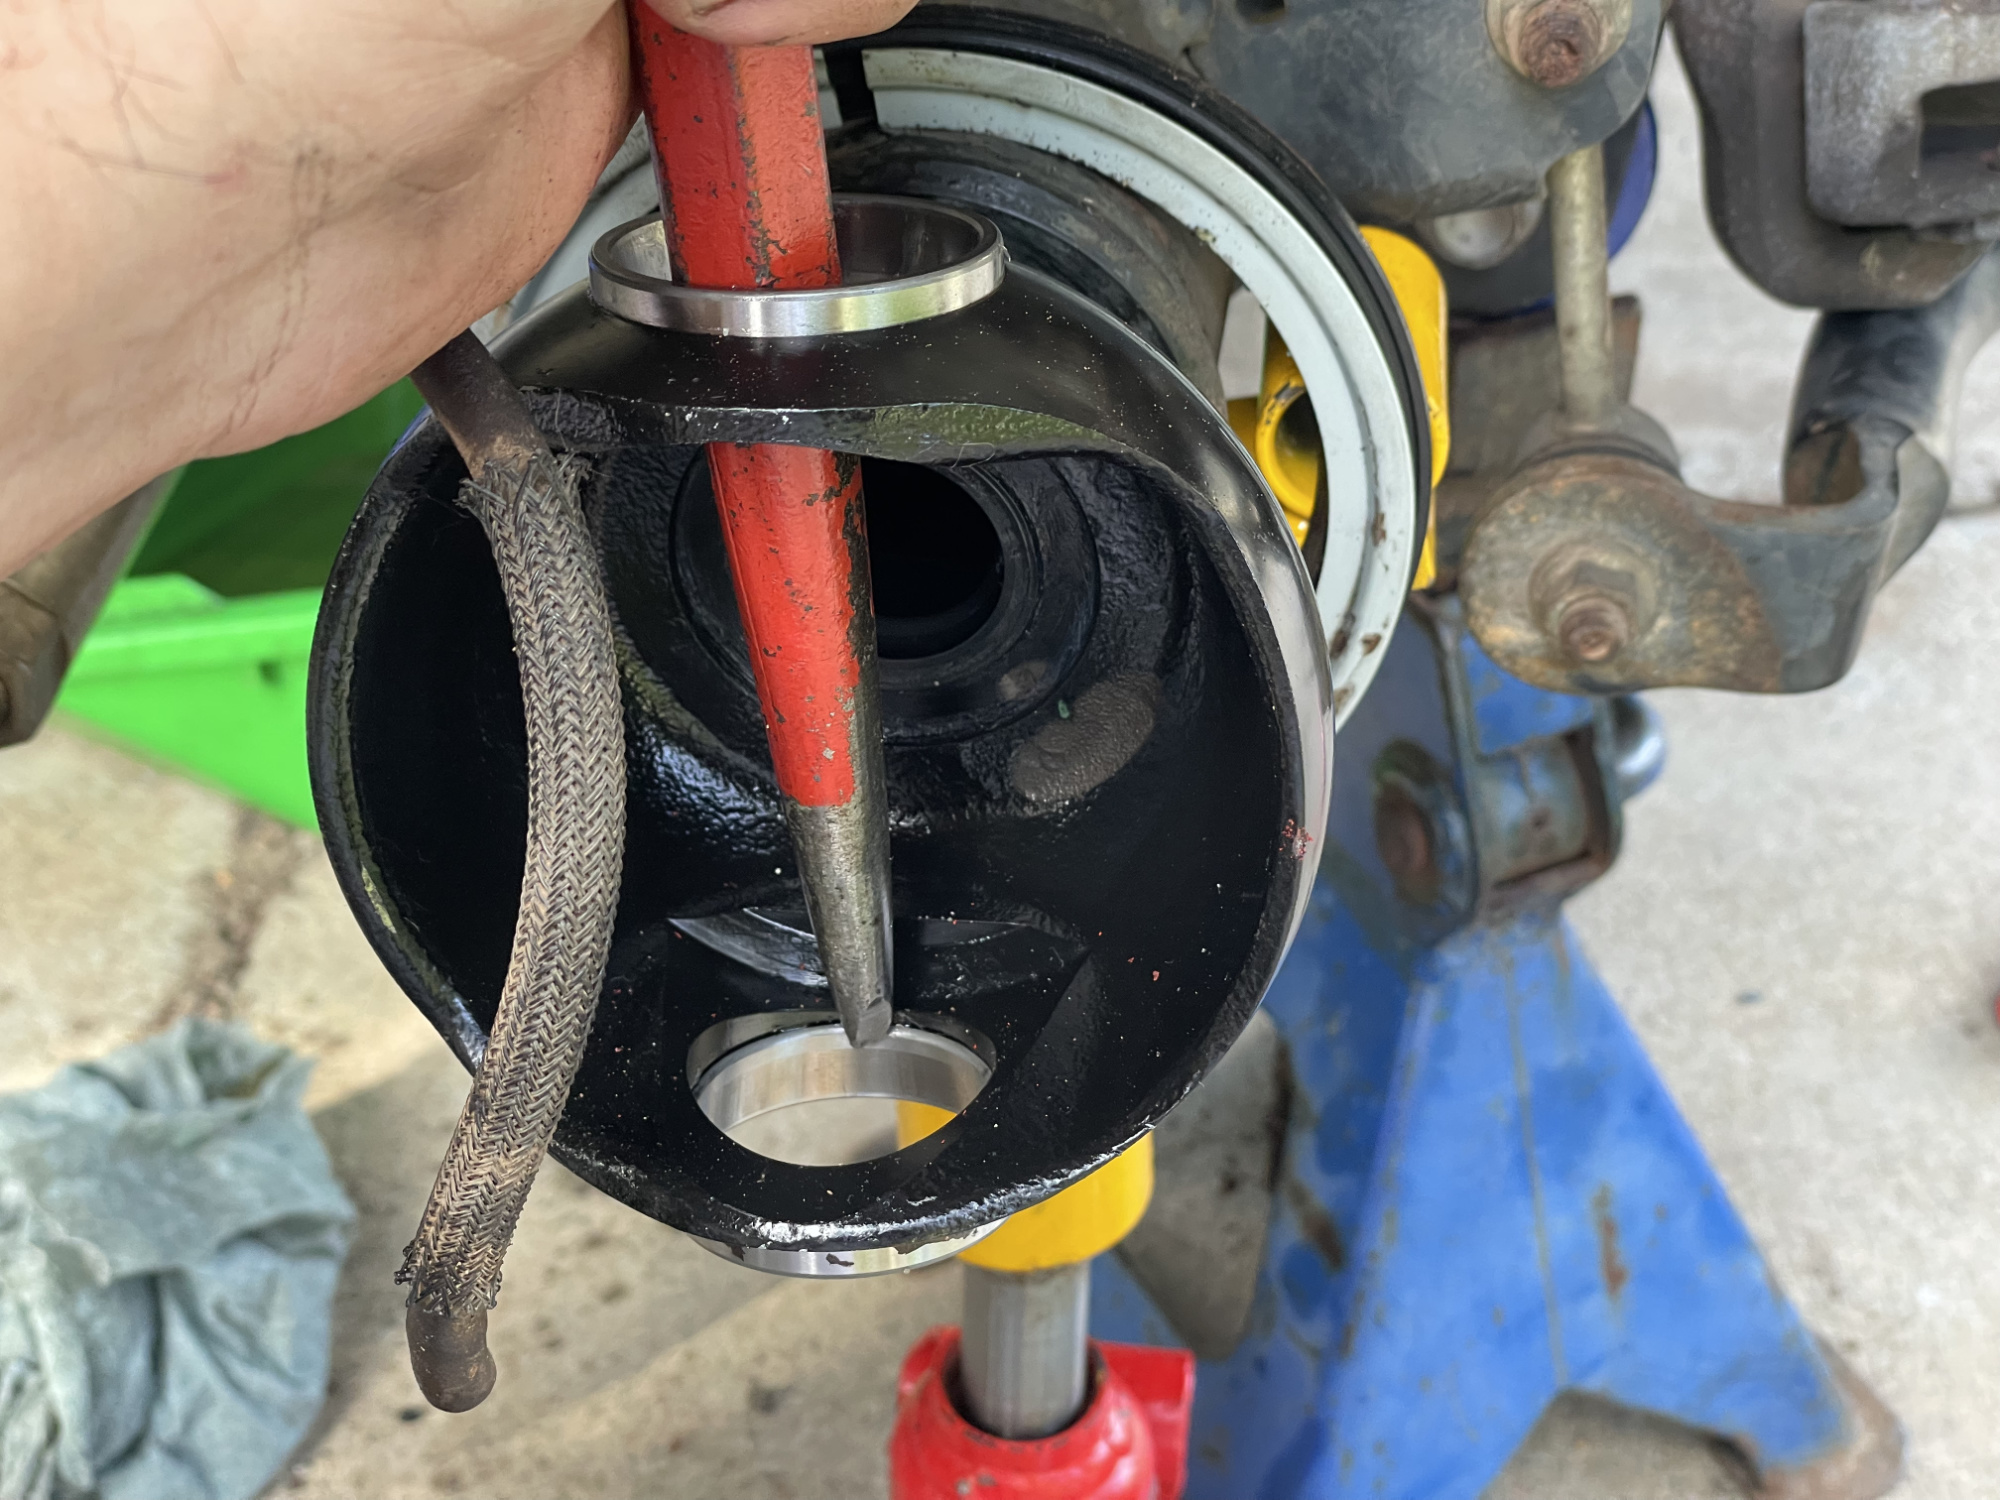
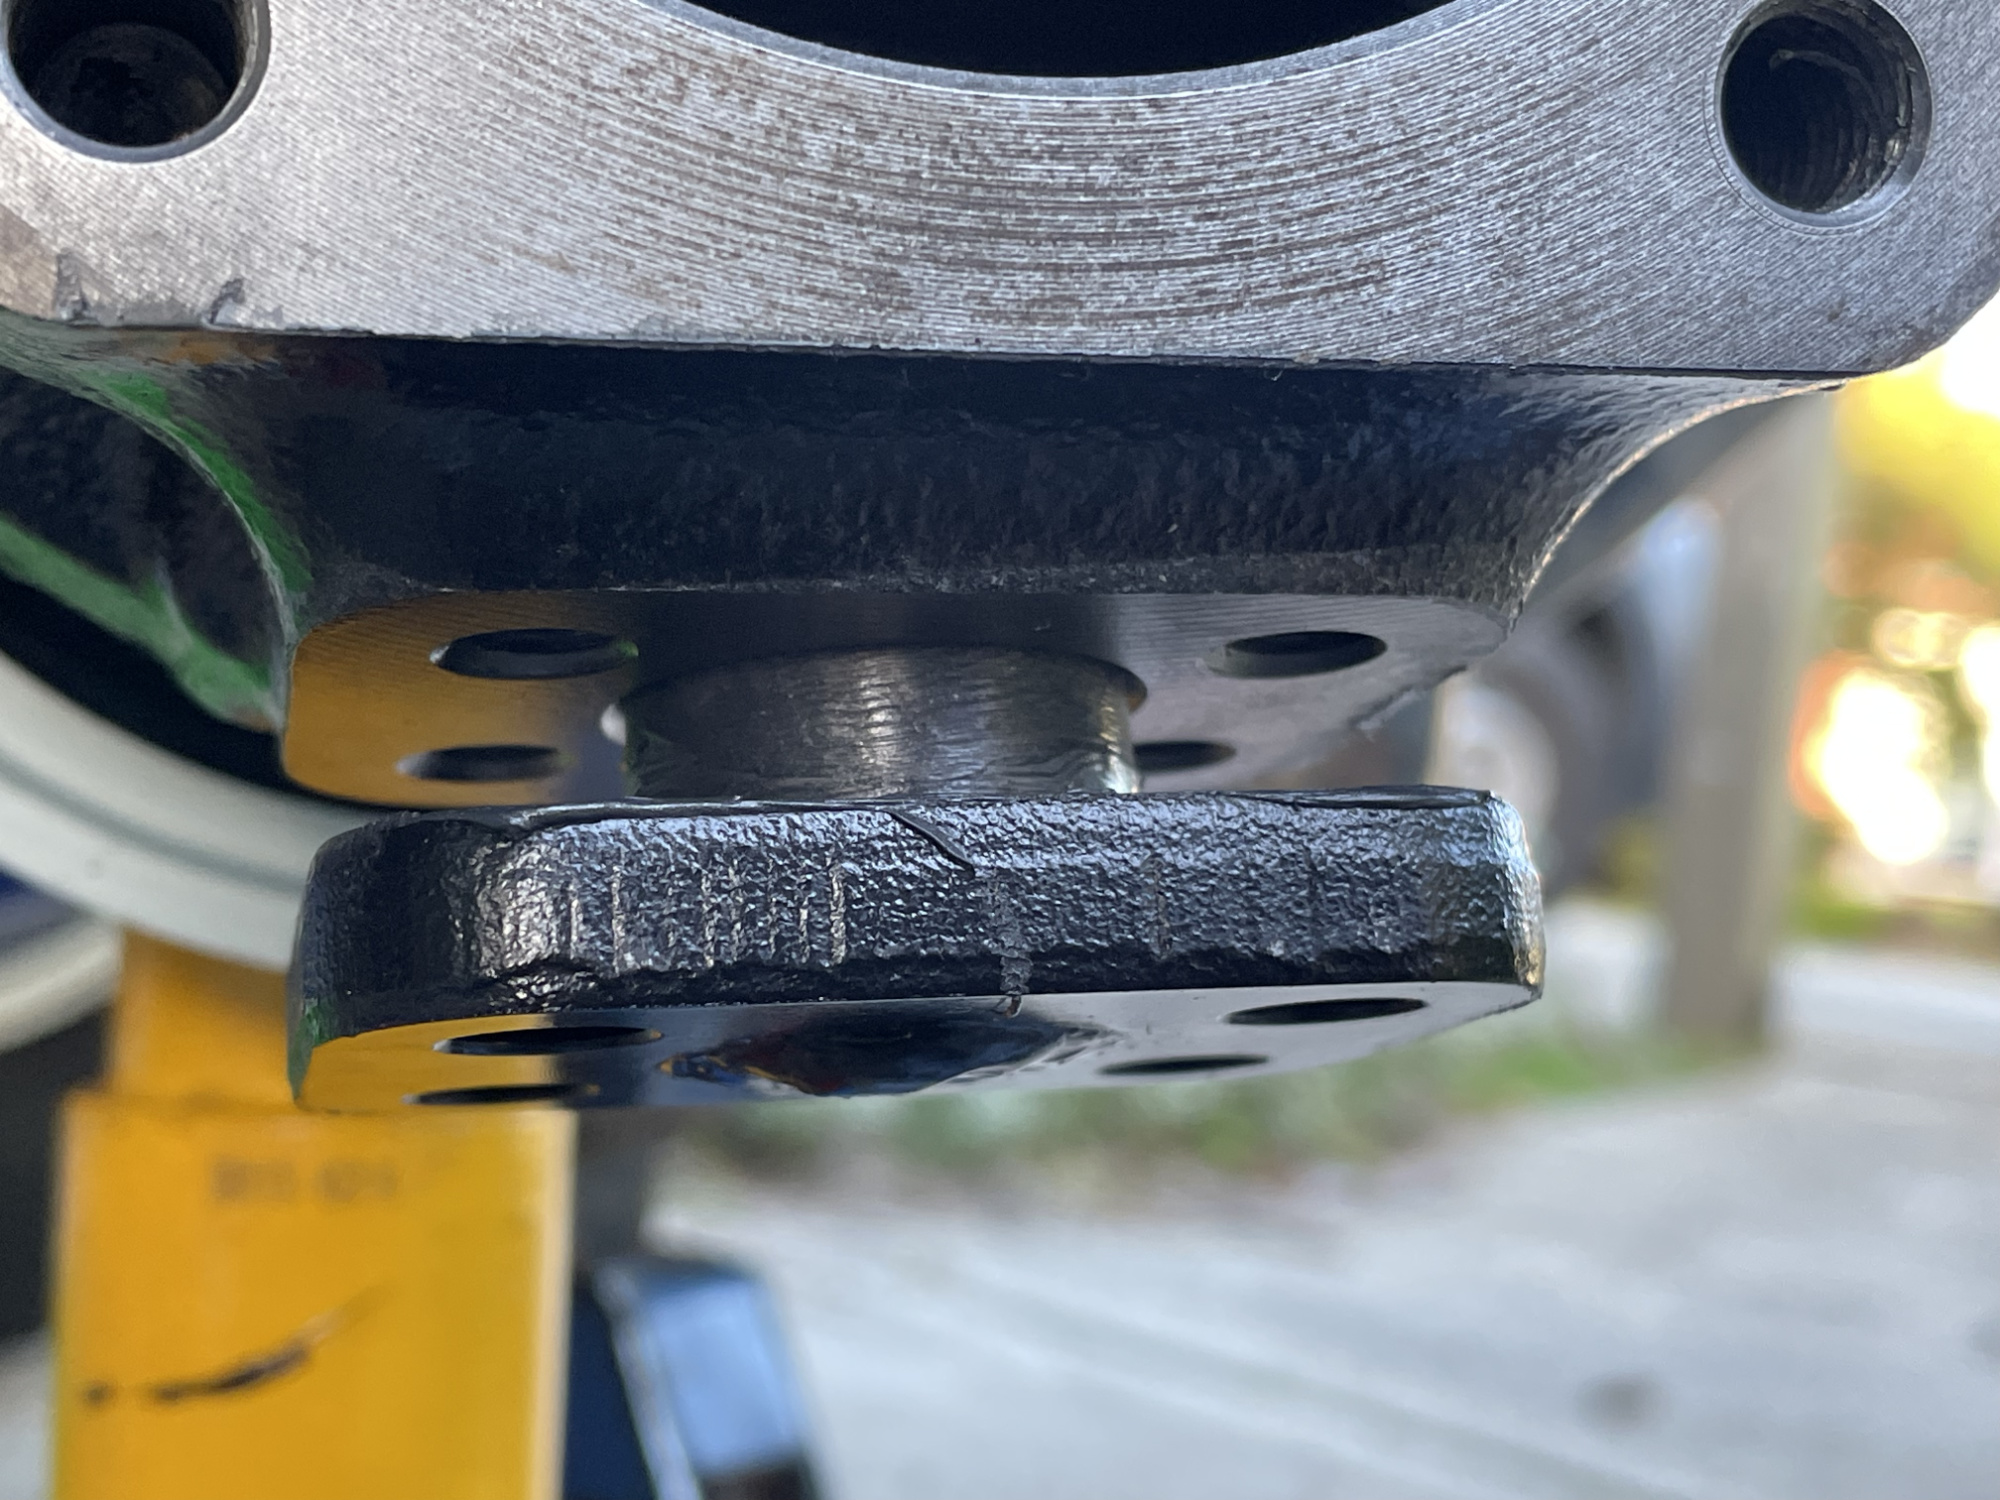
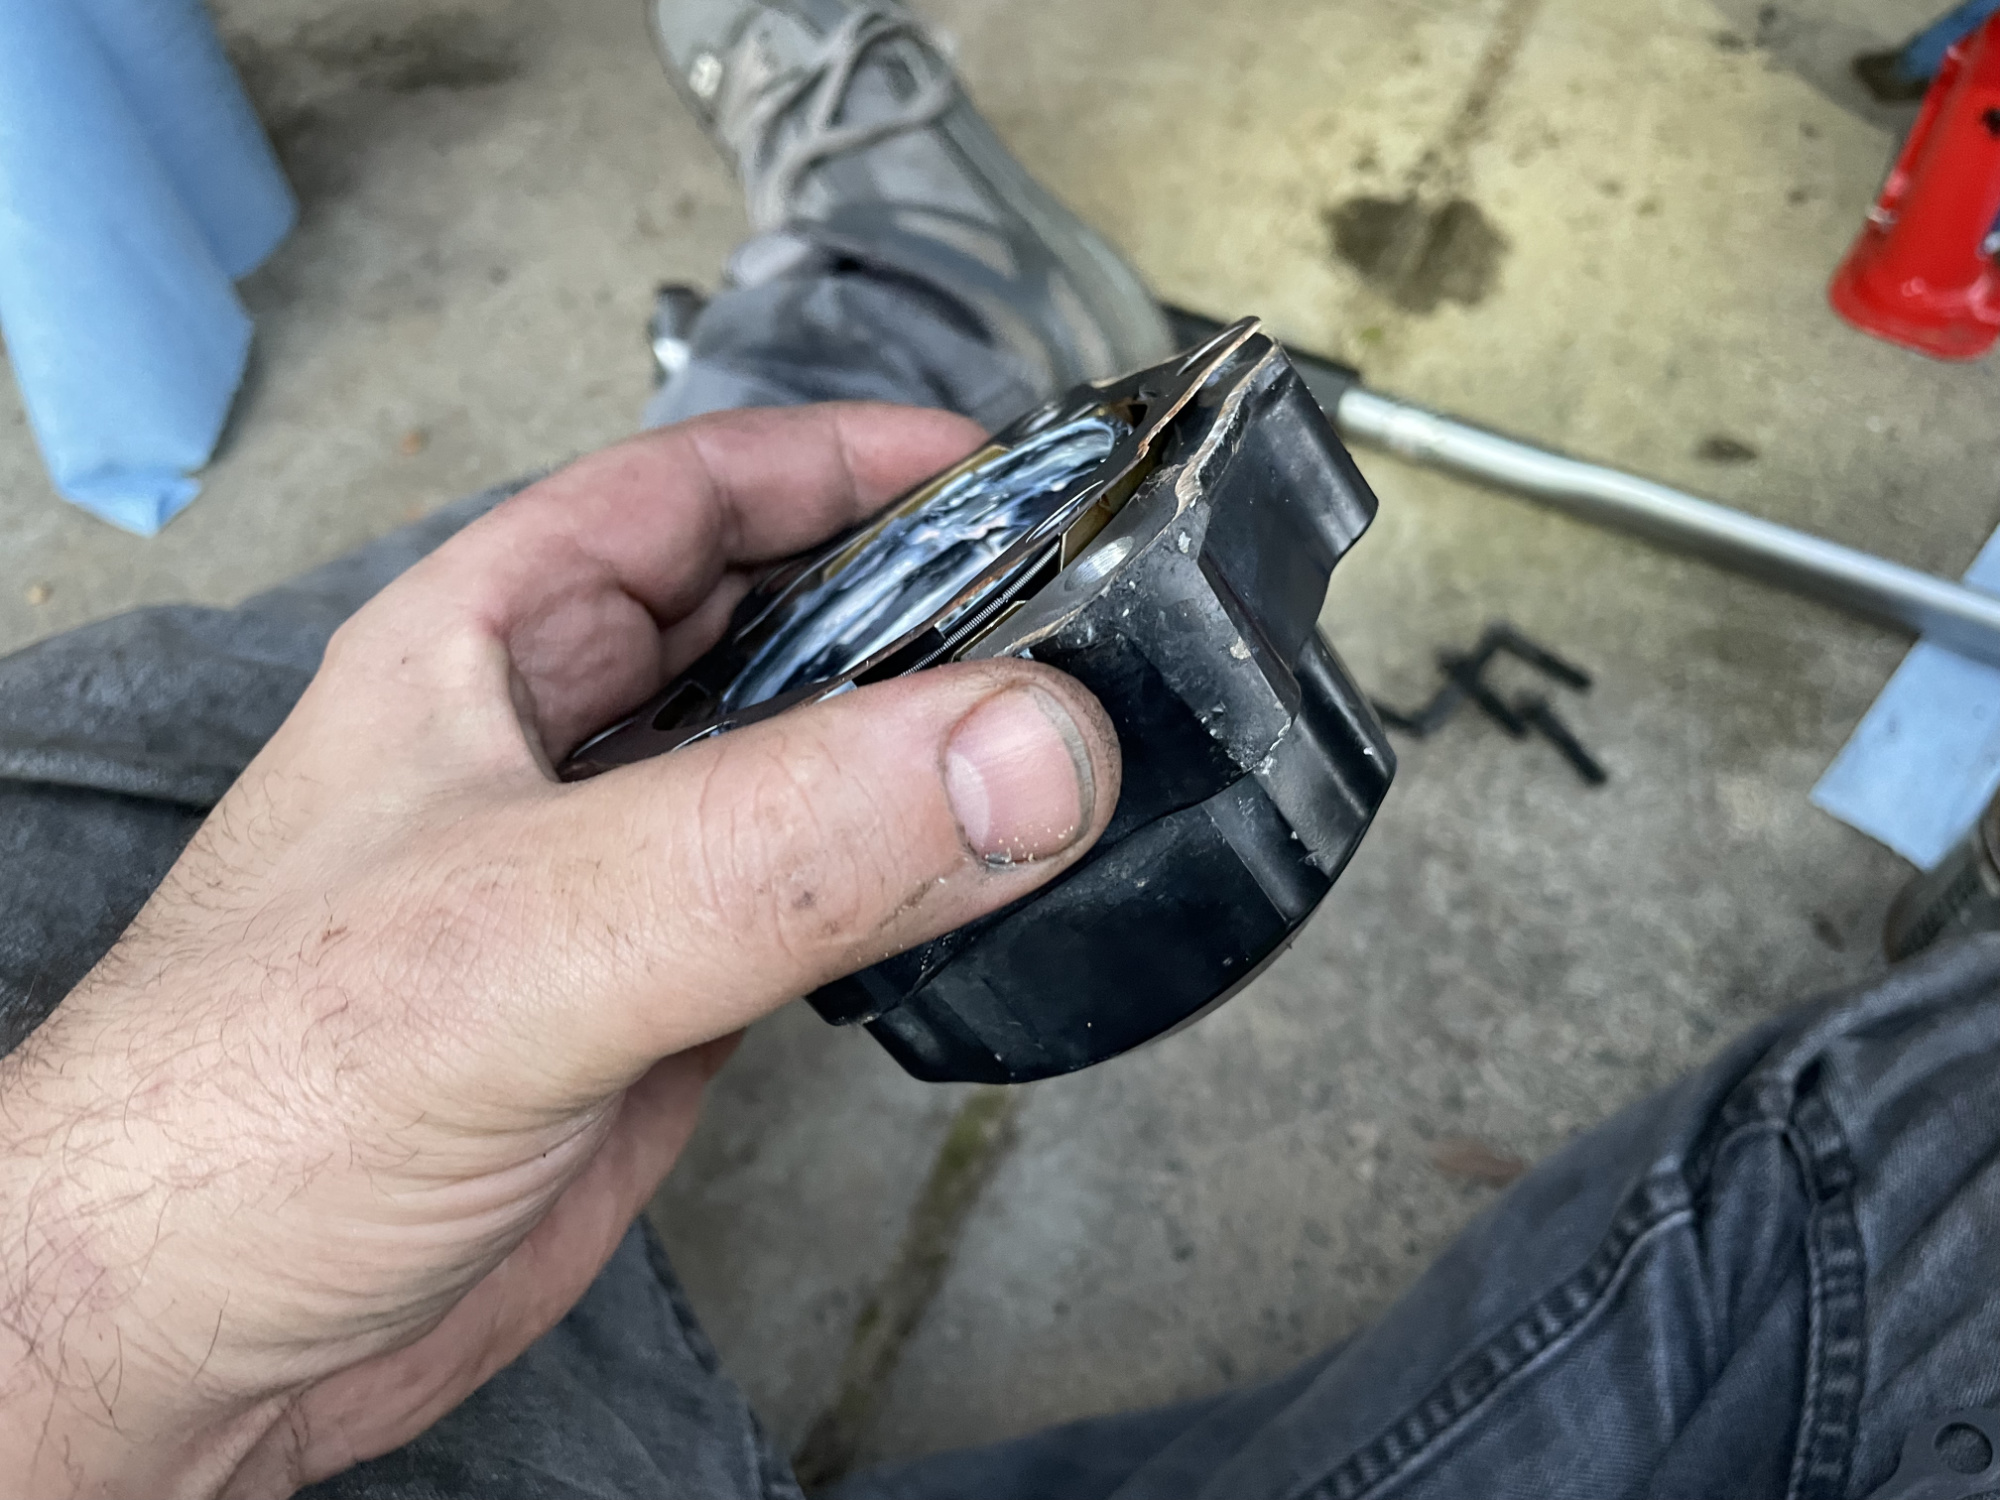
I turned my attention to the back and the 8 bolts that hold on the swivel hub seal and the felt wiper. The felt wiper is in 2 halves, behind it hides a rubber seal and behind that the seal retainer.
With the wiper seals off then you can peel off the rubber hub seal itself to also expose the split seal retainer beneath it.

You basically pull them all of the way out of the way.
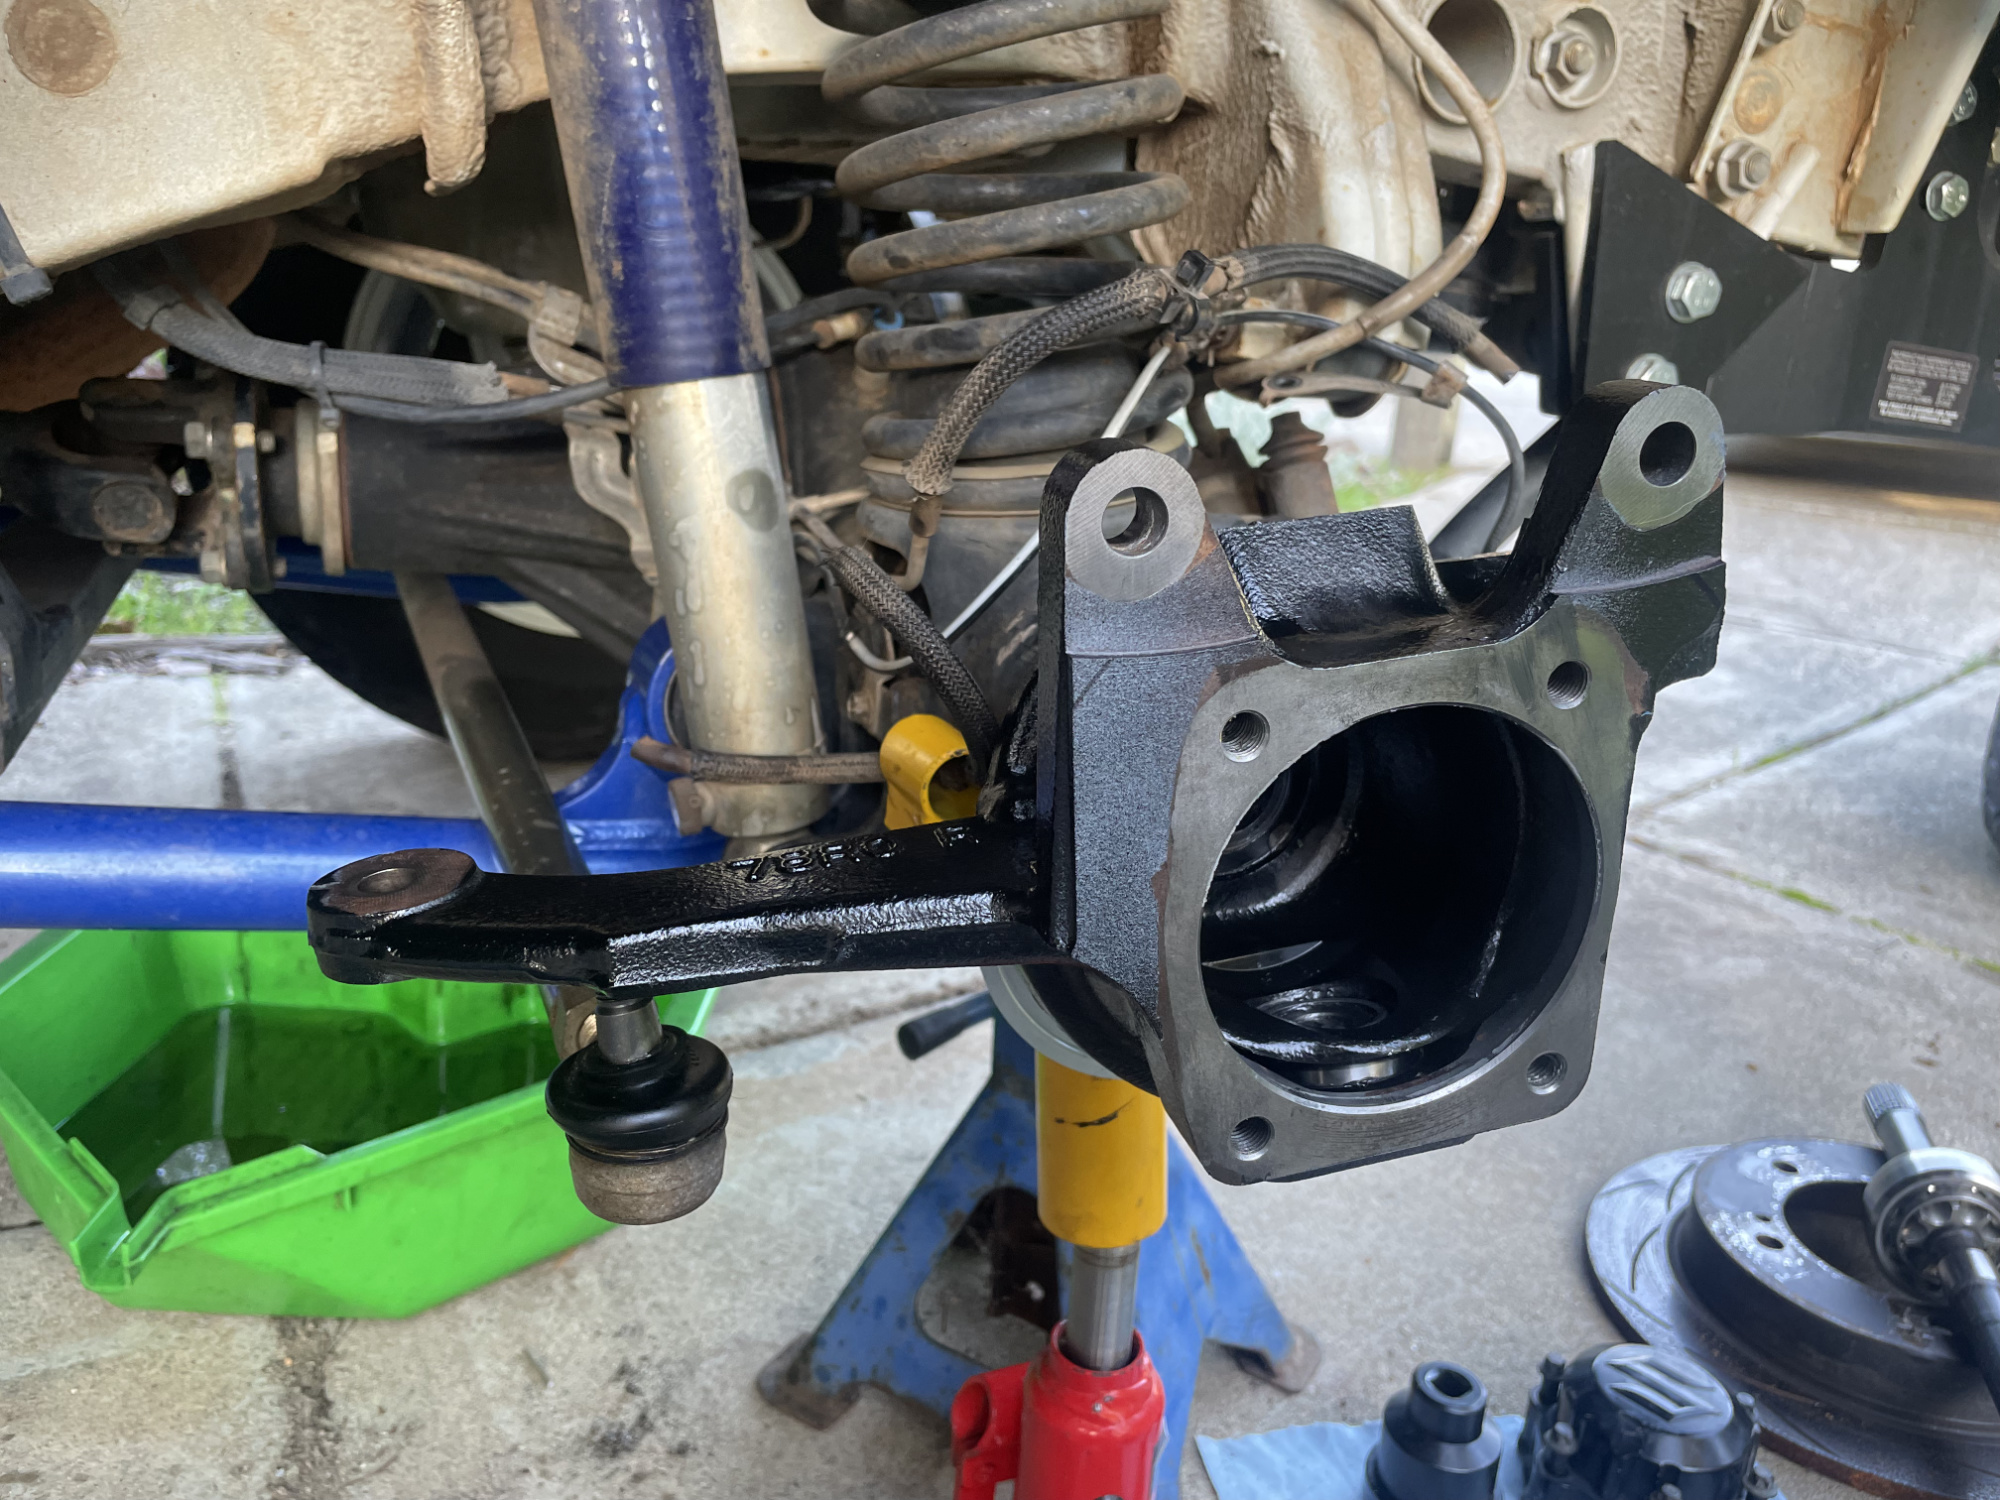
For the drivers side you only need to release the toe rod; on the passengers side you release both the drag link and the toe rod. Since my tie rod I photographed looked a bit rusty, I soaked it for a while in penetrating oil to give myself the best chance of it coming off easily. Obviously I’d already pulled off the R clip at this point.
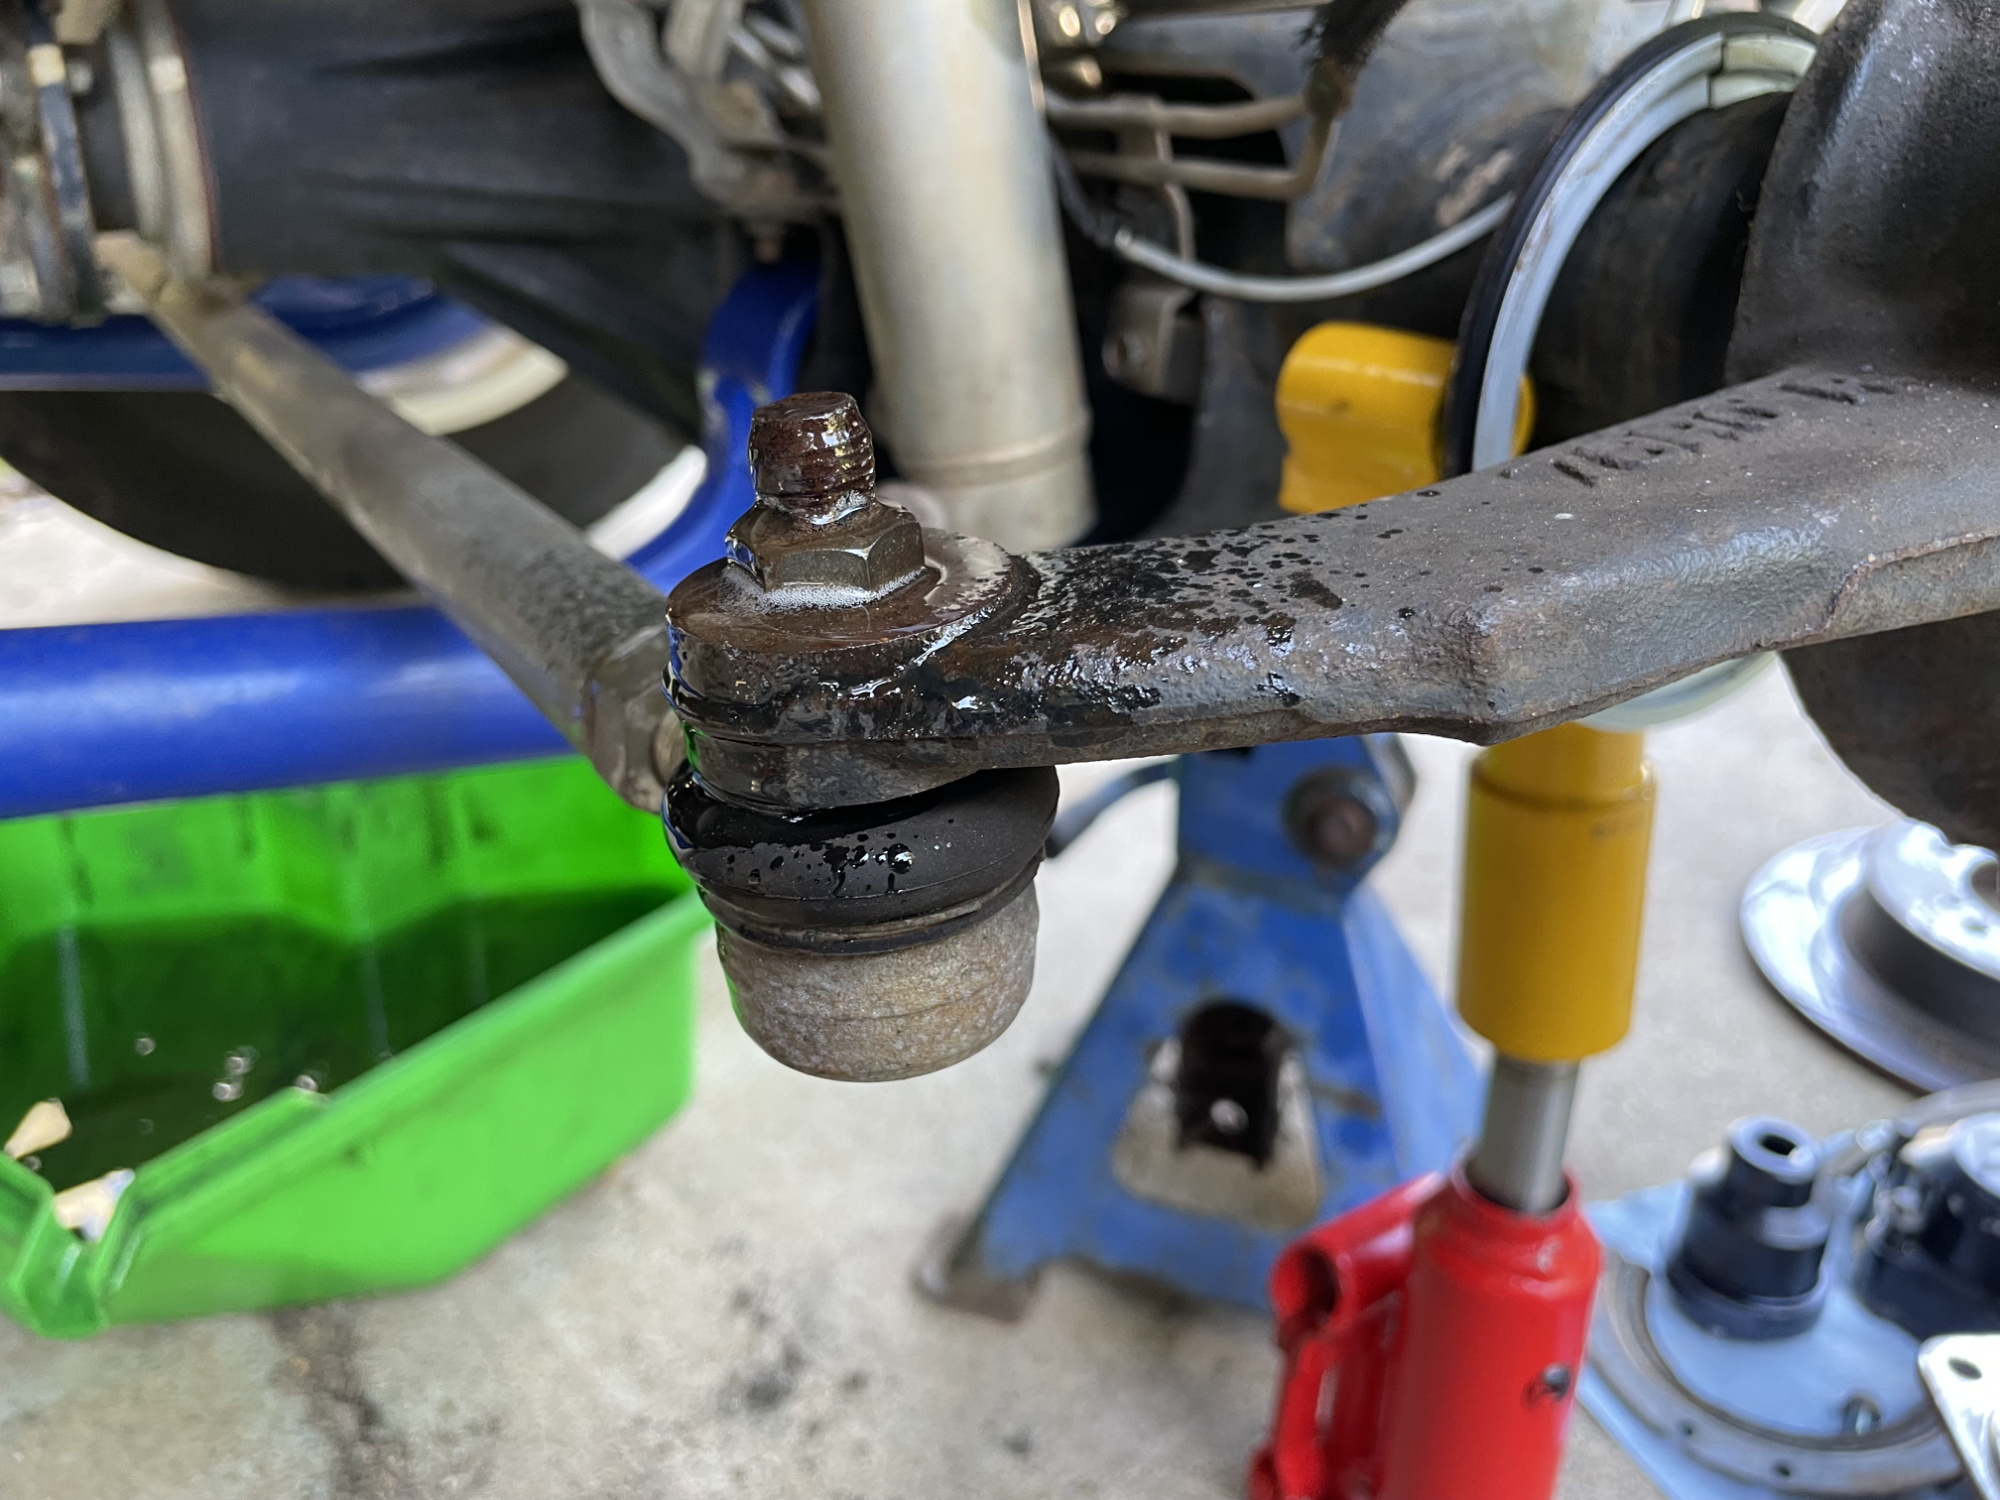
Turns out it came off really easily after soaking, though I took my time to work the nut back and forth to make sure it never bound up.
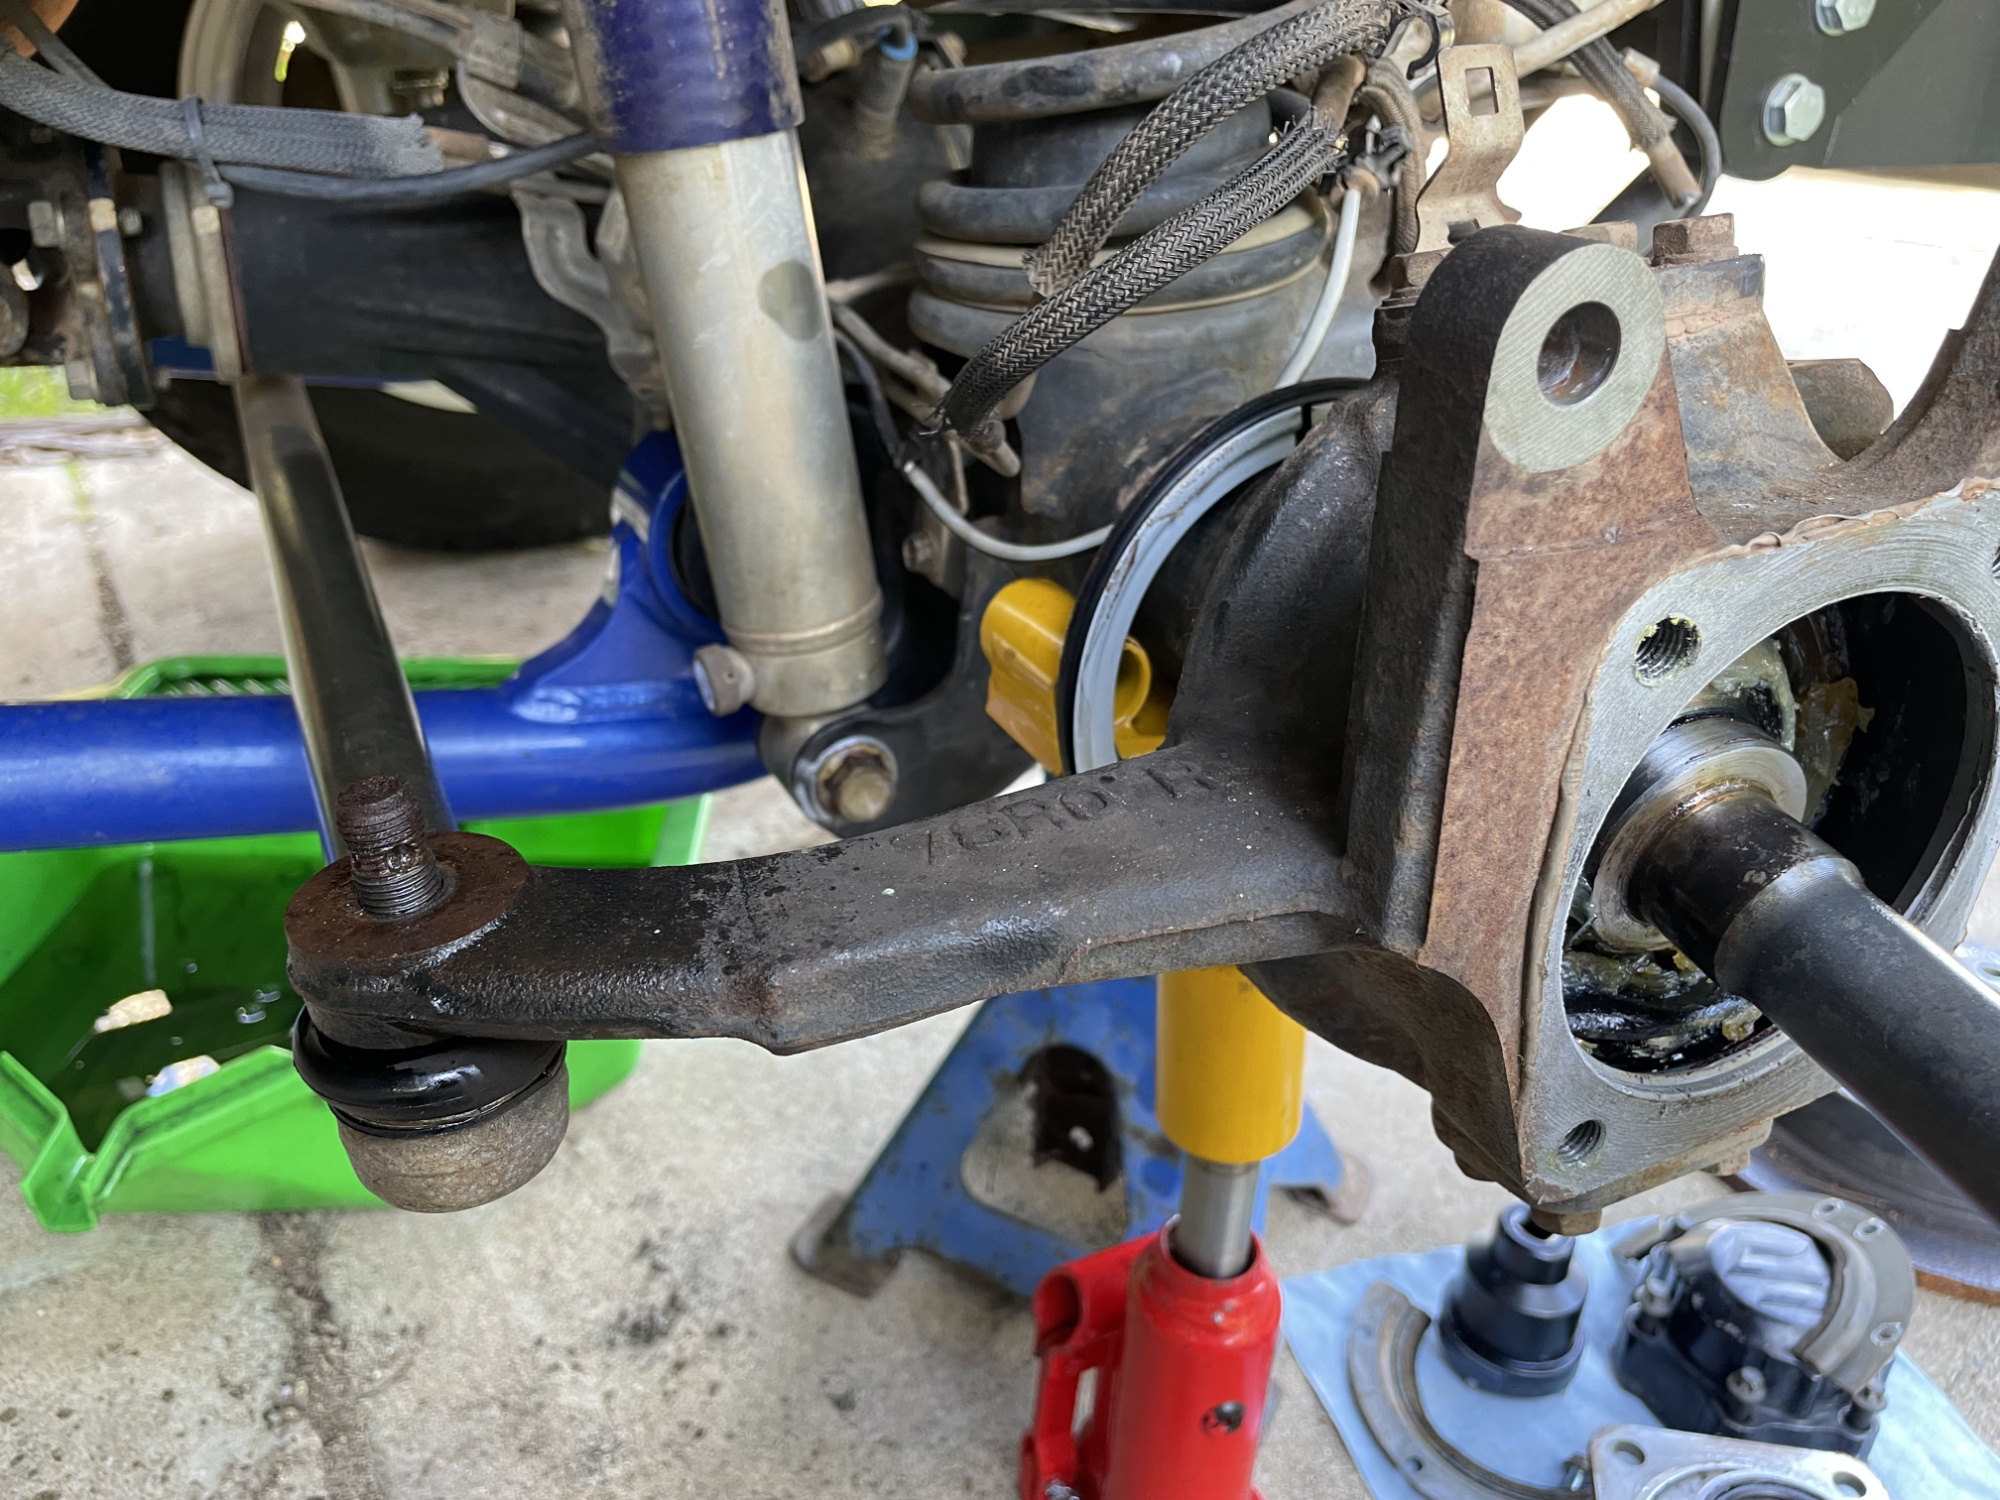
At this point most people run for the balljoint removal tools but I’ve almost never had an issue just giving some good solid taps to the end of the hub to shock the taper out. You basically hit on the end, not onto the ball joint, and that shock releases the taper of the ball joint.
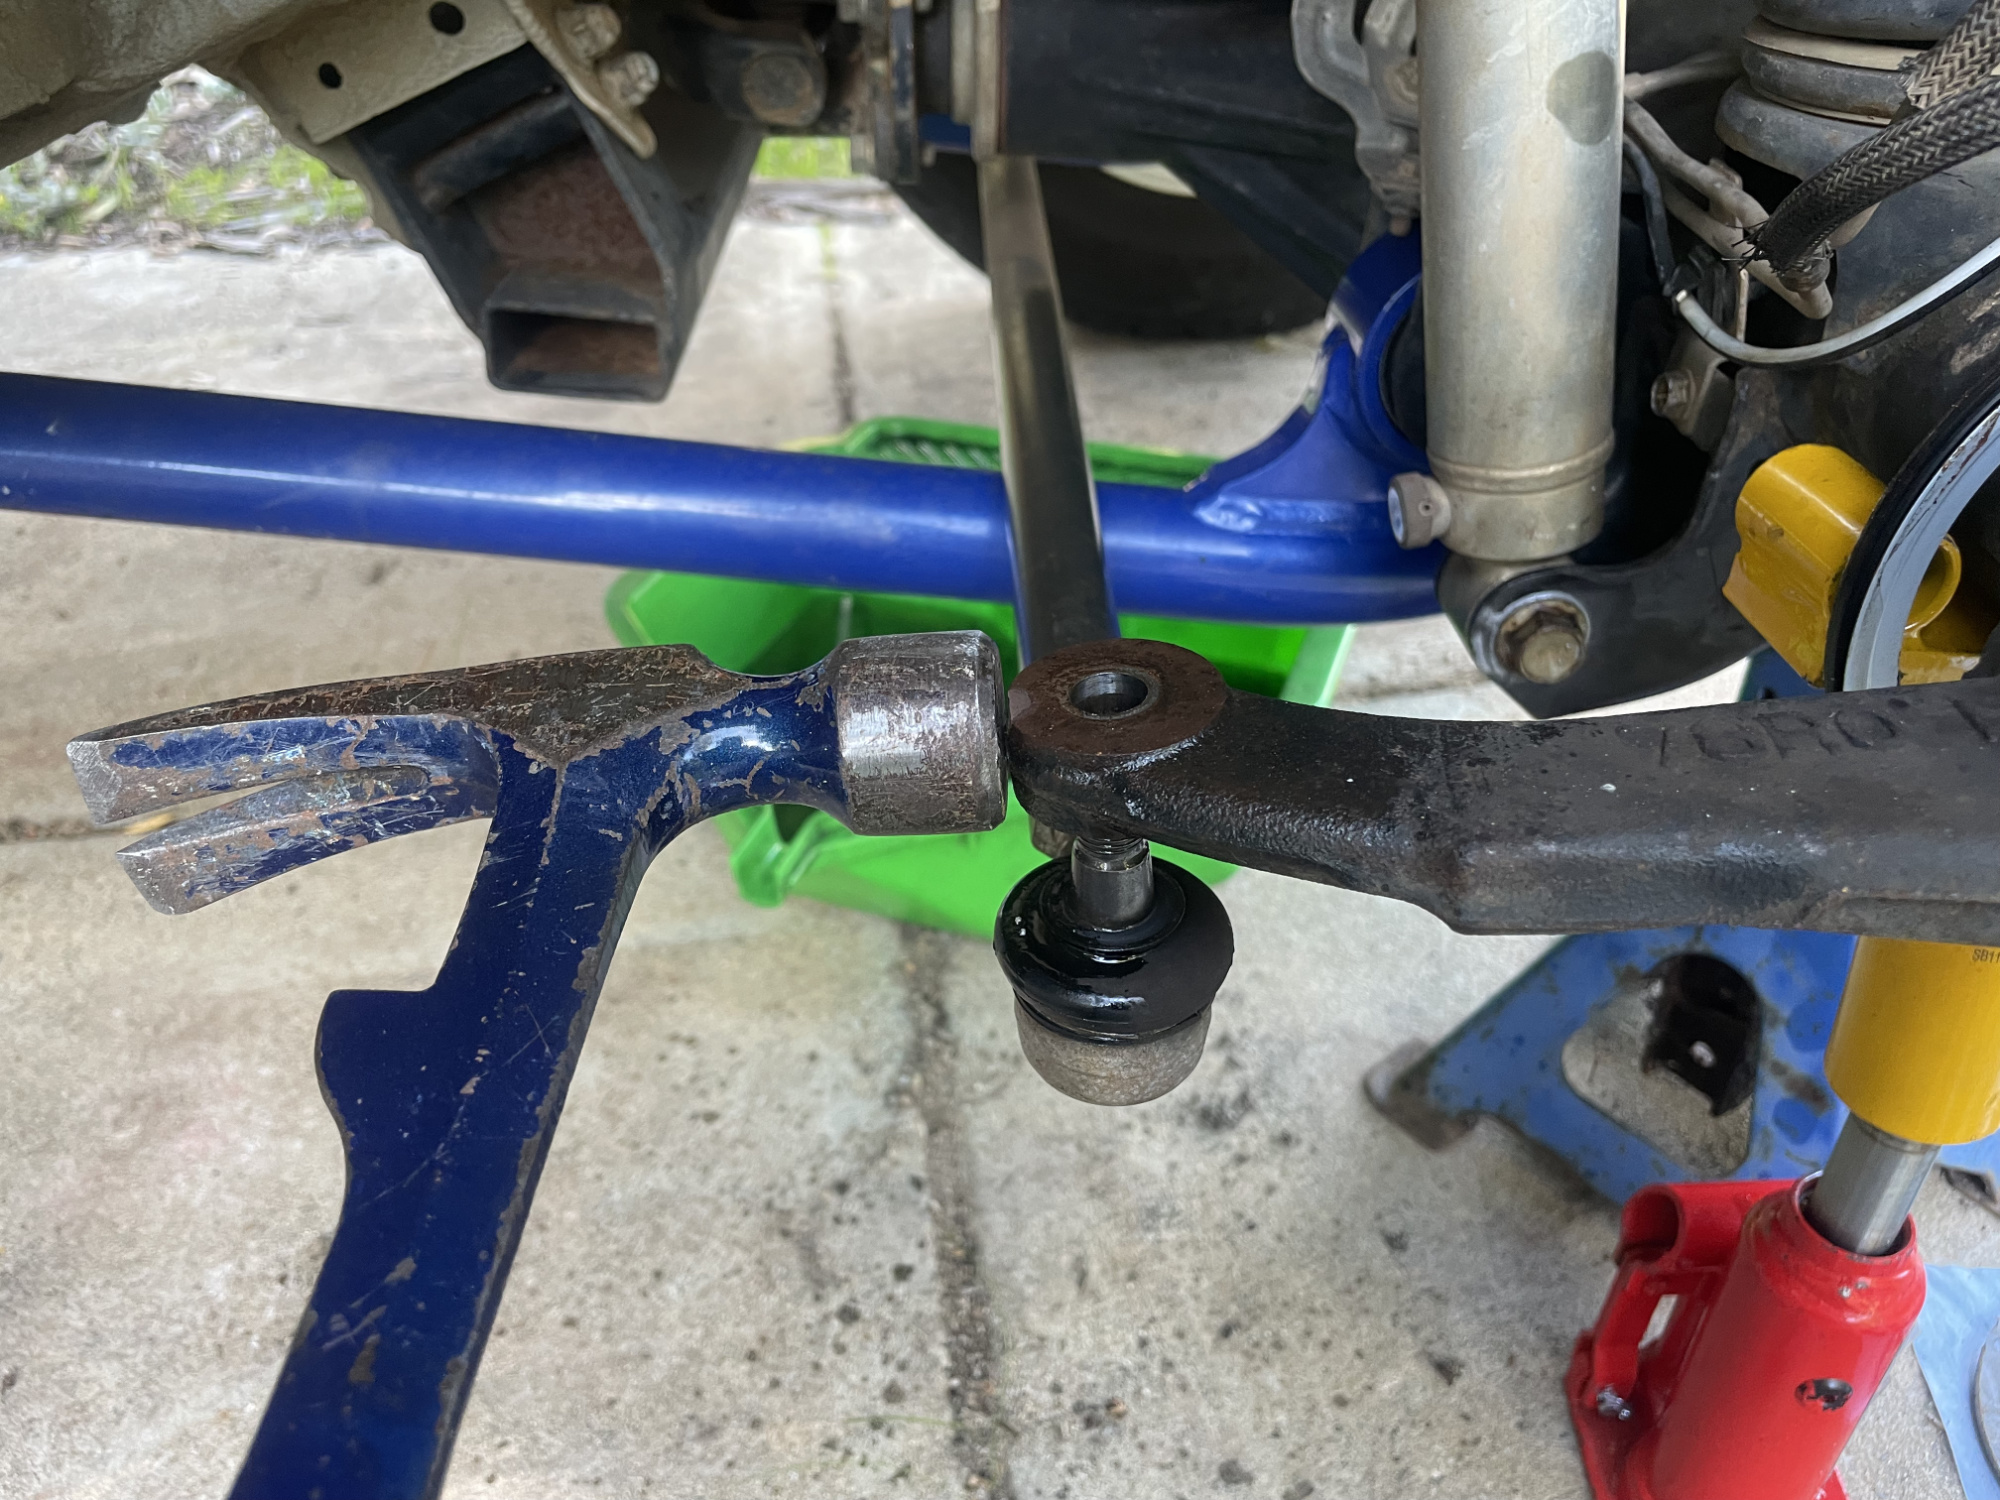
It happened fast enough that I couldn’t photograph hitting it while it was still attached!
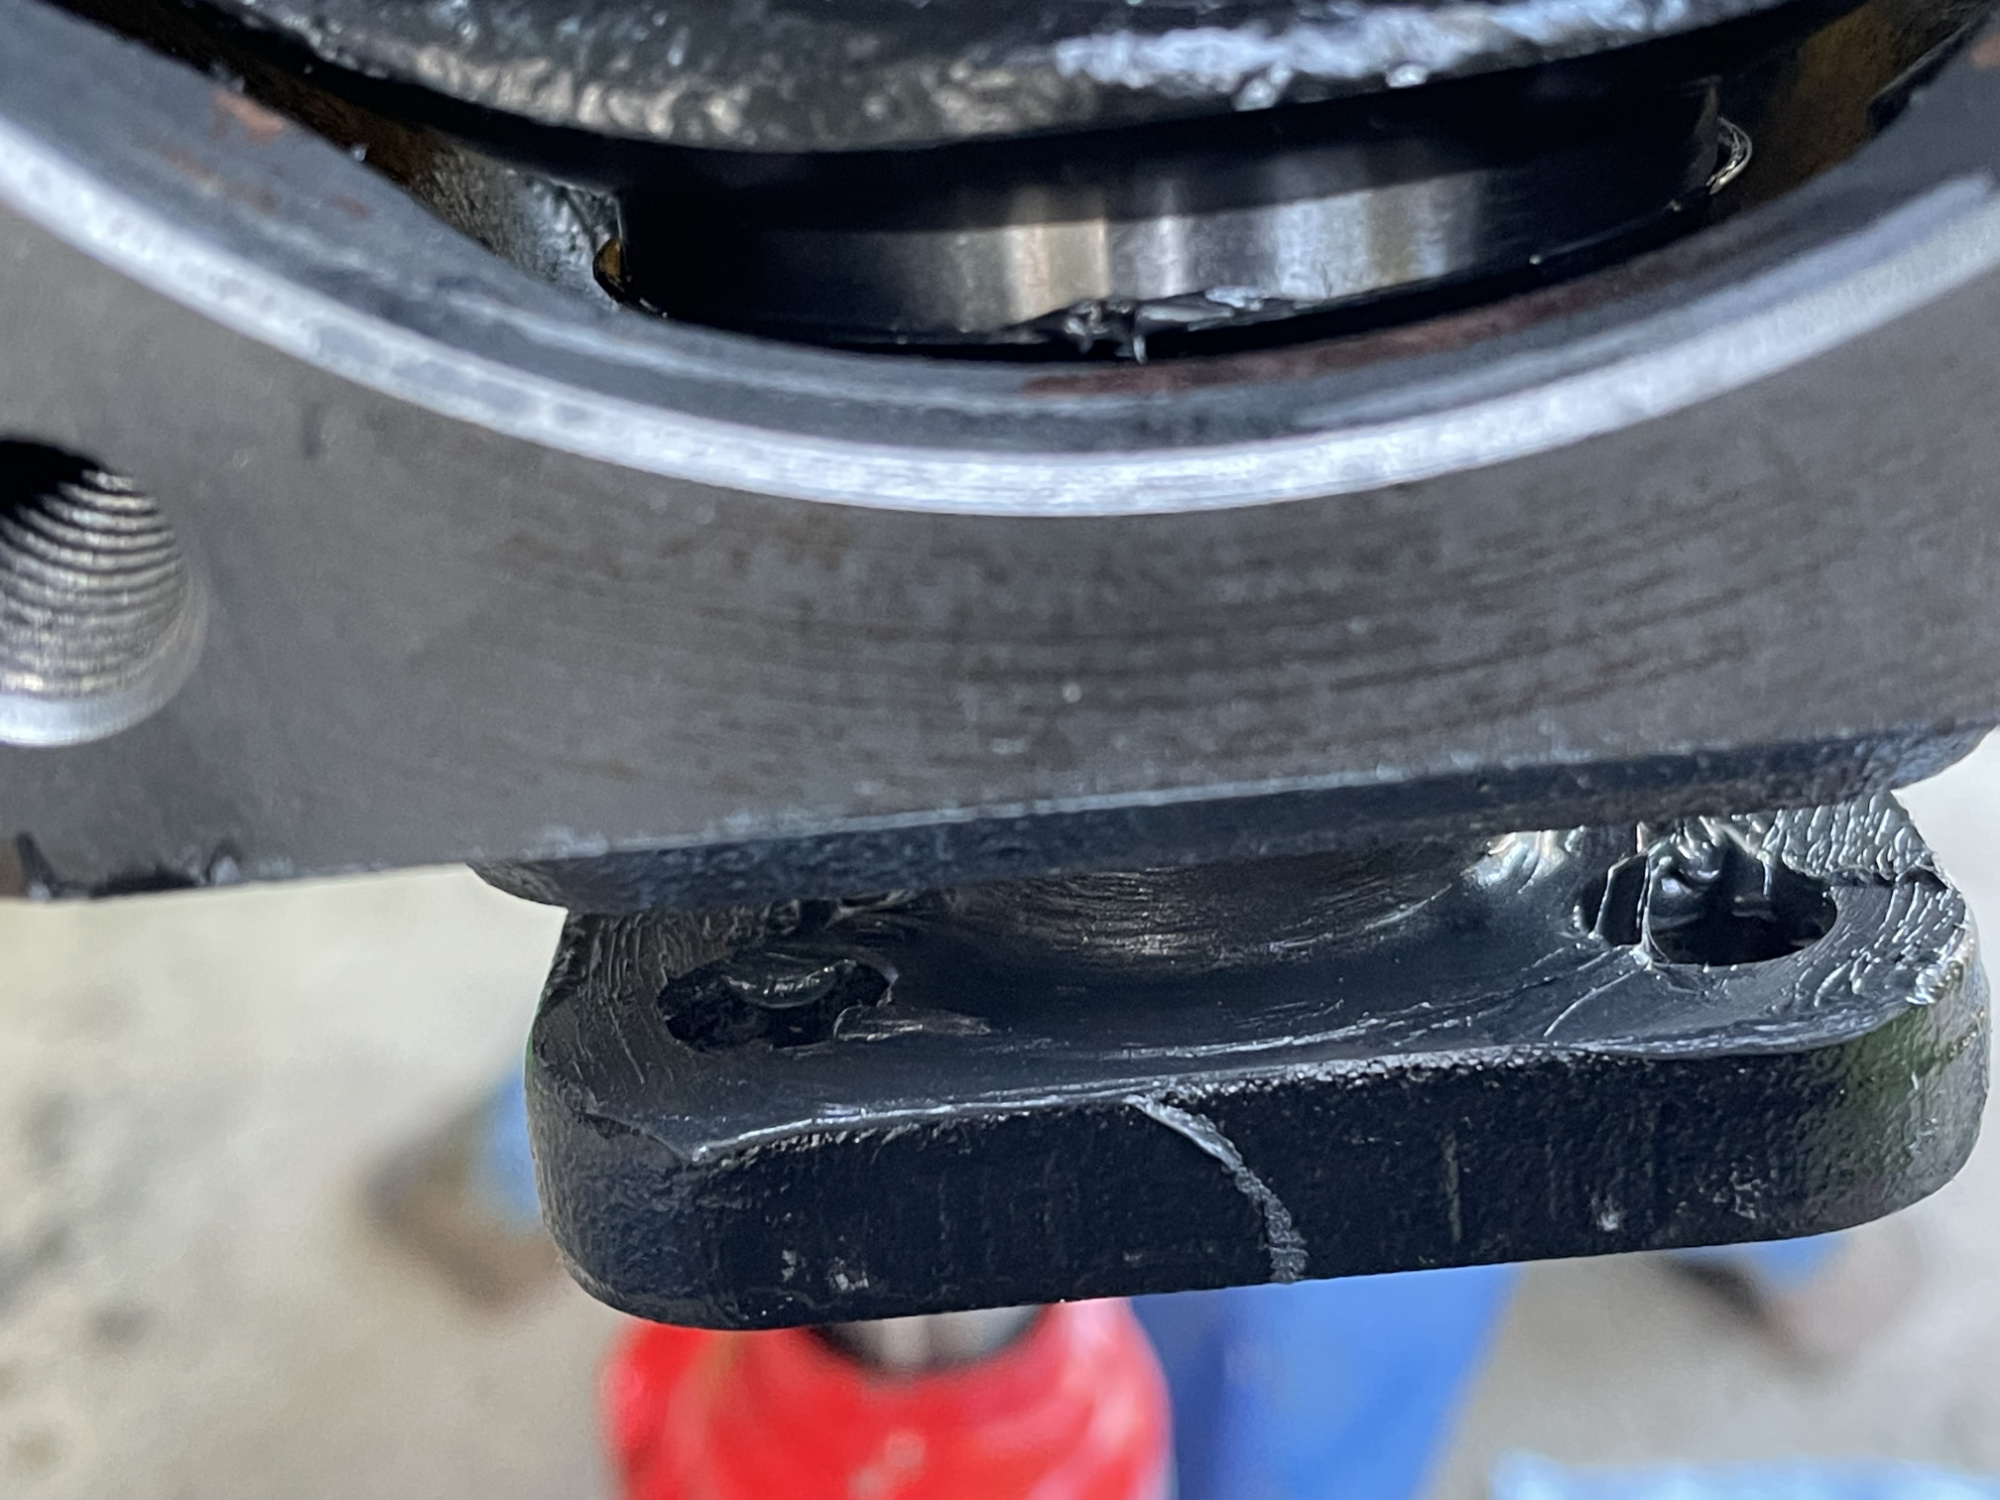
Time to unbolt the kingpins. 4 bolts per kingpin. If you’re reusing these then you should mark them so they go back into the same place in the same orientation.
These are sealed onto the hub using RTV silicone. I gave them just the tiniest tap with my hammer on their sides and that released the sealant, allowing me to remove them.
When you remove the bottom one the swivel hub is basically free to be removed. The bottom bearing will generally fall out when you take the hub off though, so be prepared to catch it.
I then pulled the axle out, but there’s no reason you can’t have removed the axle before now (and in fact it’d make life easier.
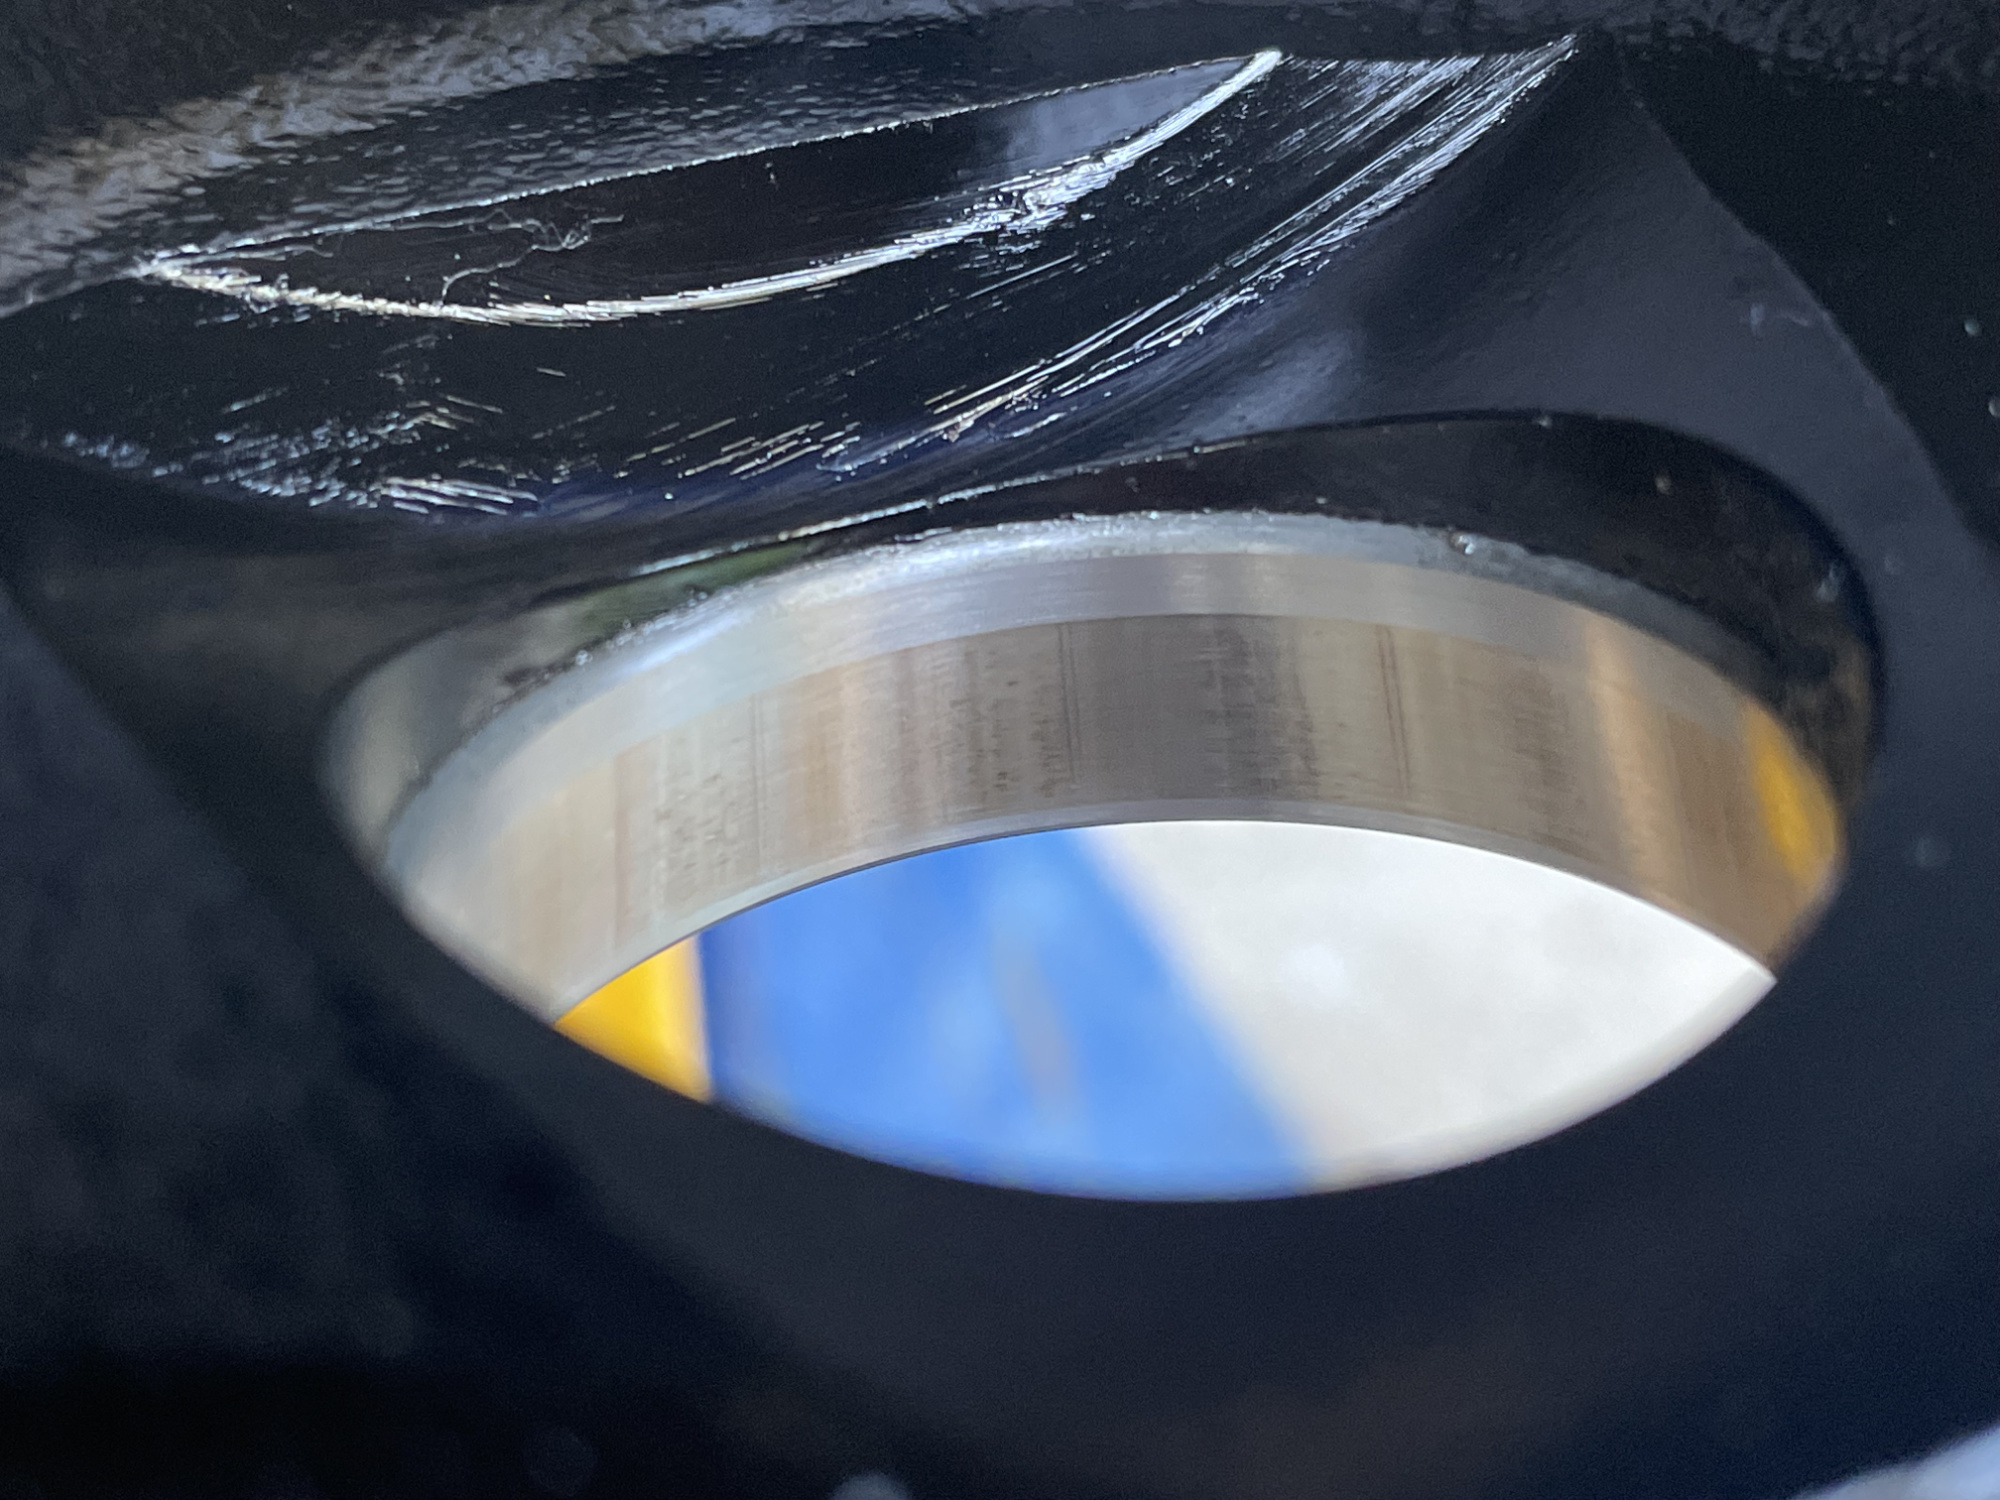
I only had the smallest shake from my steering wheel, but there’s a few marks in the bottom kingpin bearing races to indicate that the bearing was starting to skip instead of rolling around the race. This can be enough to induce a small wobble.
Once you get a heap of wear, usually to the kinpin itself rather than the bearing and its race, then you can get quite epic wobbles. As a caveat: not all cases of ‘death wobbles’ are due to kingpin related issues. Most people are keen to blame them, but there are a myriad of causes of death wobbles in any car with solid front axles.
Now we turn ourselves to refurbishing all of the swivel hub/steering knuckle related components.
Refurbish
Clean everything thoroughly! This includes the guts of the axle housing itself and also the CV joint. I clean this as much as possible so I can use my own choice of grease rather than finding the factory grease.
The kingpin races only have the smallest little lips you can get a hold of to knock them out of the axle housing, but it can be done with an appropriate punch. If you’re lucky one of your sockets will nicely fit onto the back of them but let them through the axle housing but I didn’t have any that suited.
It wasn’t easy but it was doable. Just take your time and work your way around the race methodically so you push it out evenly.
Popping the axle oil seal out can be a bit of a pain due to access but I levered it out with the same punch I’d converted into a small chisel for getting out the kingpin bearing races.
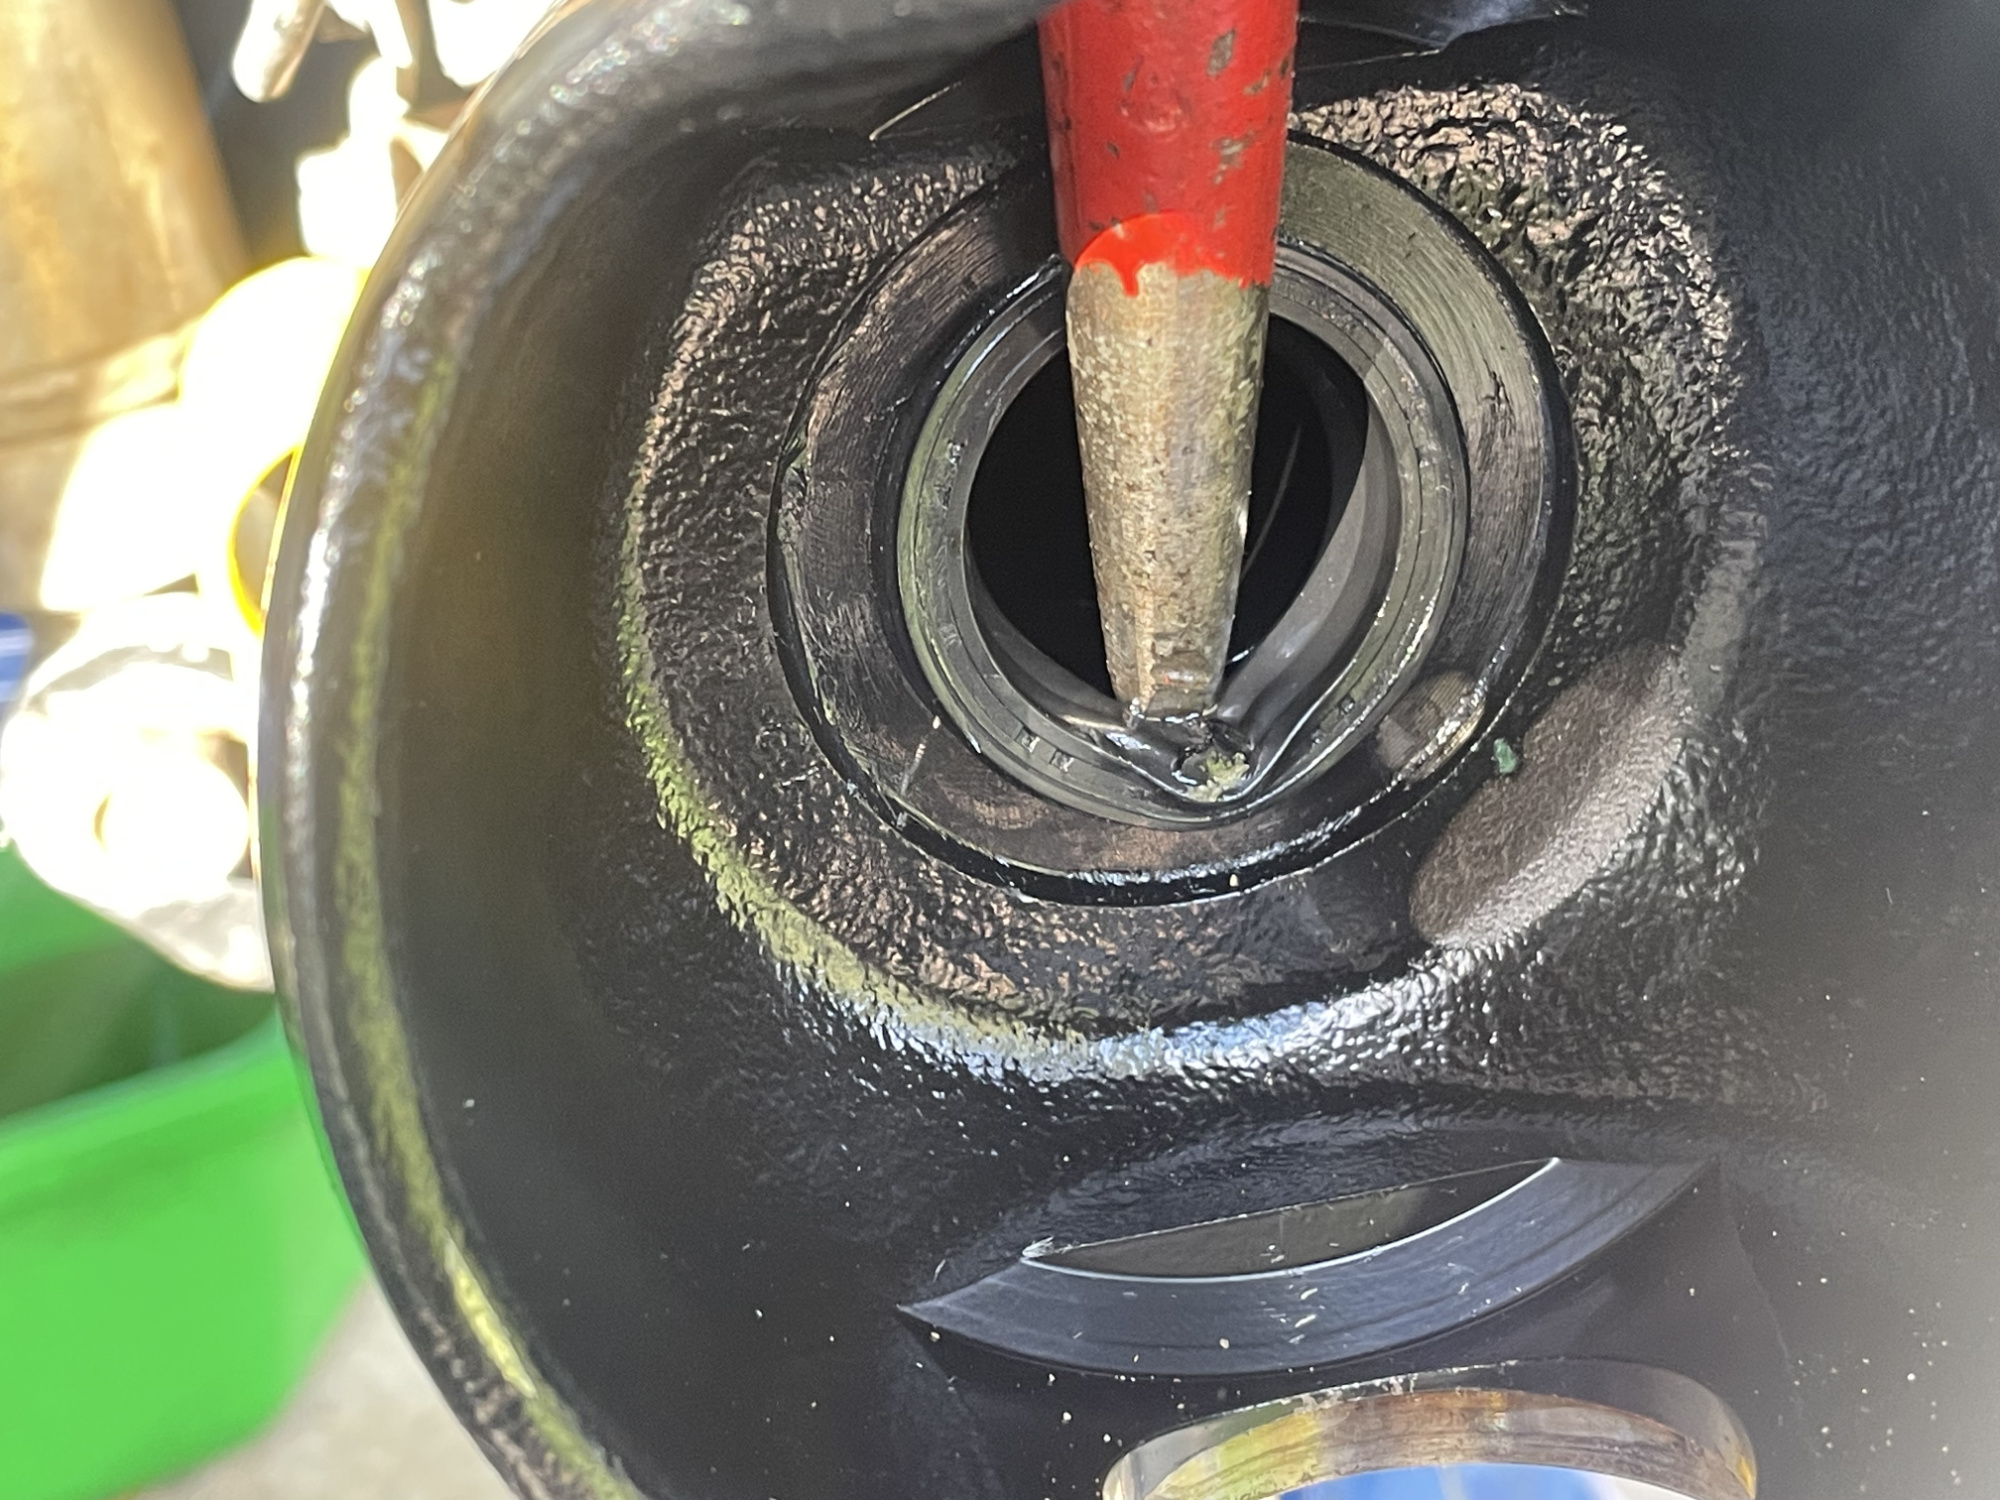
Levering out the spindle seal is also pretty easy; just don’t damage any mating surfaces or the bronze bushing that the axle runs in. It’s so easy I didn’t get a good photo of it…
I did repaint the swivel hub when it was off the car. Nothing fancy: just sprayed it down with a good cleaner, wire brushed it, further degreased it, masked up the parts that needed to remain free of paint, put down one layer of rustproof primer and two coats of a ceramic caliper paint. Done!
Refit
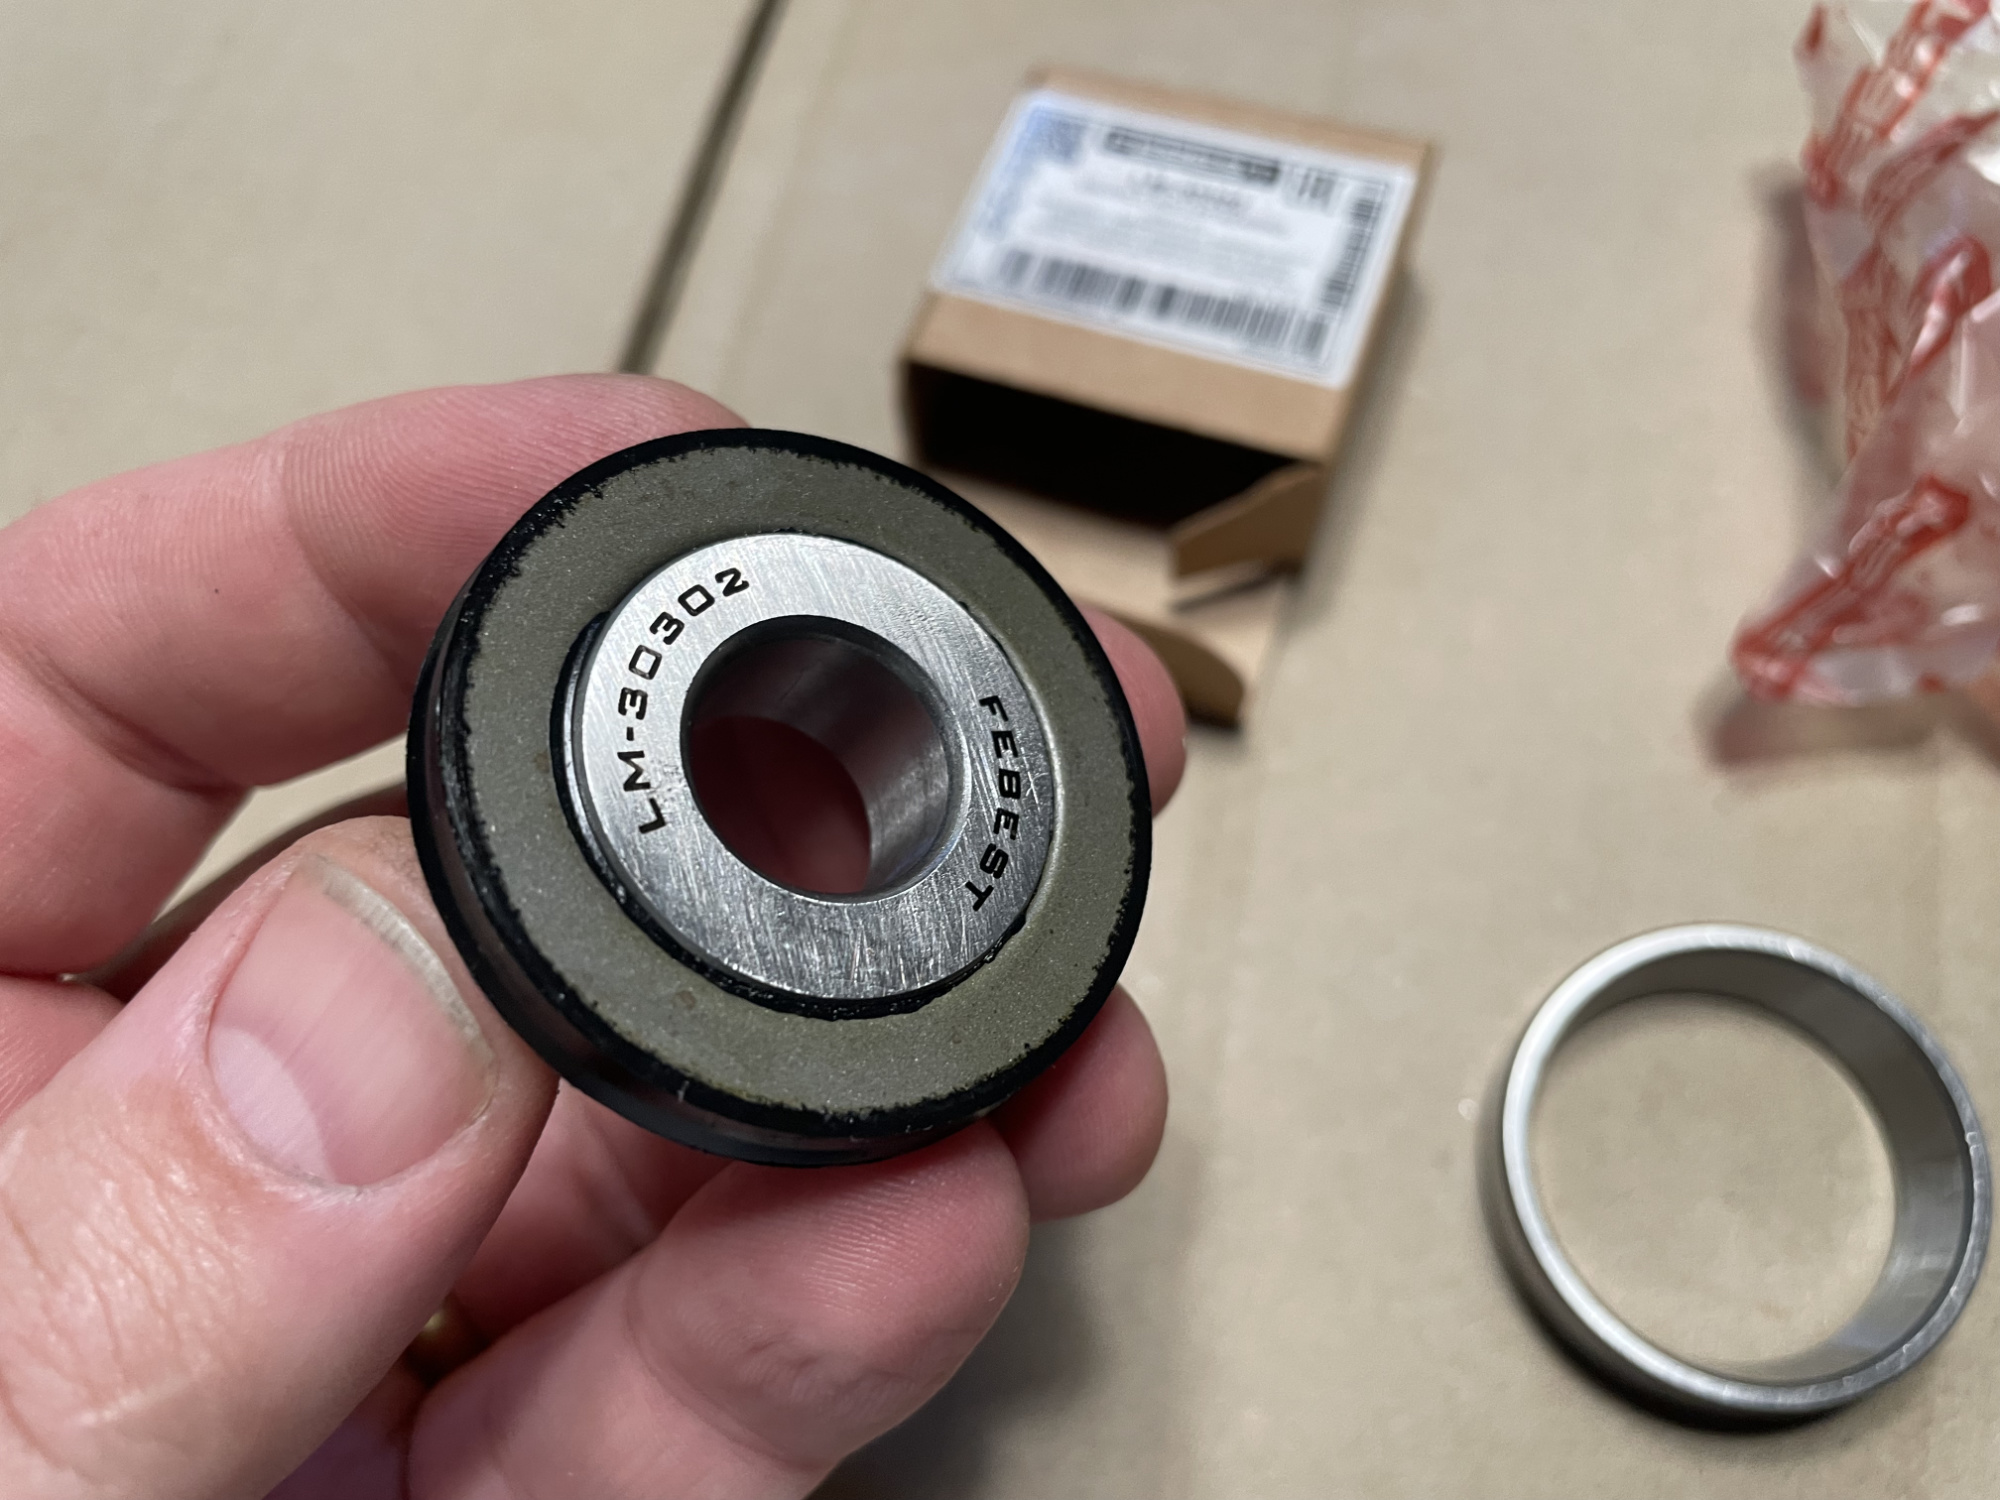
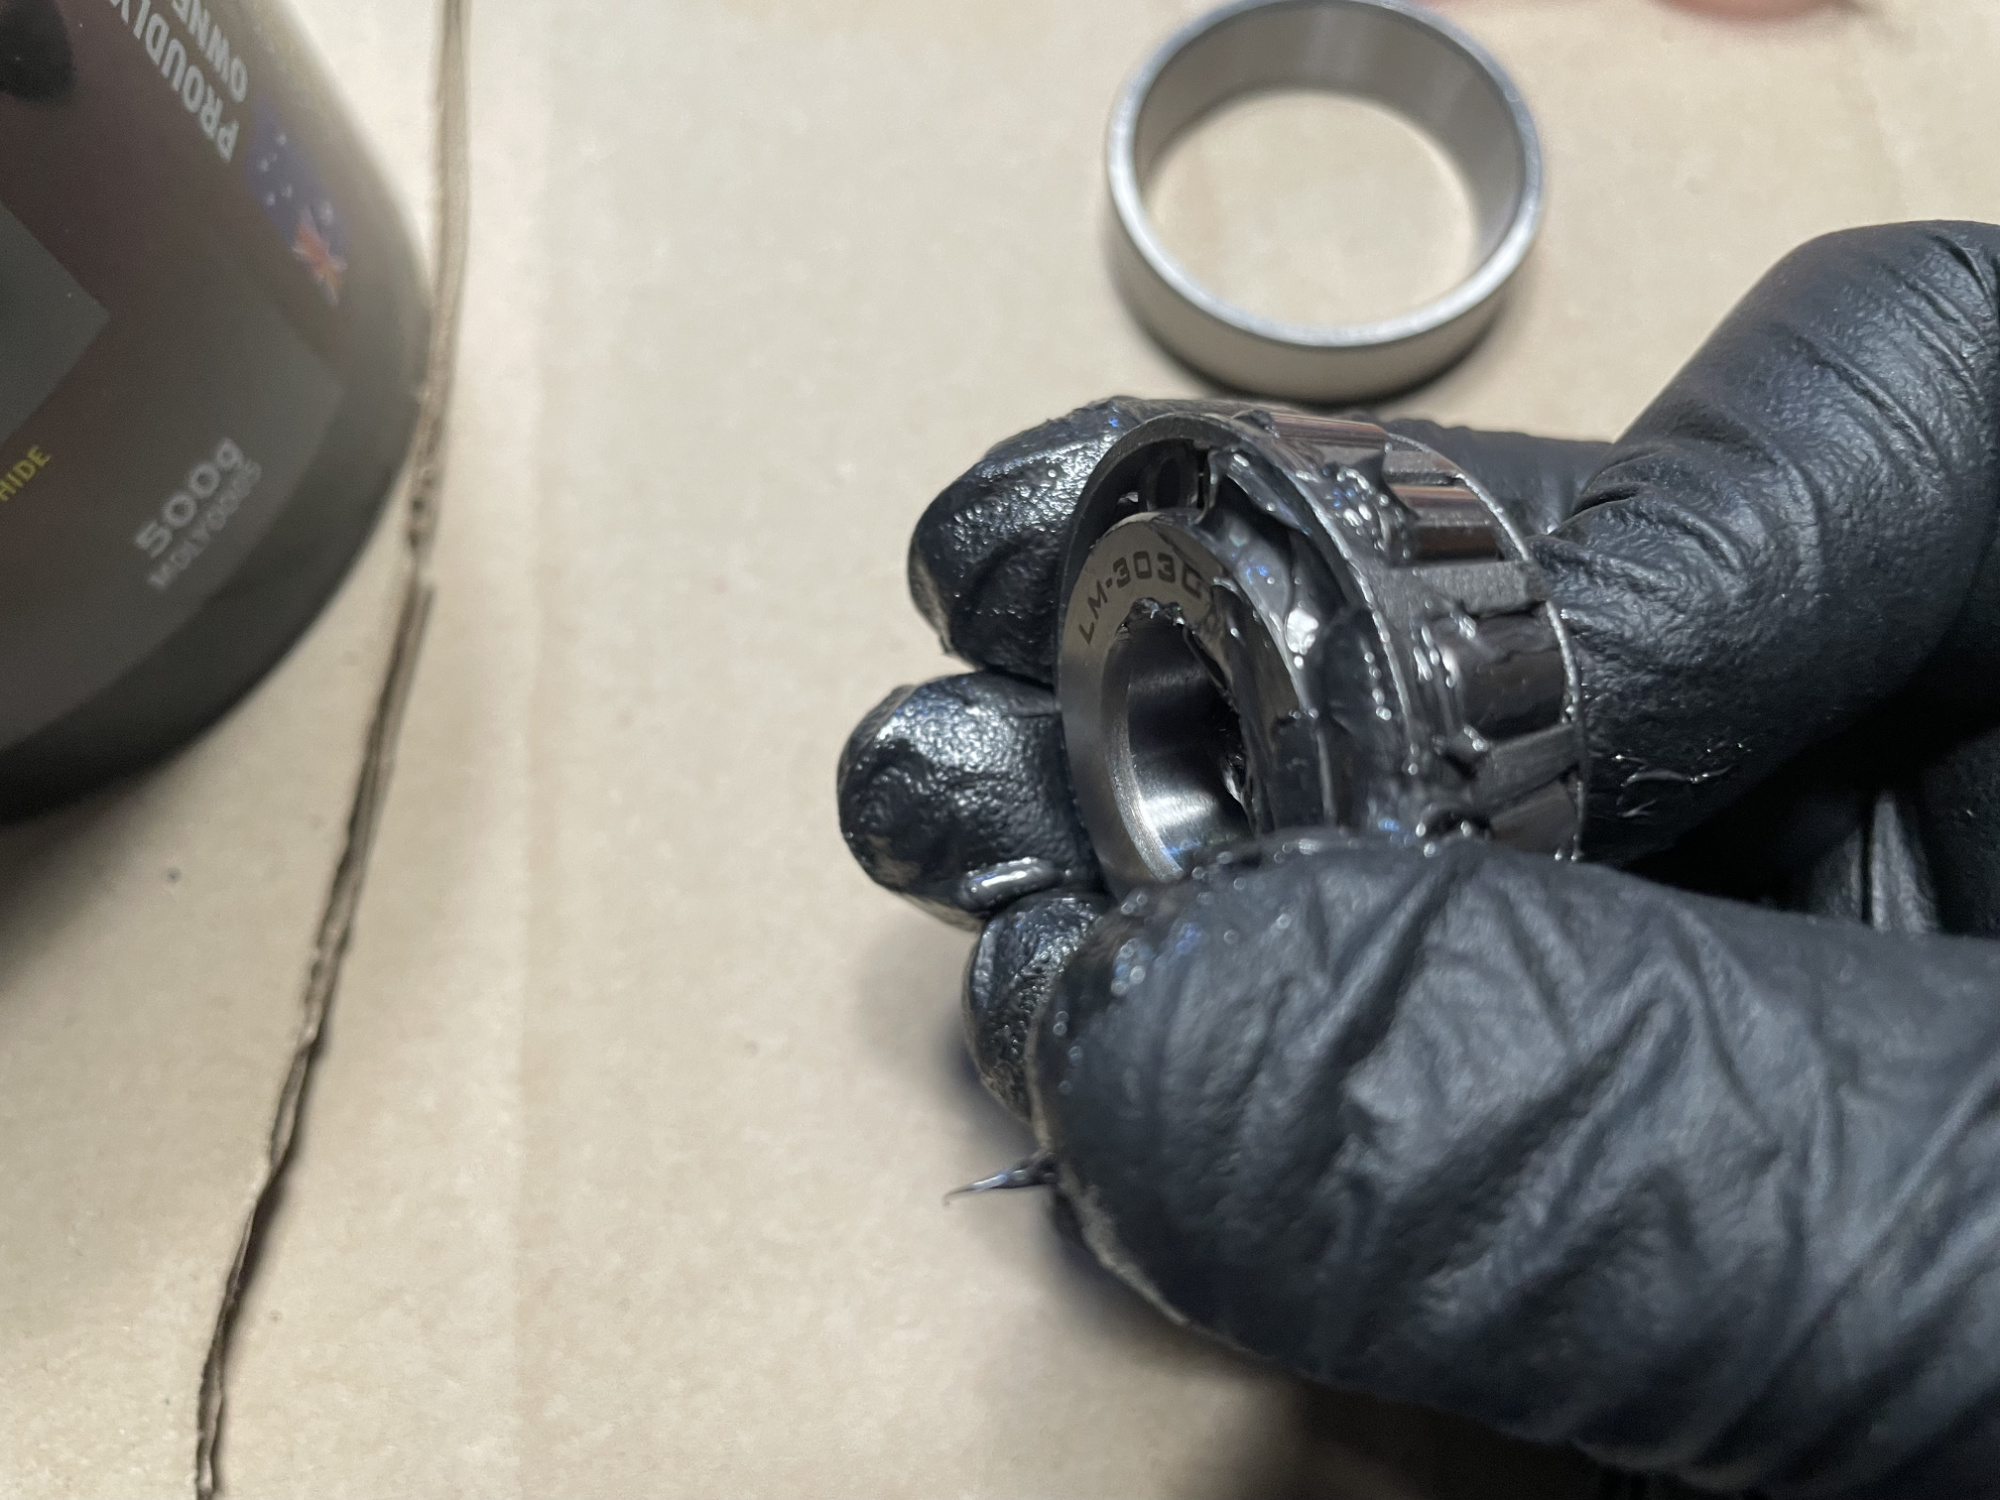
Before refitting, you need to pack your kingpin bearings with grease. It’s not hard, just takes a bit of time and is a bit messy. I’m using sealed replacement bearings to see how they go for longevity, but the same process applies to unsealed bearings.
While taking care not to damage the seal, I pulled it off to get access to the back of the bearing to allow me to pack it the traditional way.
Packing isn’t hard. Basically a bit of grease pushed in from the gap at the bottom of the bearing and repeat it in one spot till grease comes out of the top of the bearing. Move in, push grease into the next bit of the bearing and repeat till it’s all full of grease.
Here it is partly done: you can see the dark part where the grease has made it up to the top in this section, so now you’d move on and keep working till the bearing is full of grease.
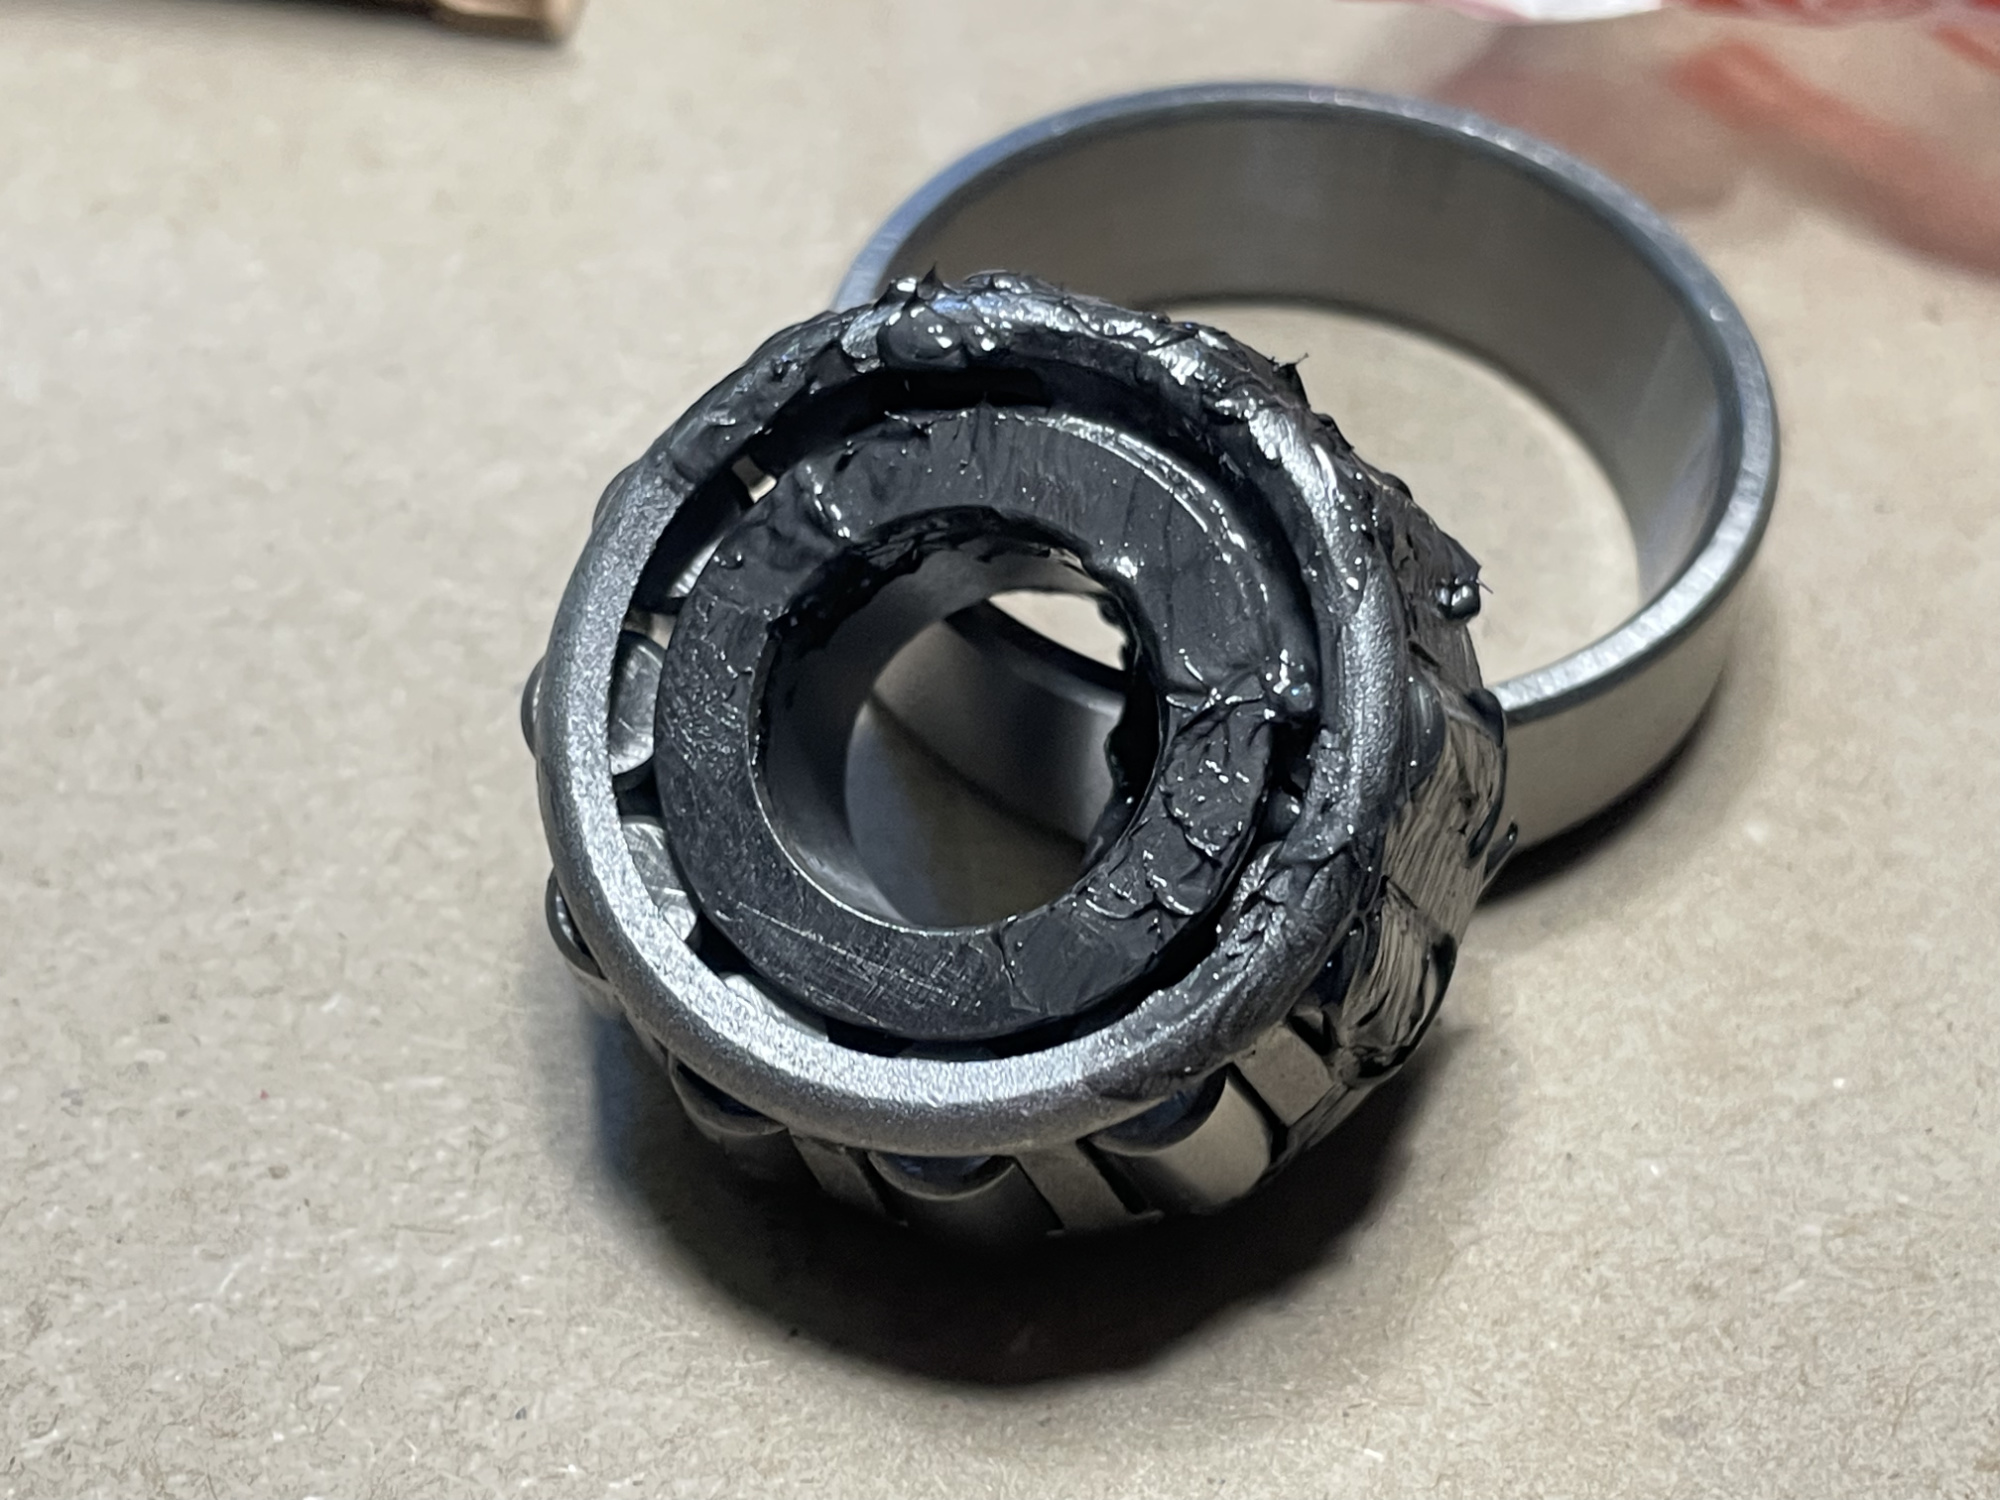
When you’re done packing them with grease then put them in a clean sealed bag so no dirt will get to them until you’re ready to fit them to the car.
Turning our attention now to parts still fitted to the car: A socket is the right tool to install the axle seal.
A few tappy taps and the new seal is installed in the axle housing. Note the grease on the lip of the seal: my factory seals came with this grease here. If you’re using aftermarket seals remember to grease this lip before reinstalling the axle.
I found a socket that suited the installation of the new bearing races though and knocked them in.
With the kingpin races installed, you can put the swivel hub back onto the car. The bottom bearing requires you to keep a hold of it unless you’re using very sticky grease; then with the upper bearing dropped into the race you can angle the swivel hub and get it over the bearings.

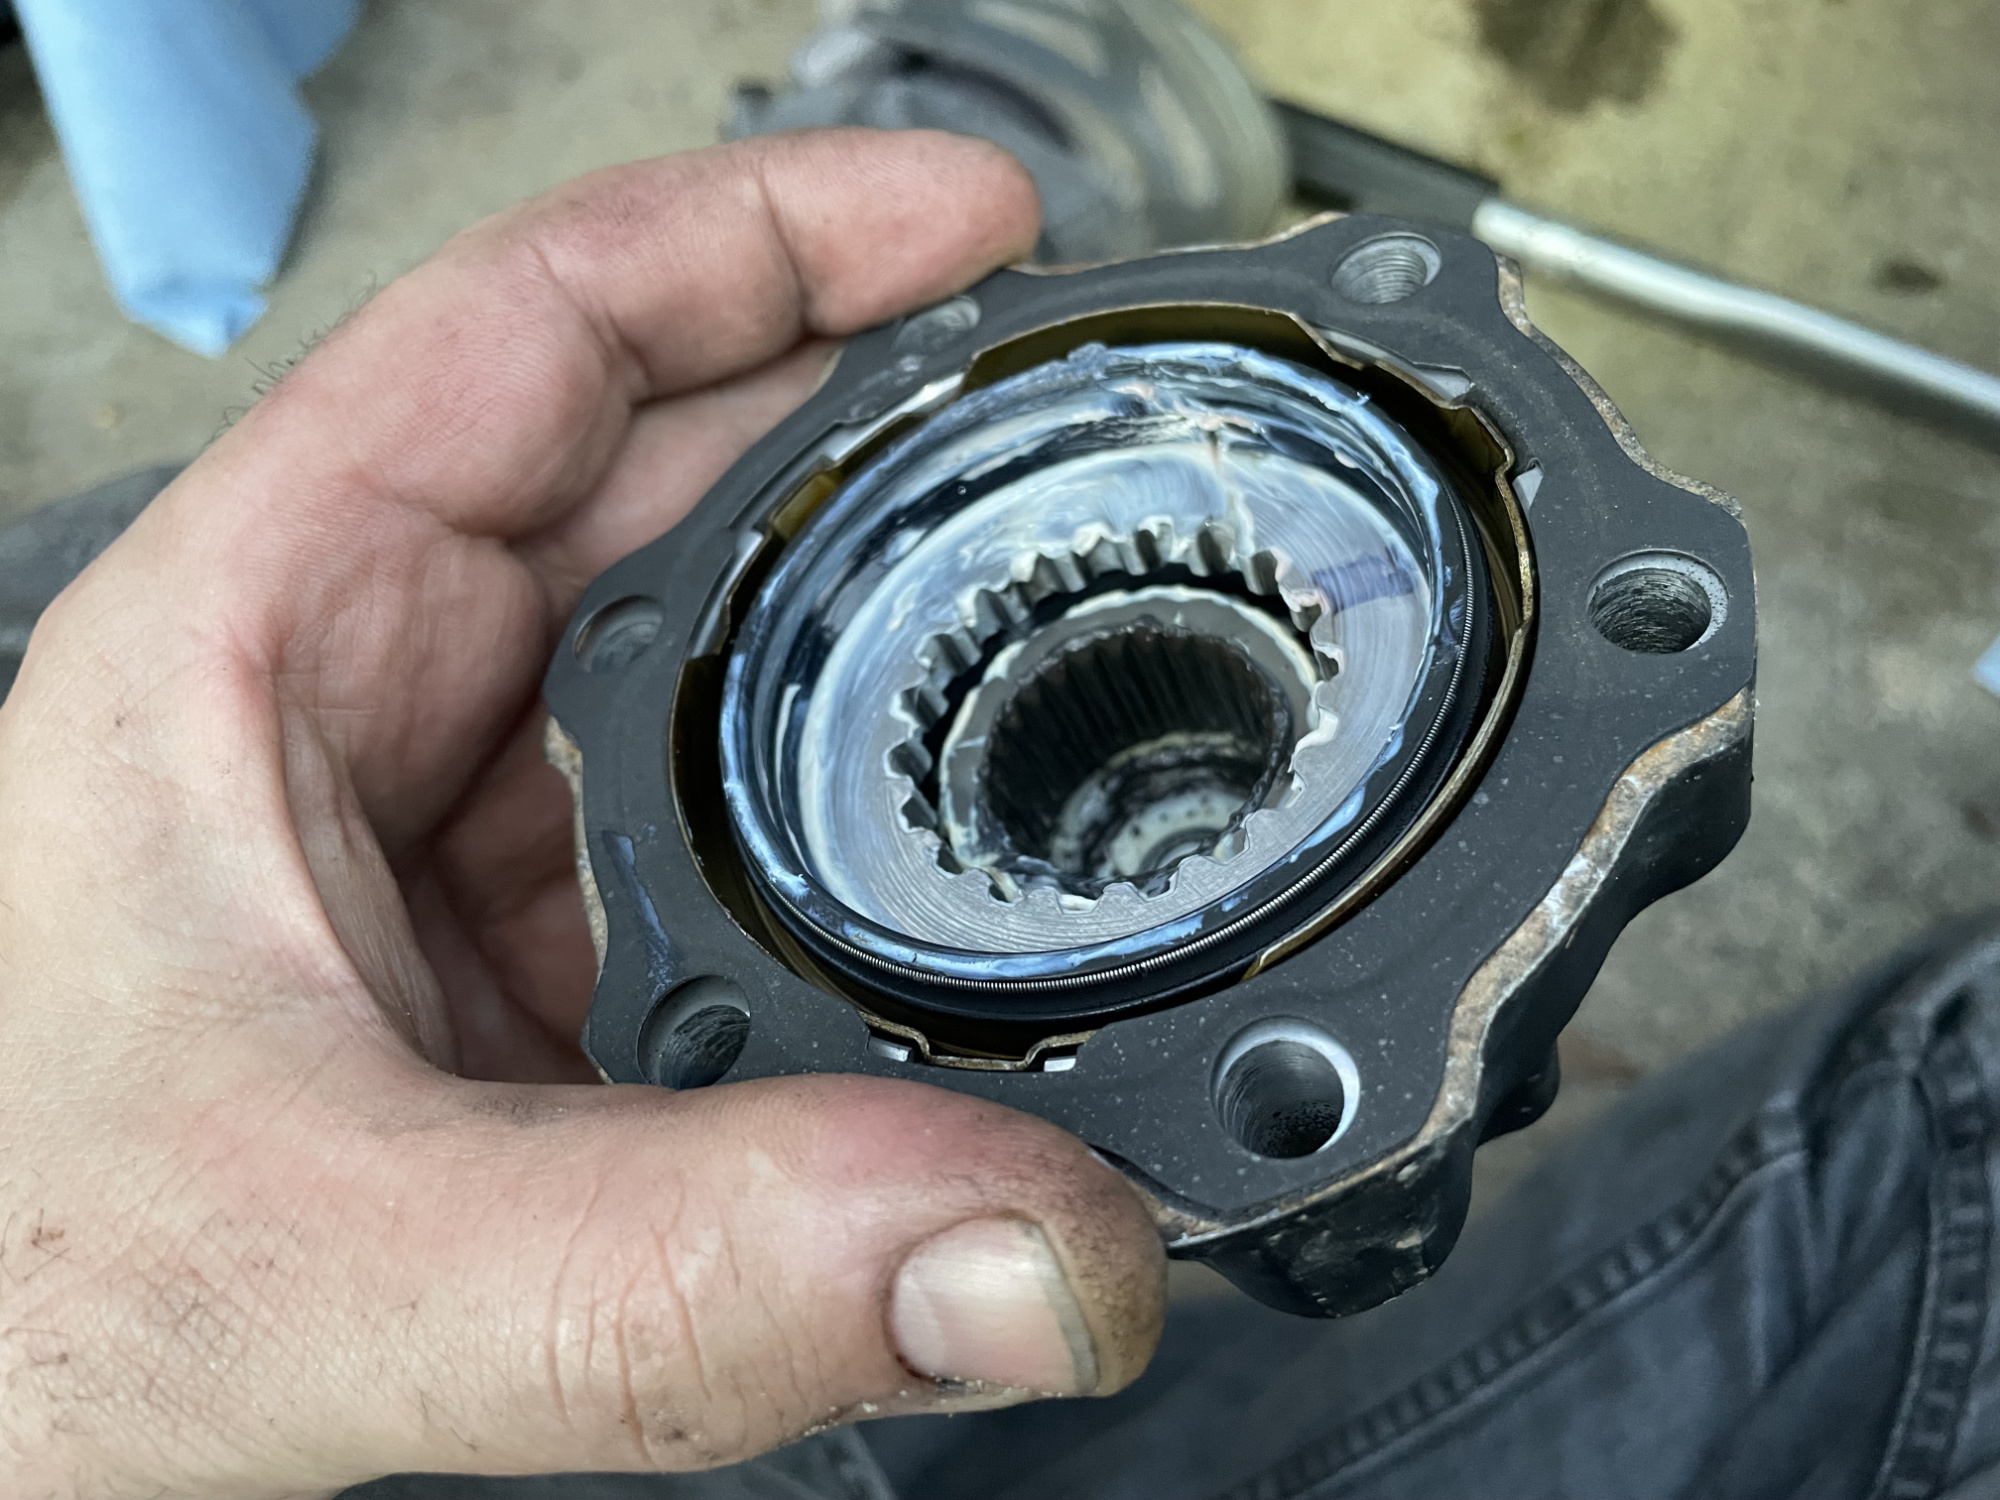
Before you refit the swivel hub, make sure you put the seal retainer and the rubber swivel hub seal over the axle housing too. That way they’re in position for the refit. Sucks to have to take the swivel hub off to put them back in place when you realise you’ve forgotten them.
You’ll notice in the next picture I gave the hub a lick of paint while it was off the car. Easiest way to make sure it’s obvious I rebuilt the hub!
Install the kingpins themselves next. Note that they need a bit of silicone sealant around the lower part of the larger diameter pin, and on their mating face.
I’m aware this looks like the Penrite grease I’m using, but it is absolutely a dark grey silicone RTV sealant! I spread it out pretty thin so it’ll fully seal but not be too hard to remove in the future.
Note when you put this in you need to line up the swivel and the kinpin bearing, and also get the bolt holes lined up too…
You shouldn’t use the bolts to really force the kingpin on, but a little pressure applied by them by slowly tightening them in a criss-cross pattern does help to keep stuff aligned and makes it easier.
Kingpin bolts are tightened to 25 Nm.
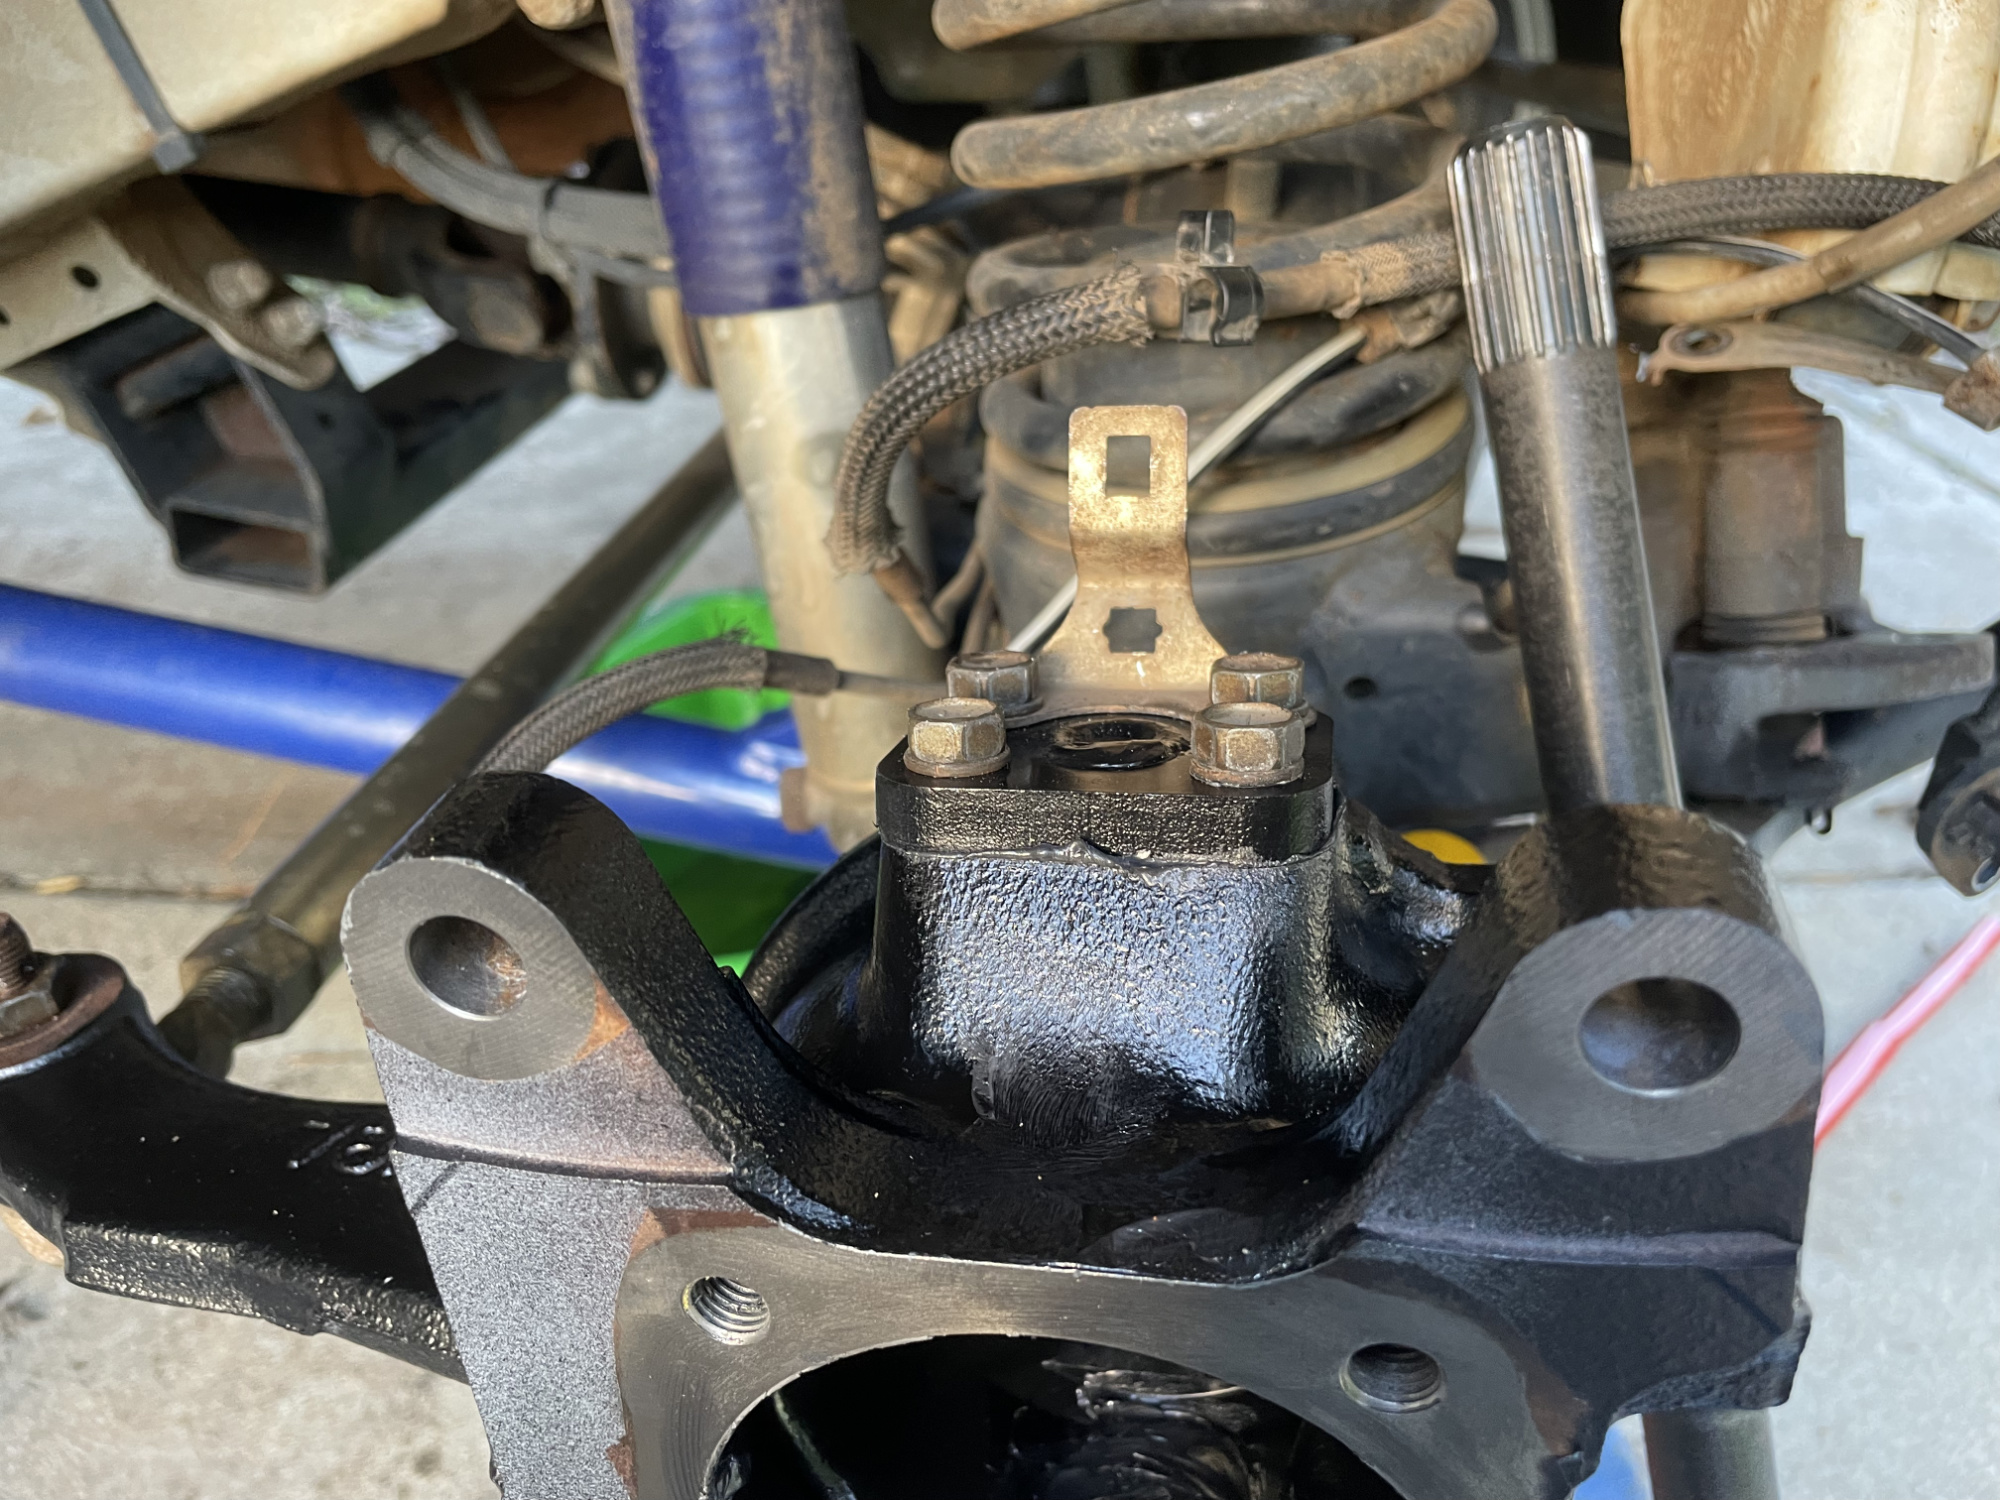
The upper kingpin needs to have the mounting bracket for the vacuum hoses attached on the back bolts.
Next up is a slightly controversial step: packing the CV joint with grease. Nominally the factory instructions don’t say to do this, just to put 100 g of CV joint grease into the swivel hub before refitting… but the CVs come from the parts desk with grease in them, and it doesn’t say to not put grease in the hub in those cases. I figure more is better, to an extent, so I pack the CV joint with a reasonable amount of grease.
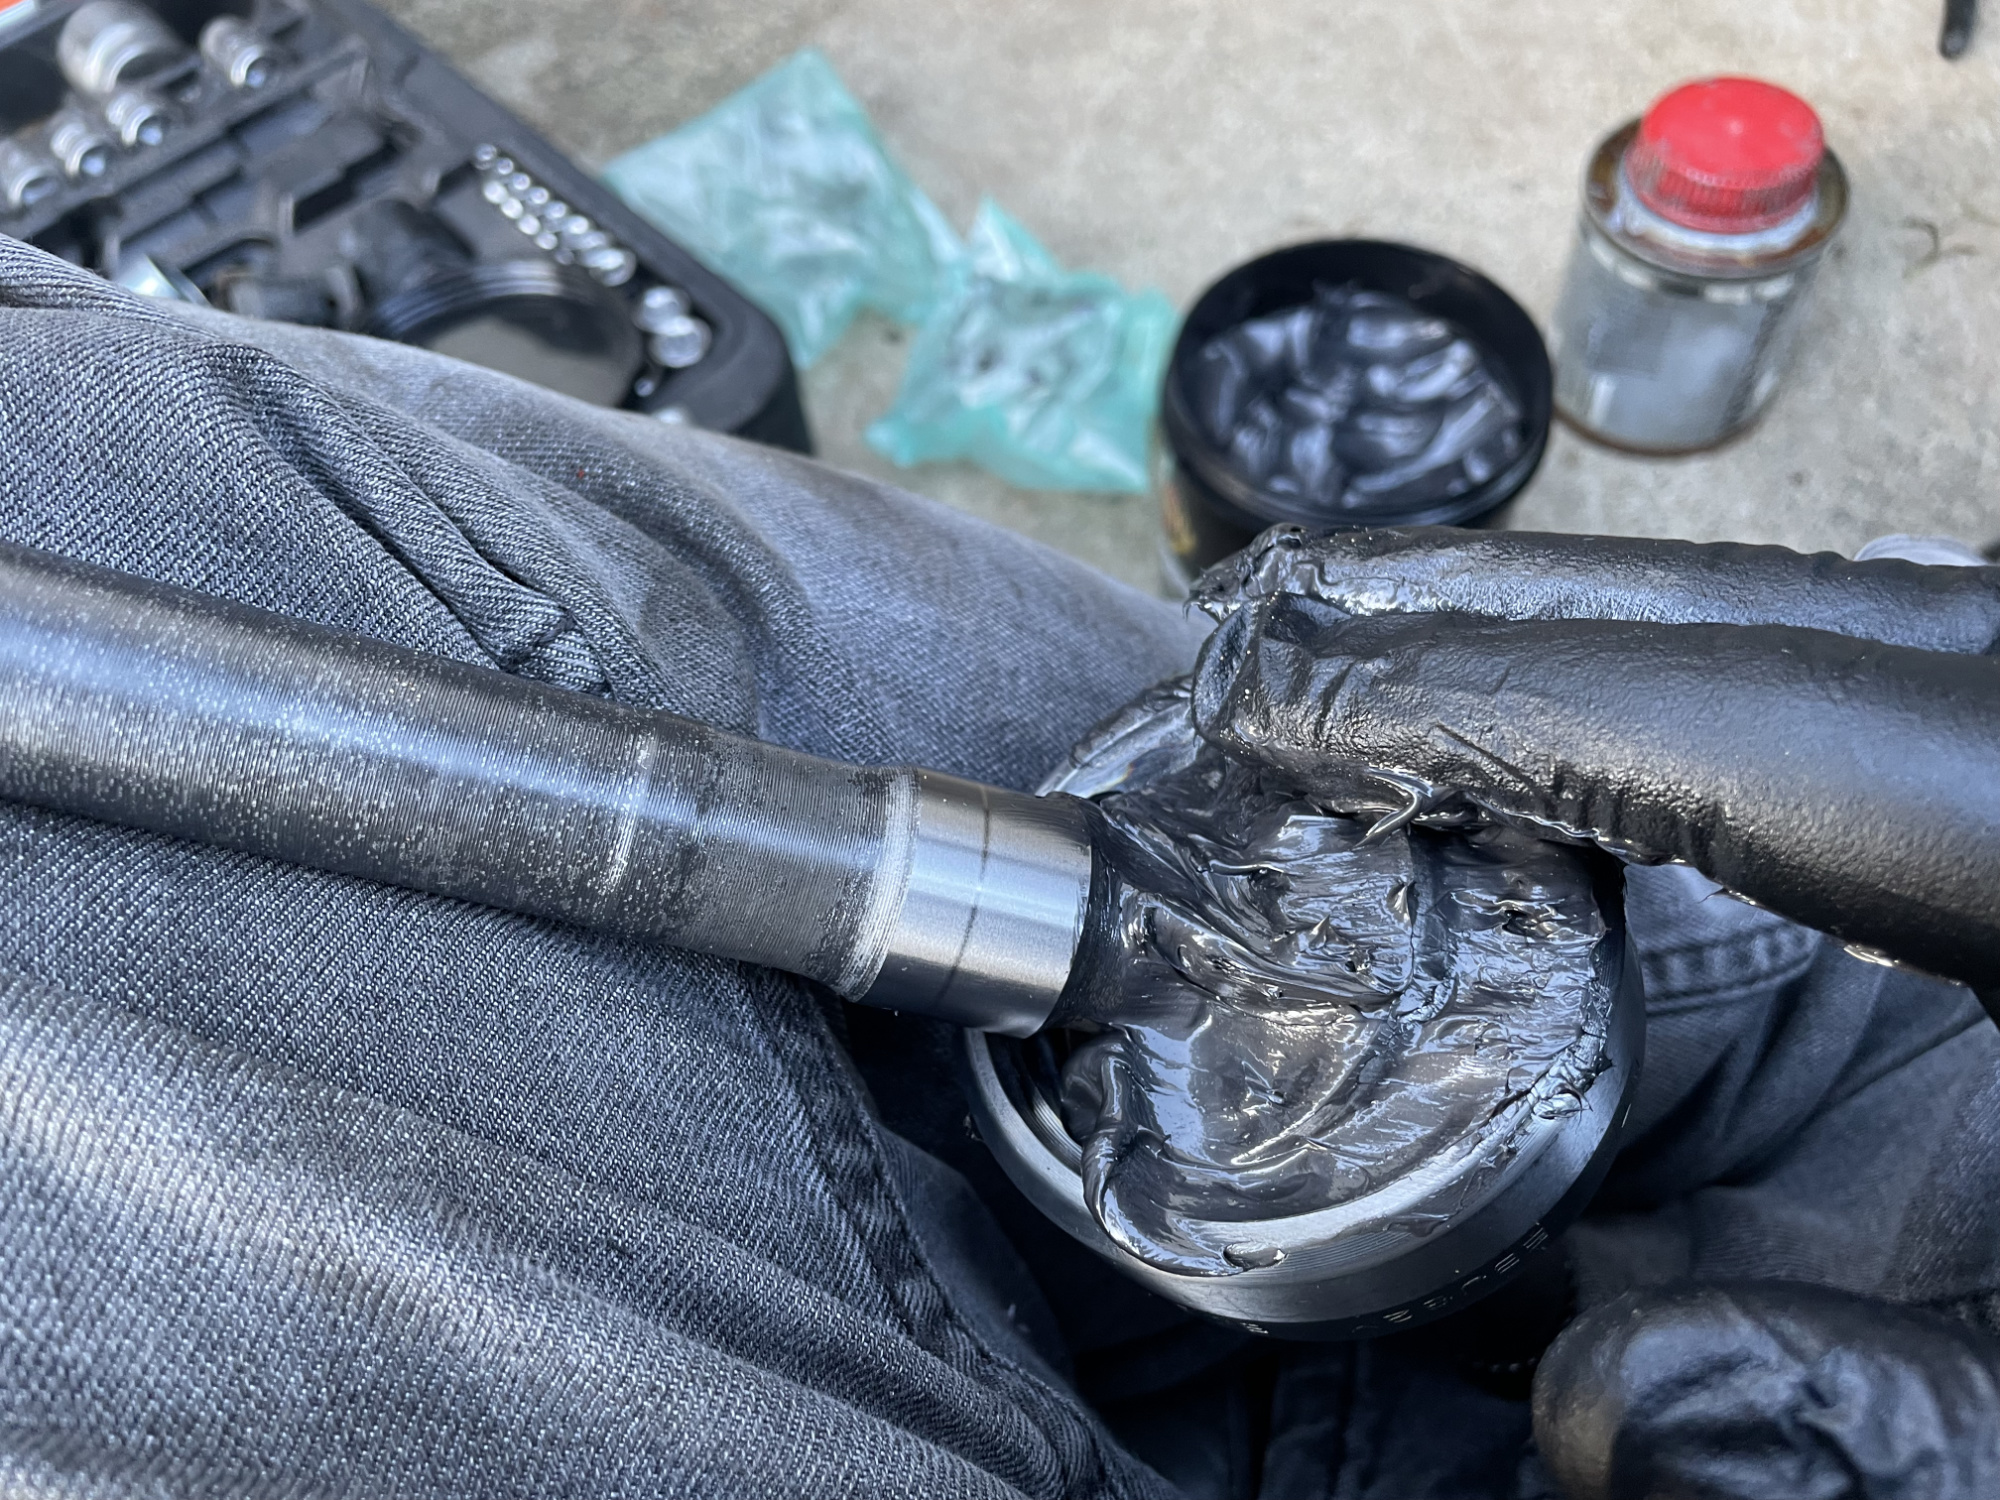
As stated, the factory instructions are for 100 g of grease per axle end, placed mostly in the bottom of the axle housing where the CV will go.
Guess how much this grease is?
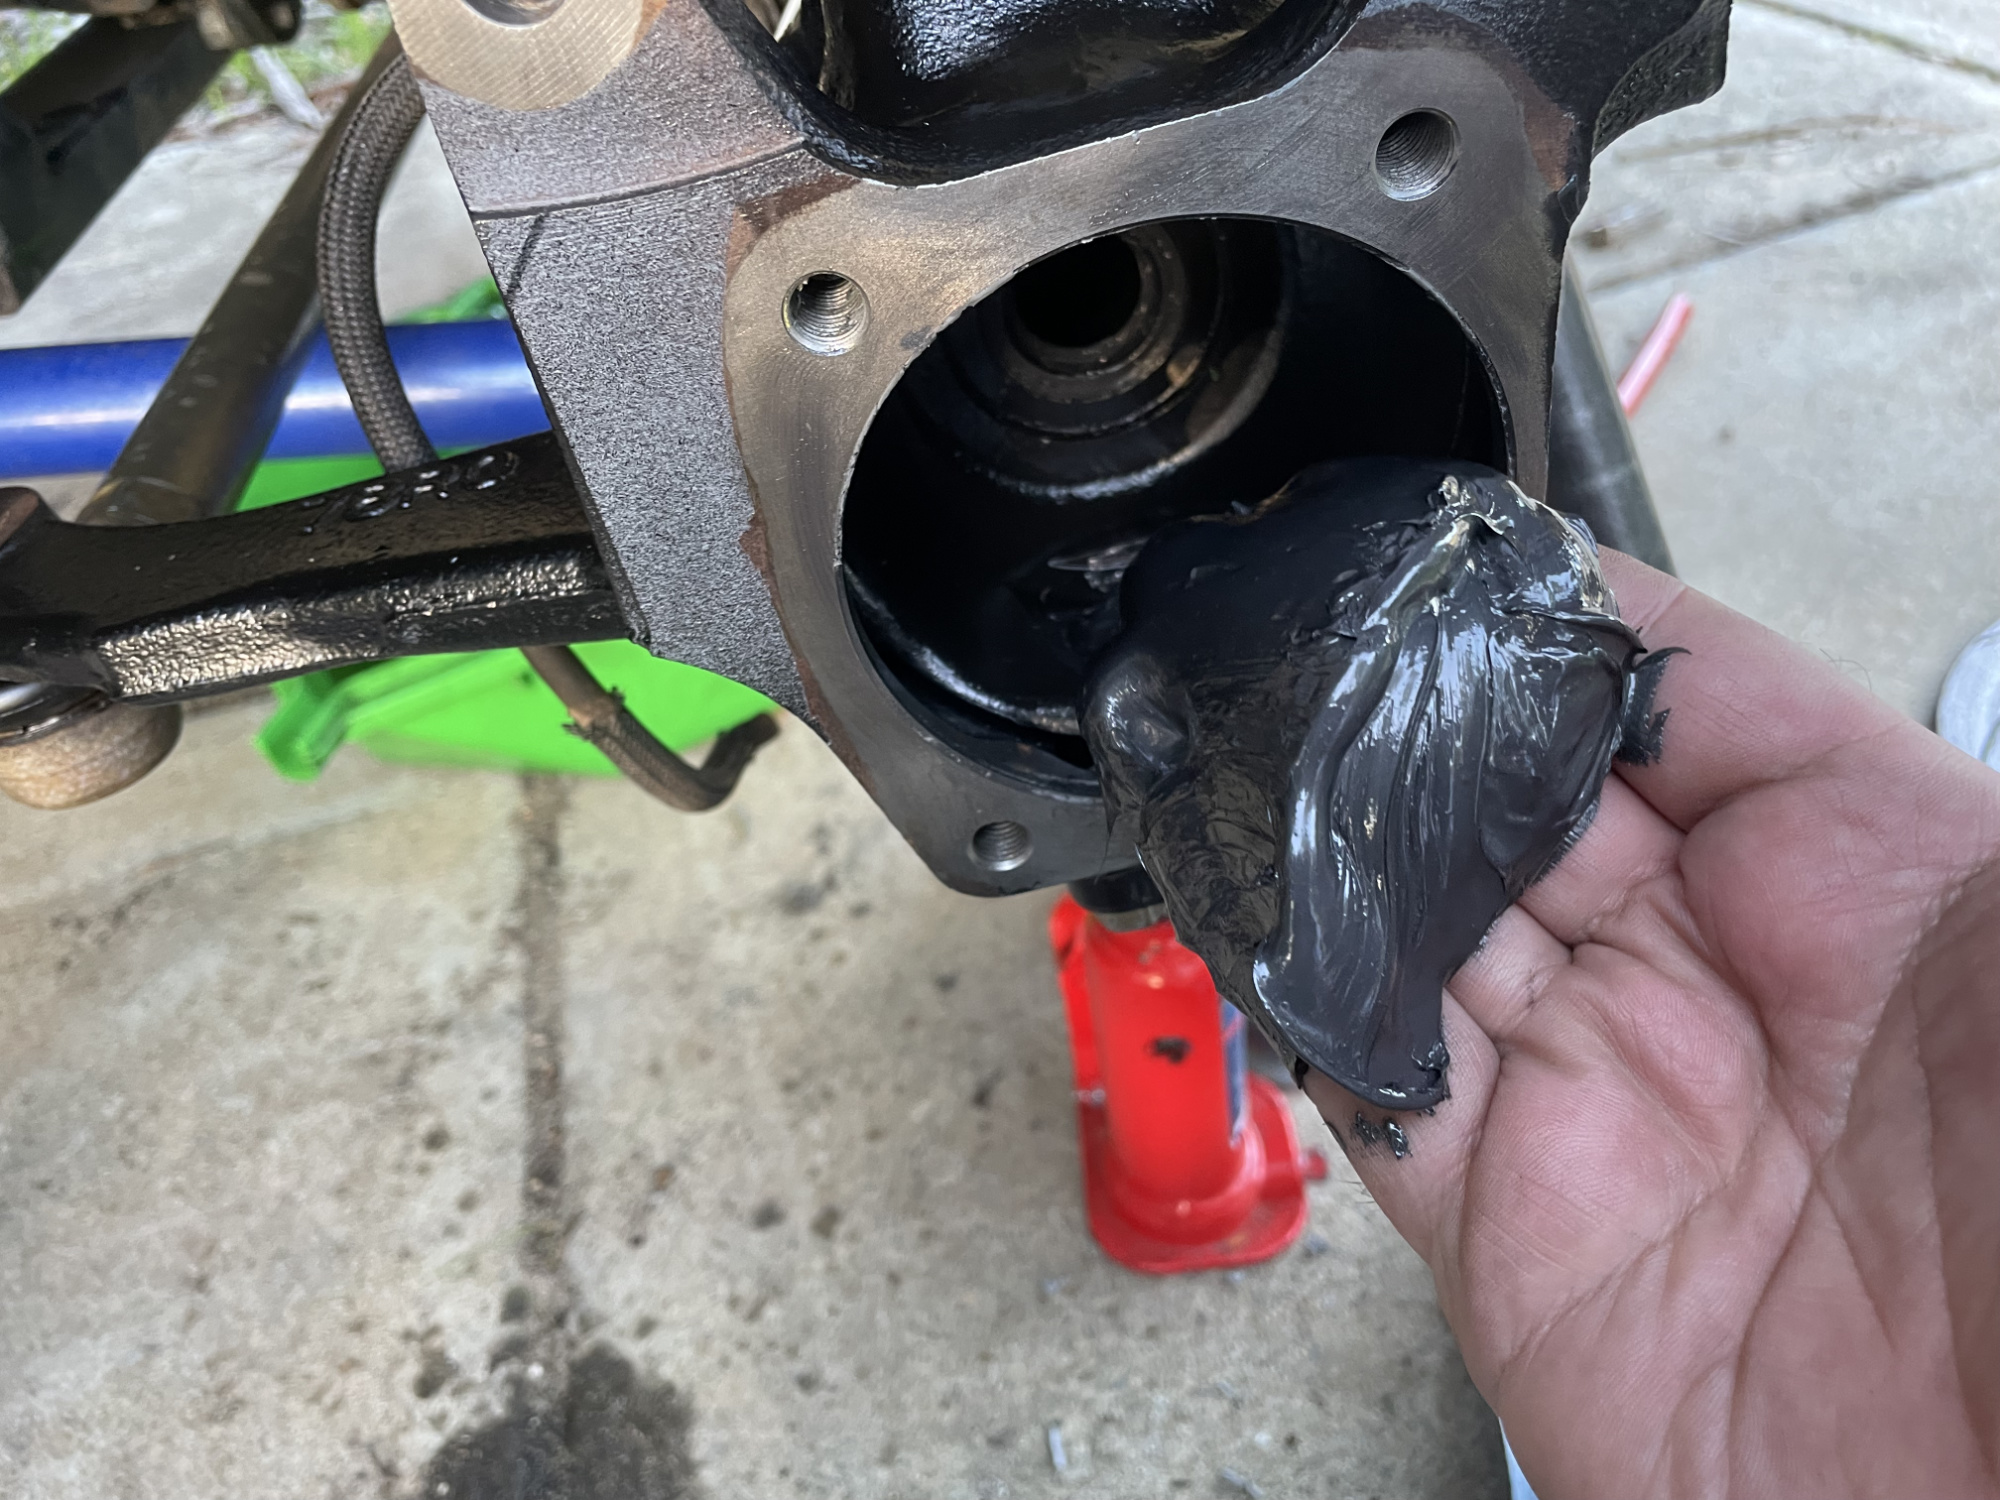
It’s 50 g of grease. And I have kind big hands. Anyway, 100 g of grease packed into the axle housing looks like this.

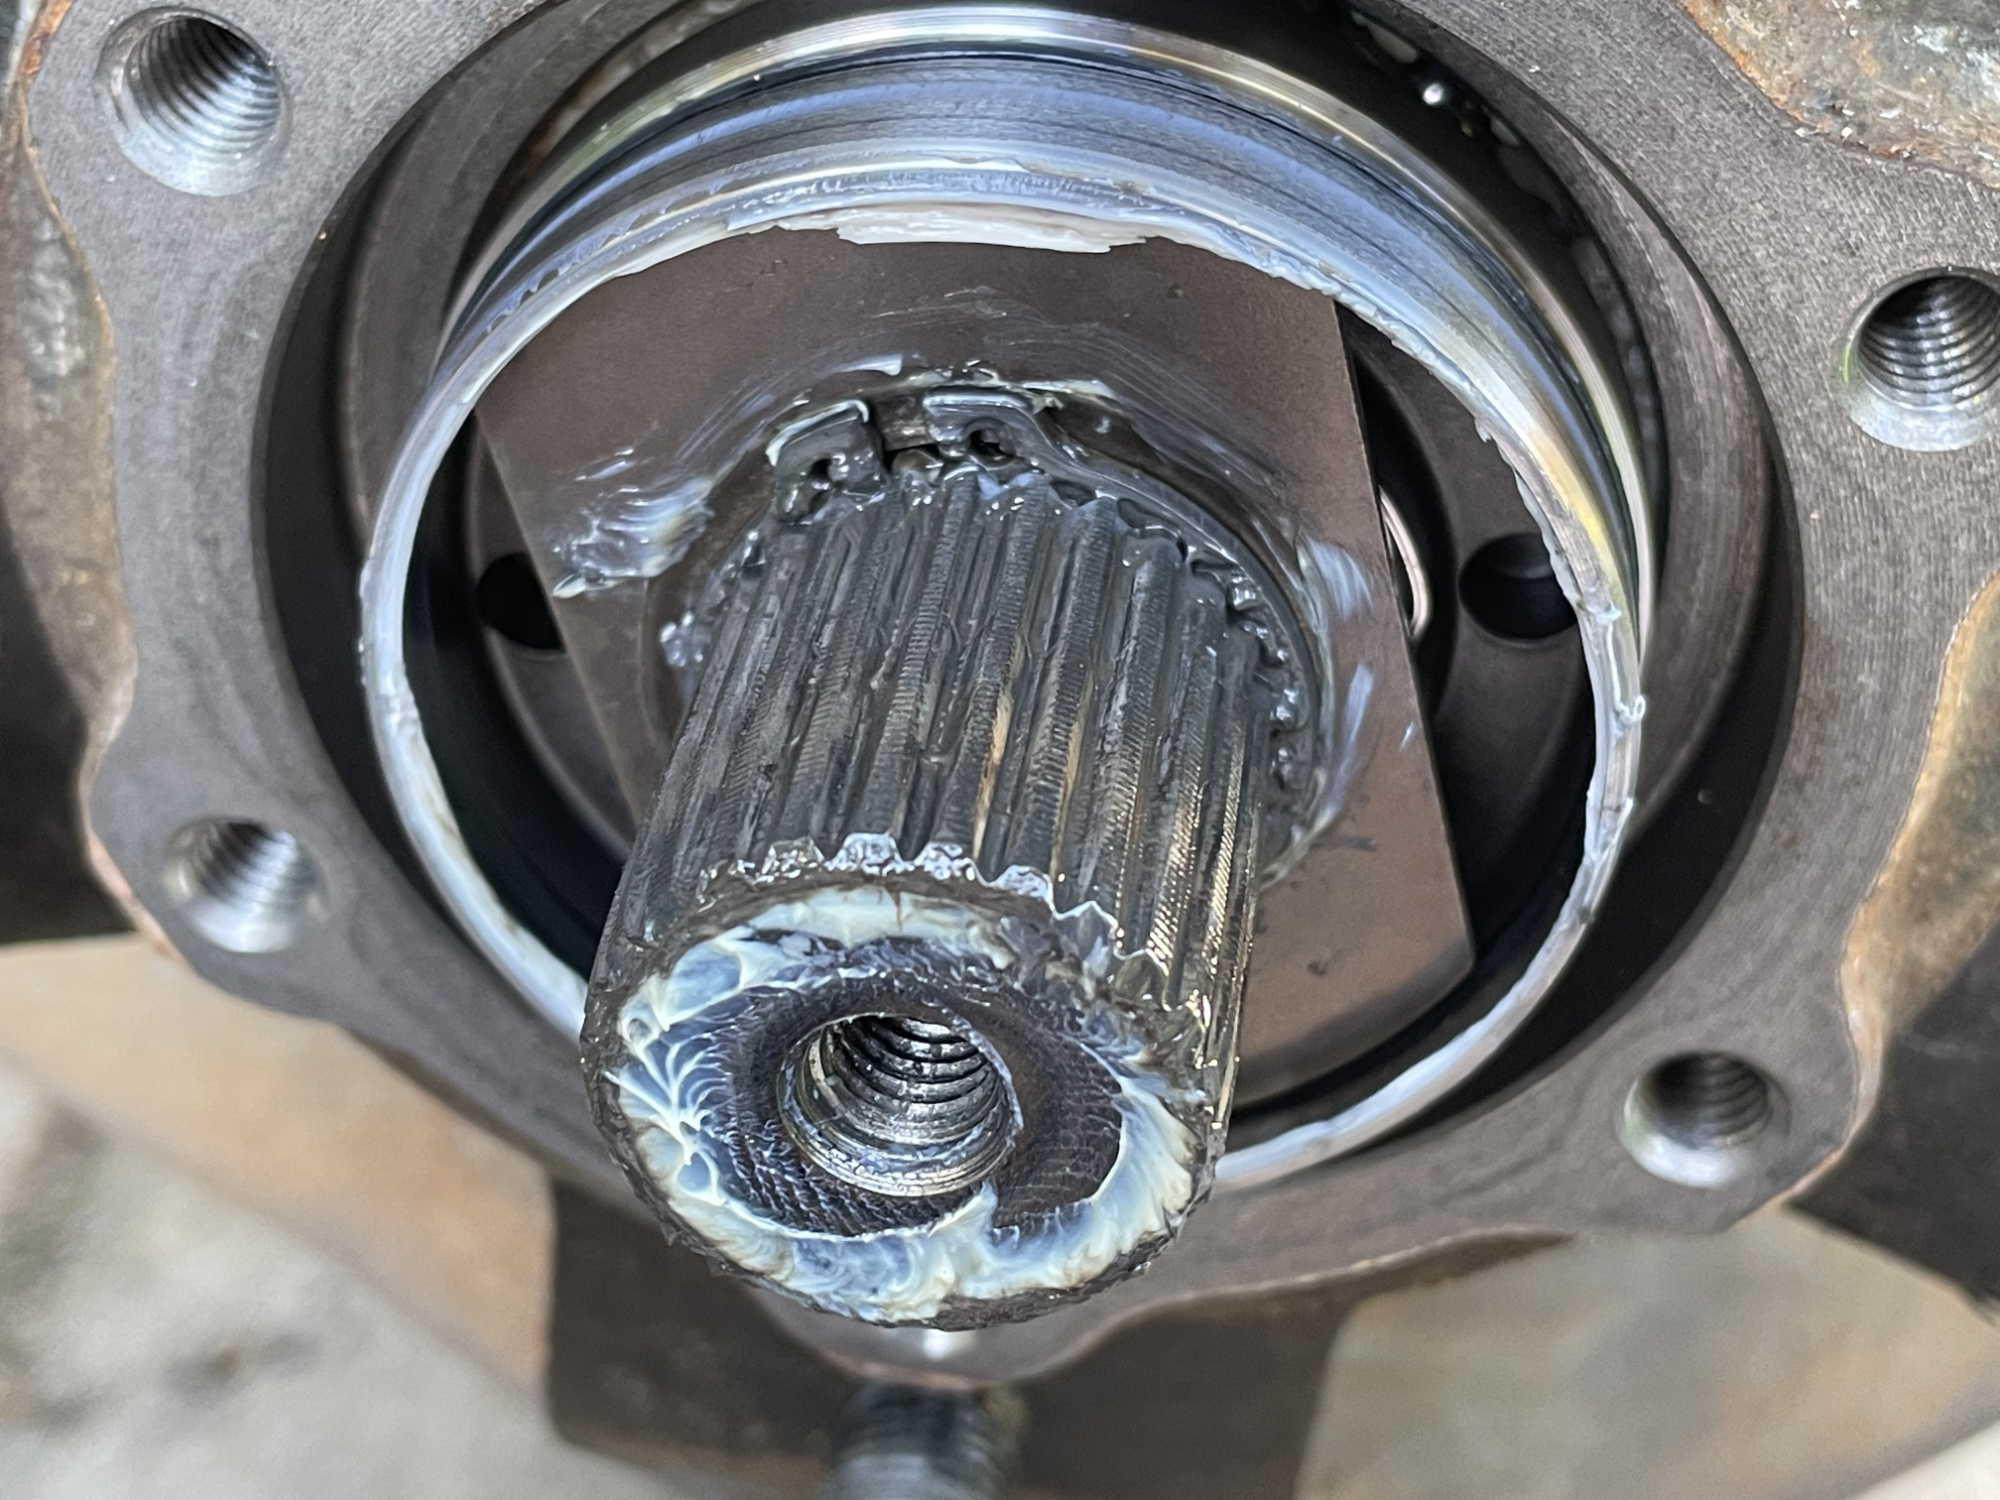
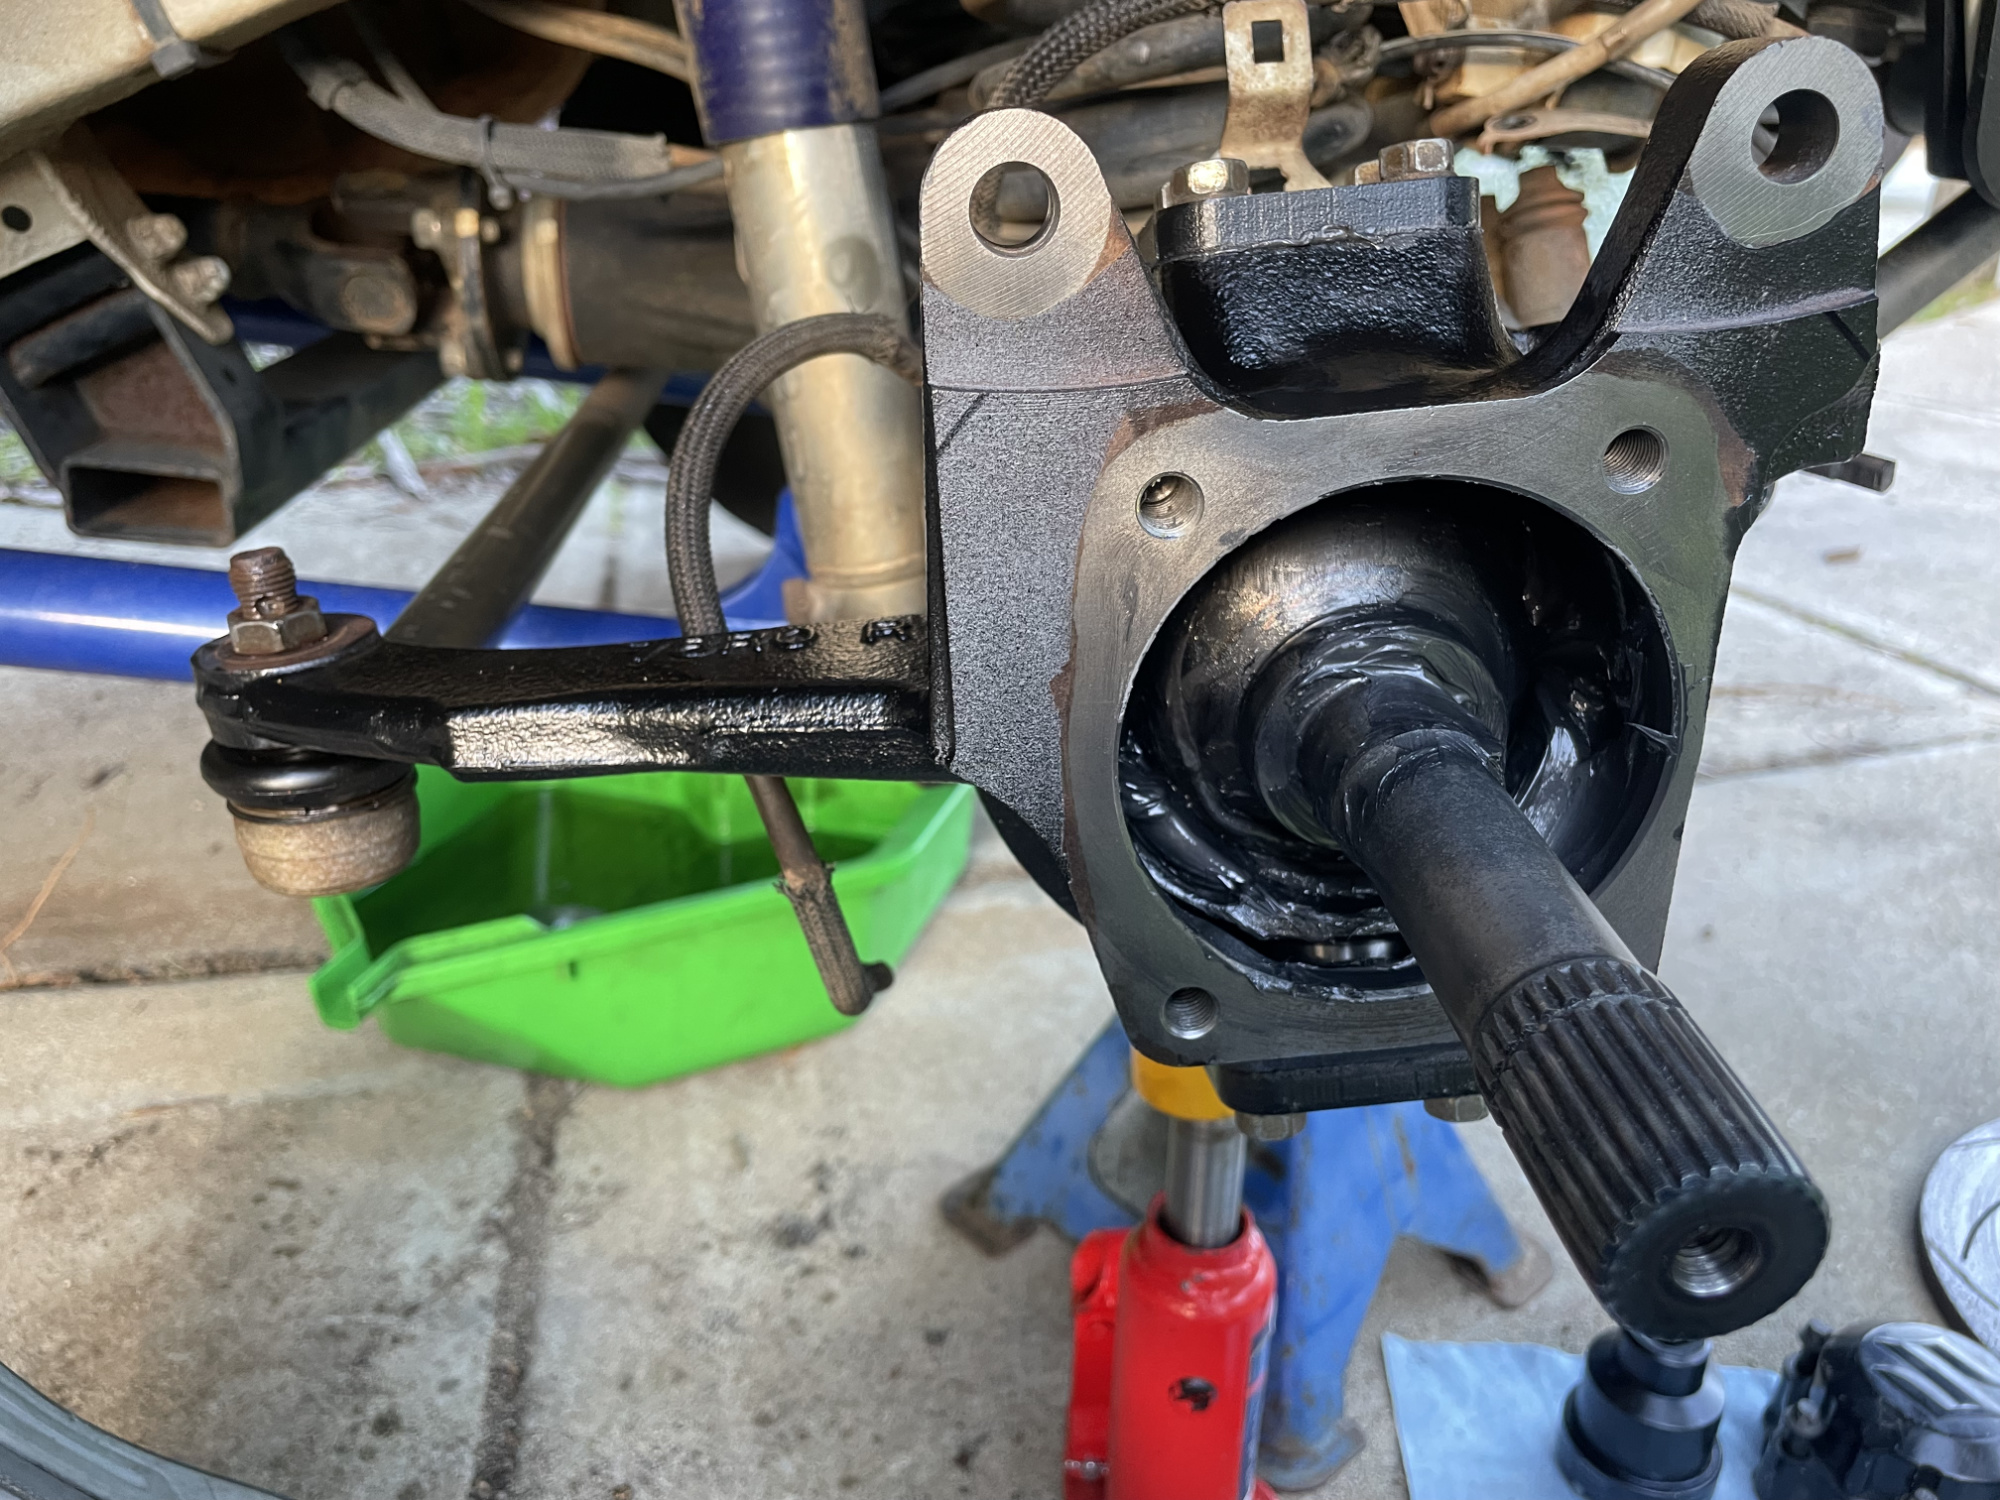
Now you can insert the axle. Take your time to make sure you don’t nick the axle seal as you insert the axle, but also so you make sure it’s nicely seated into the differential. You may need to rotate the axle a bit to make the splines line up, but when they are it’ll slide in quite nicely.
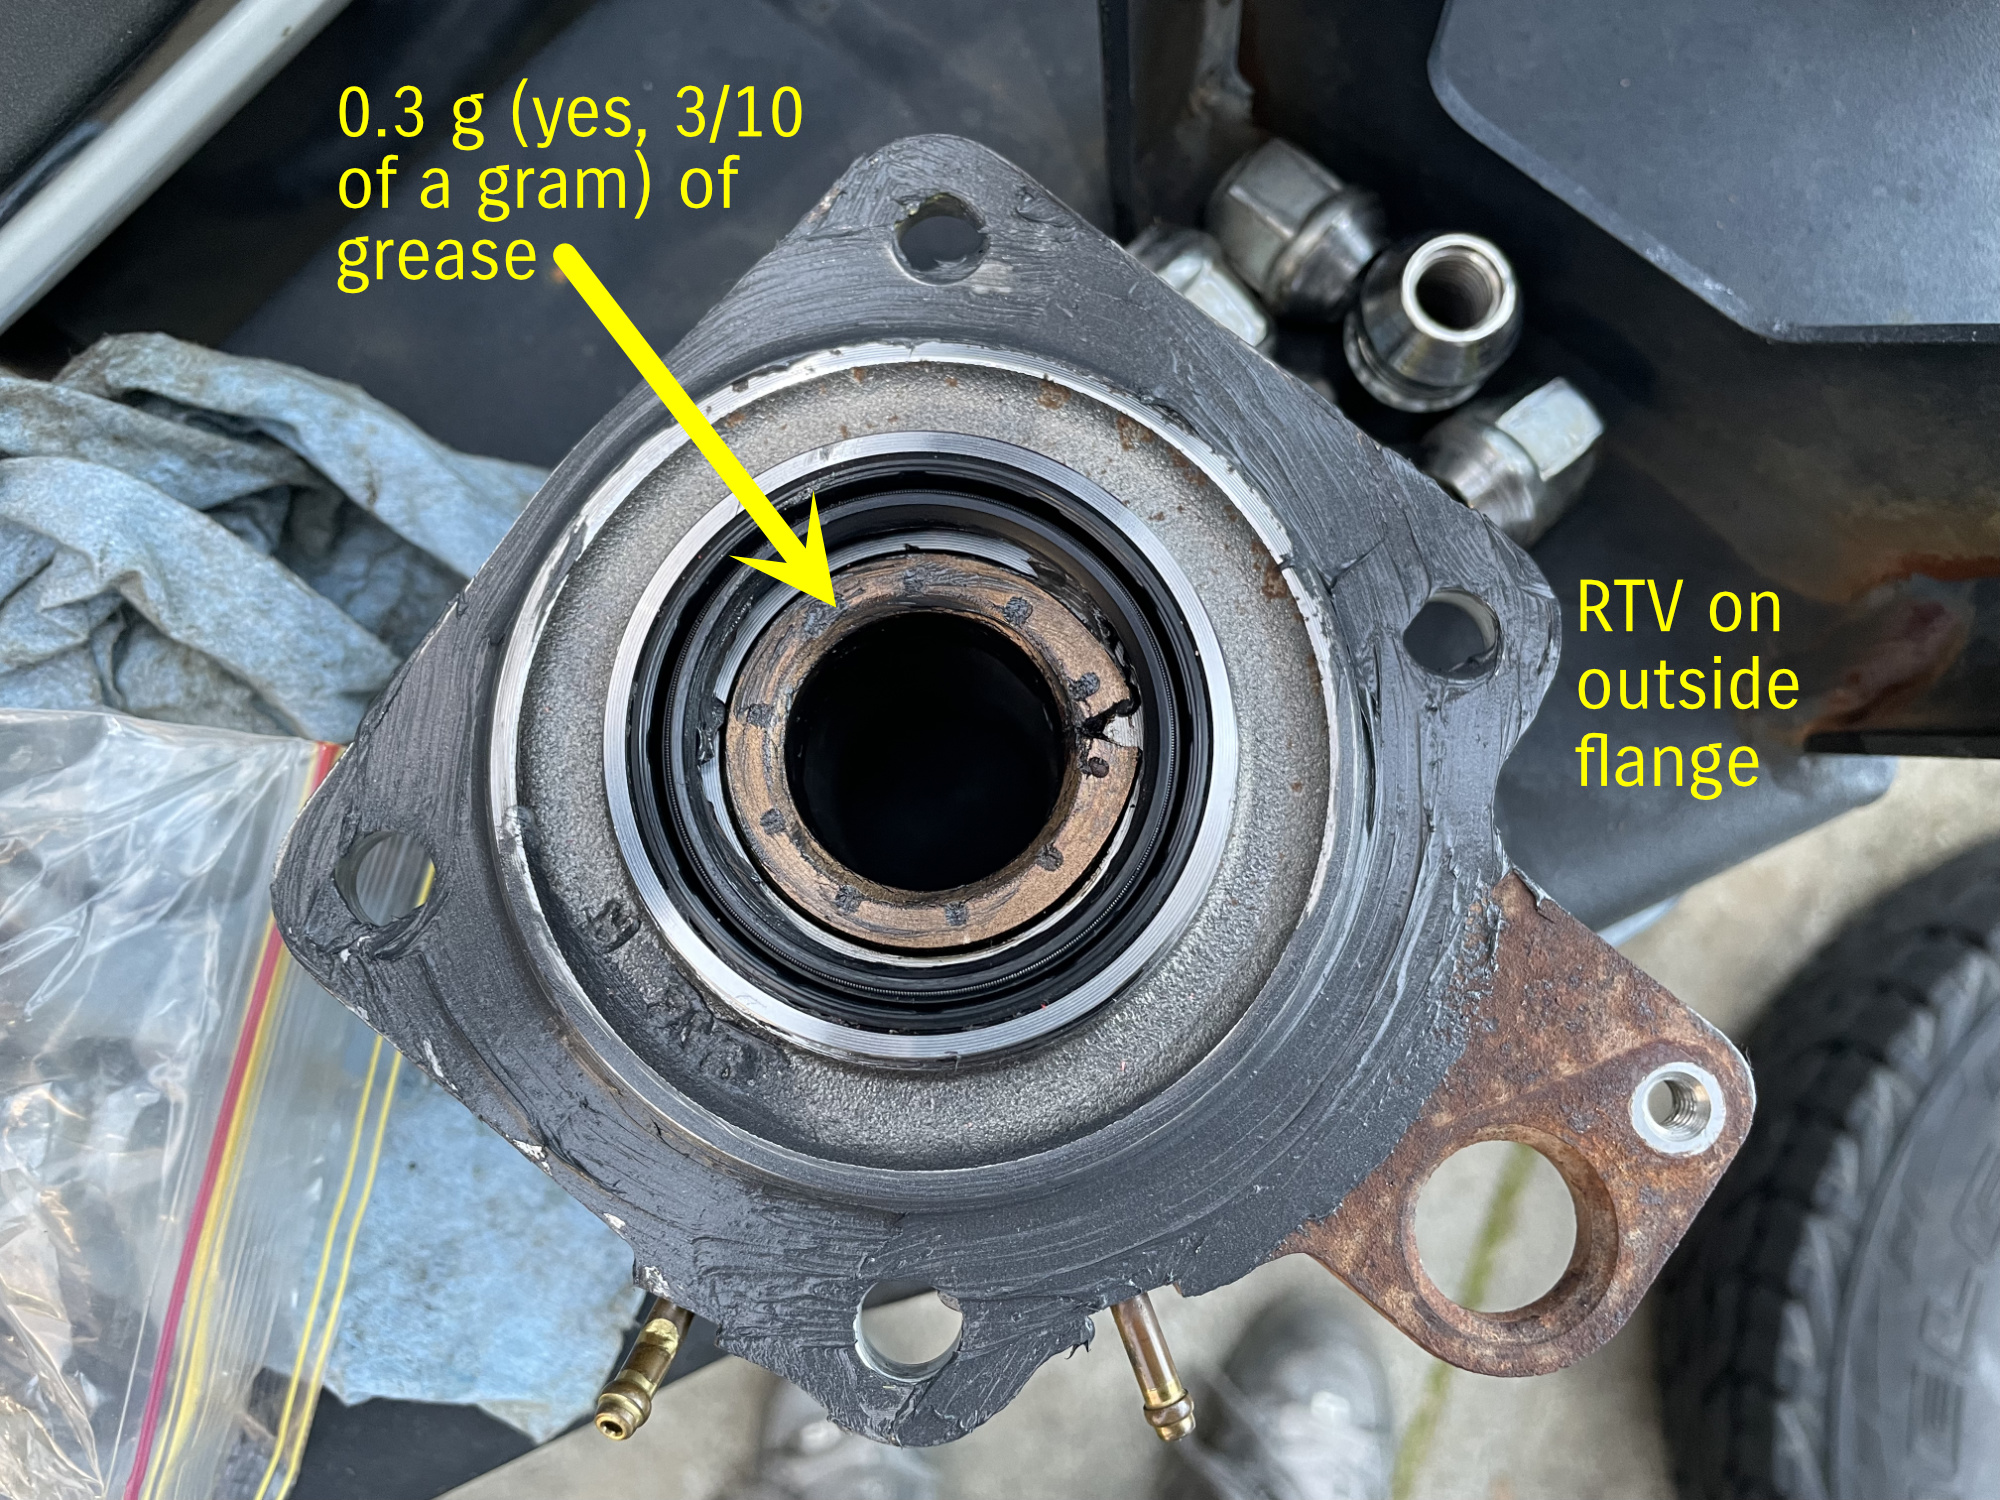
Another area of particular grease amount is the spindle. You’re meant to be 0.3 g (yes, that little) grease onto the bronze bushing in the spindle. The reason for being careful with grease here is it can interfere with the vacuum hubs if you pack in too much grease.
RTV sealant goes around the outside of the spindle flange. I also put a tiny smear of grease around the spindle outer that the seal sits in to avoid corrosion into the swivel hub.
Spindle then goes onto the swivel hub, and attach the relevant vacuum hoses now too.
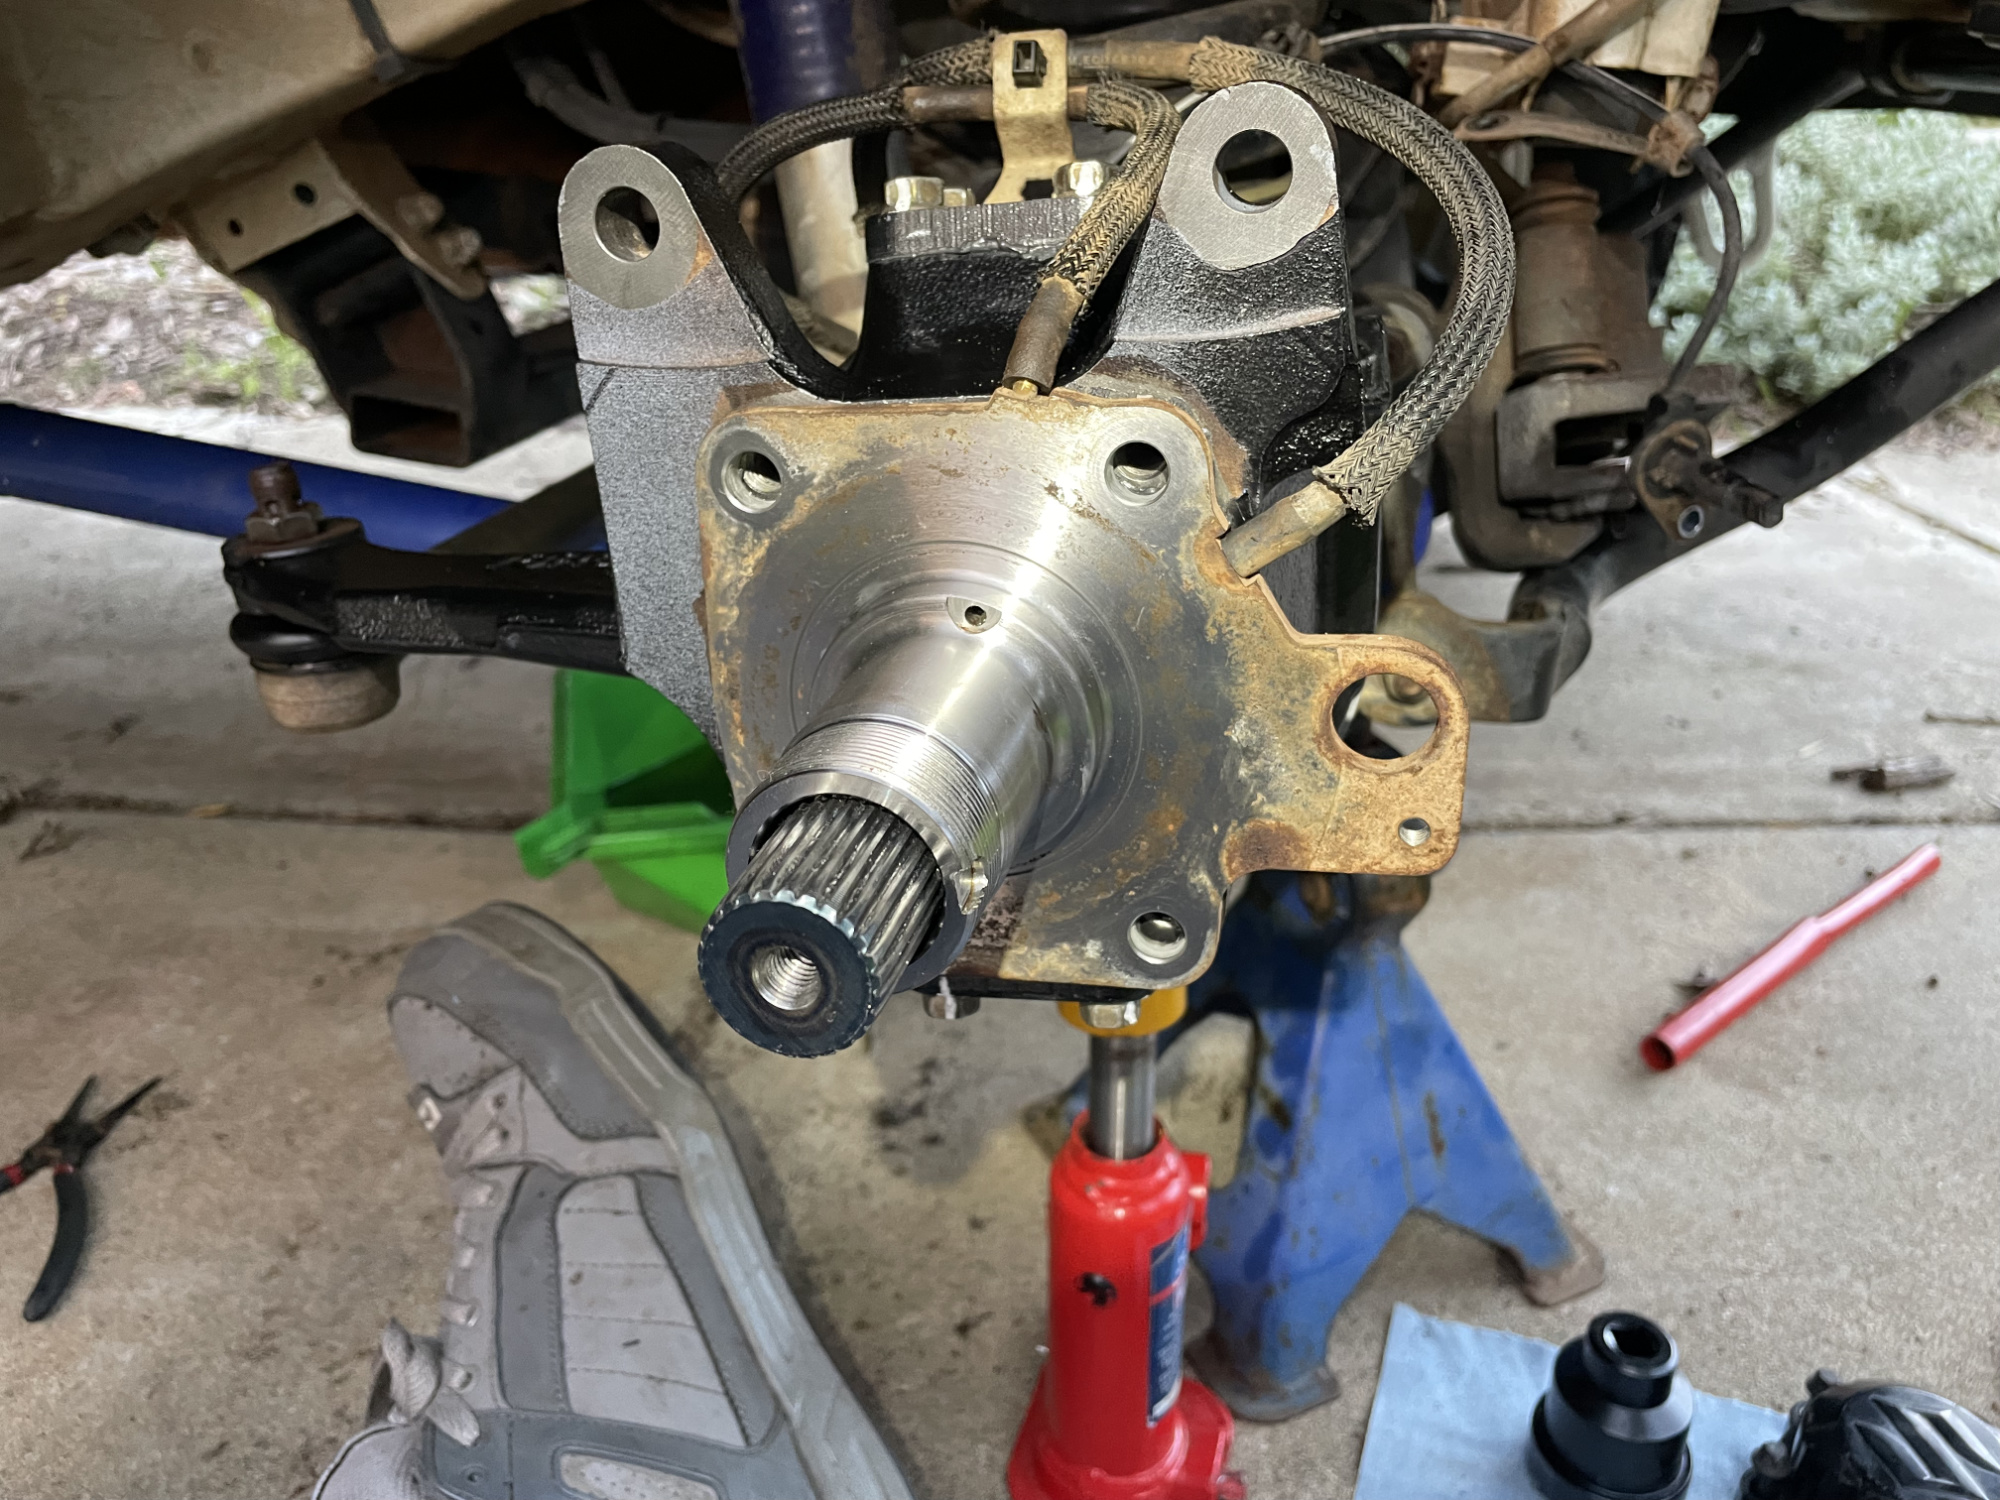
I didn’t get a picture of this step, but install the brake backing plate at this point to bolt both the spindle and the backing plate to the swivel hub. Brake backing plate/spindle bolts to the swivel hub are tightened to 50 Nm. Also put the wiring for the speed sensor back in place and do up its two little bolts to hold it in. Torque setting is not much: 8.8 Nm, but not the kind of thing where you bust out the torque wrench though.
Another thing I didn’t get clear pictures of is the swivel hub seal at the back of the hub.
Lubricate up the swivel hub seal with grease; press in the retainer so the split in the retainer WILL NOT line up with the split in the two halves of the swivel hub wipers; then press the swivel hub rubber seal into the swivel hub. Finally, bolt up the two halves of the swivel hub wipers using the 10 mm headed bolts. These bolts are done up to just 10 Nm so not tight at all.
Put on the wheel bearing washer, then the wheel bearing nut is the next thing to do up: do it up to 216 Nm, and stake the nut over at the cutout in the spindle. You are meant to use a new wheel bearing nut every time you redo it, but sometimes you can get away with reuse; however, note that often the staked part will line up at the correct torque and this makes it much more likely the staked part will break and the nut will work loose.
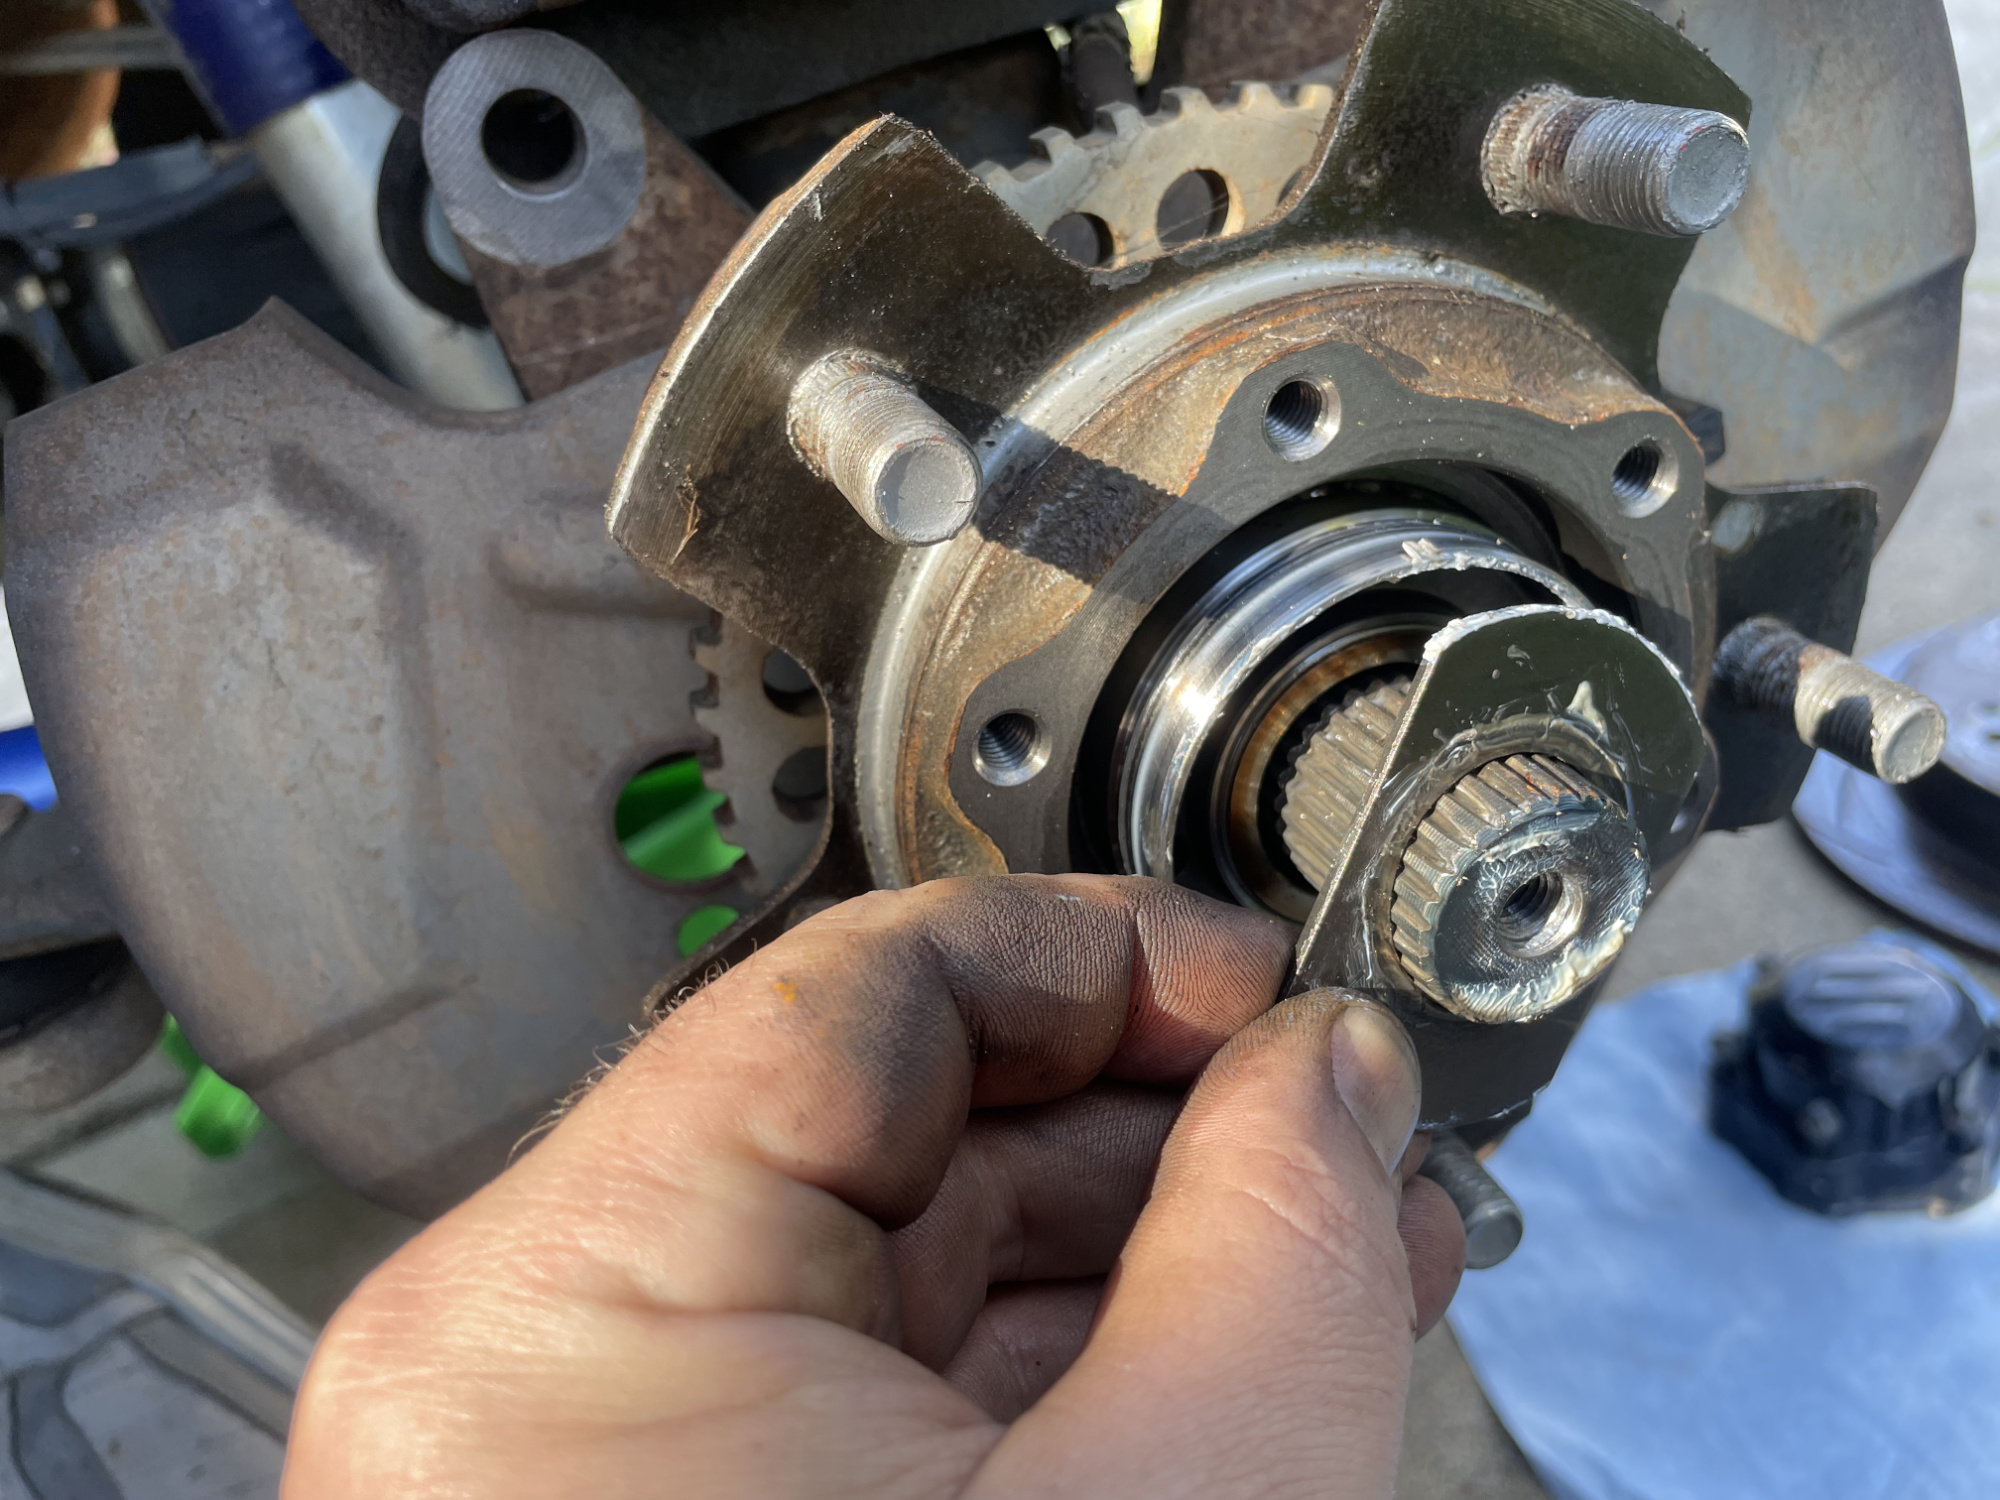
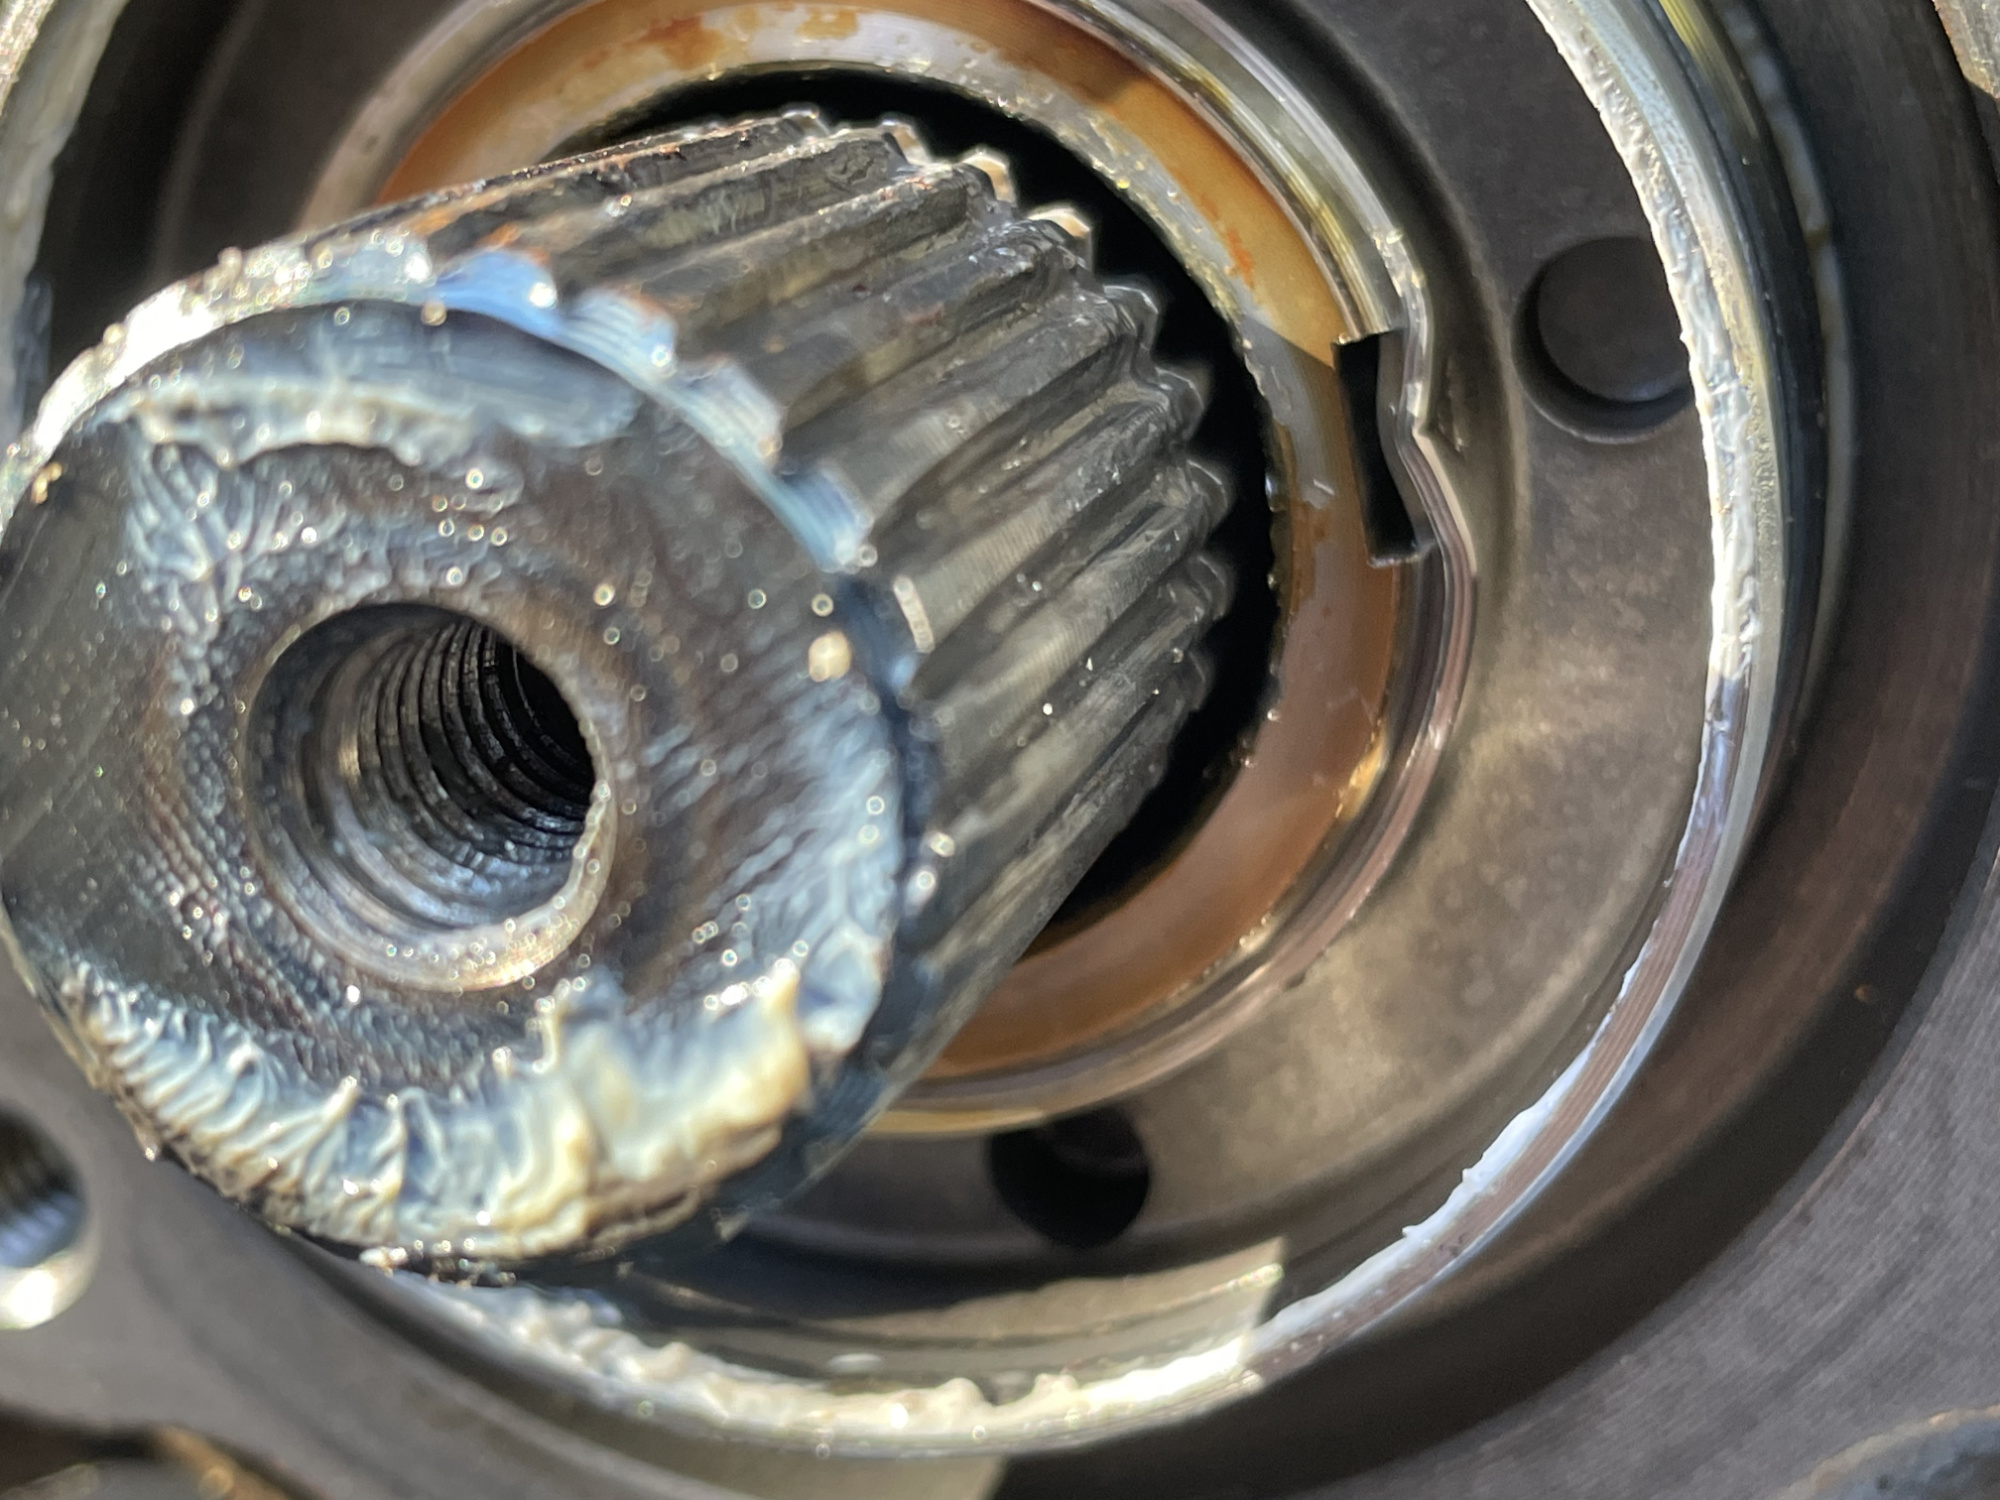
You have to work the axle out a bit so you can see the clip for the circlip. Not hard but just something to watch out for.
Install the thrust washer onto the axle, again making sure there’s clear access to the slot for the circlip.
Circlip goes on now. Not pictured as I hate putting on circlips.
You’re not meant to reuse the vacuum hub gasket. You probably can if you’re prepared to smear some silicone on it, but I’d prefer to not risk leaks with something like this. Sucks if you want 4wd offroad and you can’t get it because you didn’t put something back together properly, after all.
New gasket fits on, noting it has a little tab part that needs to rest in behind part of the collar for the hub.
Because the splines can move a bit, you need to do a bit of wriggling to get everything to line back up to seat it down properly. Take your time and don’t bolt it up until the hub is lined up properly.
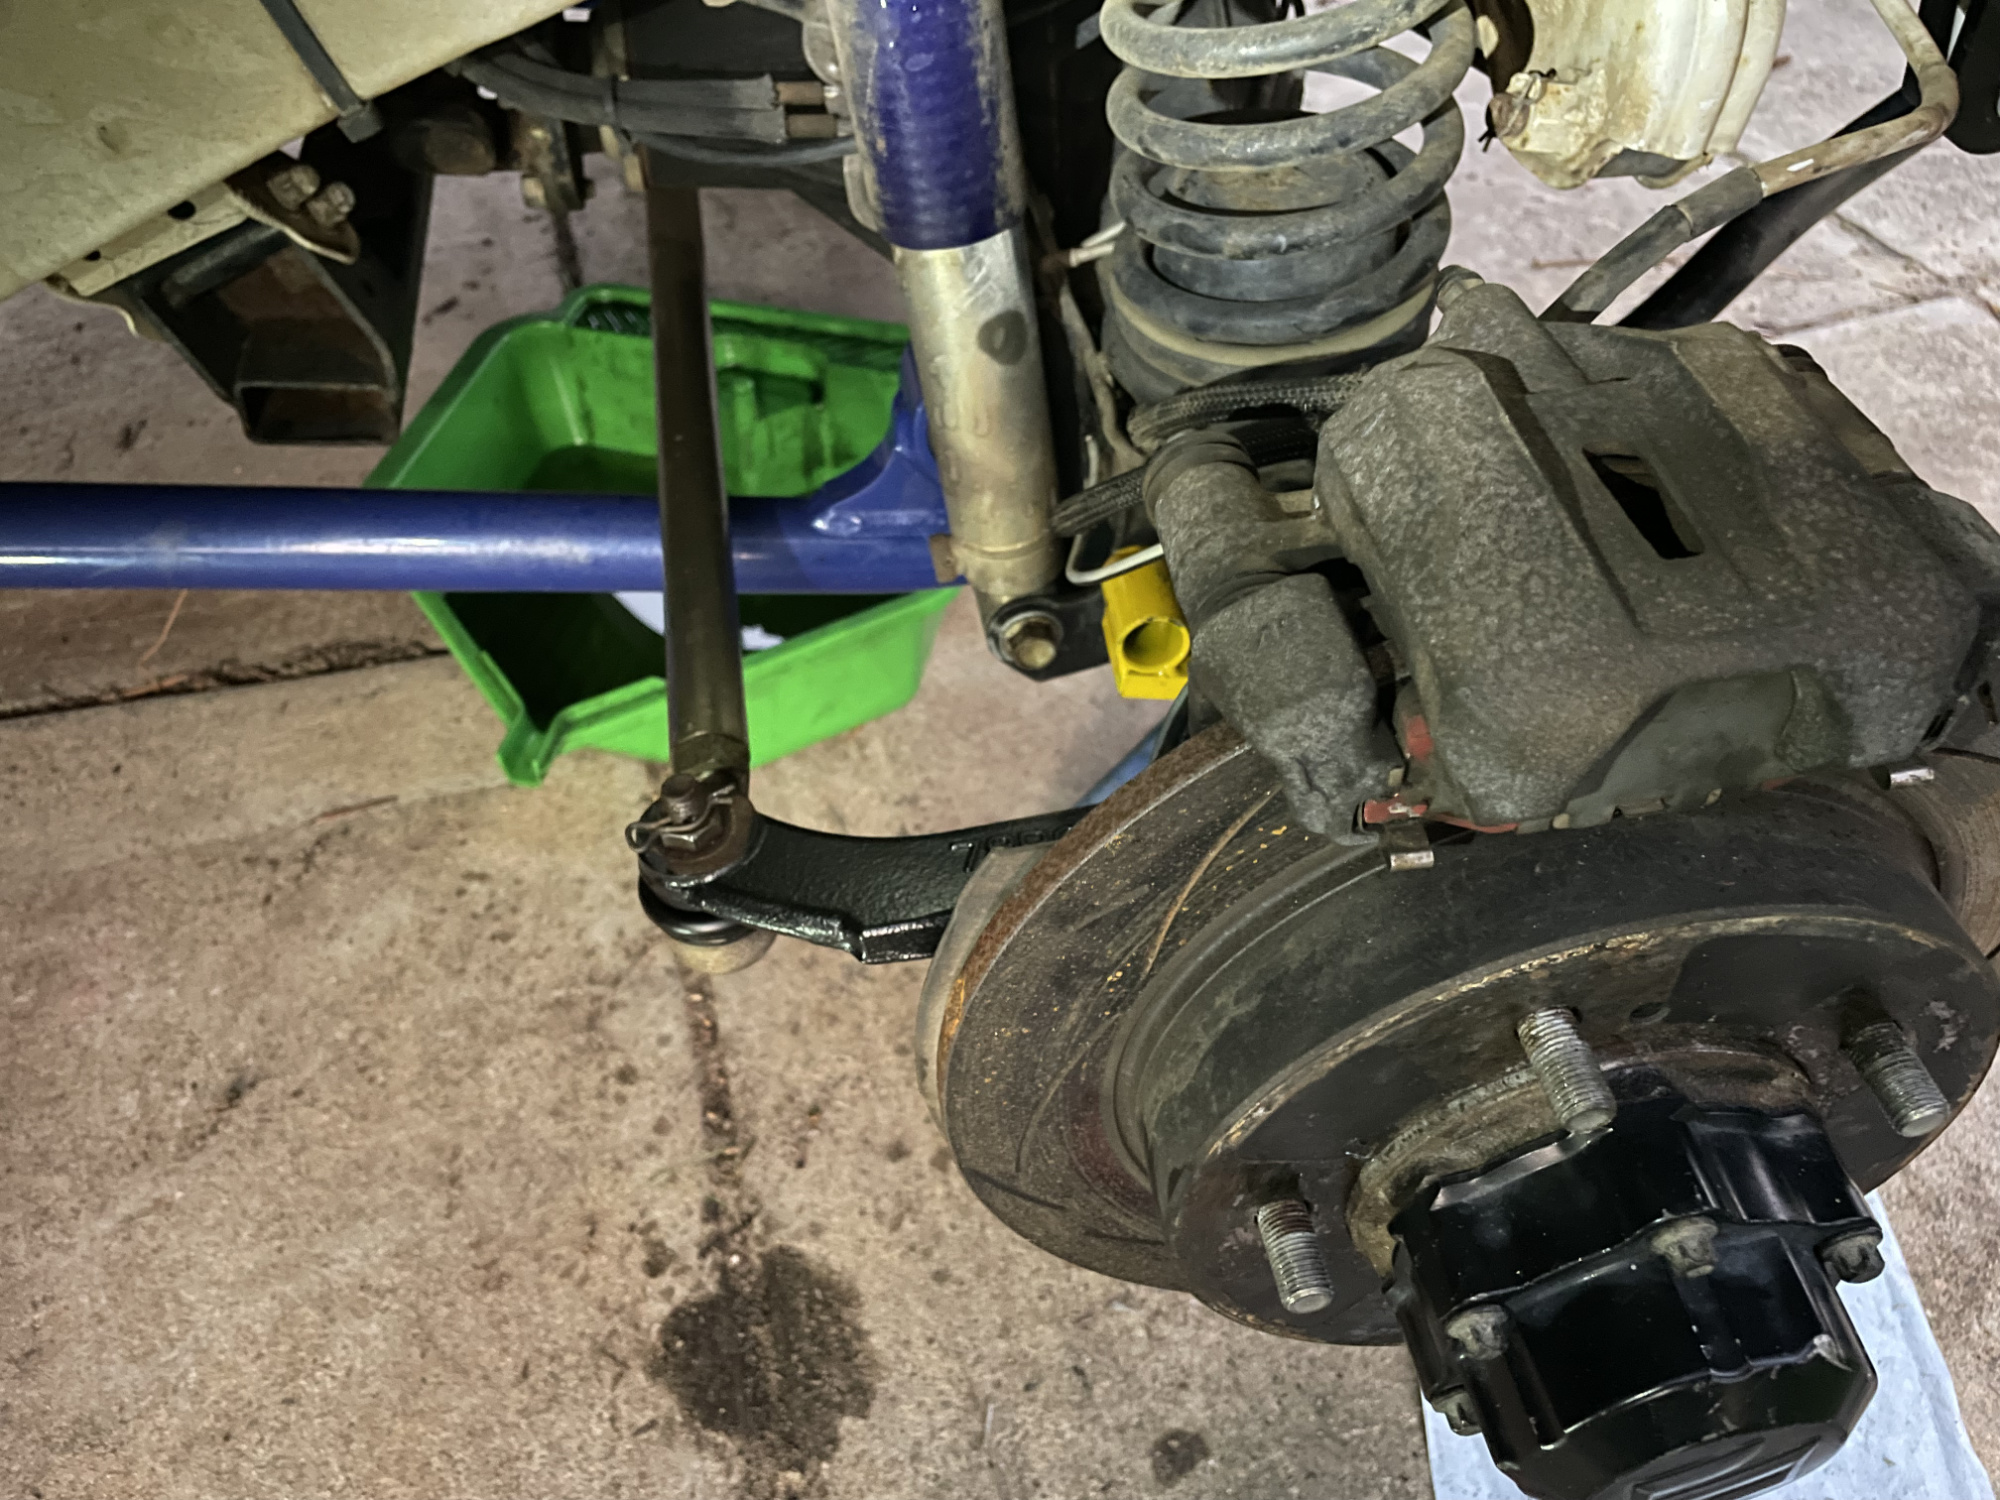
And here we are, basically all done after installing a few parts like the hub, the brake disk, the toe rod into the swivel hub and the caliper onto the hub, too.
Since inevitably someone will ask about torque settings (and I can’t remember if I’m put them in my compendium of Jimny torque settings):
- Vacuum hub bolts are 50 Nm, but easiest done up when the car is down on the ground again.
- Toe rod nut is 43 Nm (remember to put the R-clip in here, too, once it’s tight)
- Caliper carrier bolts are 85 Nm (watch out for wiring and hoses when you tighten this up)
At this point you need to put the wheel on, tighten wheel nuts to appropriate torque (100 Nm) and make sure the vacuum hub bolts are tight, refill diff with oil and off you go. Obviously if you’re doing both sides don’t refill the diff with oil till both sides are done, though.
Hope that helps someone tackle this job!