
Polishing
Machine polishing is a right pain, but here’s the TGR guide to getting it done properly. We’re writing this because we have no interest in doing our own, let alone doing it for someone else!
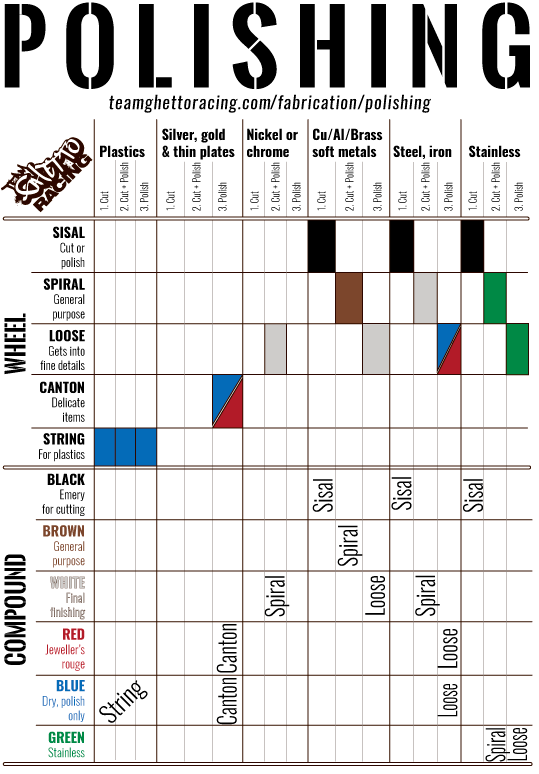
Wheel and compound selection
Wheel and polishing compound is all important – summarising one of the key guidebooks (Caswell Plating’s Buffbook: https://www.caswellplating.com/buffs/images/Buffbook.pdf) is the following handy TGR print out and chuck by the polisher guide.
Machine selection and setup
The simplest option are to throw spindles onto a bench grinder – pretty easy to do. Power is important here: the more the betterer! (The wider the wheels you can throw on, that is).
The other aspect to consider is surface speed – larger wheels or at higher RPM gives you a higher surface speed which means faster polishing action. Too fast can mean you rip through things a bit fast, though, so it’s something else to consider.
Finally, you’ll want a really good stand to hold your polisher. Good if you can bolt this down, because you’ll be laying into it fairly hard to get some things polished. Room around the polisher is also all important.
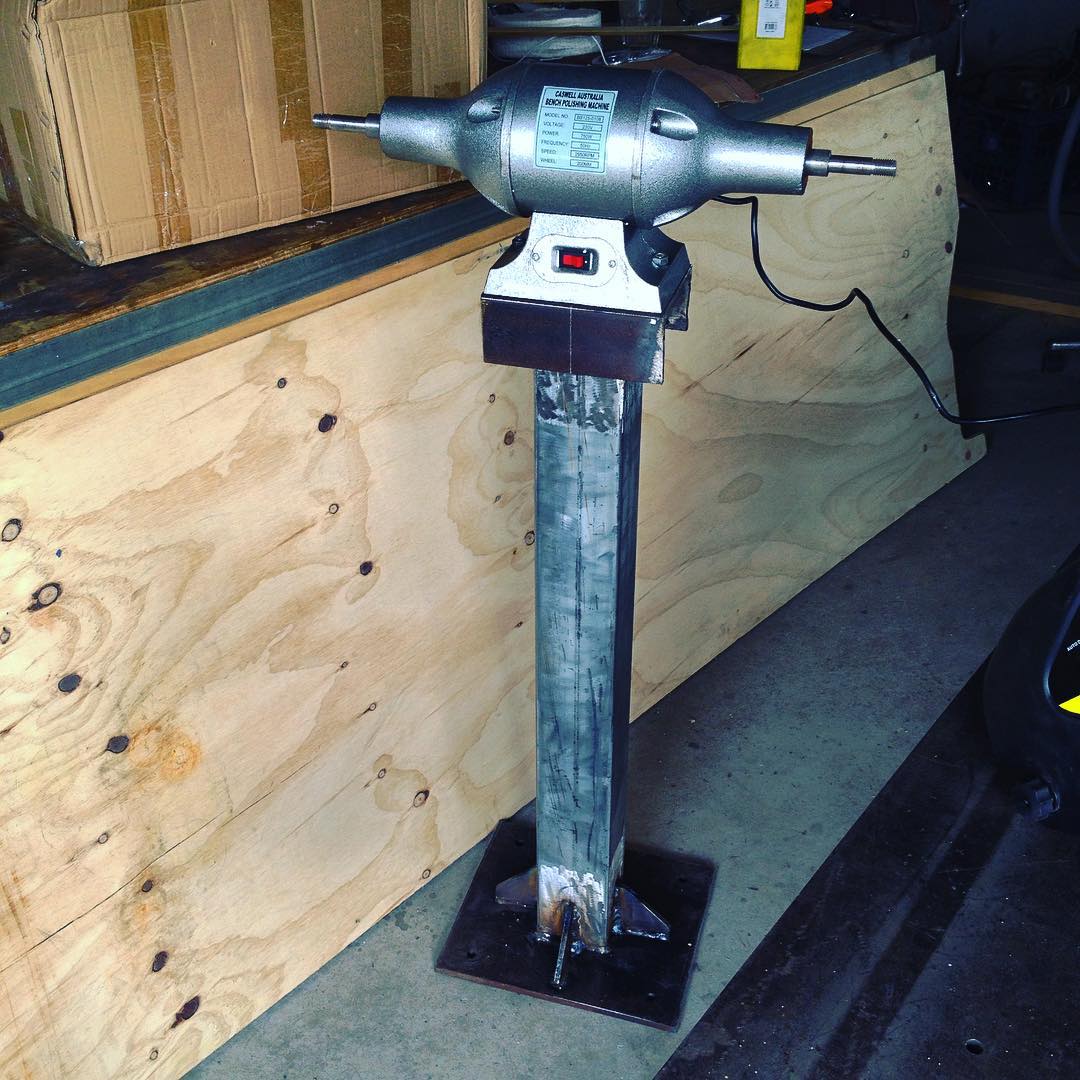
Here’s a 1 hp polisher (from Caswell Plating) – note the nice long spindles! – on a homemade stand. Stand is designed to be bolted down, and I can swap the polisher out for a 200 mm/8″ bench grinder if I want.
I decided that wasn’t sufficiently awesome, so I also made up sweet polish compound storage trays.
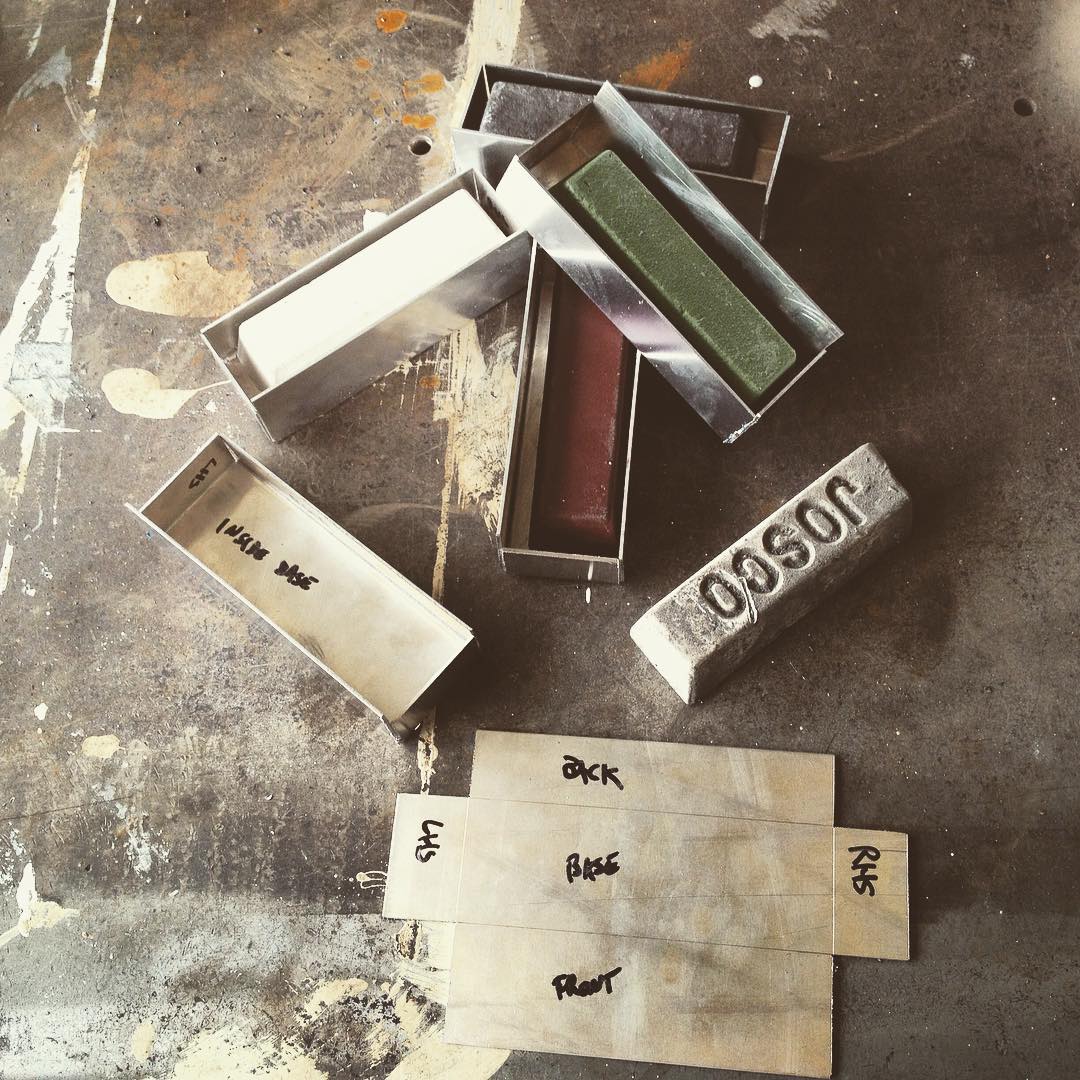
These are designed so I can hook them onto the front of the polisher stand for the one I’m presently using, plus store the rest of the compounds and stop them getting dirty.

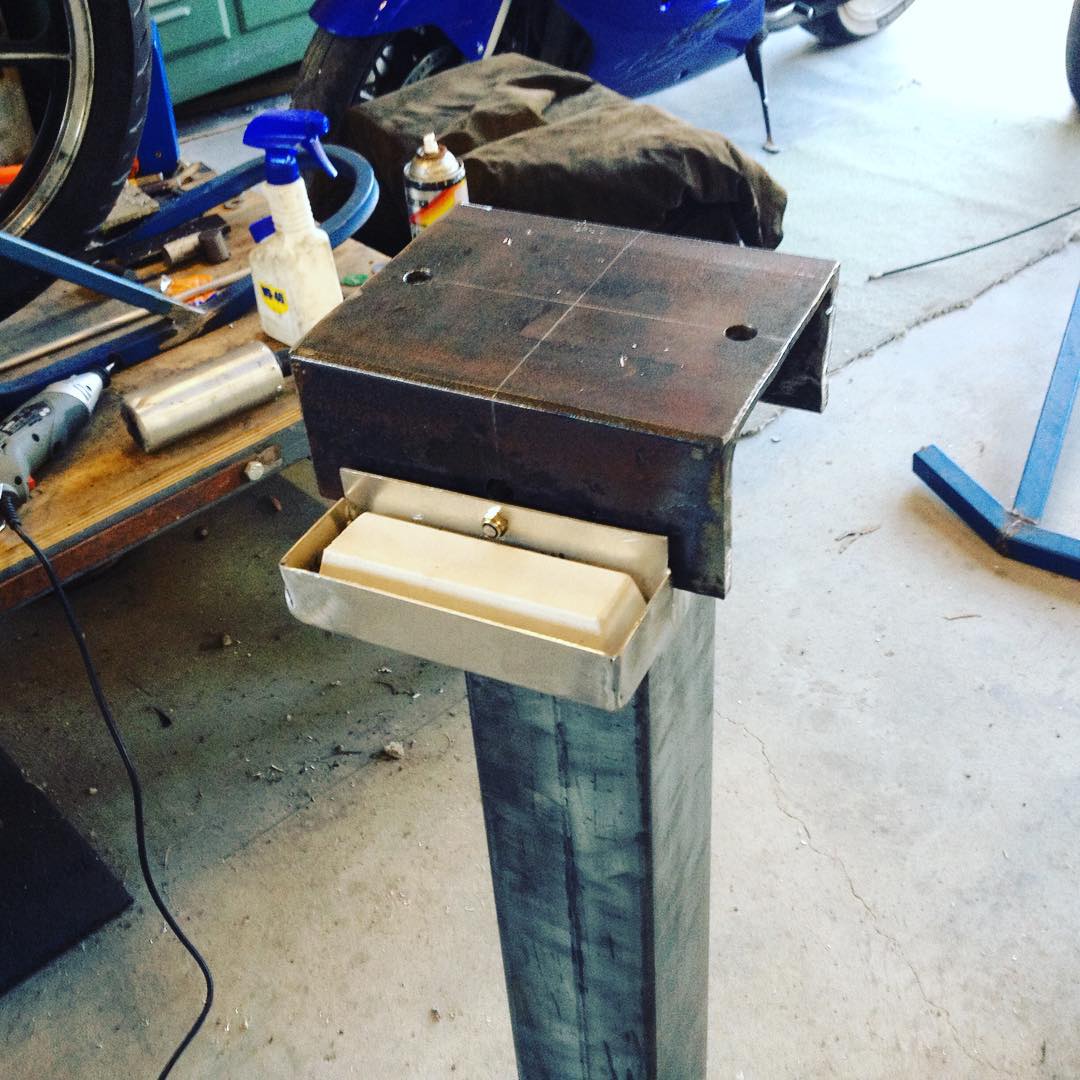
They look awesome all installed on the front with the polisher installed at home.
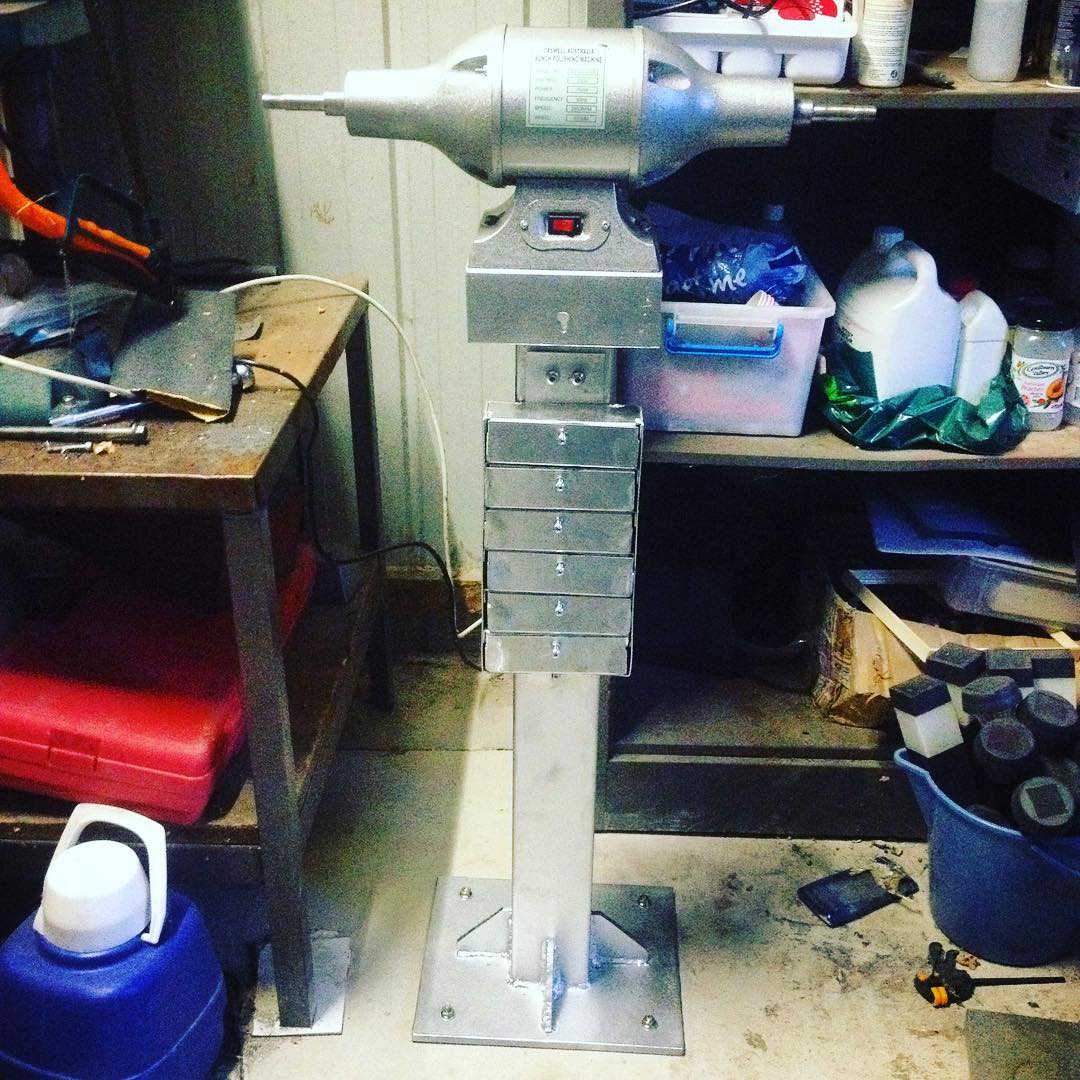
Painted up with the bare polisher all installed and it looks an absolute treat. Note the bolts holding it down so that it is super solid. Note that this is before installing spindles/wheels etc.
Polishing up old faded plastics
Polishing up old faded plastics is another favourite at TGR. Surprisingly simple to do, although you will need to do a lot of cutting of oxidised plastic off the top. This is best done with progressive grades of wet and dry sandpaper: starting at 120 grit for really faded or scratched plastics, or 360ish grit for just oxidised/faded plastics. Then progressively wet sand until you are at about 2000 grit. After this, either finish off with a plastic polish paste, or use a machine polisher with a light wheel and specific plastic polishing compound and get it done!