Four-piston brake caliper rebuild

Rebuilding brakes/brake calipers is not necessarily hard, but it does require care, attention to detail, and a couple of tools. Here’s an example of rebuilding 4-piston Tokico calipers. These are found on a lot of early 2000s Suzukis, such as SV1000s, GSX-R750s and the like. They make an excellent upgrade with SVRacingParts caliper adapters on SV650s (which is in fact what this rebuild was for).
The same applies for brake rebuilds on quite a lot of opposed piston calipers like the Nissins on Hondas. Brembos are a bit harder, cause you can’t get your hands on the seals all of the time.
There is a corresponding rebuilding of a 16mm (5/8″: actually 15.875 mm) master cylinder, too, but I thought I’d split them out into different articles.
We start with a caliper bought from ebay. Plenty of these come up for auctions, best to search for each of the bike models they came from.
It’s tricky to photograph removing the pistons, but there’s a few strategies to employ here. Never get your fingers in the way of the pistons no matter how you’re pushing them out, they can trap fingers with a lot of force and it hurts!
- If the caliper is still on the bike, you can remove both from the forks and use a small bit of brake lever pressure to push the pistons out. Works well, potentially will eject one piston before the others and then you’ll have to find another way to get them out.
- If you have a grease gun, you can put a screw-in grease nipple (Zerk fitting) into say the bleed nipple hole, block up everything else, and push everything out using grease for the pressure. This works well on stuck calipers, but again one piston might move first.
- If you have an air compressor, you can use an air line to push the pistons out. Use only the tiniest amount of pressure, brake pistons can come out with considerable force if you give them the full tank 120 psi out of a compressor!
In terms of stopping pistons coming out, you can use G-clamps or ratchet clamps and some wood to hold them all at appropriate positions and slowly work them out.
Never pull the pistons out with pliers or vise grips unless you have new pistons. Mark the piston and they’re ruined and no longer useable. They need to make a really good seal on the rubber seals in the caliper, and deforming them in any way stops that happening.
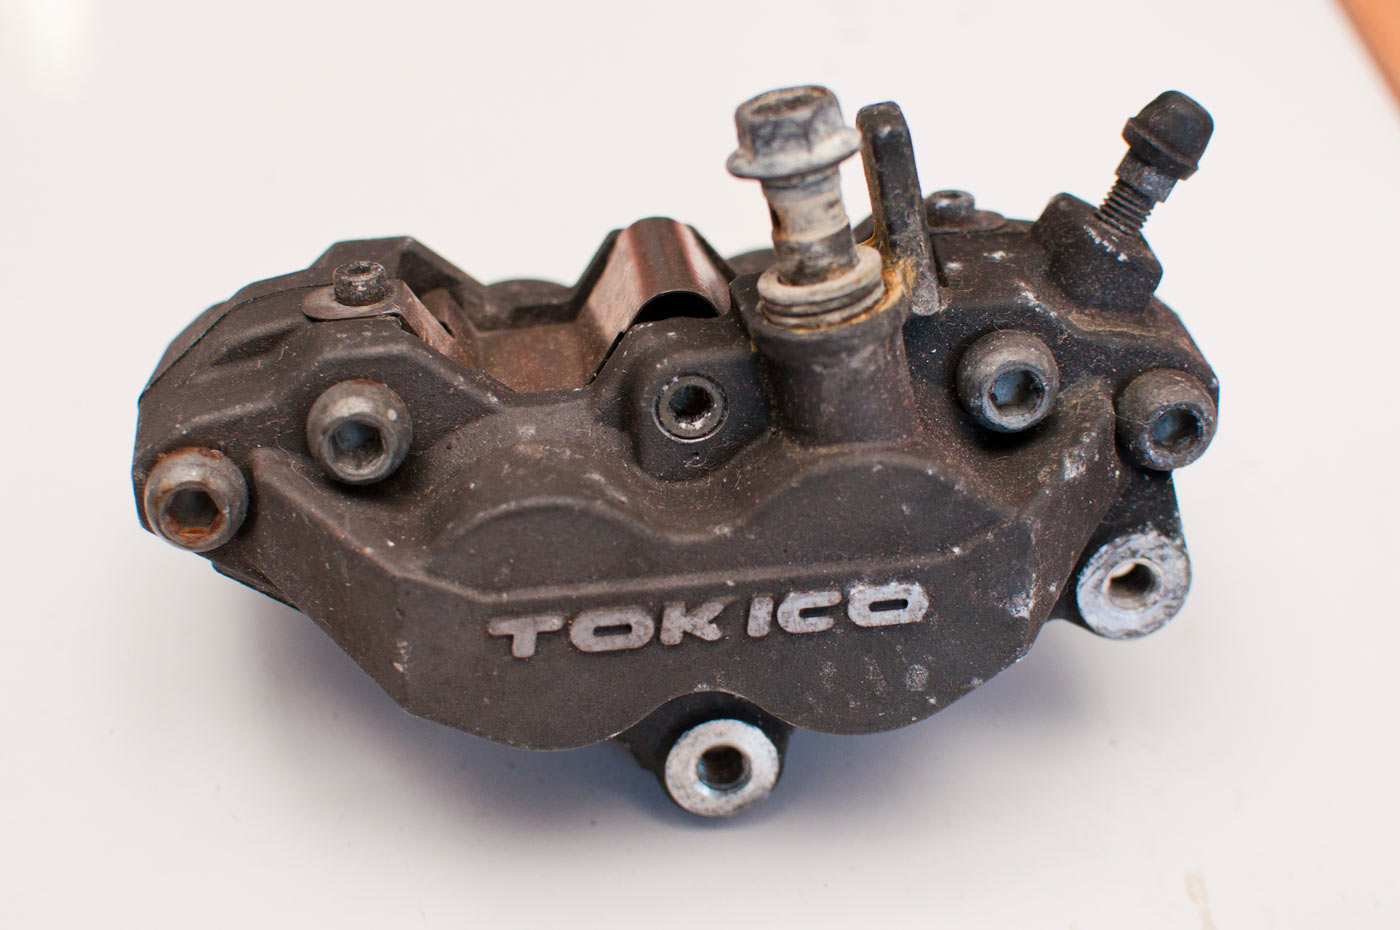
That said, the calipers come apart fairly easily with 4 allen-headed bolts. Some Nissin calipers use fancy external torx bolts, but nothing you can’t sort out via your local tool supplier, hardware store or auto parts store. Or fleabay, I guess.
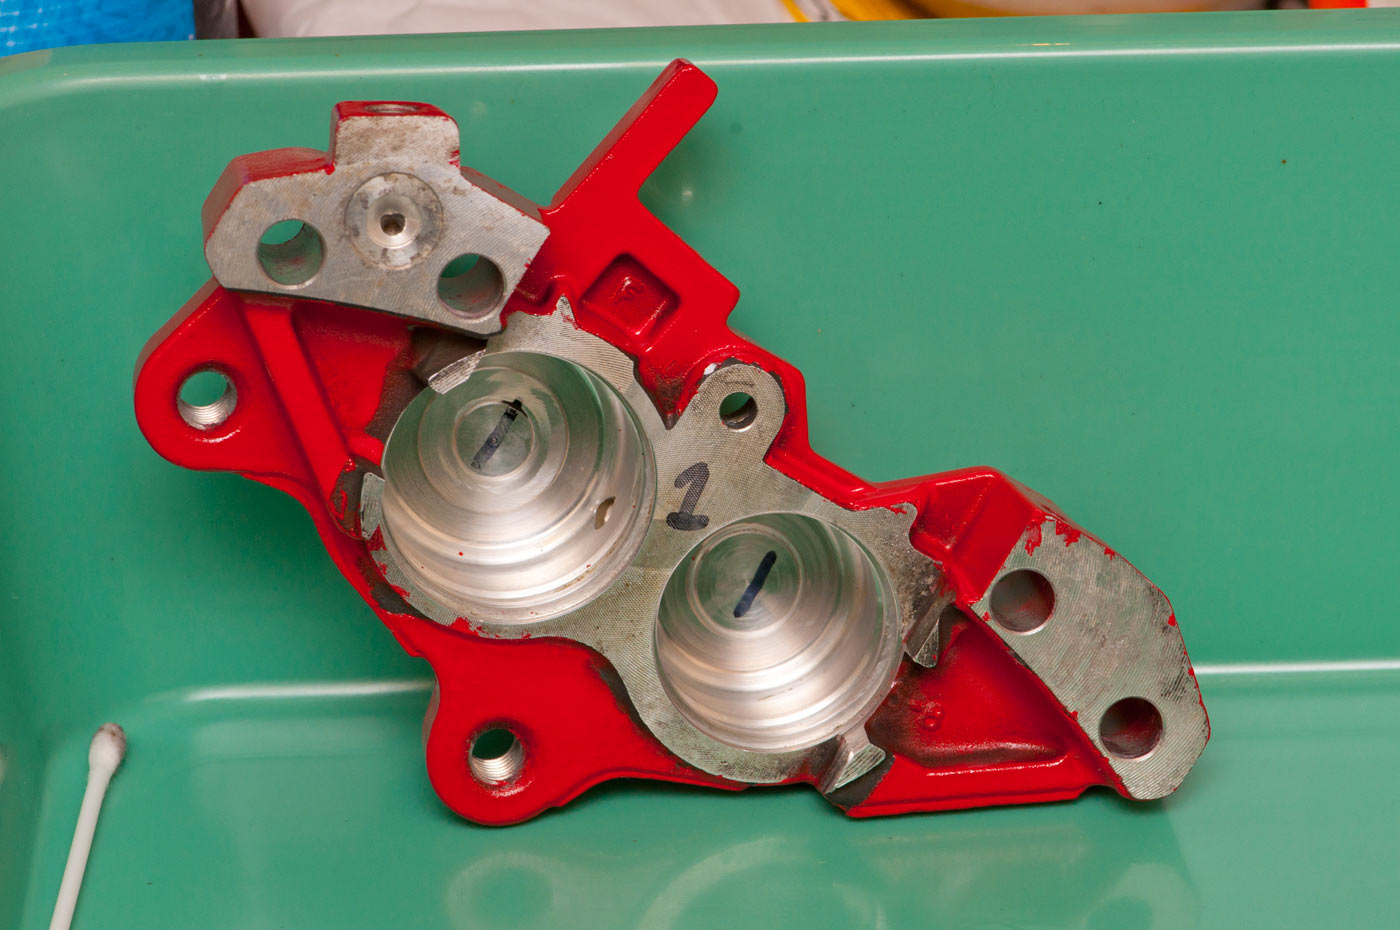
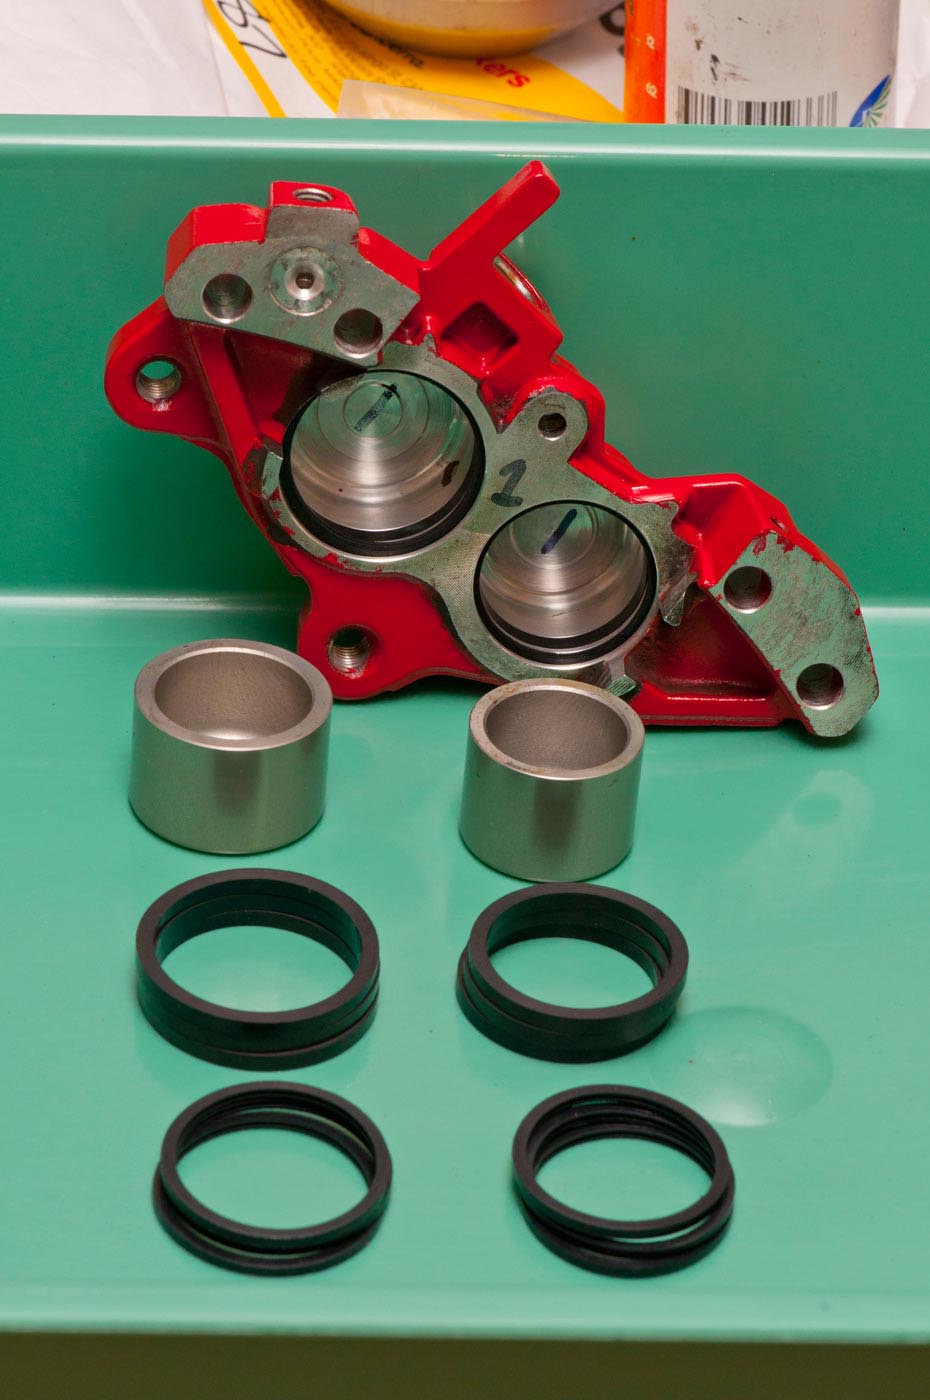
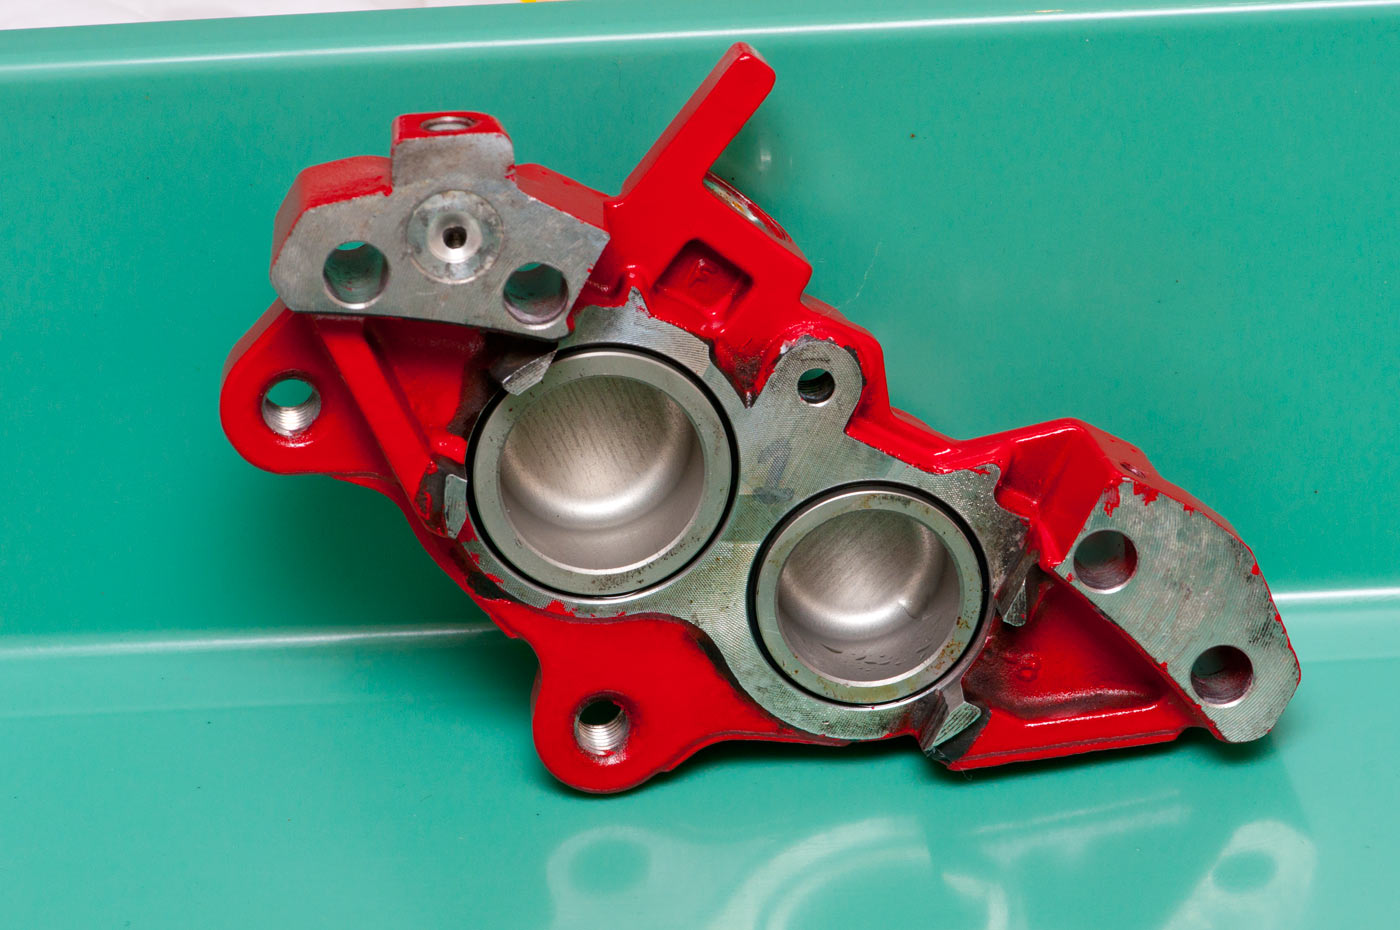
These are the calipers split apart, a bit cleaner thanks to some water and detergent. Brake fluid absorbs water, and so water with a cleaning agent (washing-up liquid OR even laundry washing powder works great) you can get them pretty clean. Note the black lips on the pistons – they’re the dust seals that actually mount in the caliper housings, but they tend to come out with the pistons when you pop the pistons out using air. The black lines in the caliper body are the hydraulic seals. You’ll be removing those later and replacing them as part of the rebuild process.
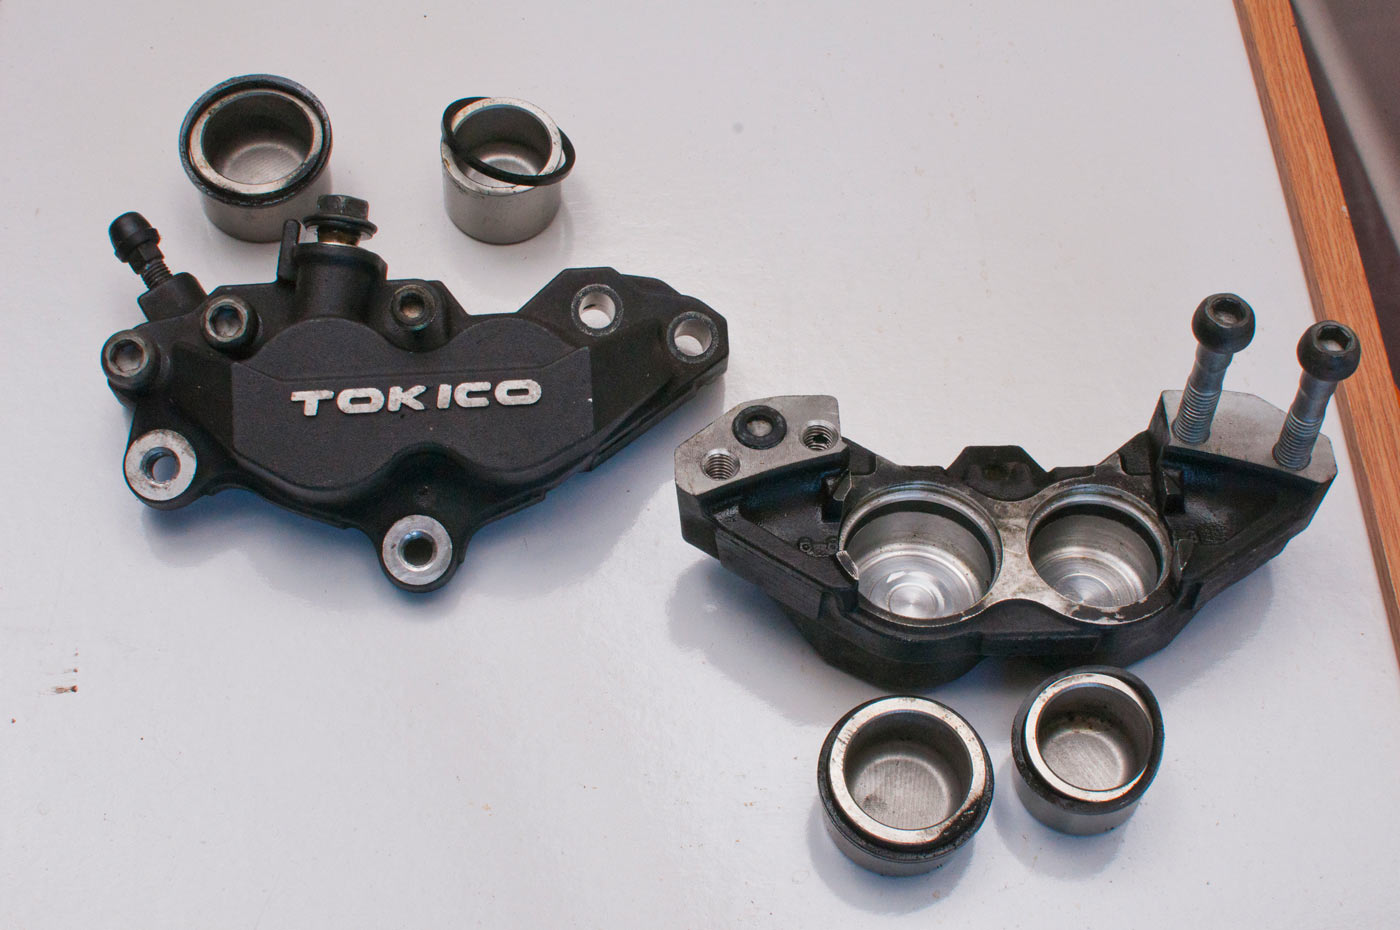
Some calipers are cleaner than others; here’s a good illustration of why you should change your brake fluid often.
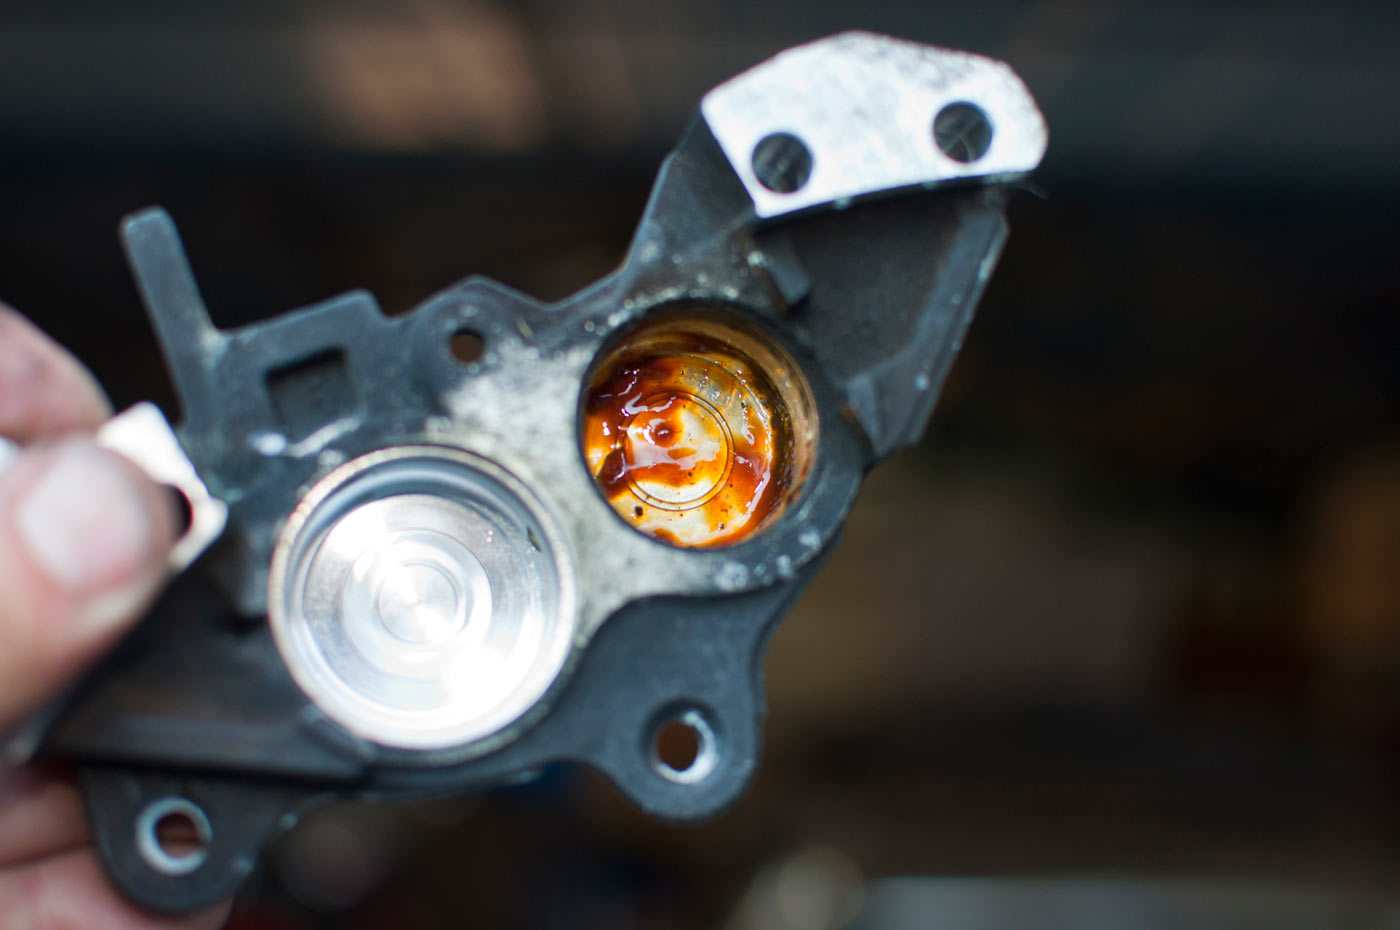
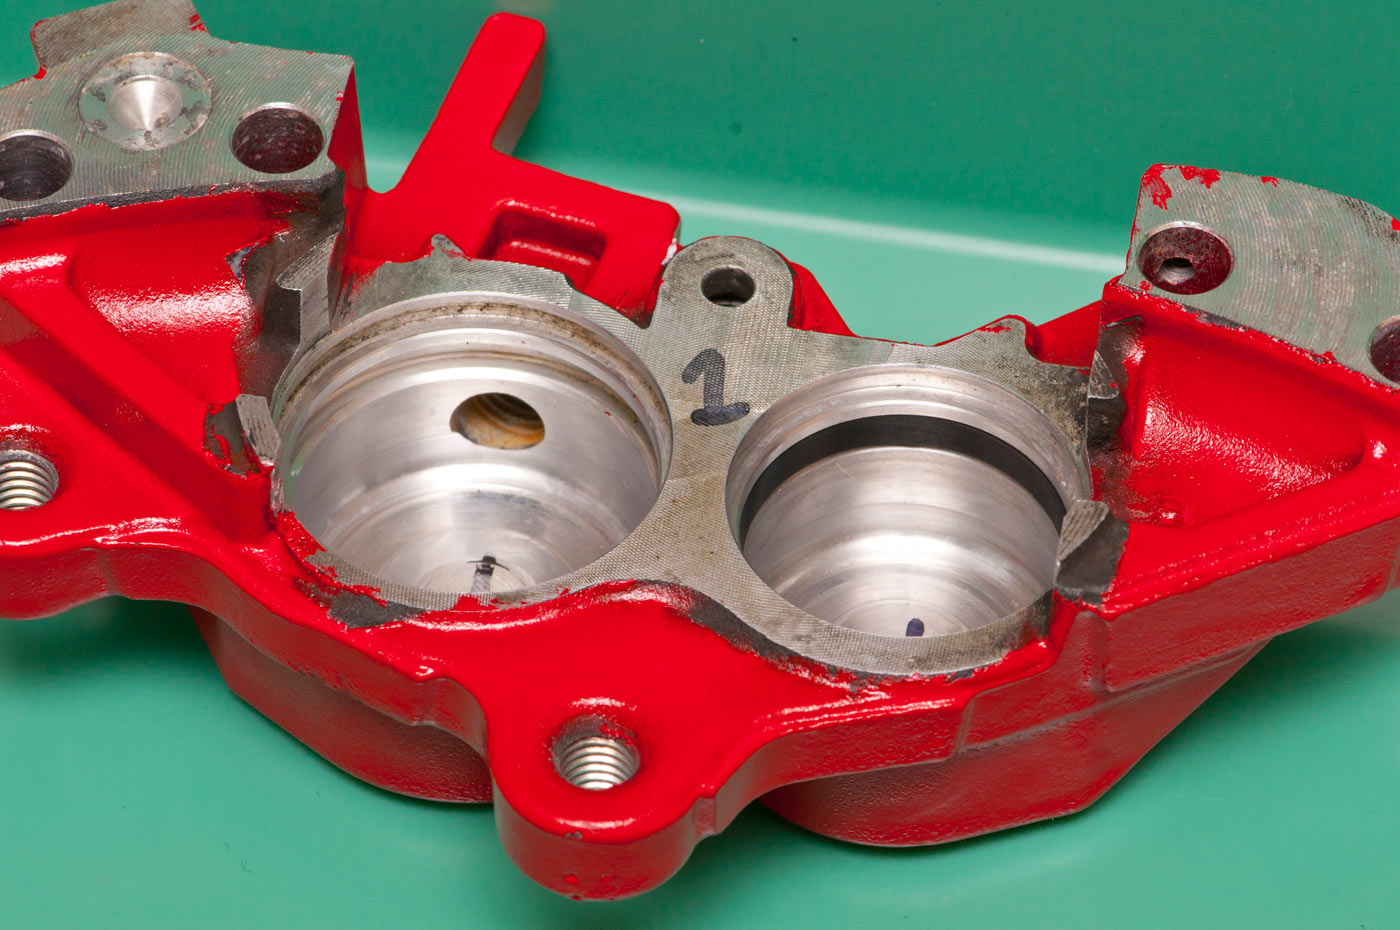
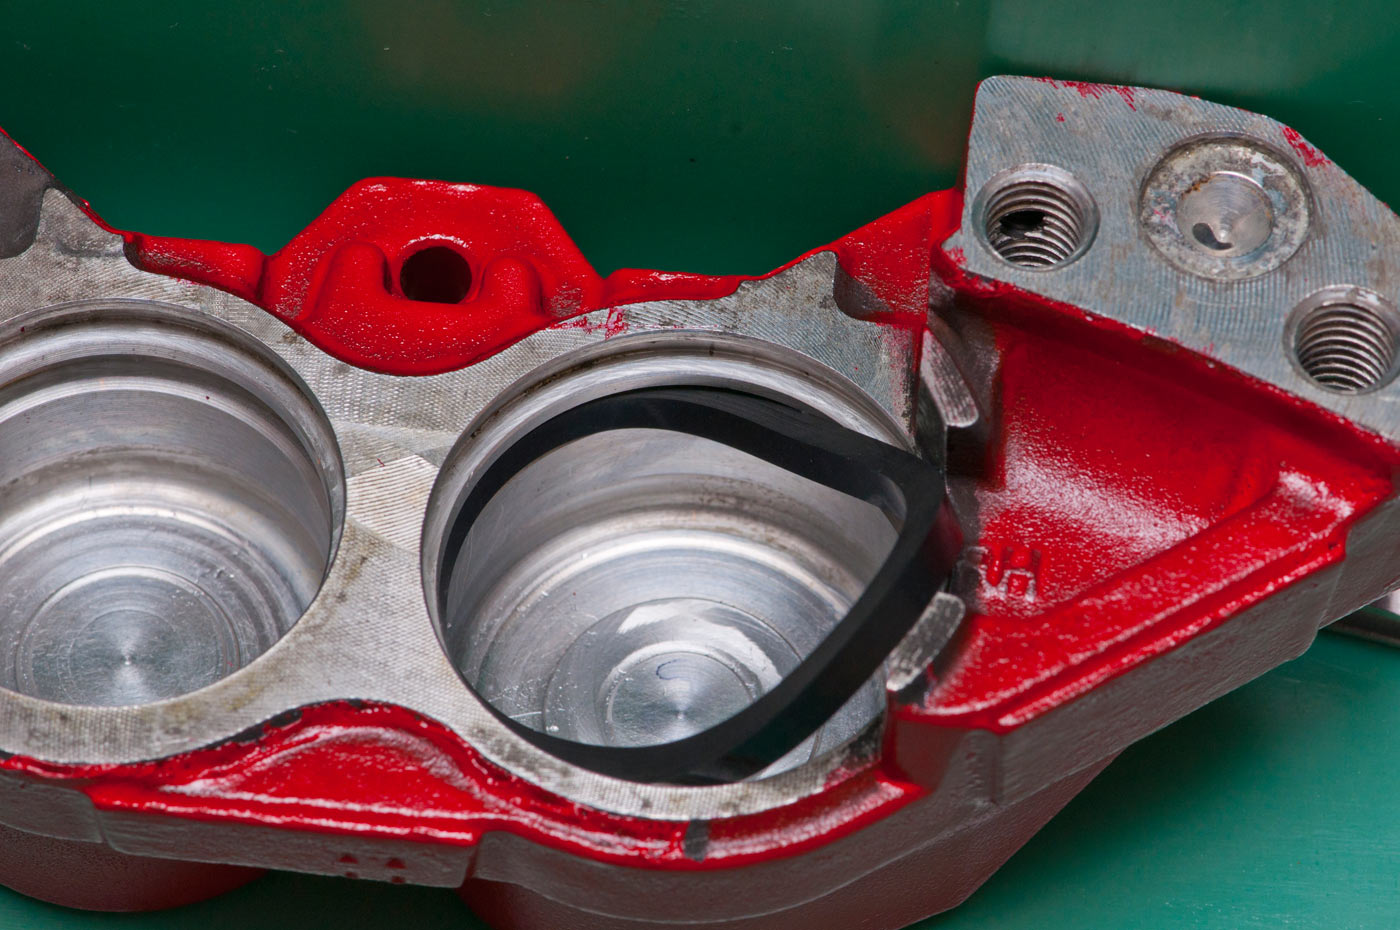
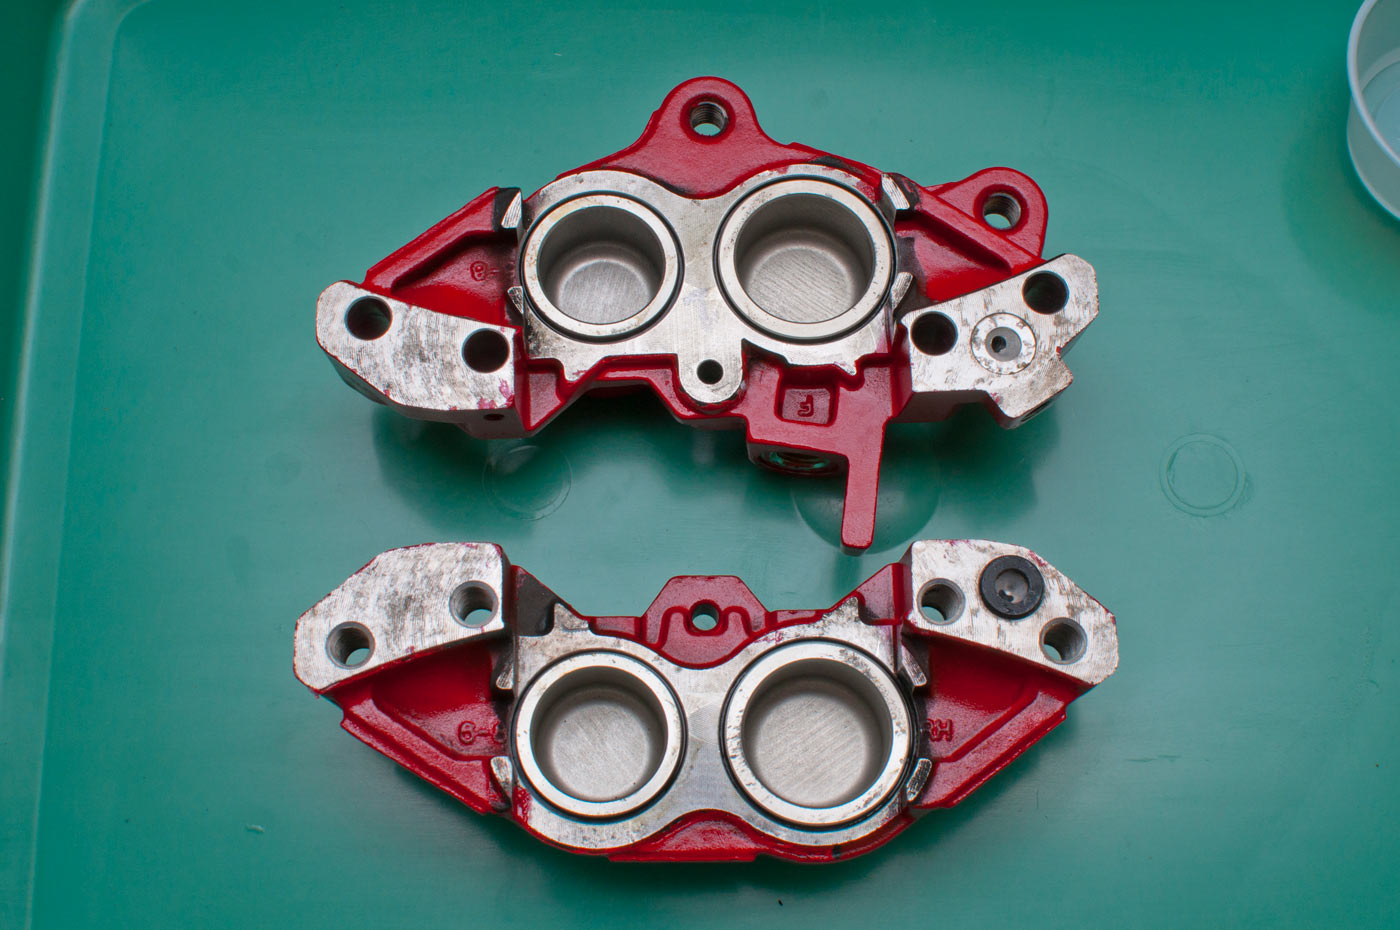
That goop in the bottom of the caliper bore is old jelly-like brake fluid. This is really common – flush your brake fluid every couple of years and you don’t end up with such much. On the left you can see what a clean piston bore should look like!
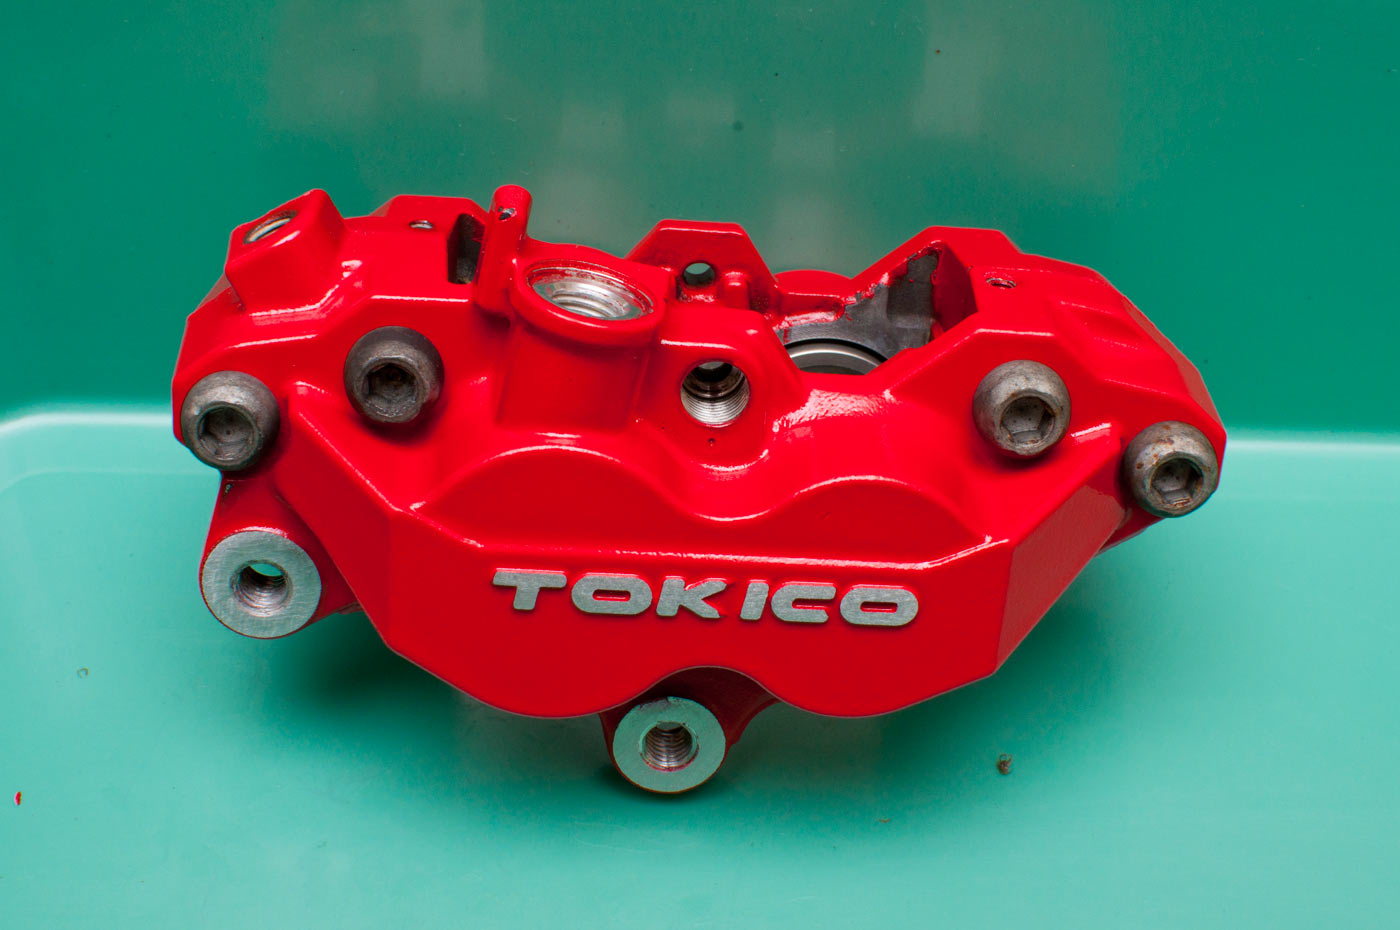
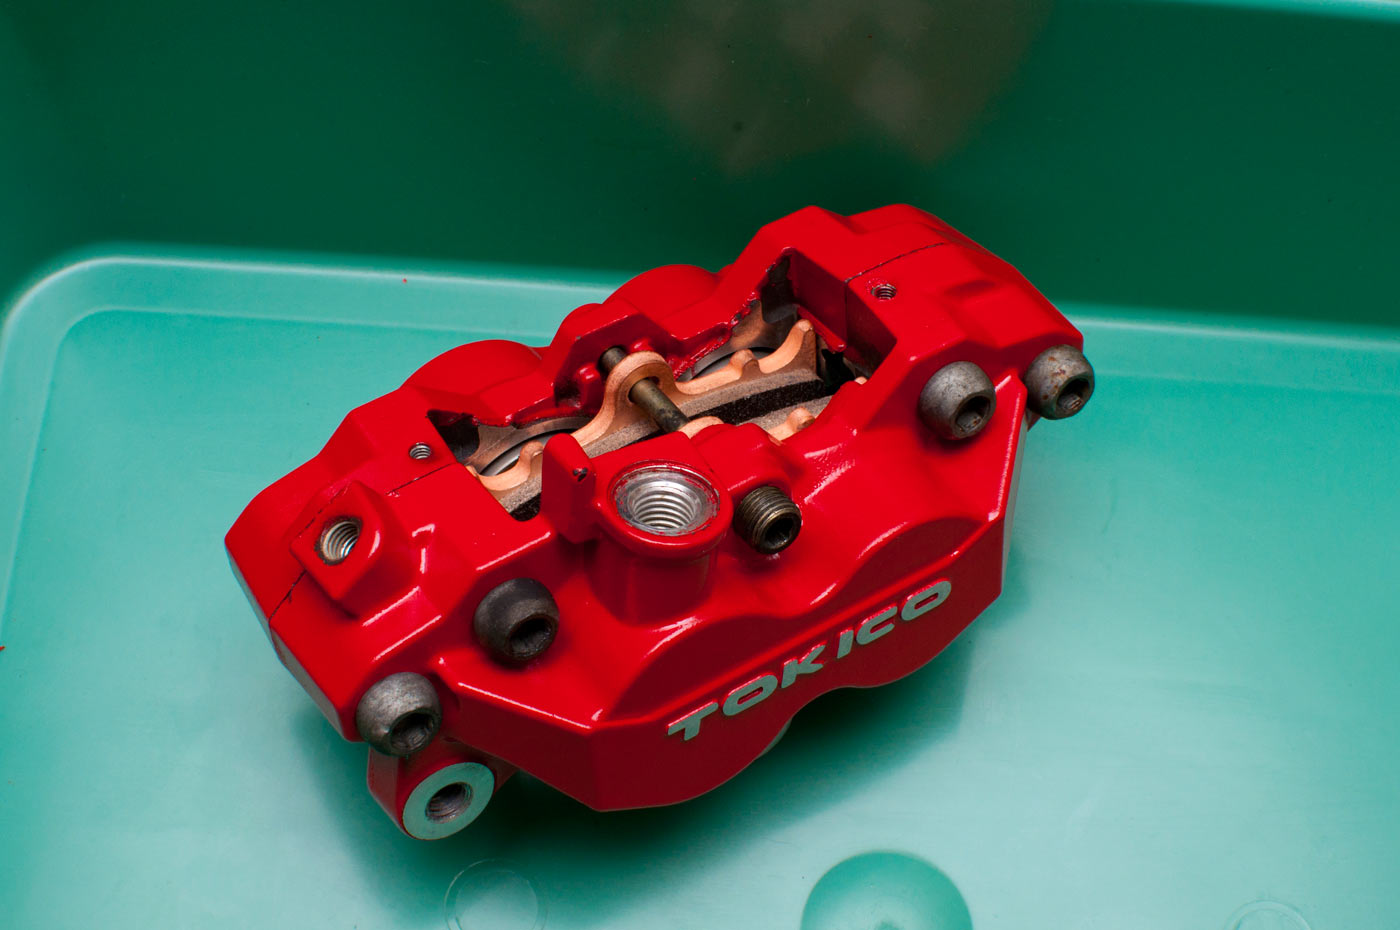
In the following photos you’ll notice the calipers change colour to red: that’s cause I like to paint calipers when they’re apart. I’ll write a separate article on painting calipers later on. Needless to say, if you want to paint your calipers, you’ll wanna be comfortable with the following photo if you want to do it properly:
Meanwhile, back at the ranch, part of the rebuild process you need to get the old seals out of the calipers. Dentist picks, sharp-pointed tweezers or nice pointly bits of plastic are great here. What’s important is to not mark the bore of the caliper or the seal mounting areas.

Wedging pointy tweezers into the seals works for me. Notice the scooge in the seal mounting grooves? Yeah, that’s gotta be cleaned out. You want EVERYTHING to be spotless when you rebuild calipers.
Note the cottonbud (Q-tip for Seppos reading this)? Yeah, I used that and some brake cleaner to get all of my cracks and grooves clean.
(Bit more clean but not perfect yet).
You also gotta clean the pistons so they’re spotless. Some people suggest emery paper and carefully polishing them but I’ve never had ones that far gone… or the rare times I have, I’ve bought new pistons. Much safer.
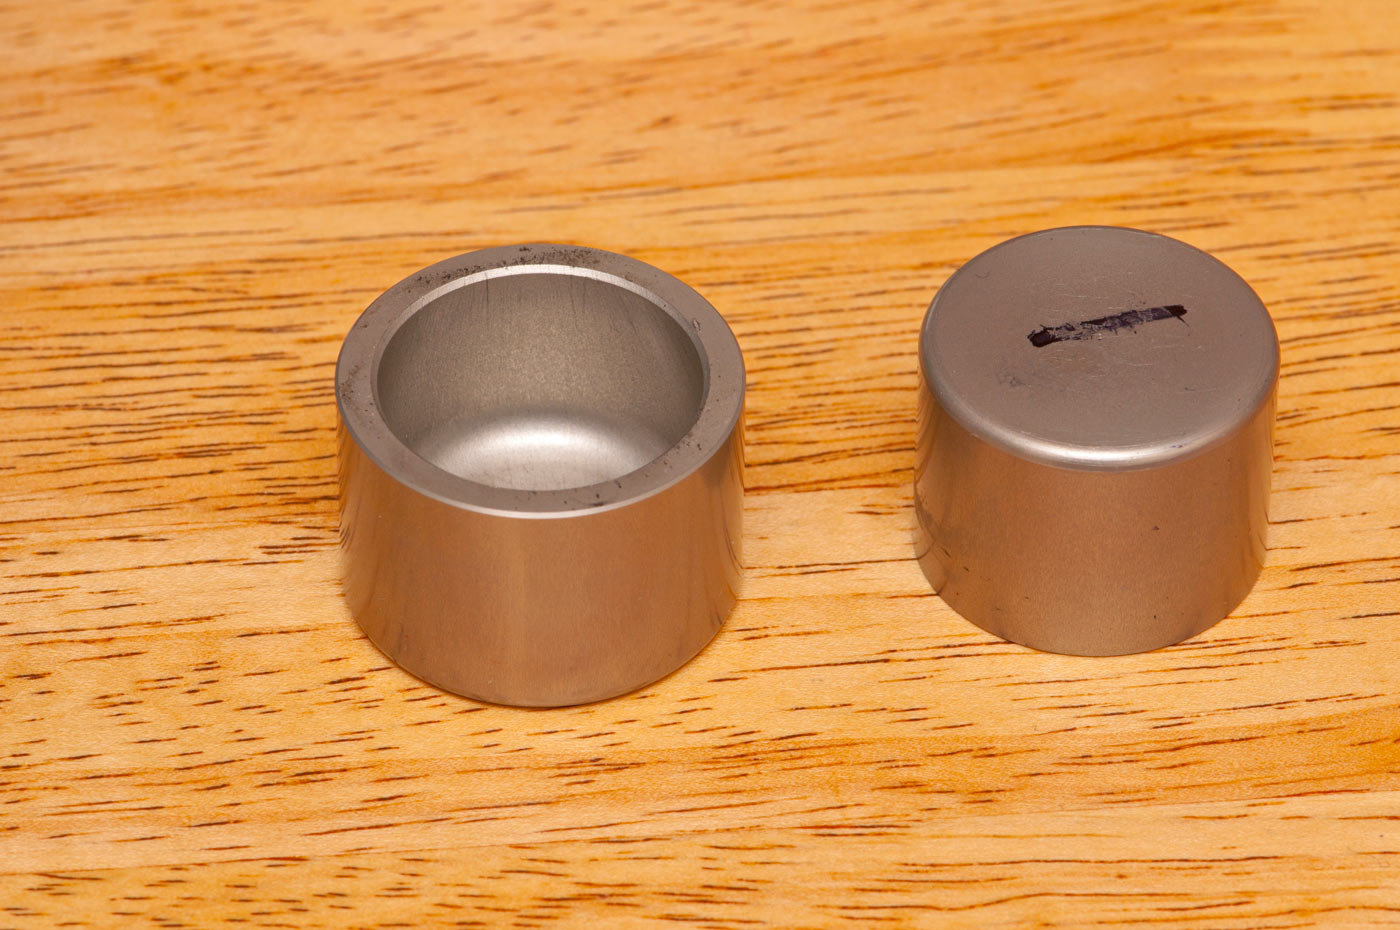
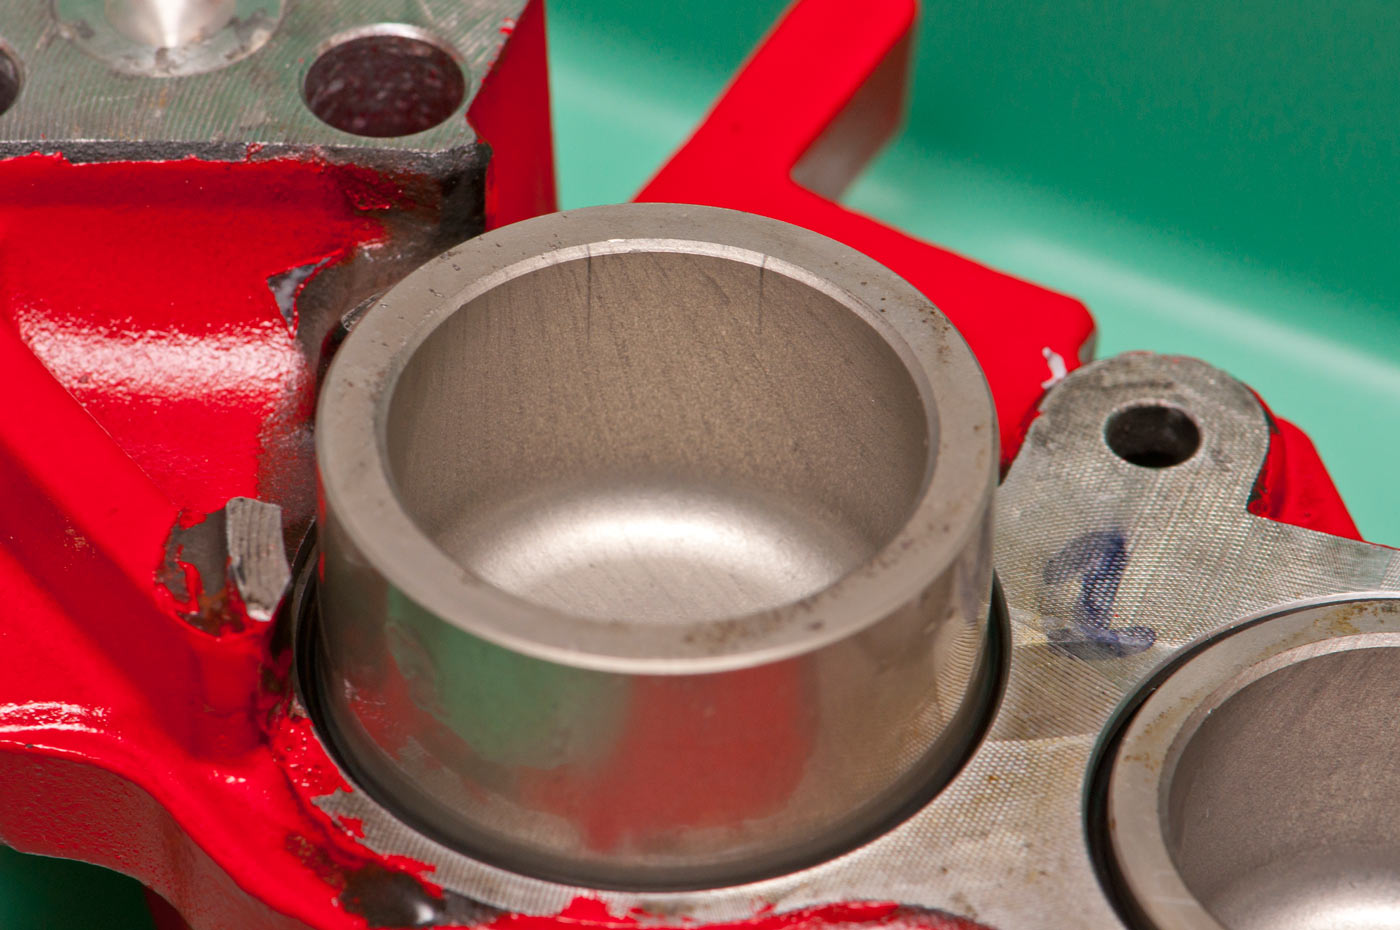
The numbers are simply cause I kept track of pistons to caliper halves to make everything go back into the same place where it came from. Not really an issue but might as well match everything up how it was from the factory.
Now comes the rebuild time. Being methodical is the secret here. I lay everything out in a nice little plastic tray because lubricating the pistons and seals means using some brake fluid (or silicone brake caliper grease, or Mr Sheen, but I prefer brake fluid).
There’s a bit of an art to getting the seals to sit in nicely. I push in one side, then seat most of it and then push the last bit into the slot. I do this all with my fingers so there’s no scratching or damaging of the seals.
Getting the pistons in is the other thing people struggle with. Once the hydraulic and the dust seals are in, it’s time to put the pistons in. I personally just use brake fluid to lubricate the piston, with a bit smeared on the piston and a bit smeared on the seal it works great. You gotta make sure you push the piston in nice and straight though.
Once you’ve got that, it’s then a case of getting both halves done. With these Tokicos, there’s a single seal that goes around the aperture from one side of the caliper to the other (this is the aperture you can see in the top left of the above photo). Make sure you have that o-ring replaced too, otherwise the calipers will never seal properly!
With that they’re ready to be bolted back together. Yeah, in hindsight I should have cleaned the bolt heads a bit better.
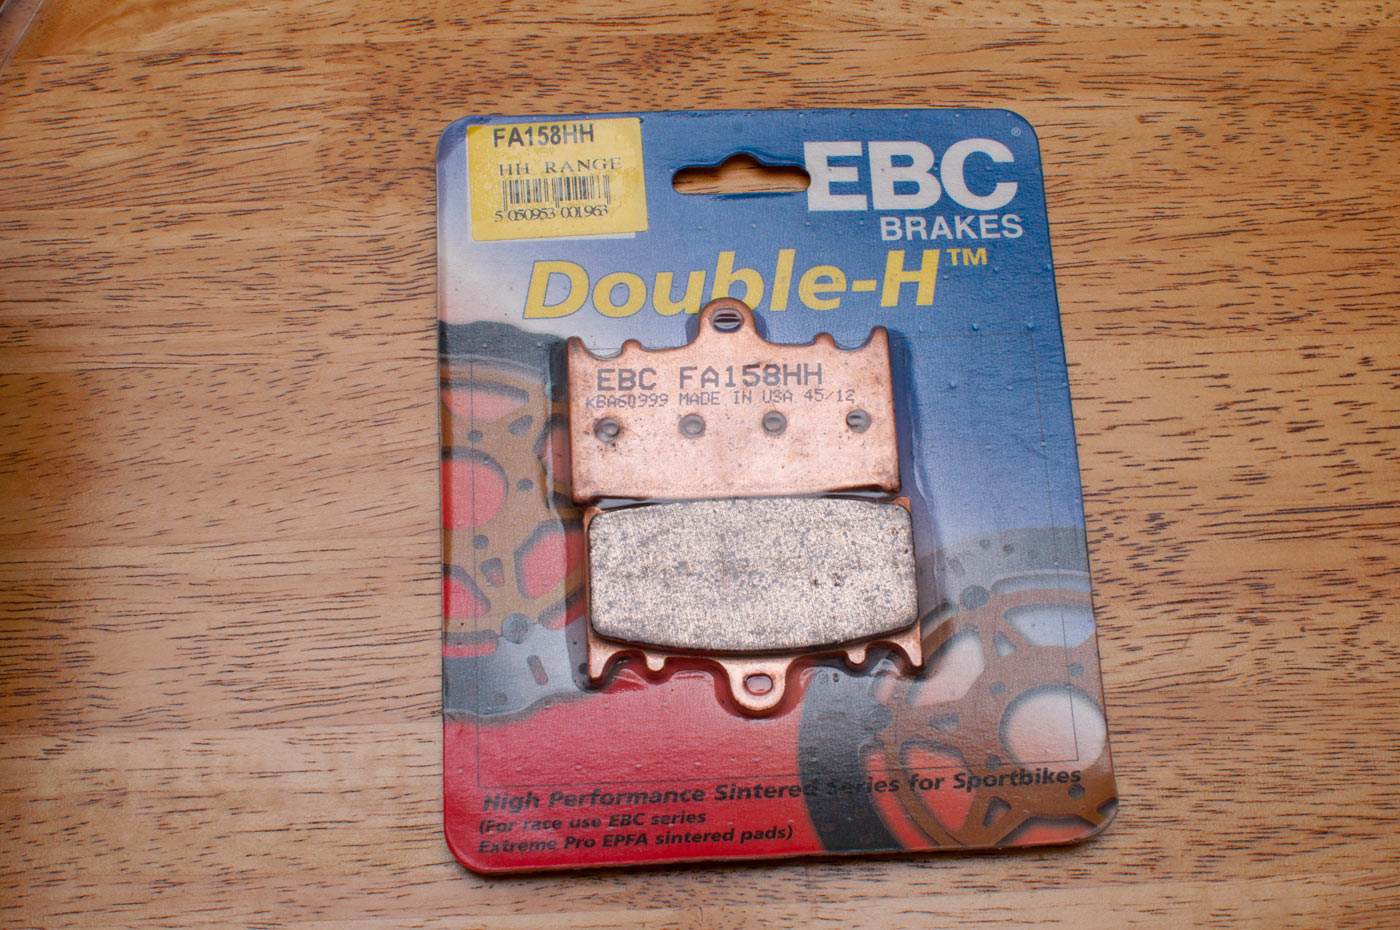
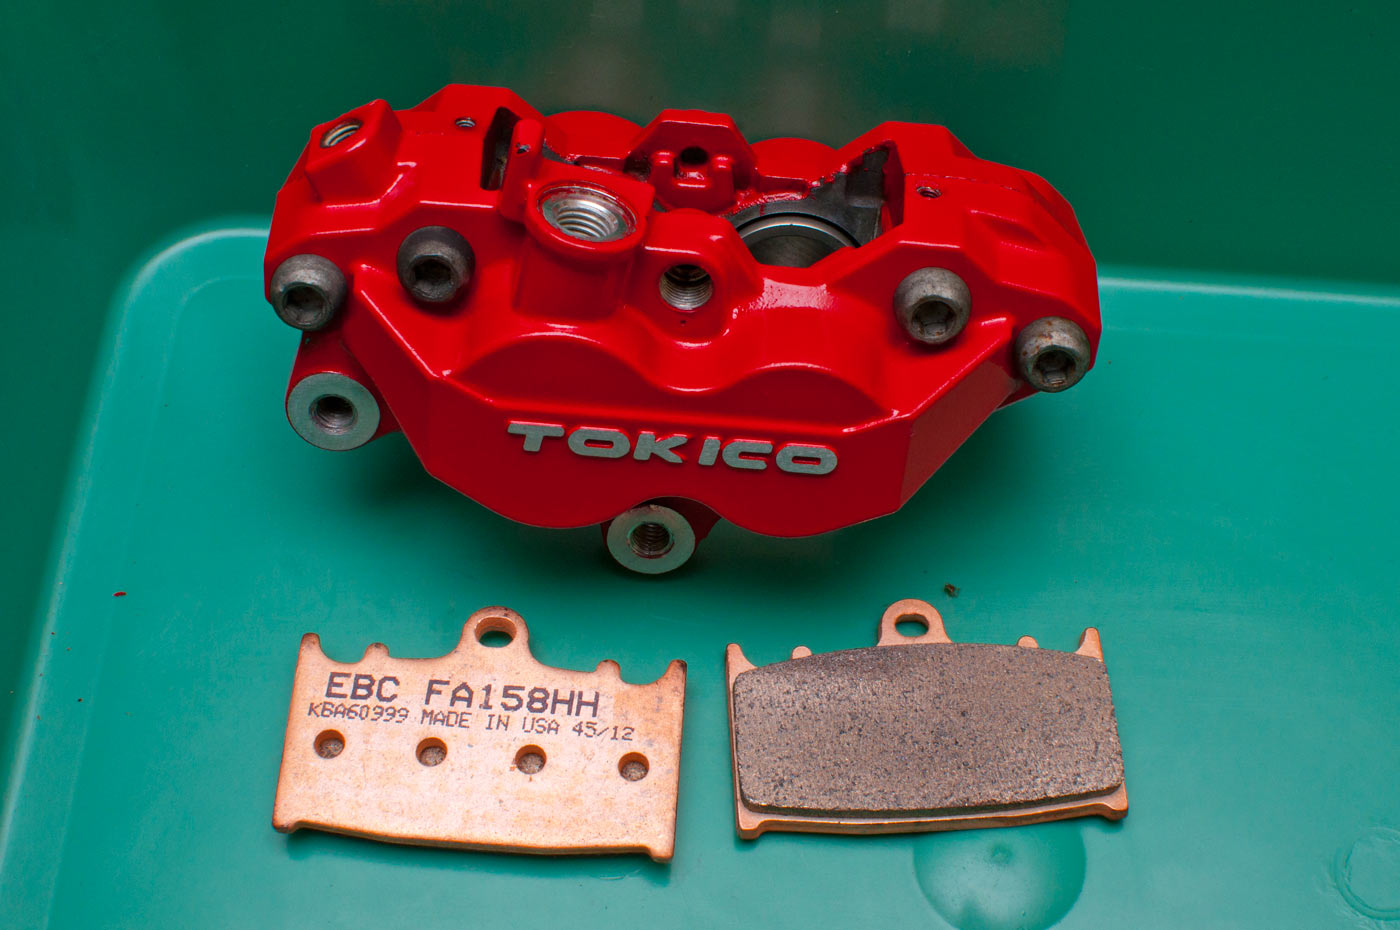
Time for some decentish pads. For the street I quite like the EBC sintered pads, which take the EBC part number FAxxxHH. (xxx are the pad model number number, for these Tokicos it is 158). If you want more performance then the EBC Extreme Pro pads (EPFAxxxHH part number, so in this case EPFA158HH), and for some bikes you can also get the “GP performance” pads (GPFAxxxHH part numbers). EBC pads have been really good for me in a lot of applications, though other people prefer other pad brands.
The pads install on the central pin pretty easily with the calipers off the bike!
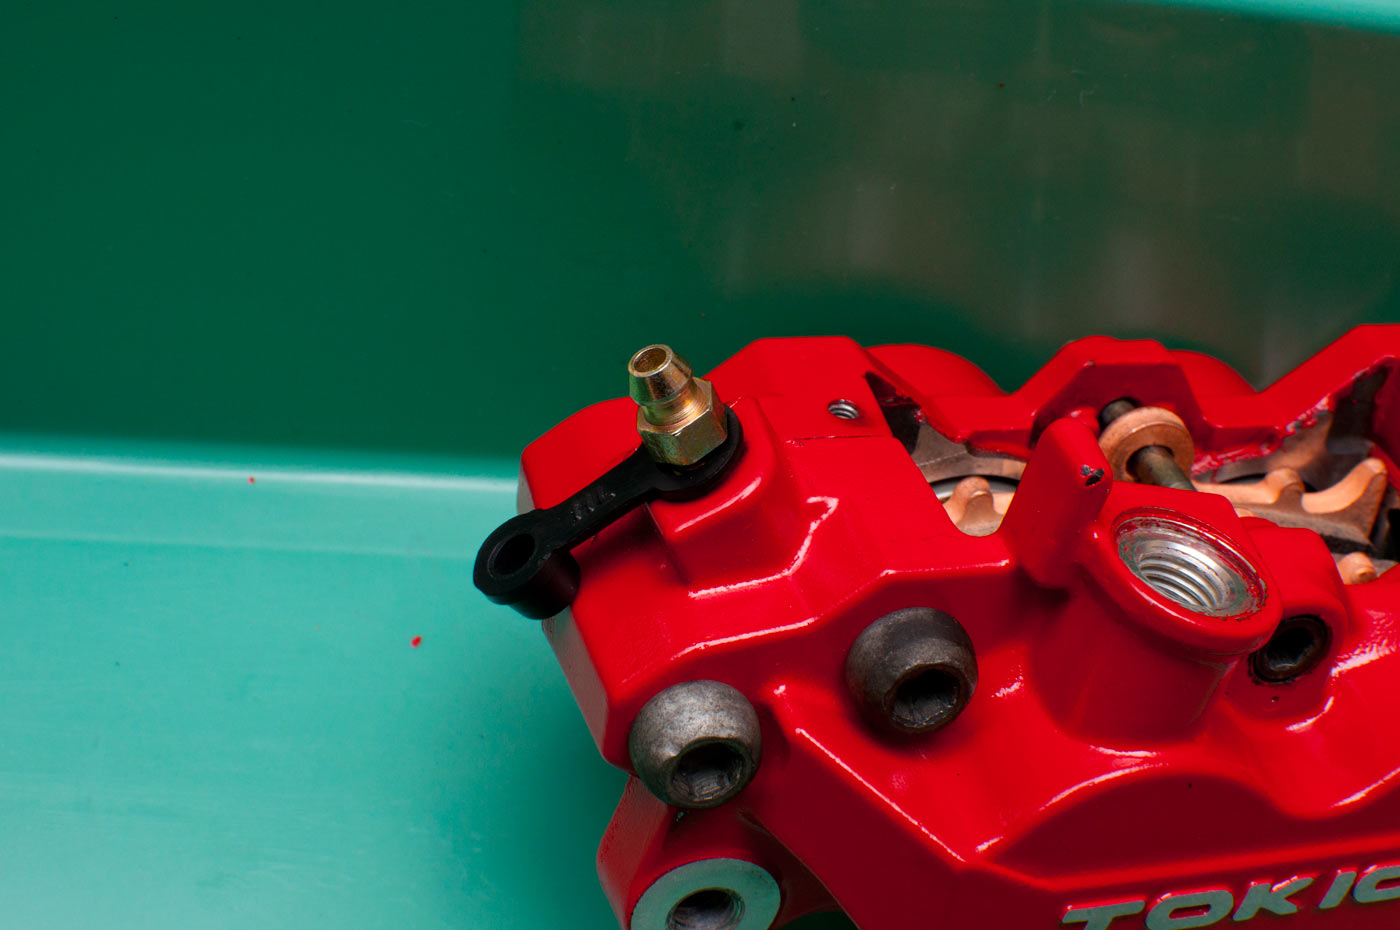
Always a good thing to throw a new bleed nipple in when you do this. If you’re gonna bleed them using a vacuum bleeder it can be a good idea to use some plumbers tape/teflon thread tape to seal the threads (only use a couple of layers).
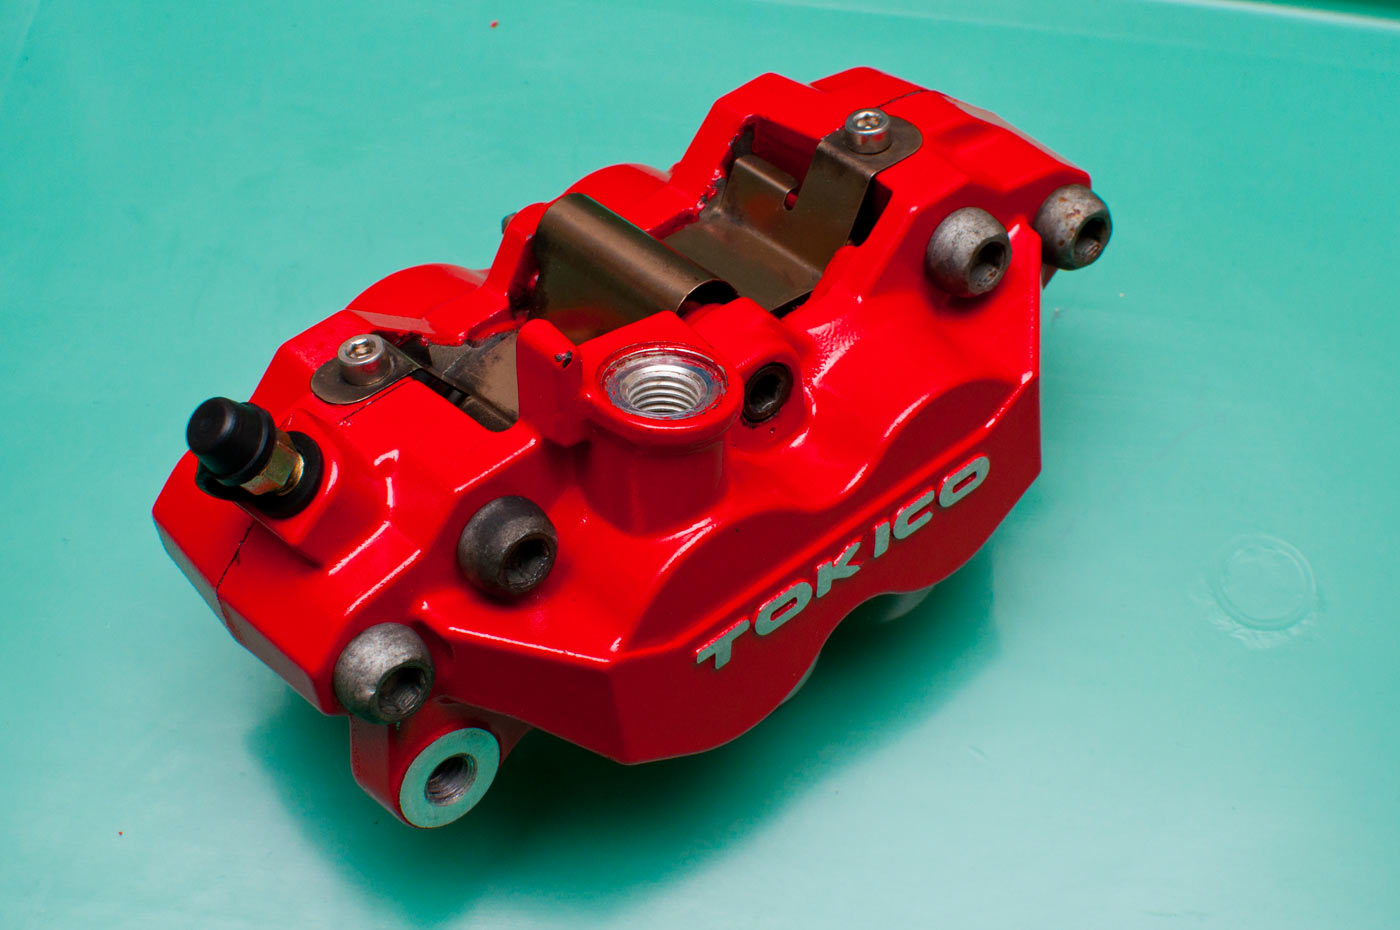
The next thing is to install the anti-rattle plate.

… and we’re all done!
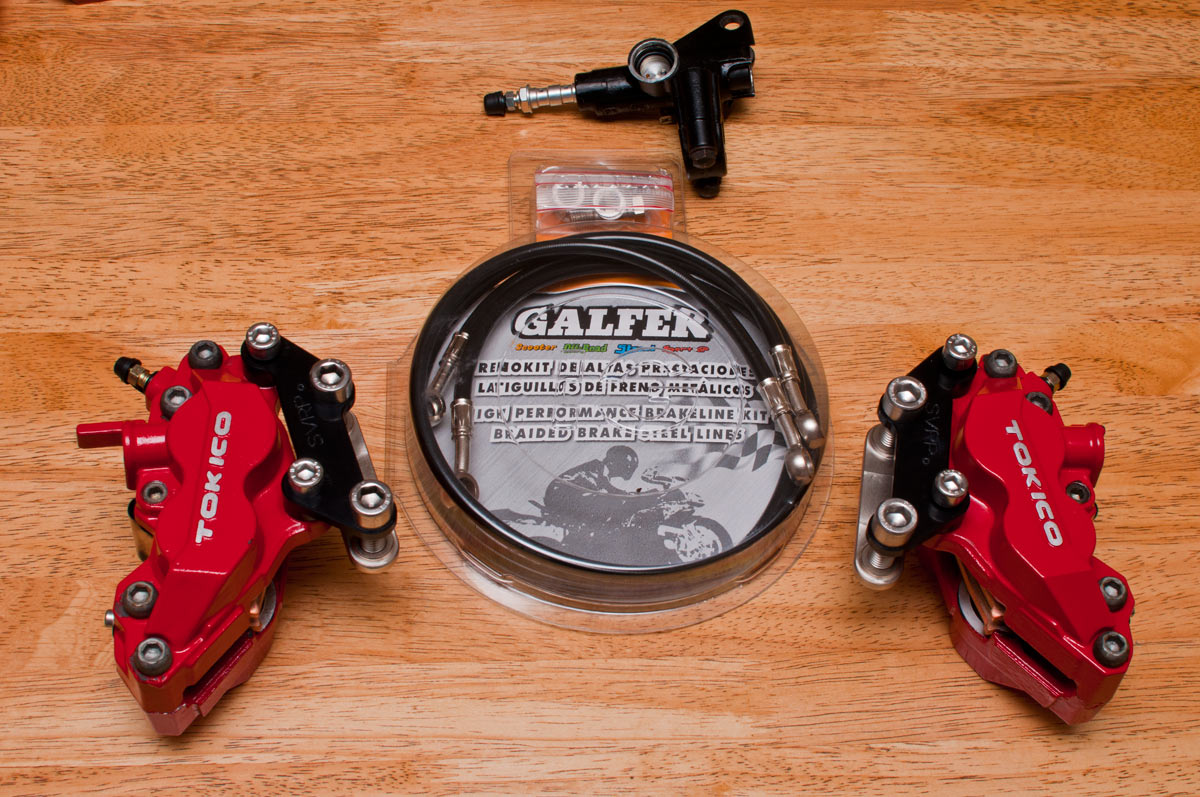
Now the last bits to allow for good reinstallation onto the bike. Braided lines, freshly rebuild master cylinder… and in this case, relocation brackets cause it’s going on an SV650.
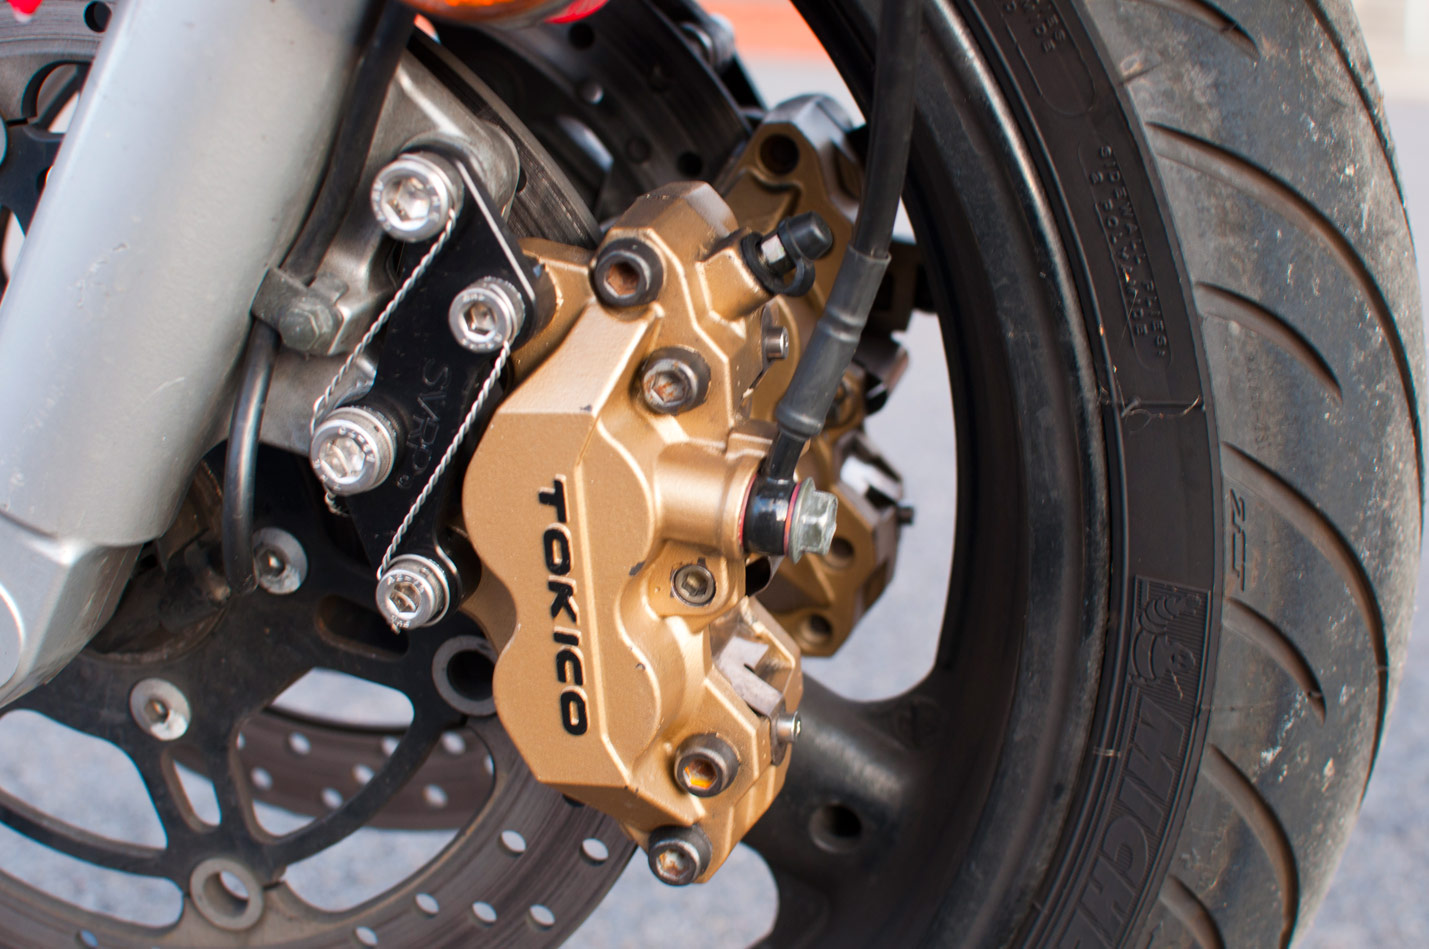
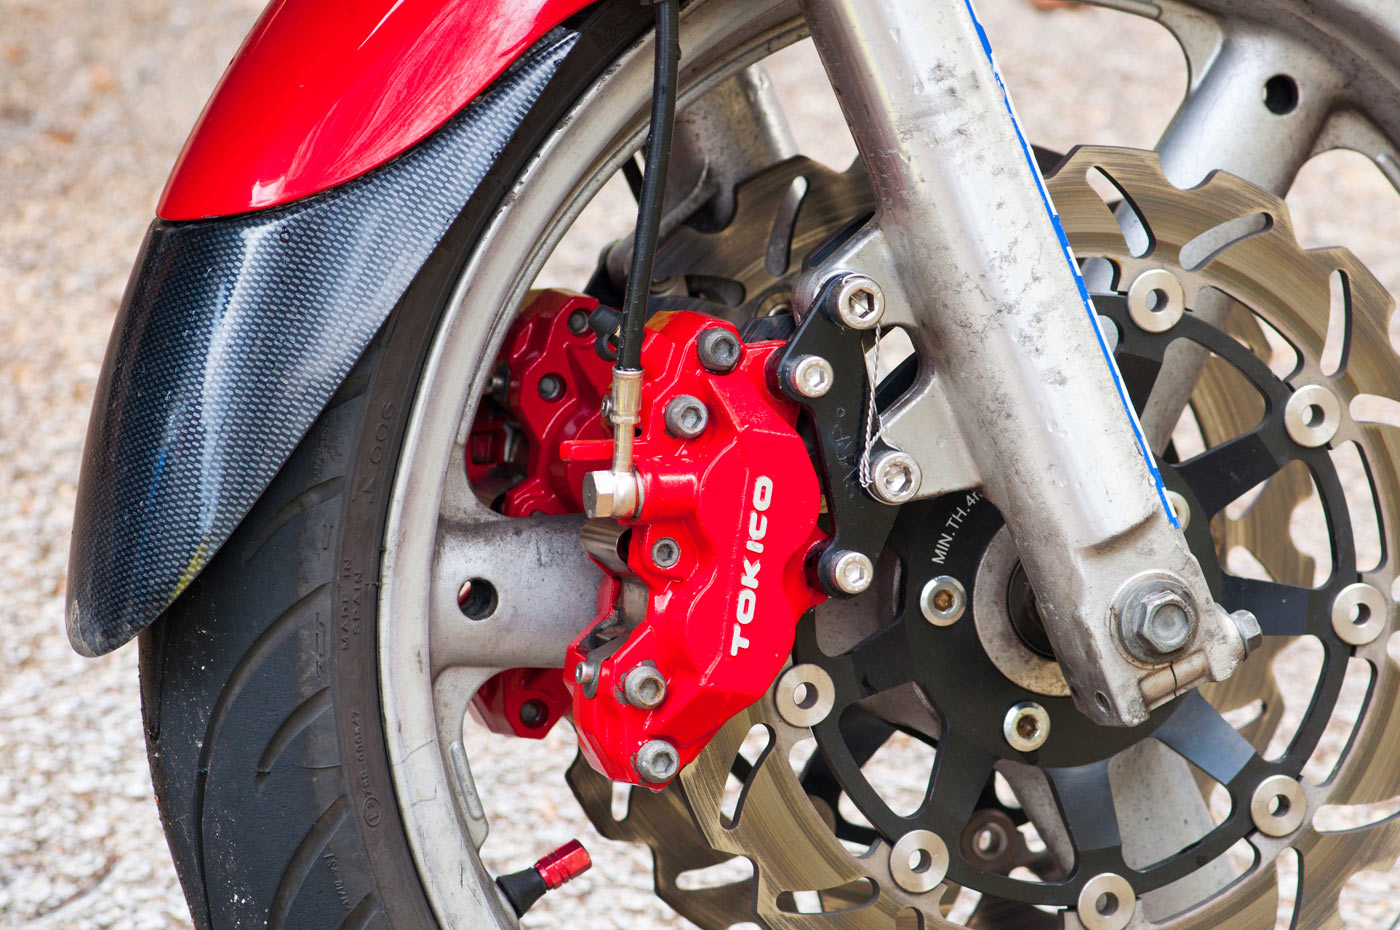
… and for good measure, here’s the same brakes installed correctly on a 1999 Suzuki SV650s with caliper adapter plates. Lockwiring because #racebike (not really).
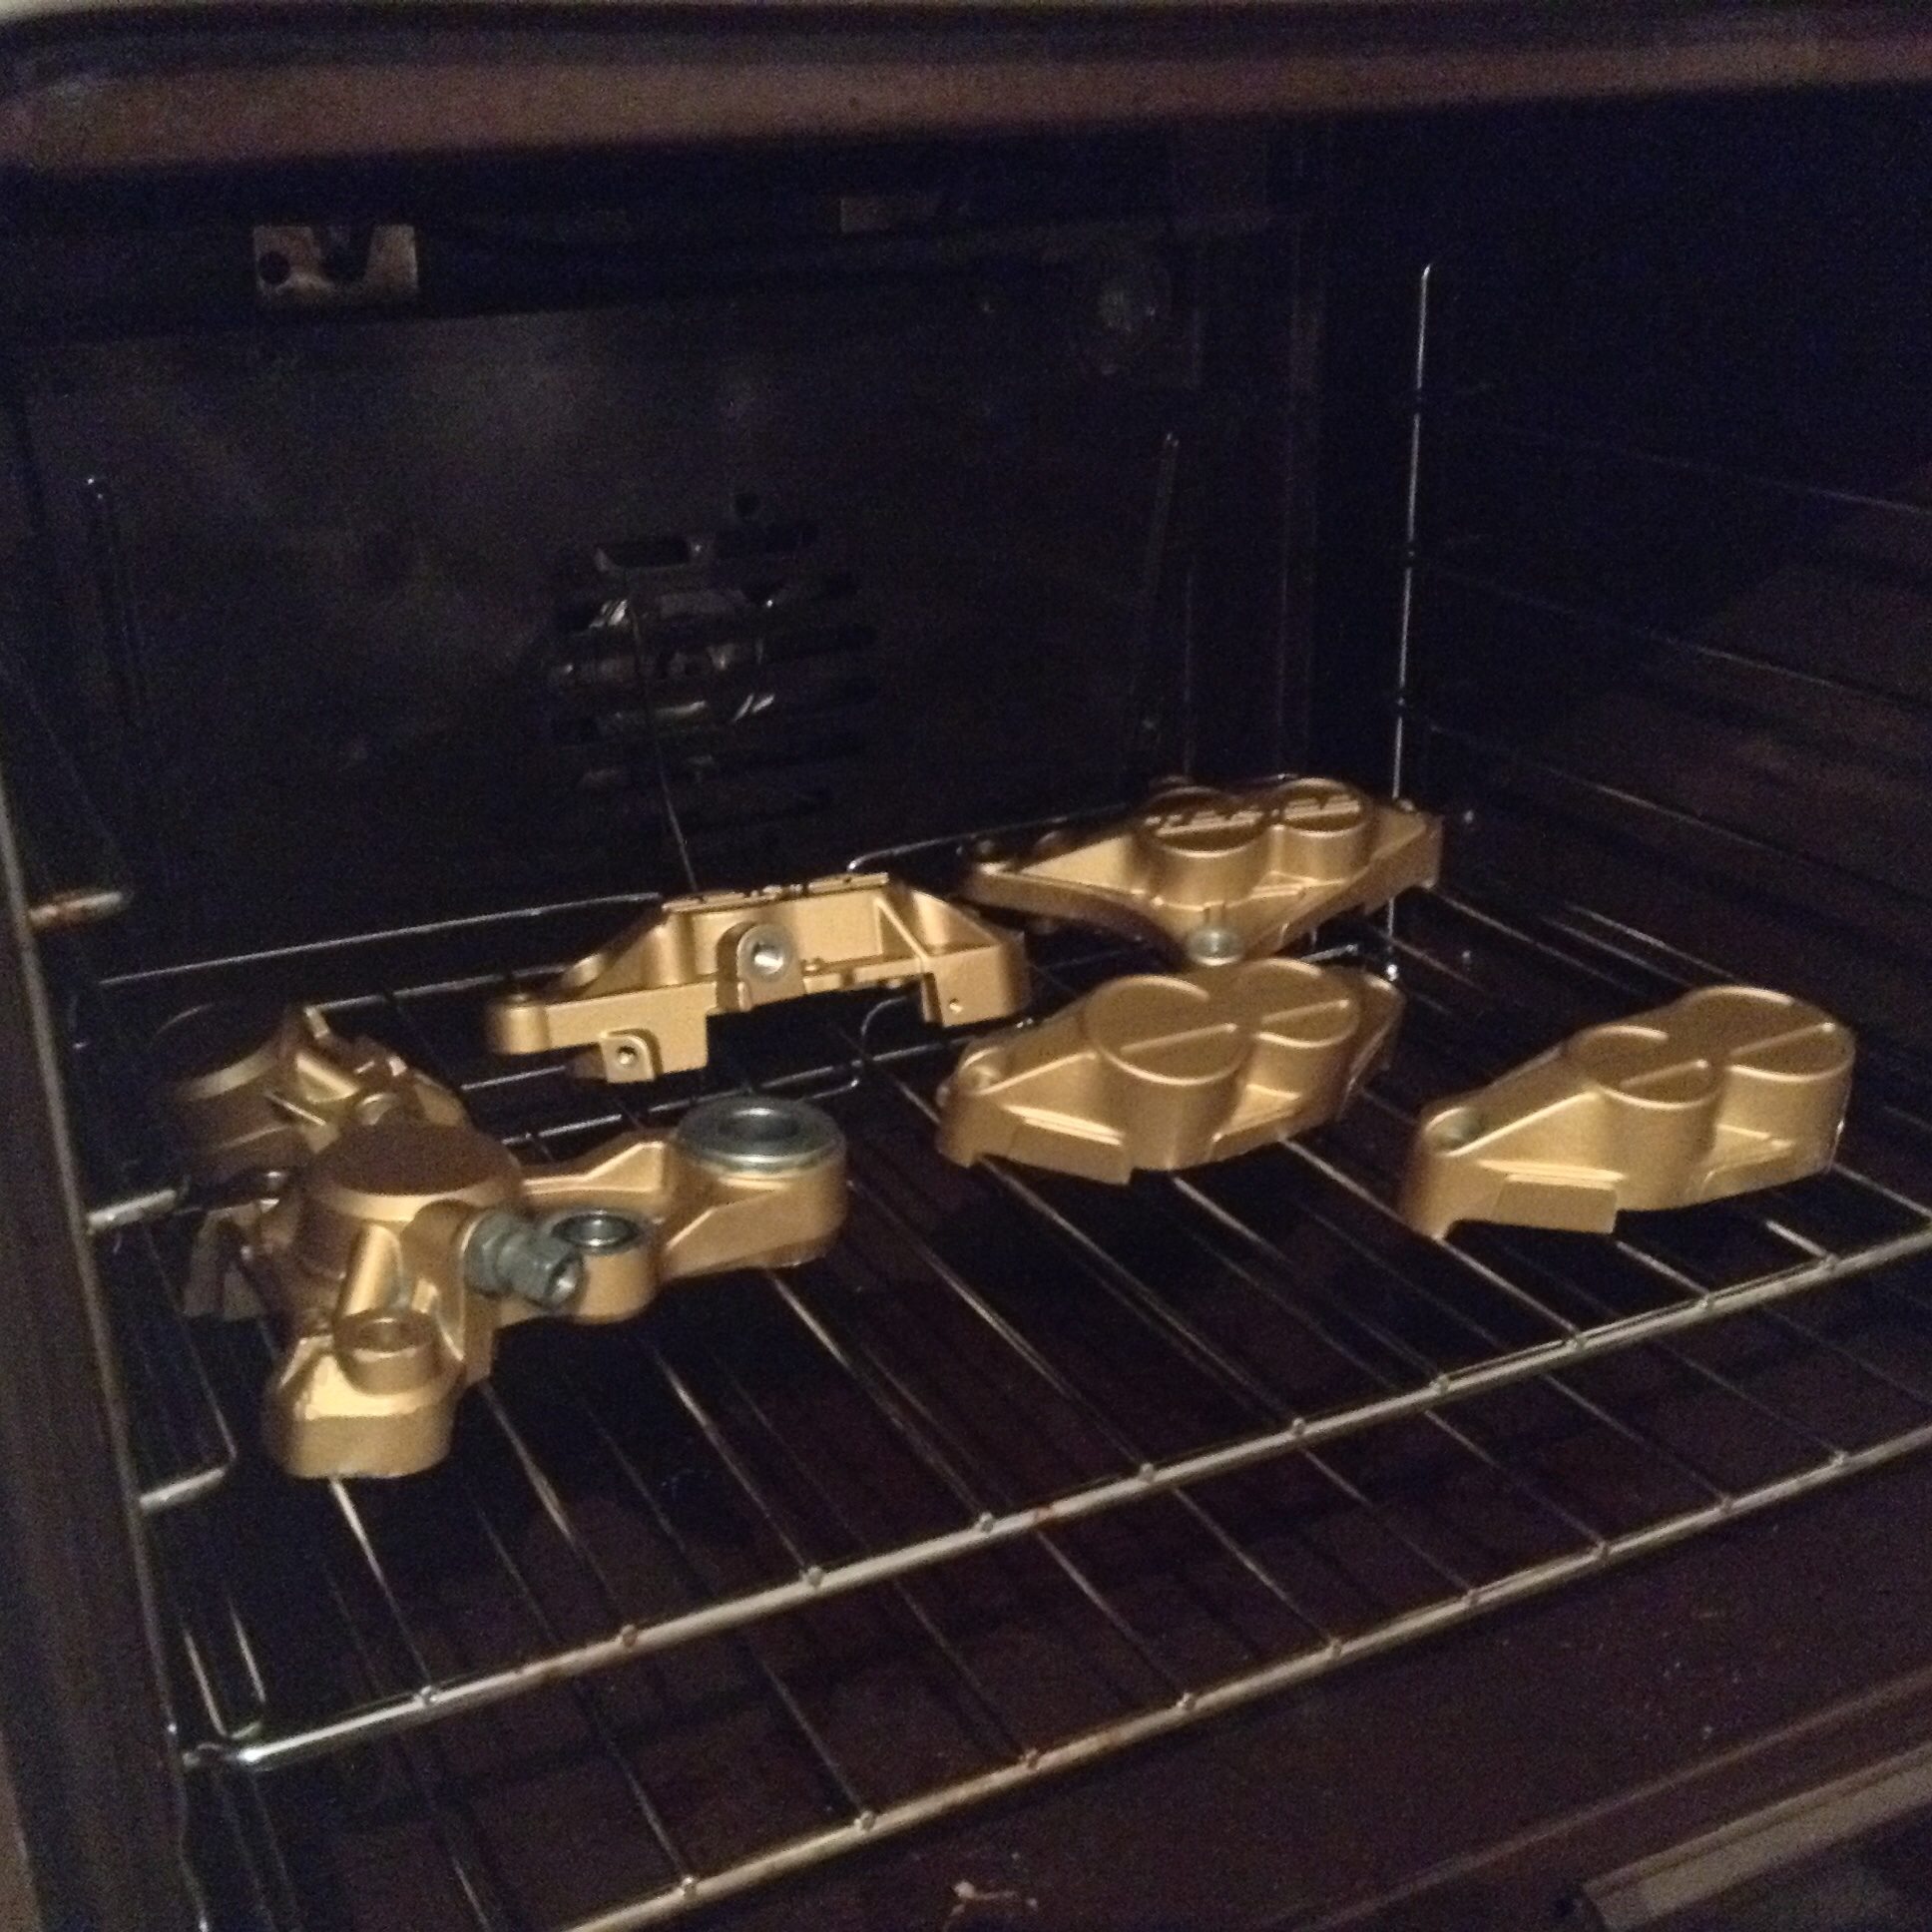
This upgrade on SVs is so good, I’ve done it to a couple now. In gold, the same calipers also look fantastic. This is on a 2006 SV650s, so gen2 rather than gen1. Still just as good!