
Installing a time-sert sump plug repair / thread insert
DIY articles -> Other mechanical -> How to install a Time-Sert thread repair insert
Installing a thread repair insert: time-sert

Unfortunately, a lot of motorcycles use aluminium for their cases. Doing a bolt up tight in an aluminium case can very easily result in stripping of the threads in the case. In these situations you have to resort to using a thread repair kit to recover the cases, or you just have to bite the bullet and buy new cases.
The engine I’m going to demonstrate this on is a 1989 Honda CT110 (postie bike) case. For the photos, the case is split. I have to do this for real on a proper postie engine and I’m not going to split the cases on that, in which case I’ll take extra photos. I tried to do it as much as possible like how you have to if you haven’t split the cases.
I put together this tutorial to help people out, but also as a practise run for me to do it on a set of un-split cases.
There are a number of steps that you take to install a thread repair insert.
Determine the size of the kit you need
For experts in sizing bolts, you can skip over this part. I’ve included it because I think it’s important to show to newbies how you do this sort of stuff.
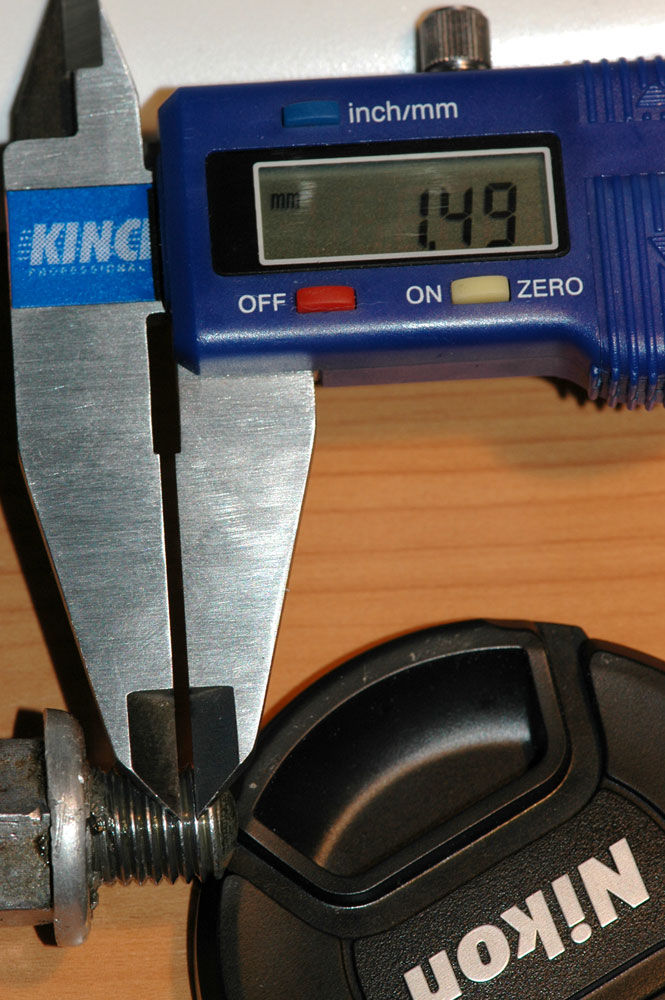
In this case, I’m doing a postie bike sump plug. I know that it is a metric bolt, and grabbing the trusty vernier callipers says it has a diameter of almost 12 mm (so it is an M12 bolt) and each thread is separated by ~ 1.5 mm, so it is an M12x1.5 mm bolt.
 Measuring the diameter of the bolt. Nearly 12 mm means this is an M12 bolt.
Measuring the thread pitch. The image below shows where you measure on the threads – it’s from one point to the corresponding point one thread up. This measurement is how far the bolt will insert for one rotation, if you’d prefer to measure it that way.
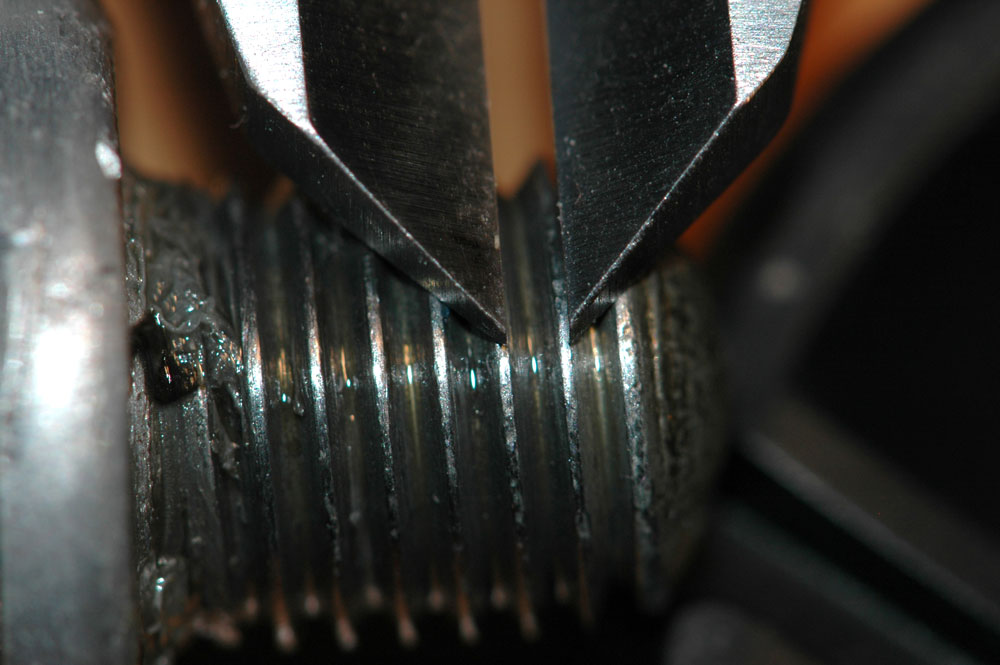
Here’s how you measure the thread pitch. In this case, I’m measuring from the bottom of one thread to the bottom of another.
Pretty simple. But, like I said, I wanted some photos to show people how you measure these kinds of things.
Find an appropriate insert kit
There are a number of insert kits available. Common ones are Helicoils and Recoils, which are very similar, and the Time-Sert kits.
I am using a Time-Sert kit in this case, as:
- It is a solid insert so it has less chance of leaking oil;
- It has a tapered top so it has less chance of being wound into the crankcase after installation;
- It features an installation method that grips the entire way around the insert, making it more difficult for the insert to come out whenever the sump plug bolt is removed; and
- The insert is installed using the entire body of the insert, not a tang, so there’s no chance of the tang snapping off halfway through, buggering the install, or bouncing into the crankcase necessitating splitting the cases to remove the little bugger.
A major downside to the Time-Sert kits, however, is that they tend to be expensive. Most local bolt shops should have all of the types, and you can also order them over the internet, for example, you could get a Tme-Sert kit here (or you can jump on ebay and search for the sizing you need, which is where I got this kit). Speak to a bolt place or someone with lots of knowledge on this (more than I have, for example!) before you decide which kit to go with.
No matter the kit you buy, you can chose to buy them either as a kit for a single size or in a multitude of sizes. The kits with many inserts are good economy if you think you’ll be repairing a lot of different bolts. Me, I tend to aim to get only the sizes I need. For this project, most of the insert kits only have inserts up to M10 anyway so you need to be separate kits for the big sizes. More often than not big bolts, unfortunately, seem to be the ones I see stripped.
Contents of a kit
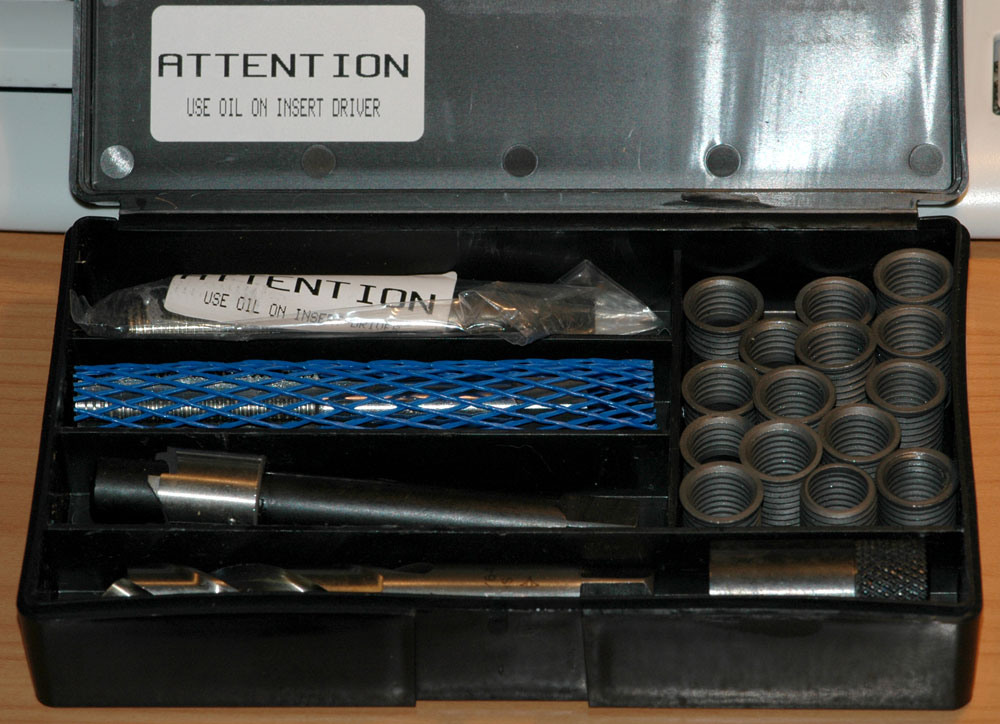 Contents of a single Time-Sert kit (I bought additional and longer inserts though)
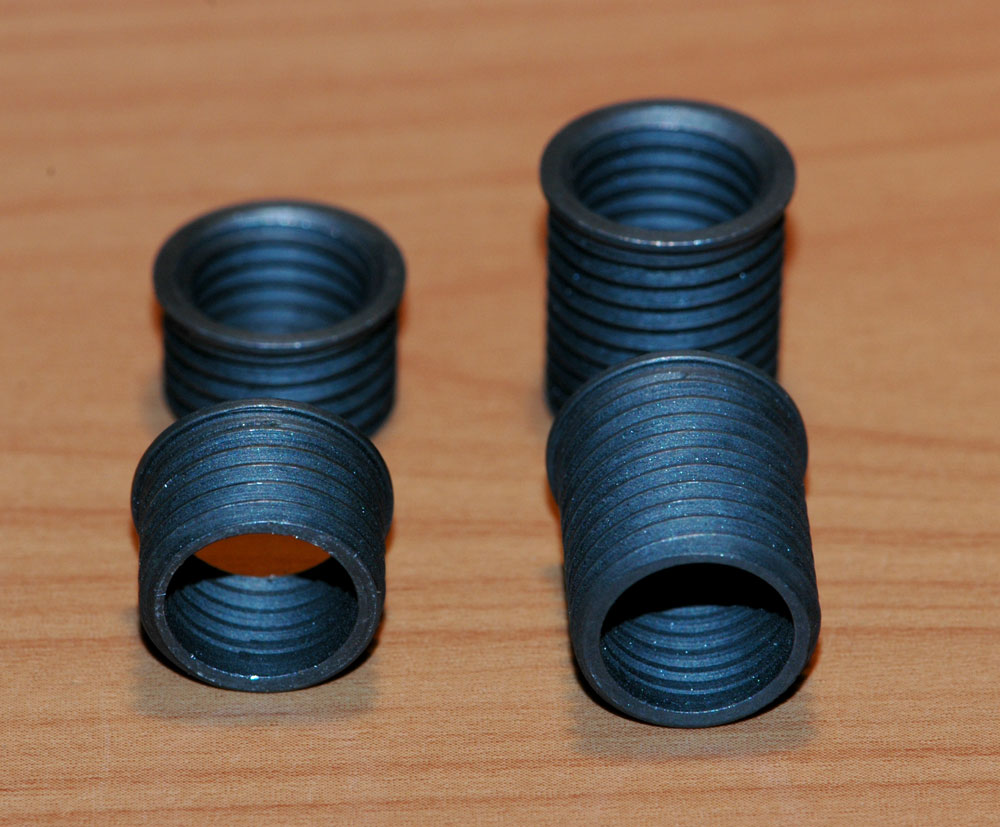
Inserts. On the left are the 9.2 mm drain plug inserts that came with my kit, and on the right the 15 mm inserts I purchased separately.
I bought a kit which came with 9.2 mm inserts (it is intended to be a drain-pain installation, so they are quite short). Just in case I needed deeper ones, I also grabbed some 15mm inserts. Inserts are cheap once you have the installation tools.
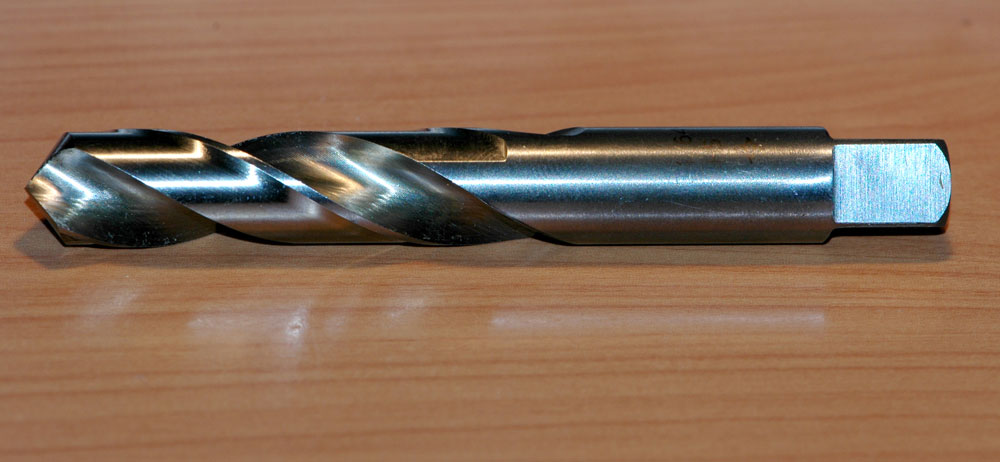
Drill bit from the Time-Sert kit
You use the drill to remove all of the old threads in the hole. You also want nice clean sides to the hole to make it easier to tap in the threads for the insert.
Countersink bit from the Time-Sert kit.
This is contained in the Time-Sert kits and not the other types of insert kits. The tapered top to the Time-Sert means you require a countersink portion at the top of the hole to make it work.
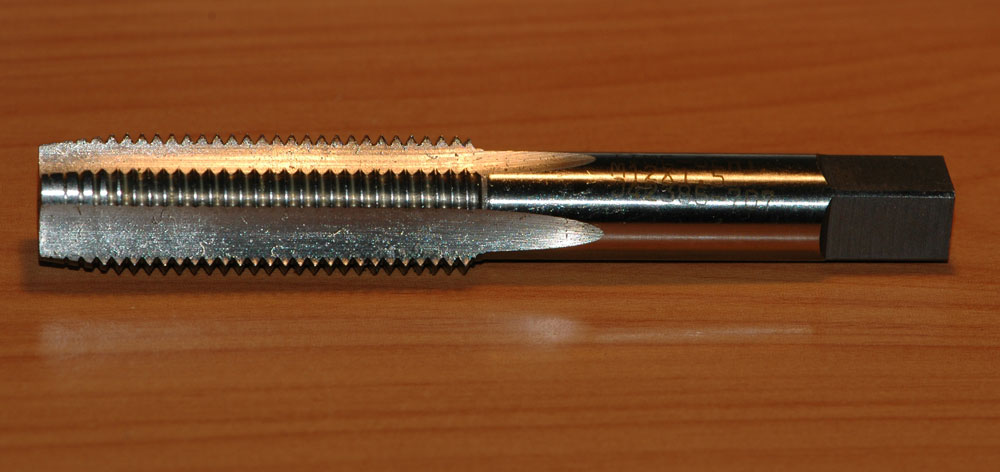
Tap from the Time-Sert kit.
This is the tool used to create the threads that the insert sits in.
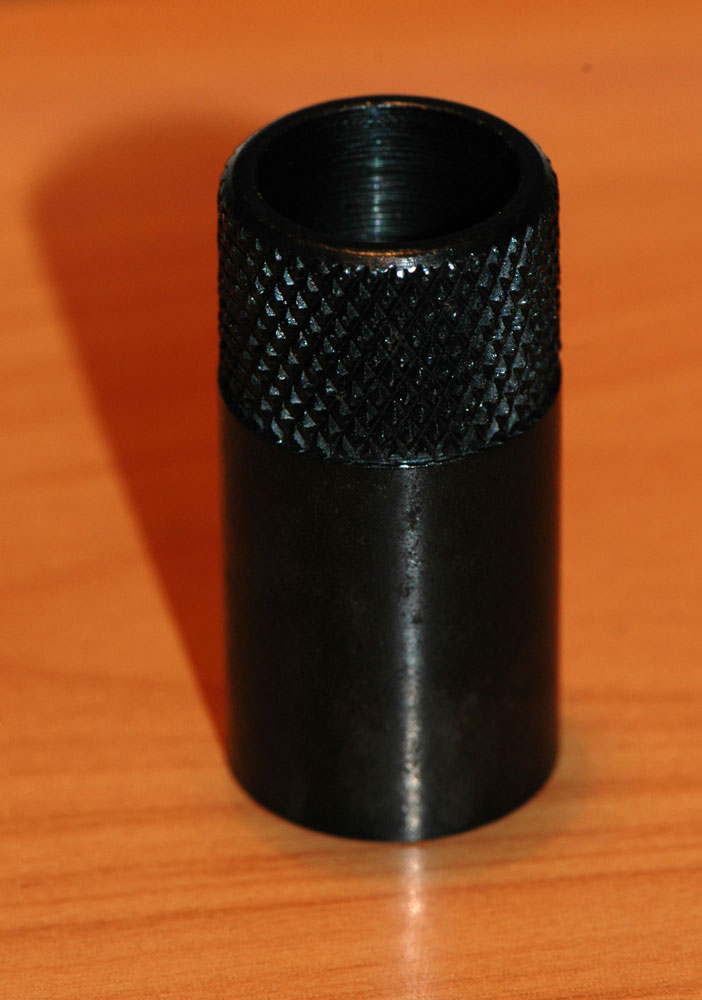
Tap guide.
Use this to keep the tap orthogonal to the surface that the bolt head will bear against. Smaller kits don’t always have this, so it can be useful to have your own tap guide to help keep everything straight.

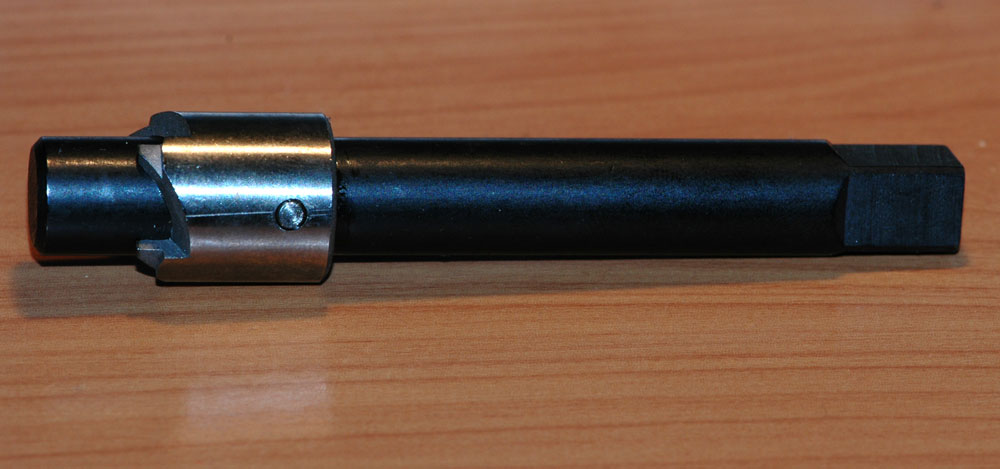
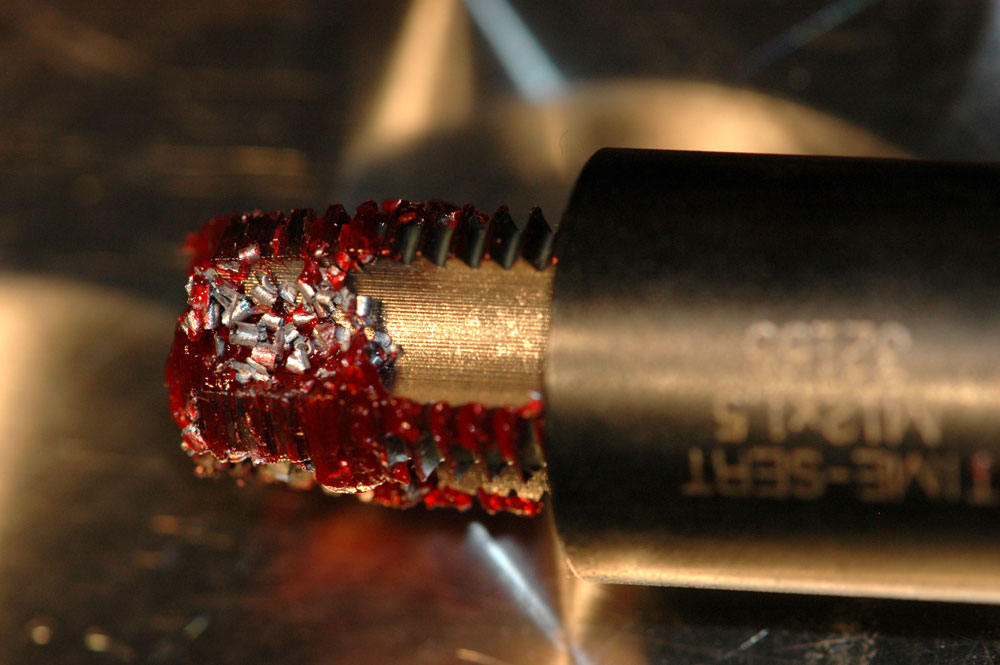
The Time-Sert insertion tool.
This is another difference between a Time-Sert kit and a Helicoil or Recoil kit. Helicoils have a little tang at their bottom that you use to install it. The Time-Sert uses this slightly oblong shaped (in cross-section) threaded insert tool which cold-rolls the inner threads of the insert and forces the insert out into the outer threads, making for a tighter fit. If you look closely at the inside threads of the insert, you’ll see they’re not fully cut, and they slightly taper smaller at the bottom.
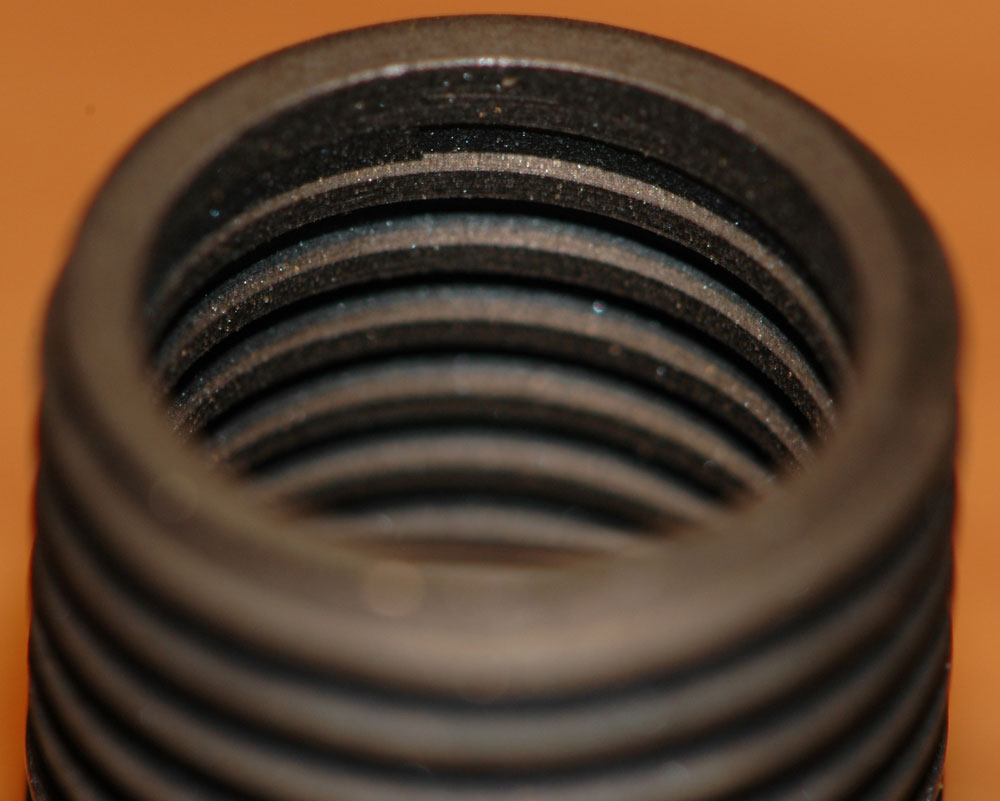
Internal threads for the time-sert insert.
Because the insert tapers very slightly, and the threads are not fully formed on the inside, the insertion tool will actually roll these threads out, press the outer threads into the threads you cut in the hole and generally expand the insert so it holds on nice and tight.
You can also tell that there’s something odd about these inserts before they’re installed – the original bolt won’t fully go into them.
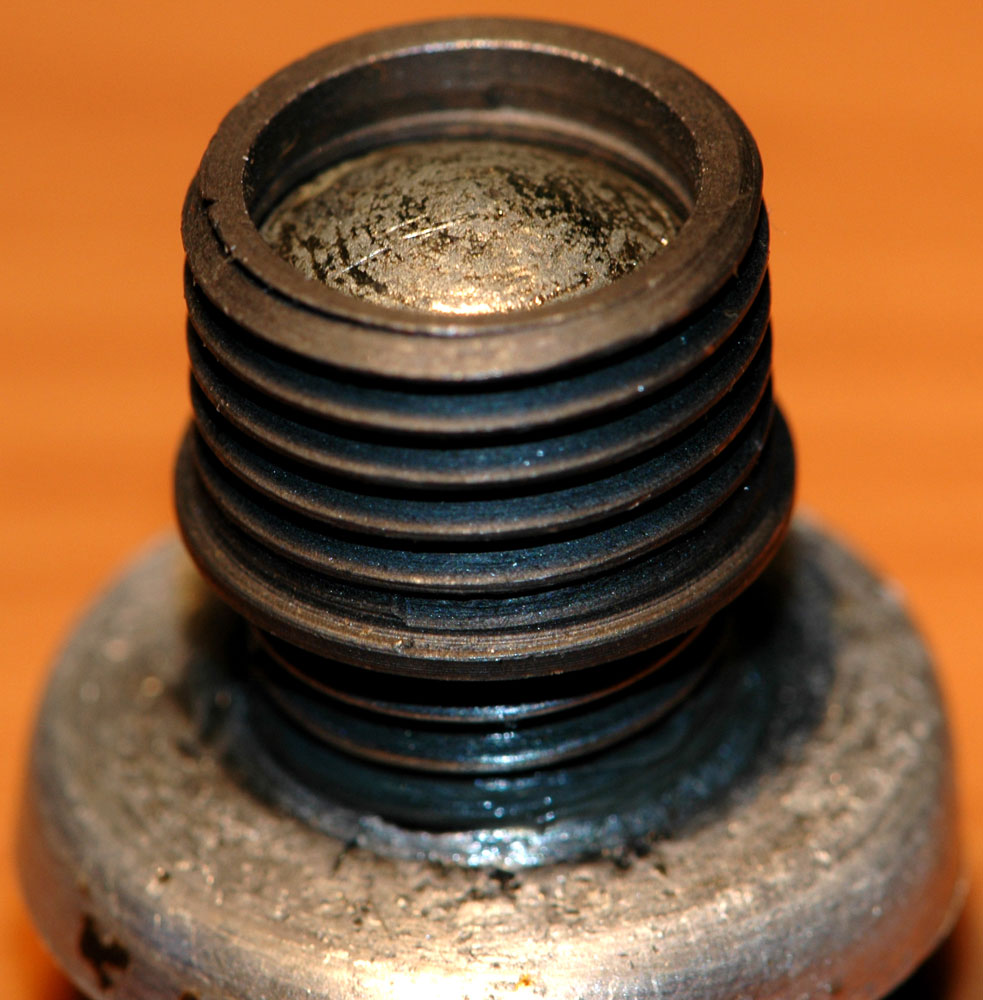
Insert on the sump plug bolt.
Note that when the insert is installed properly, this bolt will properly tighten through it – but the act of insertion changes the shape of the insert, which then makes the original bolt fit properly.
Other things you’ll need
Tap handle
Taps, and even the drills in this kit, have square ends to their shanks. A special type of handle is designed for grabbing this. You can improvise with a shifter, which I had to do for this install because my tap handle didn’t go big enough. Tap handles do make it easier to spin a tap evenly. I’ll discuss tapping technique presently. If you have never seen one, Wikipedia covers them in a good amount of detail.
Grease
When you’re cutting metal, as you’re going to be lots of times with these kits, a lubricant is necessary. Most tapping tools will tell you to use a certain lubricant for best tapping, for example, kerosene to tap into aluminium. That’s all well and good, but a normal lubricant will spread your shavings (affectionately known as swarf) everywhere. If you use grease all of the swarf gets stuck in the grease, and you don’t end up with swarf in your crankcase. This is clearly a good thing – swarf in crankcases tends to destroy things like bearings, and is a pain in the arse to get out unless you split the crankcases or fill it repeatedly up with diesel then flush with lots of motor oil. Diesel and motor oil cost a lot more than the grease you use on these kinds of tasks.
I used high temperature wheel bearing grease for the pictures in this tutorial for no other reason than that is the only grease I had at home. Anything should do, as long as it is sticky (and all greases are!)
Oil
The insert tool requires use of oil. I just used motor oil but you could use a specialist cutting oil or even sewing machine oil if you were anal or didn’t give two hoots, respectively.
Rags
Grease is messy. Rags clean up mess. You’ll also collect loads of swarf, and it’s handy to wipe that off with a rag, too.
Clamps
No matter what people say, you need to clamp your work down when you’re tapping threads or even trying to use a big, sharp, coarse drill bit on an already enlarged hole. A drill press is ideal for some of these tasks, but that assumes you either have a very small motor, or a big drill press, and also that you don’t mind swarf getting into your motor as it’ll have to be upside-down (unless you can turn your entire drill press upside-down, in which case, you probably already know how to do this so stop reading the tutorial).
Using a Time-Sert kit
This is easier than you think, but I’ll try to cover it in excess detail to make it easier to know what the go is.
1. Prepare your work
This is where you clamp down whatever you’re operating on to a bench, and if you need to, you remove any covers. For a live postie motor I’ll pull the clutch cover off cause it will give access to the back side of the upper part of the drain plug so I should be able to pick at any swarf that makes it past the grease and into the motor.

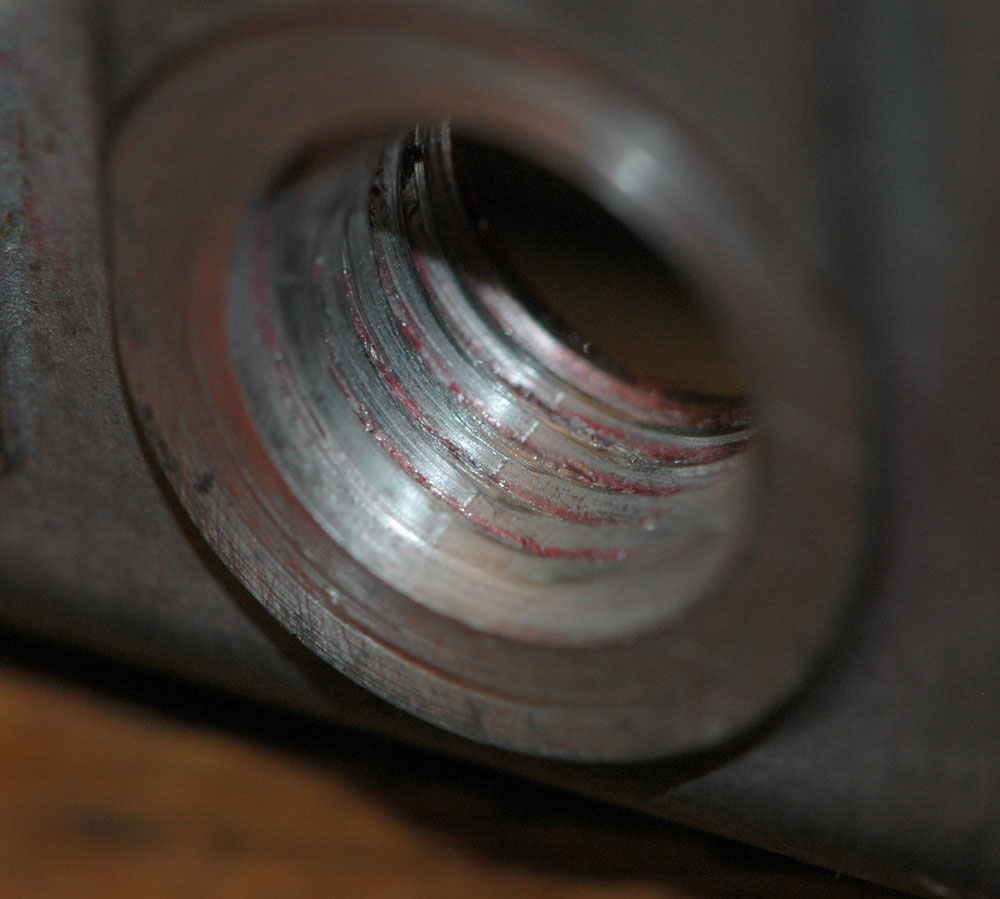
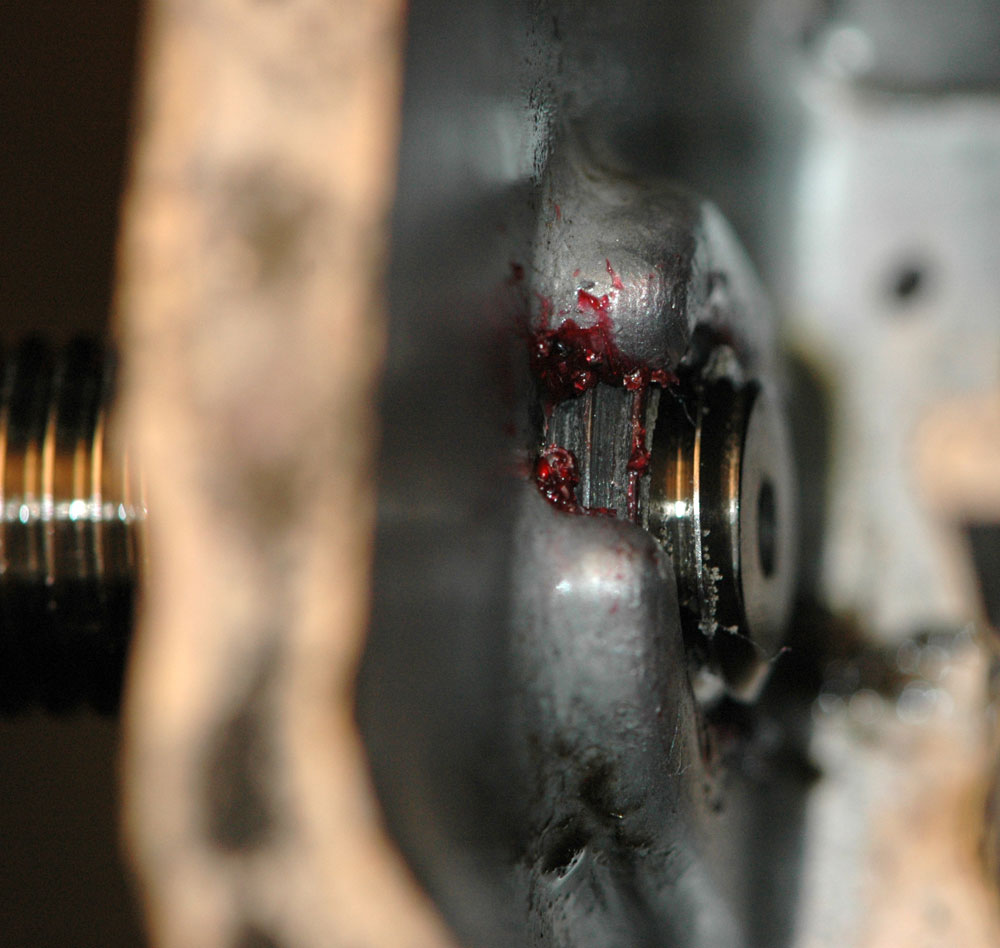
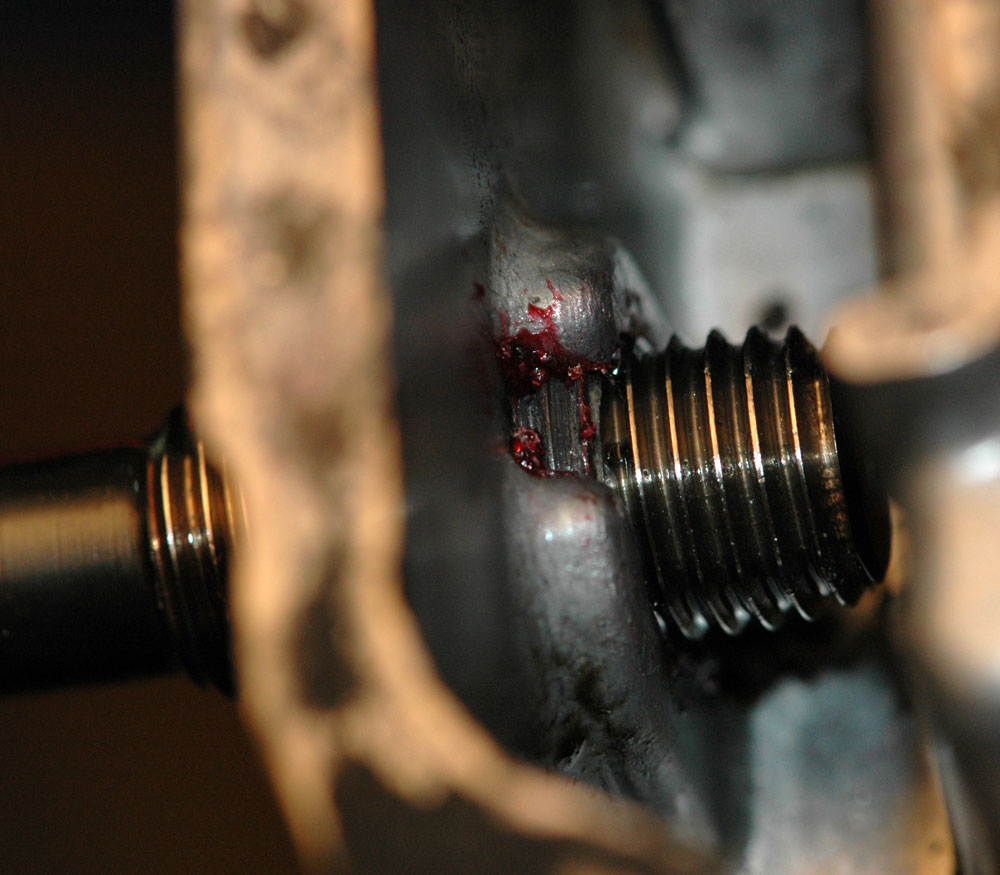
Here’s a quick before shot of the hole.
The threads in the hole I’m using for this tutorial aren’t too bad, but it’s useful to practise on something before trying to do this on a real life engine that you’d have to fully dismantle and buy new cases for if you cock it up.
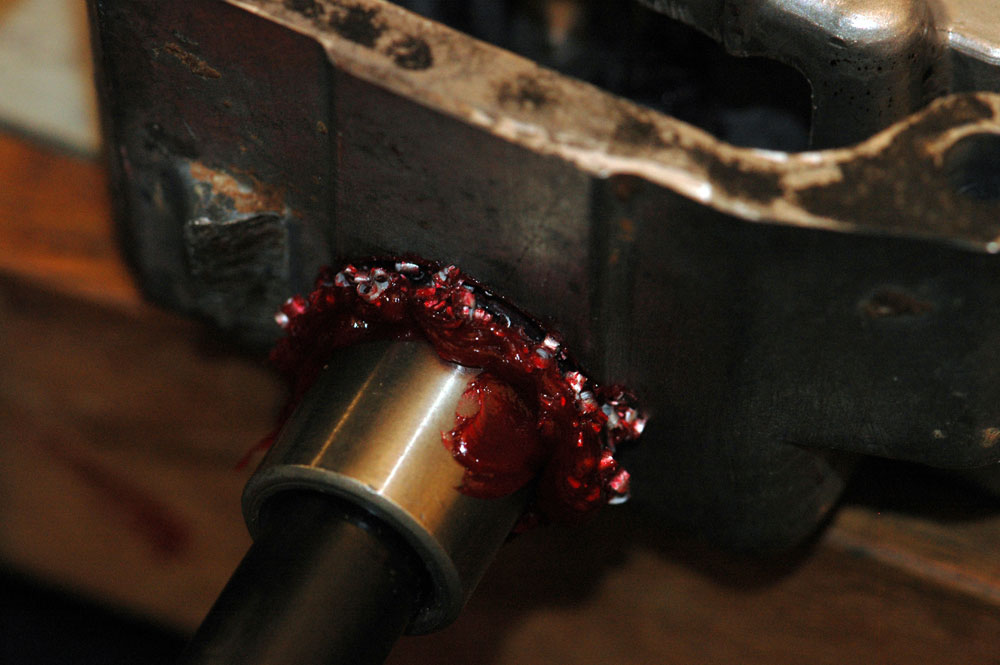
2. Clean out the old threads
Use the supplied drill bit for this. You can either drill this by hand (hard to do!) or do it VERY slowly with an electric drill.
Coat the drill bit in copious amounts of grease.

Drill bit with lots of grease on it.
Make sure you keep the drill bit perpendicular to the surface that the bolt head will bear onto. If you get this wrong, you’ll bugger up the tapping and, quite frankly, you’ll end up having to buy the next size up insert kit and you’ll feel like a bit of a fool. Keep it straight! A helper is good here; they can tell you if you’re getting off line. I tried to teach my pooch to tell me when I was offline but he just went back to gnawing on a bone.
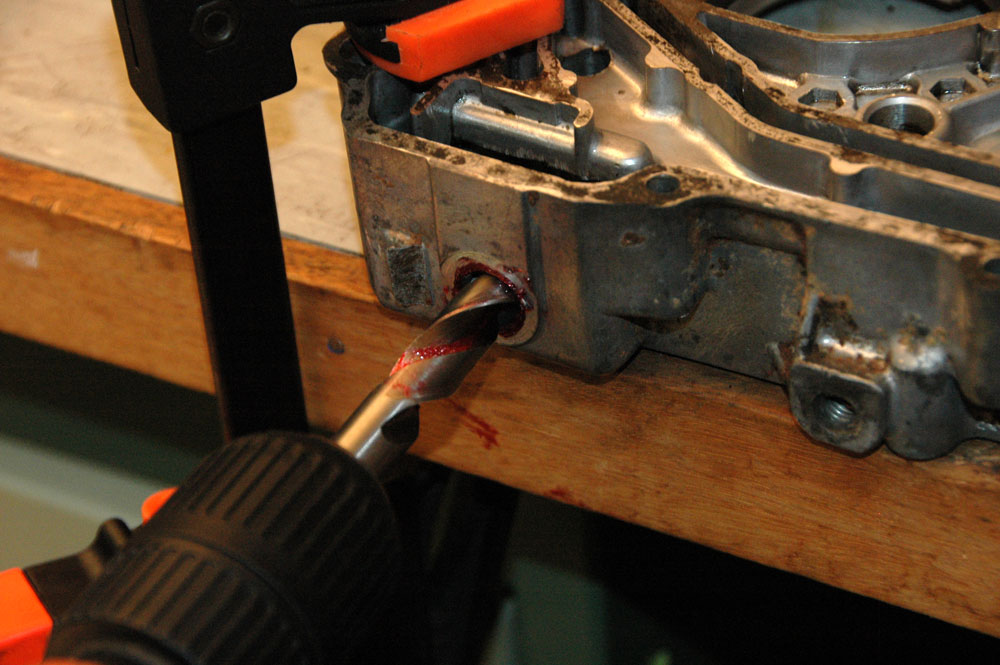
Drilling the hole to clean out the old threads.
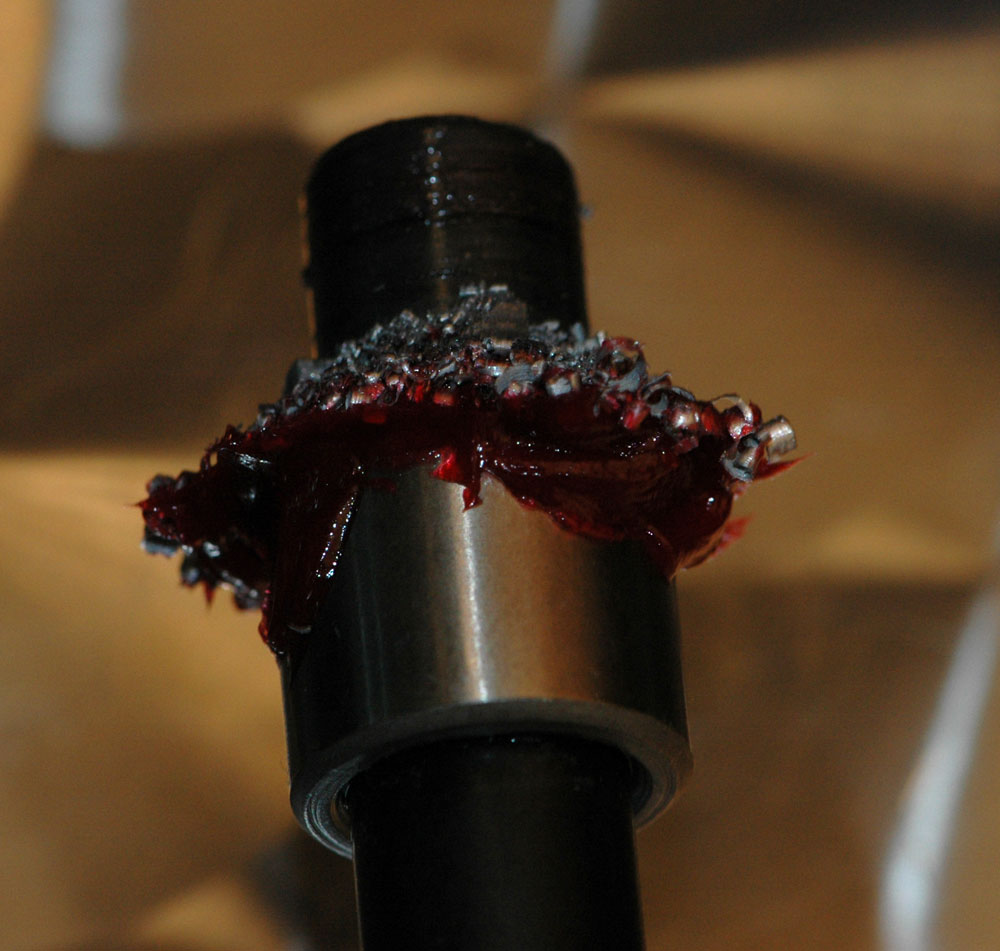
Work the drill slowly in, and if it gets stuck, don’t force it with more power, run the drill bit backwards to break any chips out. It can take some time, but just keep working it backwards and forwards, always turning the motor slowly. Don’t spit swarf everywhere as it’ll flick around outside and into your eyes (unless you have safety glasses on in which case: good man!) and also flick off the end of the drill bit inside the engine, spreading swarf inside your motor.

Swarf on the end of the drill bit. See, grease works!
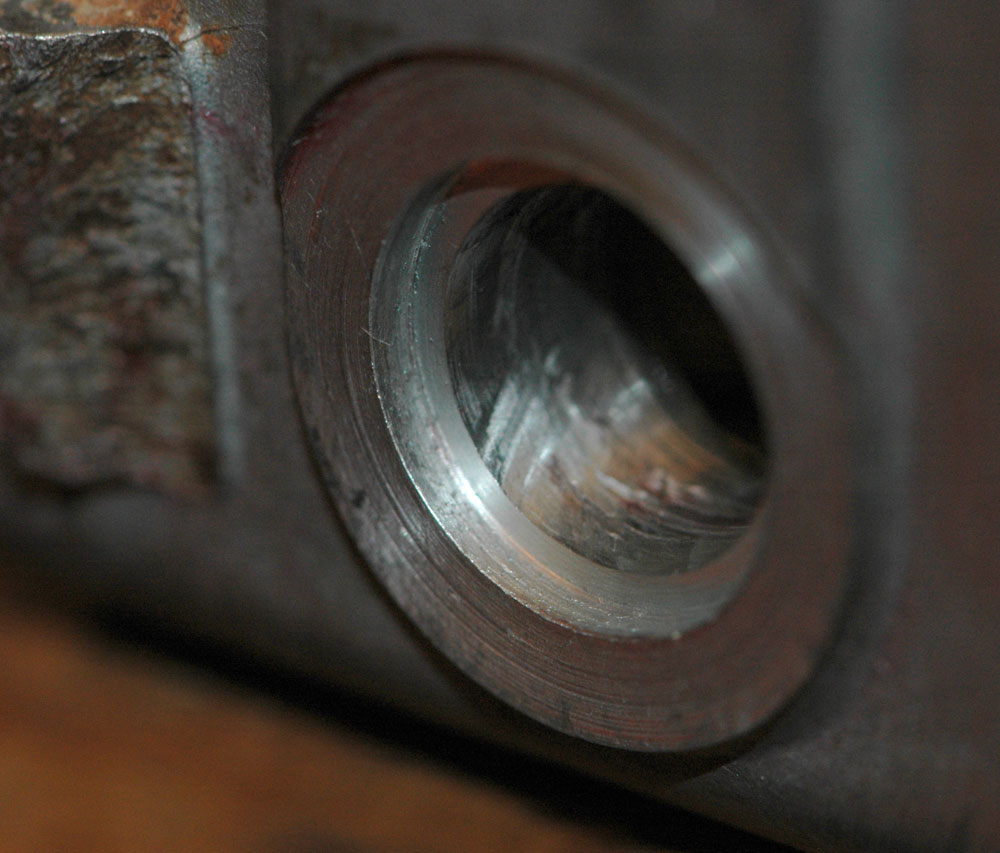
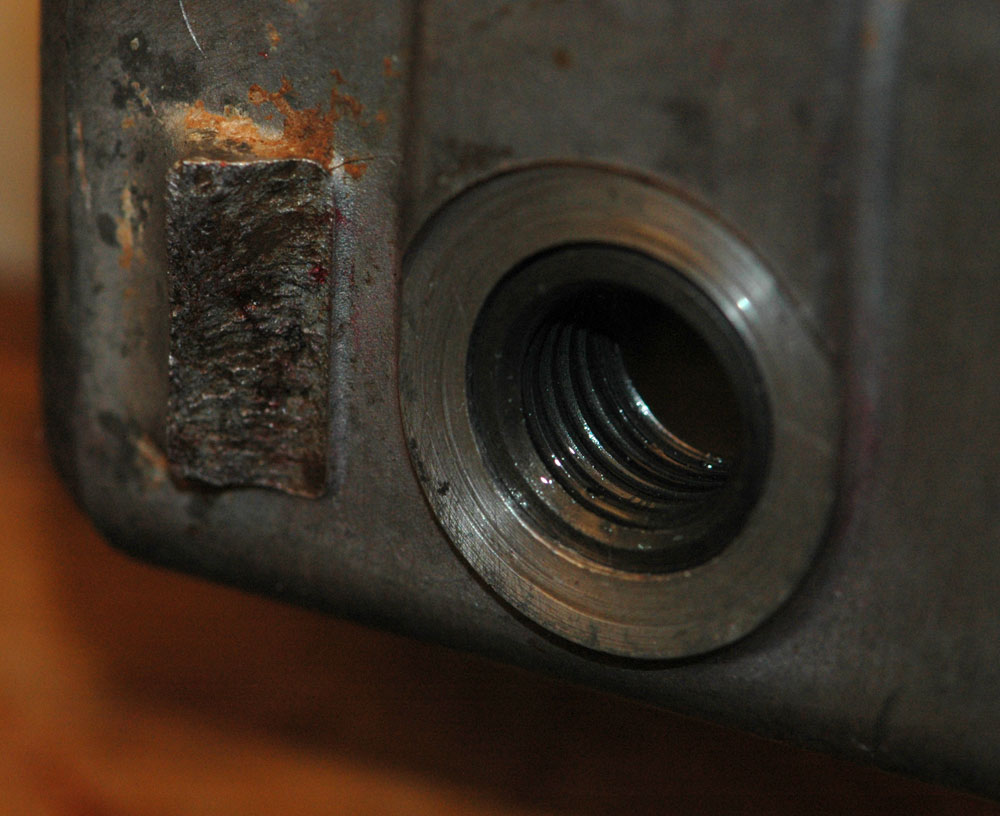
At the end of it, you should have a nice clean hole. You have may have a small ring of debris around your hole, but hey, nothing some rags can’t clean up.
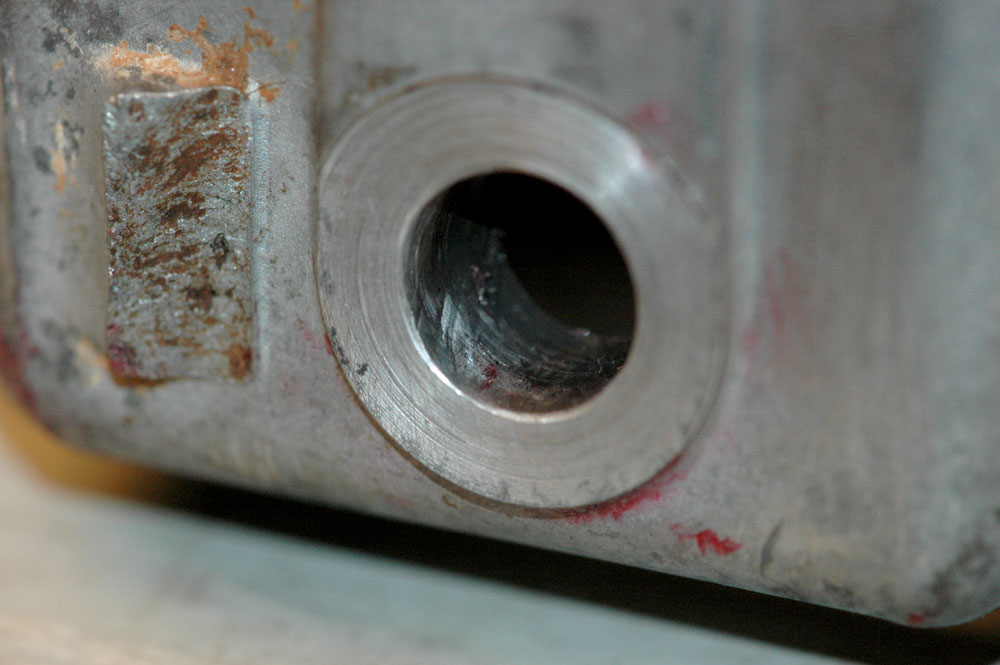
The hole, with all threads removed thanks to the drill bit.
3. Countersink the hole
Coat the head of the countersink tool with grease to contain swarf. If you don’t, PLEASE wear safety glasses – this tool flicks a lot of metal around.

Grease on the end of the countersink bit.
This tool produces a fair amount of swarf quickly, at least it stays on the outside of the hole.
If your grease is sticky enough, it’ll also stay on the end of the countersink bit.
Keeping the countersink bit perpendicular to the surface, work it in and bore until the bit will not let you bore any more.
Clean up the bit and the hole. You now have a clean hole with a countersunk section at the top.
Beautifully countersunk hole.
4. Tap the threads for the outer part of the insert into the hole
Here’s the really fun part. This is not the time to be learning tapping a thread 101, but I’ll give you the lowdown on that first.
There are two schools of thought on tapping threads: one is to just go at it as quickly as you can, smoothly, and keep it straight, and the other is to go forwards half a turn, then back a quarter of a turn, all the way through the hole. The first style seems to produce really smooth, nice looking threads. The second style is what most schools will teach students. The first style really needs high-speed steel taps, tapping in soft materials like aluminium, the second style will work on almost anything you can tap.
I work somewhere in the middle. For cutting threads for an insert kit you want slightly coase edges to the threads so it’s got some grip. You also don’t want all the swarf going into the motor, so you don’t want to just do it in one fell swoop. I go in a few turns to really cut some threads, then back it right out, clean out the flutes, relubricate, then cut more threads.
In case you’re going “huh?” about the word flutes in this context, they’re the cut out bits on the tap that hold the chips as they come away from the metal on the sides of the hole you’re tapping.
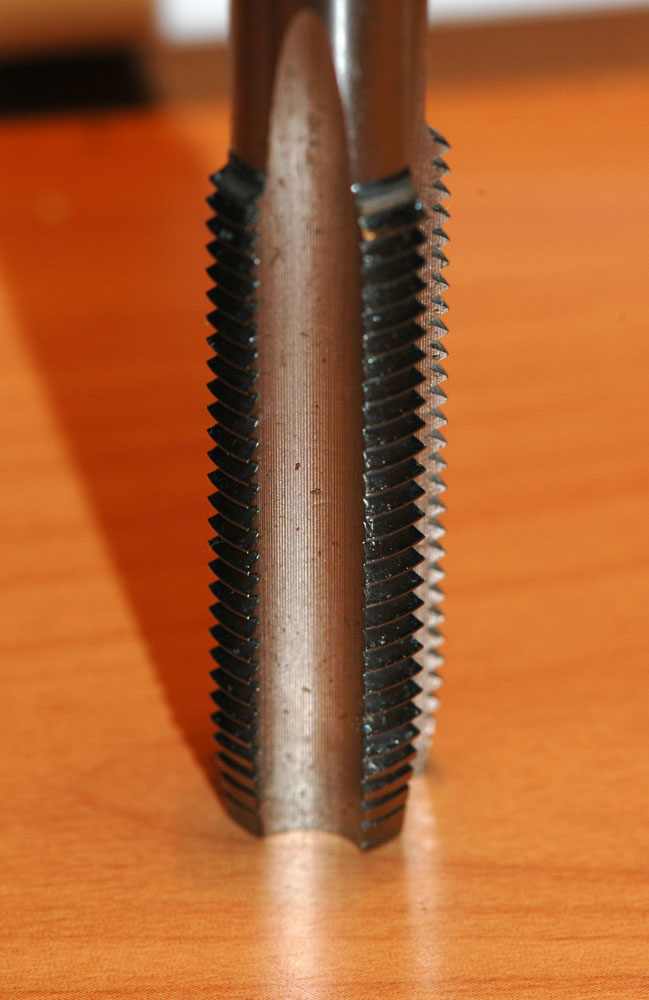
The cut away pieces of metal in the tap are called flutes. They serve to extract the swarf as you chip material from the sides of the hole.
Thread tapping 101
Tapping a thread is pretty easy.
You start by ensuring the tap is square to the surface – that’s what your tap guide is for! Use it!
Make sure you’ve got a suitable lubricant on the tap, both in the flutes (which collect the metal you cut out) and in the cutting teeth (which are what need lubricating).
Put on your tap handle, or use a shifter like I am for added dodginess, and start the tap spinning clockwise (unless you’ve got some odd left-hand-thread insert, in which case you are probably repairing something British. I pity you.) The tap will spin and slowly bite. As it bites, don’t wriggle it, please, you’ll cock up the start of the thread and then the bolt won’t work. Get a couple of turns on it, so you’ve at least cut a reasonable couple of start threads.
Here’s the tap in use. Note the guide to keep it straight. Yes, I should really use a proper tap handle, but these taps are just bigger than my biggest tap handle, so a shifter will suffice. Again, you just make sure you keep it straight and steady if you do it this way.
Normally you wouldn’t let a tap hang in the thread like that, I purposely cut more threads than I normally would at the start so it would stay and I could get a photo. The things I do. Anyway, after a few turns at the start it’ll start getting harder to turn. Do NOT proceed to the point where you cannot turn the tap – this is where you snap it off and if you’ve ever extracted a screw extractor you’ll know just how damned hard these tools are. Of course, if you’ve already bound the tap then you’re in trouble… In either the case you’ve done it right and it’ll still turn, or it is bound, you start to back the tap out by turning it counter-clockwise. Again, do not wriggle it, and turn it until it is ENTIRELY disengaged from the thread. It is NOT a drill bit, do NOT just pull it out of the hole, you’ll rip out the threads and feel like a fool.
With the tap out, you can see all the material that’s collected in the flutes. Clean it out.
Swarf collected in the tap flutes. This again shows the reason I use grease.
Relubricate, and repeat. Take it easy – you can go really slowly and do it half a turn forwards, all the way out, clean out the swarf, etc, or you can take a few turns then back it right out. The further you go the more chance you have of getting swarf into the motor and the more chance you have of binding the tap and snapping it. You have been warned.
If you’re doing this in a drill press, you’re tapping into soft aluminium, you are confident, and your tap is a high-speed steel one, you could go full speed and do it in one fell swoop. But, hey, if you were that confident, you might not be reading this guide, and you certainly wouldn’t be doing it on an engine in-situ, so this guide probably isn’t for you.
After a while you’ll realise you’re cutting no new material. This will feel nice, as the tap will never get tight as you turn it. Congratulations, you have tapped a thread.
If you haven’t ever tapped a thread before attempting to tap one for a thread insert kit I’d suggest picking up some scrap metal and a cheap set of taps and practising so you know what it feels like.
With the tapping done, clean up that hole and check out the threads.
Threads ready for the installation of the insert.
You now have a hole, which has a countersunk top, and has the outer threads for the insert cut.
5. Install the insert
The Time-Sert kit is VERY specific on this: USE OIL ON THE INSERT TOOL. Seriously, it’s not hard, read the instructions, and do it. You’re not really cutting metal so you produce no swarf, so use nice oil for this, not grease.
It’s also advantageous to use a tap handle for this as you spin the tool around a lot and it’s easier to do with a proper tap handle. My M2-M12 tap handle fits the insert tool nicely, just not any of the other tools in the M12 Time-Sert kit.
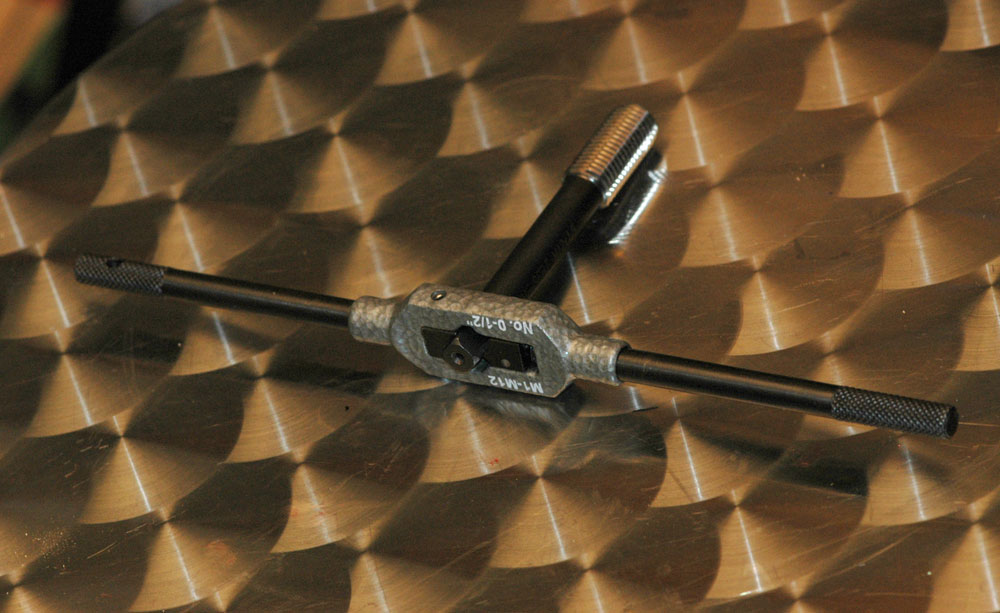
Insert tool in a tap handle.
I’m using my long-handled tap handle here, just cause I can.
Oil up the threads, and screw the insert on. For a Time-Sert kit you’ll engage maybe two or three threads on the insert before you can’t do it up with your fingers any more. This is normal. A Helicoil would differ to this a fair bit: with those kits you’d put the insert onto the insert tool, and turn it, then turn it backwards to snap off the tang once you’re done.
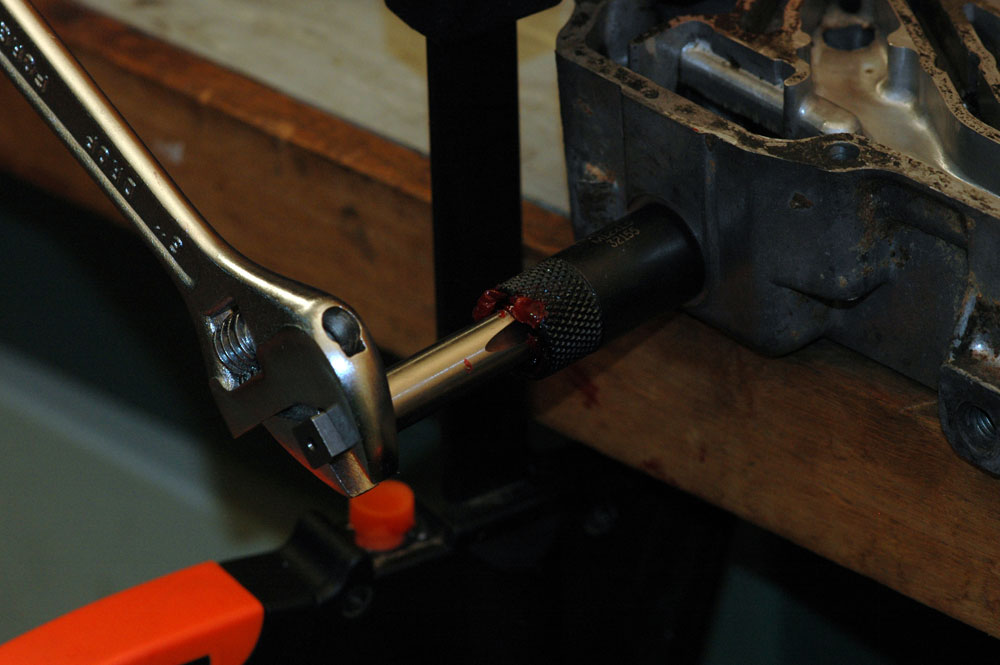
Screw the insert into the hole using the insert tool. After a while the threads will catch on the outside and the insert will stop spinning, and the insert tool will start to spin. This is the bit where the insert tool cuts the last of the threads in the insert and cold-rolls the sides into the threads. The insert will start spinning again into the hole, and then the insert tool will spin inside the insert, blablabla. Keep doing this for a while.
Insert almost fully seated.
Keep going until the insert completely bites into the taper at the top and is fully seated. At this point, the tip of the insert tool will only be at the bottom of the insert
Insert tool, the end of which has just made it through the insert.
Now you keep going with the insert tool, to really work the threads. It will slowly get easier to turn, to the point where it will be very easy to turn.
Insert tool after fully expanding insert threads.
The threads are nicely expanded to catch into the outer threads, and the inner threads are the right size for the original bolt.
You’re done! Install the original bolt back into the sucker to the proper torque, and don’t rip this bastard out.
Finished insert!
I did a bit of a test though. This particular sump plug is mean to go in at 20-25N.m, 14-18 lb.ft. I did it up to minimum torque, no problems. Maximum torque was no problem. Double maximum torque no problems. Quadruple maximum torque was a problem – I stretched the sump plug. I got it back out, and a new one installed perfectly.
These are definitely stronger than the threads cut straight into the aluminium. This is supported by a paper I found on this topic.
Happy motorcycling!