
Brake pad and shoe change
Sections
- Why do brake pads seem to wear a lot on a Gen 4 Jimny?
- Front pad change
- Things you’ll need for front brakes
- Removing the caliper & stuff
- Refitting pads
- Cleaning up and greasing caliper slides and piston
- Finishing off
- Front disc change
- Rear drum shoe change
- Adjusting the handbrake
Why do brake pads seem to wear a lot on a Gen 4 Jimny?
Something that surprises people is just how quickly brake pads can wear on a gen 4 Jimny. There’s a few reasons for it, and it really comes down to how the car is used
Firstly, the stability control and traction control systems will intervene if needed and they generally operate by braking an inside wheel on the road around corners, and offroad if there’s any wheelspin and they’re active then they’ll brake to try to stop that.
In addition, the improved brake LSD function for the gen4 means they’ll more aggressively clamp a spinning wheel to try to direct power to the wheel that still has traction. You can end up feeding a lot of torque through the wheels in 4wd, especially in low range, and the brake has to resist that force which wears it further.
Another additional reason for wear is not unique to the Jimny but it does come back to inexperience of owners. If you do a lot of mud driving then it’s really easy to cake mud on the brakes and stop the calipers fully releasing, or the brake shoes will stay in contact with the drum, which wears the friction material more. This is also makes the car slower, too, so there’s a benefit to getting in after some 4wding and give the brakes a really good clean out.
It’s also possible to end up with a dragging handbrake after a suspension lift, too. I would recommend loosening off the adjuster on the handbrake before doing a lift and then adjusting the handbrake when it is all done.
Finally, I think a lot of gen4 owners potentially run their vehicles heavier than previous cars as there’s more accessories and also fewer lightweight 4wders running around. To a degree I’m guilty of this, too. All of this adds up to more brake pad wear than you might think for a small and light car!
Front pad change
Things you’ll need for this part
- 12mm socket; 17mm if you’re removing the caliper mounting bracket to replace the disc; plus a 19mm socket/wheel brace to remove the wheel
- 10mm spanner for undoing bleed nipple if bleeding brakes
- Brake cleaner, a nylon cleaning brush and rags
- Brake fluid (& clear hose for bleeding if you’ll bleed the brakes)
- Caliper grease – this is super high temperature silicone/ceramic stuff, don’t just assume you can use any old grease.
- New pads
- Large multigrip pliers to push the caliper piston back
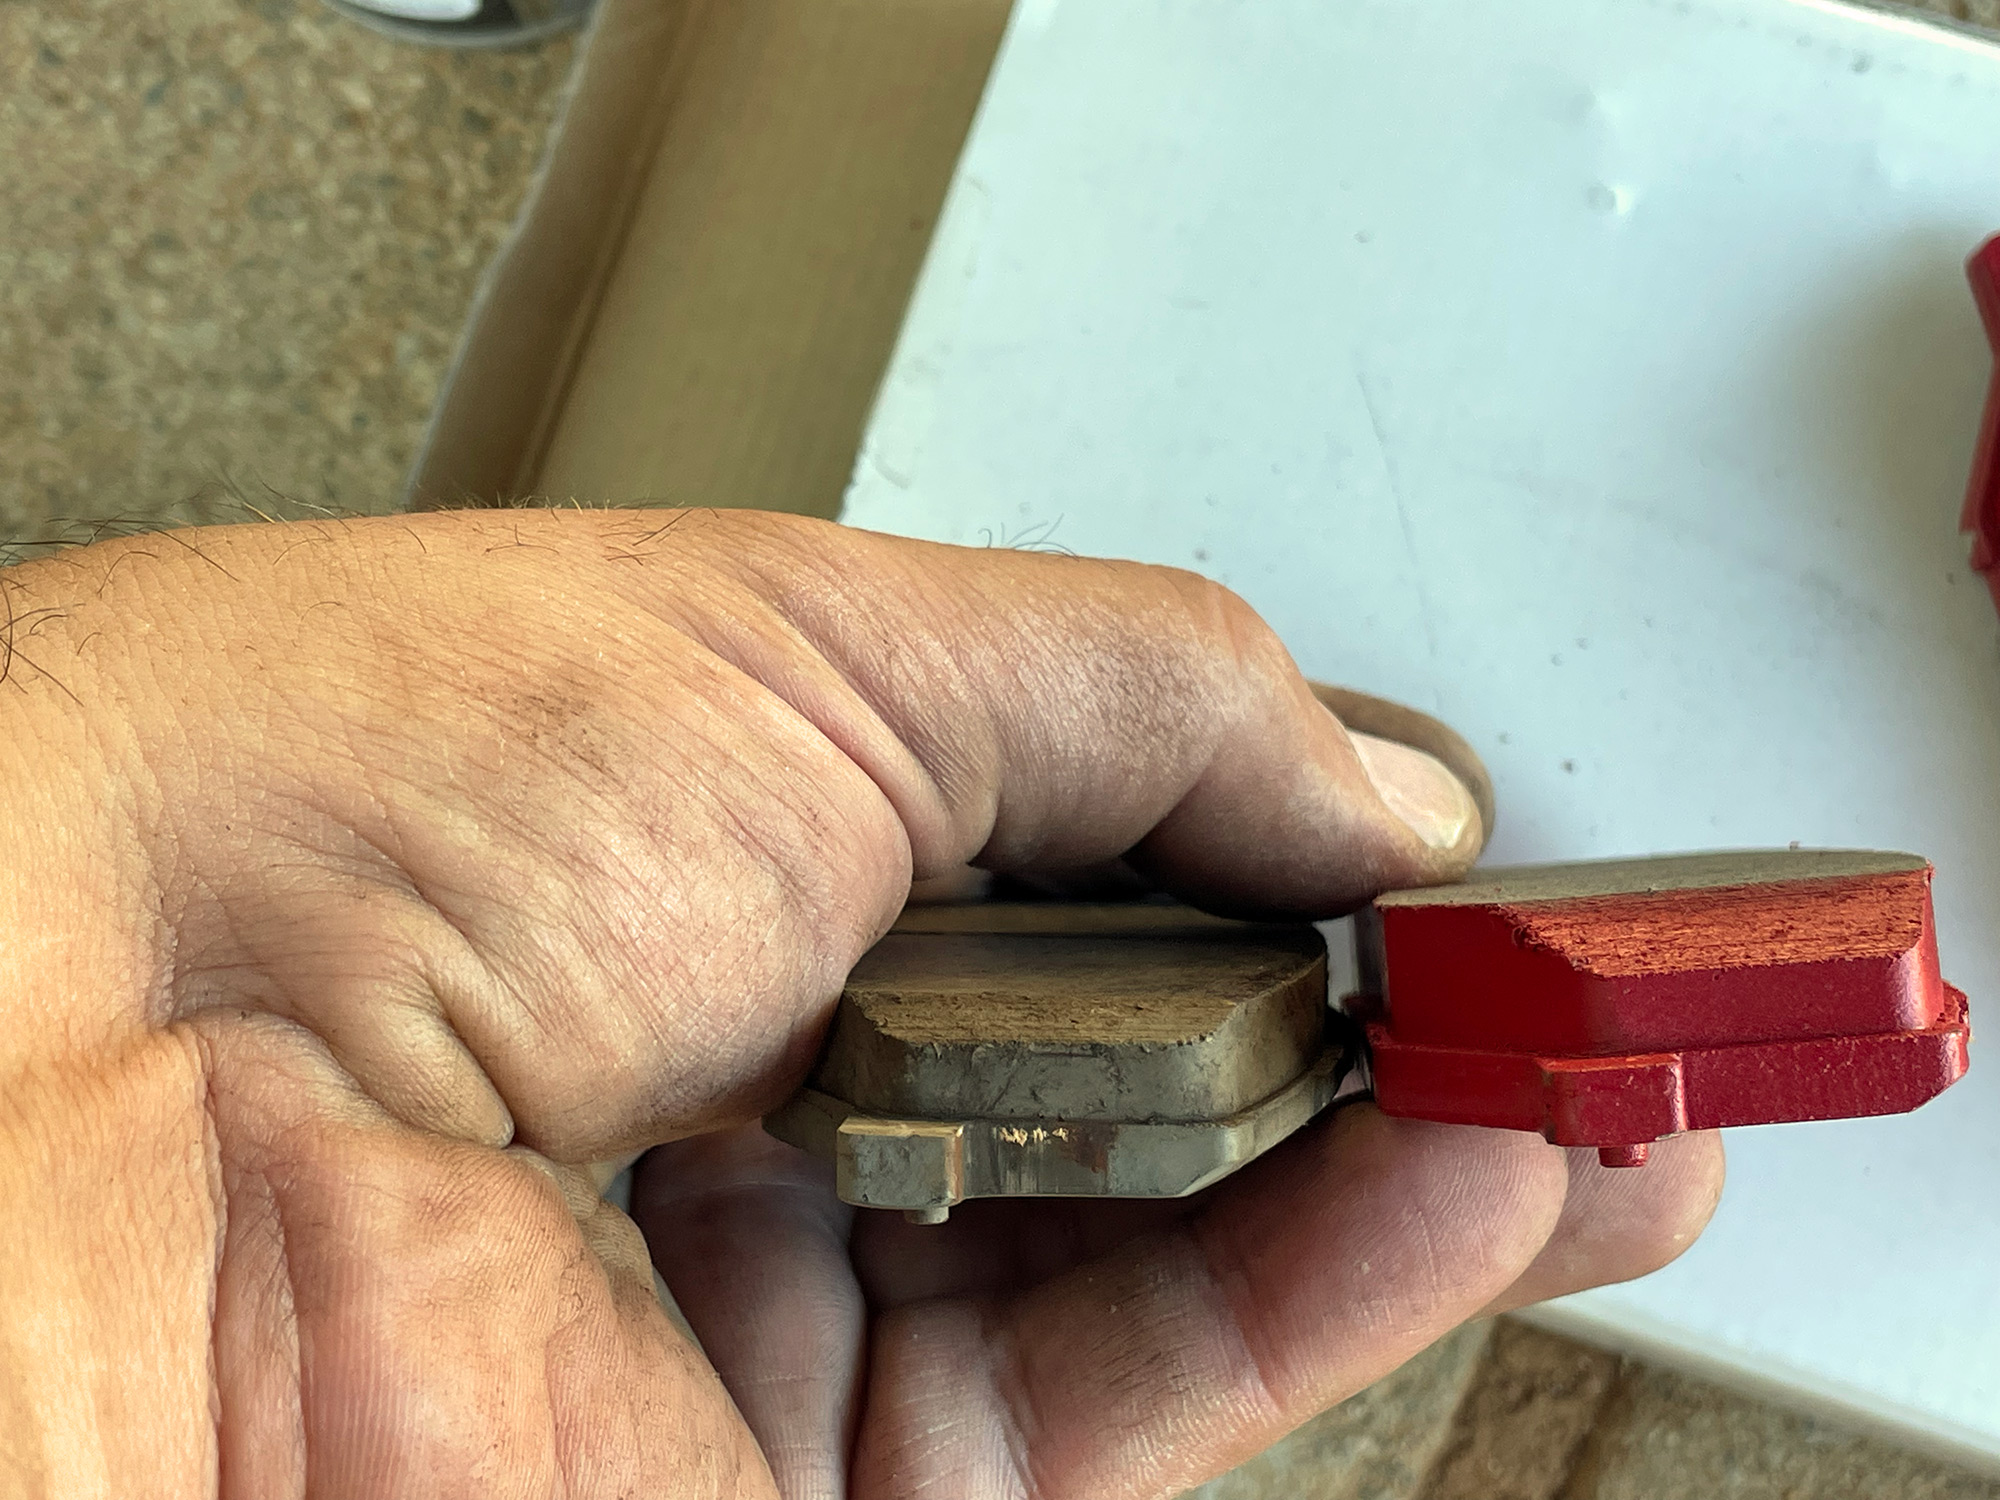
The front pads are basically the same as the previous generation (same shape) but they are 1mm thicker and a different pad compound to a gen3. I list the cross reference parts in my article on servicing the car in case you need to find some.
For this replacement, which was mostly to try it out, I have gone with some Taniguchi replacement pads. I’m not sure who is the OEM of these pads, but they are well regarded in Japan so happy to try them
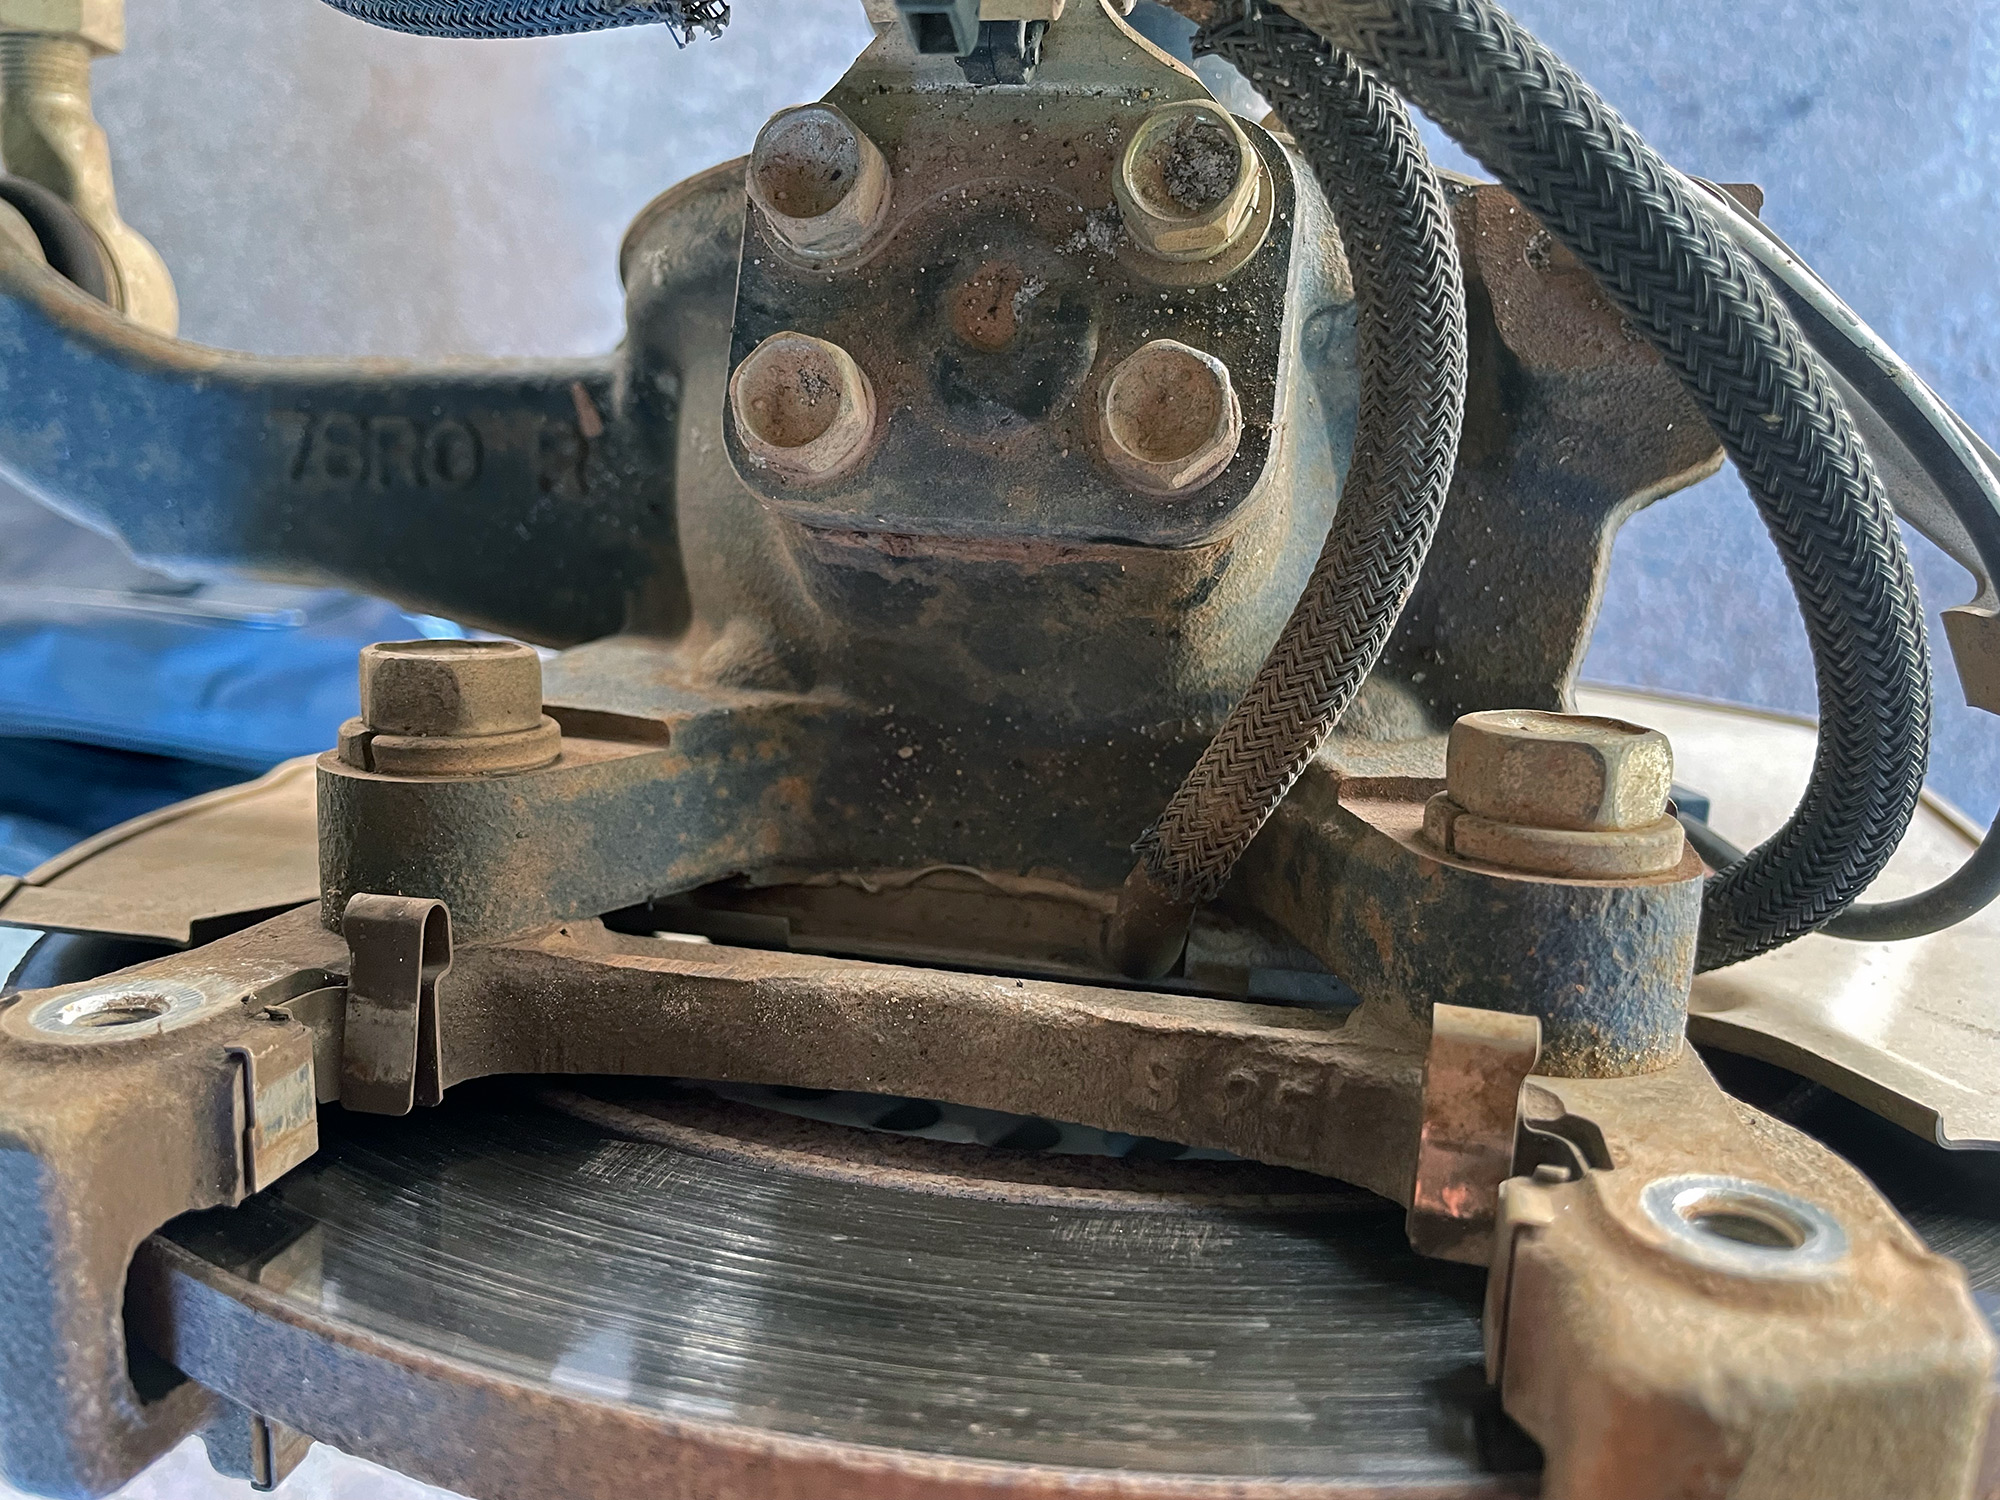
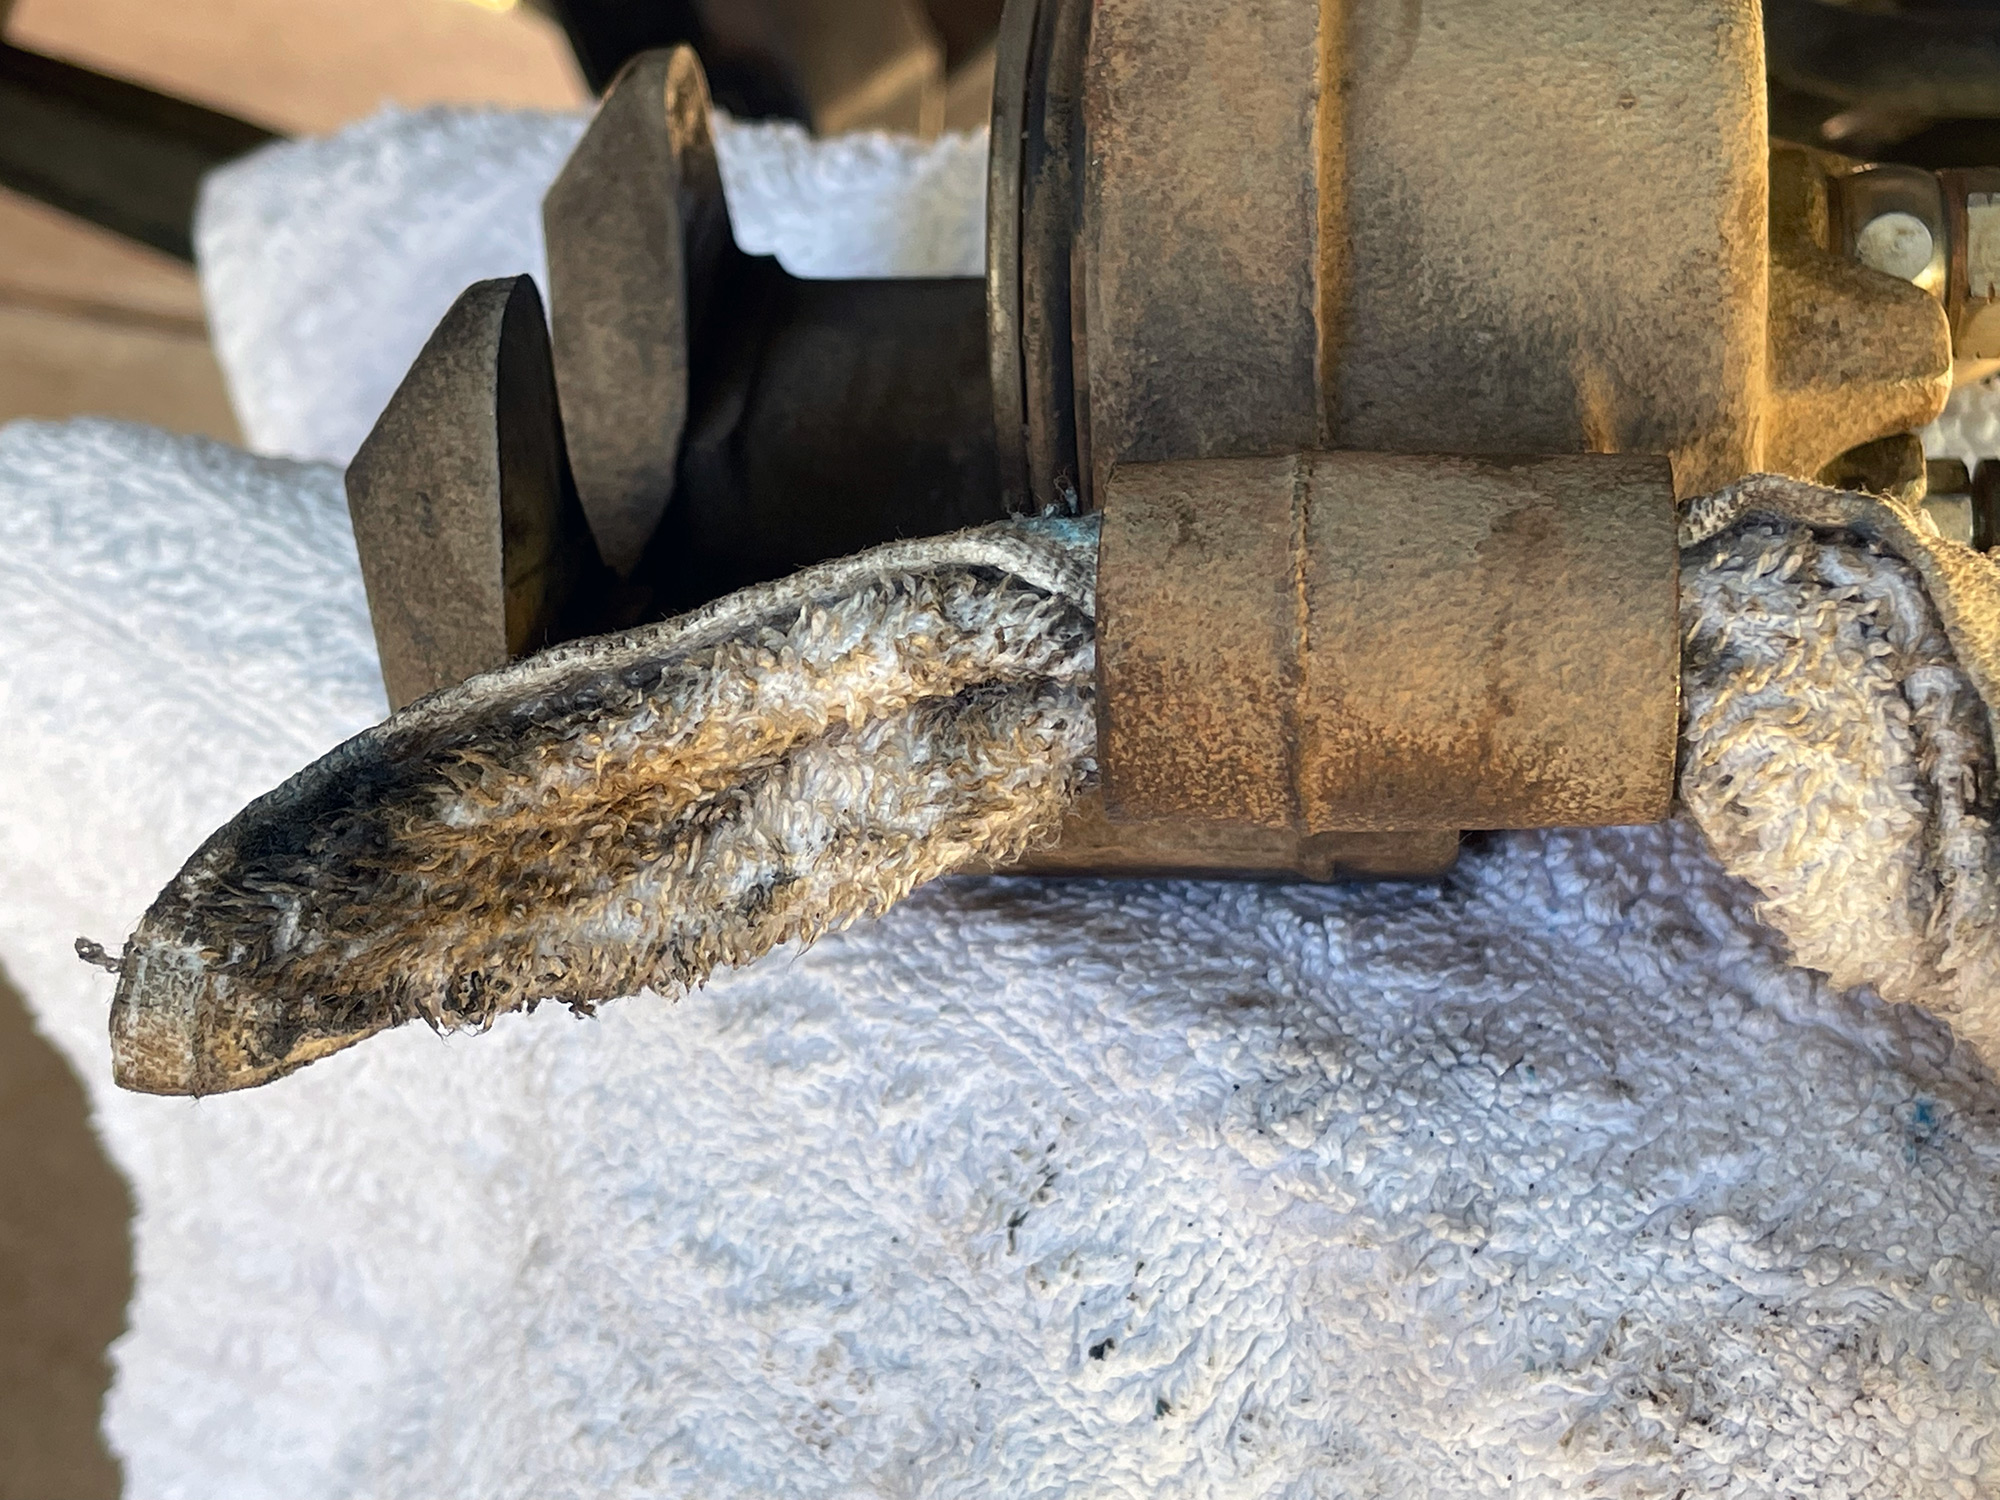
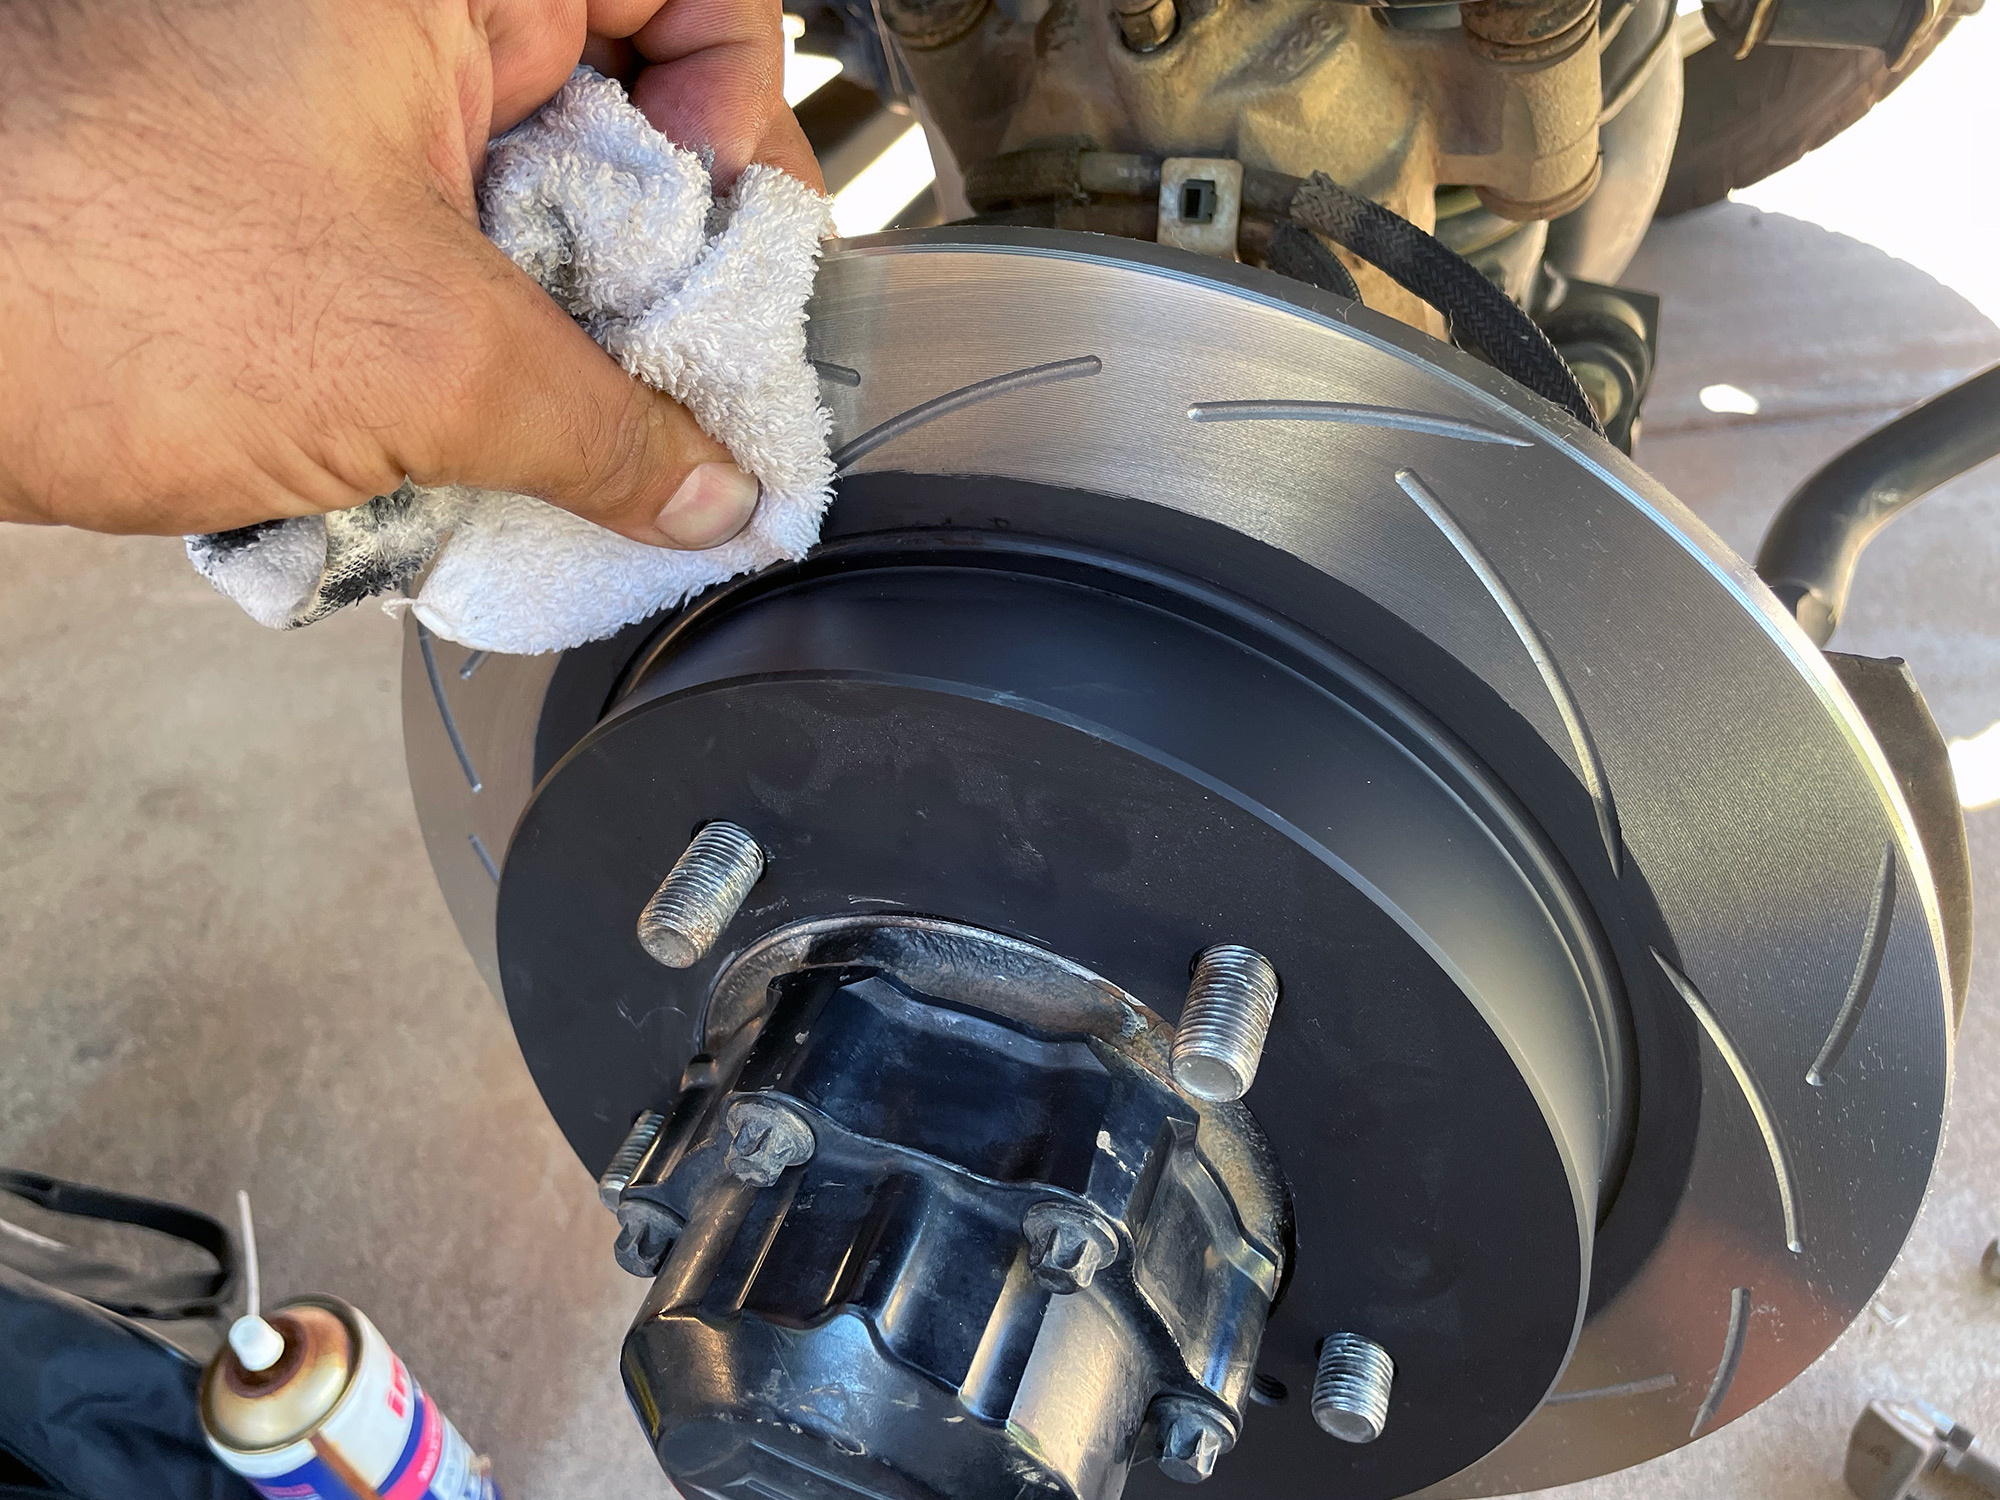
While you don’t need to remove the caliper entirely to change the pads, I do this because I like to clean everything up while I’m in there. The calipers are slide type so have a specific ultra high temperature brake caliper grease ready to re grease the slide pins. Often people don’t do this and the brake will stick on. It can also be common for water to get past the rubber boots on the slides, which will wash out the slide pin grease and corrode the slide pin also resulting in the brake sticking on.
Removing the caliper and stuff
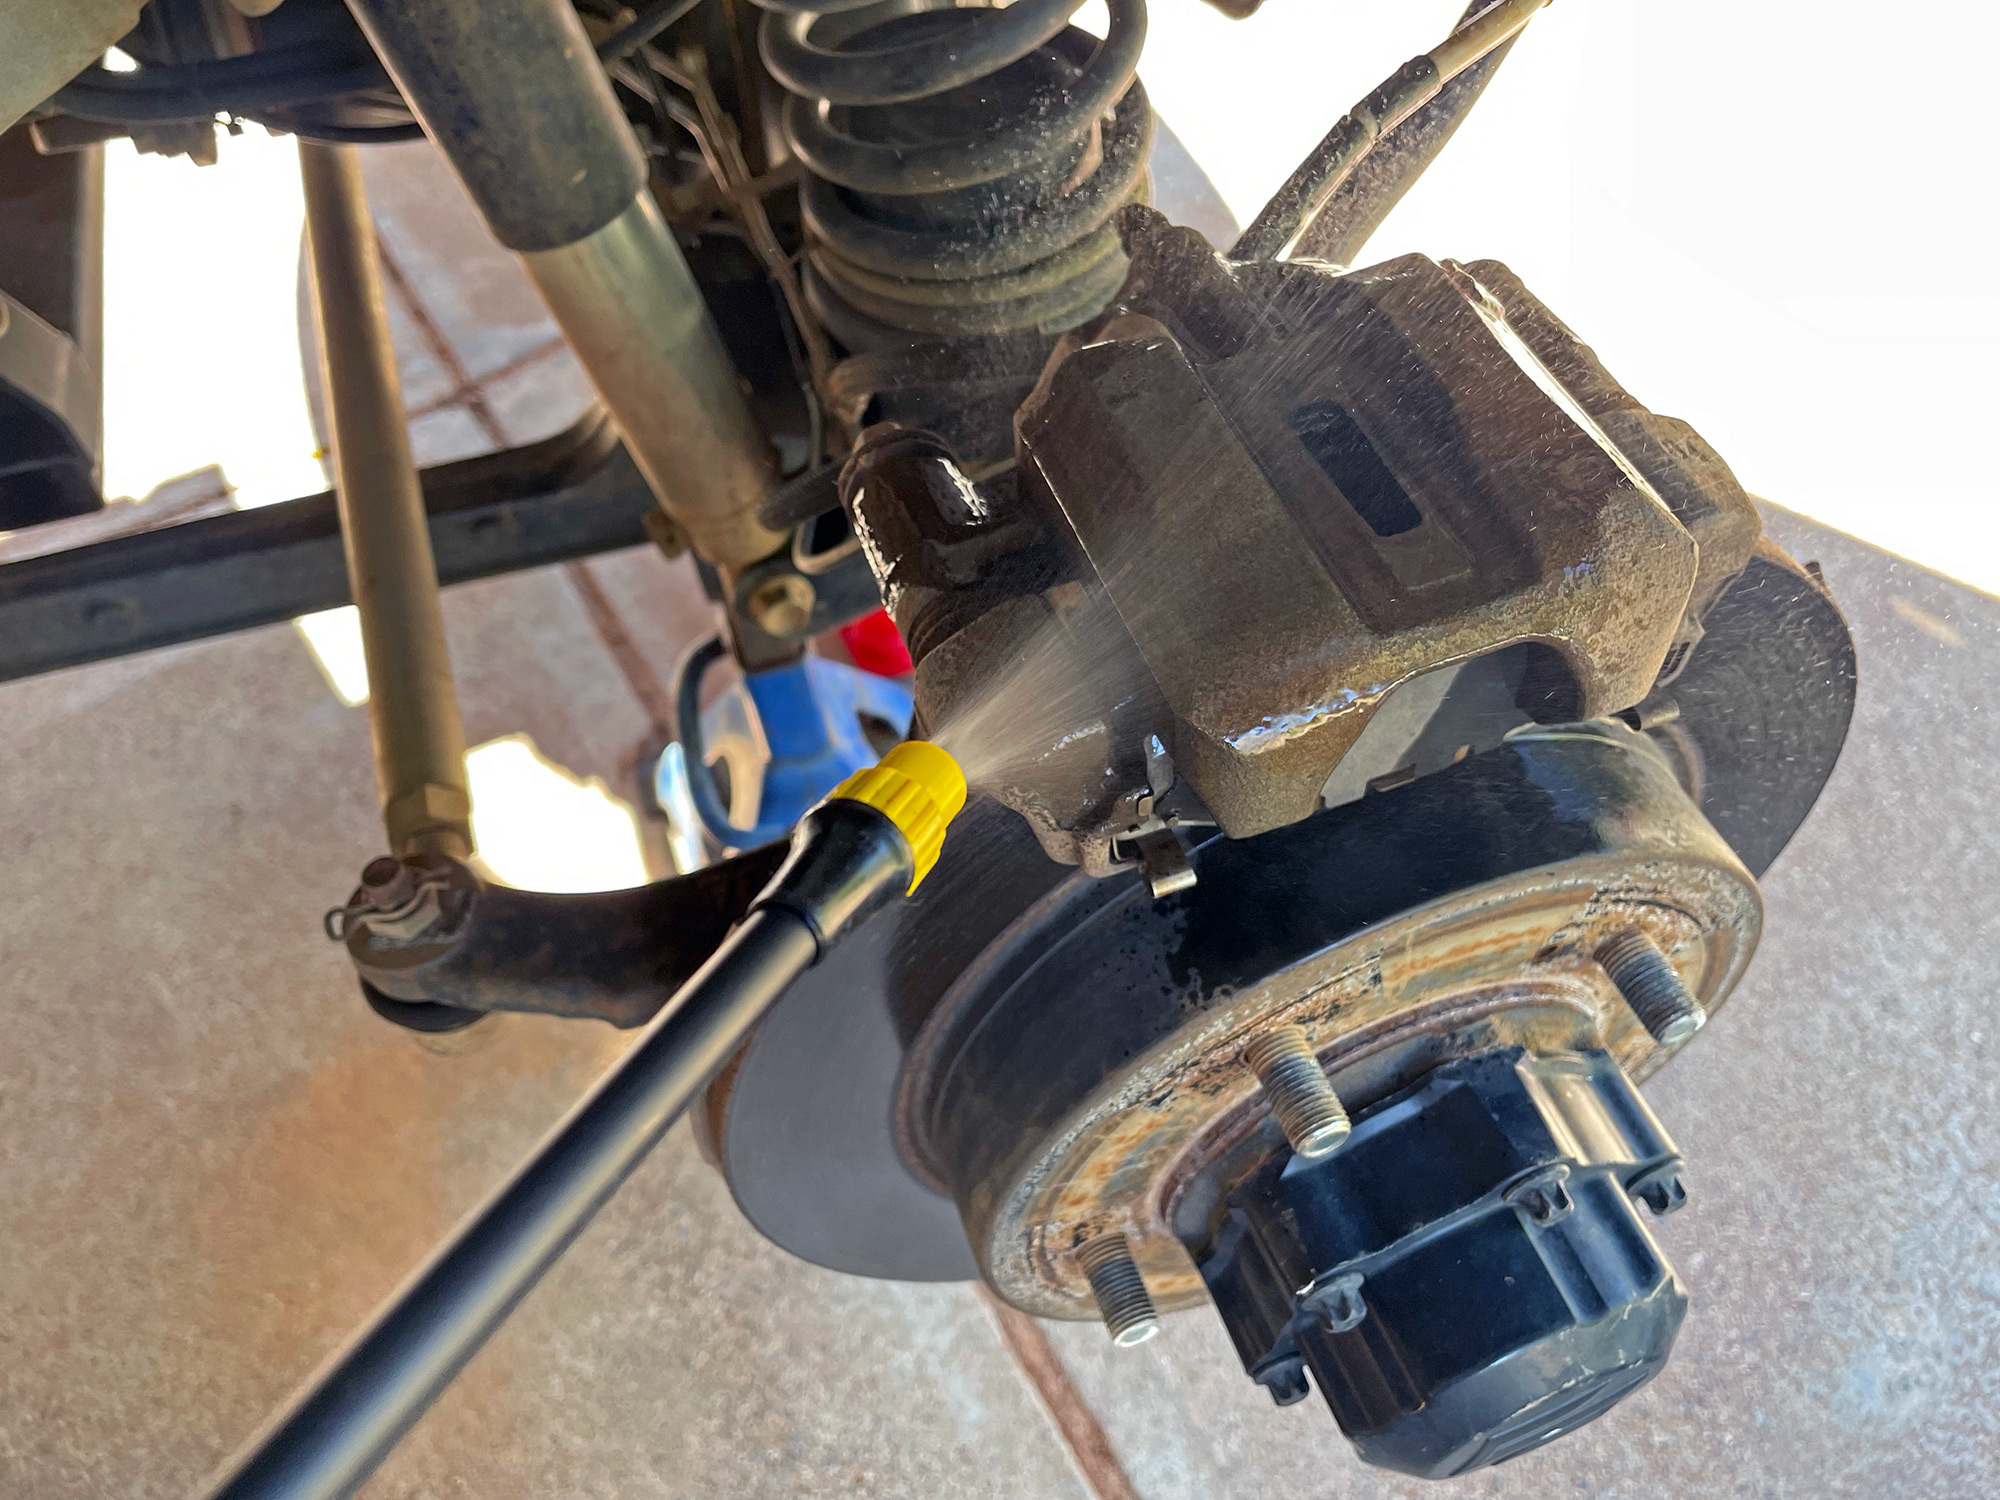
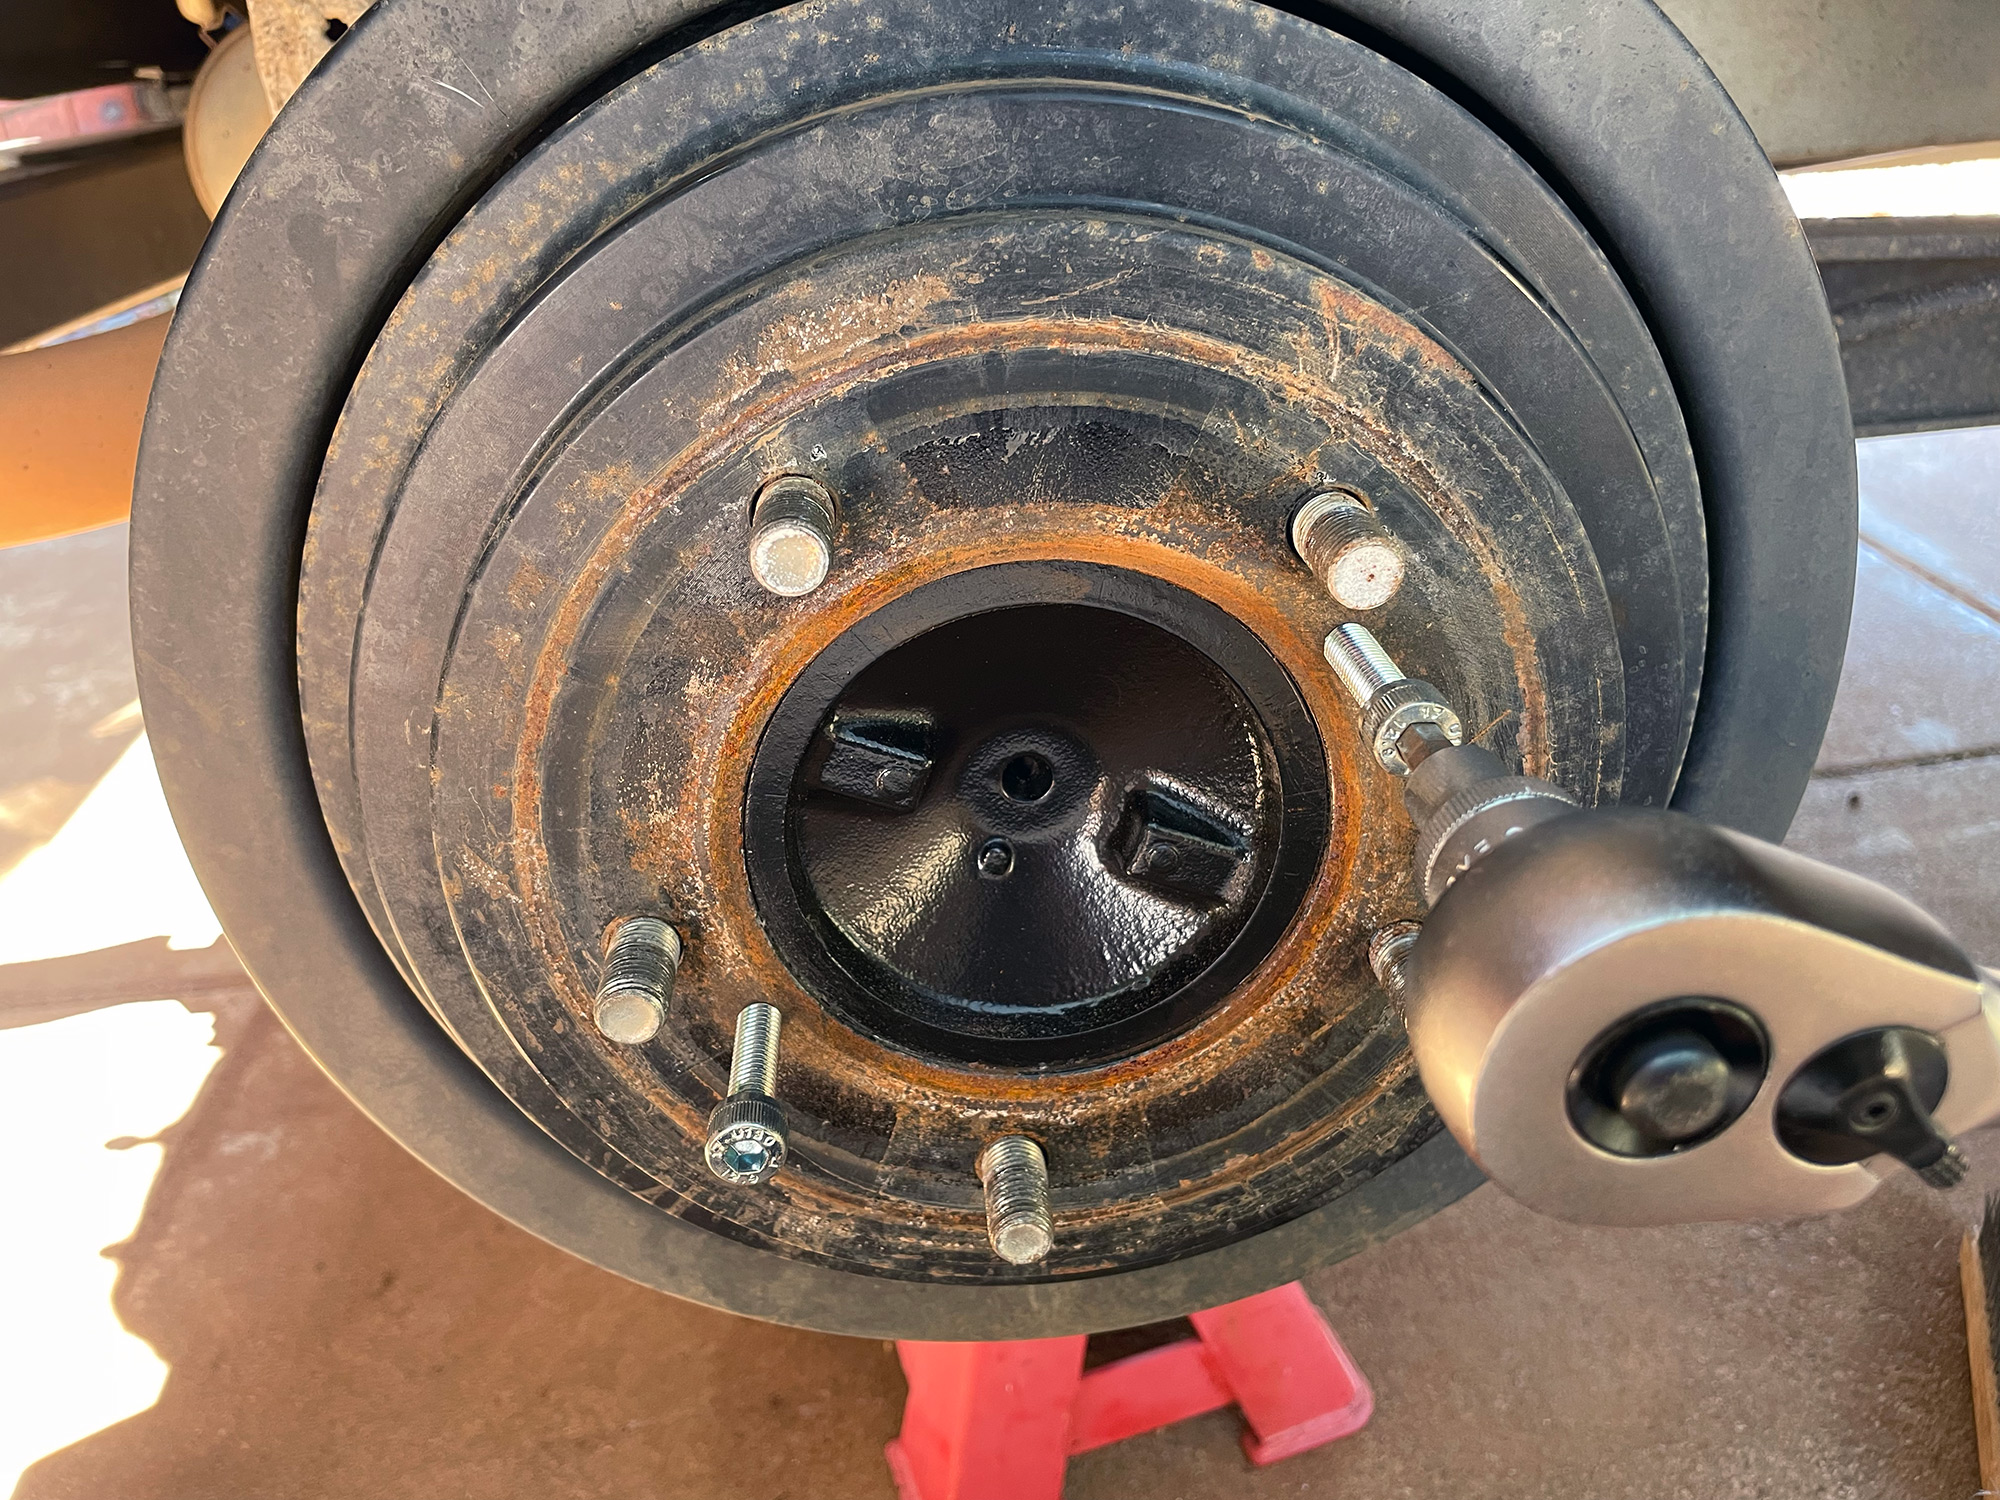
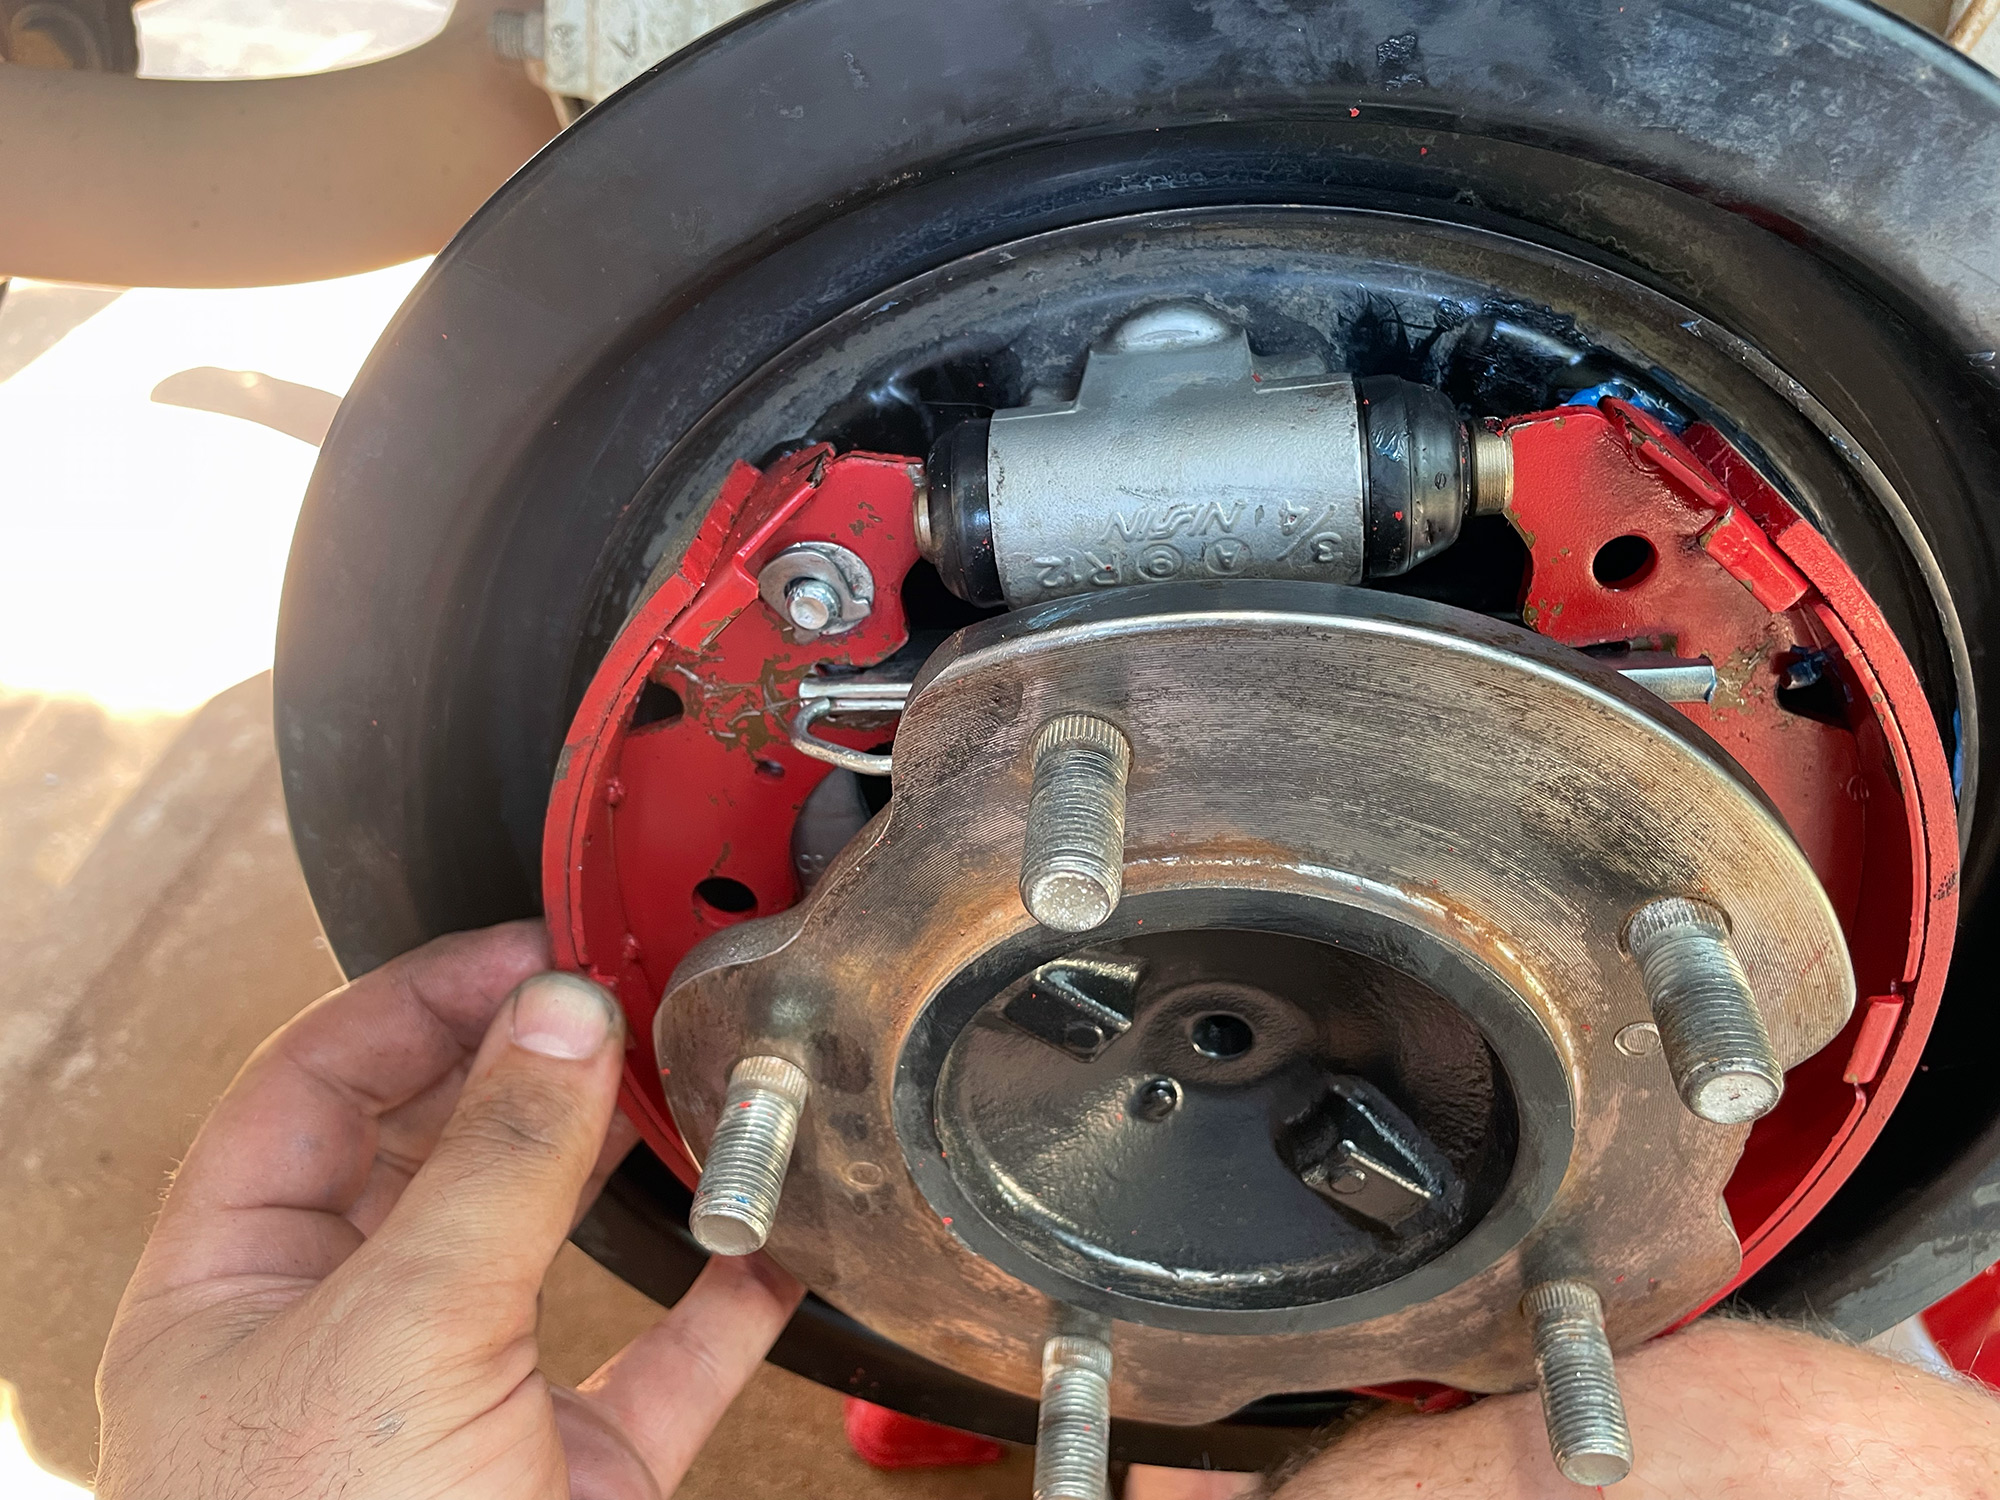
Jack up the car, fully support it, and remove the front wheel. This will expose the front brake assembly for you to get at it.
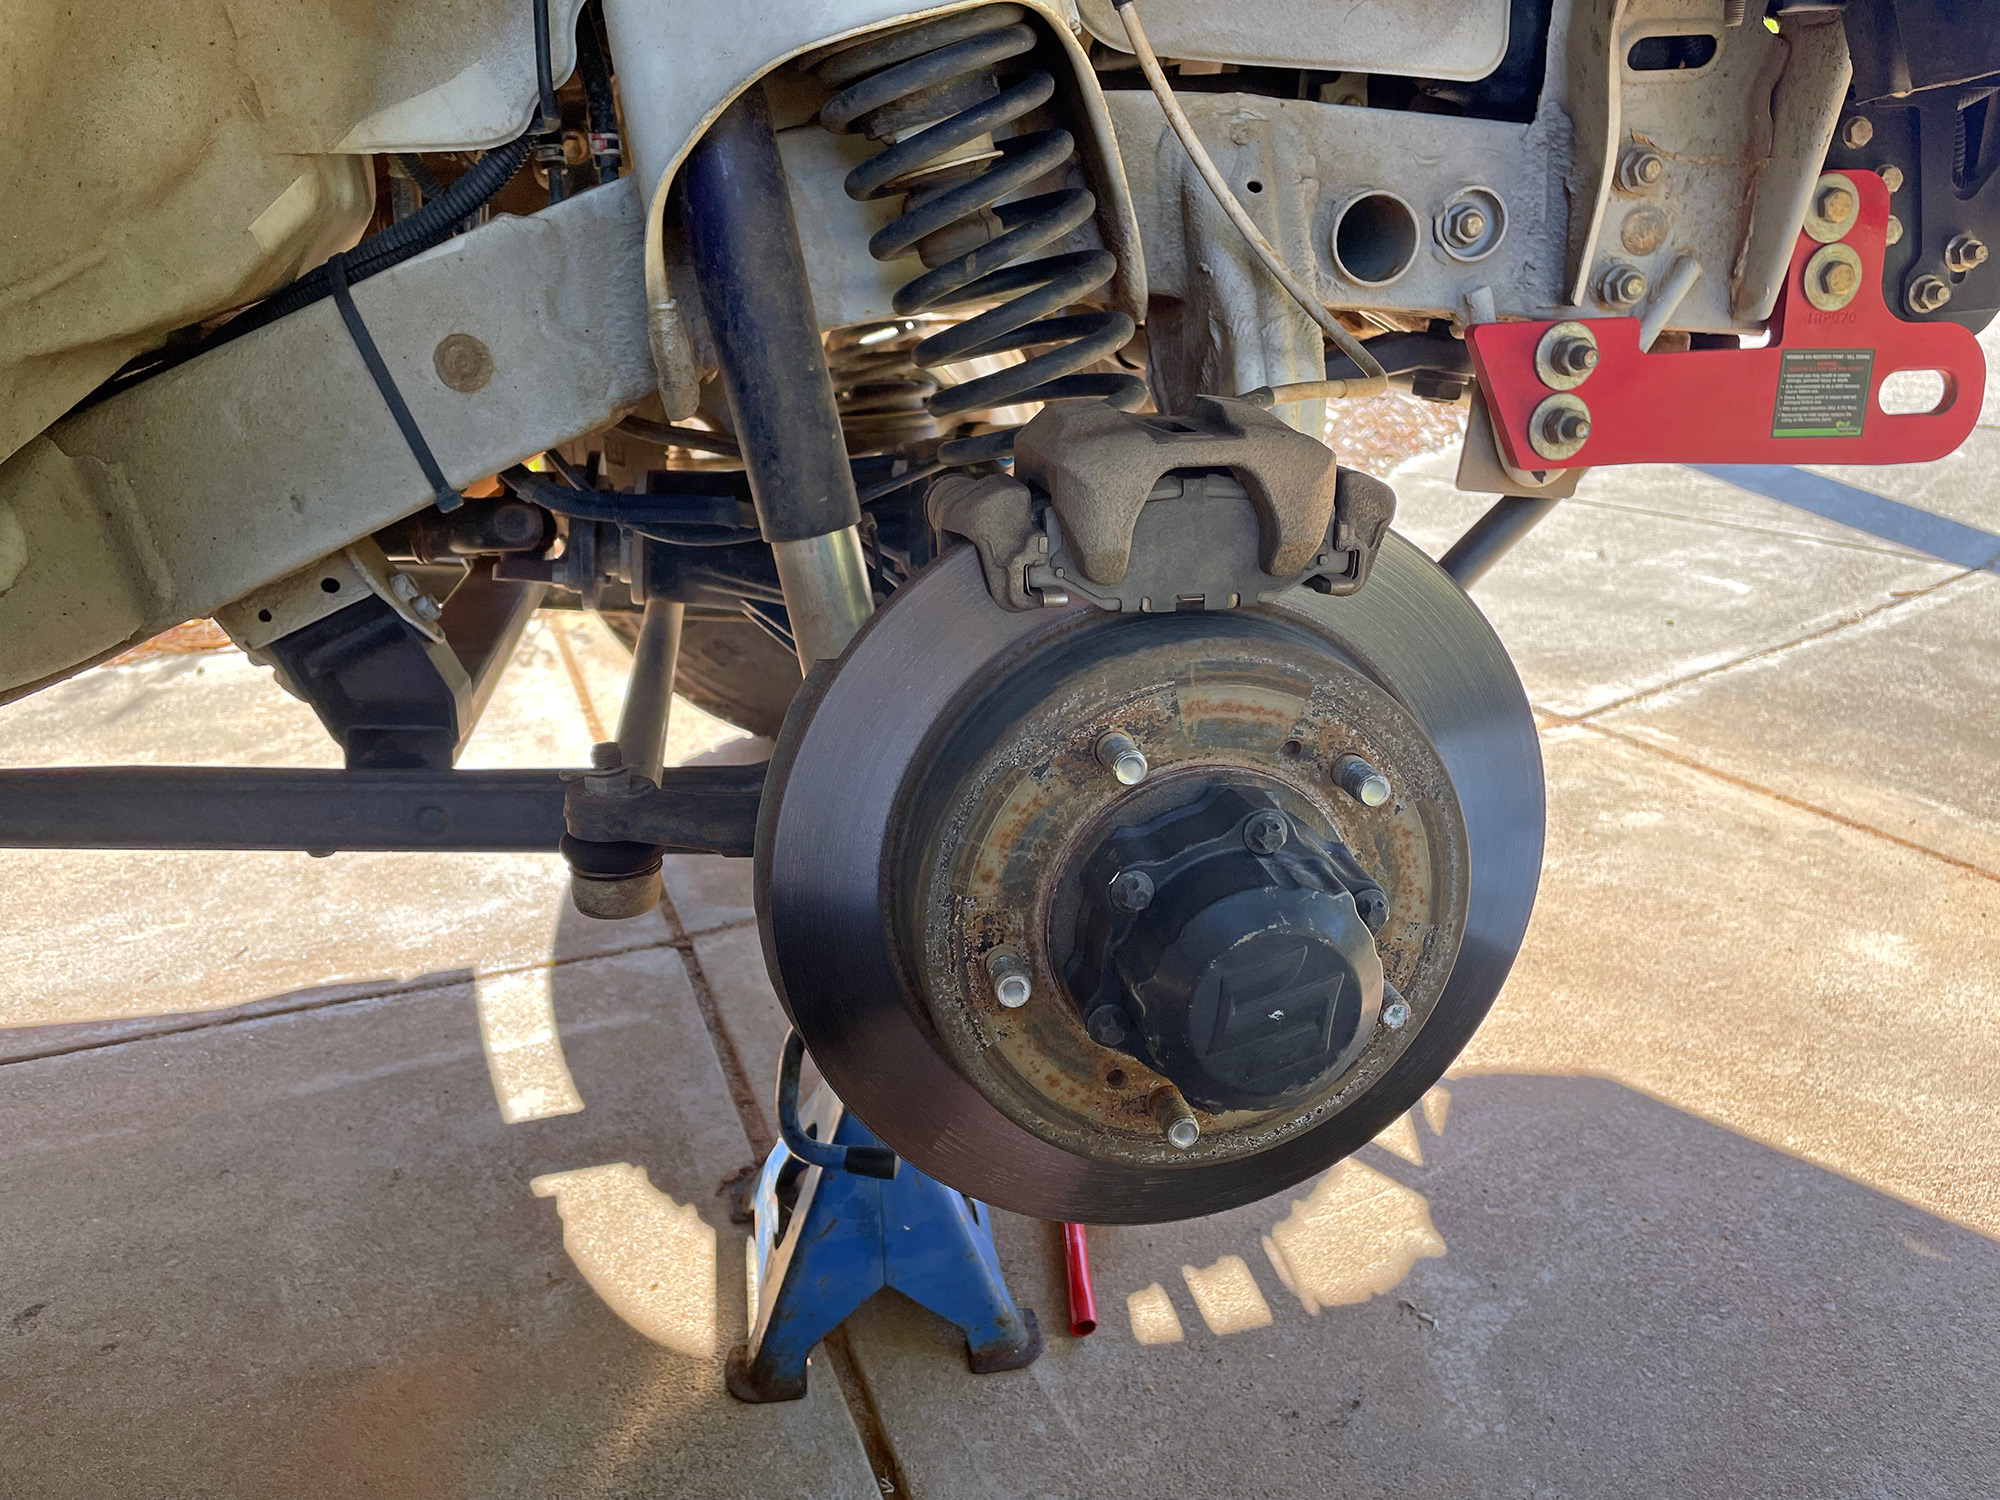
Good time to give it a bit of a clean with some brake cleaner.
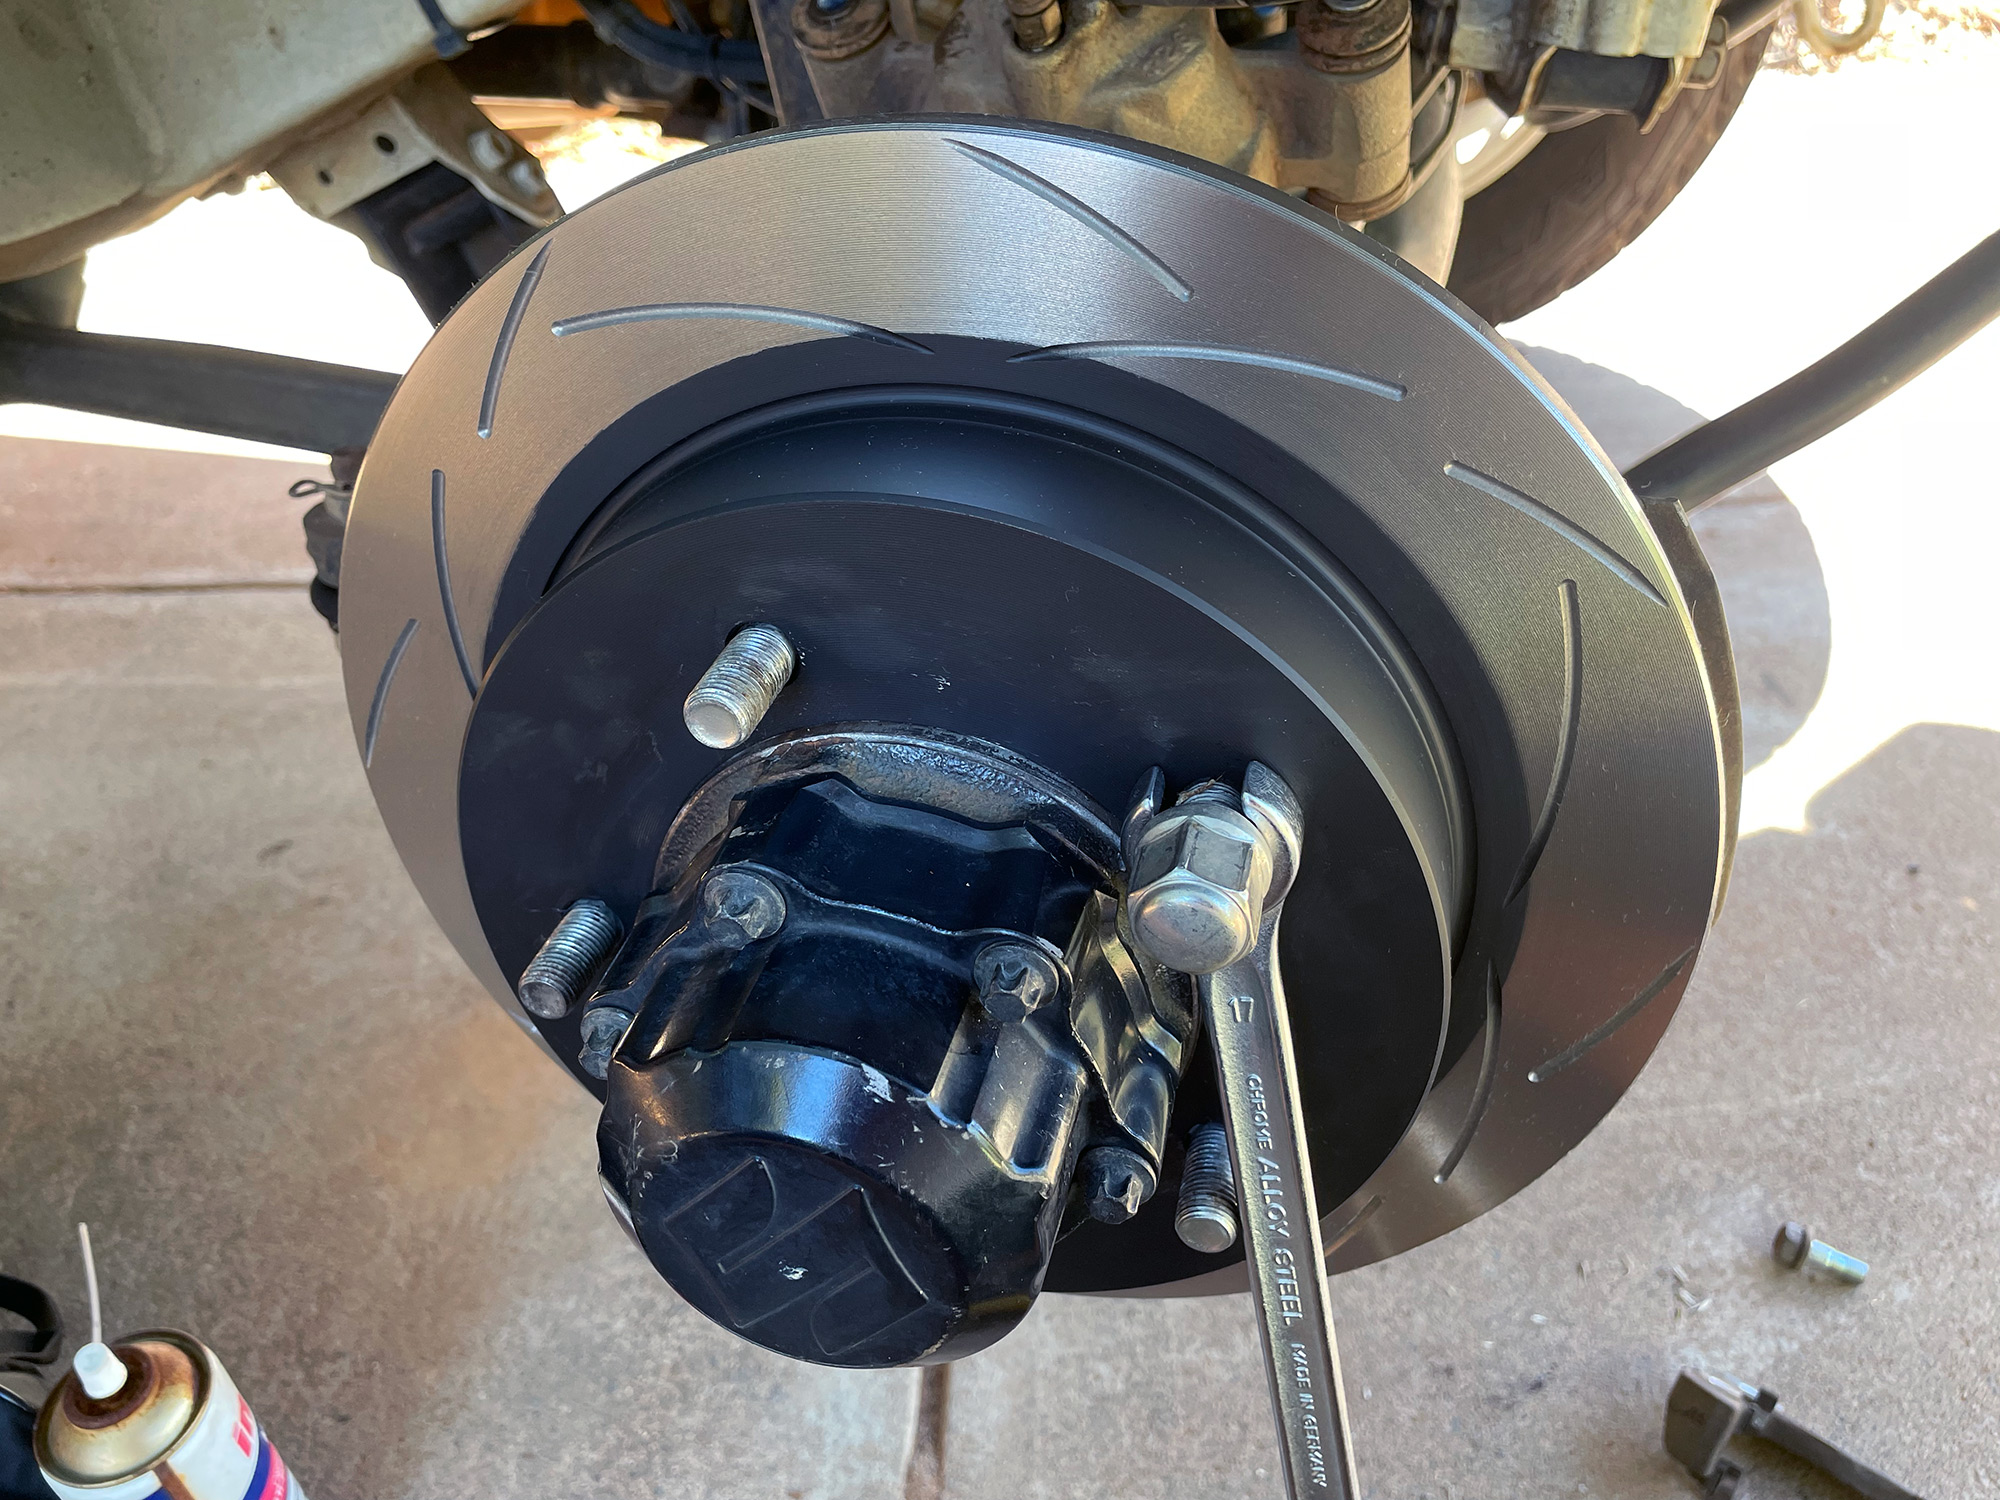
There’s really only 4 bolts to undo: two caliper slide bolts and two bolts that hold on the carrier if you are taking off the disc (or just want to fully clean everything up). 12mm for the caliper slide bolt, 17 for the bolts holding the caliper mounting bracket/carrier to the steering knuckle. When you refit these, the caliper slide bolts are tightened to 23 Nm, and the caliper mounting bracket bolts are tightened to 85 Nm.
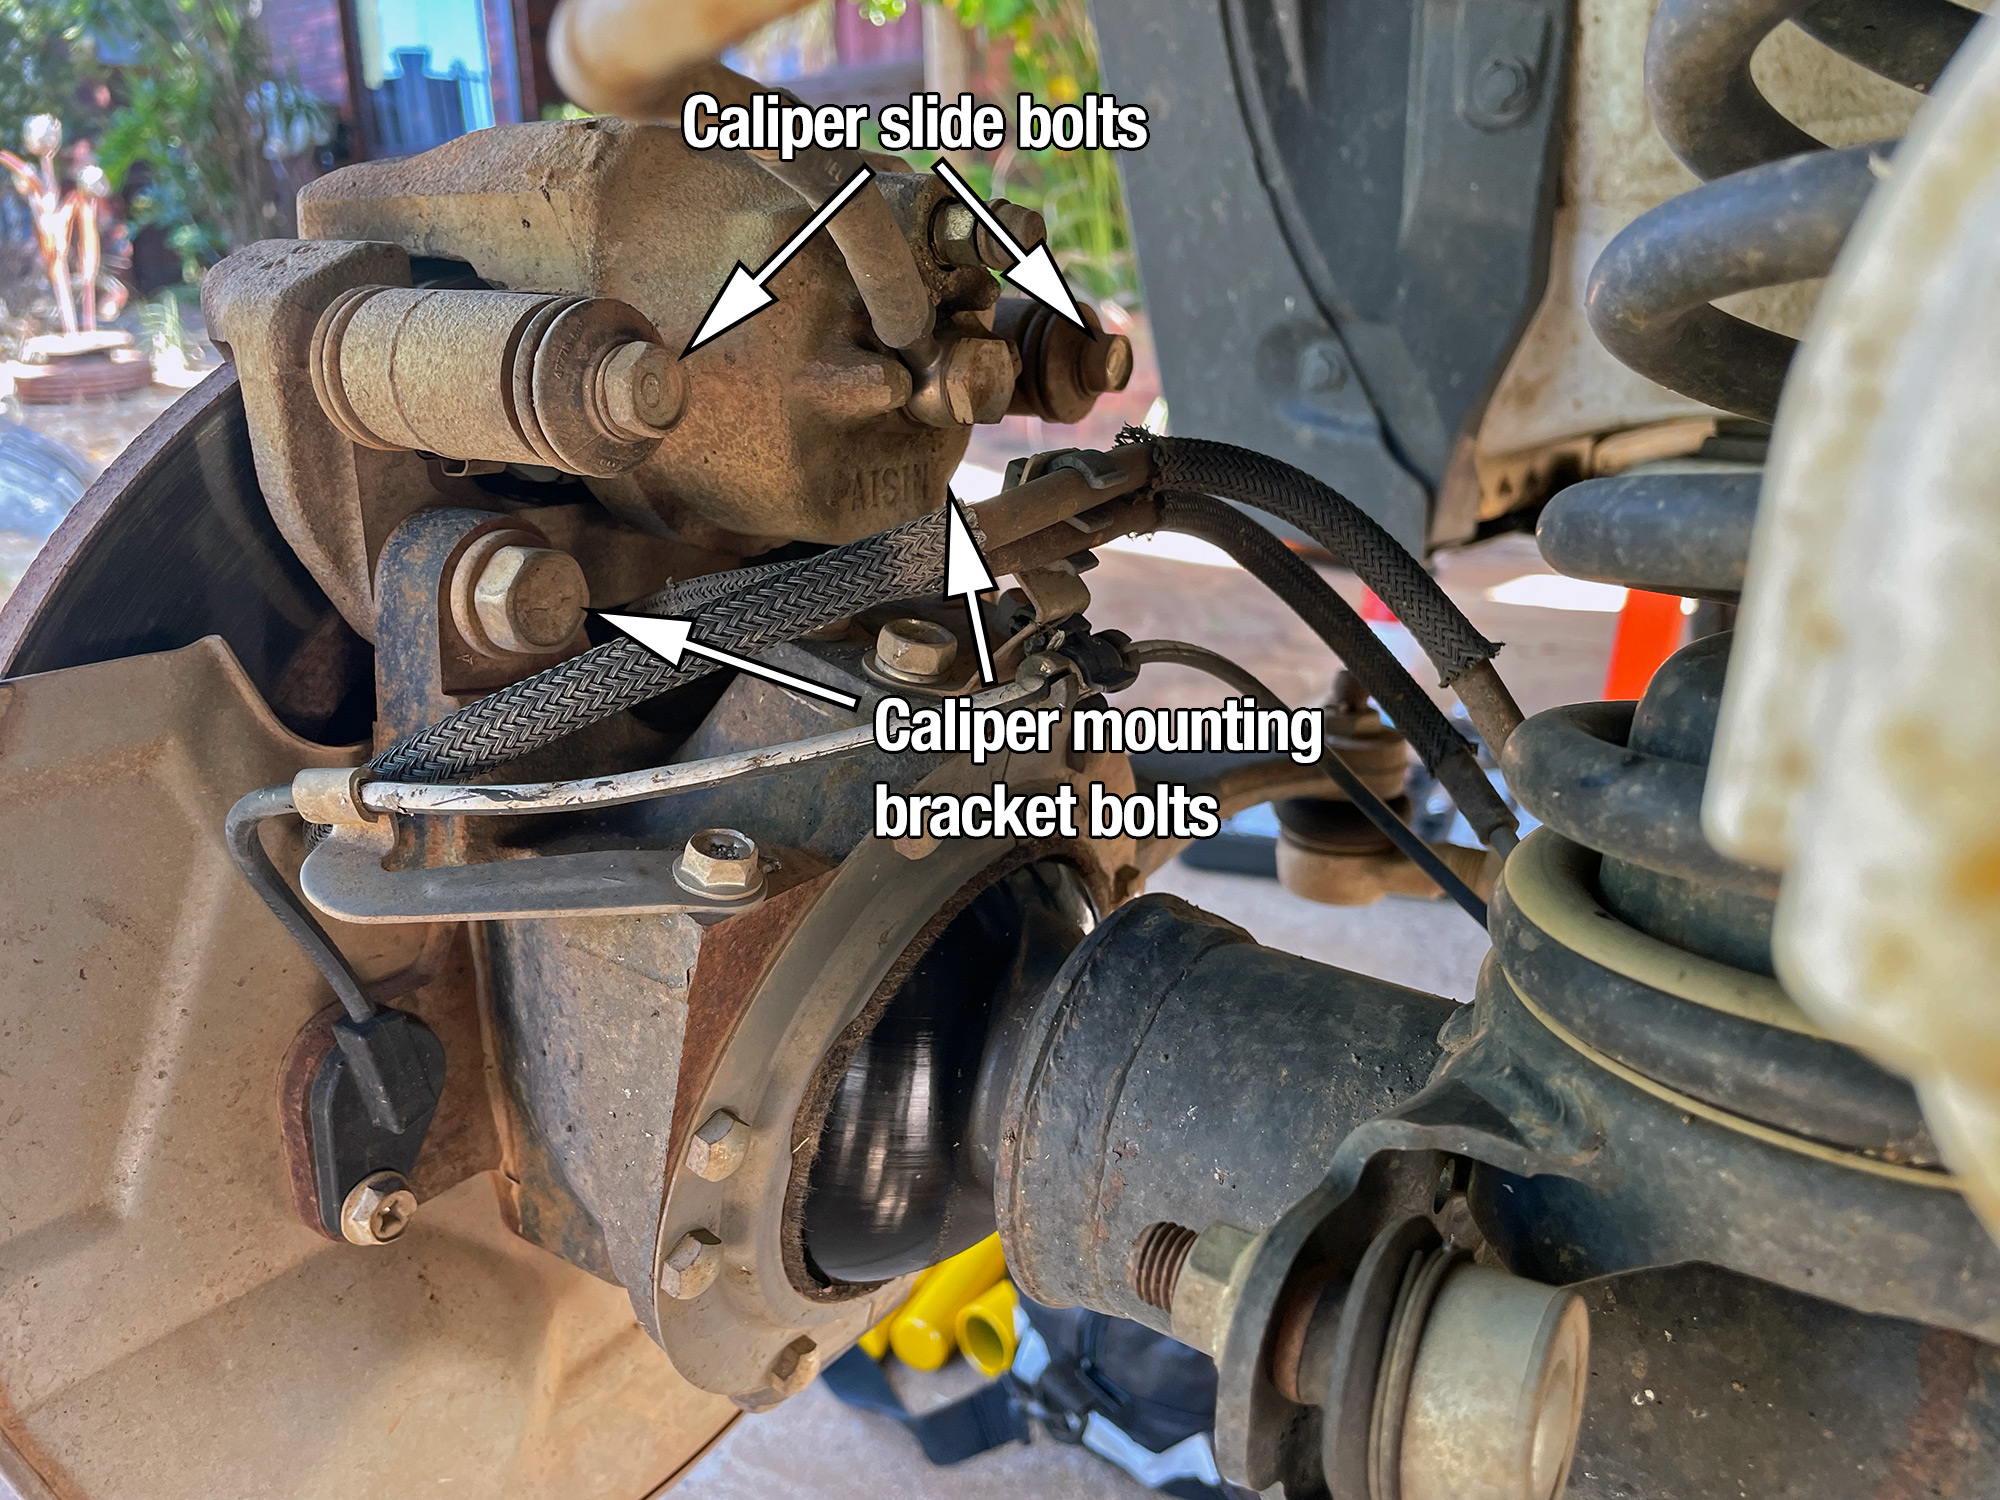
First up undo the caliper slide pin bolts.
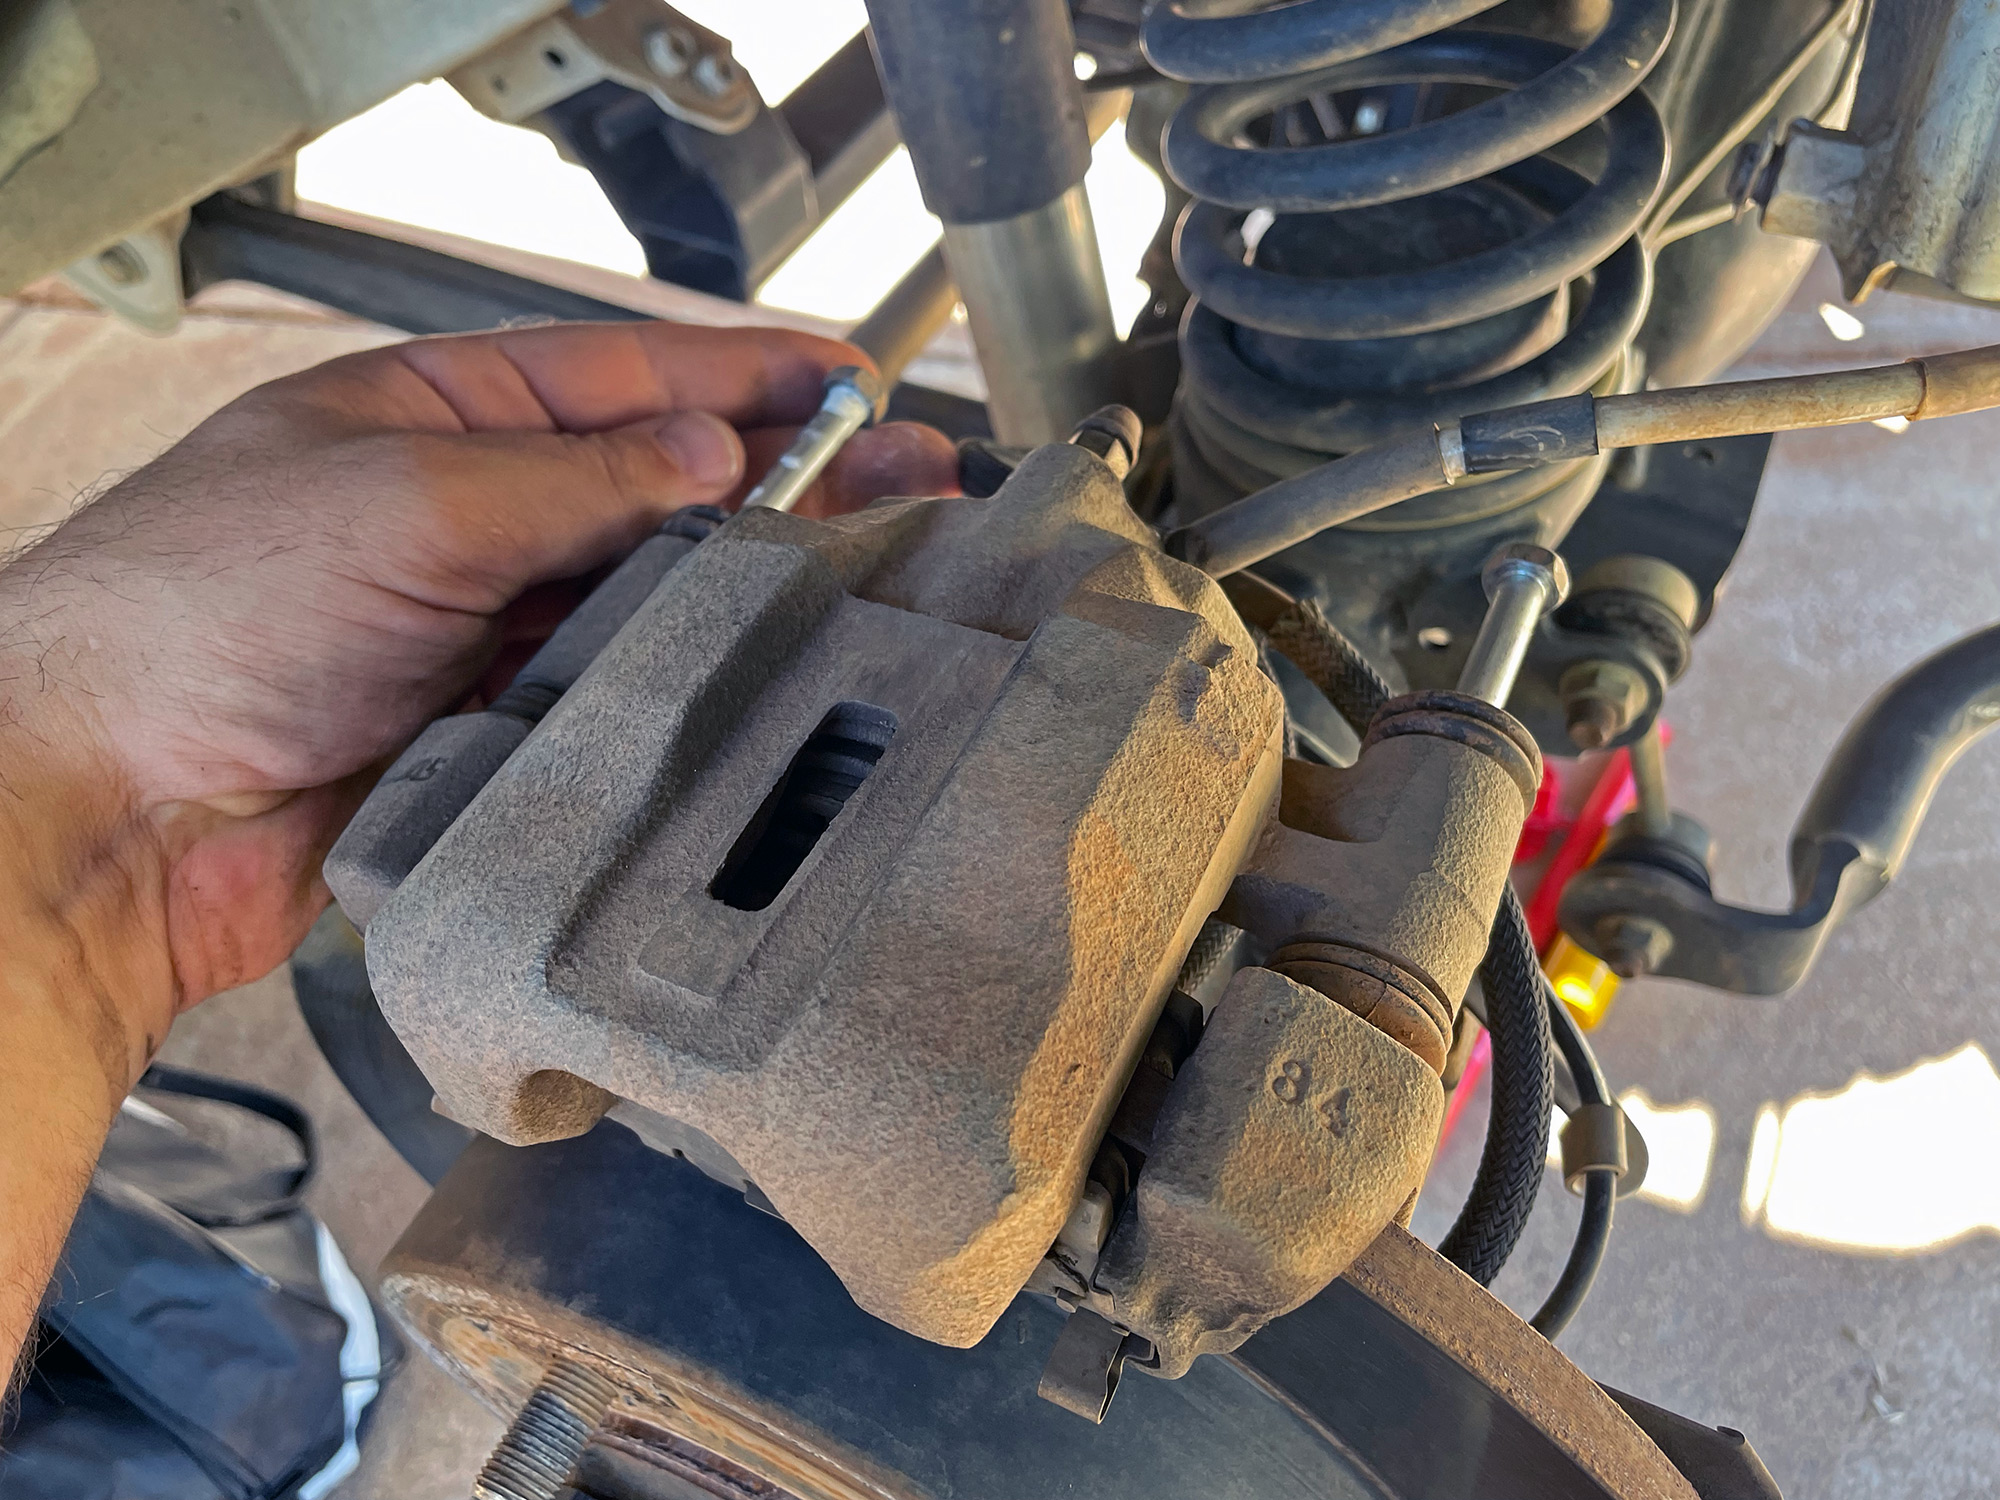
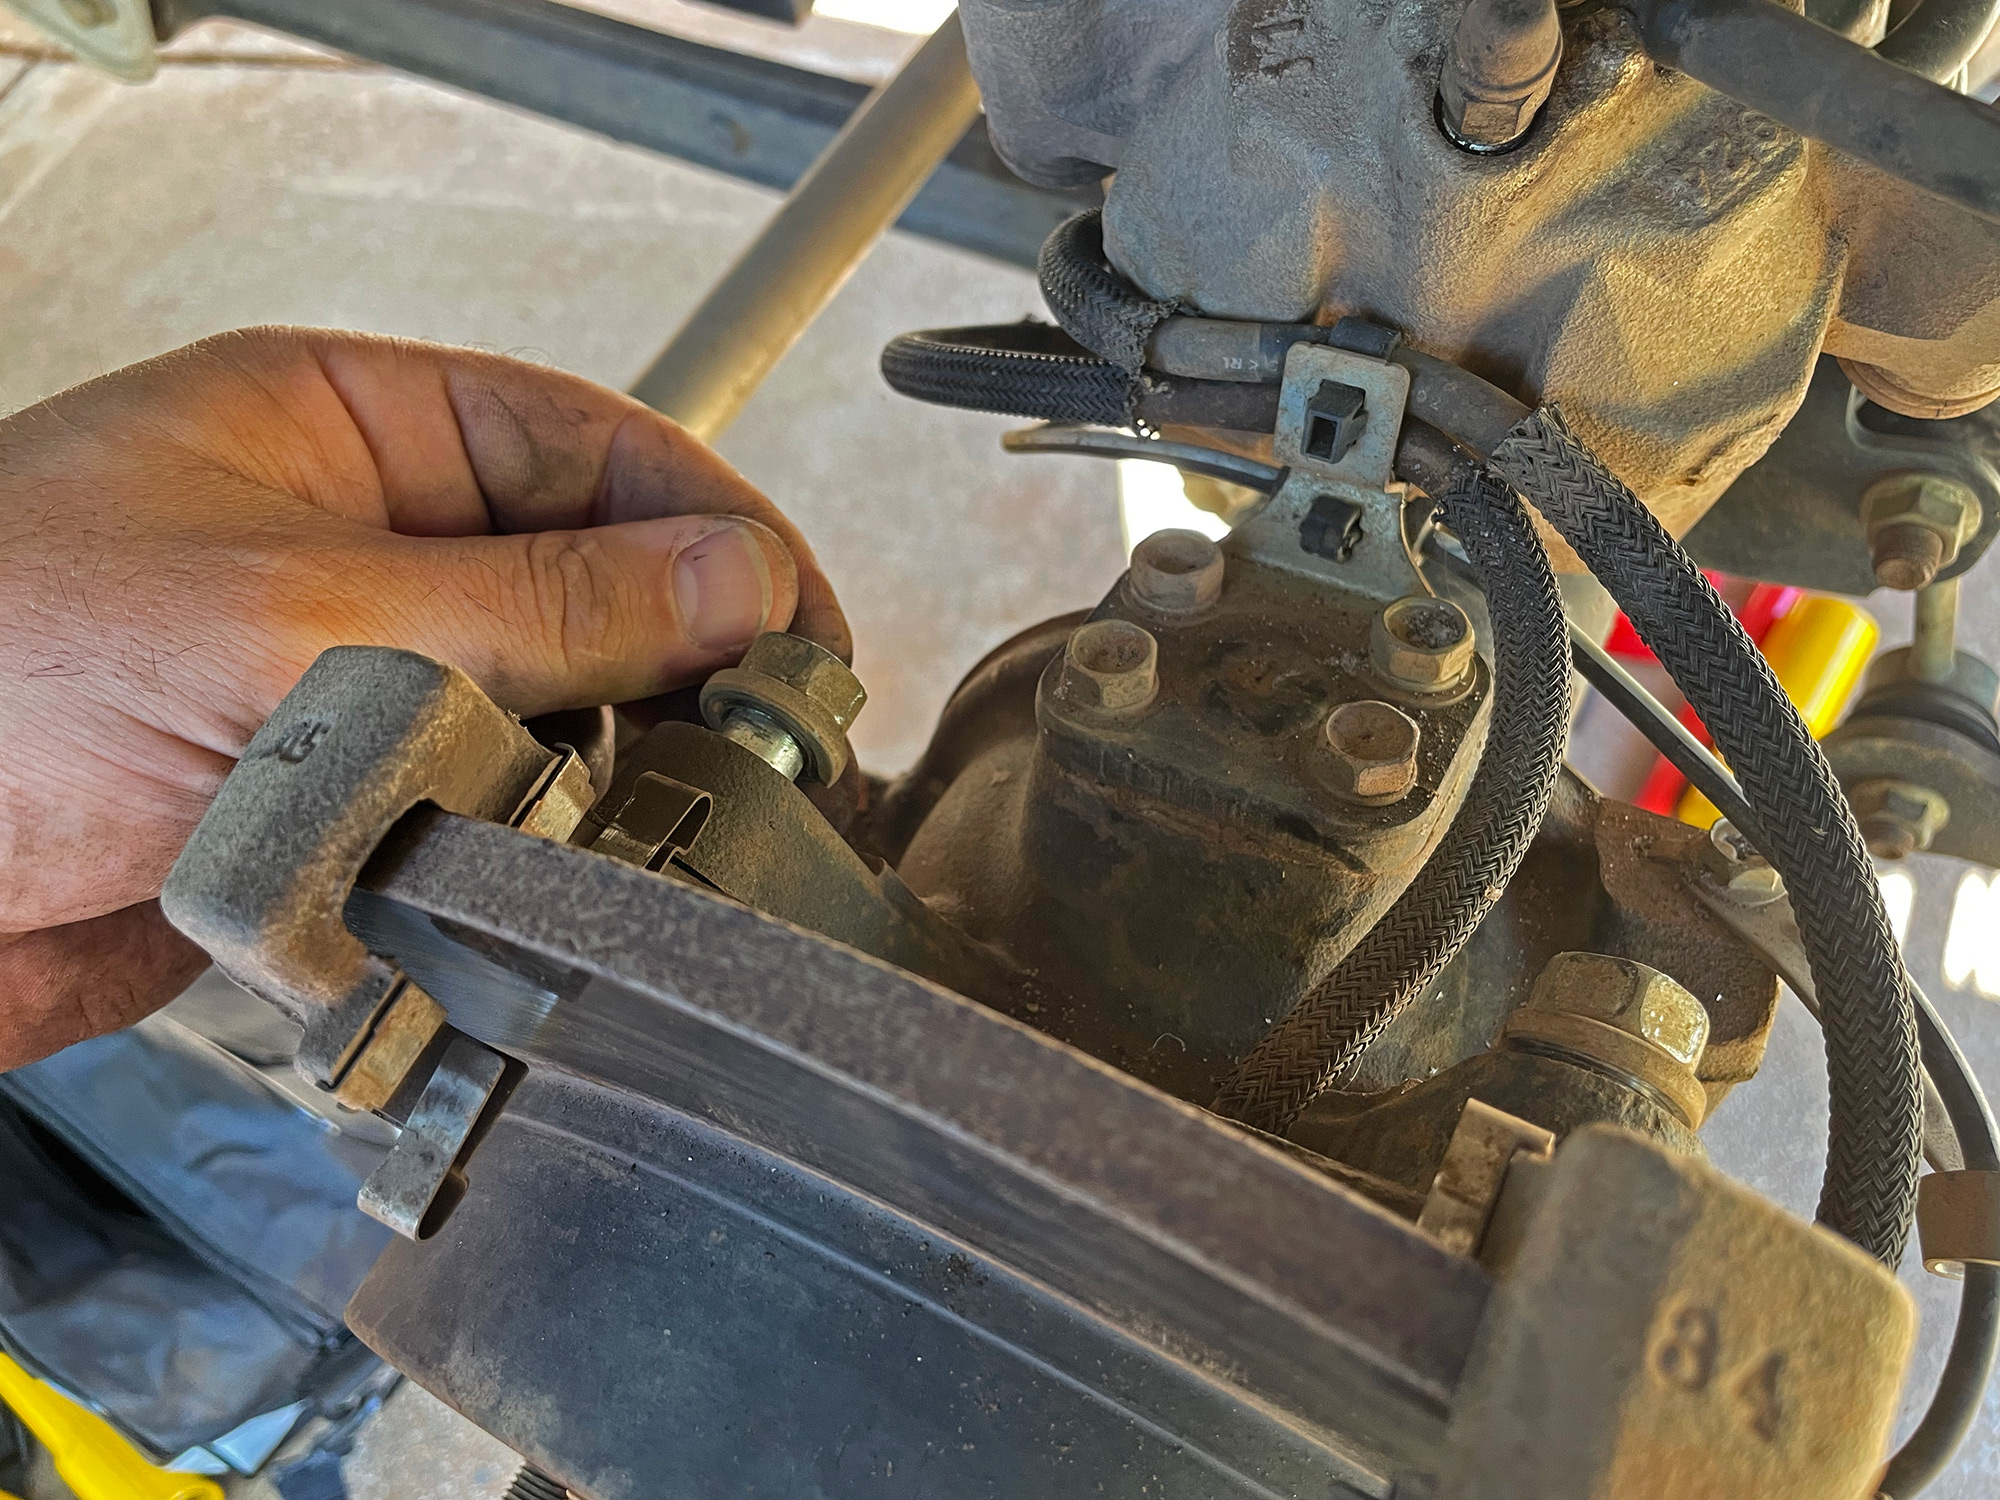
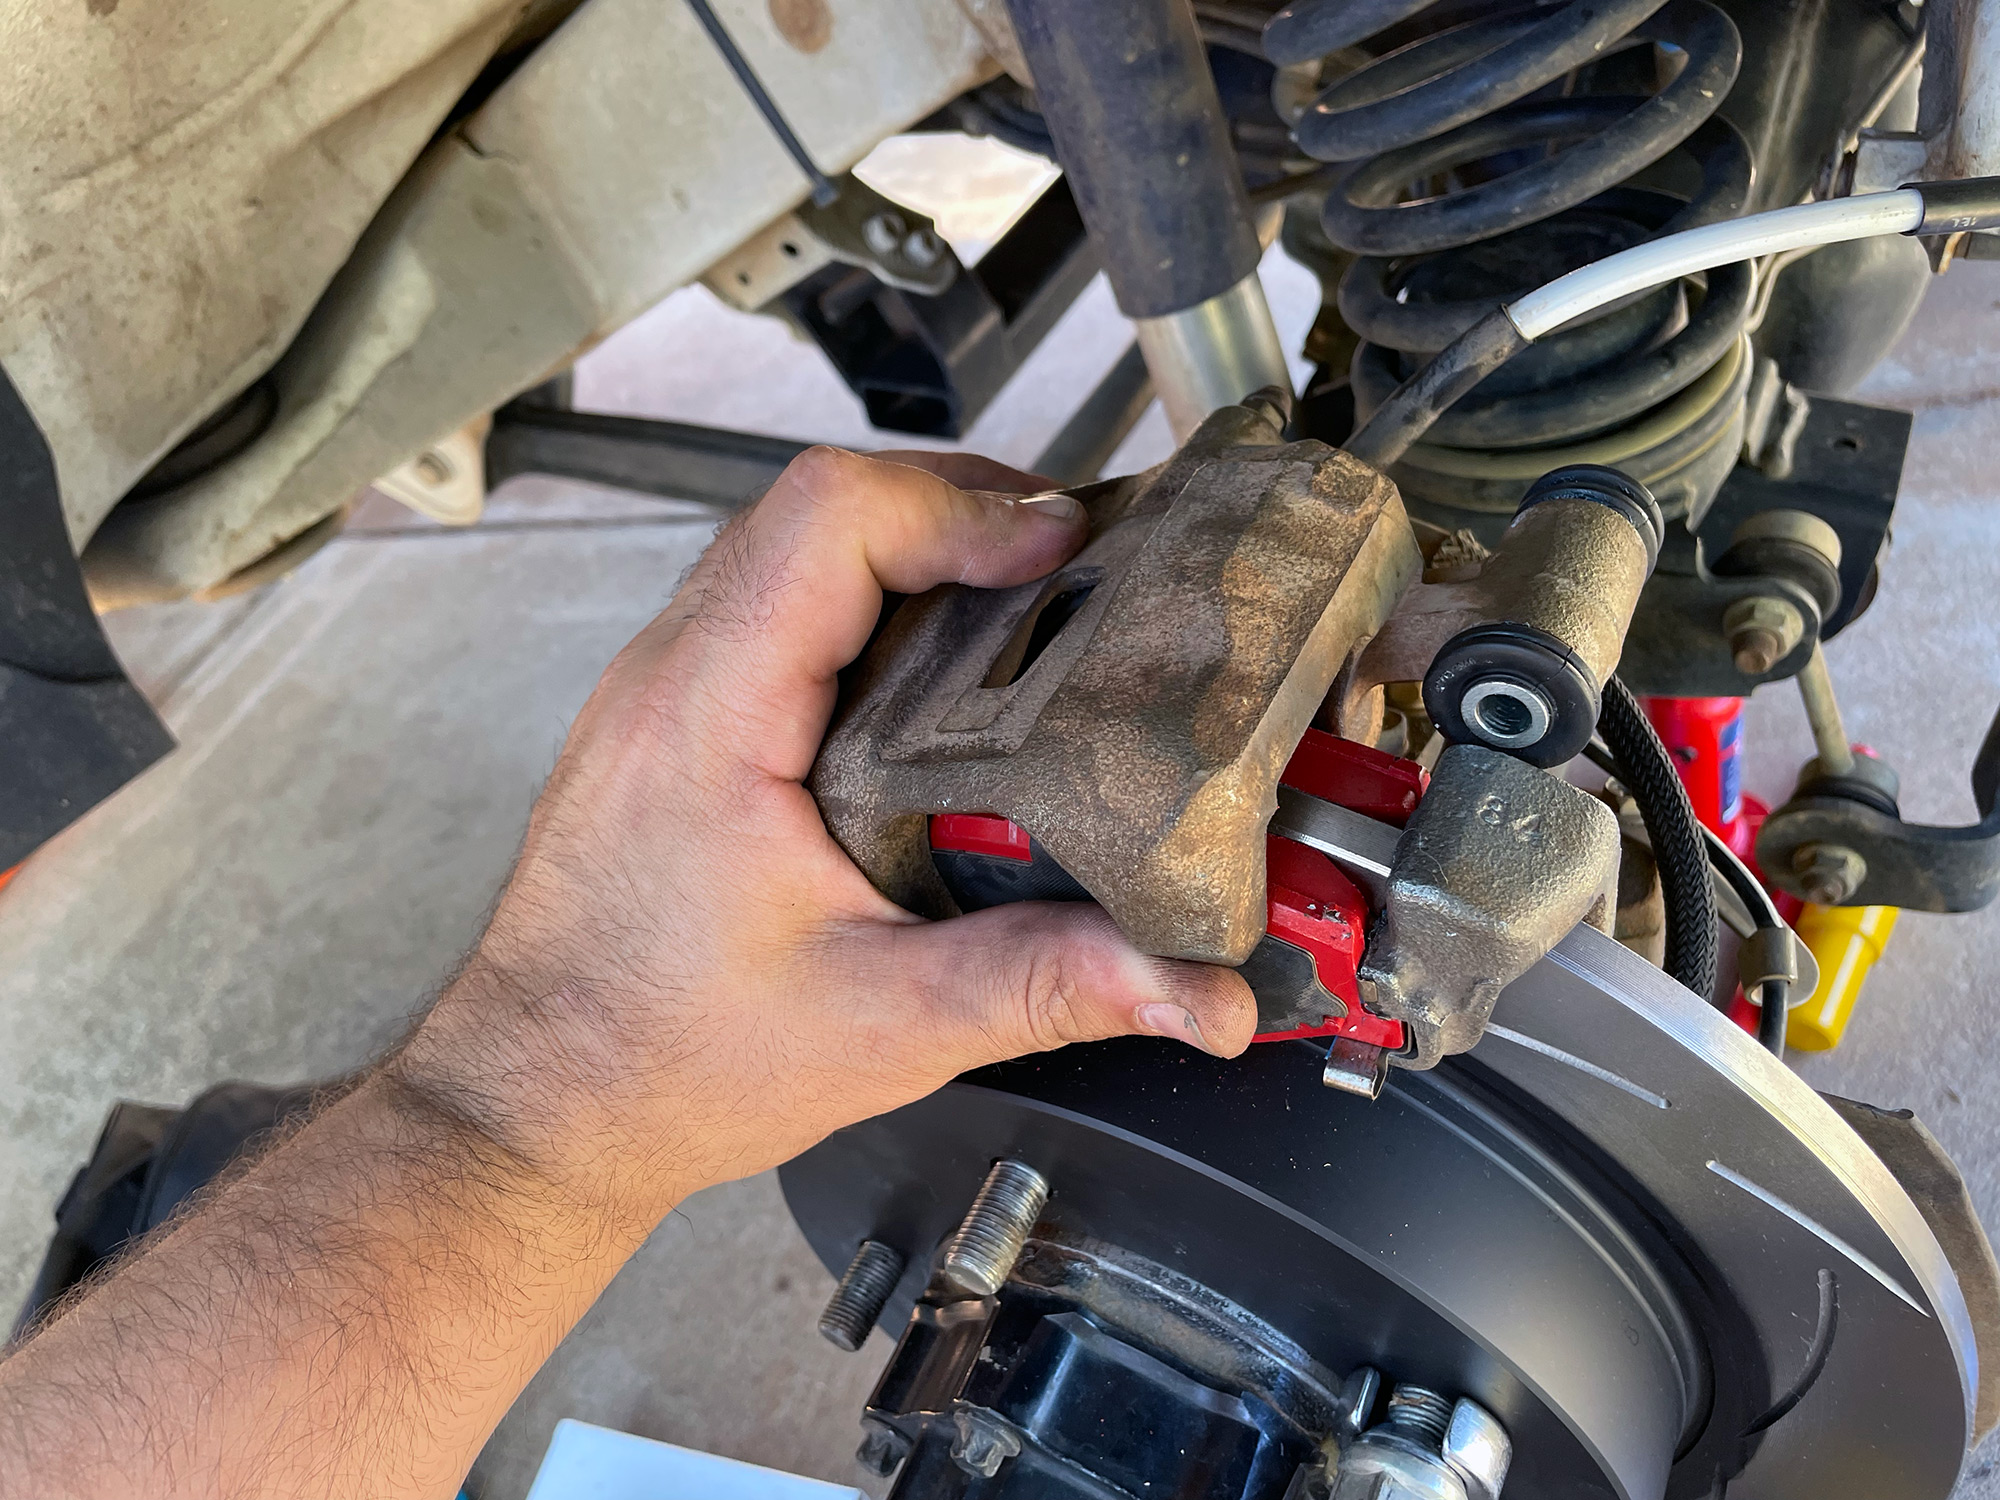
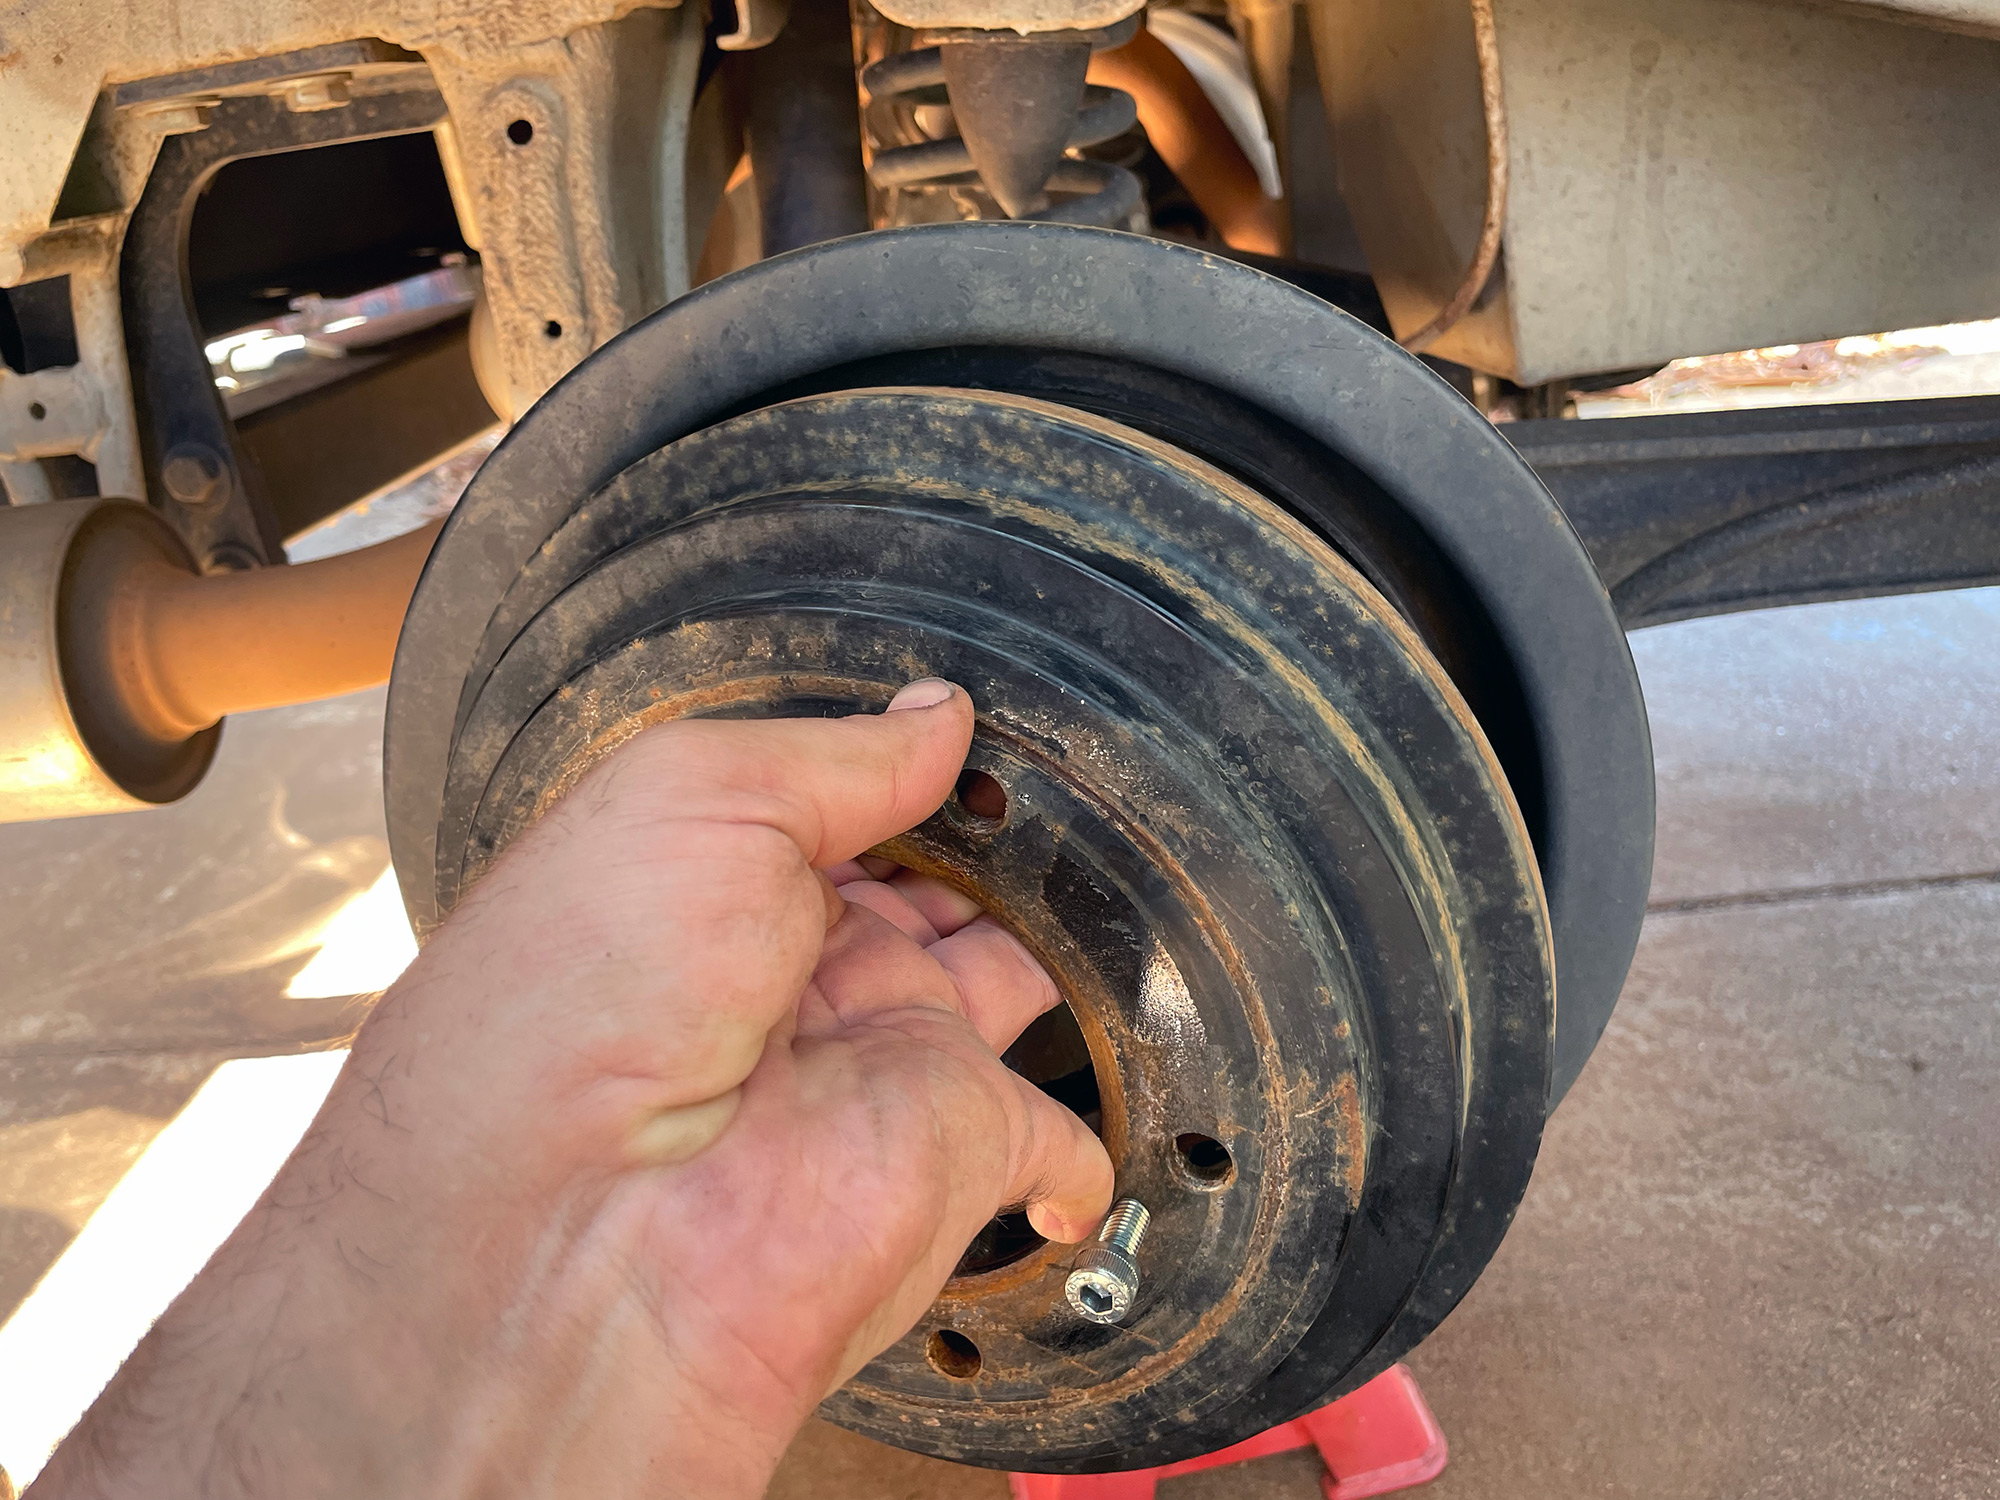
The caliper just lifts up at this point off its mounting bracket.
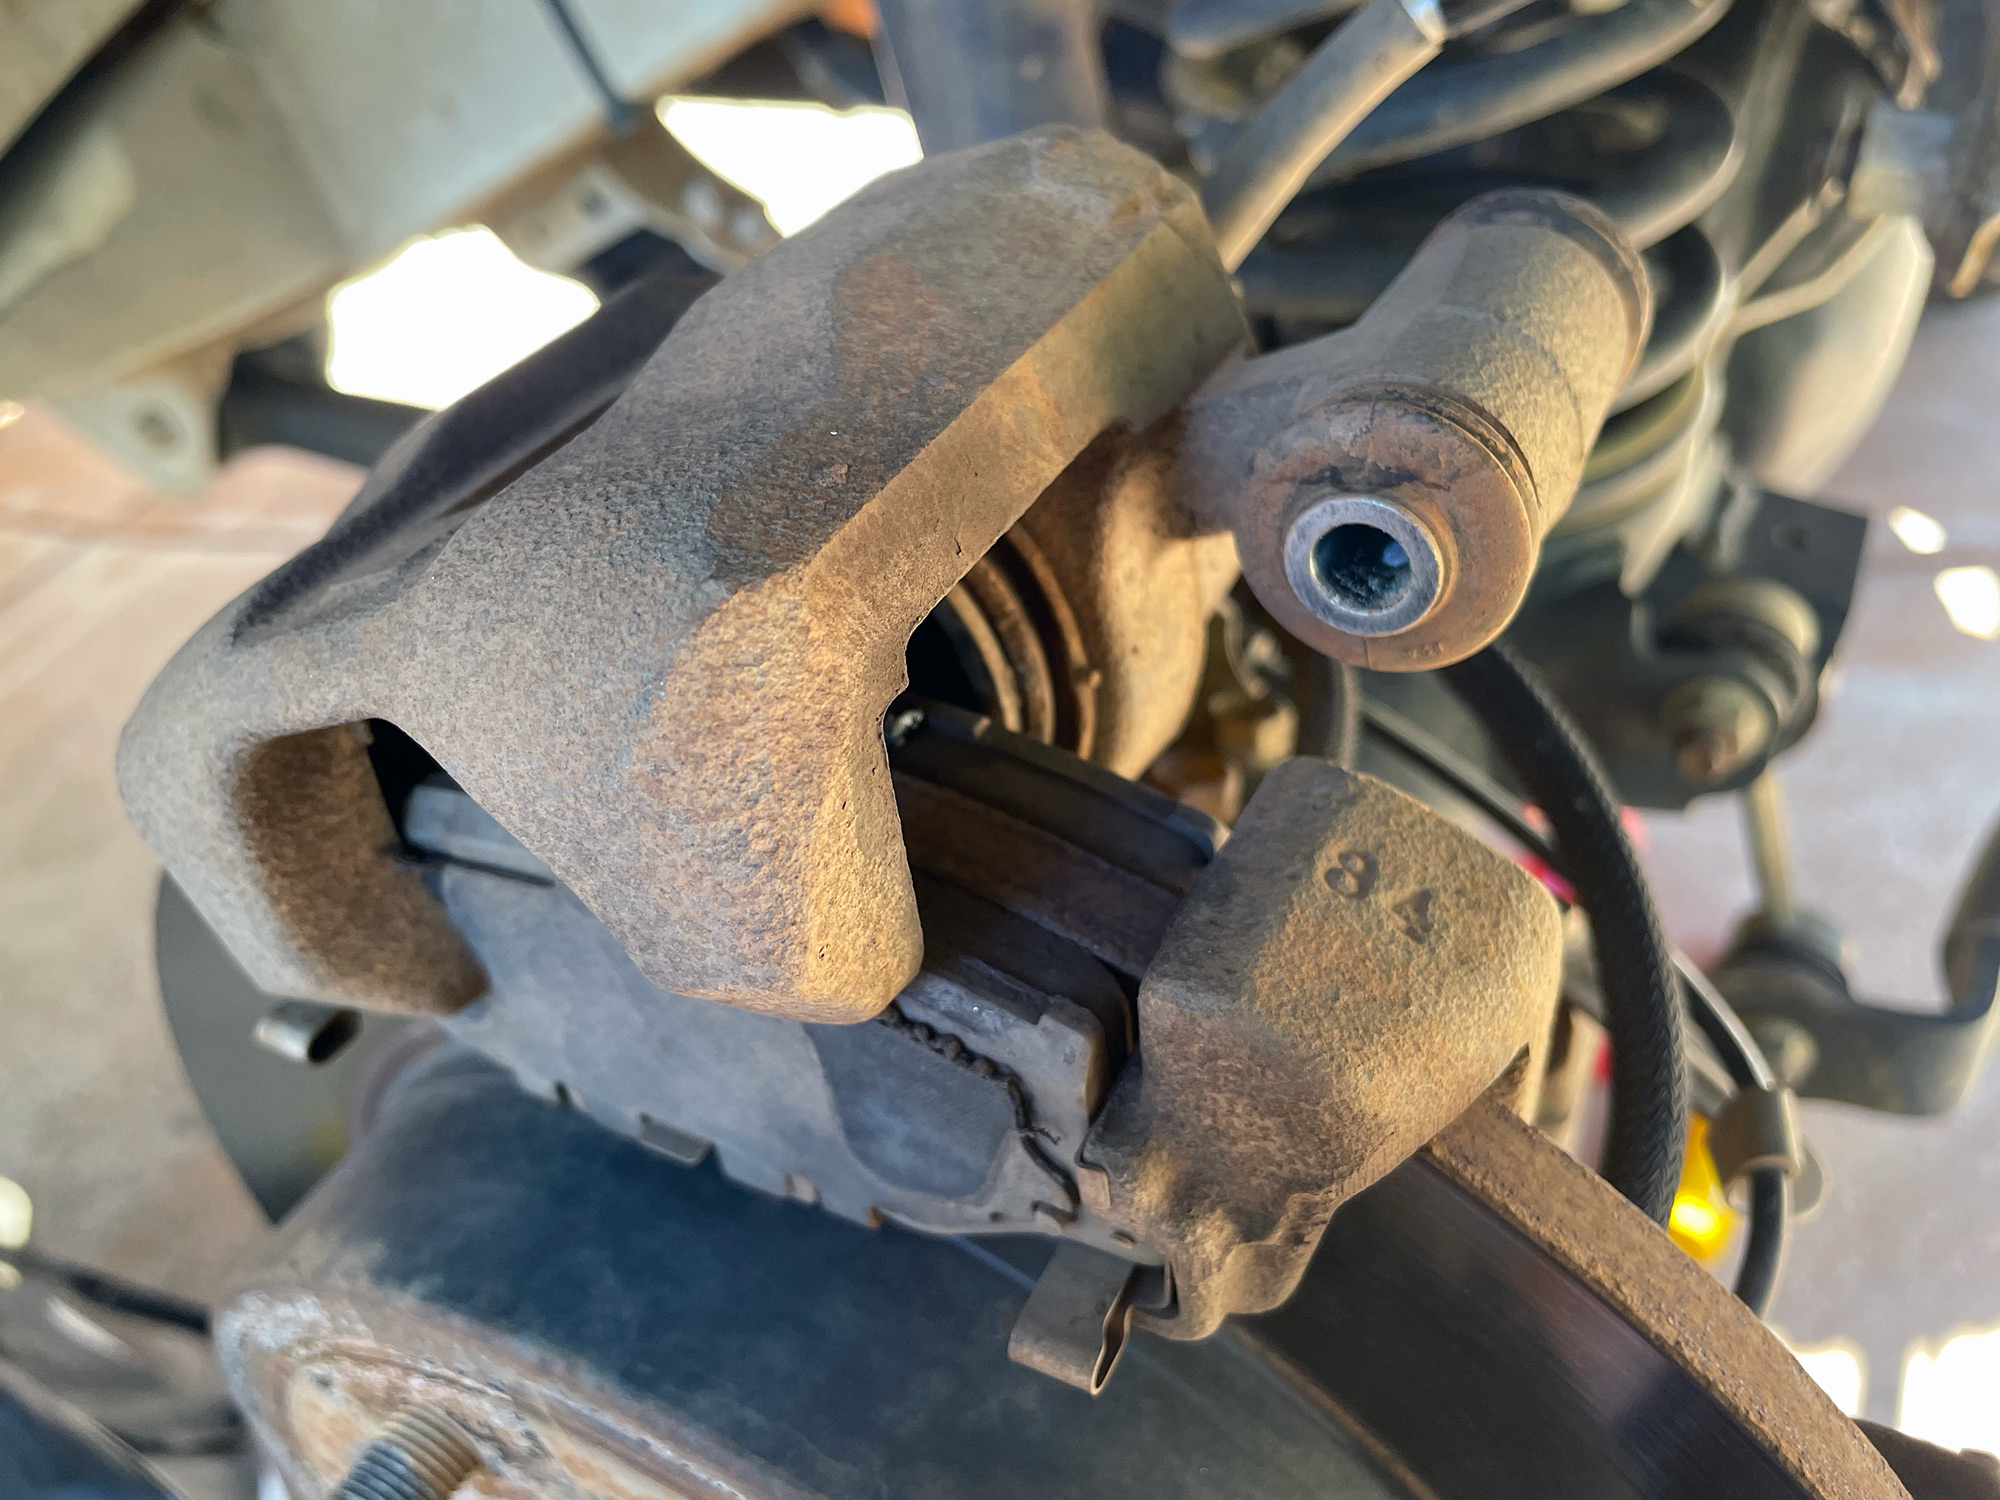
Don’t hang it from the brake hose, rest it somewhere or hang it with a rope or something so the brake hose isn’t being pulled on. Pads can just pull off the mounting bracket at this point.
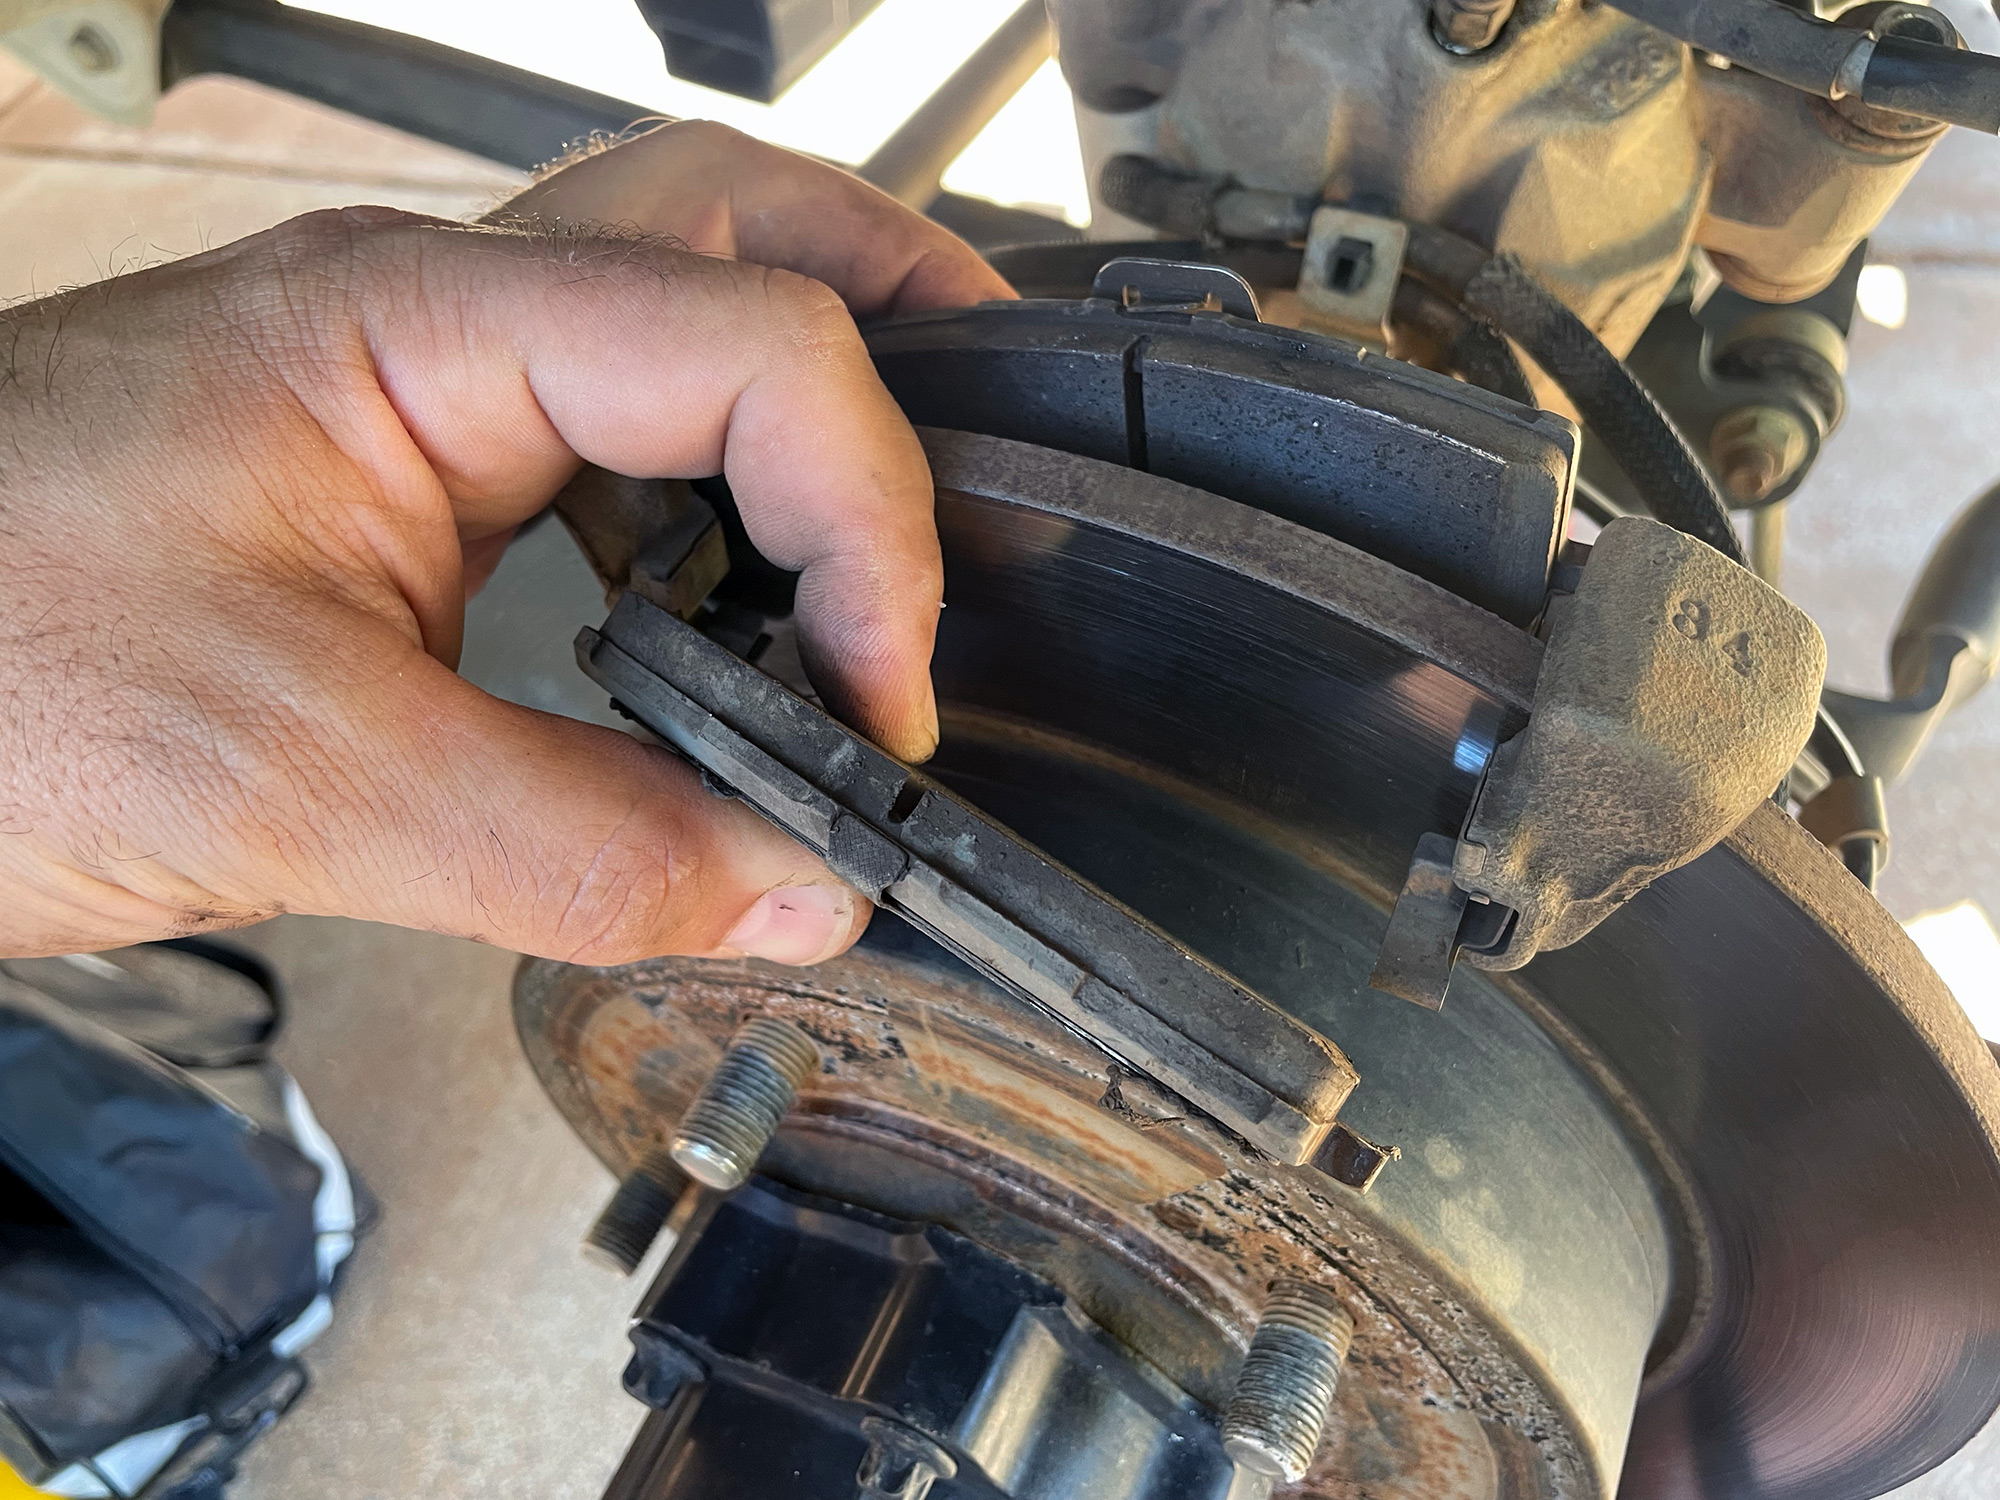
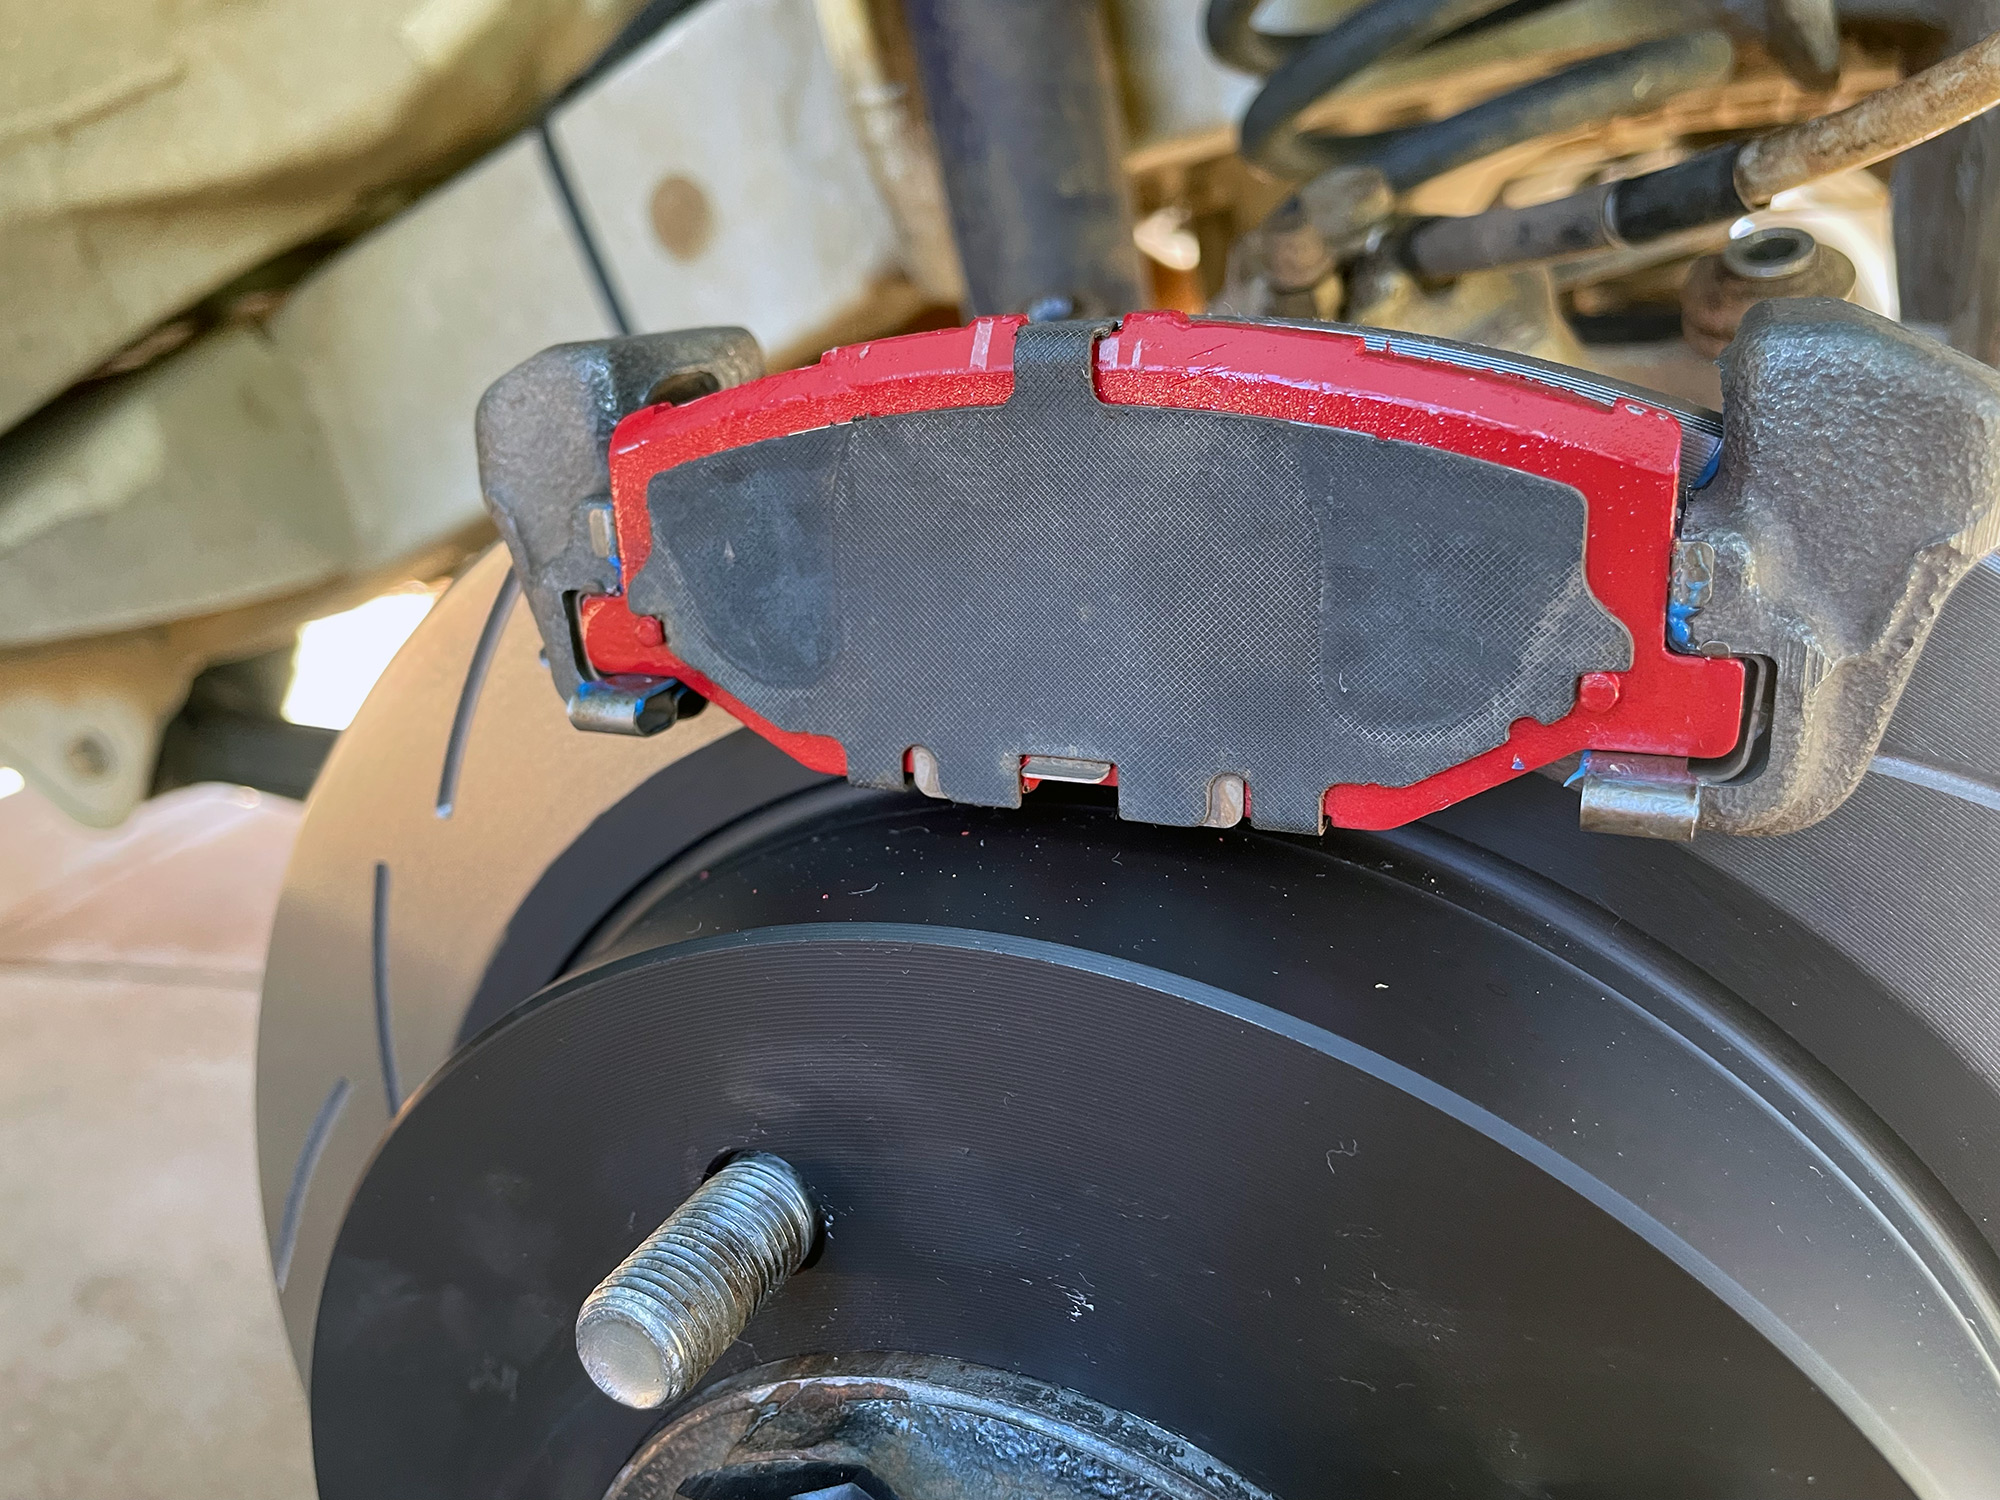
Factory pads have a little bar that will touch the disc and squeal when they are getting low. It’s low tech compared to an electric sensor but it does work. Many aftermarket pads don’t have this, which just means you need to keep your eye on how the pads are wearing.
I still had a fair amount of pad wear left but I wanted to swap to different pads and write it up so figured I’d do it now.
These pads had done about 55,000 km and were maybe half worn. Not bad at all.
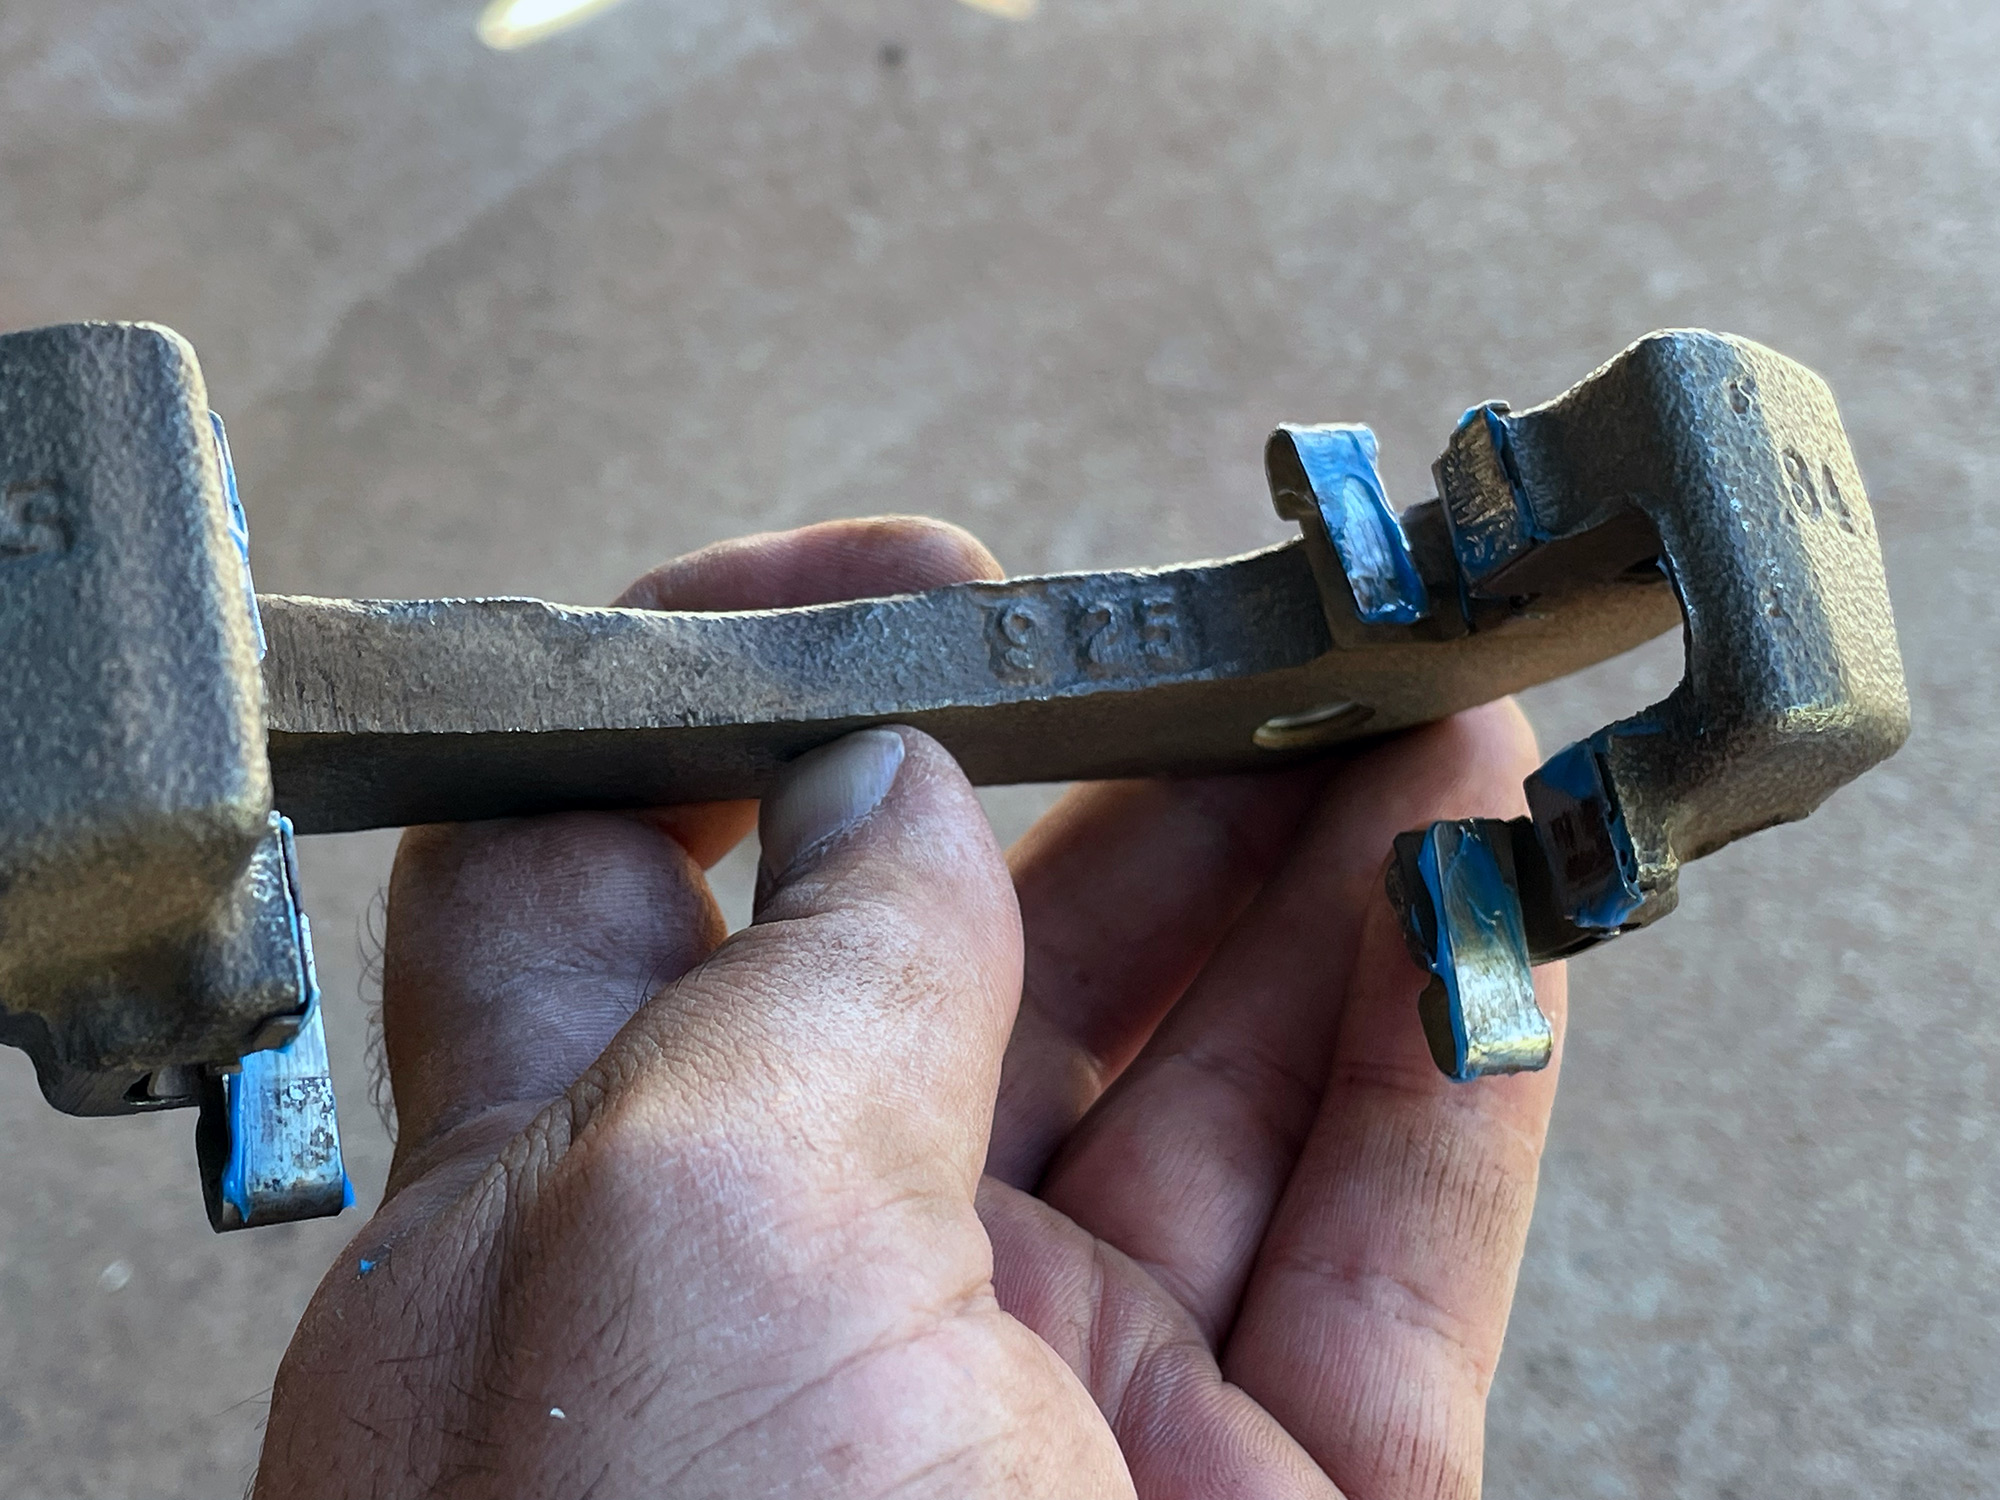
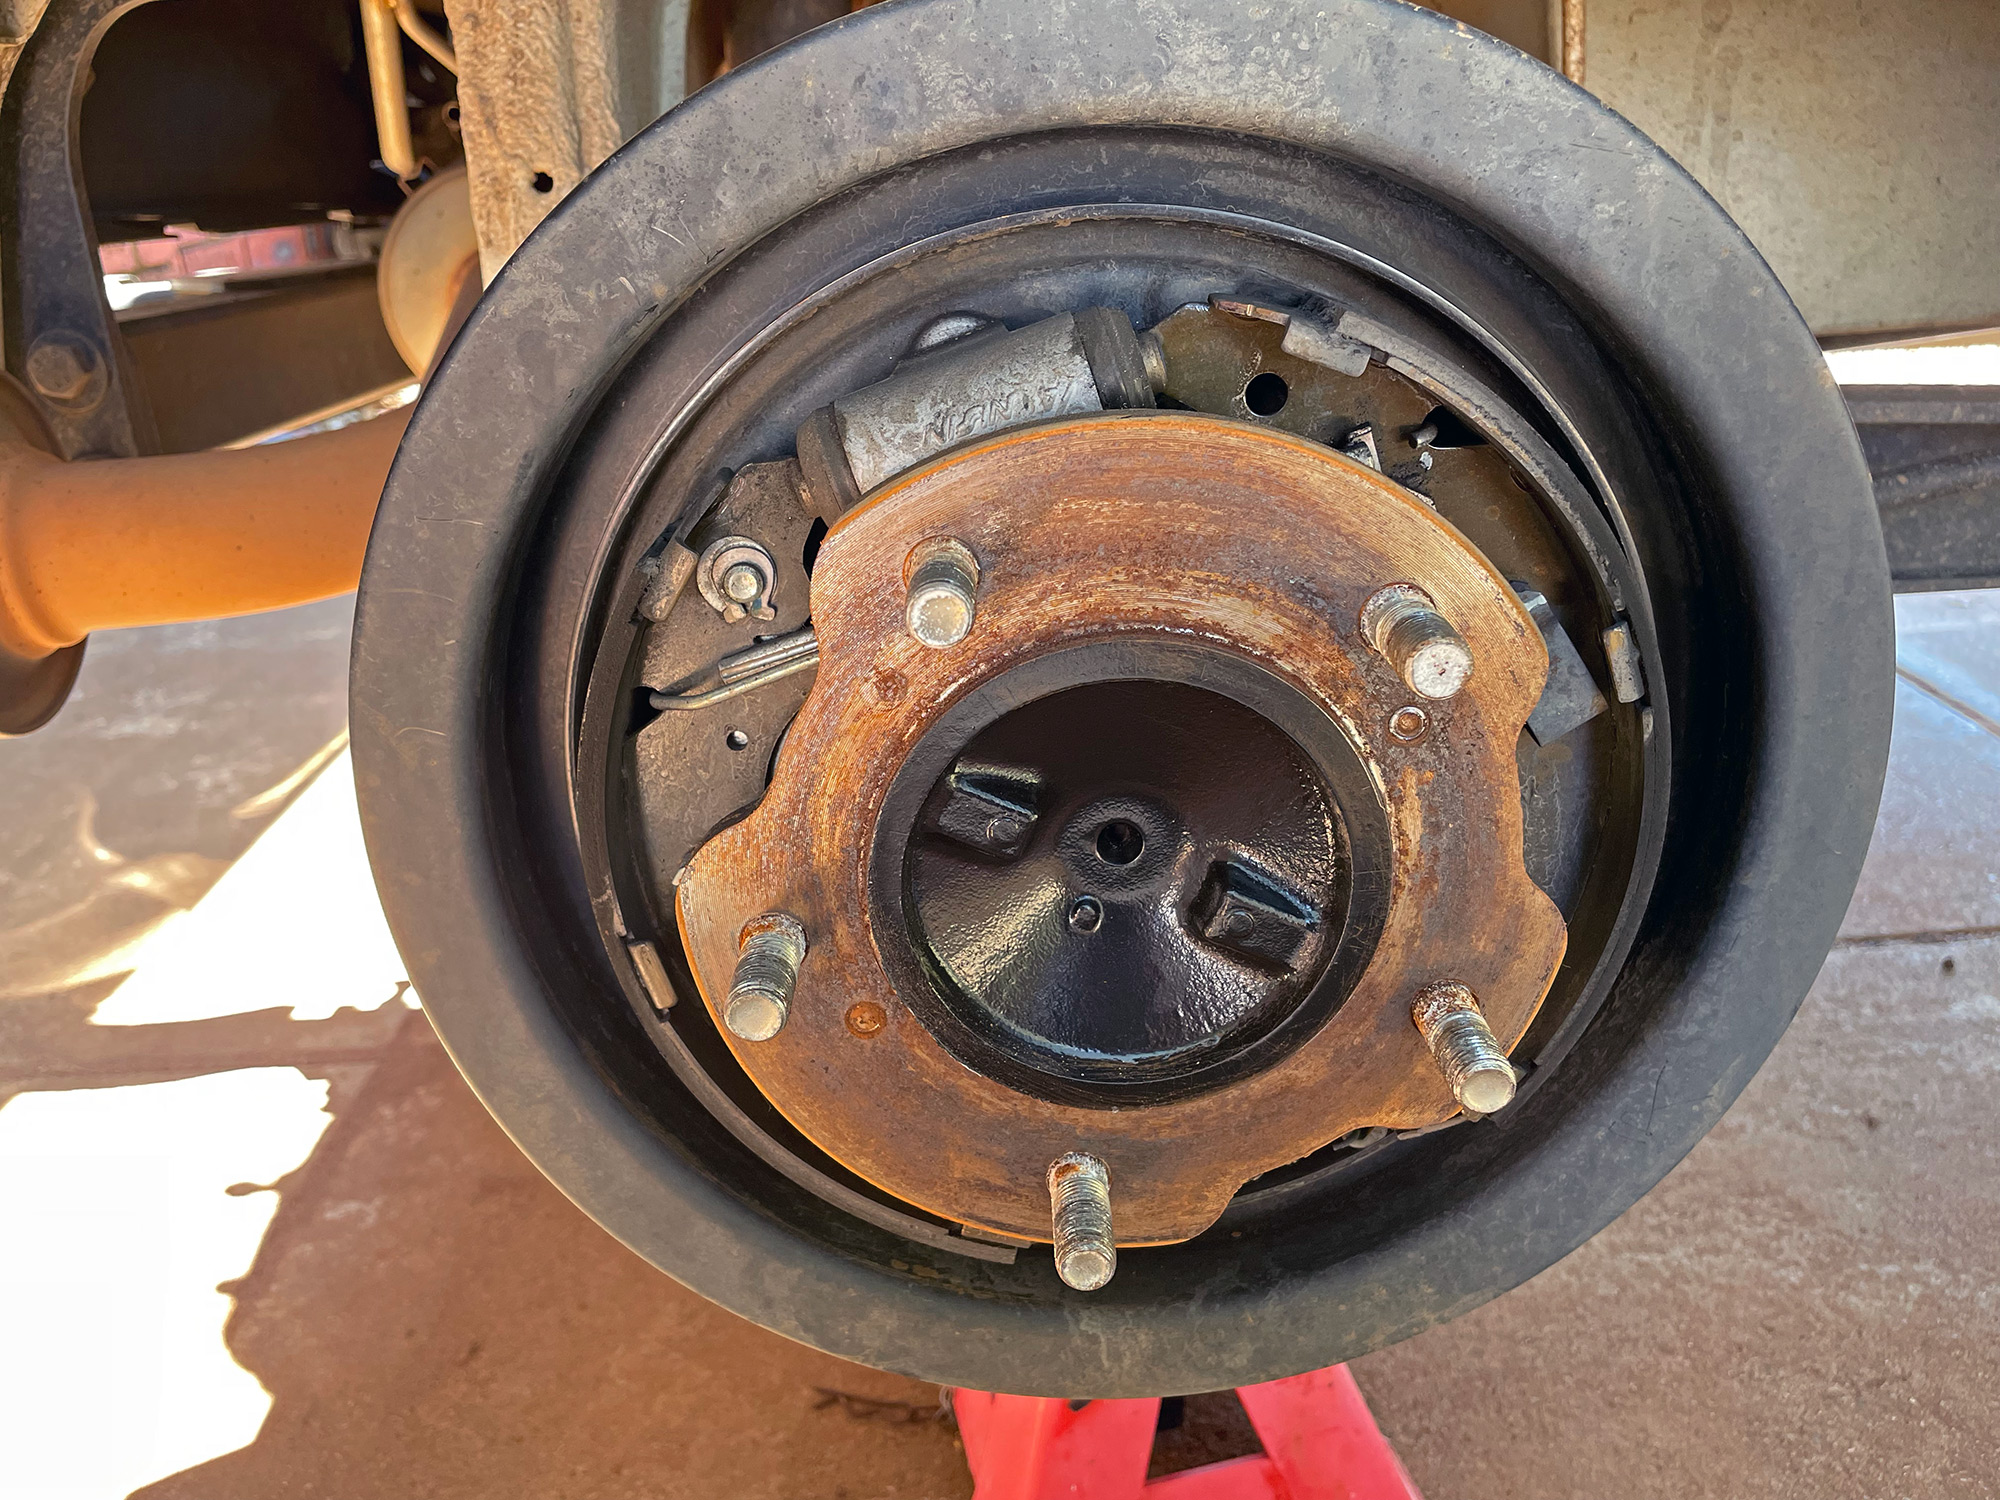
If you are changing discs then you need to remove the caliper mounting bracket, but it is useful to remove it and clean everything up anyway I think. Here’s the two 17mm headed bolts visible now the caliper is removed.
After cleaning up the caliper bracket and/or replacing the disc, tighten these bolts up to 85 Nm.
Refitting pads
After cleaning up and refitting the mounting bracket (if needed), you need to grease the little bits where the pads sit in and put in the new pads. Remember – this is using super high temperature caliper grease, not some ol’ random grease from the shed.
The pads can then go on.
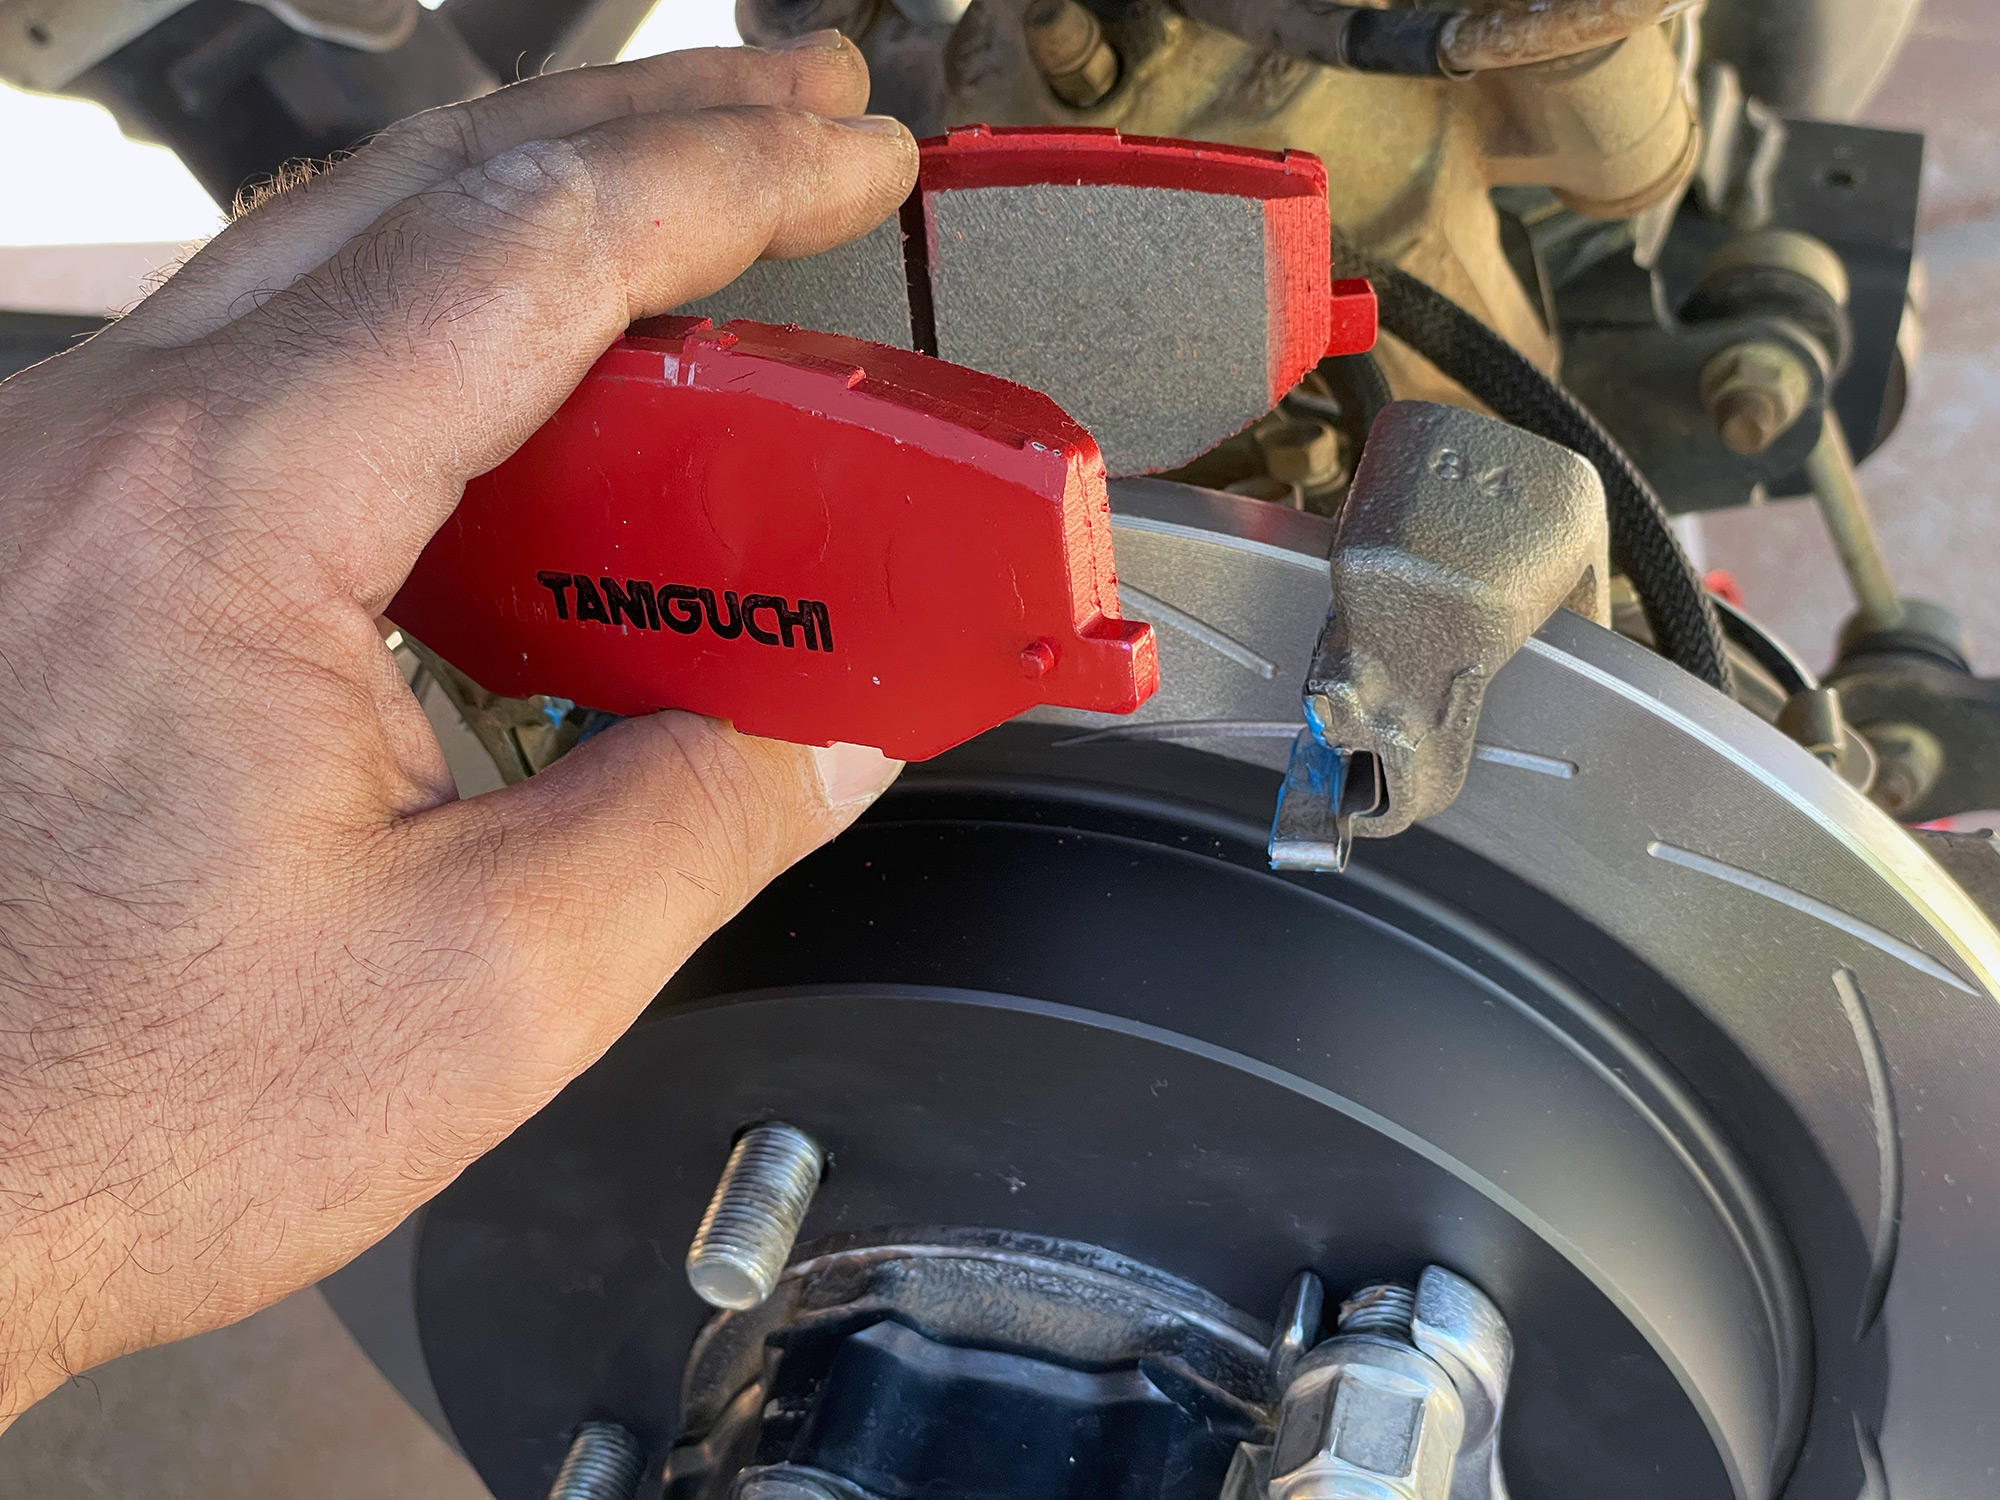
The factory pads have an anti squeal plate on each pad – these pads are different, one goes onto the outside pad and has the 2 arms of the caliper grabbing it, the other one goes to the inner and has the caliper piston pushing against it. Clean up the factory ones from the stock pads and fit them to whatever pads you bought. If your pads came with new ones then use them, obviously.
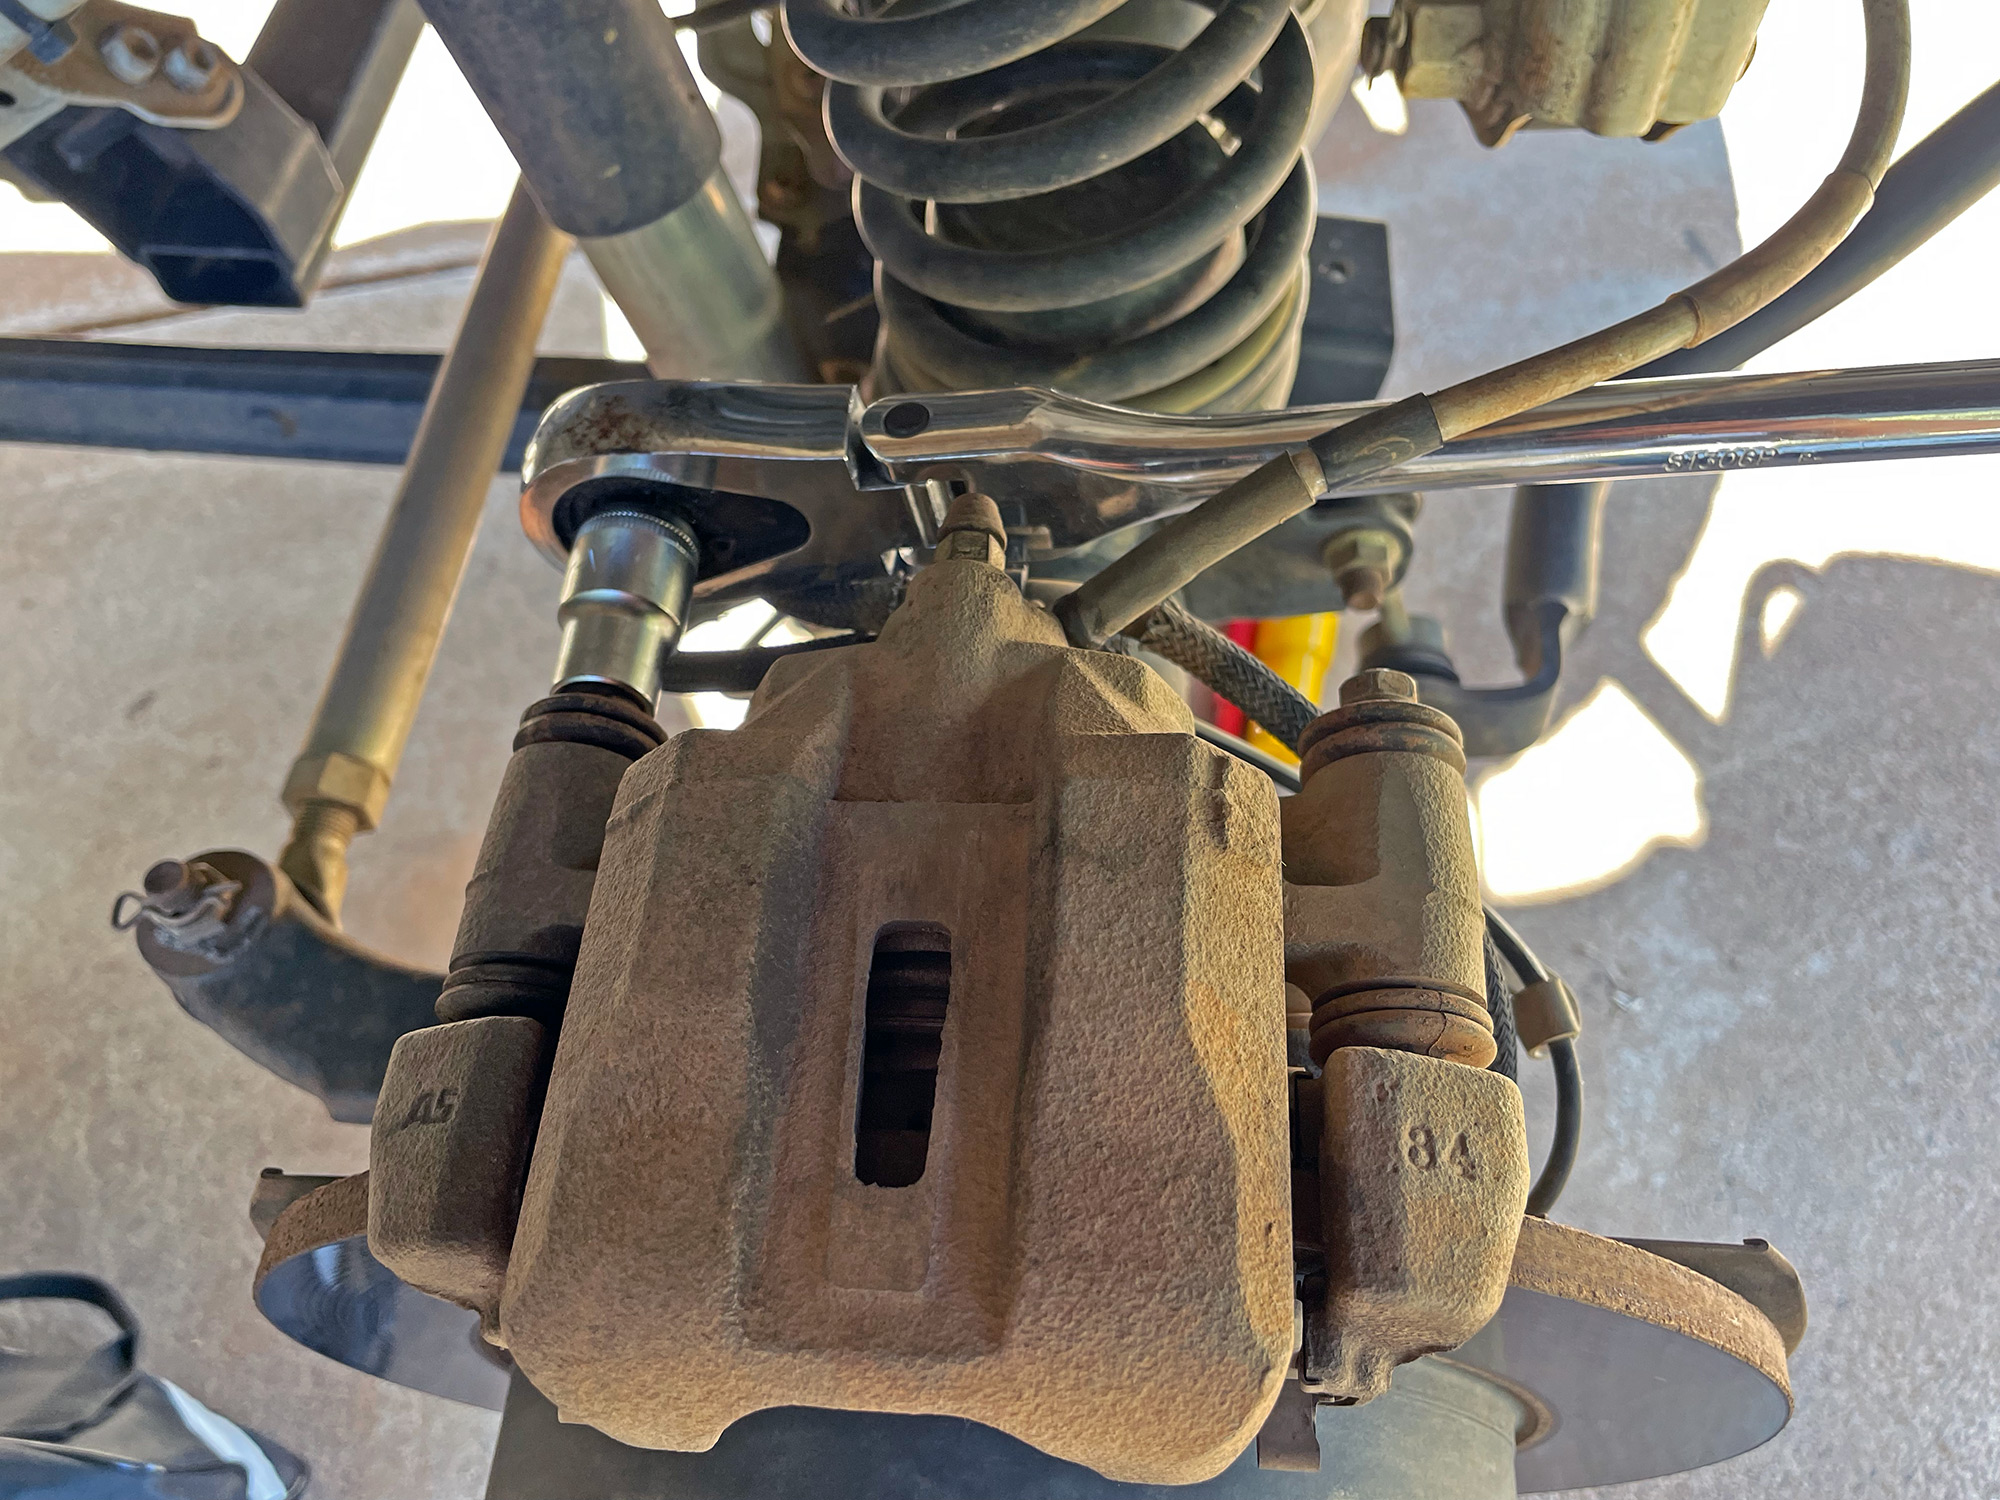
Now we get onto some other caliper cleanup stuff.
Cleaning up the caliper slides and piston
The caliper slides are often overlooked by people replacing brake pads. They can get sticky as the grease gets old, and on 4wds its very common for the slide pin grease to get contaminated with mud, causing them to stick. This will wear out your pads, but it will also mean you have a wooden brake pedal that doesn’t press as far as it used to, but also doesn’t slow the car as well as it once did either.
Start off with the caliper slides after the caliper is removed from the bracket.

Push out the slide pin from the rubbers.
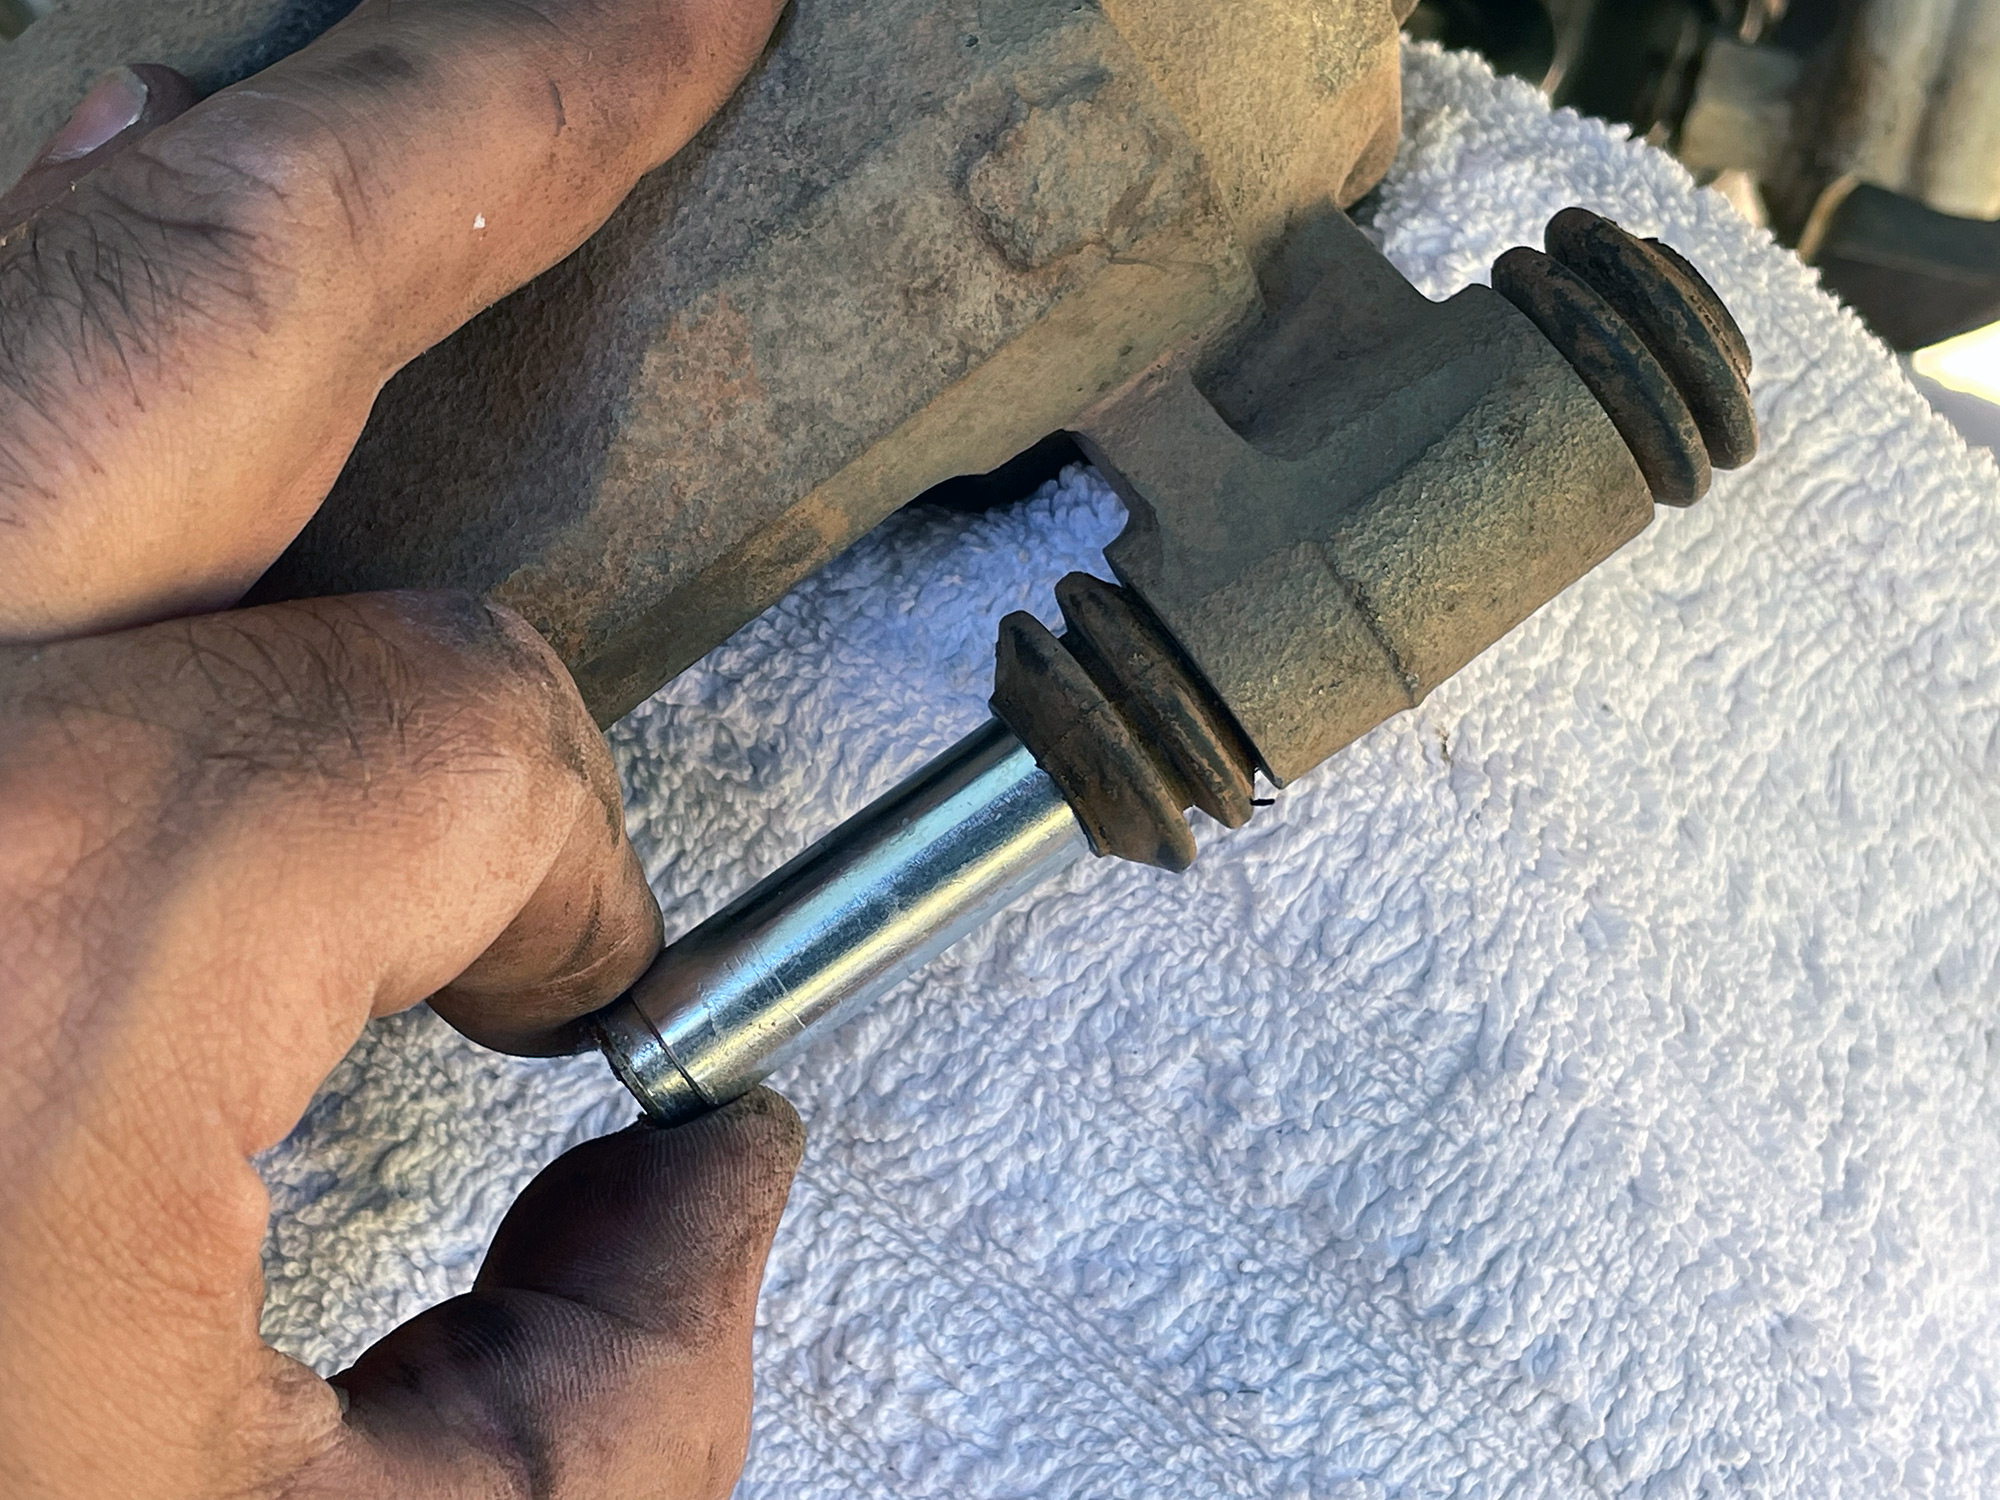
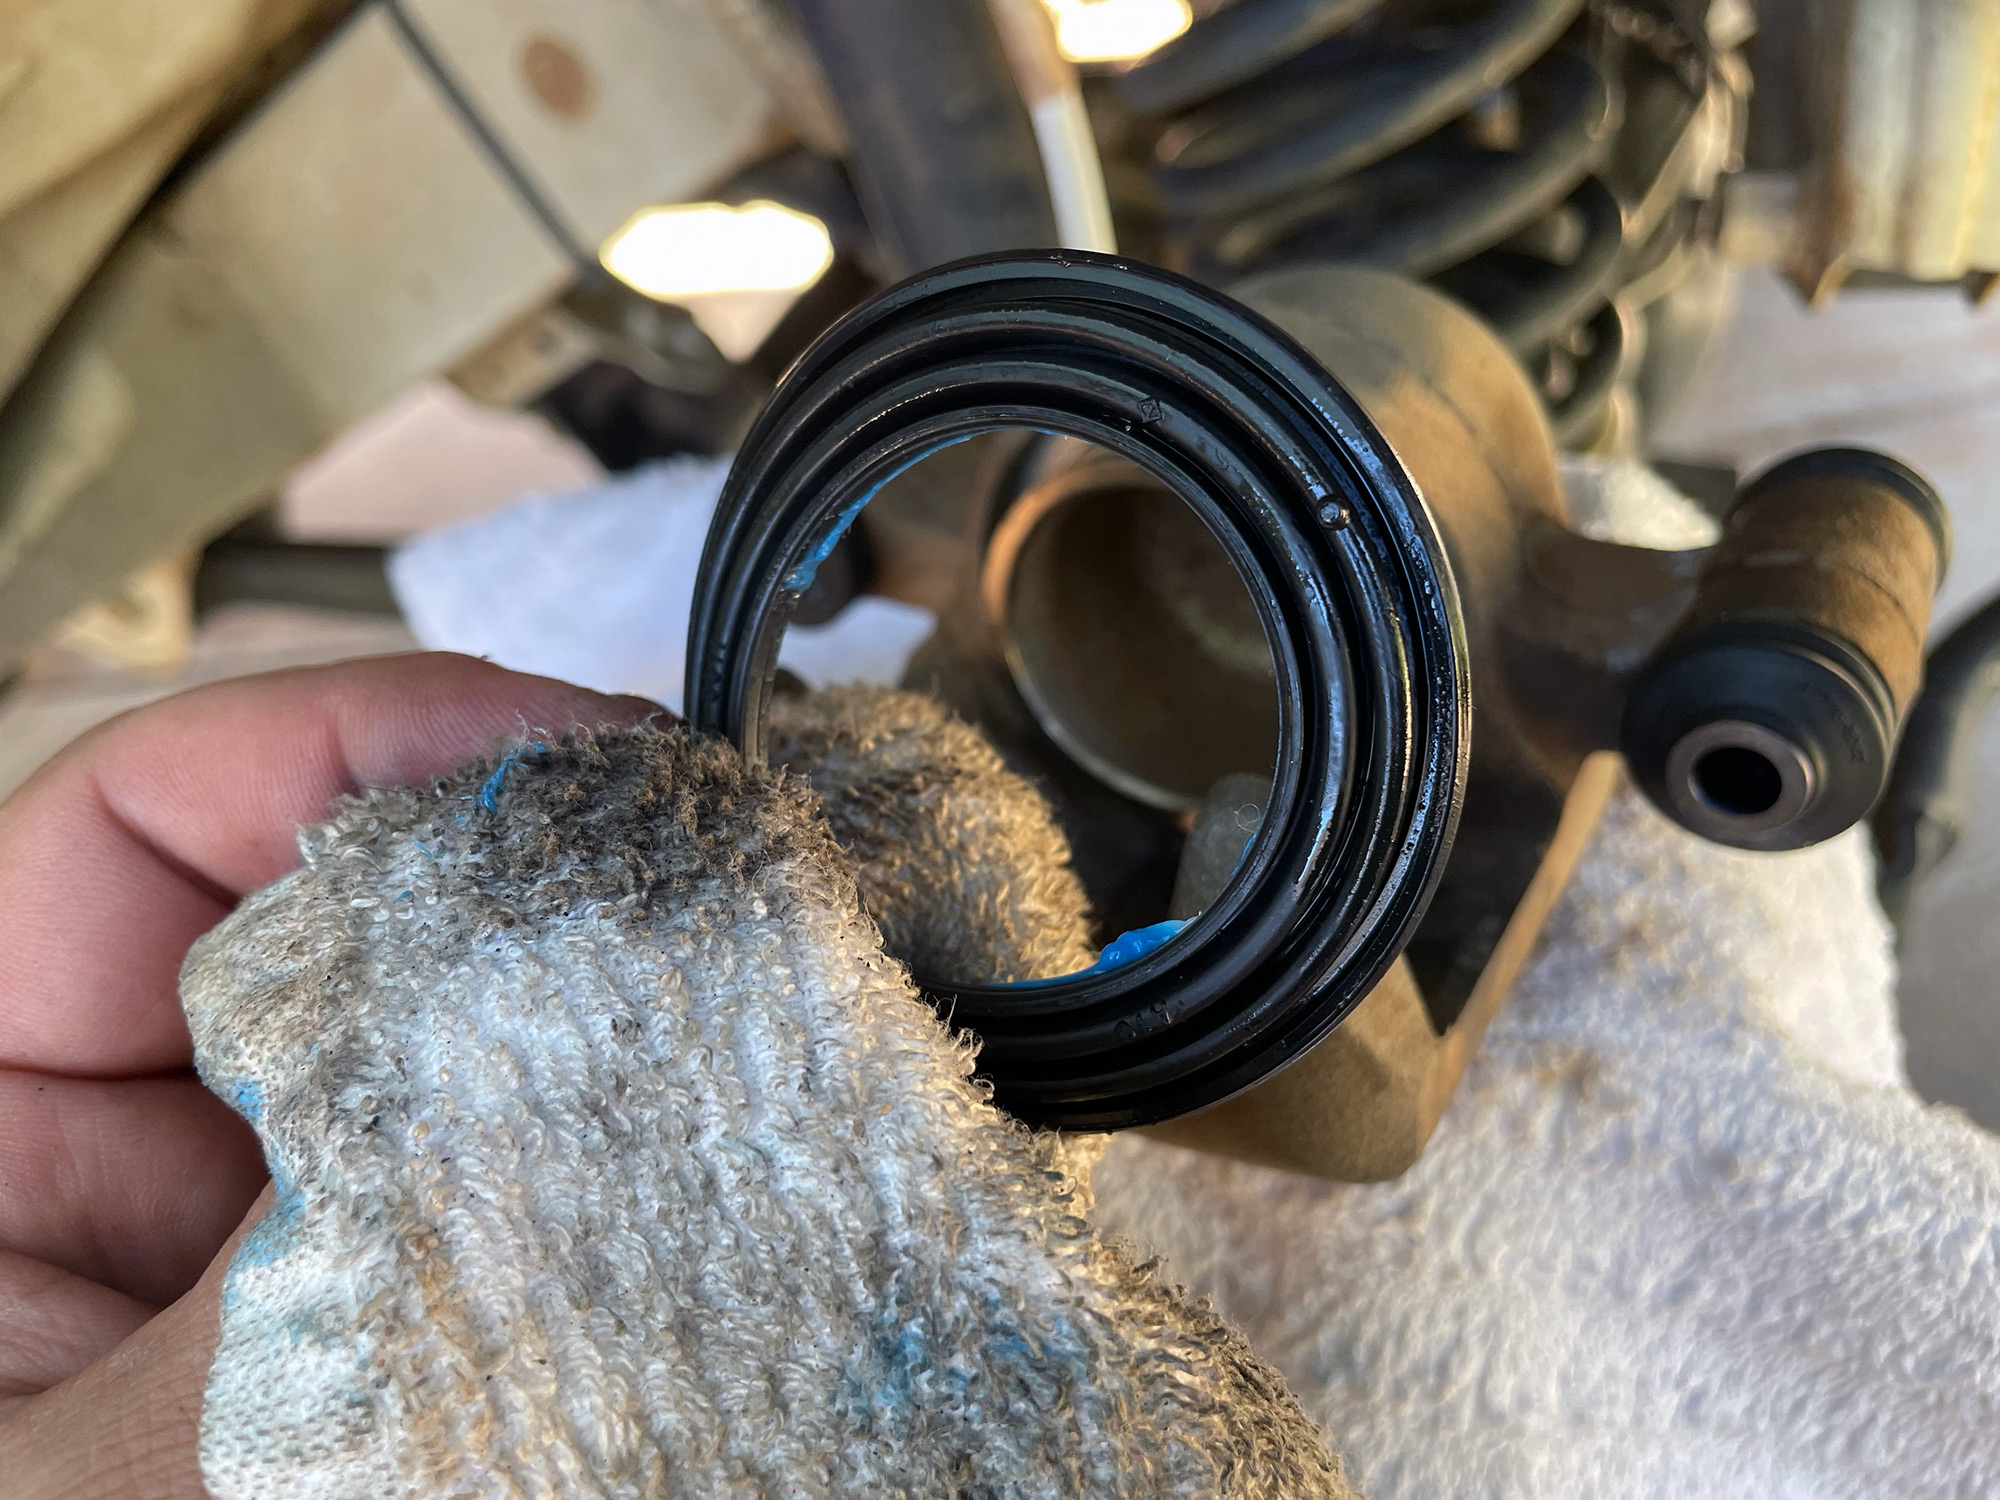
So long as the rubbers aren’t totally trashed you can take them off the caliper and clean them up.
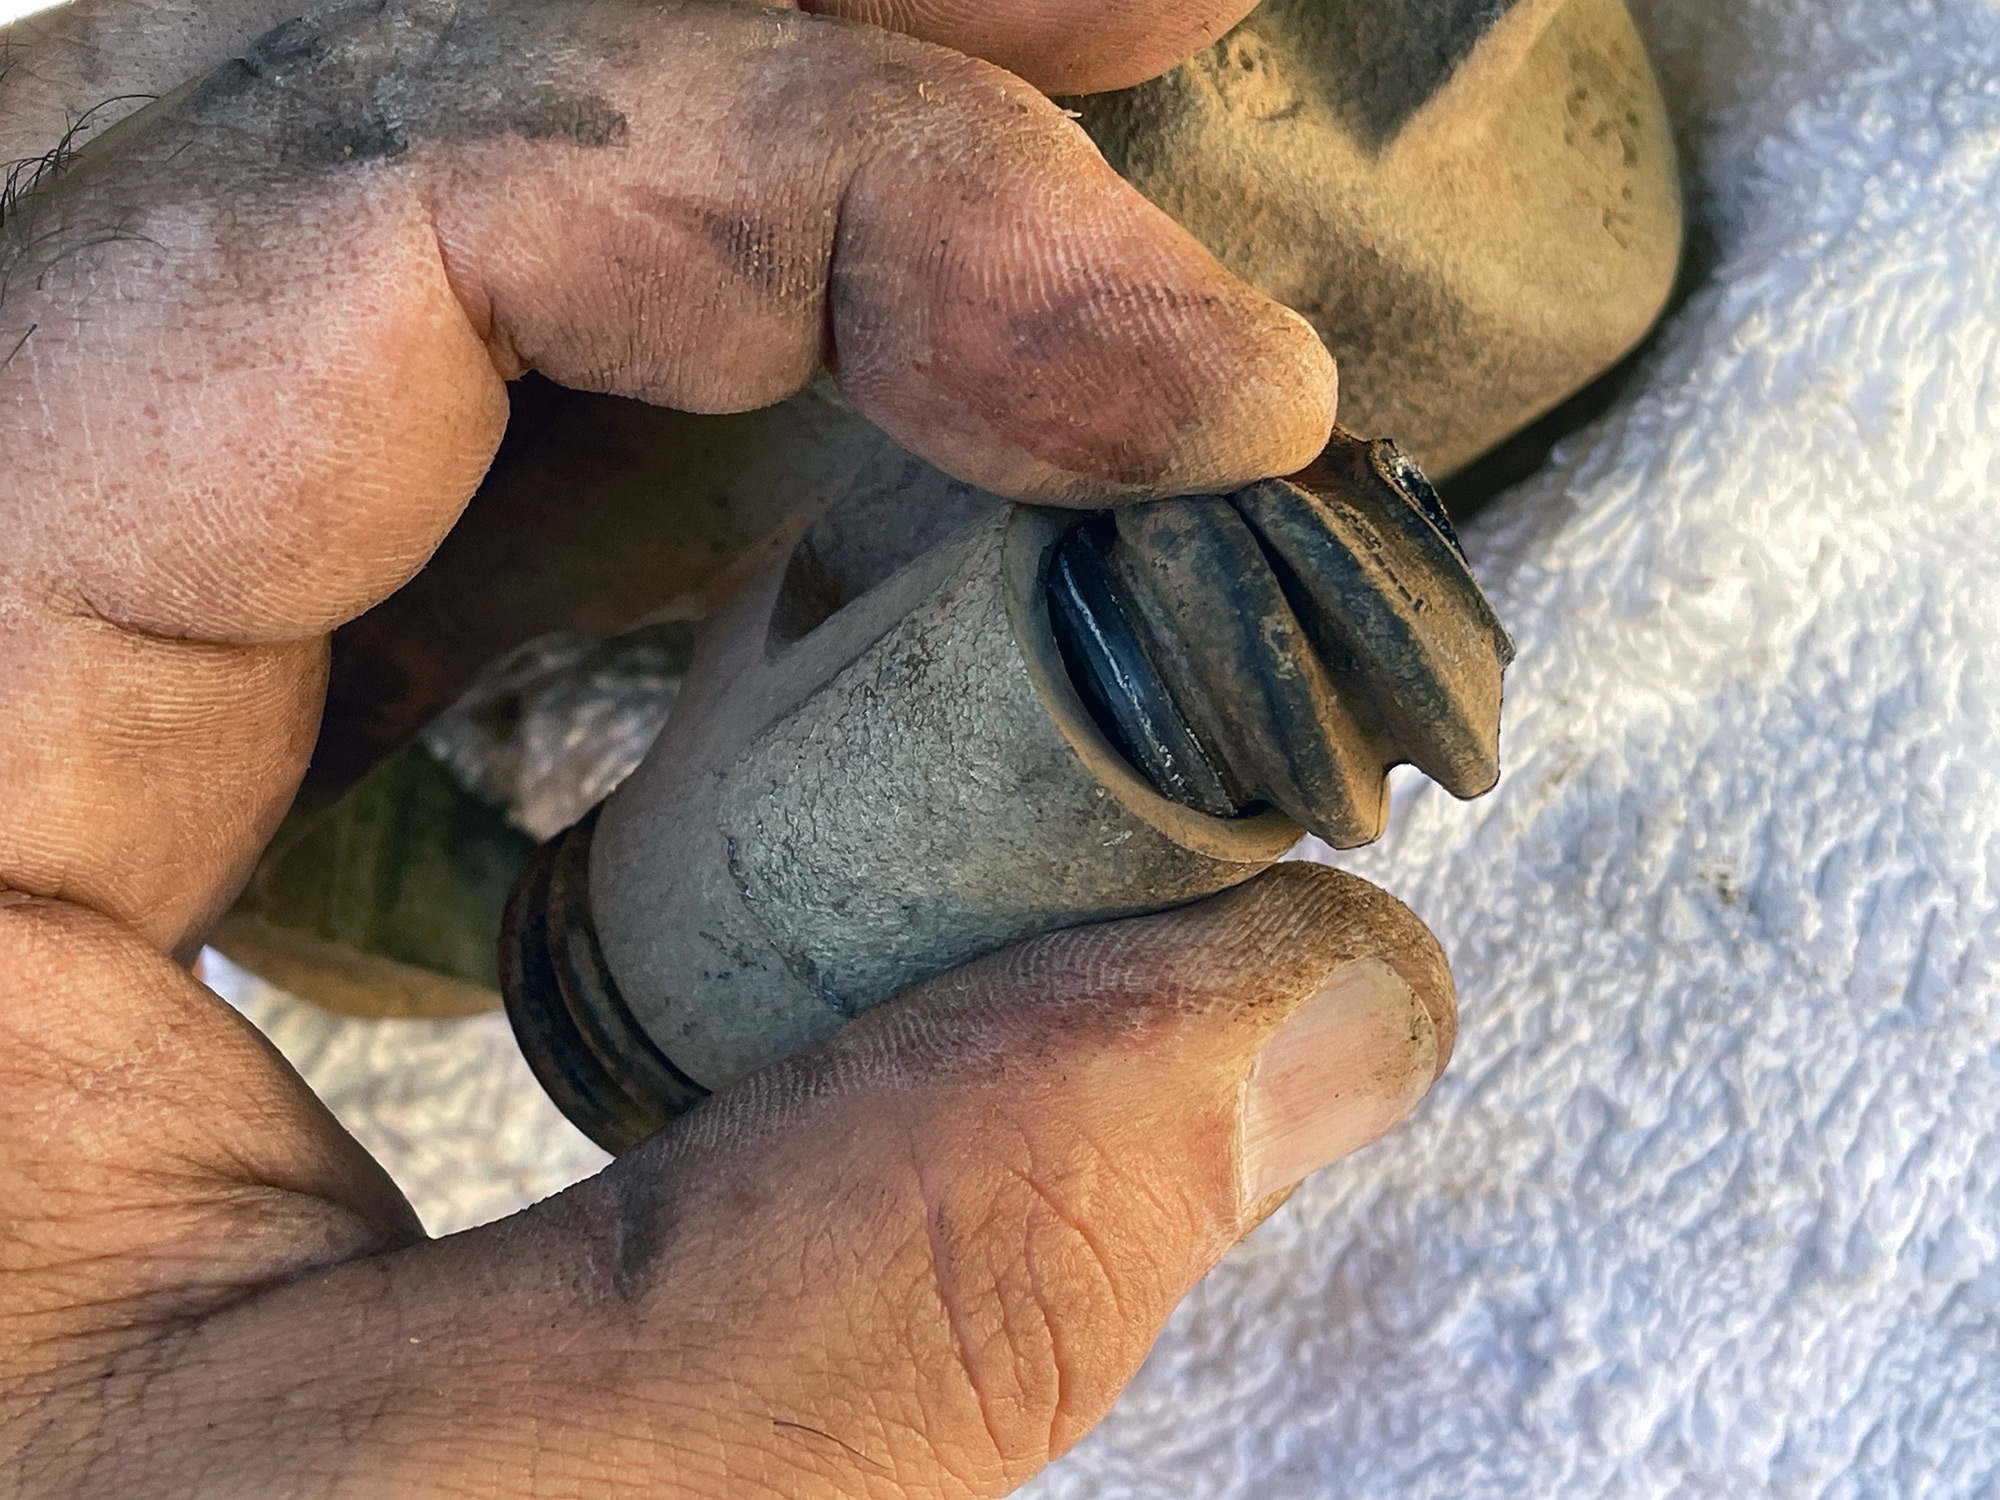
Time to use some semi-gentle cleaning stuff to clean up the rubber. I often use inox mx3 as the cleaner for the outer rubber, but then a bit of isopropyl alcohol to clean the grease out of the inside.
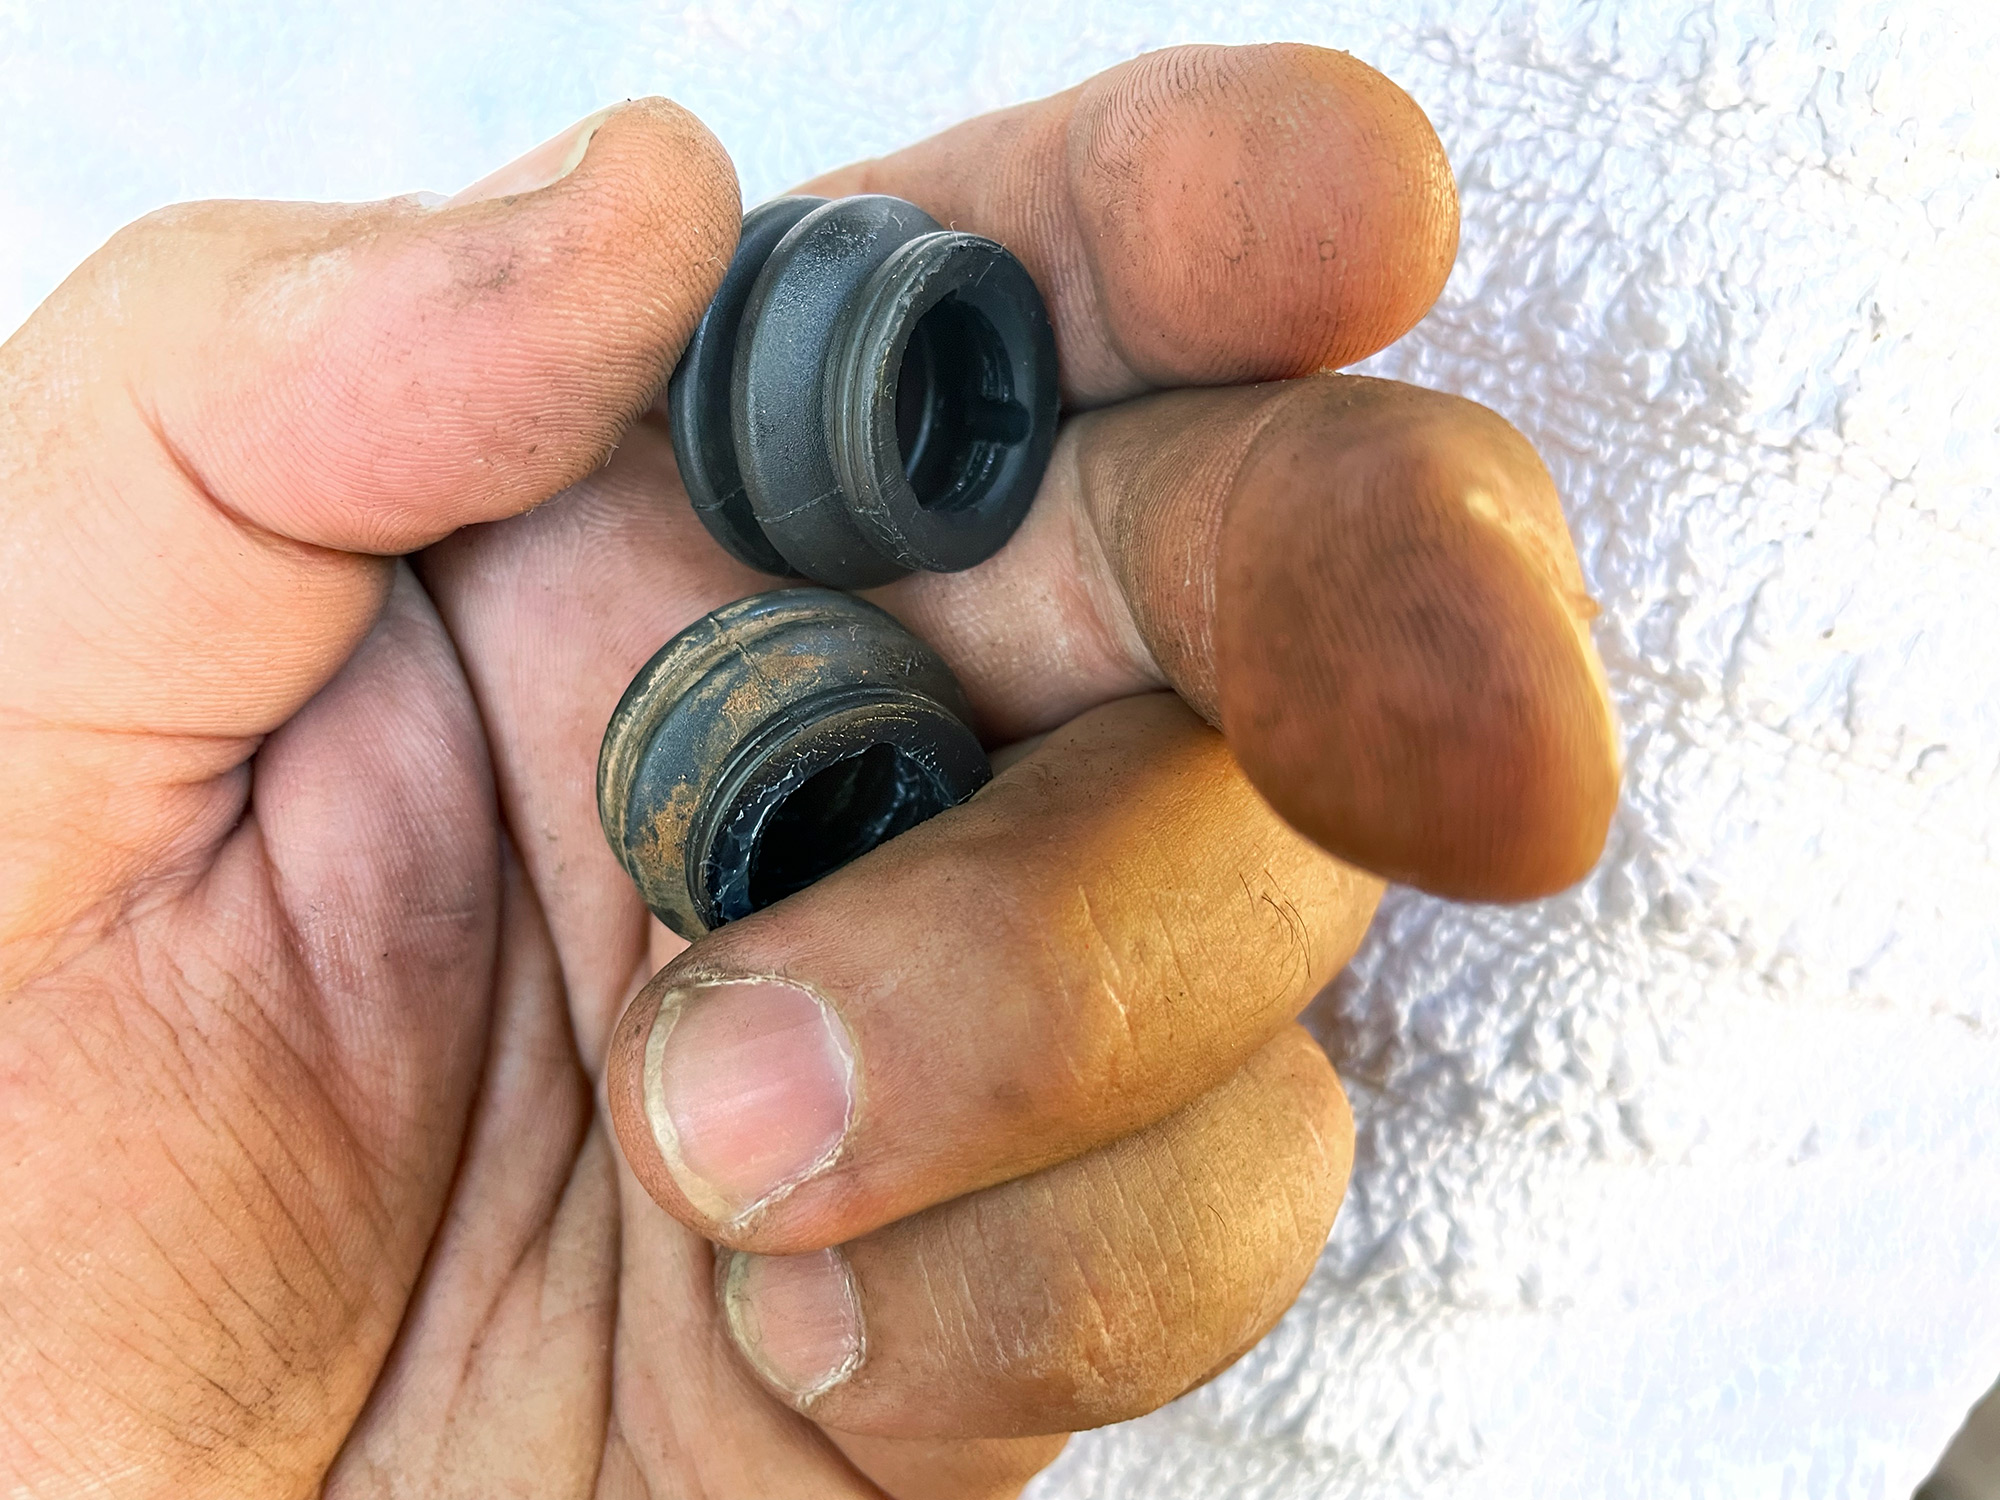
Here’s a comparison of a clean and an unclean slide pin rubber.
Once the rubbers are clean, clean out the caliper holes for the slides.
With the caliper body push the slide rubbers back into the caliper body and push in some caliper grease.

The other thing to clean up is the caliper piston. A huge issue with 4wds is getting dirt and debris behind the piston dust boot. When you push the piston back in to refit new brake pads, this dirt gets pushed into the brake fluid which is not great for your brakes. Clean it up and you’ll have good brakes for longer.
Start by pulling up the dust boot carefully. When the car is pretty new these will be fine and pliable, when they get old they can get very brittle so be careful if the car is getting on in years.
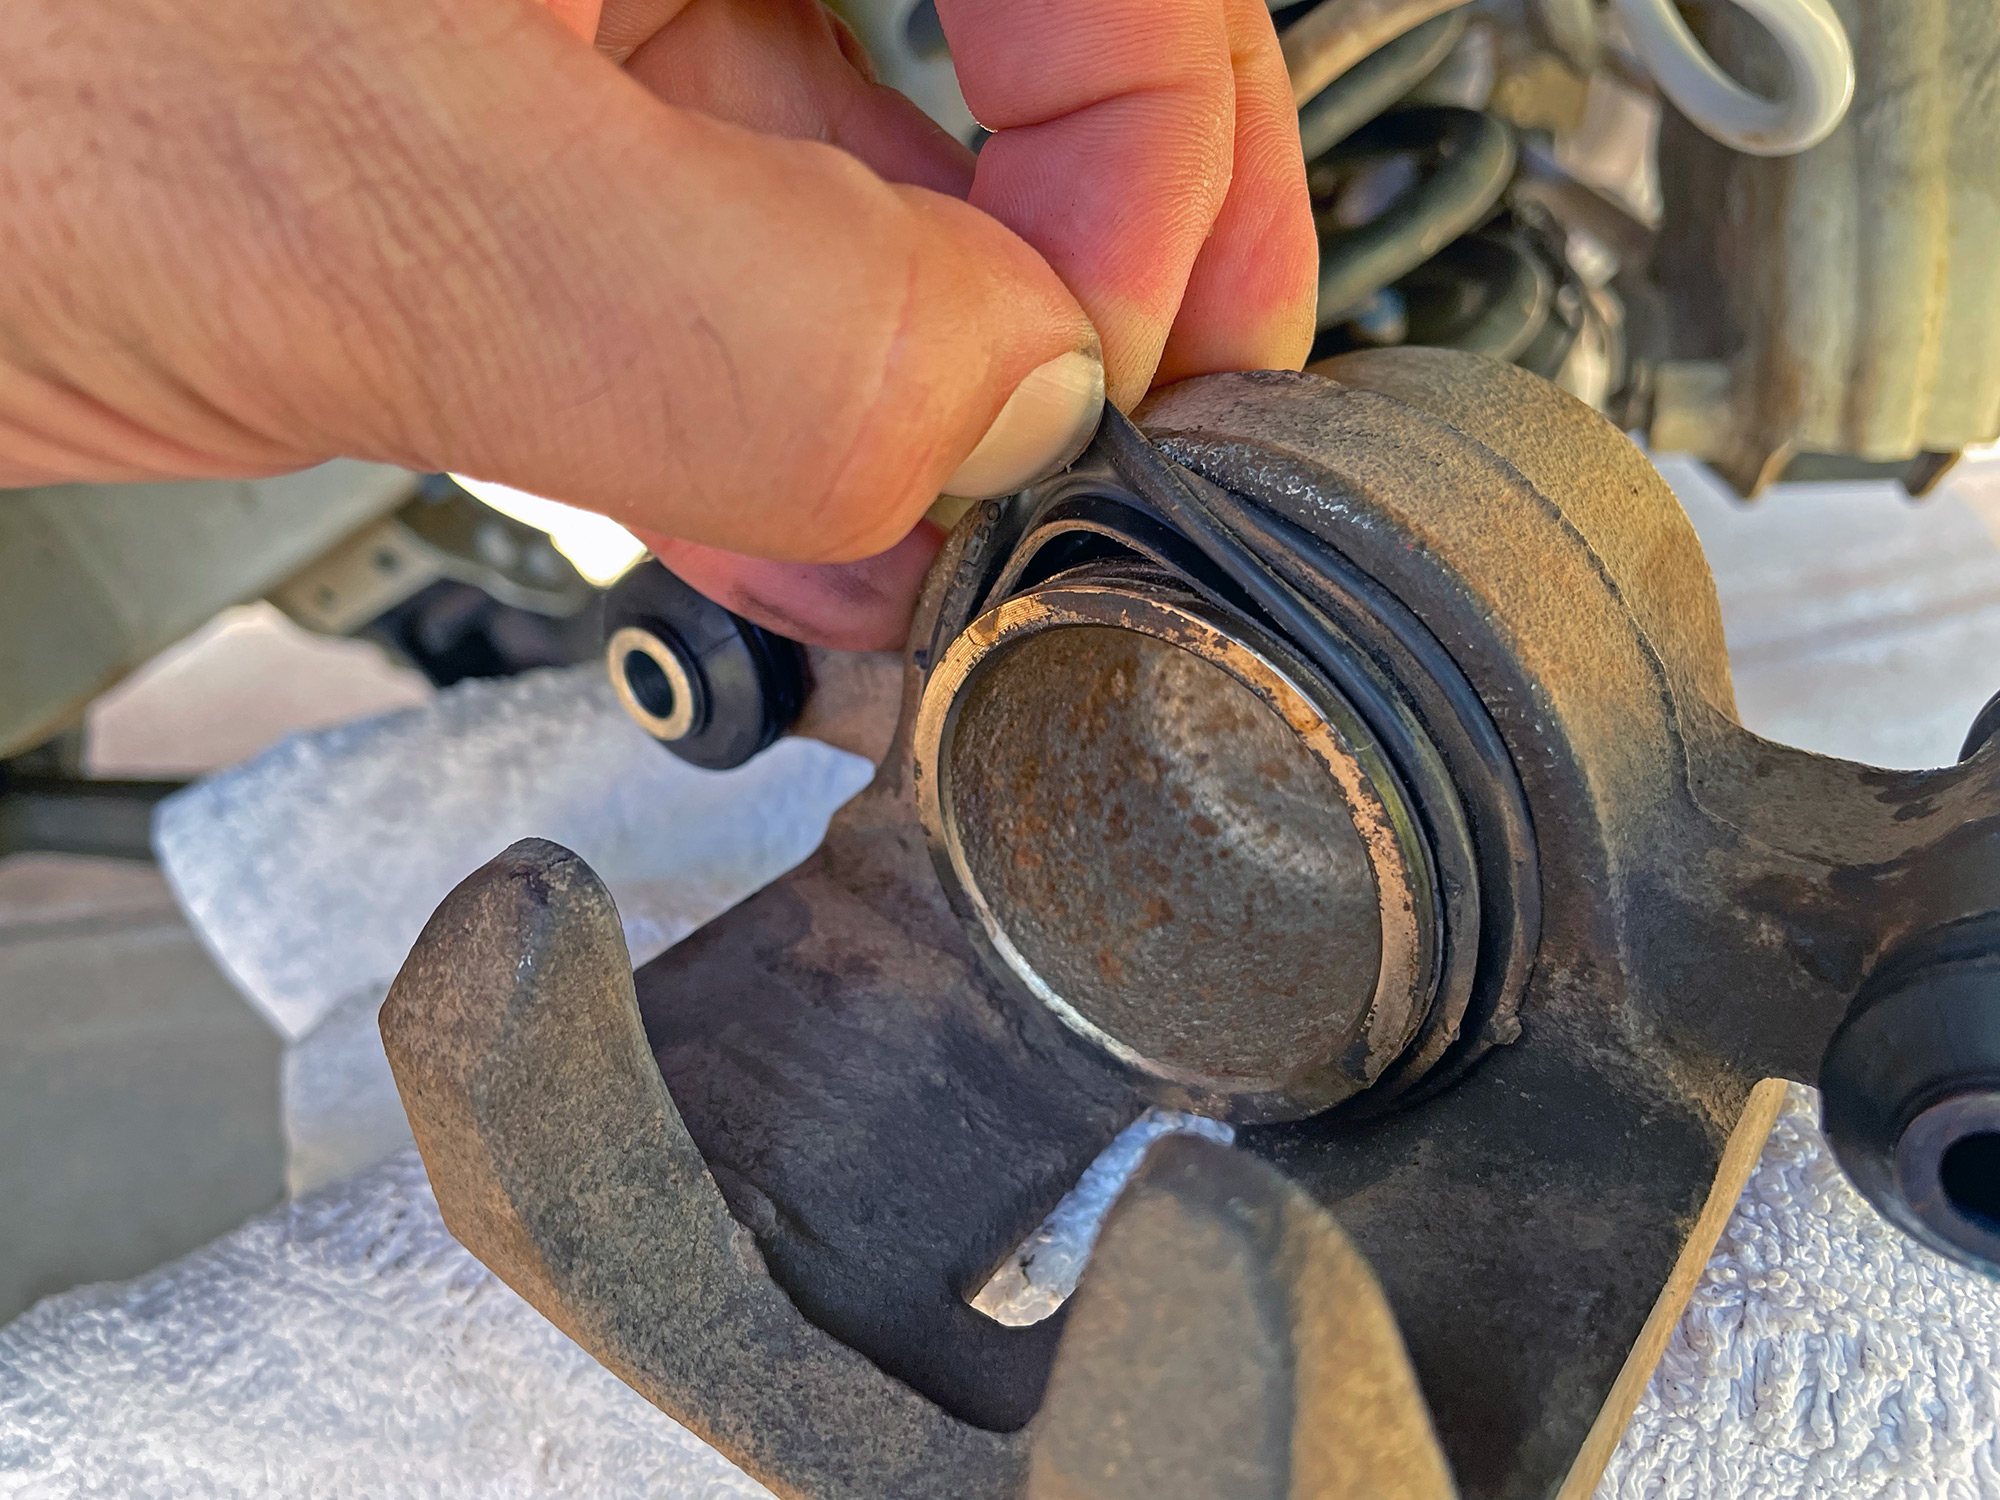
Slowly work around the dust seal, pulling up and over the piston and then pull the base out, too.
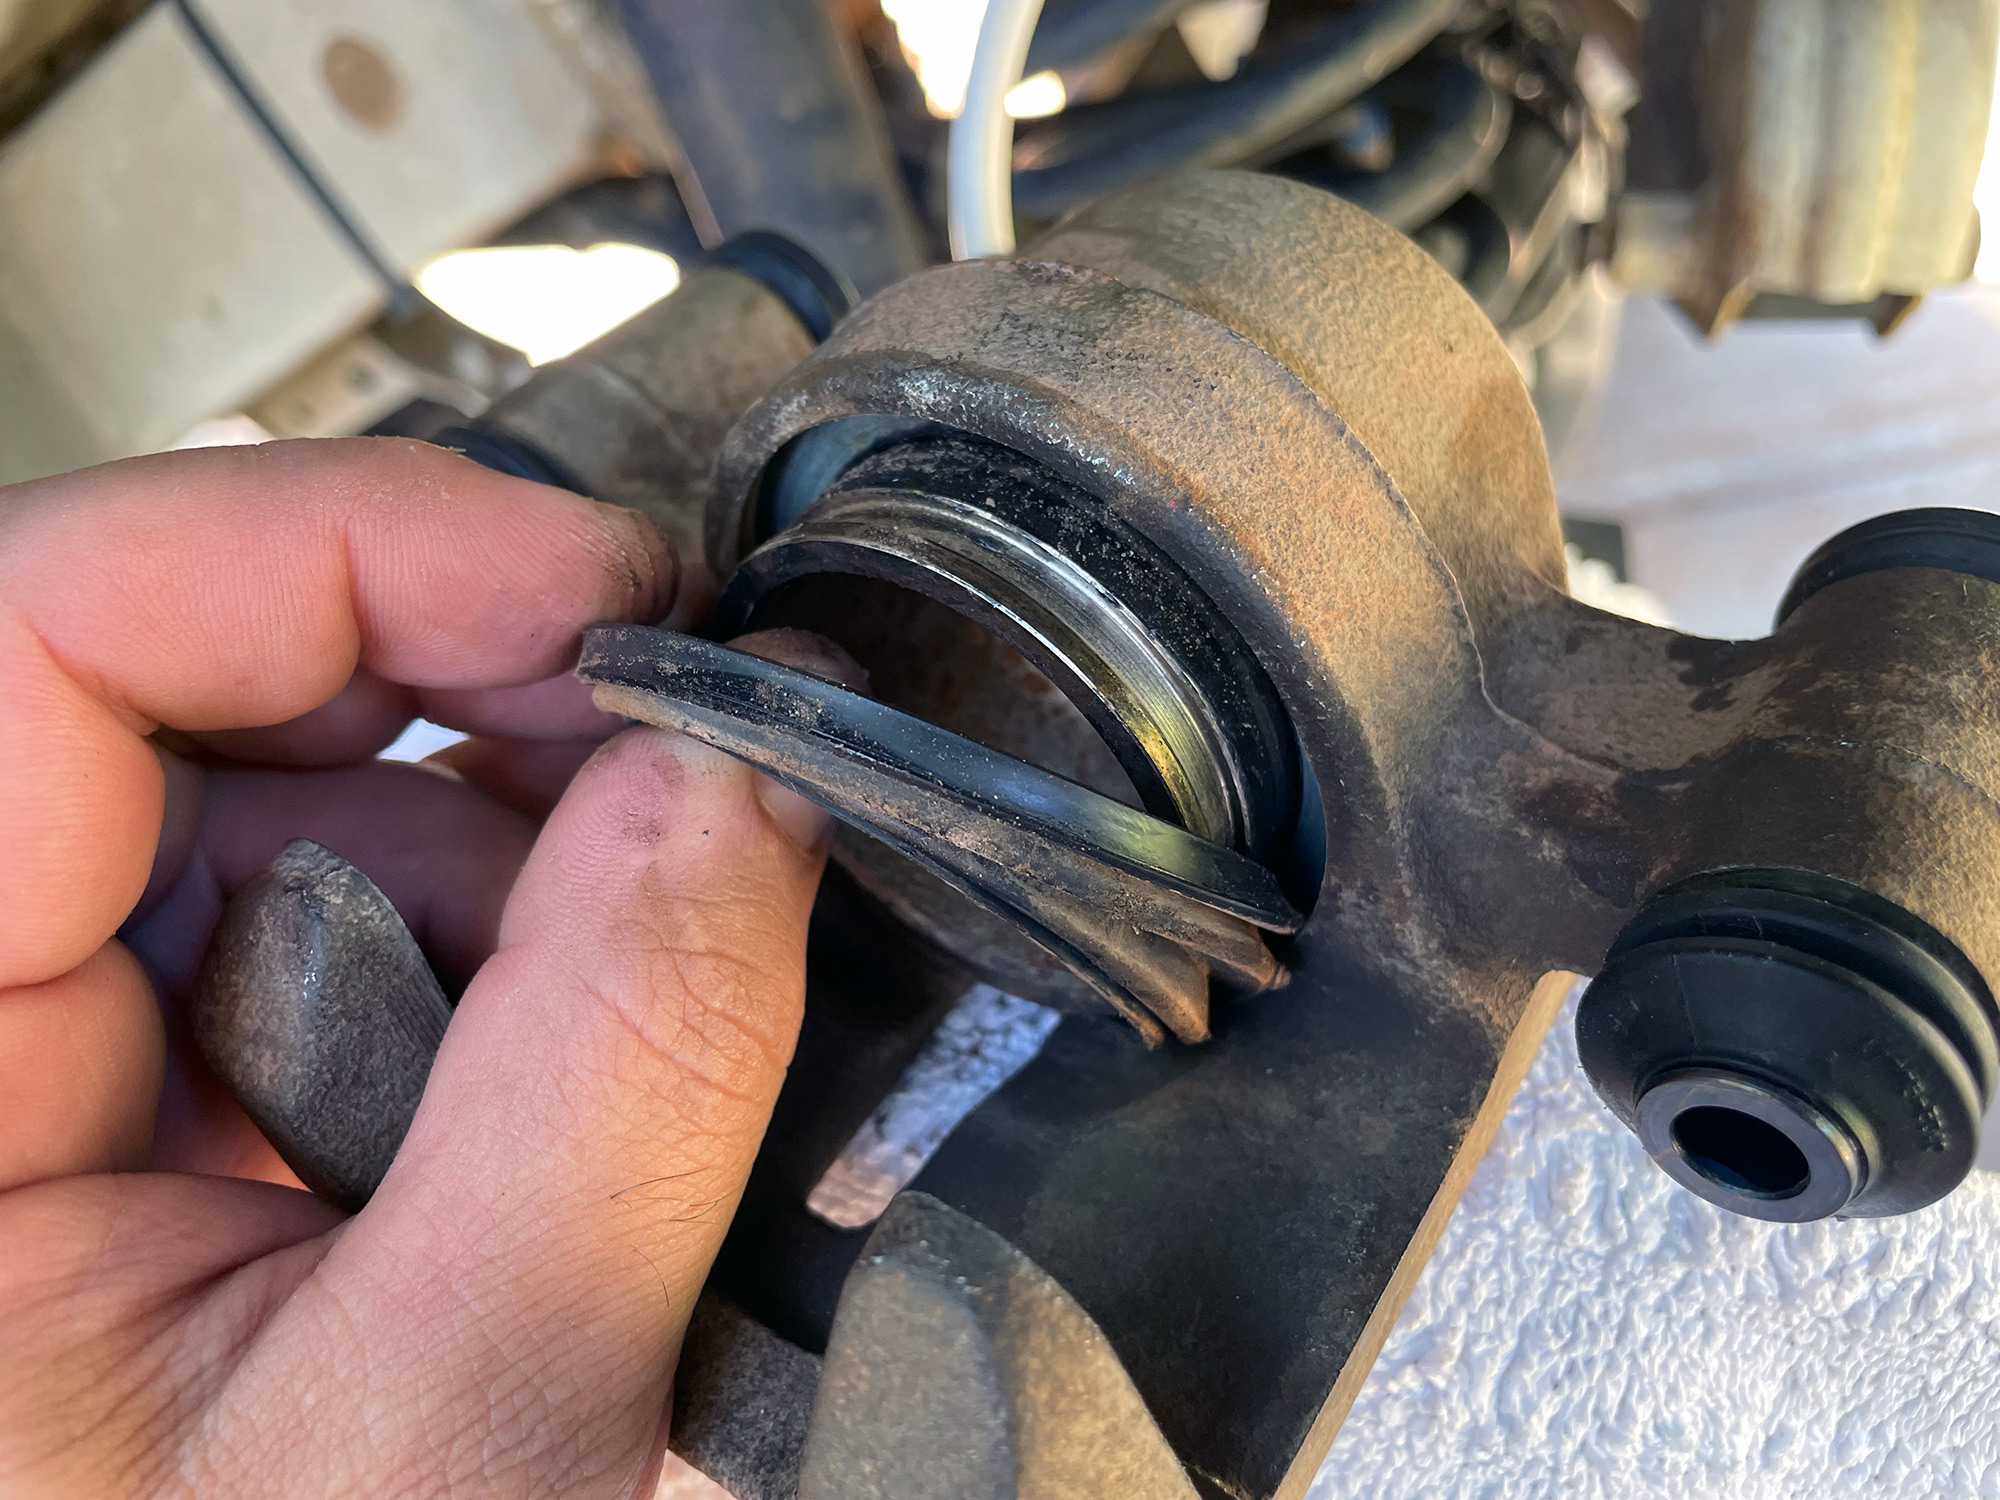
Not a huge amount of dirt there, but some brake dust and a bit of mud. Some brake cleaner and a bit of time with a rag will get the piston clean.
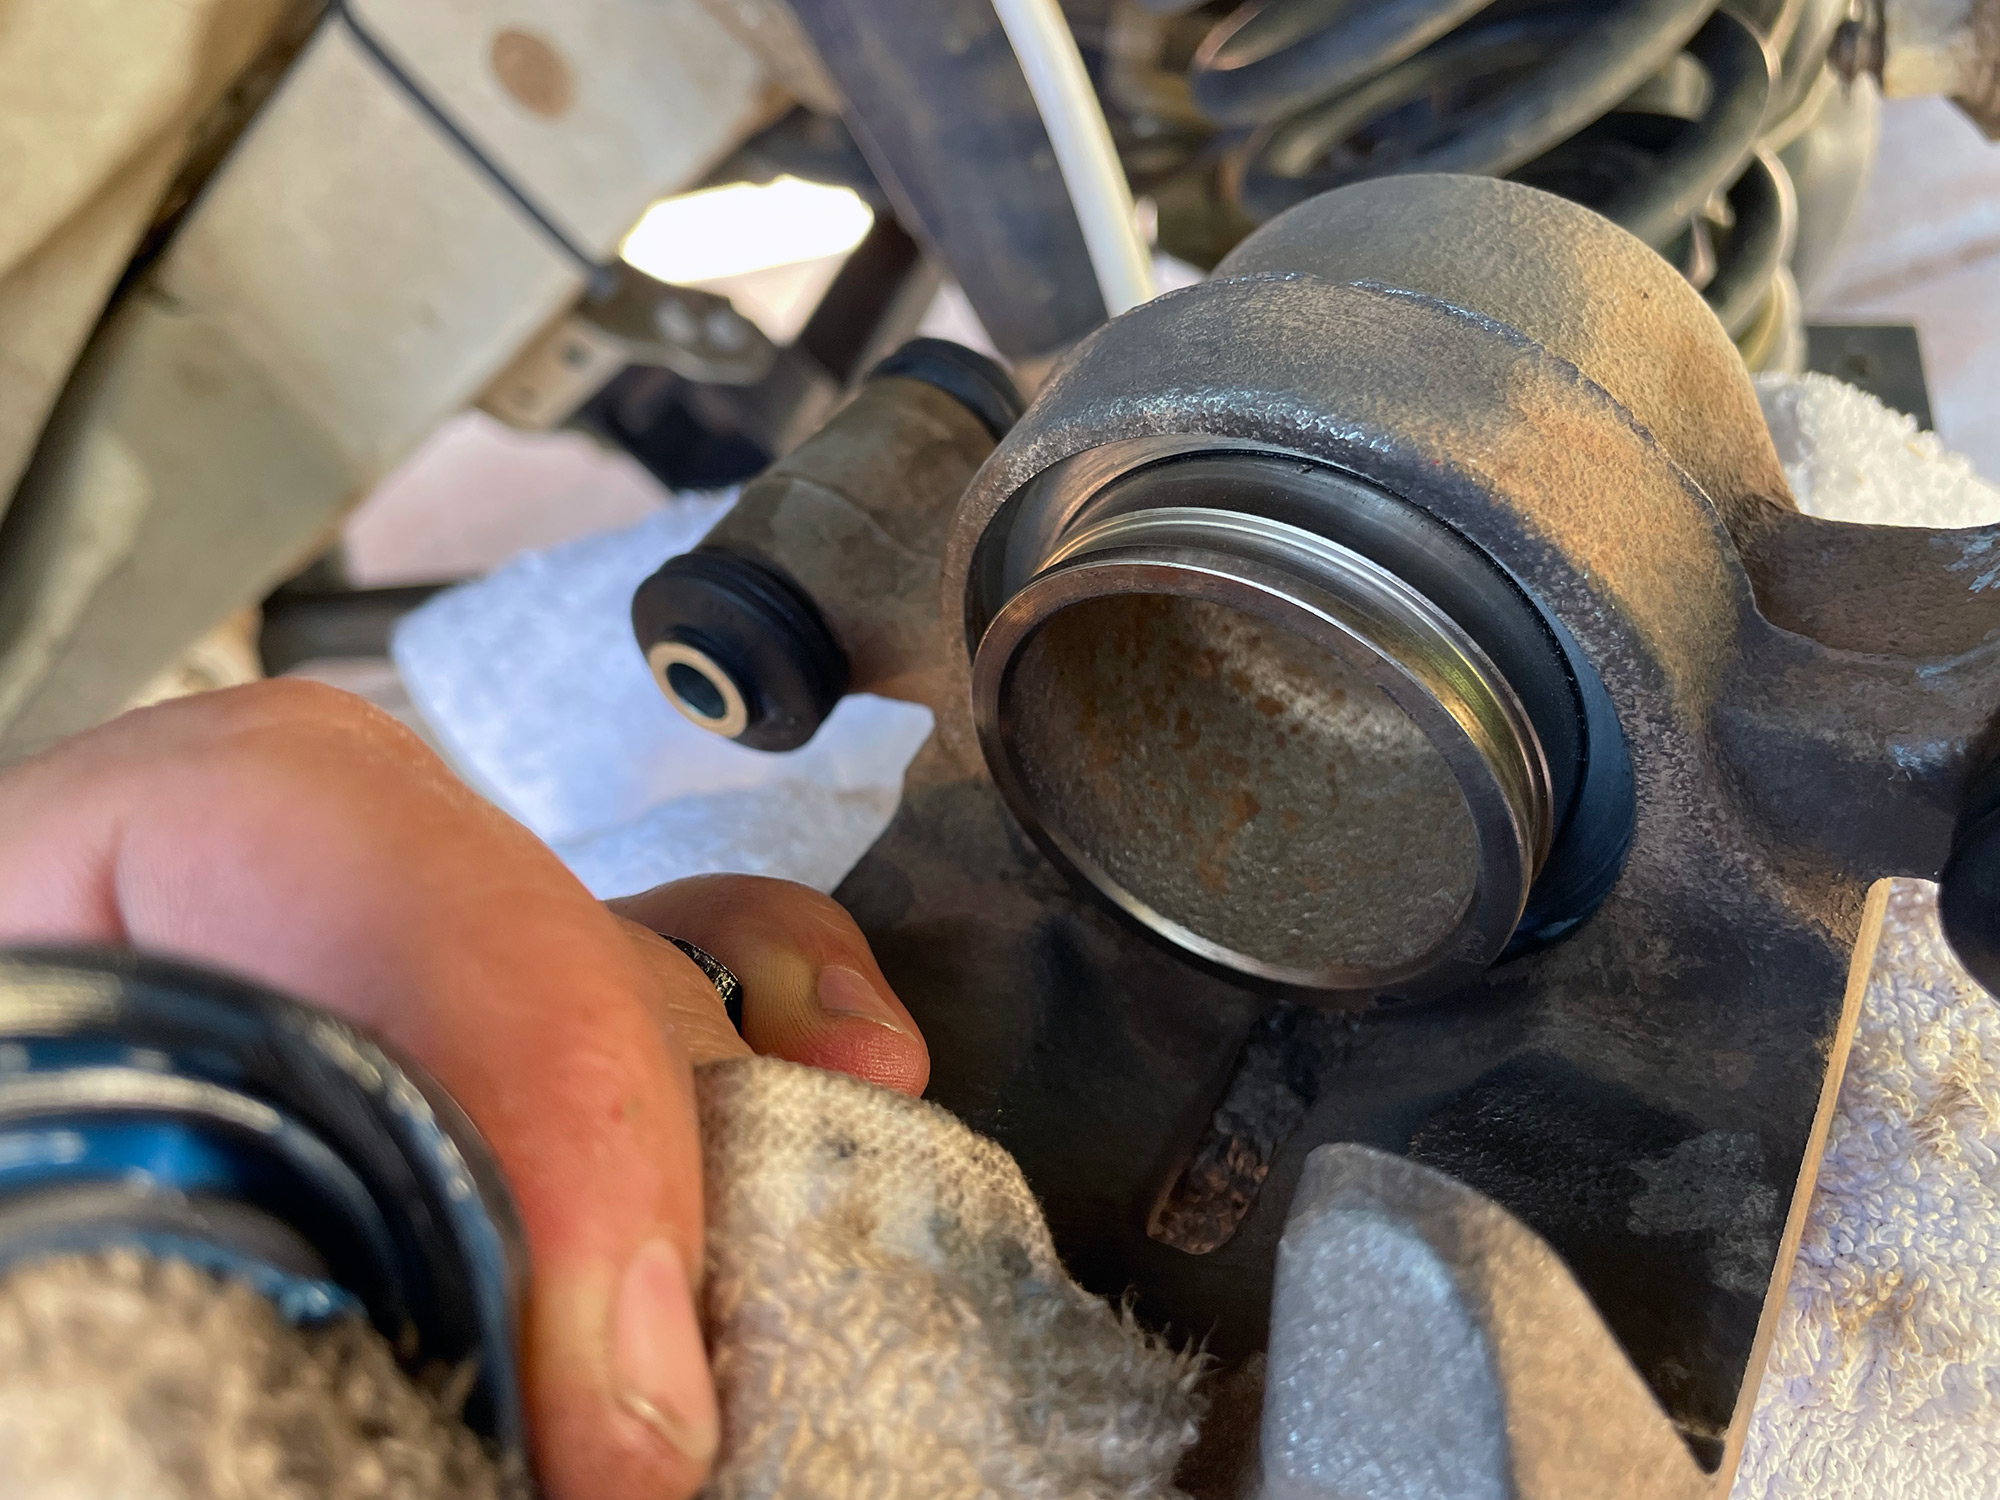
Clean the dust boot like you did the slide rubbers, too.
Finishing off
In the home stretch now; with the piston clean it’s ready to be pushed back so it’ll fit over the new pads. As the old ones wear the piston pushes out and doesn’t fully go back in, so you need to push it all the way back in.
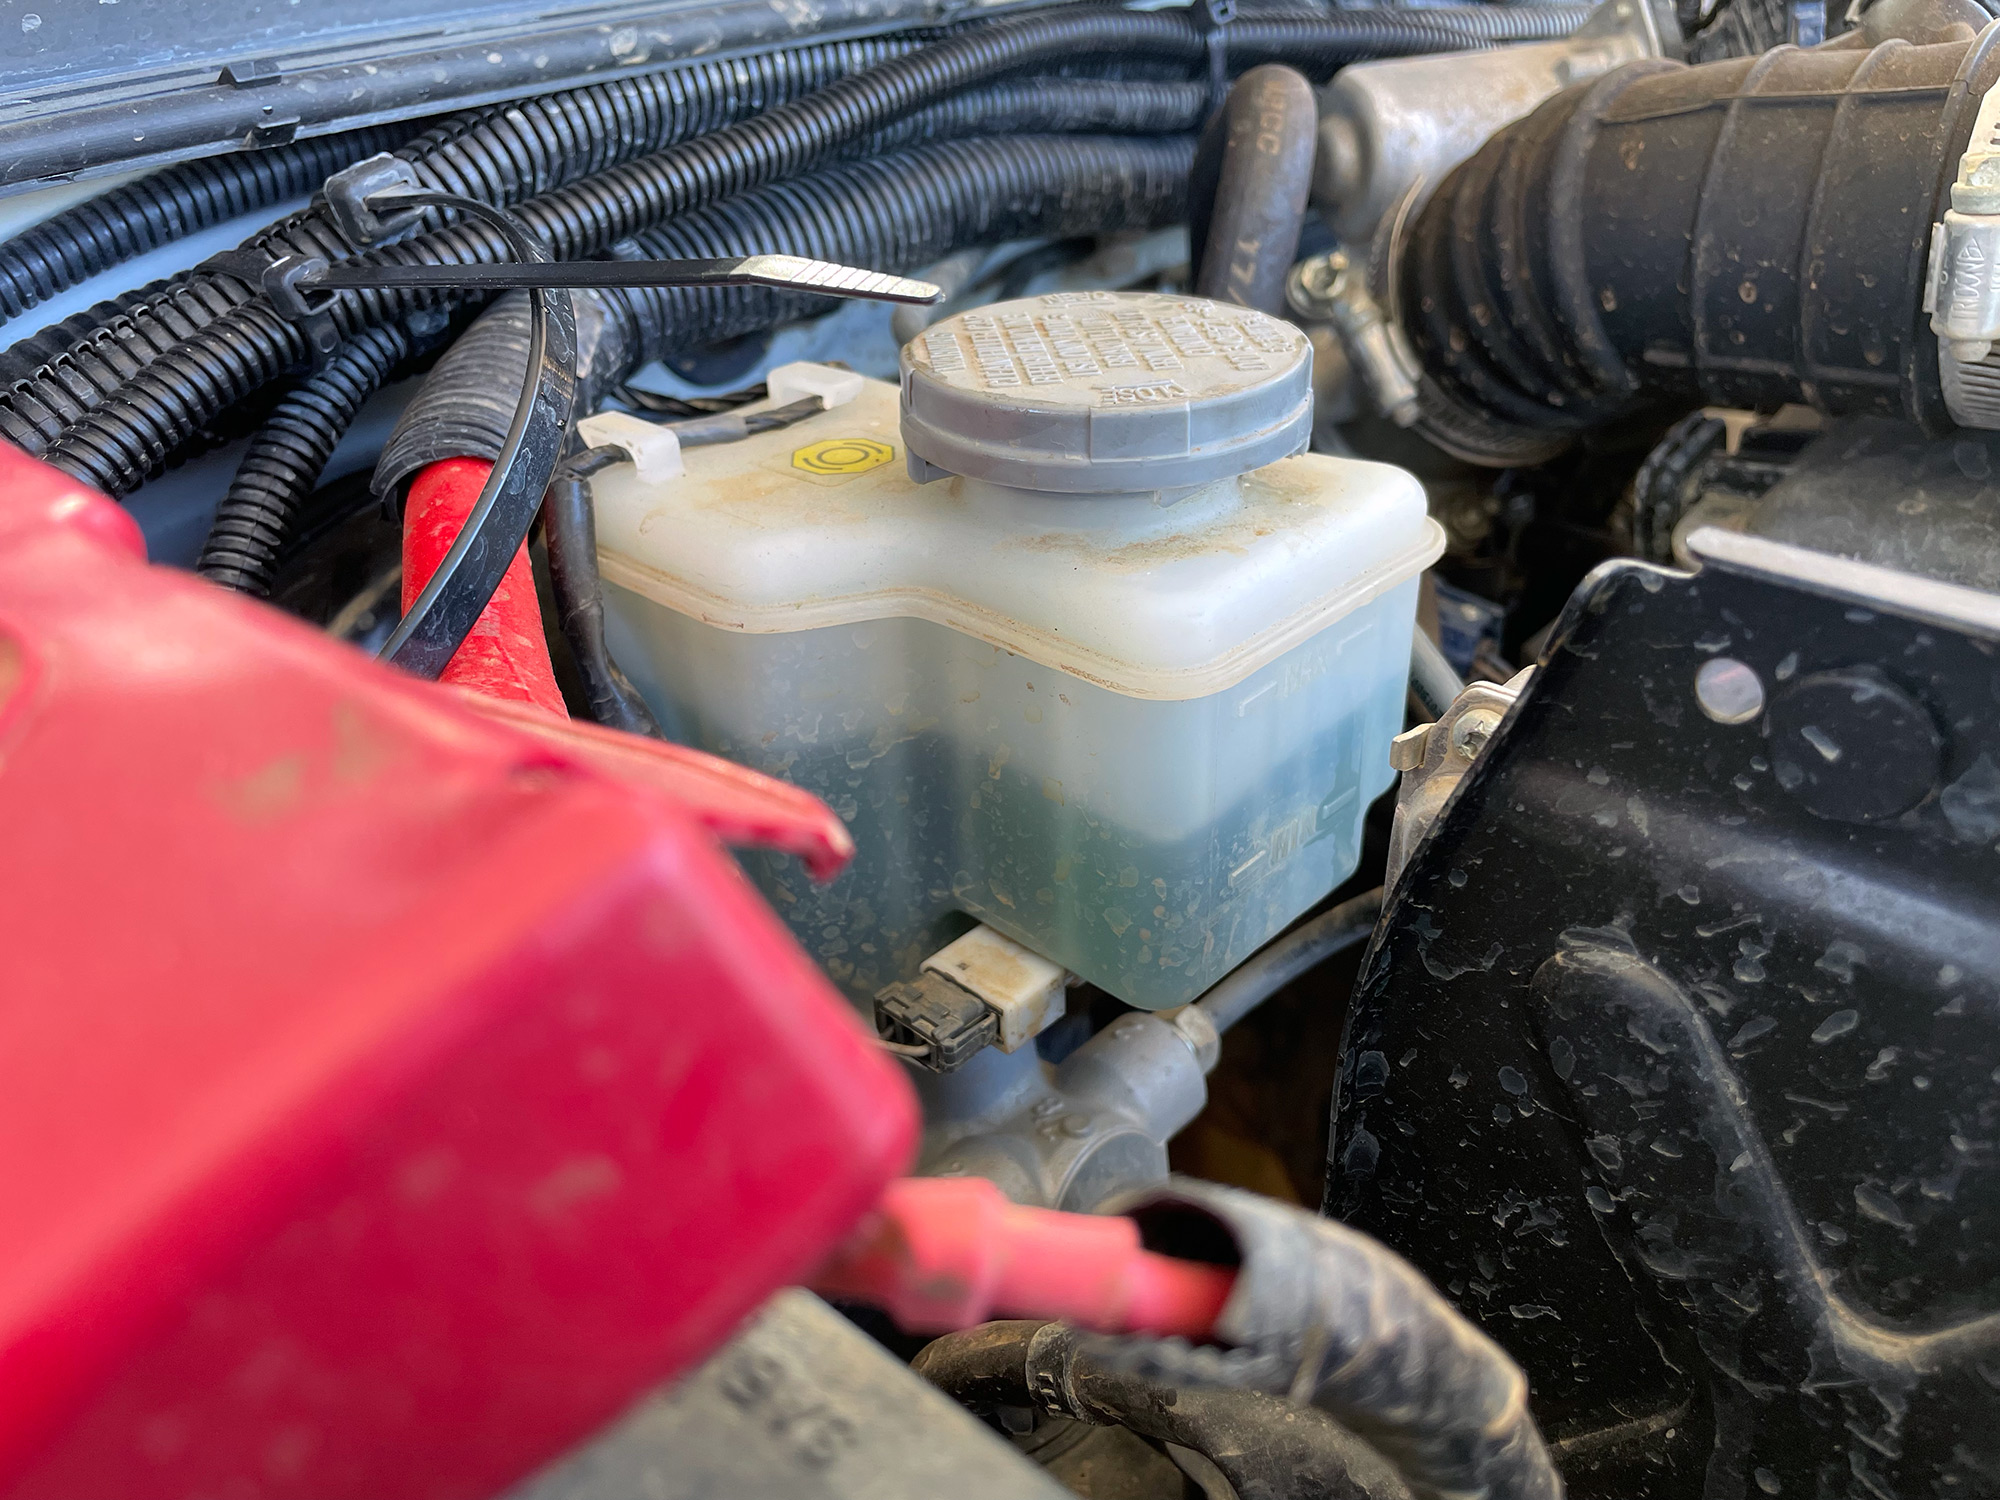
Something you have to consider, especially if you’ve been topping up the brake fluid, is the brake fluid in the master cylinder might be quite high & if you push the piston back like that you’ll overflow the reservoir.
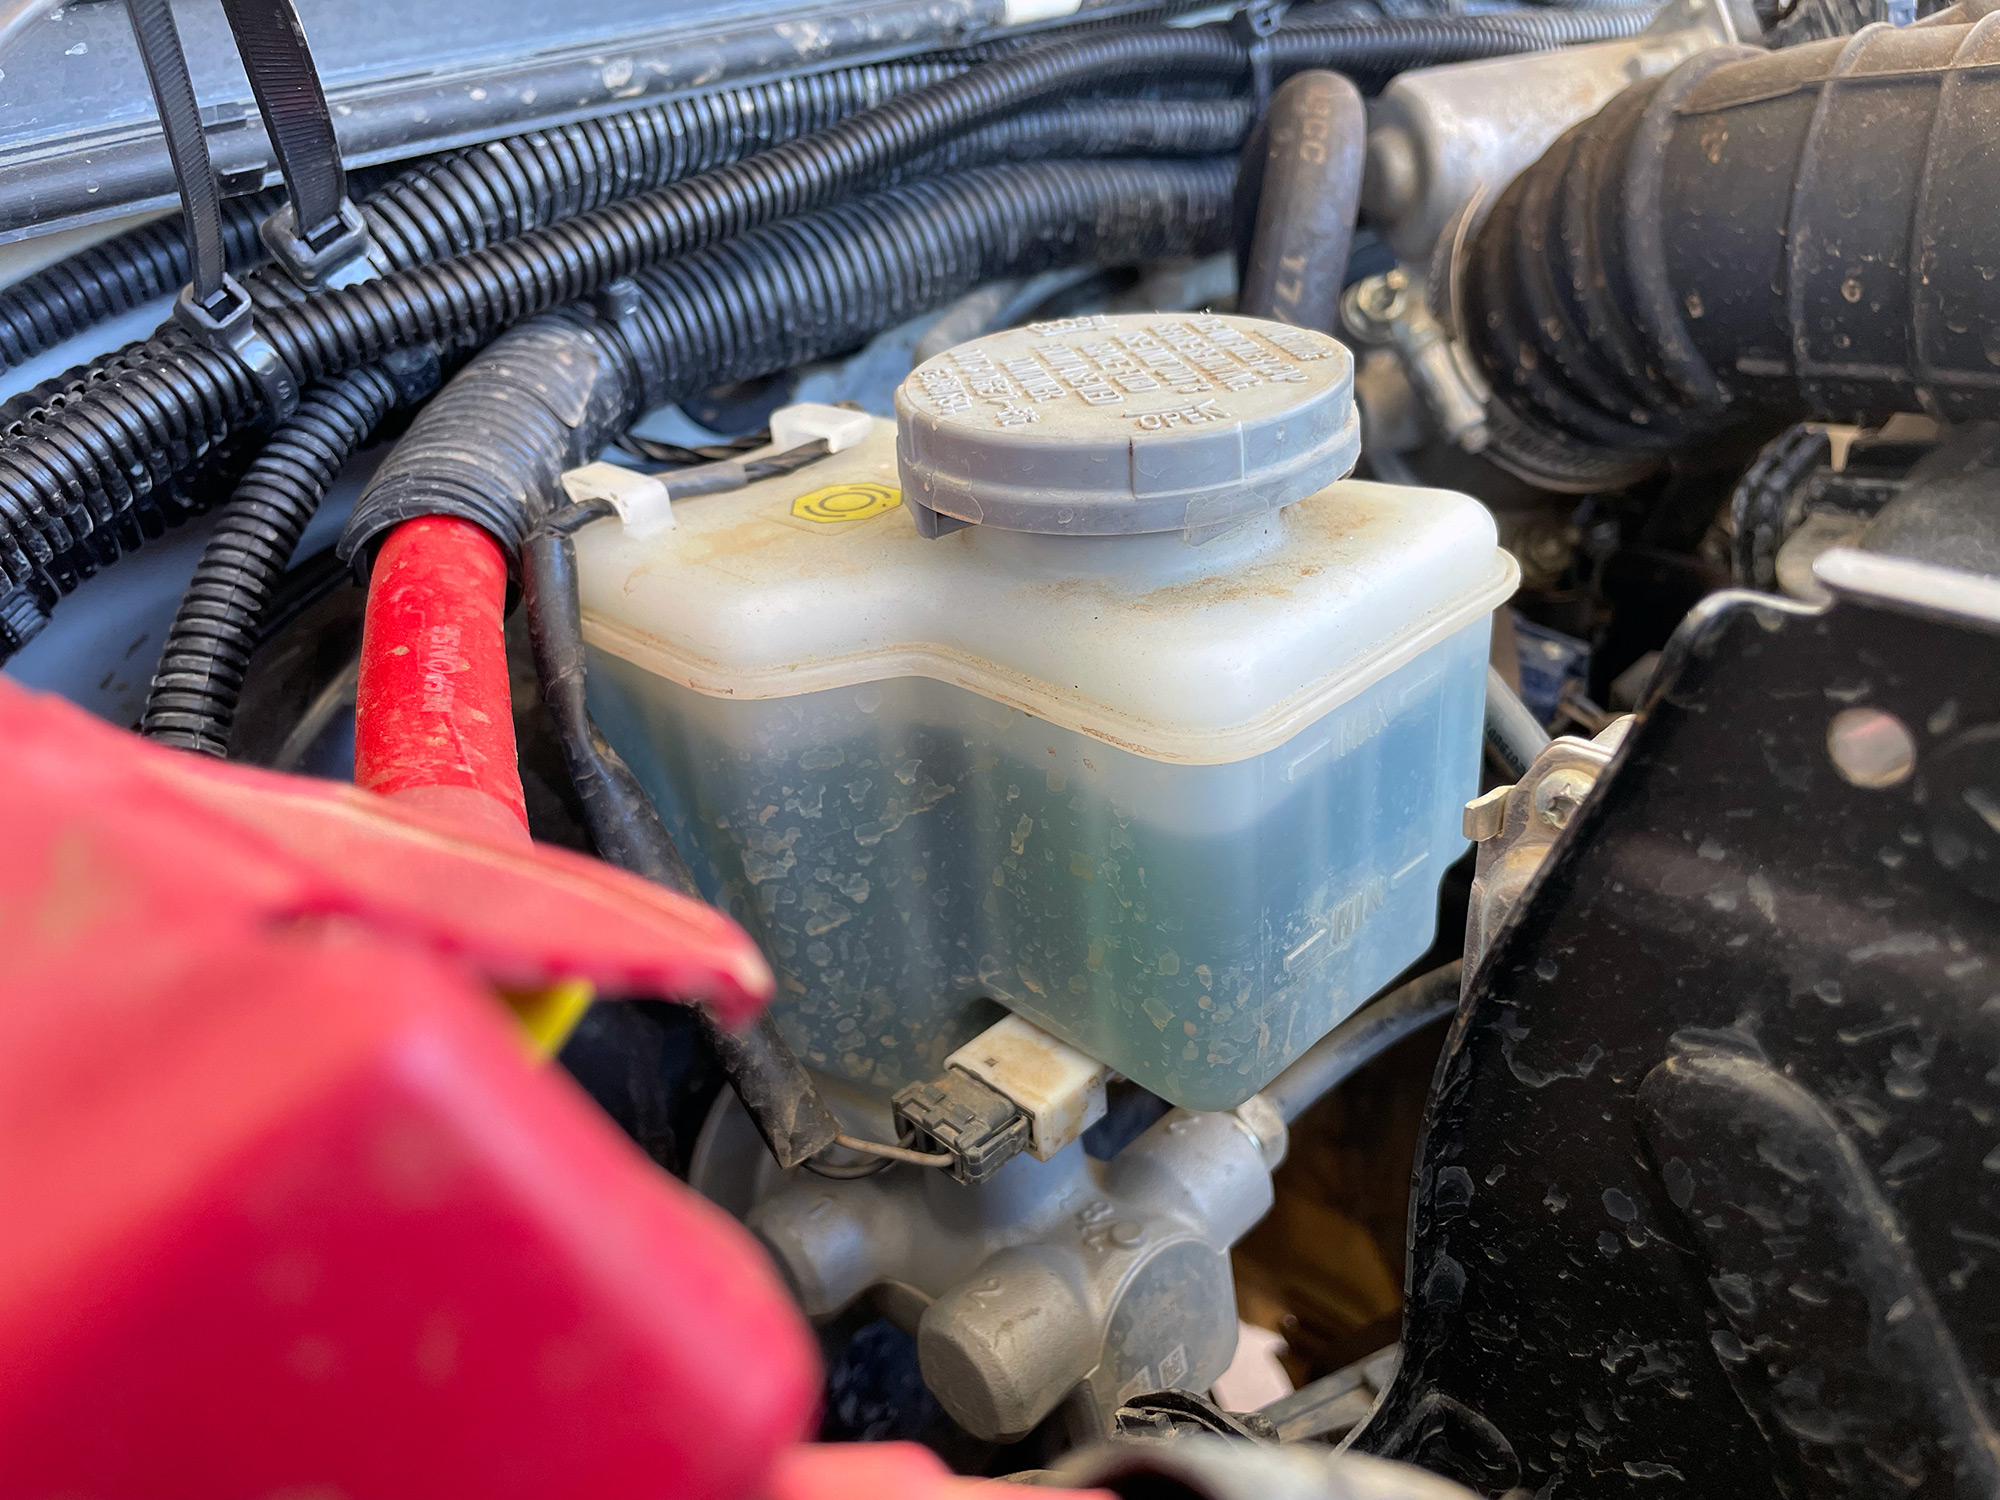
Because I like to use a brake pad change as a good excuse to also change out my brake fluid, I like to use a syringe and suck out as much old brake fluid from the reservoir as I can be bothered to. Here’s it after sucking out some fluid.
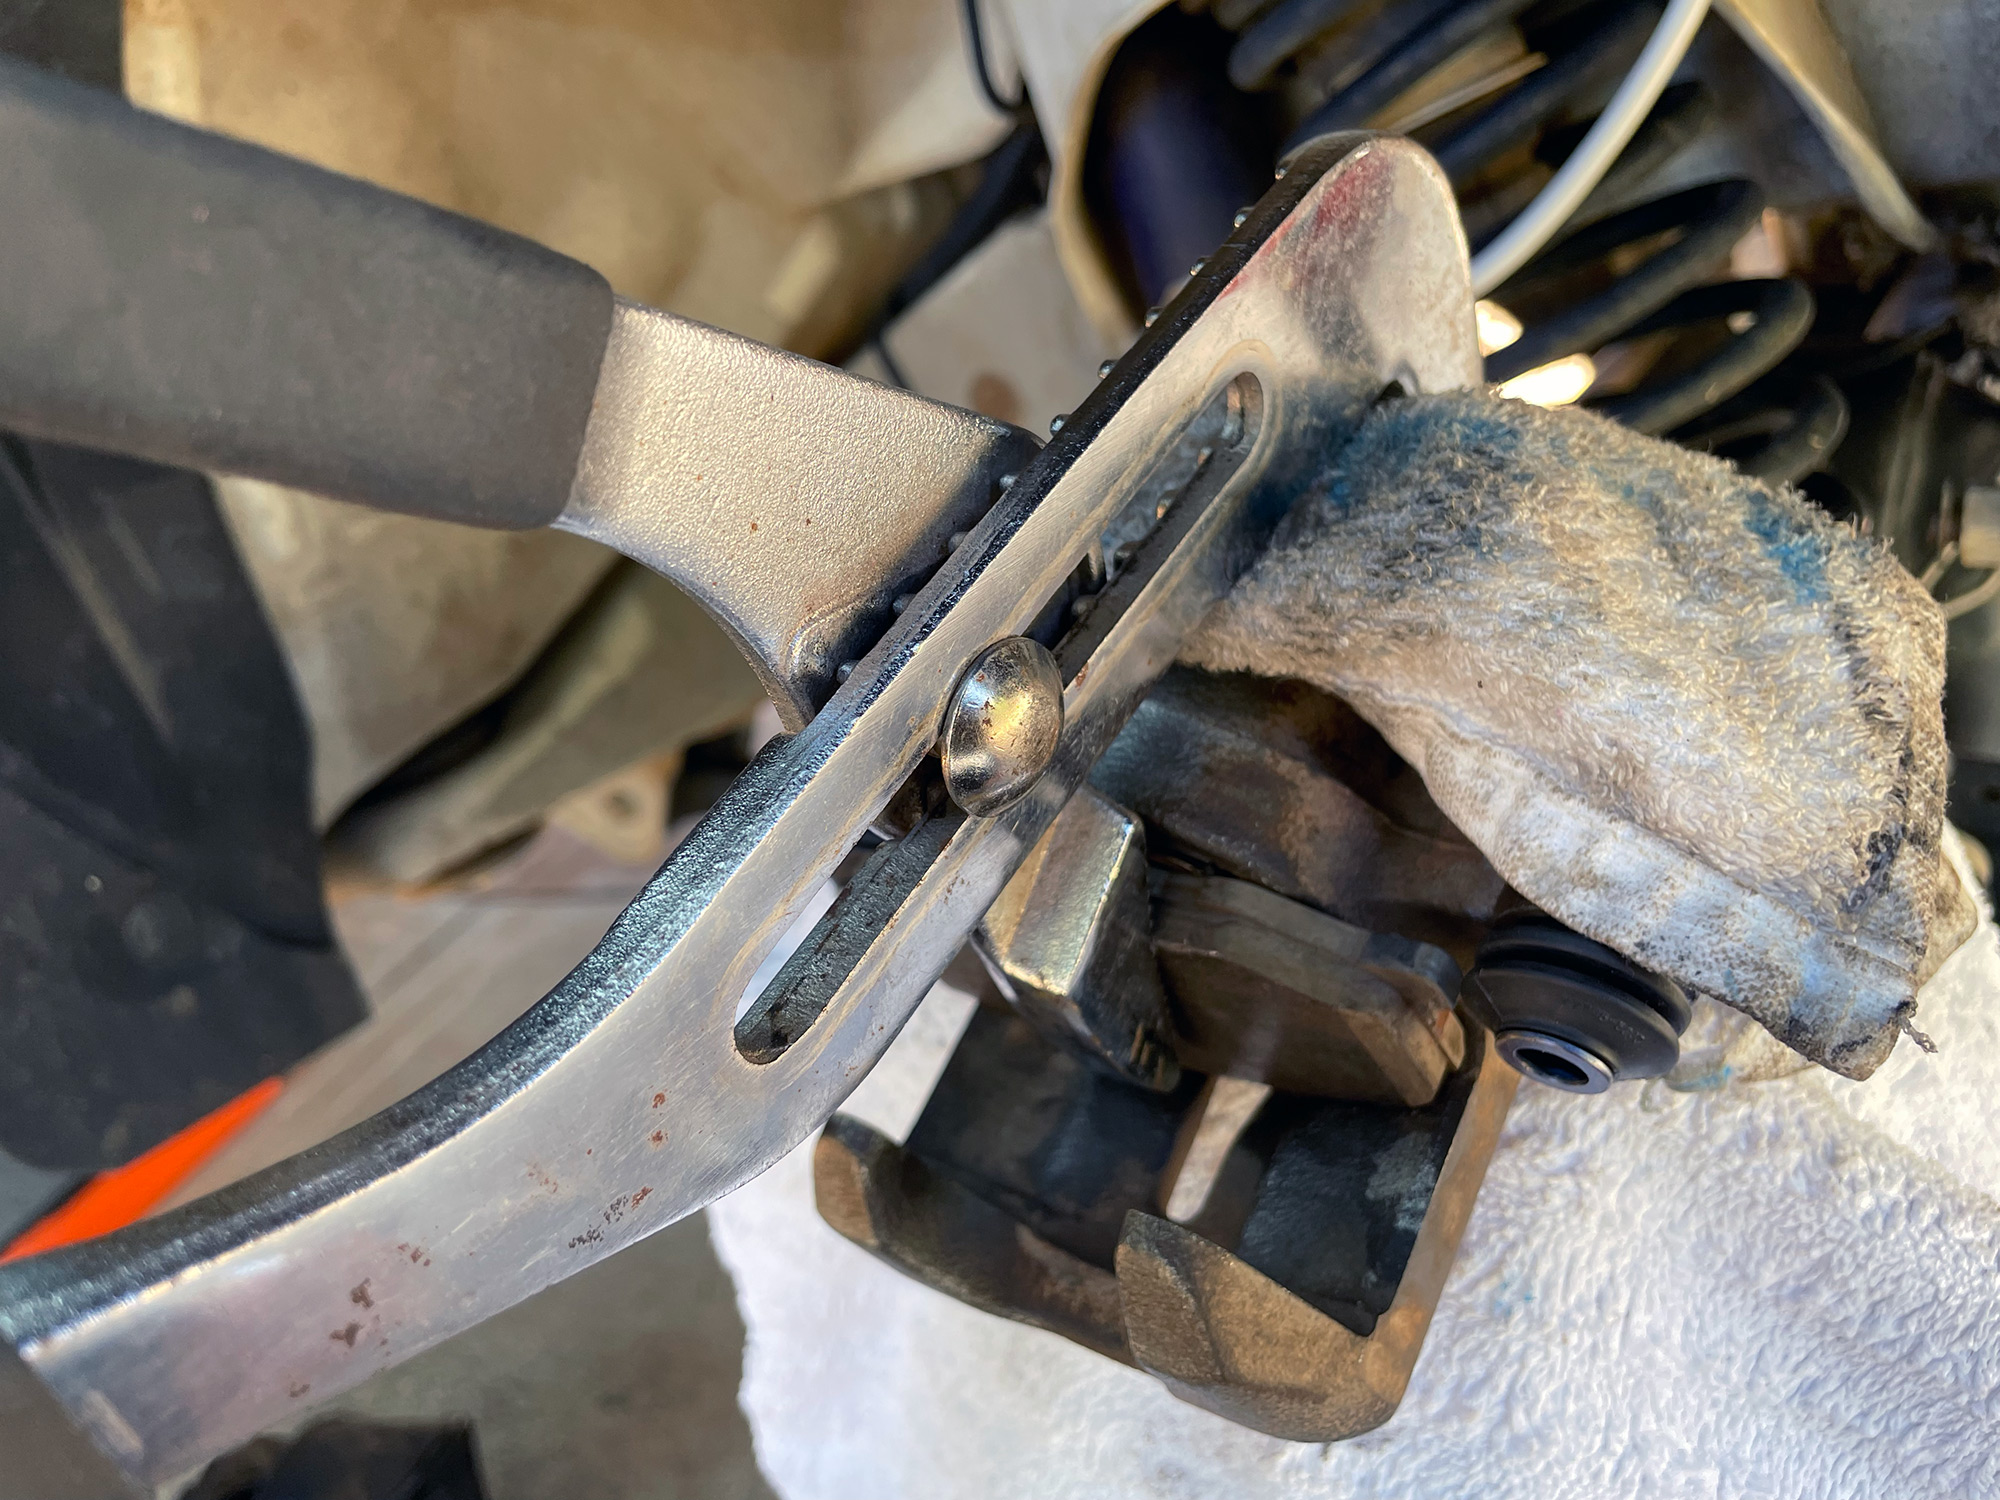
You can then push the piston back. While you can sometimes do this just by hand, I like to use the old brake pad to stop the caliper piston get damaged, and a rag around the caliper body, and grab the old pad with a pair of multigrips and slowly and evenly push the piston back in.
You can now refit the nicely serviced and cleaned up caliper to the mounting bracket. Slide pins are tightened up to 23 Nm, as mentioned earlier.
Good time to check out how much fluid has gone back into the master cylinder from pushing the piston back.
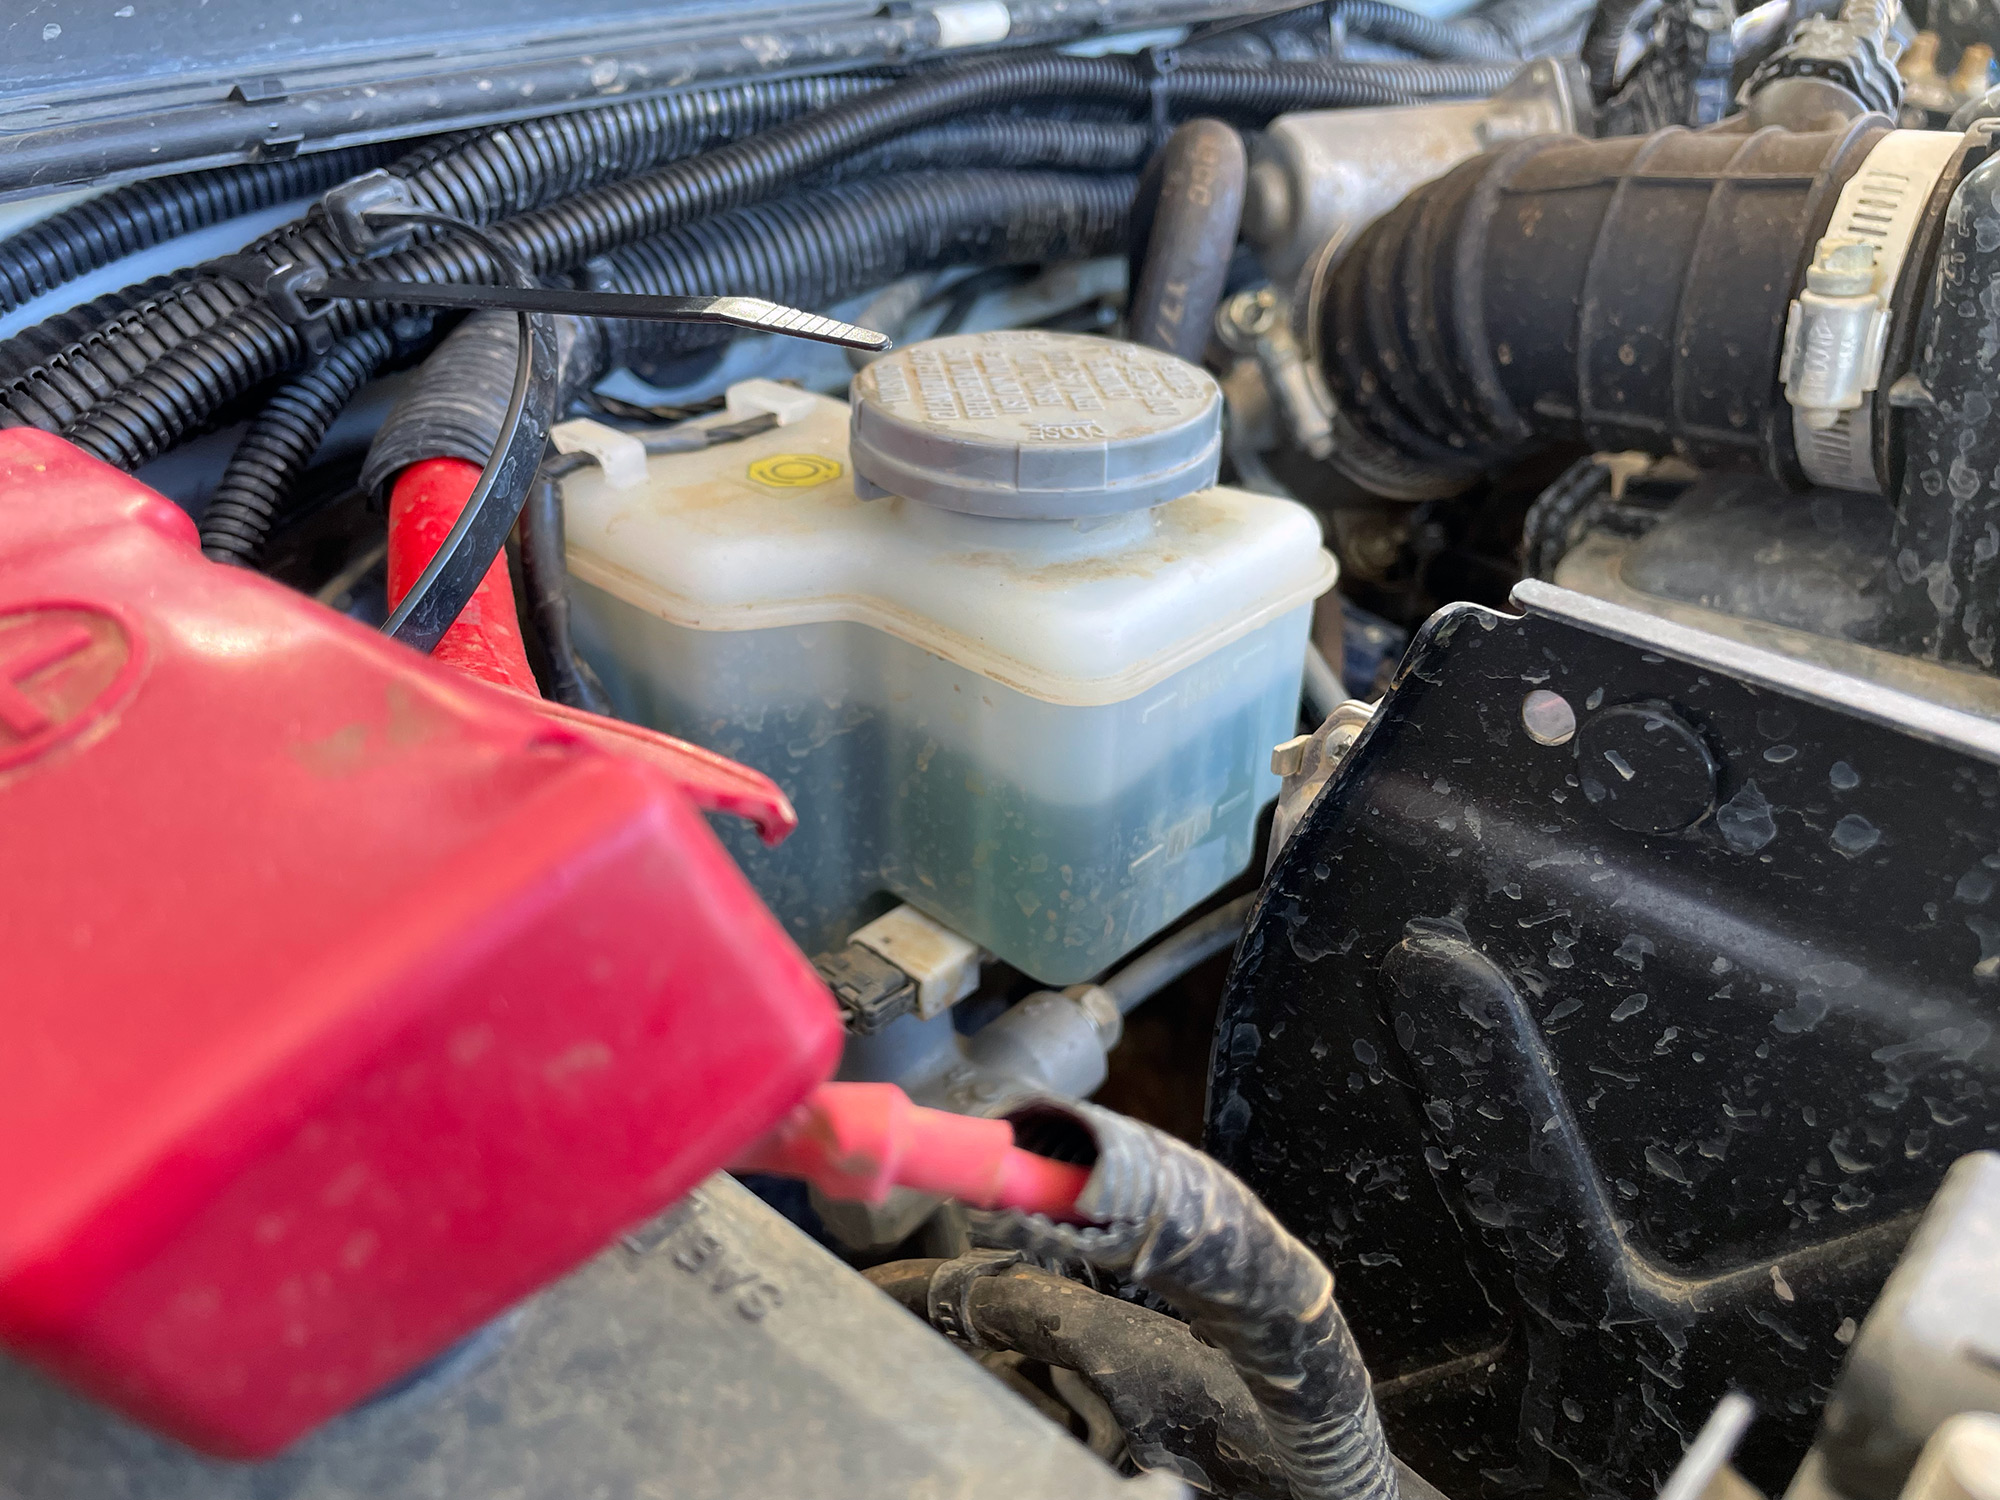
Not a heap but some. Top up the fluid and then push the brake pedal a few times to seat the brake pads.
An alternative to pushing fluid back up to the master cylinder is if you are going to bleed the brakes is to push the piston back while also simultaneously releasing the bleed nipple. This will push old fluid from the caliper out the hose on the bleed nipple, rather than back into the master cylinder. Before you completely push the piston home, tighten the bleed nipple up and then push it that last little way.
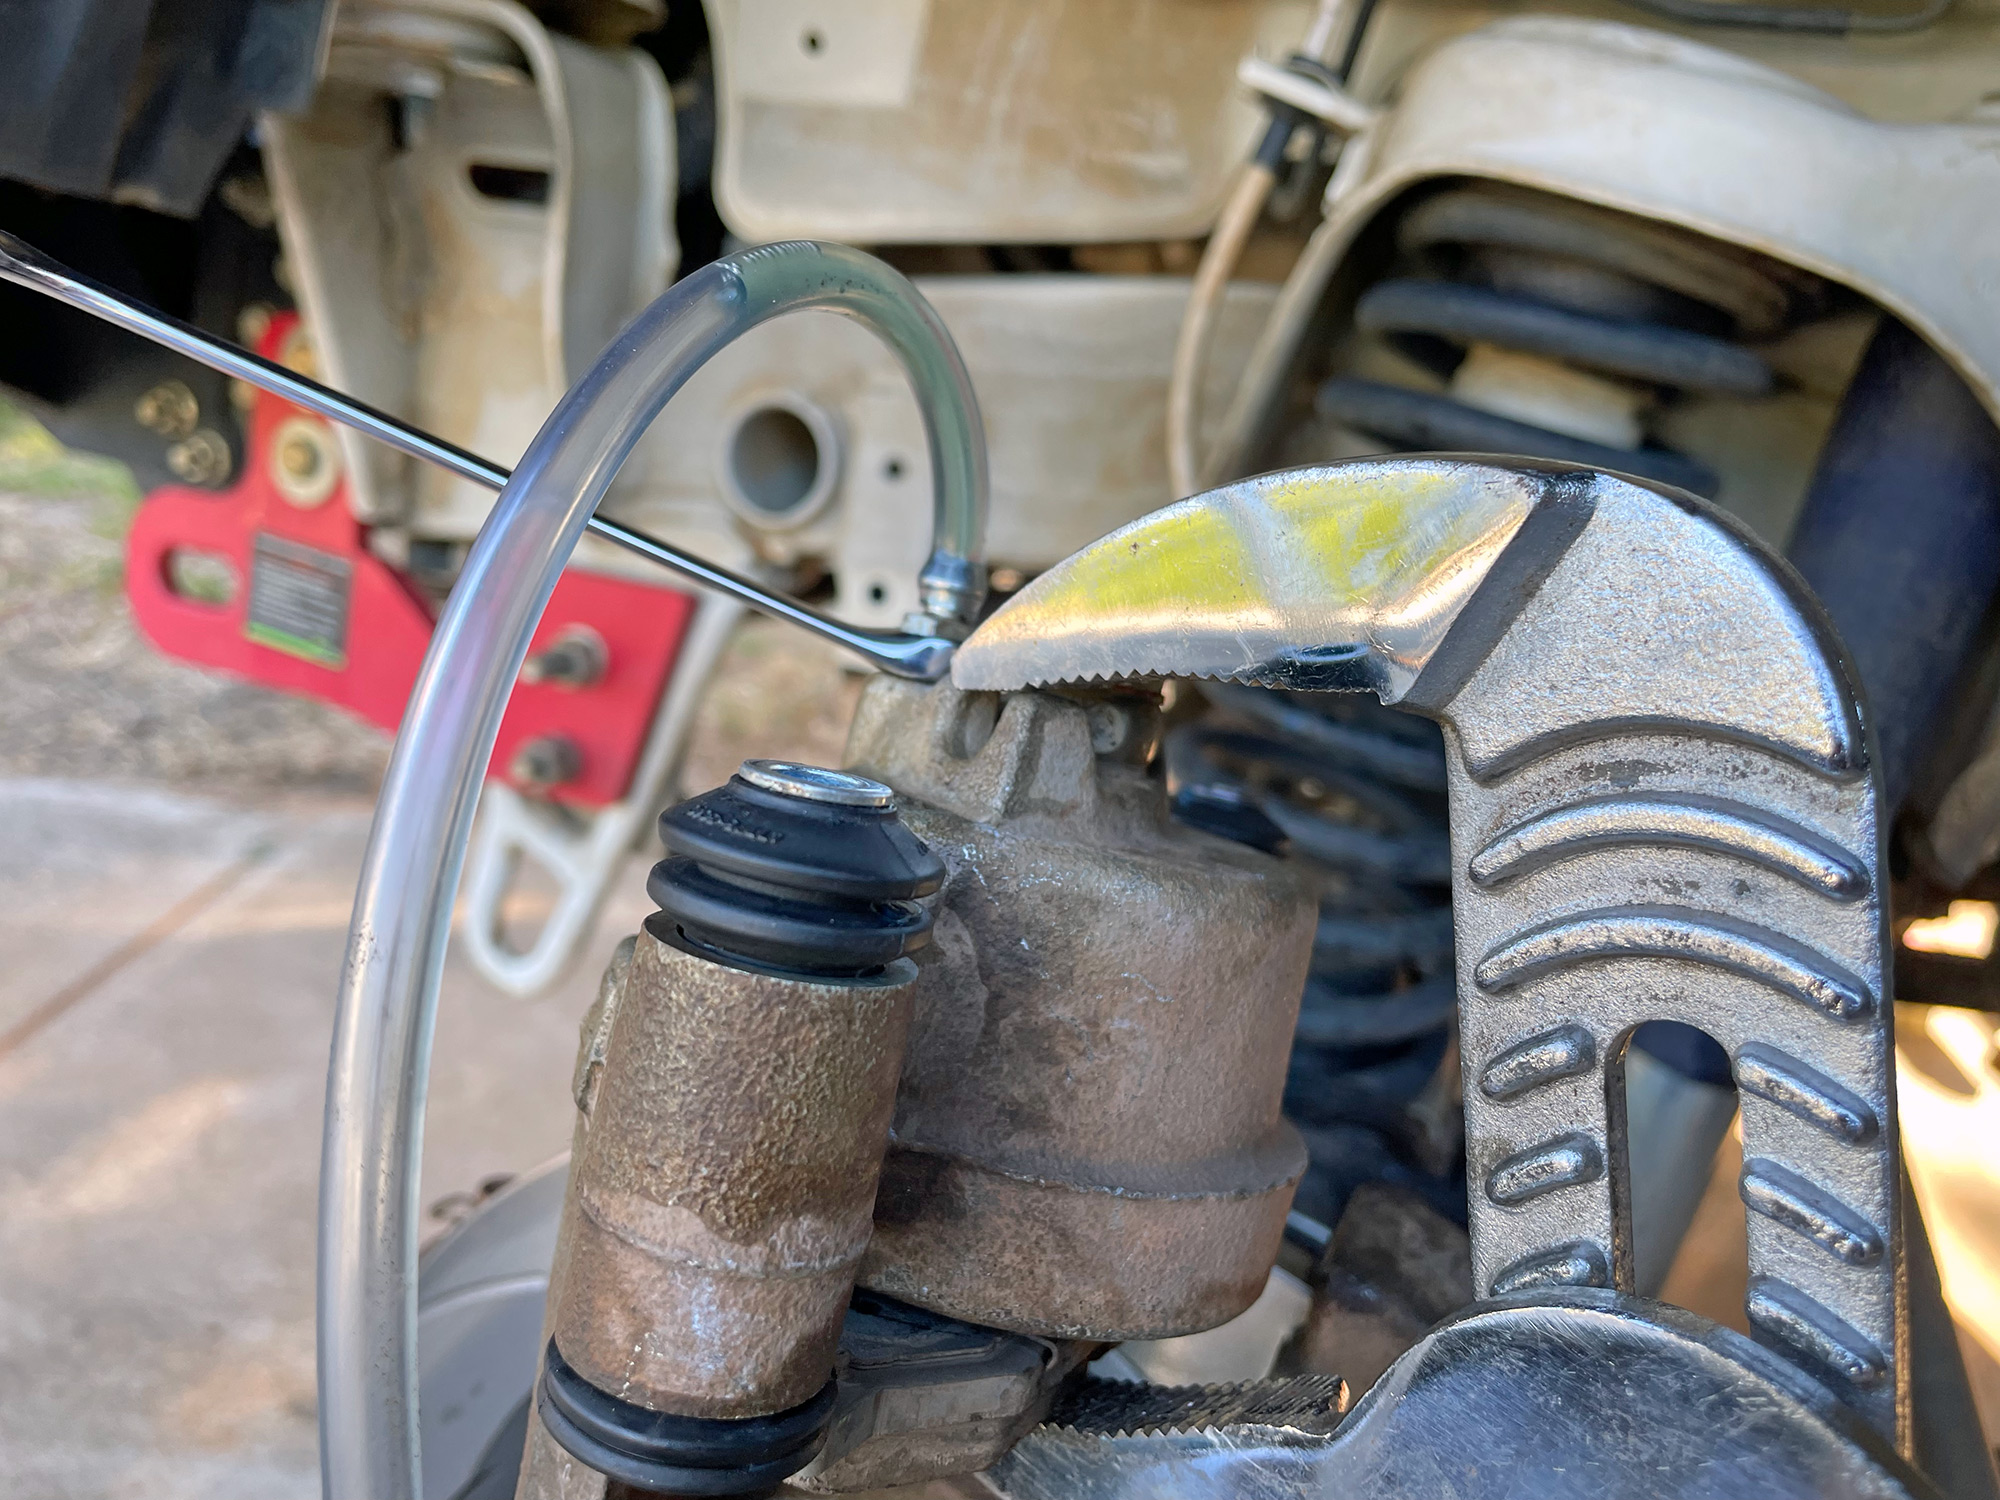
Normally I’d protect the caliper with a rag but I really just wanted the photo here. Probably grab something more solid than this little boss, too.
And that’s it! Copy-paste these instructions for the other side of the car and you’ve got both front brakes serviced and new pads installed.
Front disc change
The discs are very easily changed, but I wanted to illustrate a couple of things that will help if people end up with discs rusted onto the hubs – this is common once a 4wd gets a bit older. In fact even after 4 years and some beach driving and stuff, mine didn’t want to come off that easily anyway!
To start the disc change, first remove the caliper as shown in the pad change and then the caliper mounting bracket. You’ll be left with likely a slightly rusty looking disc and various bits of surface corrosion around.
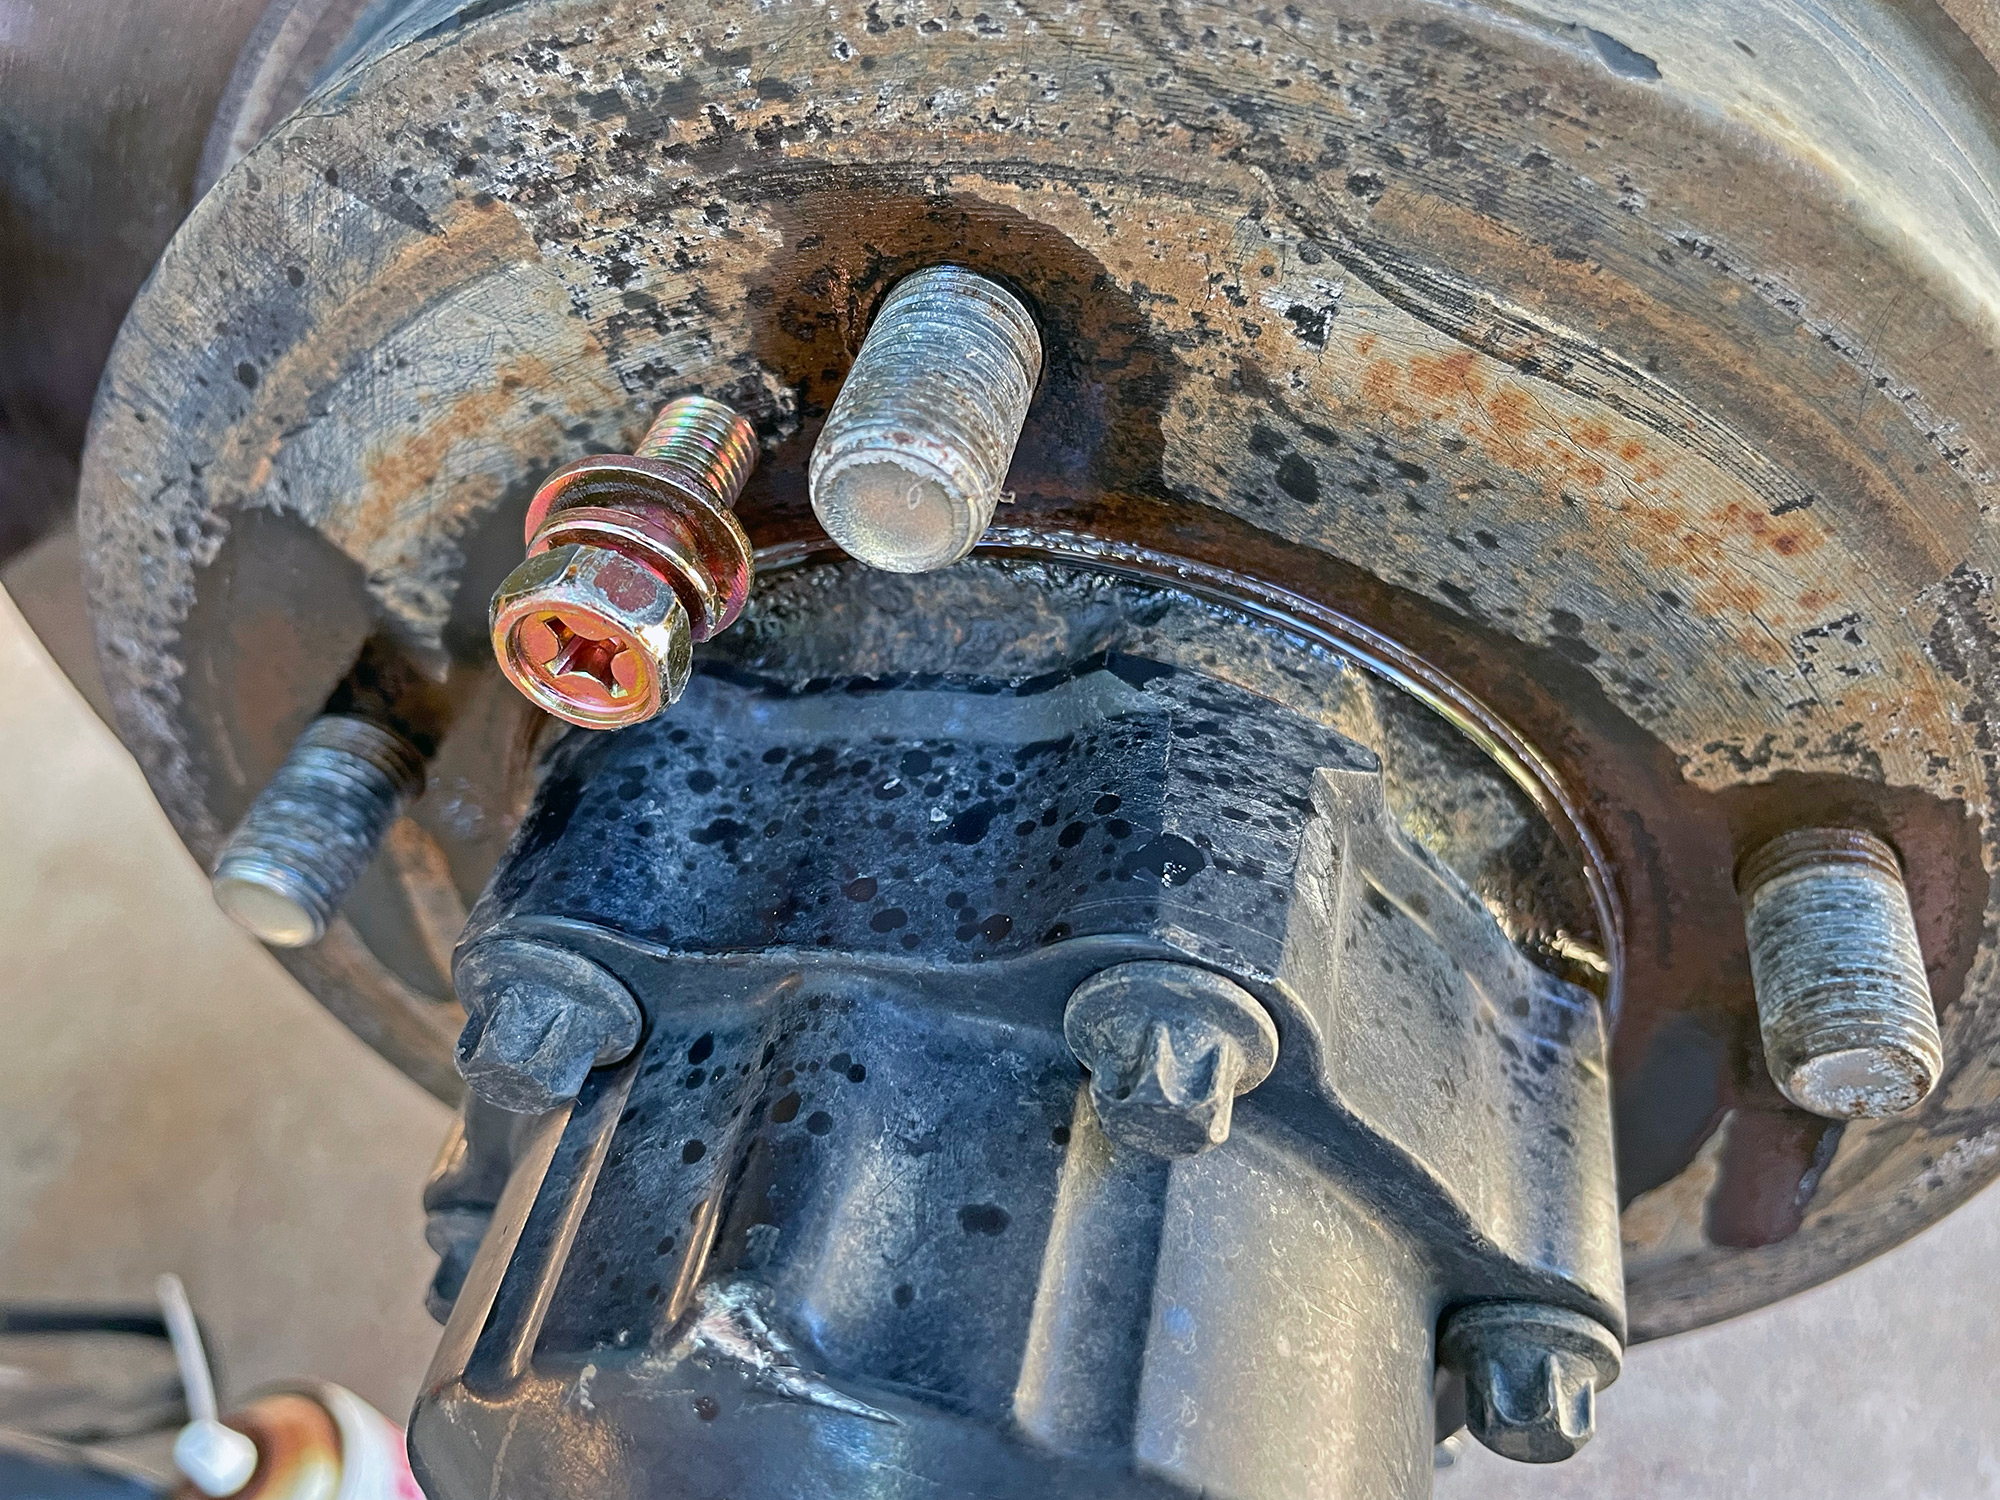
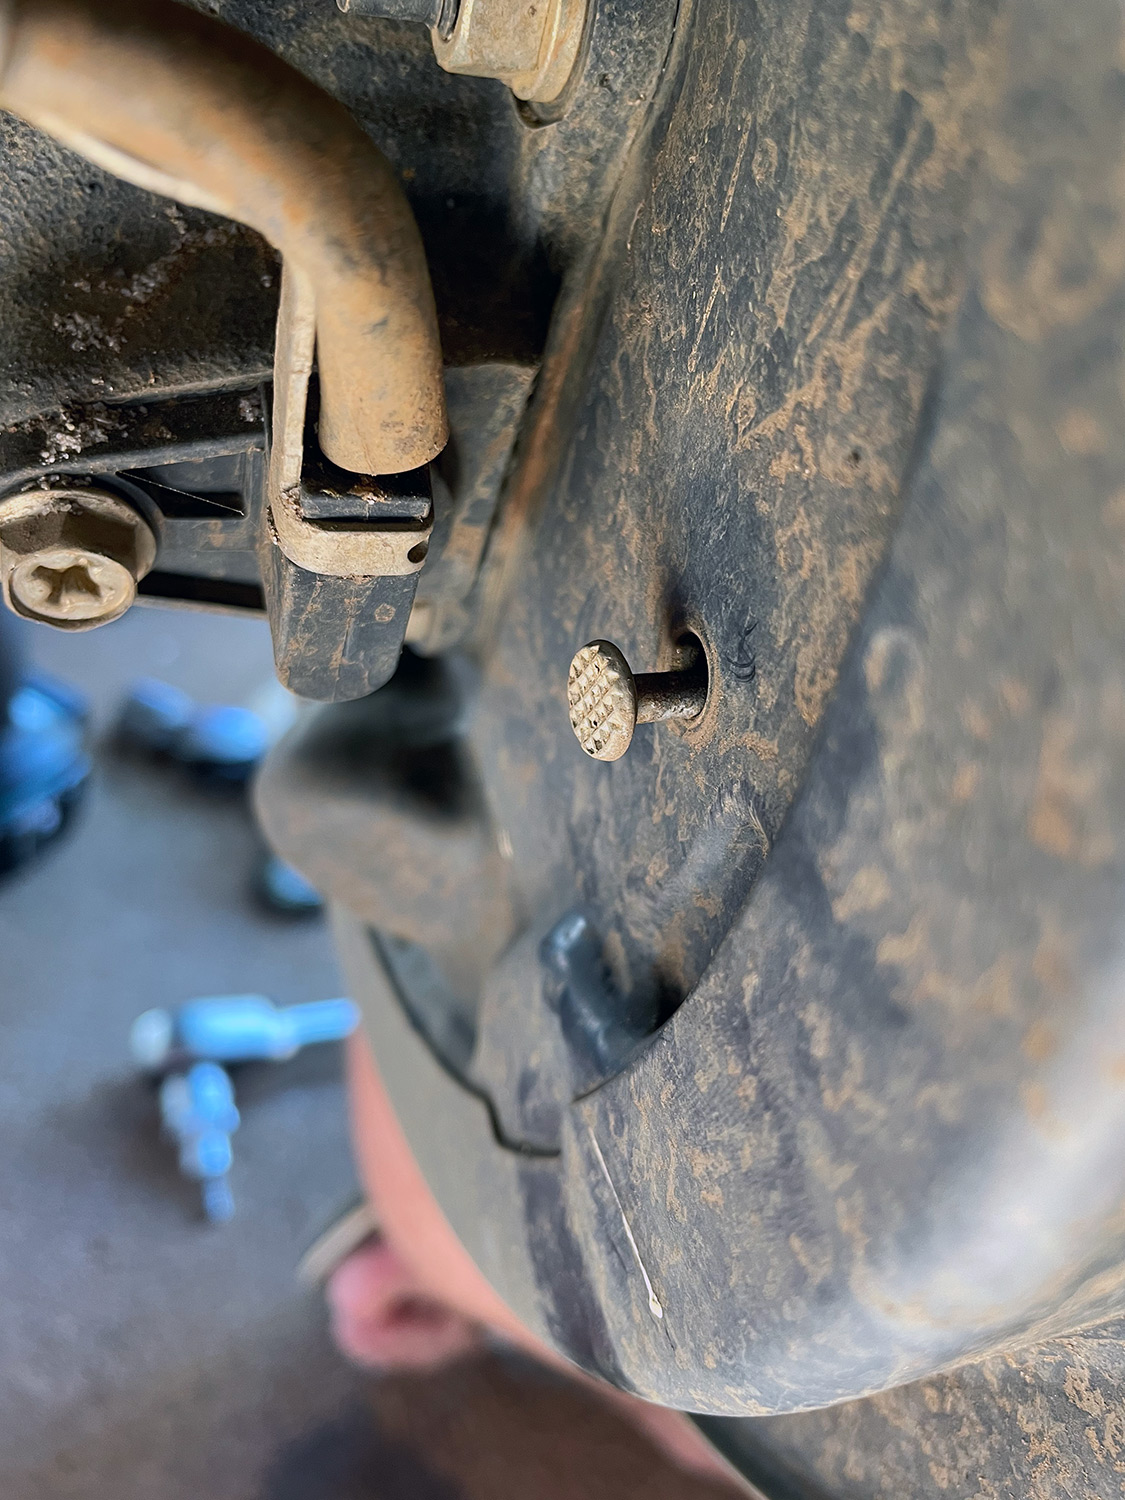
The disc has two M8 holes in it which you can use to push onto the hub and pull the disc off. You’ll want to clean up these threads before going any further.
Use some penetrating fluid around the centre of the disc, all of the wheel studs and also behind the two puller holes, and then screw in M8 bolts to the puller holes.
Just slowly and evenly screw in these bolts and the disc will come off. Resist the temptation to bash it with a hammer – that’s a good route to bending a disc and have an awful vibration under braking.
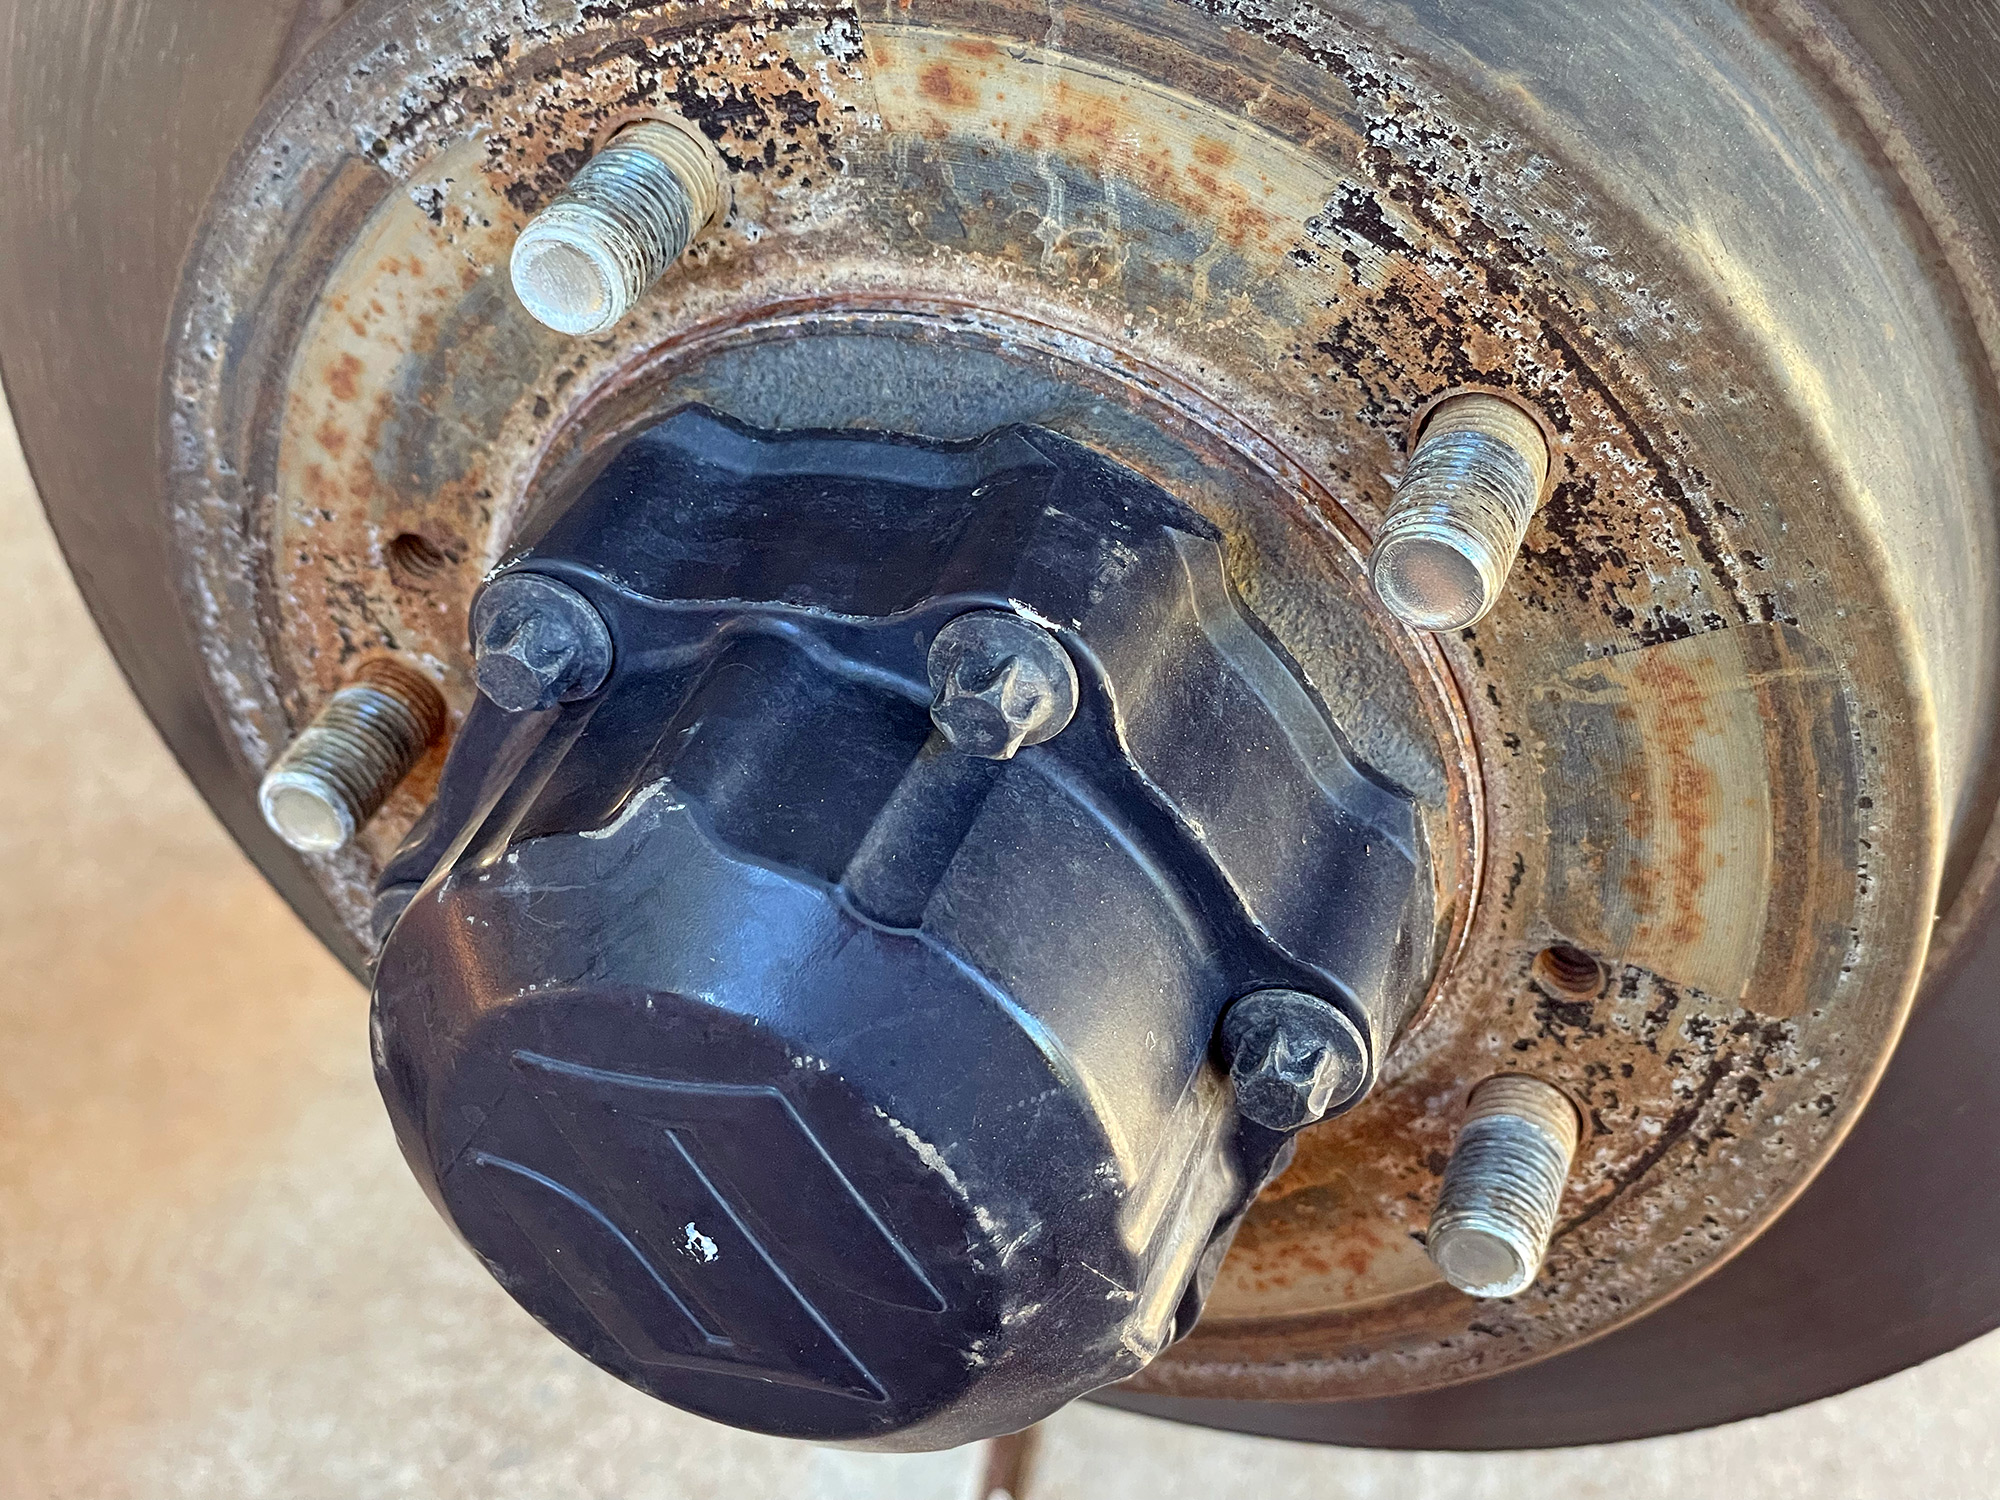
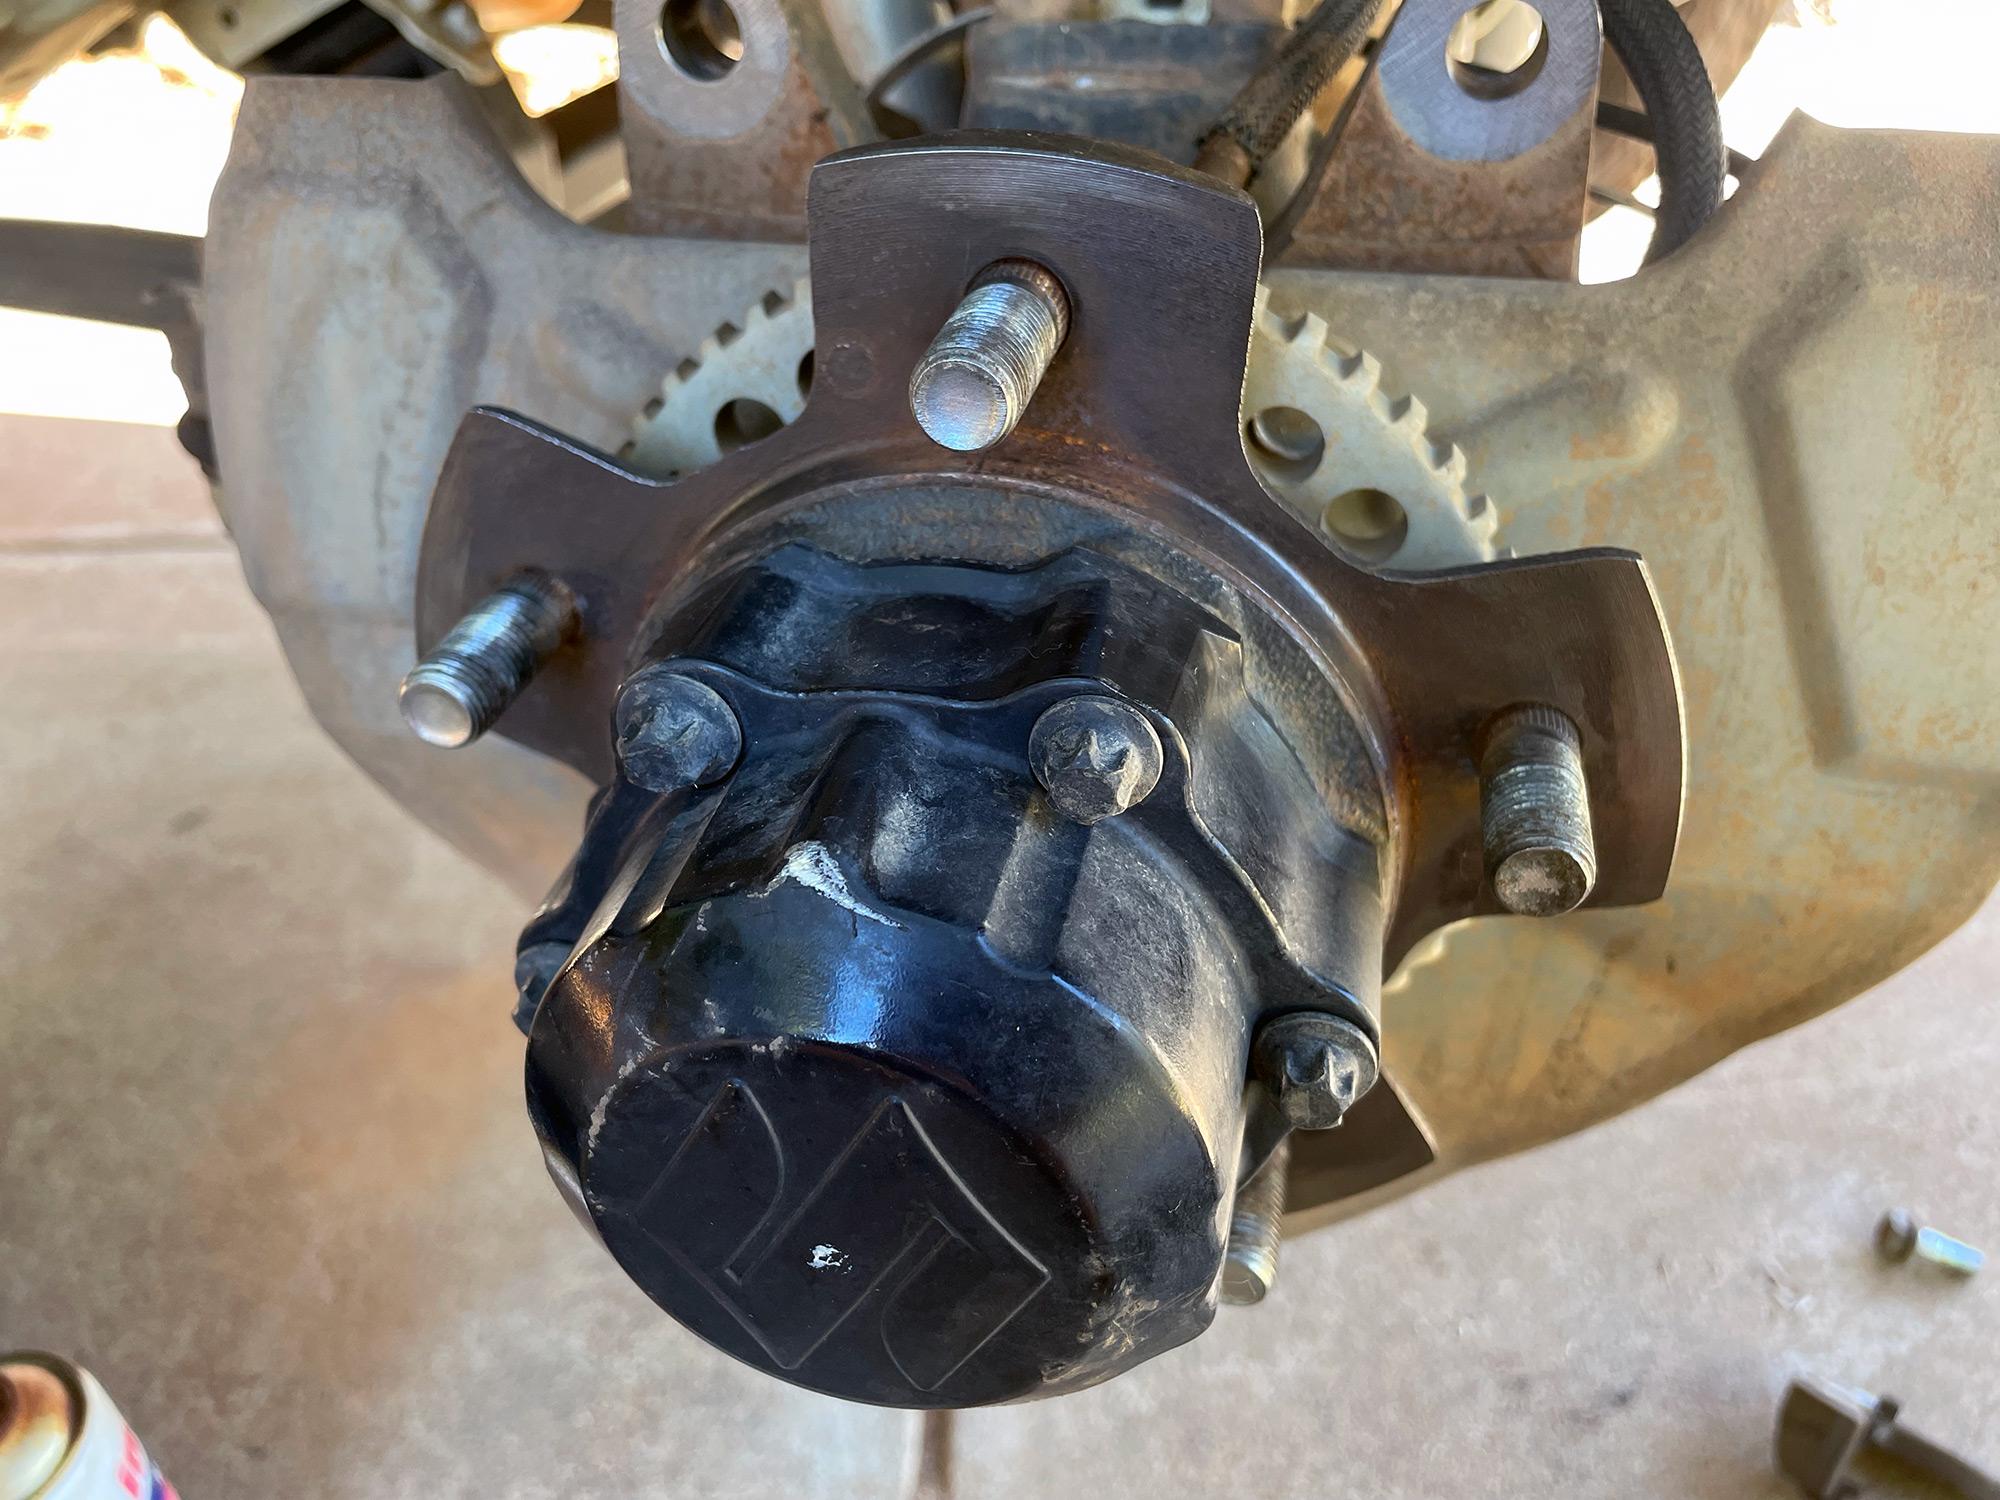
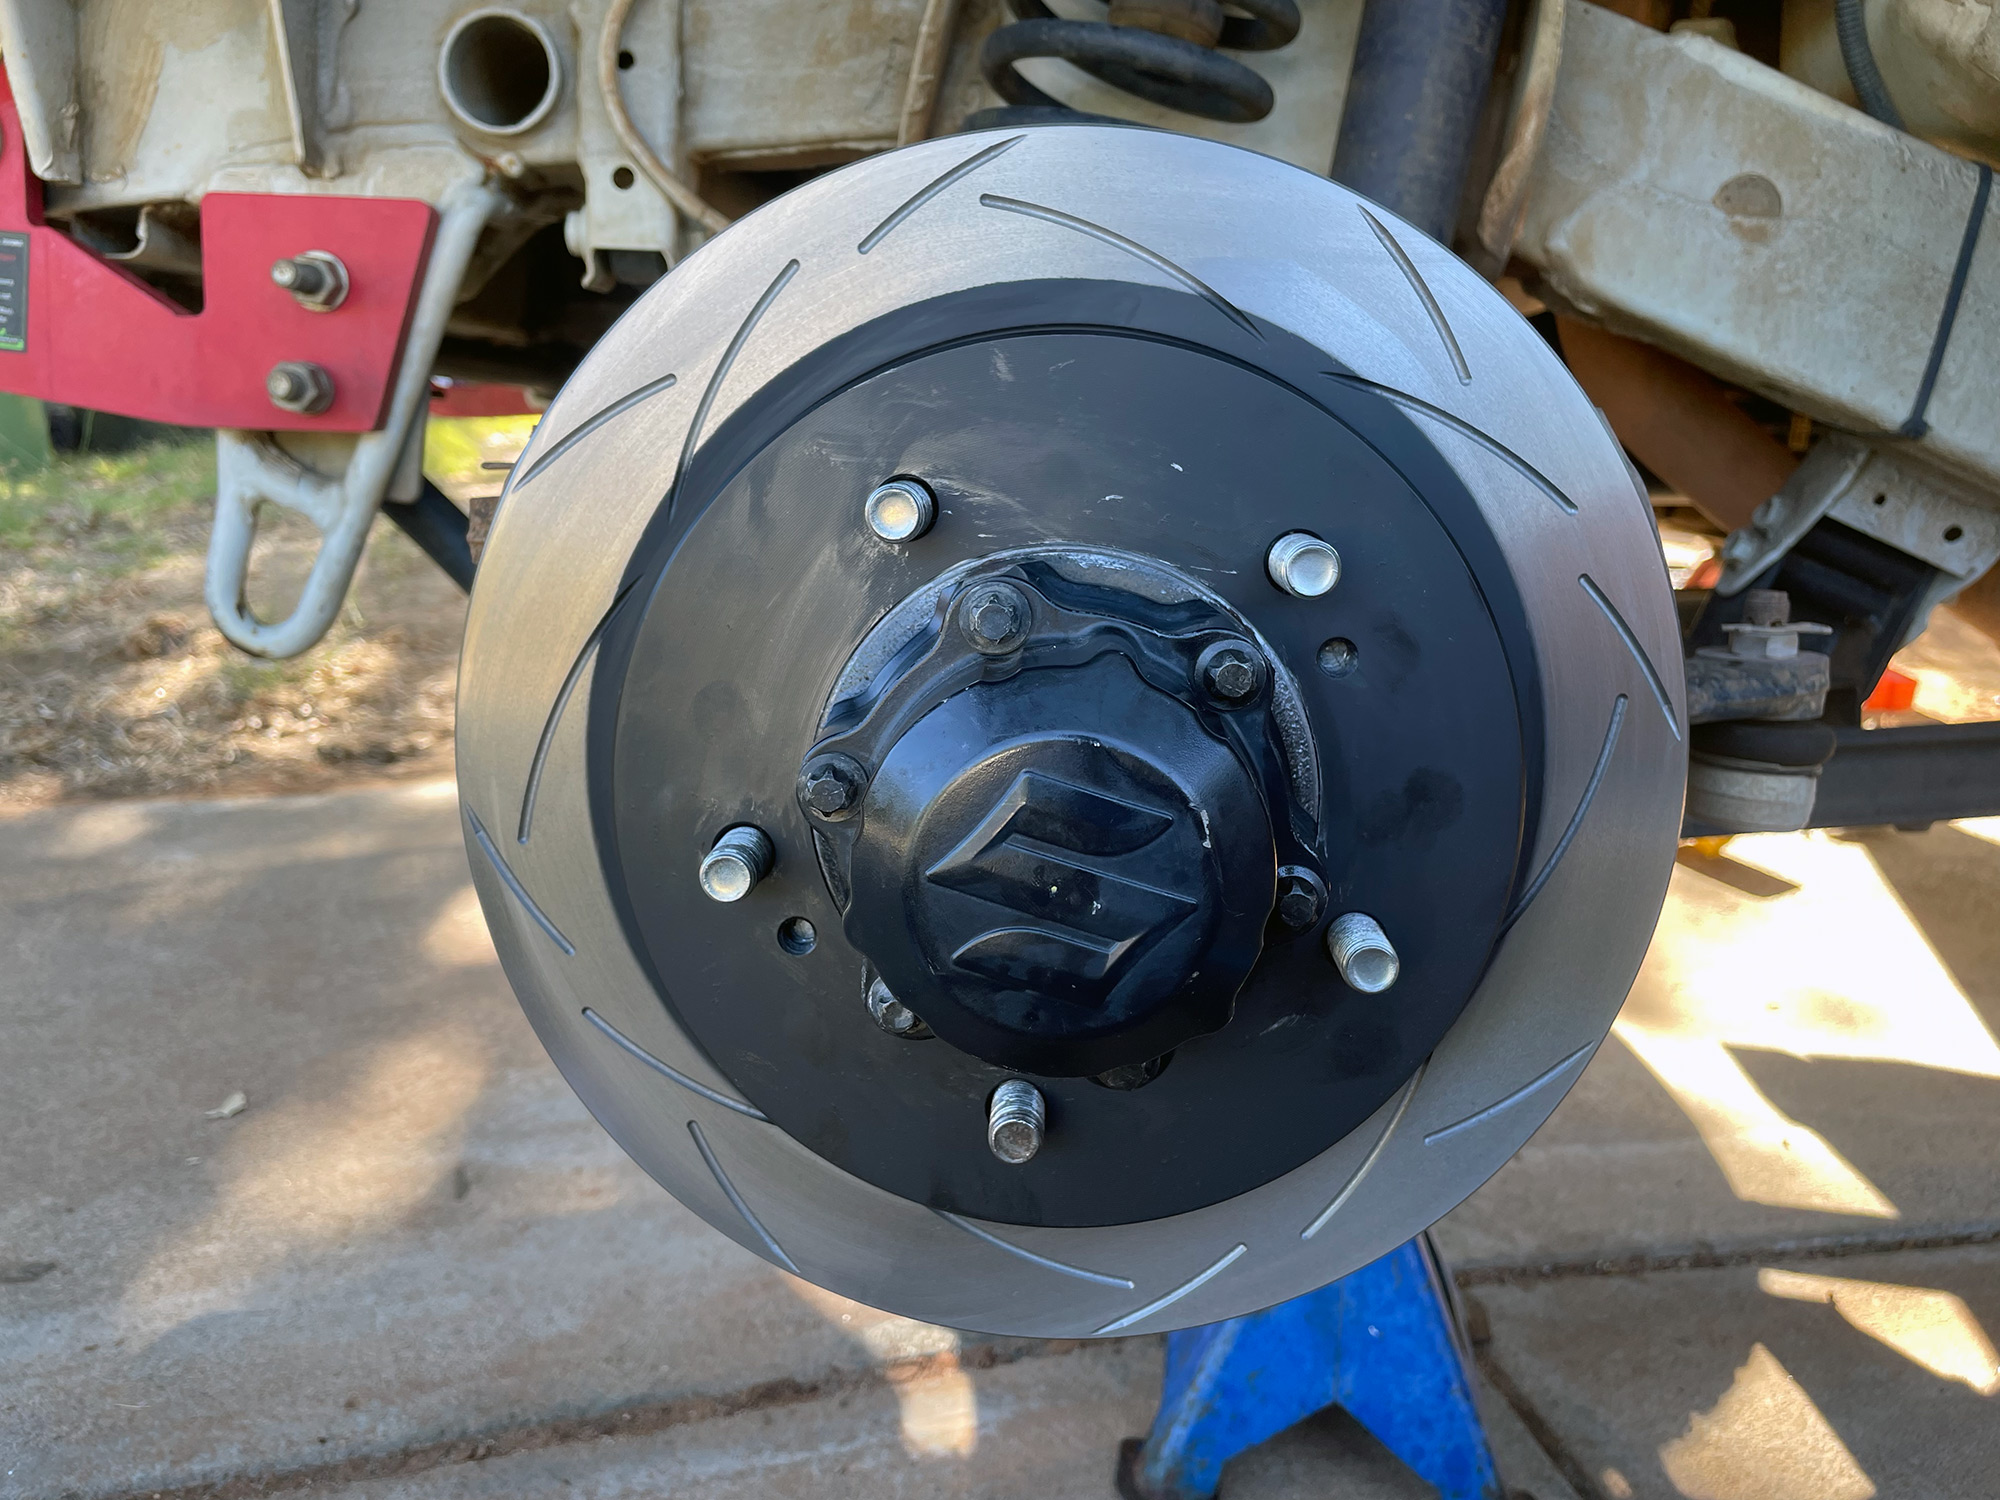
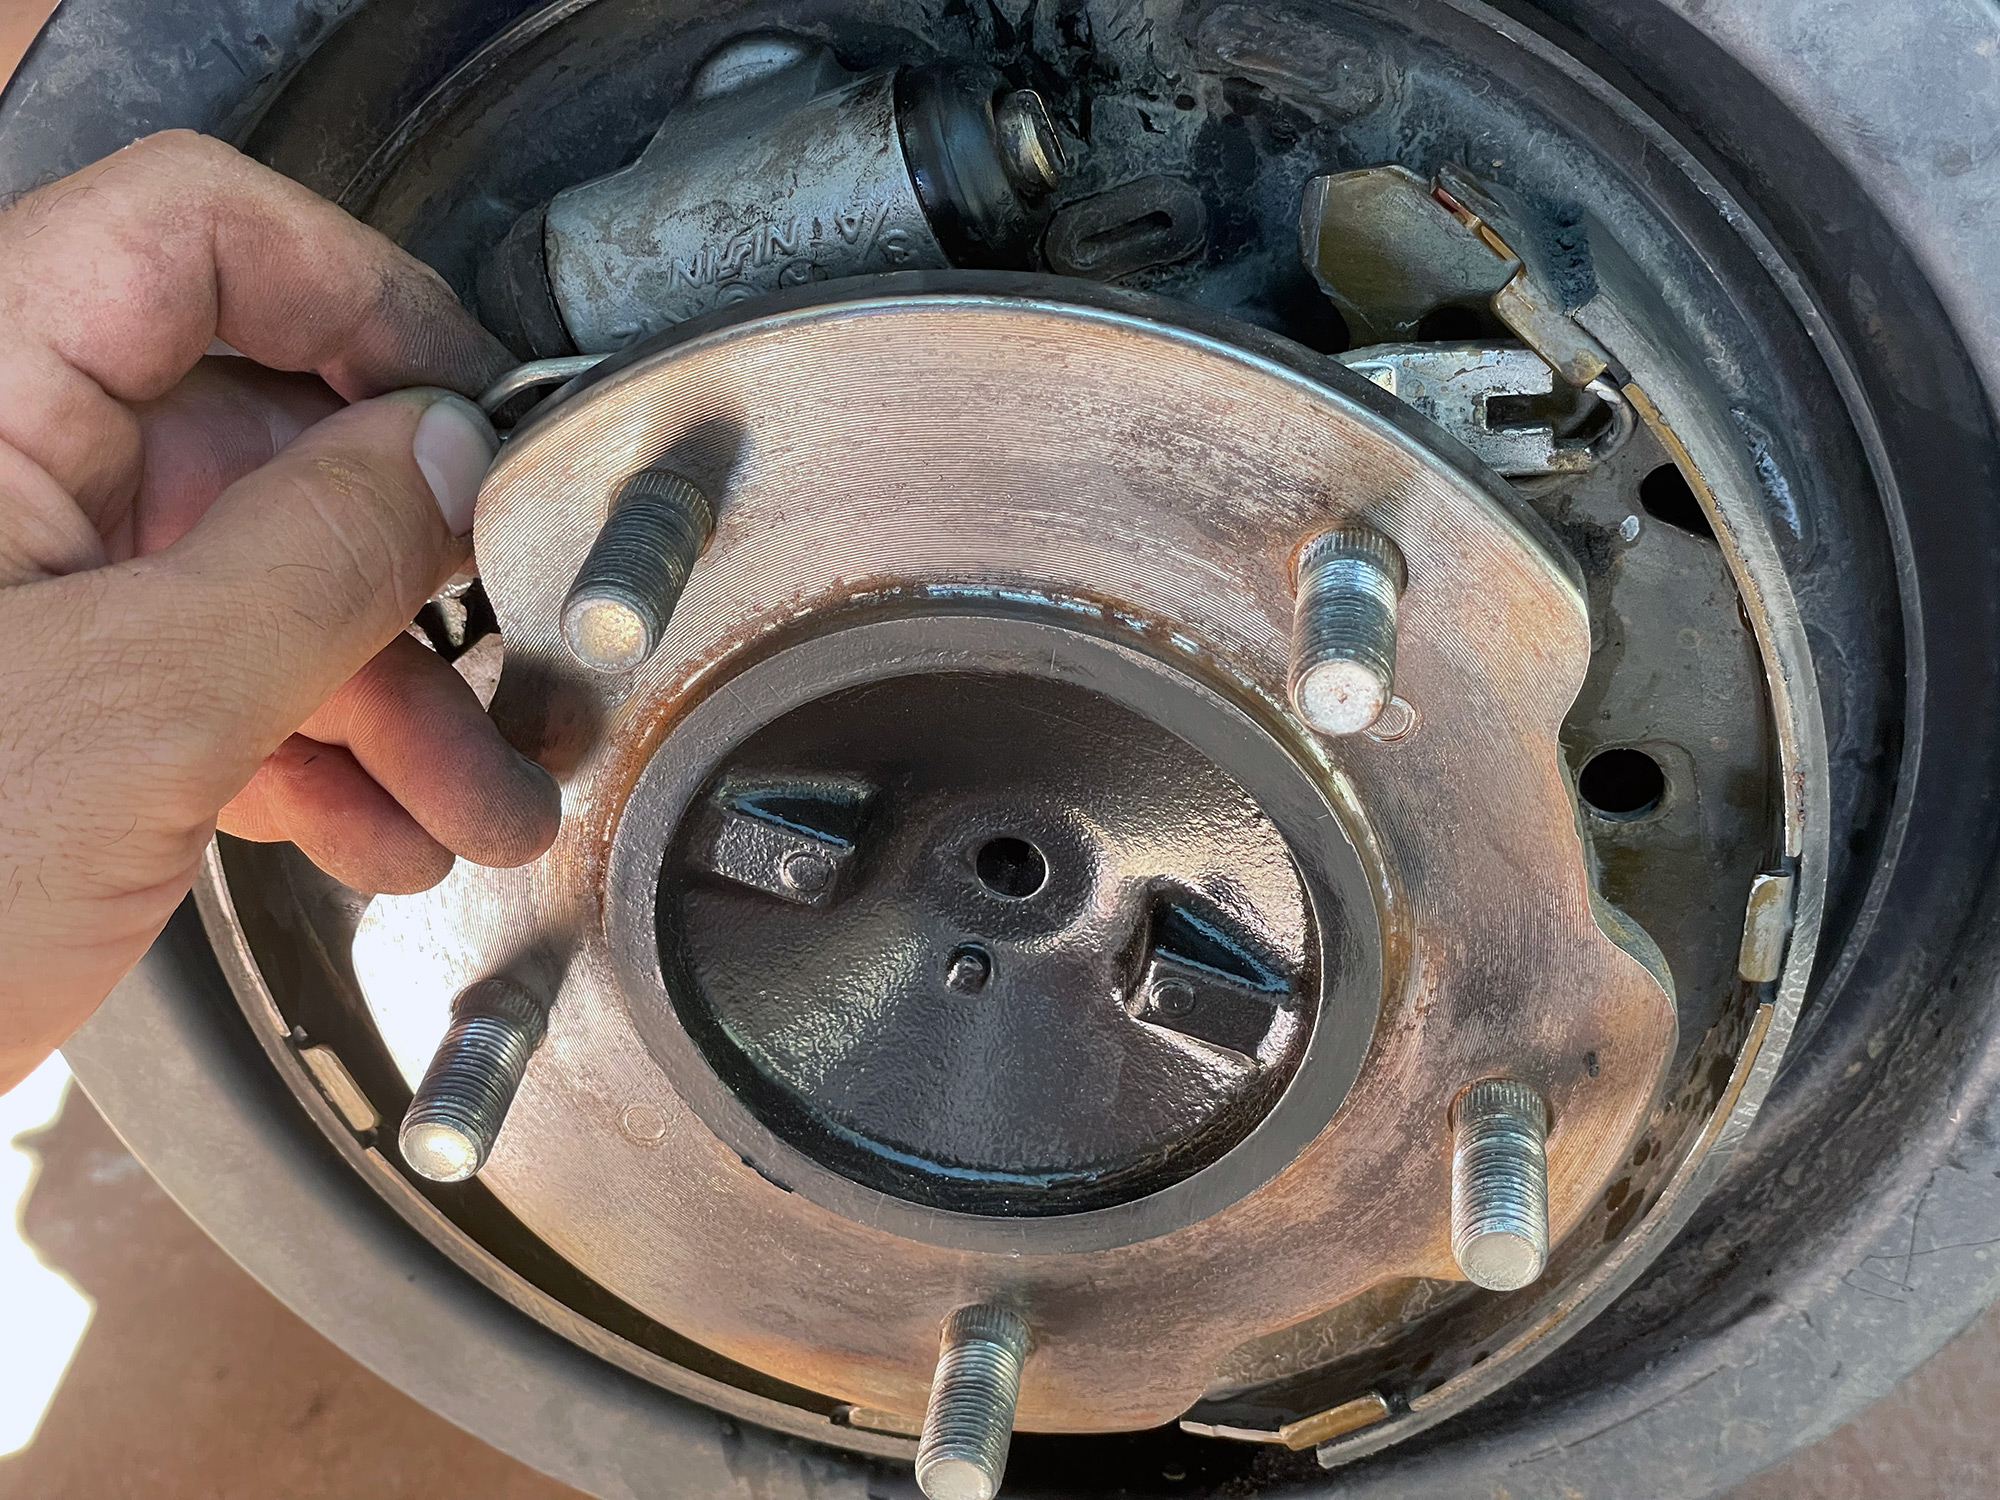
The disc off reveals the wheel hub. Good time to make sure the front wheel bearing doesn’t have any play in it, too.
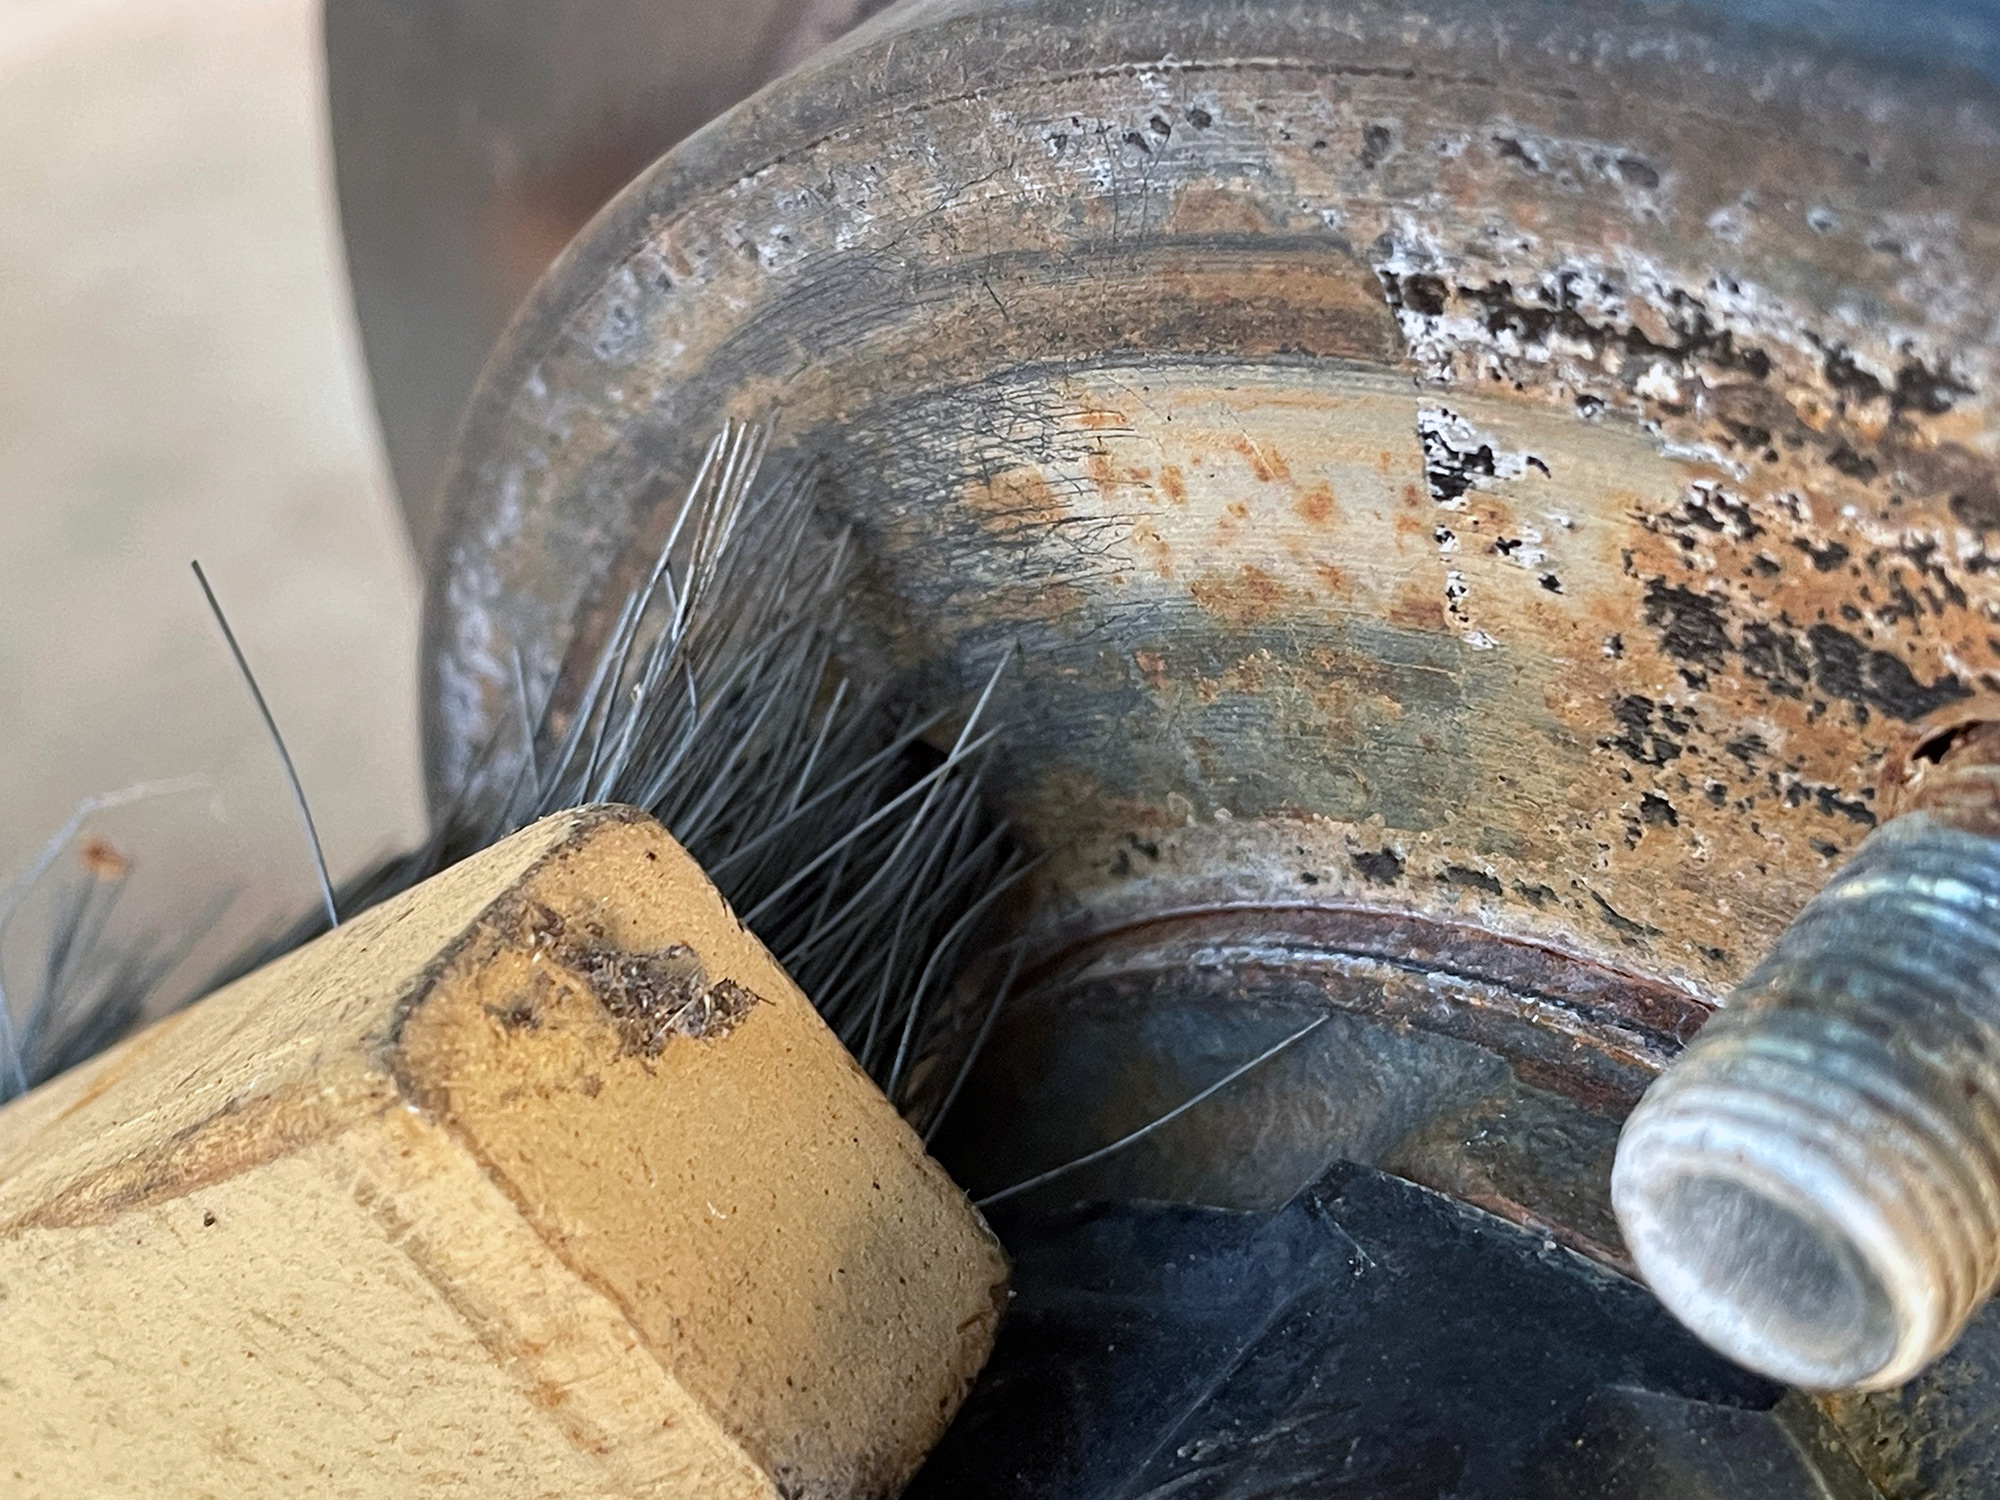
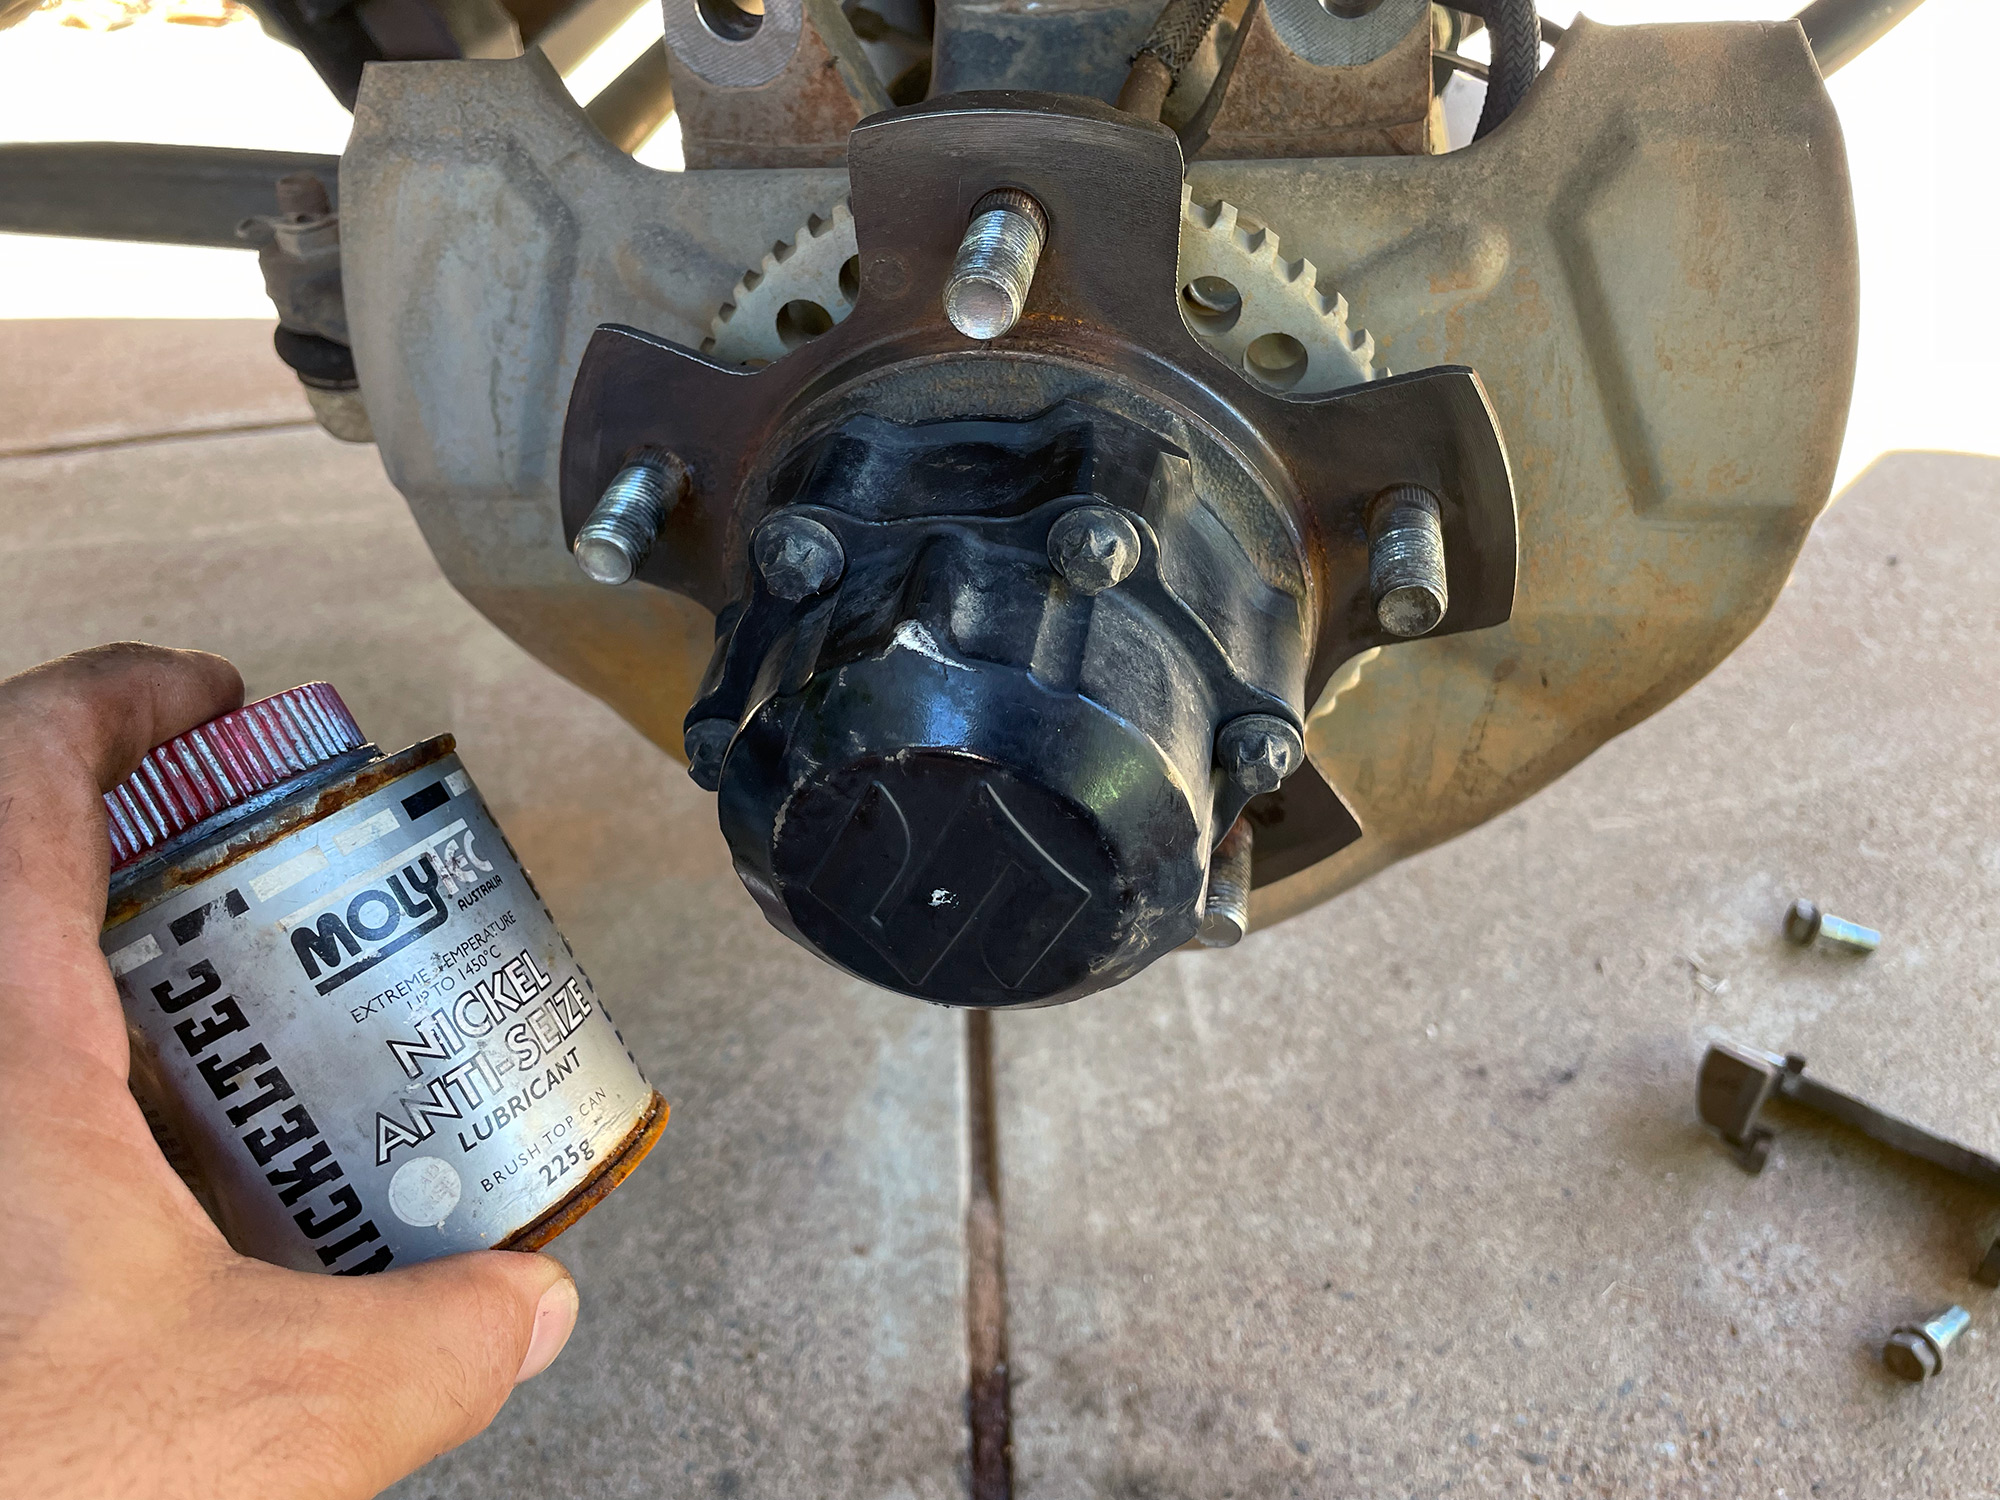
Clean the wheel hub up with a wire wheel on a drill; it can also be a good idea to put a very thin coat of nickel antiseize on the hub, too. This might give you a chance of getting the disc off in the future more easily.
Push the new disc on, and then clean each side of the friction area of the disc with a rag with some brake cleaner on it. Most discs have a bit of oil or wax on them to stop them corroding in the packaging so good to remove it.
To align a new disc before putting the caliper bracket on, I use a spanner and a wheel nut to push the disc square onto the wheel hub. It’s a surprisingly easy way to do it.
The new discs I chose (DBA 587S) look pretty nifty, even without everything else fitted.
Rear drum shoe change
Honestly, this sucked and not something I’m zealous to do unless I have to. It is a necessary evil if you have to do your rear wheel bearings and after doing the first one I worked out a bit more of a system to do it relatively quickly. As a warning: some of the springs really suck to get back into place.
Start off by jacking the car up and taking the wheel off. Also release the handbrake – it really sucks trying to pull drums off when the brakes are still on!
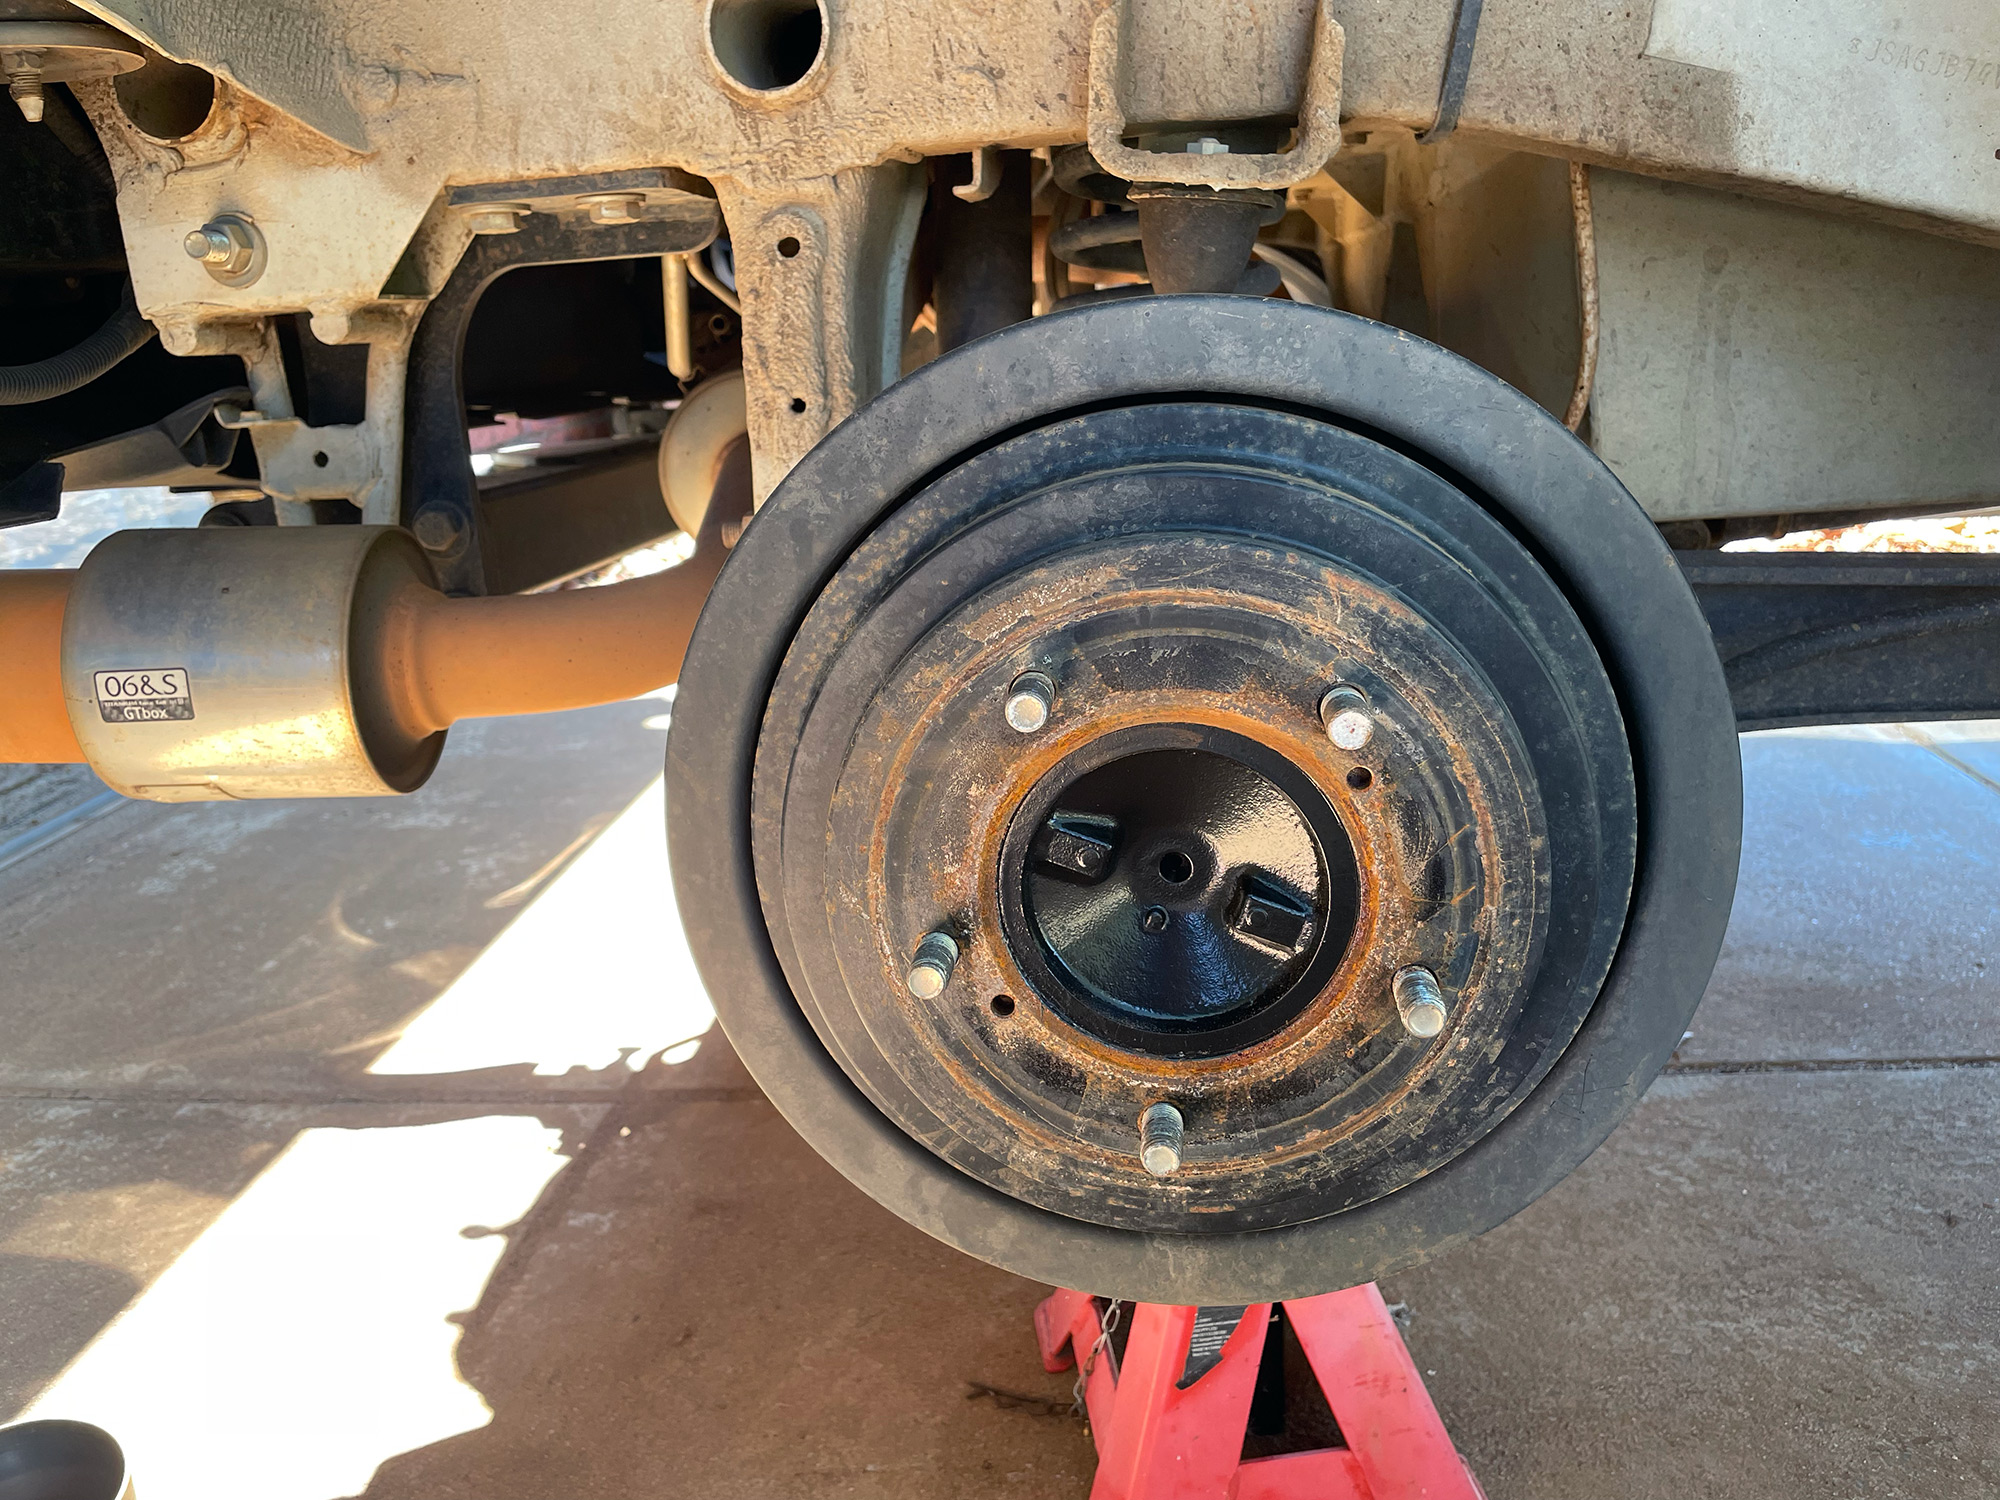
The drum can be pulled off with M8 bolts using the 2 holes near the wheel studs.
Wind them in evenly and slowly, the drum will eventually come off.
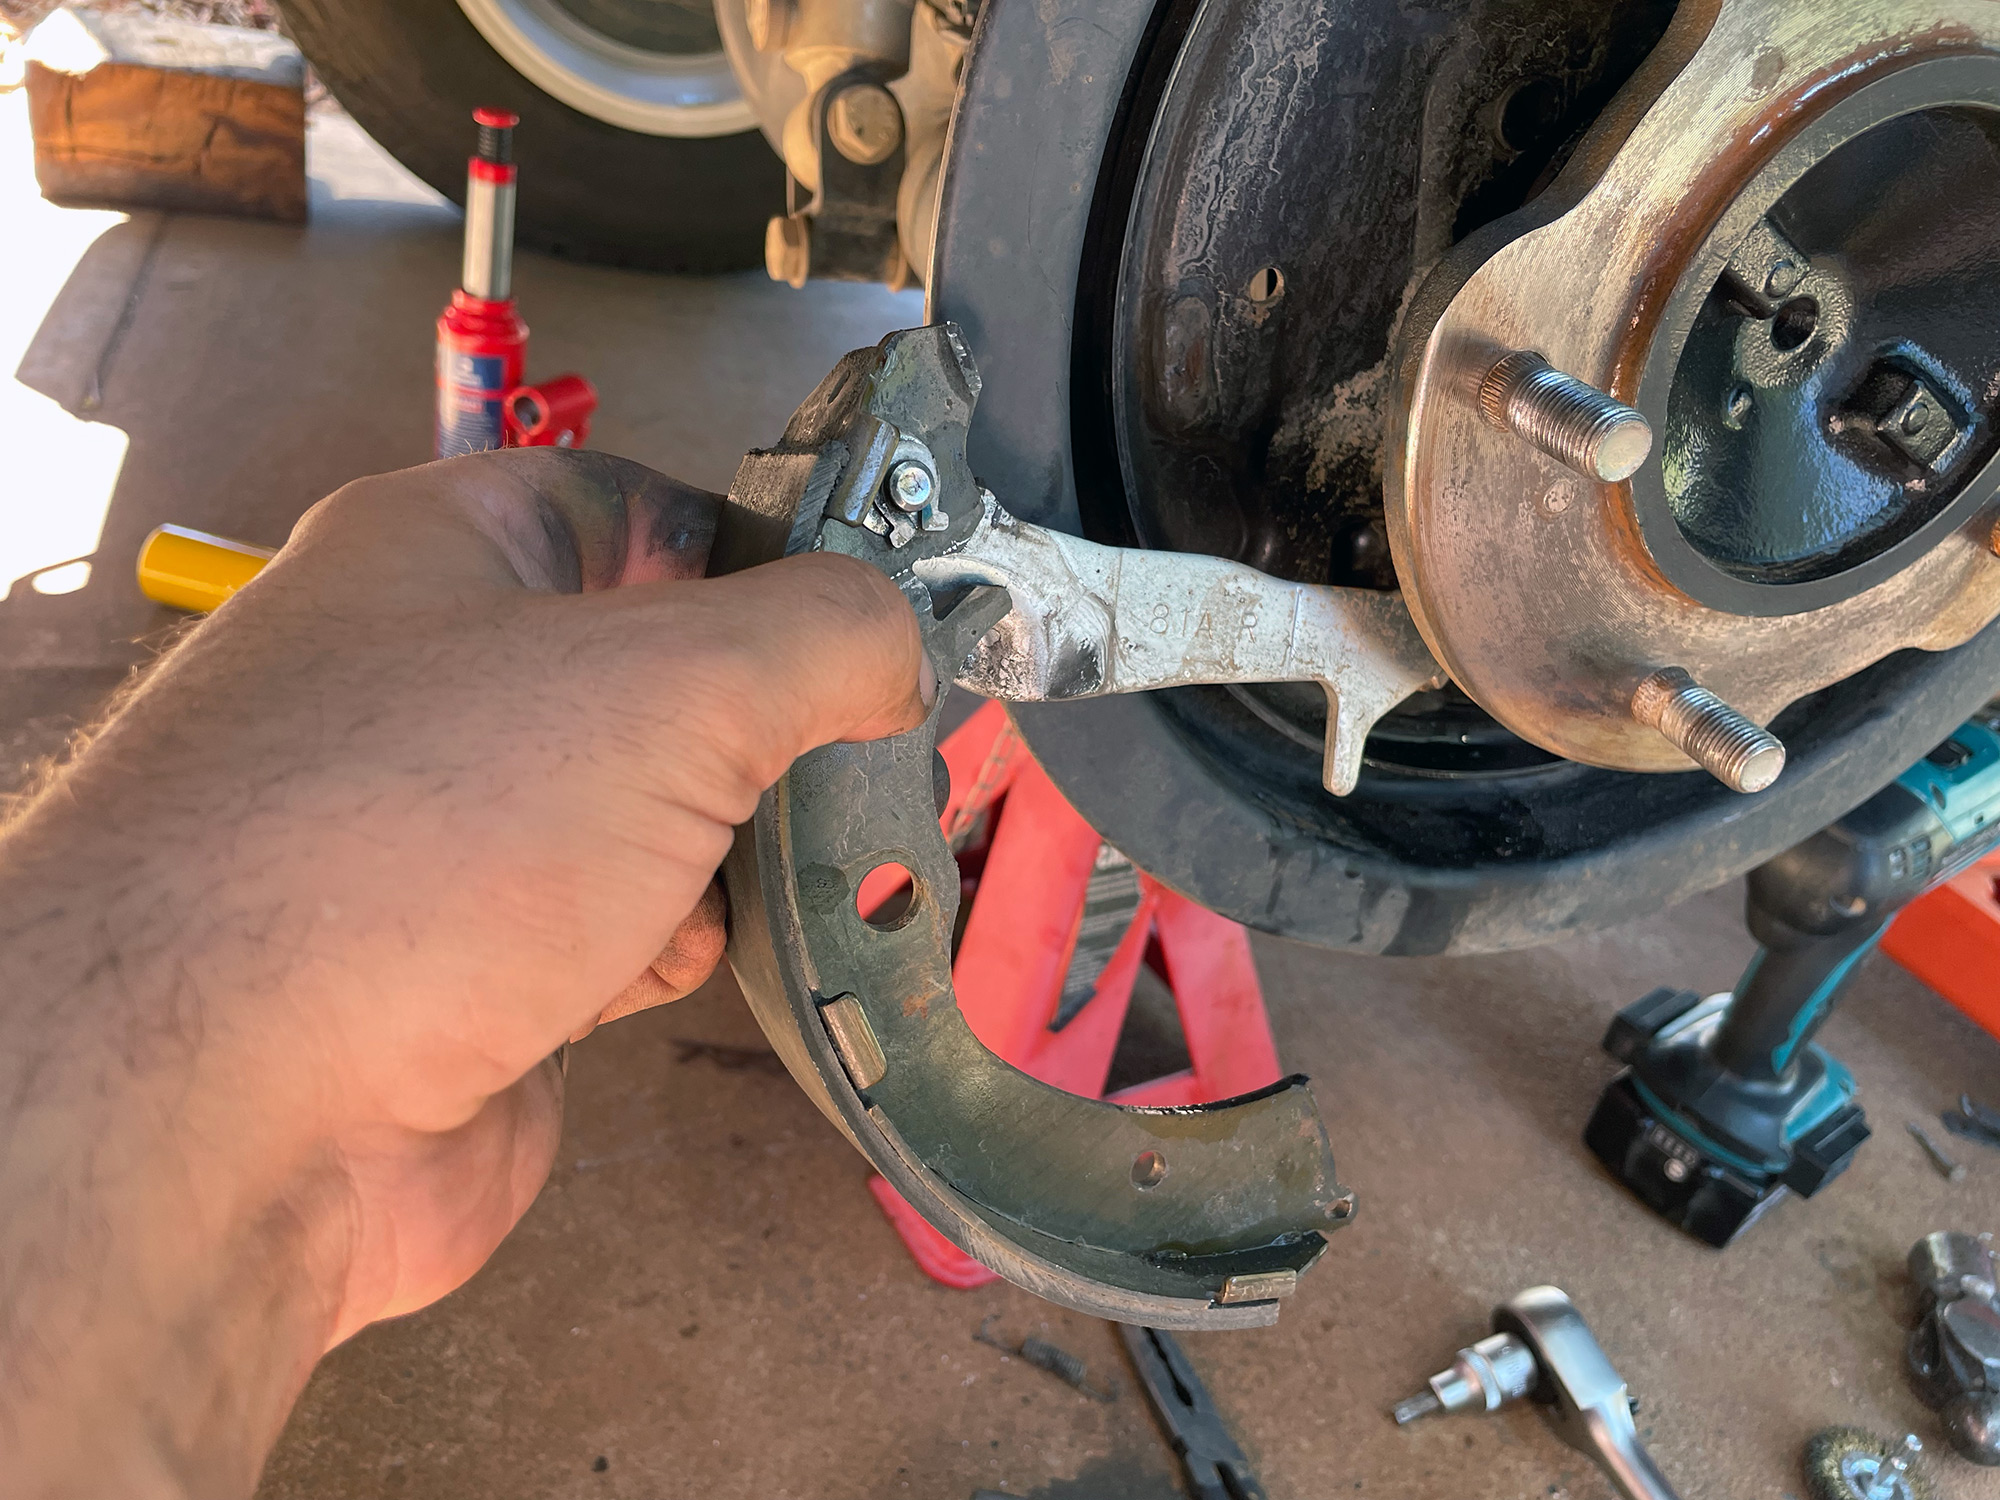
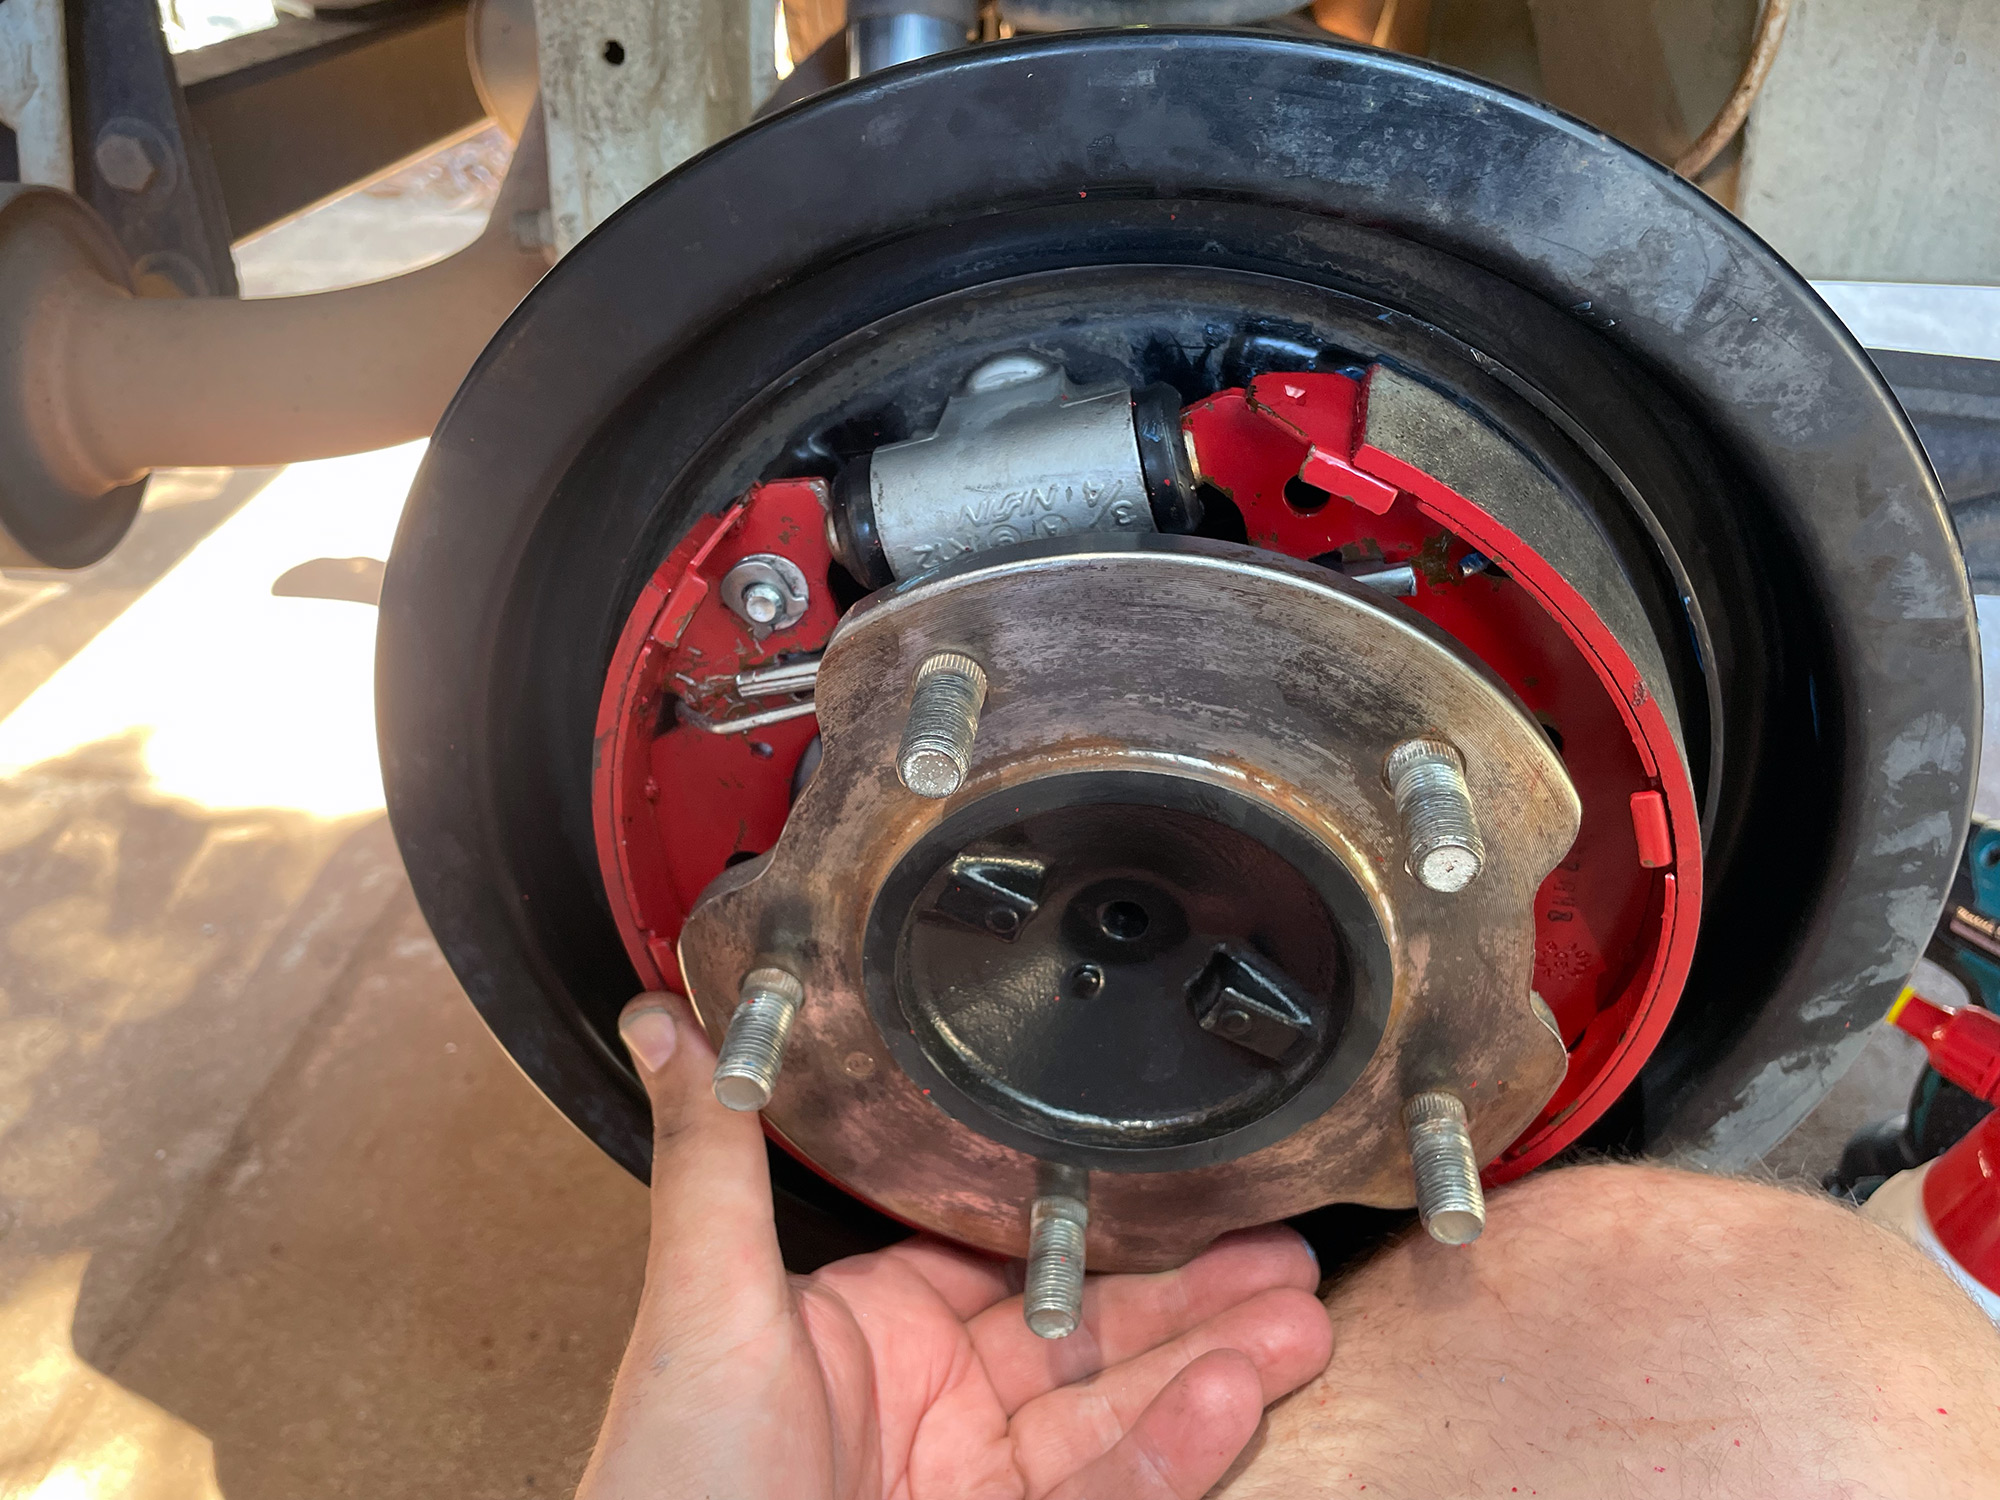
With that you have the joys of the brake shoes awaiting you.
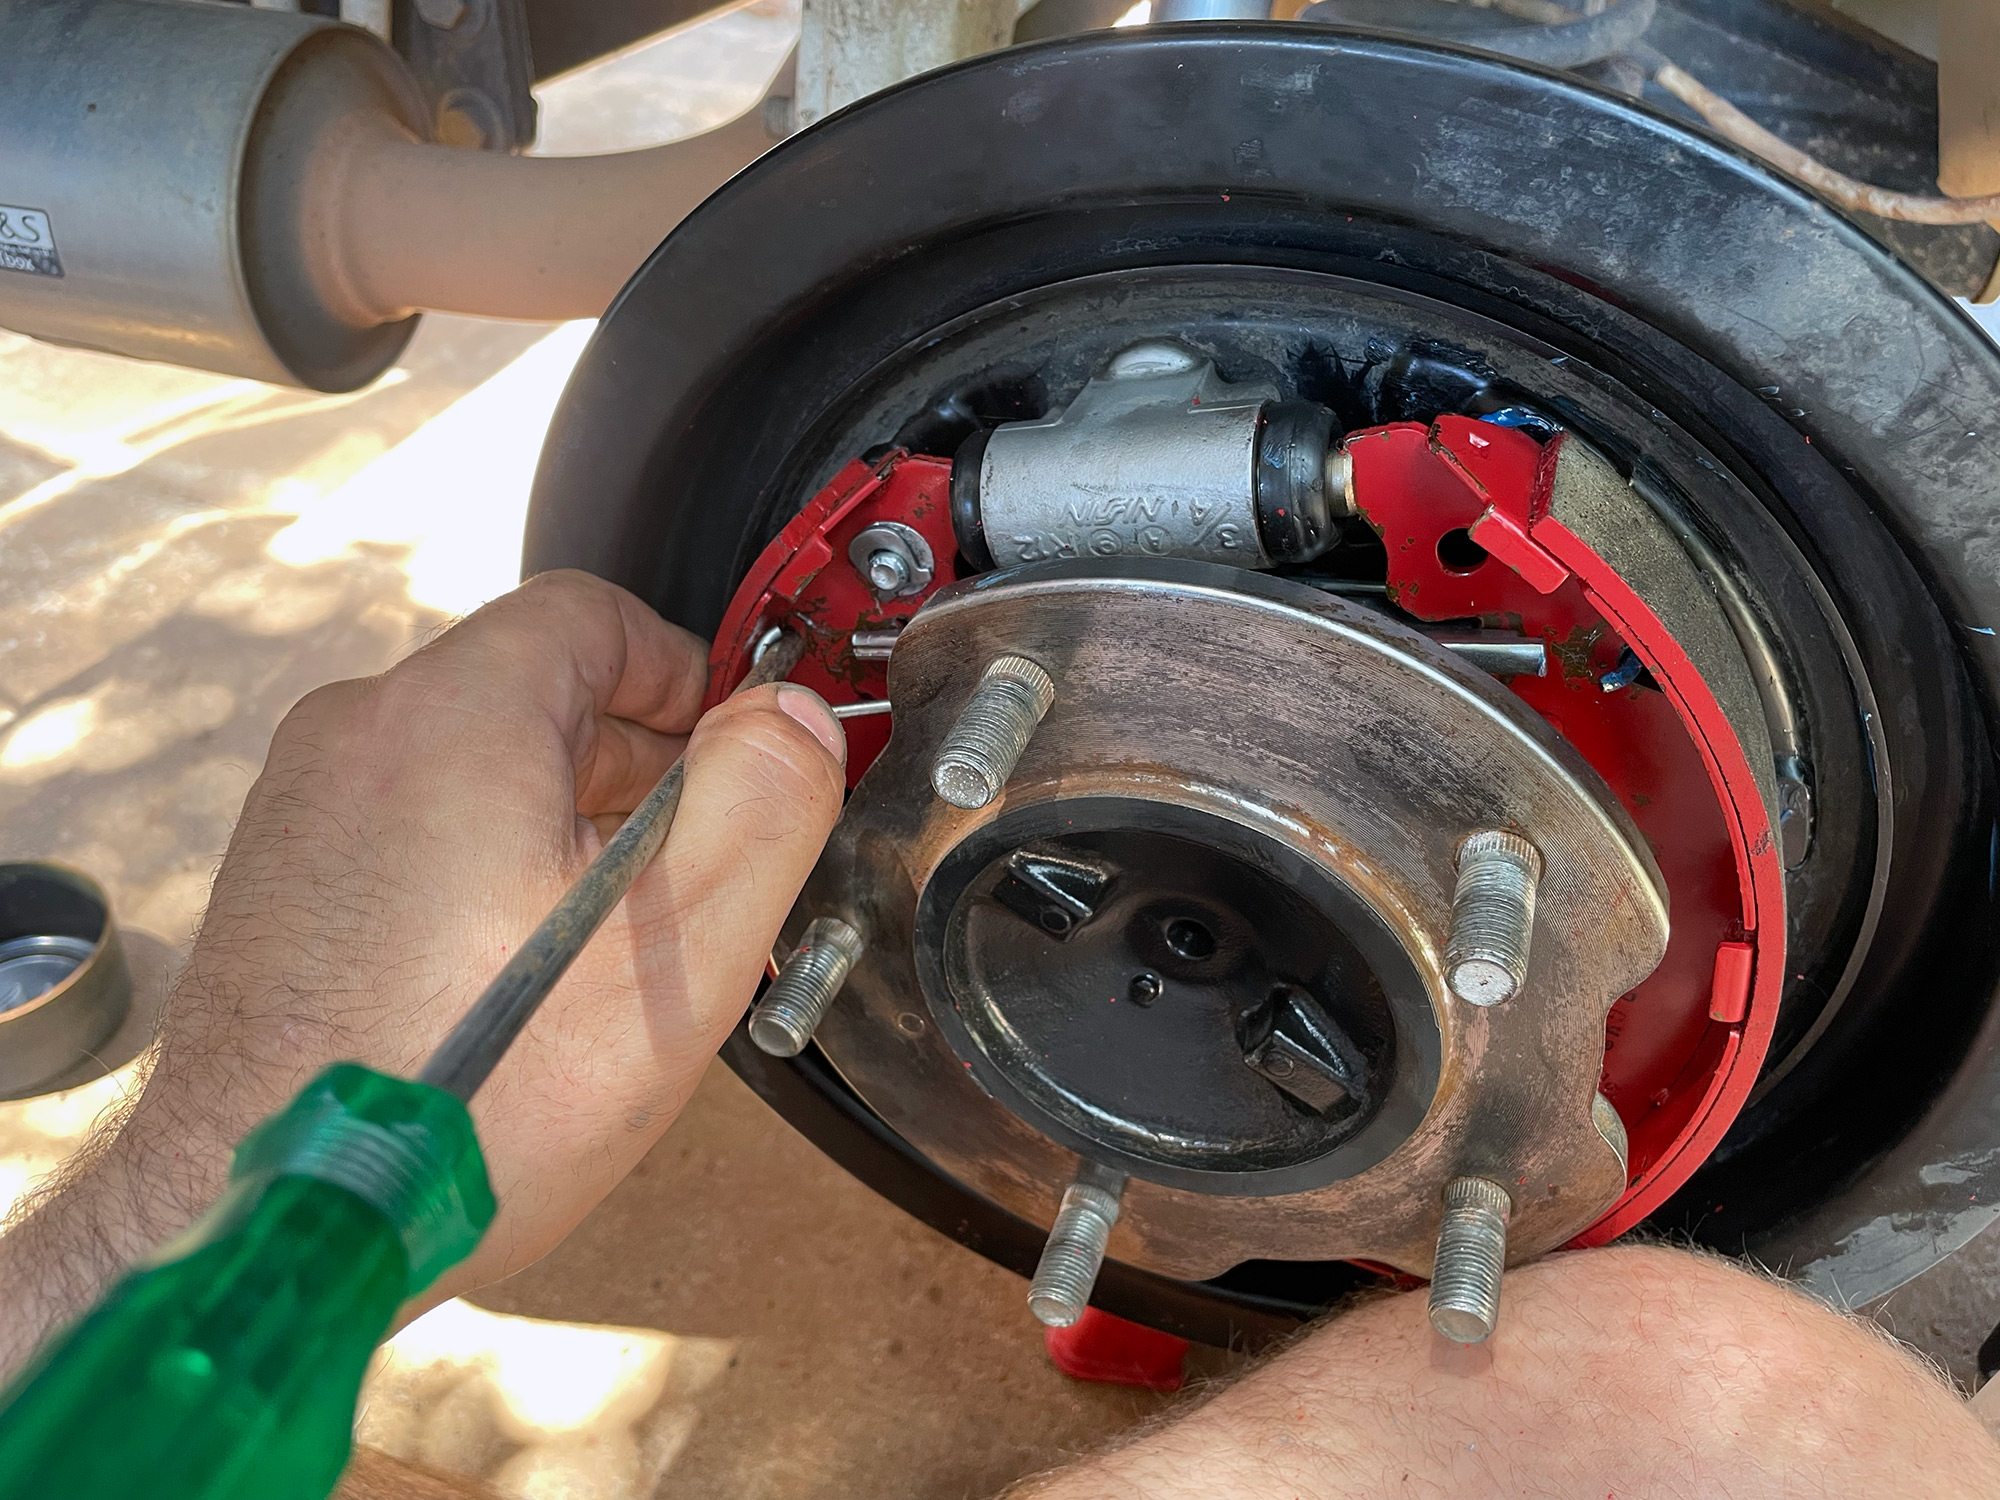
Step 1 is to push in each of the two shoe retaining clips, one each side. These are the rectangular looking springs in the middle of each shoe.
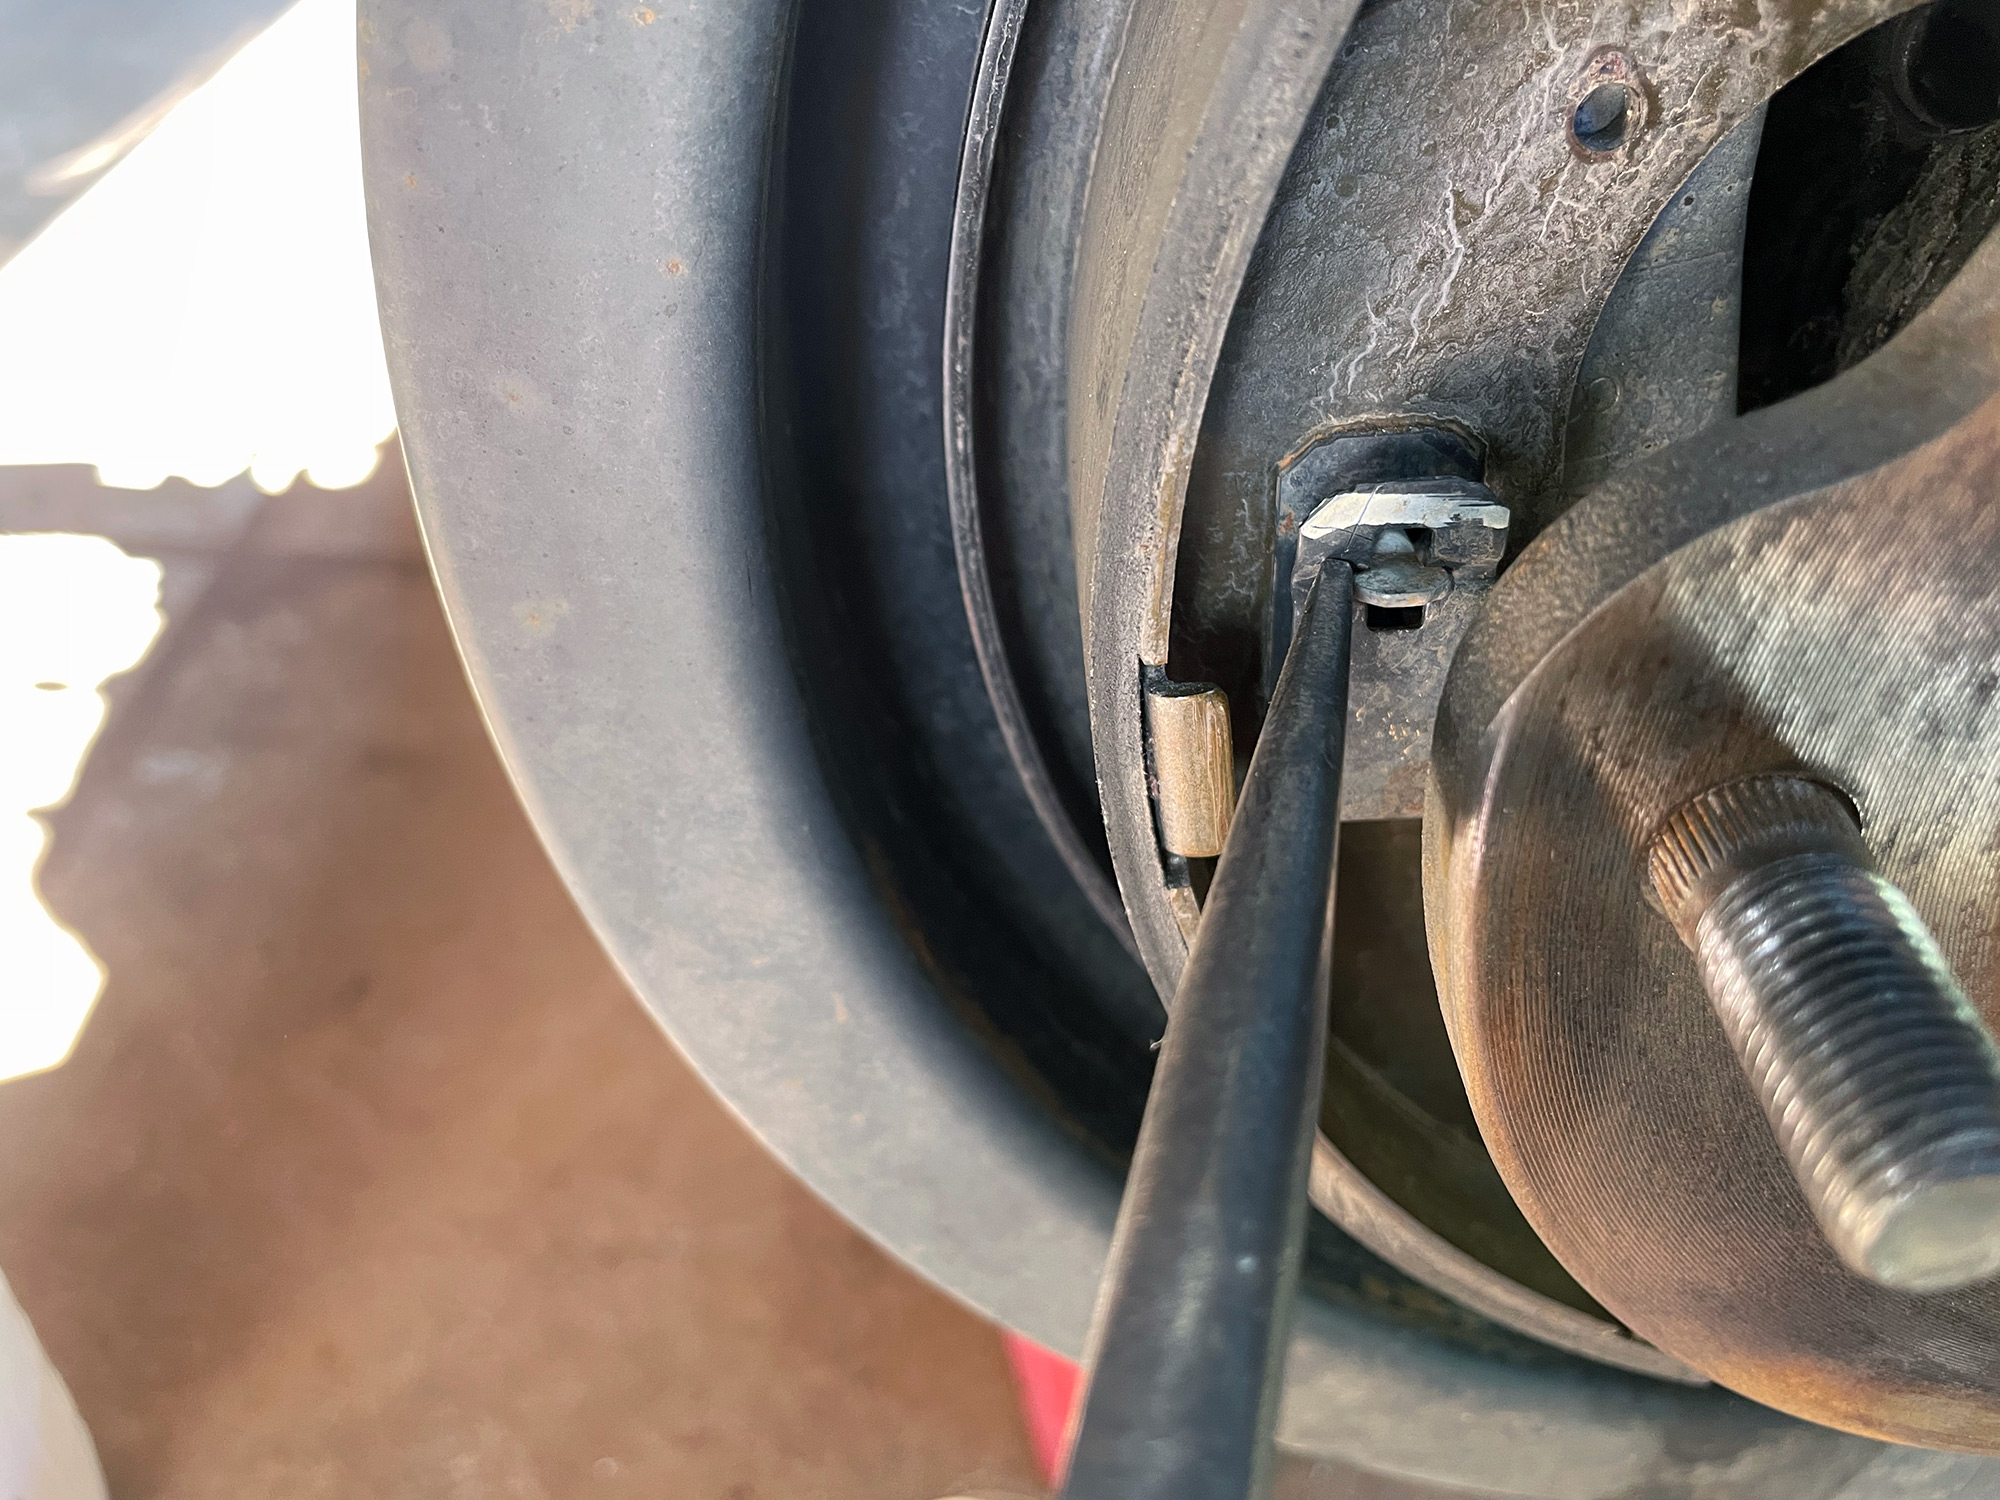
When you push down on the spring, you can turn the retaining pin at the back of the drum backing plate 90 degrees and release the spring. Then the pin can be wriggled out from the back.
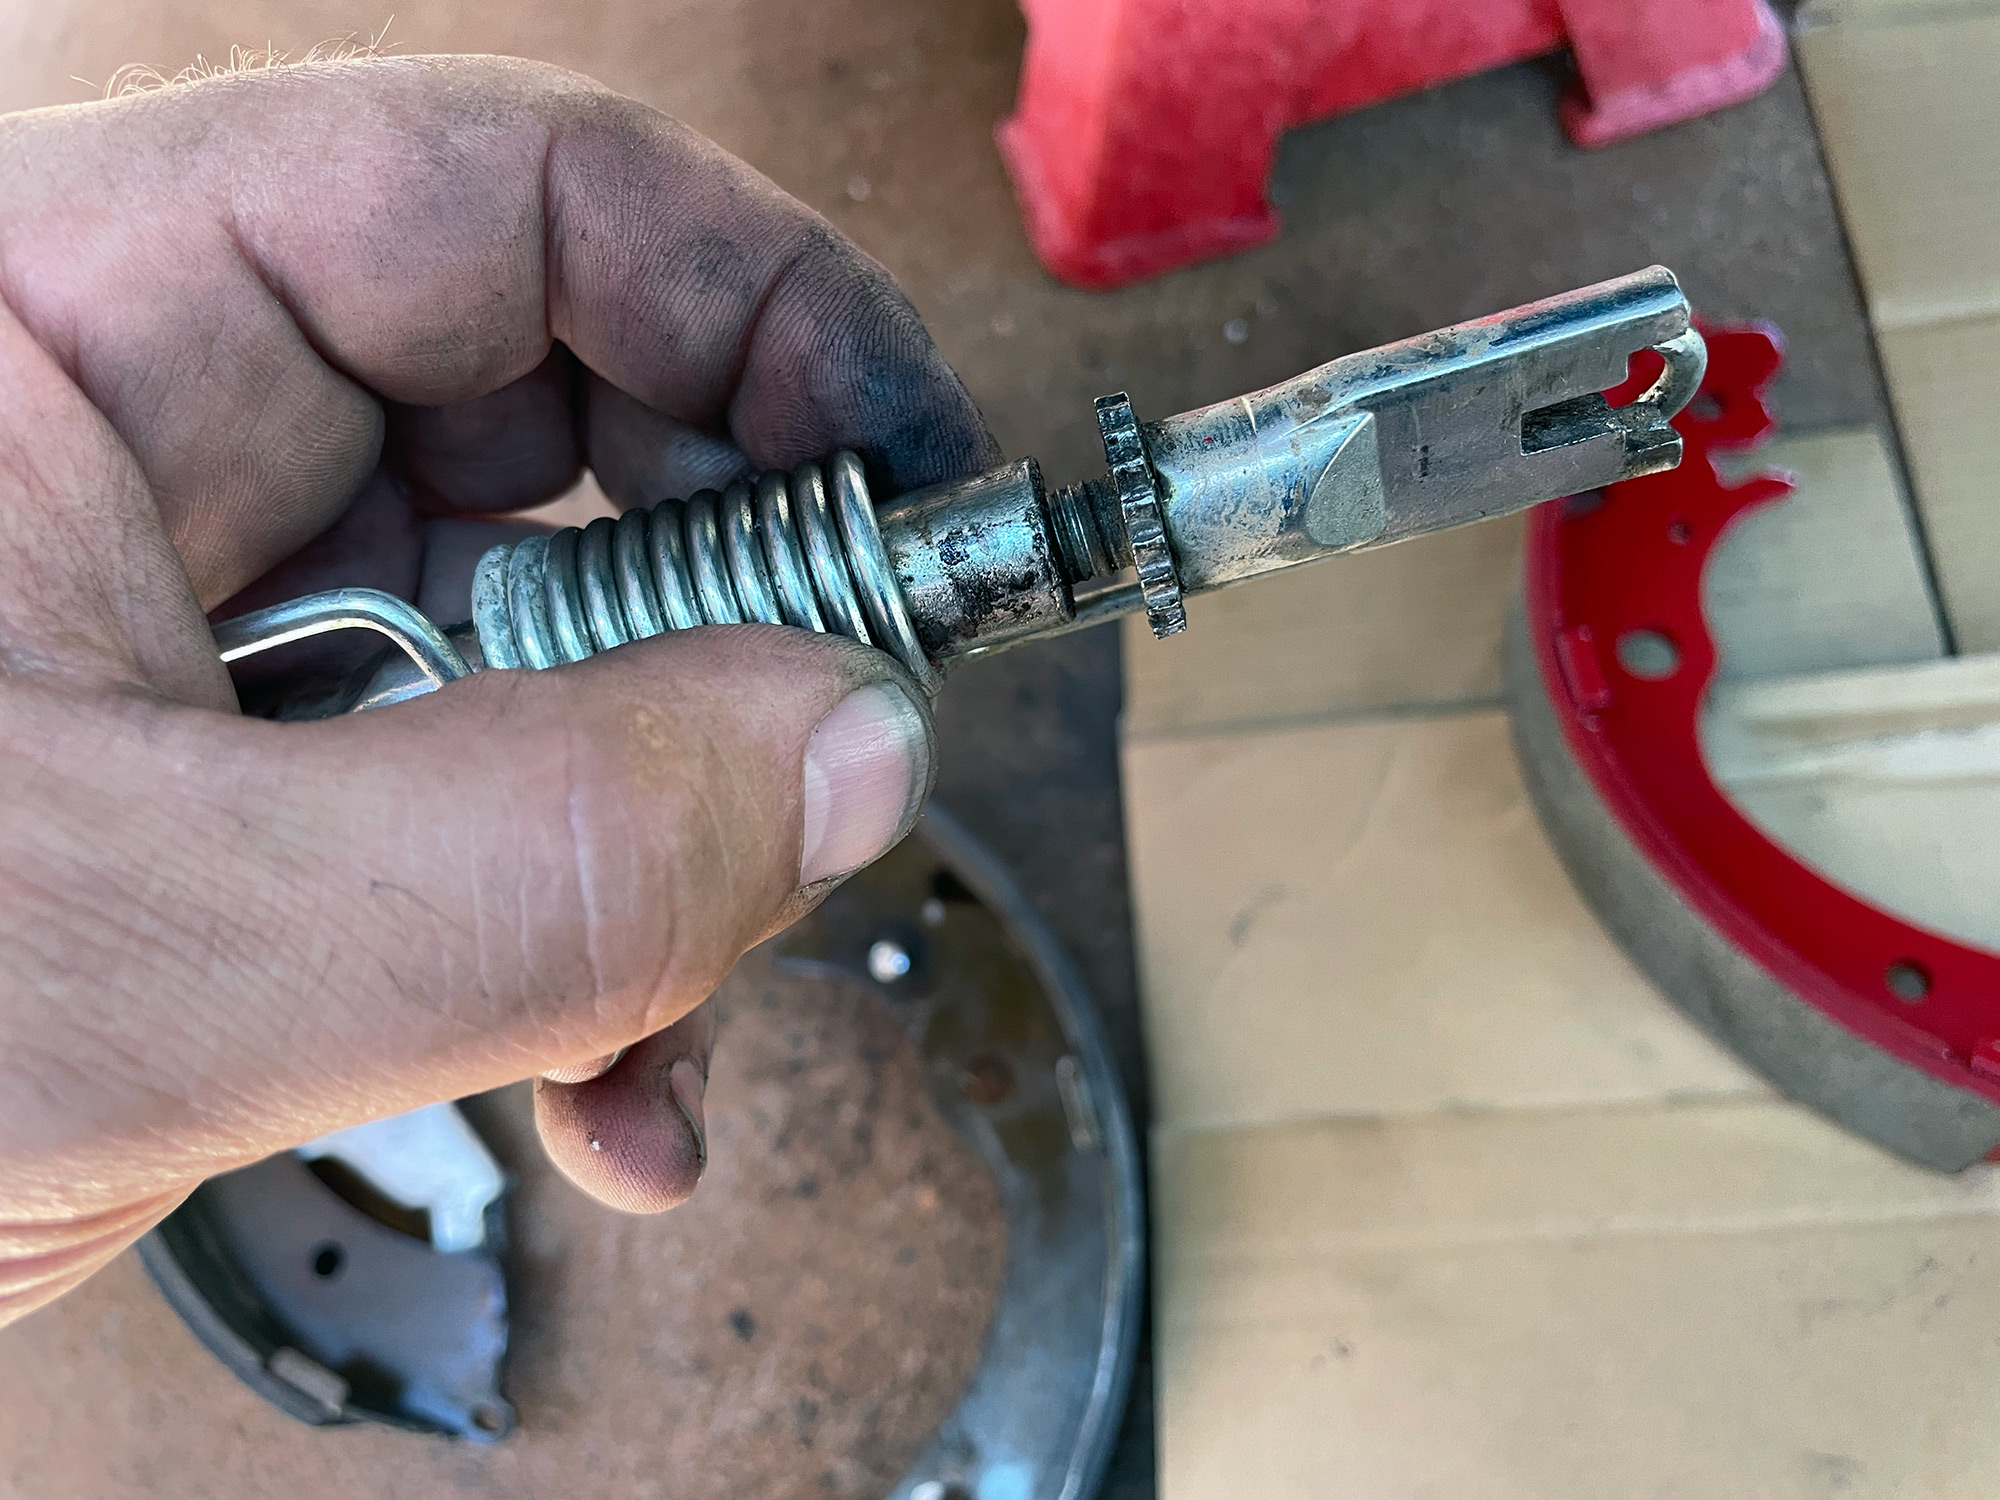
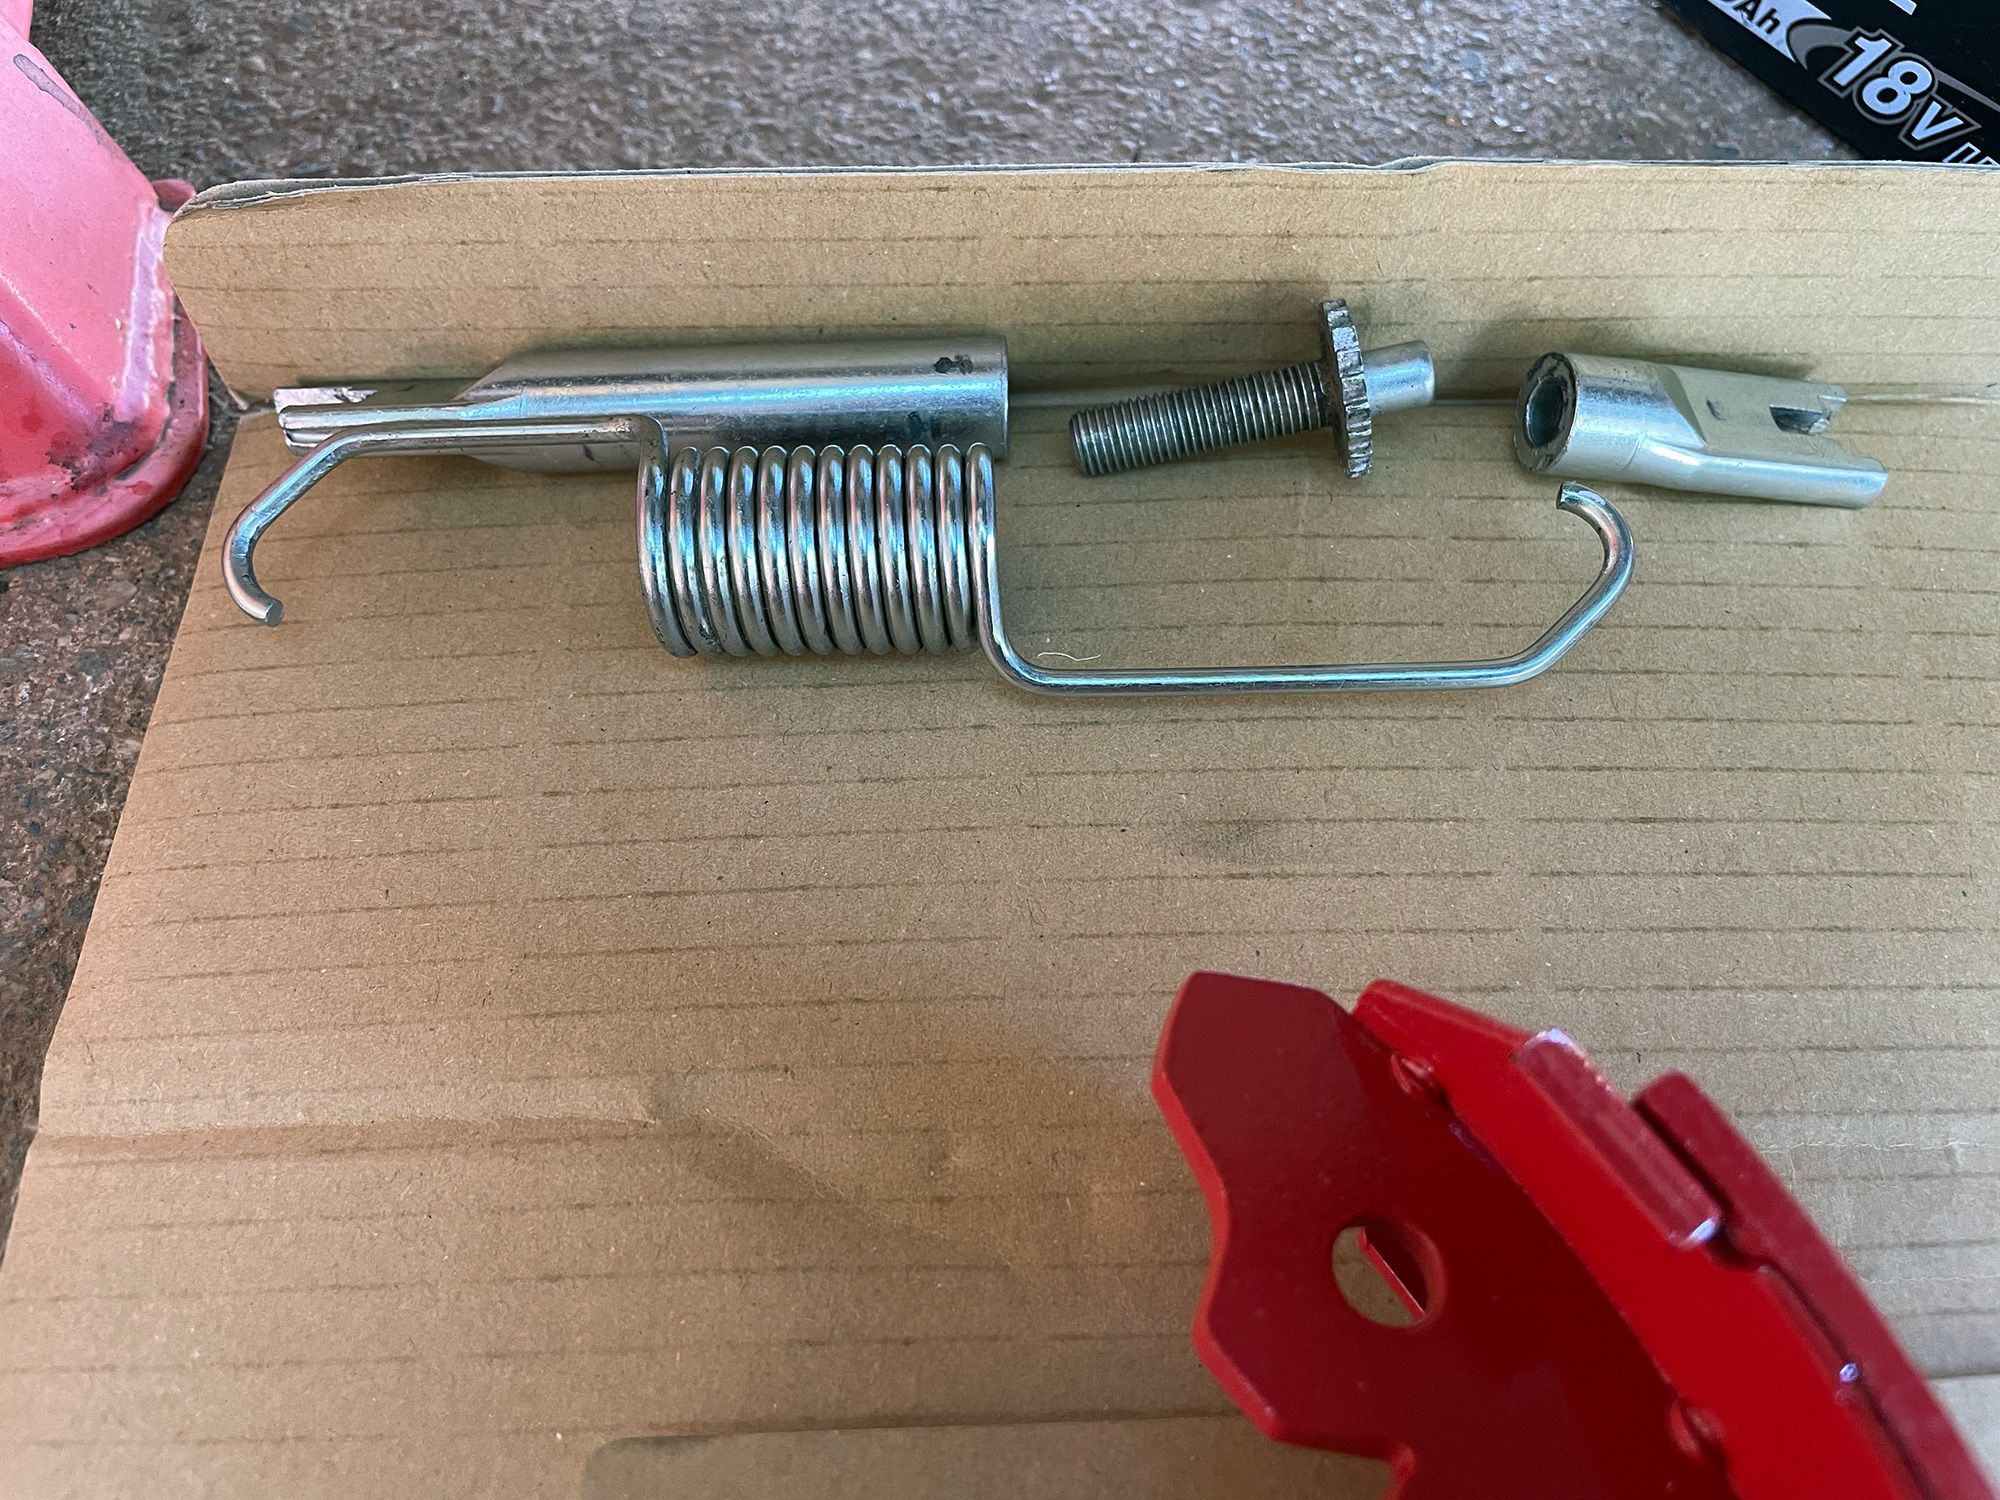
Next up you need to remove the adjuster tension spring. This is towards the front of the car on each side.
The adjuster arm can then be removed. Kinda just wriggles out, hard to explain.
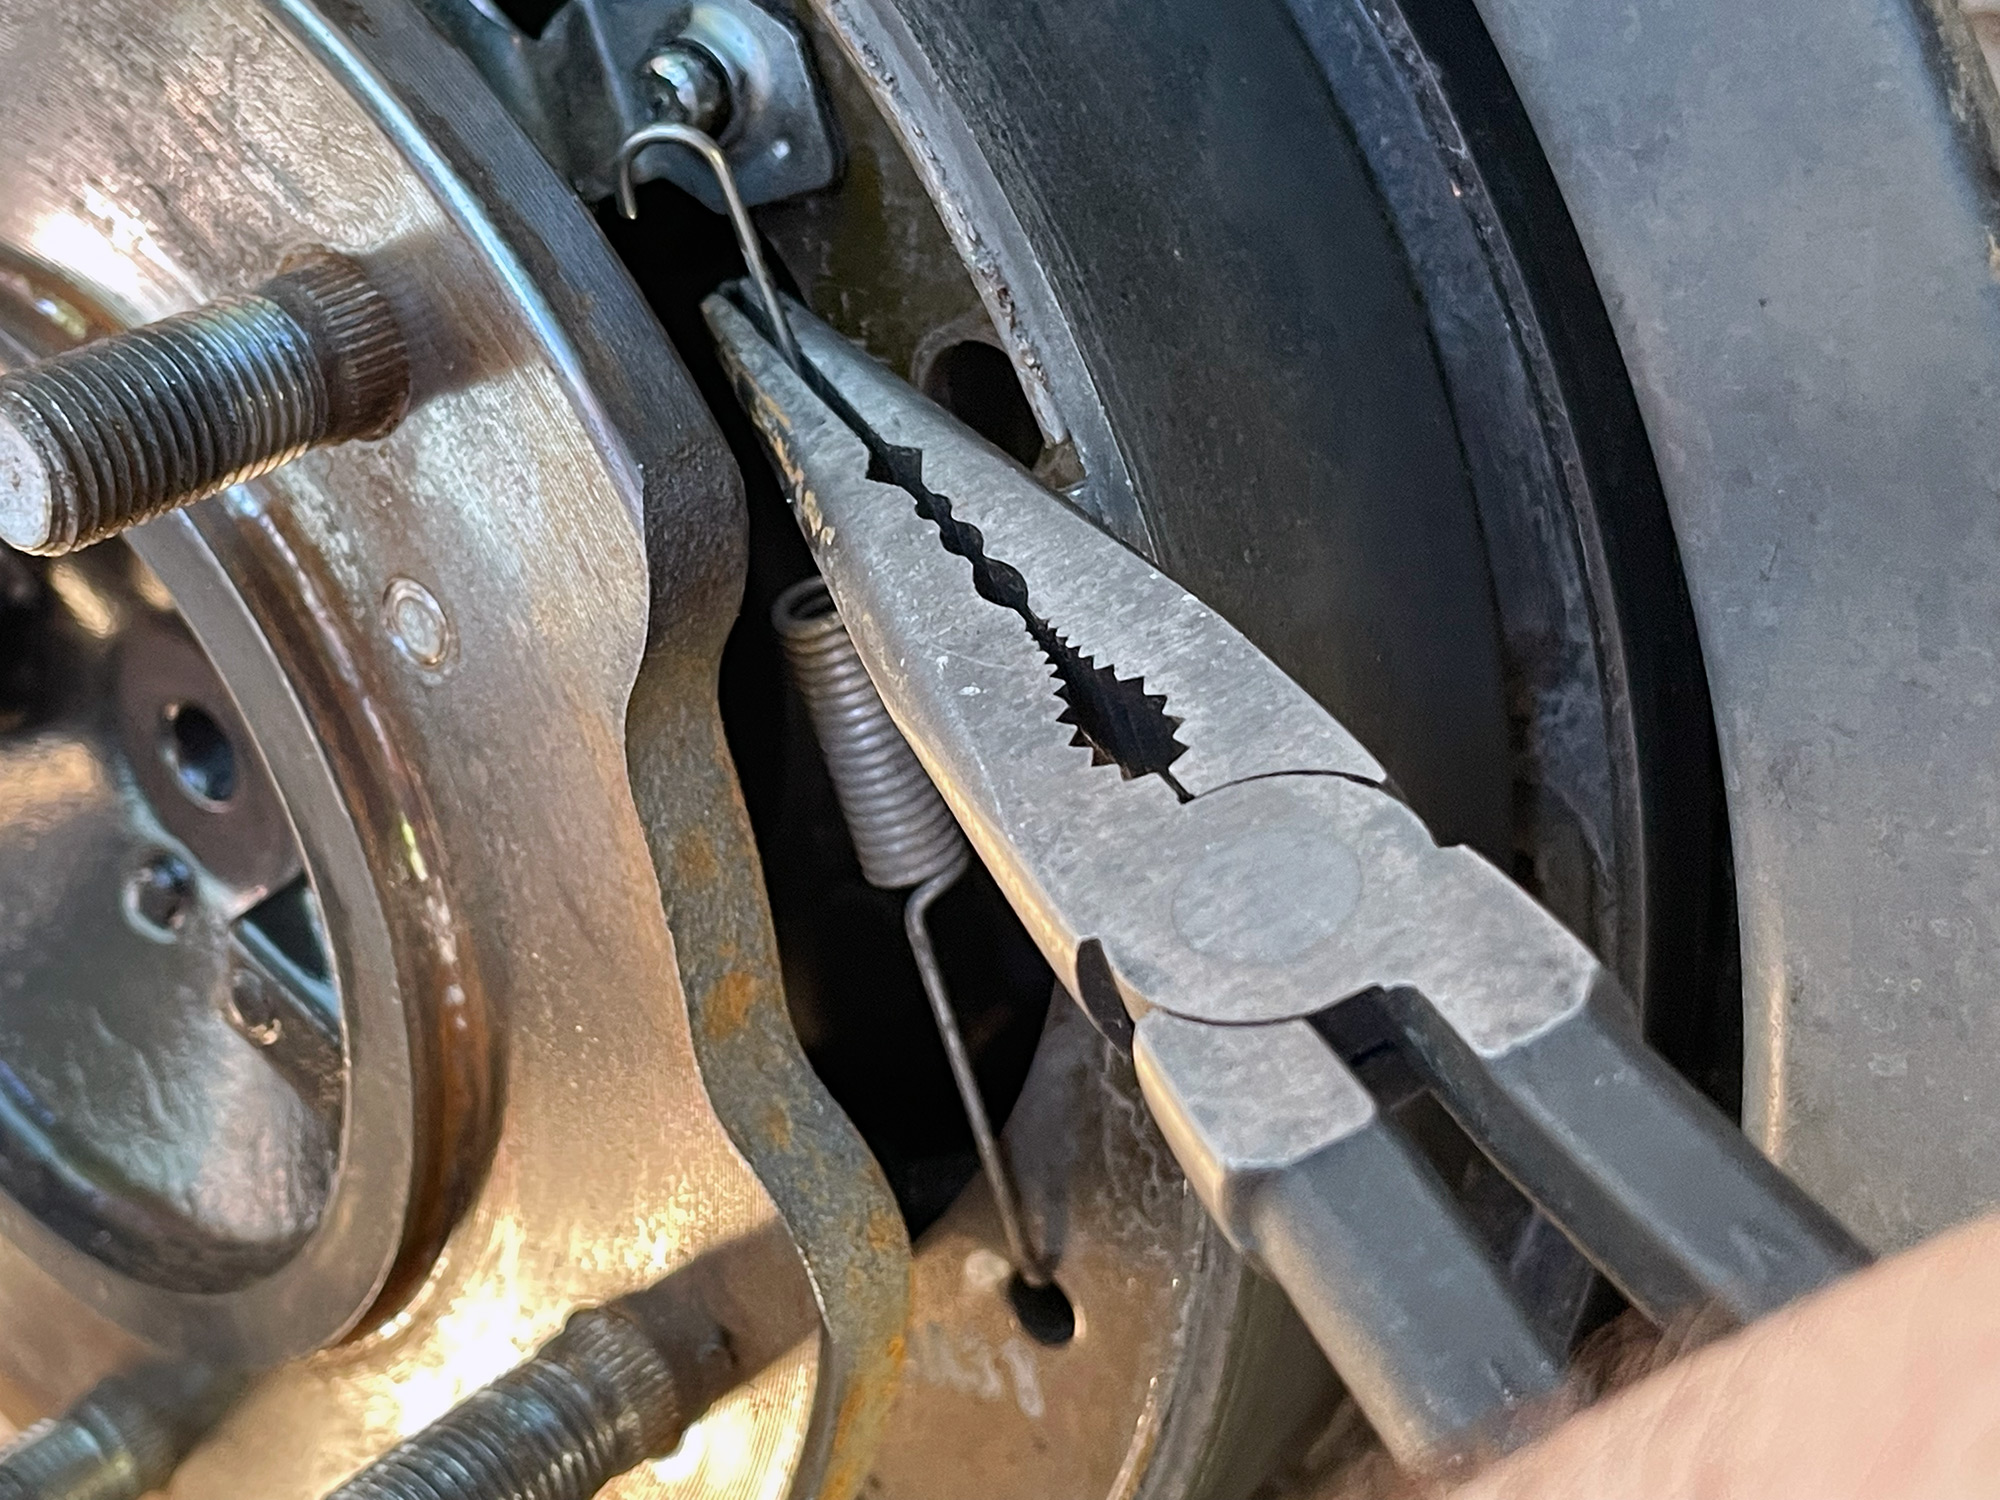
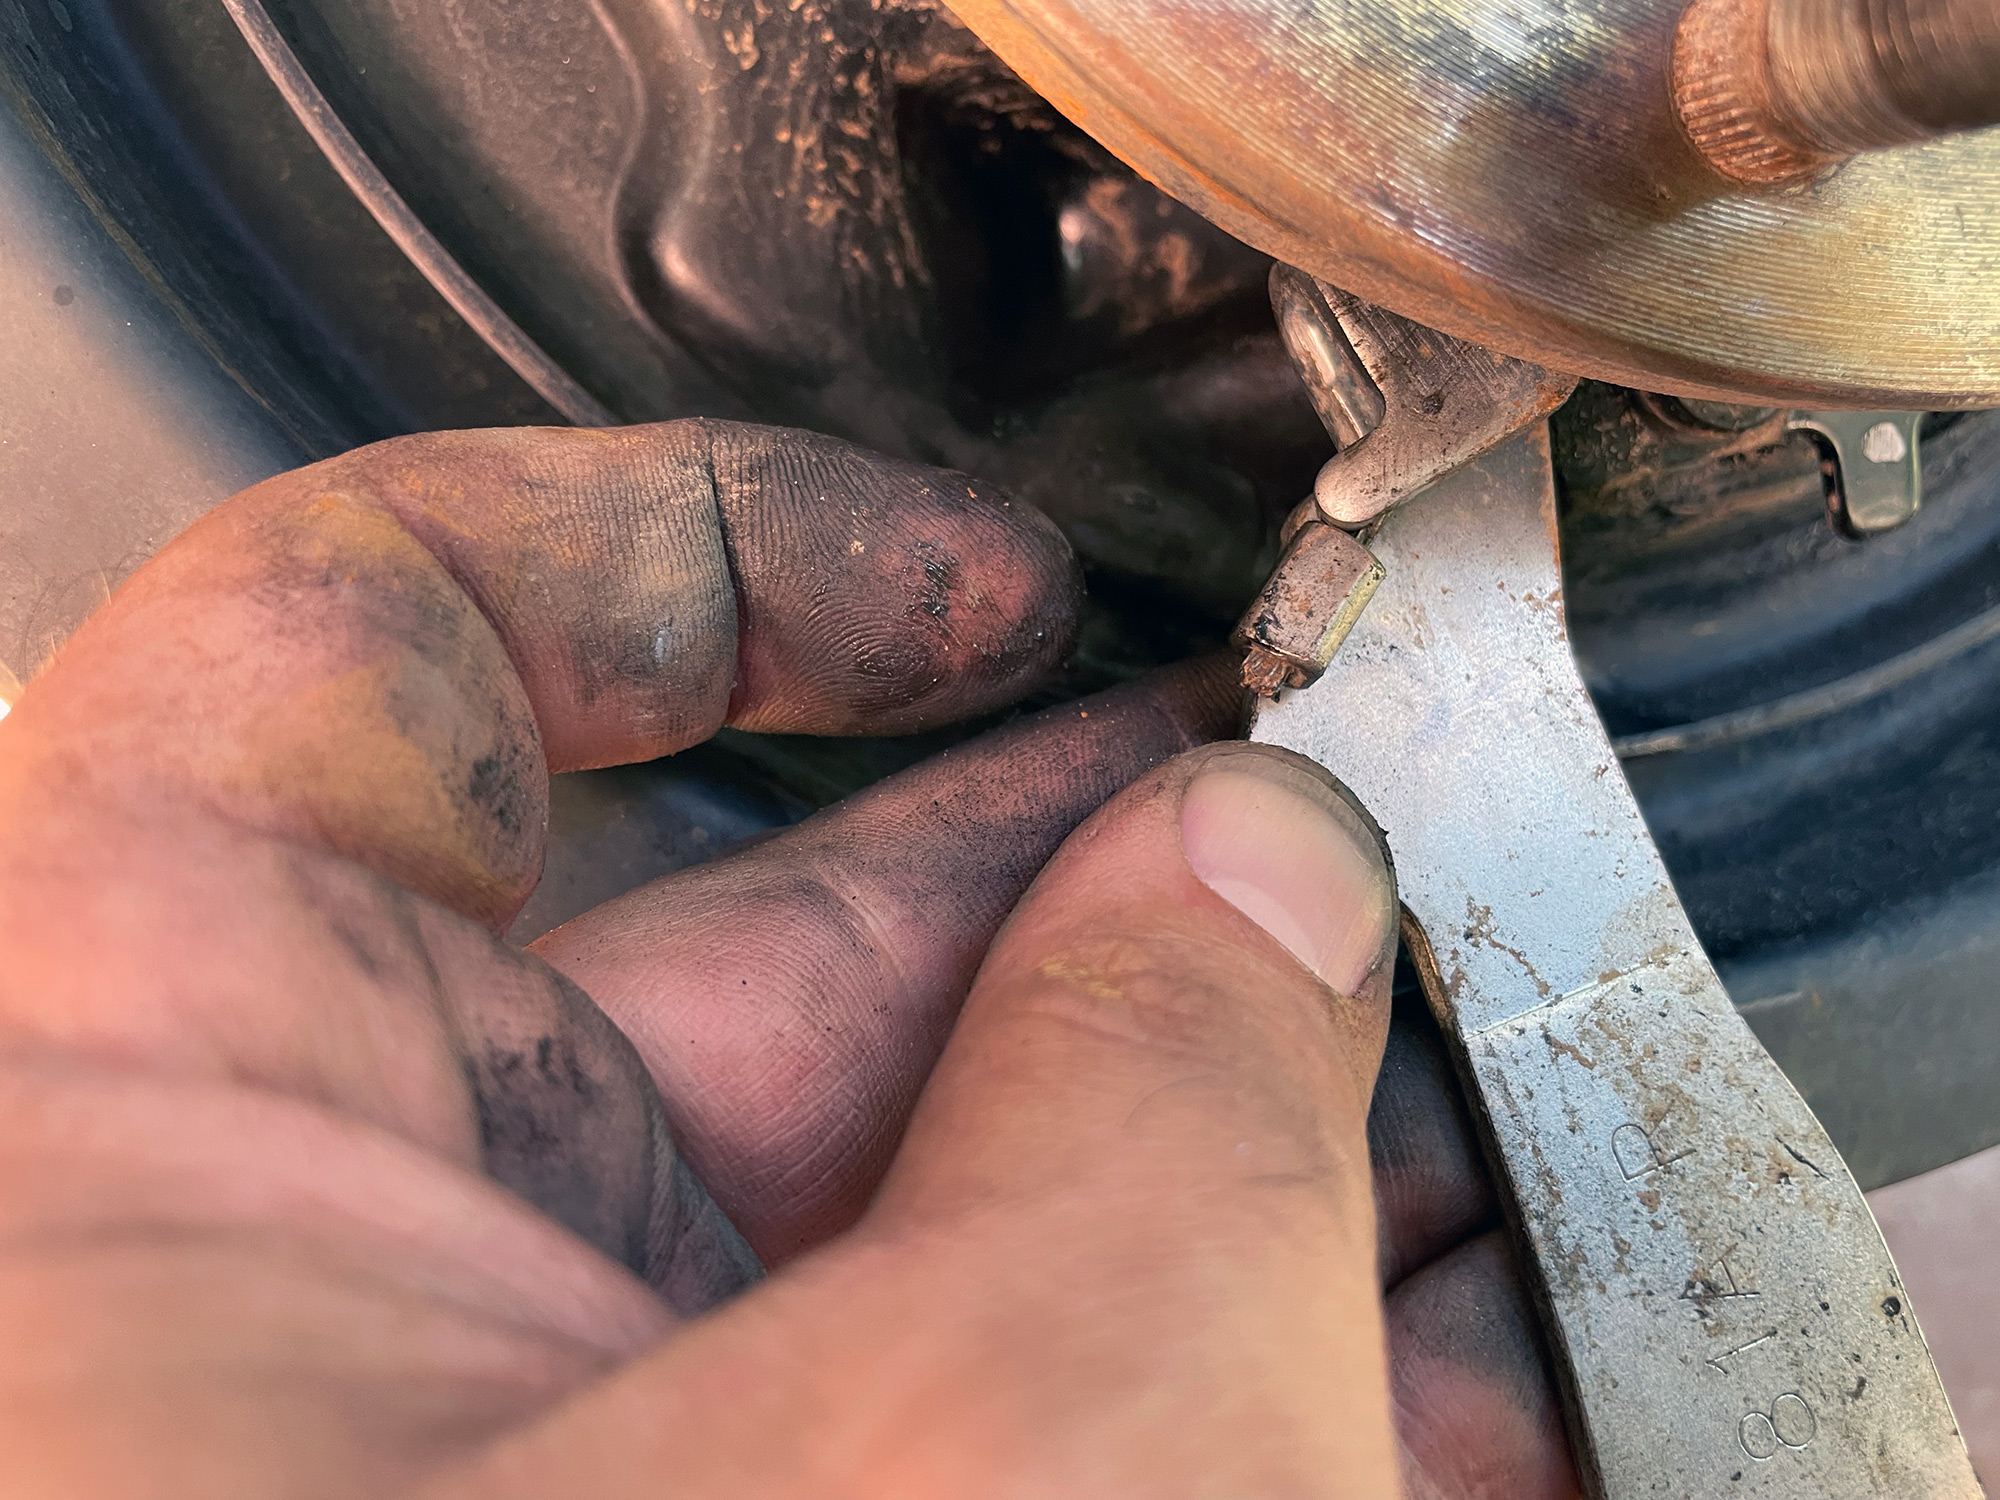
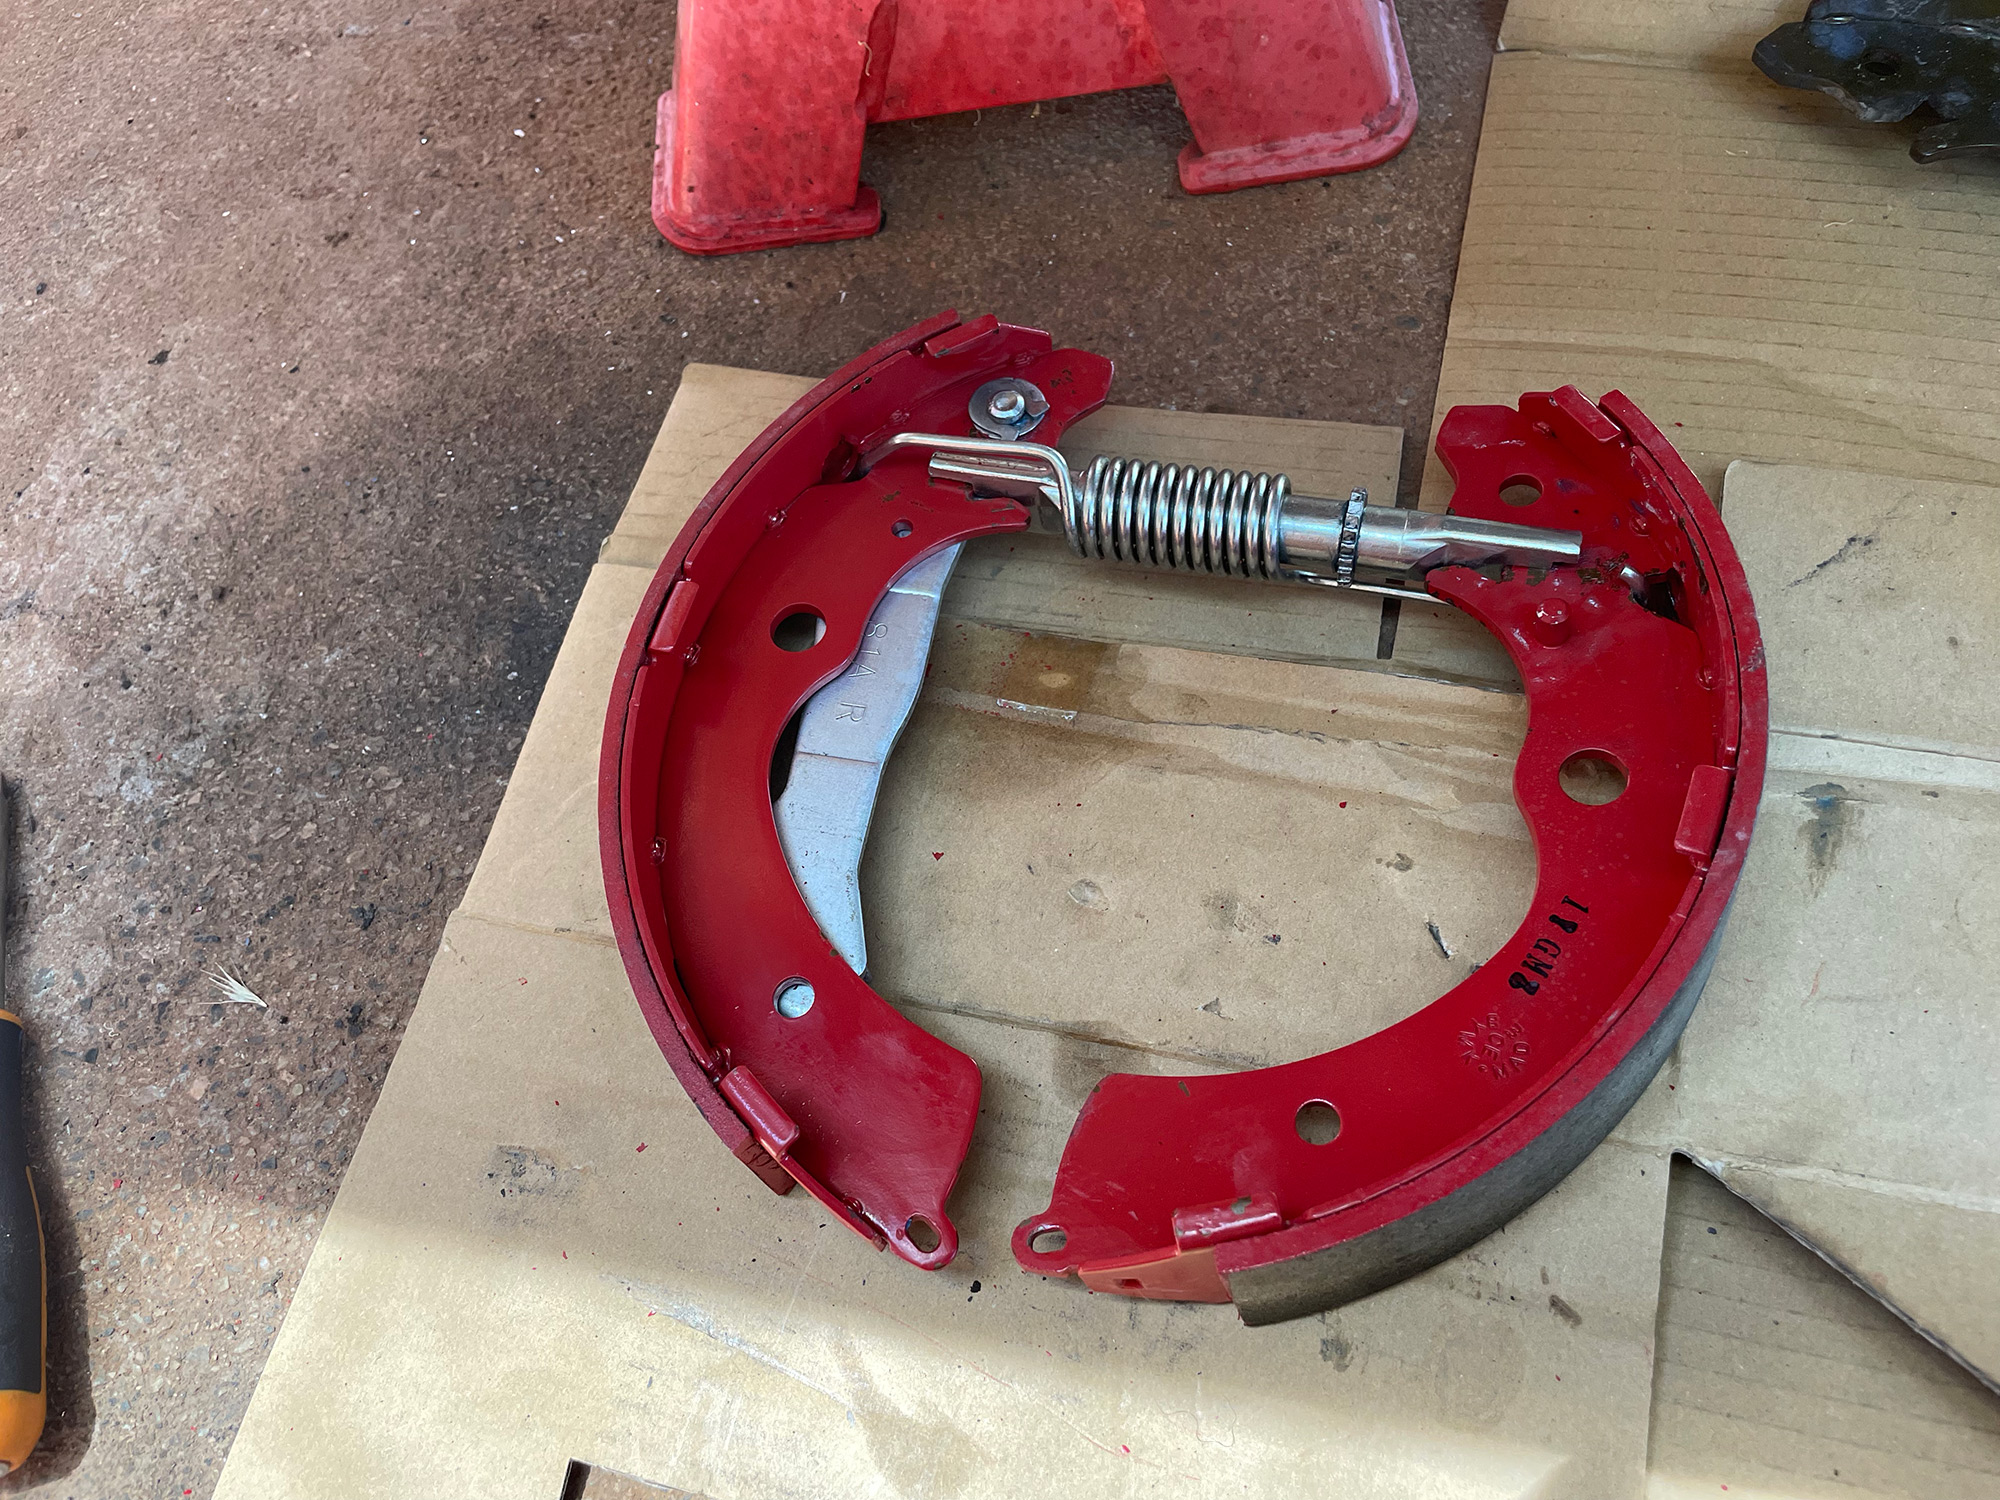
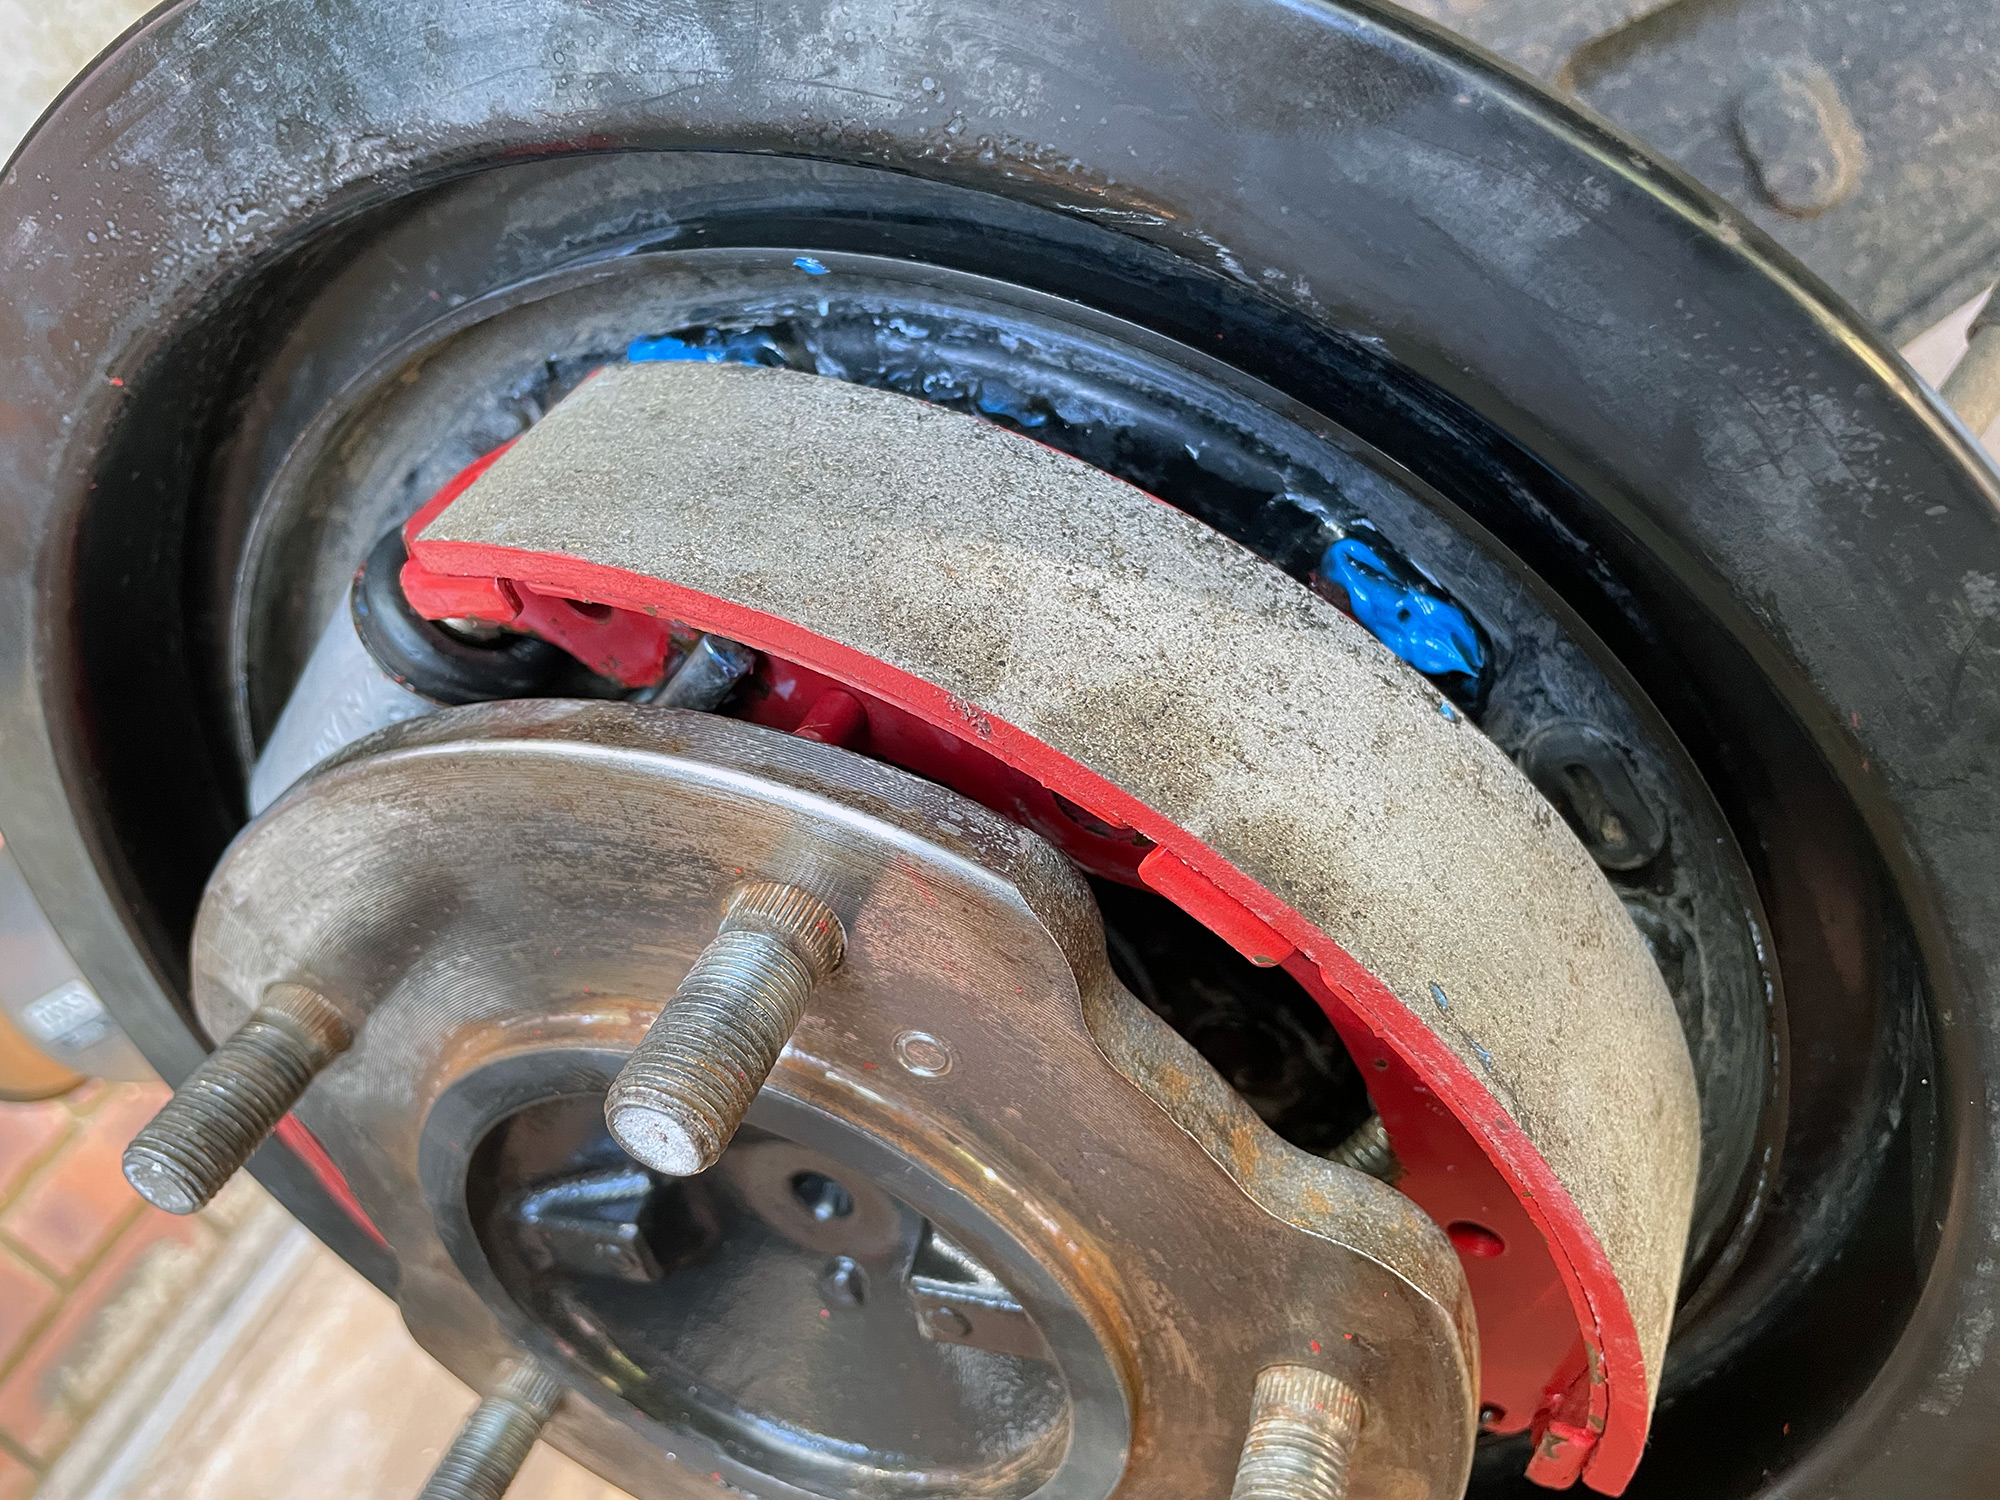
You’re now left with two springs: an upper and a lower spring pulling the shoes together. There is a lower one, don’t worry about undoing this as it’s easier when you release the upper to just flick this one up.
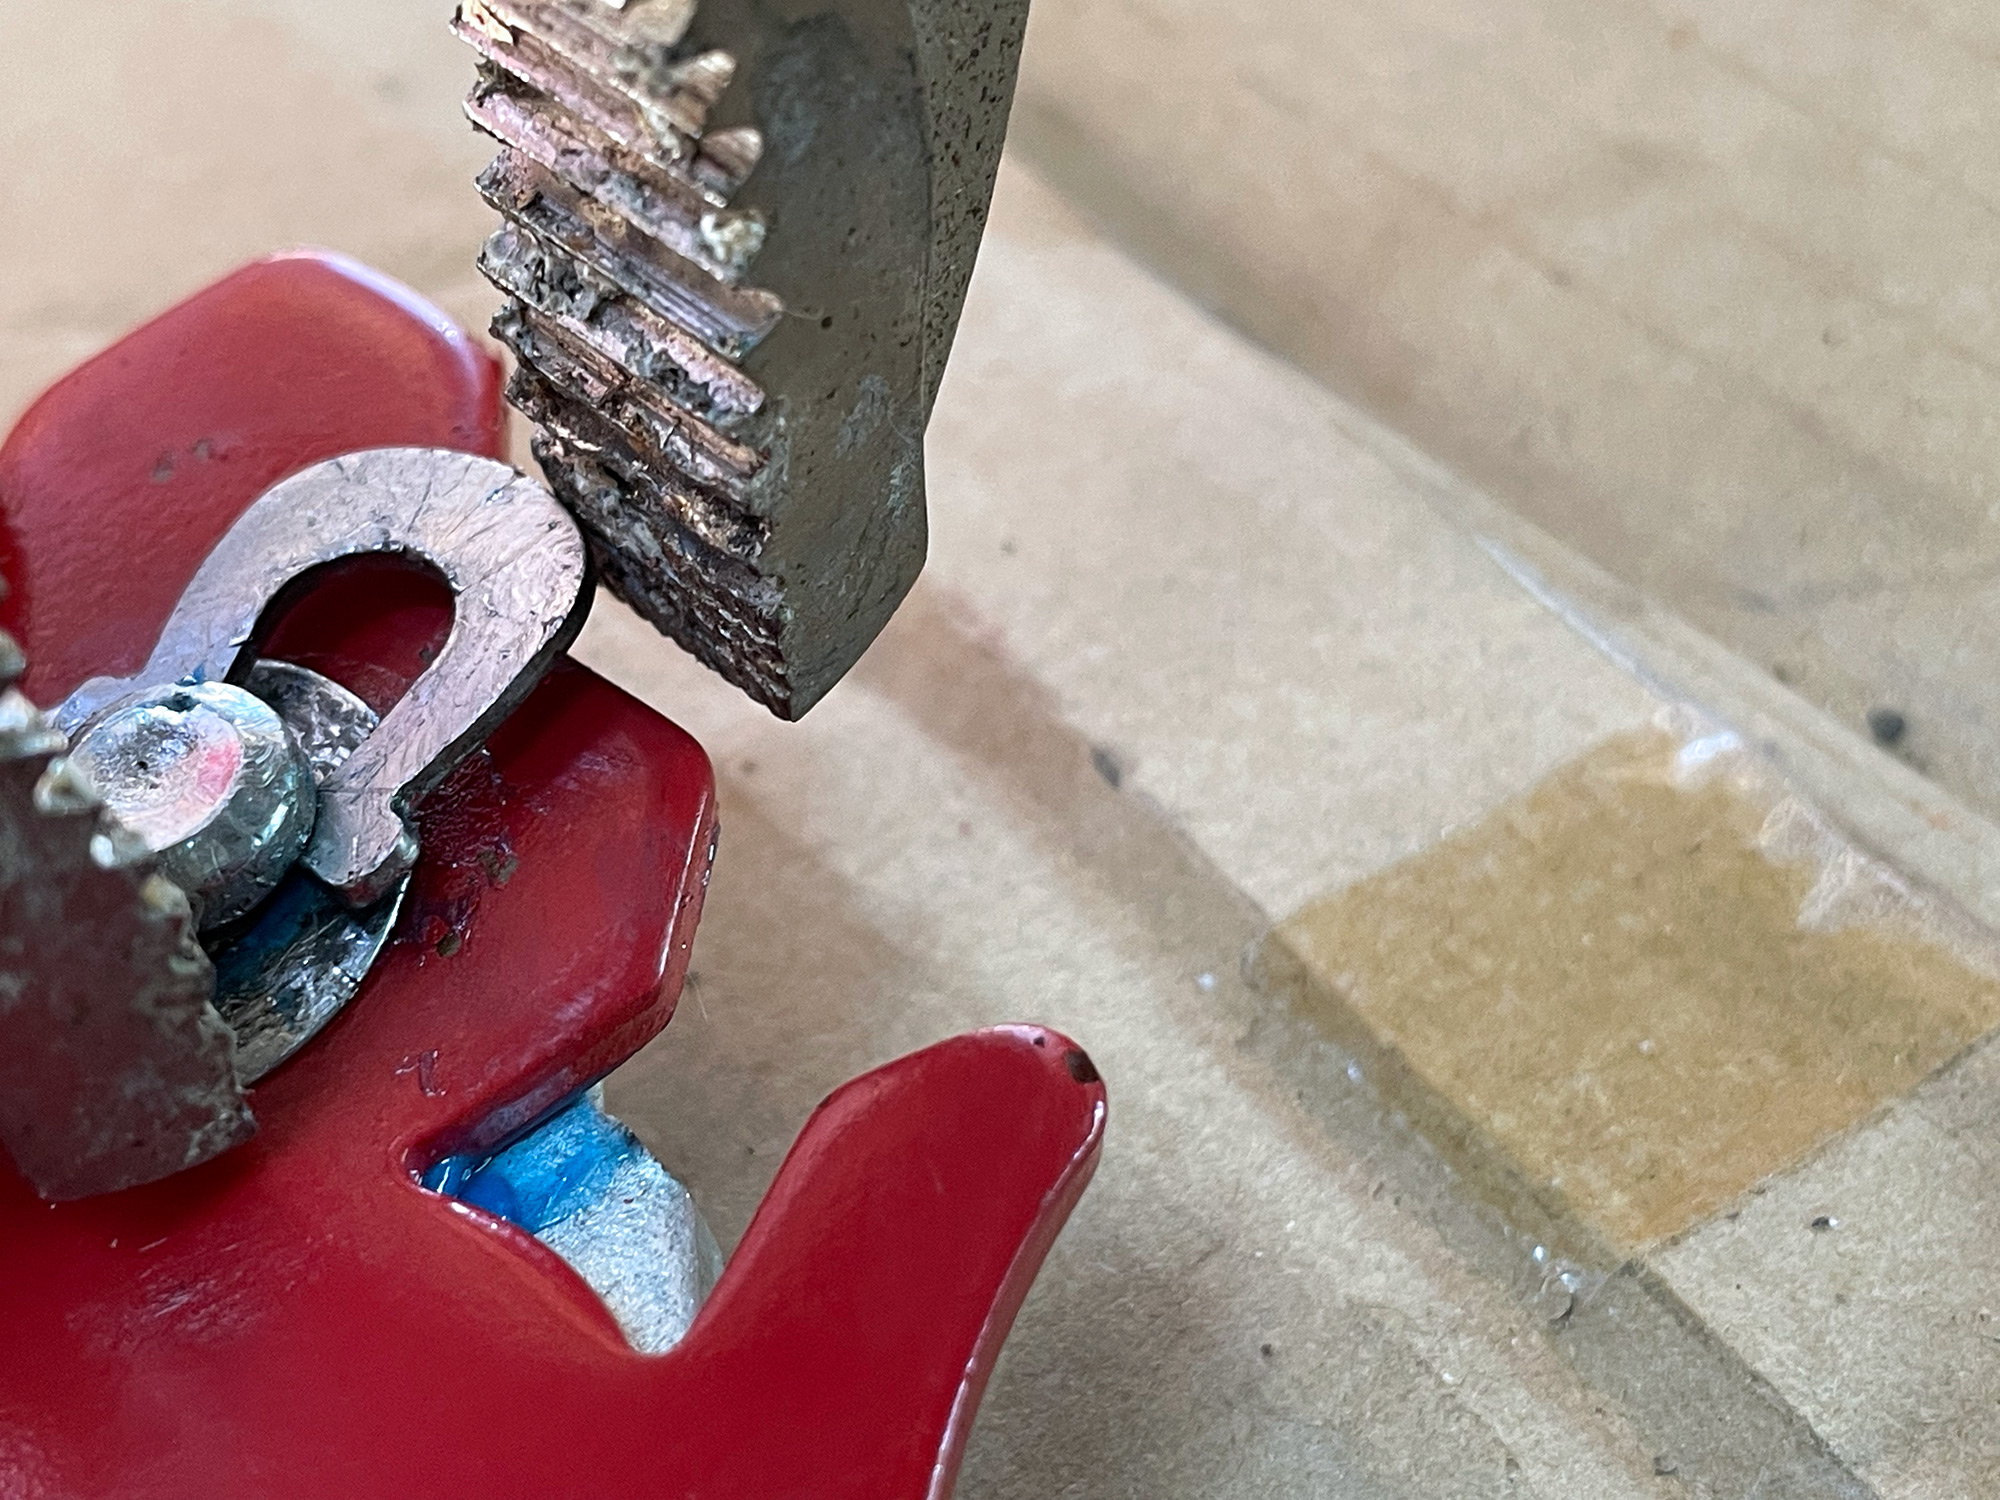
I couldn’t photograph releasing the upper spring that is around the adjuster mechanism. It comes in from the front on the rear shoe; I just pushed it and pulled at it with a set of long needle nose pliers and it released. Be careful here: it can be easy to push the shoes into the wheel cylinder and pop one piston out. If this happens you are committed to bleeding the brakes as part of this job. This next photo is trying to illustrate the upper spring over the adjuster being released.
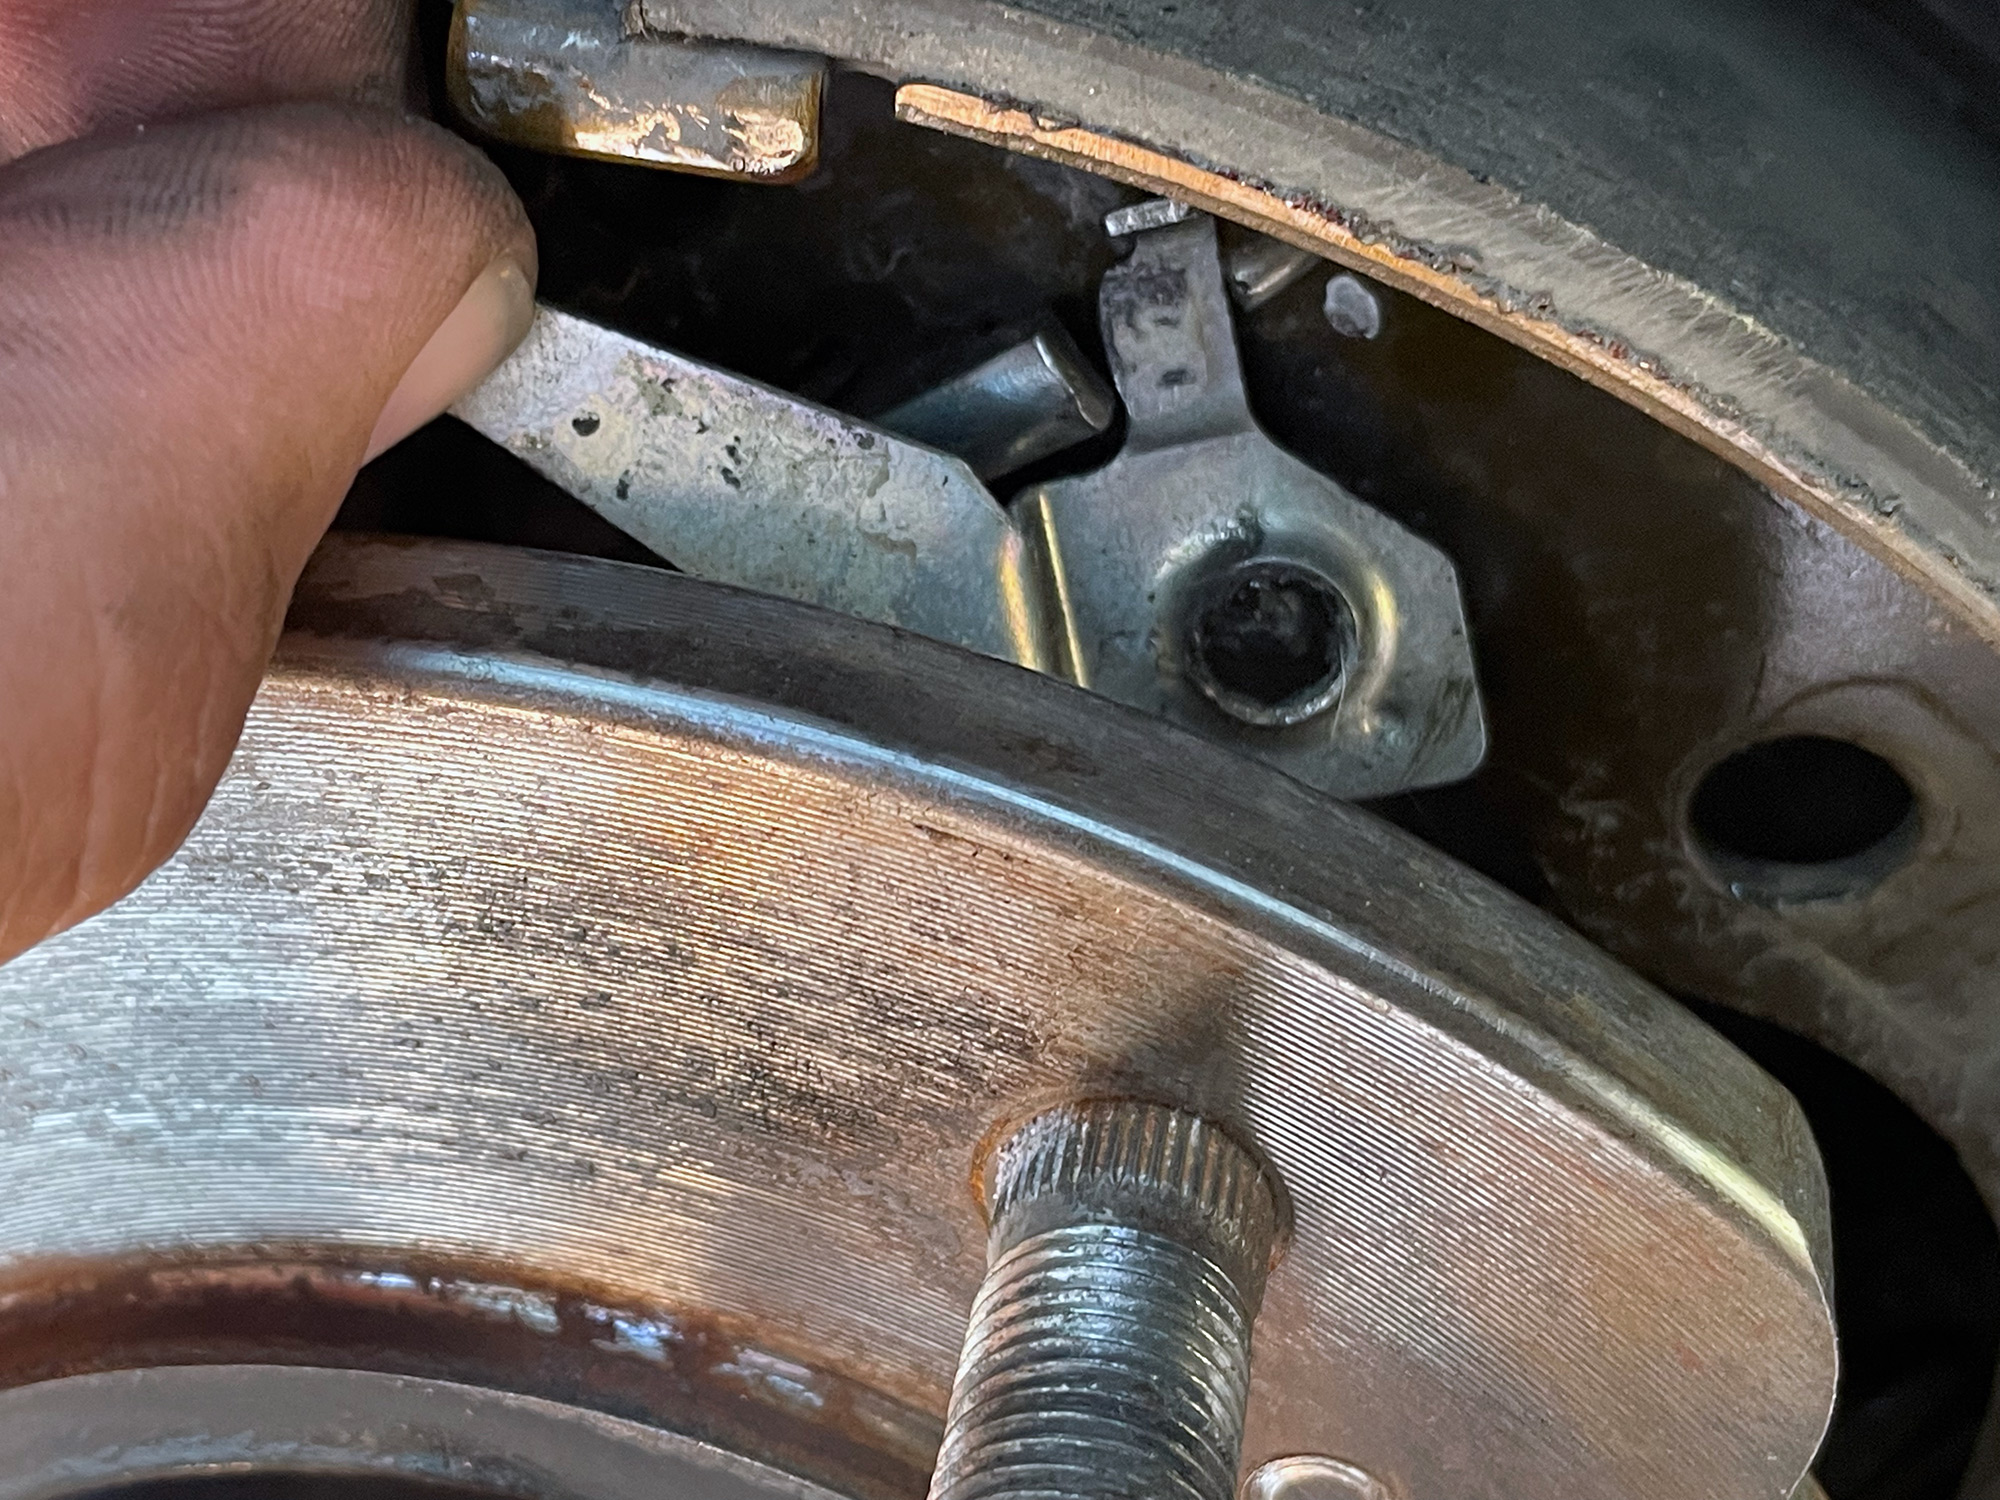
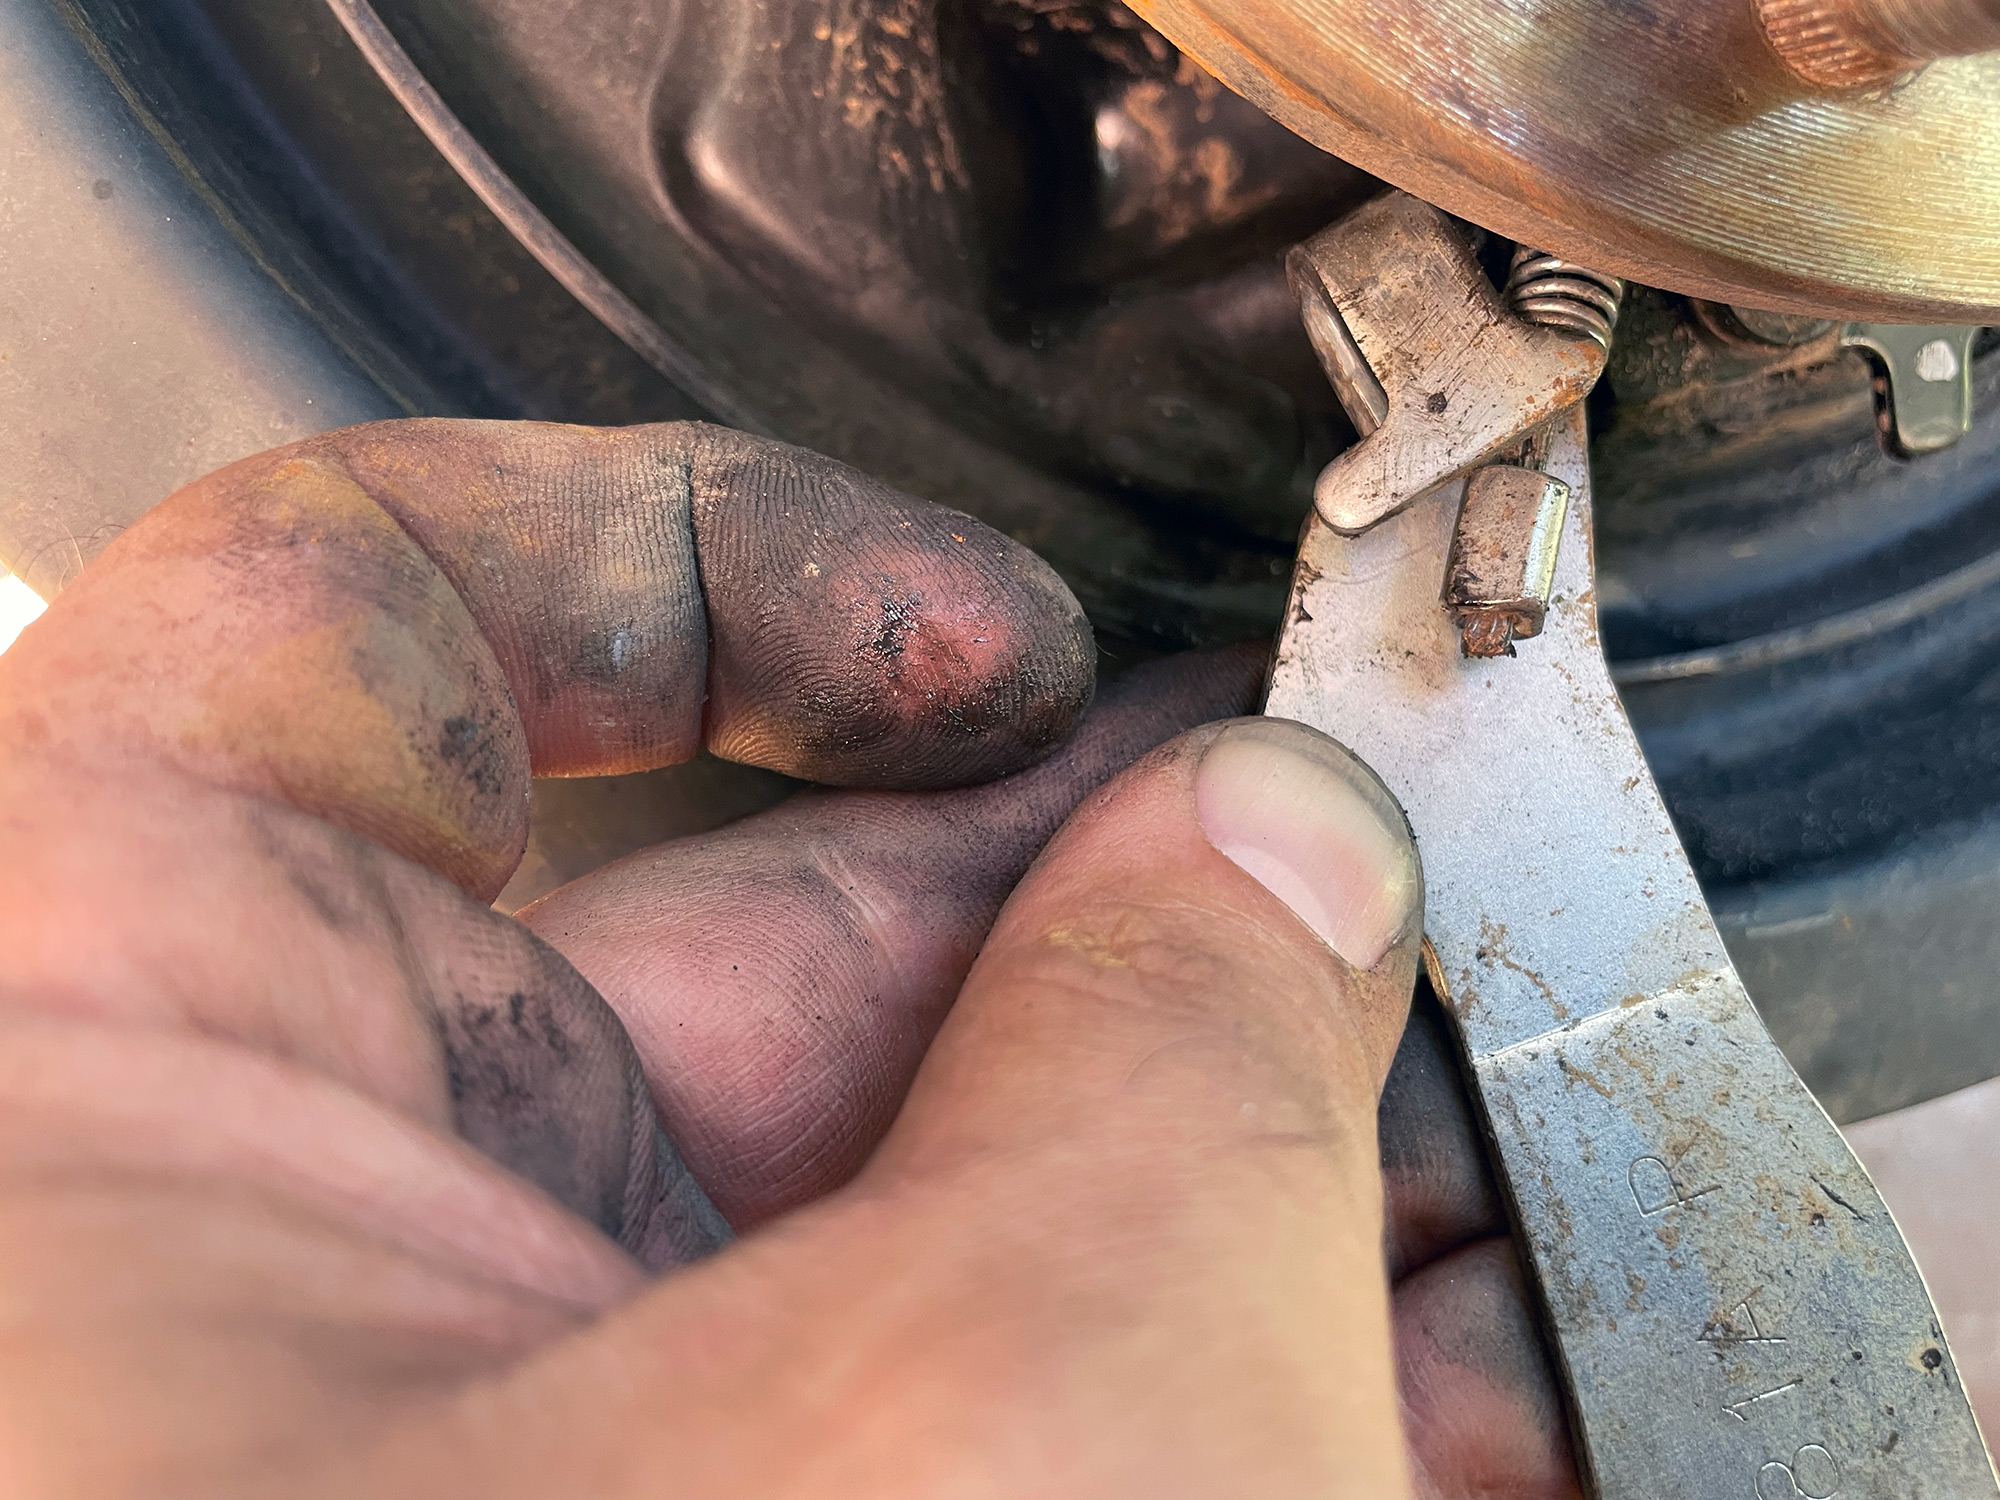
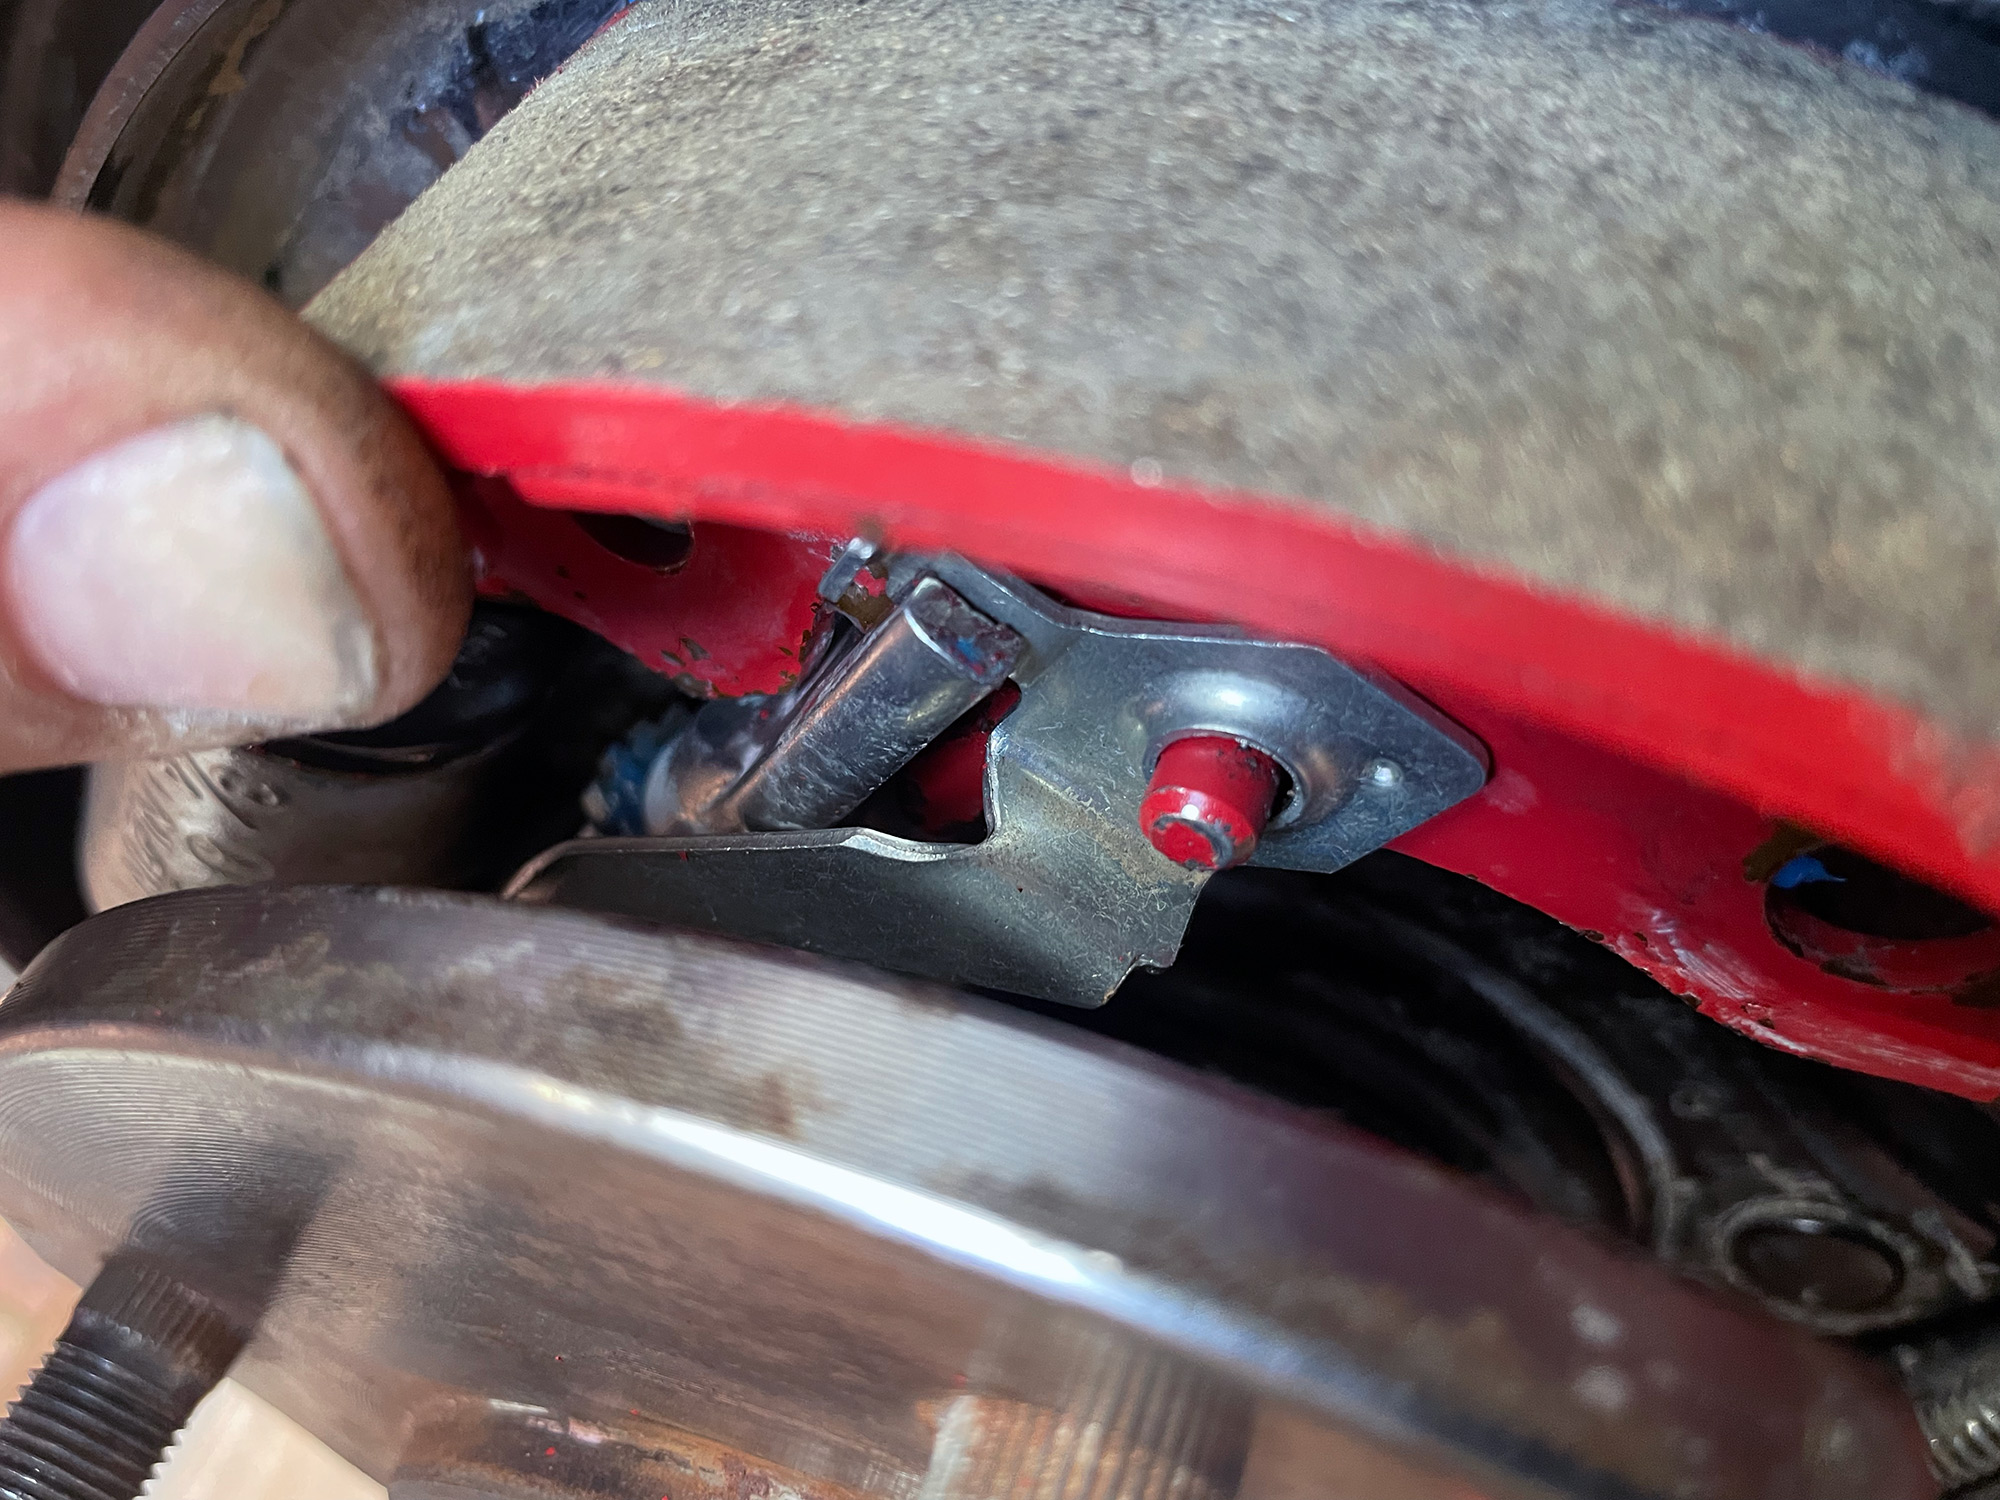
Next up the handbrake cable has to be released from the arm on the rearmost shoe.
If you push back on the spring on the handbrake cable then you can pull the end of the handbrake cable up…
… and then out of the handbrake actuator arm.
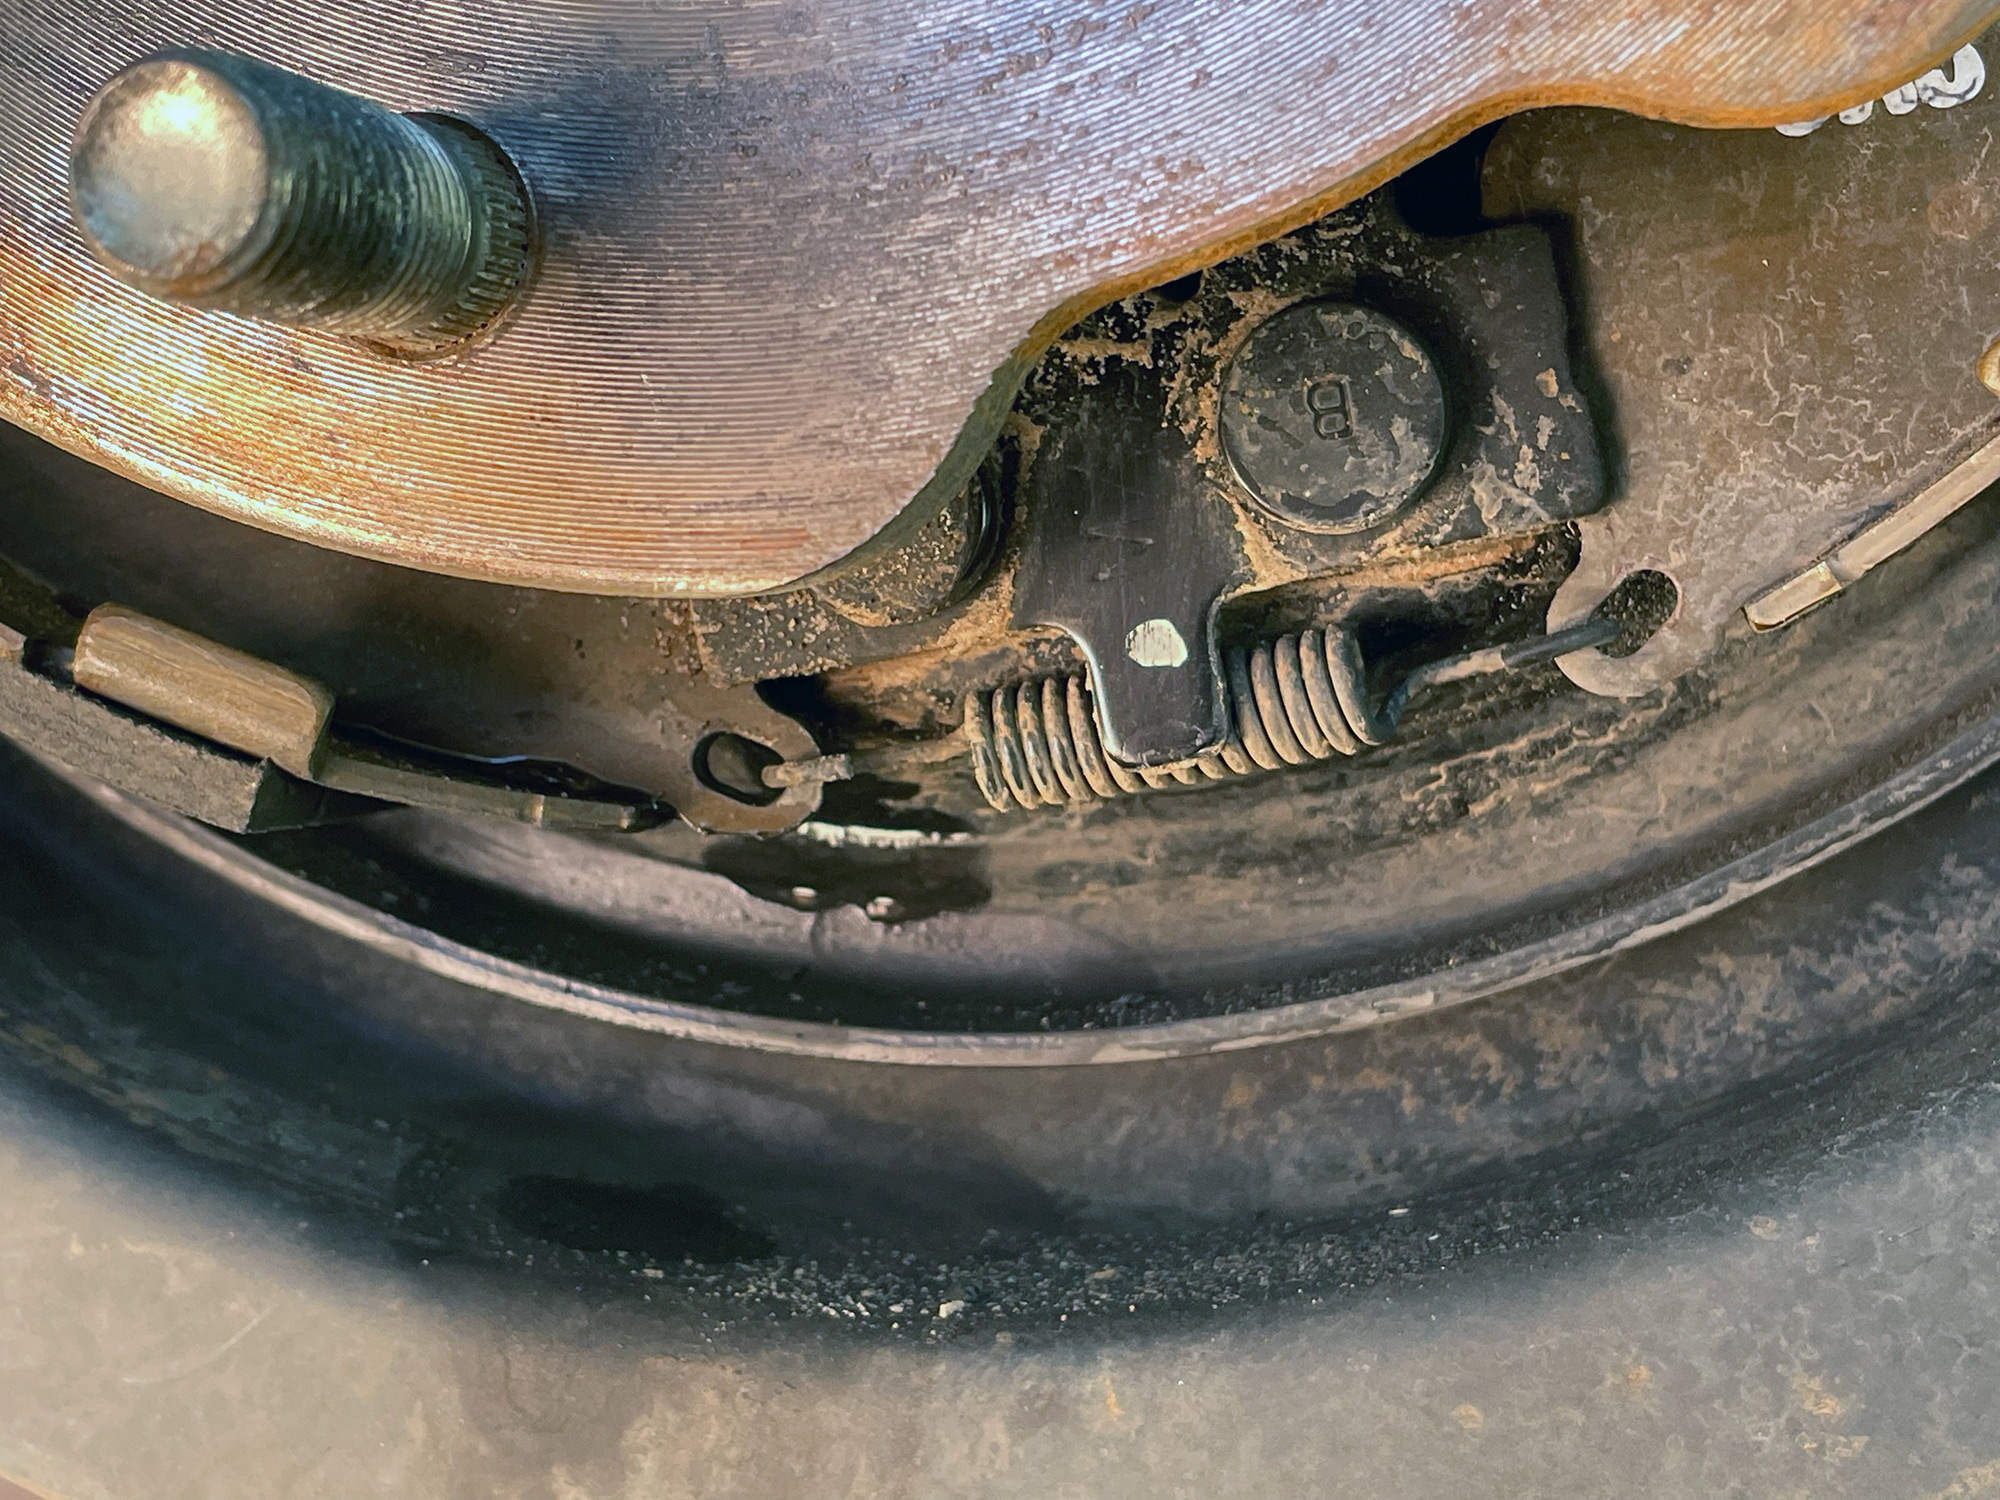
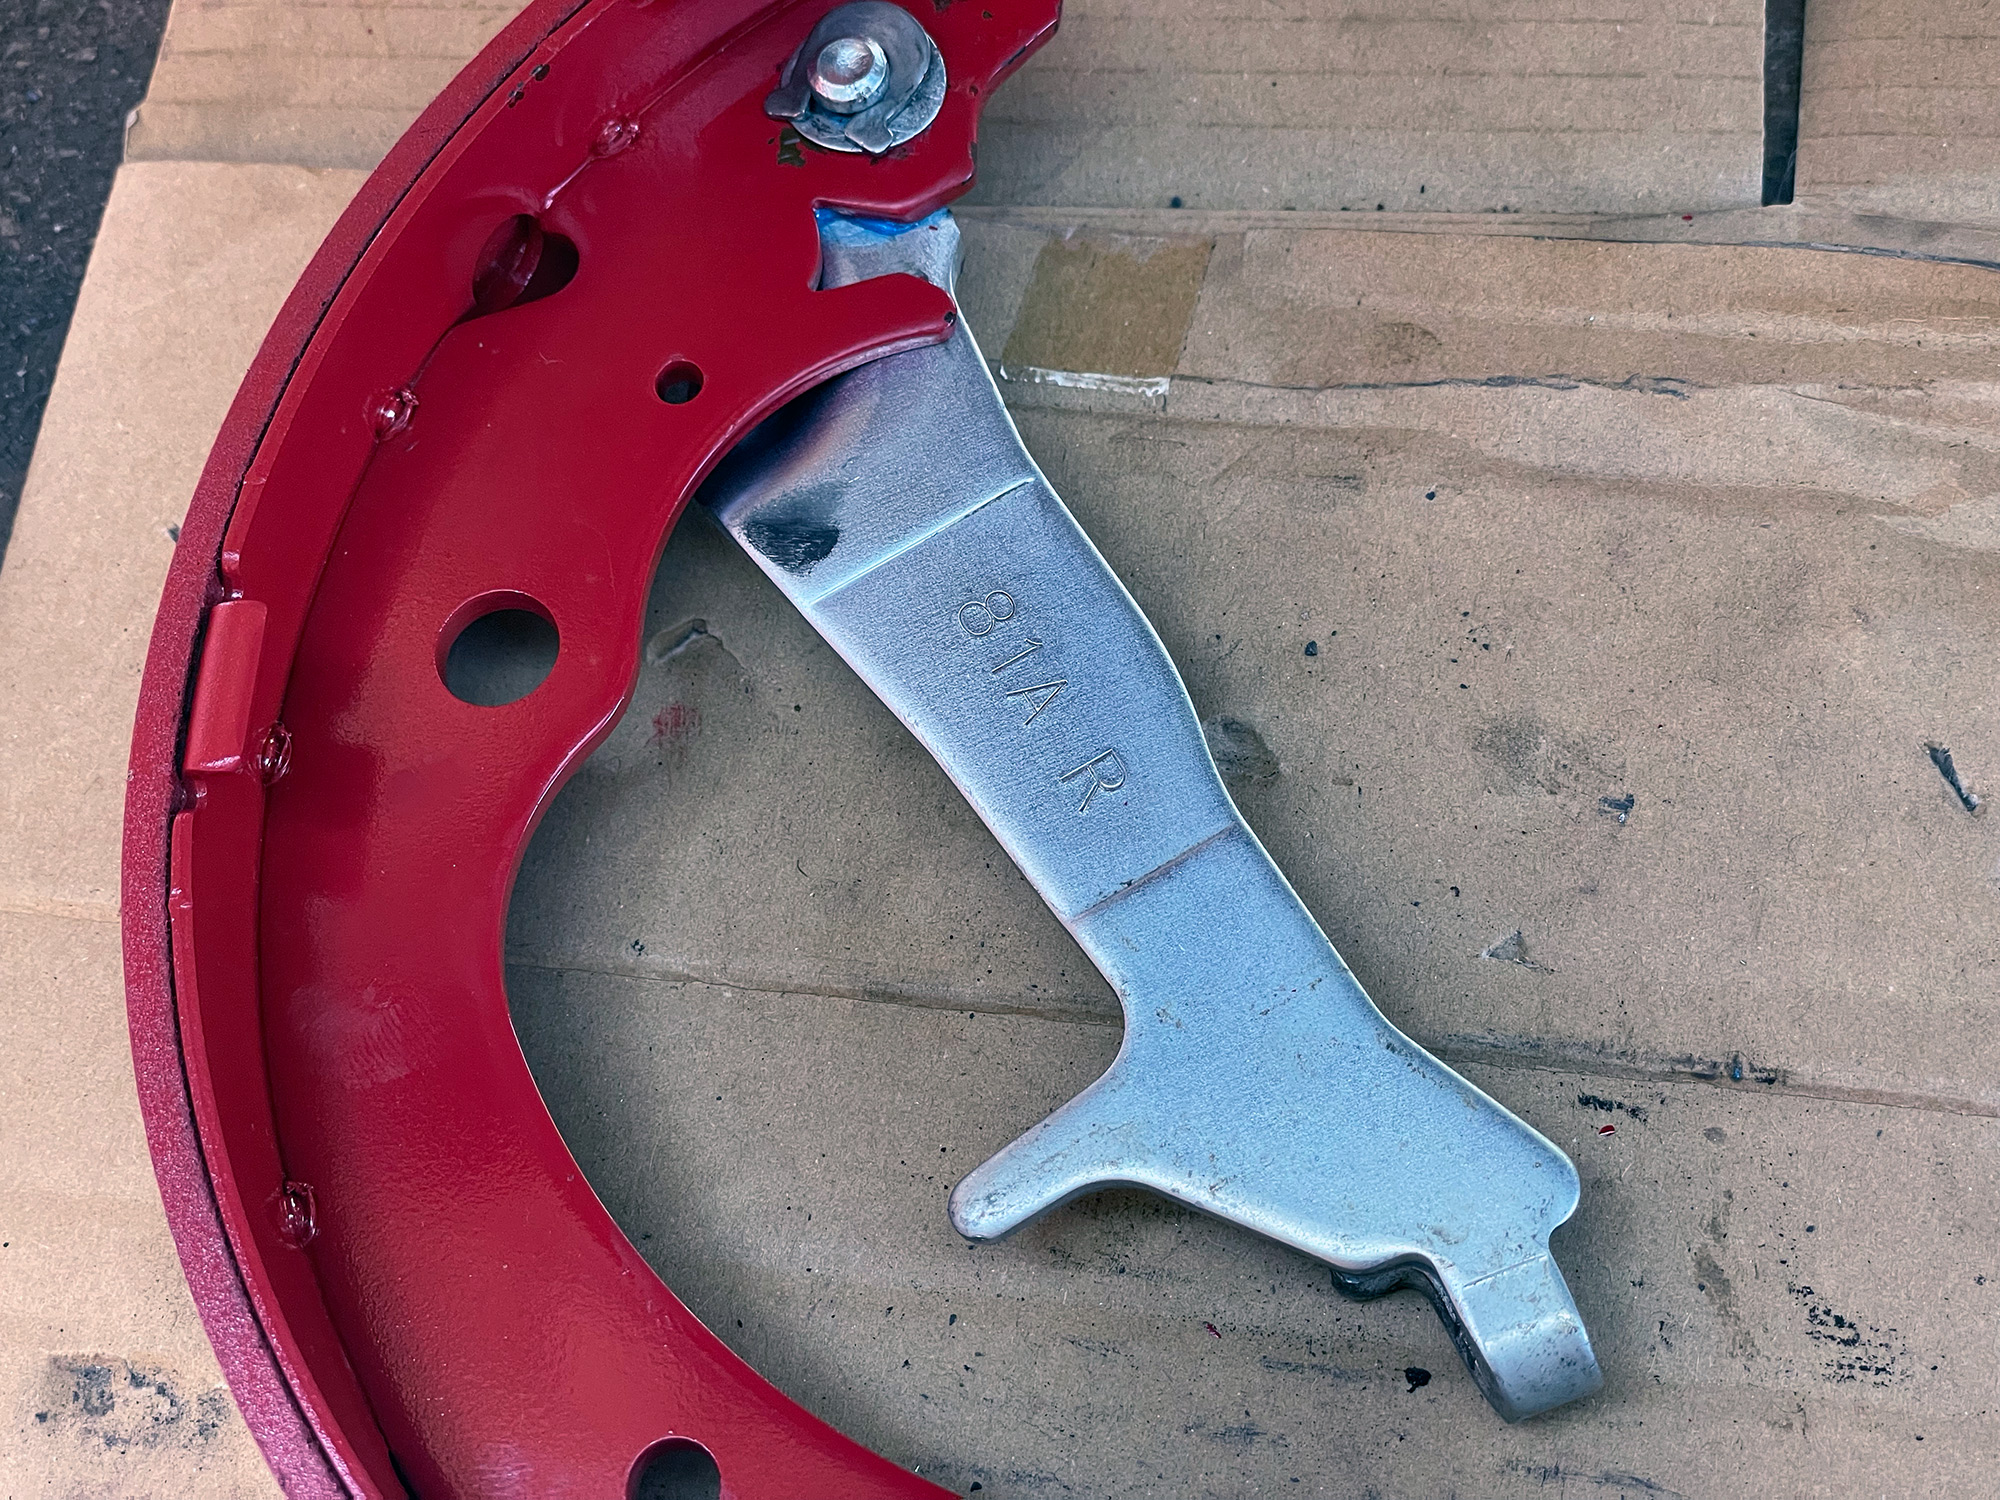
Here’s the adjuster out of the car; you need to clean it up and also screw the adjuster in so it is as short as it can be.
Some brake cleaner and the adjuster cleans up nicely.
We’ll get back to the adjuster soon, first we need to swap over the handbrake actuator to the new shoes.
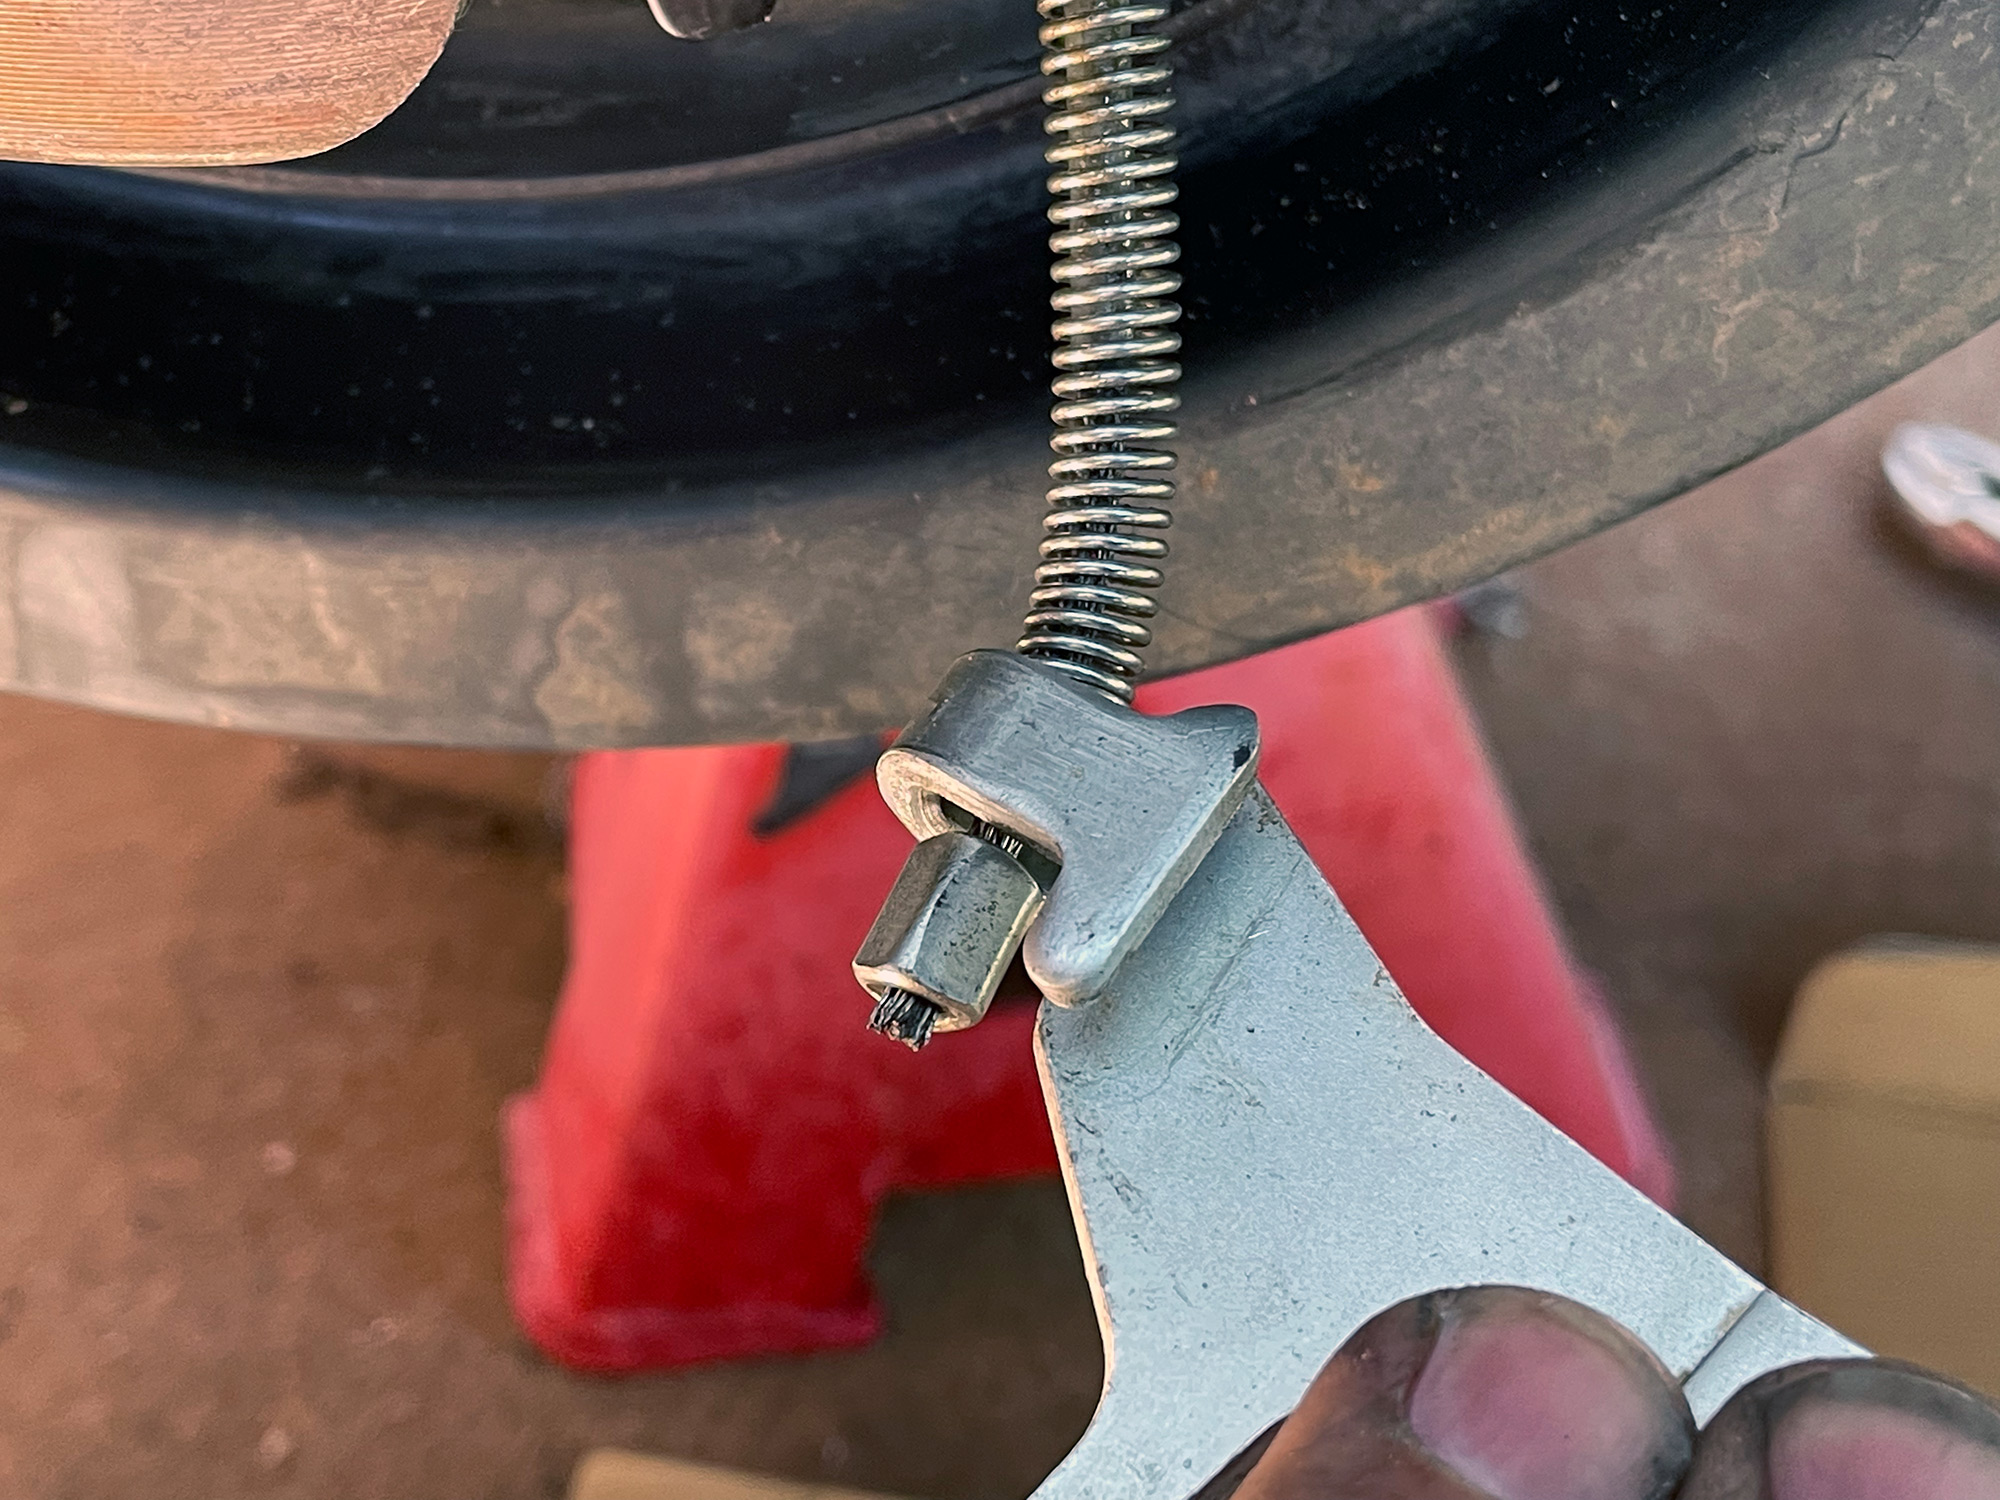
There is a weirdo circlip that looks like an ohm symbol, you use something like some multigrips or vice grips to pull it up using the pin as the bit you pull against. Suzuki call it a push nut.
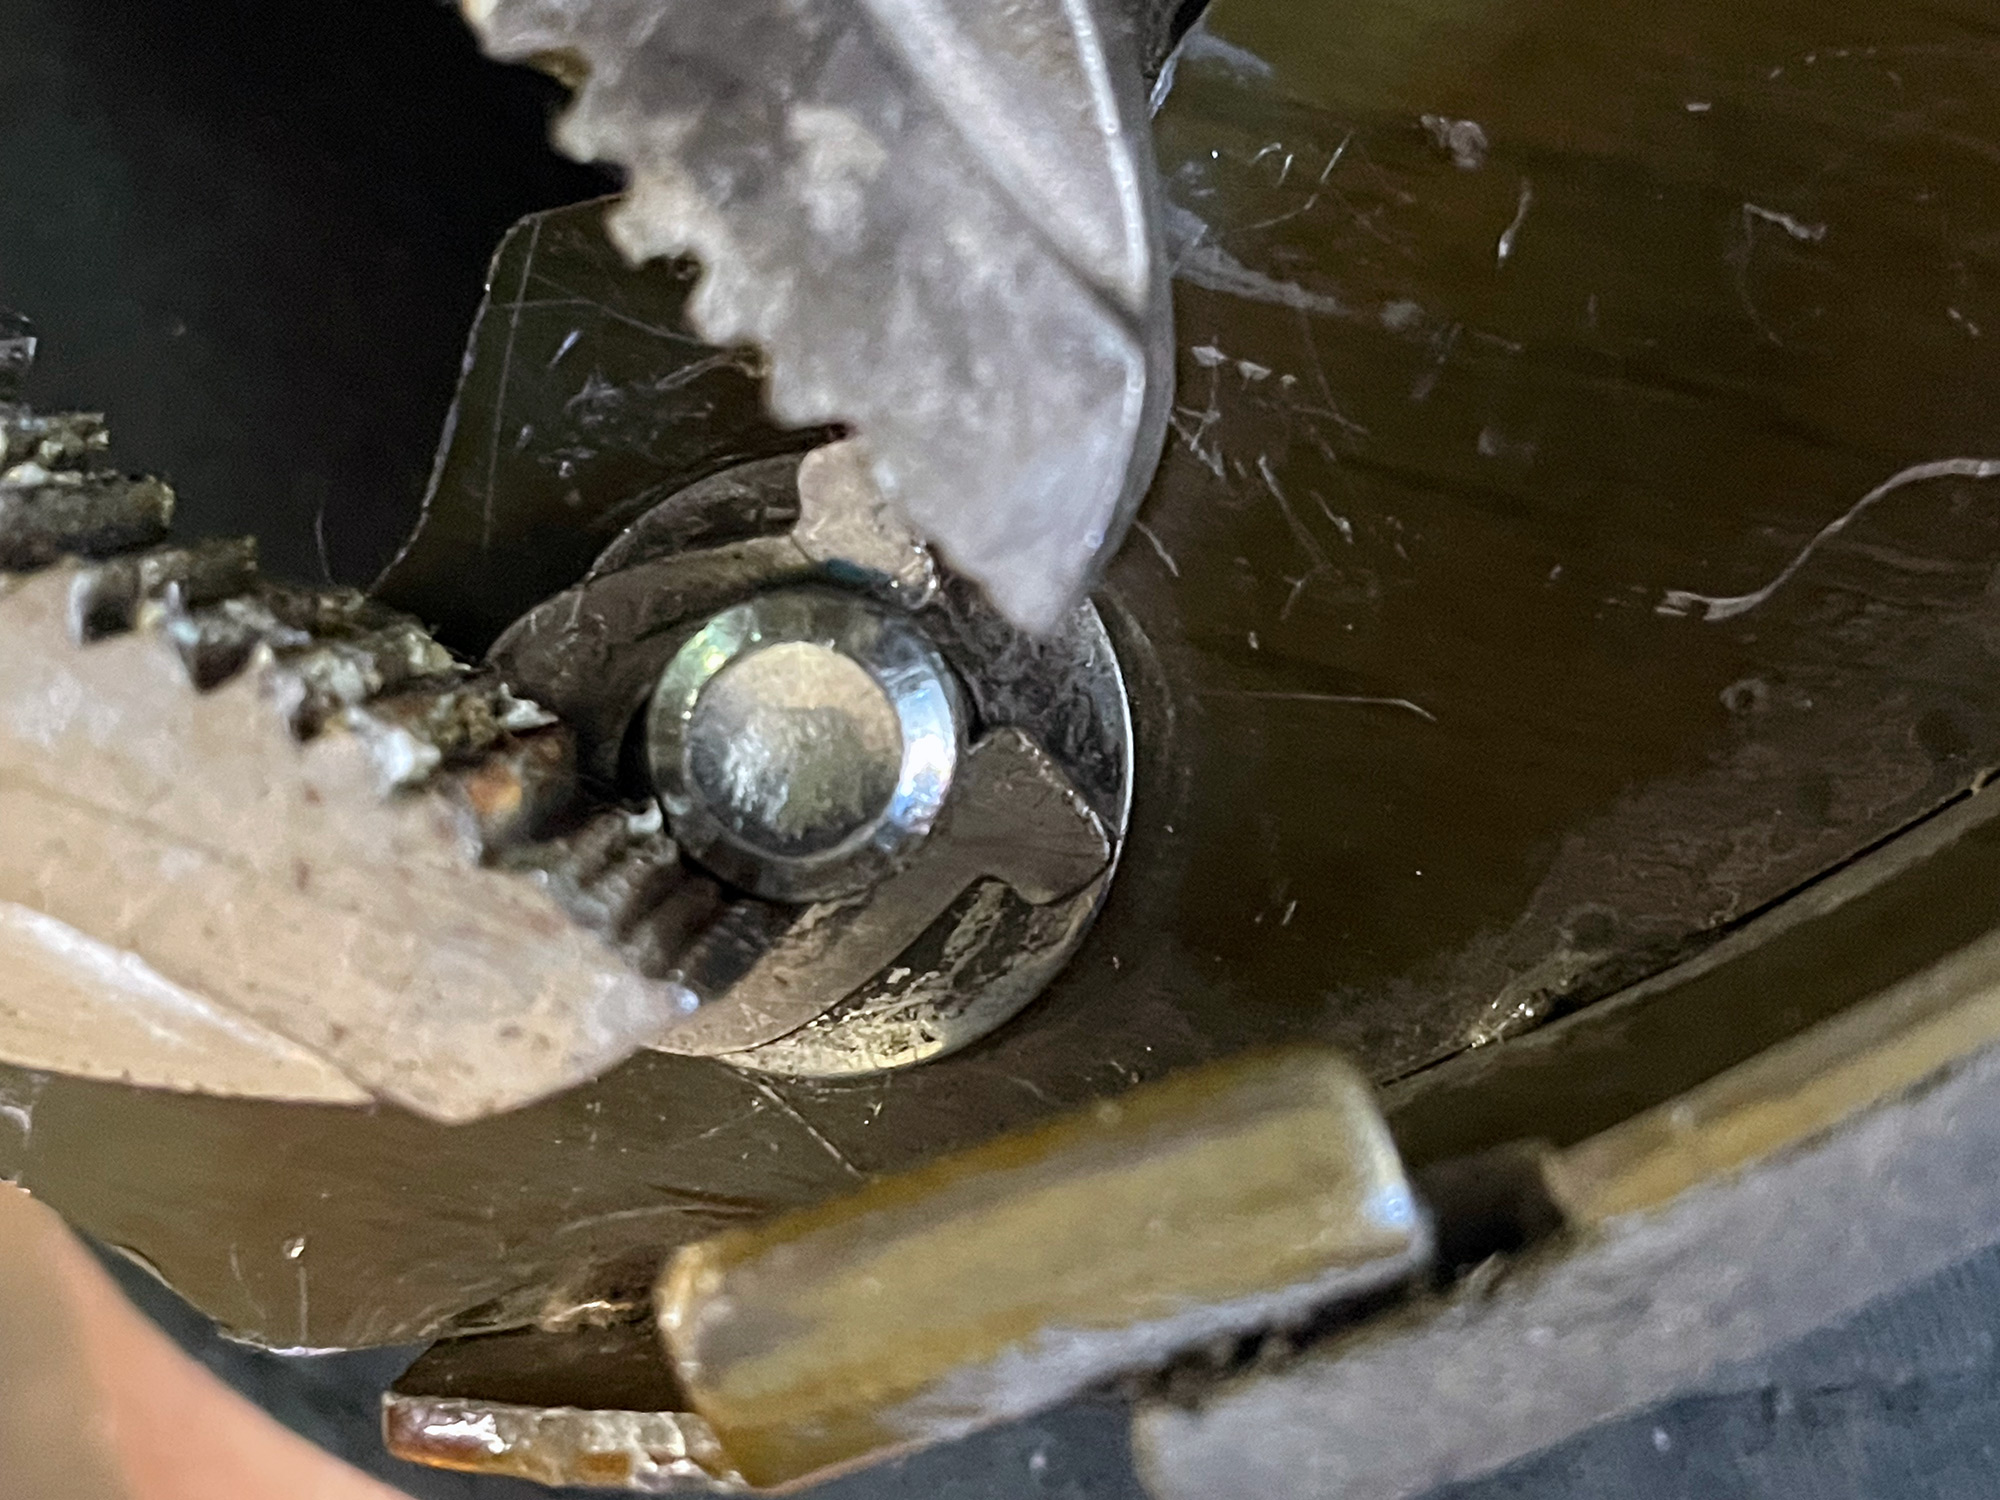
It was really annoying to get this clip out. You’re meant to use a new one; I didn’t have one so #yolo.
You need to grease up the pivot pi before fitting it to the new shoes.
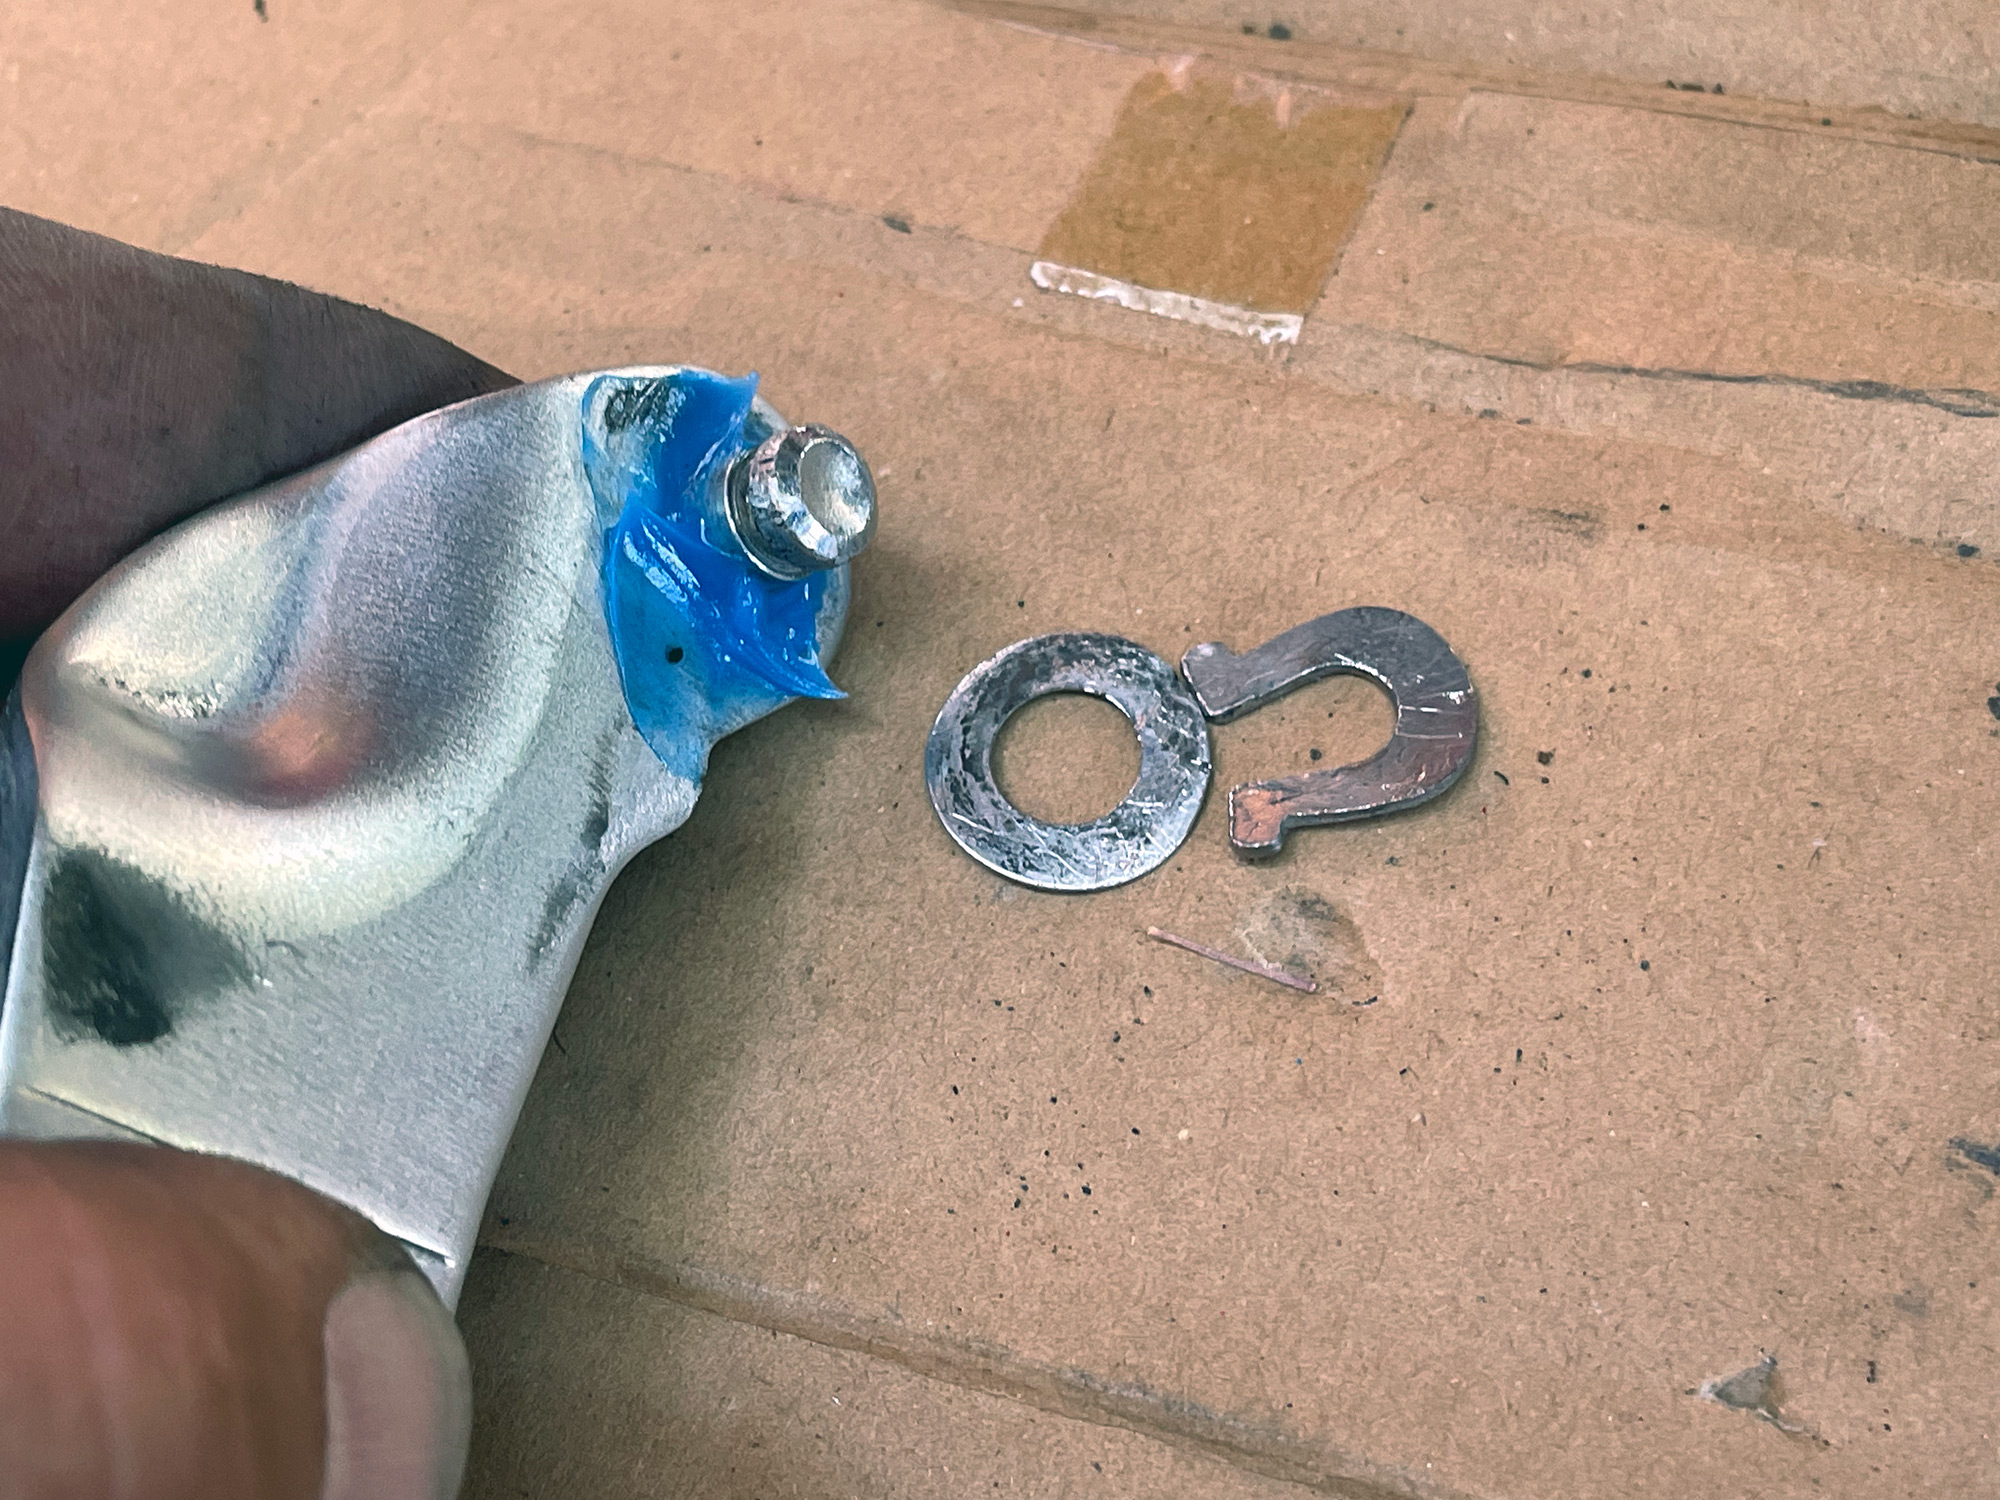
You’ll also want some grease on the other side which will go underneath the spring washer.

Now you refit the spring wsher and push the push nut back on.
The lever is now installed on the new shoe.
It’s now useful to understand how the adjuster all fits back in before you spend the next hour fighting the massive spring trying to get it together. When putting the adjuster back together, I greased the threads of the ratchet mechanism with brake grease.
The method I used to get this back in starts with the rearmost shoe going in and the handbrake cable goes back onto it.
I then used the retaining spring and pin on the rearmost shoe to help hold it in place. I then fitted the spring from the back to the frontmost shoe, and put the other end of the spring on the groove on the side of the rear end of the adjuster. This helped me fit the end of the adjuster in.
It’s really annoying to get this spring in. You can see all the scratch marks from me trying to work out a good way to refit this.
A screwdriver didn’t really work but I did end up using a very large set of pliers and managed to get it to work. You need to hold the front shoe from popping off with your knee; also, this is another spot where you can end up pushing the wheel cylinder and popping one of the pistons out of it… it’s really frustrating getting everything to line up.
The relief you feel when the spring clicks home, though, is immense.
I refitted the bottom spring to the shoes, too, and then lifted the shoes up as there are 3 spots per shoe (i.e. 6 per side of the car) on the backing plate where they rub. These parts need high temperature brake grease on them too.
Next up the adjuster lever gets put back on.
The adjuster spring now gets refitted, and then the retaining pins and their springs.
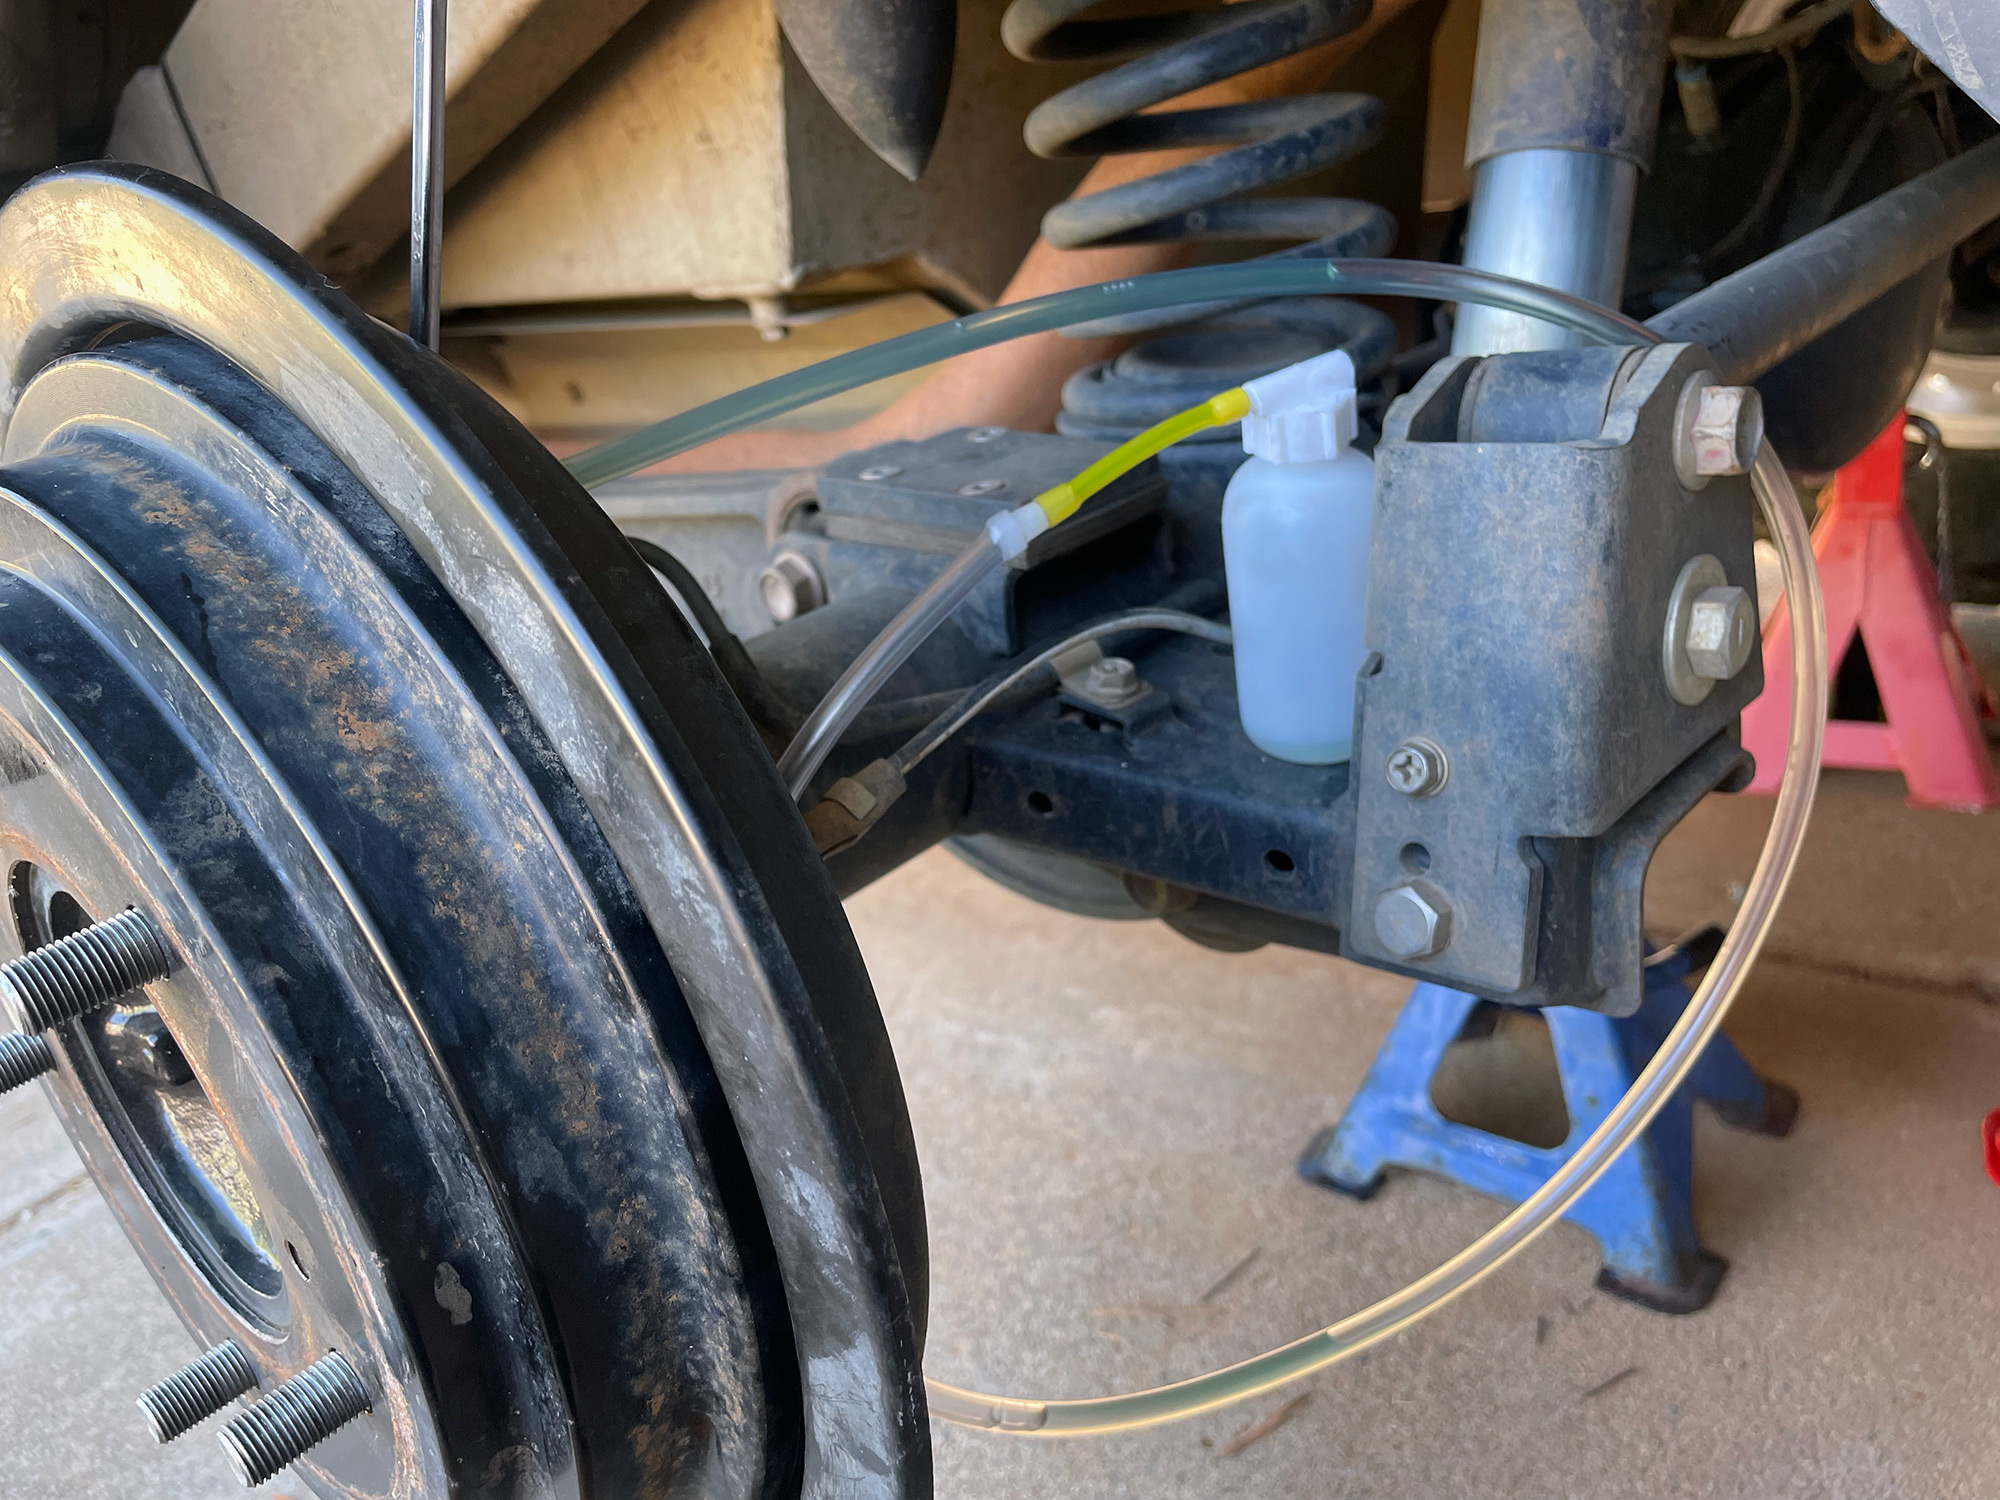
I would suggest bleeding the brakes after doing this, you do a lot of jiggling around with the wheel cylinder and inevitably some air will get in. 8mm spanner for these to release the air.
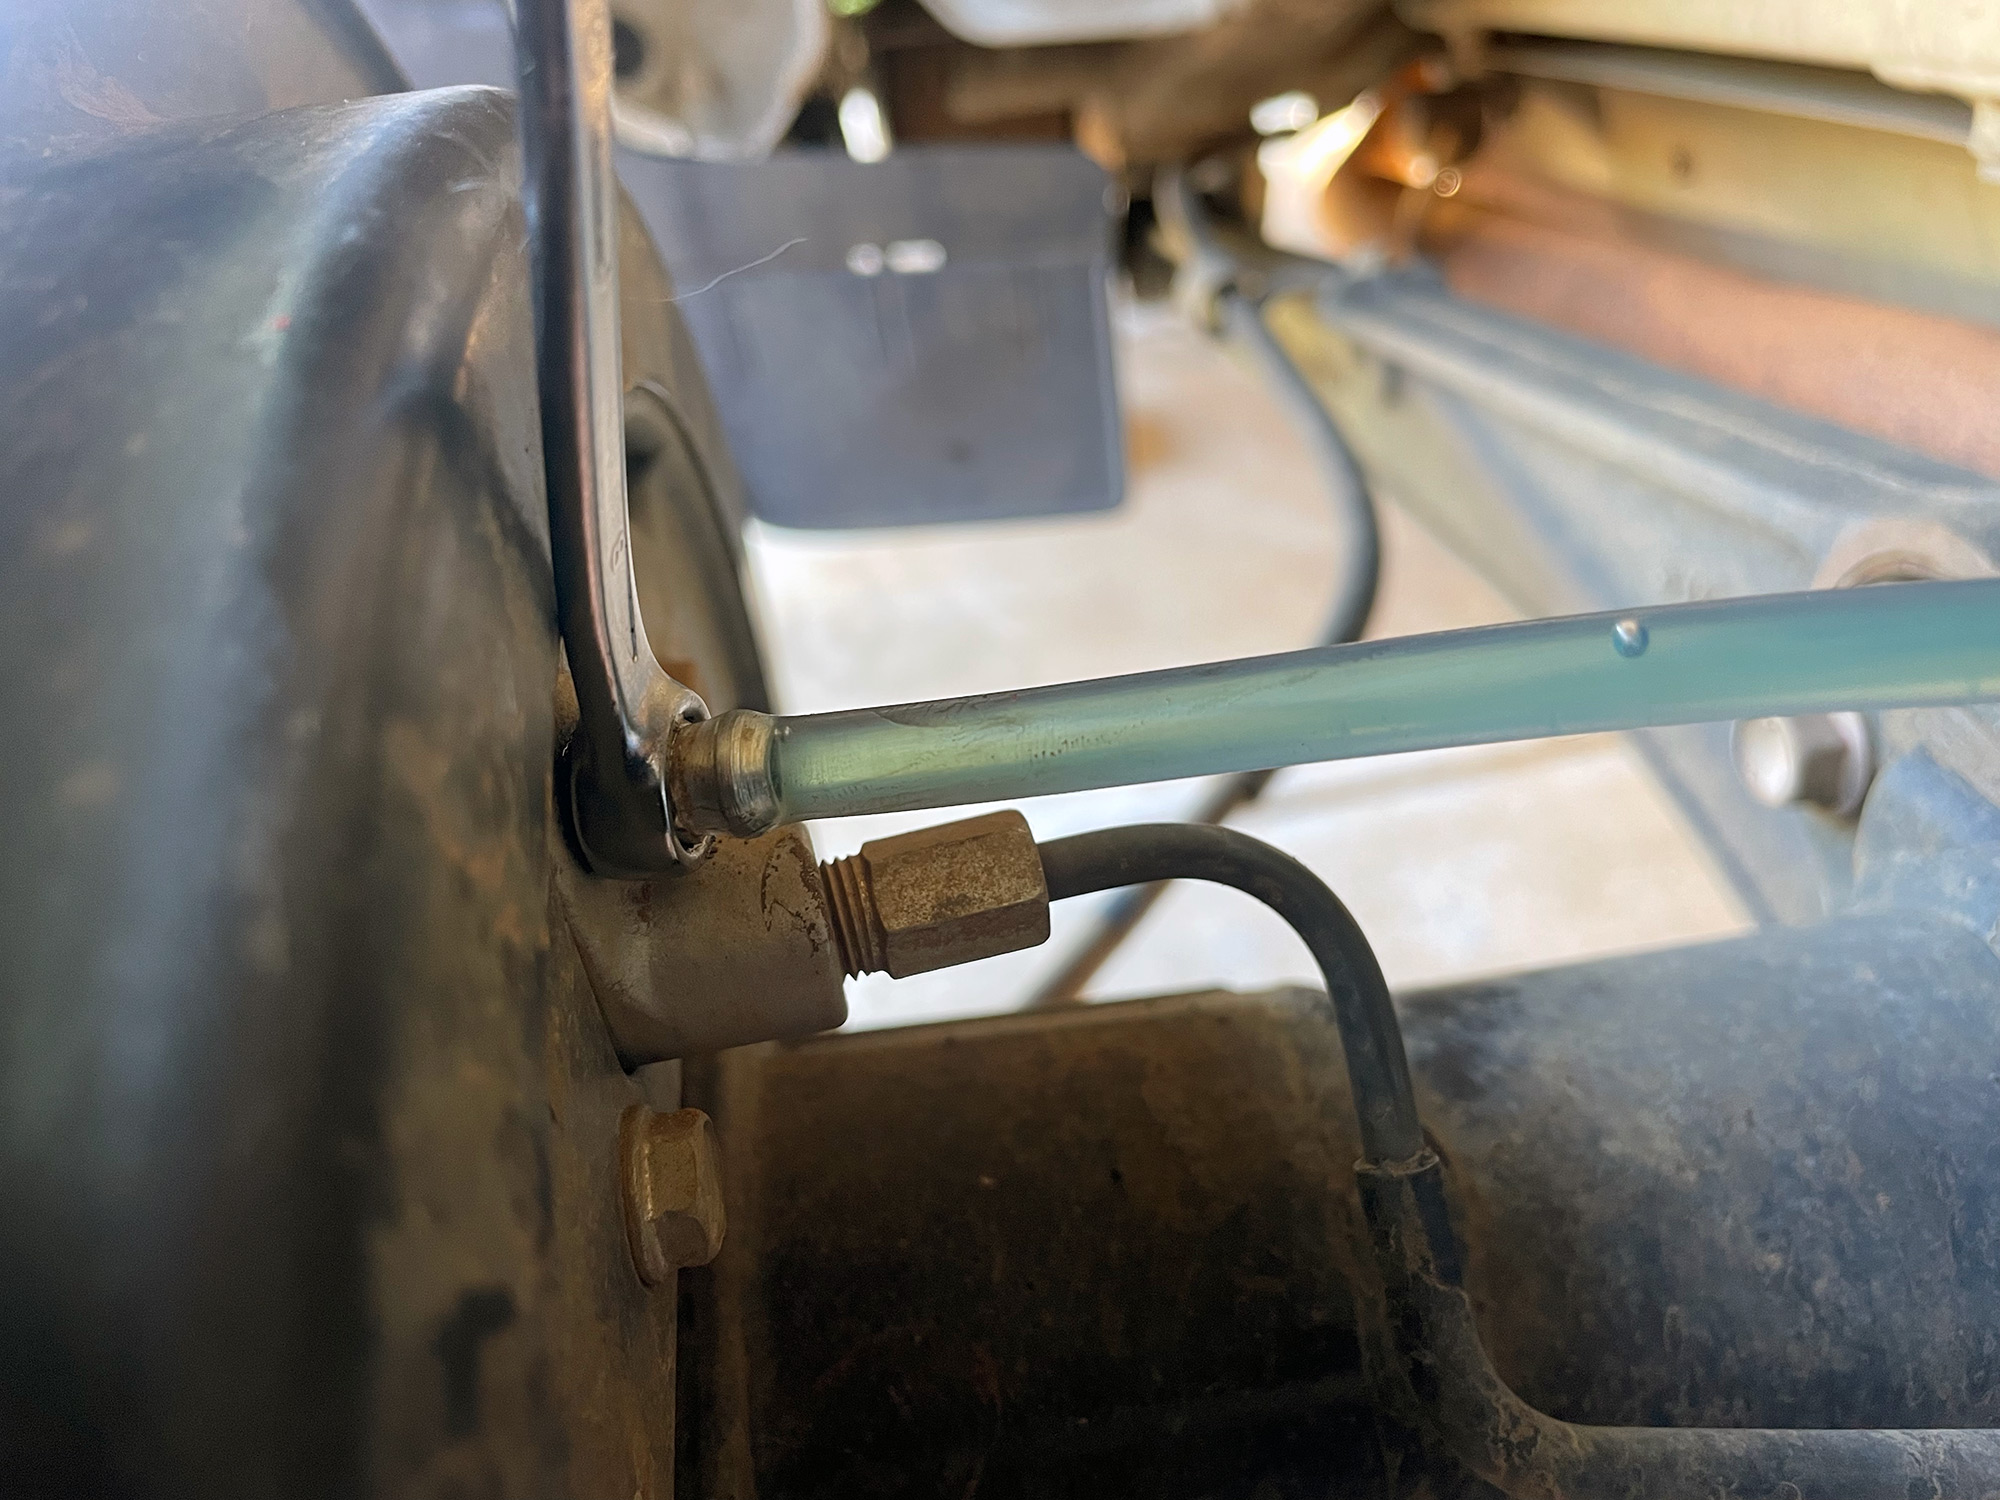
Good idea to do this and fully flush the fluid out, really.
Adjusting the handbrake
Once you’ve bled the brakes you will need to adjust the handbrake along with using the car’s brakes to automatically adjust the brakes.
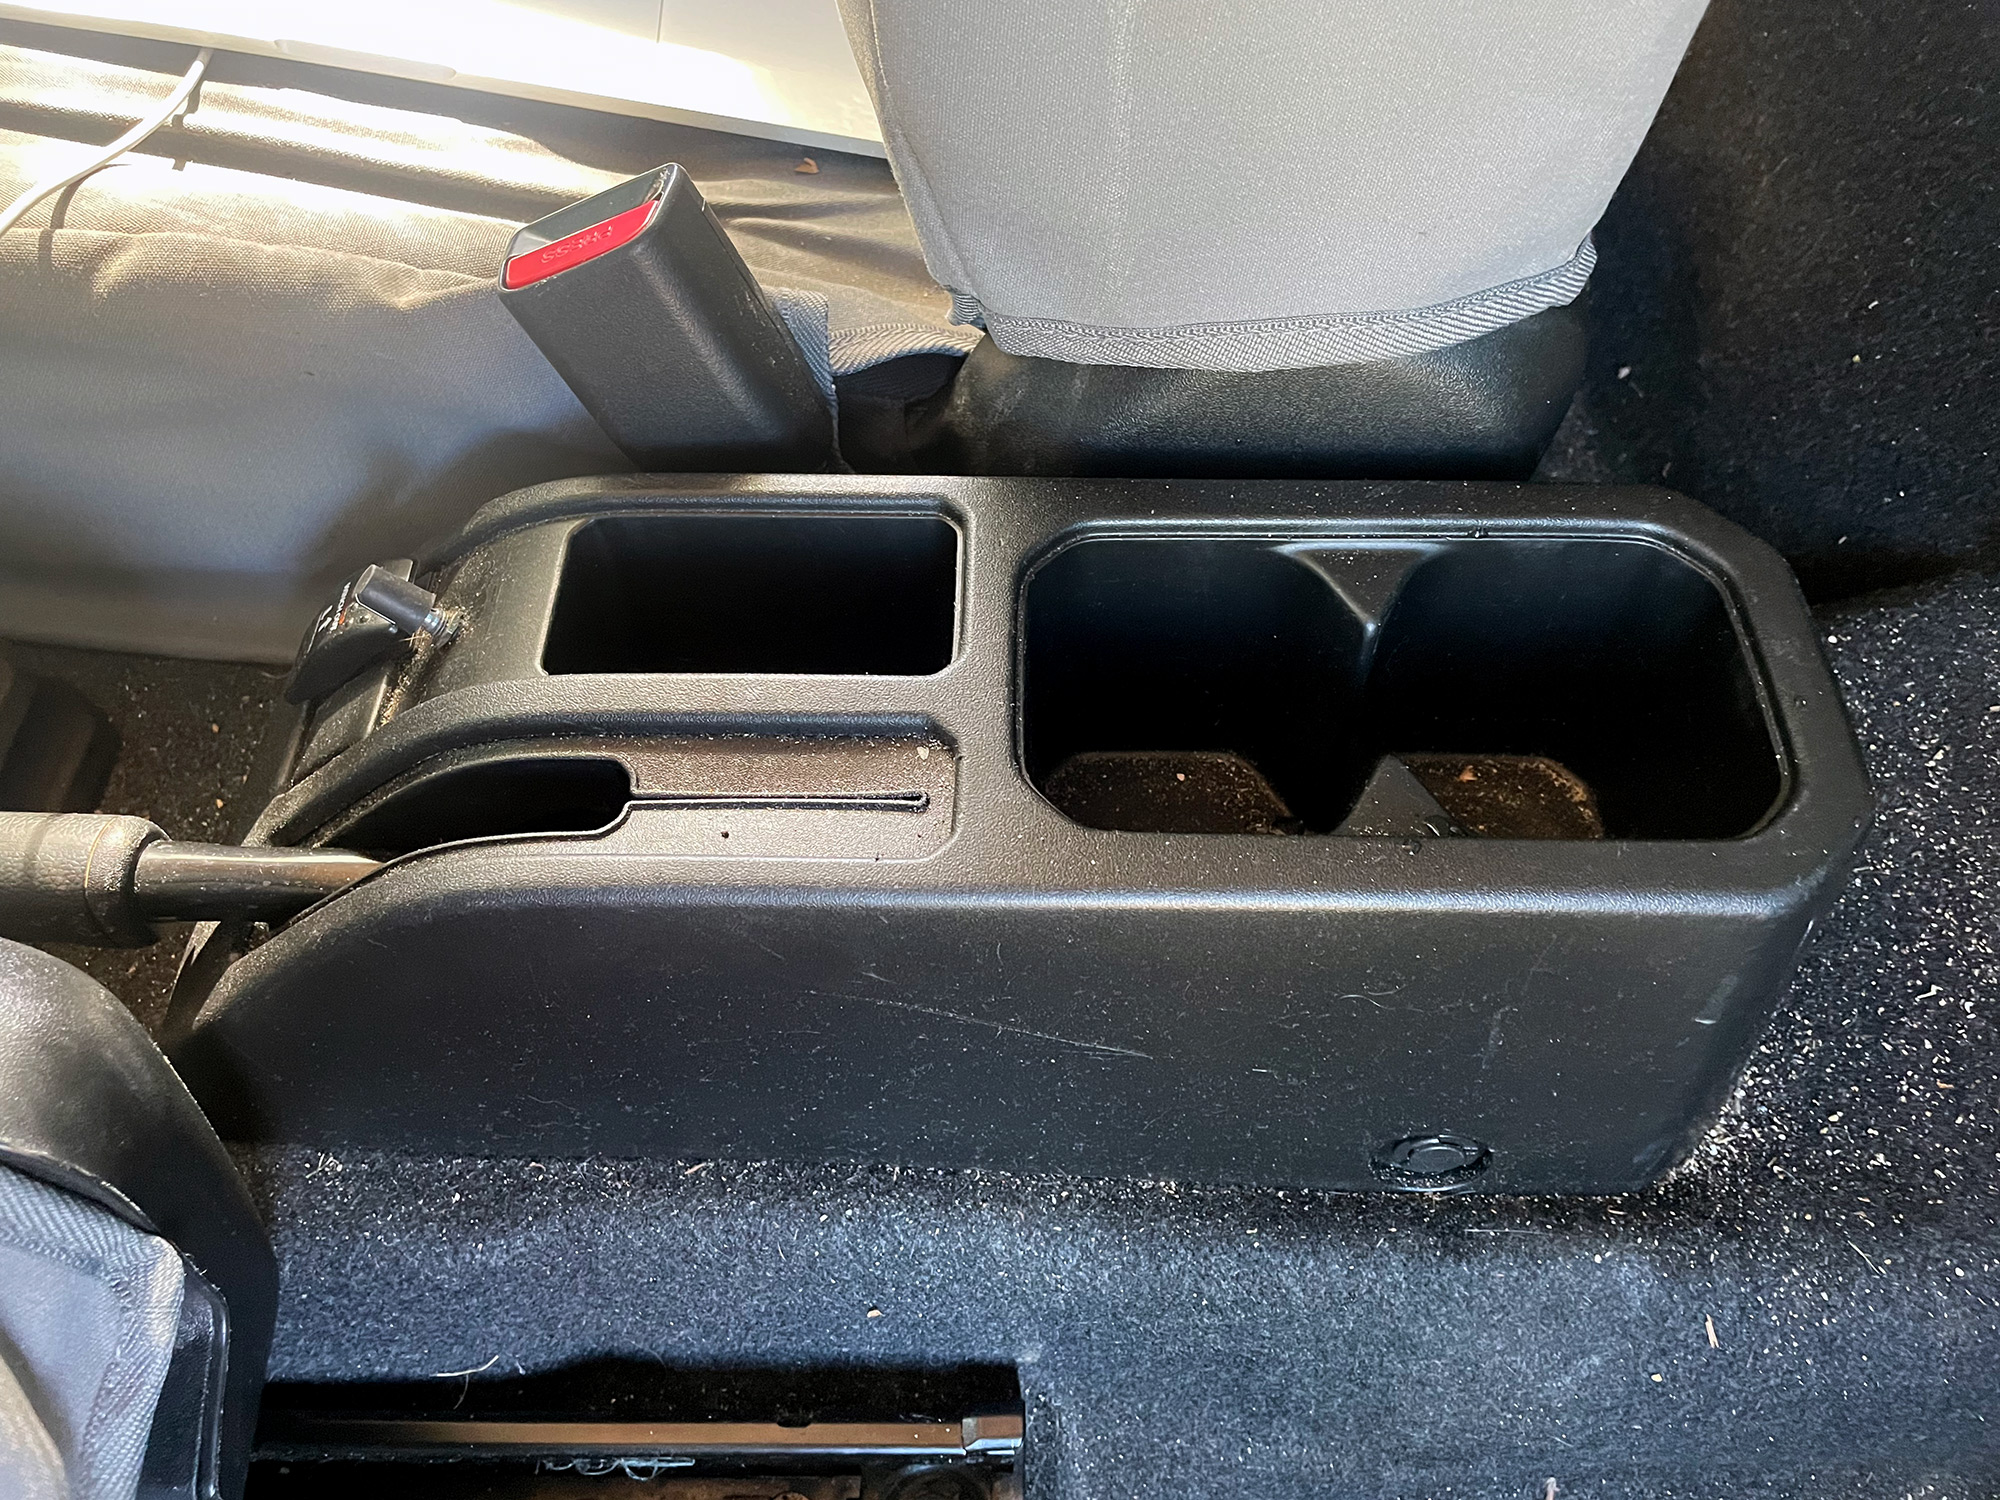
You remove the centre console as the first step of adjusting the handbrake. Two push pins – one each side and then just lift it up. Apologies about the sand, I had just been at the beach before taking these pics.
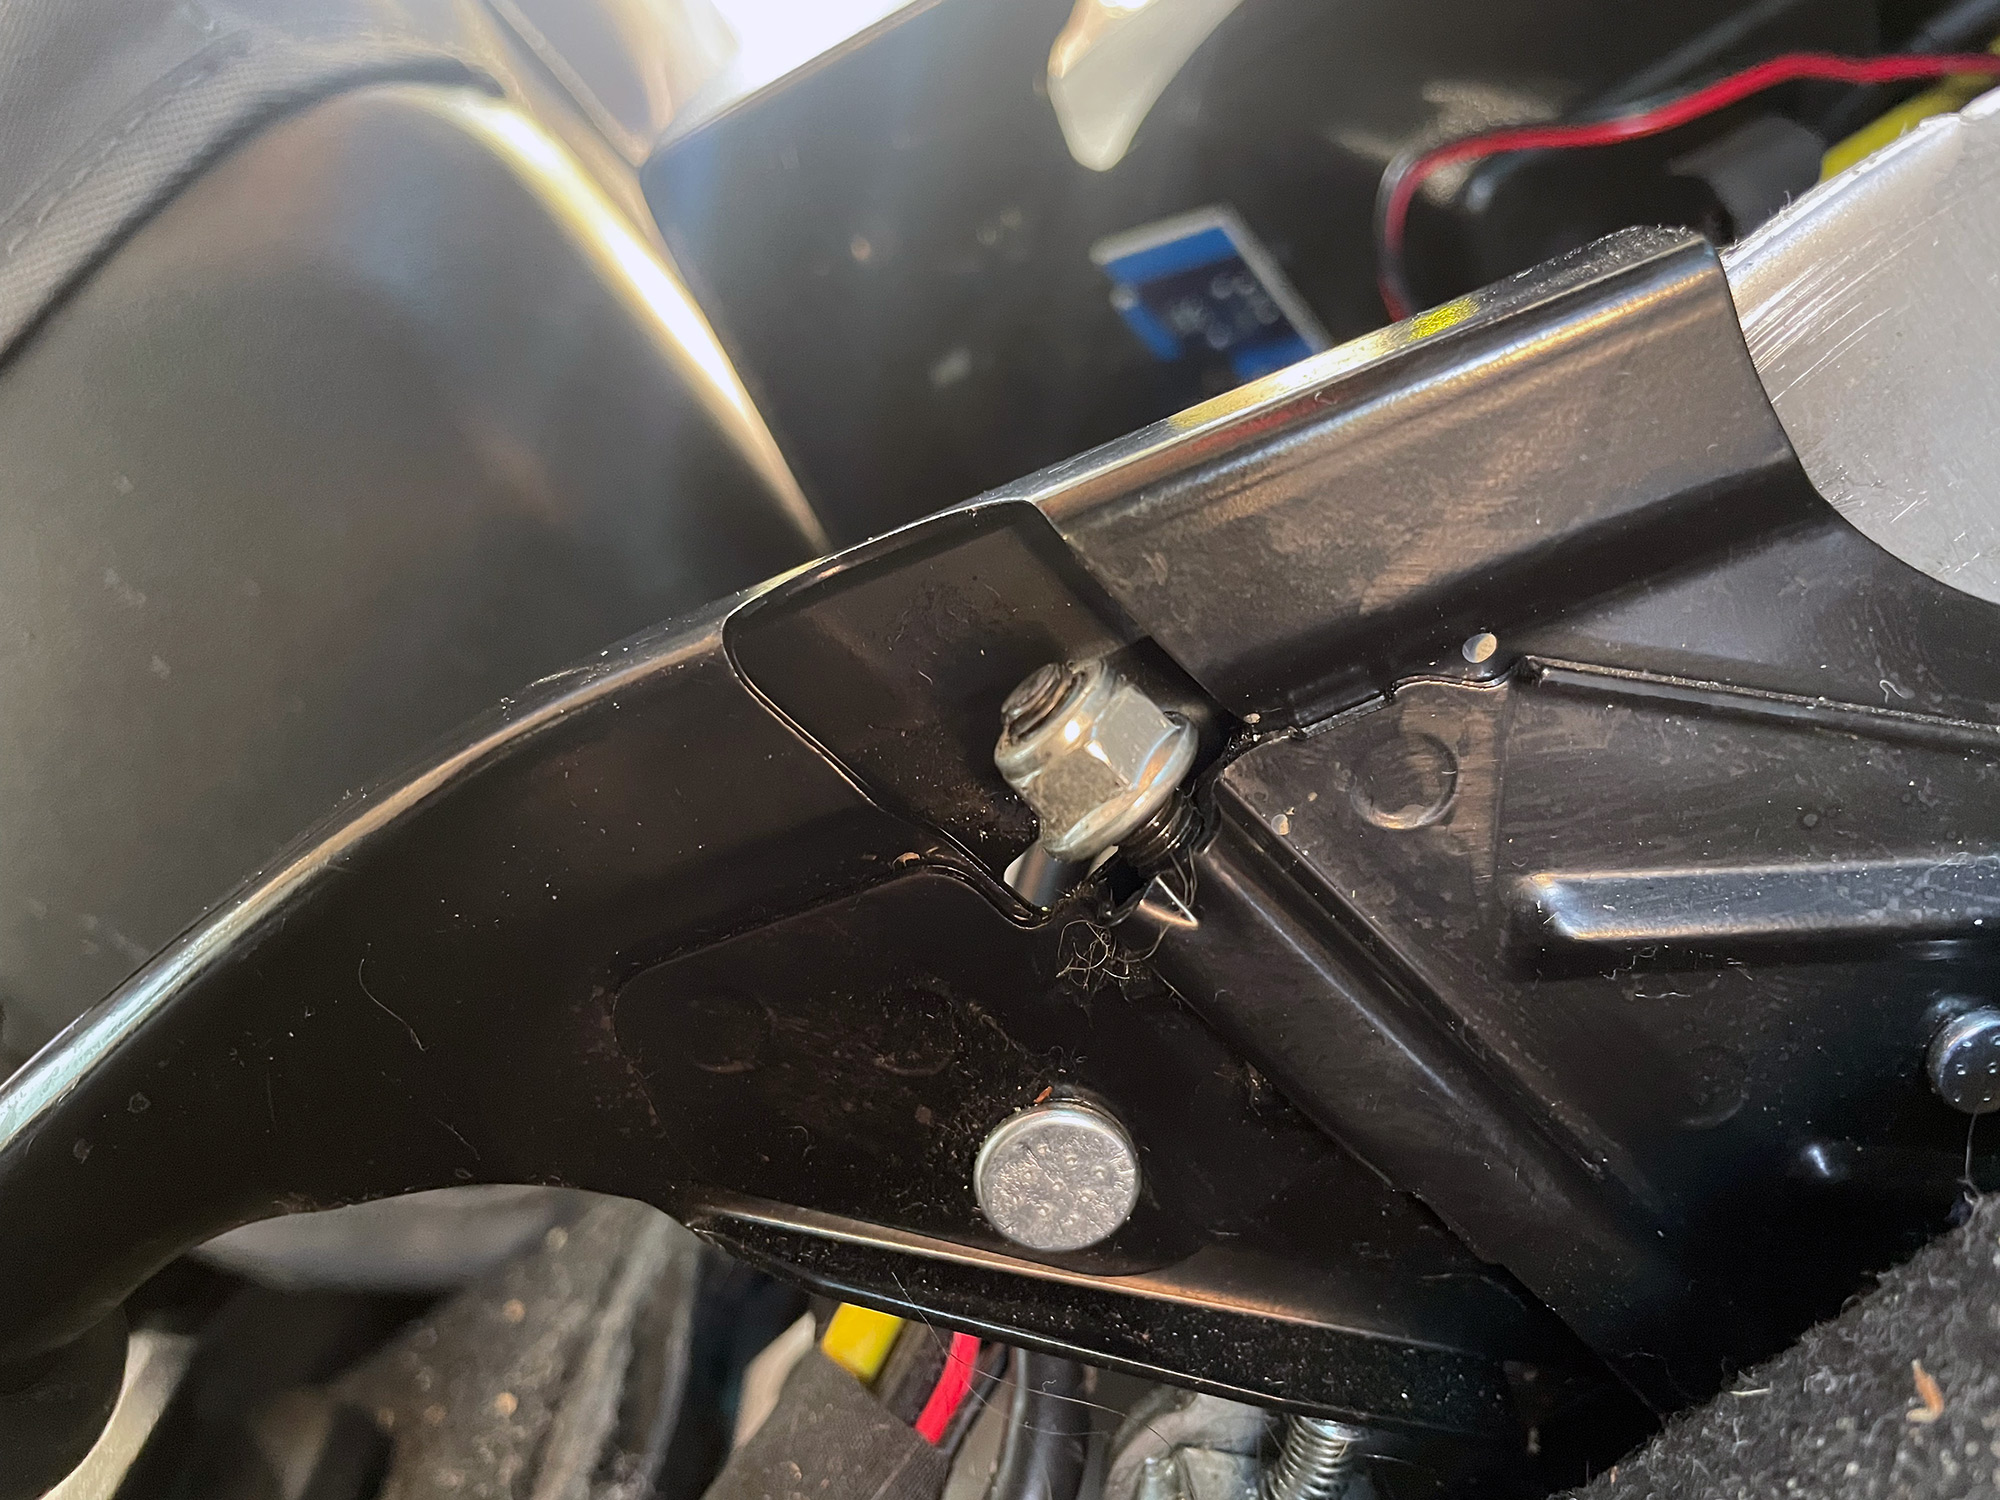
You now need to release the adjuster nut for the handbrake so the cable is slack.
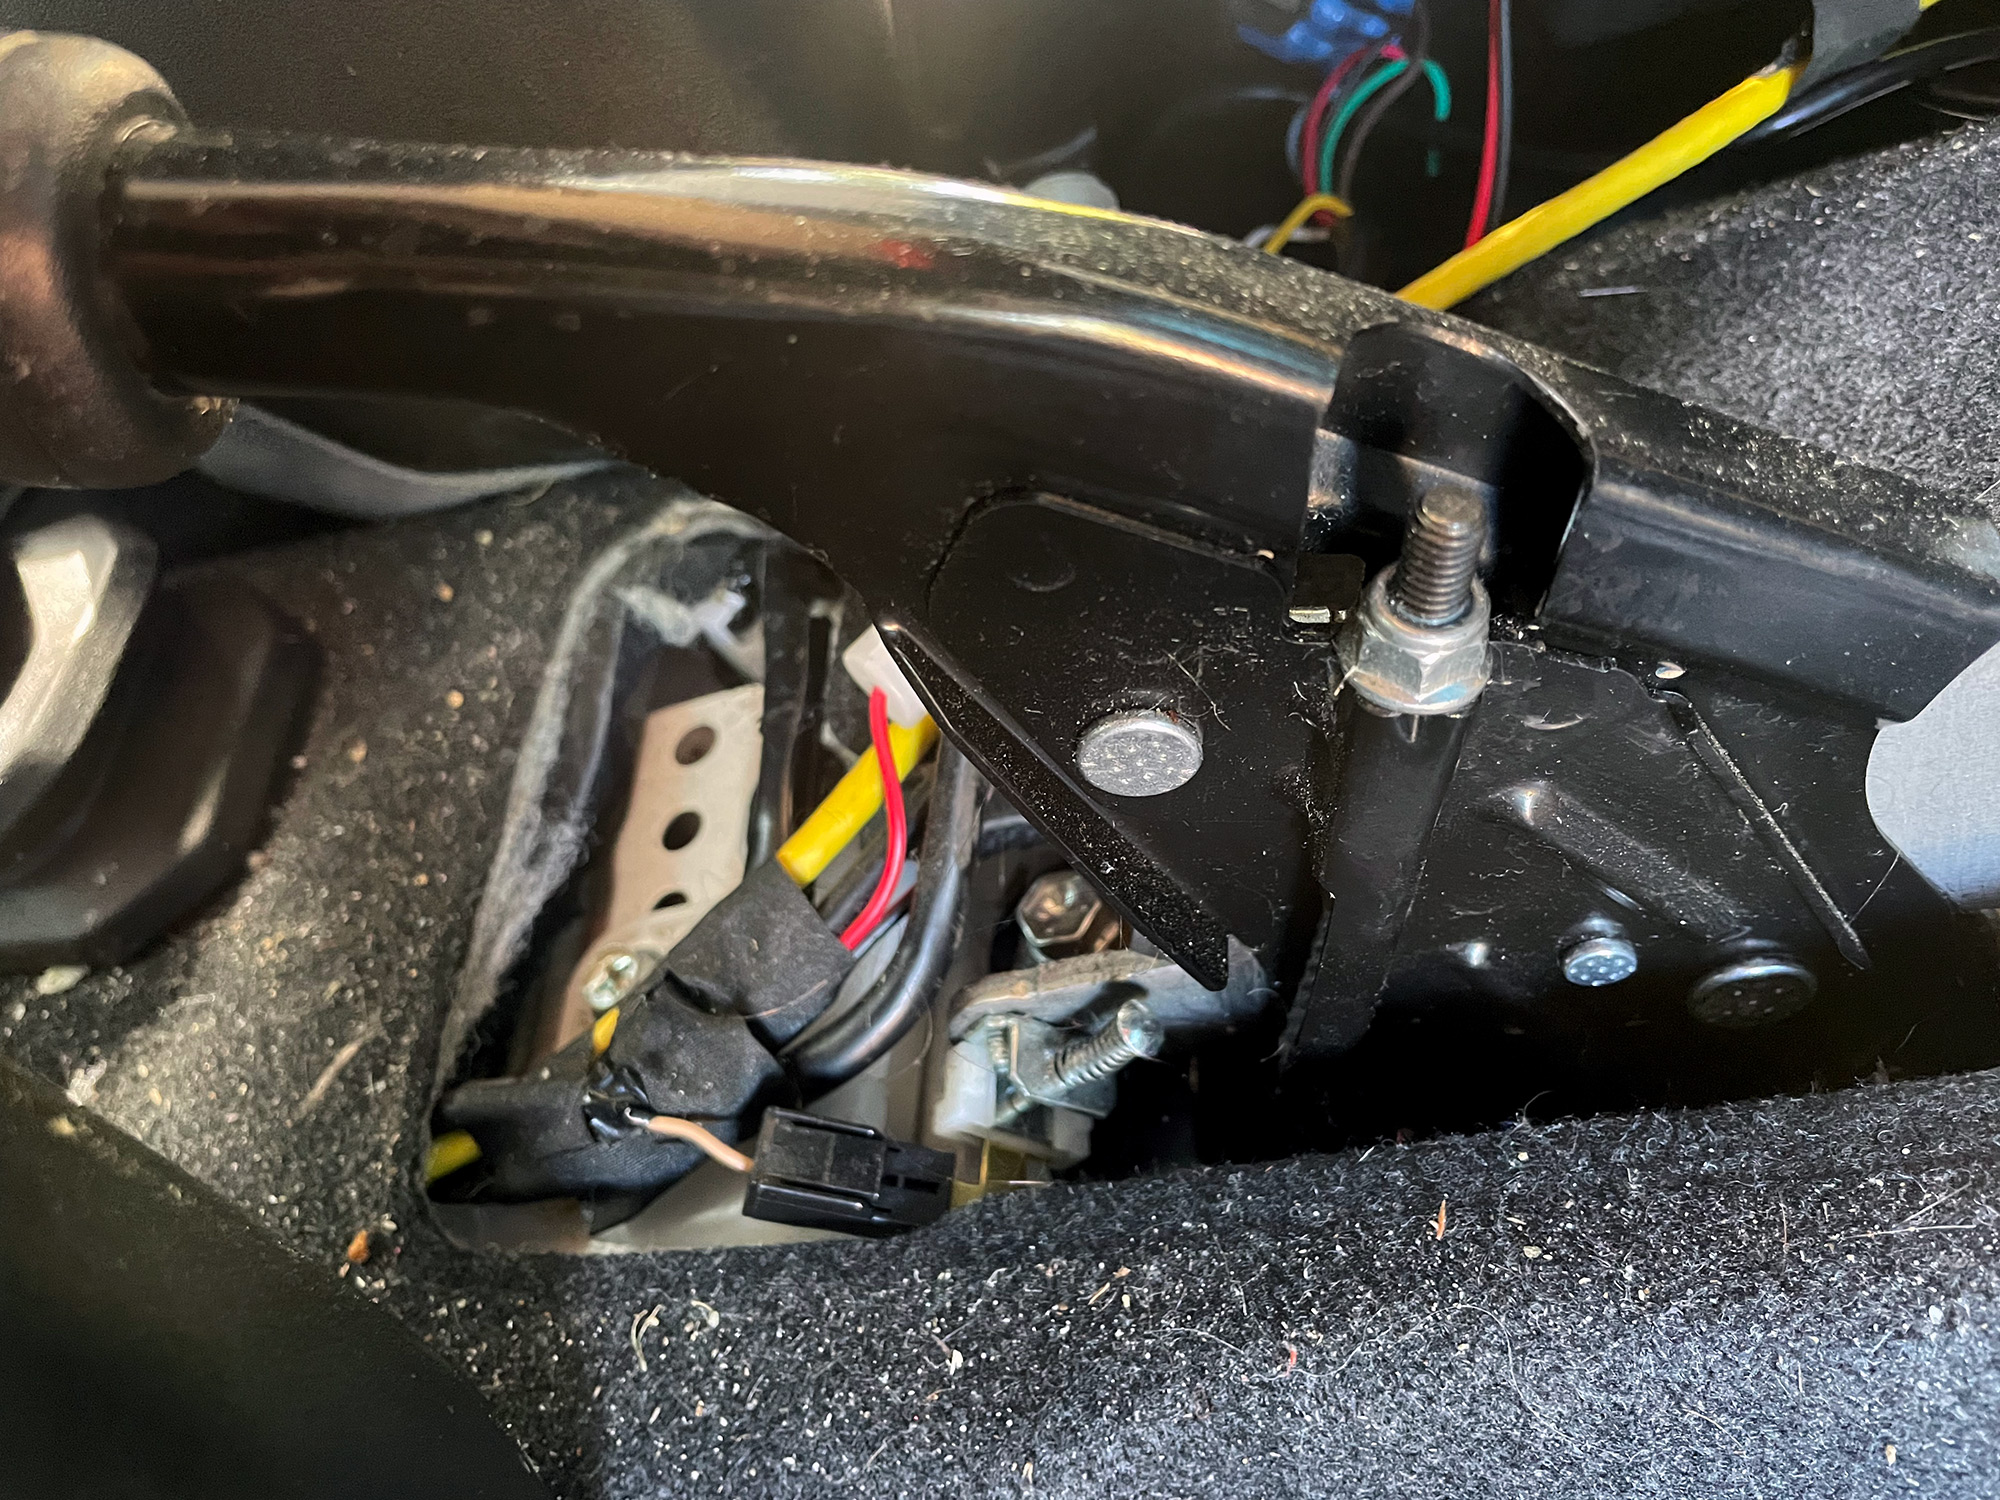
Undo this nut till the cable is slack…
… then you need to start the car, and pump the brake pedal moderately hard 10 times. This will adjust the brake shoes up. Once that is done, tighten the handbrake adjuster nut up so the rear brakes do not drag when the handbrake is not put on, but drags a little when the first click of the handbrake is reached, and the handbrake fully goes on with about 5 or 6 clicks.
Refit the centre console and the brakes are adjusted!