
MegaJimny false floor
This one is a little different: MegaJimny provide relatively good instructions for this, though I will still do my customary own here with added stuff to know. I’ll provide a bit more context to my thoughts about it, including not just the floor itself but also aspects around buying it, how it’s packaged and built, and some little tweaks I suggest.
I am also including my written instructions on the installation so people understand what they’re in for if they elect to buy this. Instructions are only emailed to you, you can’t get access to them when checking it out. I’d prefer to see the instructions be available for a product prior to purchase so people can assess if they’re up for the DIY challenge of an installation, need to seek help when it arrives or buy more tools, or indeed if they are better off taking it to a professional.
It is a new product to market and it’s the closest commercially-available false floor for what I’m after. It replicates a lot of what I’m seeking, which is another thing I’ll cover in this article. I’ll also cover a few of the mods I’ve done subsequent to installation to make it even better for my use.
Sections
- What am I after
- Pre-installation thoughts
- Installation process
- Post-installation use thoughts
- Post-installation mods
- Ultimate verdict
What I am after
I have a few things I’m after in a false floor:
- Matches the height of the rear arches, i.e. isn’t inset.
Some false floors are designed for extra interior height so they are dropped down, thus the floor is no longer flat. I wanted it to totally match the height of the arches which means it’s practically the same as just having the seats folded flat. - Removes the seats
You gain a lot of space underneath the false floor if you remove the seats, so I wanted to do this - Has easy access to underneath the seats and divides the space well
I had previously done my false floor with an access hatch but something where it’s a larger opening that just lifts up would be ideal. In an extra ideal world, this will be strong enough to pivot with my fridge or some drawers mounted onto it. - Isn’t hugely heavy
A lot of people think 4wding engineering is actually just adding more weight till it feels chunky; engineering is about optimisation not just throwing more mass at the problem.
To date, noone had really cracked all of the above. They had parts of it, but not an appropriate level of everything that suited what I was after.
That changed with the 2026 launch of the MegaJimny MG-X base deck and integrated storage setup. Thus I ordered one. I paid full price for this, no discount codes and no influencer favours asked for; I think it’s important I replicate the experience the buying public would have.
Pre-installation thoughts
Weight
Most important specification here is that MegaJimny specify that it adds about 12 kg to the car once the rear seats are removed. Given the seats and the rear storage box weigh in at about 14 kg total, and the shipping weight is 30 kg, there’s about 4 kg of packaging materials to account for. Not totally sure the maths adds up, but that’s the main headline number: +12 kg.
Buying experience including freight
This is a real positive to the false floor.
The ordering process was easy, tracking info was provided quickly and the order was shipped out quickly. I believe these are made offshore to MegaJimny’s specs, i.e. they aren’t something you’ll find duplicated elsewhere immediately, so if there isn’t stock it might be a couple of weeks before they could be restocked and dispatched.
Freight, given I’m on the remote other side of the country to the supplier, was very fast and arrived ahead of schedule. Ordered 12 May, dispatched 13 May, arrived 18 May. For a trans-continental road/train shipment that’s about as good as you can get.
It comes in two boxes, totalling a bit over 30 kg of shipped weight, so just be prepared for that with the arrival. The boxes, as you’d anticipate, are not small: one is a long relatively thin rectangular box as wide as the Jimny and the other is a flatter box but basically the dimensions of a single seat back plus a bit.
Cost
The cost including freight totalled to $832.70. Given over $100 of that is freight to Perth that’s perfectly acceptable and in line with expectations on freight of a bulky and slightly heavy item. Unsure if east coast freight prices will be slightly lower.
It is one of the cheaper base deck/false floor options, especially once you consider the division of space underneath and the large access panels.
Packaging
This is my one initial niggle with it. I get the need to protect the product but it is overly packaged with polystyrene. Open your delivery outside because you will get polystyrene everywhere when you do so.
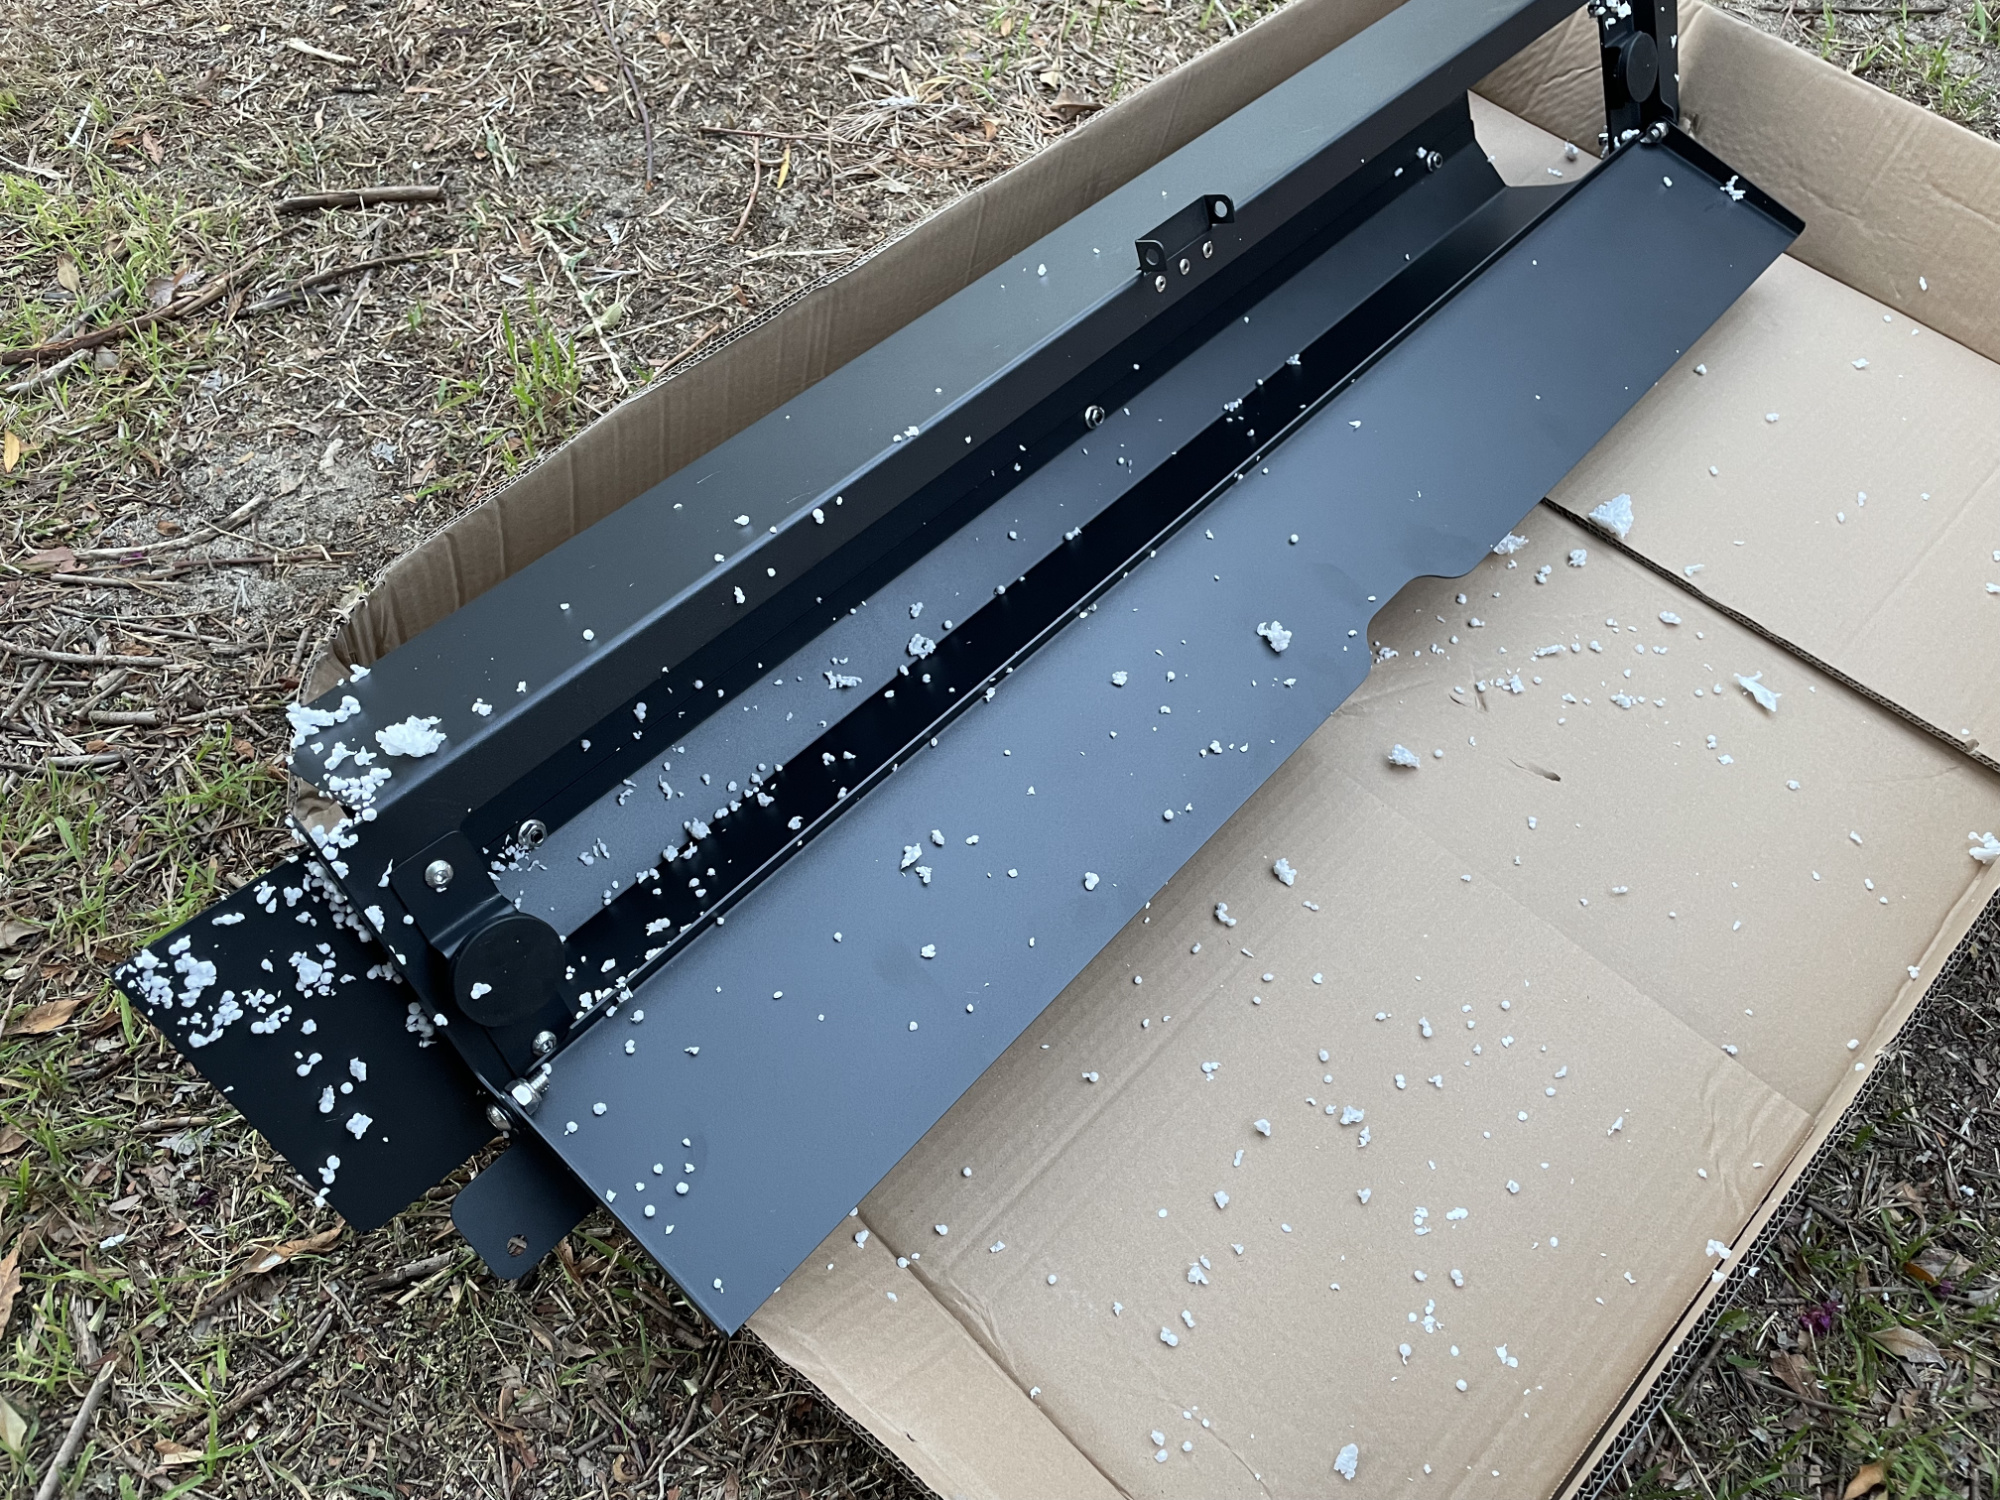
I was super careful not to damage the polystyrene, but, you just can’t help it: the main front storage area has a big rectangular piece of polystyrene stuffed inside it and what you end up with is what I picture above.
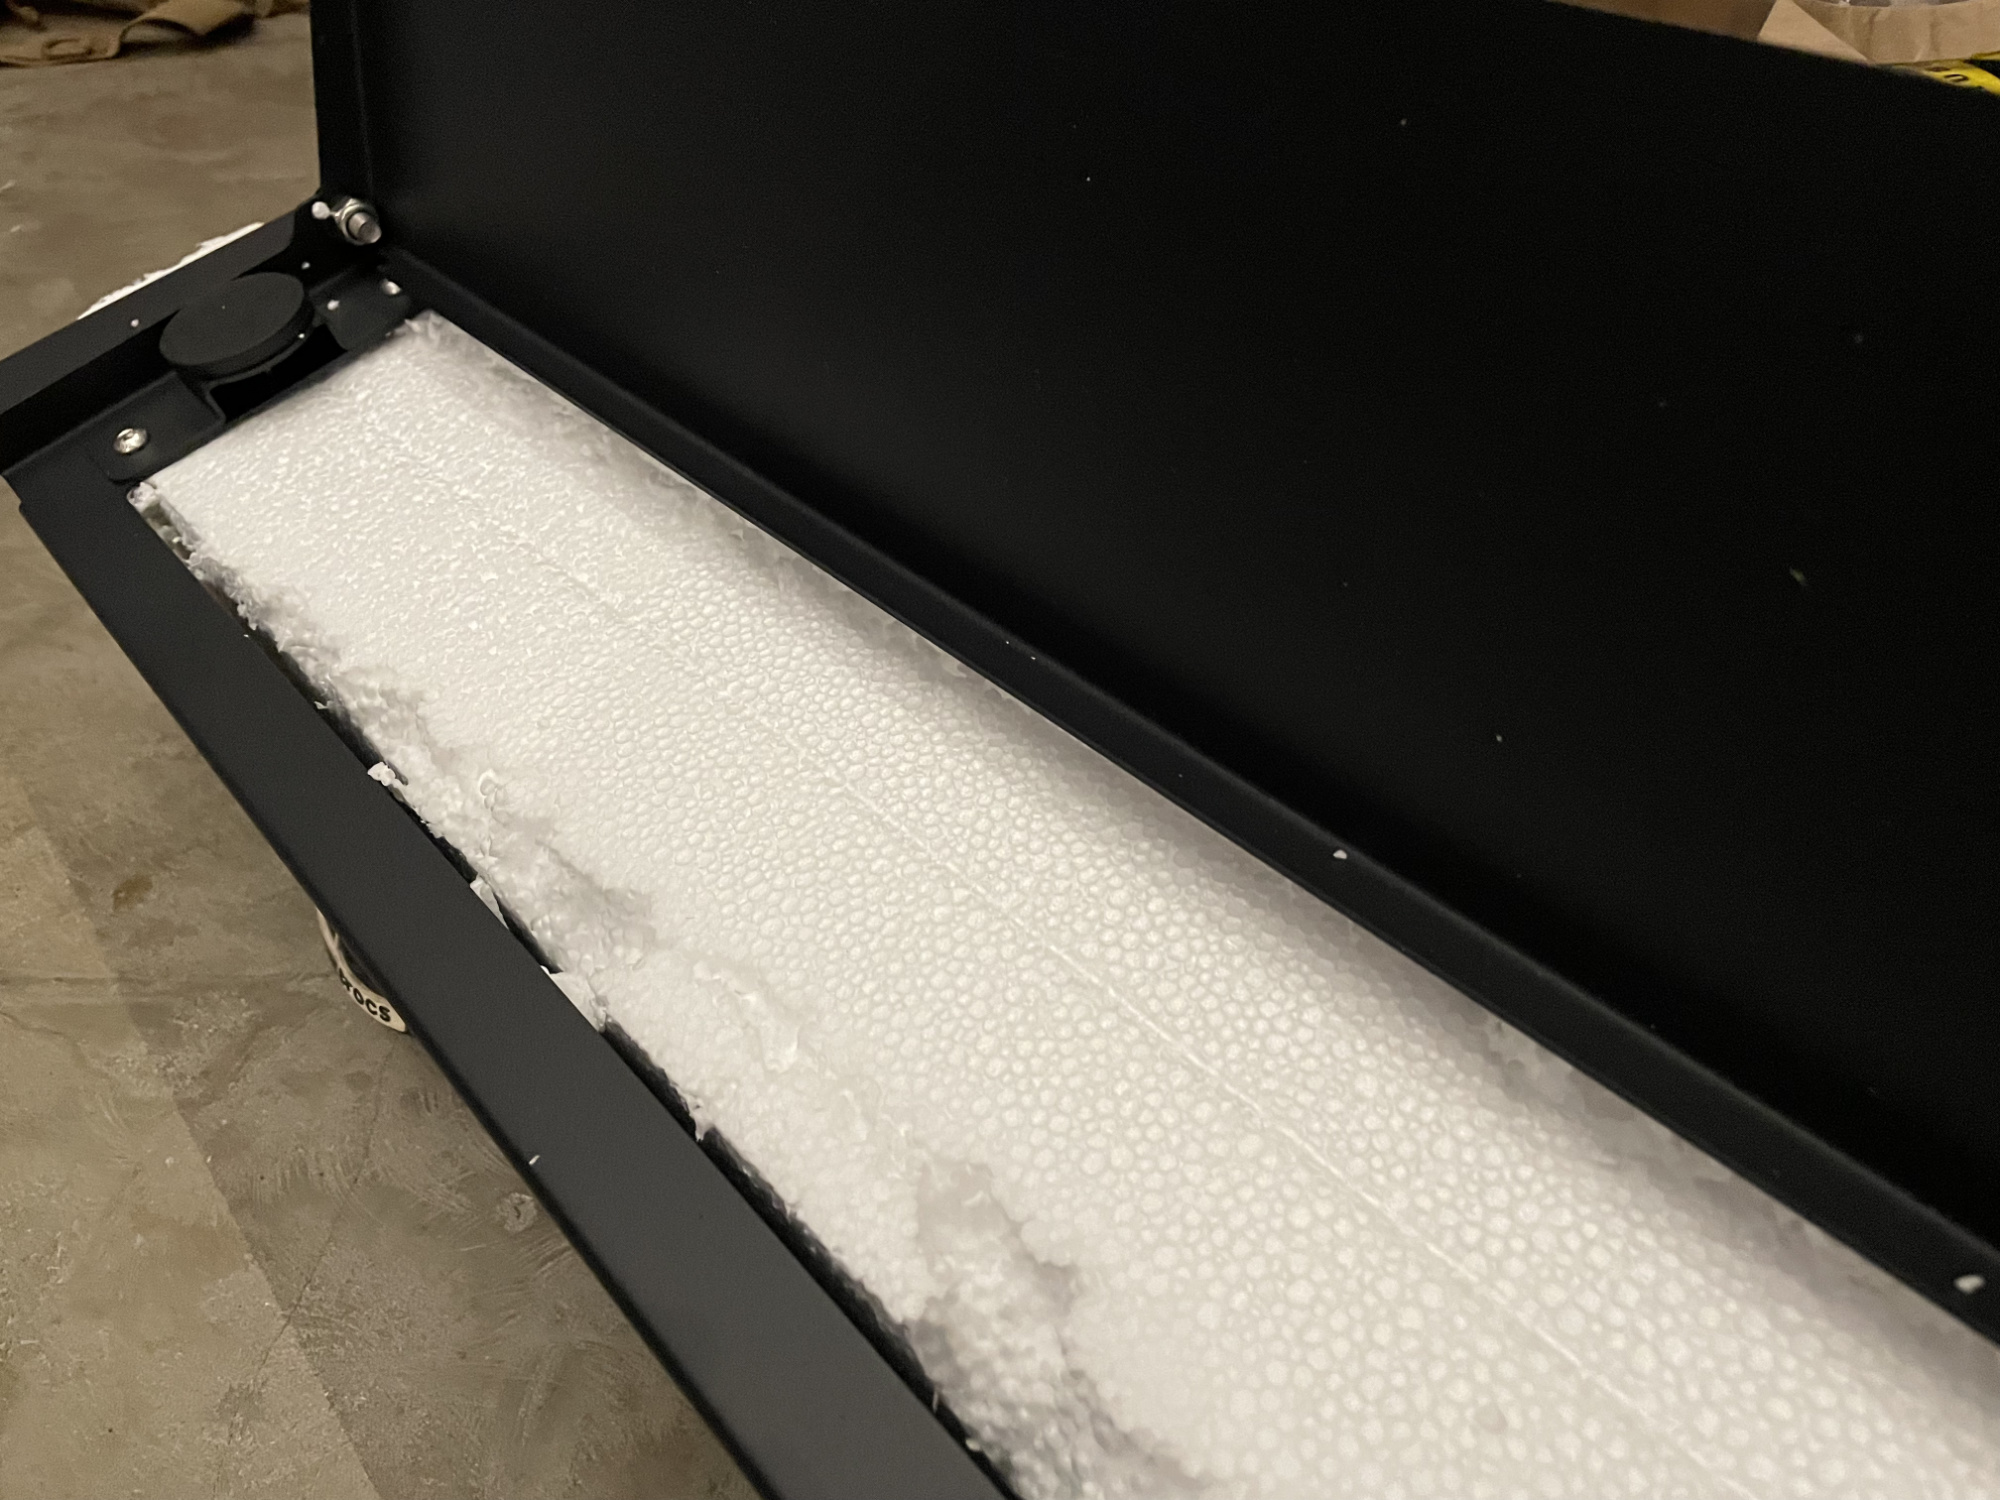
I think stuffing this storage box with polystyrene is a bit unecessary: it won’t stop the box being crushed in transit if dropped, and pushing the polystyrene inside rips it due to the rivnuts etc. This means you end up with a heap of polystyrene balls everywhere, and it gets even more damaged just trying to pull it back out to unpackage it.
There’s also a large lot of additional plastic wrapping and foam wrapping. Again, understand the need to protect it but just need to account for this in your rubbish. If you live in a place with restricted rubbish collection you might be slowly disposing of the packaging over a few rubbish cycles.

Sheets of heavy butchers paper or thin cardboard over it would provide just as much scratch protection, be much less messy and way less annoying to dispose of. Fortunately my local tip will take clean polystyrene for free for recycling, but if your tip doesn’t then it’s a bit of a pain.
That said, it arrived undamaged so the packaging is more than adequate. I guess what I’m saying is it feels overkill and a bit messy.
Flipside to that: the fasteners are just wrapped up in some pallet type wrapping in thin foam. Putting them in a little box or a nice bag would make them a lot more obvious in the bottom of the box. Make sure you find these and don’t just assume it’s a bit of packaging.

(It would also be nice if the fastener breakdown was provided in the instructions. In lieu of that, here’s my breakdown for you. A bunch of extras were included.)
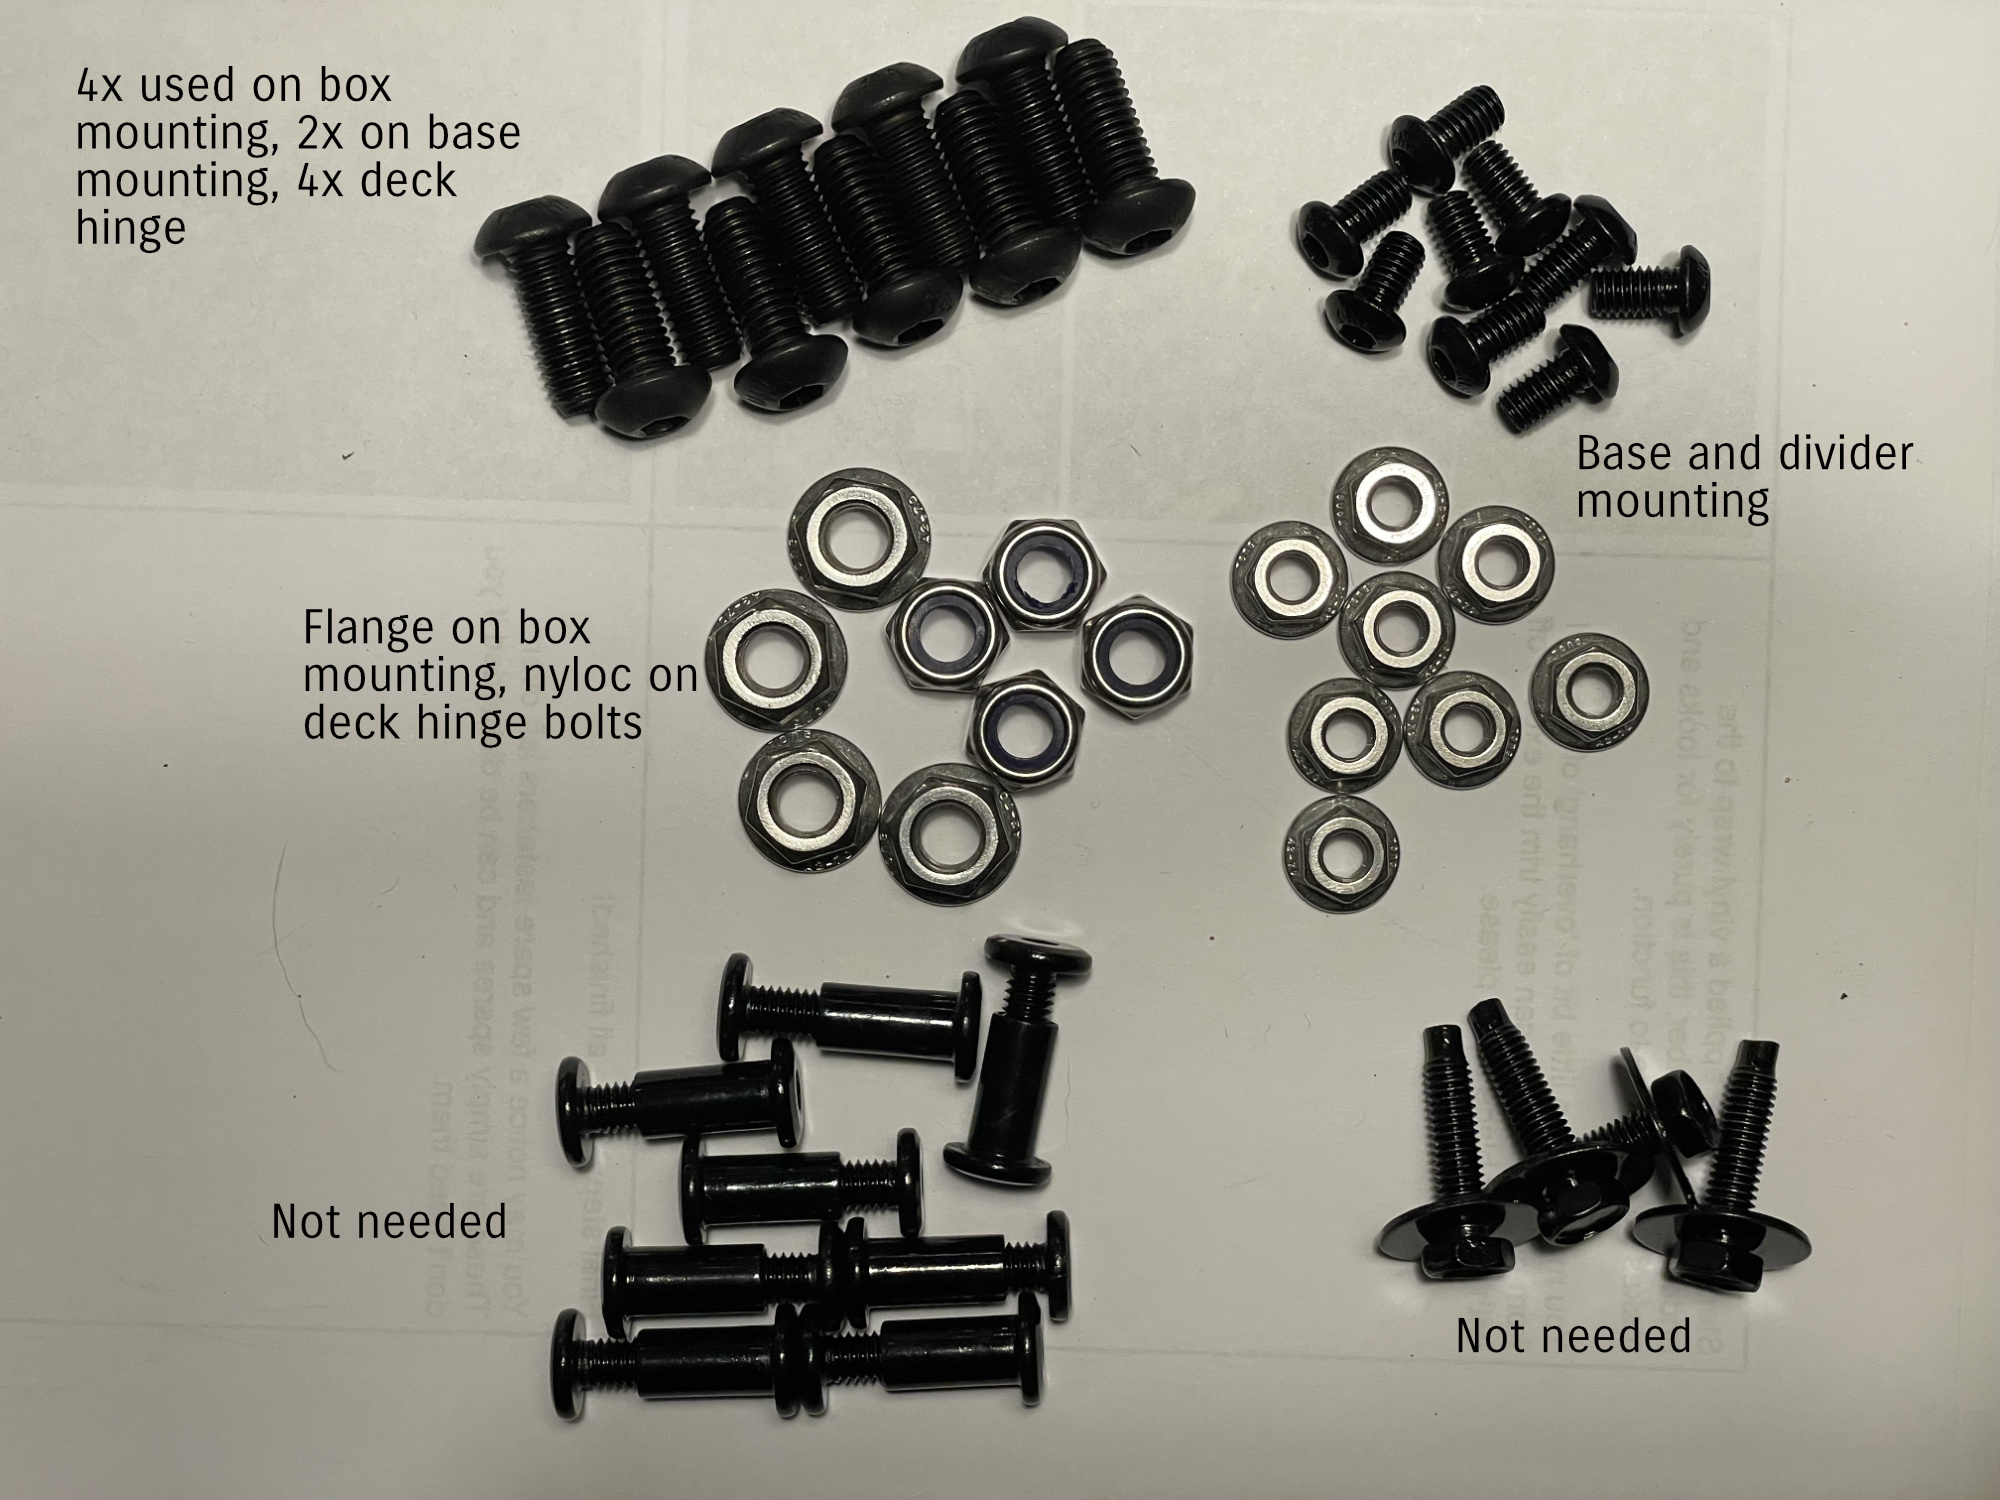
Considering I don’t have access to the build into to come up with that, it wouldn’t be too hard to have pulled the fastener info out of the manufacturing instructions to include in the instructions. The instructions effectively say “hey you’ll probably have some fasteners left over, all good!”, but would be good to know what was definitely needed. You will need:
- 10x M8 allen headed bolts. 4 are used to mount the front box down, two more to mount the baseplate to the front box, and 4 are used to act as the hinge pivots on the false floor itself.
- 4x flanged M8 nuts, used to mount the front box down
- 4x nyloc M8 nuts, used as part of the hinge pivots for the false floor itself
- 8 (or maybe only 7) M6 allen headed bolts; 4 mount the base to the rear panel, 4 mount the divider. You may already have one of the divider bolts installed in the front box anyway.
- 8 flanged M6 nuts to suit the above
The other fasteners are already installed in the base deck etc hence not needed. The allen shanked nuts and bolts do help to align the false floor hinge holes though.
Installation process
Installation is pretty straightforwards. You do have to remove the rear seats; instructions are given for doing this with the emailed instruction link, and then you install the false floor and storage system itself.
How-to
Rear seat removal
I cover this in my interior removal article for the most part so I won’t repeat it here. Doesn’t take long, just remember to undo the seatbelt nuts before you undo the rest of the seat, and only pull up the seat base a little before unclipping the wires.
You have to remove the plastic seat base retainers from their mounts.
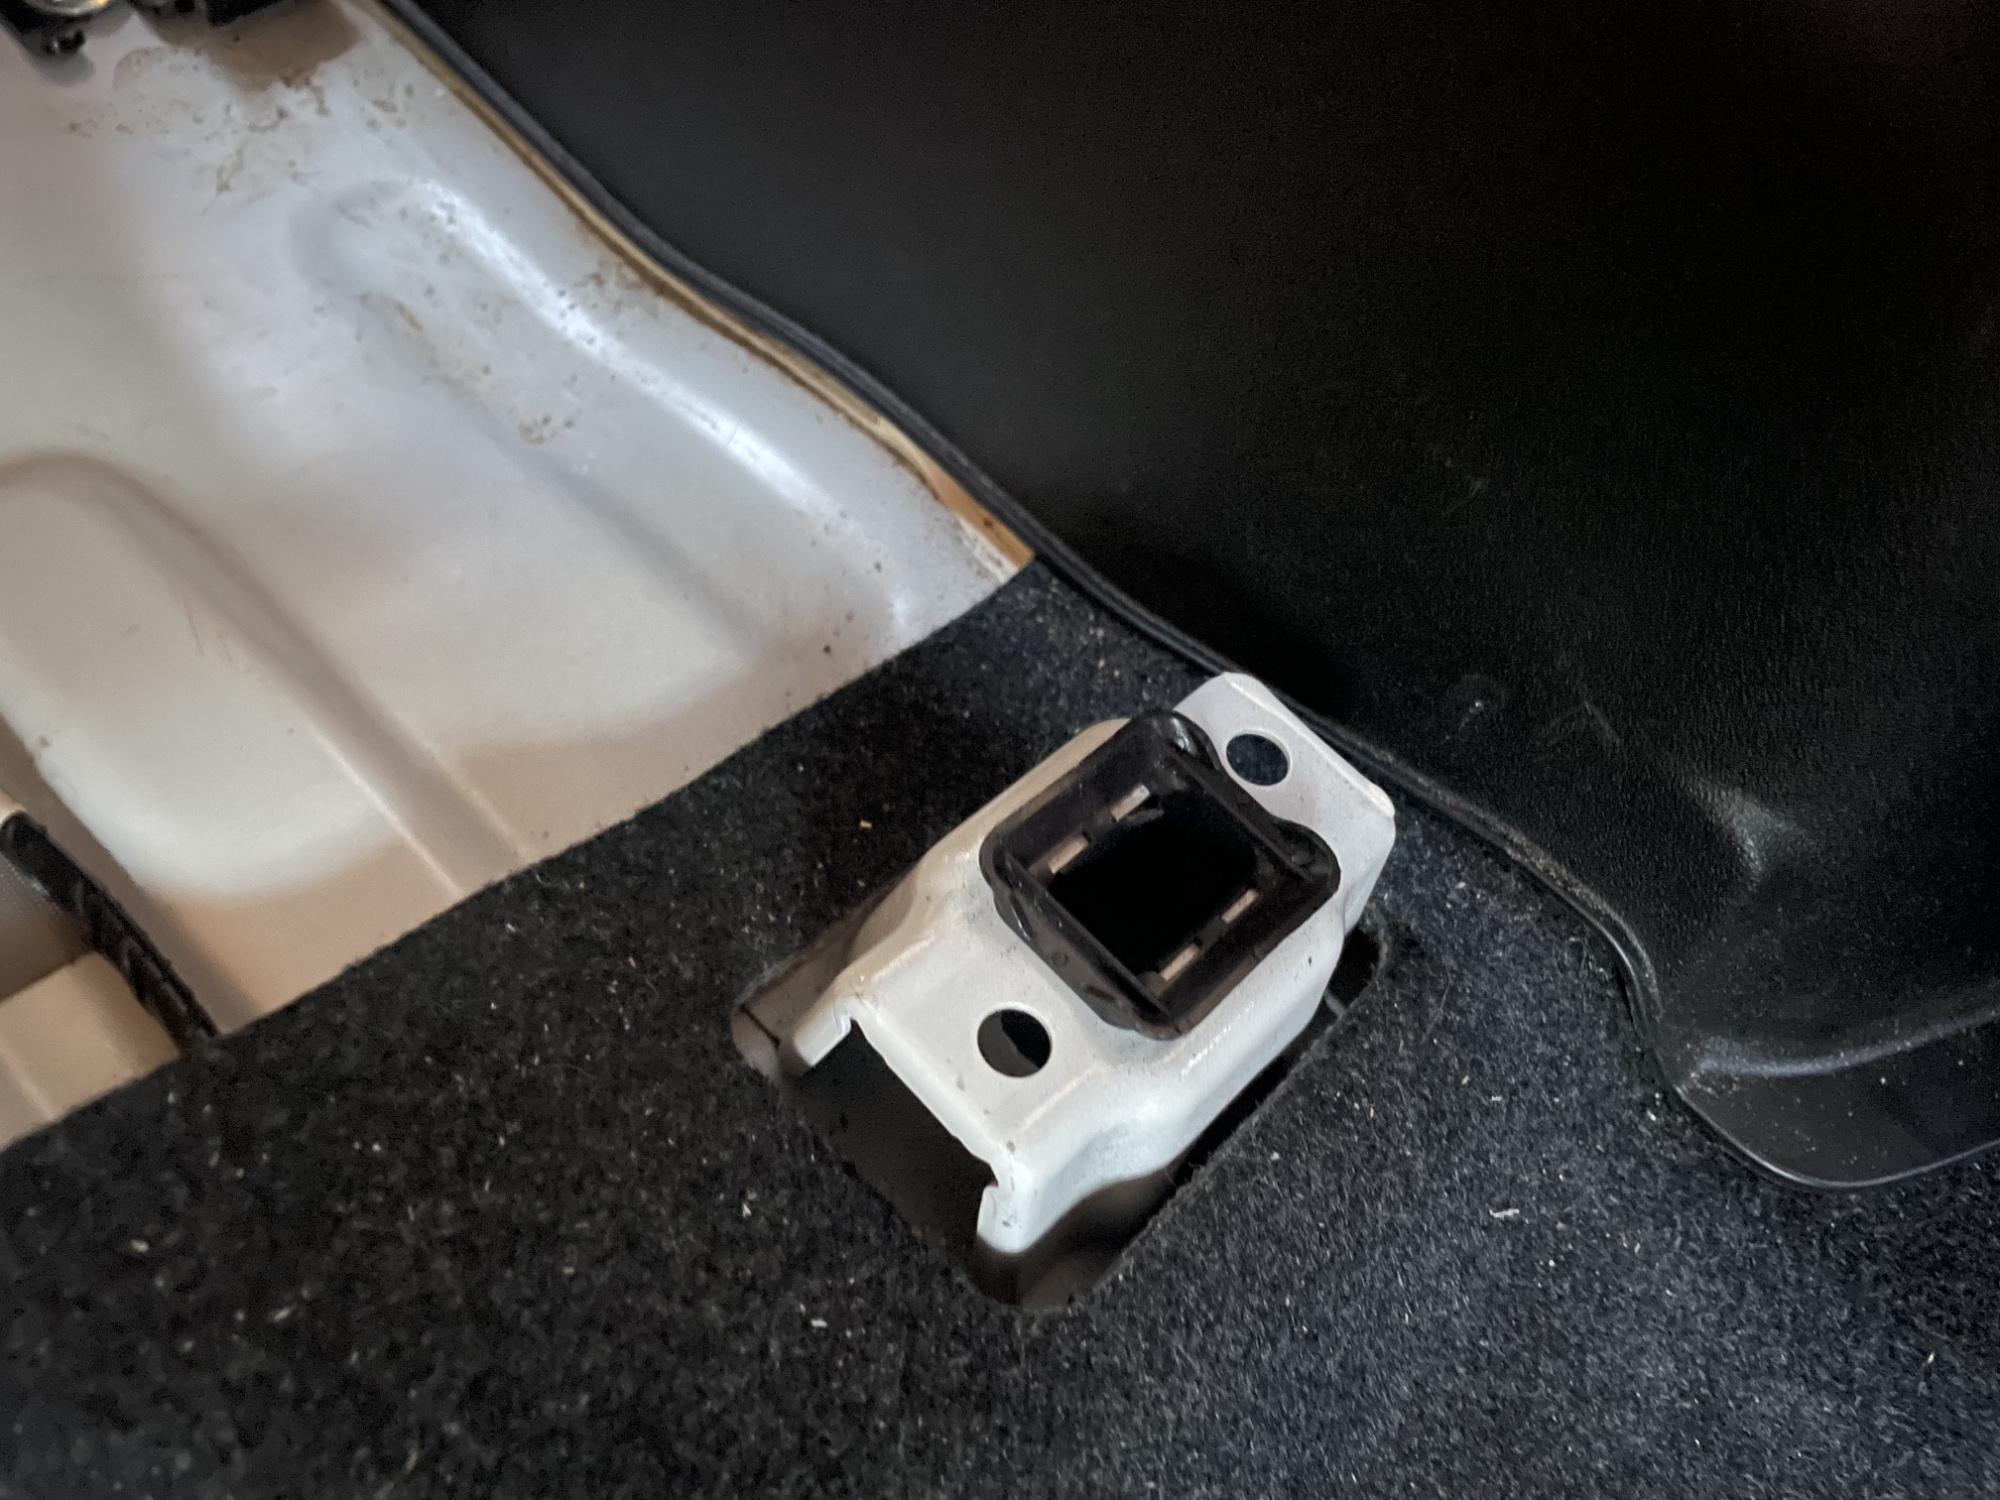
They have little squeeze tabs which can be a little fiddly to get to, but once out all good. I was able to get one side up pushing on the side of it from inside, then used the angle to get the other side released and up it came.
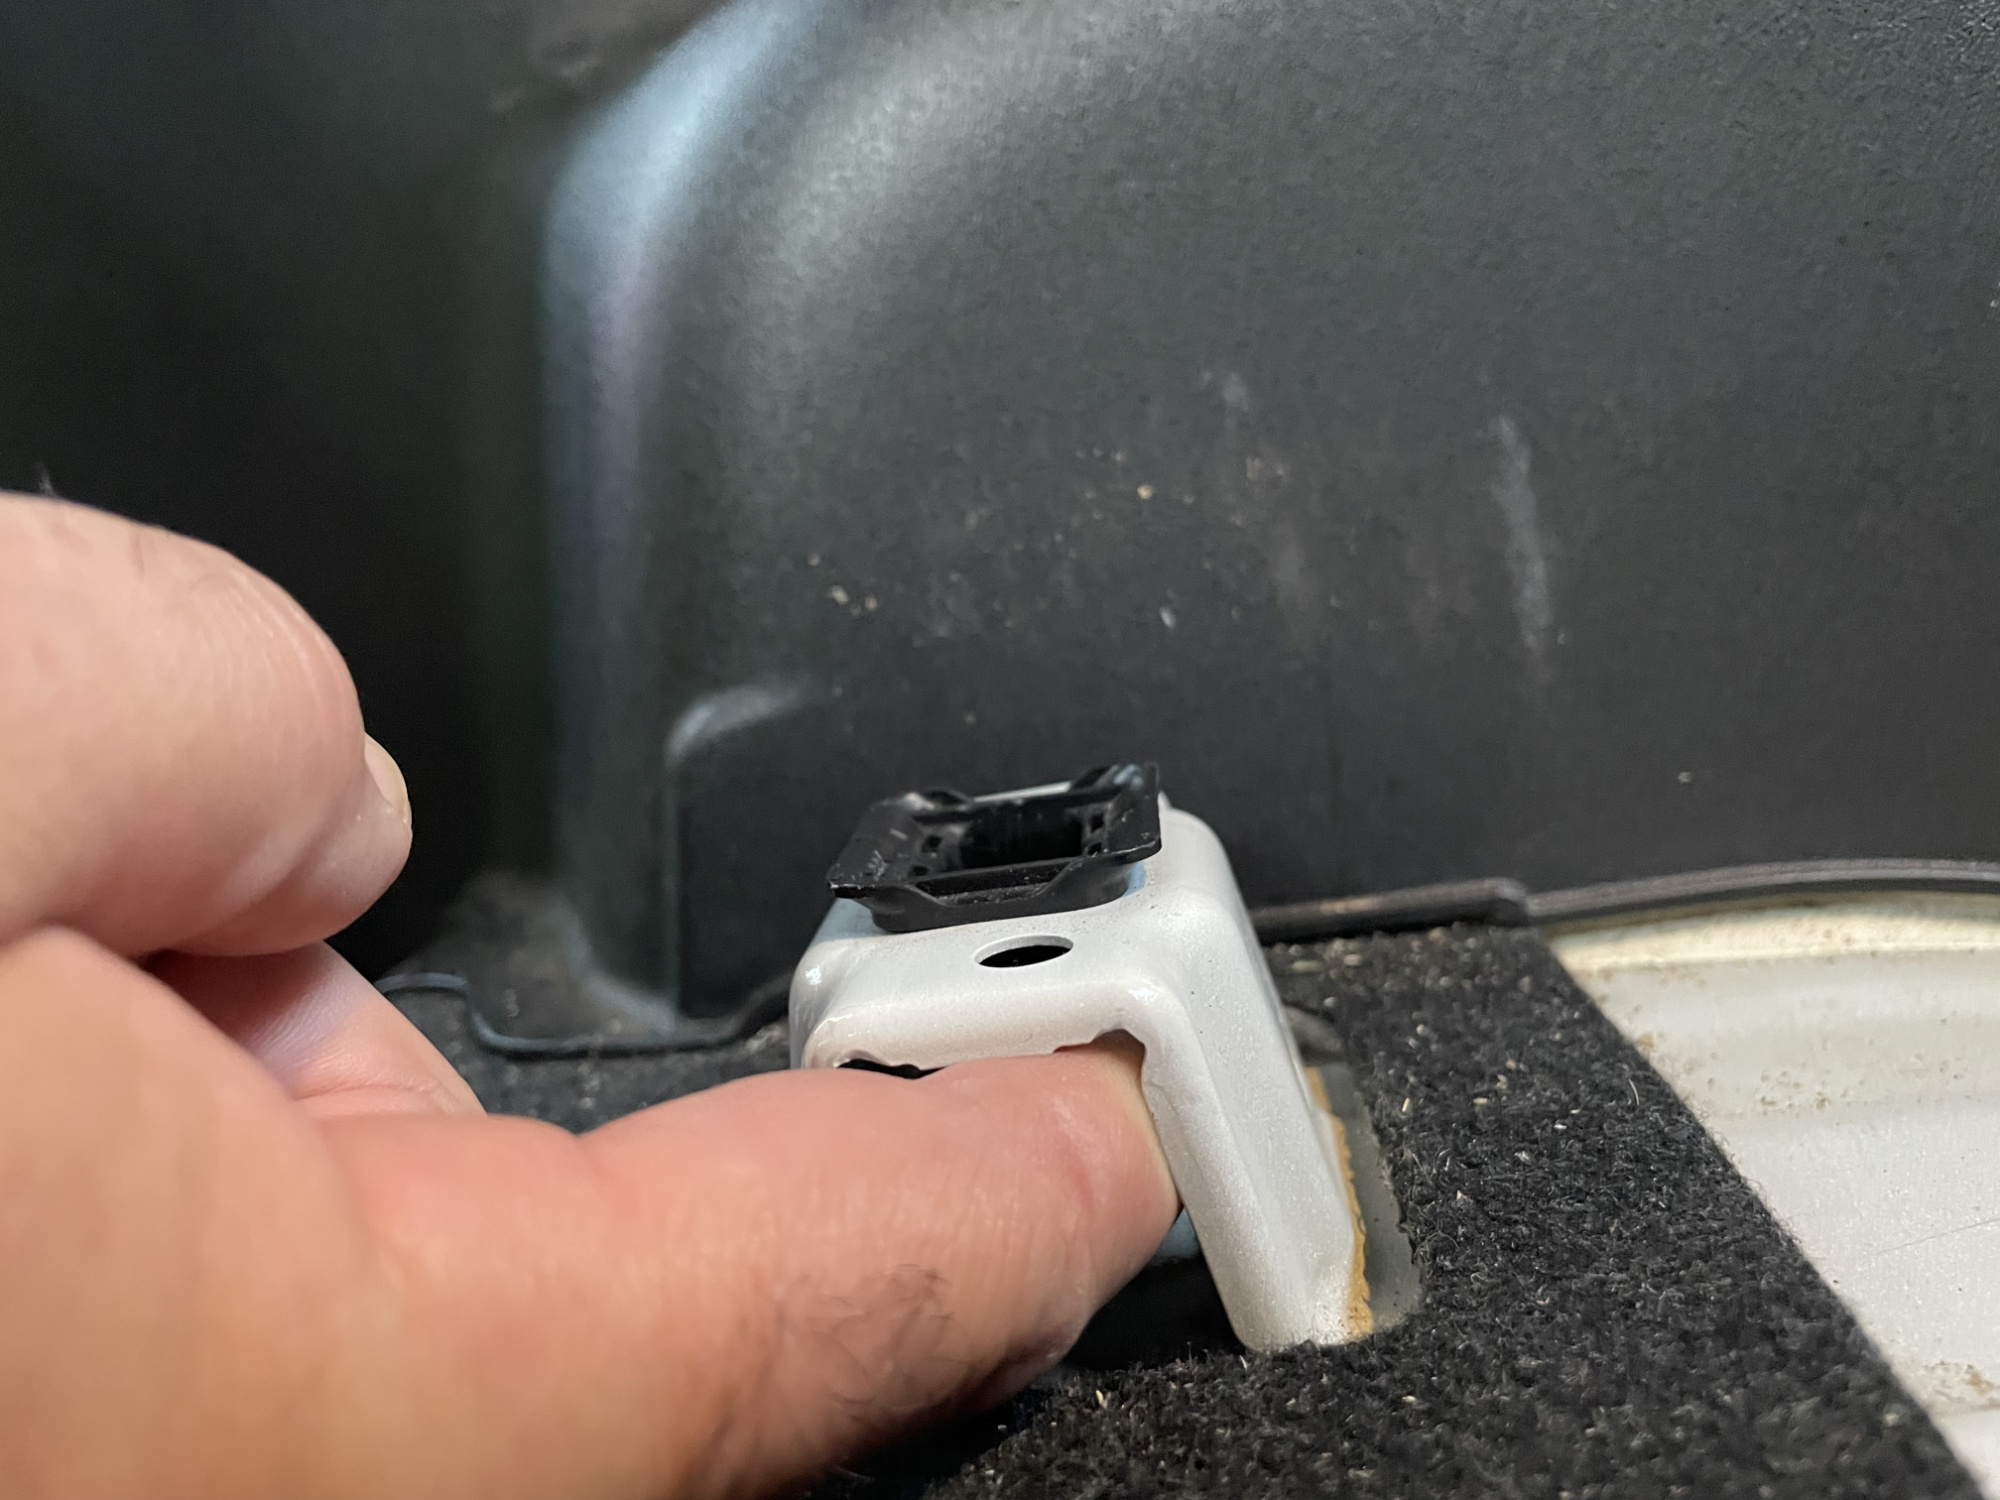
With the seat base retainers removed from their mounts, you also should unclip the seat occupancy wires from the floor and the base mount for the rear seat base. It is taped to the floor, has one white plastic push tab into the floor and also one clip into the seat base retainer mount. No pics of this but you’ll see it fully released in the next picture.
If you have installed multi stage sound deadening all up the rear underneath the carpet then you may need to trim some off to get the front box to sit flat. No after pics of the trimming, but here’s where mine ran up to and it was too high & stopped the front box sitting correctly.

Mounting the front box
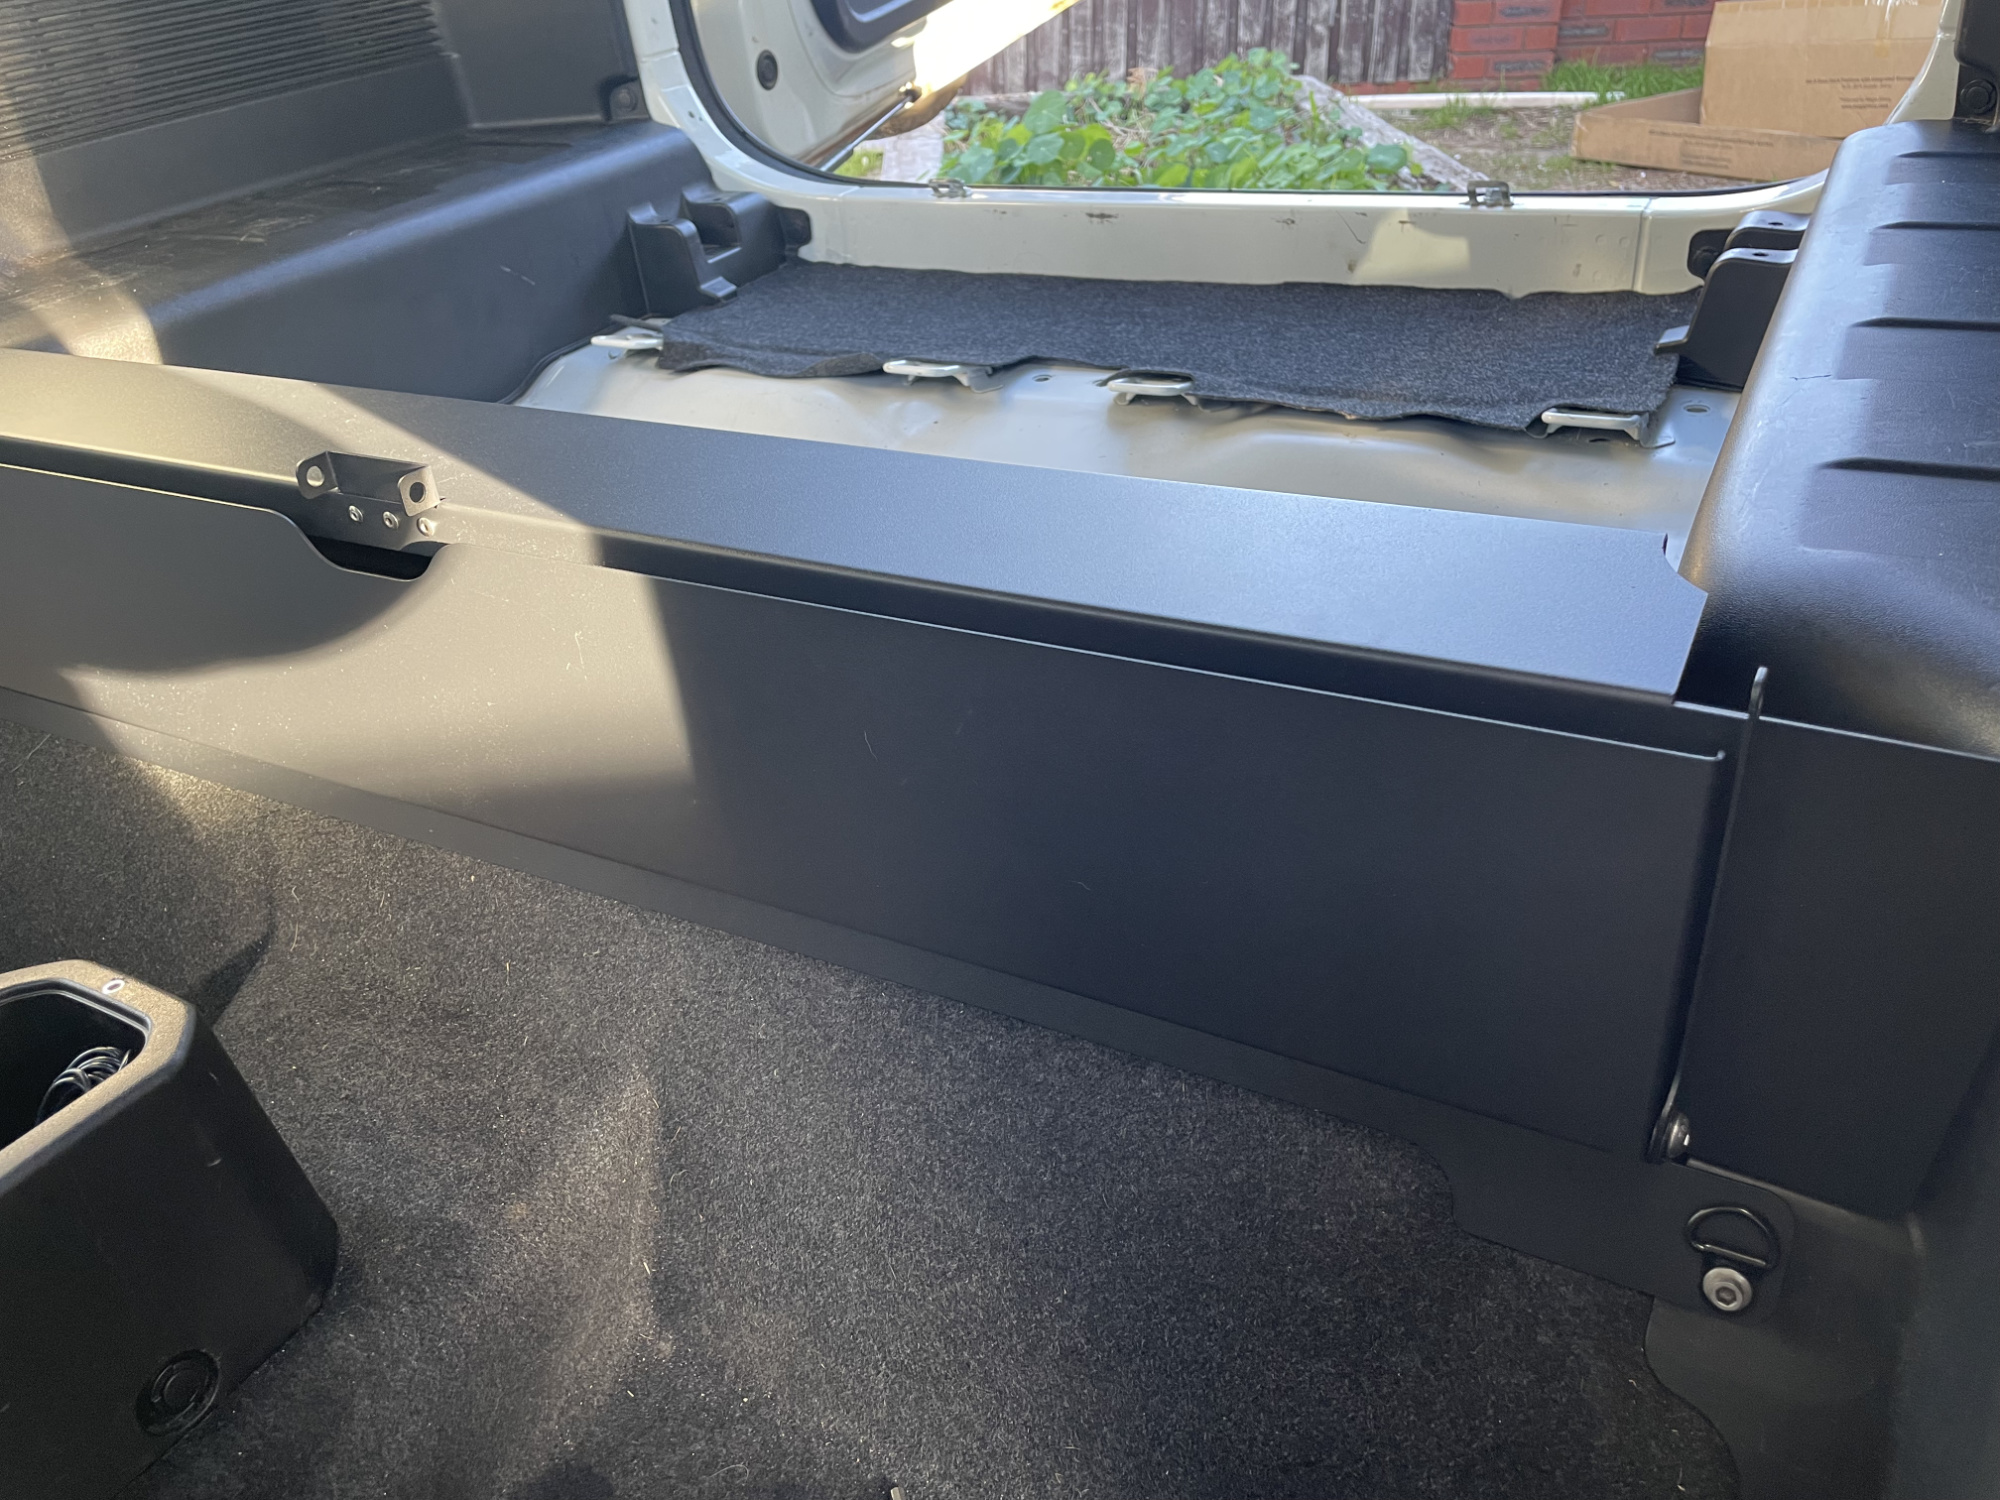
Contrary to the instructions, I actually found it easier to use longer bolts in the front lower mounts in the footwell to slightly retain the box, and then put the upper bolts into the seat base mounts. I did this because I wanted to still have tiedown points available in the footwell so you need longer than the included bolts. I used much longer flanged M6 bolts here plus my lovely little tiedown D-rings.
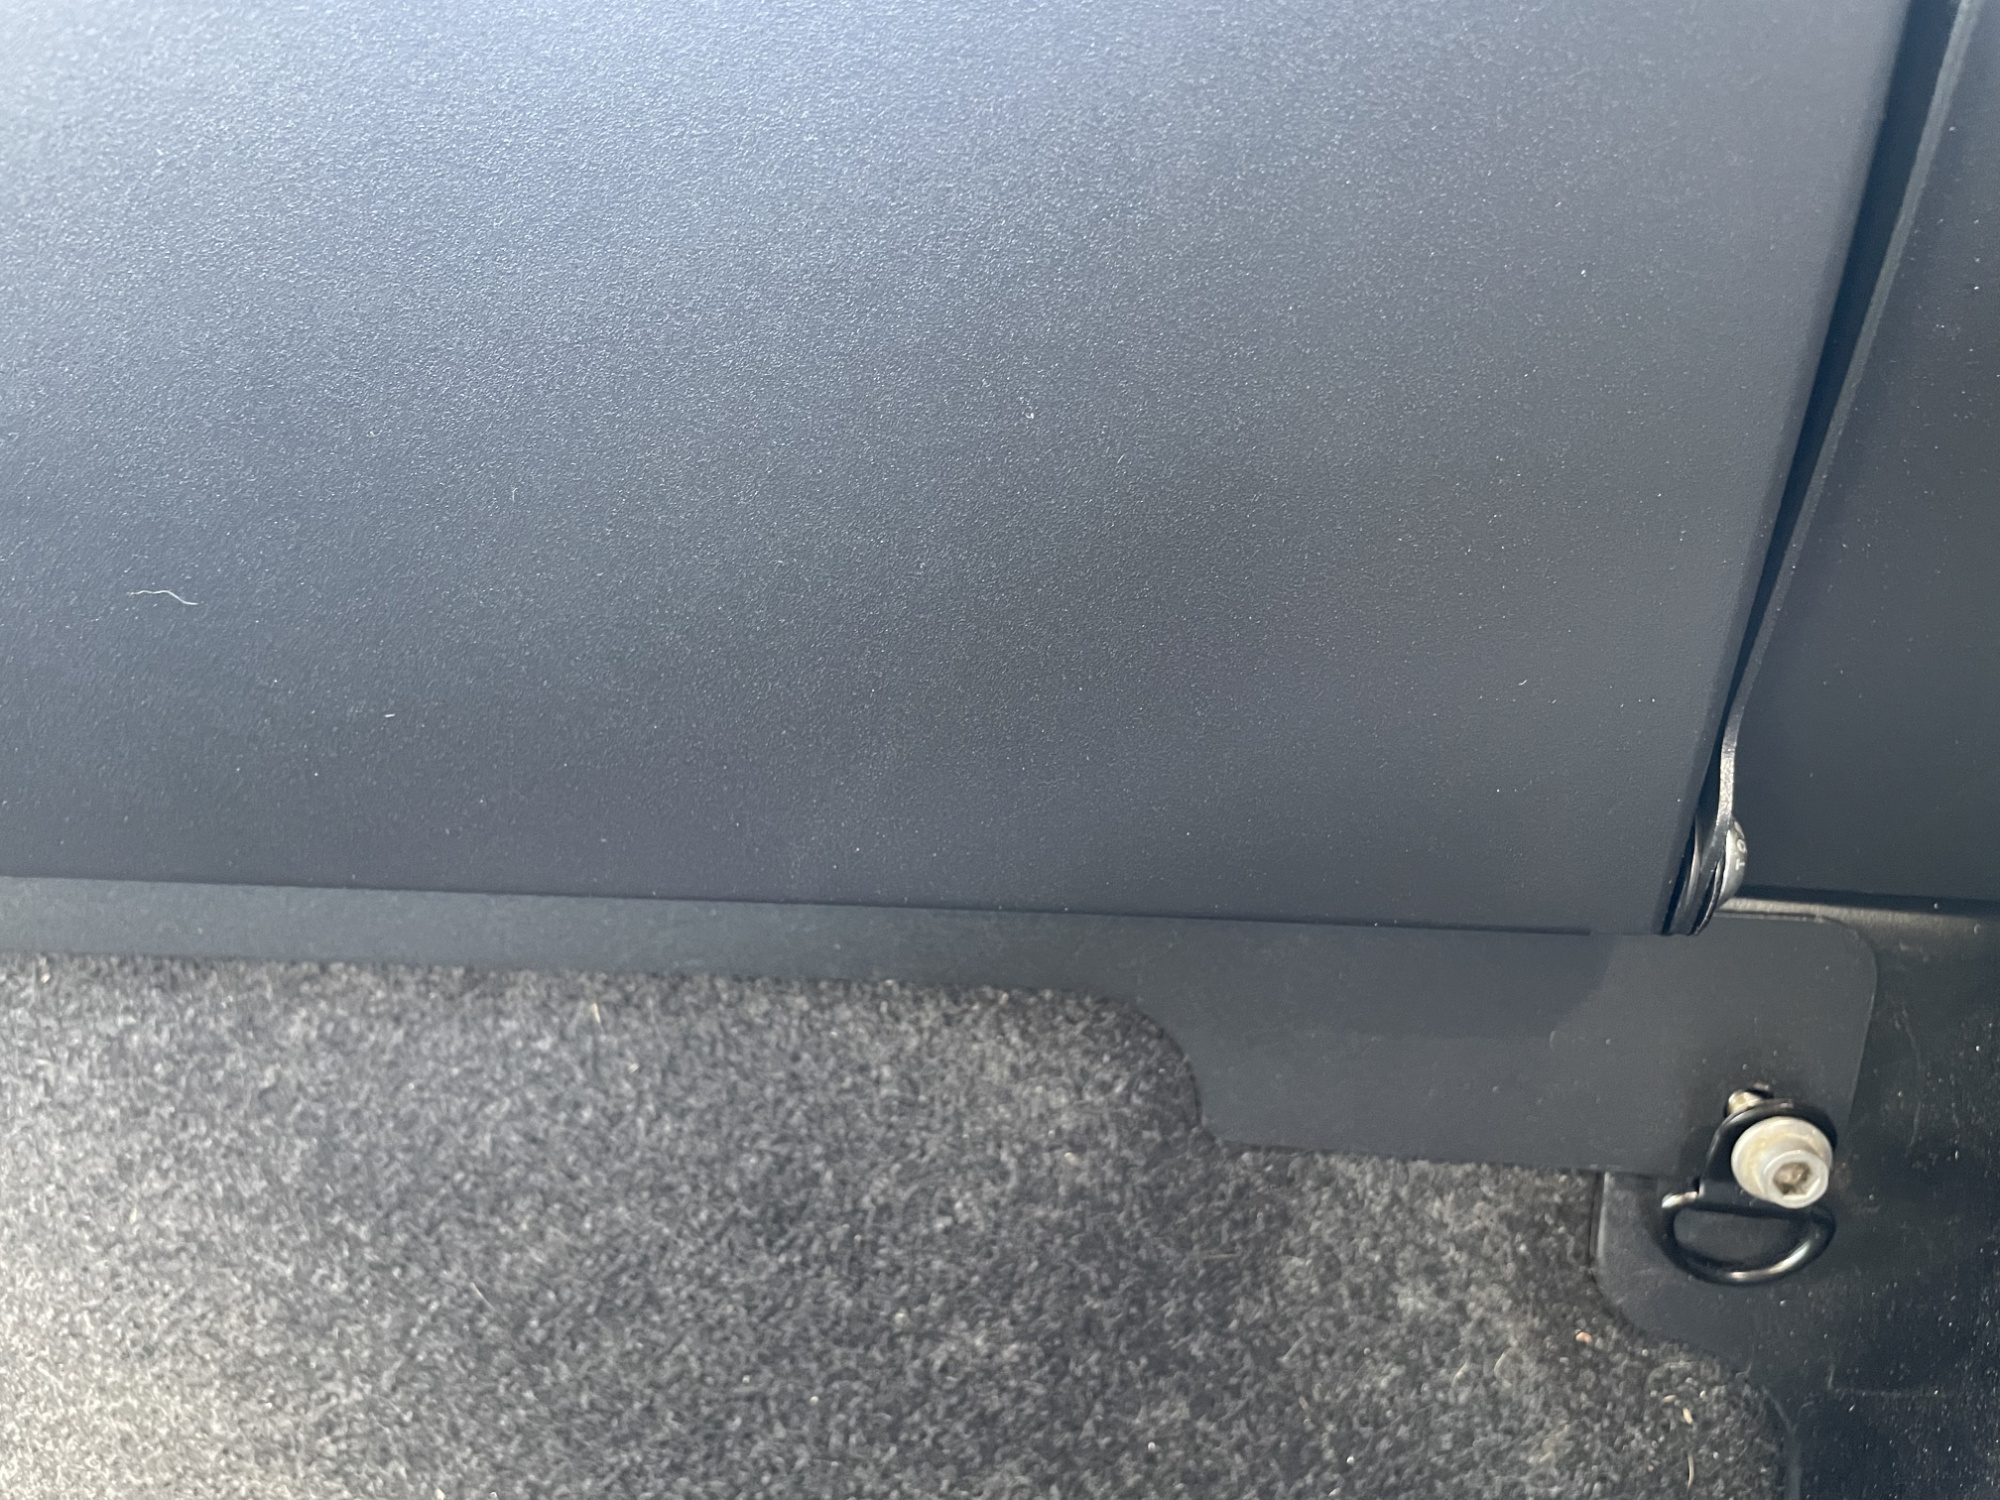
Note these are super loose here, that way I have a heap of movement of the front box.
You now need to line up the holes in the base of the front box with the holes in the rear seat base mounts.
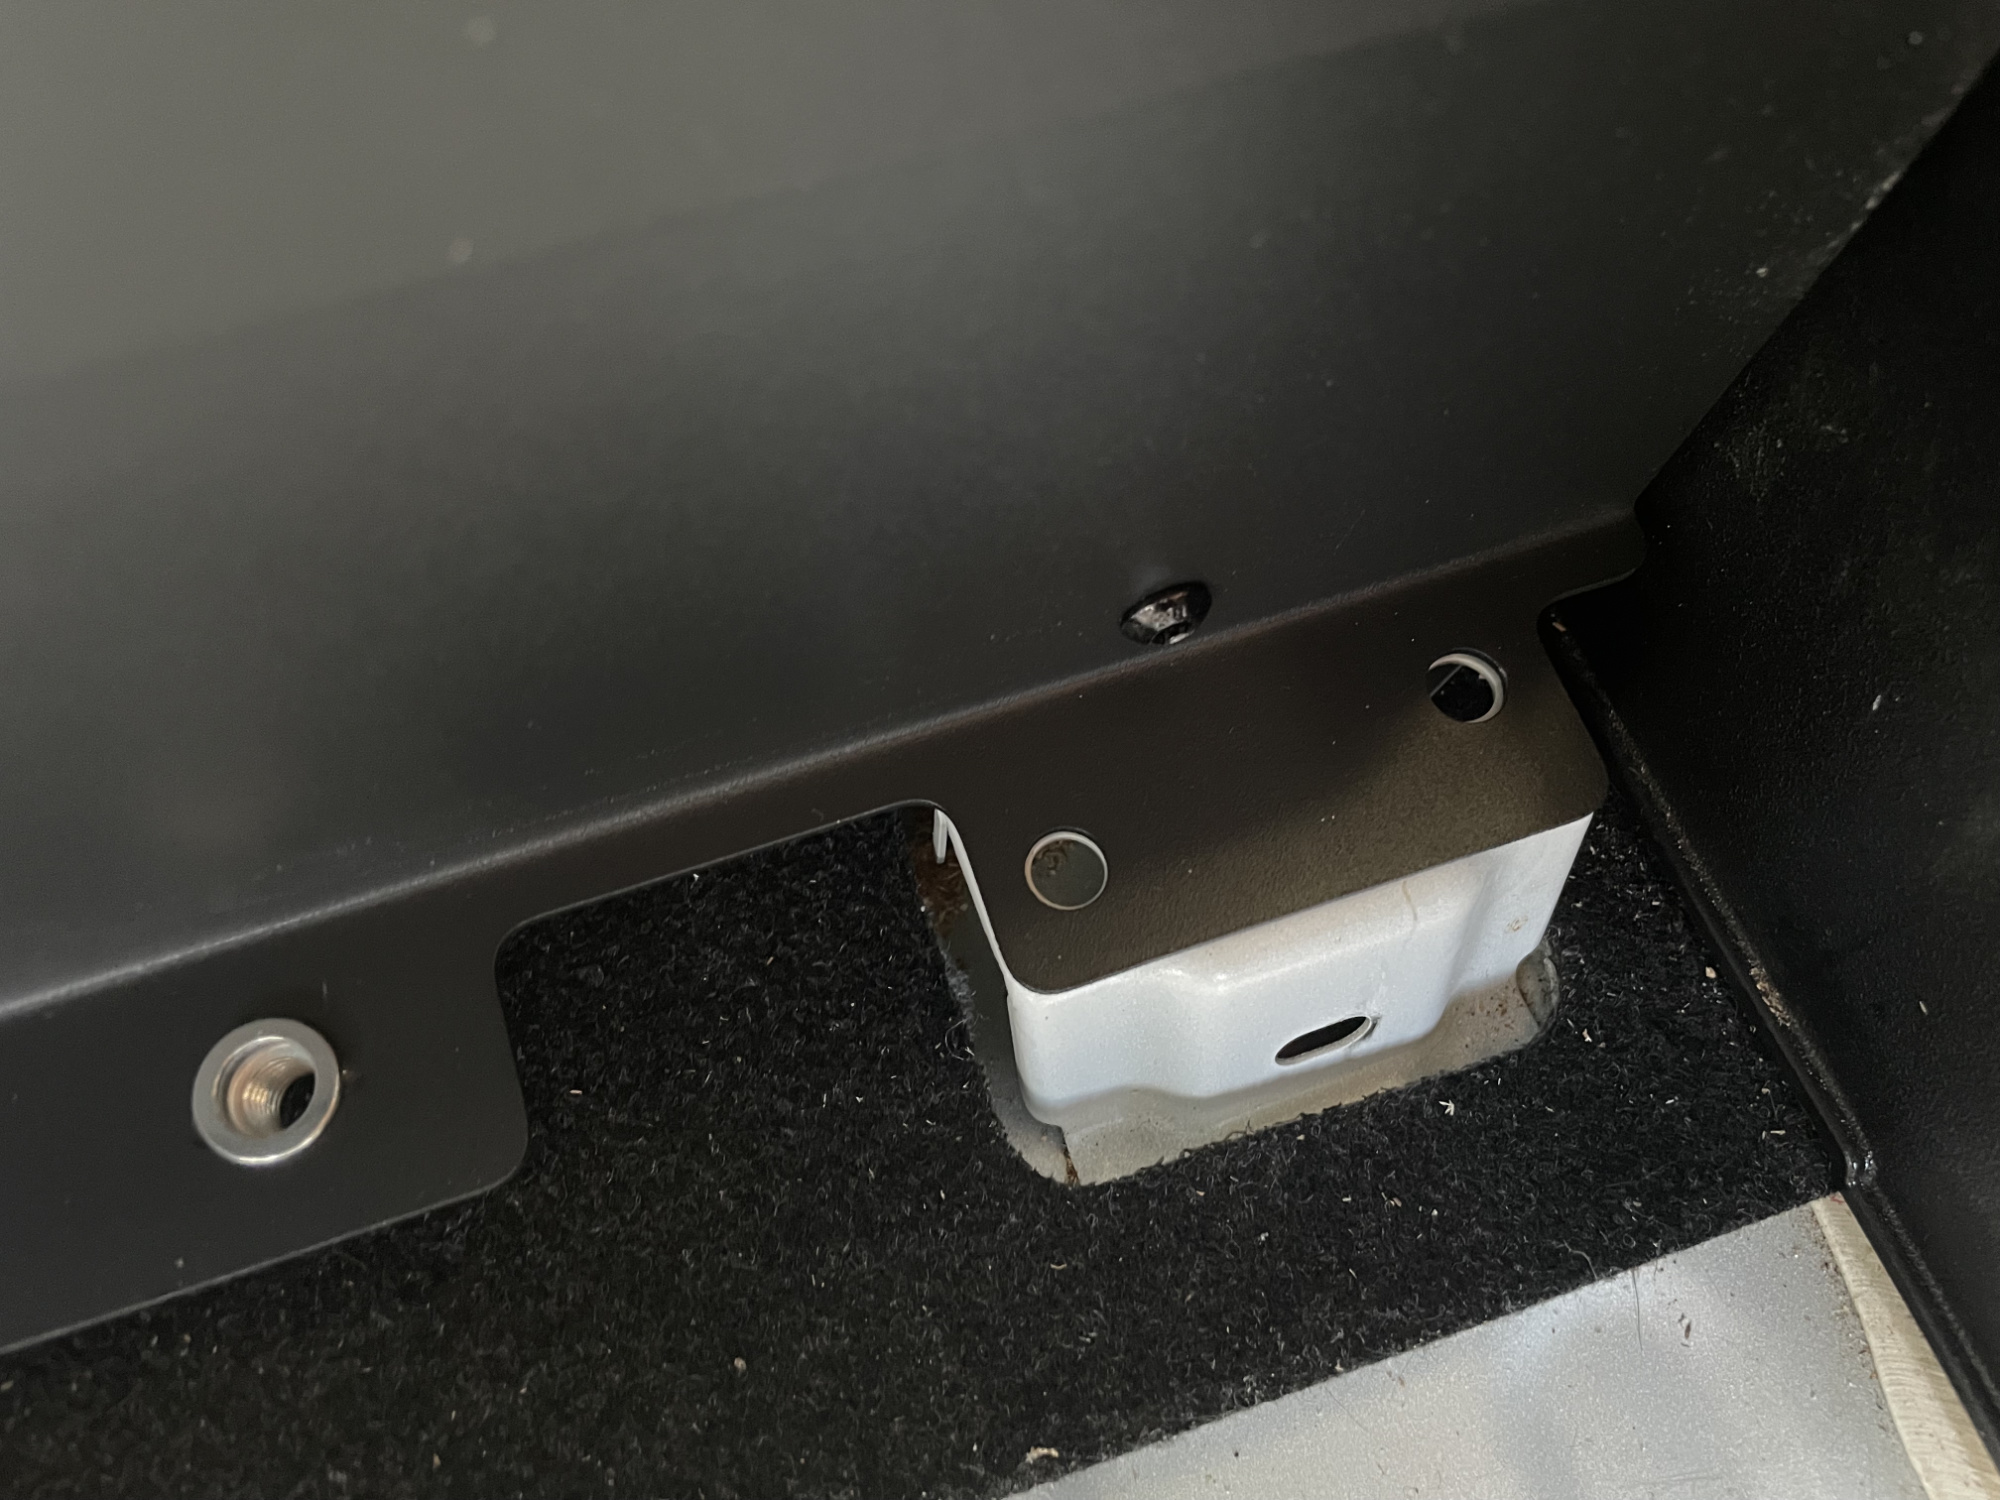
Do the outside bolts first! Be prepared this is actually kinda fiddly to get the nuts lined up. First push the outside bolt in, and then using your fingers carefully work the nut on. It takes some feel to get this right and get the nut started nice and straight. Just take your time and get it lined up nicely and only do stuff up with your fingers at this stage (and not even that tight at all).
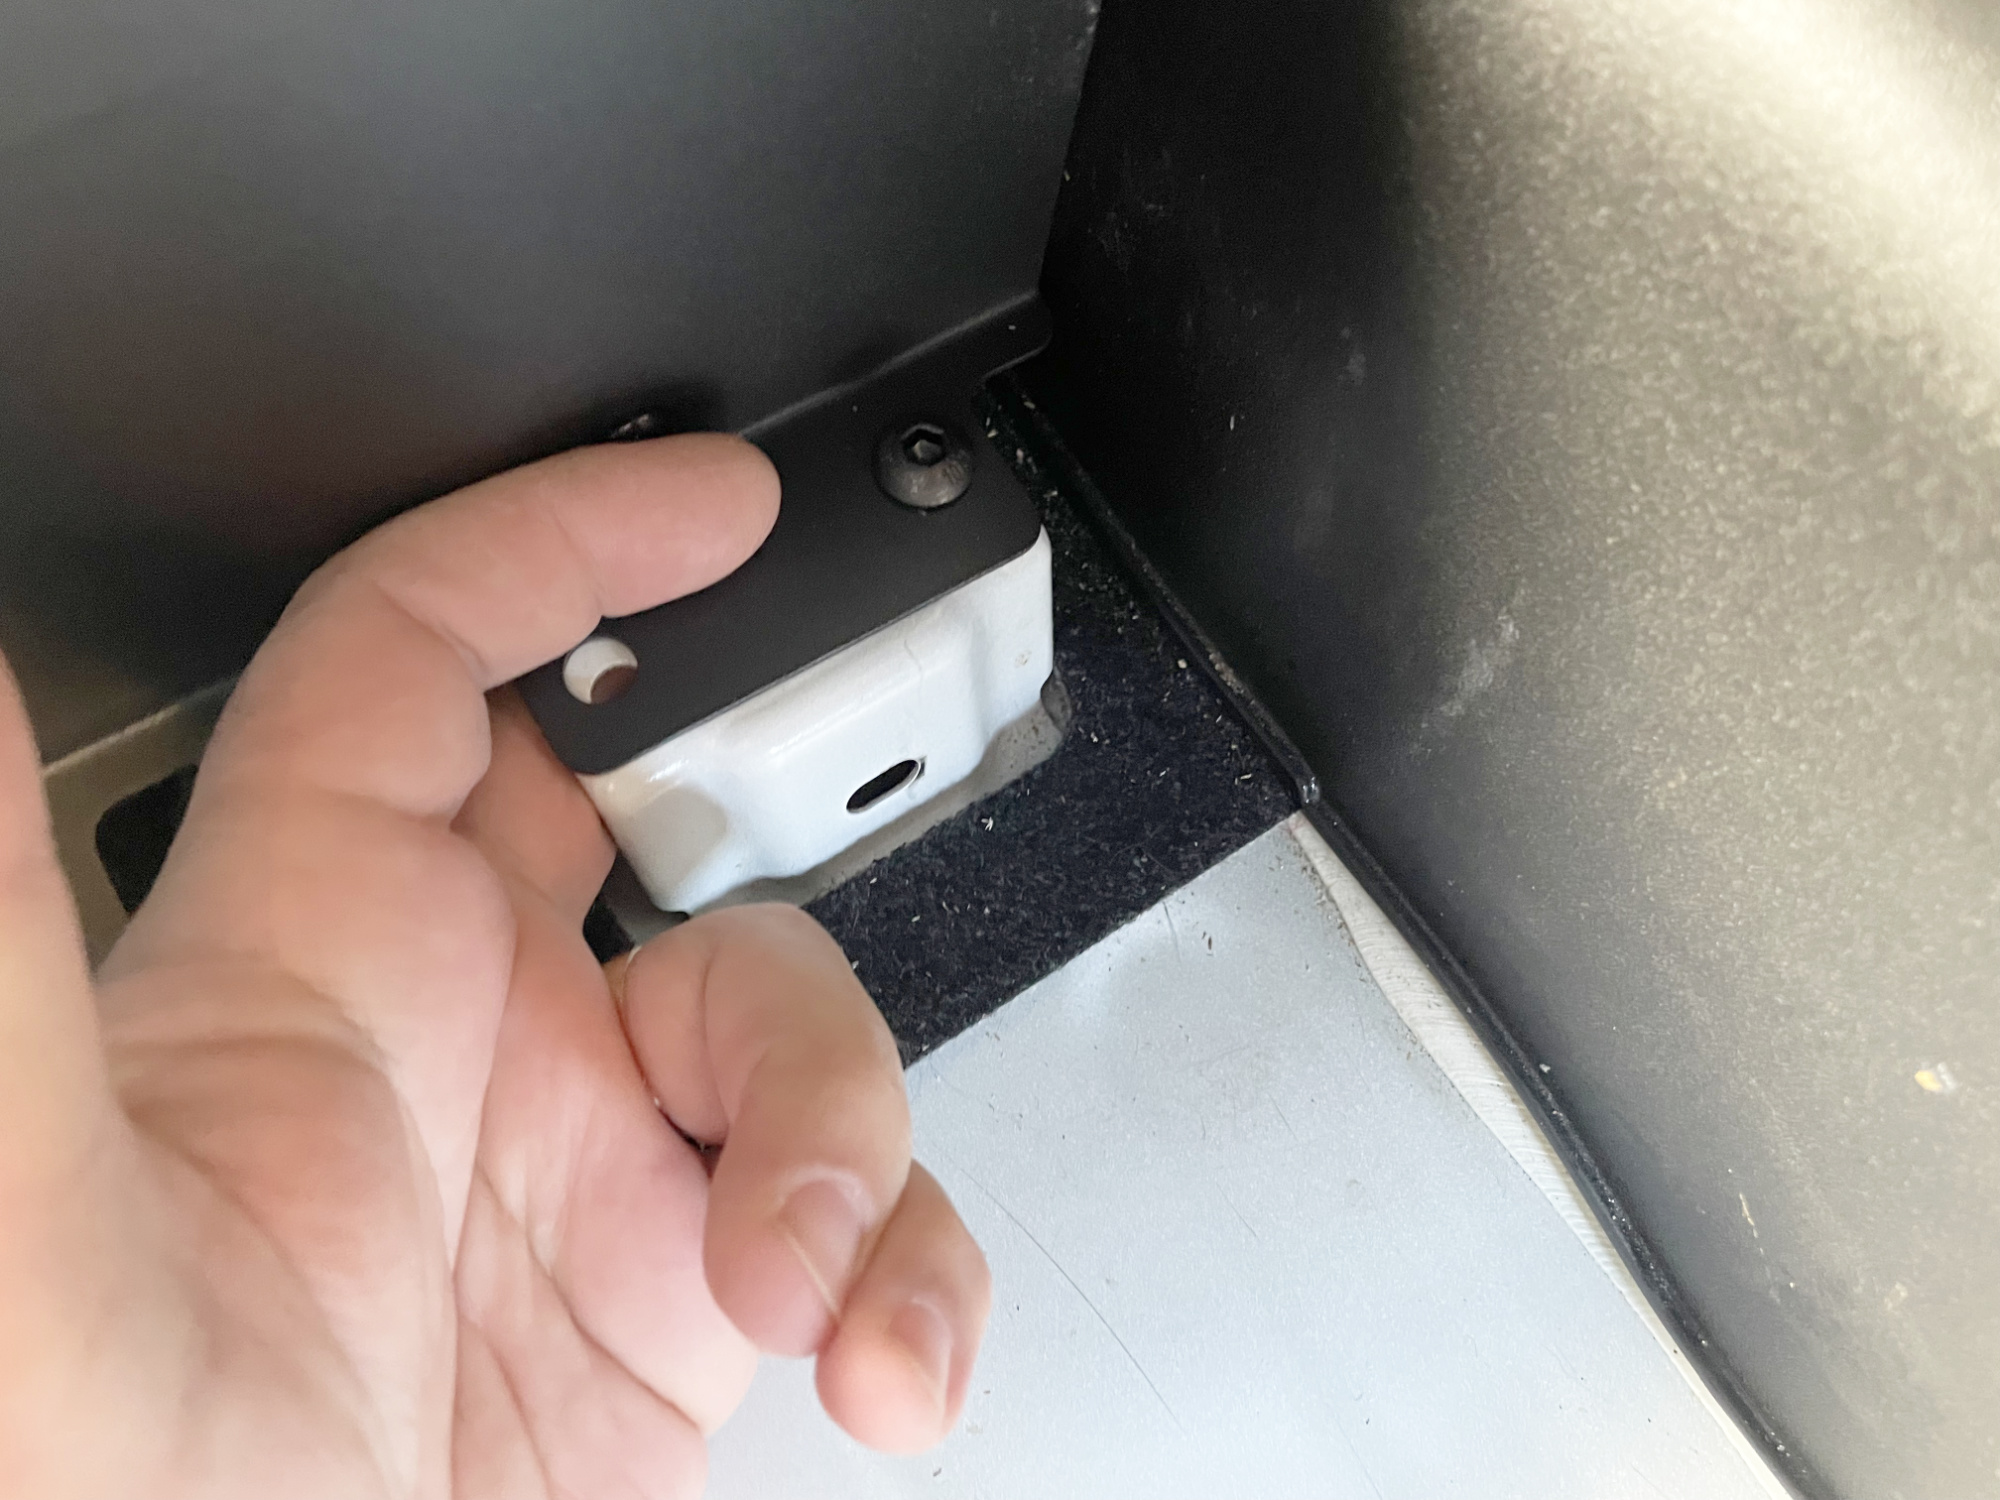
Then put in the inner bolt and do the same teenager fumbling in the dark action and get the 2nd nut started on its respective bolt.
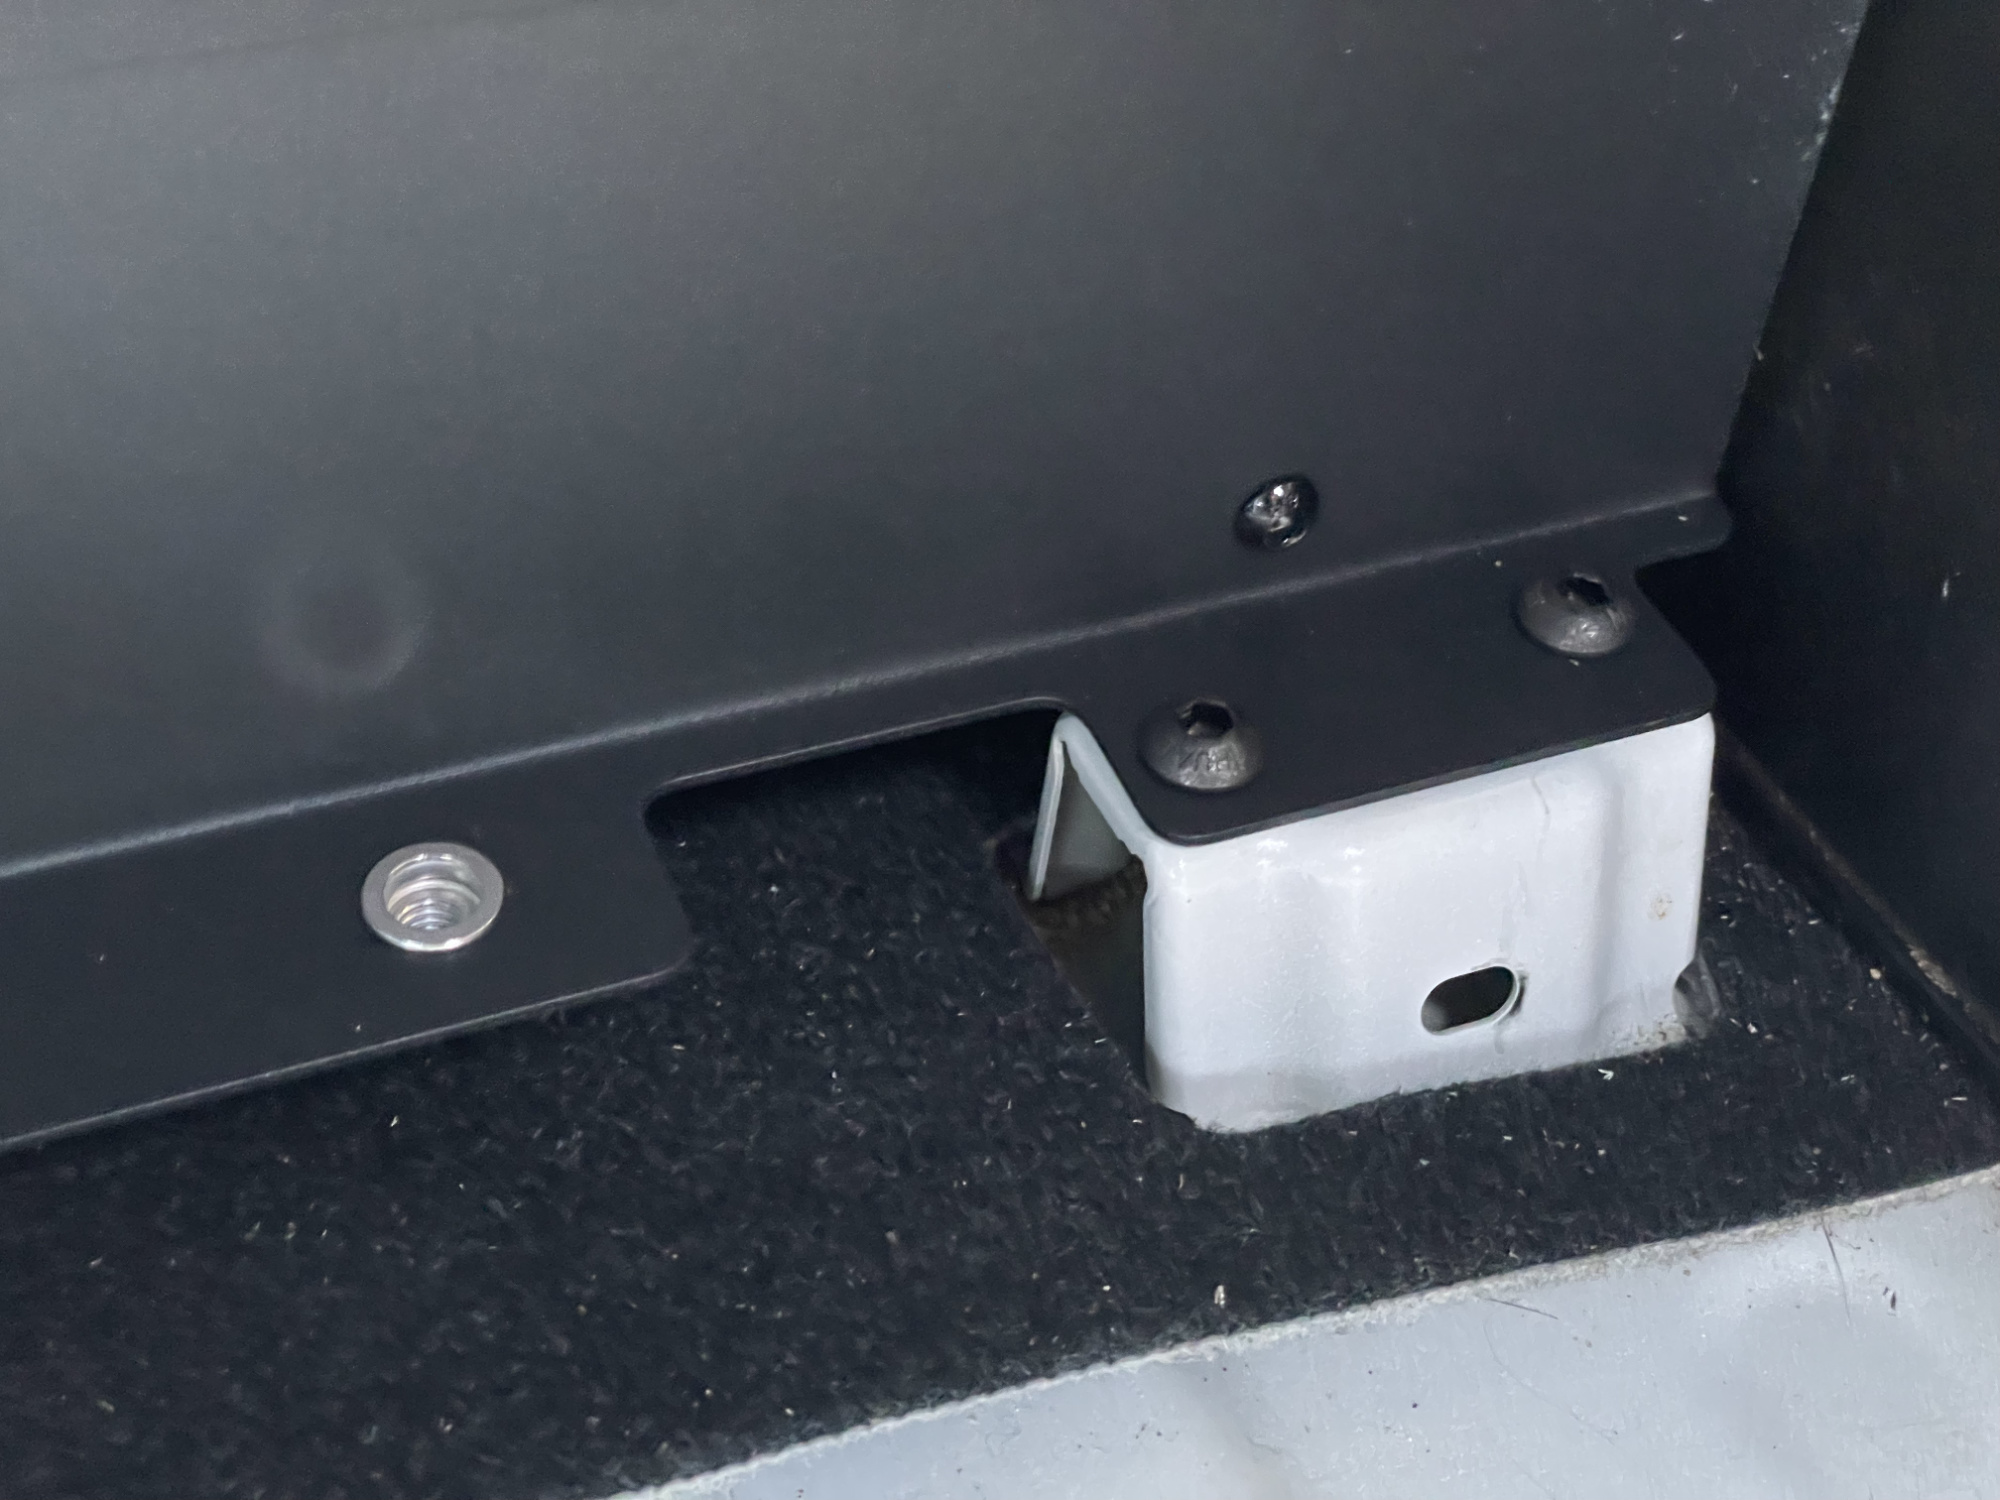
Repeat for the other side, and then the included instructions say you can do everything up tight here. The flanged nuts bite enough you don’t really need a spanner, just hold the nut with your finger till its tight enough to bite down.
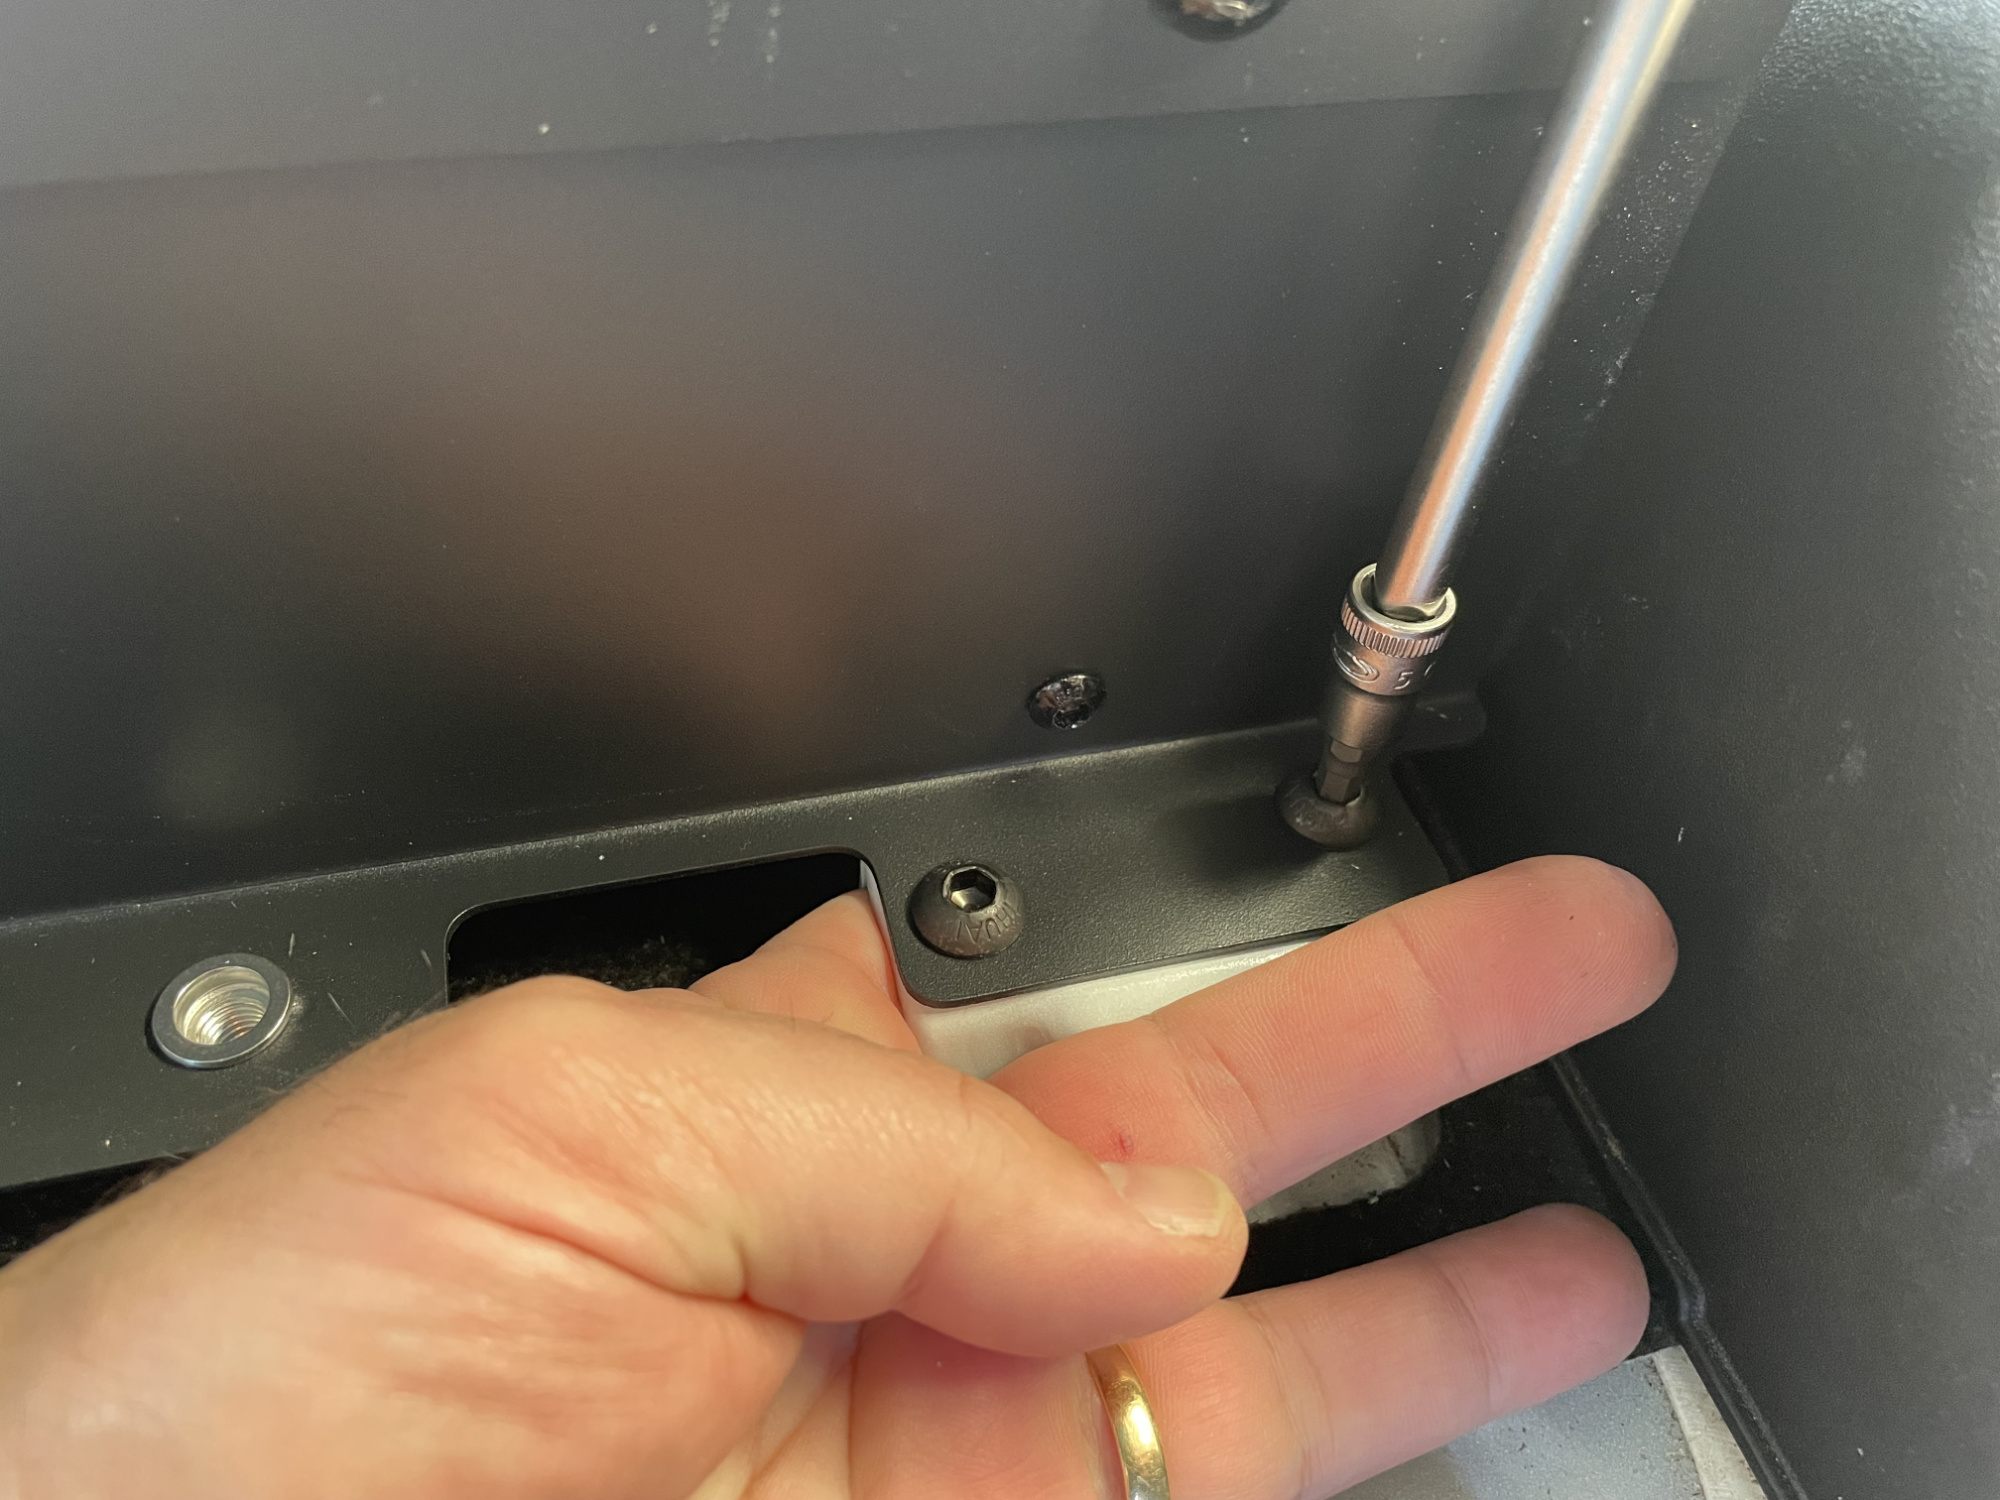
An improvement here would be designing captive nut plates to go inside the seat base brackets. It’d give you more scope for realignment in a later step and would be way less of a cockaround than trying to fit fingers inside an awkward mount.
I also made sure to tighten up my much longer front bolts.
Mounting the rear panel and base
Rear base plate gets mounted next and it uses 4 bolts from the seats themselves. You start with the outer two bolts only, and only quite loose to begin with.
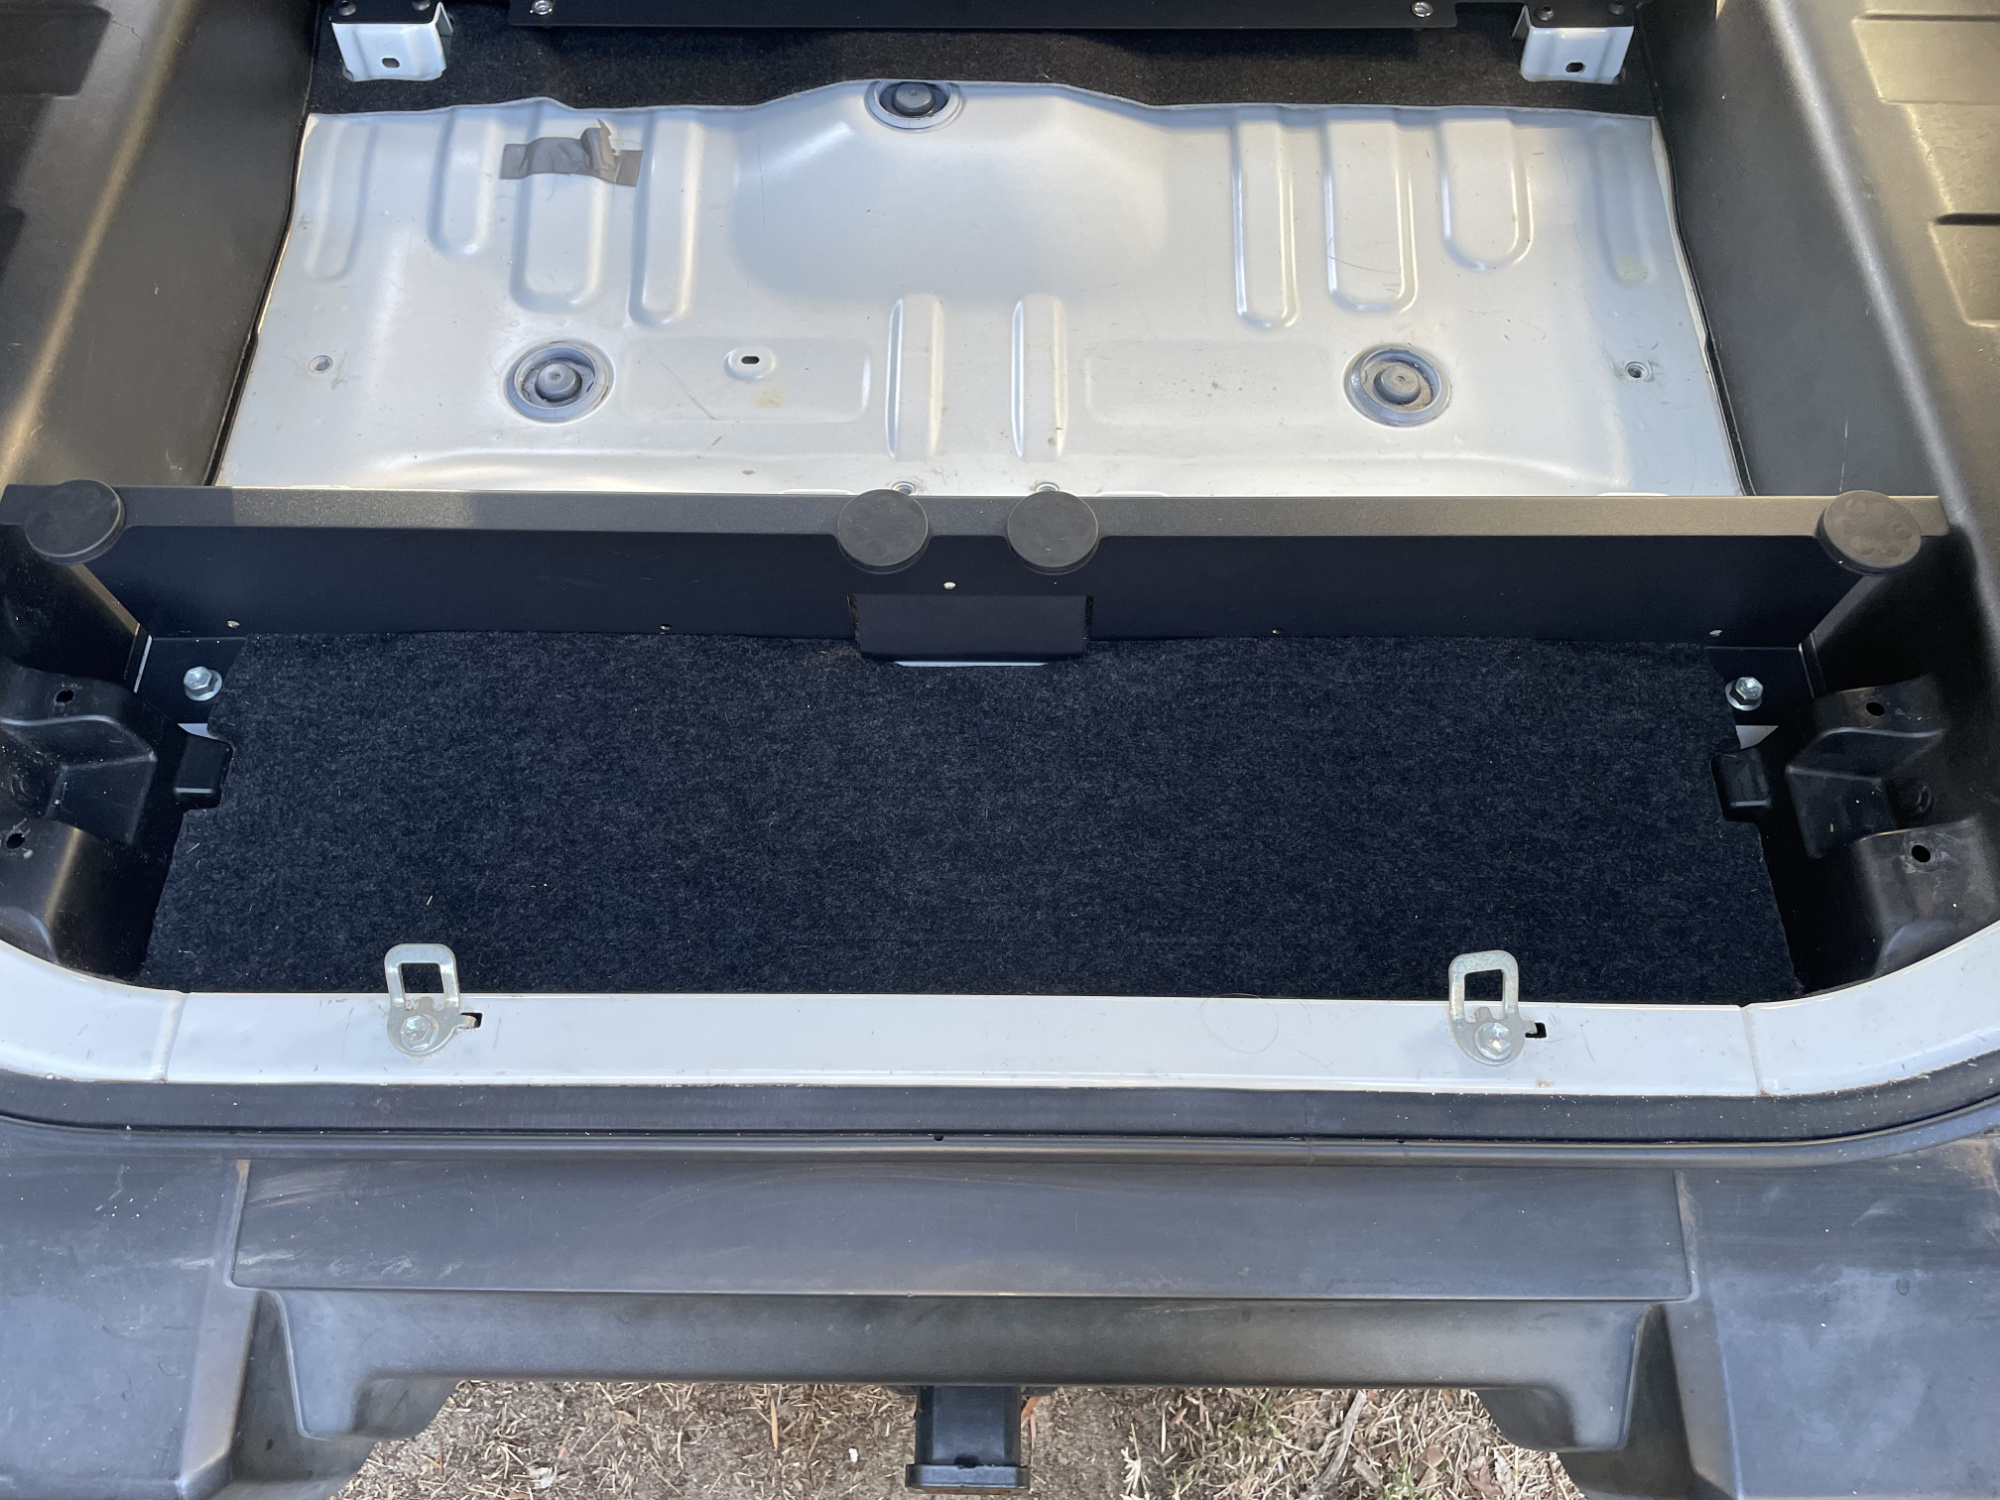
While I had the carpet here on top of the jack, you really need to remove it at this point as the bits that poke through the rear plate get in the way of the base plate.
Base plate next goes in. You need 4x M6 bolts and nuts, 2 M8 allen bolts, plus two seat base bolts. One of these M6 bolts and nuts is potentially already in the front box (mine was) so just bear that in mind. Here’s the bolts kinda laid out on the base where they need to go.
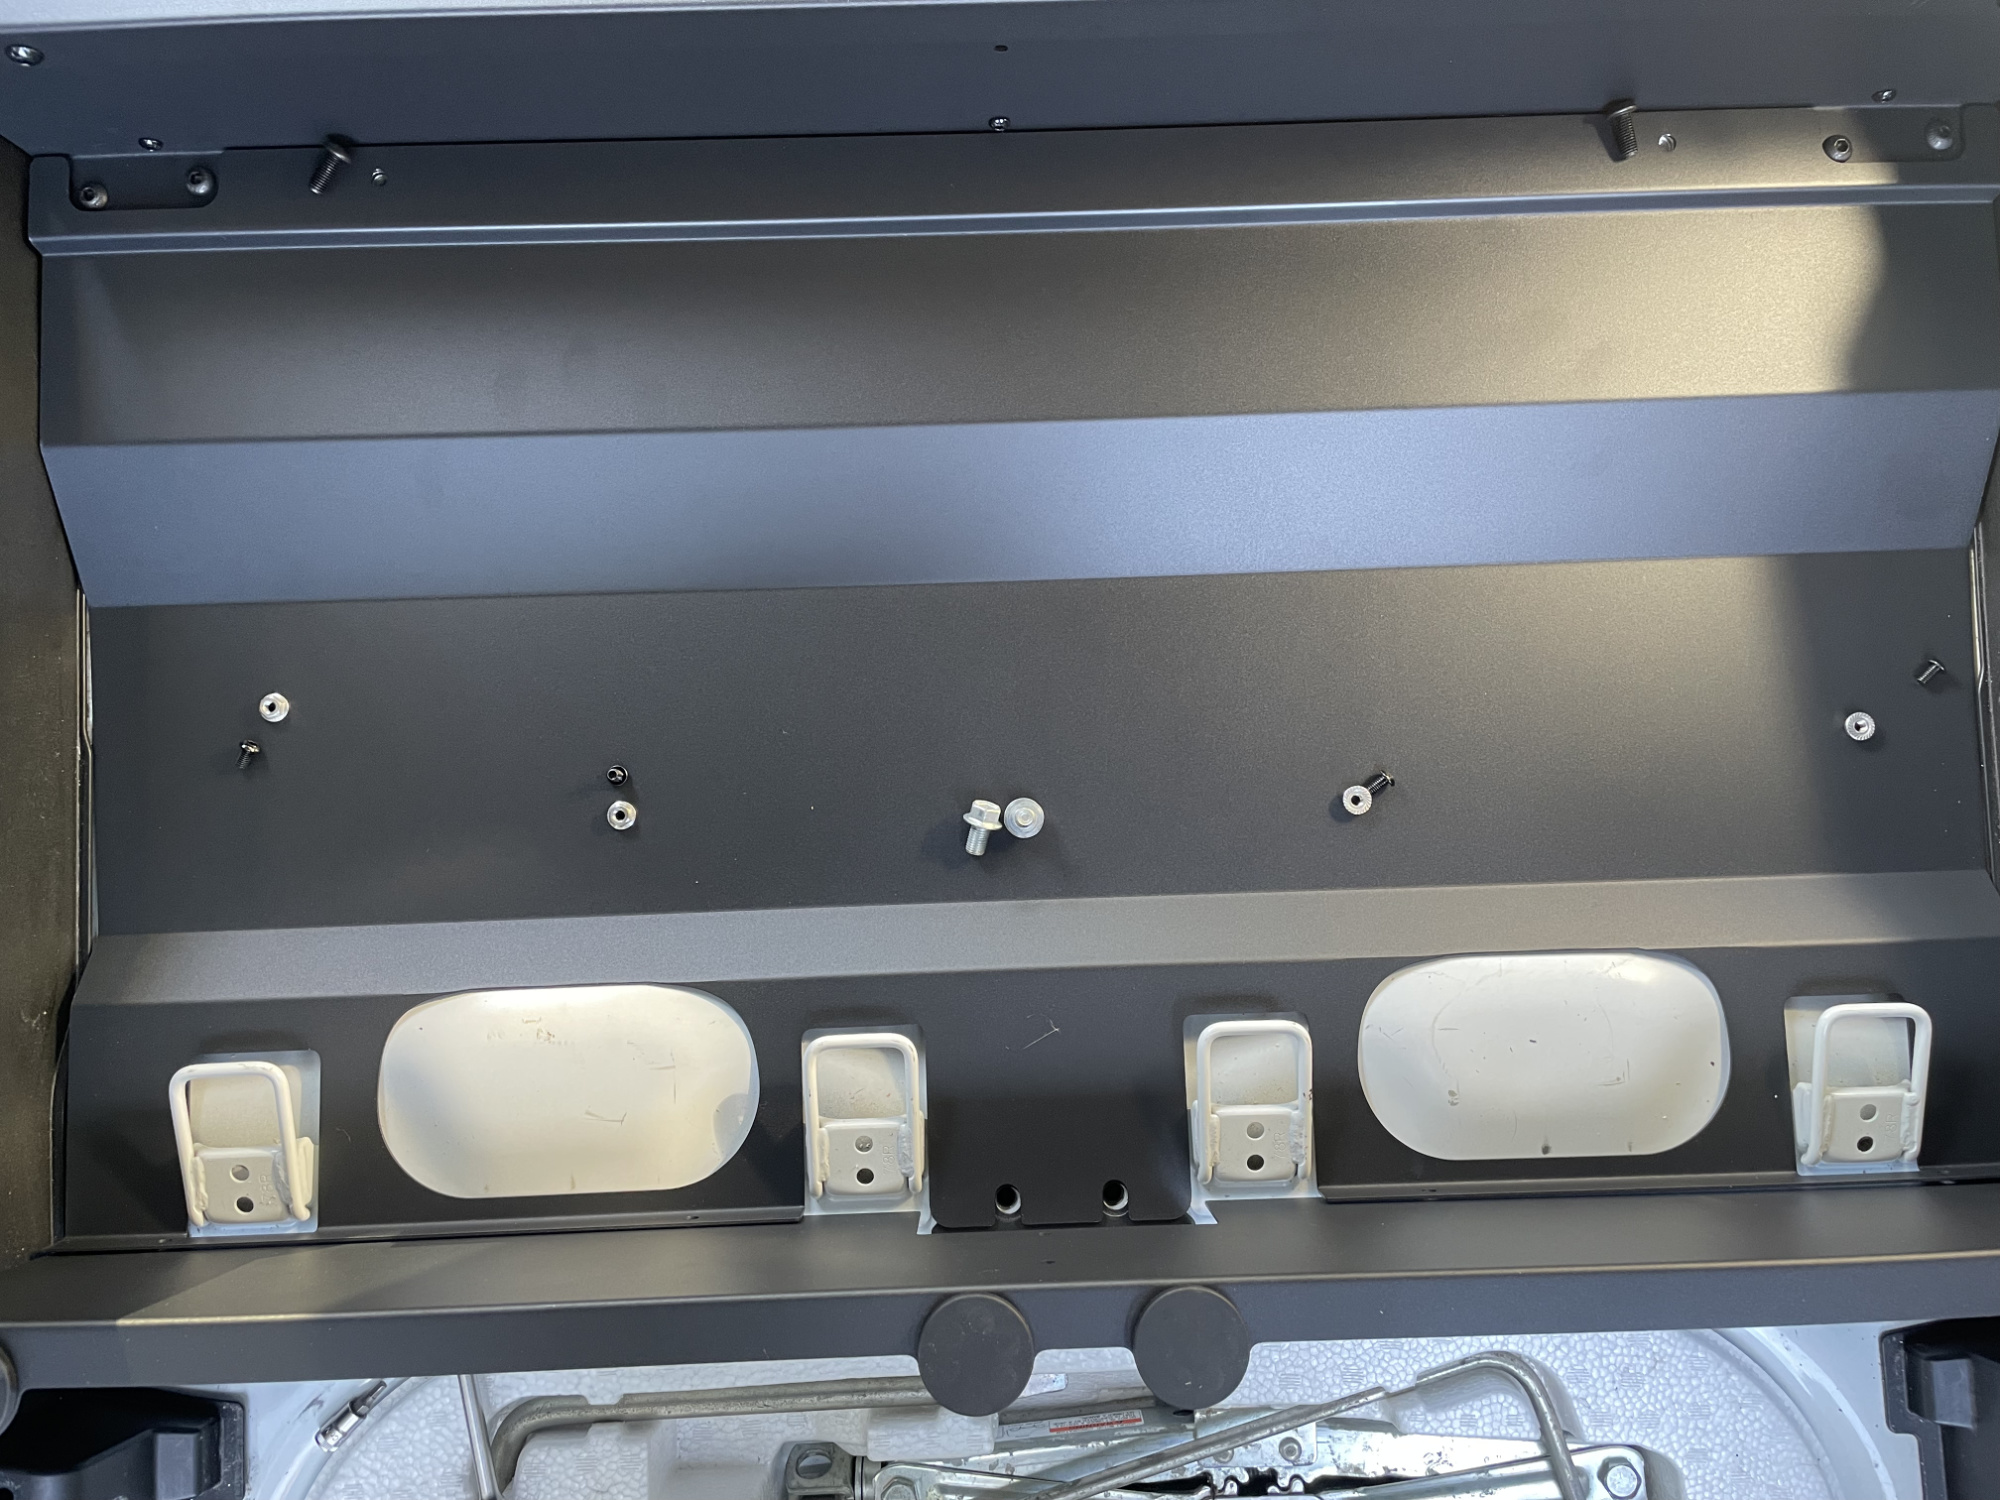
Just loosely put them all in for now; you shouldn’t tigthen them up till you have the central divider in.
M6 bolts through the base into the rear divider and with their nuts on the back side.
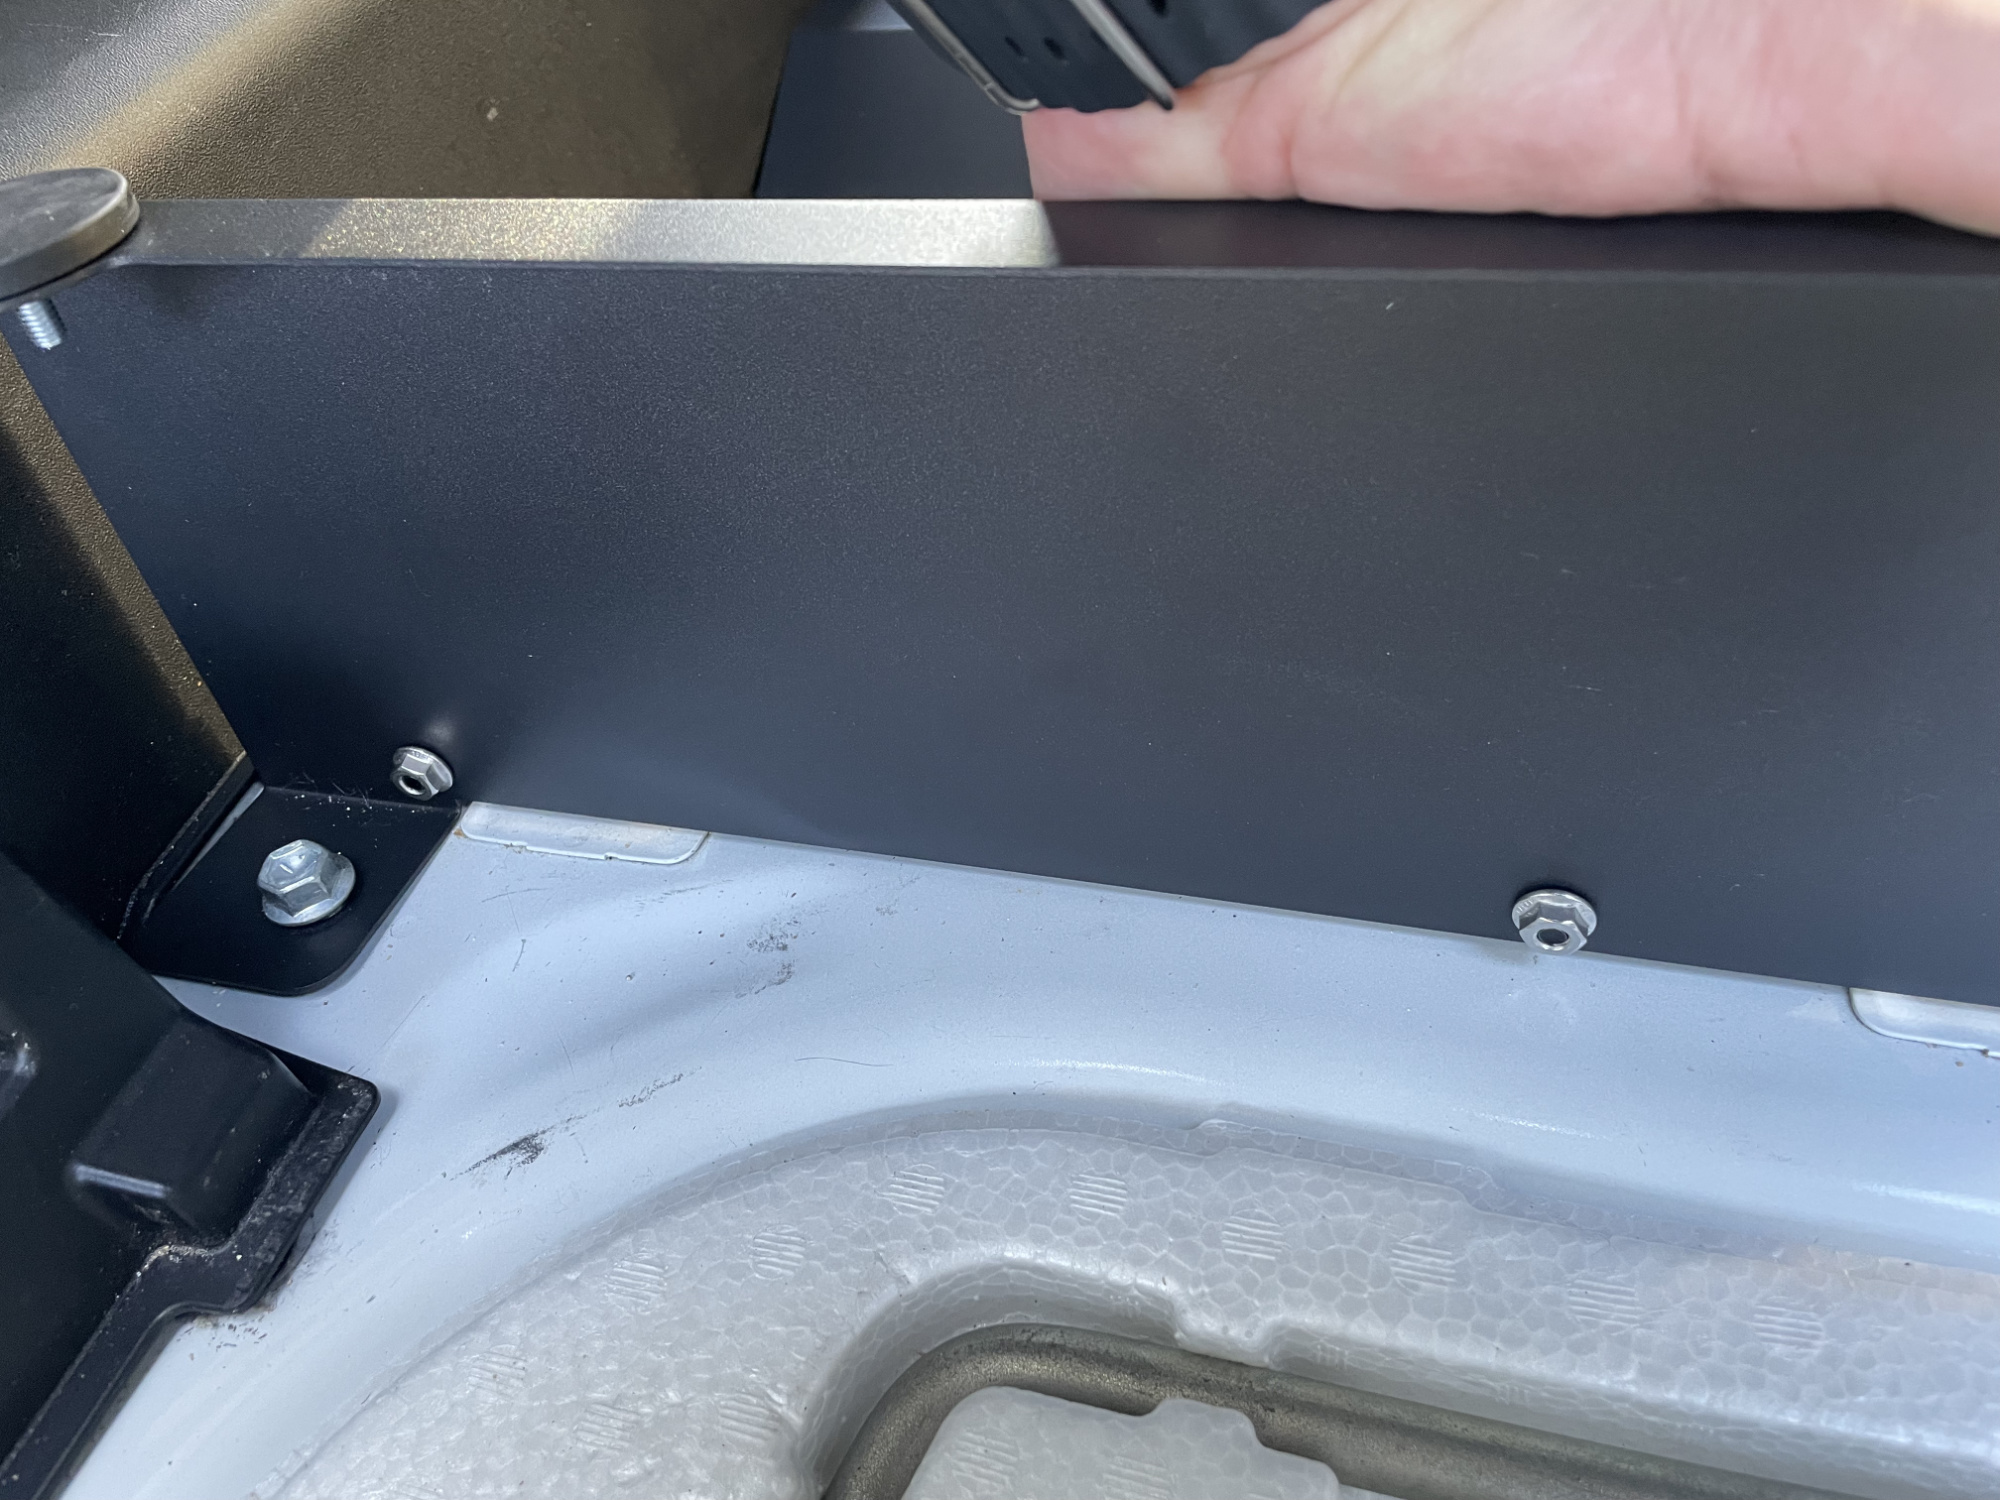
Didn’t bother photographing it but at the front there are two nutserts in the front box which is where the M8 bolts go, and do these next.
Finally, do the rear seat bolts down through the base and rear divider and into the threads in the floor. Again, none of this gets fully tightened at this point, just loose.
Central divider
Central divider goes in next (if you are using it – I believe it’s optional). There’s 4 M6 bolts and flanged nuts needed here, though one of the M6 bolts and nuts may already be installed in the front box
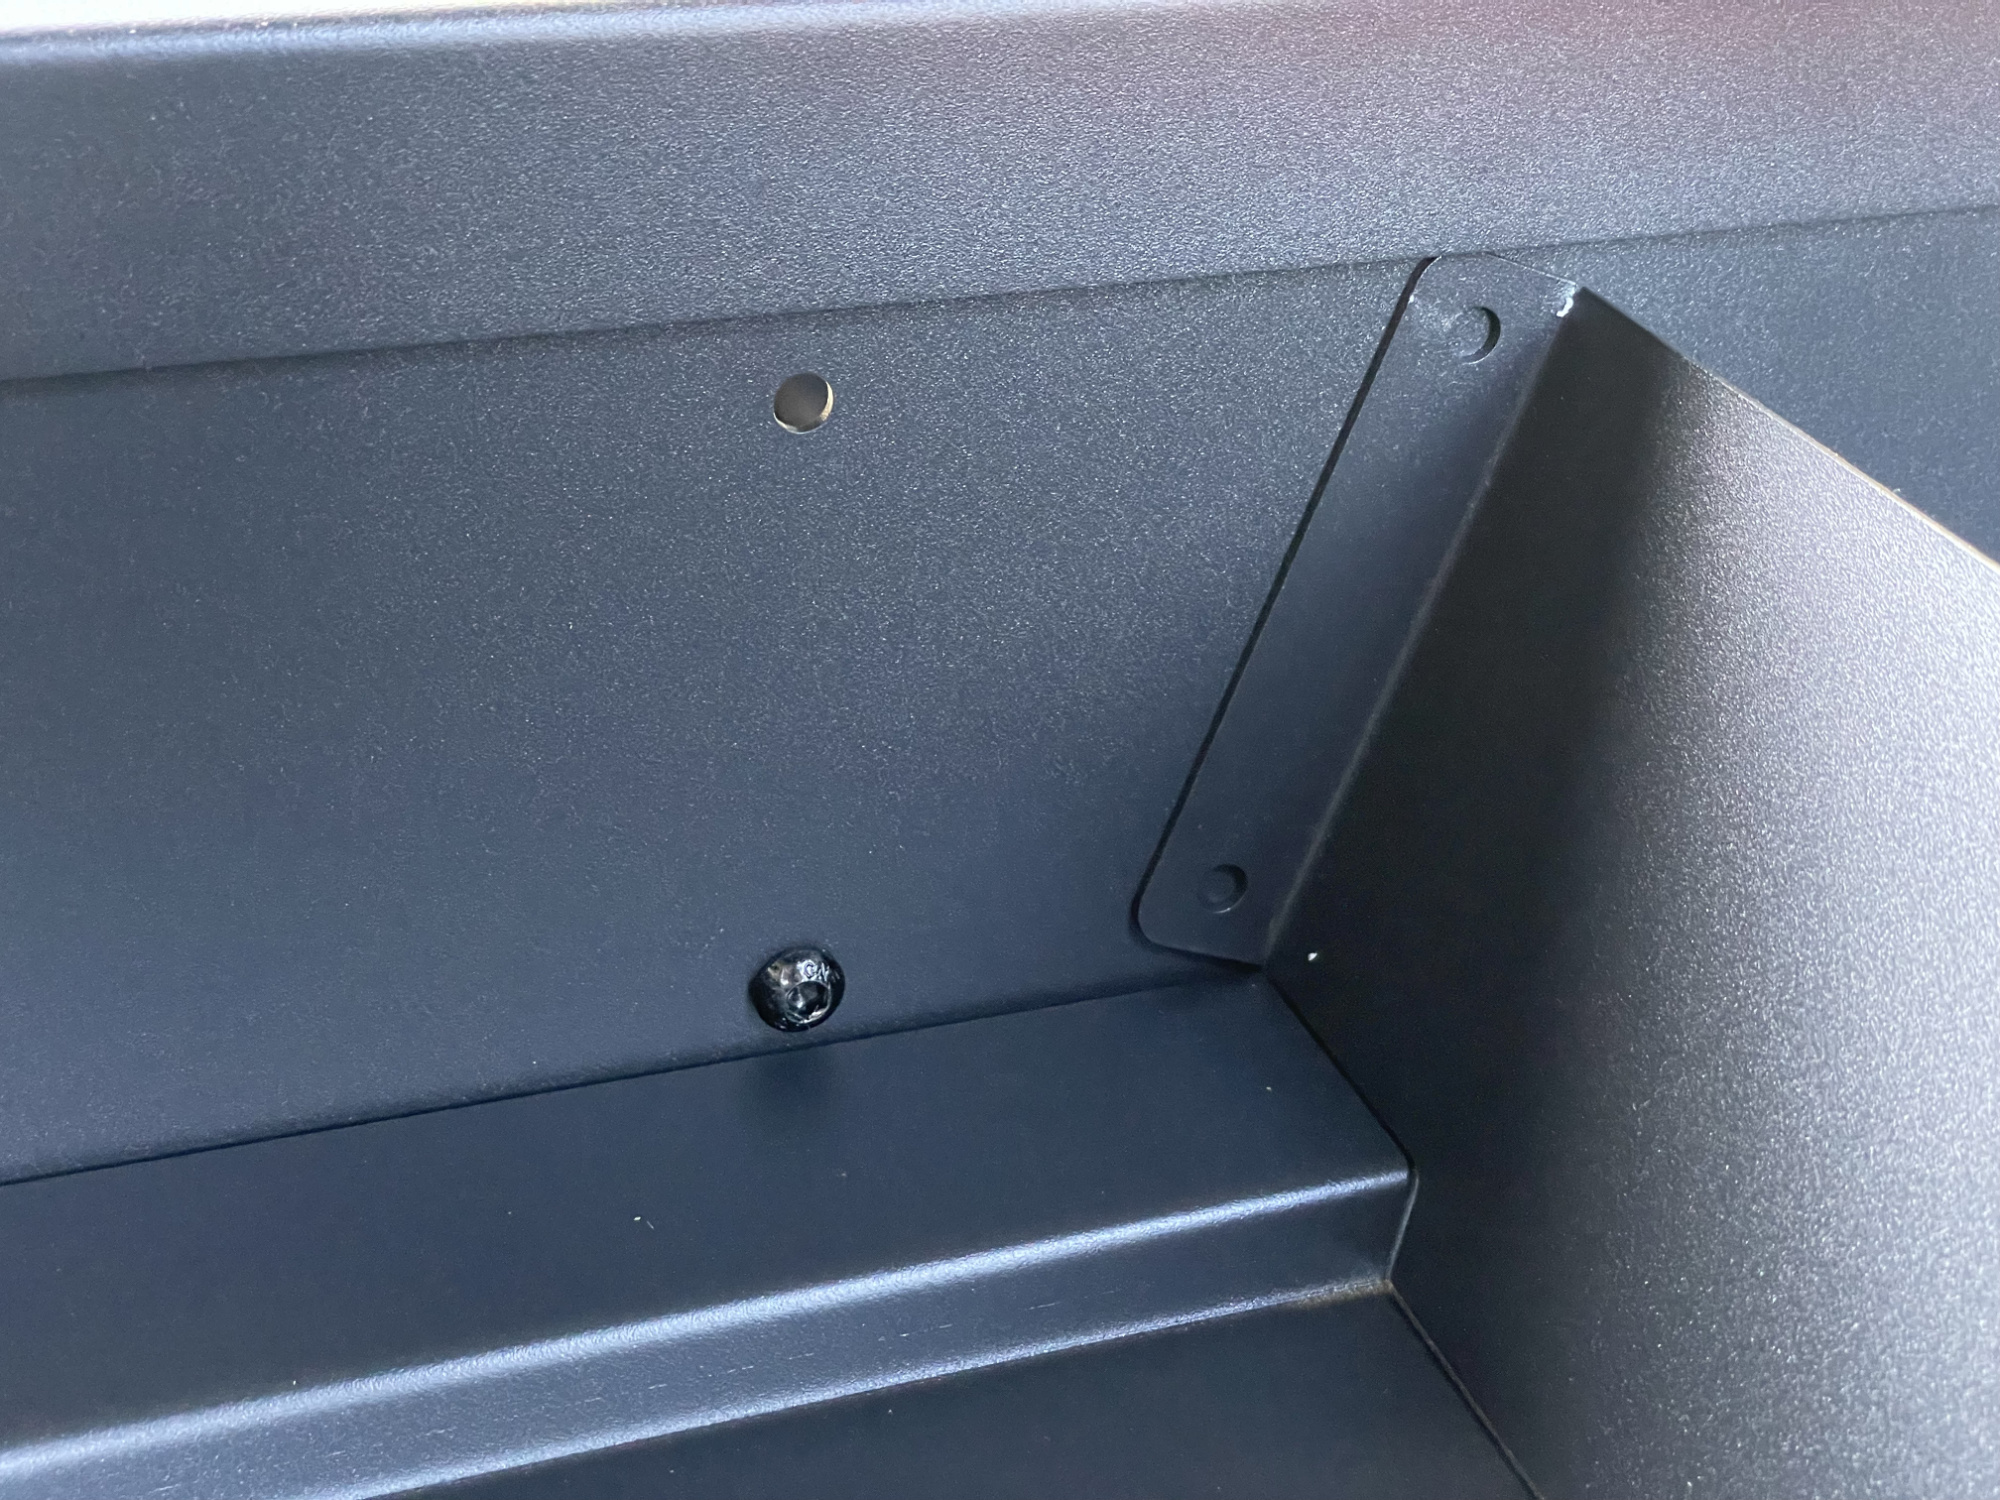
Undo this, noting that you’ll have to open the box to get to the nut, and then put the divider in place and put the bolt back in and the nut on but don’t fully tighten it yet.
With that done you have 3 more bolts to go, here’s them roughly sitting on the base to give you an idea what is needed where.
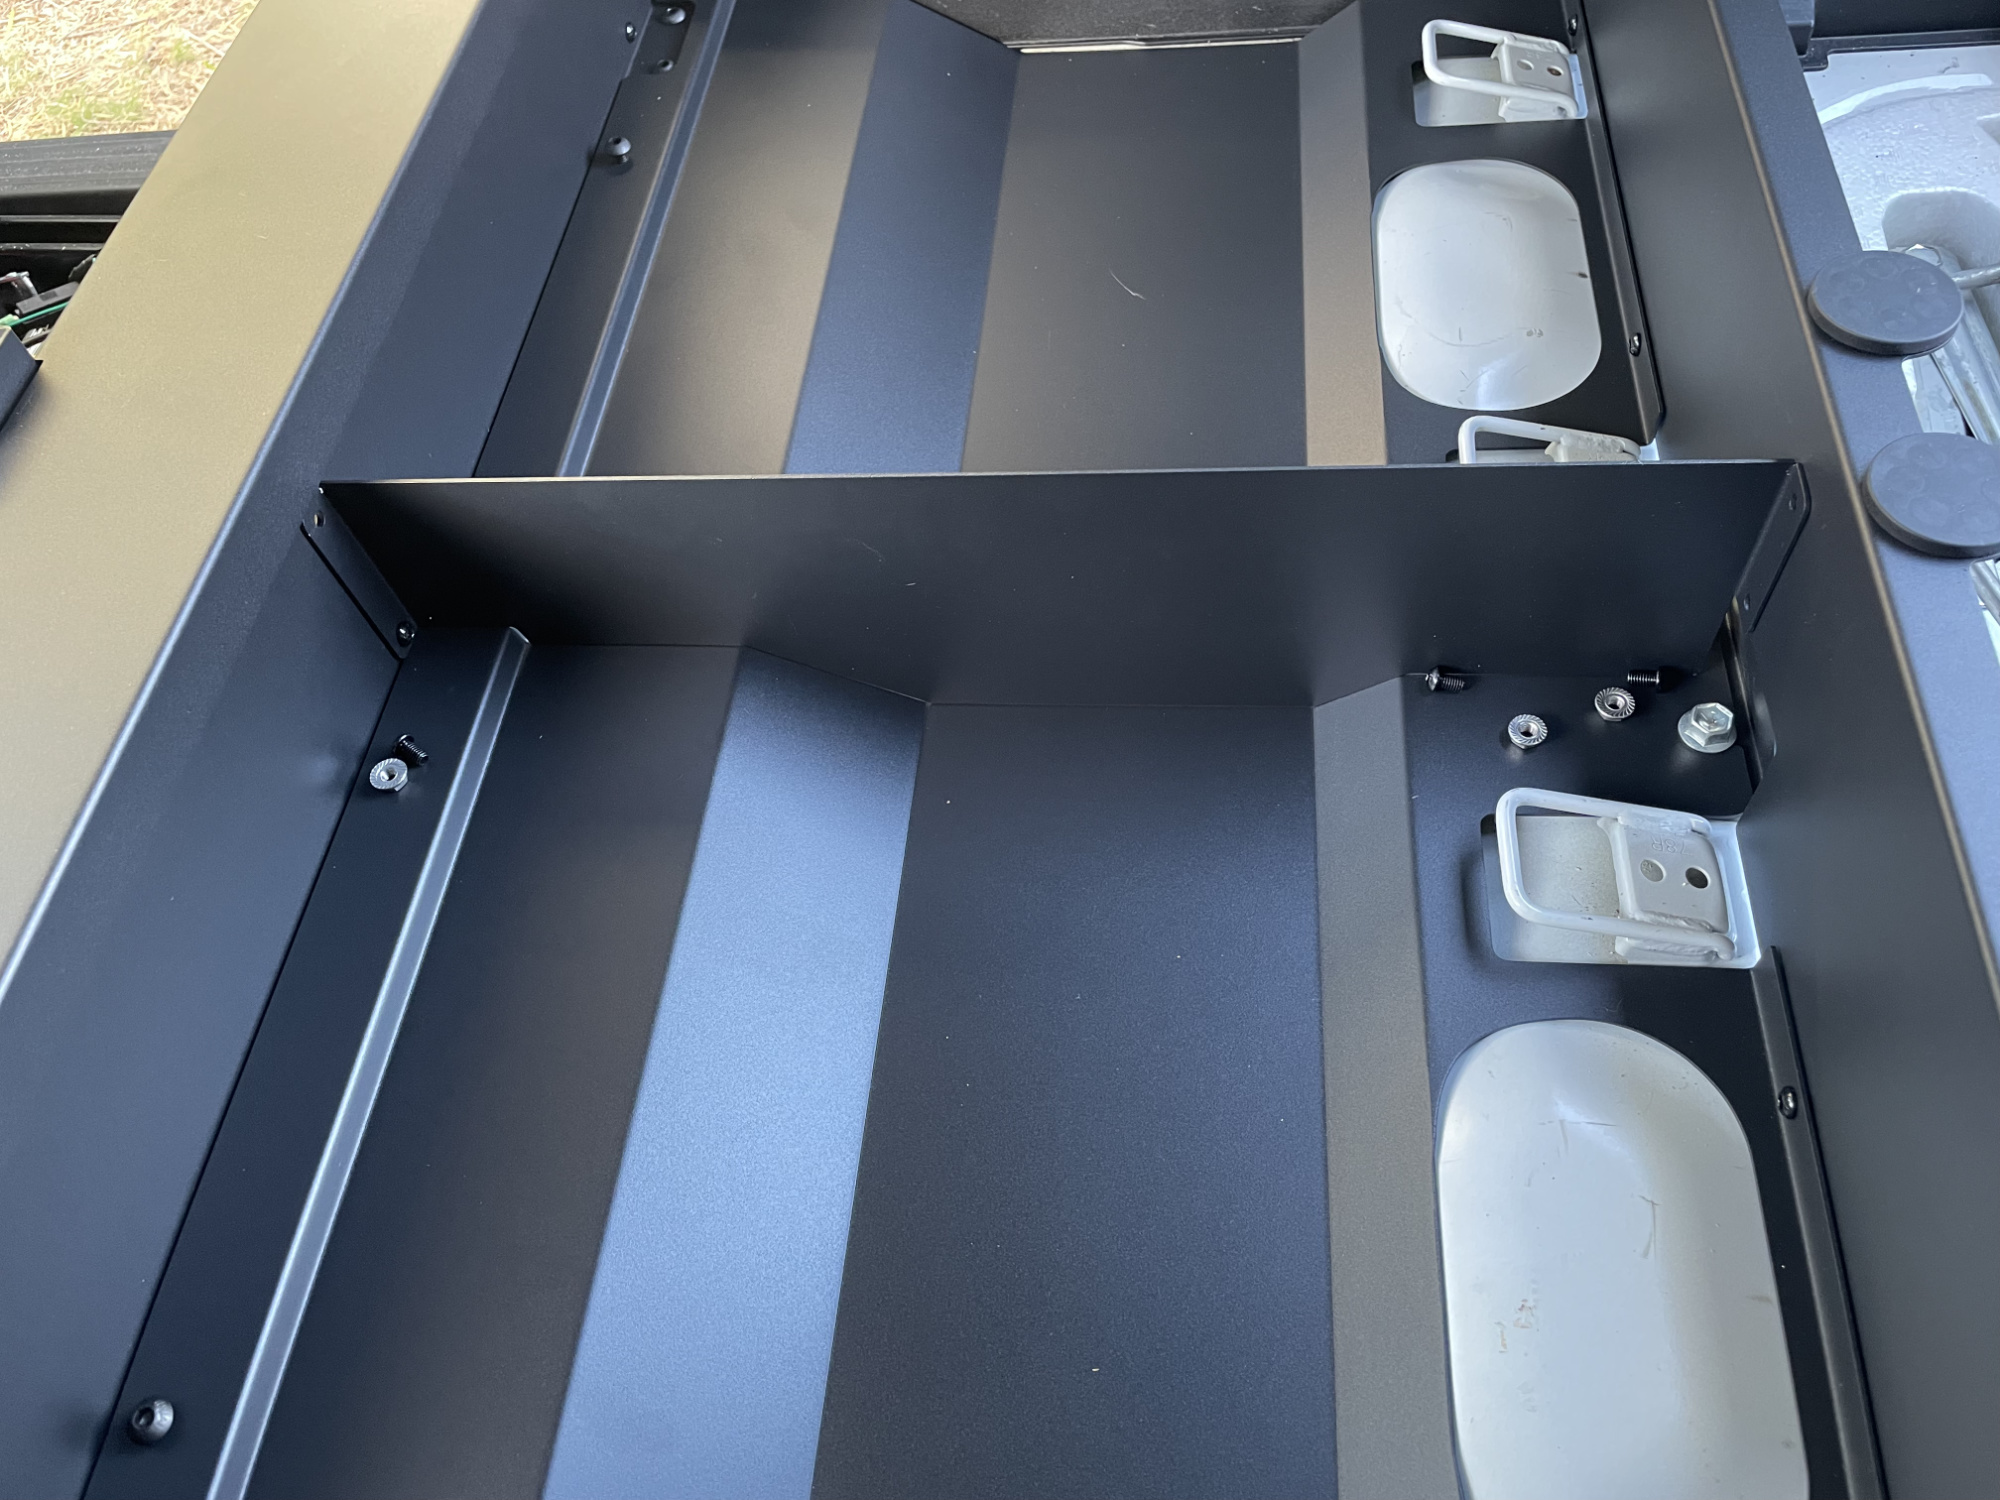
With the central divider in, now you can go through and do up all of the bolts to get the frame all nice and tight.
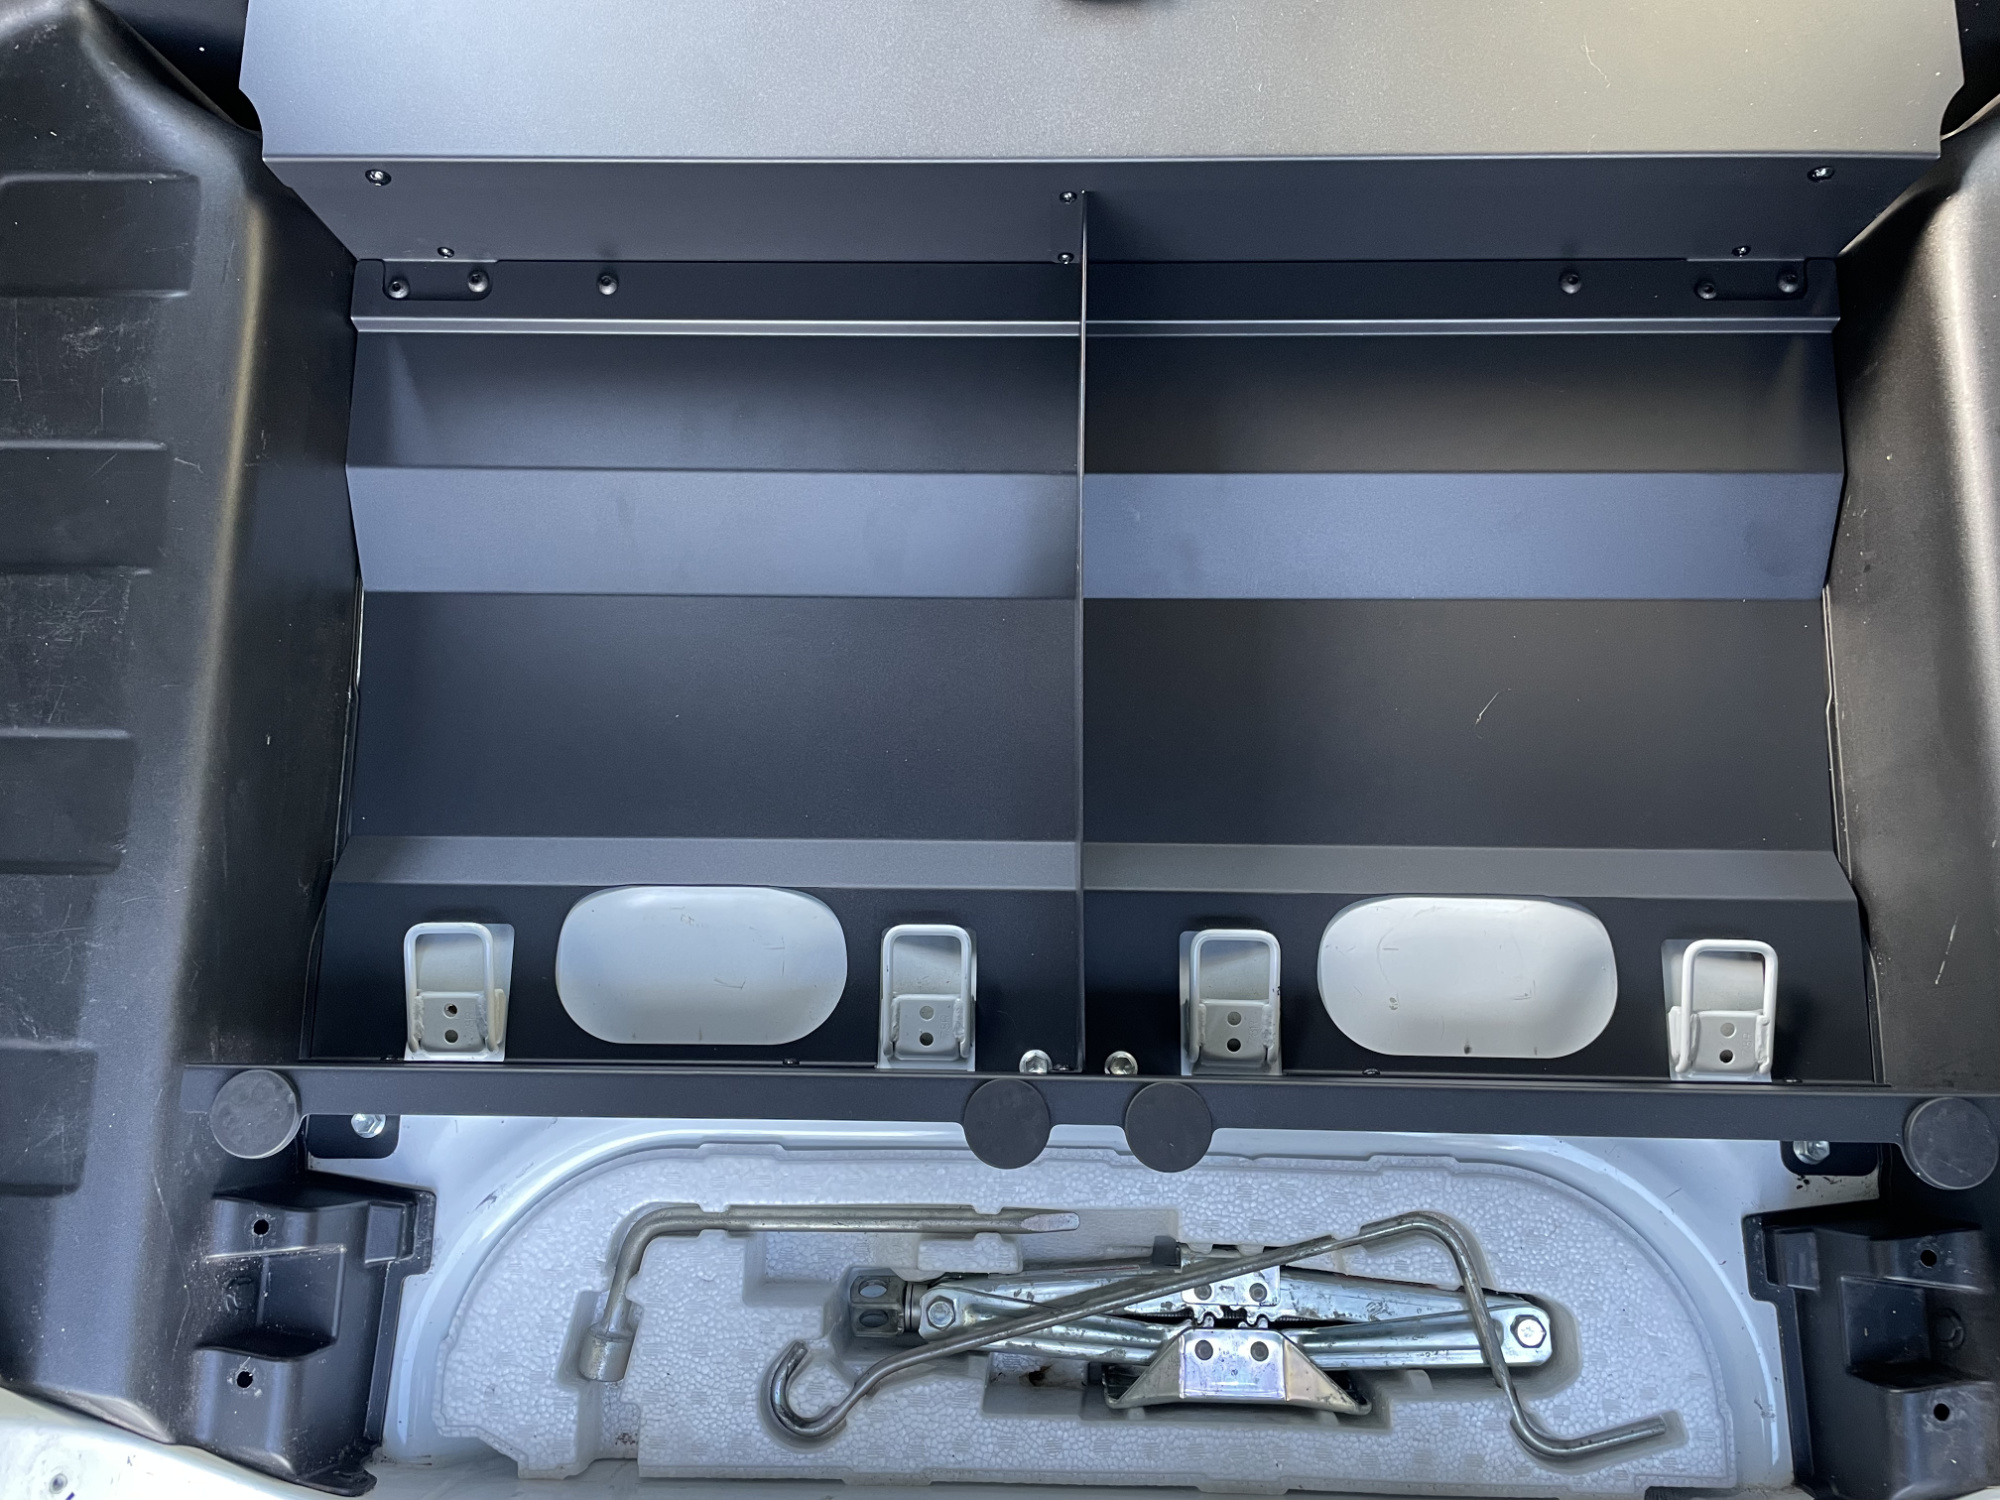
False floor plates
Here’s where the fun began for me. It started before I even fitted them: the carpet is already lifting off one side of the passengers side panel.
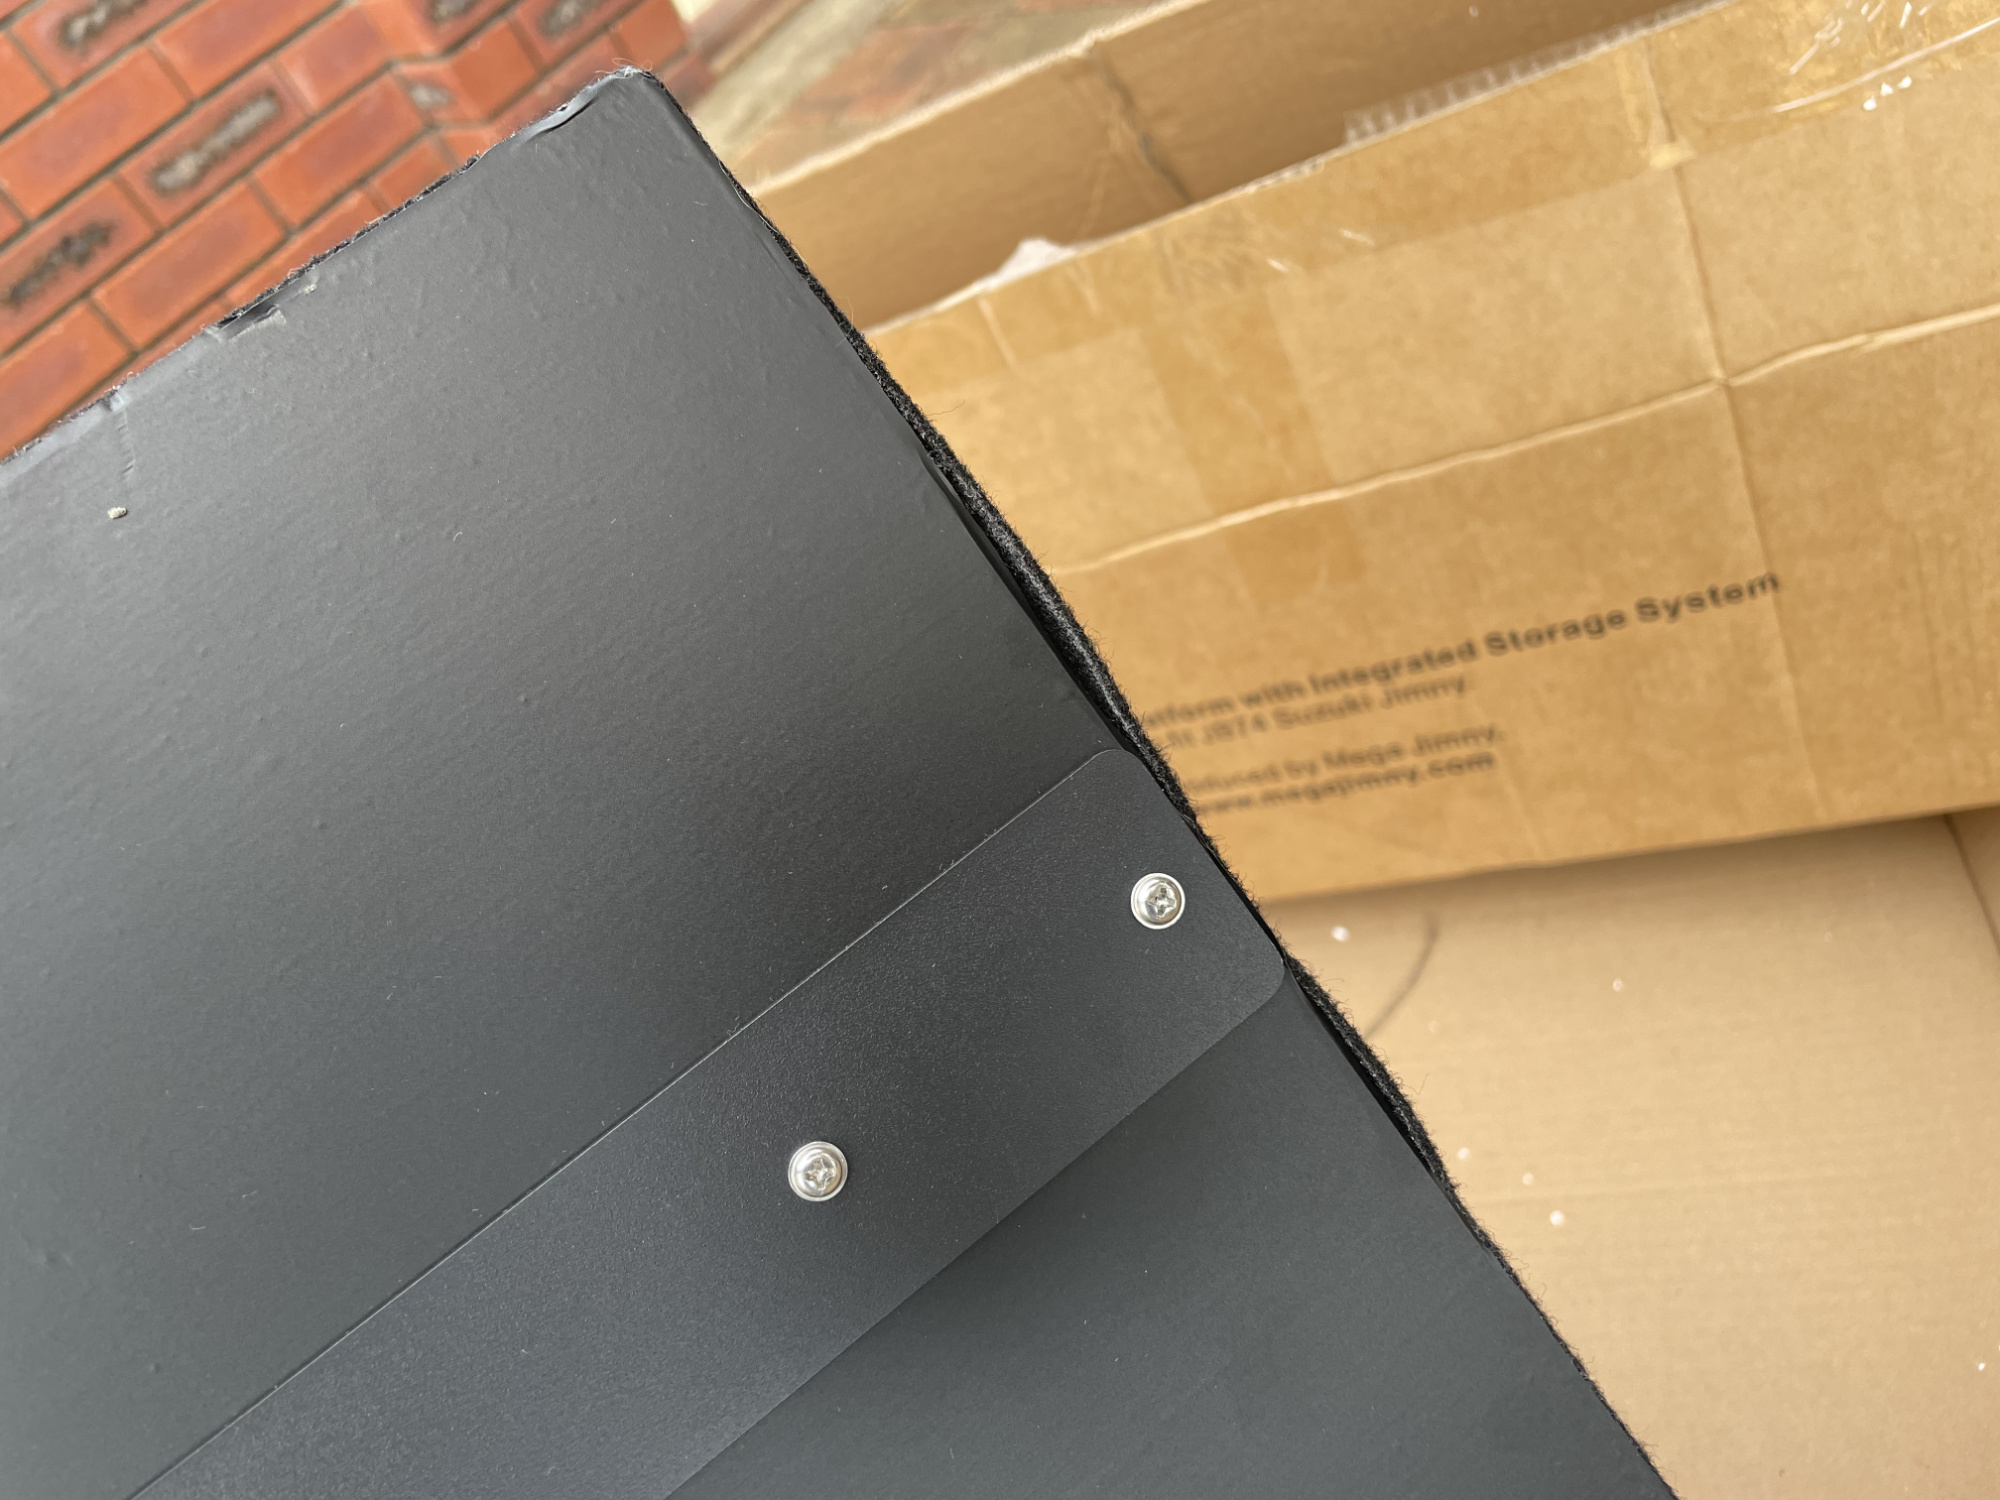
When fitting the floor panels themselves you should start with the drivers side panel. The hinge part on the panel for the central hinge needs to go towards the drivers side of the part out from the front box.
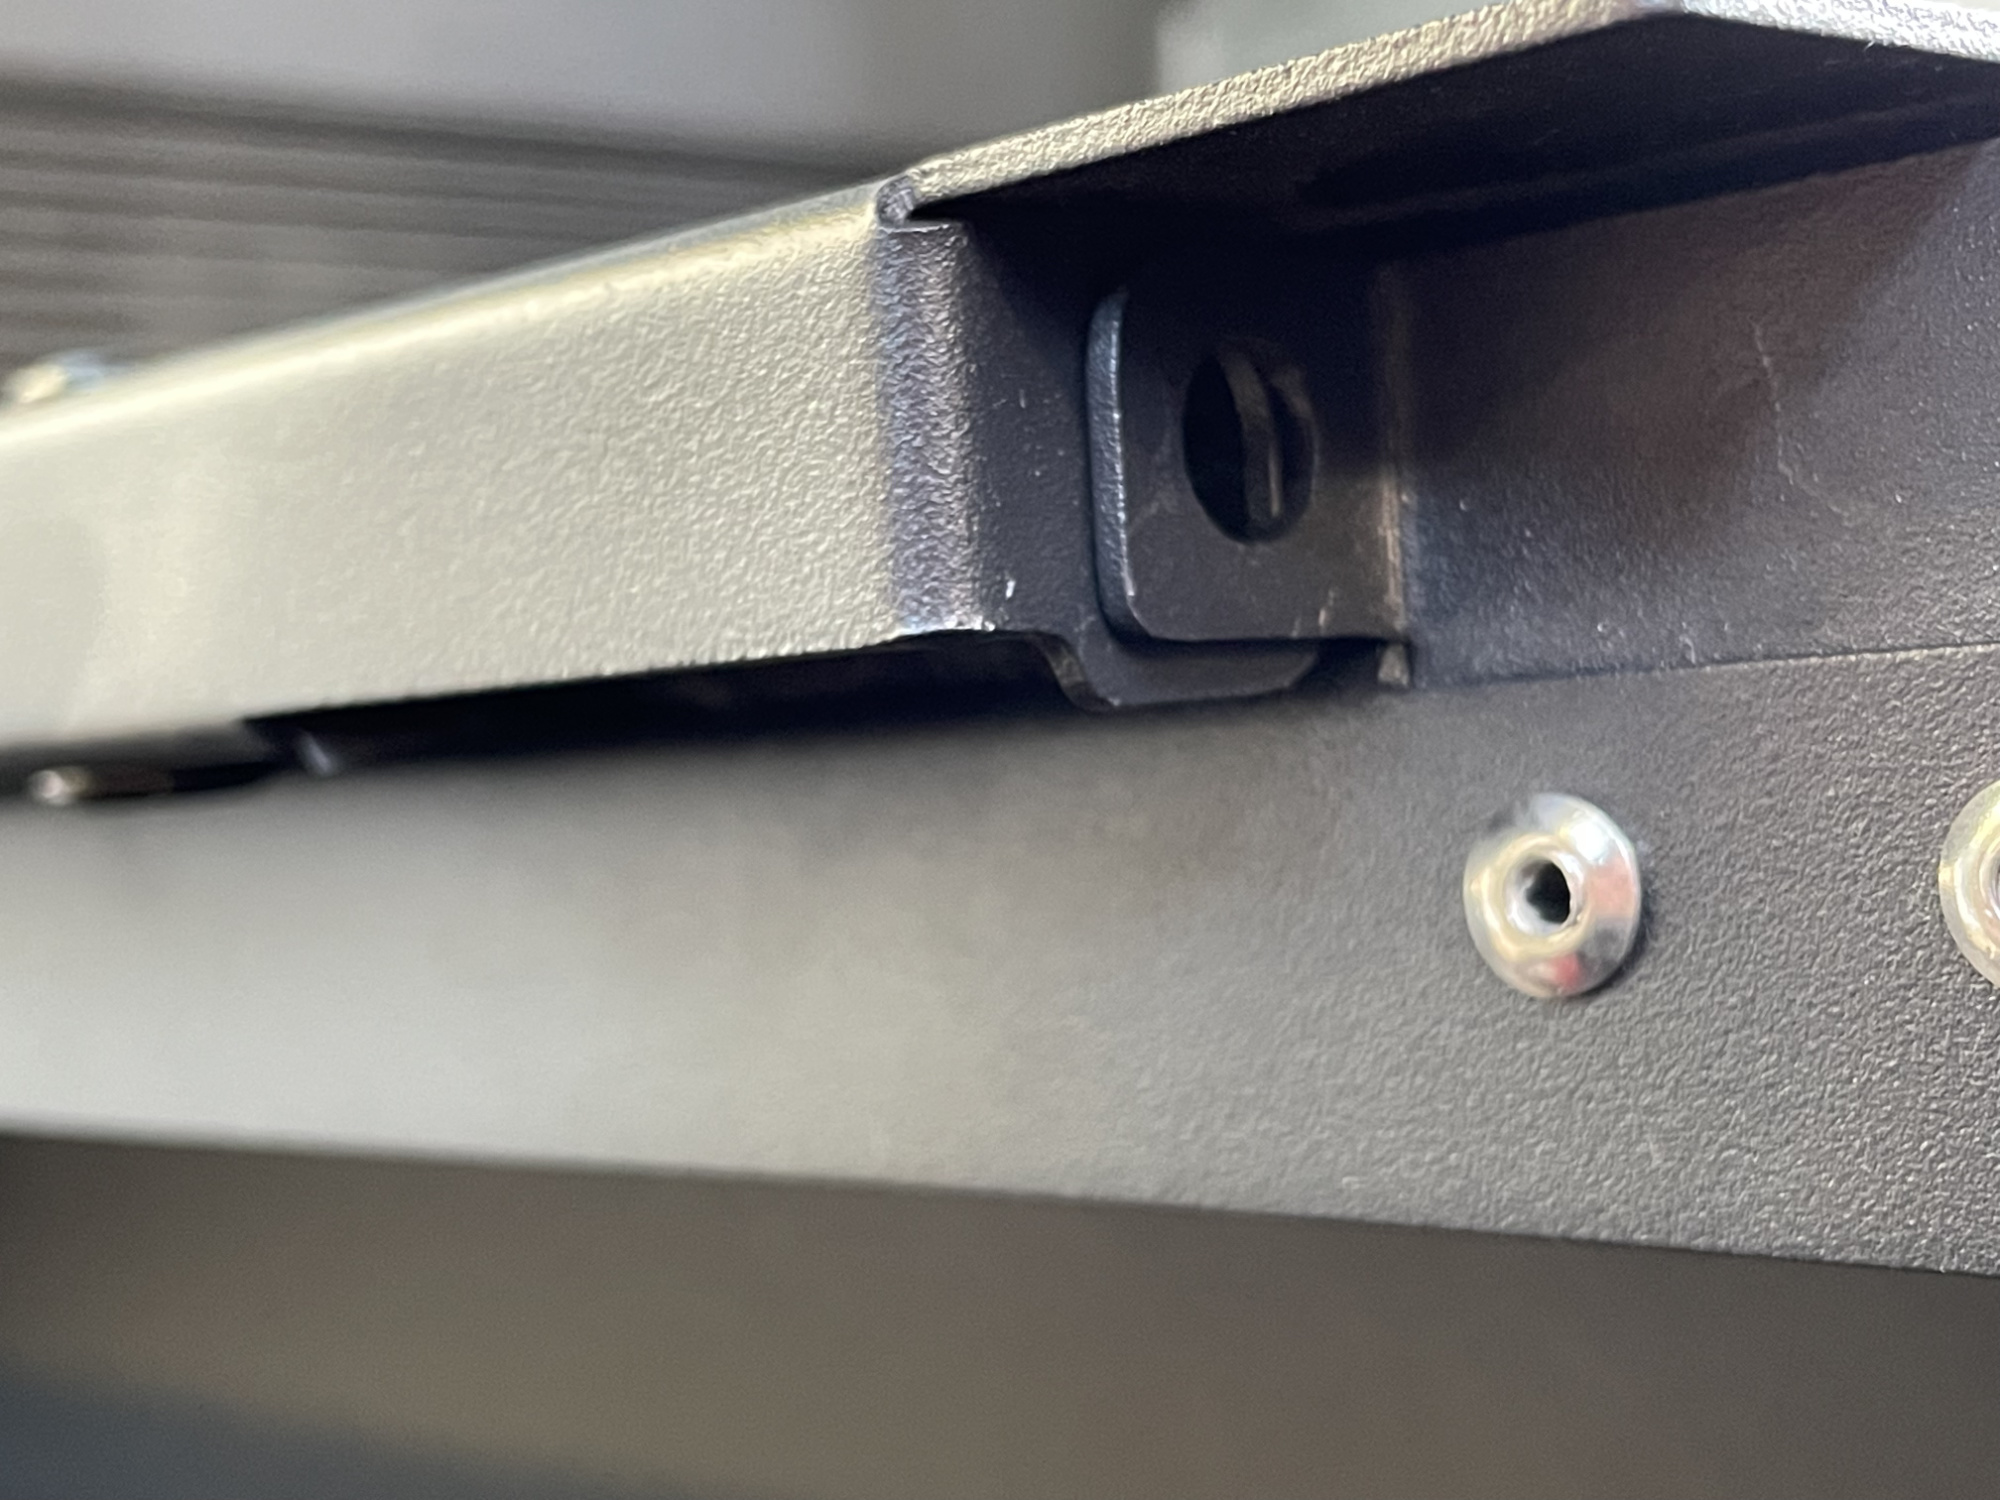
It became apparent in poking through the bolt for the outside hinge for this part of the floor that the hinge bracket itself was bent, as you can see here.
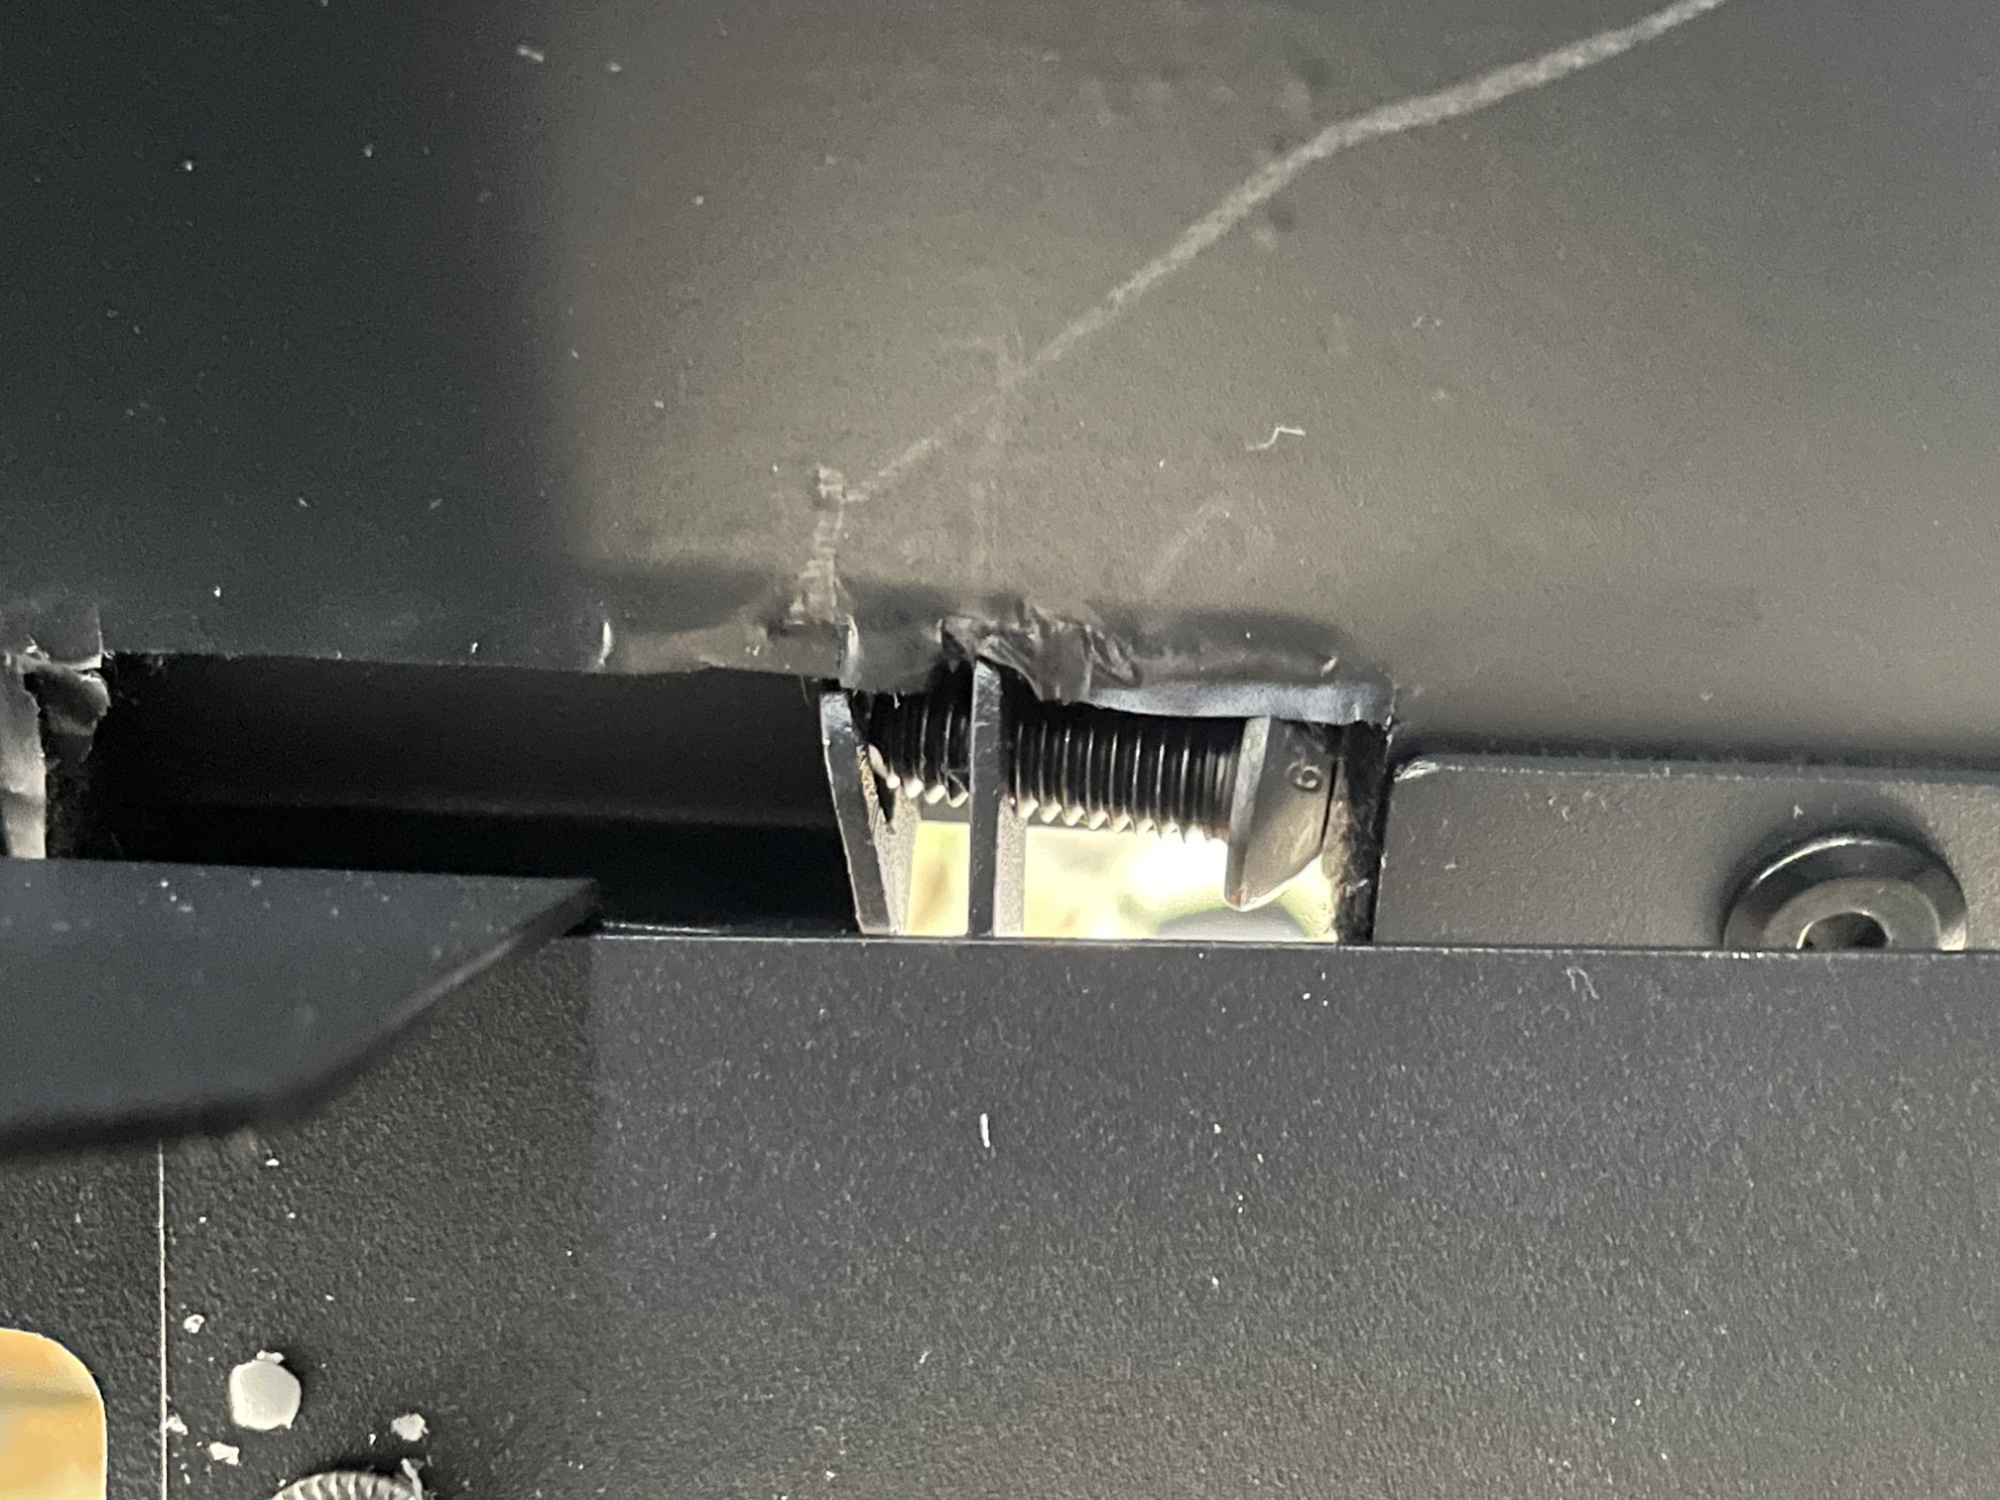
No matter which way I poked the bolt through I couldn’t make it work. In the end I got it off the car and between bending the hinge on the floor panel and also a bit of bending of the hinge on the front box I was able to get it to line up well enough.
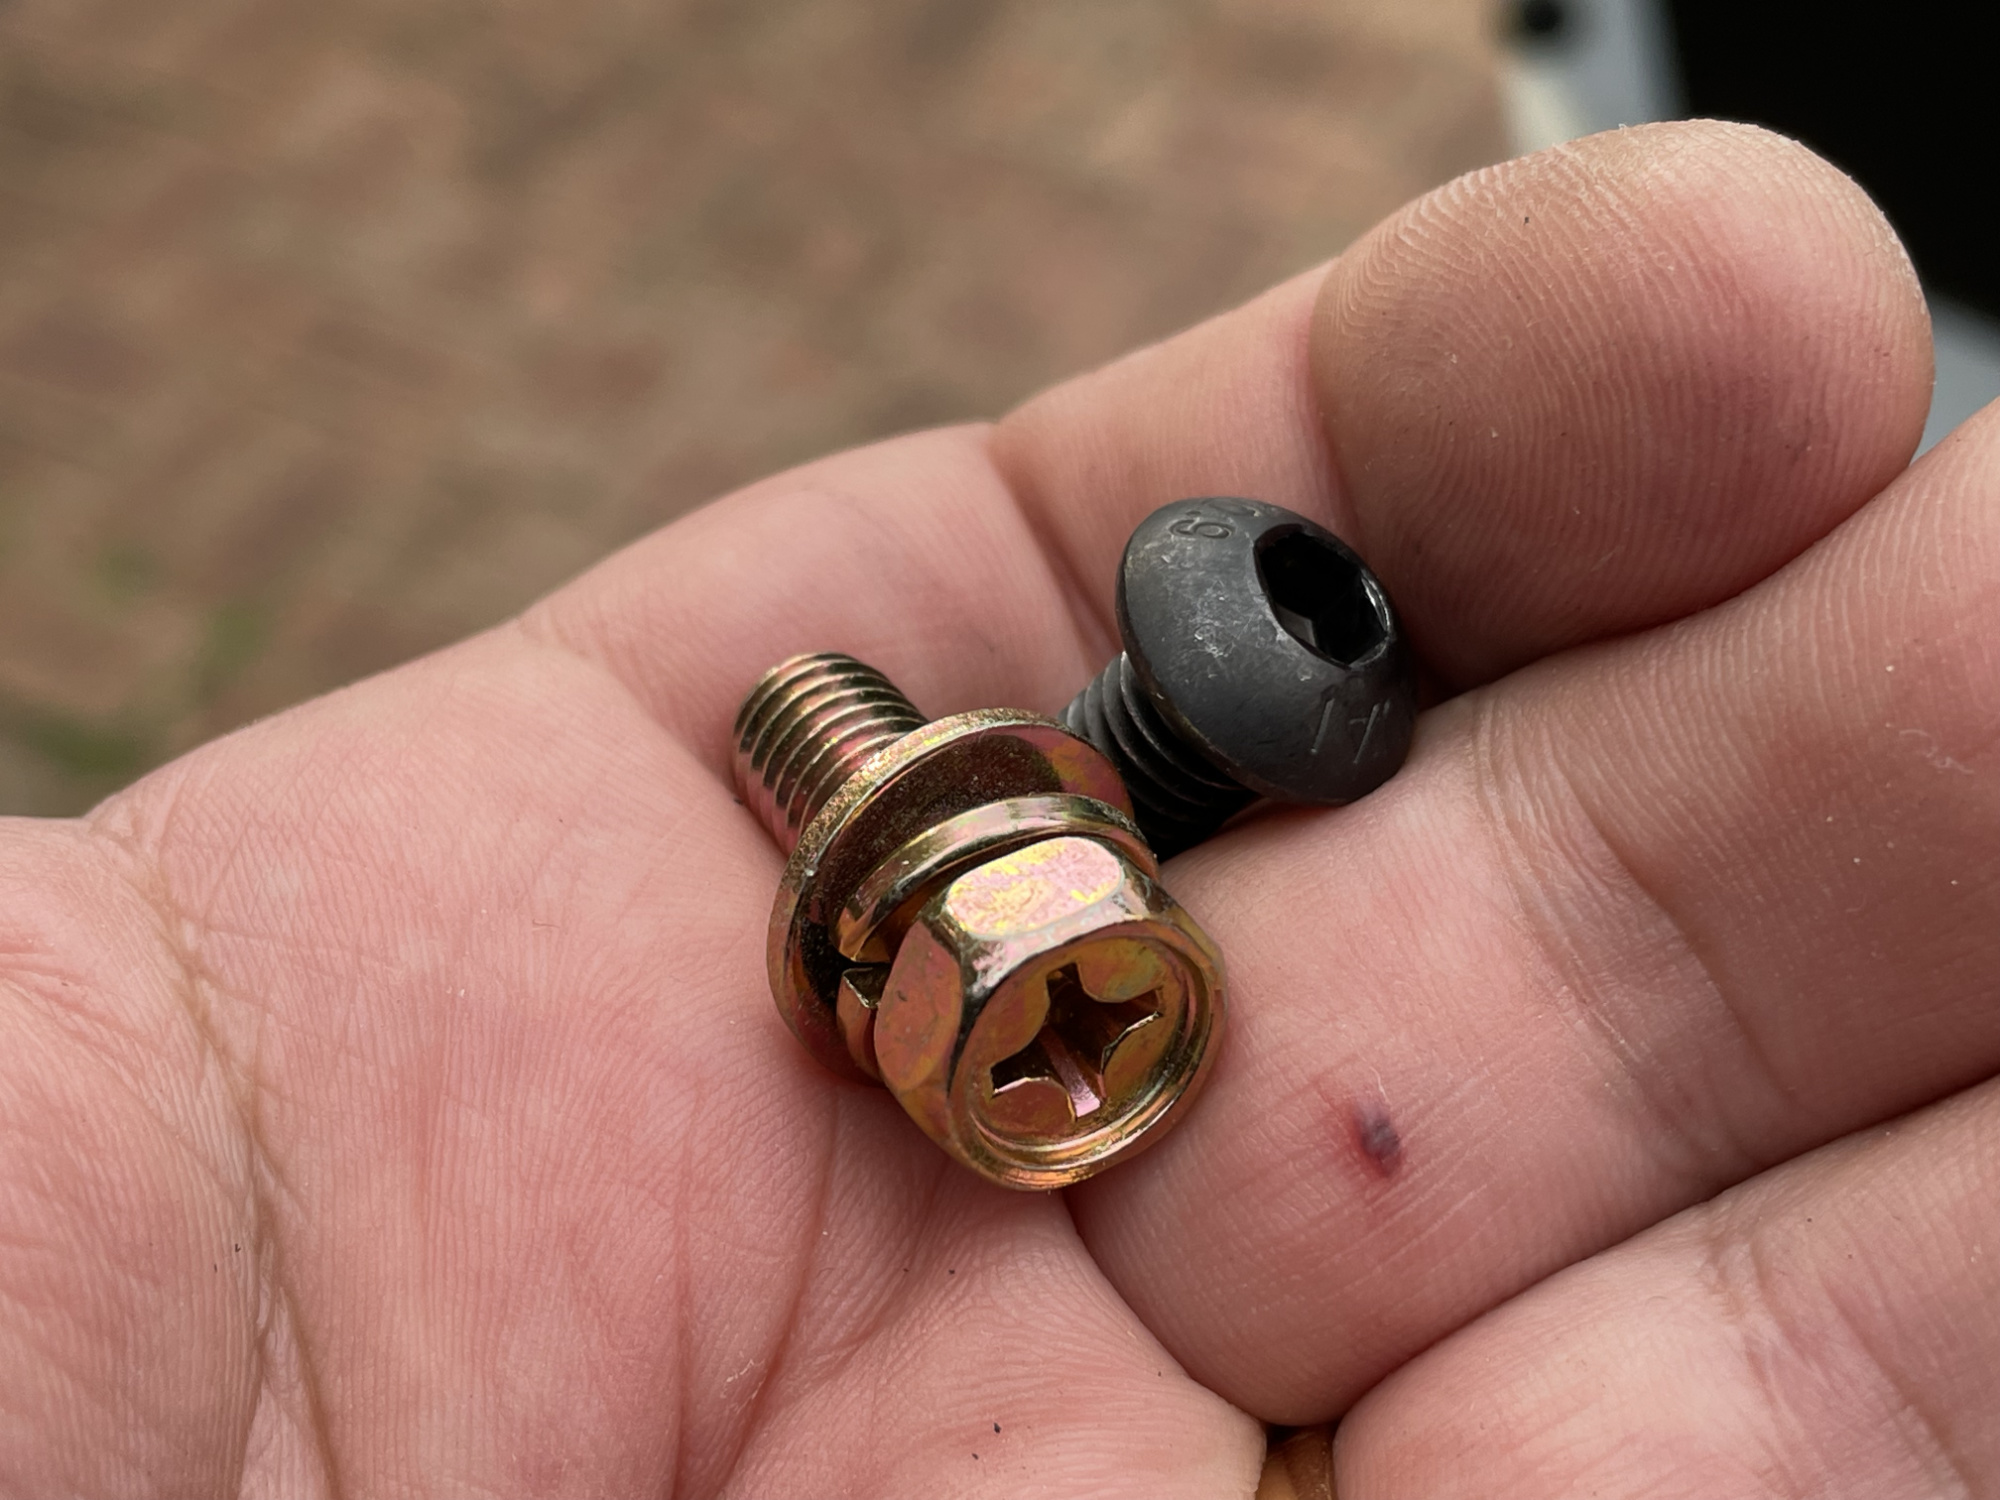
I also gave up on using the allen headed bolts here. They just become too fiddly to do up nicely, and swapped to using some zinc plated JIS bolts; these give me a 12mm on the bolt side and the 13mm on the nyloc nut side meaning I don’t need two of the same sized spanners to adjust the hinge brackets. Since they also have a JIS cross screwdriver fitting on them, I can also tighten them up using a screwdriver bit into a ratchet spanner for narrow access. Mint. Highly recommended mod to make installation less of a screwaround.
The passengers side plate was actually slightly worse, I needed to drill out the outside hole as it hadn’t been cleaned up from the original cutting. At least, that’s my assumption as you could see the ridge left from the start of a laser cutter or waterjet to make the hole.
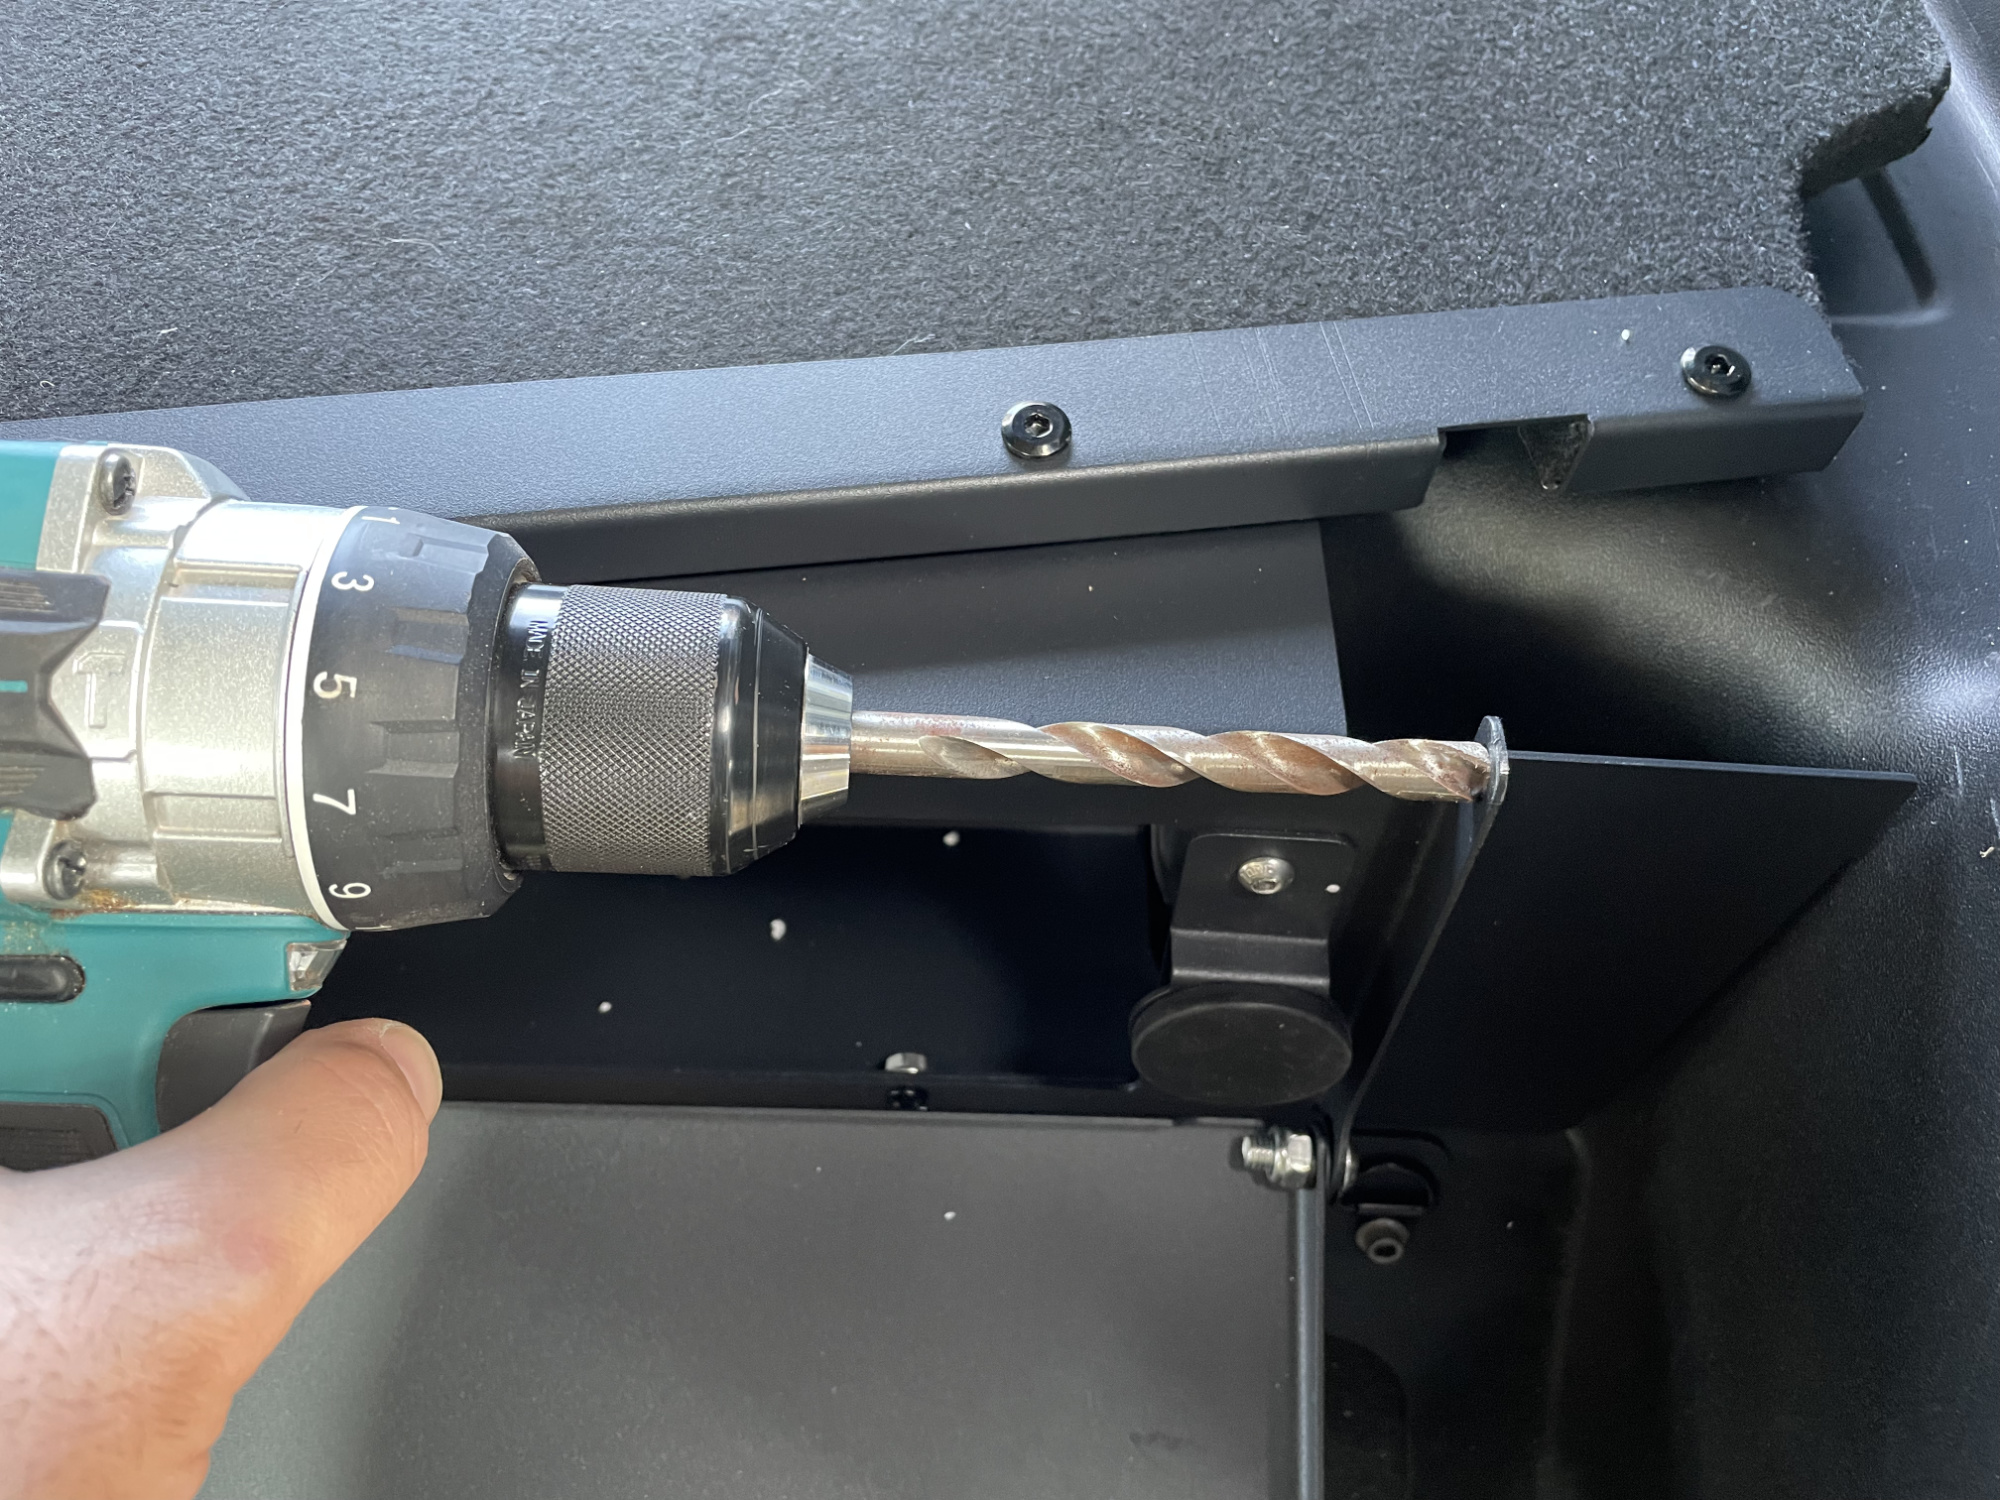
At least it counts as a mod once the powertools have come out I guess.
You only need to do the hinges up enough that stuff doesn’t rattle and move around.
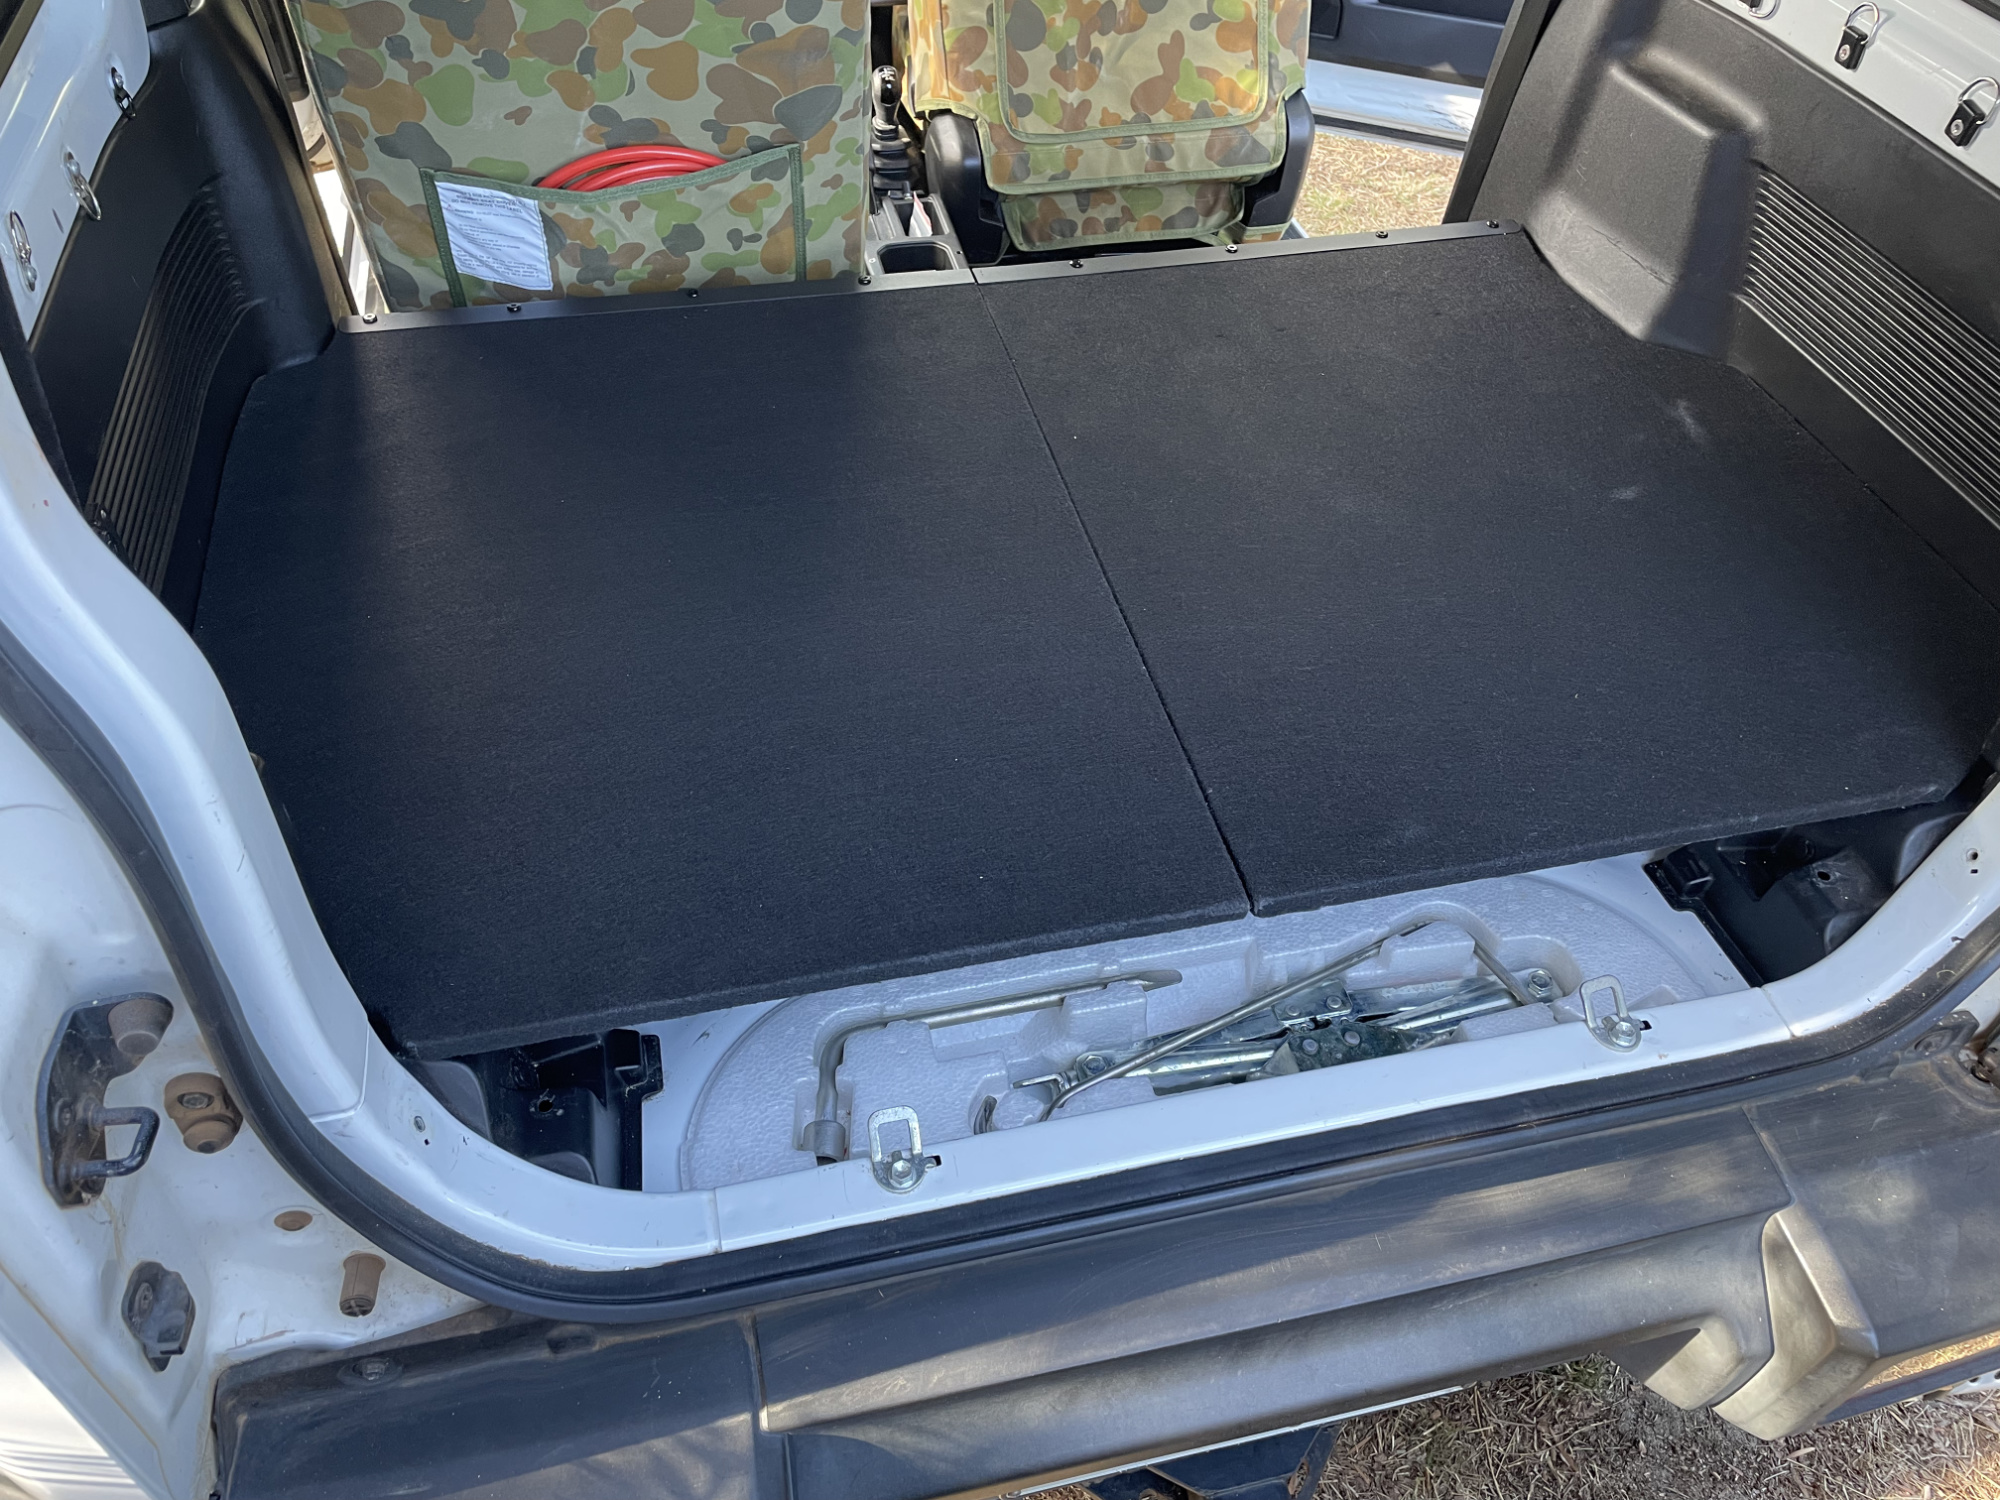
This is basically as good as I could get the alignment, but to adjust alignment of the floor base plates you just undo all of the bolts on the hinge a little and tweak it.
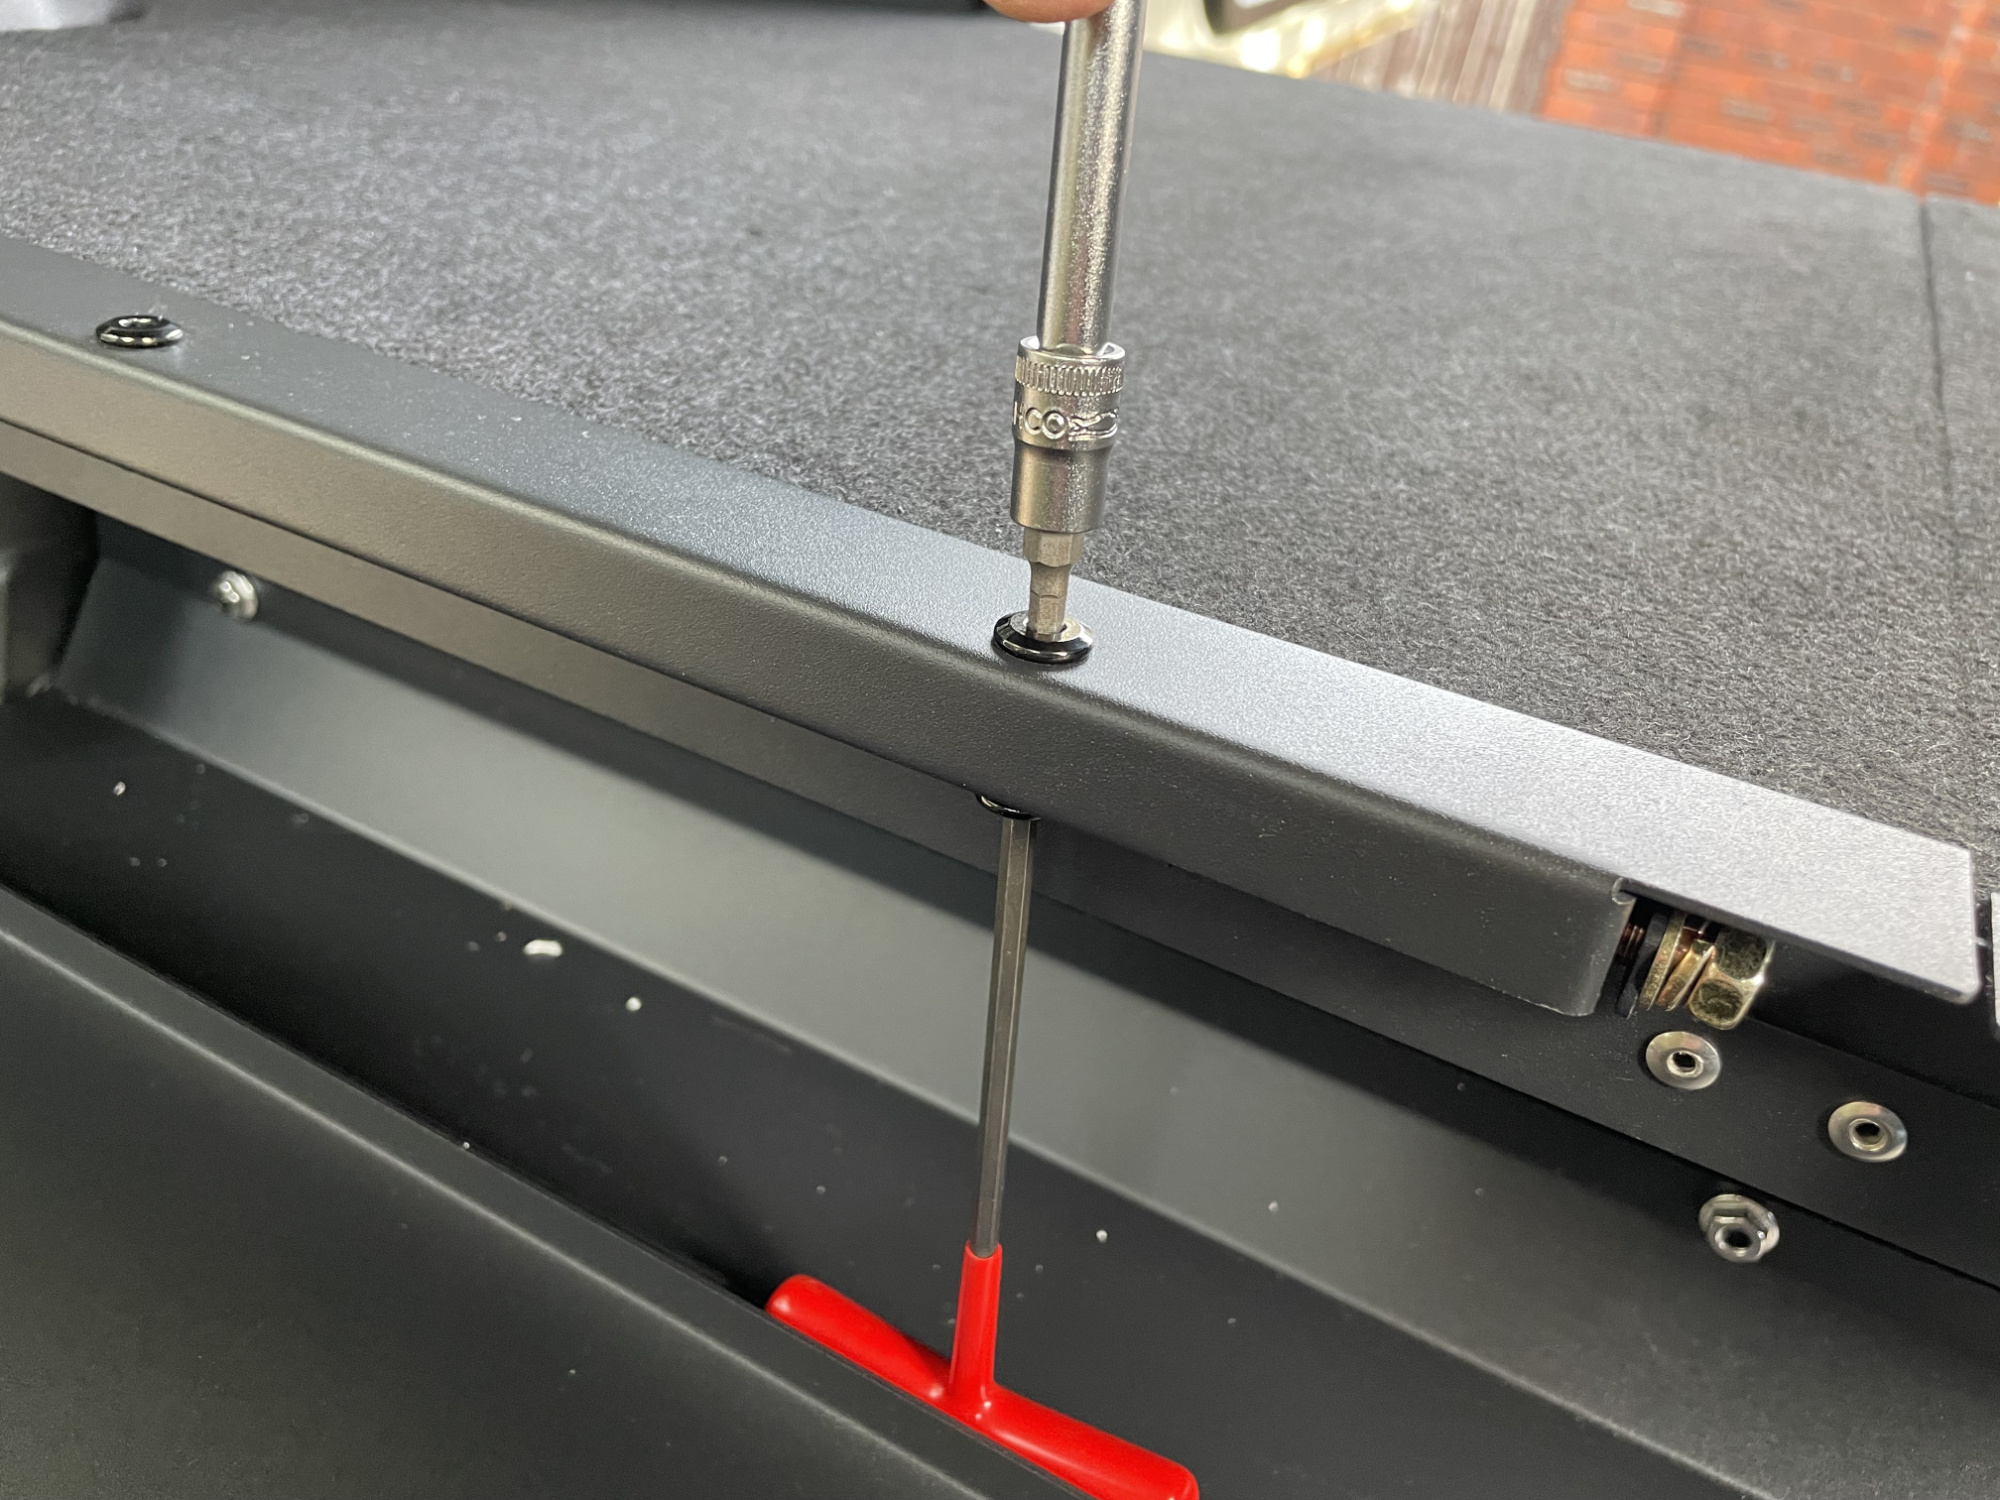
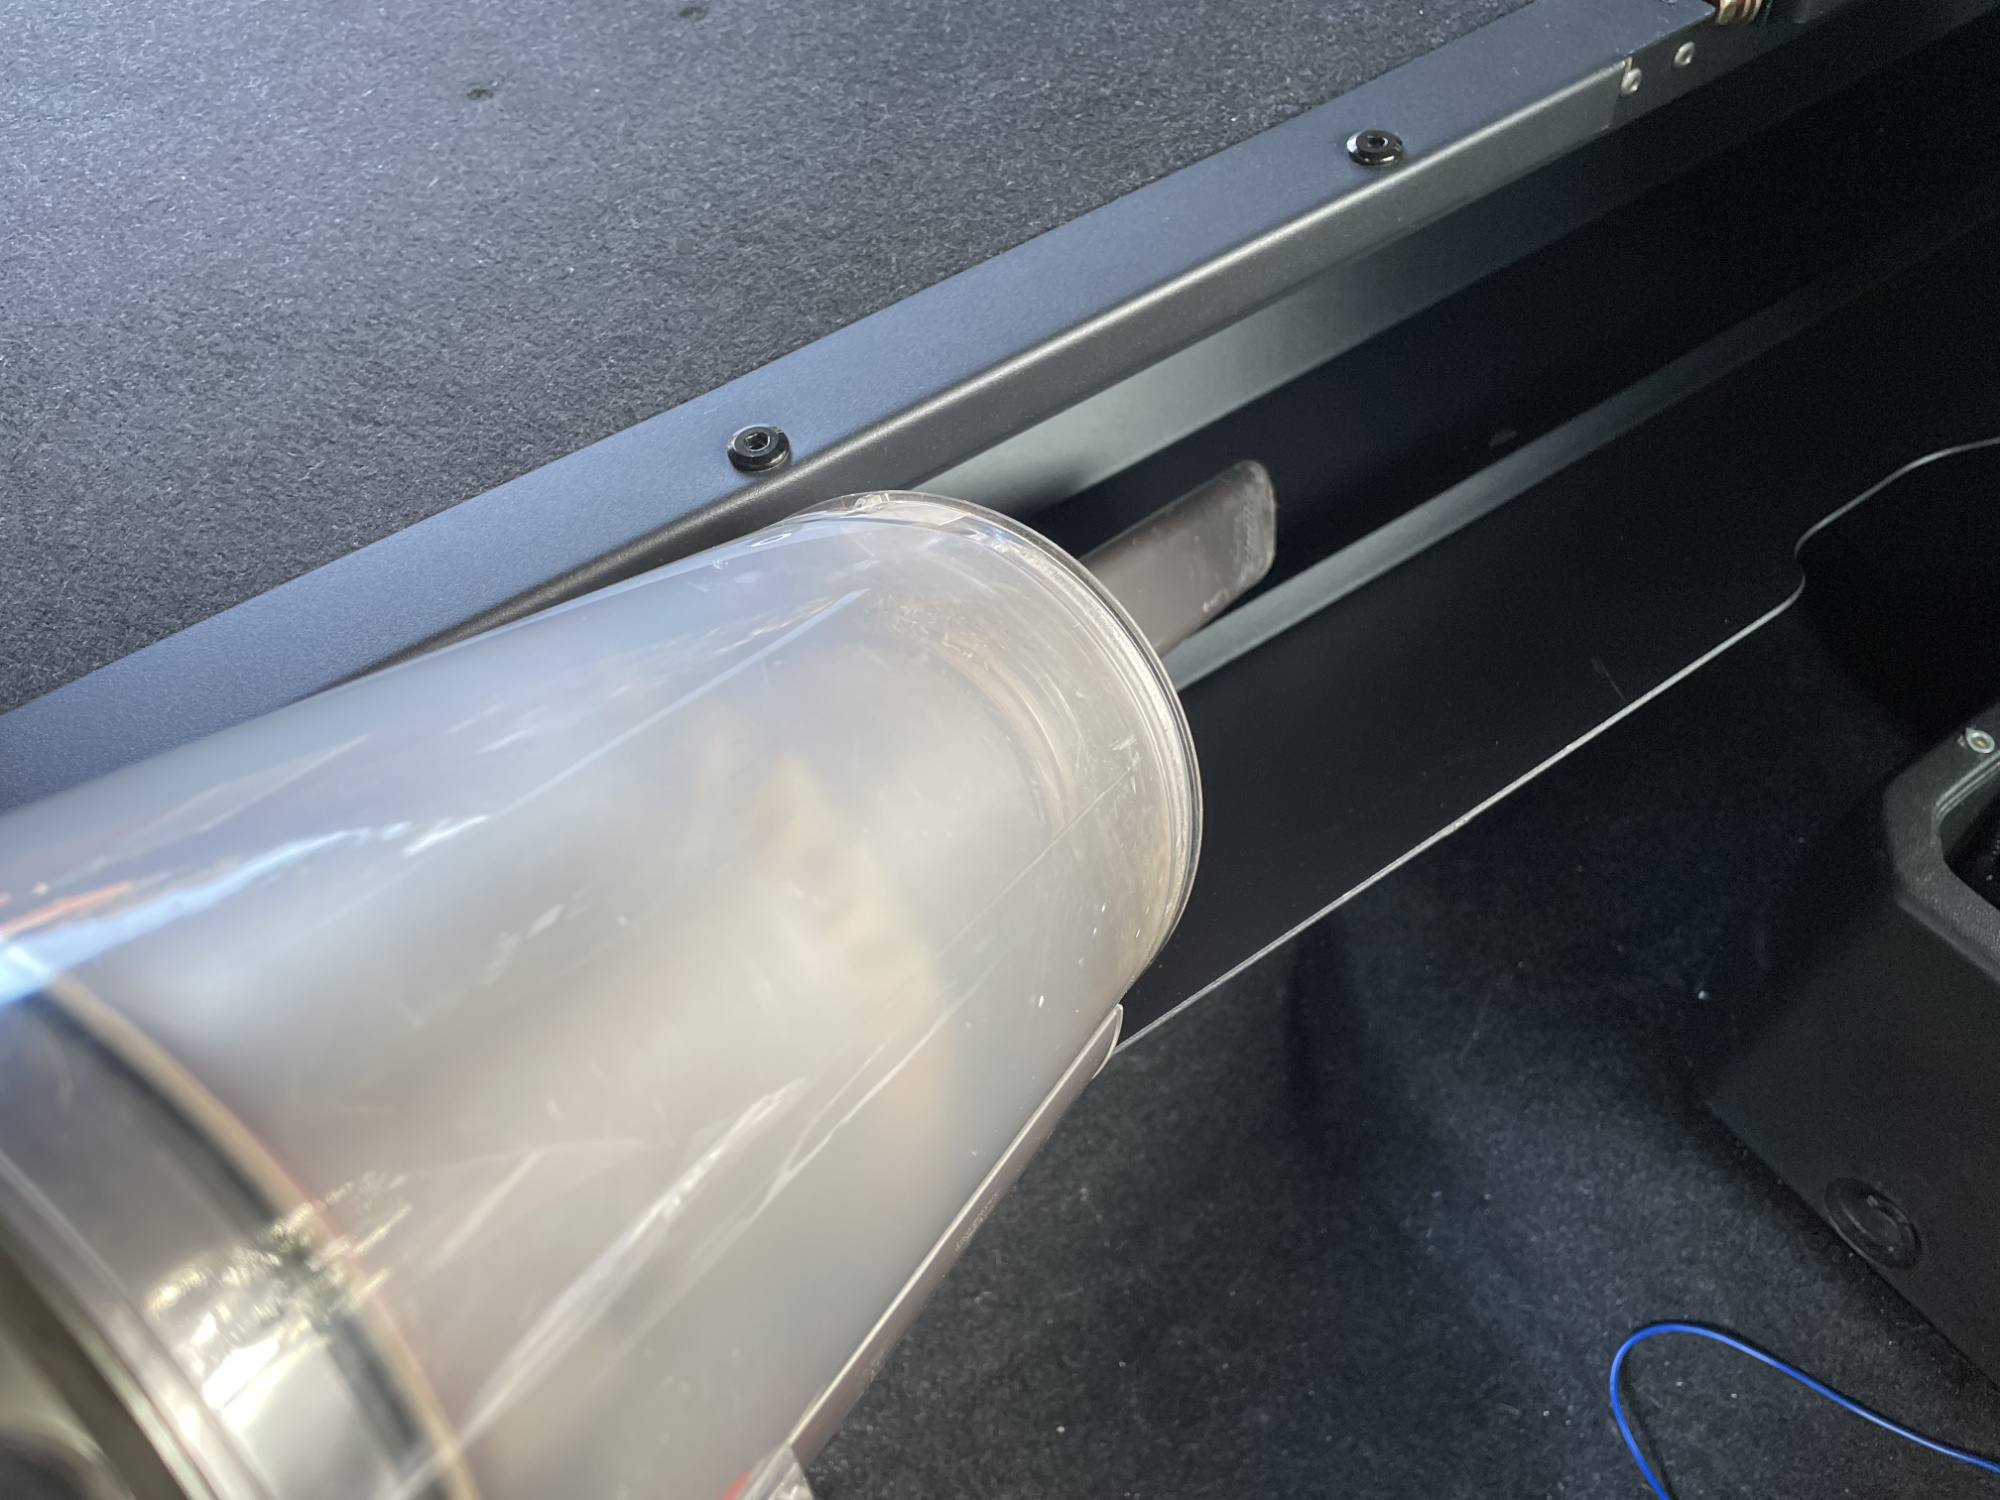
As you can see in that picture you will find styrofoam everywhere for days after, so vacuum as much as you can at this point.
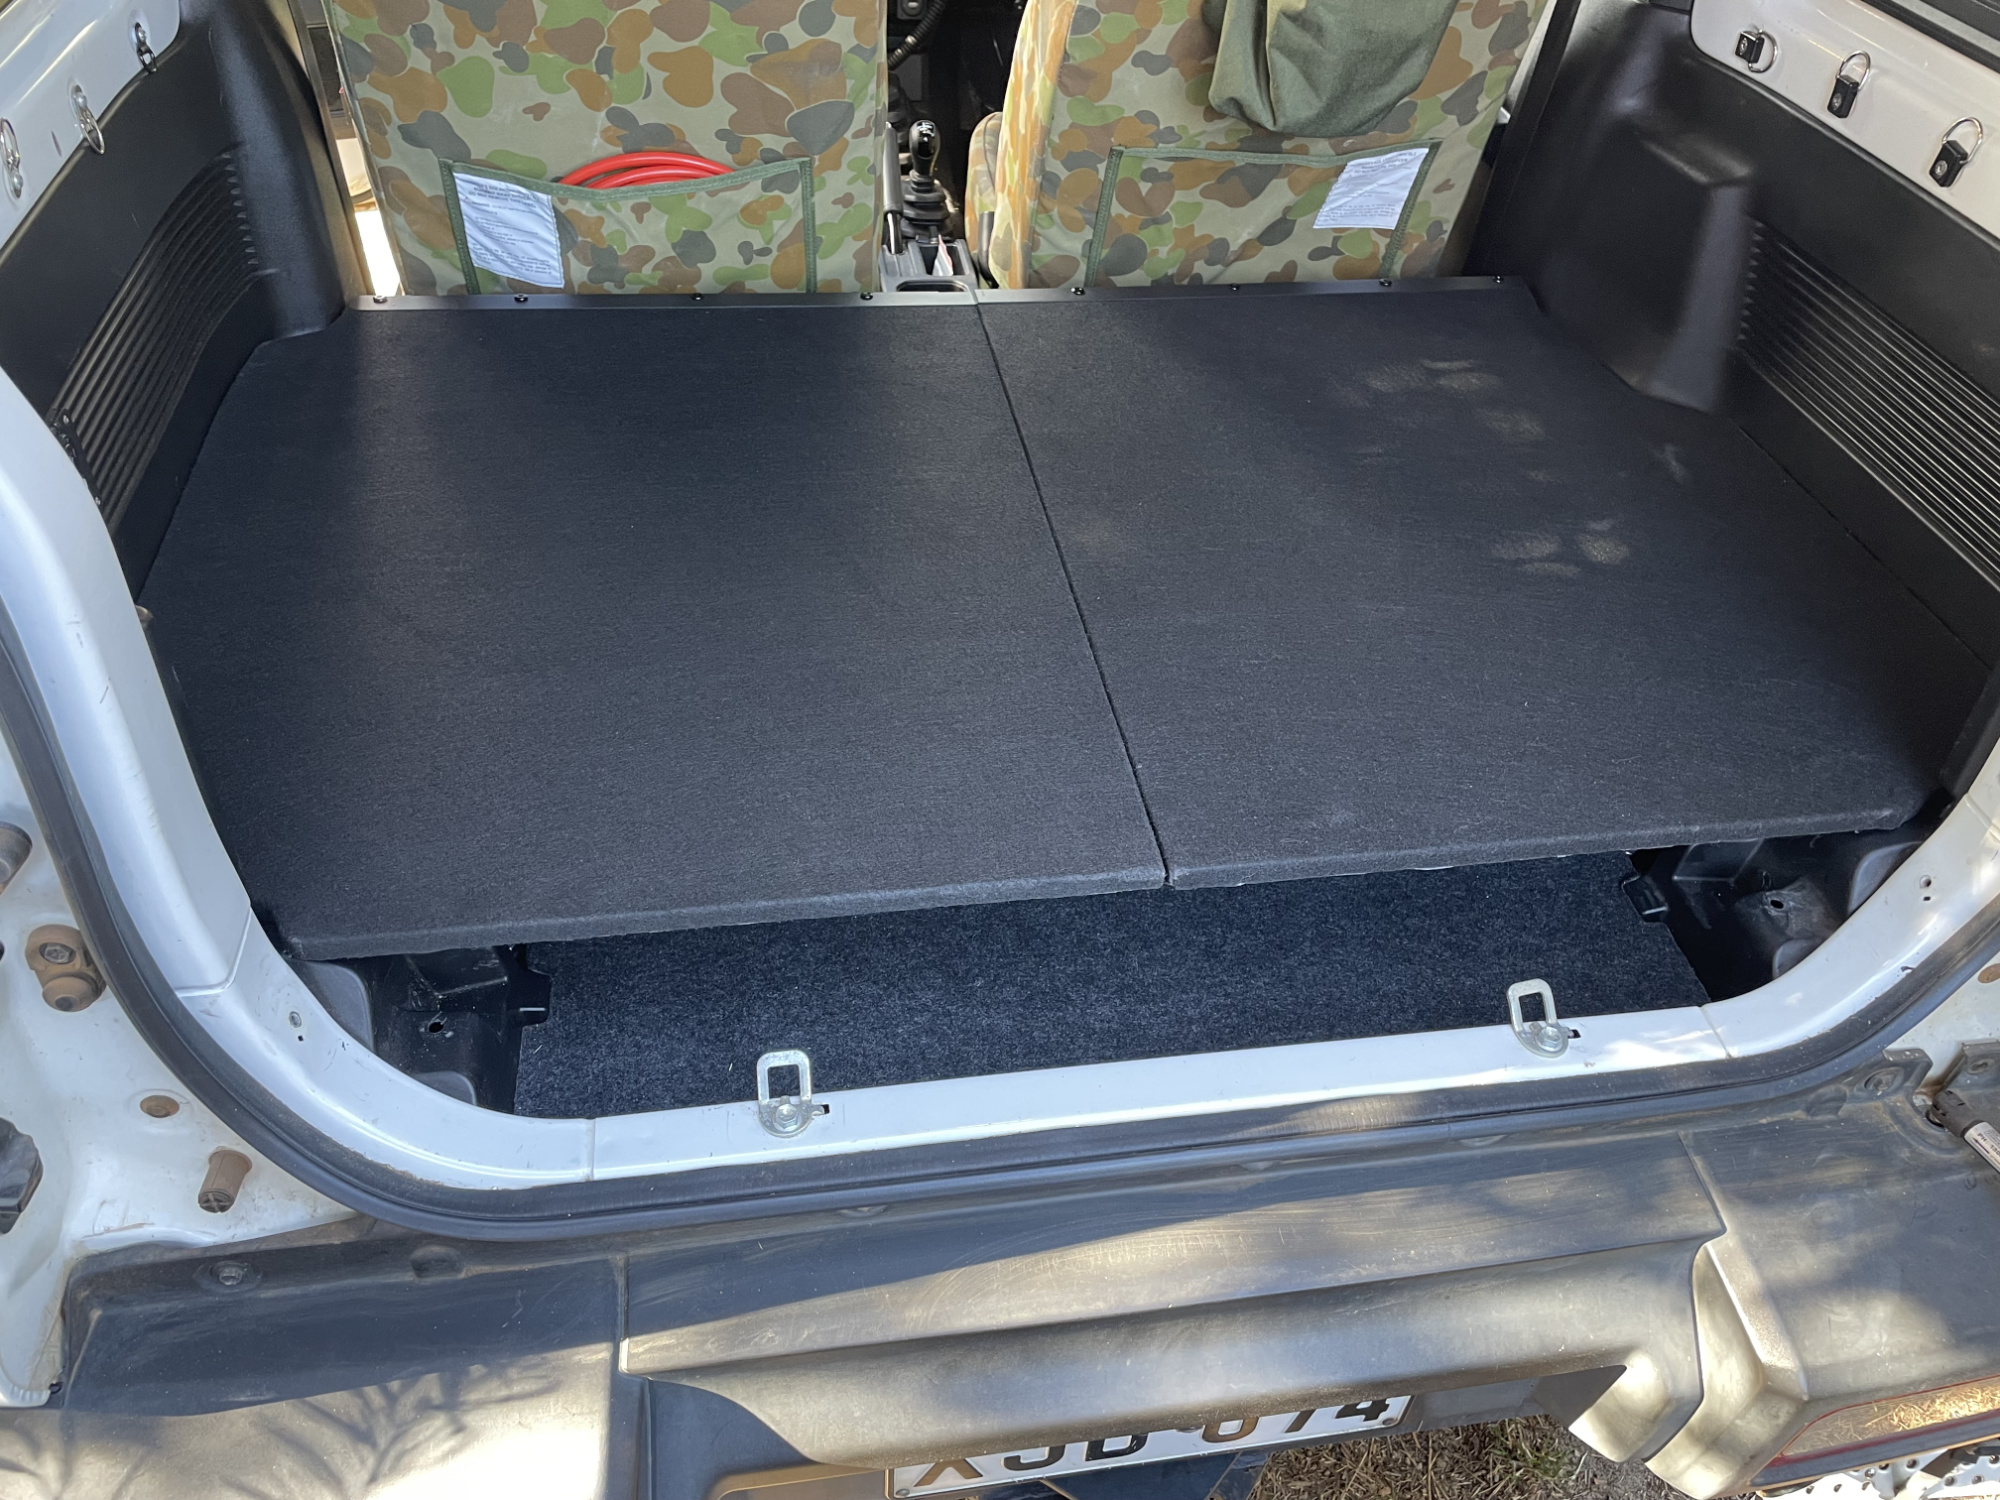
Here it is all installed and done as best as I can
Thoughts on included instructions
Instructions are provided digitally via an email: all good there, but, might be nice to also include a QR code to the instructions with the physical packaging. That way if the email gets flagged as spam or something people don’t miss out on them. Instructions are comprehensive and well illustrated: a lot of Jimny mod suppliers could learn a lot from this.
The included instructions also specify only a 10, 13 and 14 mm spanner or socket is needed, plus 4 and 5 mm allen keys. I would actually suggest you need two 4mm allen keys (so you can adjust the false floor top alignment), also, you really need allen key sockets to make a couple of things easier.
Post-installation use thoughts
I need to use it more but I will gradually update it.
Some thoughts on my use of it
I mostly wanted something to easily mount my fridge to, and have accessible storage underneath and it meets that need perfectly. I may well end up remaking the false floor panels themselves to try to cut out some weight and also because the fitment isn’t just quite what I want at the moment.
I don’t intend to use a rear table with the car, so one aspect I am considered about making bigger base plates is to ensure they actually go all the way back to the back door. This would also allow me to make them with a lip down. Doing so would mean they act as a substitute for the storage box that is now removed.
A couple of mods to my car are trickier to accommodate and not perfect just yet. The panels don’t fully open height-wise because of my openable back windows. I also have an Anderson socket and cigarette lighter socket on one side of the back and this interferes with opening of the passengers side false floor panel, but only just. A small relief cut on the plate would sort this.
I do like the accessibility of the storage though underneath, so with some tweaks it’ll be great. The front box is good, since you can open the hatch with the front seats in a typical position.
One thing that is fantastic is my 100W solar blanket perfectly fits in one side, and is held from sliding back and forwards by some of the rear seat brackets.
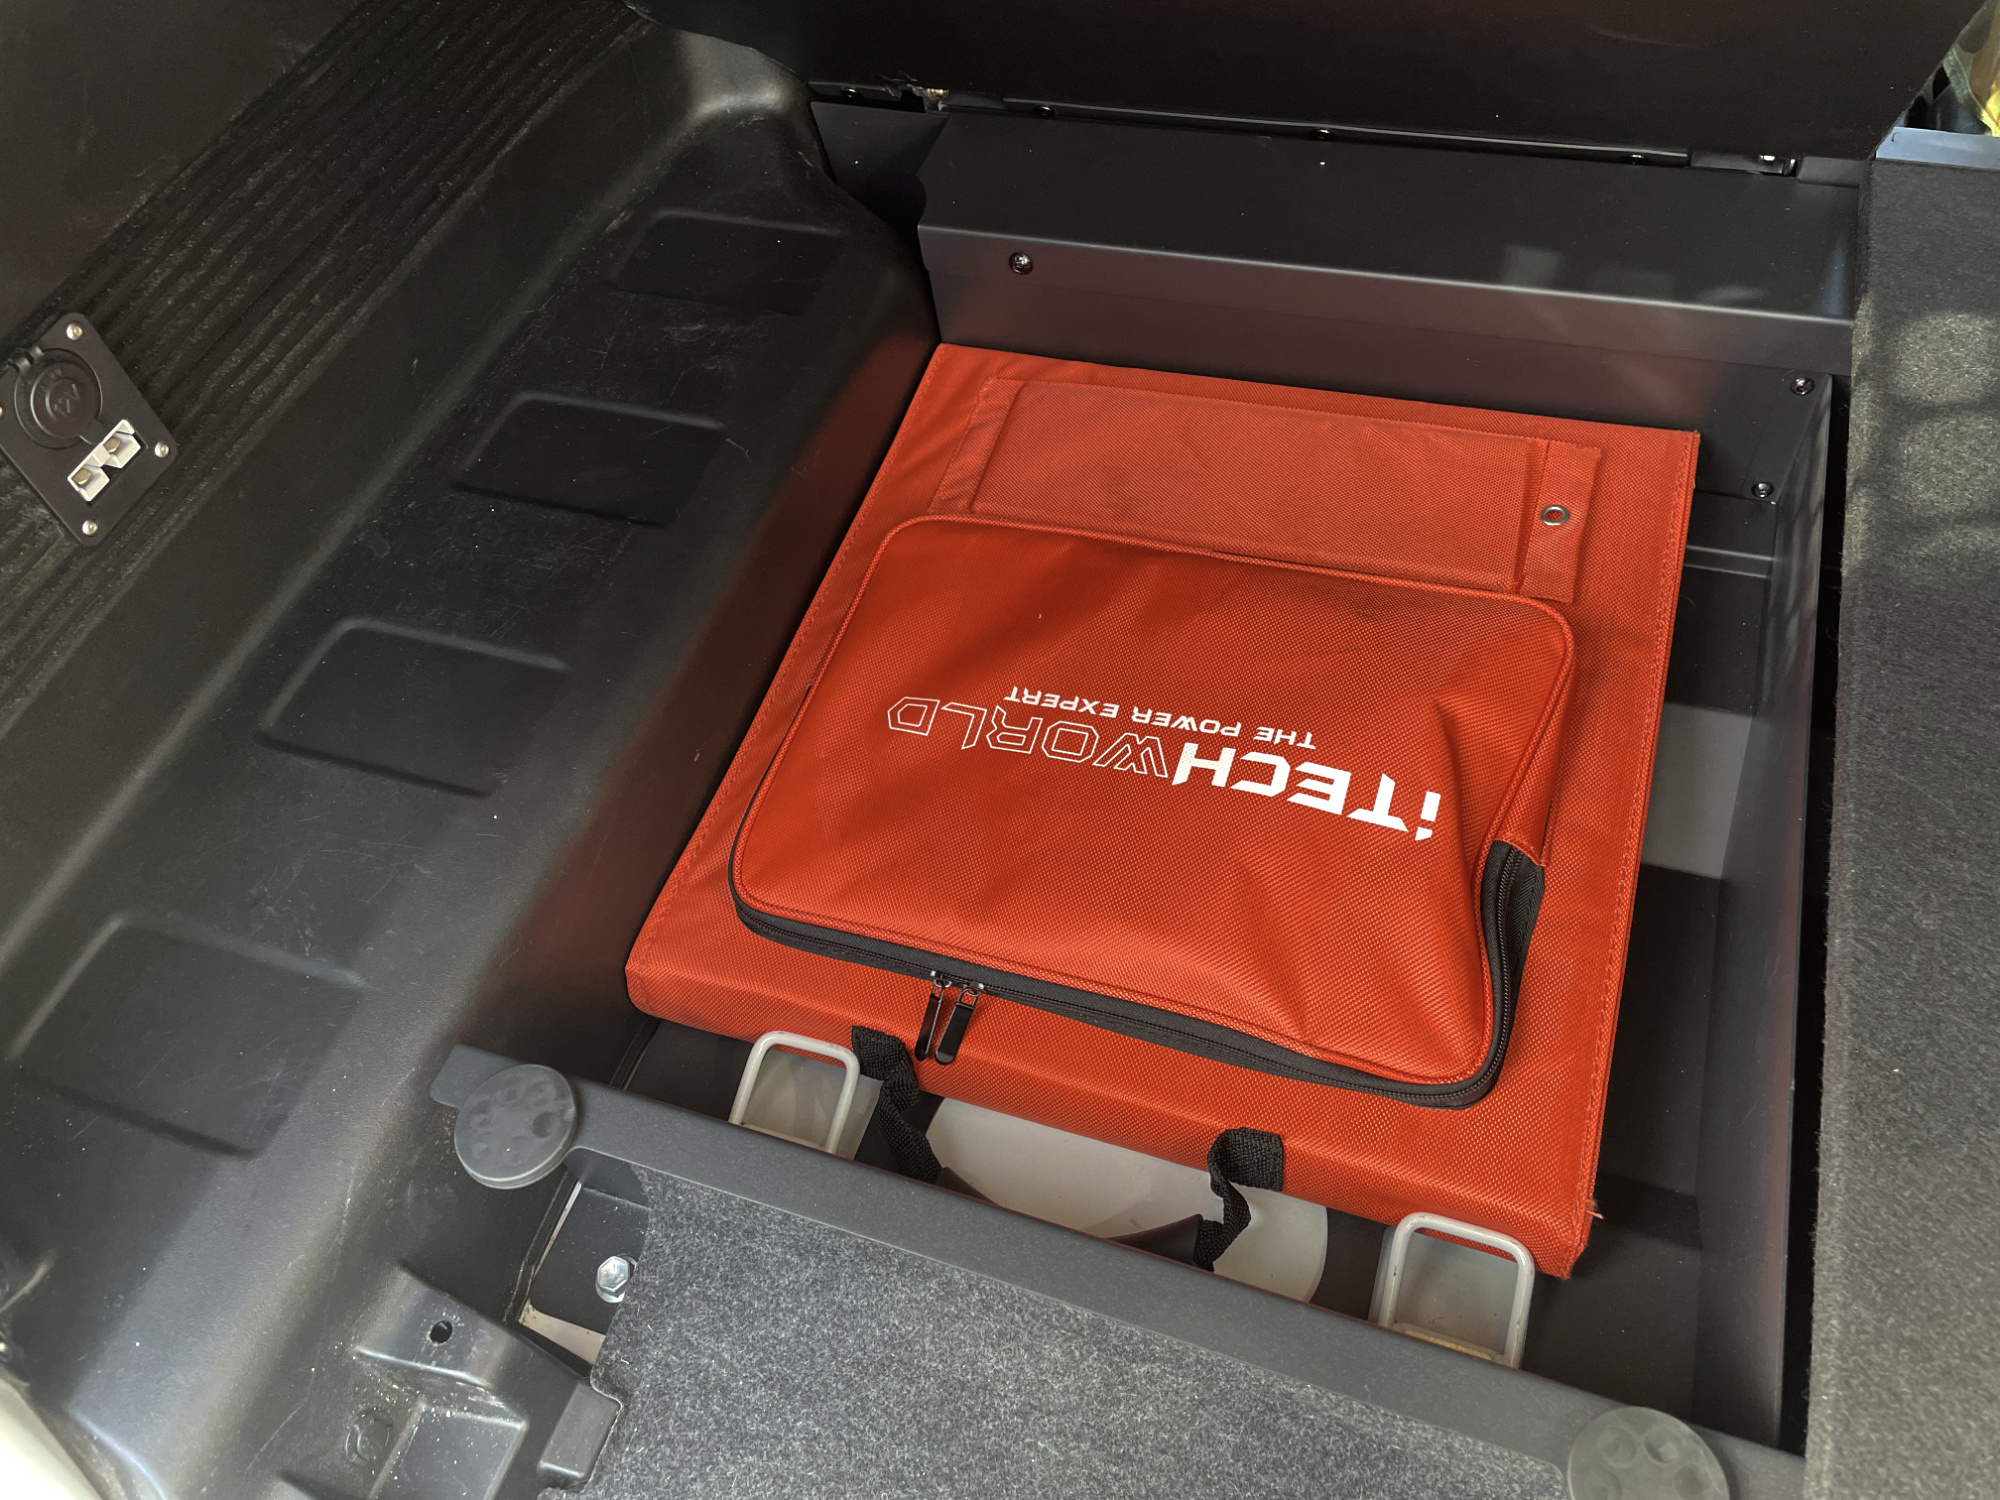
This will be the side my fridge will be on when camping, so the fact you’ll be able to lift up everything including the fridge to access this will be great, but also will be storage I won’t be accessing too often. This will make a good spot for other random electrical things e.g. Anderson extension cables and the like.
Mods you could do
The first suggested mod I have is to actually look at using the central divider as a way to mount gas struts for the openable floor panels. Especially with a fridge or something mounted onto these panels then lifting them up can be tricky.
The base plate being quite thick then it gives you options to mount things to it, e.g. you could put a compressor onto it. It would require some thought and probably mounting part of the compressor bracket before you even fit the base plate to the car, but it certainly would be possible.
What tweaks might be worth doing
- Build it a bit more Jimnyable
I think it’s overbuilt. Some people love that in 4wd things, but, mass is no substitute for design and engineering. There is no point having the base plate be 2mm steel when the floorpan it’s bolted to is < 1.3 mm thick.
The base plate alone is 5 kg, and if it was slightly thinner and much more cut down (or even just 3 separate parts: two side stretchers and one middle section integral with the central divider) it would be more like 1 kg and end up making the platform no less strong at all. Most of the mass of the base is doing nothing for strength to the frame.
The same goes for the rear deck. My car was used for a commerical 4wd and van fitout place during Covid & they do everything, even for heavier duty builds, out of 9 mm marine ply. With the right support that will easily exceed what even a GVM upgraded Jimny could conceivably have in the back. - Rethink some of the fasteners
The fasteners are slimmed down in selection so they are easier for people to identify. This is a good thing.
Nevertheless, I would say that the hinge bolts absolutely suck as allen bolts for adjustment. You can do it, ideally small screwdriver bit and a 1/4″ ratchet screwdriver would give you access, but there are better choices. I used JIS bolts (so M8 with 12mm head), but even better would be M8 with reduced head (e.g. 10mm). The area into the hinge also is not sufficiently relieved enough to fit a regular spanner, though I have some reduced head ones that worked ok.
The M6 allen bolt through the box for the central divider is also too short and doesn’t have full nut engagement because of the additional lip on the bottom of the box. That one at least needs to be longer.
I would also use acorn nuts on the ones into the rear area where the jack is, rather than just bare flanged nuts. - Redo some of the tolerances
The tolerance on the false floor hinged sections is a bit off at least in terms of my car, so opening them is a bit sucky. While the instructions specify you can use the bolts on the brackets for the false floor to align them, there is insufficient ‘give’ in the holes in my false floor to get the alignment right. - Supply some tiedowns and bolts to suit at the front
A couple of little d-rings at the front like I have done, and better bolts to suit, really adds to the setup. - Add additional QA/QC (and factor that into the price)
The fitment on my hinge brackets was not great due to brackets being incorrectly bent, and the holes weren’t fully finished. QA at the warehouse before dispatch does add cost, but I would absolutely pay $100-$200 more for something that just worked out of the box and took less time.
Indeed, if I was paying someone to install it, them rectifying the issues would cost me more than that in labour. For the target market it needs to be slightly more of a drop-in solution, at least in terms of the unit I was supplied. It might be other ones are better.
Post-installation mods
After installation I’ve done a couple of modifications to the floor to make it a bit better for what I’m after. As I do more post install stuff I’ll add it here.
Adding tiedowns
The first tweak I’ve done subsequently to installing is to add some extra d-rings. I had added a couple at the front, but I have now added them all along the front lip and also on the 3 bolt at the base of where the front storage compartment is.
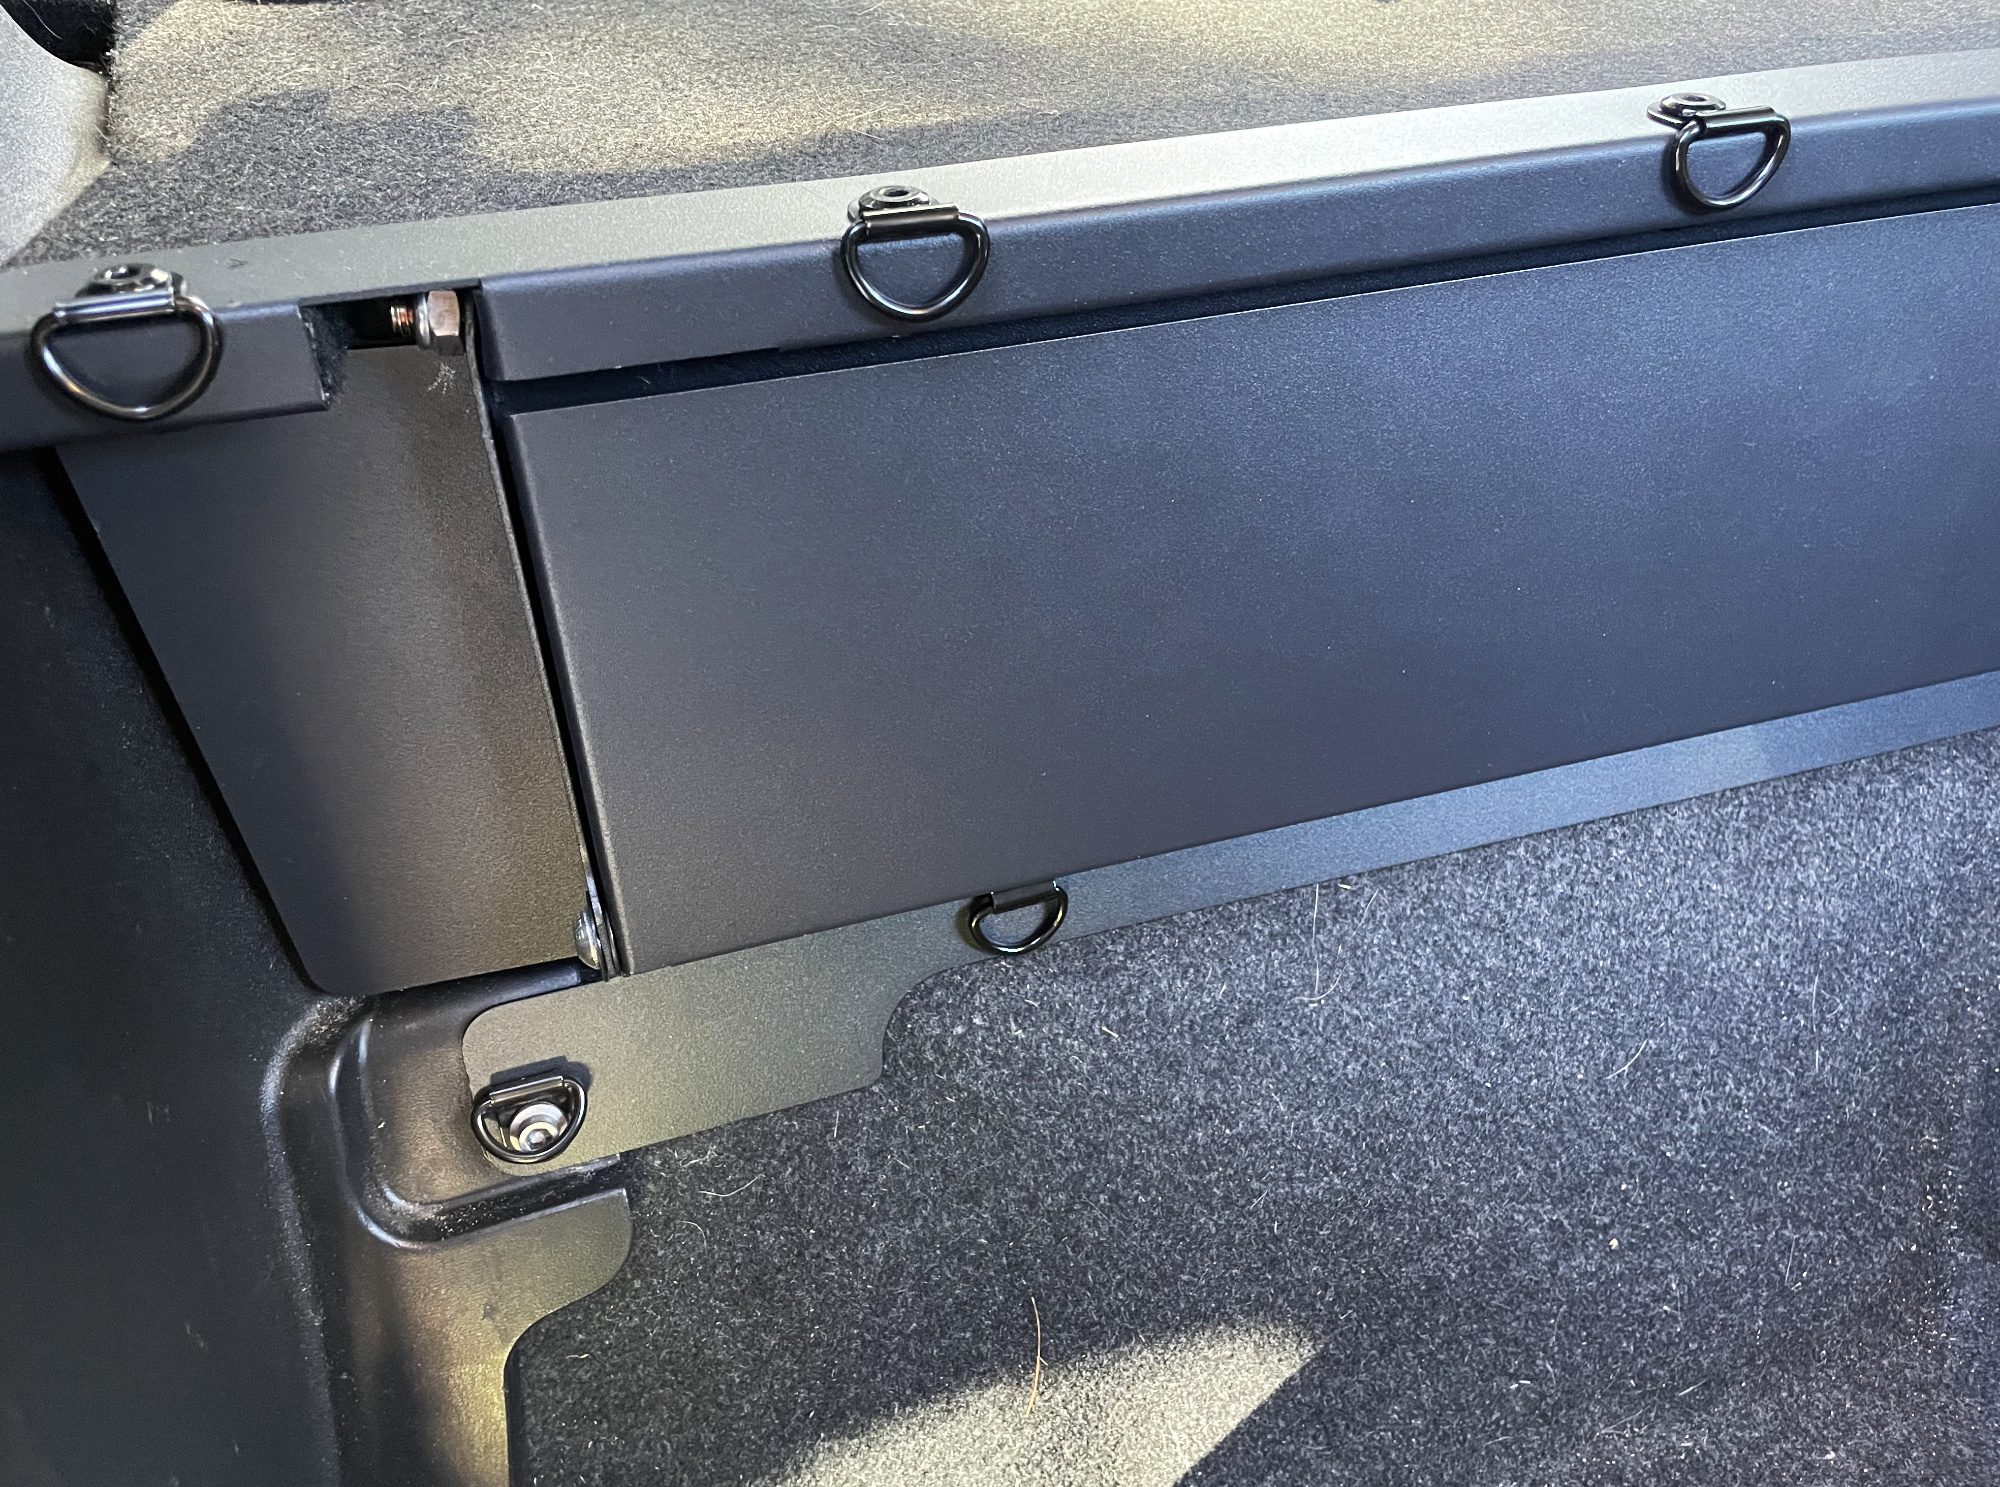
Nothing too difficult here. Used some M6 appropriate metal d-rings; the ones in the 3 bolts in the lower part of the front storage box need longer bolts and nyloc nuts to work appropriately. You’ll also want longer bolts for the two in the rear footwells at each end. The upper ledge has the 8 sleeved bolts for the alignment of the upper panels; just undo these one at a time and you won’t lose panel alignment. The upper part of the sleeved bolt is the standard M6 sized bit so works perfectly fine.
It’s probably overkill, but I carry enough variety of things in the back that sometimes I’ll want some midway along tiedown points to help restrain things.
Mounting a drawer fridge
This is slightly more involved, and you have to understand what I wanted from it. A couple of my desires:
- Fridge to be relatively straightforwards to remove
- All fasteners to be accessible from the top or side of the fridge only
- Stable enough I can lift the base and access underneath without the fridge moving around
- Some degree of protection around/above the compressor and hoses/wiring but nothing complicated to remove
I use a Dometic CD30 fridge which allows you to relocate the compressor from the back of the unit to either side. This fridge ends up being almost exactly half the width of the Jimny’s boot space in width which makes it relatively even to mount in the car. This means the slightly dead space on the side of the fridge ends up being taken up by the compressor and then giving you a bit more space behind the fridge as a bonus, too.
I mounted the fridge to the false floor using 3mm thick aluminium angle, cut to be relatively short. The ‘middle’ of the car brackets are mounted to the false floor under the fridge, making it possible to lift either side, and the ‘outside’ brackets with the compressor bracket stay attached to the fridge when you take the fridge out. This makes removal and refitting really fast: undo the compressor side brackets, undo the two bolts holding the fridge to the middle brackets and lift the fridge out. Then take off the two middle brackets and you have a fully flat false floor again.
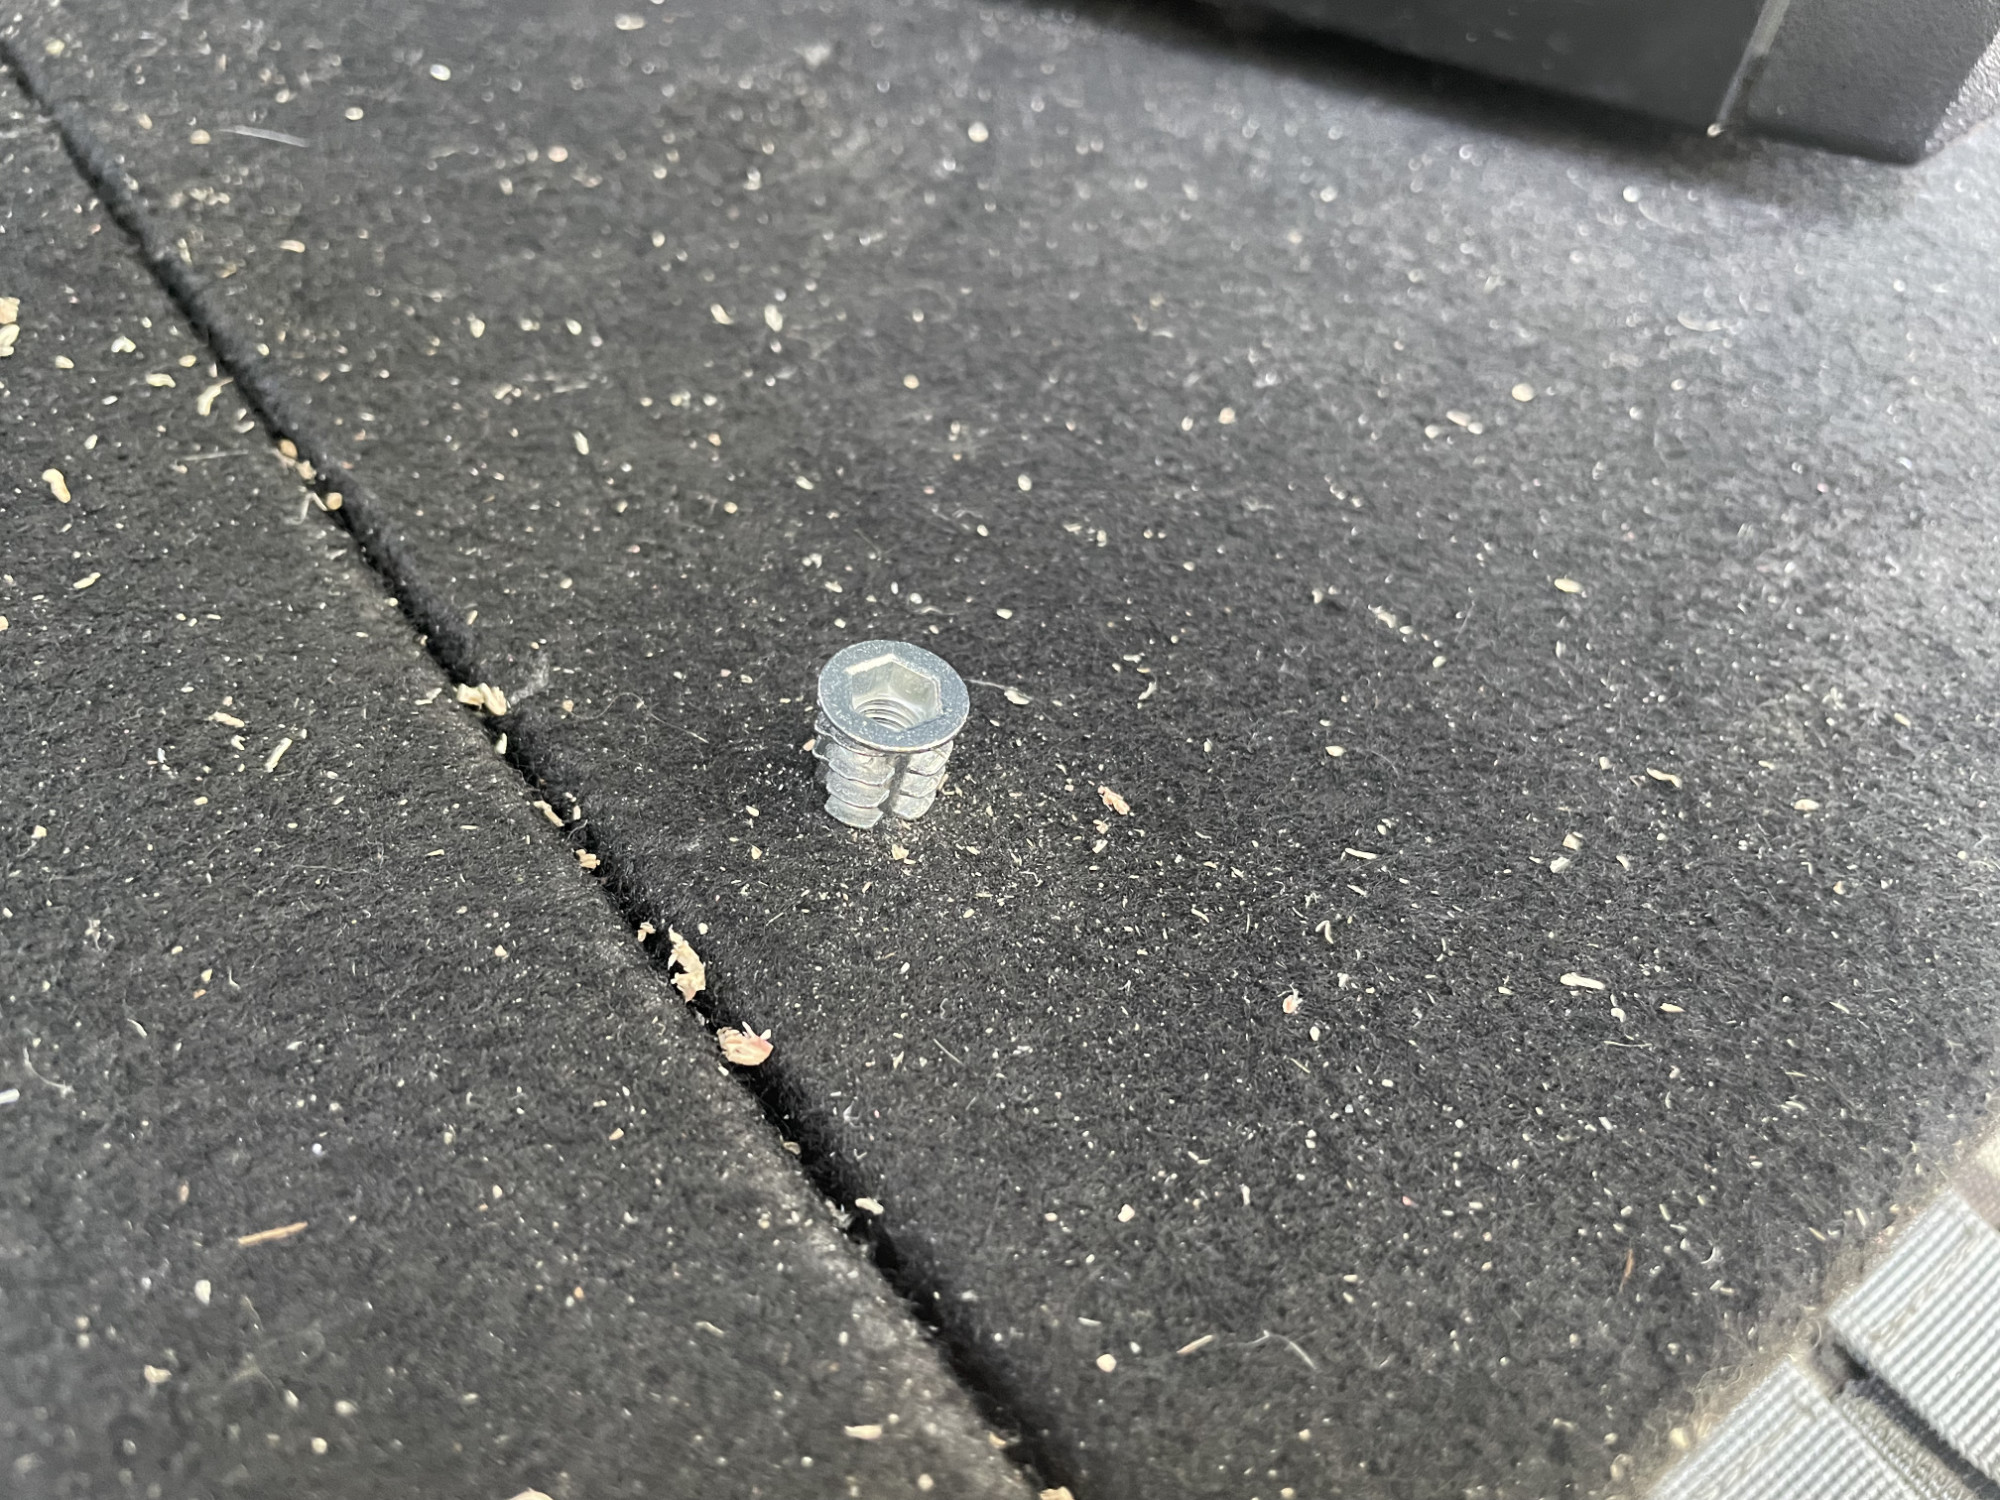
The way I mounted the fridge down is to use wood inserts. These give me an M6 thread and will more than sufficiently hold the fridge down. You simply drill the correct sized hole into the wood and then screw them in with the internal hex. With 13 mm long inserts there’s nothing poking out of the bottom to interfere with anything beneath the false floor, too.
Not much else to show really, four brackets covers it. Here’s a picture of the two mounted on the ‘middle’ side of the car prior to fitting the final wooden side panel.
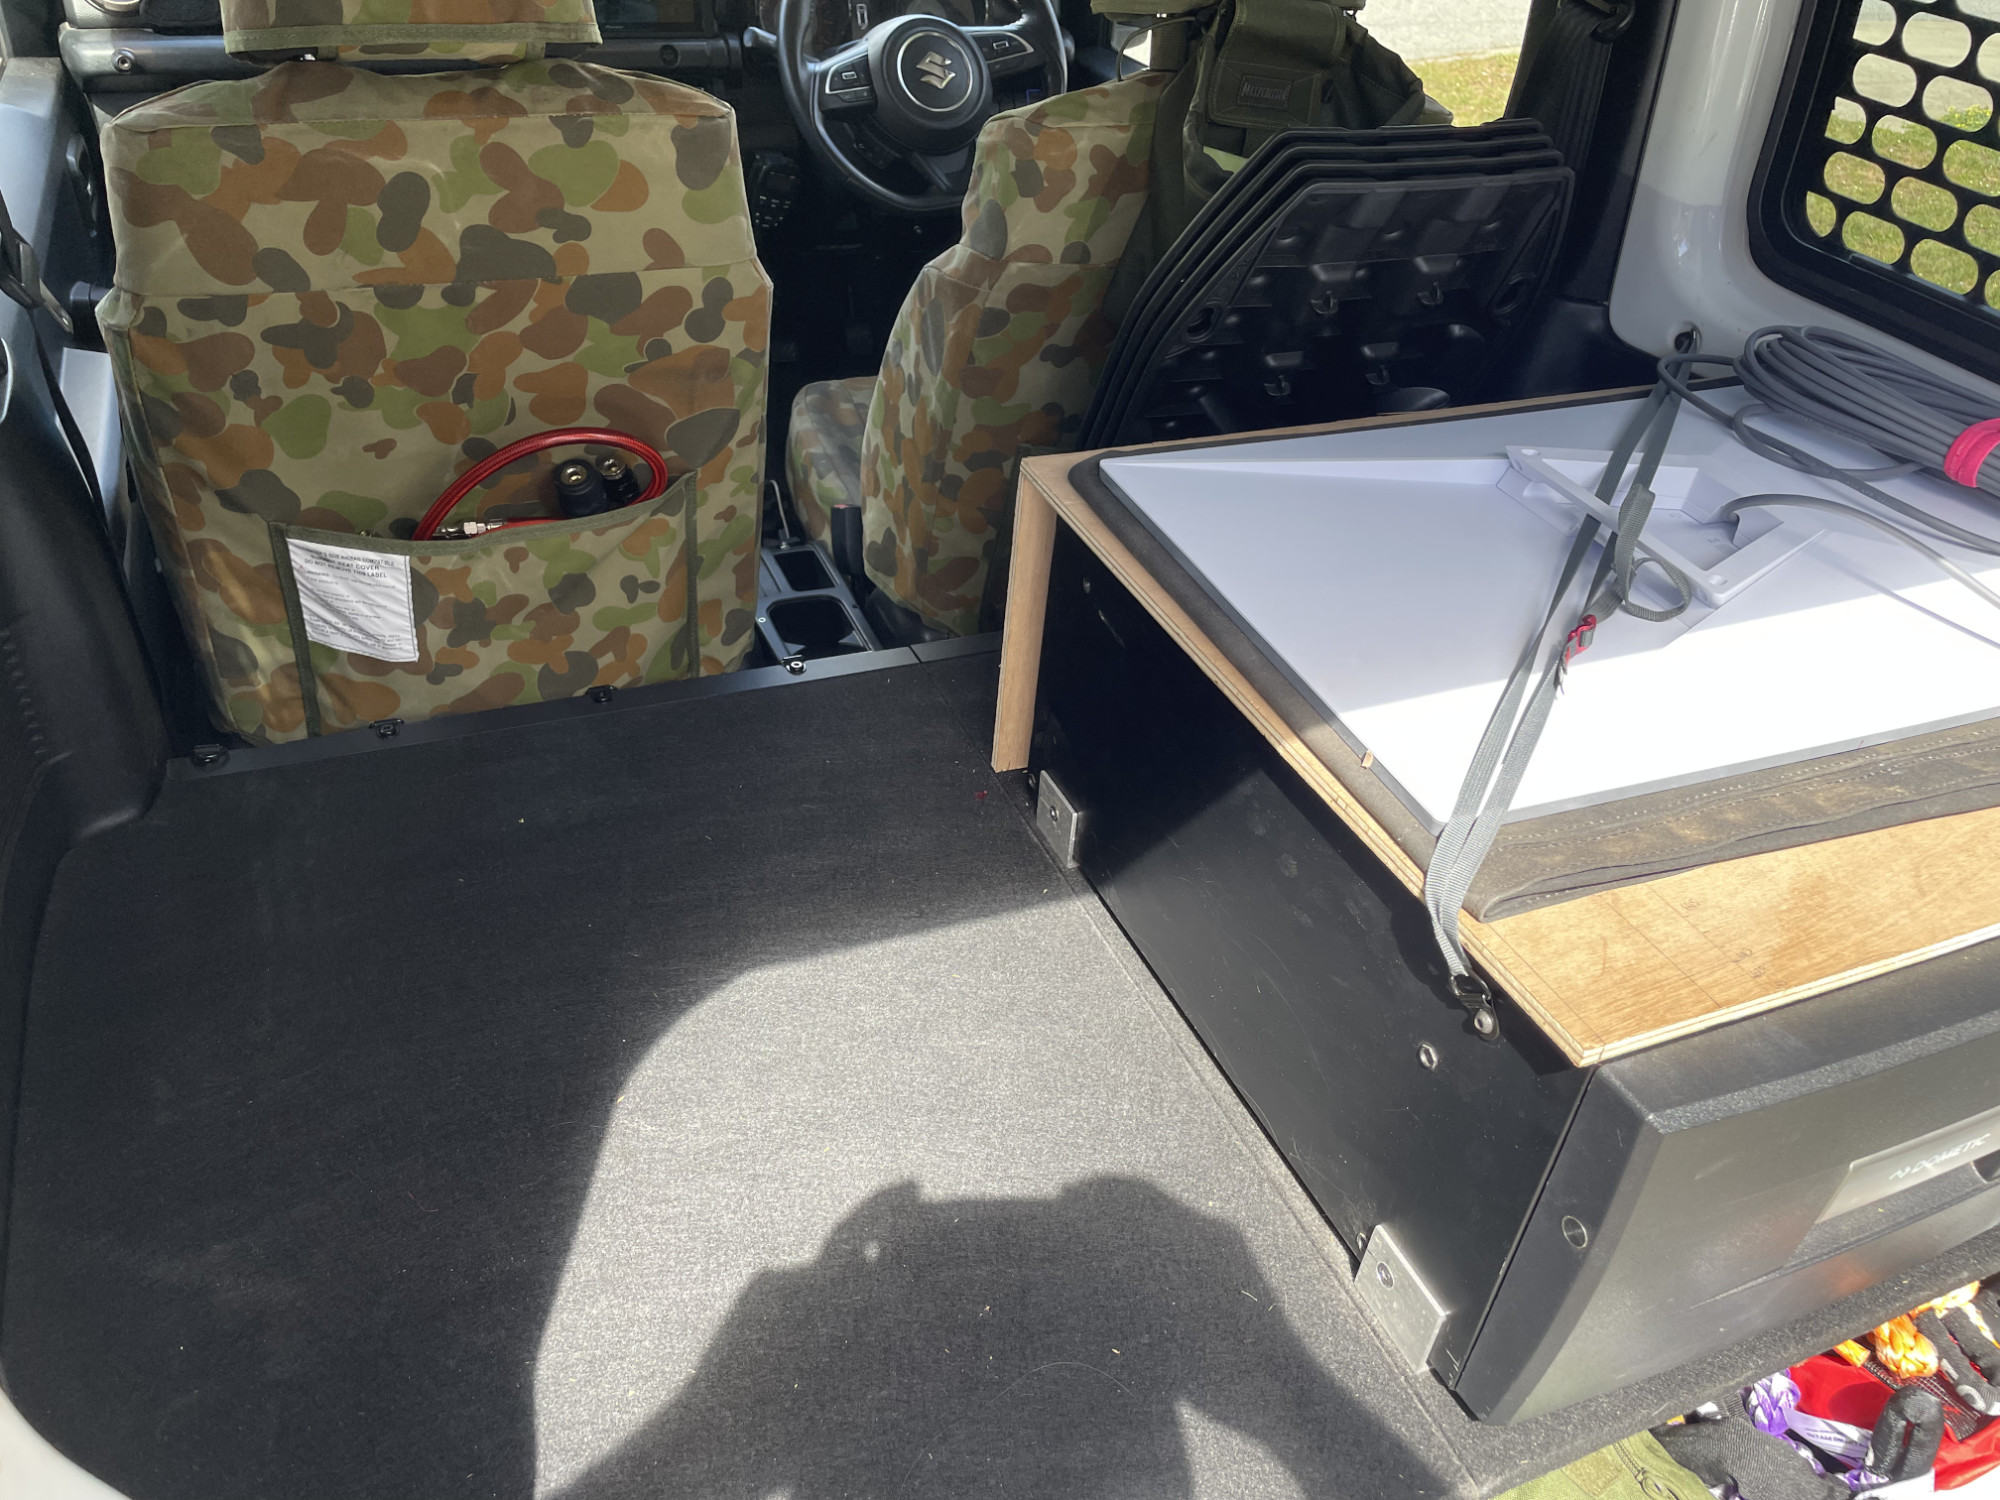
There’s just enough room for 6mm plywood to make up a side panel, though will need to be routed down to 3 mm thick where the brackets are. You’ll also probably wonder how the top wooden platform is mounted to the fridge. Eventually it’ll be bolted to the fridge, but for now I use very short self tapping screws into the top. There are 4 holes in the top of the fridge, which are not officially mounting points, but match where the feet mount on the base. There’s only insulation in those spots so light self tapping screws, exactly how the feet are mounted, are safe enough.
With a low profile tiedown into the side of the fridge it’s also easy enough to use good quality 100 kg straps to secure things to the fridge, e.g. in the picture above there is a starlink dishy strapped down for transport.
Although it’s not light, it does lift up relatively easily. At some point I think I’ll add gas struts to this floor to make it a lot easier.
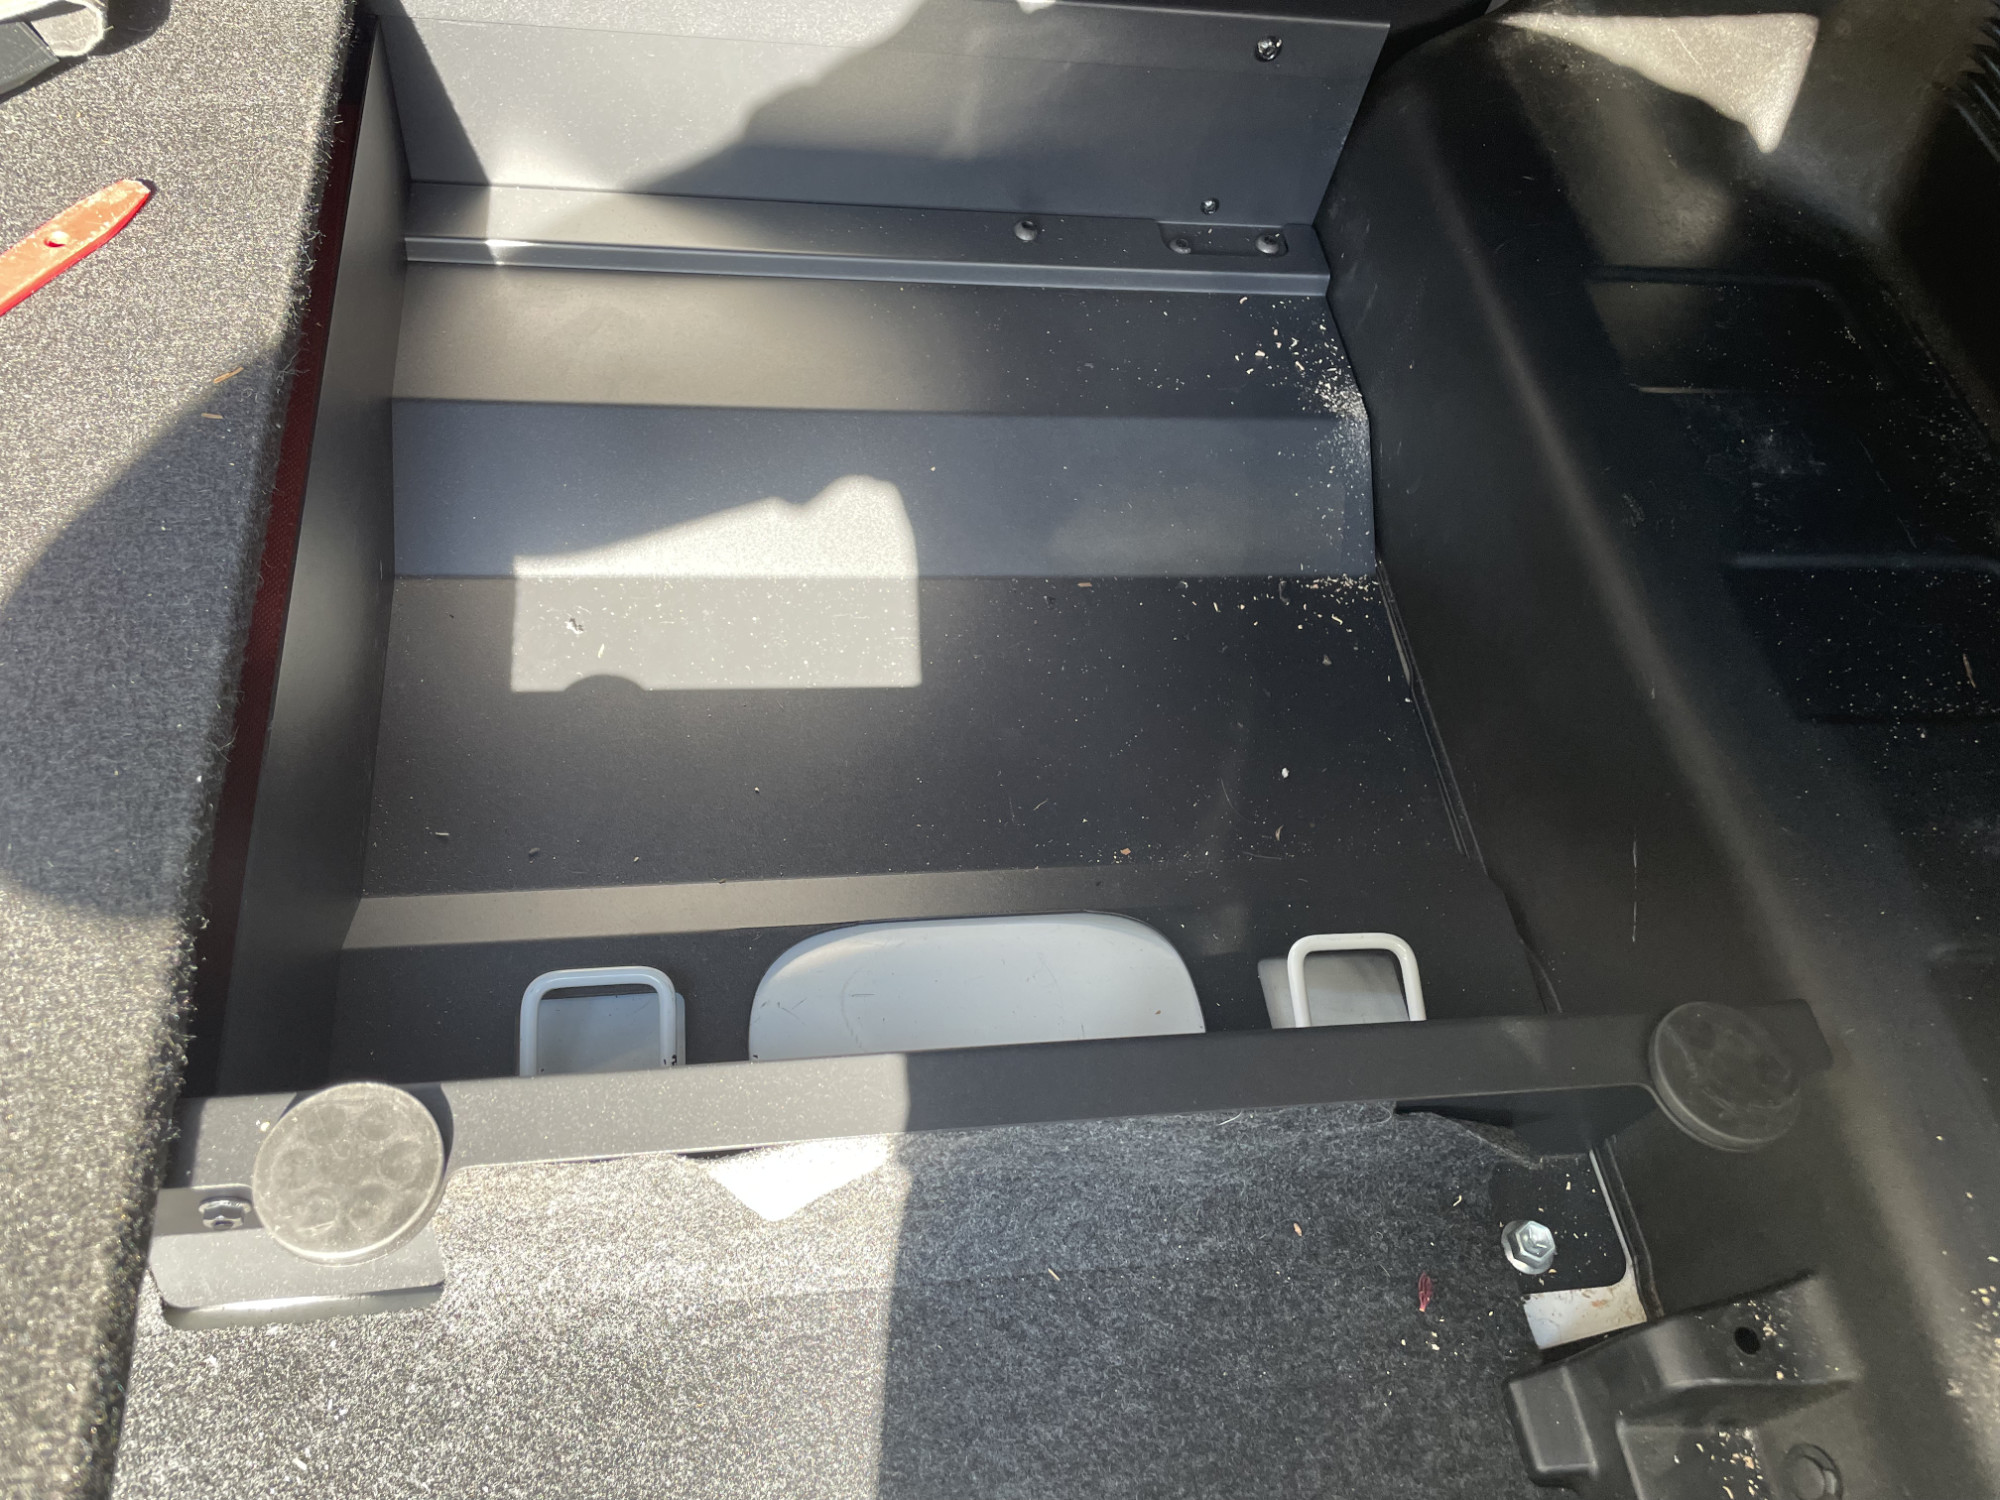
Lifting it up gives you access to the ample room beneath that side. I probably won’t store anything I want regular access to here, but it does give me a good option to get things out of the way but still have them (relatively) accessible. Yes, I obviously vacuumed up all of the wood chips from installing the brackets once I had everything installed.
The other question about power is making sure there’s a nice spot for power to come in without being really annoying to unplug and replug. To sort out power I installed a flush mount Anderson connector. These have been designed to be more stable and stronger than other commercially available ones, and also much more Jimny sized. Still need to sort out a couple of print things, but, getting there.
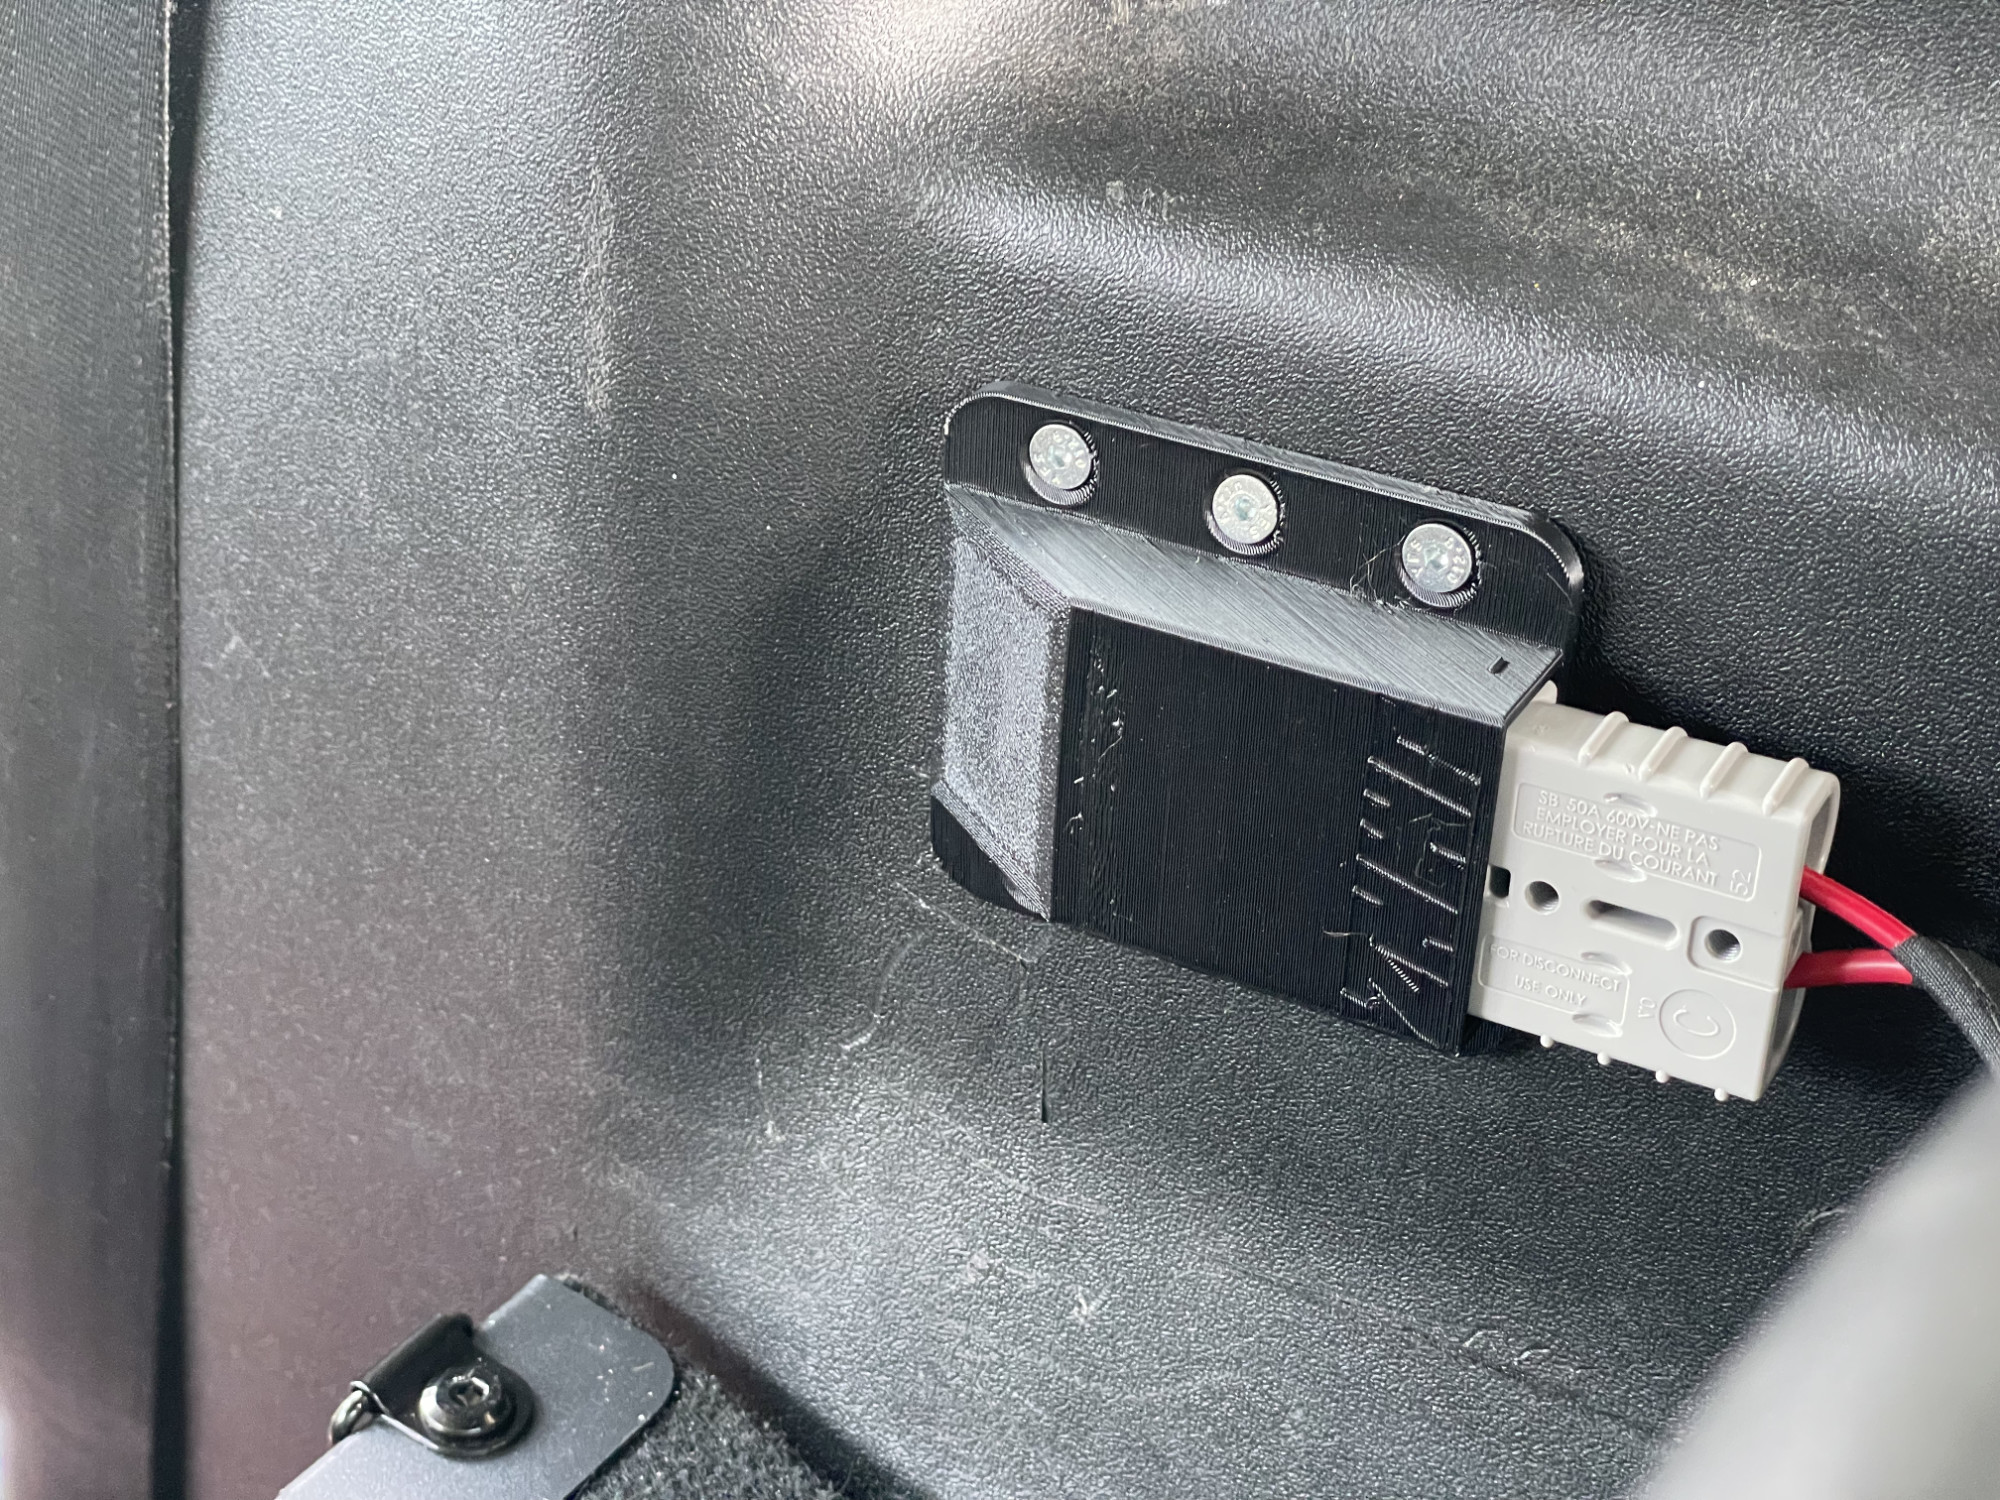
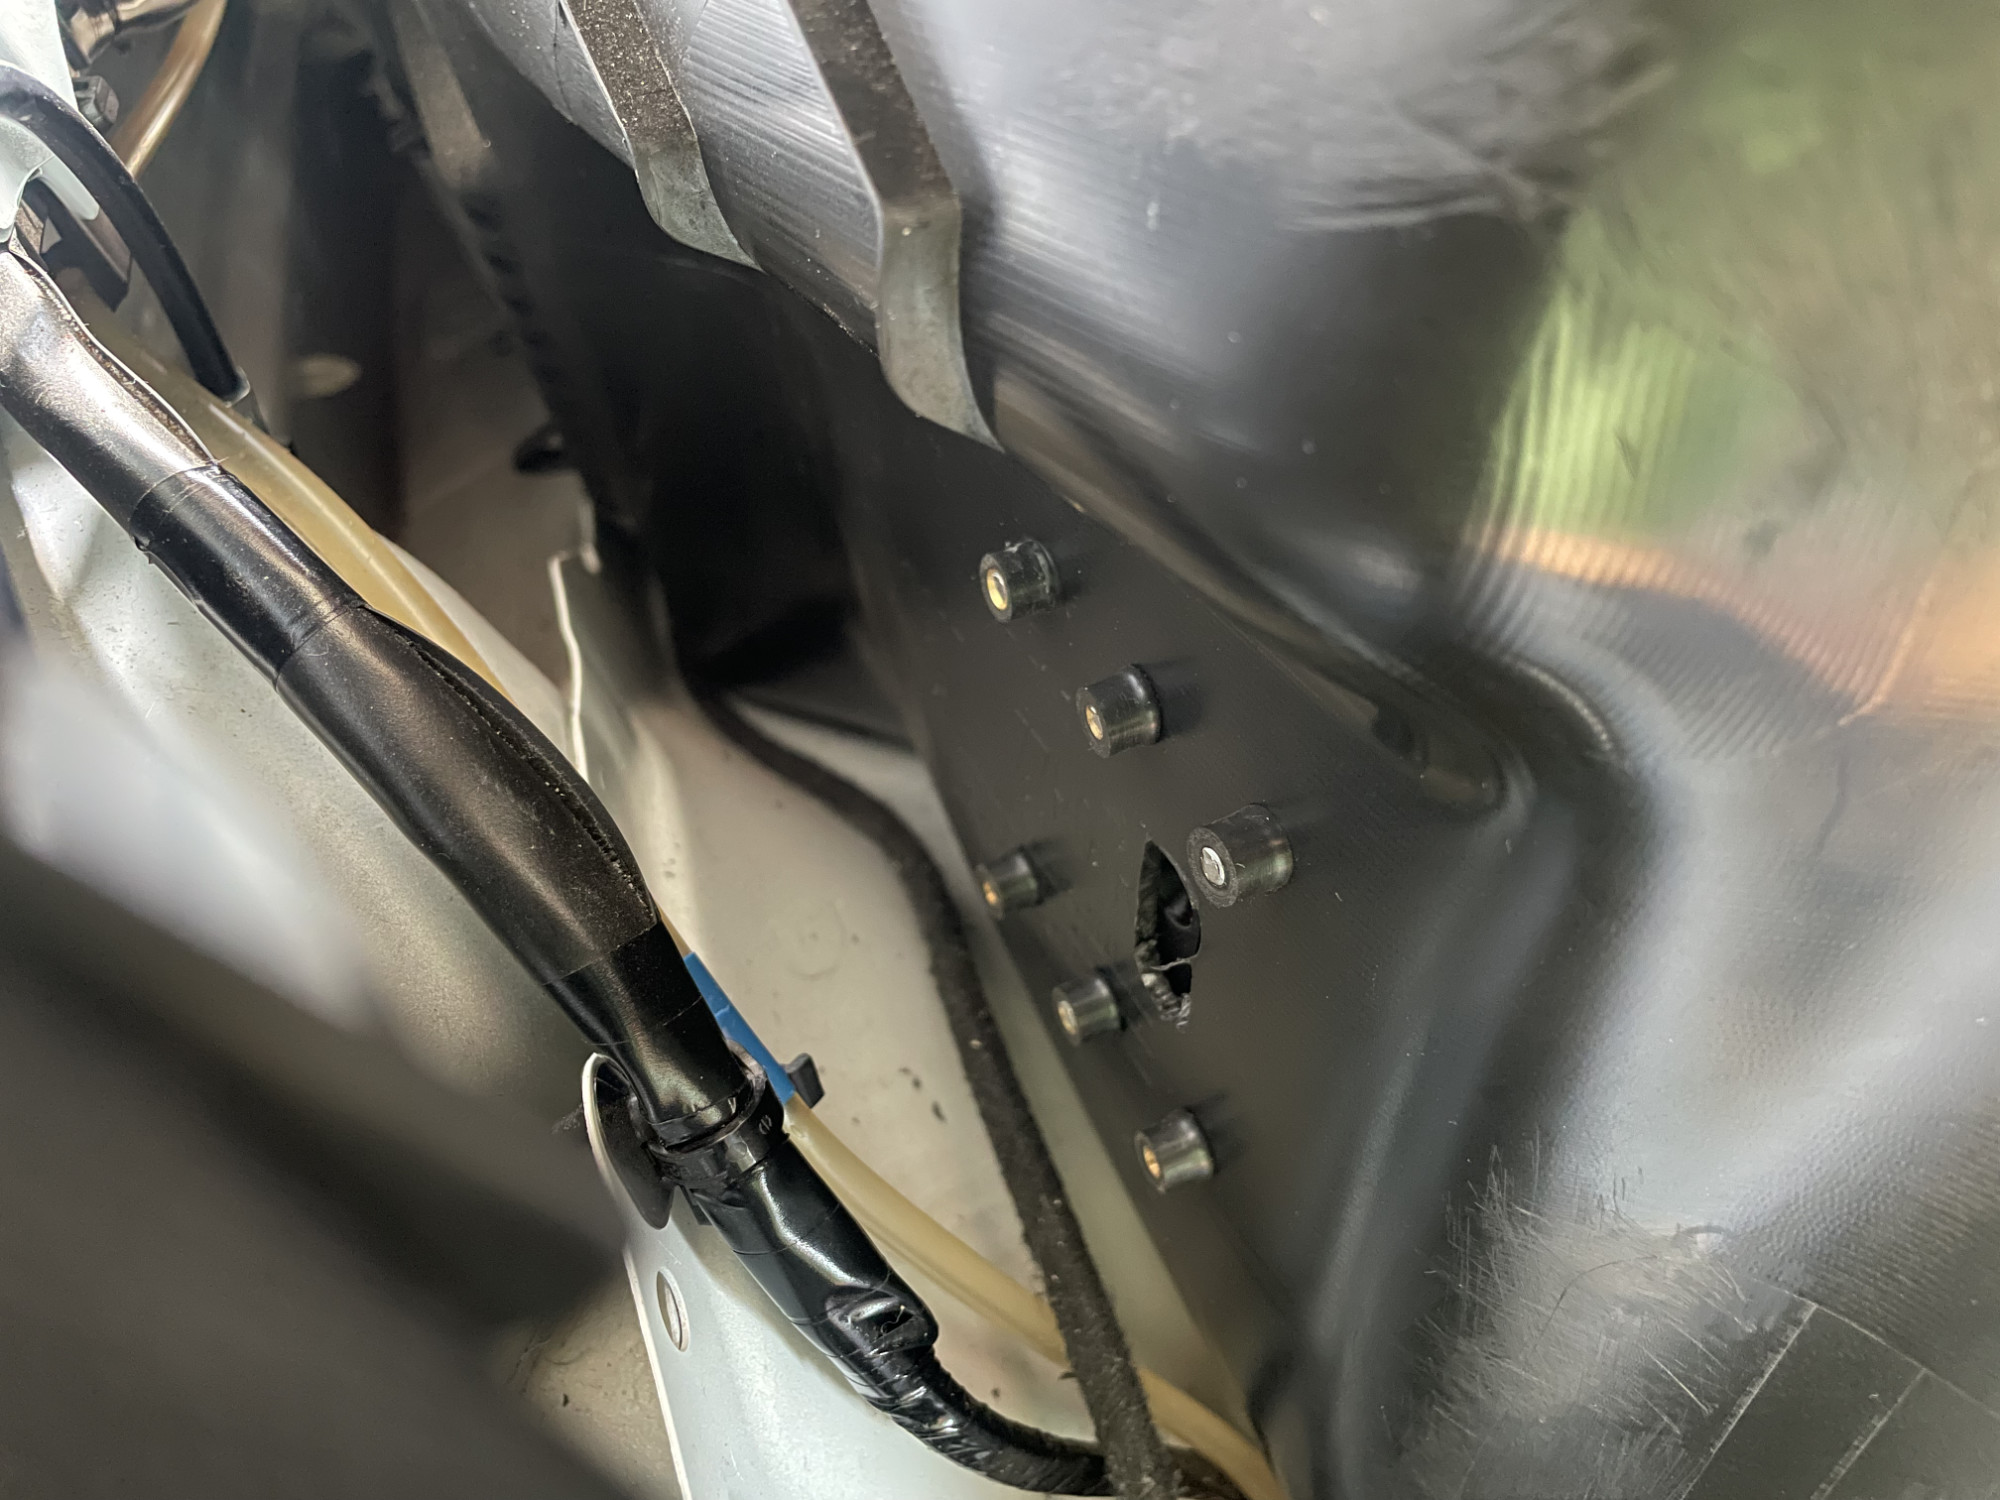
Instantly people think of mounting something like this using nutserts but they aren’t ideal into plastic trim in my experience. Instead I used M4 rubber wellnuts which are much better at holding into plastic.
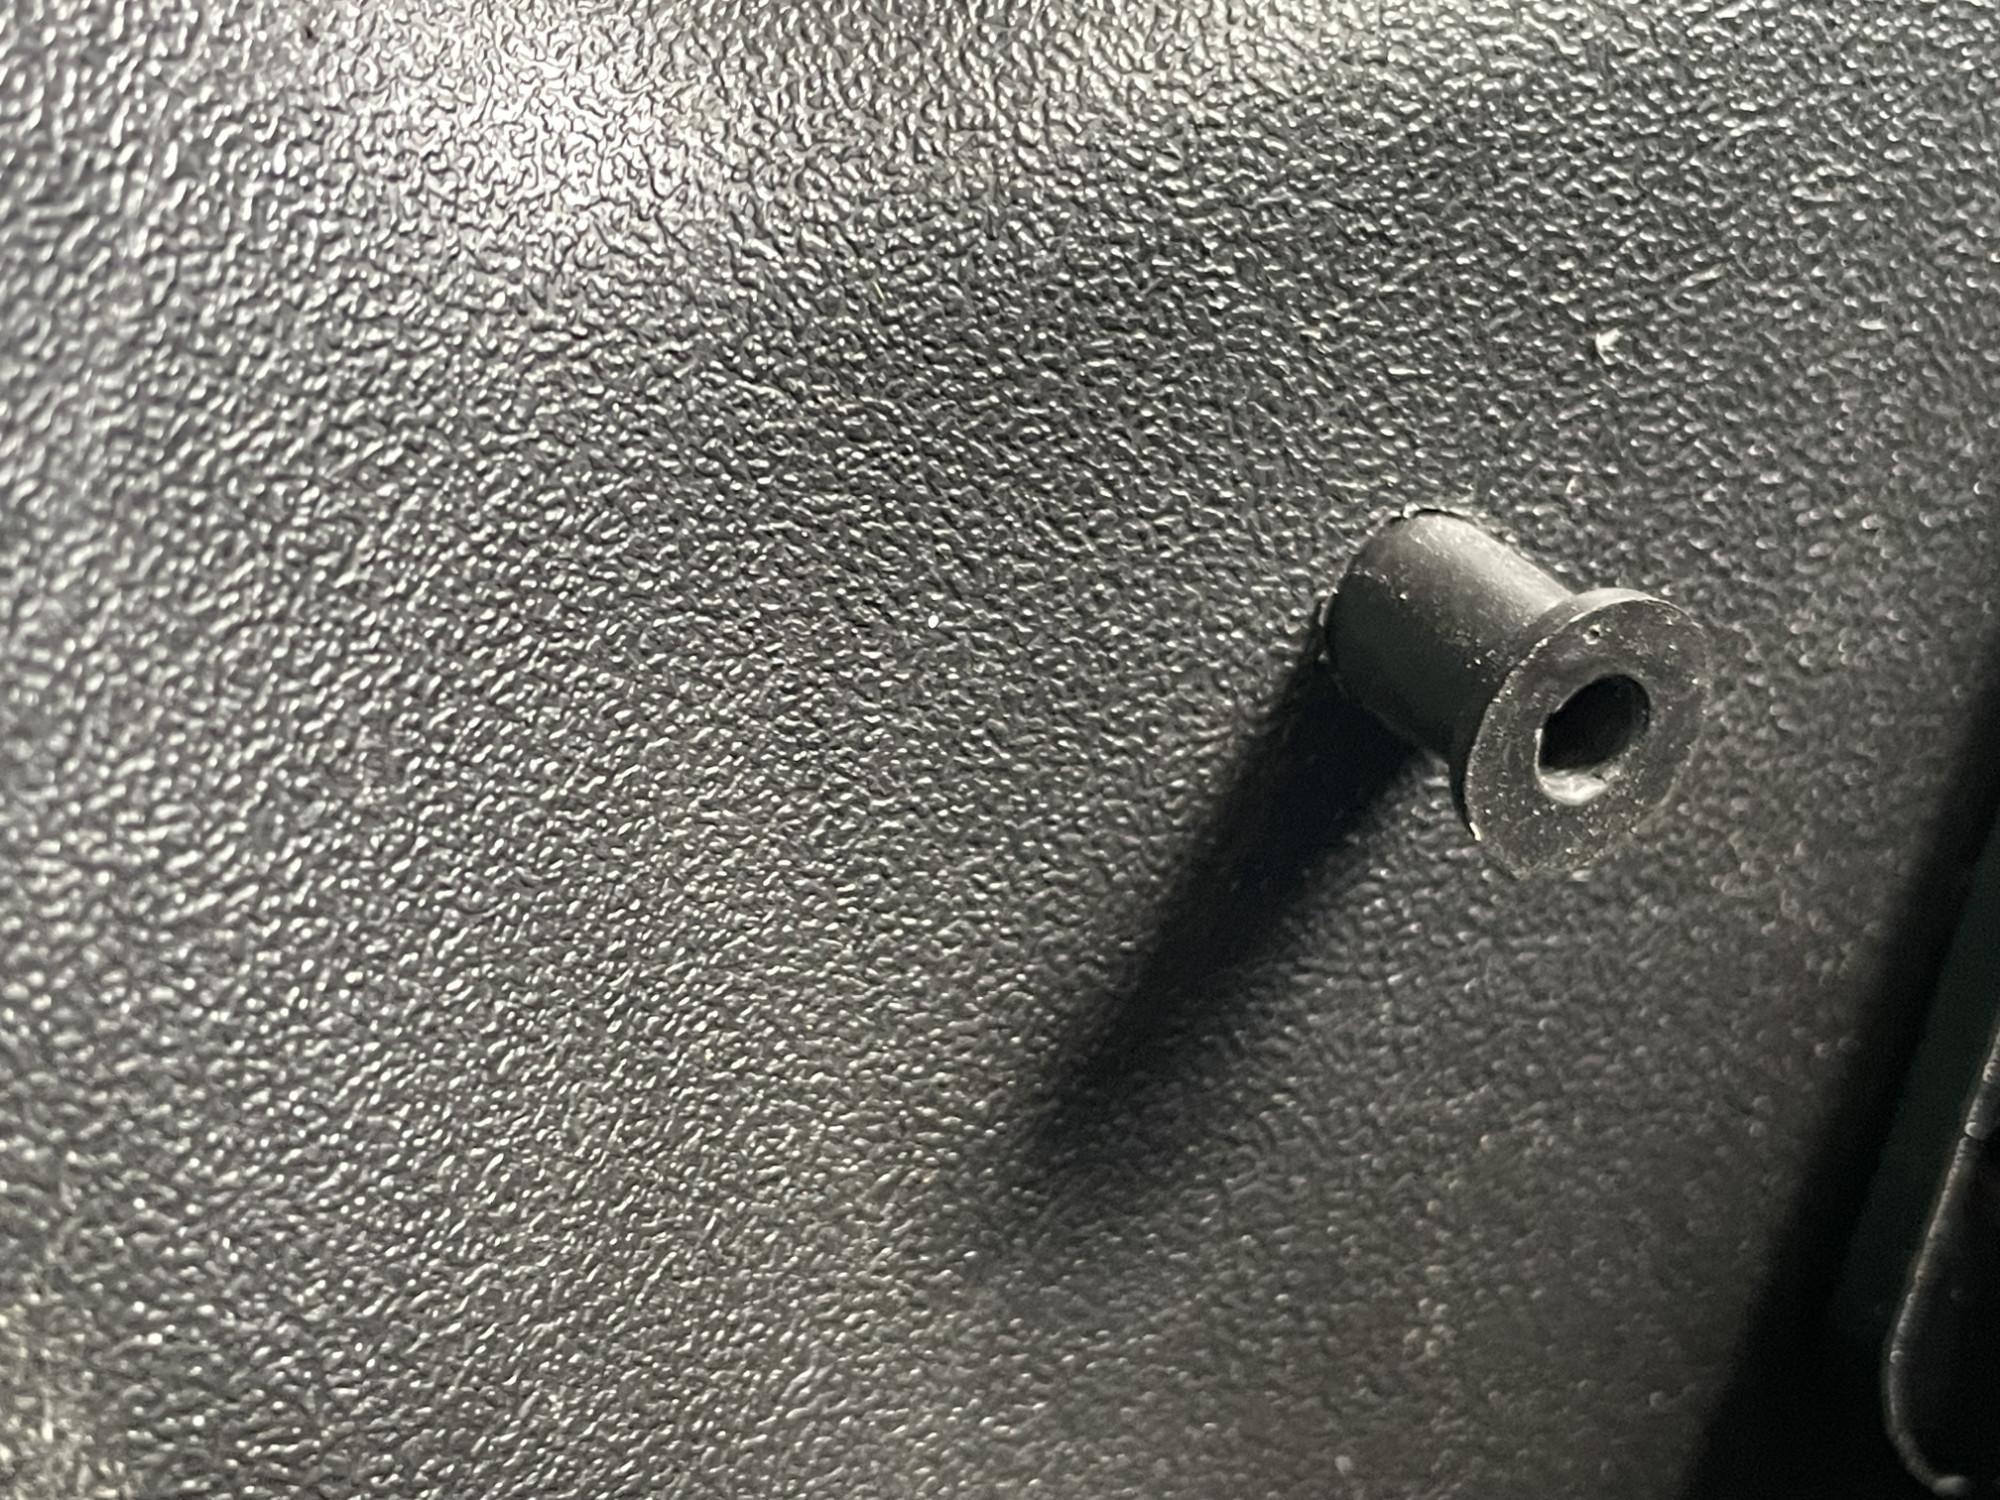
With all 6 tightened, it’s very stable and solid and you can see from the back how the wellnuts hold into the plastic.
It’s also low profile enough that it won’t be a problem if people get into the back of the car if I refit the rear seats, too.
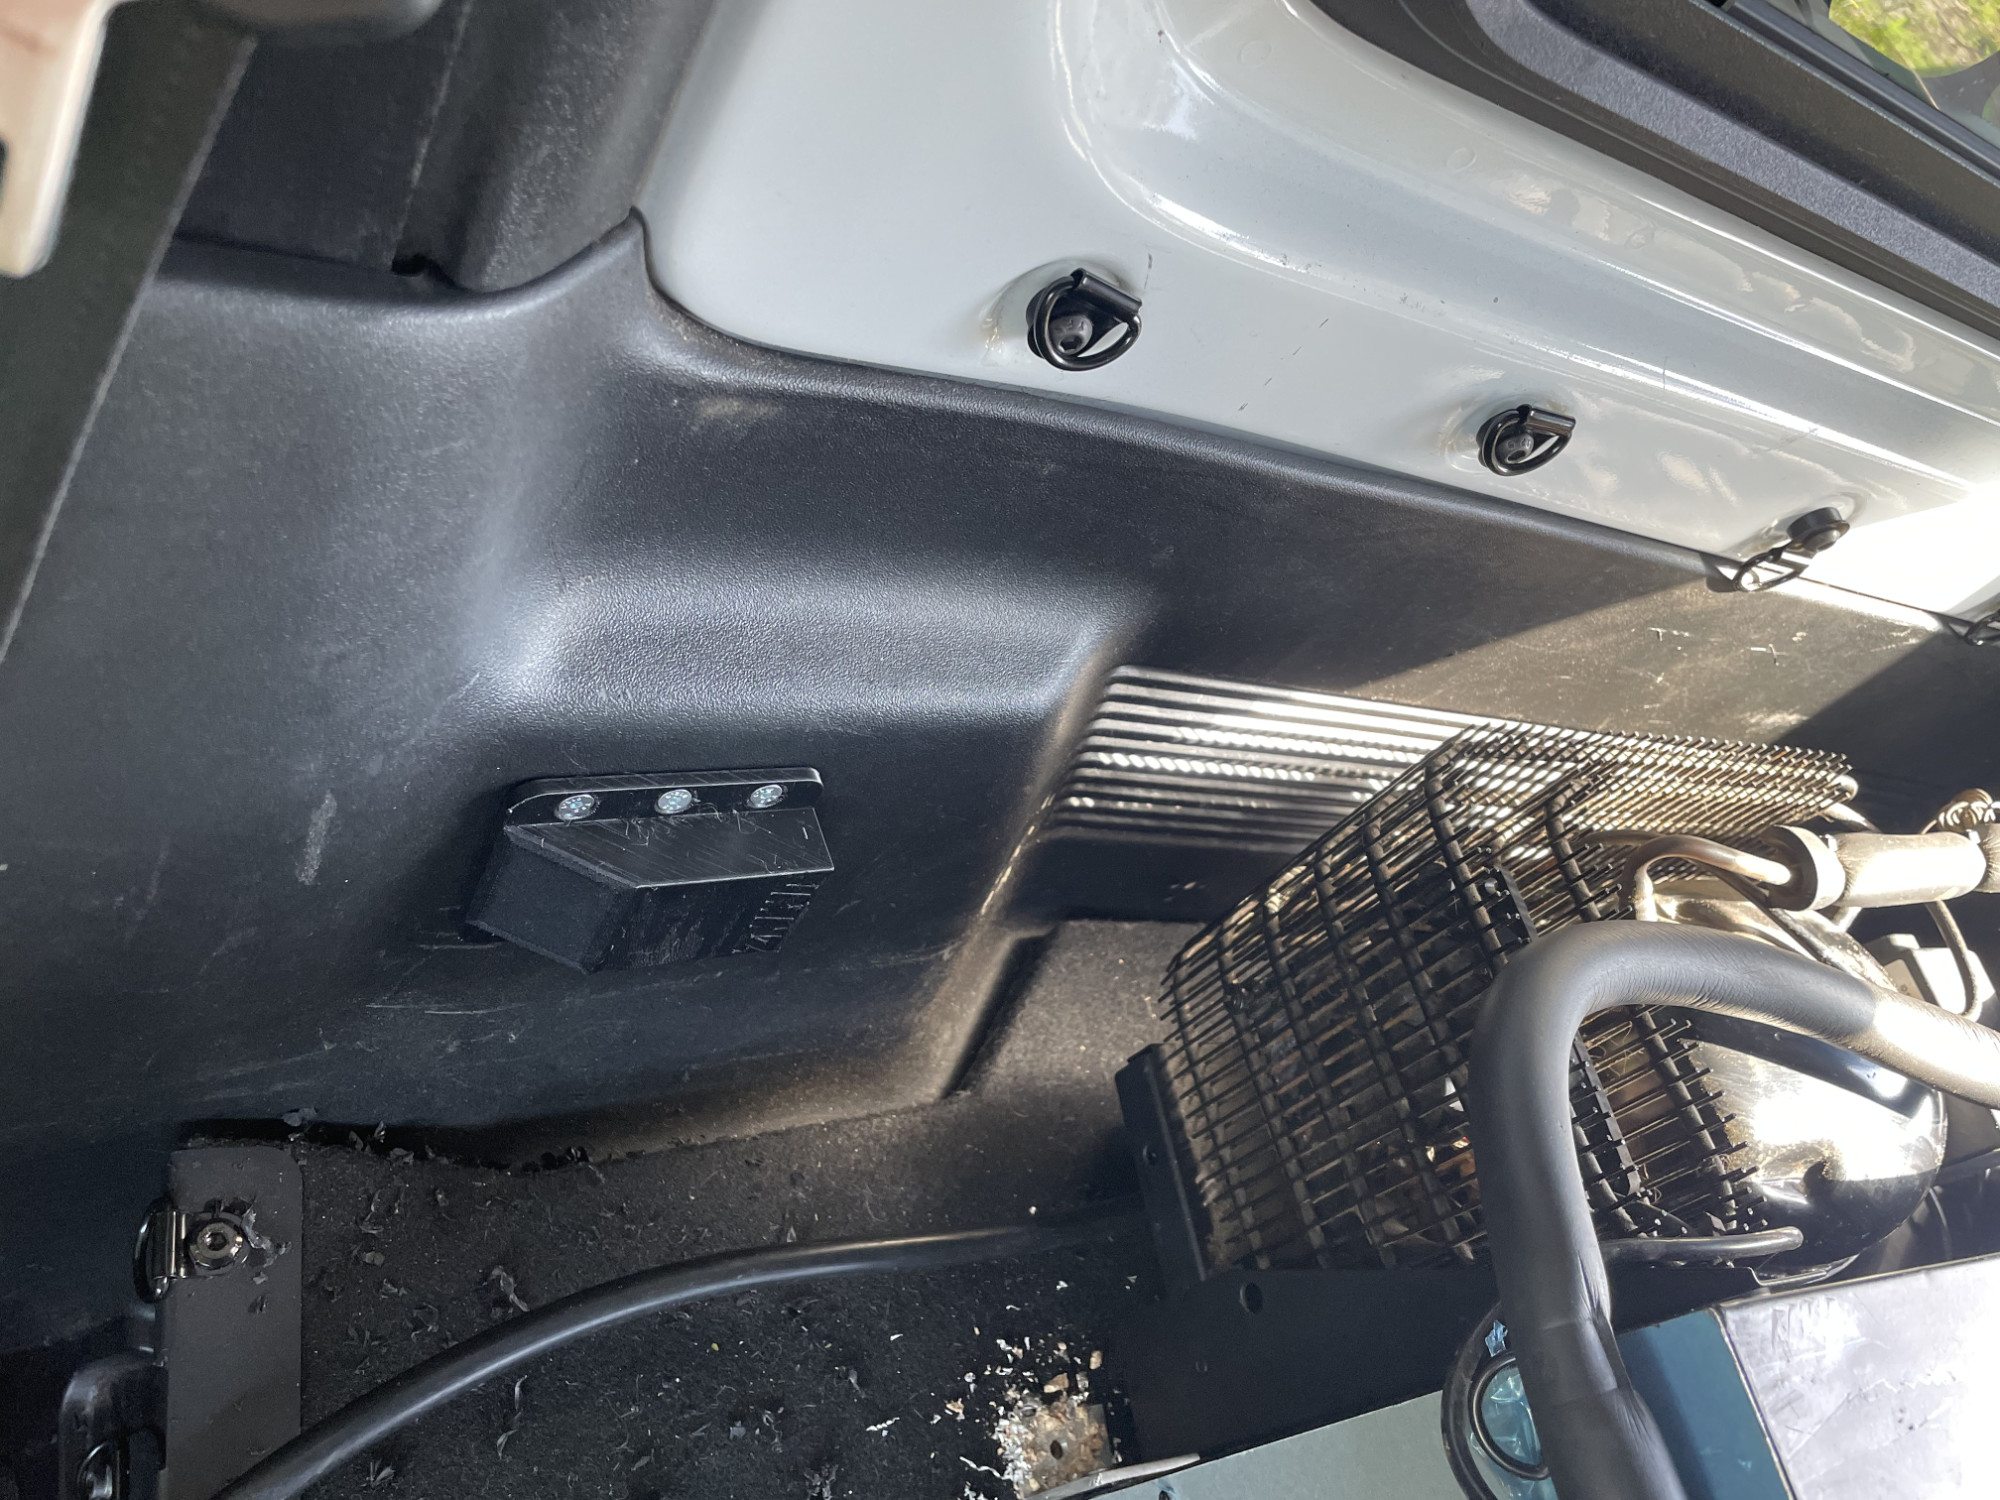
(Obviously I vacuumed up all the swarf as this was a picture mid installation. It also shows you how much room there is around the compressor for cooling and airflow)
Ultimate verdict
I think my best summary is good but imperfect. Cost wise it’s good and if certain aspects were improved then it would justify an even higher pricetag. There are other products on the market for the Jimny which fit and function worse and cost more, and there’s others that cost the same and function less well.
It is the closest off the shelf false floor to what I want, and for the most part it works ok. Some of the aspects around the installation and/or niggles like how frustrating the false floor hinges are to line up and get tightened up are probably things that can be tweaked as production goes on.
If you are willing to deal with the couple of little tweaks and don’t want to build yourself a false floor for a 3 door Jimny then it’s certainly worth the money.