
Jimny electrical upgrades and work
This originally was going to be a smaller article on some of the internal electrical work but I realised there’s a need for more detail for those who use this as a resource. It’s also not aimed at covering details of things like my 2nd battery installation, but instead some basics of some electrical upgrades and modifications e.g. installation of driving lights including making my own harness, getting wires through the firewall, and things like diff locks and winch and air compressor control wires working too.
There are some other parts I’ve covered on their own separate pages, but are electrical mods:
- Extending the earth point to maintain ECU current sensing
- Upgrading the main battery
- Adding a 2nd battery and modifying auxiliary electrical circuits
- What switches fit where
- Adding driving lights
- Fitting LED side indicators
- Fitting LED front indicators (with or without DRL functionality & adding load resistors to stop fast flashing)
- Adding some dash cams
- Interior lighting upgrade via LEDs: I first tried undimmable panels, they were ok but a bit bright; switched to dimmable and colour changing ones and they are super worthwhile.
Some details of the wiring of accessories also live in their appropriate areas e.g. how to power and control the winch or driving light upgrades.
Outline
- Planning
- What size wiring
- Getting wiring through the firewall
- Fuse-relay holders
- Making relay and fuse holder for my accessories
- Dashboard illumination
- Headlight piggyback loom
Planning
The first thing I have done in planning is sketch out what are the likely things I’ll want in the car and under the bonnet.
The next aspect is to plan cables getting in and out of the cabin, as this is where you want to do some future proofing. I actually hate making up my own multicore cables so I have two suggestions here: for four-core cable I use a Jaycar pro ‘speaker cable’ multicore cable, and for 5 or 7 core cable a good option is high quality trailer wiring. If you do this then you’ll have a much simpler time getting the cables through the firewall grommet than trying to put through individual wires. These wires also don’t pass a heap of power so it’s ok to have them separately insulated as a cable run.
.I also like to make sure I have good high quality power cables run through: this is important if you’re going to have high current draw accessories in the back of the car, or you want a second battery inside the car and want it charged from the alternator. For this I go probably overkill and poke a single 8AWG cable through each main wiring grommets.
What size for my wiring?
To follow on from the discussion about planning wiring, the main aspect here is to plan how much current you’ll be putting through the wires.
| Item | Current draw | Suggested wiring |
| ARB under bonnet compressor | 14A | 10AWG / 6mm2 / 2.8mm compressor might take more current to turn on, also could be running for a considerable length of time |
| Driving lights (2*75W) | 10A | 14AWG / |
| Fridge | ~5A on startup | |
| Winch | 300A+ | 1AWG / 50mm2 |
Getting wiring through the firewall
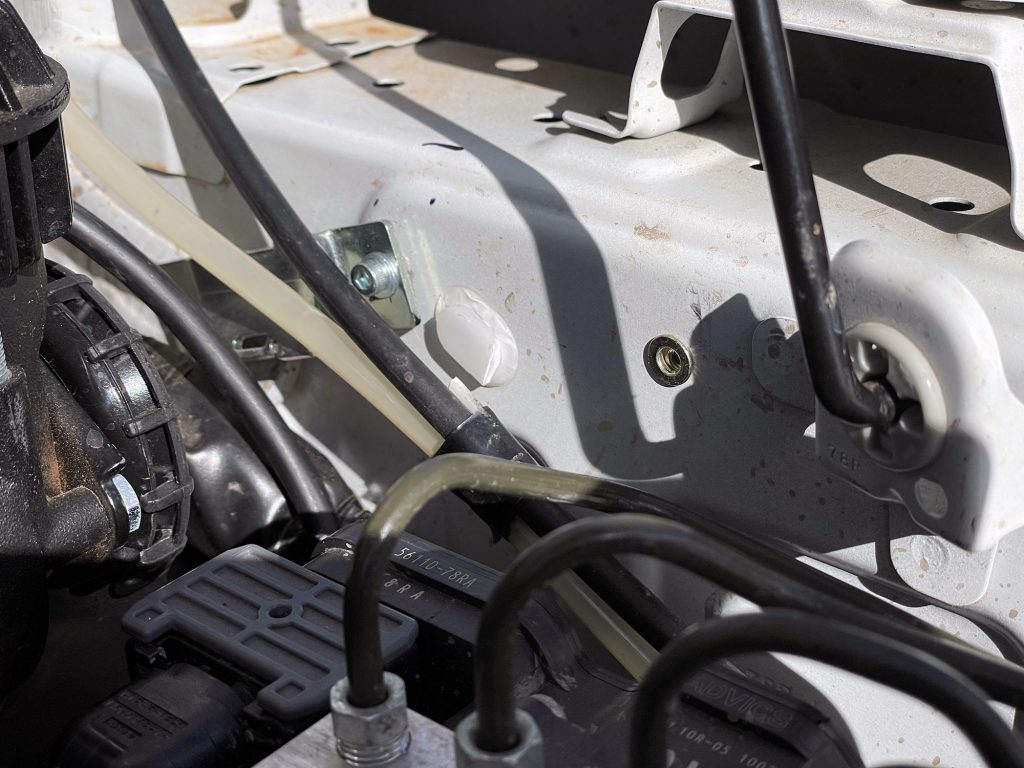
This is a super common question with the Jimnys. On each side of the engine bay there is a large grommet used for the factory wiring and this is perfect to get wires through. Small wires can go through next to the factory wiring, larger wires you’re better off poking a hole with something round and sharp (e.g. a drill bit) and then feeding the wire through.
If I am helping out friends with this task, my usual strategy is to poke through a multicore cable to run wires. 4 core cable can be useful if someone just wants signal wires for a couple of accessories (e.g. driving lights plus isolator for a compressor and maybe rock lights); 5 or 7 core cable is often more useful though. I’ve found Jaycar 4 core speaker/microphone cable is sufficient for lowish power needs for signal wires and lasts well even into the heat of an engine bay. If you are after more cores then 5 or 7 core trailer wiring is the best source; in appropriate thicknesses you can get slightly more than 10A supported, too. Usually for these things I’m just after signal wires to switch relays so do not need nearly that much current.
Best access is found through the passengers side, however, if you have an under-bonnet compressor mount here you won’t have great access.
If you’re poking wires through on this side please note that the passengers side gets awfully close to the BCM/fuse & junction box wiring. It’s therefore important to be a bit careful.
The drivers side is a lot harder to access standard, but just disconnect and remove the battery from the car. This way you’ll have heaps of access.
The drivers side comes in quite a bit high up under the dash so can be hard to see, but it is also nicely hidden by coming through behind the dash.
Fuse-relay holders
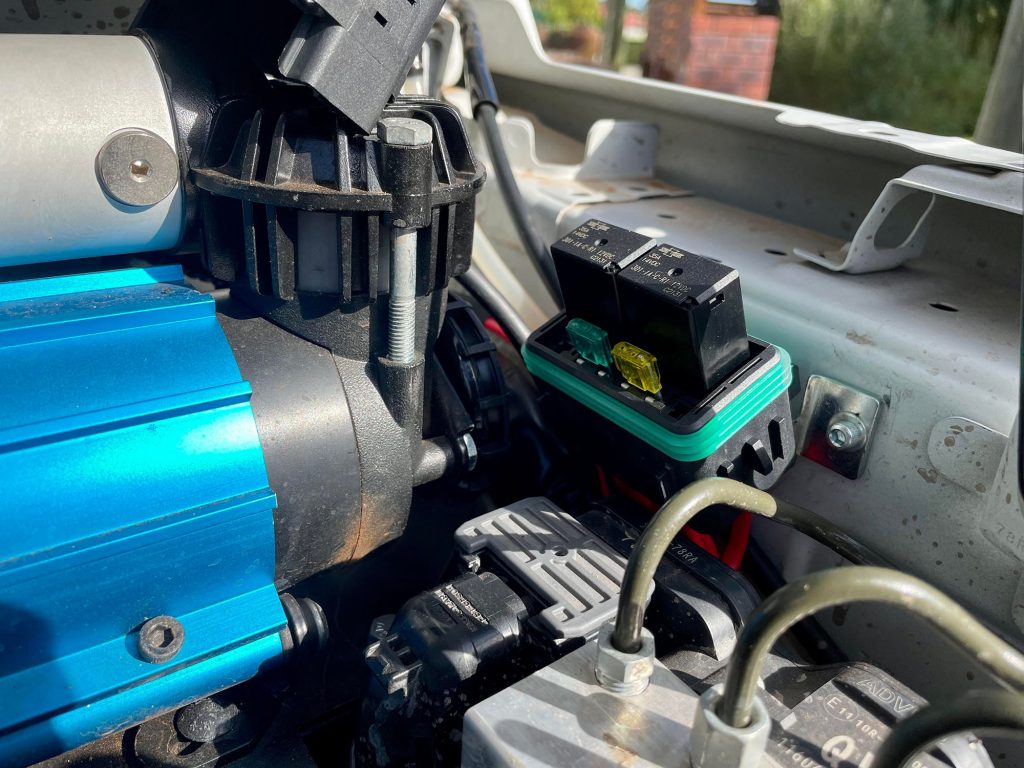
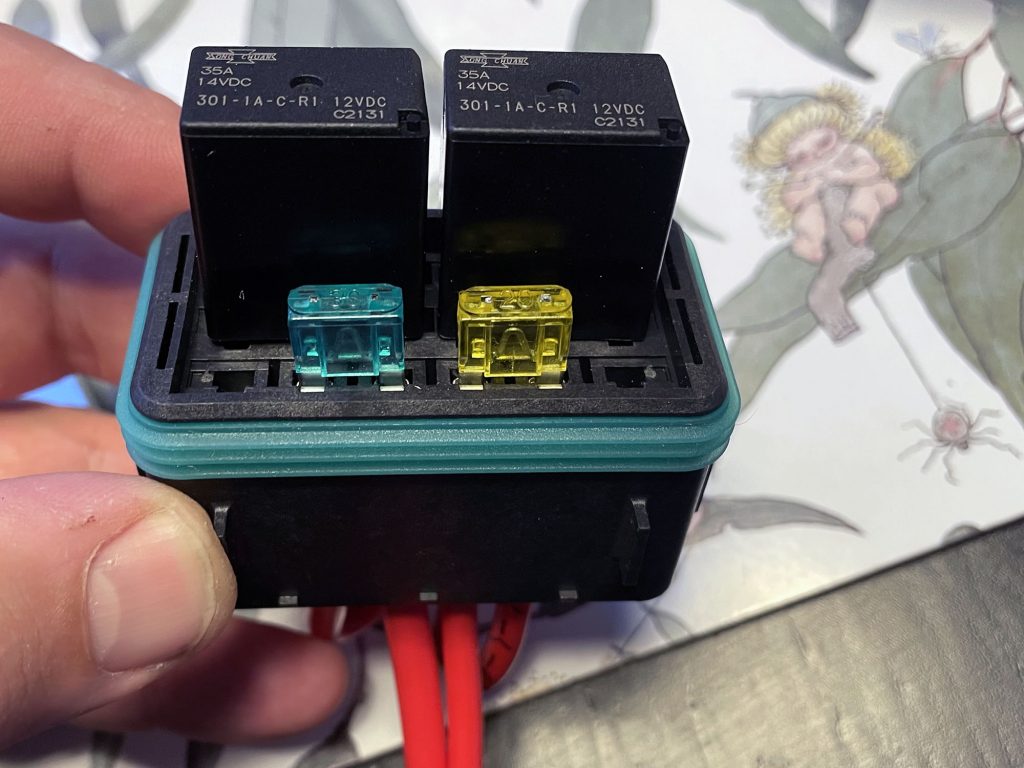
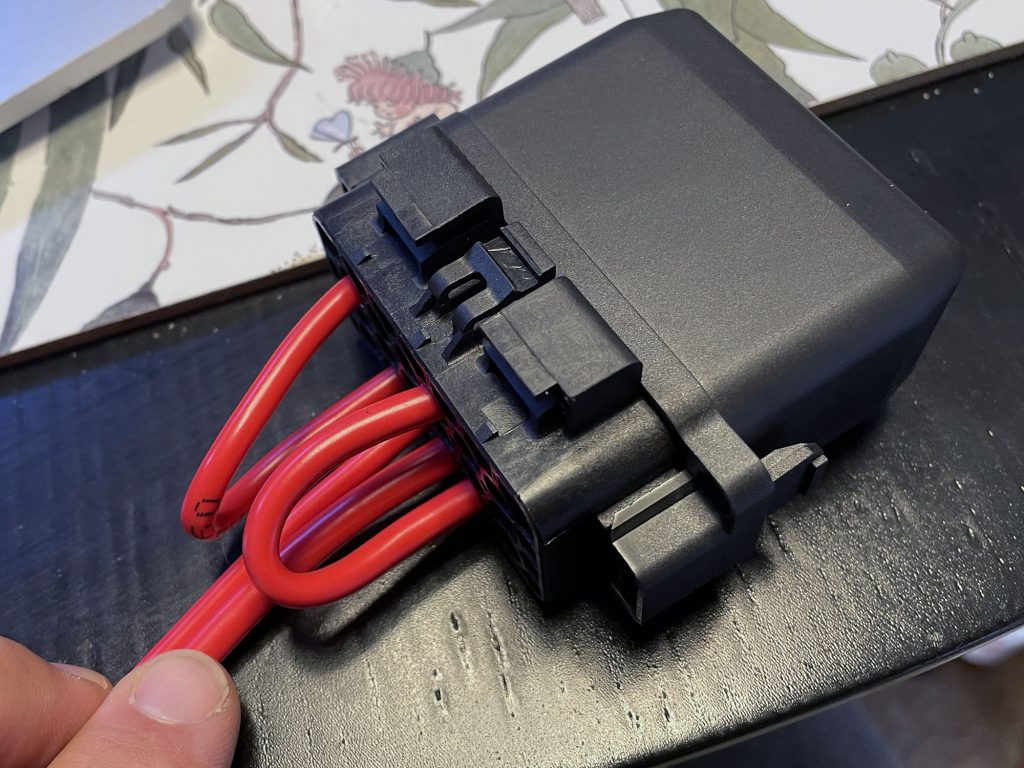
I was put onto these by one of the Australian JB74 members: Swe-Check carry a fair line of ISO280 compatible weatherproof/waterproof fuse and relay holders. The PDMKit311 is an excellent choice which lets you hold either 3x40A micro ISO280 relays, or 2 relays and 3 mini blade fuses, or a bunch of fuses on their own. One option here would be to use it as a relay holder, and then put fuses in another holder. In my case it’s perfect for holding fuses and relays for the driving lights and the under-bonnet compressor.
Another great option for simplicity are the smaller Bussmann power distribution modules that will nicely carry a fuse or two and a relay so you can have your accessories with their own small power distribution units. There are a heap of other options including holders with much more capacity and also some with internal buses to make power distribution simpler, but since I’m here only to describe how I did it, I’ve stuck with what I’ve used.
Note that for the compressor I have to use a micro relay, rather than an ultra micro relay. This limits my layout but two relays and a couple of fuses does me perfectly.
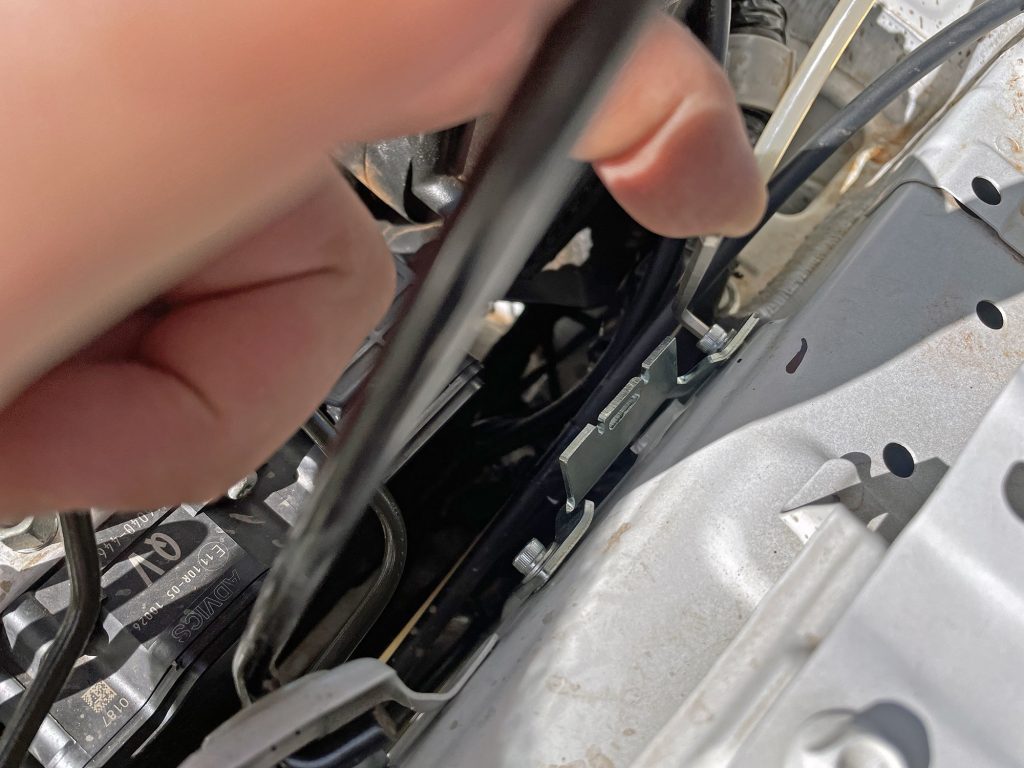
I decided to mount mine up near the ABS pump and the compressor. Tight fit but just enough room. I will relocate the hoses for the windscreen washers though a little lower to give room for the wiring harness.
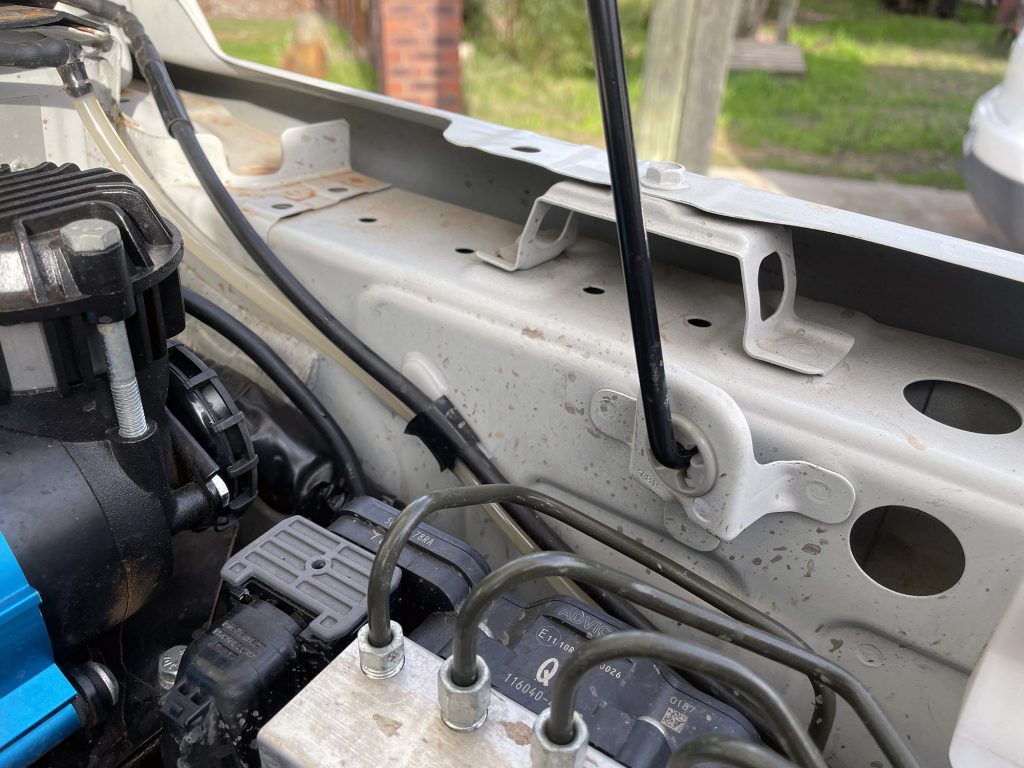
It’s important to check to make sure you have room to take the cap off, and also to take the housing off the bracket.
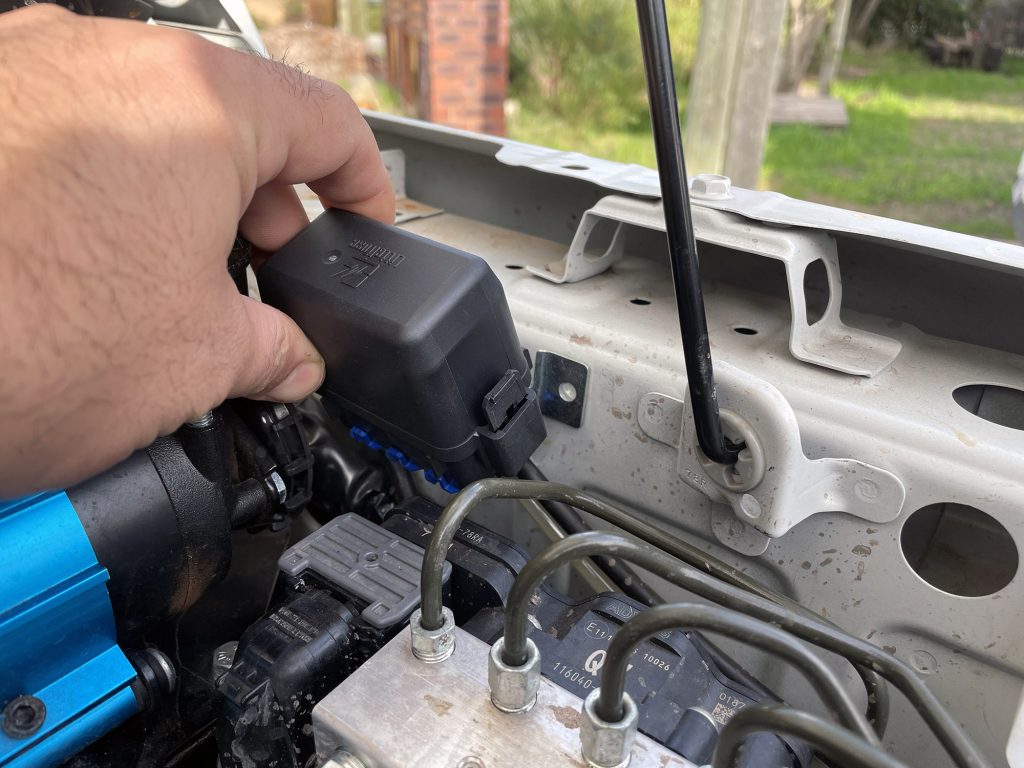
I marked it up pretty crappily but no biggie, drill one hole, mount it, use the bracket to mark the second hole to make it nice. Good spot here for some rivnuts although drilling and installing them with the compressor and ABS pump in the way was a little challenging.
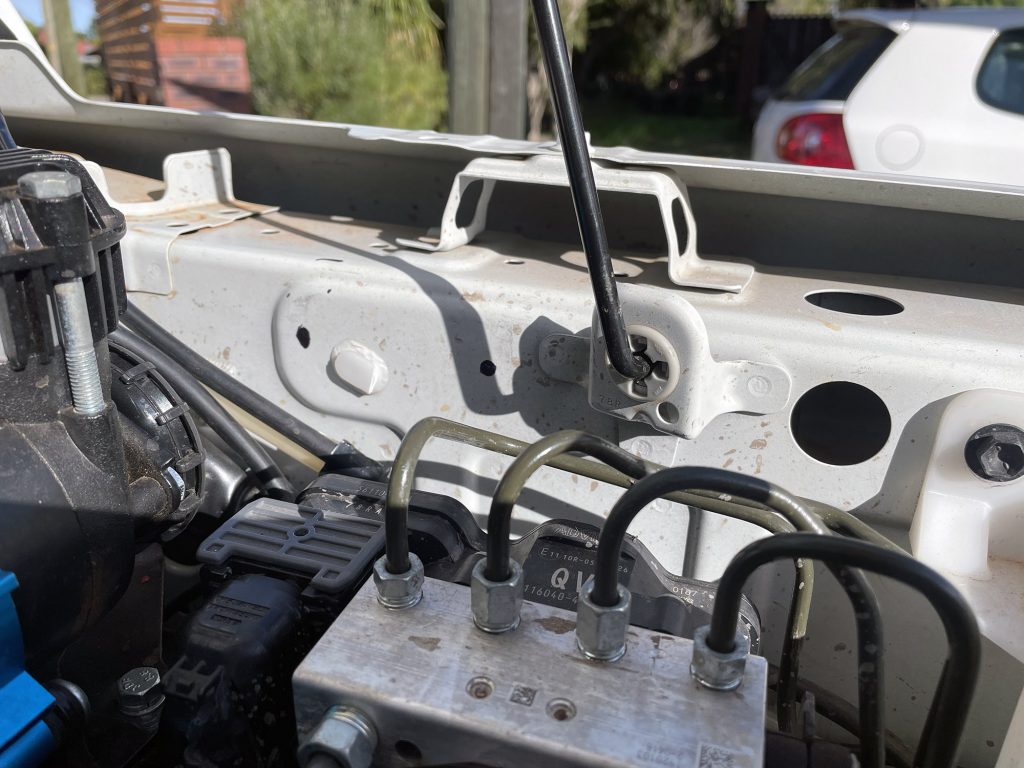
Drill it out, paint over the drilled parts, rivnuts in, bracket on, sorted.
Looks good with components in it and the wiring sorted.
Making up a compressor/driving lights harness
I figured it might be instructive here to take you through making up wiring from scratch. This is not necessarily going to suit your purposes to follow exactly but hopefully will demystify the process.
The first thing to do is to work out what terminals do what on the relays. Although polarity doesn’t matter, I’ve stuck to the conventions most people use. Swe-check have a fairly comprehensive article on it if you want more understanding of relays and their wiring.
- Switching side: Terminal 86 power from switch, terminal 85 goes to ground
- High power side: Terminal 30 power in, terminal 87 power out to compressor or driving lights.
Note that with this holder the power coming in from the battery is unfused. I’m ok with this as I take a lot of physical protections to ensure there’s no chance of a short on the high power side, but I also bring it into the relay first via a fuse so the wiring is protected from the relay forwards. Not everyone will agree with this strategy but it’s what has worked for me for a long time, and is pretty consistent with how cars are wired in general.
For each circuit, power from the battery will come into a fuse, go through the fuse and out to terminal 30 on the relay. An input from the switch will come into terminal 86, and then terminal 85 for the relay is connected to ground. Finally, equivalent wire the same as the input wire size will go on terminal 87 to power the device when the relay is switched on.
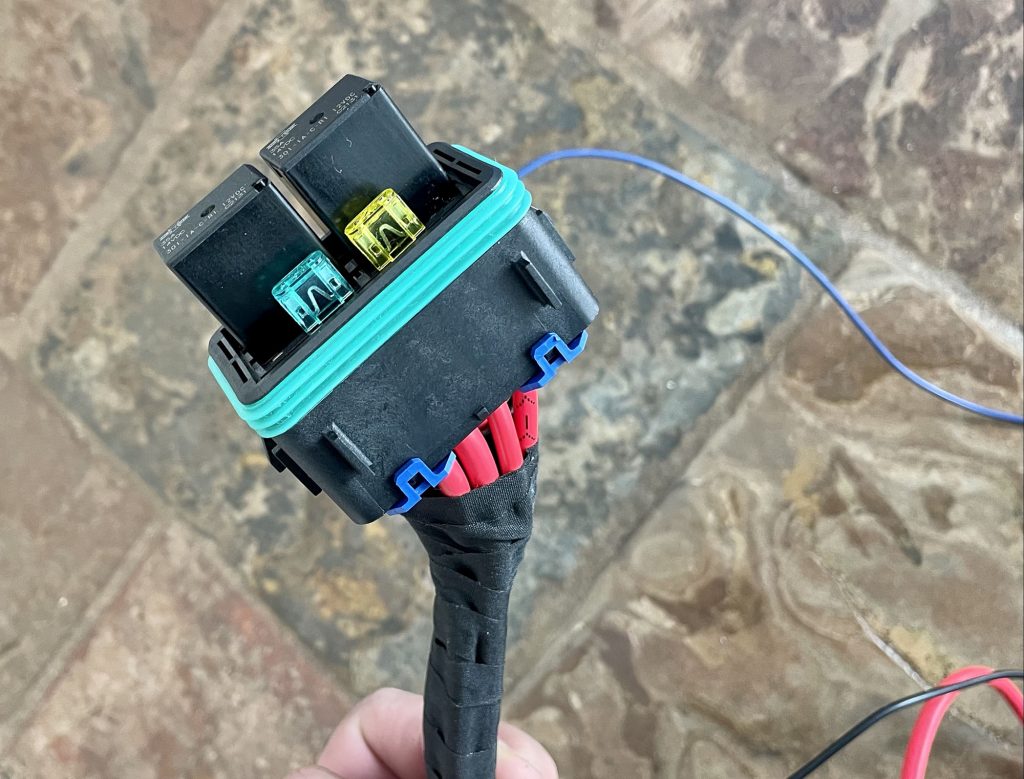
One note with these terminal holders is that 10AWG is the absolute largest wire you will be able to get in. You’ll also struggle with 10AWG to get the largest sealing rings on the wire but it can be done (or strip it back all the way, and use some silicone to seal the weatherproofing boot against the wire).
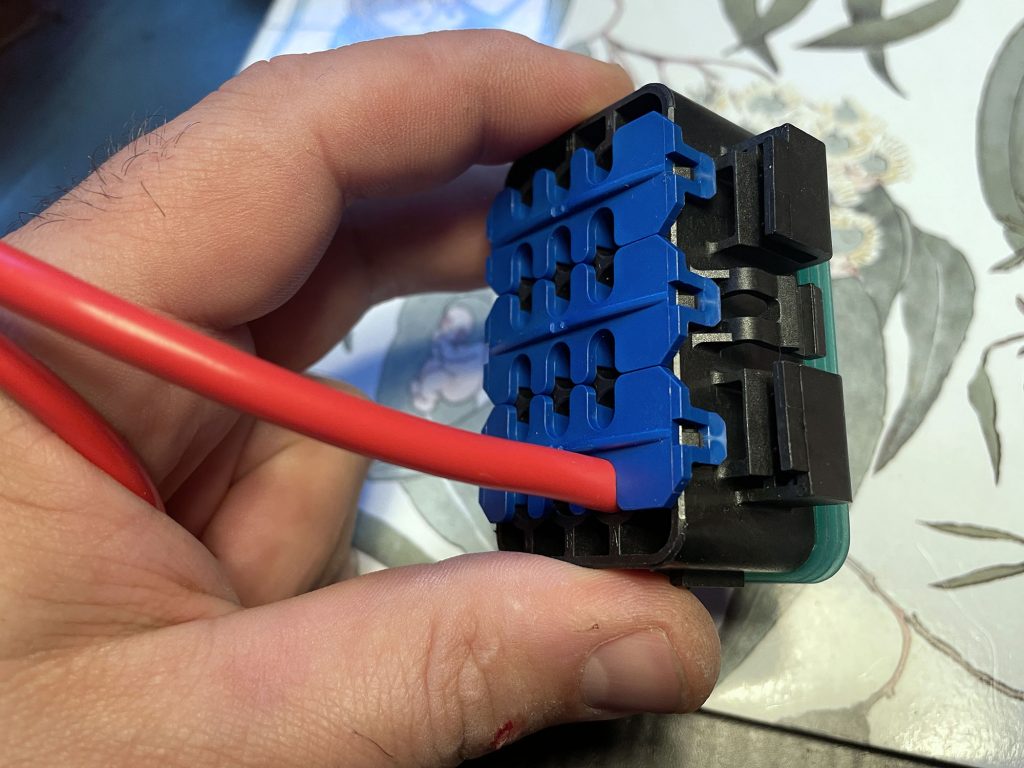
So from here it’s just a case of stripping wires, fitting the sealing boots, and then the terminals. Note that you need terminals and sealing boots of different sizes according to the wire you are putting in it: blue boots go with the largest wires, grey with medium sized wires, and the smallest wires use green boots.
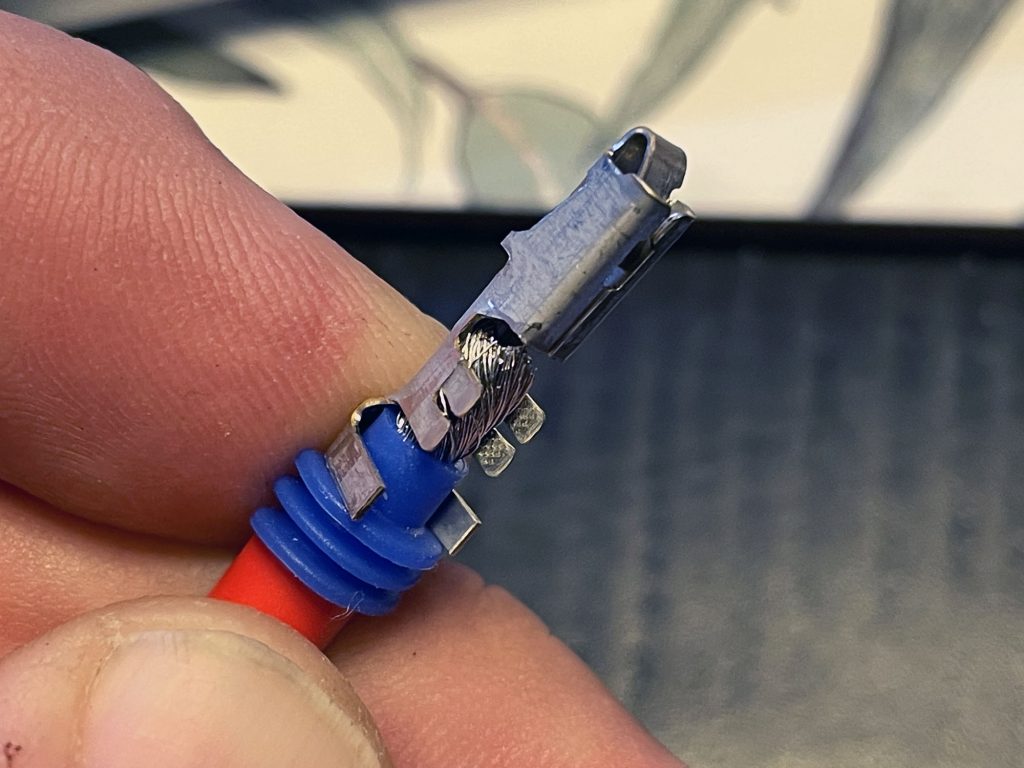
You then just crimp it using uninsulated terminal crimpers. I gave mine an extra crimp in the middle just to be sure, and also folded over the arms to grab the sealing boot.
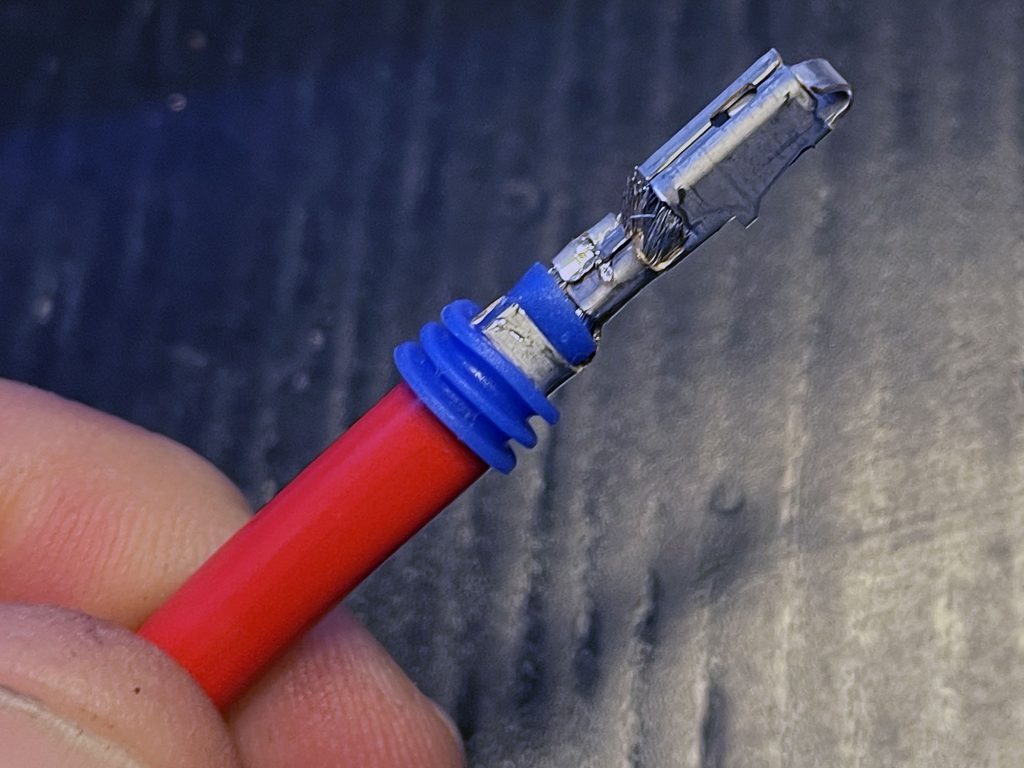
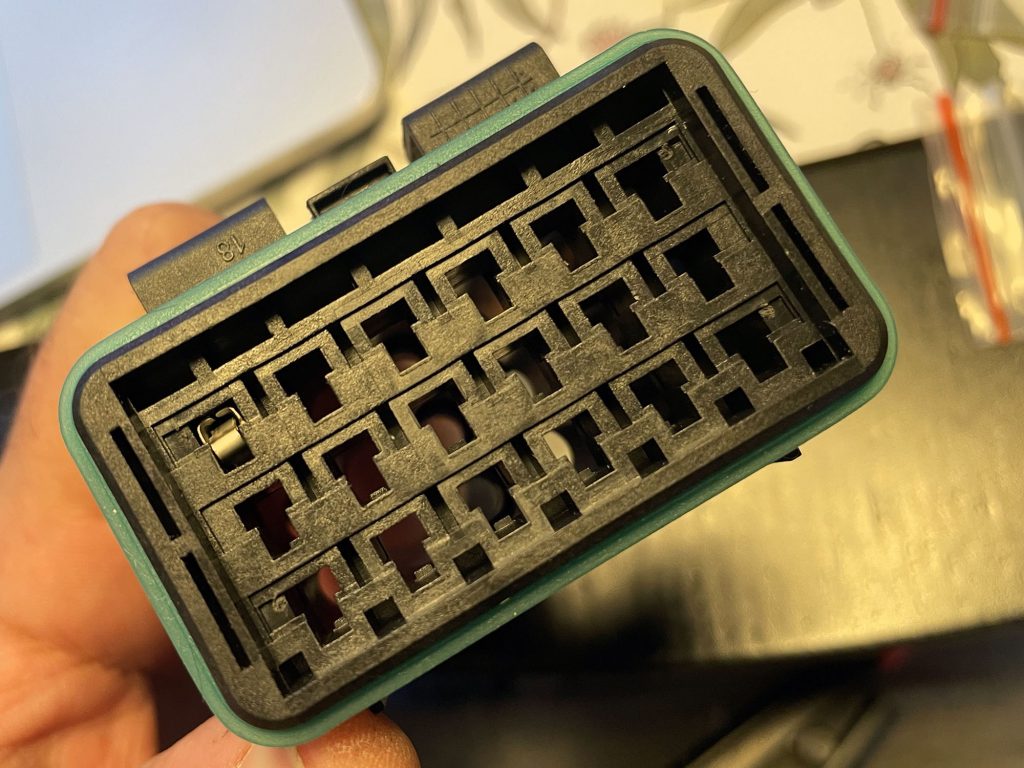
These are then just poked up into the appropriate spots in the base of the holder.
You’ll hear the terminal click in place: note the orientation of the terminal in the picture above. The smaller tab part of the terminal also can be pushed in from above if you want to remove the terminal and move it elsewhere.
Areas that won’t get terminals need to have little blanking sealing plugs poked into them to seal them up.
Note for this kind of fuse holder without an internal bus, you need to make little loops to get power from one area to the other. To get power from the fuse to the input of the high power side of the relay, for instance, I have made up little loops that bring the power where it is needed.
With all the wiring done, including the inputs from the switches and also with ground wires made up, it’s time for a bit of electrical tape to make it up into a loom. This will then go inside some split room and for some further tape to ensure it is well secured and protected for years of offroad use.
Simple, but taking care with it all makes it look much more professional. The bare blue wire will be joined with the high power output to the driving lights but I need to do some extra things on the car side of things to get that routing correct.