Jimny driving light installation
This page is a bit of a collection of info on driving light installations on the Jimny. So many people ask about options I thought it would be good to go through different things you can buy and different considerations, and then walk through what I’ve done and how I’ve done it. Since this also involves how I wired up the switch internally and also the relay wiring it’s of use a bit more than just for this topic.
Sections
Considerations
There’s actually a lot of choice for adding driving lights to any car, but especially the Jimny. You certainly don’t need a bullbar to mount them to, so I do want to cover that as a topic, but also you have a range of lights. Sometimes that choice of light is dictated by the legalities of where you live rather than your wants, so it’s worth understanding all of that.
What kind of light you’re after
The first consideration is the kind of light beam you’re after. While (at least in Australian terminology) we don’t differentiate between a ‘driving light’ beam and a ‘combo’ beam, there are significant differences between beams out of auxiliary headlights.
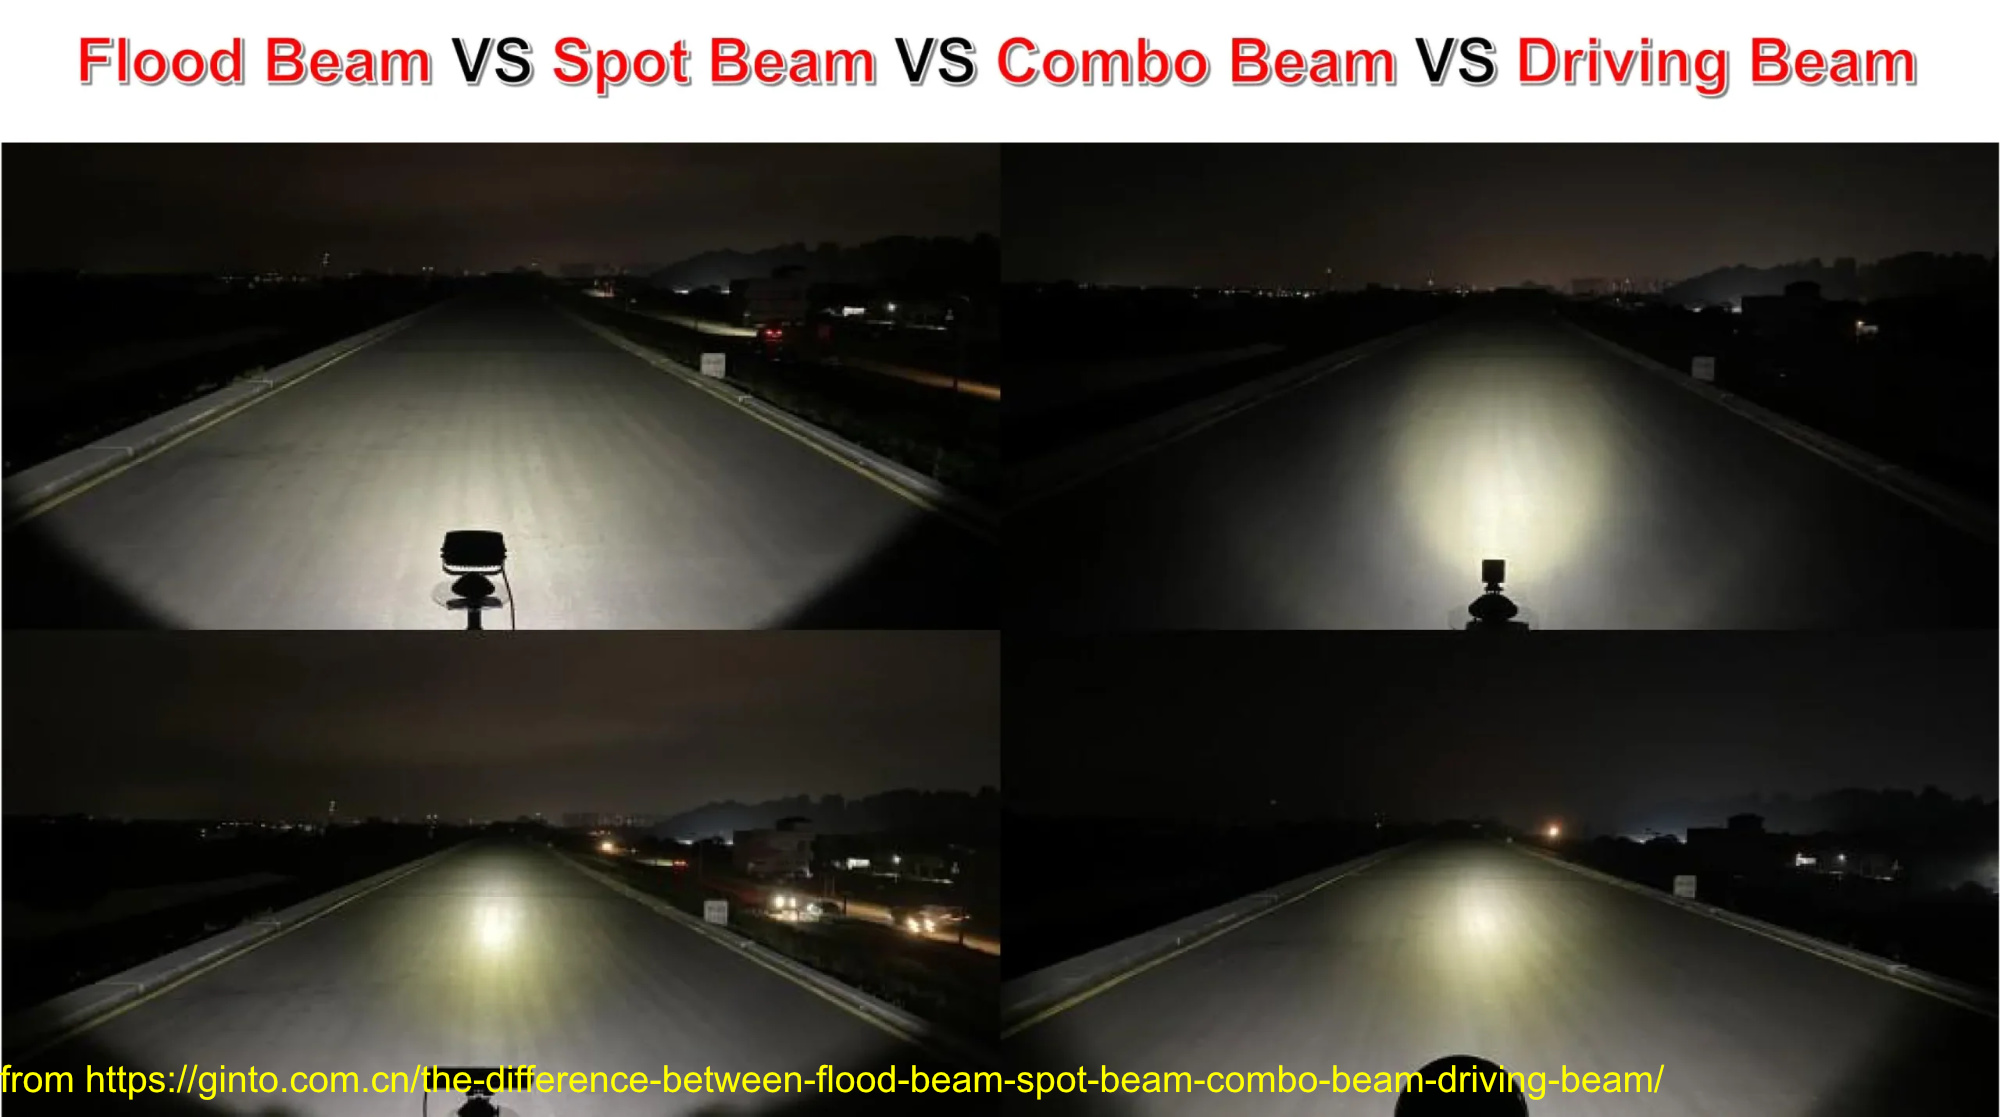
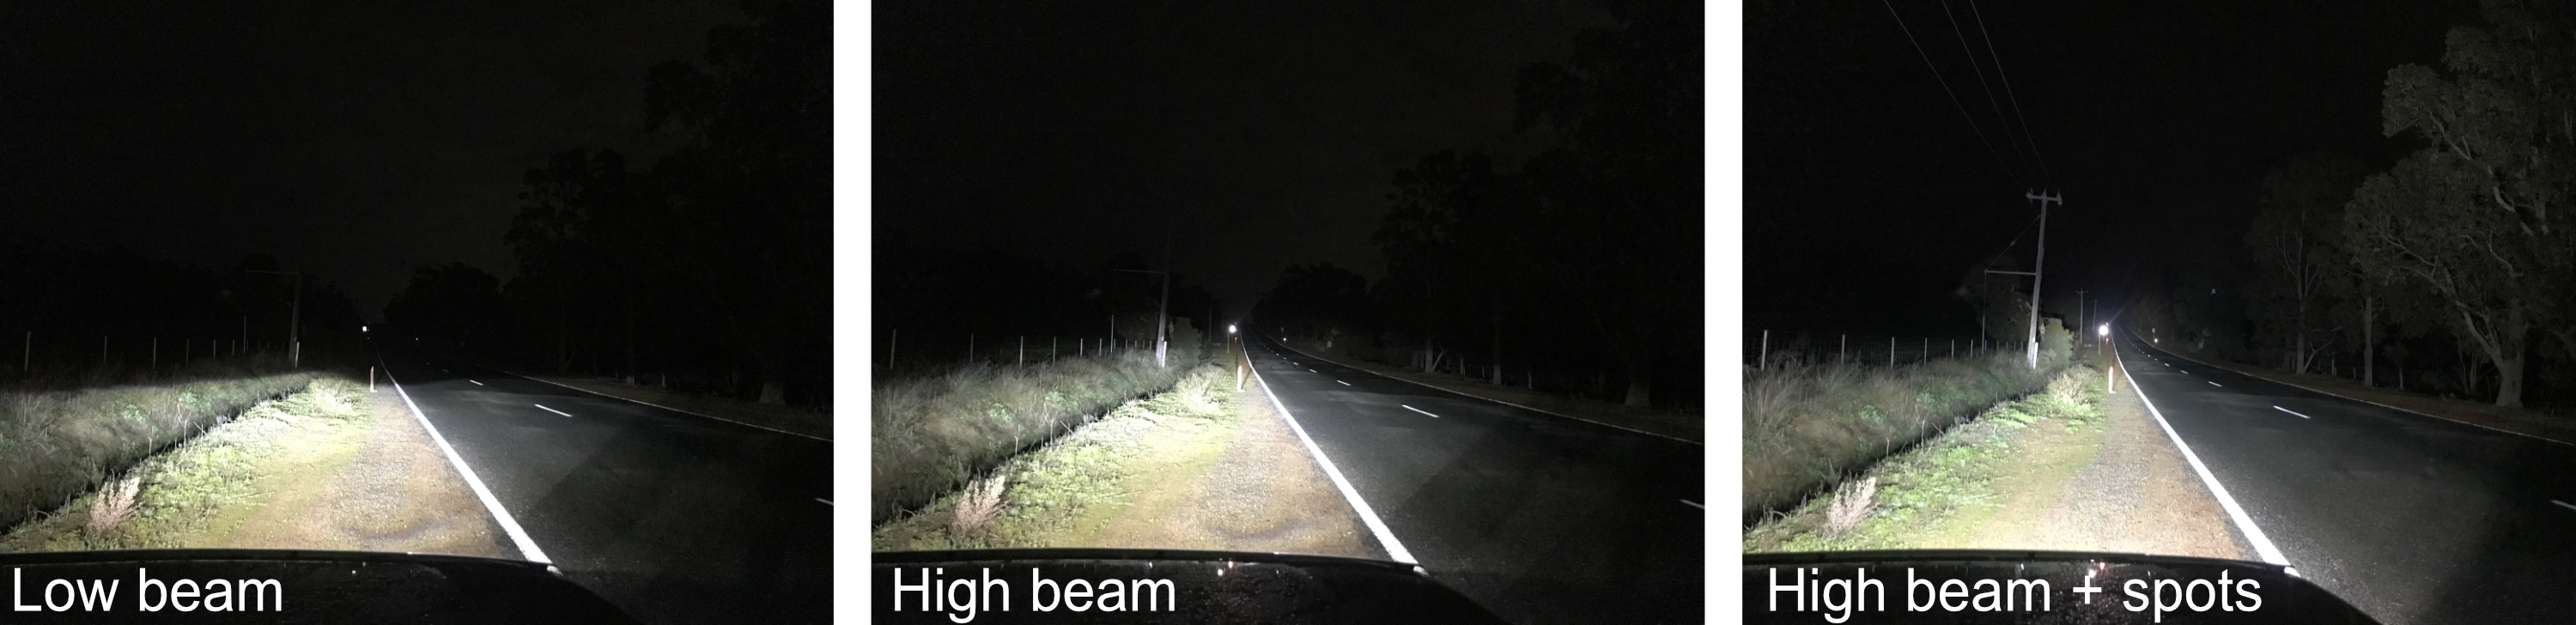
Essentially flood/spread beams will be the widest, and a spot beam will reach the furthest but have the least reach. Width is good to spot what’s happening to the side of you, and obviously length matters too, as it gives you more time to reach to things far in the distance.
Modern LED driving lights (in particular but even HID lights) have incredible ranges up to the order of 1 km, so I generally think this is an area with good choice you can have your cake and eat it too. Even opting for more of a spread beam you can still have a usable driving light range of 500m+, usually even 750m+, and also have the width covered.
Some people think that modern LED headlights, and their cooler/bluer light colour can be fatiguing on eyes. That’s not really something I’ve experienced and I can’t really speak to, but it is a consideration for some people. On the other hand, I find it distracting to have visibly different light colours from (say) the Jimny’s LED headlights and a more normal incandescent light colour, so it’s good to get the colours relatively similar.
On that topic: one of the main positives for LEDs and also HID driving lights is just how efficient their light is. Modern LEDs can throw way more light than incandescent based systems, and on something with the Jimny’s charging system that can make a big difference.
Modern lighting has also come with it the development of the “light bar” or a row or two of high output LED elements. These can work fantastically though they do have the limitation that you’re generally restricted to aiming only up and down, and you usually cannot change the beam pattern with lenses. This means width is absolutely only determined by the light bar and what beam properties the manufacturer has baked in. Individual driving lights can be aimed a bit sideways to help add to the width of the beam if needed and that’s beneficial. On the flipside to that, though, it also means they are more critical in their aiming and have the potential to vibrate to different positions if not tight enough, compromising your lighting quality.
How you’re going to mount the lights to the car
Here’s the other main consideration between light bar or individual driving lights: how you’re going to mount the lights to the car.
The main options here are:
- Roof mounted (either alone, or on a roof rack)
- Base of A pillar mounted
- Behind the grille/bumper
- On a front lamp stay
- On a bullbar
Some of these positions are governed by legalities which we will now touch on.
Legalities of where they go and how they need to operate
Different jurisdictions have different legalities which we’ll cover shortly; some places do not allow for additional lights at all, some have limits on the number/geometry/where they’re installed, as well. Even across Australian states this is not harmonised.
All Australian States and Territories require the lights to be mounted:
- Symmetrically about the centreline of the vehicle
- Face forwards
- Operate only with high beam on, and be independently switched from high beam
All jurisdictions have a maximum number of driving lights/auxiliary headlights: all but the Northern Territory allow for 4 additional lights; the NT allows for 6 and 8 if you get a specific exemption. LED lightbars count as one light, unless segments can be switched independently (and then each segment counts as a light).
It is possible to have non driving lights, but they can’t be used when driving: these would be ‘work lights’ and require independent switching to other lighting circuits, and, have an illuminated switch so that drivers can tell if they are on when driving.
Light positions on the vehicles varies a little bit by place in Australia. Sometimes positions are not explicitly excluded, but sometimes they are, e.g. in Tasmania you cannot have roof mounted lights past the midpoint of the vehicle (not the midpoint of the roof, mind you!).

Some suggested options
Roof mounted light bars
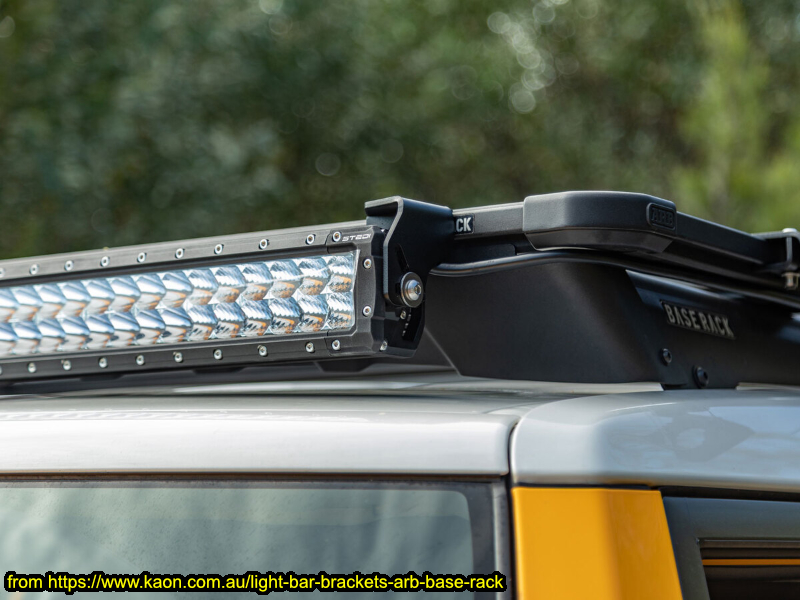
This is a common option that a lot of people like. In fact, for some roof racks (like the ARB Baserack) which can be noisy without a wind deflector underneath the rack, a lightbar can serve as a wind deflector and give you auxiliary driving lights as a bonus, e.g. like this example from Kaon.
It’s possible to buy brackets that mount the lightbar just above the windscreen even without a roof rack; because of the inward curve of the front gutters the mount itself has to be a bit back on the roof and then the mounting arms have to come forwards and up to make sure it throws light correctly. Most of these are designed around a ~52″ straight or 54″ curved lightbar, and because of the fixed position between the two mounts it does lock you into whatever lightbar might fit between the two sides.
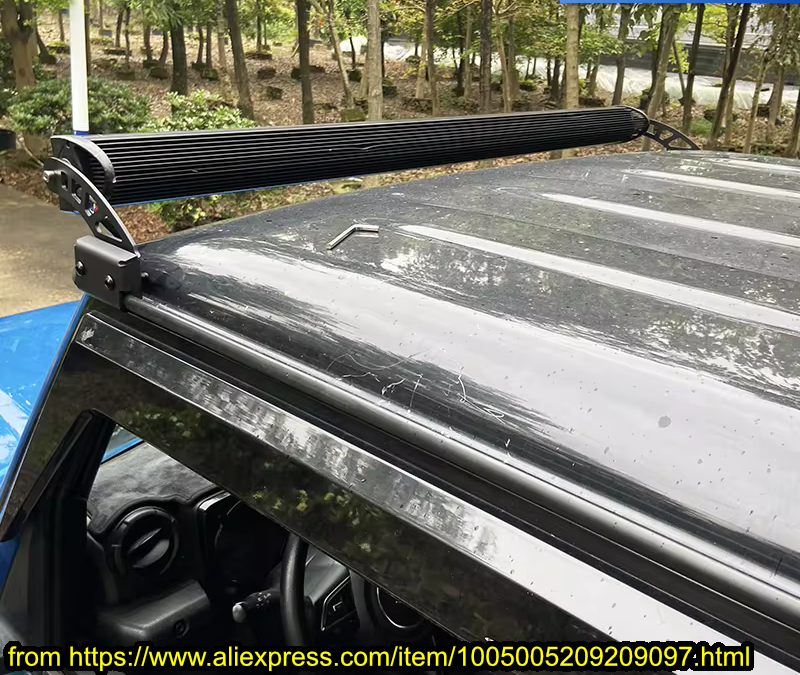
My main argument against these is mostly down to a) you’ll always get a small bit of reflectivity off the bonnet and b) you lose a bit of light to the front of the vehicle because of shadows cast by the front. However, it is an option many people like and that’s completely fine.
Another option people run with is to mount their lights to a roof platform. I can’t advise directly on this but most platform systems have light mounting brackets to suit and you would use these. Since they can mount both lightbars or individual driving lights there’s a lot of options: it doesn’t lock you into a particular width ligthbar unlike the stand-alone gutter mount options do.
Bottom of A pillar auxiliary lighting
The biggest challenge here is the limited space so you can’t fit very large lights. Really this is more for close in or just to illuminate the sides of the road (hence a setup like this is often referred to as ditch lights).
There’s a heap of brackets that give you this option. One will sit the light slightly inboard, and one will sit it a bit further outboard. Mirror mounted ditch light brackets are another option, though these do push the plastic trim that covers the mirror mount itself out a bit which isn’t the tidiest look I think. Another cool option mounts them a little up on the A pillars.
The biggest difficulty here is if you want to use them as spot/driving lights rather than just ditch lights. Usually you need to go for a relatively small cube shaped light, and these don’t throw very much light, e.g. Stedi C4 light, spot pattern gets you 217 m @ 1 lux or if you go for a flood pattern, the same sized light only gets you to 129 m at 1 lux.
However, that does make them perfect for lighting up the side on tracks and/or as an auxiliary light if your main driving lights are a tight spot beam pattern, so it’s an additional use you could go for.
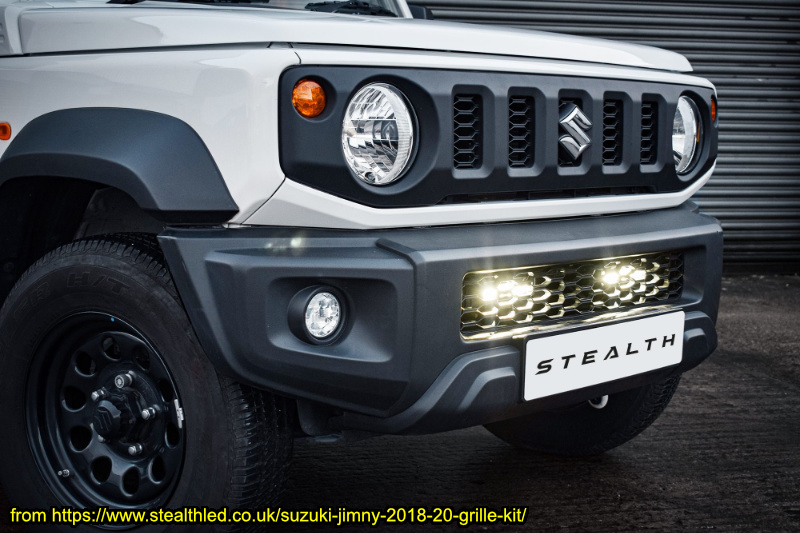
Behind the grille light bar
This is not one I have done nor are there that many commercial brackets to do it, but if you either remove the grille or the bumper there are some structures you could use as brackets for either spotlights or a light bar hidden behind the grille or the bumper hex patterned plastic part.
A good example is from Stealth LED in the UK, who have an option to add two small light bars behind the bumper.
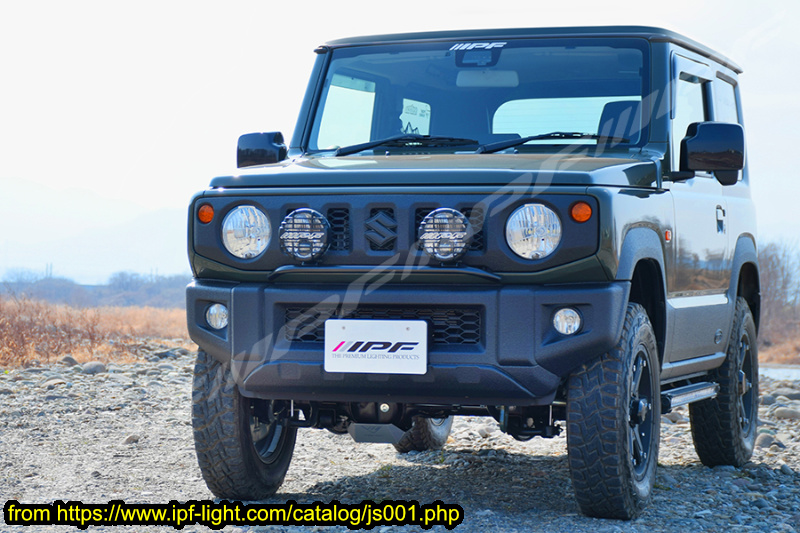
Driving lights on a light stay
There’s actually a few options in this space, so definitely if you think you need a bullbar but mostly want it for mounting driving lights then consider some of these options:
- Grille mounted light stay/light bracket option one
- IPF grille mounted light stay (recommended as it’s more stable than the cheaper ones, but it does mean a little trimming of the radiator shroud and front bumper)
- Numberplate mounted light stay/light bracket these are usually generic rather than specific Jimny fitment; they do vibrate a bit as they attach to the plastic bumper but they do work pretty well.
Of these options, I would go for the IPF one as it is regarded as the most stable, but the duplicates available from some of the larger Jimny resellers or direct from Aliexpress can also be ok if you’re on a budget.
Driving lights on a bullbar
This is the absolute classic mounting method.
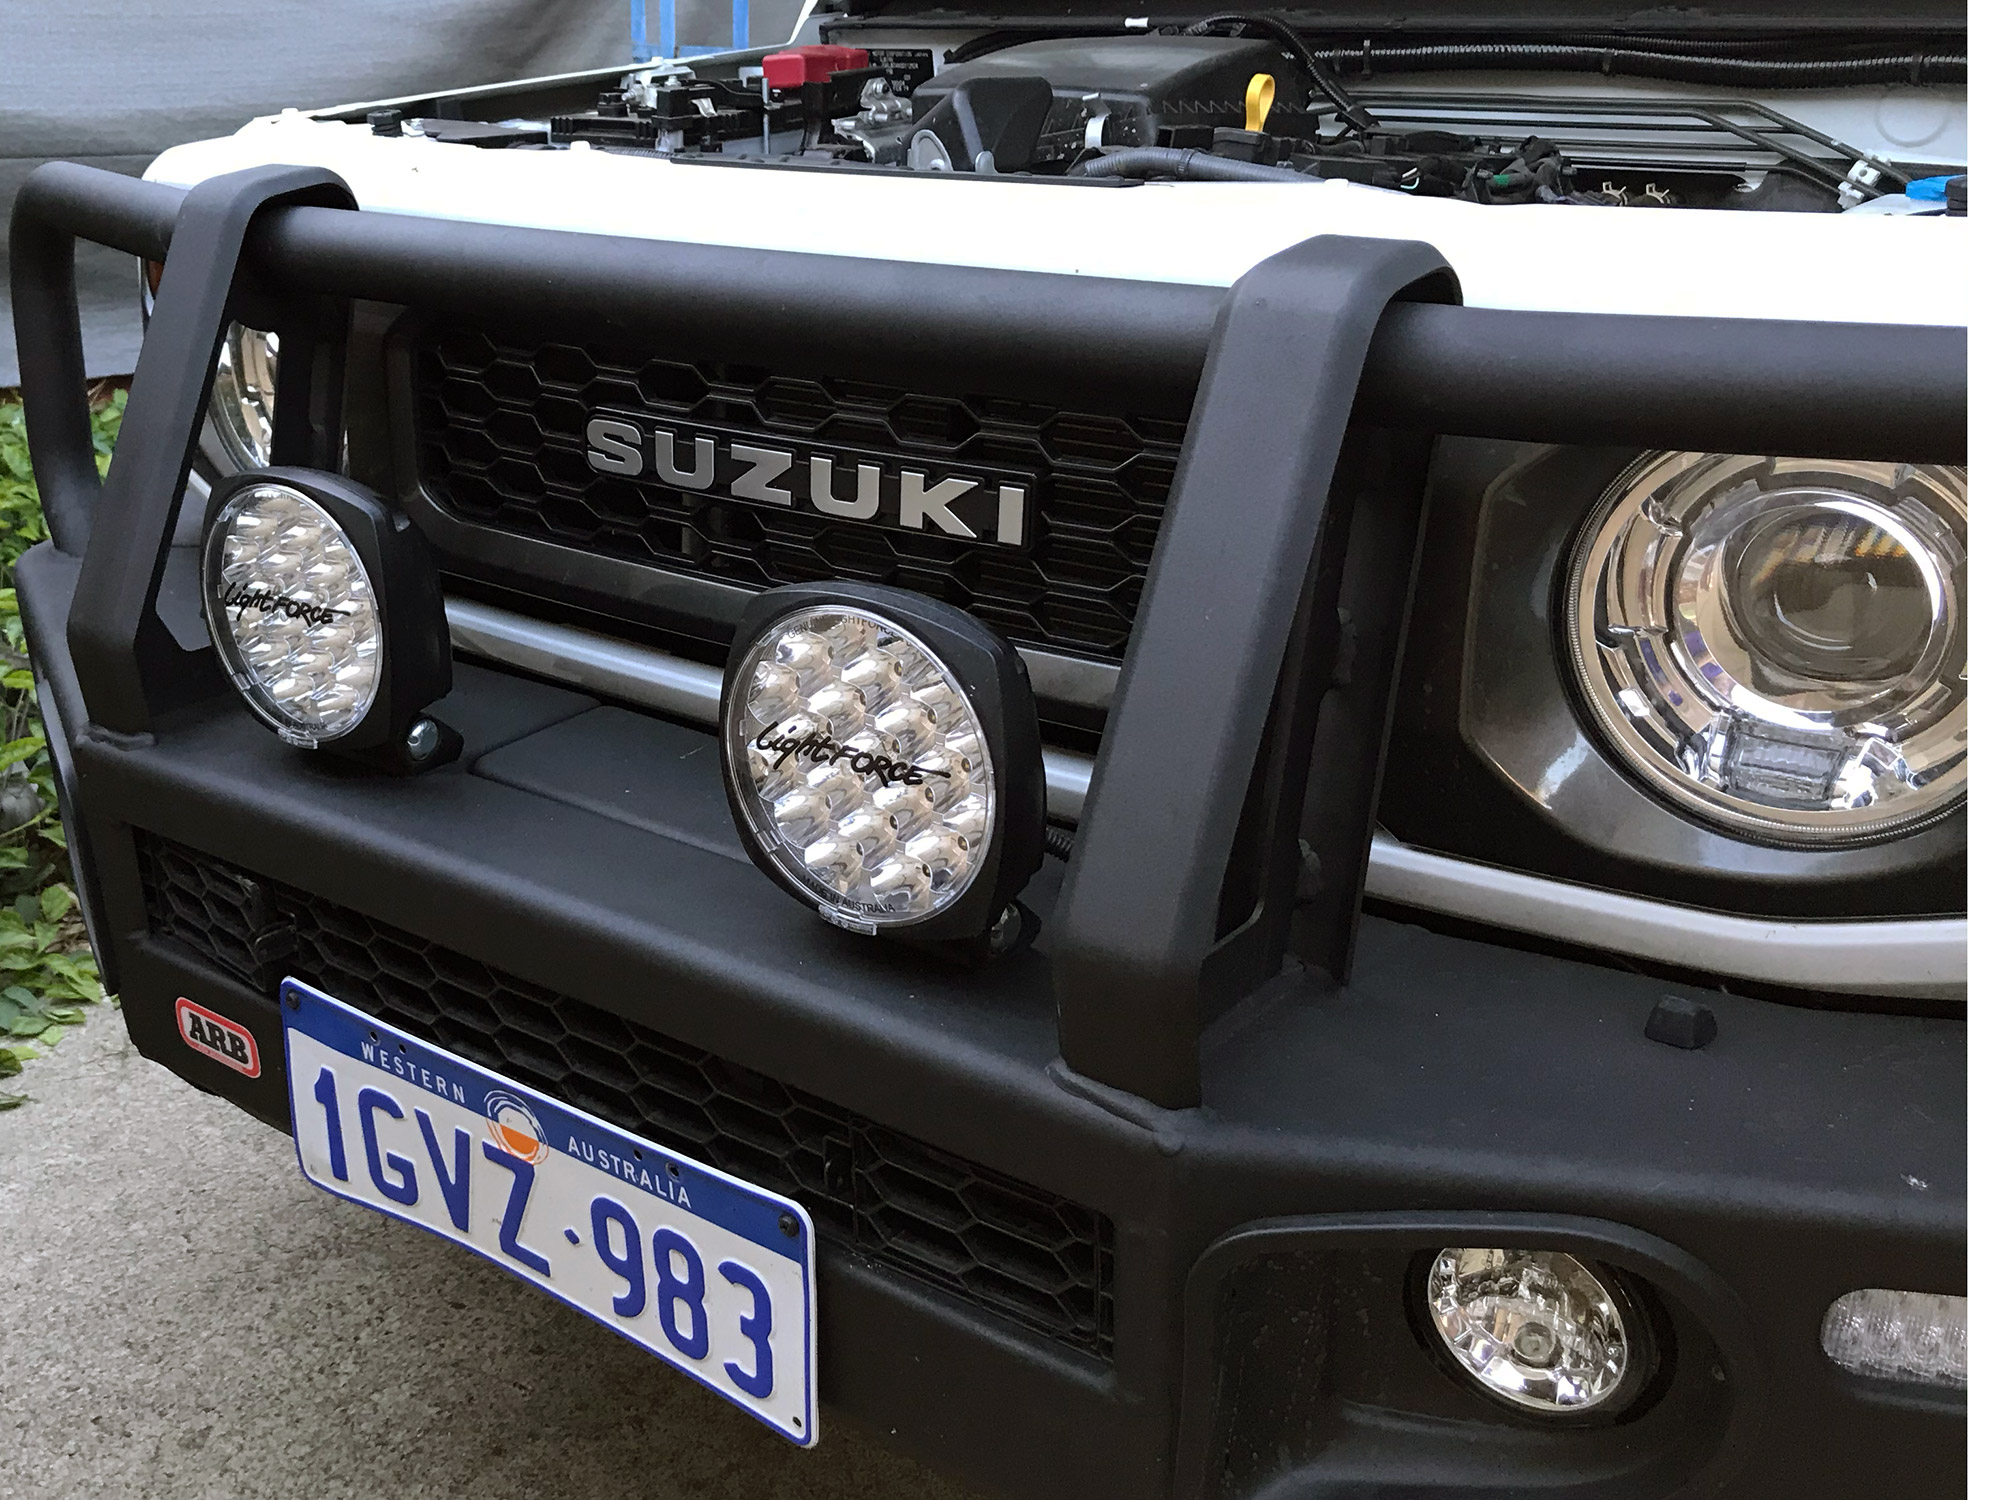
Pretty much if you have a bullbar you can do this; note that some bullbars can get a bit tight with large lamps so you do need to think about this a bit. While people have rammed, say, 9″ large round lights into each of the Jimny bullbars that are available, they will reduce airflow to the radiator and can look a bit large.
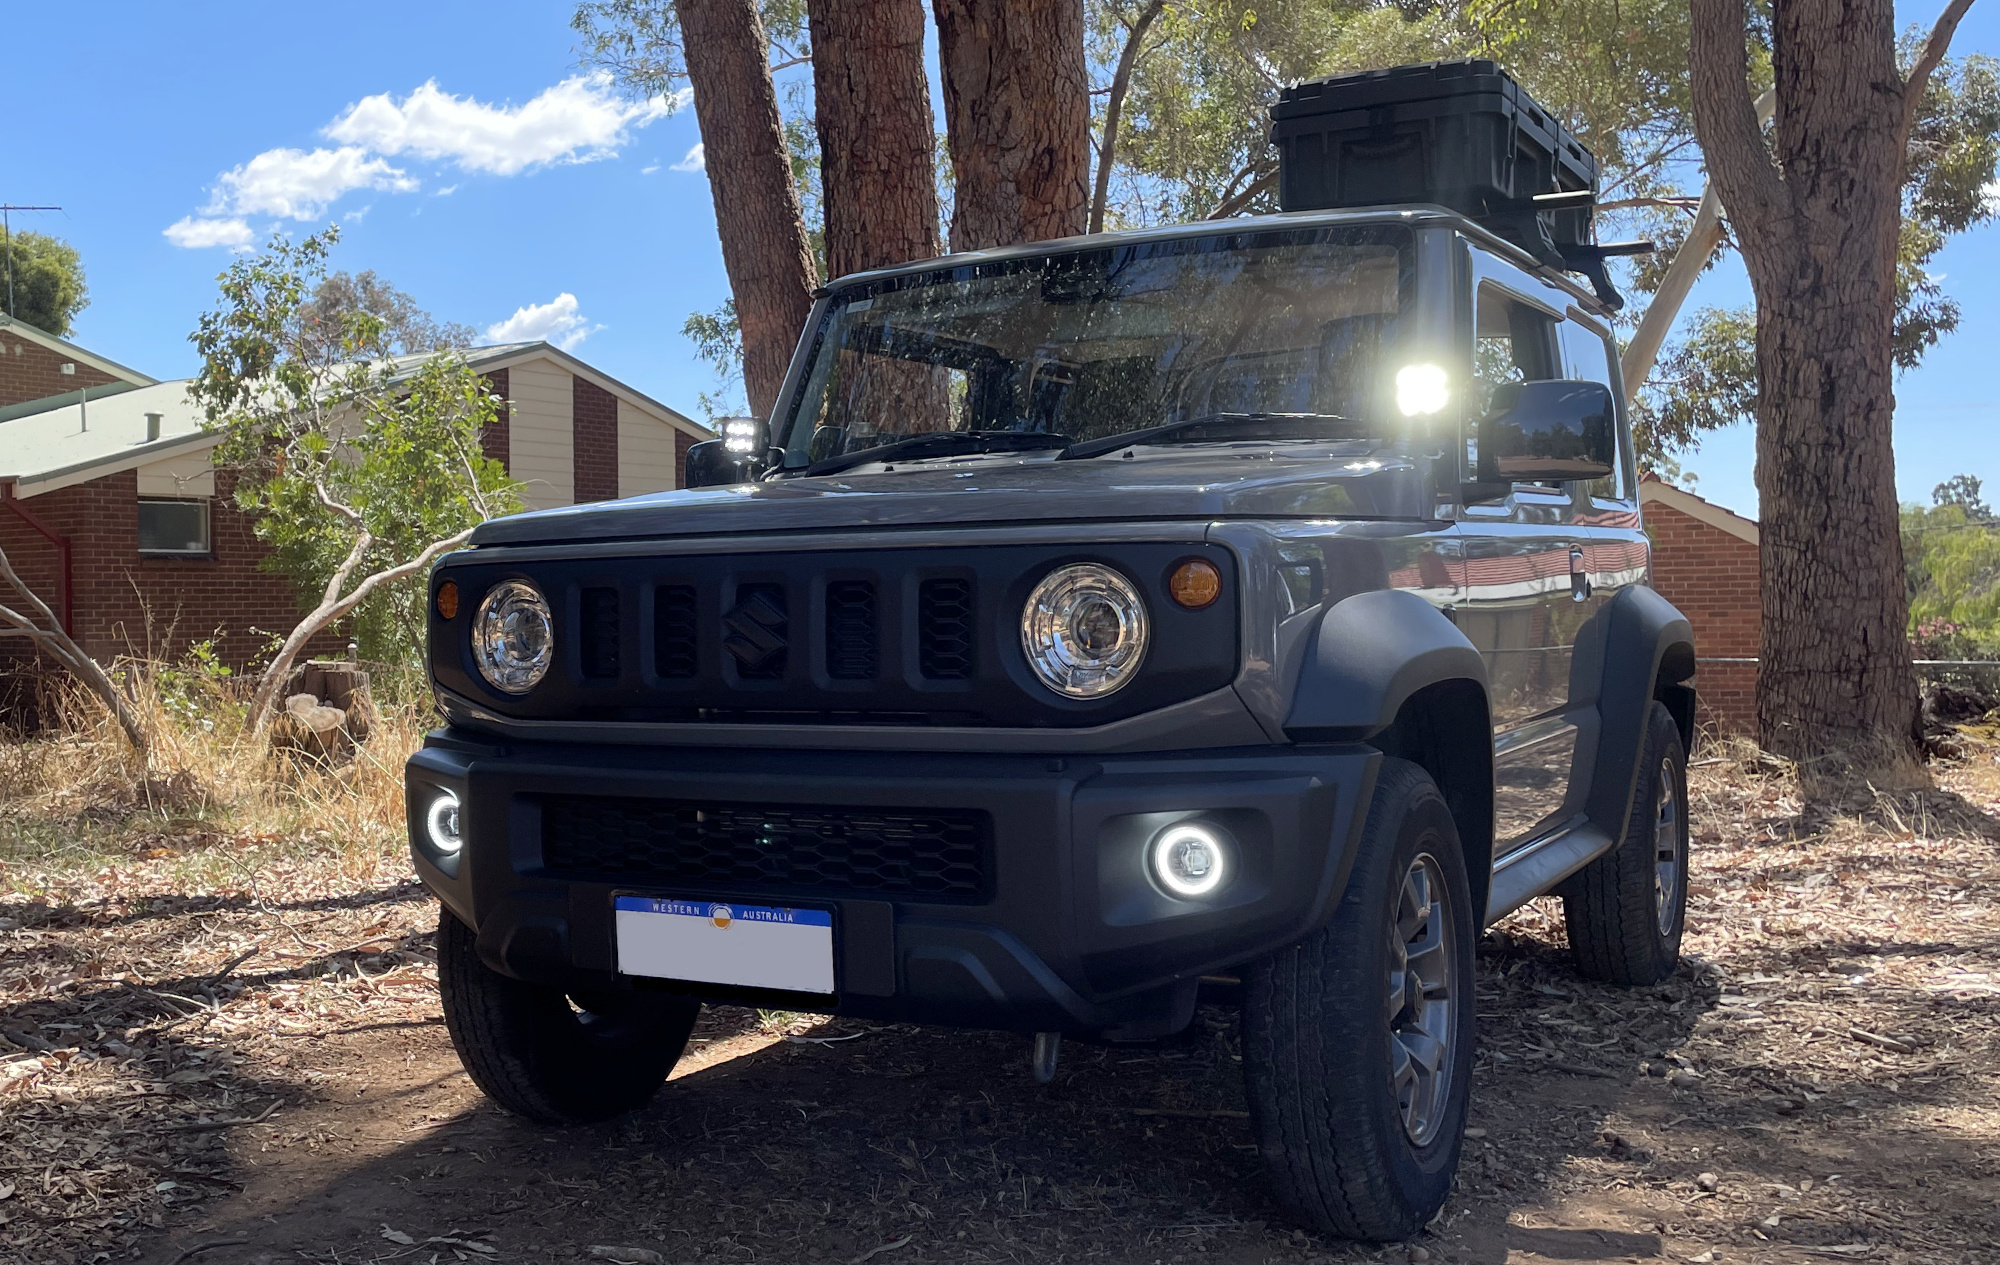
My setup
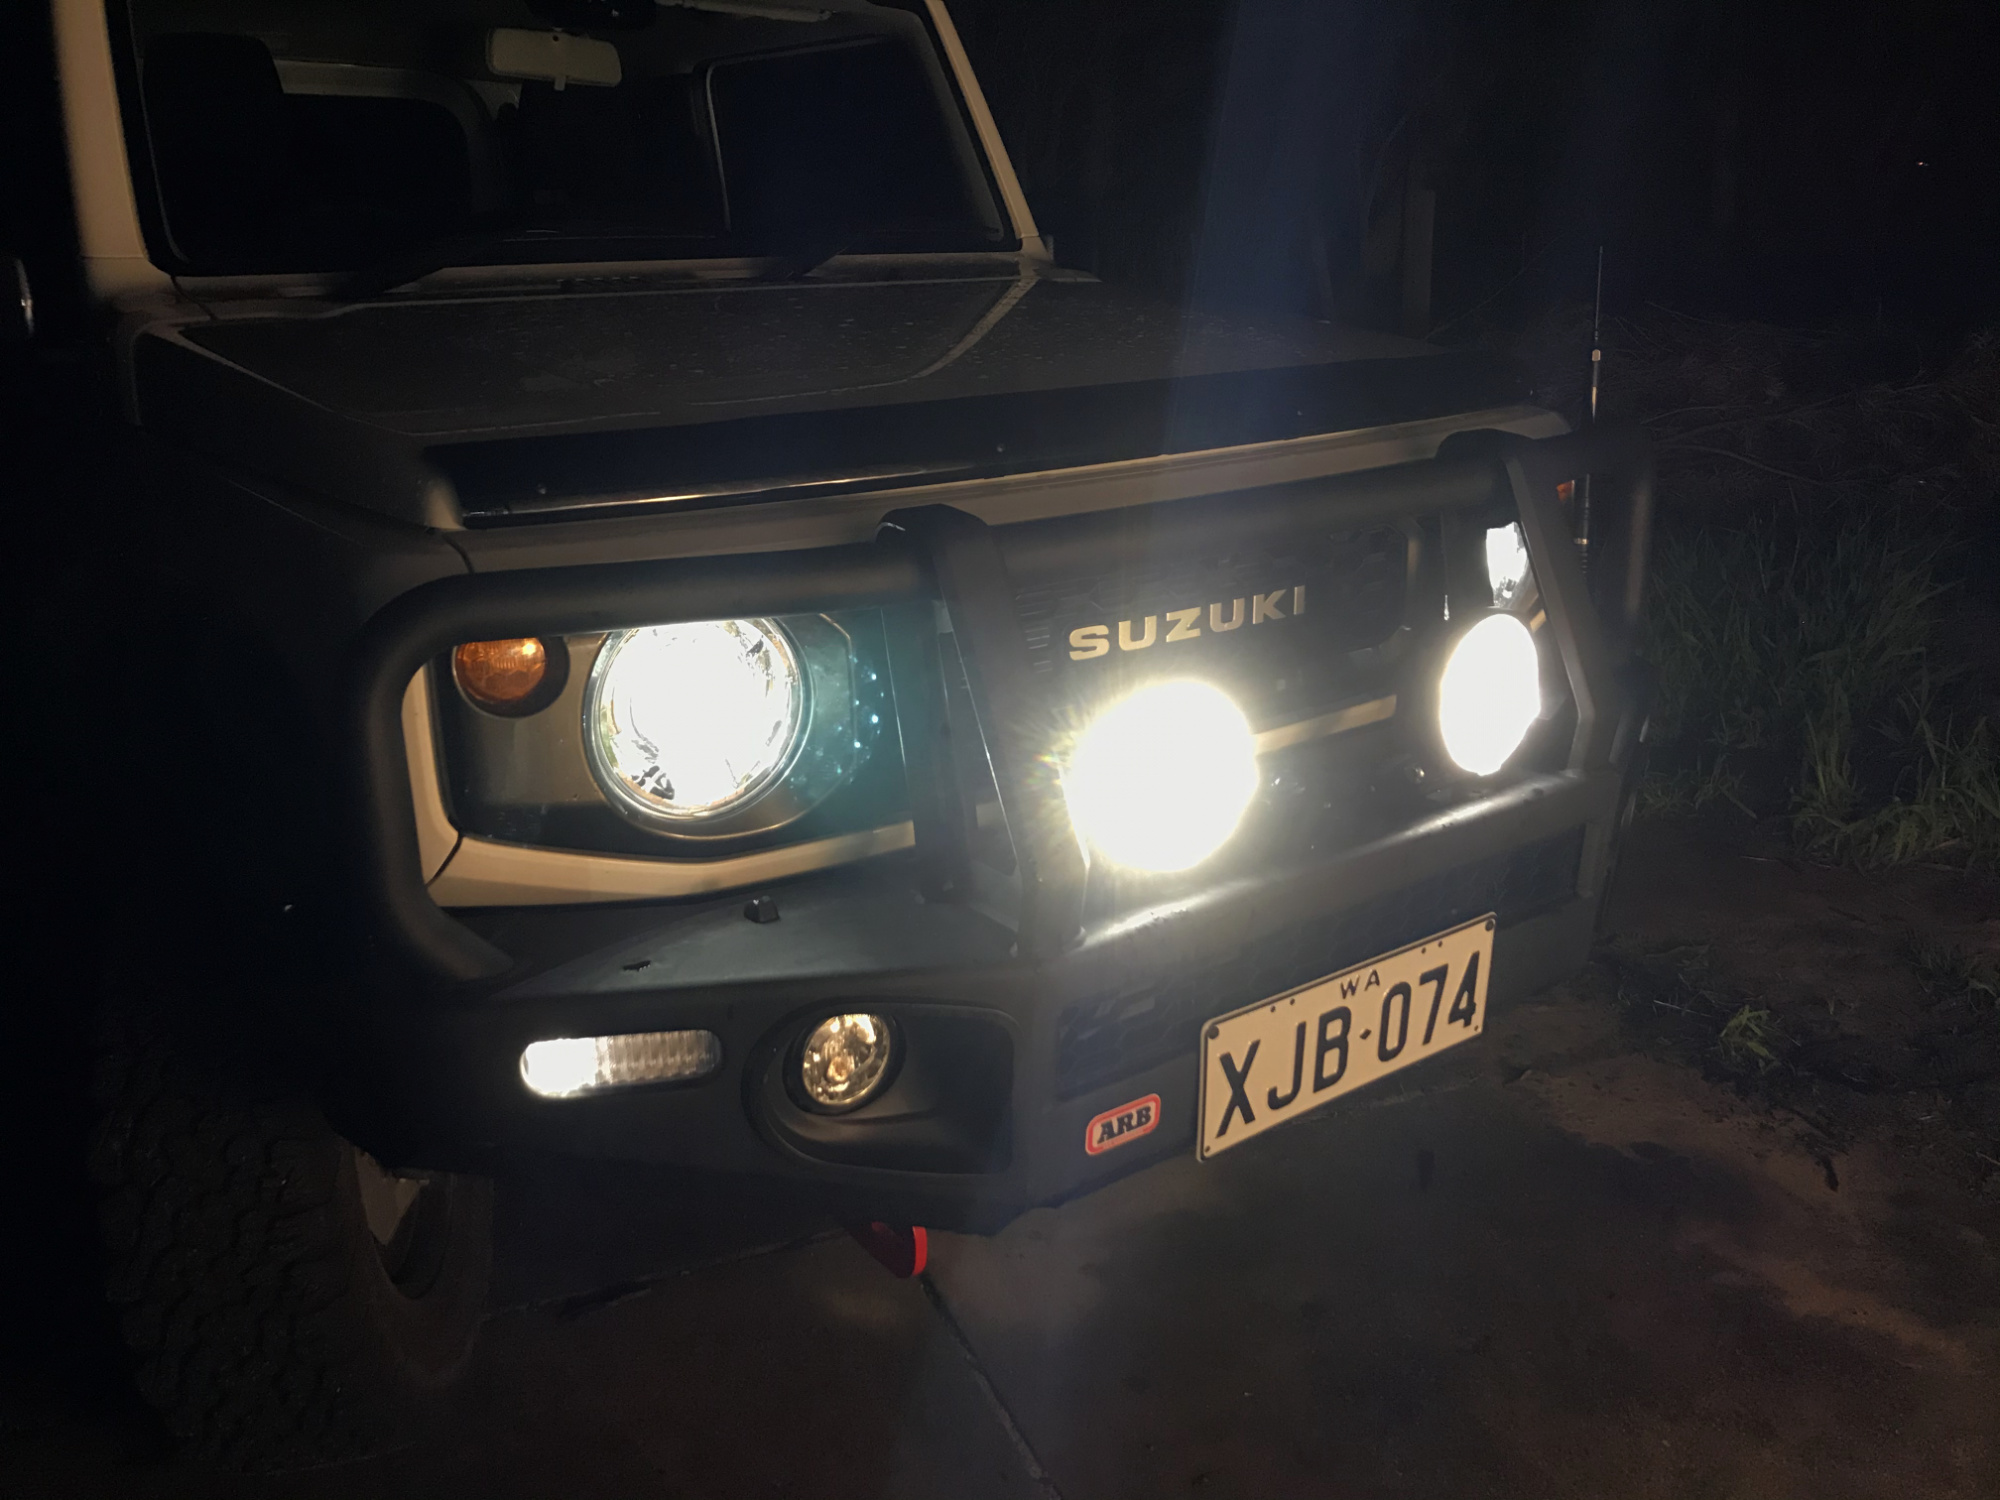
Since I was going to run my car with a bullbar I never really had much of a decision to make in terms of how I will fit driving lights to my car. The factory LEDs are good, but it’s good having a bit more range and width to the headlights provided by driving lights.
I wasn’t completely sure what I wanted, but I did want quite good quality LED units; removable filters were also high on the list so that the lenses were protected by default with stuff I could swap out as needed. I was able to find a good deal on 2nd hand but barely used Lightforce Venom Professional LED units. These came with optional locking bolts and the Lightforce generic wiring harness, and were cheaper than many off-brand options. Based on their quality I’d probably buy them at full retail price now I’ve had them; they outperform some common used other Australian brand lights that friends have that are much larger.
Installing lights to the bullbar
Nothing too difficult here, there are a couple of holes ready made. Use the little access ports to do up the bottom nut and you’re basically there already.
I had to blur the end of my security tool just in case someone works out which of the 99 patterns I have on my lights! It’s very good that it just works with a normal socket, so it’s super easy to throw into your toolkit to make sure you have it with you to adjust lights on the road if you need to.
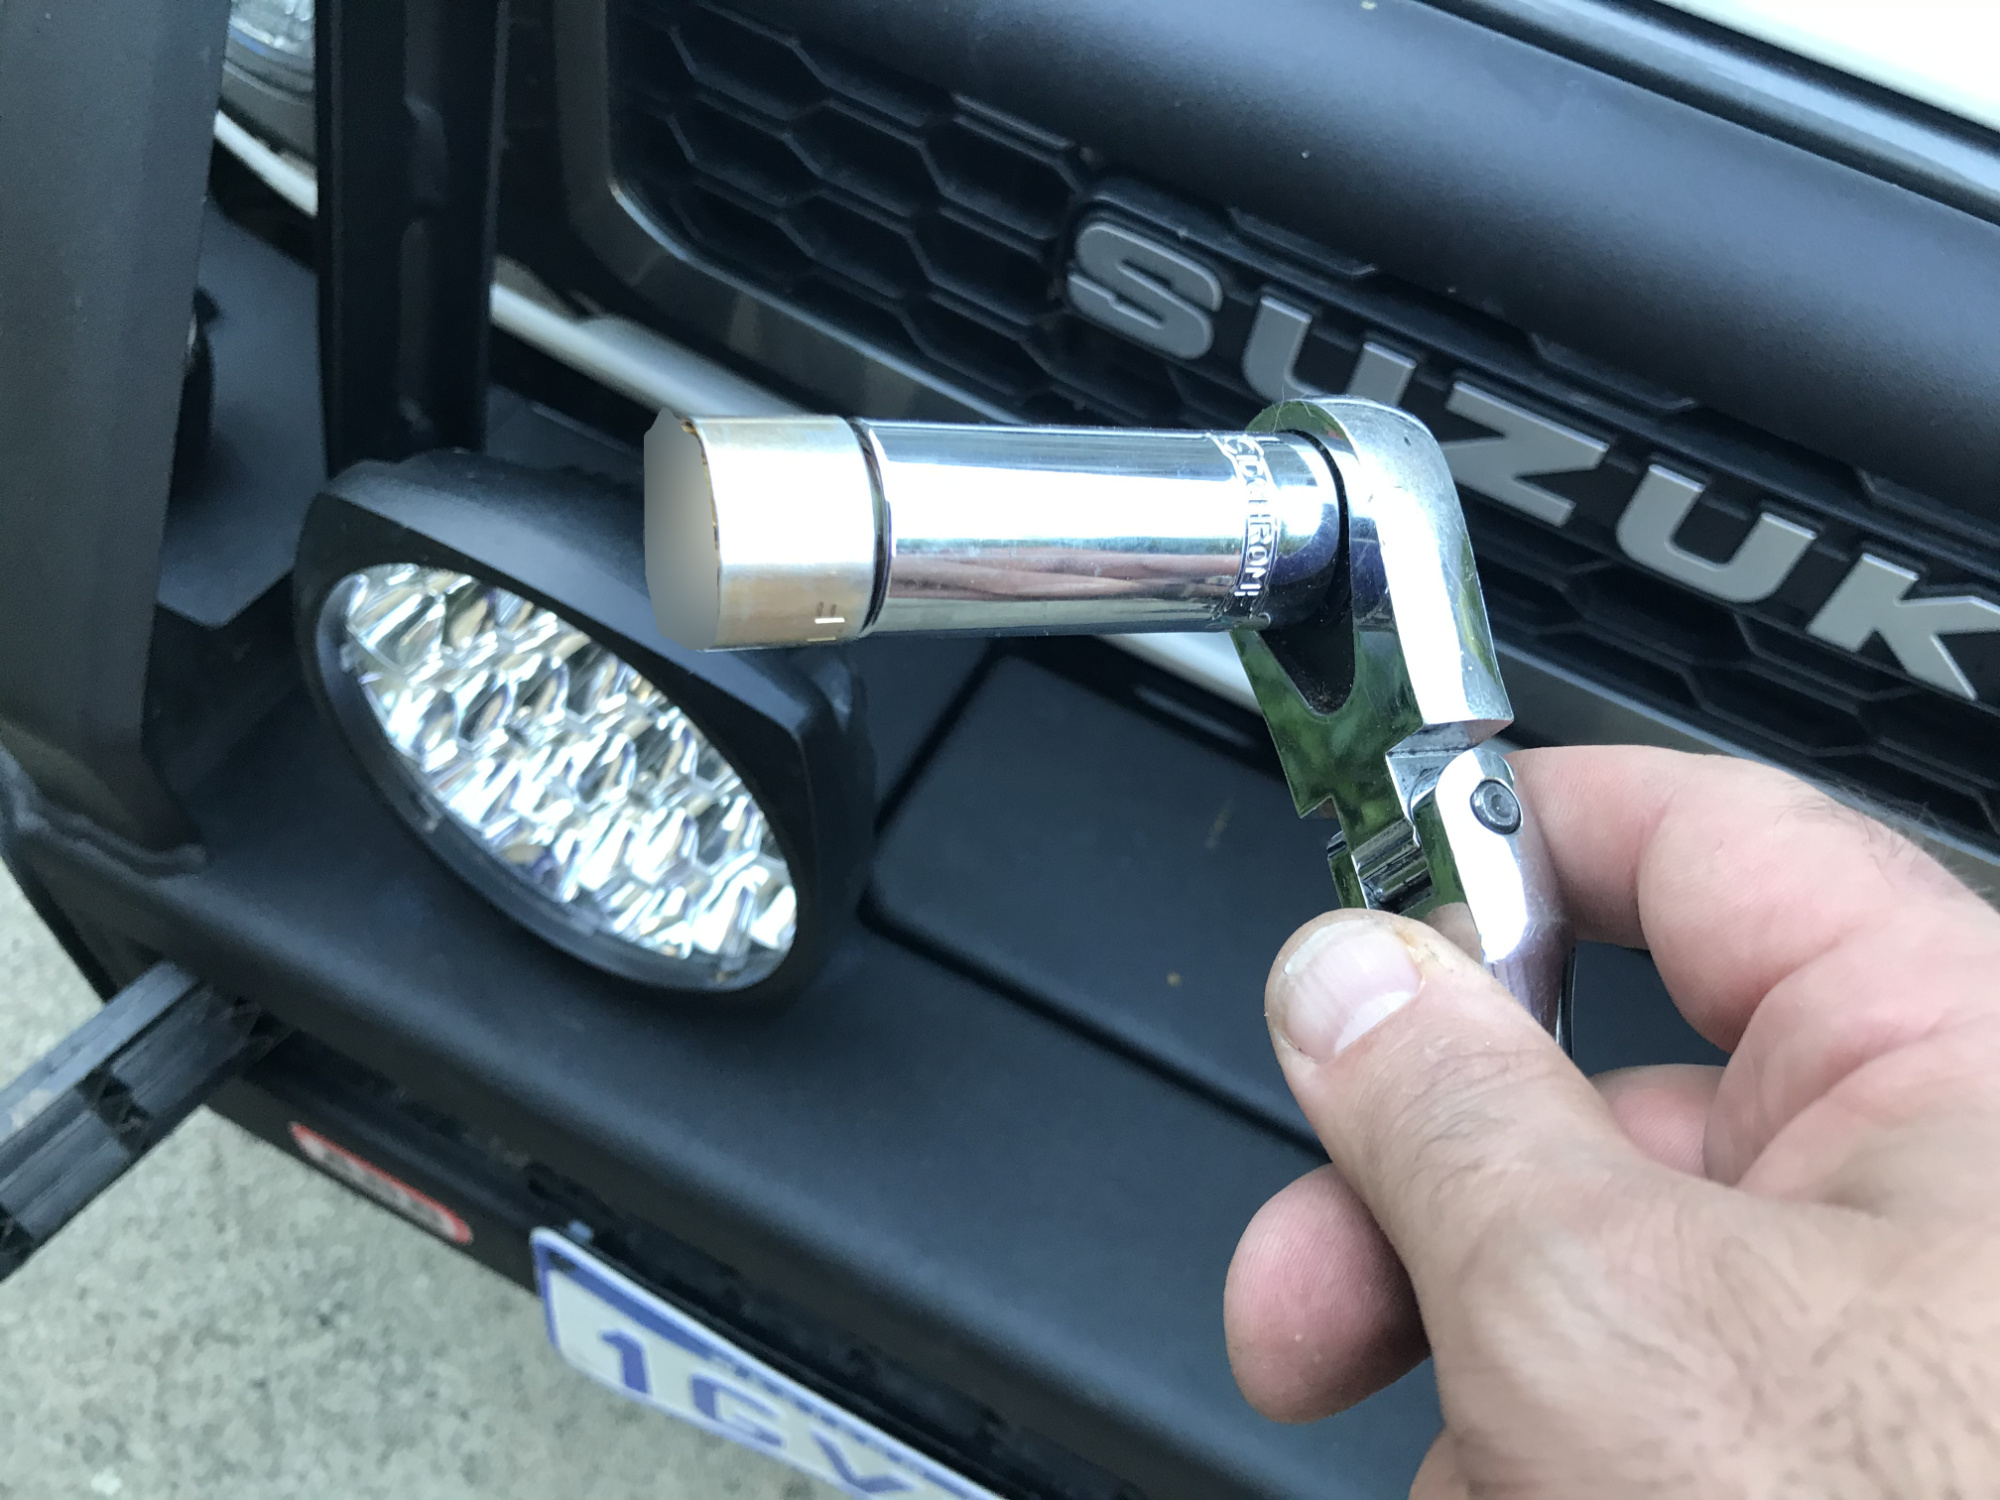
That’s it. Bolt it up using the existing holes, and you’re basically there.
Wiring up: engine bay relay harness
Although not a heap of info here because it’s so simple. This harness needs a permanent power connection, a ground connection, somewhere to mount the relay, and 2 wires into the car: one brings in the signal from the high beam on the piggyback connector on the headlight wiring and one comes back out to switch on the relay.
It’s worth undoing the air inlet bracket to give yourself a bit of access to a good ground point for the relay, and somewhere to tuck the relay itself.
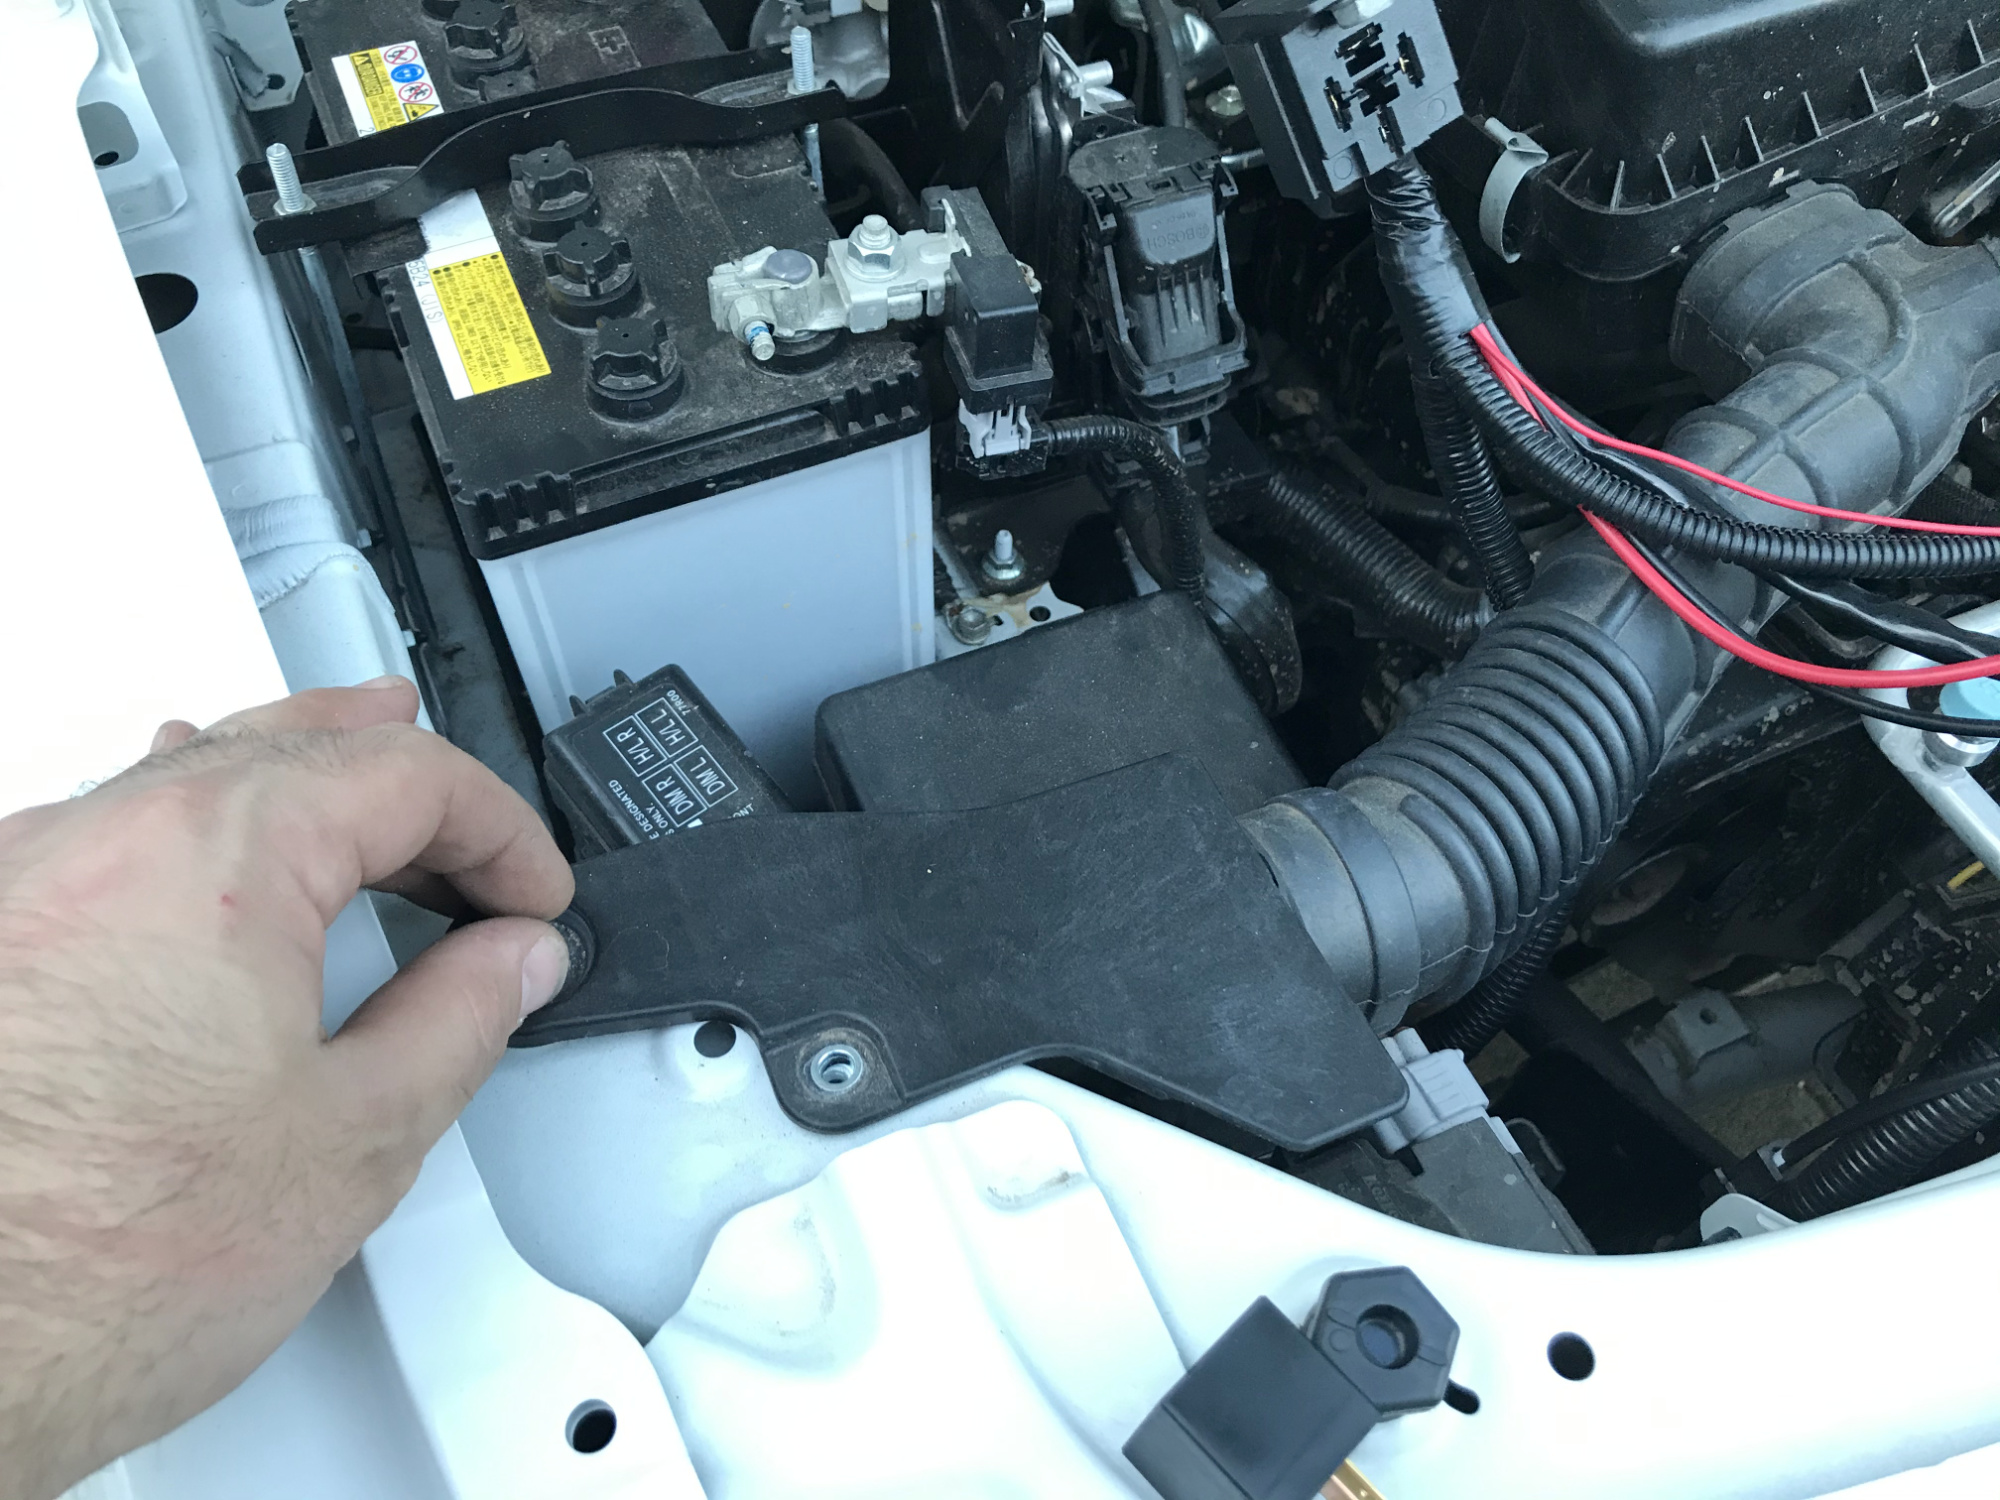
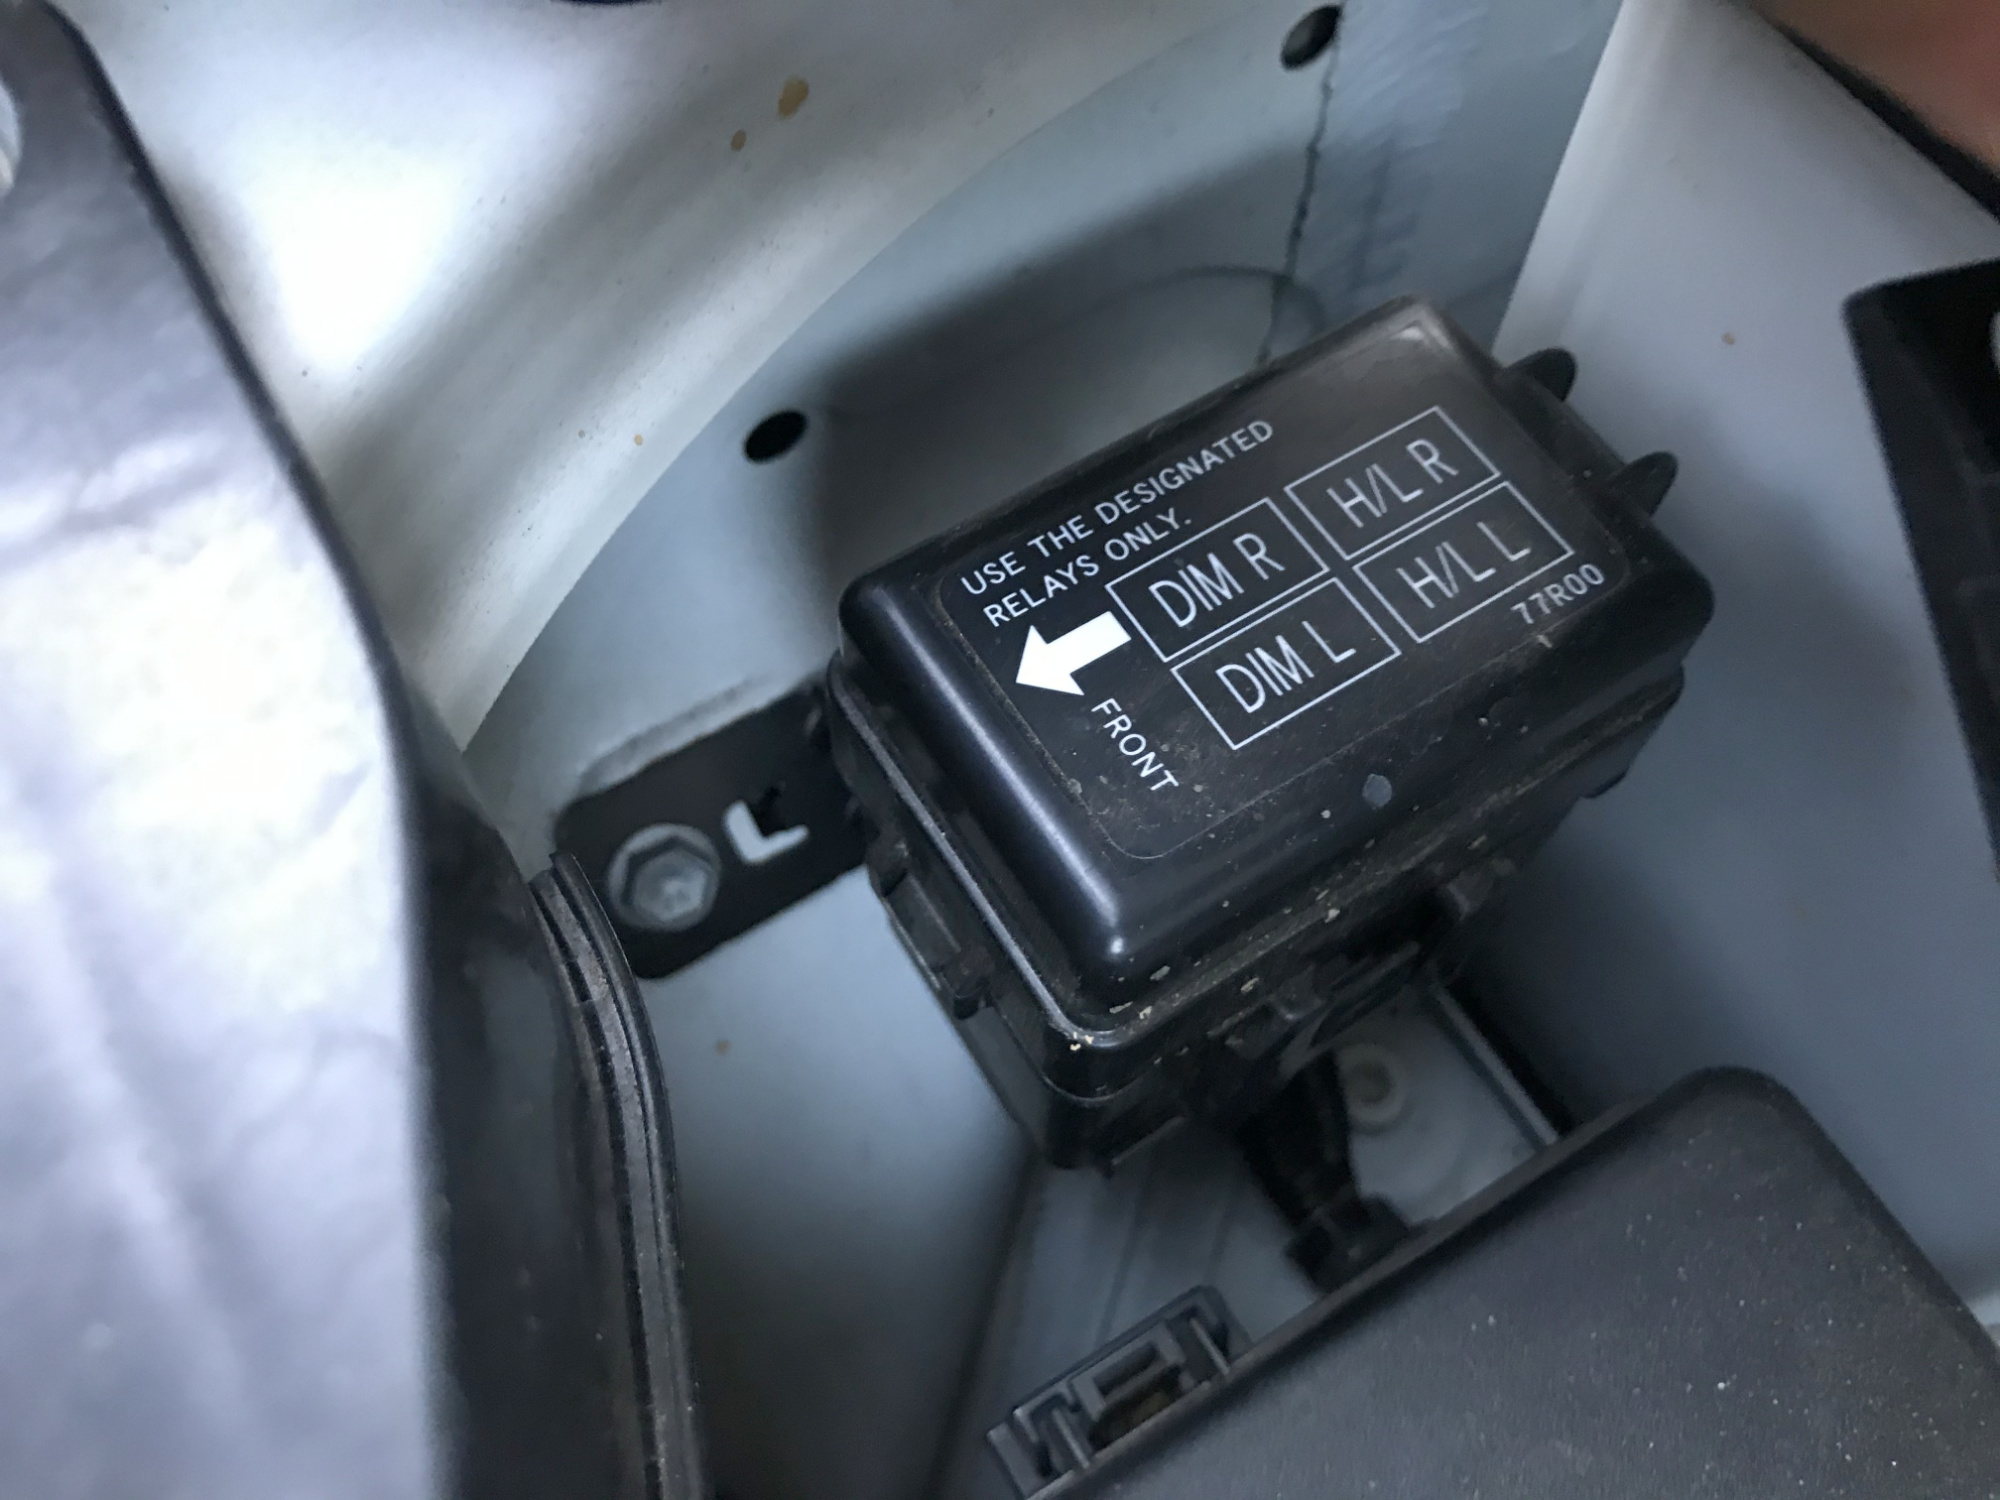
Here’s the bolt you’re looking for to use for the ground point for the relay: it’s the mounting bolt for the car’s headlight relays and hides underneath the air inlet hose to the airbox. Use a chassis mounted ground point for anything on the driving light relay harness because it means you aren’t bypassing the current sensor on the negative terminal on the battery.
The fuse holder for the permanent power wire is easily mounted to the battery tiedown bracket.
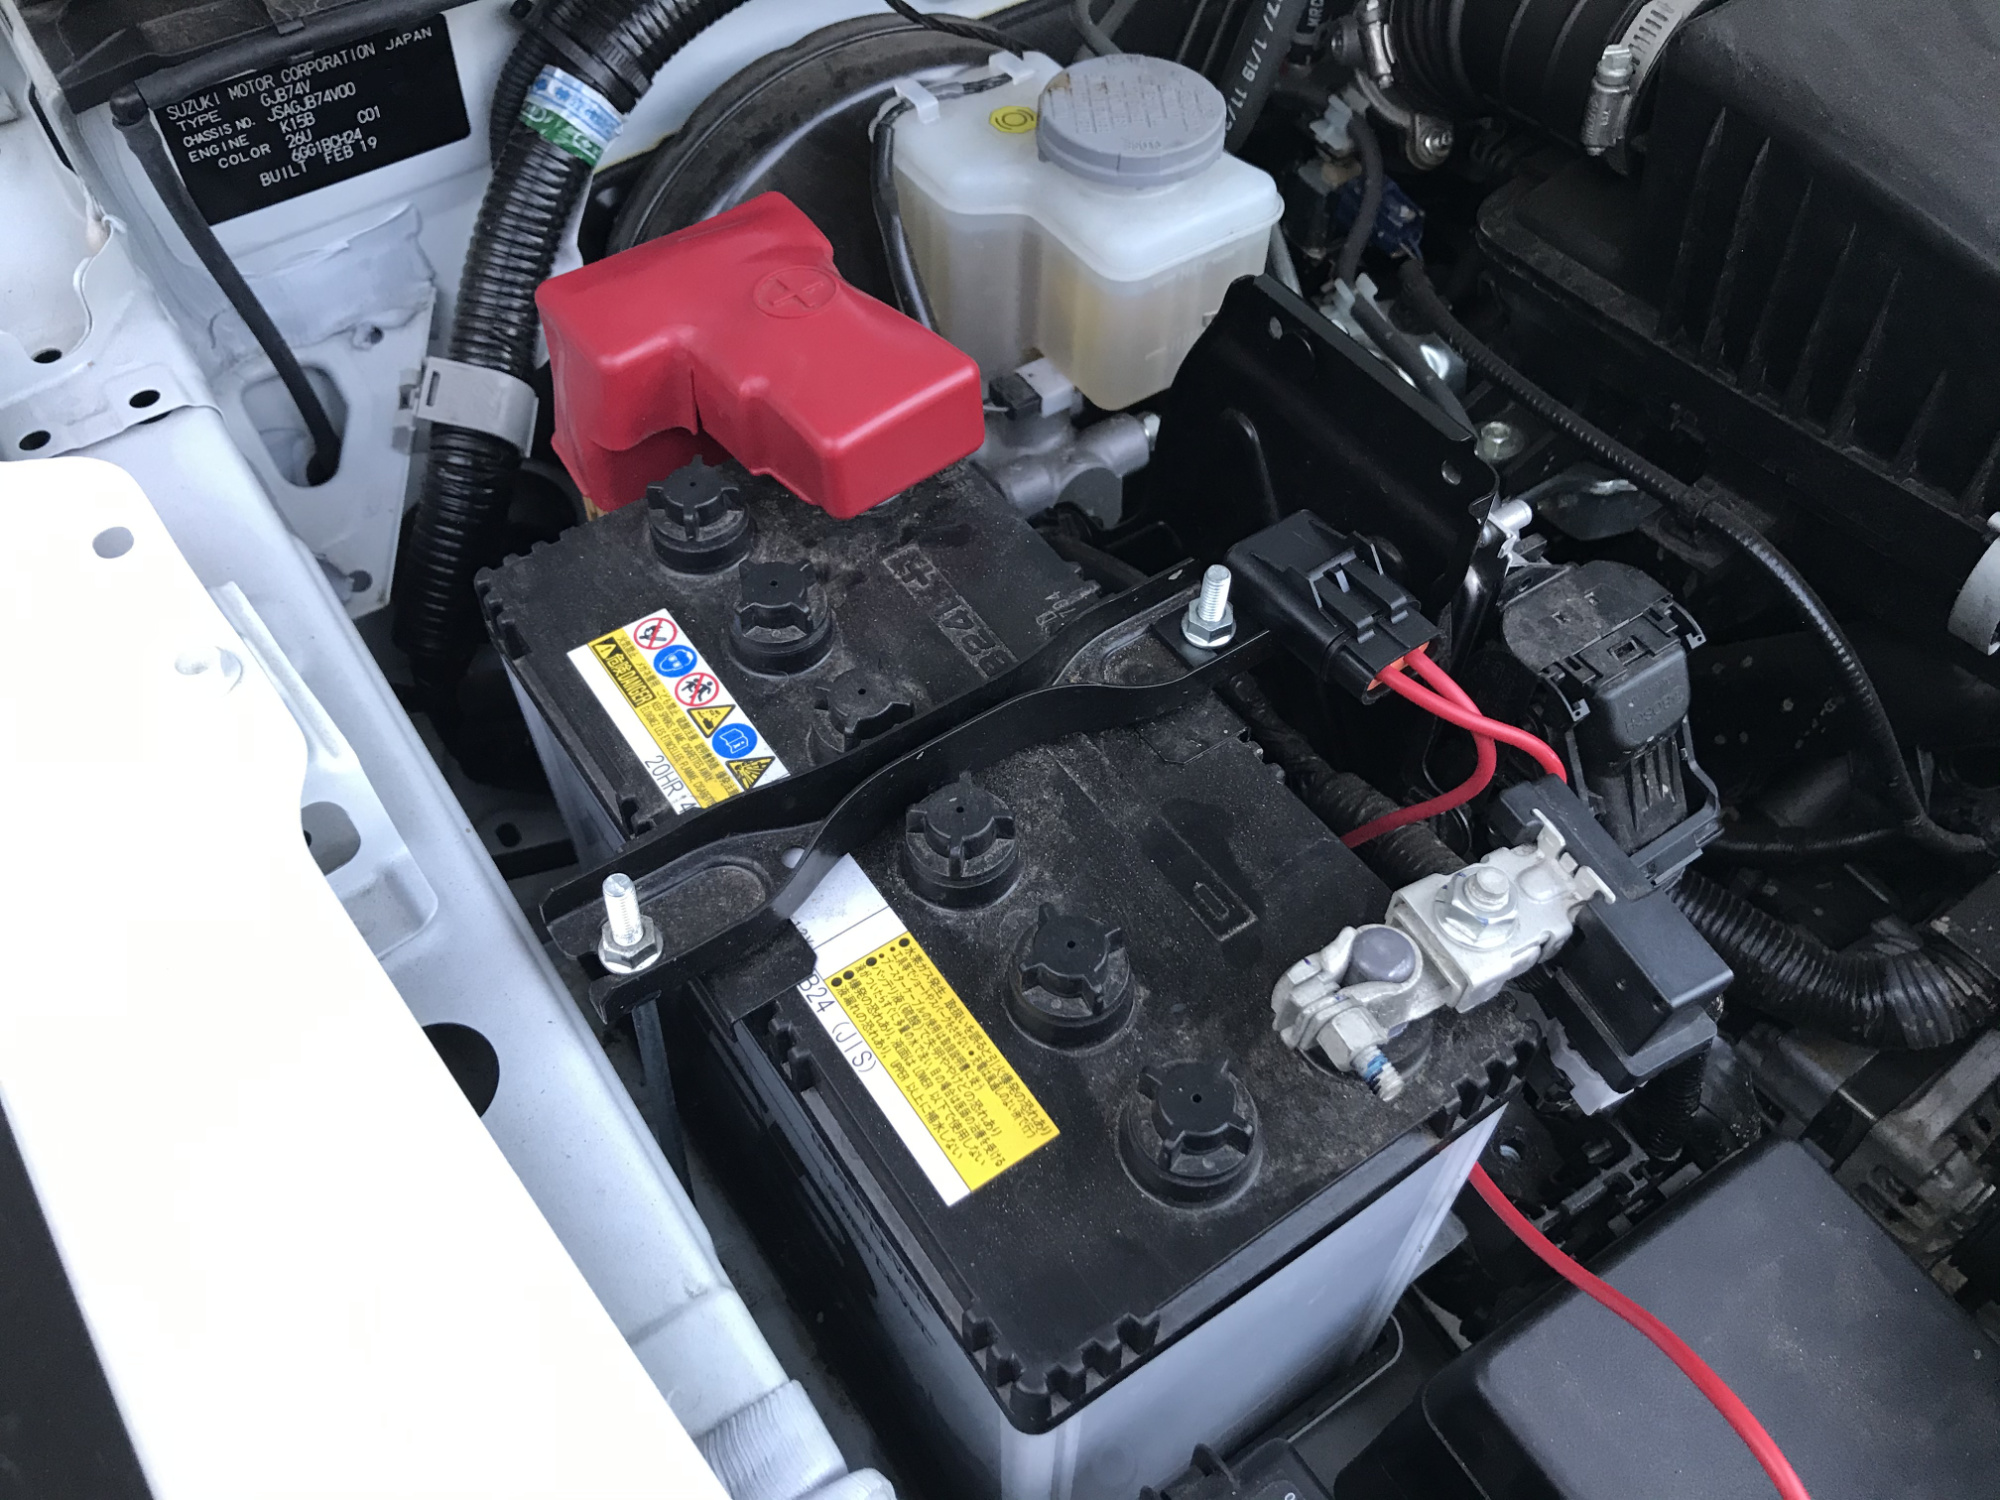
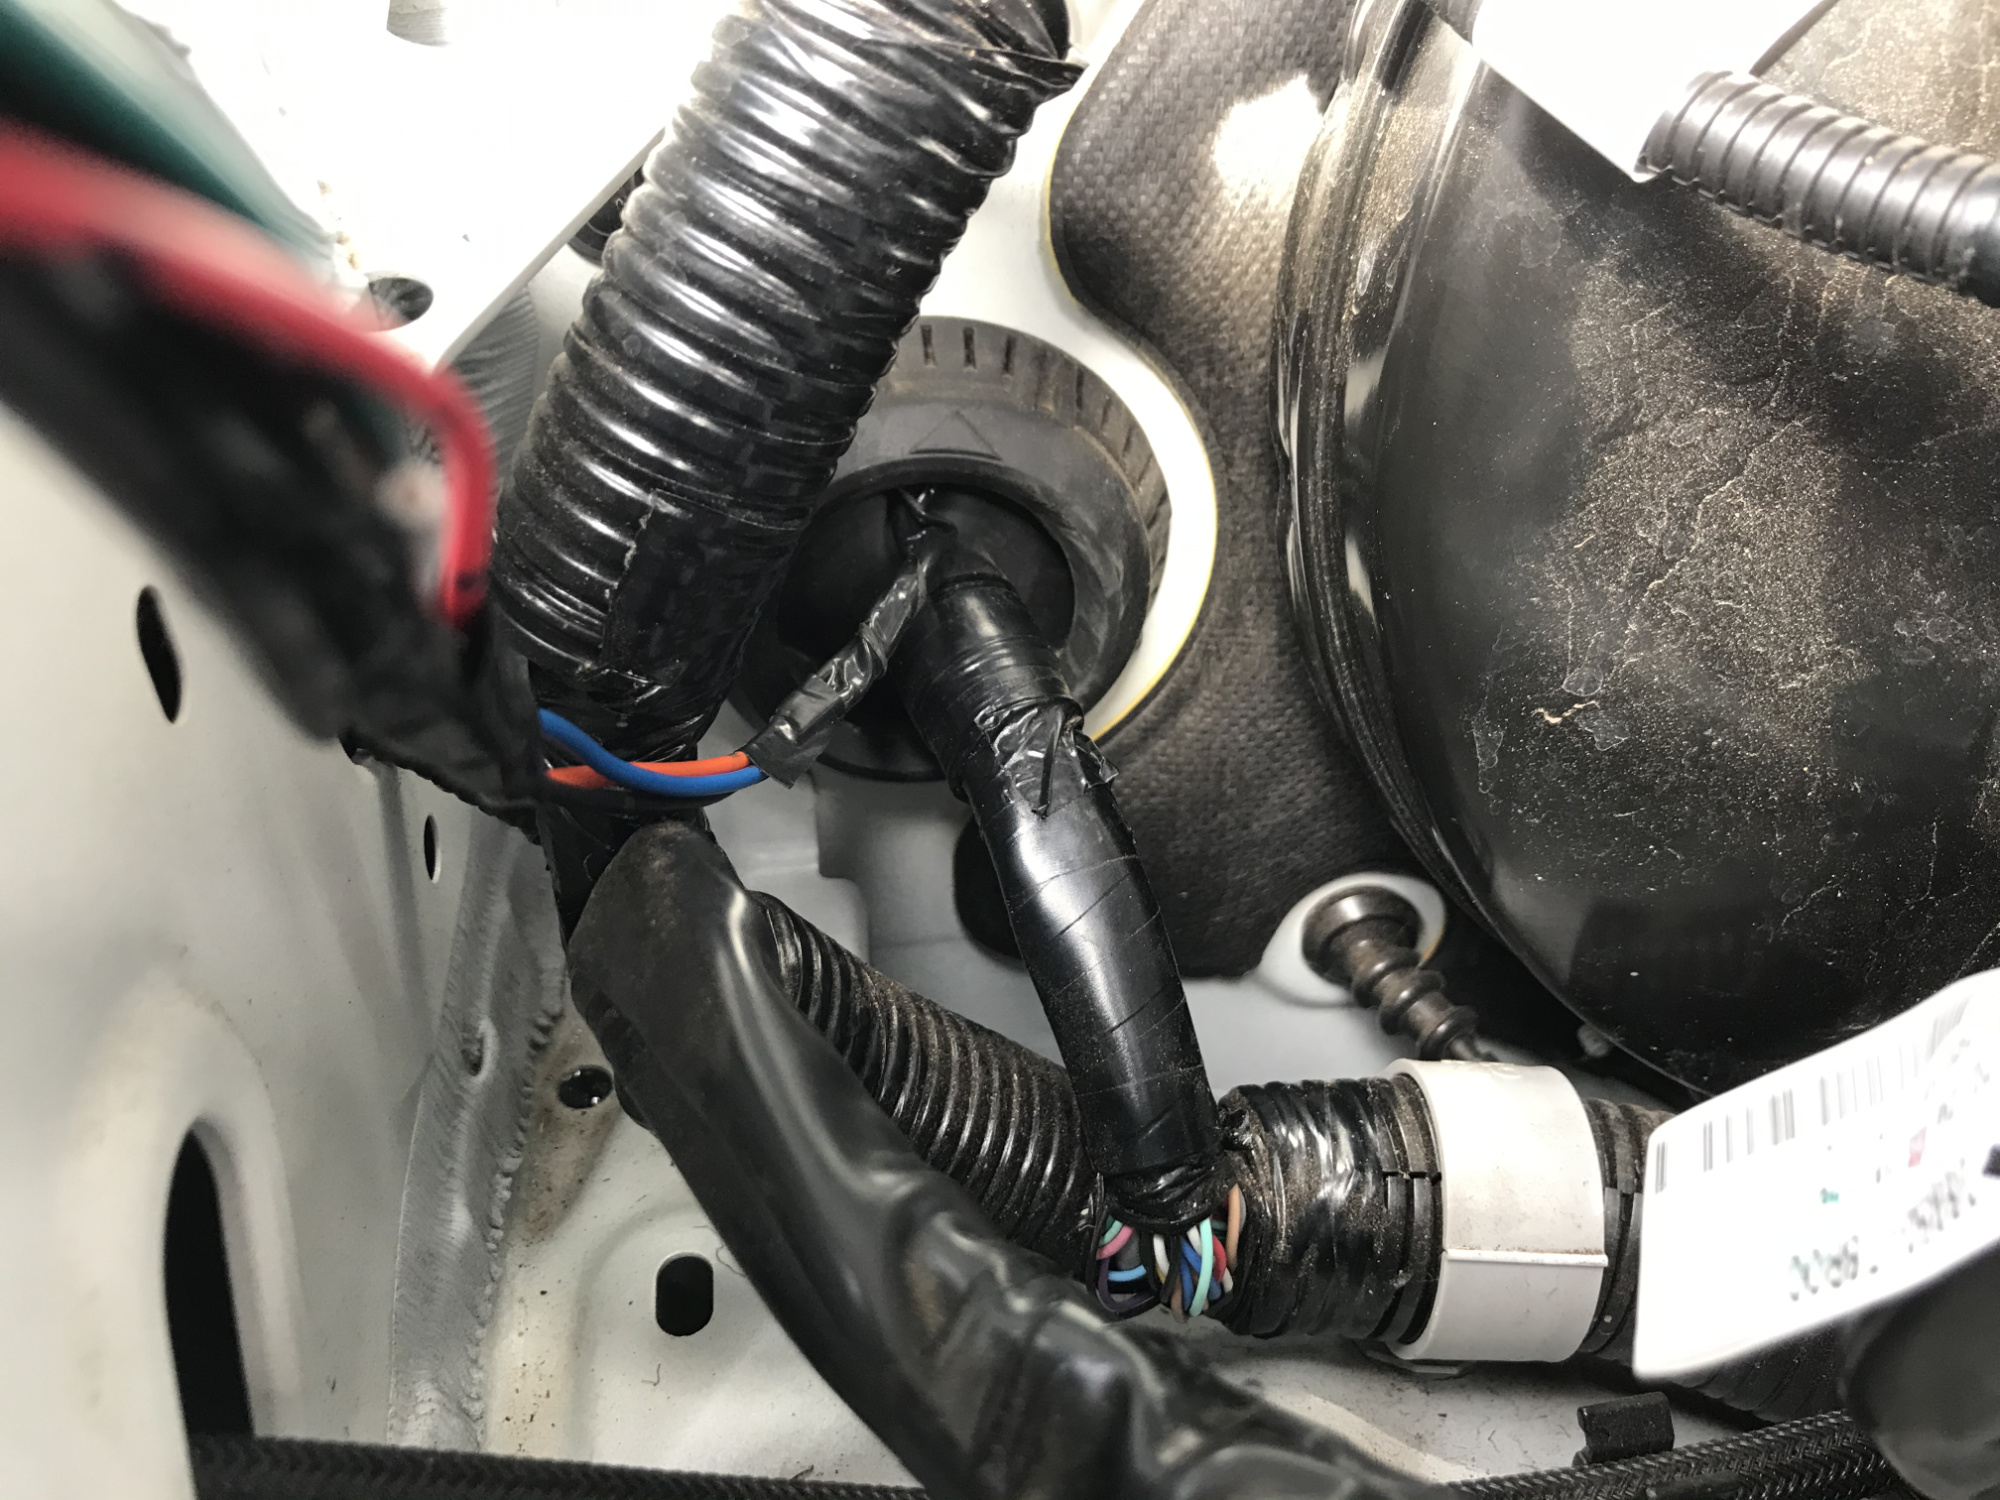
The wiring to go into the cabin I poked through the large main wiring grommet on the firewall next to the brake booster. This is best accessed by removing the battery from the car.
Accessing the positive signal off the high beam for the headlight is not hard. I used a commercial piggyback adapter, though note that many of these end up wired wrong. If your harness is separately earthed like mine then it’s usually not a problem, but many aftermarket generic harnesses use the piggyback wiring to also earth the relay, and then the driving lights won’t work. This is all covered in my writeup on piggyback harnesses if you discover this issue.
Wiring up: interior switch
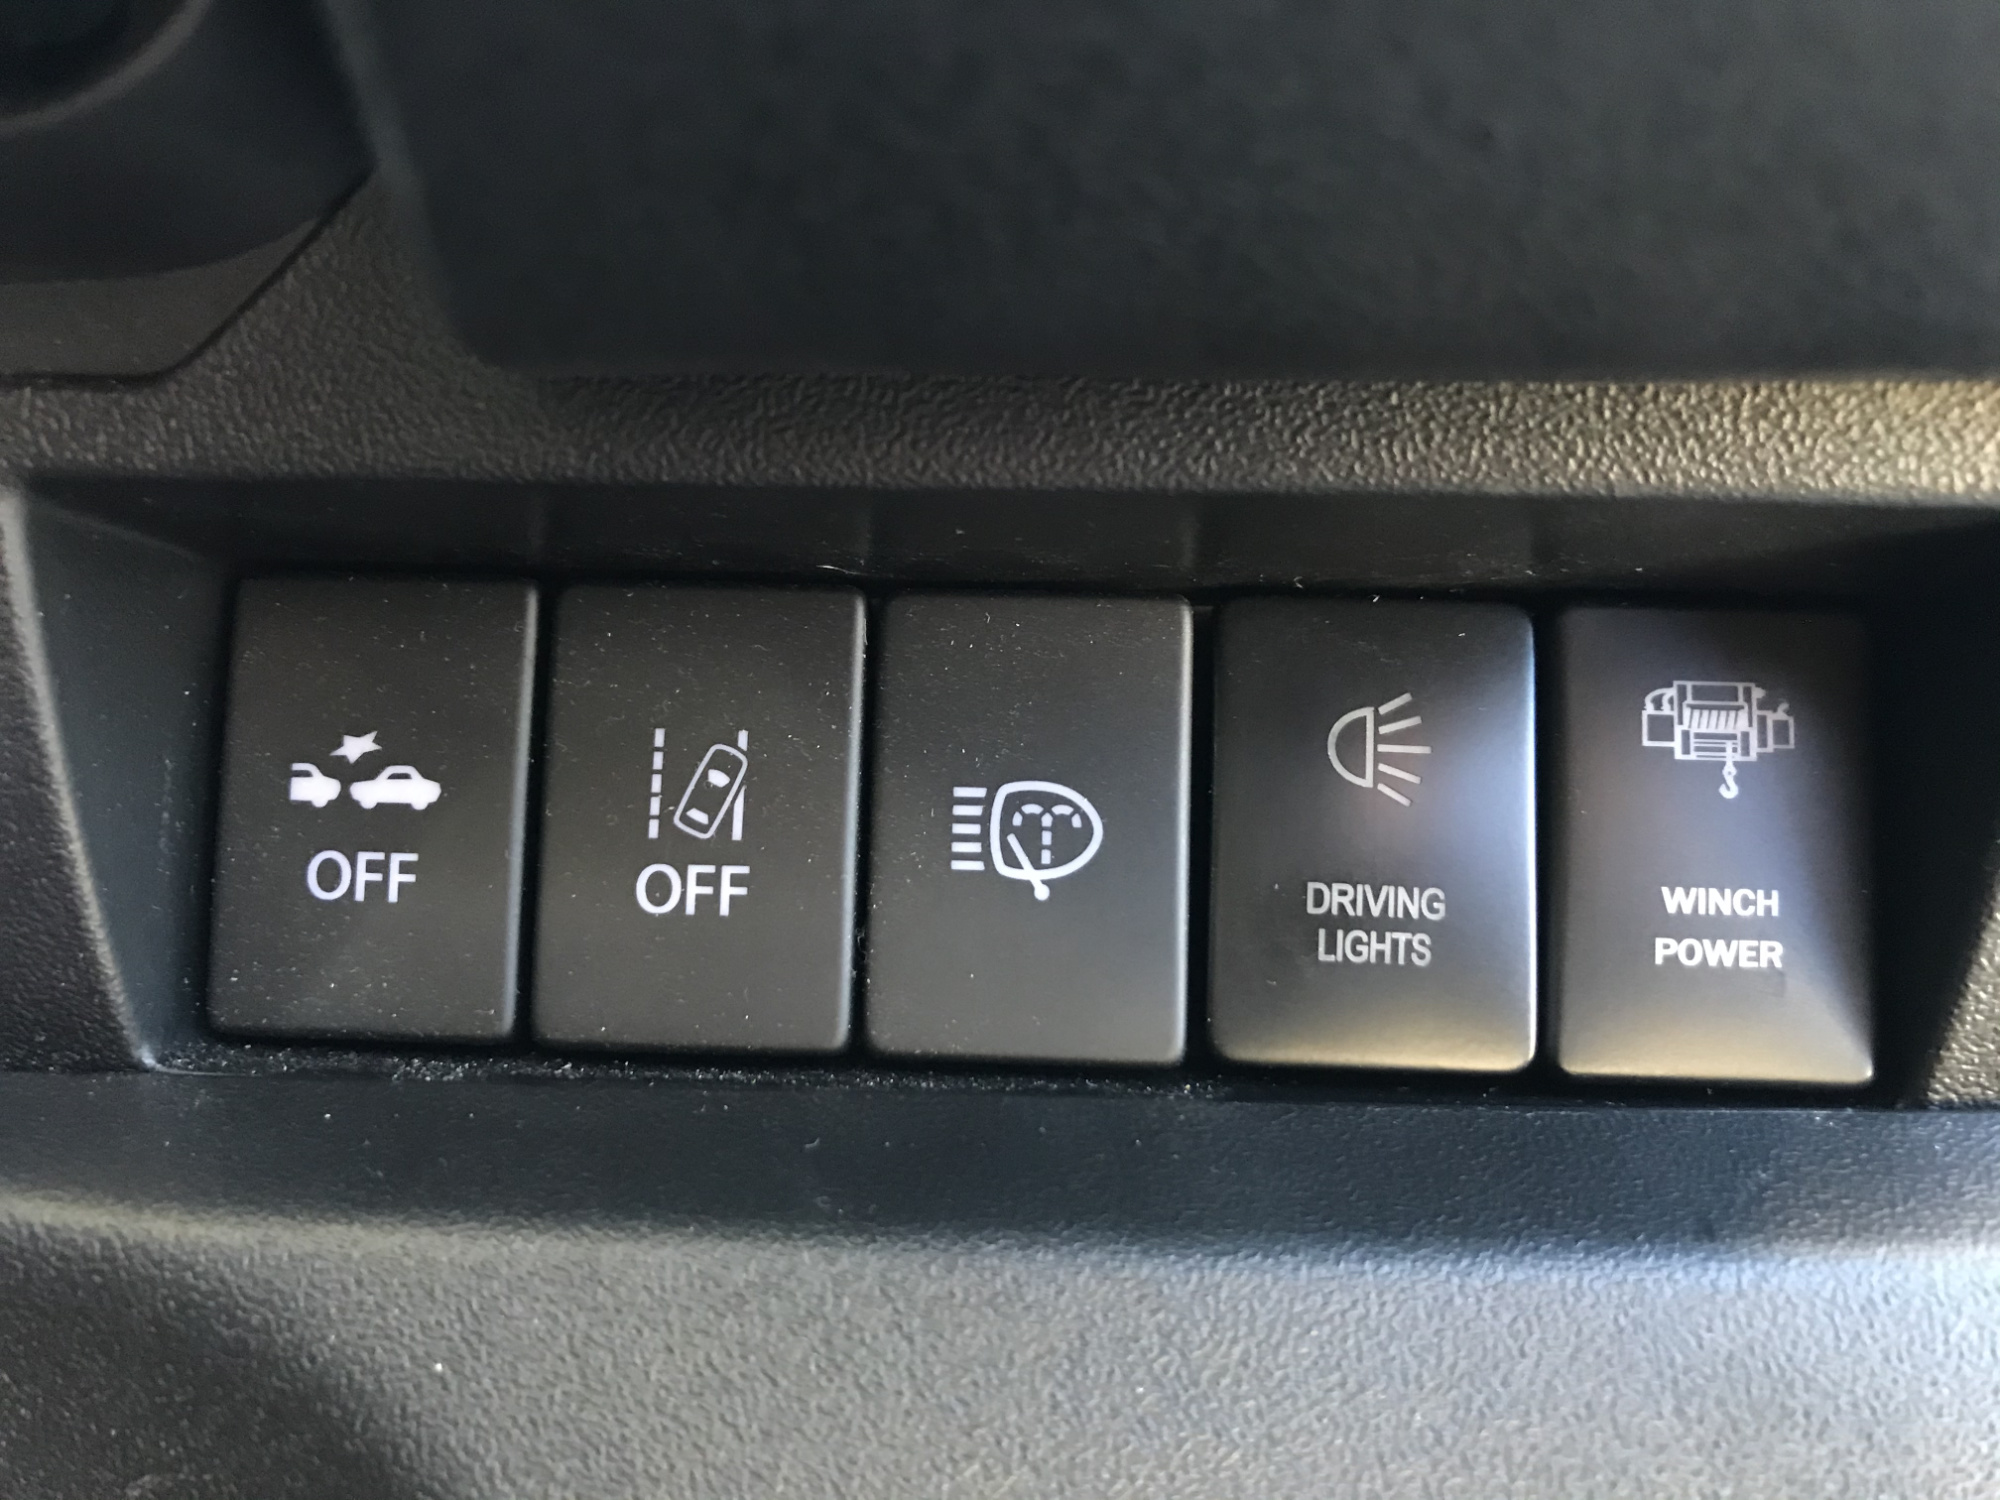
I used a short Toyota switch suitable for the dash aperture which is fairly straightforward to wire up.
These type of switches will need a ground for wiring, input for illumination, input from the high beam headlight signal and then output to the relay. Ground is easy and found in a lot of spots under the dashboard, and the input and output wires to the relay harness are poked through from the engine bay. You have to look up from the pedals and you’ll see a hole where they come through, though can be hard to spot amongst the rest of the factory wiring going on.
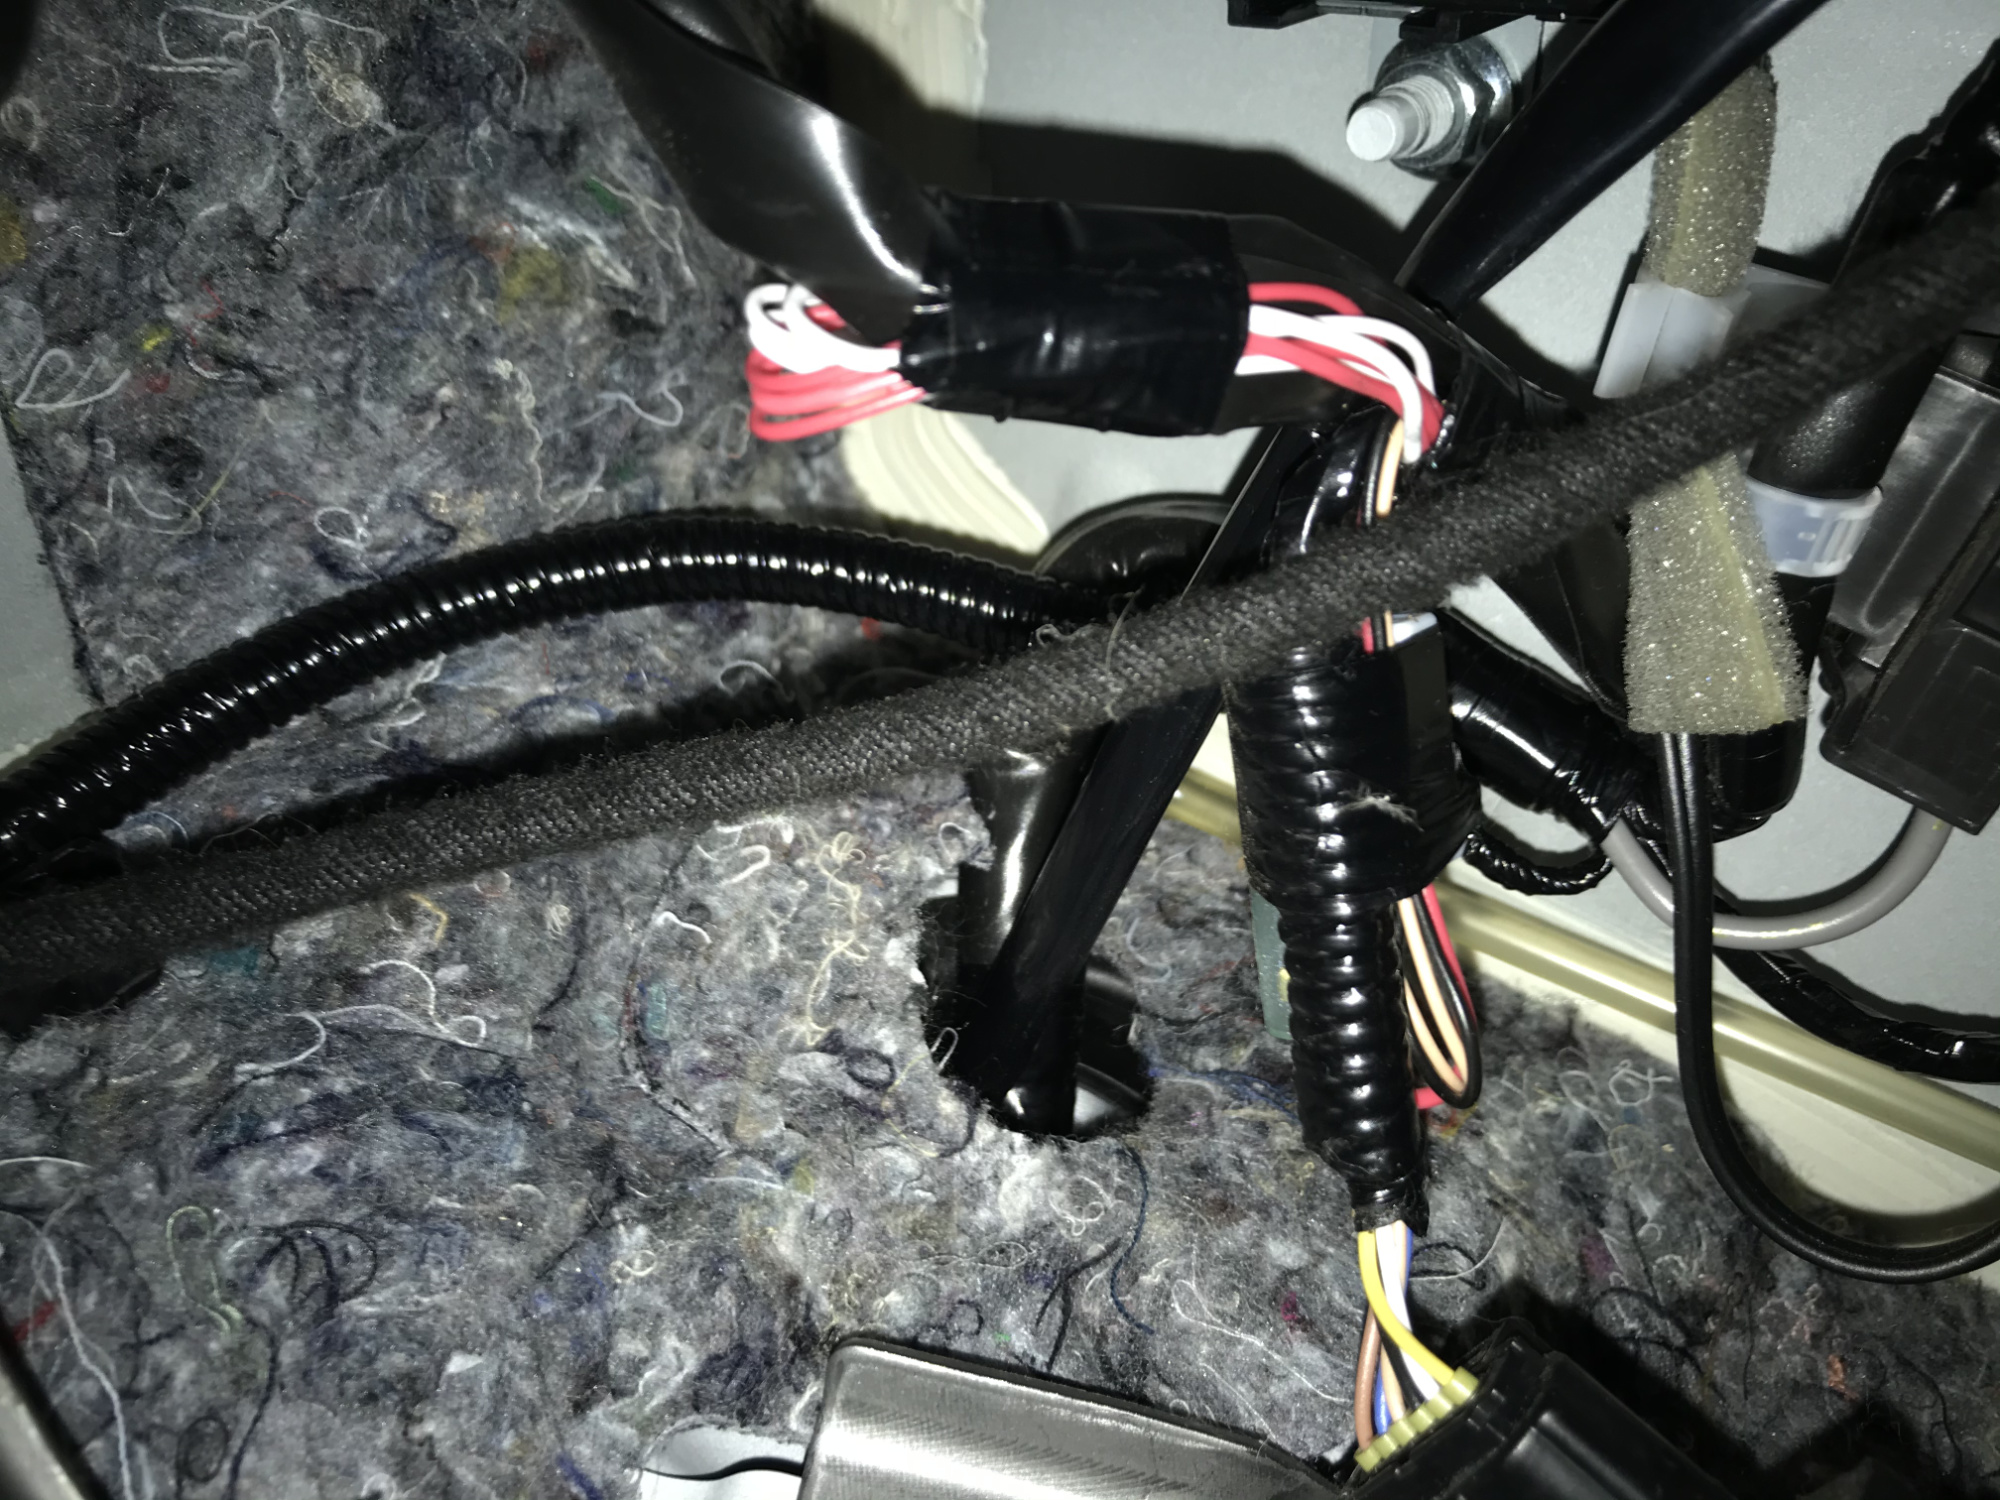
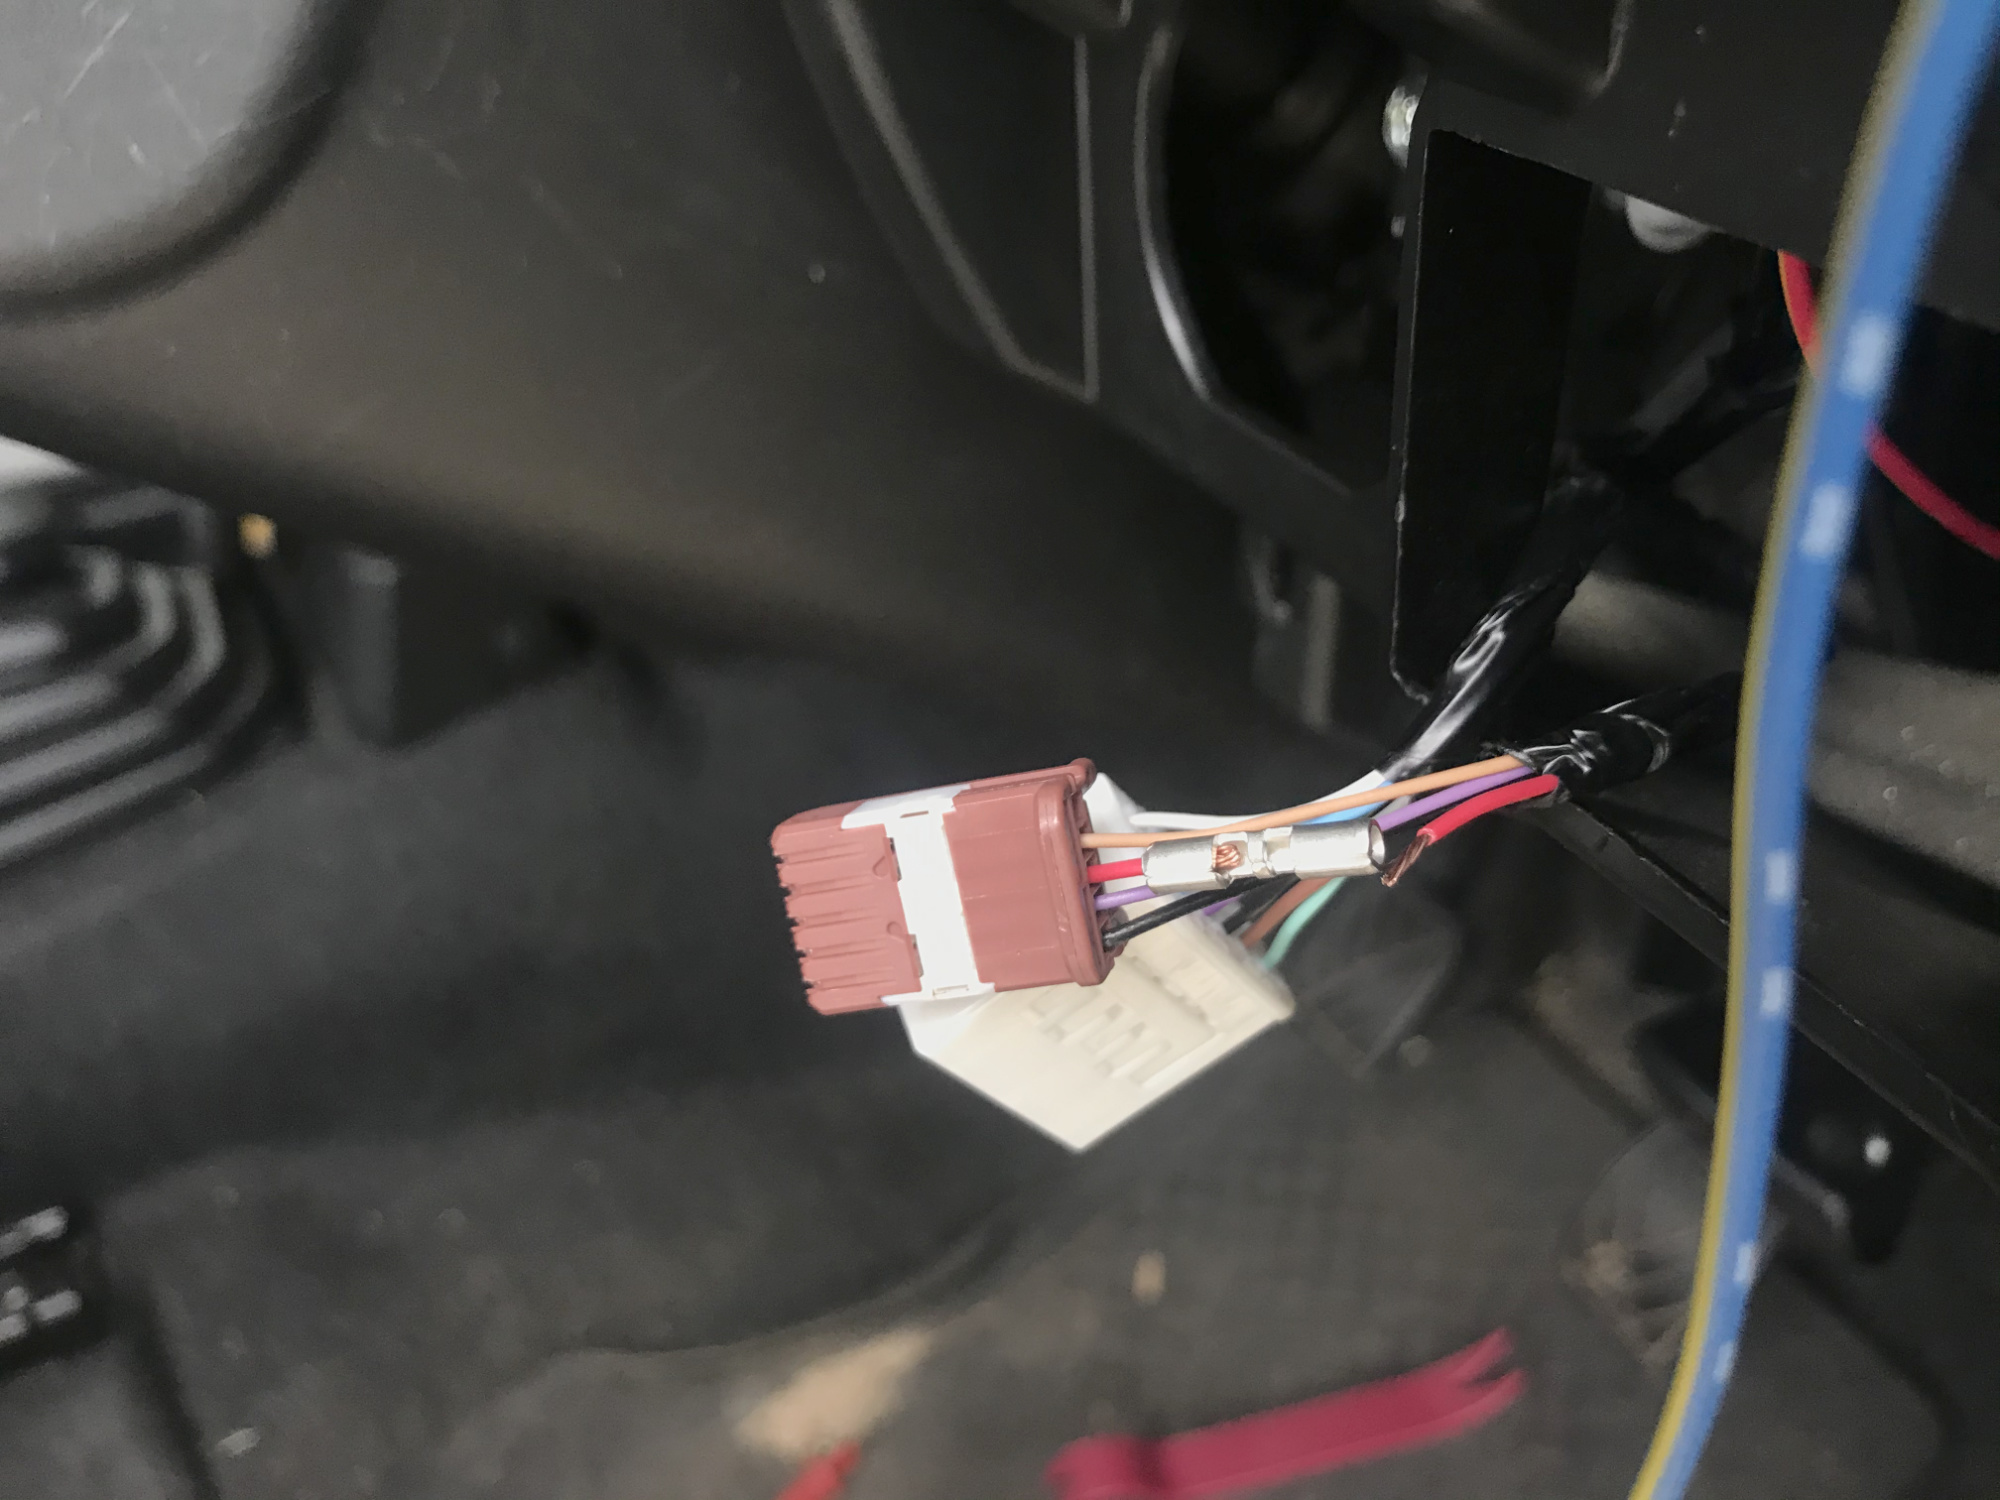
The only thing left then is to deal with the illumination signal. This is the red wire on the factory dash switches; I used a crimp terminal and basically used that to have an extra illumination wire off the factory dash switches. Not the most elegant and I’ll redo this with a piggyback harness I’ll make myself.
To give yourself room to operate, easiest to pull the panel off below the switches; this is the panel that contains the mirror controls (which you can unplug from the back of the panel if you wish).
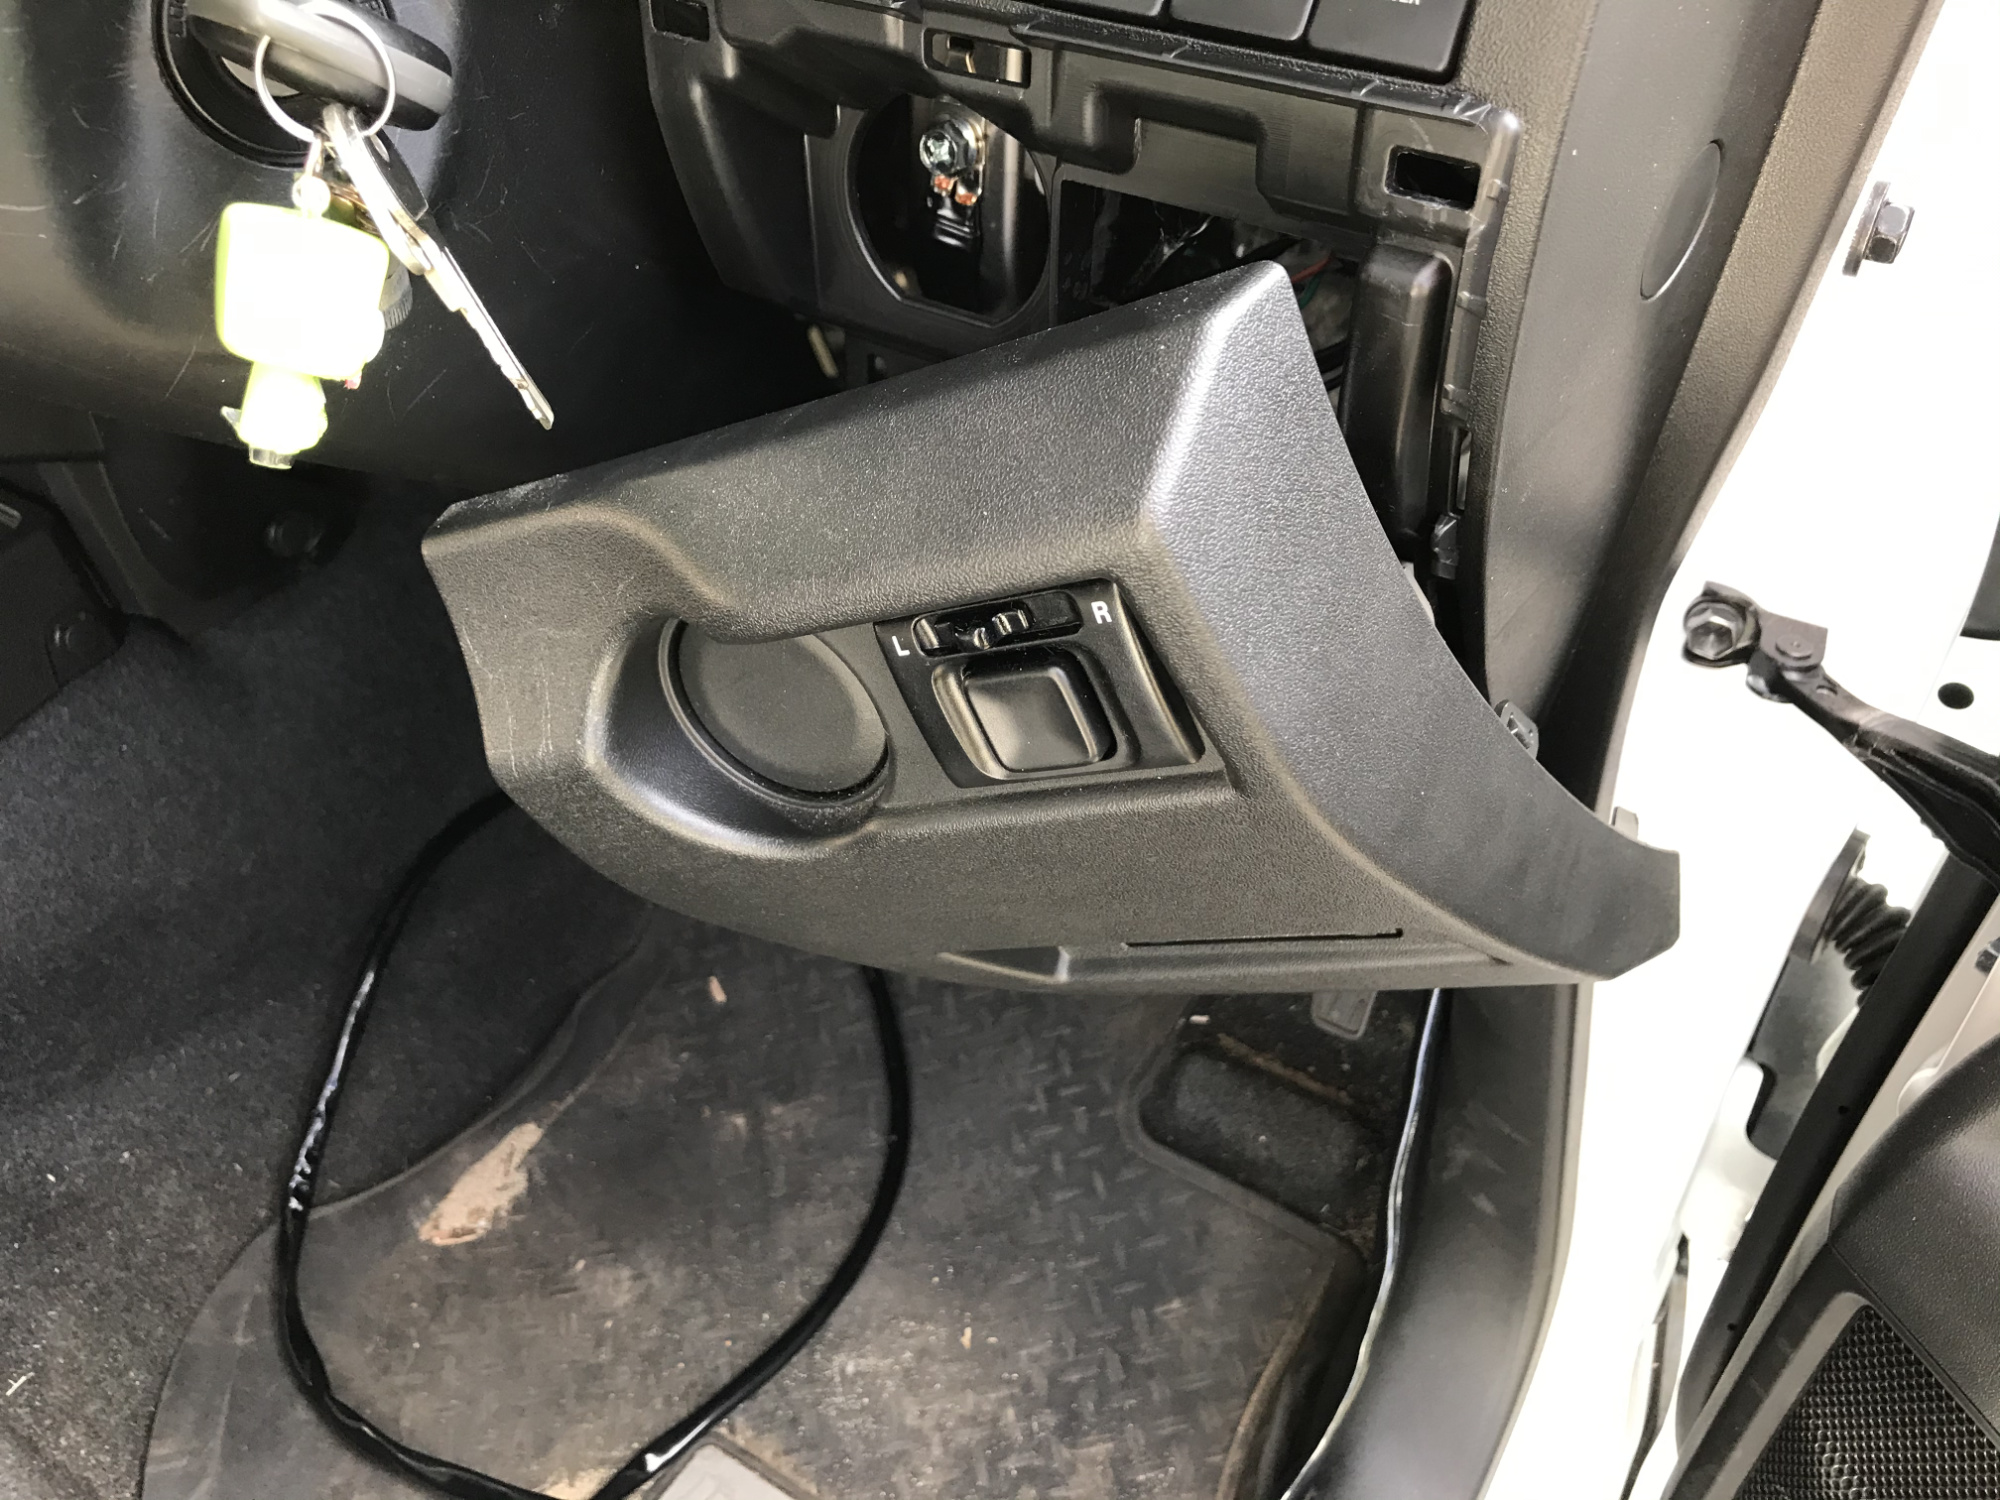
This gives you just enough room to pull down one of the connectors from the factory switches to tap into the red illumination wire for backlighting for your switches.