
Jimny tyre pressures
This comes up too often to not try to write something down.
The basics
The tyre pressure placard in the Jimny is a really good place to start with onroad pressures. 26psi front and rear, going up to 29 psi in the rear only if fully loaded. Yes, they are much lower than you might think for a 4wd: it is a small, light 4wd with narrow tyres with a tall sidewall.
If you are hitting offroad, think proportionally to what a larger 4wd might do. A 4wd channel might tell you to go down to 24psi for gravel roads but that’s only something that started at 50+, so 18psi is a good proportional change. They talk about 15 in the sand, so 10-12 psi might be more sensible.
- DO NOT run what a larger 4wd runs;
- DO NOT run what your mate who thinks they know cars says to run without thinking about it first;
- DO NOT run just what the tyre place put in it when they fitted the tyres; and most of all,
- DO NOT run the maximum PSI as listed on the sidewall of the tyre.
My recommendations
These are really based on what seems to have worked for a lot of people and applies across a range of tyres. Larger/stiffer tyres don’t necessarily need more pressure (theoretically they need less), but light truck tyres get more pressure for the same load capacity so it sort of equals out with the stock tyres.
Normal everyday road driving including highways: 26 psi. This is the best compromise of wear, tyre pressure and fuel economy.
Evenly graded gravel: 20-22 psi. Give yourself a bit more traction, but don’t sit on high speeds especially on gravel roads.
Rougher gravel roads: 18 psi. This pressure will give the suspension a helping hand, will have a much better ride, but note the above point re: speed.
Rough roads, mud or rocks: 15-18 psi. Low pressures give way better traction and it’ll look after the tyres nicely too, though sharp rocks on stock tyres might cause issues at low pressures on the sidewalls which are kinda weak. On stiffer tyres you may need lower pressures to bag them out more.
Sand: 12 psi. Do not be shy about going lower, potentially down to single digits. It all comes down to the key elements of traction, traction and also don’t forget traction. At low pressures don’t attempt to turn really sharply at speed but it’ll do surprisingly well even at 10psi.
Long (several hour), fully loaded highway runs: 30 psi. It’ll not be the best ride, but you’ll get marginally better economy. Reserve this for when economy matters or you’re bashing out a full day entirely on bitumen highway.
Detailed info sections
Some theory
With the recommendations at the top, we can dig a bit deeper into the ‘why’ and think a bit about what matters when it comes to tyre pressures.
Why vary tyre pressures?
Ultimately, tyre pressure is all about balancing a few factors and so recommendations will vary depending on the type of tyre.
- Traction: generally lower pressures give more grip.
This is related to both footprint, and also the way the tyre generates heat. - Heat management: on the road, lower pressures will generate more heat.
The more speed and the more weigh your tyres supports the hotter they’ll get. If you go too low to start with, then heat will build up which is when you risk blowouts. On the other hand, too high a pressure and the tyre will not work efficiently. - Tyre wear: incorrectly inflated tyres will wear unevenly.
If you run too high a pressure, you will wear the middle of the tyre before the edges. Conversely, a low pressure will wear the edges before the middle. Bear in mind that, especially on the front on the Jimny, you will probably find you’ll wear the edges a bit more anyway so take this into account when assessing how your tyres are wearing. - Ride quality: lower pressures give a nicer ride.
There are limits to this; a really low pressure will make the car wallow around a bit more, and cornering can be affected too. One way to think of this is you run the least amount of air you can for the most comfy ride. - Fuel economy: lower pressures give worse fuel economy as they promote higher rolling resistance
In general, people probably run Jimny tyres too high because their brains are calibrated to heavier cars often with lower profile tyres, or they’re thinking of much larger 4wds with much larger and different tyres.
Theoretical pressure change for different tyre sizes/load ratings
You can theoretically calculate tyre pressures based on static load and what’s needed to ‘support’ the tyre correctly. Doing so for a Jimny at max GVM spread over 4 axles gets you a theoretical pressure for the stock tyres of… 26 psi. Exactly what Suzuki say to use!
The reason it’s not quite the 26/29 for fully laiden is because of not taking into account weight distribution, and caravan tyres don’t quite need to think about traction and also heat buildup in quite the same way that a car turning corners does.
This gives some surprising results for people: larger tyres that people fit to Jimnys usually are also higher load rated which actually means they need LESS pressure to support the Jimny’s miniscule weight. This is most obvious if you look at the tyre pressure chart based on the ETRTO standard.
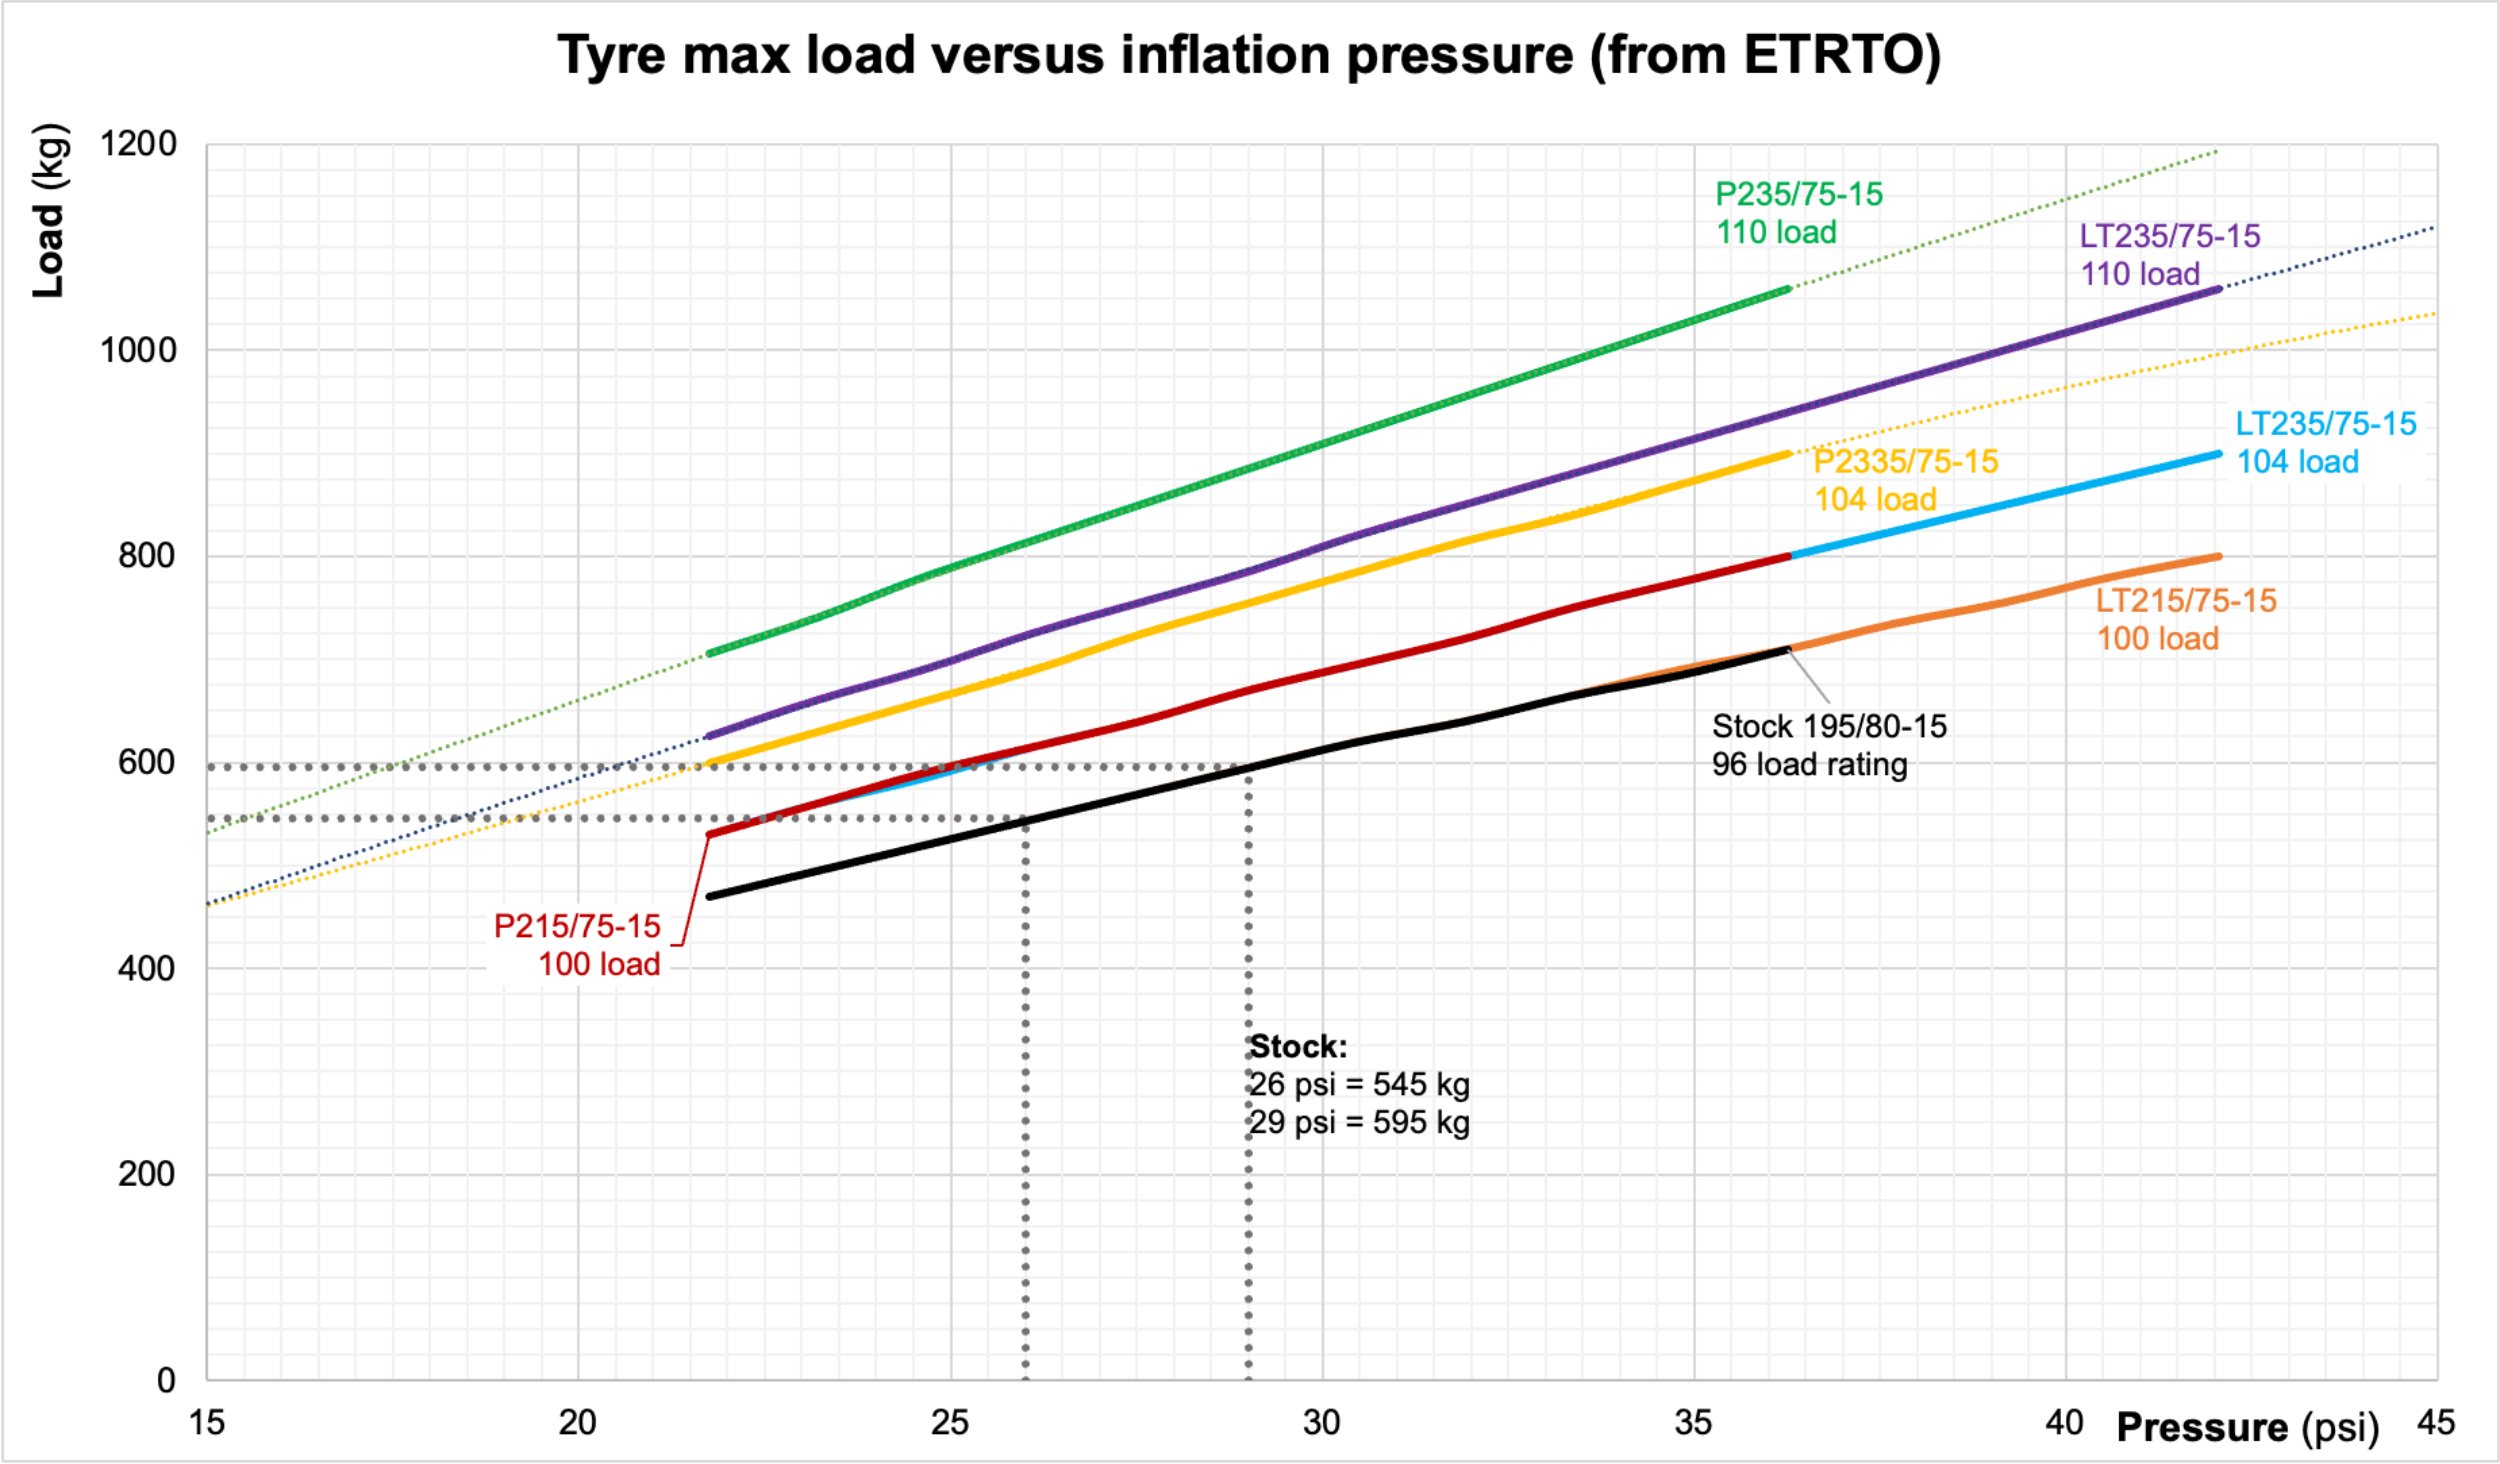
Note one interesting fact here: passenger constructed tyres get a higher load capacity for a given pressure/load rating than extra load tyres, though the higher load tyres can run higher pressures for a higher overall load rating. A few things jump out from this chart:
- A 215/75-15 of LT construction essentially has the same load capacity as a stock tyre for a given pressure, so would run the same pressure as a stock tyre; and,
- If you are using a passenger constructed 215/75-15 tyre, or an LT constructed 235/75-15 104 load rated tyre then the theoretical pressures are 22.5 to 25 psi.
Not covered by the ETRTO tables but based on projection down to lower pressures (the dashed lines):
- If you are using a passenger constructed 235/75-15, 104 load rated tyre then the pressures work out to be 19 to 21 psi; and,
- A LT constructed 235/75-15, 110 load rated tyre is 18.5 to 20.5 psi.
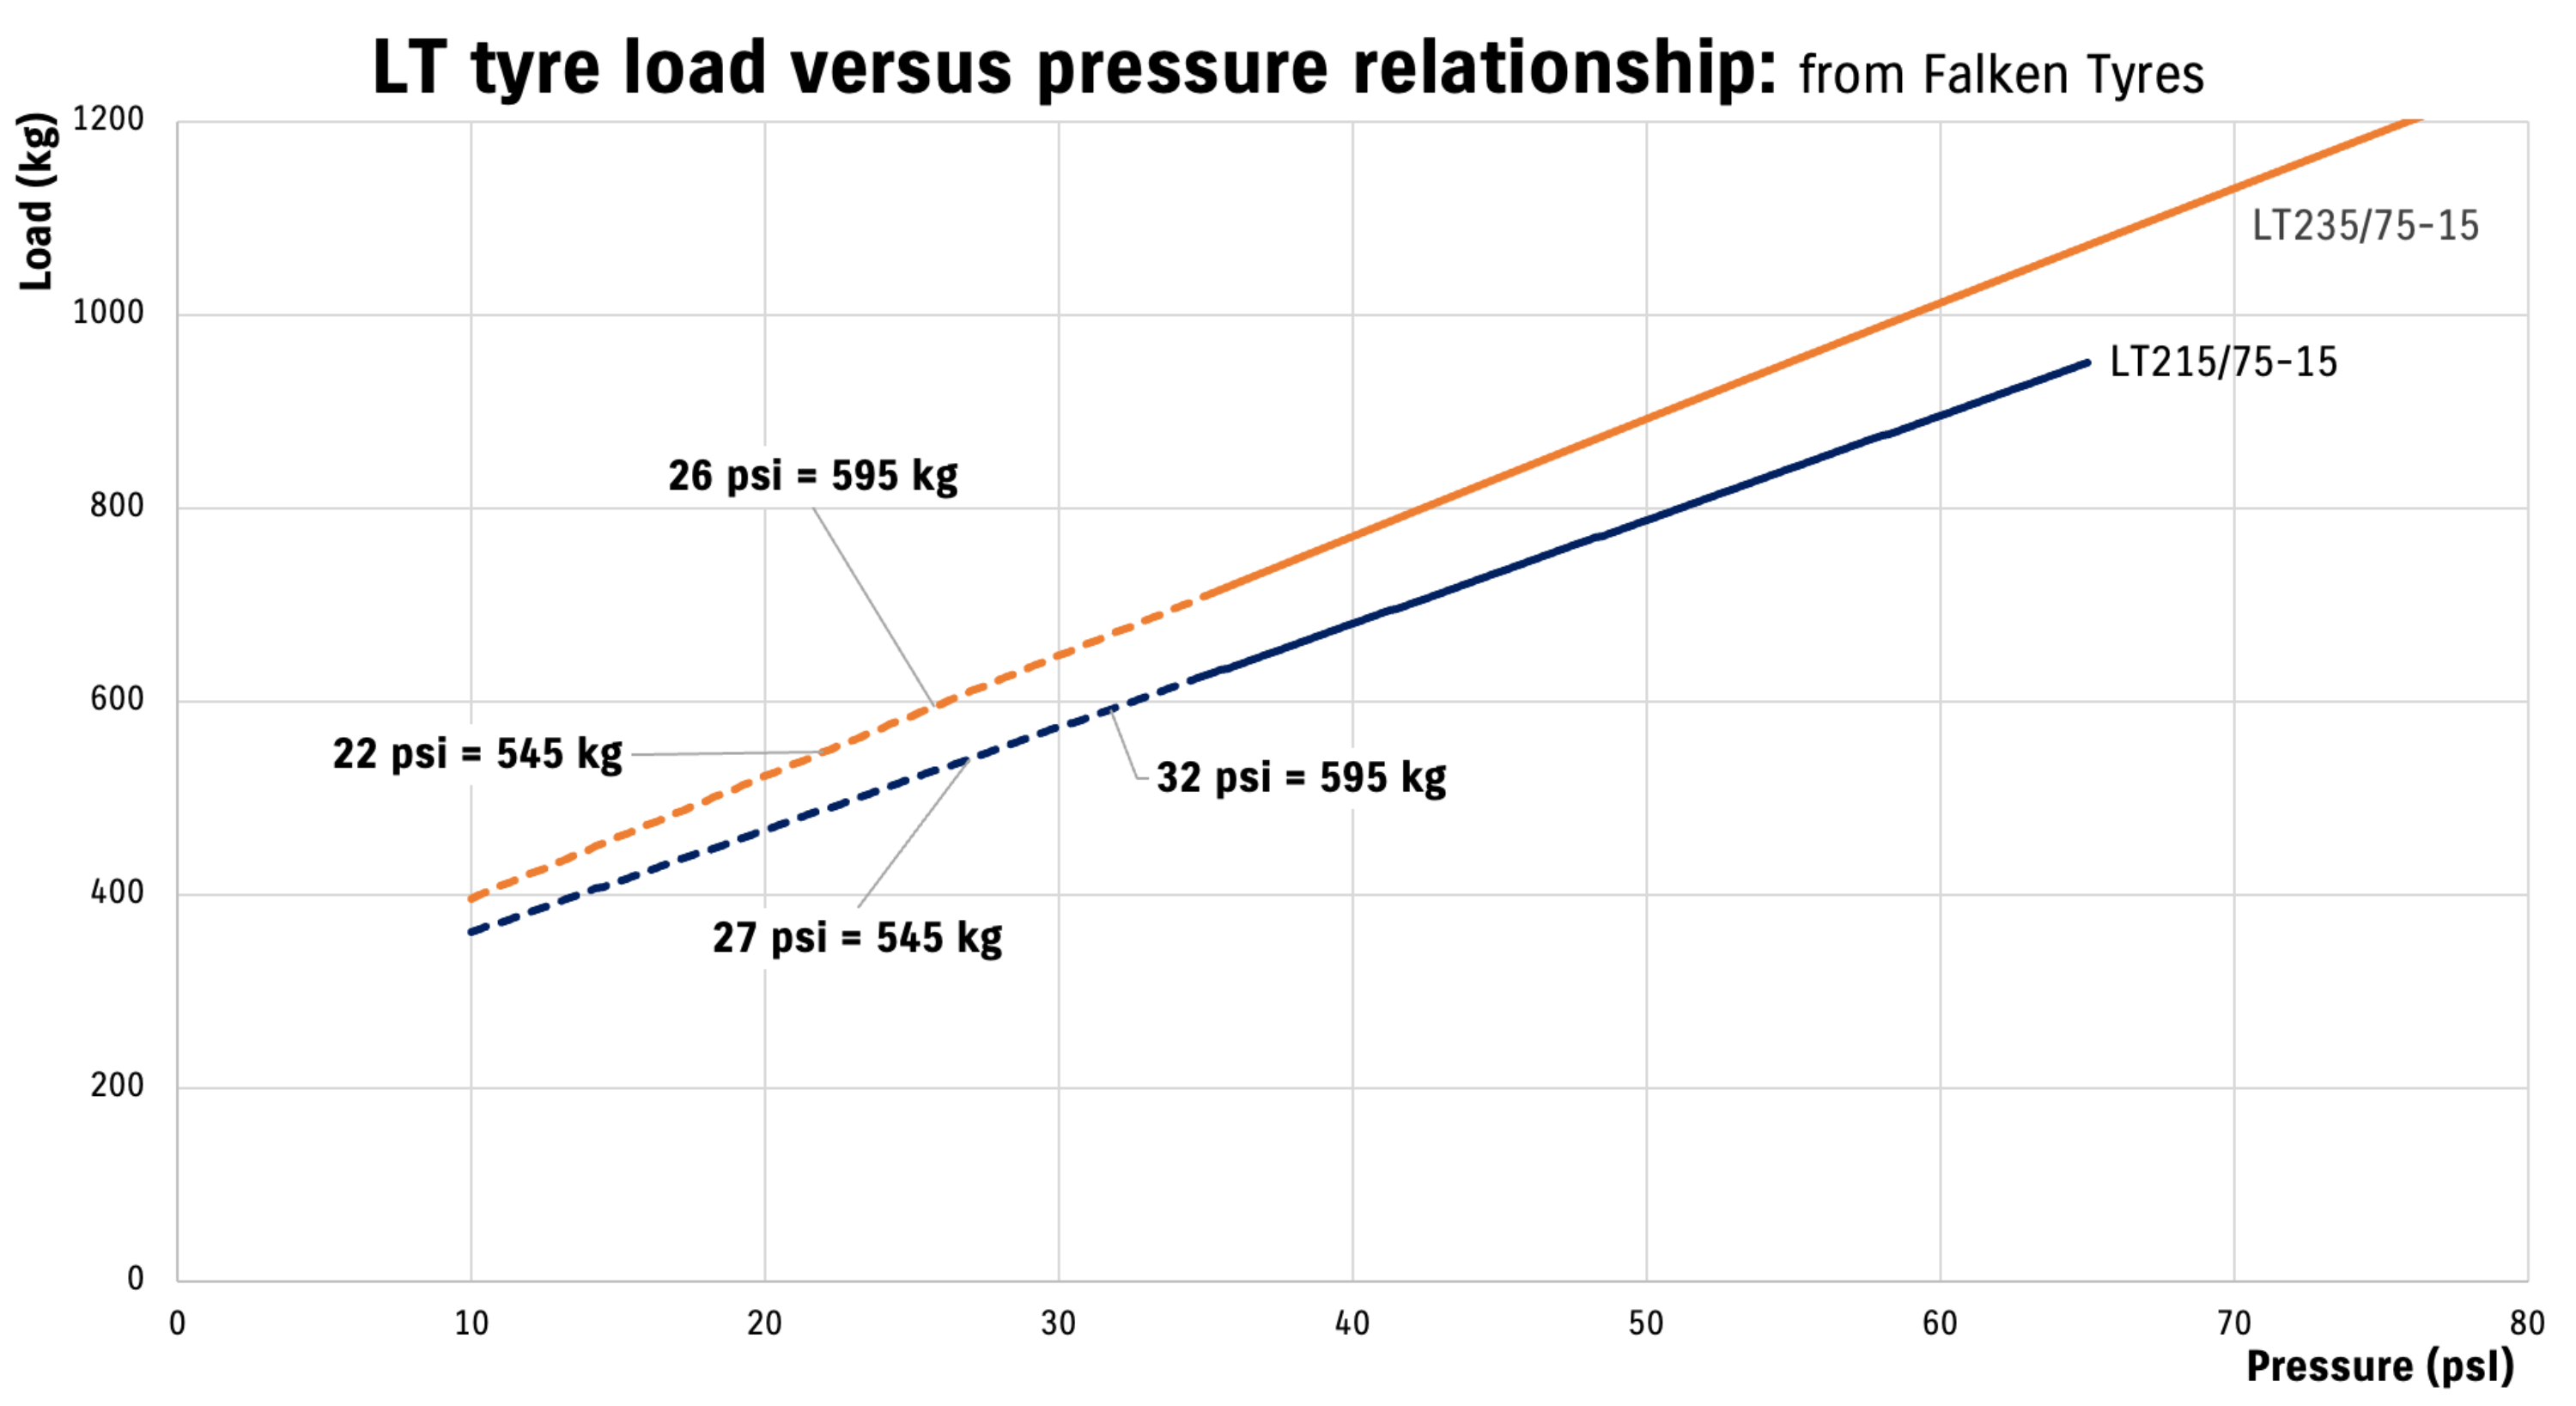
Another source for a different angle is Toyo Tires of America who publish snippets of the Tire and Rim Association load tables. Taking 545 kg / 595 kg as our reference loads for lookup, you find the following loads for P or LT marked larger tyre sizes at the standard Jimny pressures:
| Tyre size & load rating | Loads at pressures |
|---|---|
| P215/75-15 100 | 26 psi: 686 kg 29 psi: 721 kg |
| LT215/75-15 | 585 kg @ 35 psi |
| P235/75-15 105 | 26 psi: 796 kg 29 psi: 842 kg |
| LT235/75-15 104 | 695 kg @ 35 psi |
A final viewpoint comes from Falken tyres, again extrapolating backwards from their listings for 215/75-15 and 235/75-15 LT tyres you basically end up stock pressures, especially for 235/75-15 tyres.
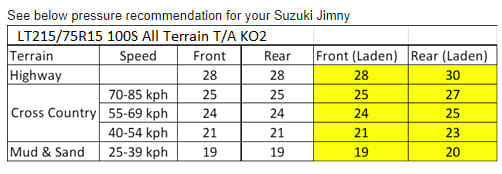
As a cross check, this also correlates with some figures given by BFGoodrich when a bigjimny user asked about what pressures to run their LT215/75-15 in KO2 form on a JB74.
So, in short: don’t believe anyone that reckons you need 35+ psi in your larger tyres just because bigger tyres mean more air needed.
Would I necessarily run tyres as low as extrapolations from these data sources indicate on the road? Probably not. The standard basically says if you fall off the lower end of the load capacity curves then you just use the lowest pressure it goes to – about 22 psi. However, for LT tyres the minimum pressures of 35+ are just plainly too high for the limited load a Jimny provides.
The key point here is that little pressure is needed per se to support the weight. Obviously this changes if you are carrying more stuff with your stiffer tyres and the particulars of the tyres you’re running, especially if you have a car at a higher GVM than the factory GVM (which is what the factory pressures are worked out for). The key point is it isn’t as simple as suddenly running big tyres means you need much higher pressures, and indeed quite often it’s probably opposite to that.
At some point I’ll go measure the footprint of tyres at multiple pressures to illustrate how overly high pressures support the car only on the middle of the tread and how the footprint bags out at low pressures. If you really want to understand how pressure changes footprints, but basically the theory goes that wider tyres spread out a bit but thinner/taller tyres get longer as you increase their footprint with lower pressures. Wider tyres therefore might actually hold onto the bead a bit better at lower pressures, but you might get a better footprint increase with taller tyres (we’ll test that when I have a chance to measure footprints).
Practical stuff: how to vary pressures
This is going to seem obvious to a lot of people but especially as Jimnys attract a bunch of new people to 4wding, it’s probably worthwhile going over some basics.
First off, by convention you read the tyre pressures when they are cold. This means cold, not ‘oh vaguely a bit cooler than when driving on the highway for 30+ mins’.
This obviously is something to bear in mind when you adjust pressures after a long drive. Let’s say you drive on the highway at 110 km/h for an hour and the tyres are nice and warm. Bleeding them down to beach pressures of 14 psi might mean you actually have less pressure in there than you think when the air inside cools down a bit. Experience is really all you can go off here as to exactly ‘how much’ you bleed off, but it can be worthwhile bleeding off a fair amount and then checking them a little of the way into your chosen drive, or, have a coffee and wait a bit for everything to cool down.
Gauges
Reading the pressures is as simple as using a tyre pressure gauge and this is even a fine way to deflate your tyres though it might take a bit more time.
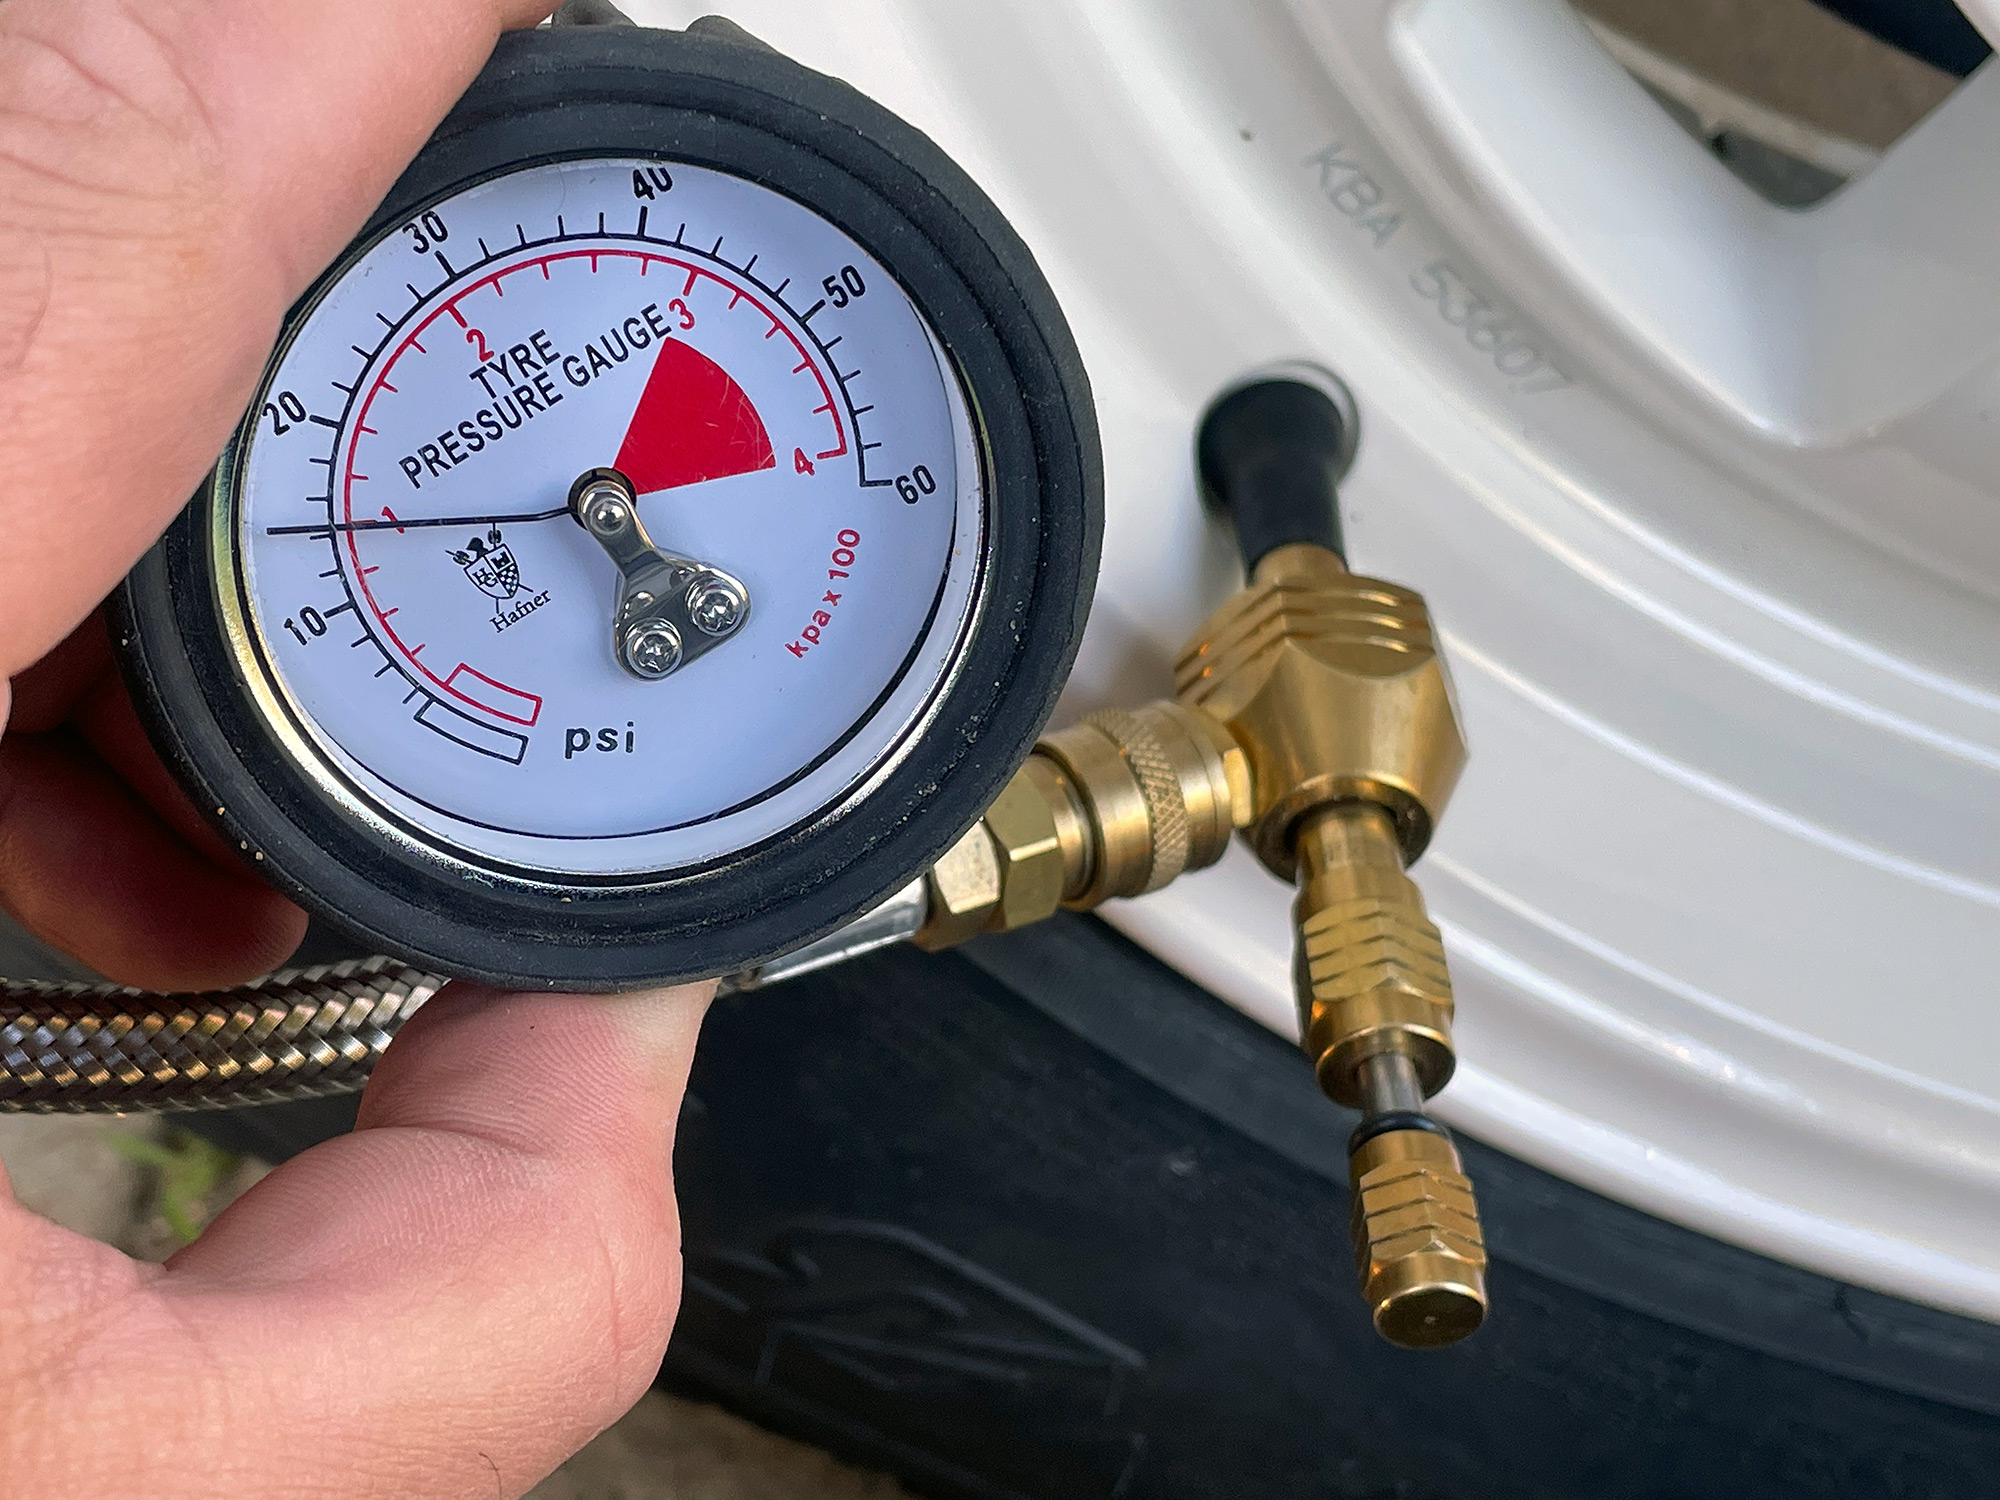
It’s worth having a good one but for the most part what matters more is consistency than absolute pressure values. Although there is some variation between pressure gauges I have, the difference at these pressures between my cheapest $2 gauge and my most expensive fluid-filled fancy-pants one is < 1 psi so do not feel compelled to buy an expensive one.
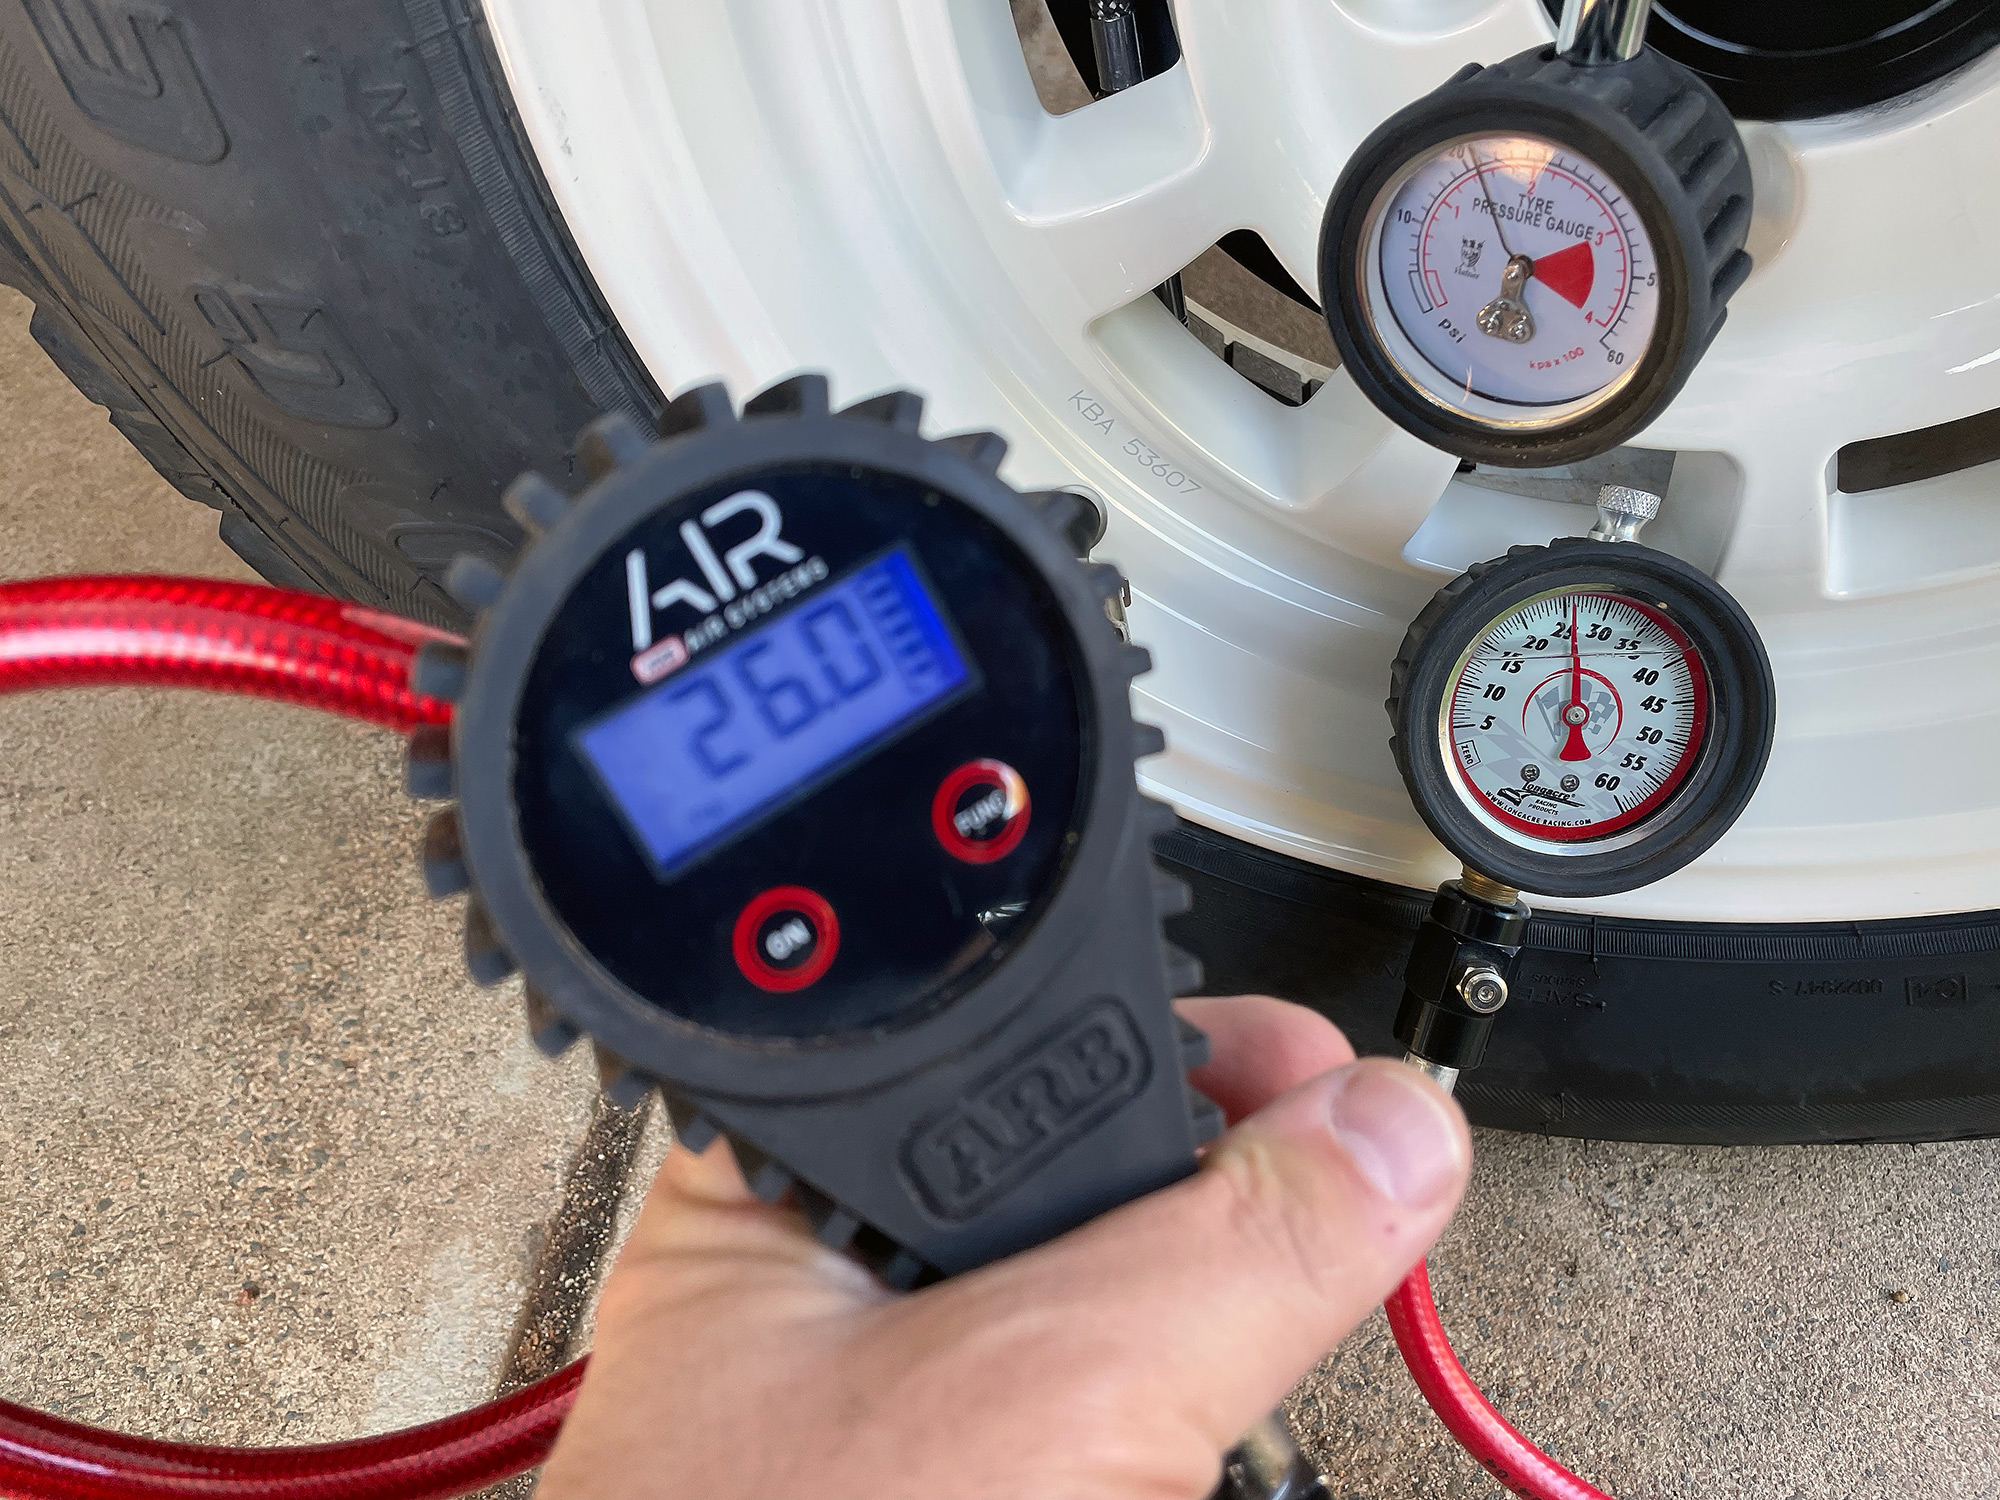
You do, however, want a pressure gauge that lets you keep the pressure it read. It makes life a lot easier. Something with a hose rather than directly going onto the valve is also nice for the ergonomics. I bought the ARB inflator kit to match my compressor and it comes with quite a nice digital gauge, but you can do ok with even quite cheap gauges. It is sensible to check any new gauge against any that you trust to make sure you’re getting accurate readings, and also check how repeatable they are at their measurements too.
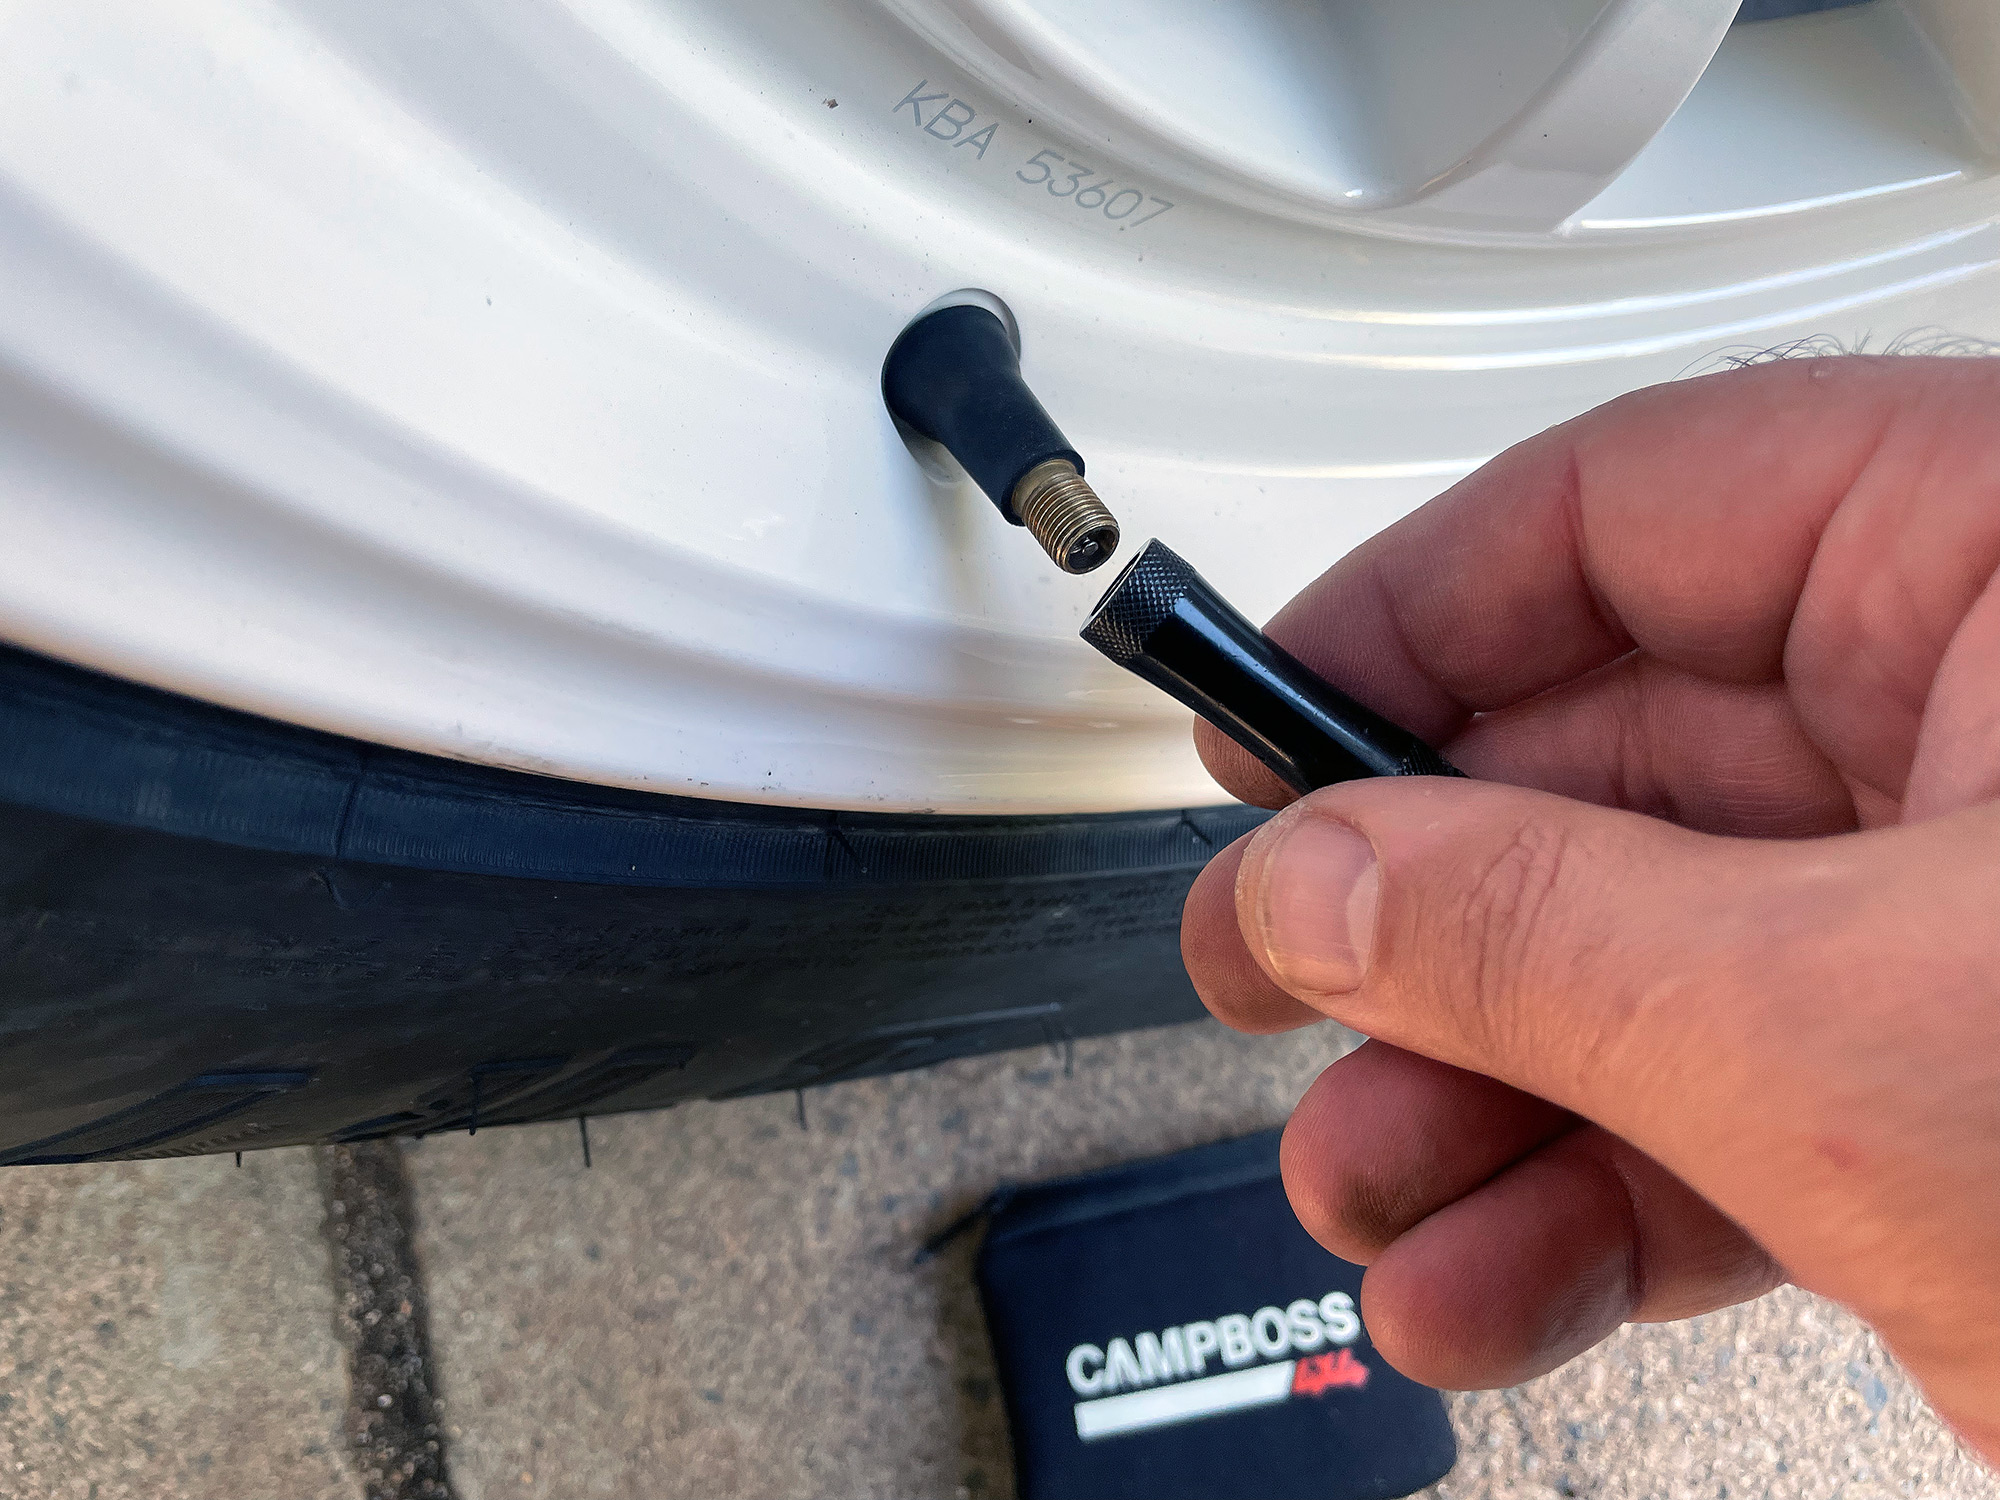
Tyre deflators
Obviously the other aspect to varying pressures is around not just checking pressures but also deflating to a given pressure. There’s a key point I need everyone to understand before reading the following:
DO NOT FEEL OBLIGATED TO BUY EXPENSIVE DEFLATORS TO GET 4WDING.
The simplest deflating method is something to poke the valve core down and release air, obviously.
If you time how long it takes to get to the chosen pressure you’re after, you can then just use a stopwatch to get yourself close on the other wheels. Jimny tyres are small and do not take a long time to deflate so this is not a huge time sink.
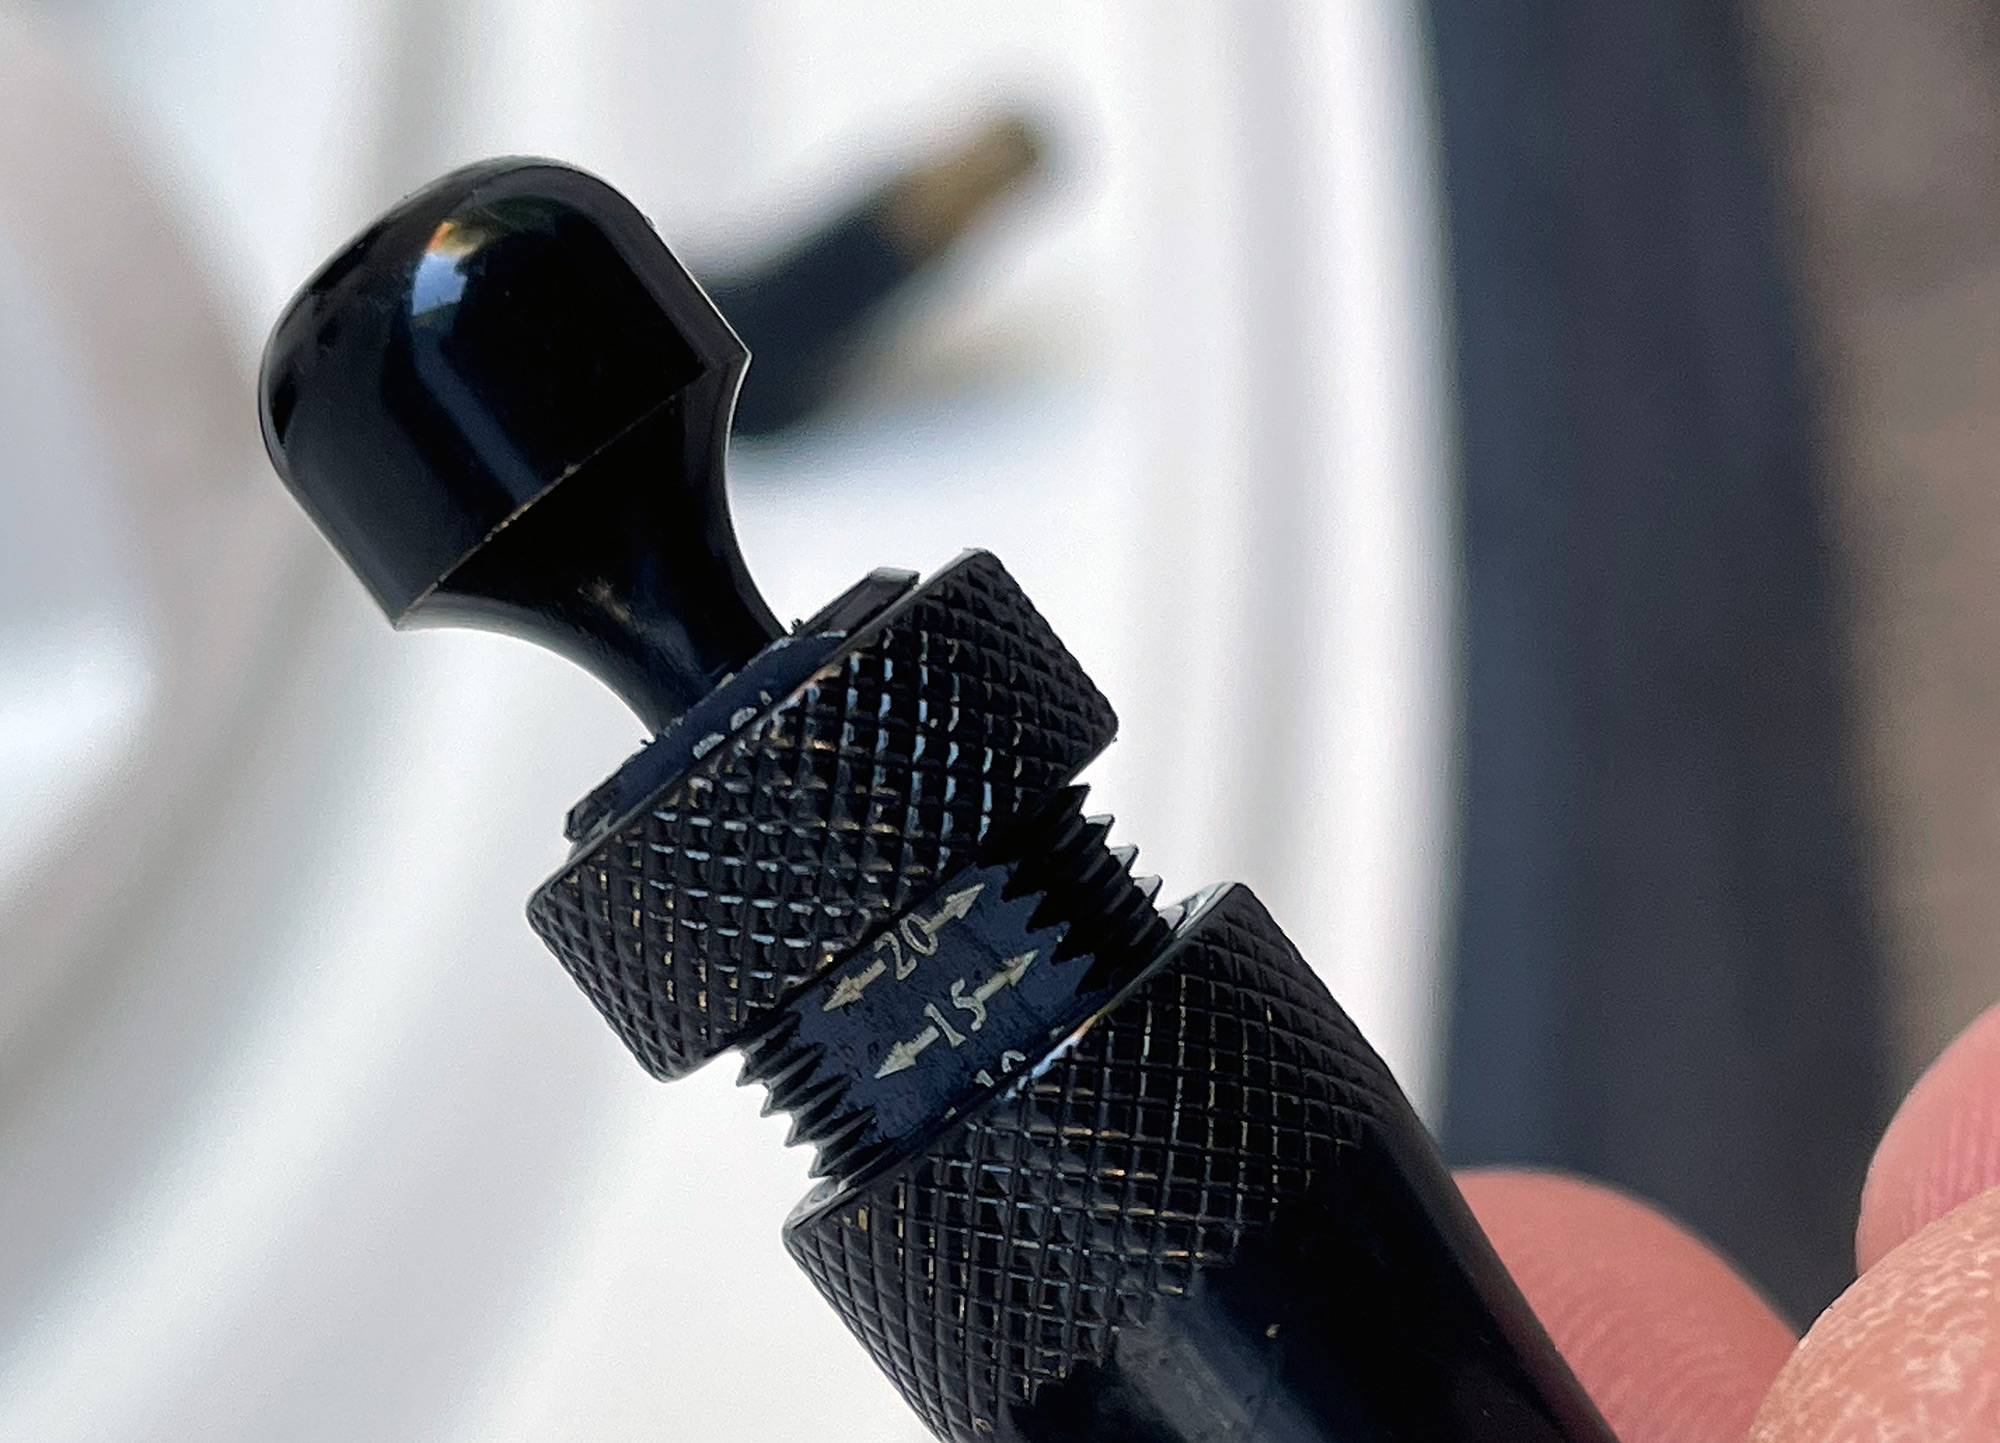
Fancier, faster deflators that let you remove the valve core from the valve are now really cheap though and are worth considering.
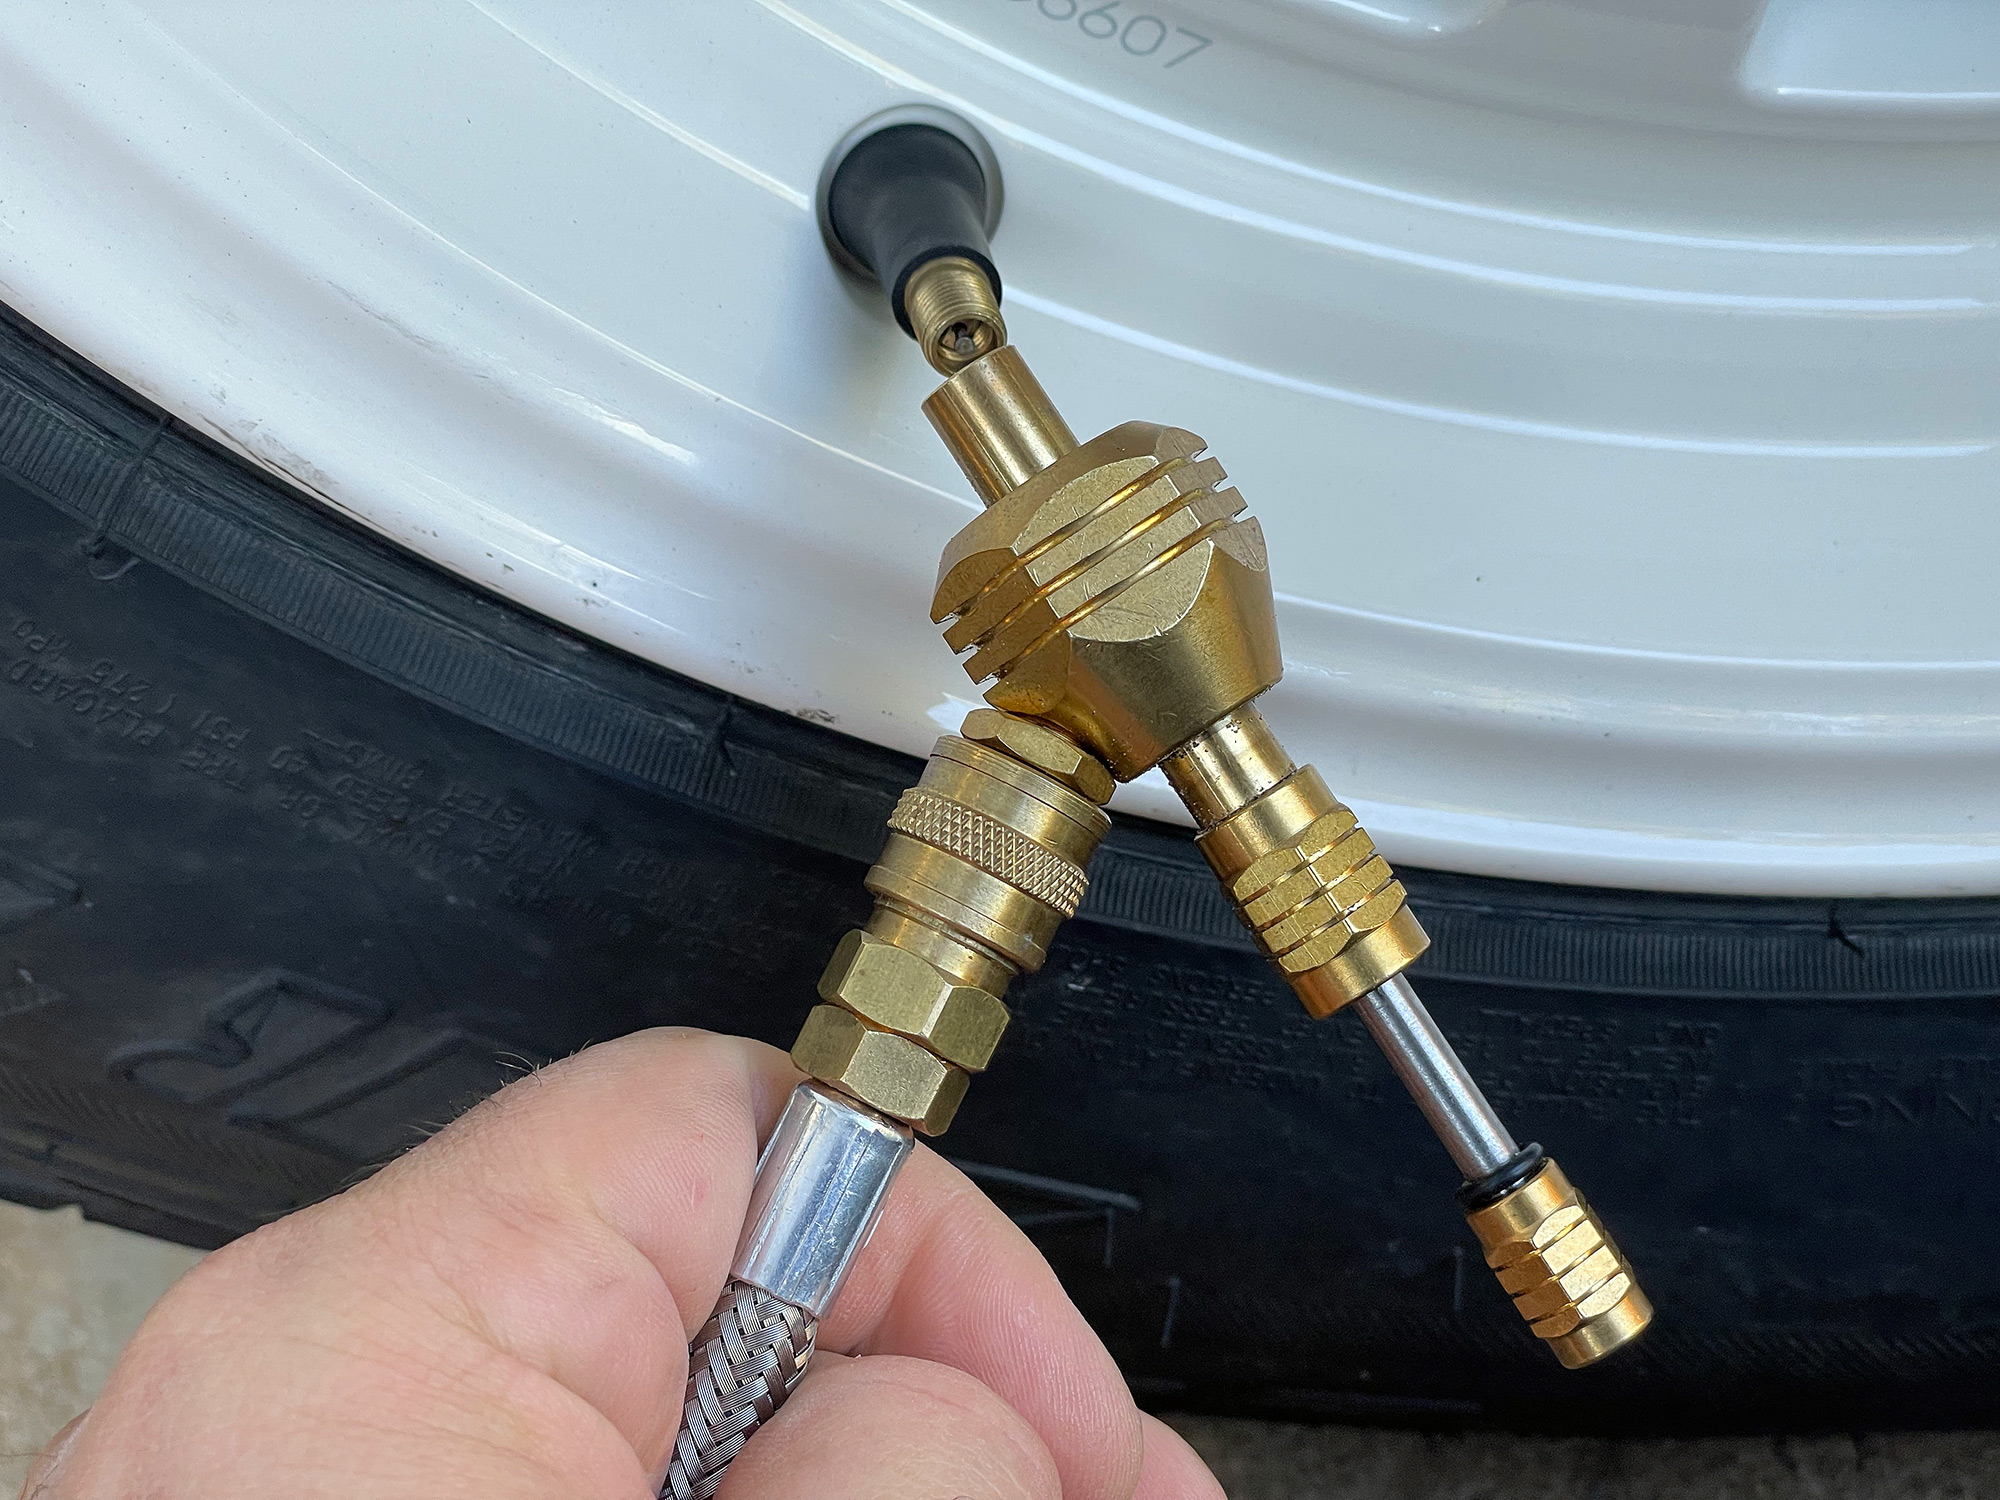
You want to make sure the valve stem is a bit clean inside and out before using them and have some spare valve cores handy just in case you lose one or ruin one. These style of deflators are often great to use as they let out air a lot faster, and you can often monitor the pressure as you go. You do need a bit of practise to nicely thread the valve core back in but they work ok.
It’s hard in words to describe how to use them, but the inner screw part takes a bit of feel to know when it’s actually grabbed the valve core to start unscrewing it. You kinda just have to do it and get used to how it feels to really ‘get’ it. They are super fast at letting tyre pressure out though because of how much more room there is to get air out than with the valve core in.
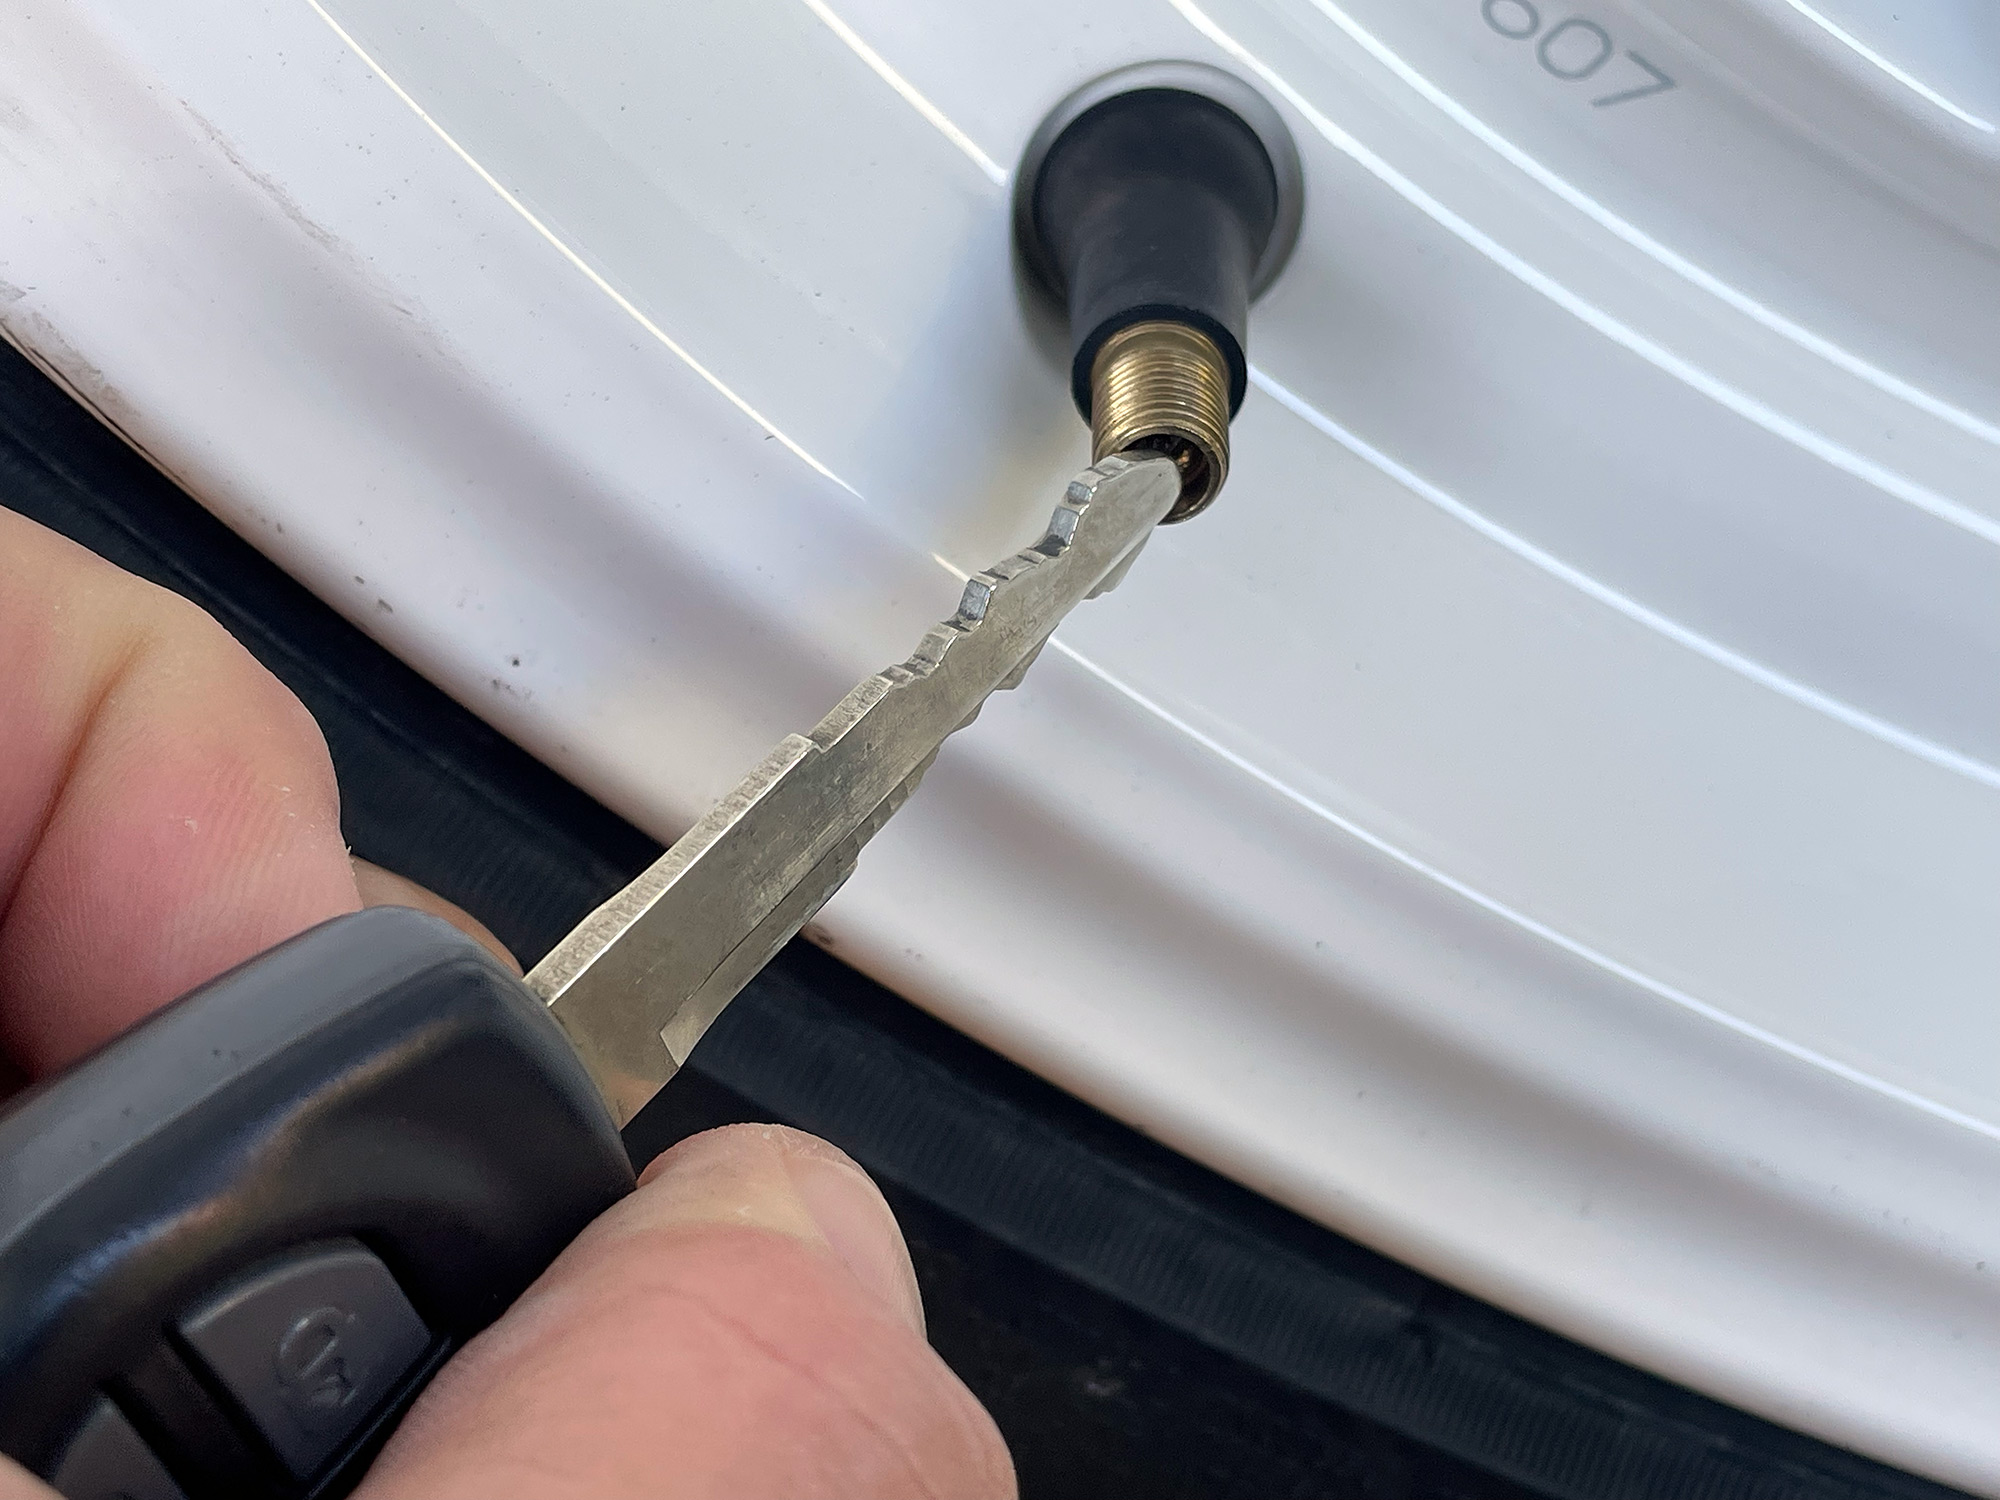
In addition if I’m using a deflator that pulls the valve core out, I also like to have an independent valve core tool. Ideally this is one that has the little threads to help re-thread a valve stem just in case you get things wrong.
The next option are automatic deflators.
These used to be ones that you set the pressure with a bit of calibration and then left them (e.g. Staun deflators); some newer ones let you adjust the pressure on the fly. My experience with these is they are good if you know exactly what you want to let it down to, and the Staun ones are super repeatable. I bought some of the adjustable ones and they worked ok, a few times, but the markings are pretty hit and miss to get to exactly the right pressure you want.
The nicest thing about these style of auto/semi auto ones is you can screw one on a valve, go to the next tyre and work your way around and just let them do their thing. If they are repeatable then great, you’re on your way a bit quicker than manually fiddling. At that point you end up spending so much time unscrewing them, checking pressures etc you lose the efficiency gain of doing multiples at once.
The ultimate in luxury is a multi-headed deflator which connects using multiple hoses to your tyre valves. These can be really expensive, though can be a time saver especially in deflation. They also can even up tyres side to side or front to back (or both) depending on how many tyres they do at once. 2 or 4 tyre options are common but you might spend $300+ on them. If the budget is tight, this money might be better spent elsewhere.
… that said! you can also DIY this for < $100 like I’ve done, and I’m really happy with one I made up for myself using a few air fittings.
Inflating
I don’t really feel I want to get into a big discussion about compressors etc, but, if you are going to let tyres down then you need a way to get them back up again. You can trundle along at suitably low speeds on the road to a service station if you have no way to pump your tyres up; you can certainly go 4wding with just having a plan for where you’ll put air in your tyres.
As an experiment for the next scale up in the budget option, I tested how long it would take me to get the Jimny’s tyres back up to road pressures from the 14psi I run on the beach using a upright floor pump used for bicycle tyres. This isn’t a fancy double-acting one or anything, just the cheapest one I could grab.

Surprisingly enough, it only took me 1.5 minutes to inflate one tyre from 14 to 26 psi. While not fun, it was certainly doable. It would add up and get annoying which is a barrier to wanting to let your tyres down often, but, you can do it with nothing more than a manually operated pump.
A portable compressor is a much better option if you go 4wding regularly, though, and I would recommend them.
The faster/larger the better however consider where you’re going to pack it into the car. Even better is an onboard mounted compressor, however, don’t let budget stand in the way of this side of things. The cheapest compressor you can get will absolutely inflate Jimny tyres happily, it’ll just take a bit longer and have less ‘cred’ at the end of the trail.