
GPS and navigation stuff
Navigation and good mapping is essential for a good time on and off road. Here’s some of the things I use. This is a bit less Jimny specific; I have some Jimny specific tips but a lot of what I say is universal and hopefully will help some people out.
Sections
My navigation tools
Overlanding: offline mapping via CarPlay/Android Auto
If all you’re doing is some basic touring, you’d be surprised how much detail is saved in Google maps. You will want to have saved offline mapping in your device. I’ve got a bit on the how you do enable this further down this page. I have offline maps saved for basically anywhere I’m likely to go.
I find it’s also easier to have the phone actually in a holder for this though.
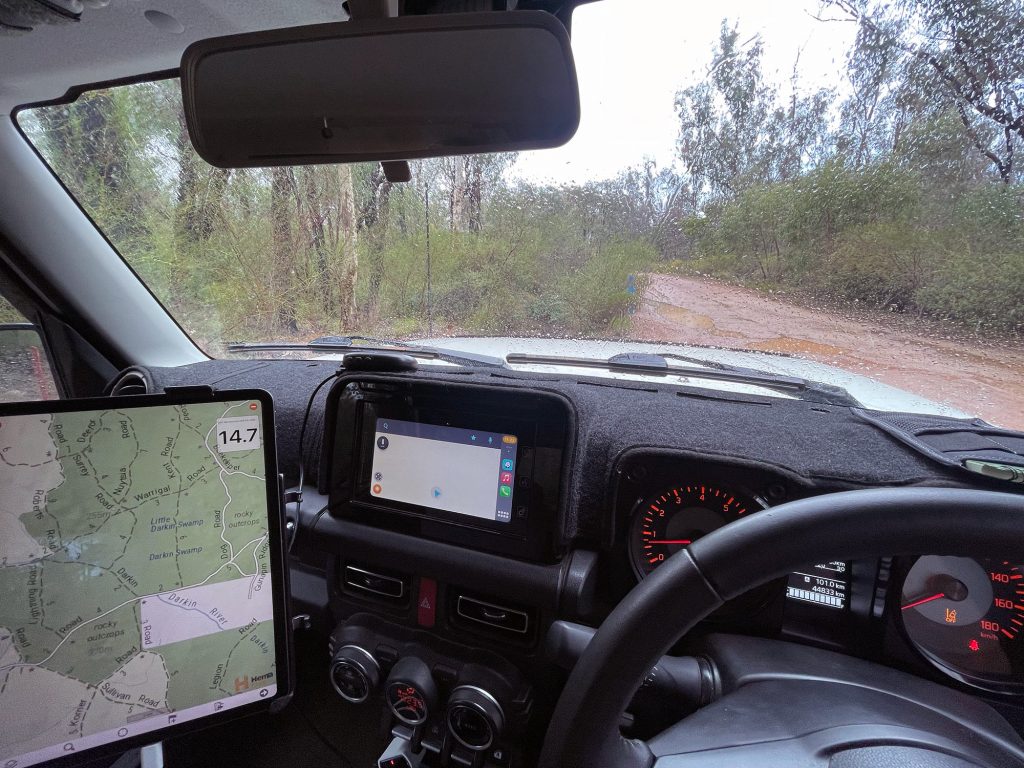
Driving around daily I don’t do this as mostly I have Waze up and some music playing, but, the additional turn-by-turn heads up display on the phone is a good thing; you can also have a GPS speedo application up as Google Maps doesn’t seem to display GPS speed (annoyingly). The other benefit it’s a good cross-check against the mapping; once you go remote the mapping is never perfect, not least because roads change especially outback Australian roads. It’s also nice to have an easy to find overall distance to go measure, which is more challenging in more specialist mapping packages that don’t necessarily understand routing in the same way mapping applications used for navigation do.
In addition, most (all?) specialist offline mapping packages for topographic mapping usually don’t work with CarPlay or Android Auto, so you’re stuck using the device’s screen only. A good option here is to have up Google Maps or similar via carplay on the headunit as an additional (and different) route screen.
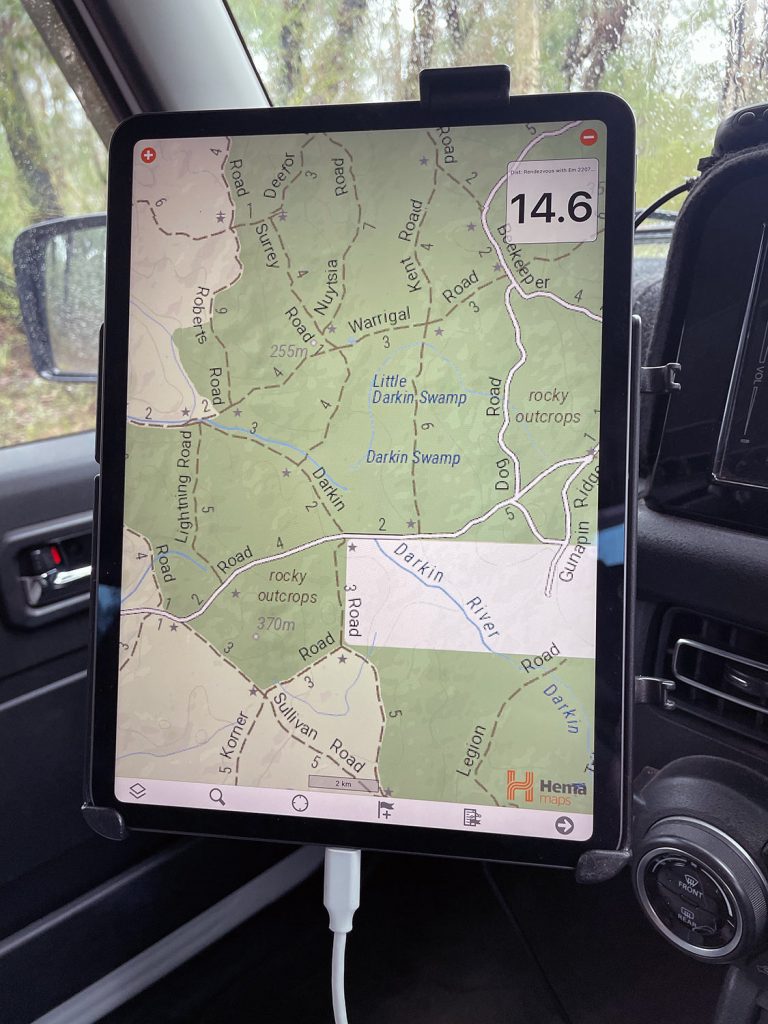
Mainstay of navigation: HEMA maps via iPad and phone
The biggest benefit here is the array of topographic maps, especially suited to long touring but has some surprising detail on fun tracks and the like.
For my larger navigation tasks I use an iPad. While any would work, I happen to use a several year old 11″ iPad Pro which is sufficient for my needs. The best part is I have it in a nice dedicated solid RAM Mount holder so it’s rock solid and easily attached and detached.
A thing to know about iPads and using them for mapping: non-celluar iPads do not include internal GPS and so you also need an external GPS receiver. For an iPad there are only a few supported GPS’; because I use this setup a lot I stumped up for a Bad-Elf GPS Pro. This is now discontinued so you might need to do some digging as to the best current iOS device GPS.
For mapping I like the Hema 4WD application, which is a one-off cost of $99. This is compared to most products (including a lot of the other Hema applications, but also accessing good quality maps in Gaia GPS) which are monthly or yearly costs.
Note that buying the application once means you can use it on all your devices. If you have family sharing then your family members can also use it, too… at least under the Apple family sharing system. No idea about the Google equivalent. A lot of the subscription services are per person so it can add up if you and your partner both like using 4wd maps.
The mapping quality for Australia is excellent using the Hema mapping. Additionally they include the 3rd generation 1:250k topographic maps of Australia which can be a better choice in certain areas of the country. The Hema mapping also includes their specific mapping e.g. the Desert Tracks product which is useful for additional info in certain areas.
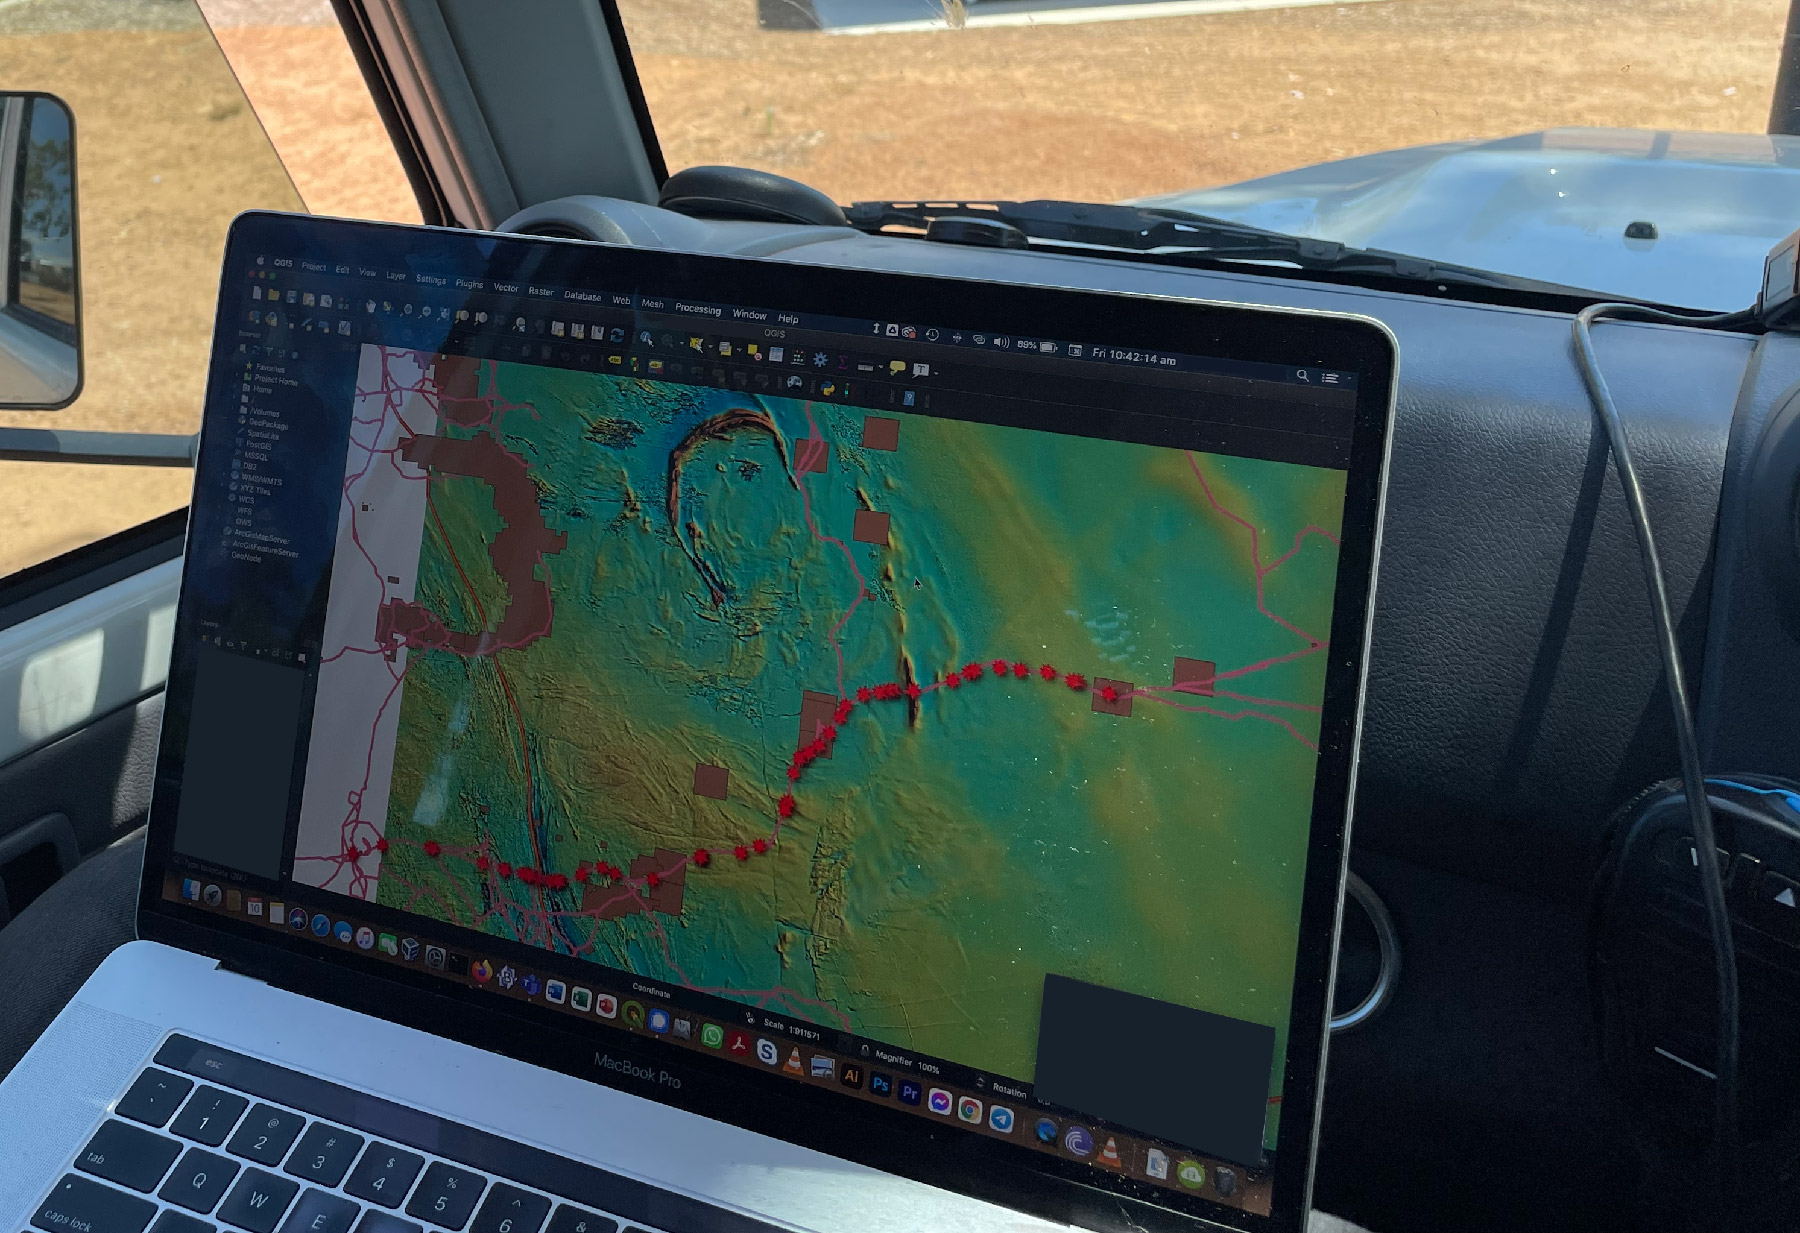
Another benefit to the Hema mapping system is you can also add waypoints and the like. To make tracks I use a combination of Google Earth and QGIS on my computer. I cover how to do this below: the easiest way to keep things organised is paying the small yearly fee for the Memory-Map.com website, but it can also be done transferring files to the iPad and then adding them to the Hema application. Using the Memory Map website makes it easy to keep synchronised waypoints between my phone and my tablet. For short trips I generally just use my phone, but for longer trips I prefer the screen on the iPad.
One challenge of using an ipad for navigation is that you need to account for having a GPS in the ipad itself – not all do. I actually use an external bluetooth GPS (a Bad Elf GPS Pro) which I’m really happy with, but it is an added cost.
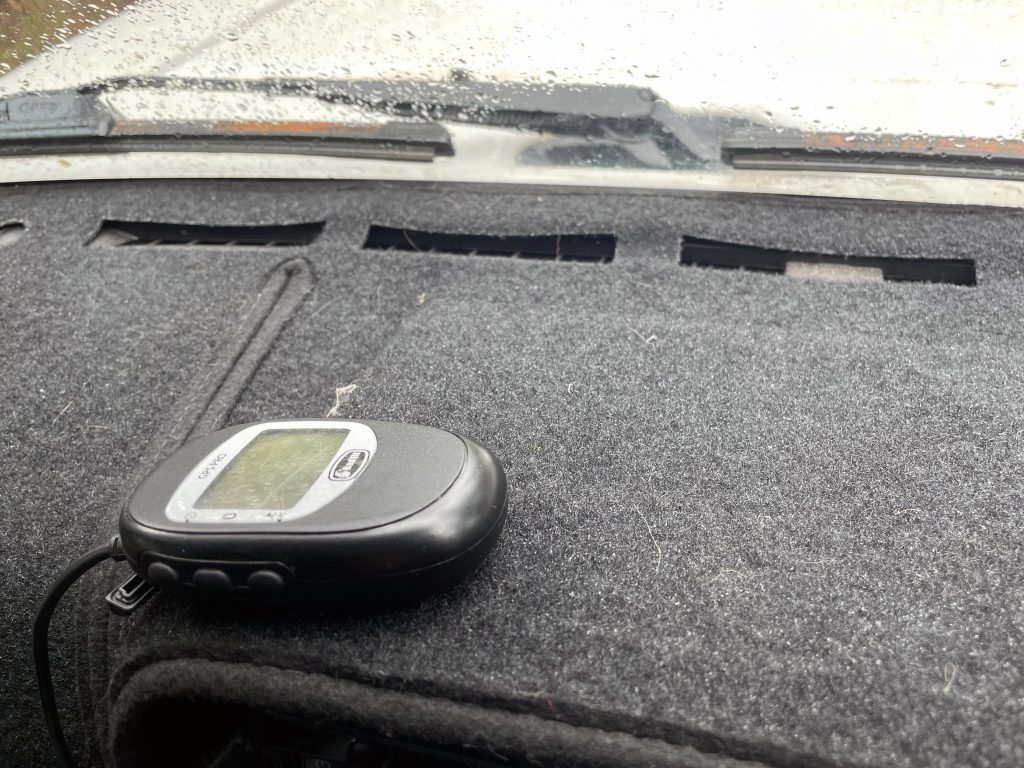
I chucked some velcro at the back of the GPS and got a 90-degree USB cable to suit the unit and it just sticks nicely up on the factory dash mat.
You’ll need a reliable way to power your devices if you go down the iPad/bluetooth GPS route. For this I have a BatPower CPD2 adapter which plugs into any cigarette lighter socket. This gives me a USB-C port that will work even 90W laptops, and two USB-A ports suitable for high power devices. The USB-C port is perfect to power my ipad directly via a USB-C cable, and the other USB port can be used to power the GPS.
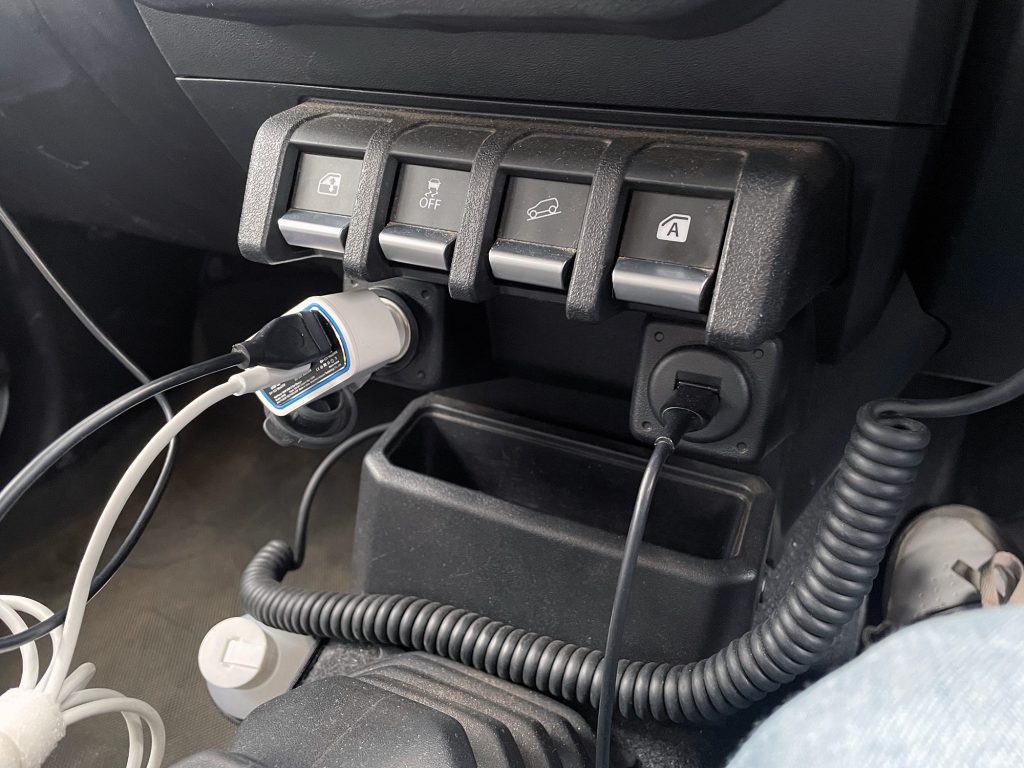
I have previously used this adapter to even power my laptop on a work trip when using it for GIS work, so it’s a really versatile and highly powerful adapter!
Backup: handheld Garmin GPS with Hema mapping
If you’re doing something serious don’t just rely on a single navigation method. The primary backup method I use is a Garmin handheld GPS, a GPSmap 62s. A huge advantage to this is you can add map overlays from a microSD card. For consistency with other mapping I added the Hema 72k topo mapping product, which can be bought direct from Garmin or via 3rd party resellers.
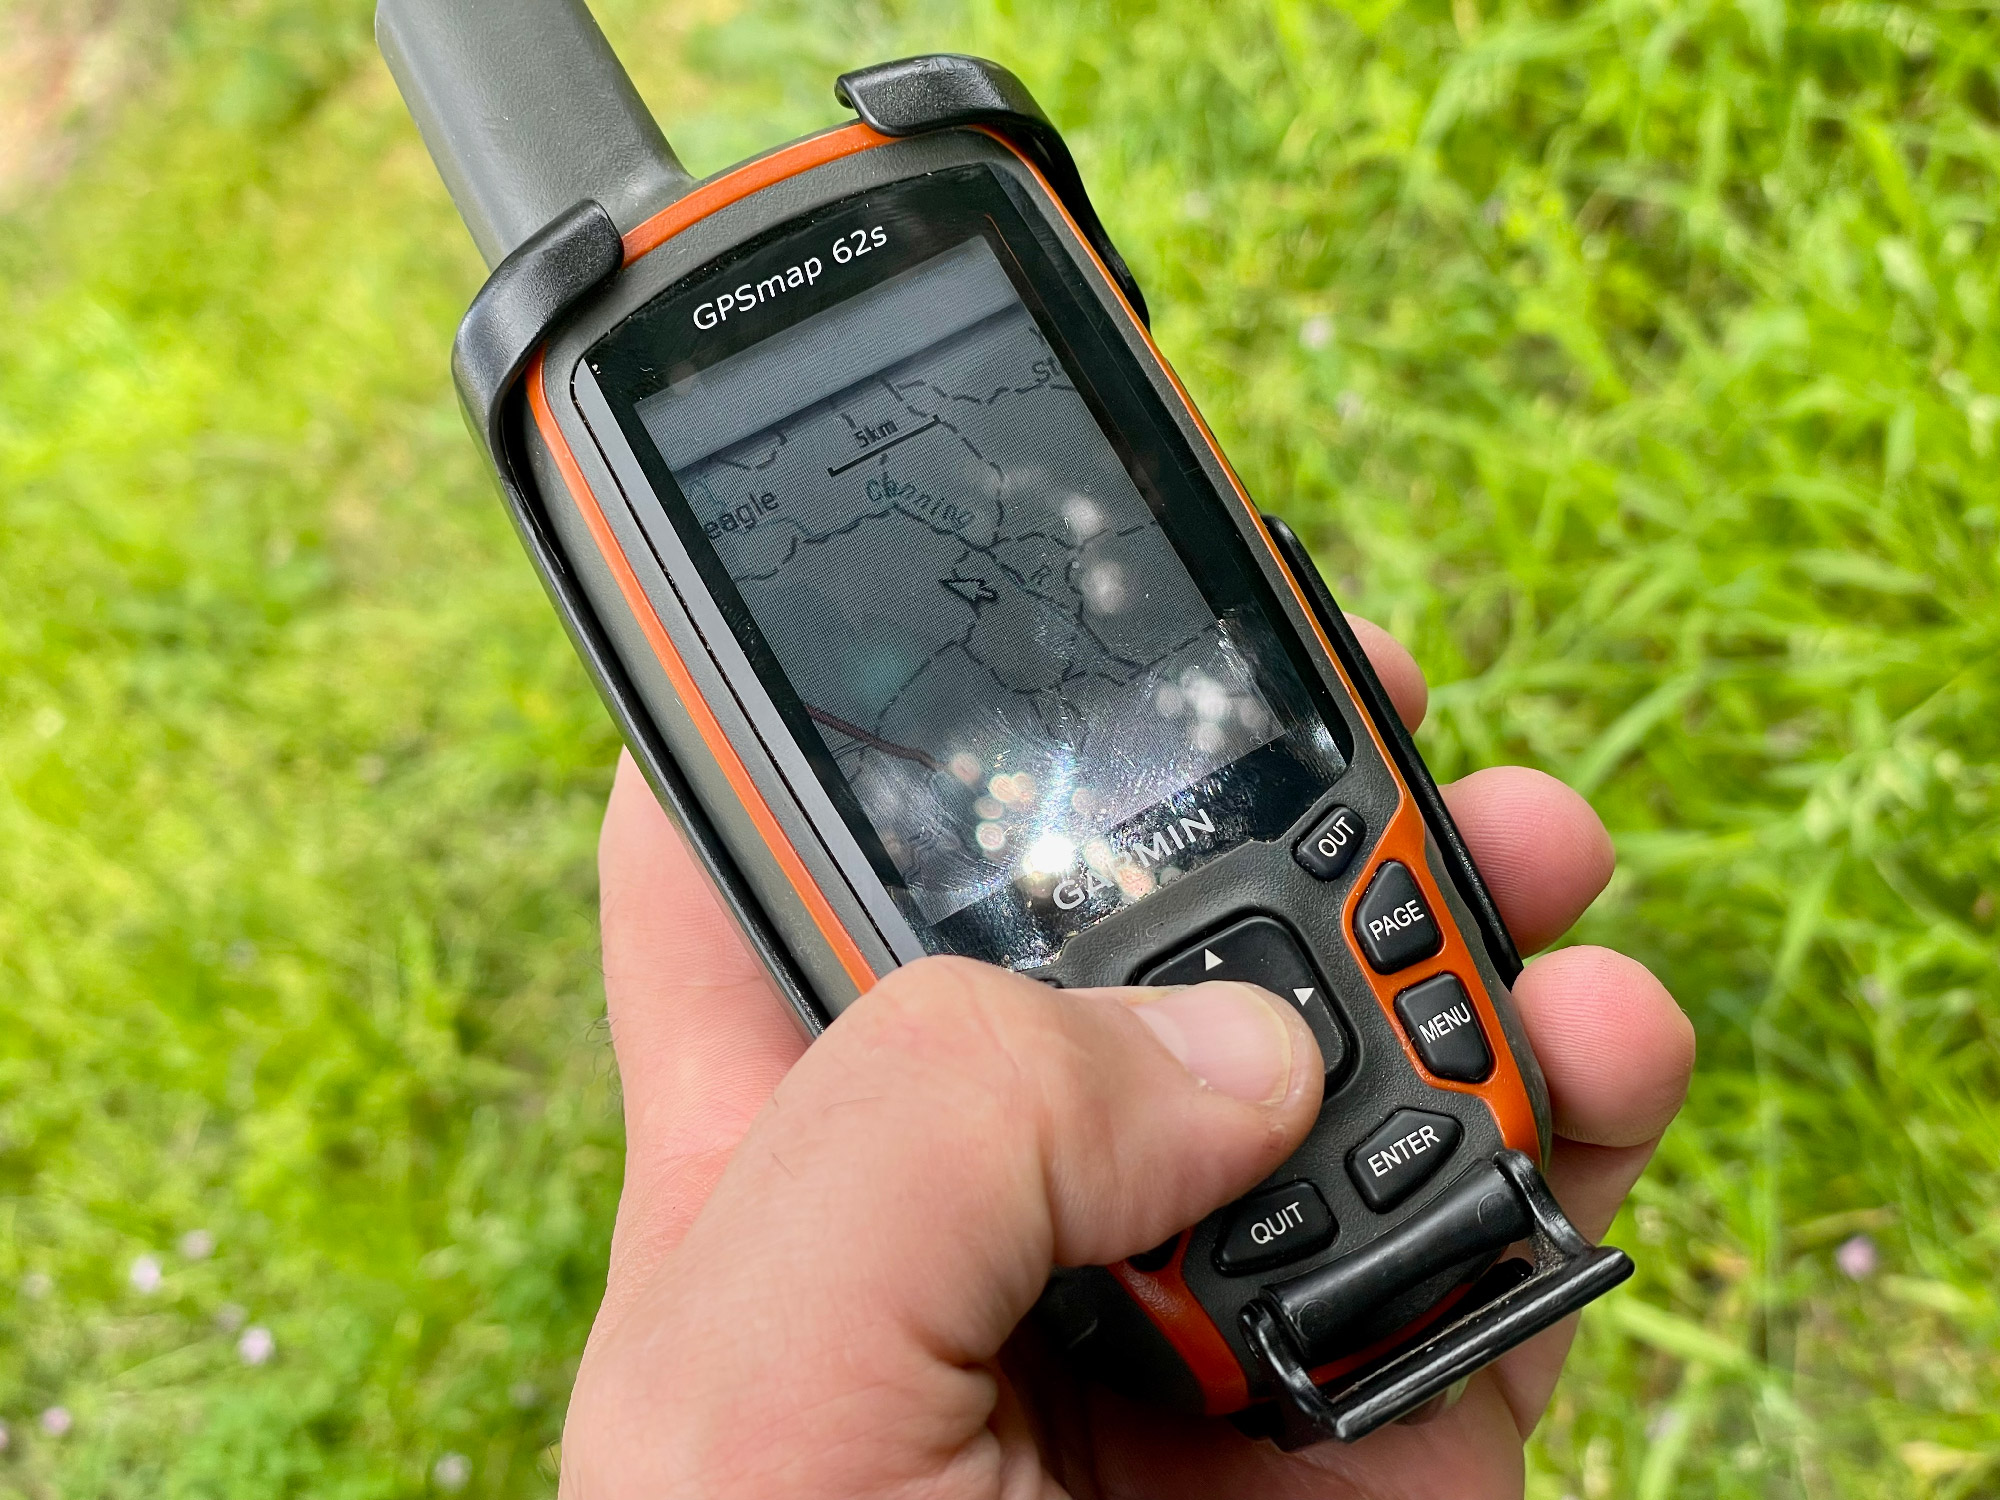
You can add files to this basically by connecting it to a computer via USB and it appears like a USB storage device – just copy over some GPX files and then you can load them.
Plotting and planning routes
Plotting interesting routes using Google Earth
A really useful tool to seek out interesting routes is to grab them from Google Earth. I’ve never seen this documented really well so I’ll try to do it justice here.
To keep things organised, it’s easiest to have some dedicated folders in your My Places – just right click on My Places and create a folder that way.
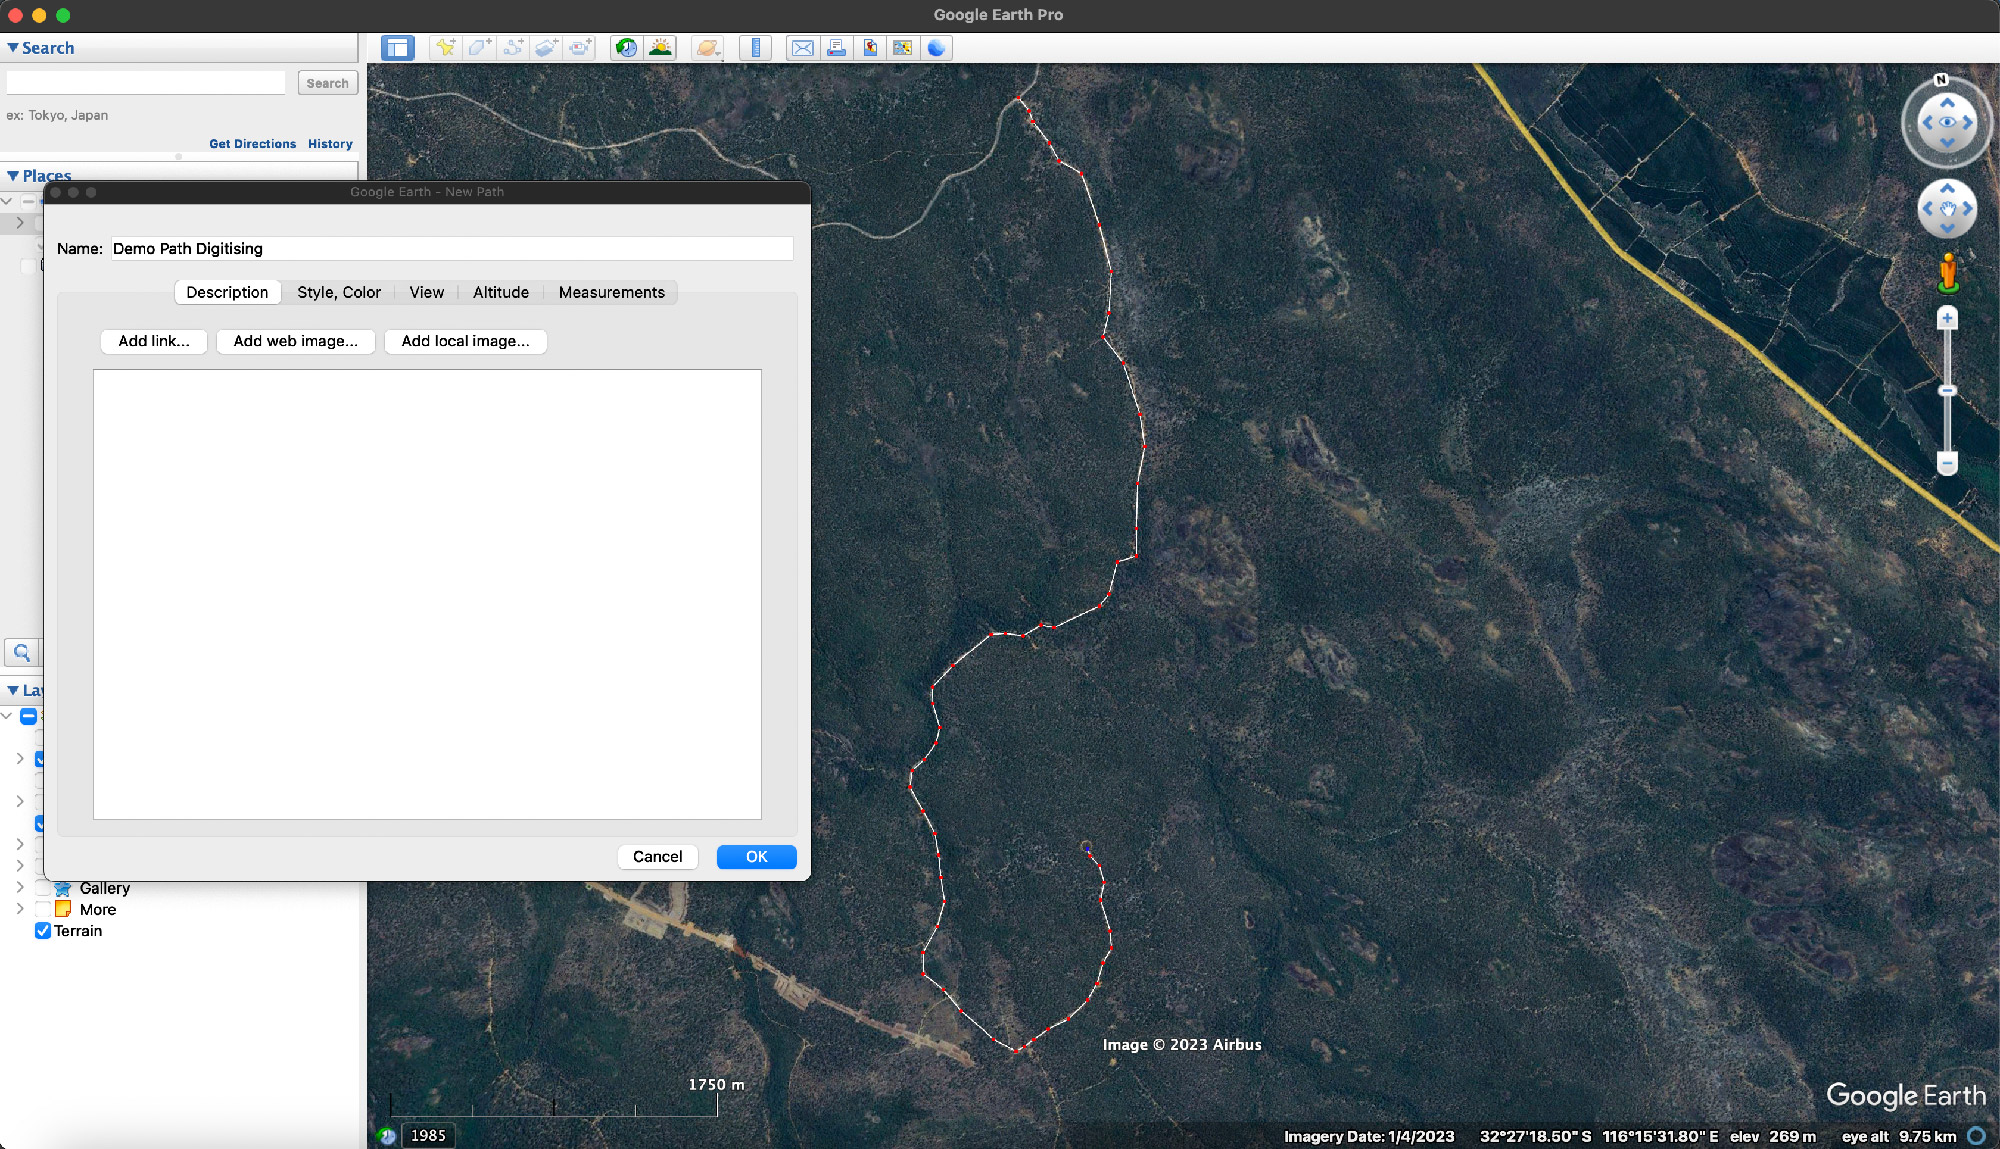
First off, to create a path (which is the most common task for doing this sort of work) roughly zoom to where you want the track and then right click on the folder you want to store it in and then Add -> Path

You will then get the New Path dialogue box, and the mouse pointer will become crosshairs to let you digitise. Roughly digitise your track and also give it a name.
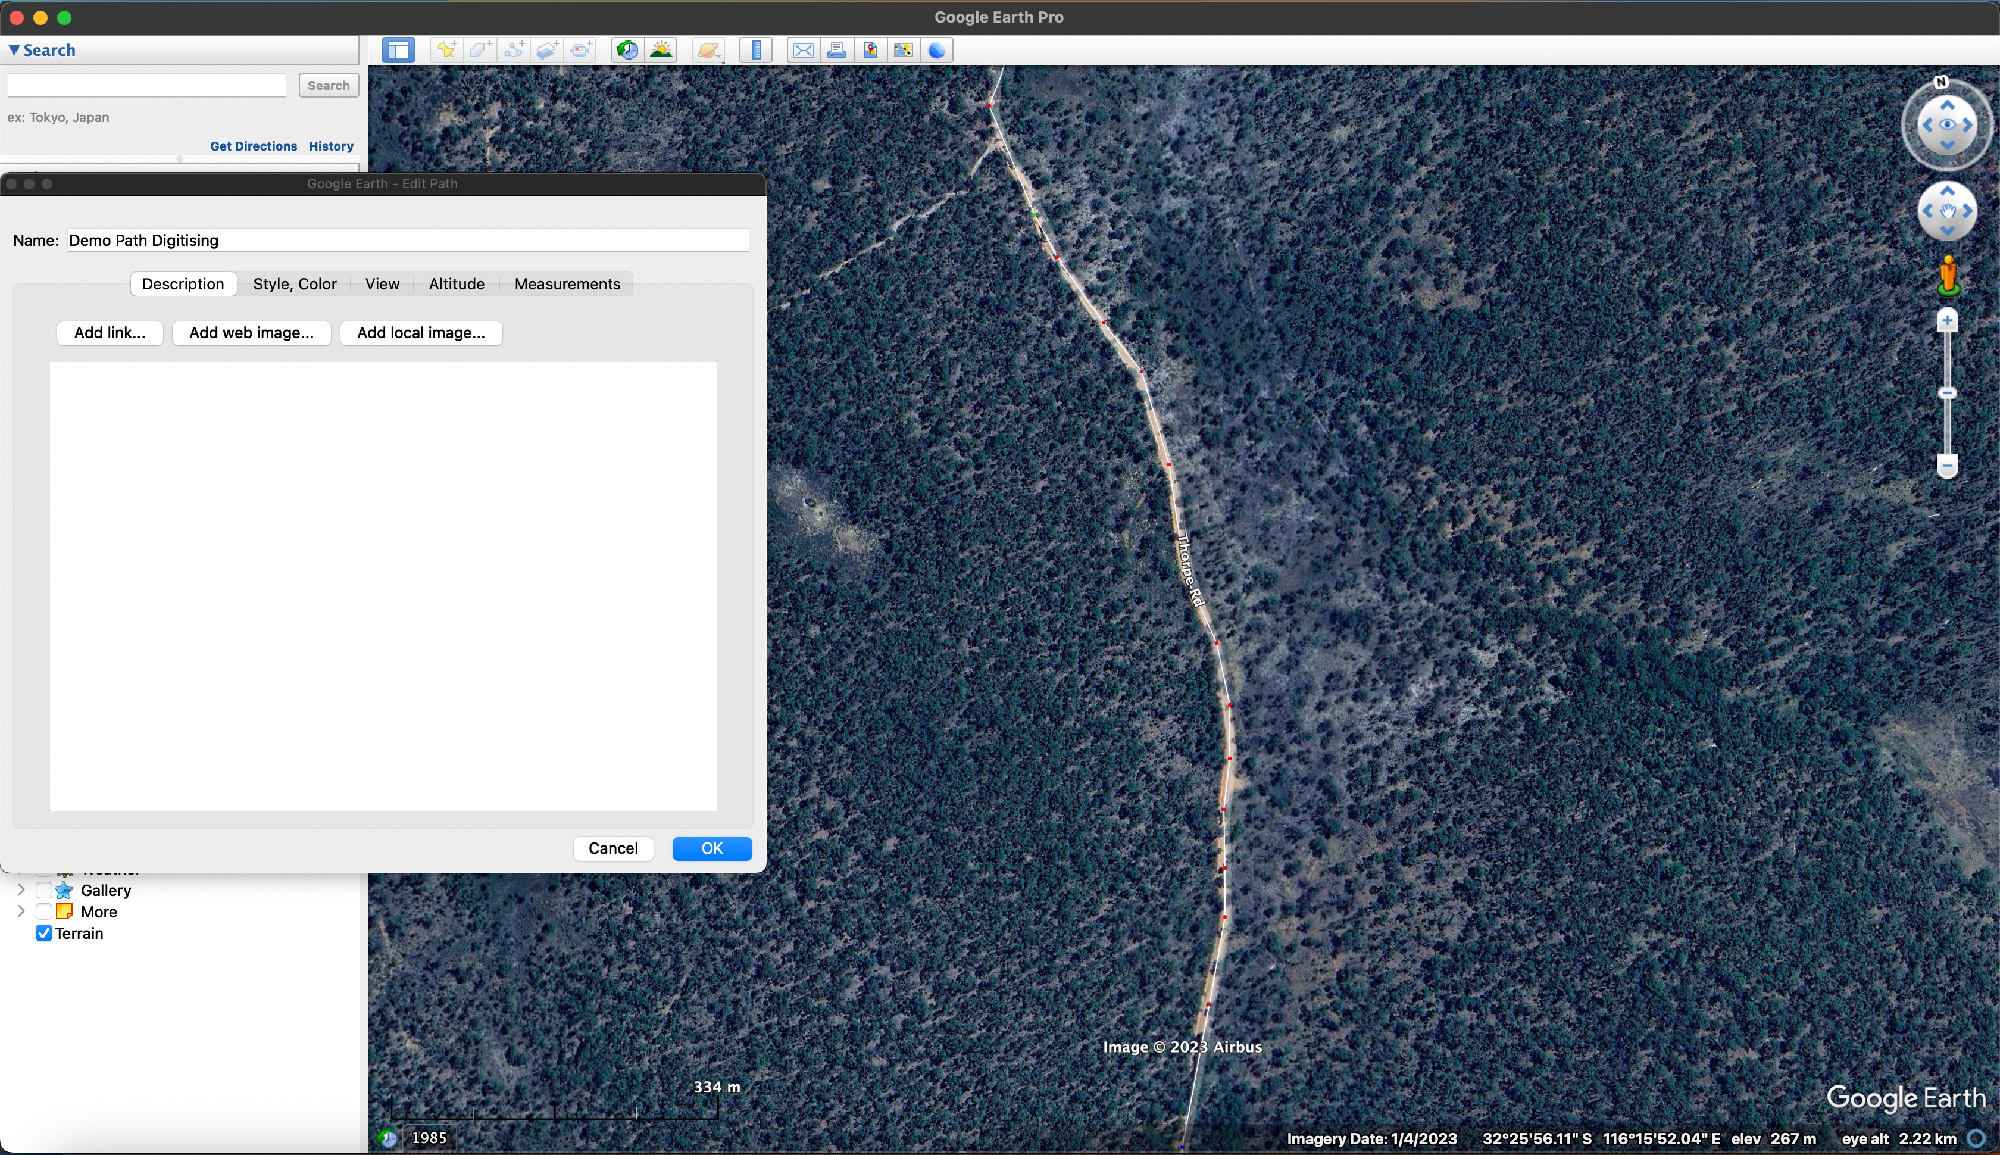
Once you’ve created the path roughly, if you want to edit it you can right click on it and then select Get Info.
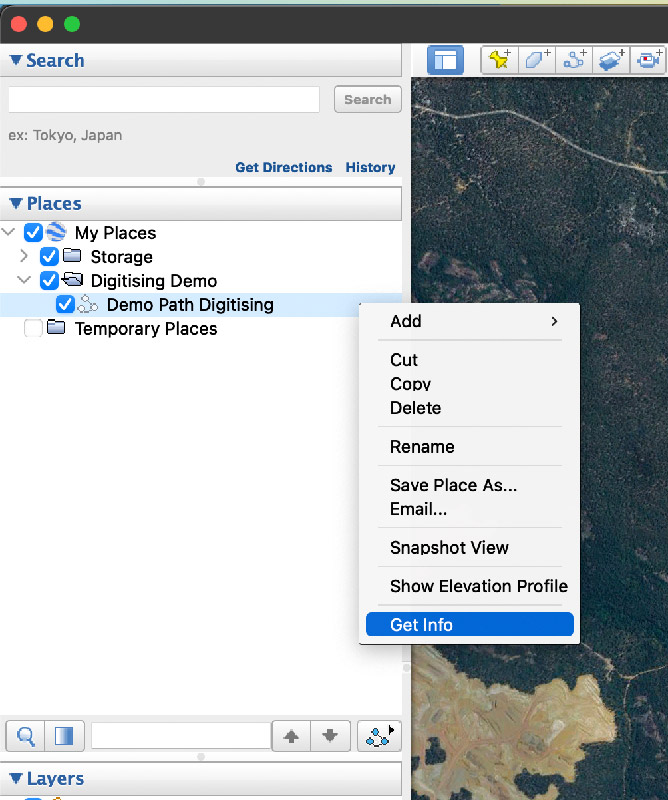
Once you have the info pane up, you’ll see you have the digitising crosshairs back.
You will also see the nodes of the path in red. If you hover over this point and then click on it, the node will turn blue and let you drag it somewhere else. If you want to add a point bear in mind that it cares about the topology of the path – you need to click on the point BEFORE where you want to add a point, and then add a new point or points and they’ll be correctly ordered. If you want to delete a point just click on it and press the delete key on your keyboard.
This image is before doing some editing and adding some points. I zoomed in to help refine the track: if you want to navigate when digitising just use the arrow keys on your keyboard to move the view.

After editing we end up with a refined track that I’m happy with
Hit ok on the info dialogue box and you’re sorted with that path.
A really useful thing once you have a reliable track is the ability to look at the elevation profile to get an idea on the terrain you’ll be going through. Right click on the track and then select Elevation Profile
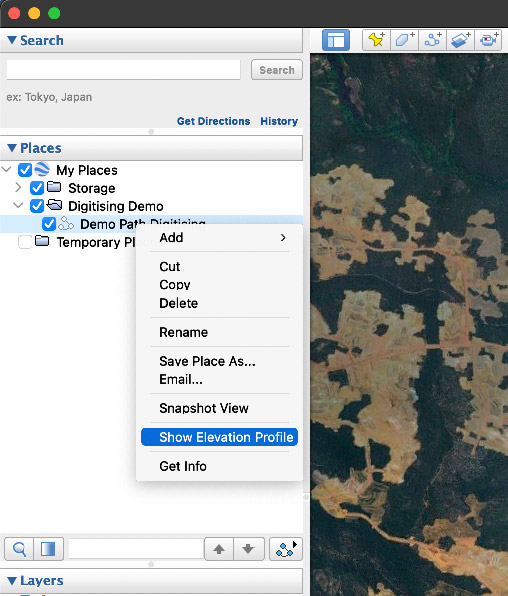
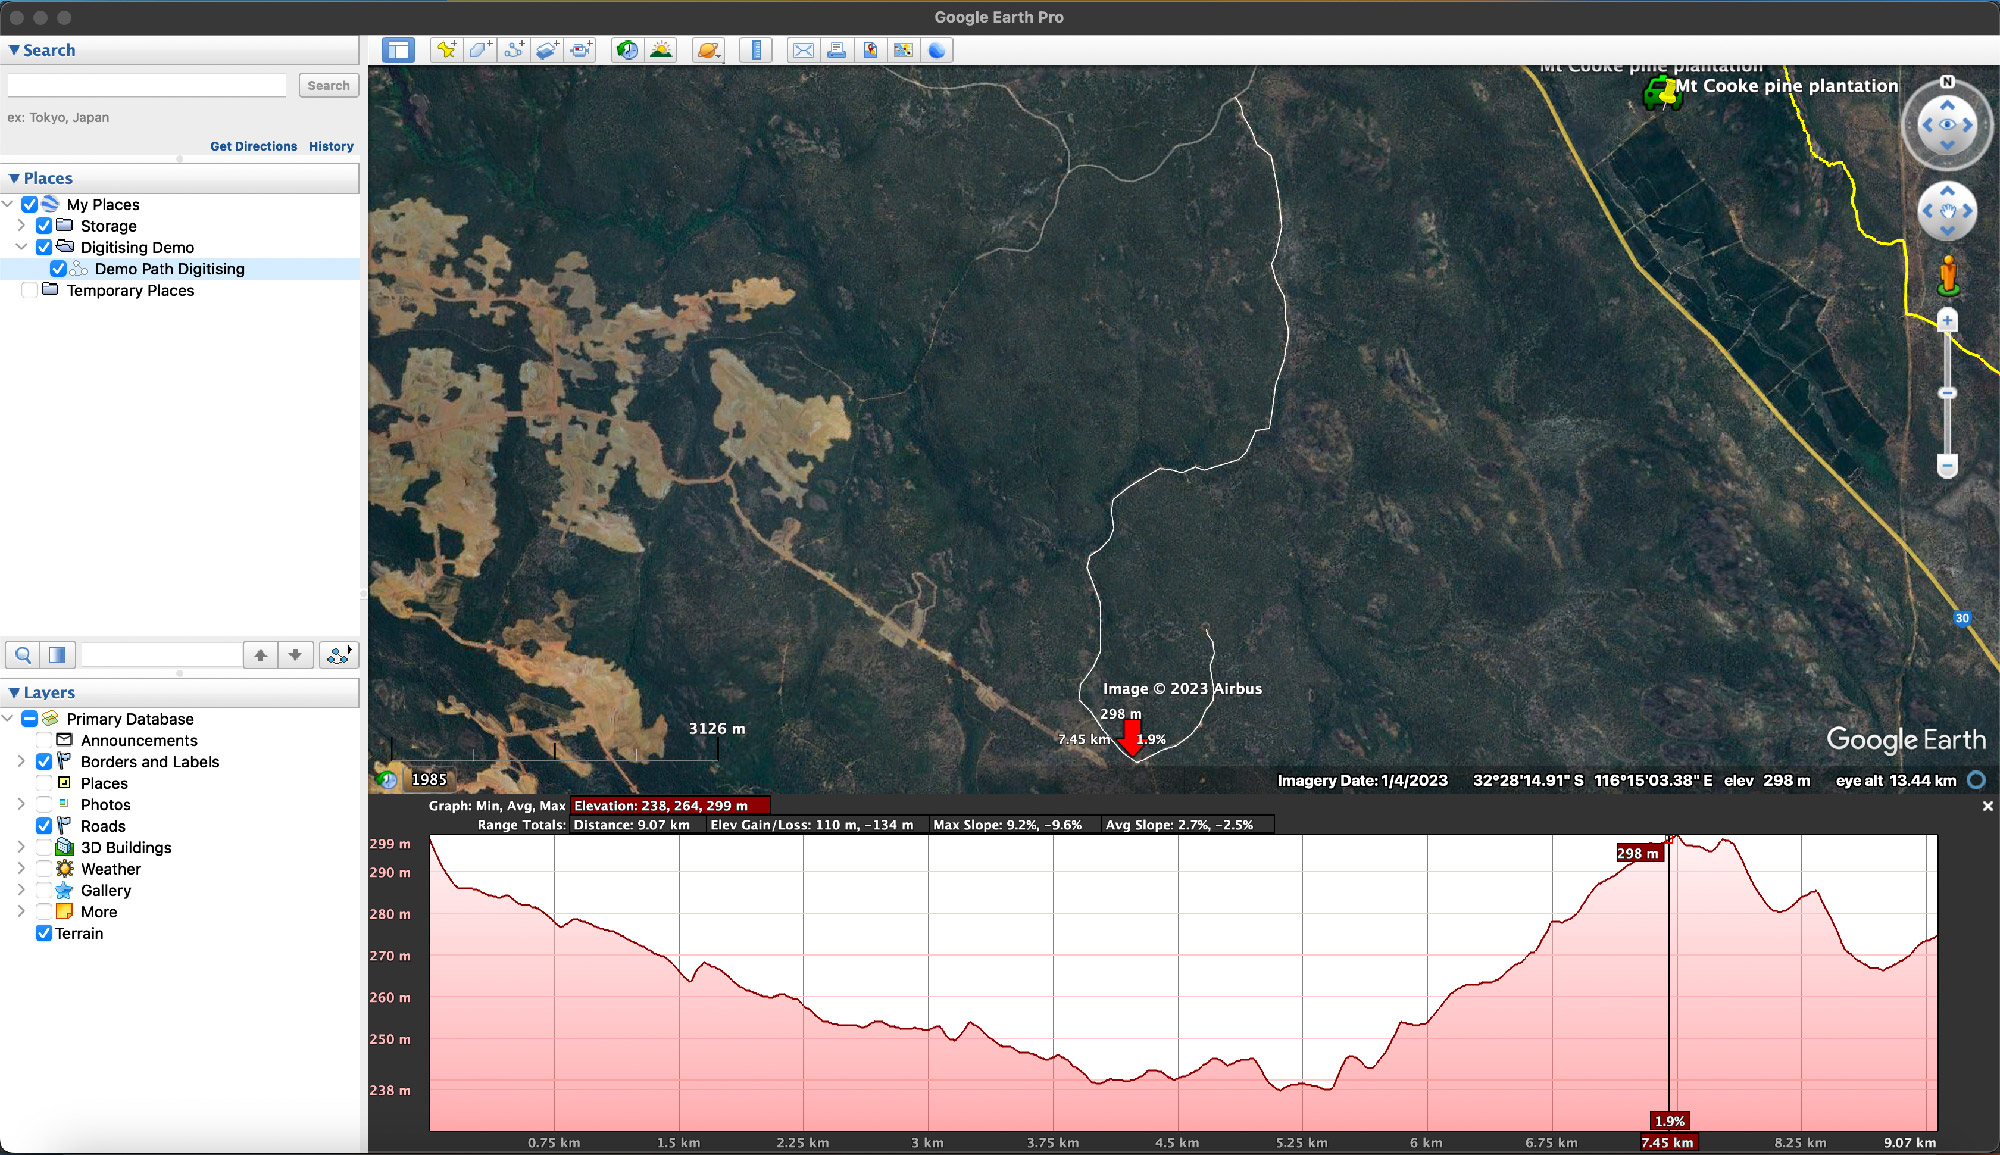
Here you can see the random path I’ve picked gradually loses elevation, before picking back up again at the point where the arrow is at 7.45 km along the track, and then drops again.
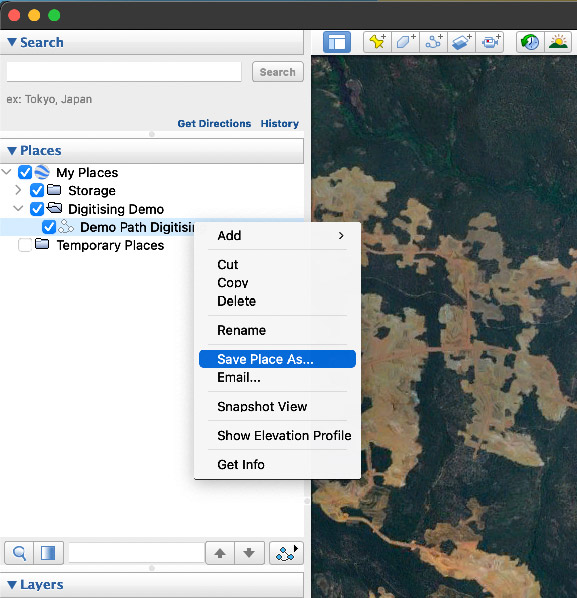
The downside is that while Google Earth is useful to help see and organise data, the format isn’t always the right thing for getting into mapping applications. To fix this the first useful thing you can do is export the layers. If you have a full folder you can export the entire folder as one KMZ file, however, it’s easier to export each thing separately I think as you can keep things organised and separated.
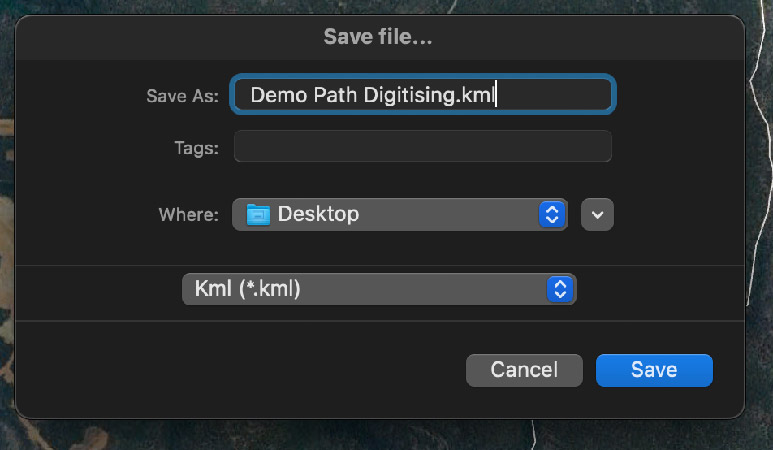
To export, right click on the layer and select Save Place As…
You can do this in either format – KMZ or KML. KML is best for a single layer, KMZ for multiple layers… but the next step doesn’t distinguish and it doesn’t matter.
With that saved somewhere you can find it then you need to move onto converting it to a useful format for your device.
Conversion and data cleanup
Annoyingly there is never one standard for data, and this is especially true for mapping data. A lot of GPS systems want files in the GPS eXchange format (.GPX) and Google Earth only really speaks in the language of KMLs (keyhole markup language). Some software, e.g. Gaia GPS, can deal with KMLs but if you want things on handheld GPS’ and the like then you need to get familiar with ways of converting data.
In addition, transfer of files to GPS mapping software can be a pain. There’s a lot of little tools out there but ultimately I think you’re better off using a much more powerful tool for this: the open source GIS package QGIS. It works on PCs, Macs and Linux machines and is non-proprietary. Previously I’d used some Garmin software and a few command line tools for conversion but QGIS does bring a lot of useful things together.
Finally, there’s a lot of public data out there that you might not be aware of, so I’ve included a bit in how you access this. This can be useful things like environmental protection areas but there’s no end to the amount of data you might want to use to help pick a route for some 4wd action.
I haven’t fully written it up but I’ve got some hints near the bottom of this section on how you deal with coordinates given to you by crusty people who only provide you written down coordinates, too.
Convert KML to GPX using QGIS
To start with just fire up QGIS and make a new blank project. Drag the kml file into the layers area or the main part of the window and the data will be loaded.
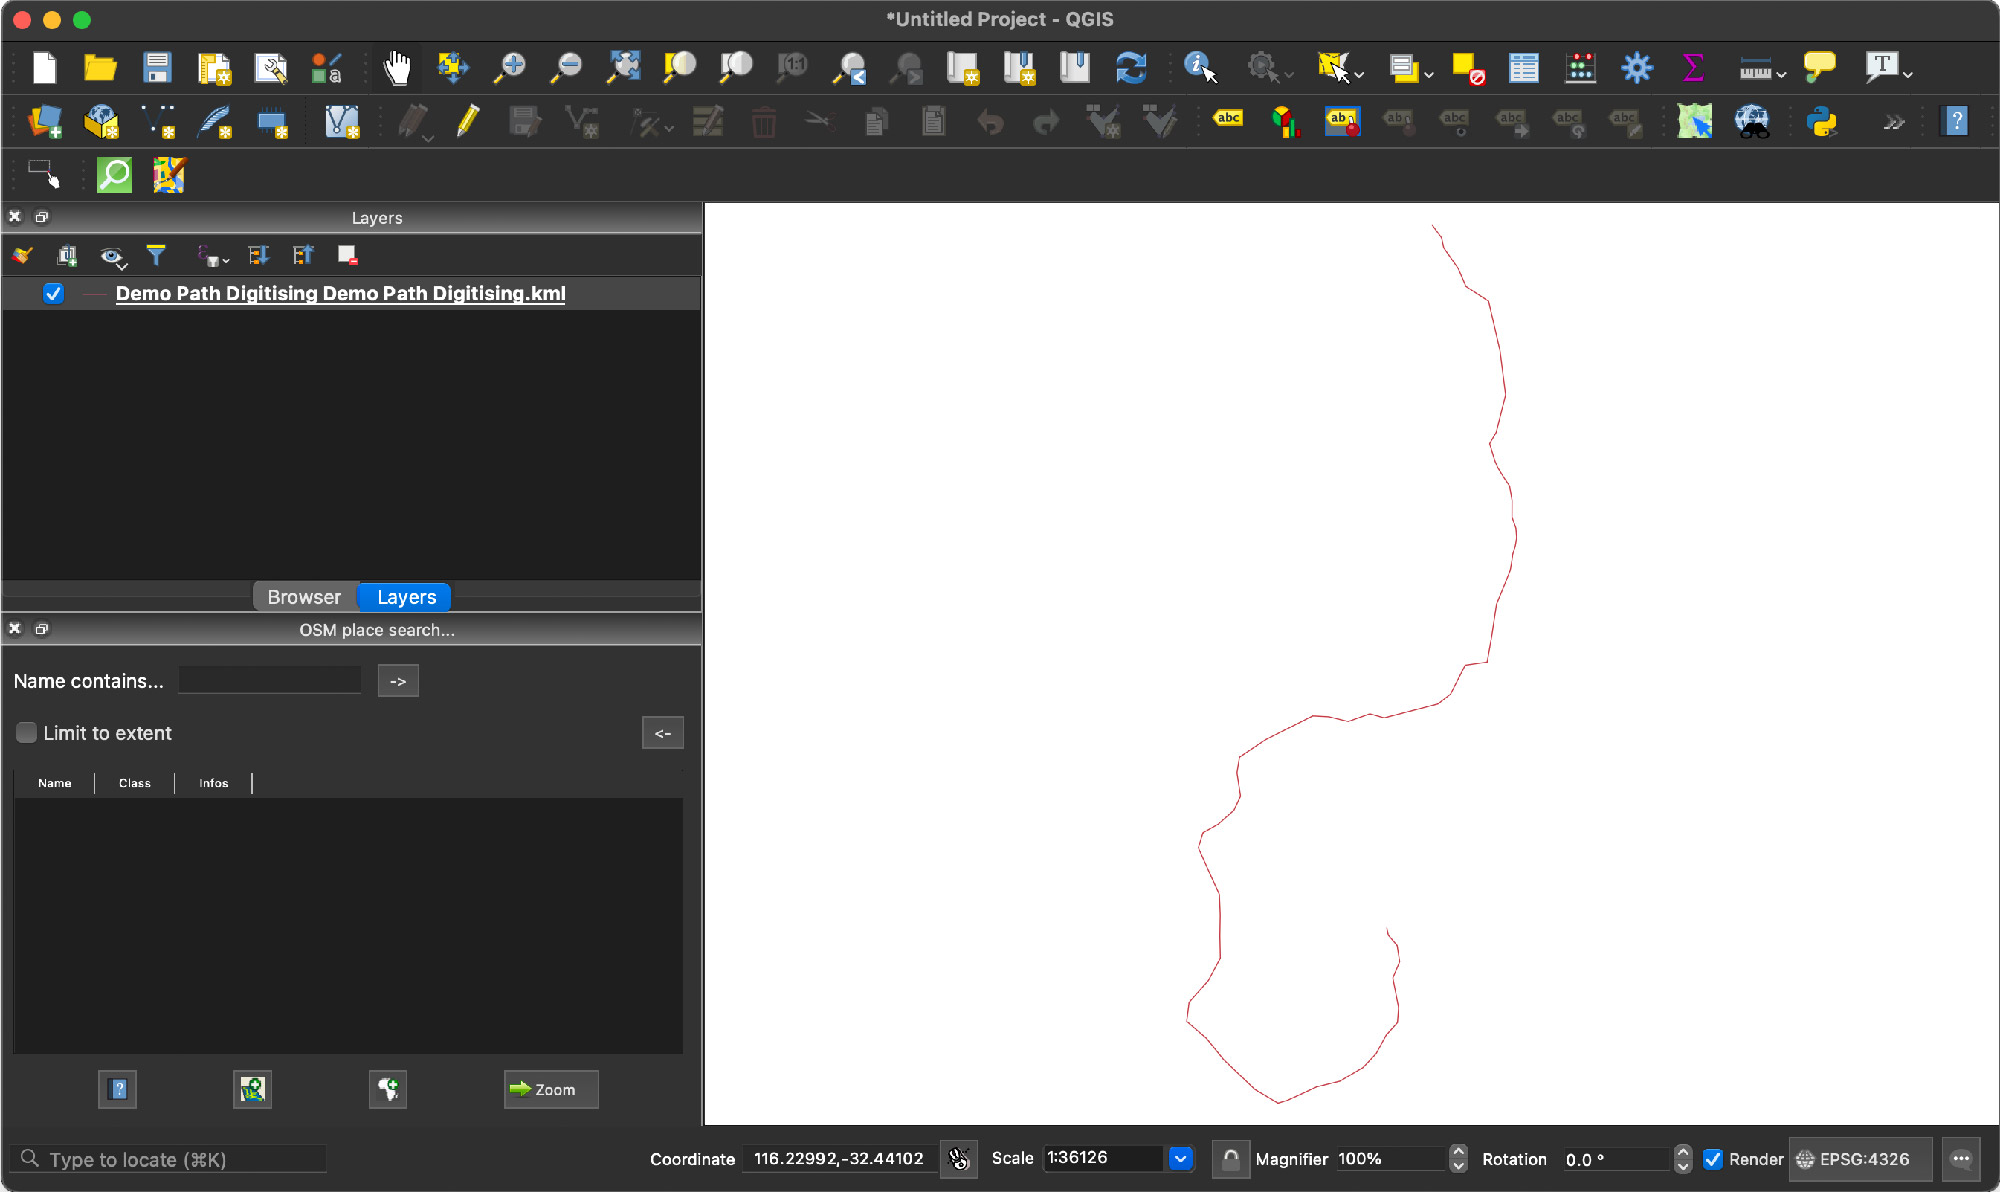
To export it into a new format, right click on the layer you’ve just added in the Layers pane and select Export->Save Features As…
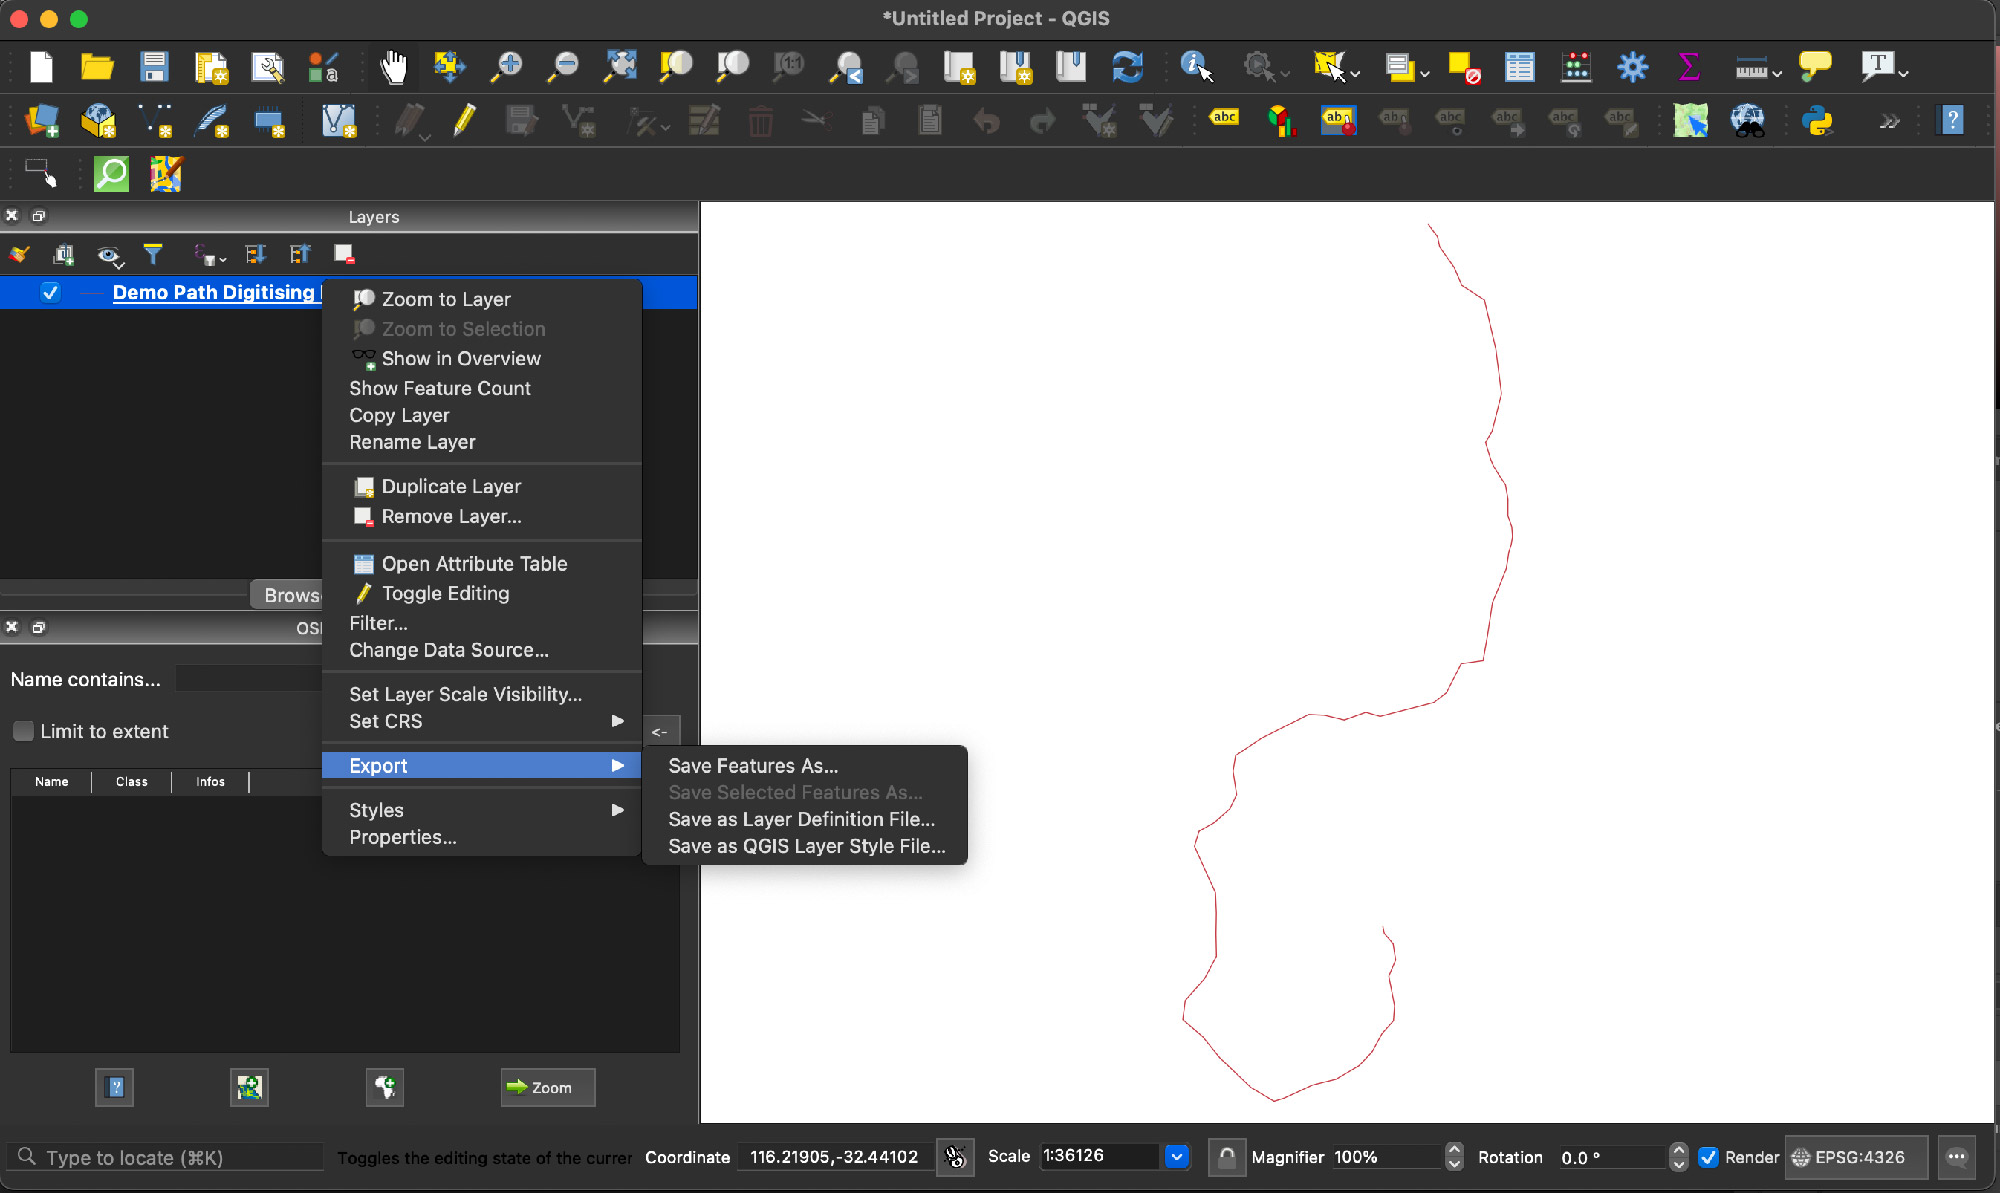
This will pop up a fairly complicated dialogue box where you have to make a couple of selections to make everything work.
Firstly, you need to force GPX extensions because otherwise you don’t end up with a working GPX file. In addition it’s a good idea to force geometry and also type. In this case I will just say that it is a Track only and this makes it work happier with the Hema 4wd maps app. With the FORCE_GPX_TRACK option there is no need to change the geometry type to path or similar, though. Note that a route is a GPX thing where you go from waypoint to waypoint, and a track is the key ‘path’ type.

With that saved, we now have a GPX file ready to transfer to the mapping device.
Transfer tracks and waypoints to your mapping device
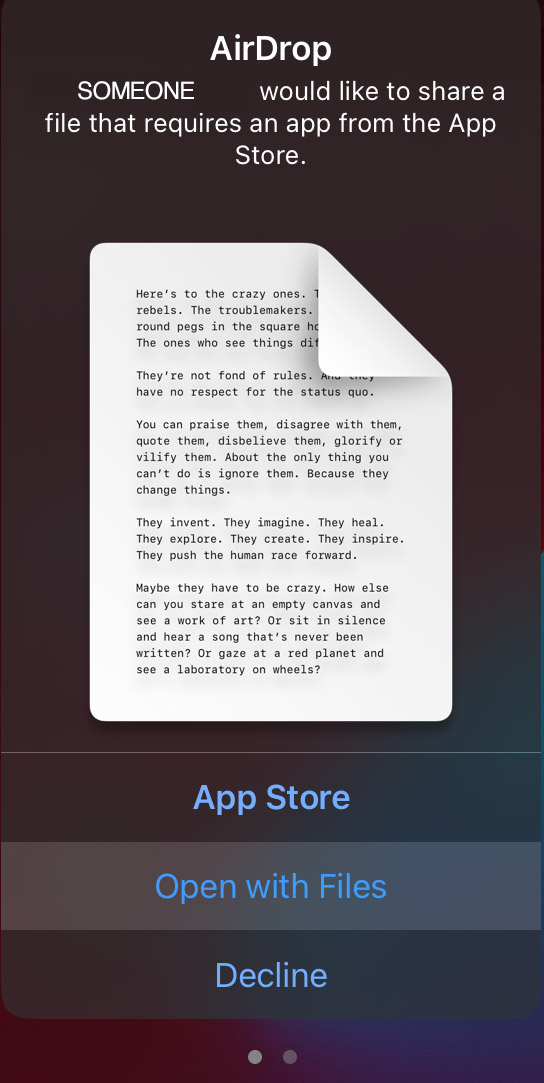
As someone who mostly lives in the Apple ecosystem, for me the easiest option is just airdrop the file to your device. When you do this, an alert will show on your device that says you need to download an app from the App Store but you can also elect to “Open with Files” which will let you save it to your iPad.
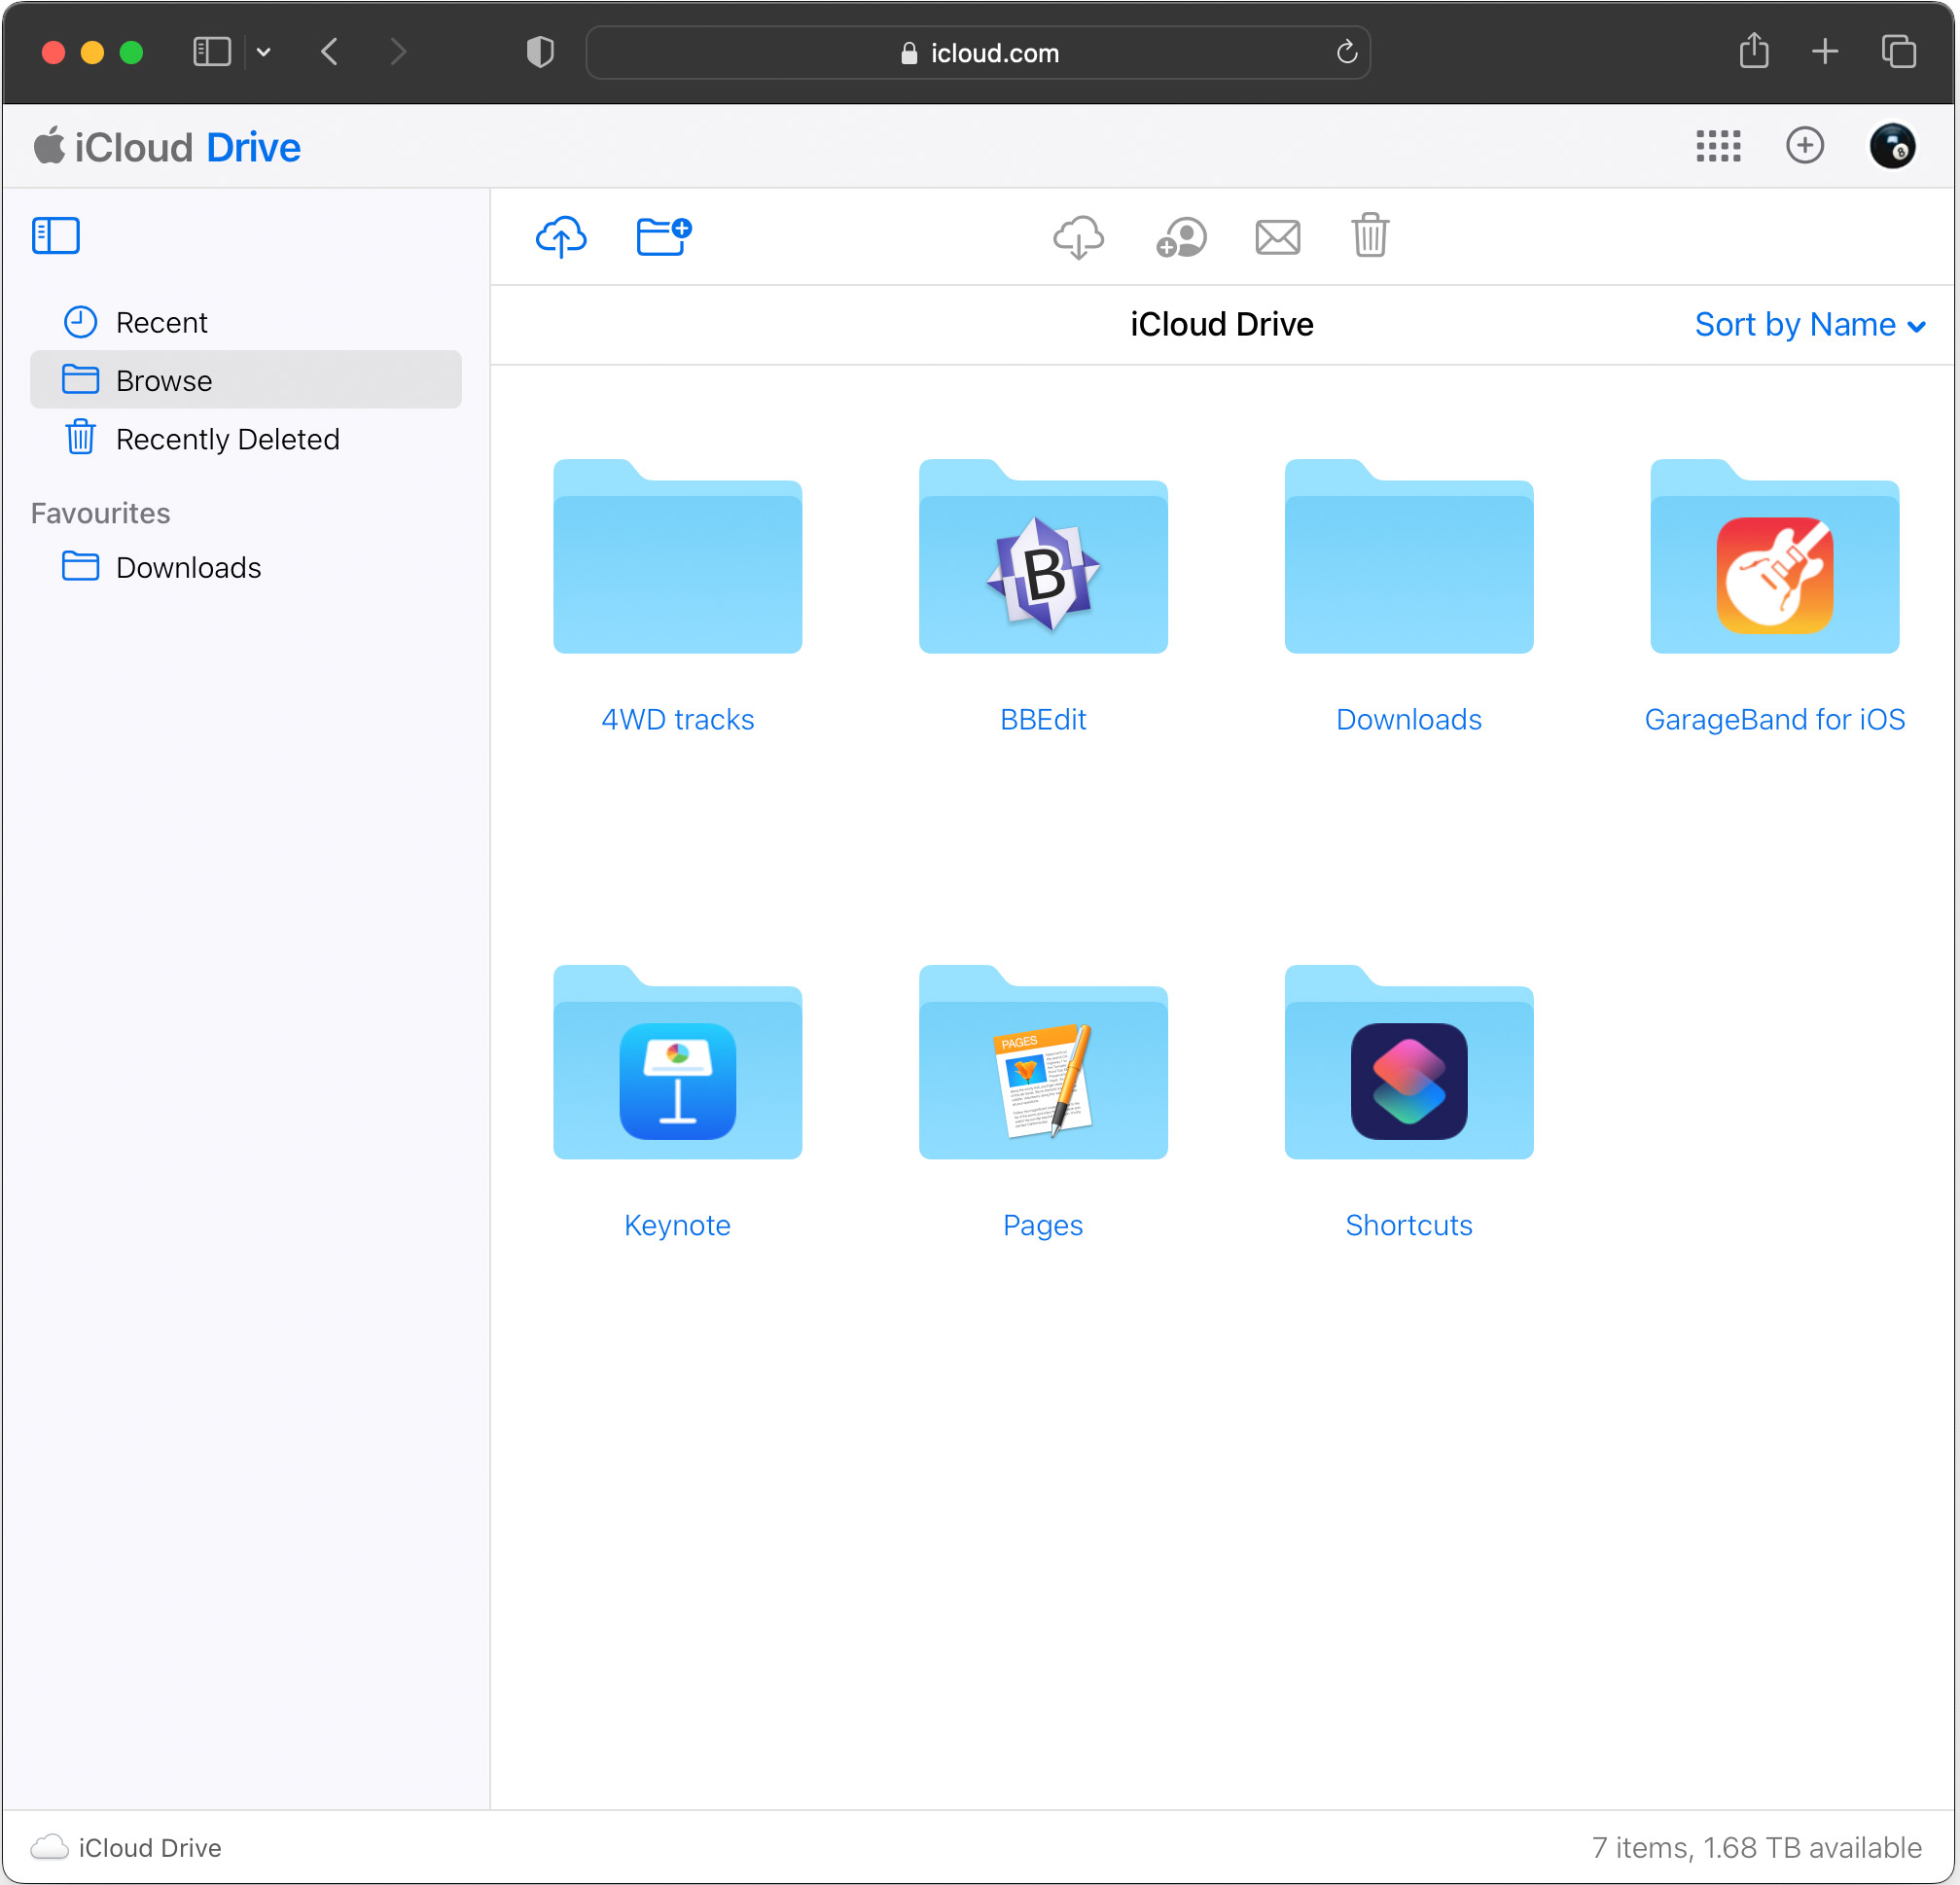
You can also load things up using iCloud drive – just open up icloud.com on a webbrowser on your computer, log in, then browse files and drag and drop the appropriate file(s). This would probably work with other cloud storage options you can access off your device e.g. dropbox, Google Drive etc.
Another option would be adding it to a USB drive or just dragging it directly to your device IF you are running something where you can add files directly. With my iPad the most recent version of the iPad OS lets me see it as a usb storage device and I can drag and drop the file directly into the iPad’s internal storage. I prefer not to do this as having it on some kind of cloud storage e.g. iCloud Drive lets me sync between devices.
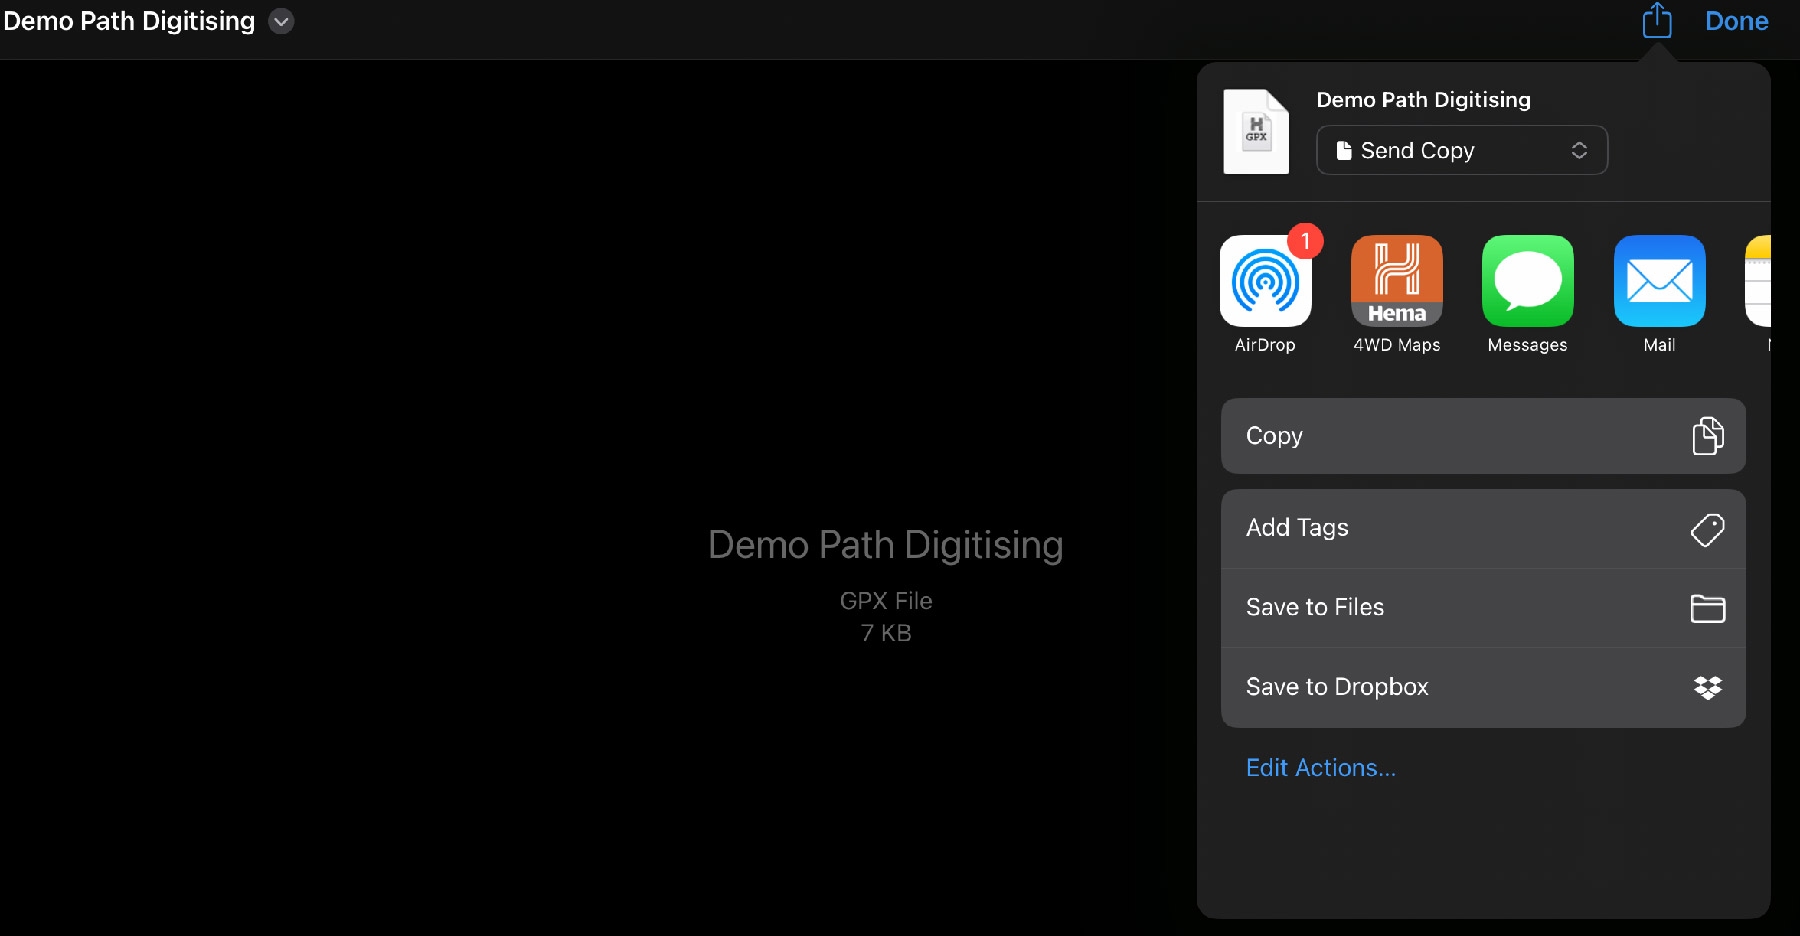
Once the file is added to your device, navigate the files and tap on the file. If you’ve airdropped it you’ll get a weird mostly blank looking screen as the device doesn’t know what to do with the file; just hit the ‘Send To’ button up in the top right (the box with the arrow on it) and you’ll get an option to send a copy to appropriate apps. Since I’ve used it a lot the Hema 4wd Maps app is one of the first visible but you may have to scroll to find it.
Tap on the app you want to send it to and it’ll go off and be added to that app. I’ve tested and this works at least for the Hema app and it also works for Gaia GPS.
I won’t teach you how to totally navigate the Hema app, but, if you go to the Tracks area within the app you’ll now see your new track added. Yes, I’m aware there’s a lot of weirdly named ones in my app here in the screenshot – they’re from a work trip and not organised particular well.
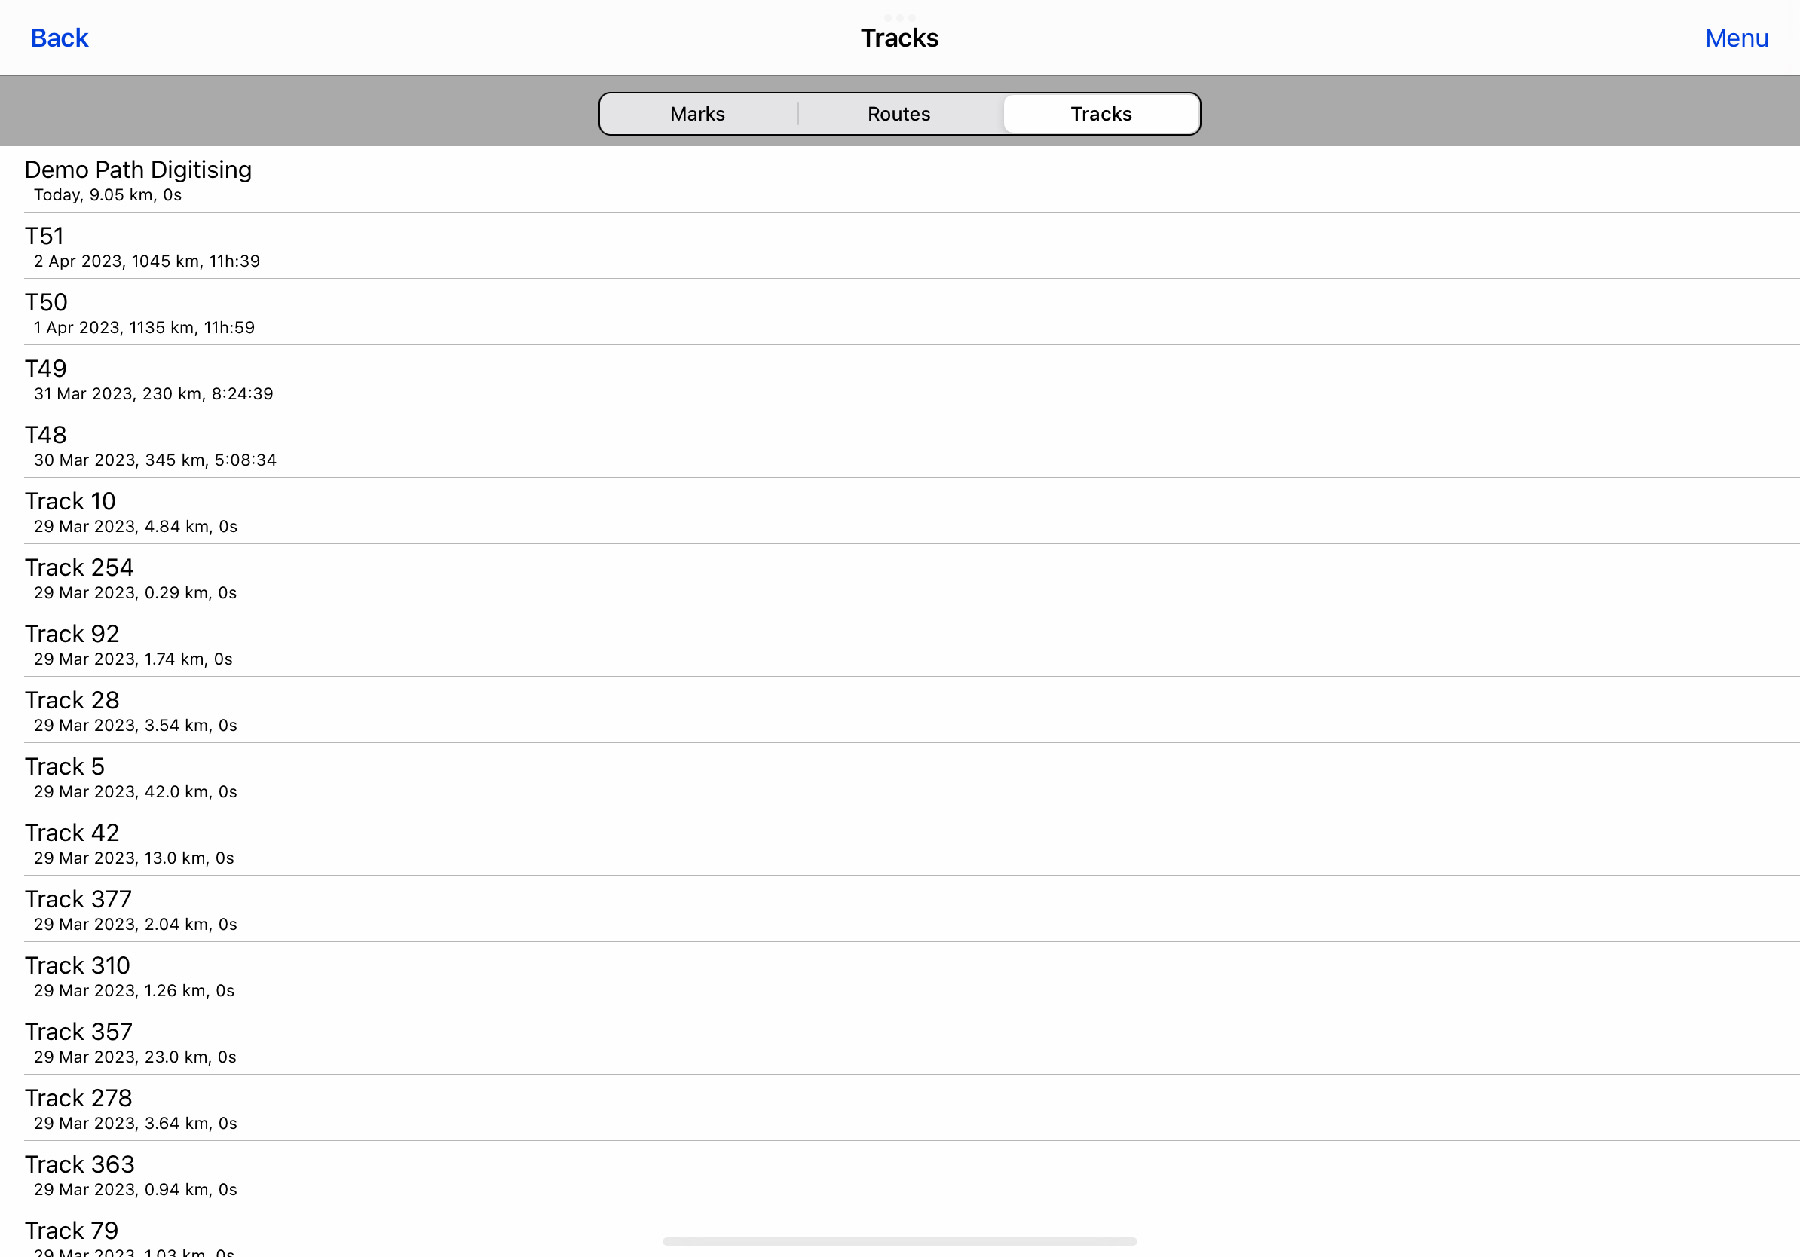
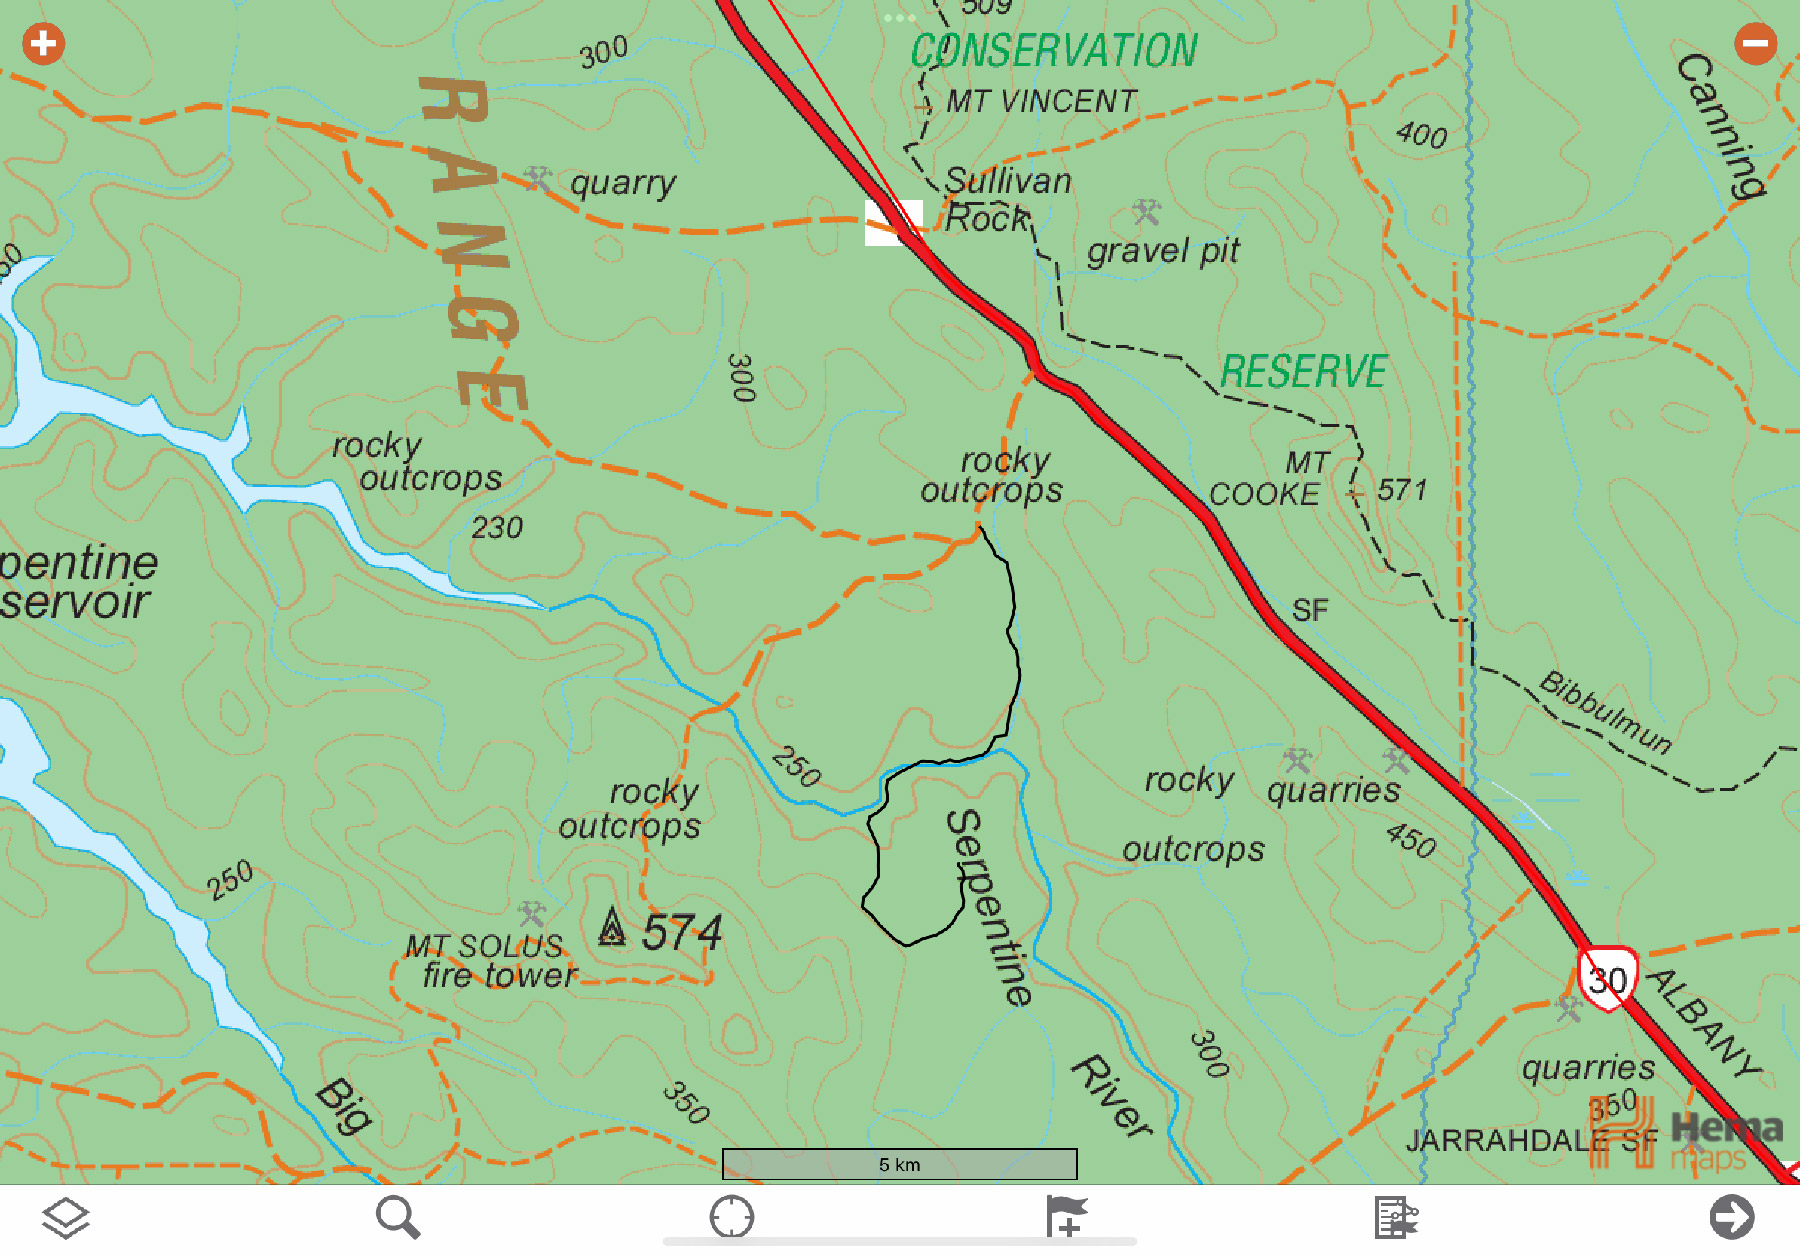
If you tap on the track you just added, you can change the properties for it like colour, line thickness etc. You can also select ‘VIEW’ which will flick you over to the track in the map view and let you see all of it.
Accessing public data repositories
Here’s an interesting reason to get into GIS stuff via QGIS: you can access modern data repositories and add files from there. This is something I do regularly to get the latest dieback regions to avoid these areas on a random trip. It’s also good to get, say, the most up to date Aboriginal Heritage places to avoid disturbing culturally significant sites on a trip.
For a practical example of this we’ll look at how to extract the DBCA dieback layer to see if you’re going to navigate through an area of dieback which might mean sidetracks are closed off to public access.
First off, you need to add a web feature service to QGIS to access the latest information – you do this by finding out the “Web Feature Service” URL, which for this layer happens to be provided by the Western Australian Government.
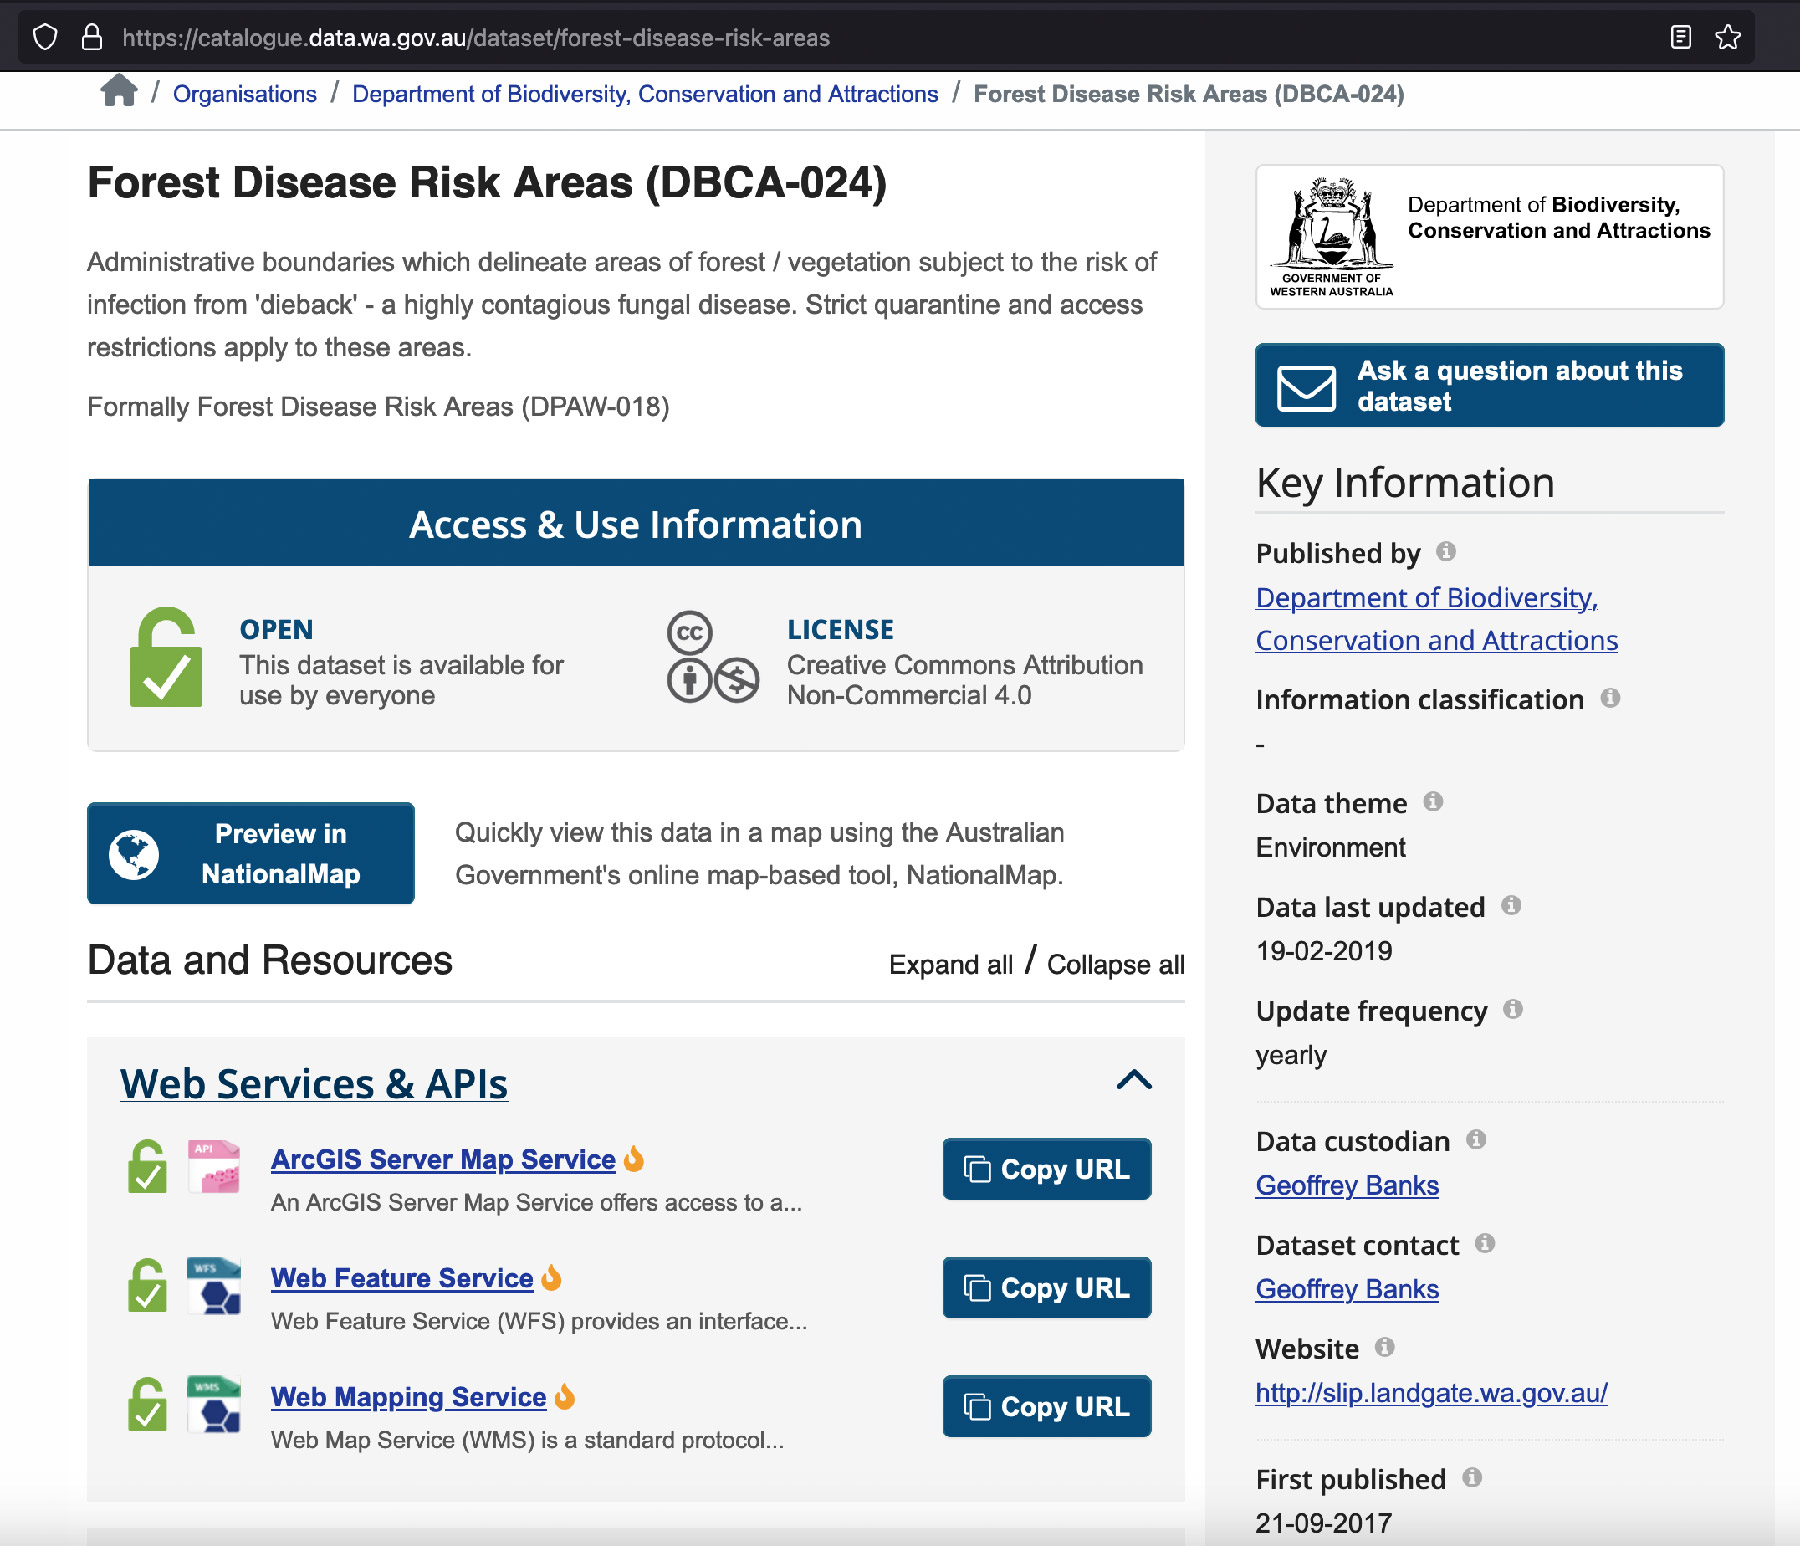
You can then elect to copy the URL. You want the feature service version as this gives you the original polygon information, rather than the “web mapping service” which would only give you an image of the data. (Note: You can also use this page from data.wa.gov.au to download it in other GIS formats e.g. a Shapefile which you can directly import into QGIS)
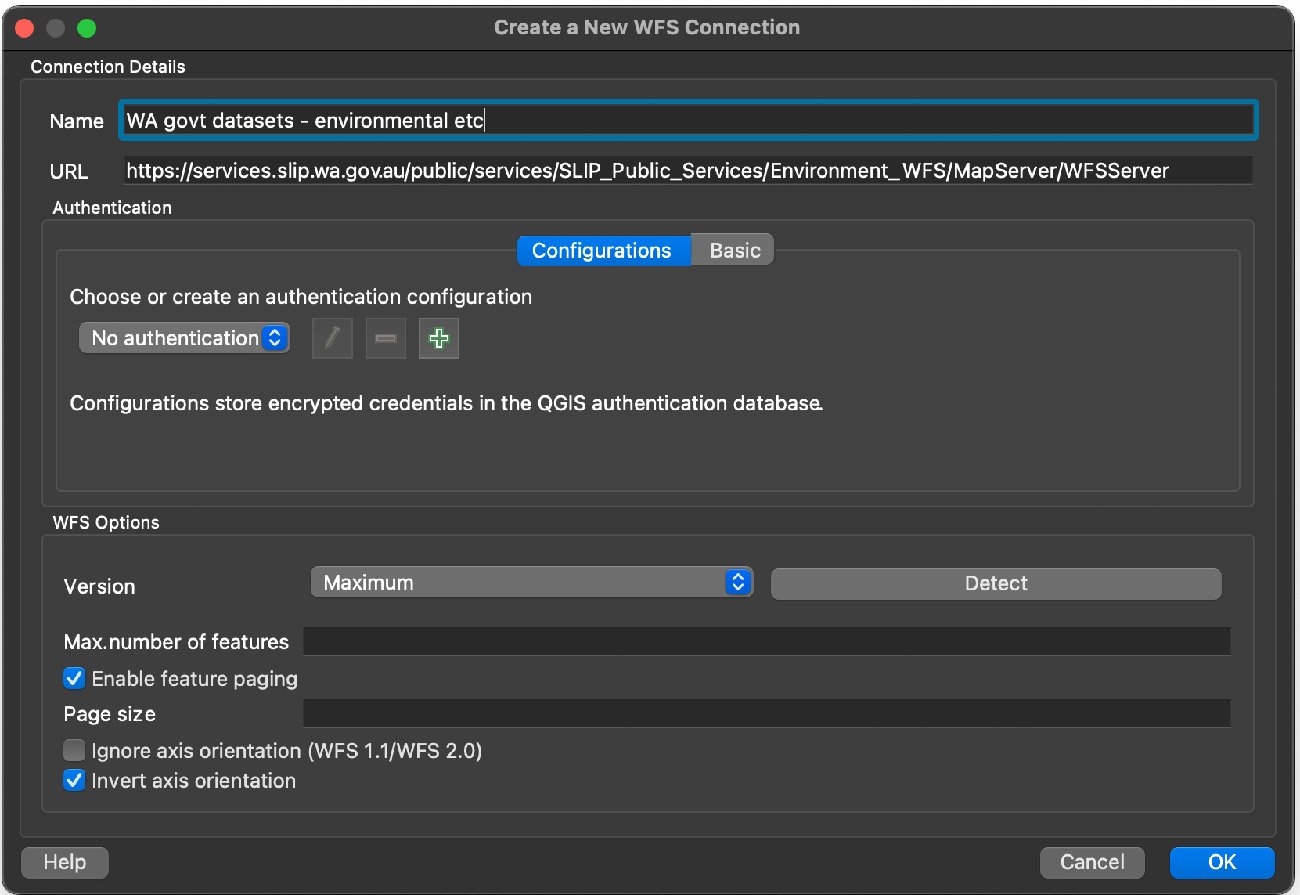
Having copied the URL, in the Browser pane of QGIS right click on the “WFS” option and then “New Connection…”. Provide a semi meaningful name, and for this service you also need to “Invert Axis” as for some reason it gets served up rotated 90º.
Now you can use this web feature service to add various layers to look at how they might interact with your various routes. To add a layer from a WFS, use the drop-down arrow by WFS in the data browser, then on the WFS endpoint you just added, and select the layer you want and right-click on it and “Add Layer to Project”.
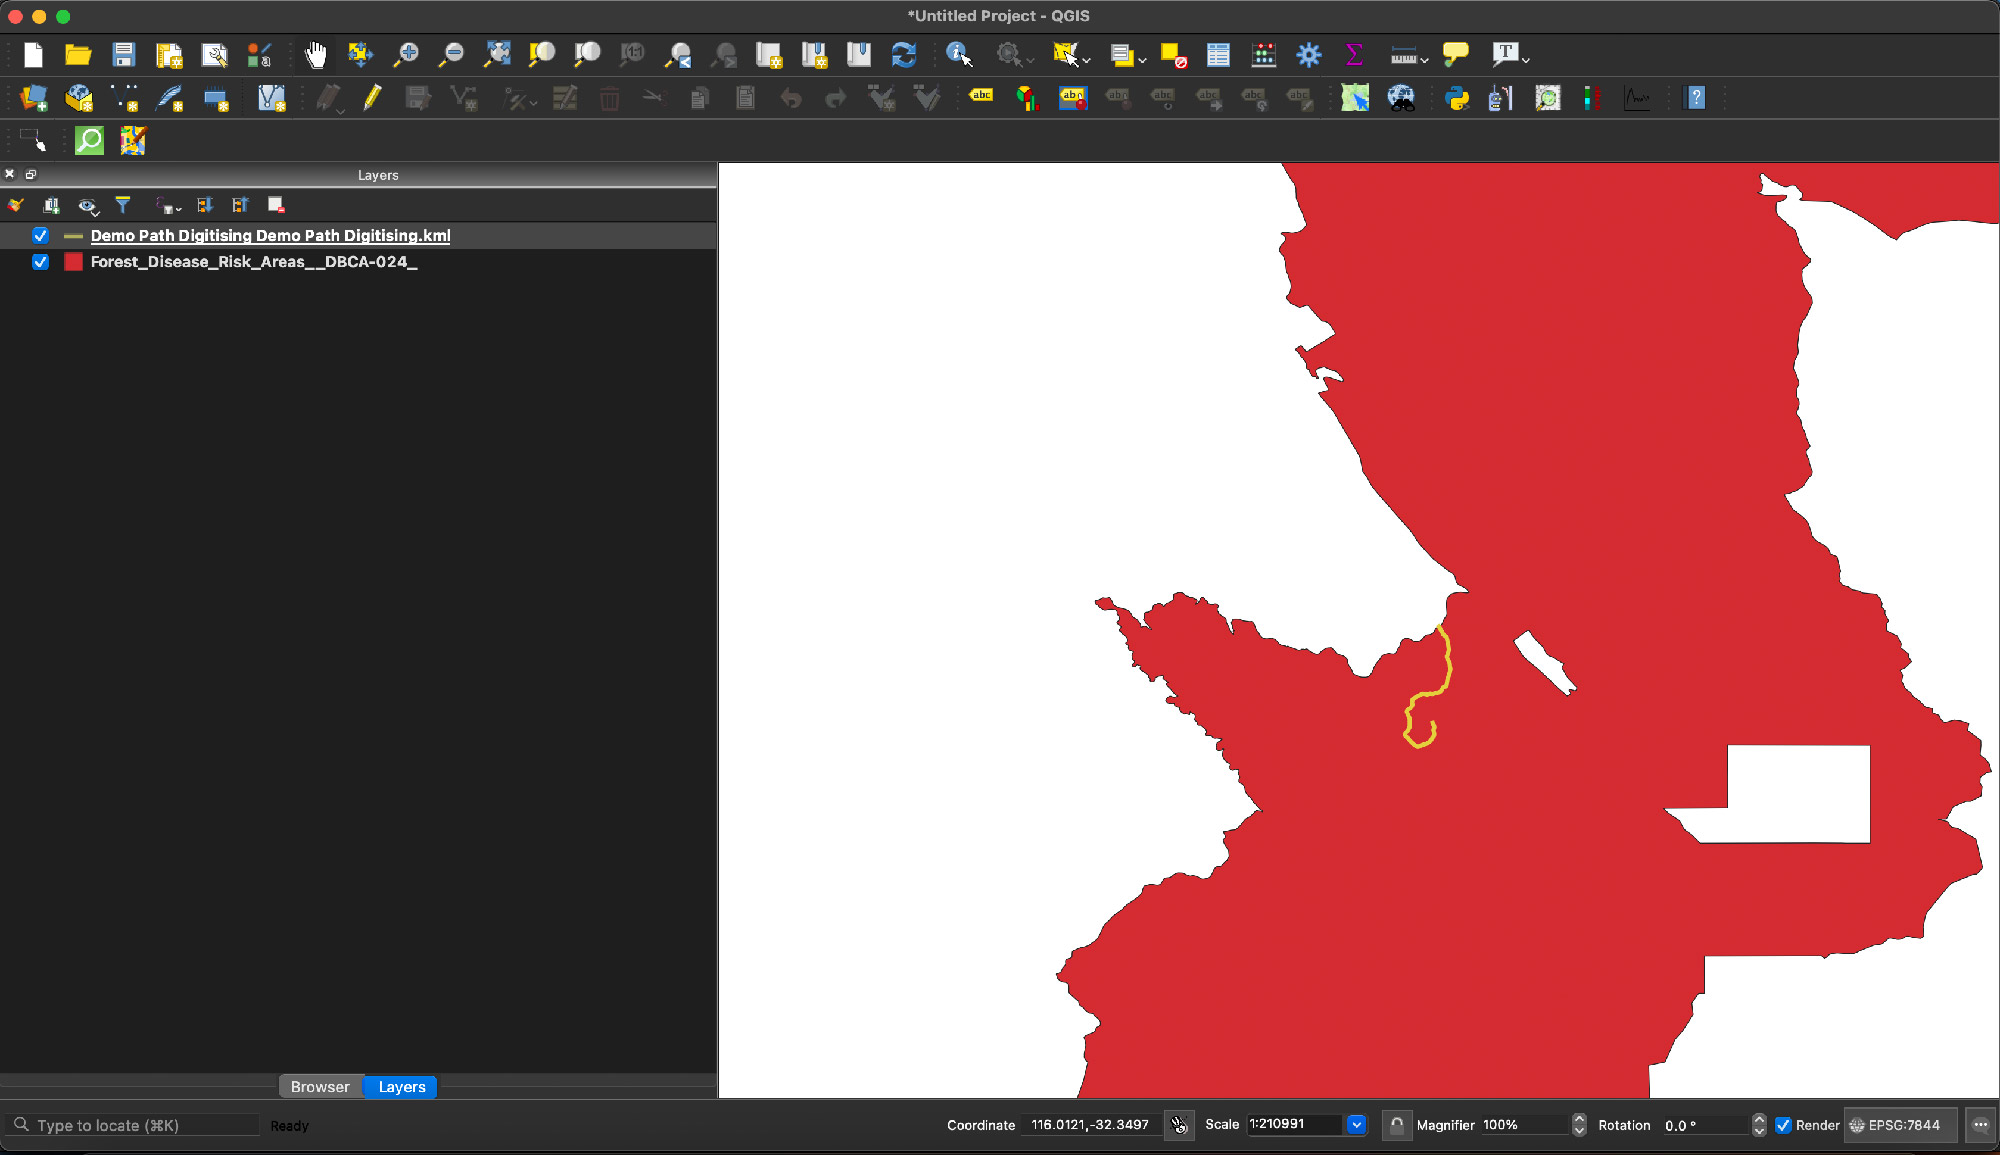
Pretty easily we can see this path we just digitised happens to go straight into a dieback risk area – this probably means it’s not accessible to the public! Useful stuff to know before you go out bush to some secret squirrel place you think you found in Google Earth, I think…
It’s even easier to play around with these data if you then export it to Google Earth. Just right click on the layer you just added and then select “Save features as…”. You change the format to “Key
This data is probably easiest used exported to Google Earth, so I then simply export the layer as per converting my layer to GPX except change the filetype to KML and then add this KML to Google Earth. This would then let me see where these polygons overlap with a particular route. In this case, the example I have just previously digitised starts at the start of dieback area so likely would not be publicly accessible. There is another route I have previously digitised however which skirts around it.
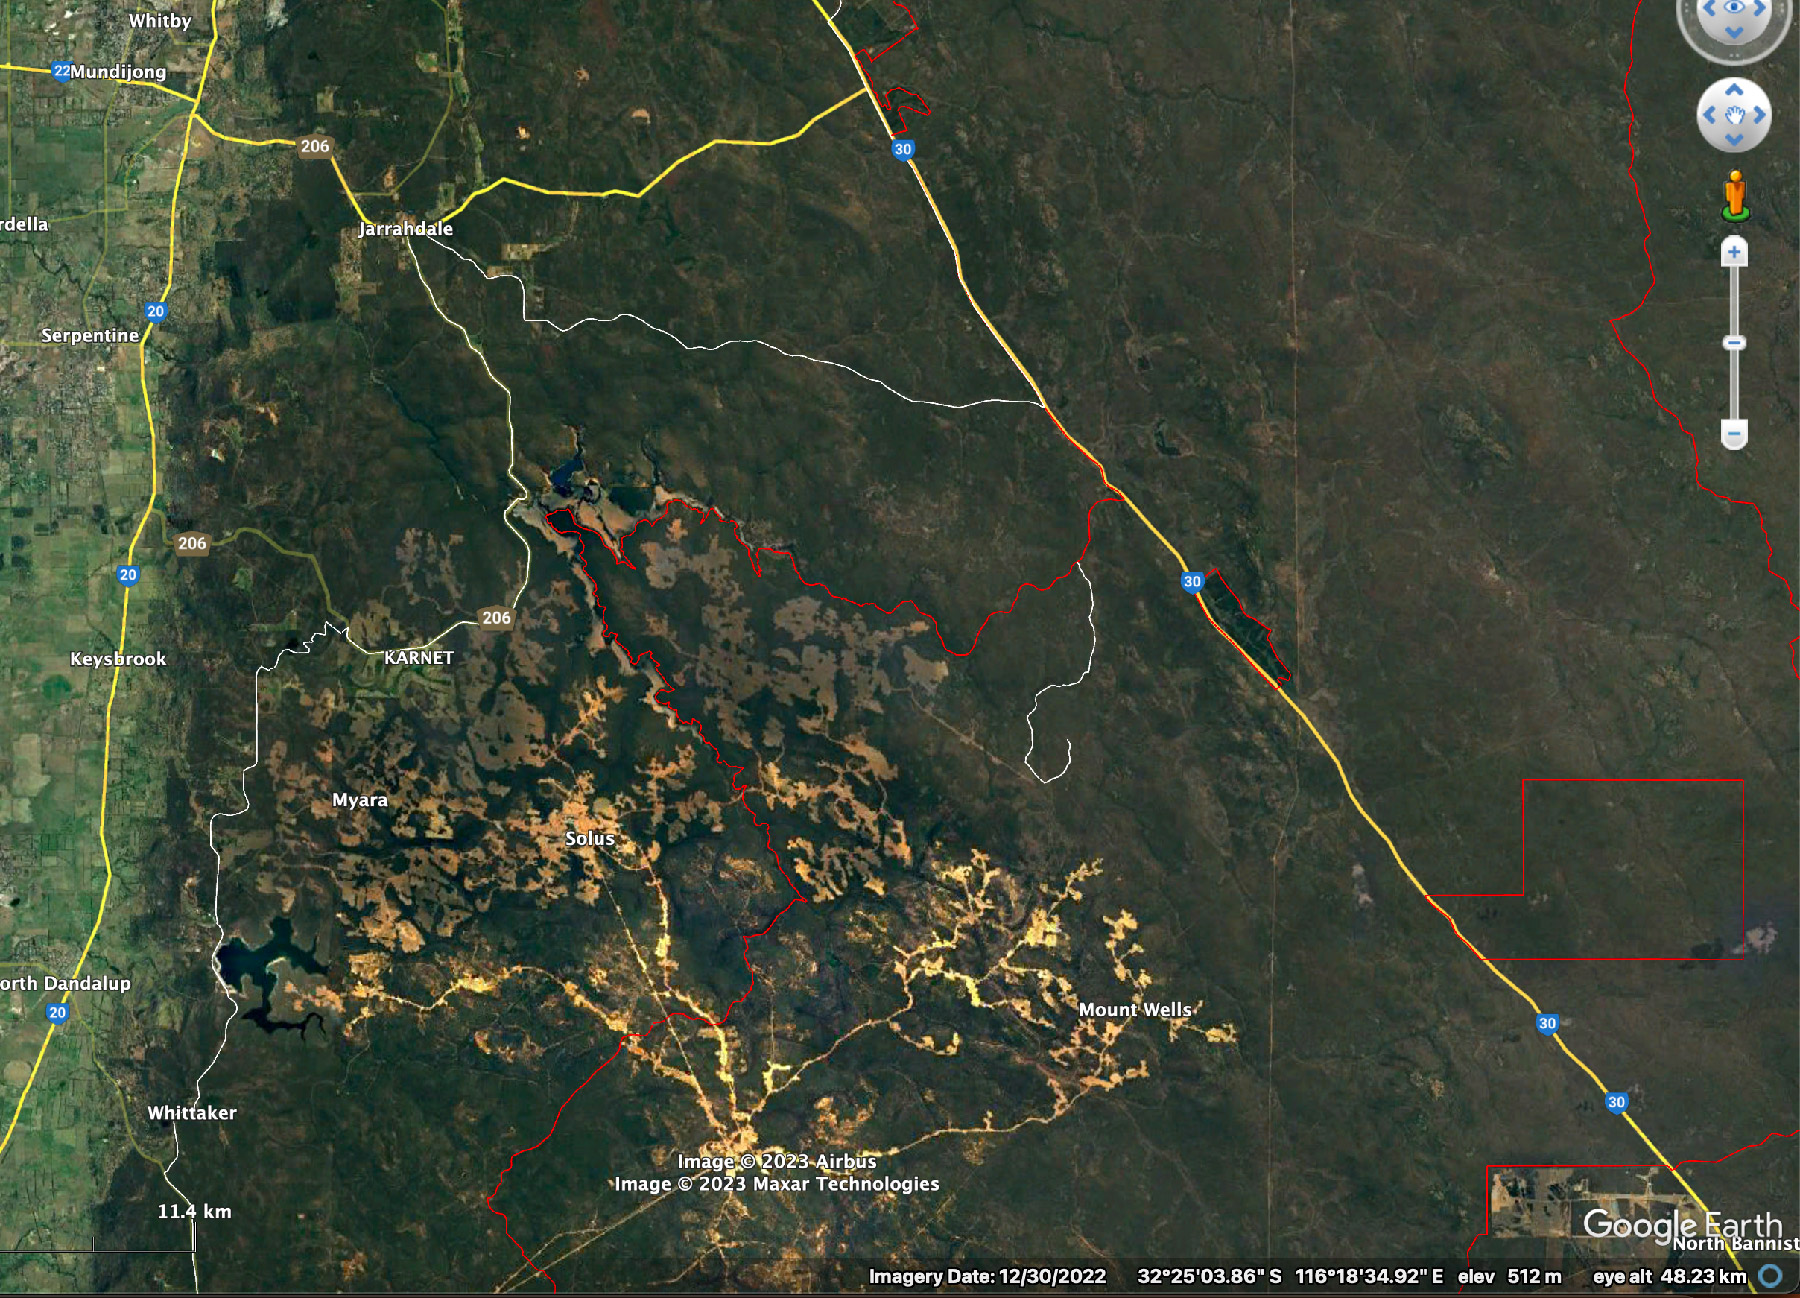
Doing this kind of mapping and analysis can save pain or entering areas you are not allowed to go into – so it’s very useful before doing a trip!
Adding waypoints you’ve got from somewhere else
A great thing about being able to play with GIS software and also Google Earth is the ability to add waypoints from somewhere else. If they’ve provided a particular geospatial file, chances are QGIS will be able to read it and export it. An example of this might be the waypoints provided for the giant 4wd loops in WA (obtainable via email request through https://www.wa4wda.com.au/services/) but also things like places of historic interest.
A lot of 4wd forums, however, also seem to just publish waypoints individually as text. If you just have a couple of these then you can usually just add them individually to your mapping application, but if you have more than a few it might be worth combining them into 1 file to bulk load them.
If you put all the coordinates you want to load into a comma-separated spreadsheet (a ‘CSV file’) either via Excel or manually in a text editor, you can then load these up in QGIS: Layer Menu -> Add Layer… -> Add Delimited Text Layer.
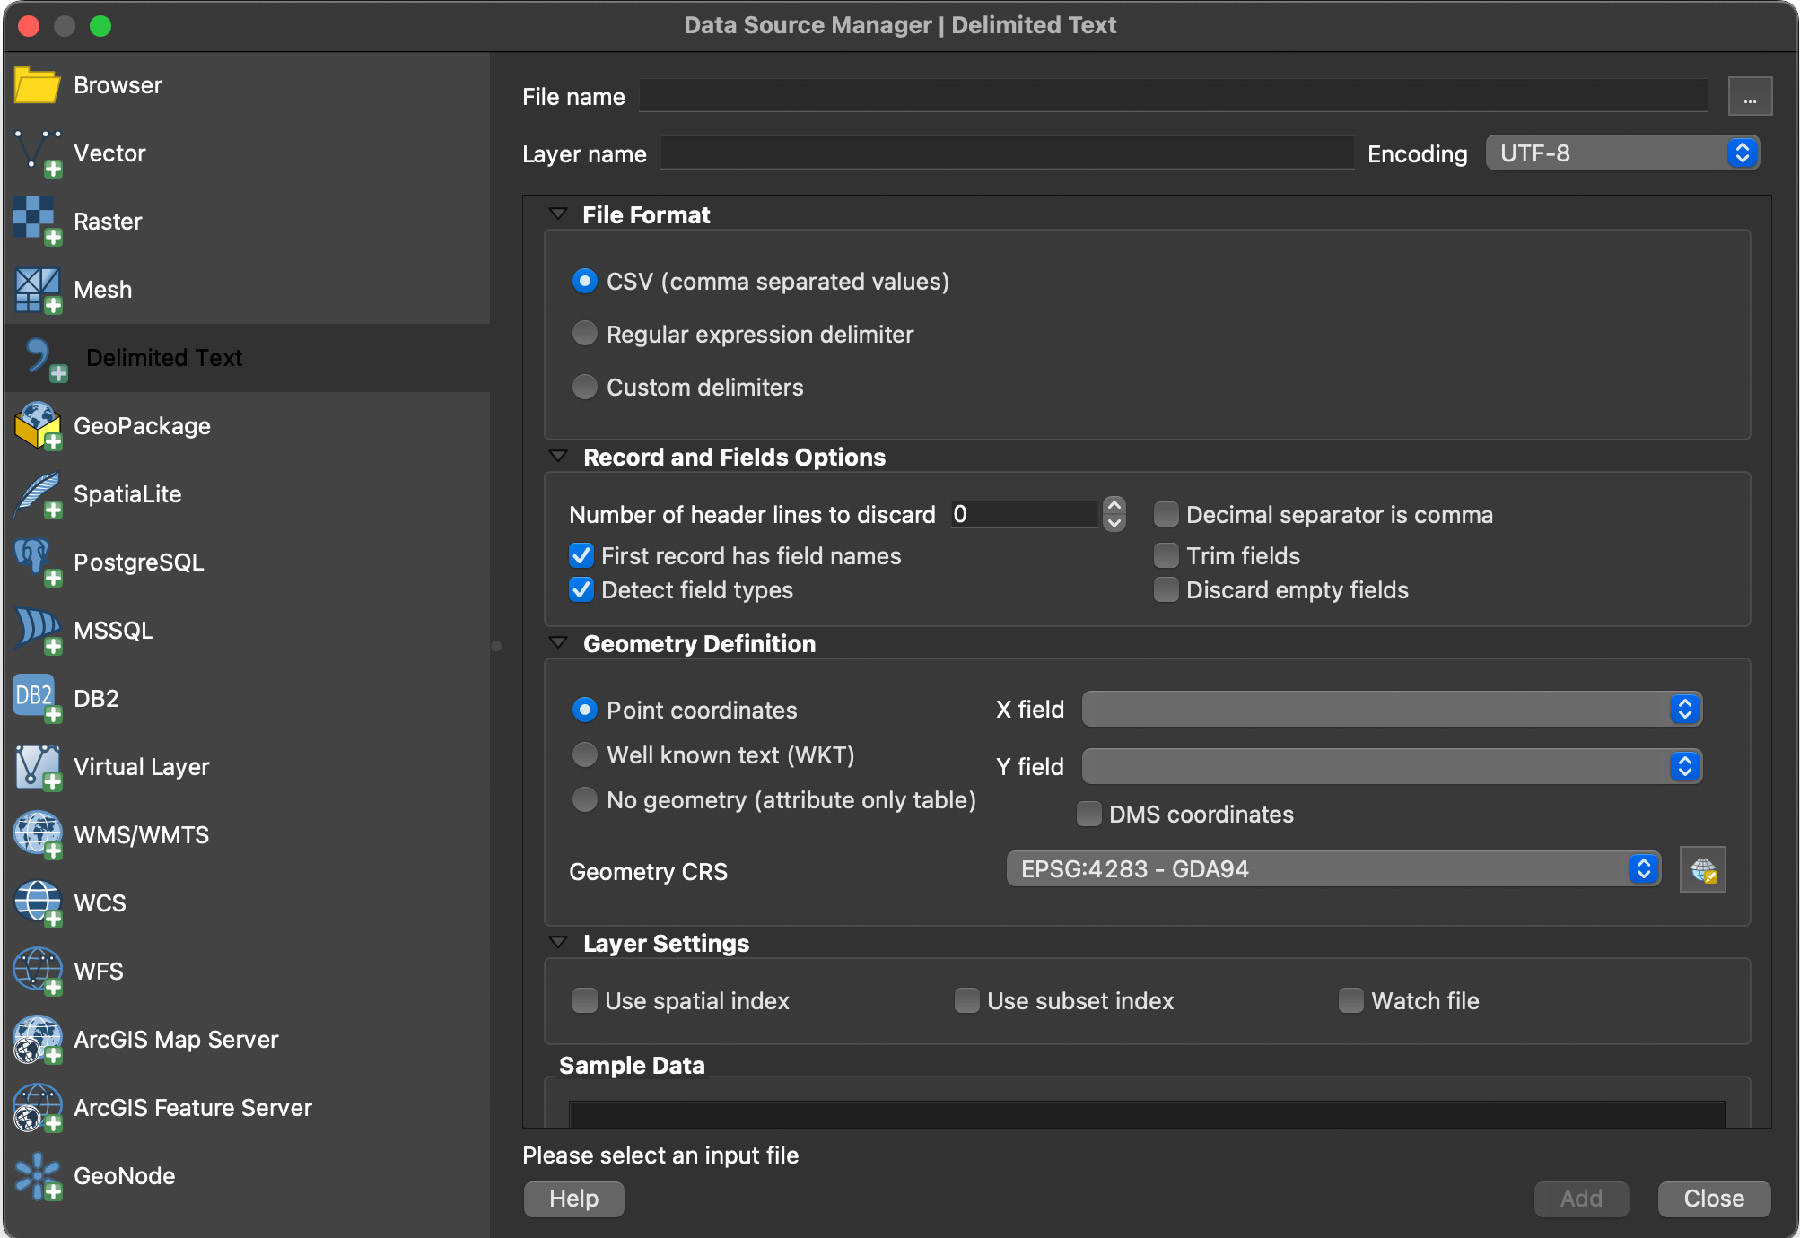
Some key elements here:
a) You need to know the projection of the data – out of scope of this article, but likely most data will be in latitude and longitudes and can be assumed to use the WGS84 spheroid which is specified as EPSG:4326 in the “Geometry CRS” dropdown field.
b) You need to know which columns are the X field (longitude for lat/longs) and Y field (latitude for lat/longs)
c) Some details about the way points are specified – the tickbox that says DMS coordinates means the coordinates are in degrees, minutes and seconds versus being assumed to be decimal degrees, for instance.
If there’s suitable interest in some of the ins and outs of this I’ll expand on this section to explain these things though.
Archive of some routes and maps
Another aspect you find with 4wding is a lot of people don’t share routes they’ve created, or they’re locked up behind paywalls or annoying forums as attachments etc. Or, additionally, they’re published as waypoints but in a way that really sucks to paste and get into a GIS or onto a GPS system. Currently I don’t have too many routes saved but this is a little spot where I can put them as GPX and KML files eventually.
Currently I’m working out the best way to archive these and share them so watch this space for some GPS files for the following things I’ve mapped in detail.