
False floor
If you’re going to treat the Jimny as a two seater, it can be worthwhile to make a false floor for the back. In some markets, where the Jimny is available as a 2 seat commercial vehicle, this is already done for you although I had some
Sections
- Design thoughts
- Removing the rear seats
- Cutting out the main false floor
- Support frame
- Access hatches
- Finished product
Design thoughts & options
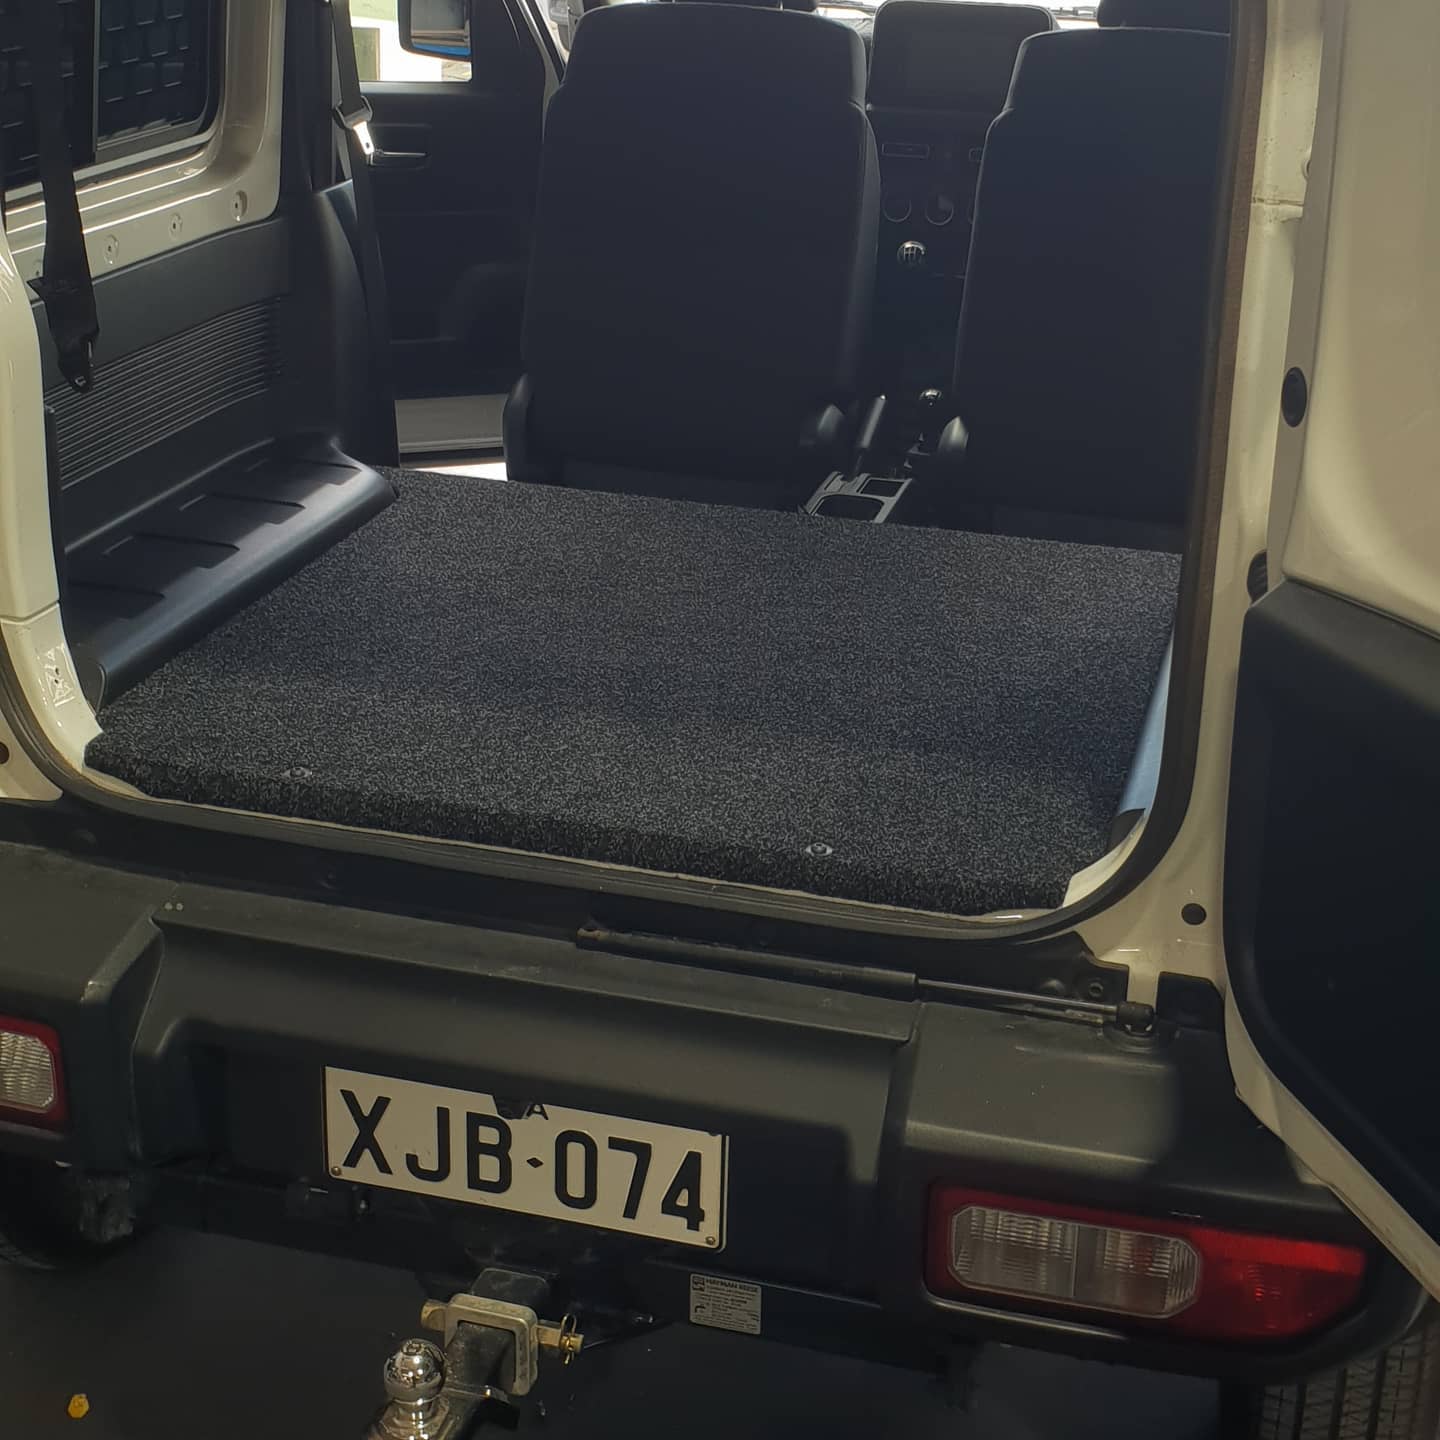
A big element for me was making loading and organisation as simple as possible. This means it’s easiest to just go with a false floor that totally covers the back, including the plastic bits that cover the wheel arches. This gives you the full depth of the seat area for storage underneath the false floor which is great for stuff like water bladders, tools etc. I also didn’t care about retaining the luggage crate for the back, so it was helpful to remove that too.
There are some other designs people have done. If you want maximum height for drawers then you’re better off with a lower height false floor than one that covers the plastic on the sides, too. My car was templated by Custom Installations/Custom Overland Solutions for a floor like this for a customer in Sydney; the professional made low false floor was very neat indeed but not ideal for what I was after.
It isn’t a huge height difference but it does dictate what you can more easily fit on there, versus having that extra room for taller shelves. The Front Runner base deck also sits at a similar height, although has a different frame to the one Custom Installations did & also doesn’t close off at the front. There is also a Bushtech one using a steel frame and quite thick plywood, but this ends up ~$1000AU at time of writing.
I also wanted to engineer my floor a bit better than just overbuilding it and calling it good. Chatting to people in the trade who make these for a living indicated that you can go thinner with the ply than you think and then just suitably reinforce it with an appropriately made frame that hooks into the bolt holes. This frame can also just be pine, it doesn’t need to be steel or anything so you can end up with a false floor that is lighter than the seats that are removed. Many ones out there commercially are a lot thicker than they need to be for the width they span in the Jimny so they end up heavier than the seats and also thicker which cuts into storage height. In an already small car where you might be hitting weight limits this isn’t ideal.
Finally in terms of design I was also happy to make my own which meant I could customise it how I wanted as well as document it for inspiration for all the various readers out there… but if you’re not feeling handy on the tools I’d contact a specialist outfitter or get one of the premade ones. It will take time and some tools to make this.
Removing the rear seats
The seats come out incredibly easily, with just 8 bolts holding the backs into the car and also a couple of nuts for the seat belt ends.
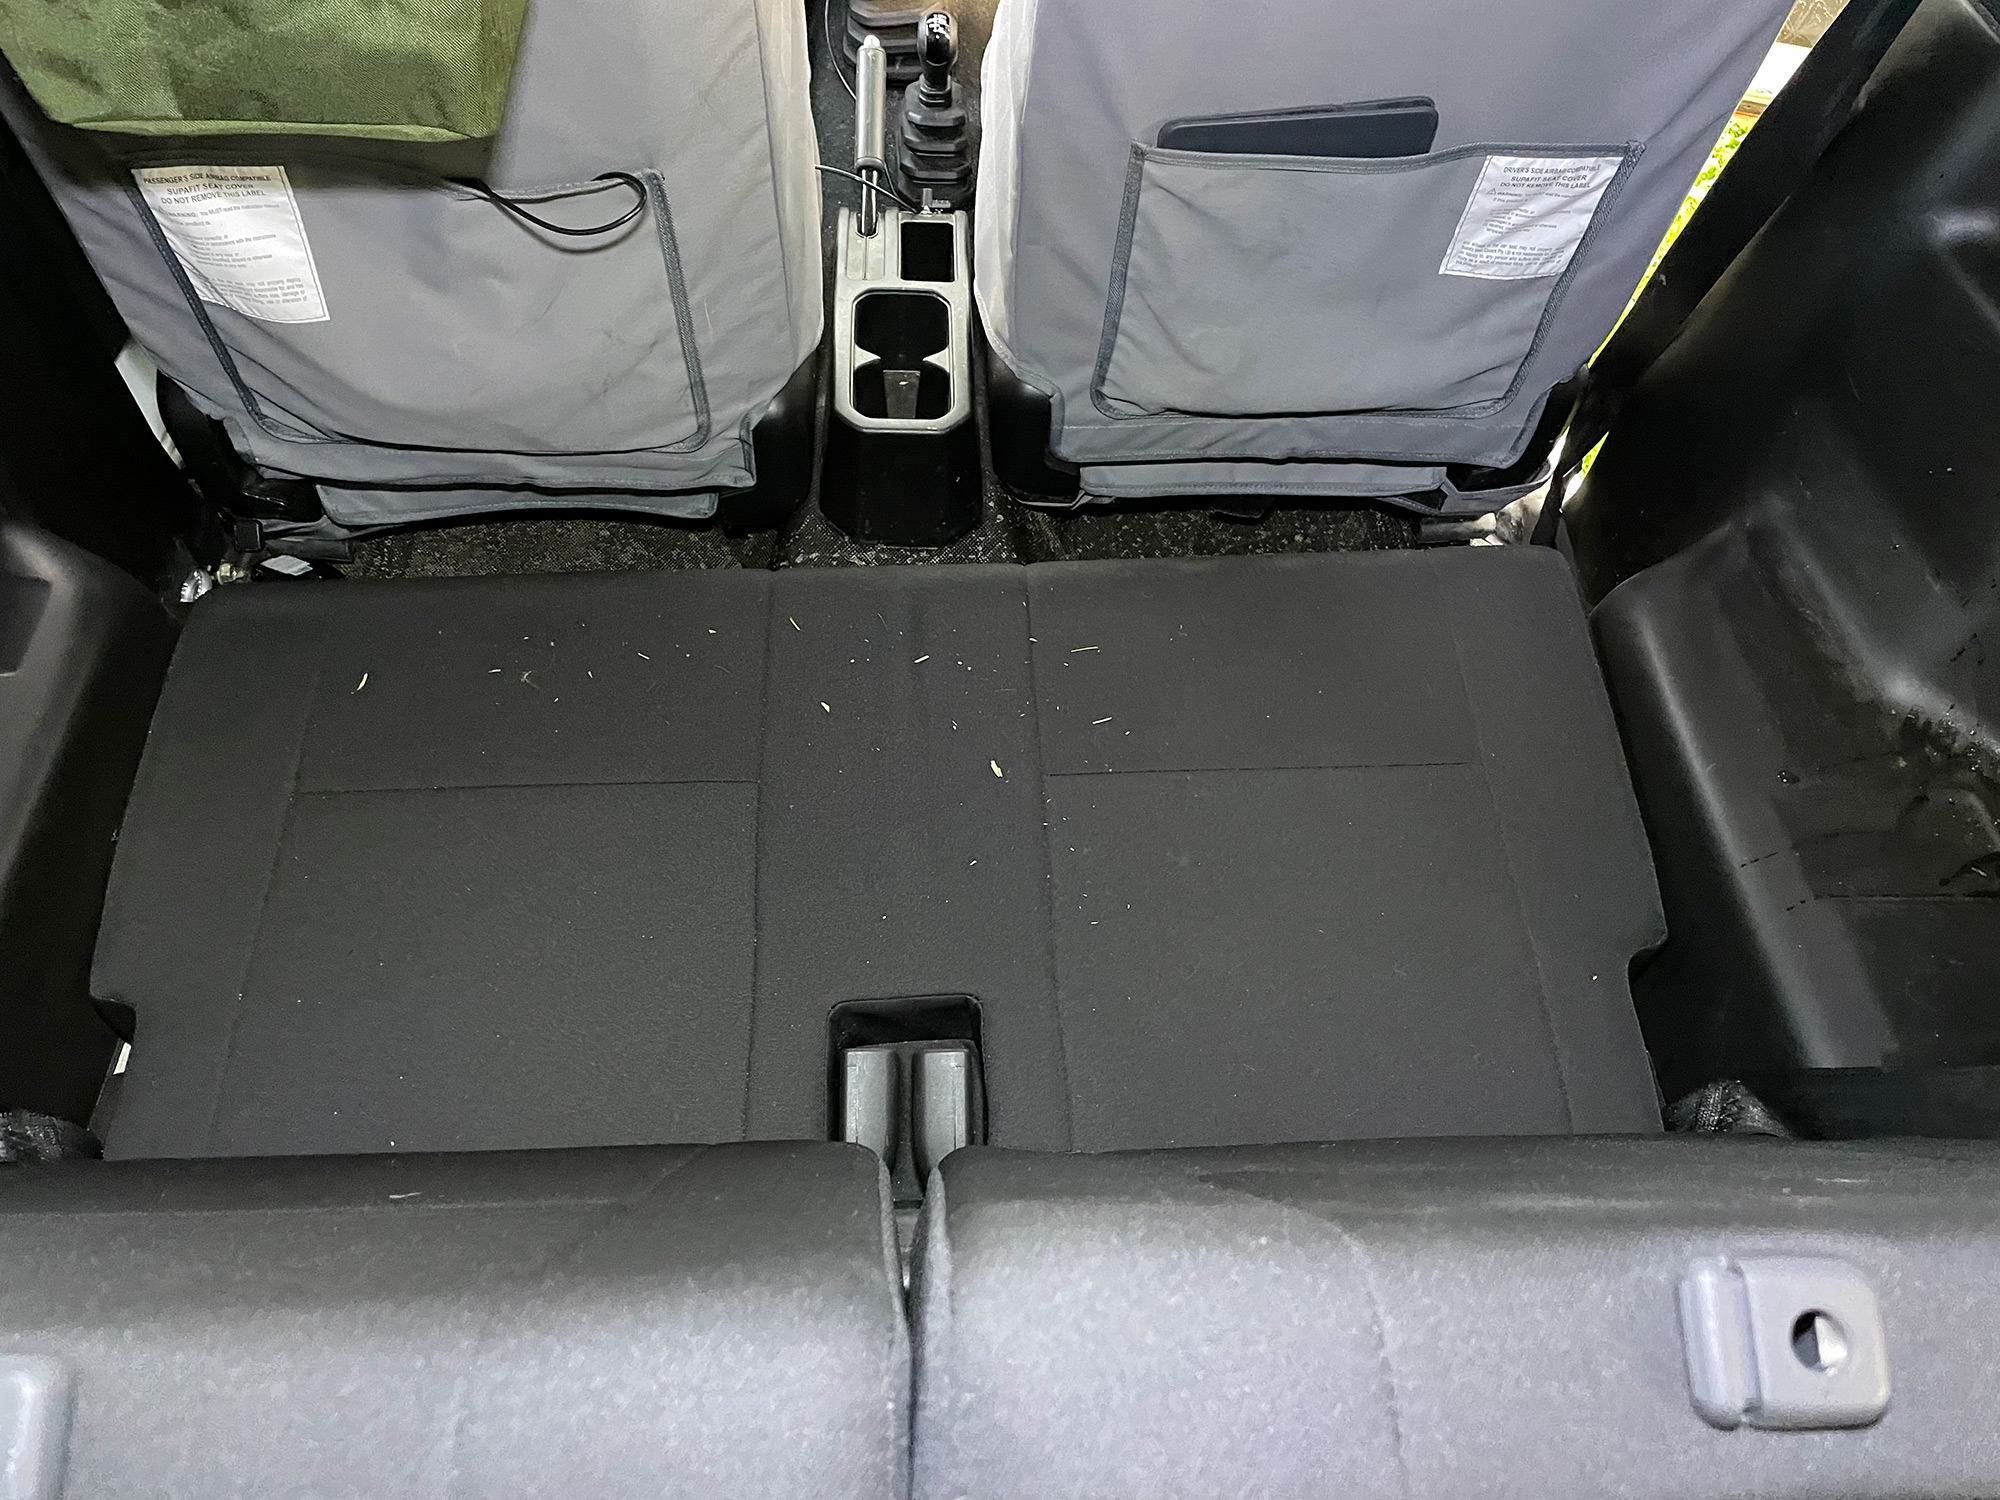
Start with a bare rear. In this pic the mud stain is cause I didn’t clean the car out from some 4wding before pulling the rear seats out.
Might as well also lift out the jack and its foam too
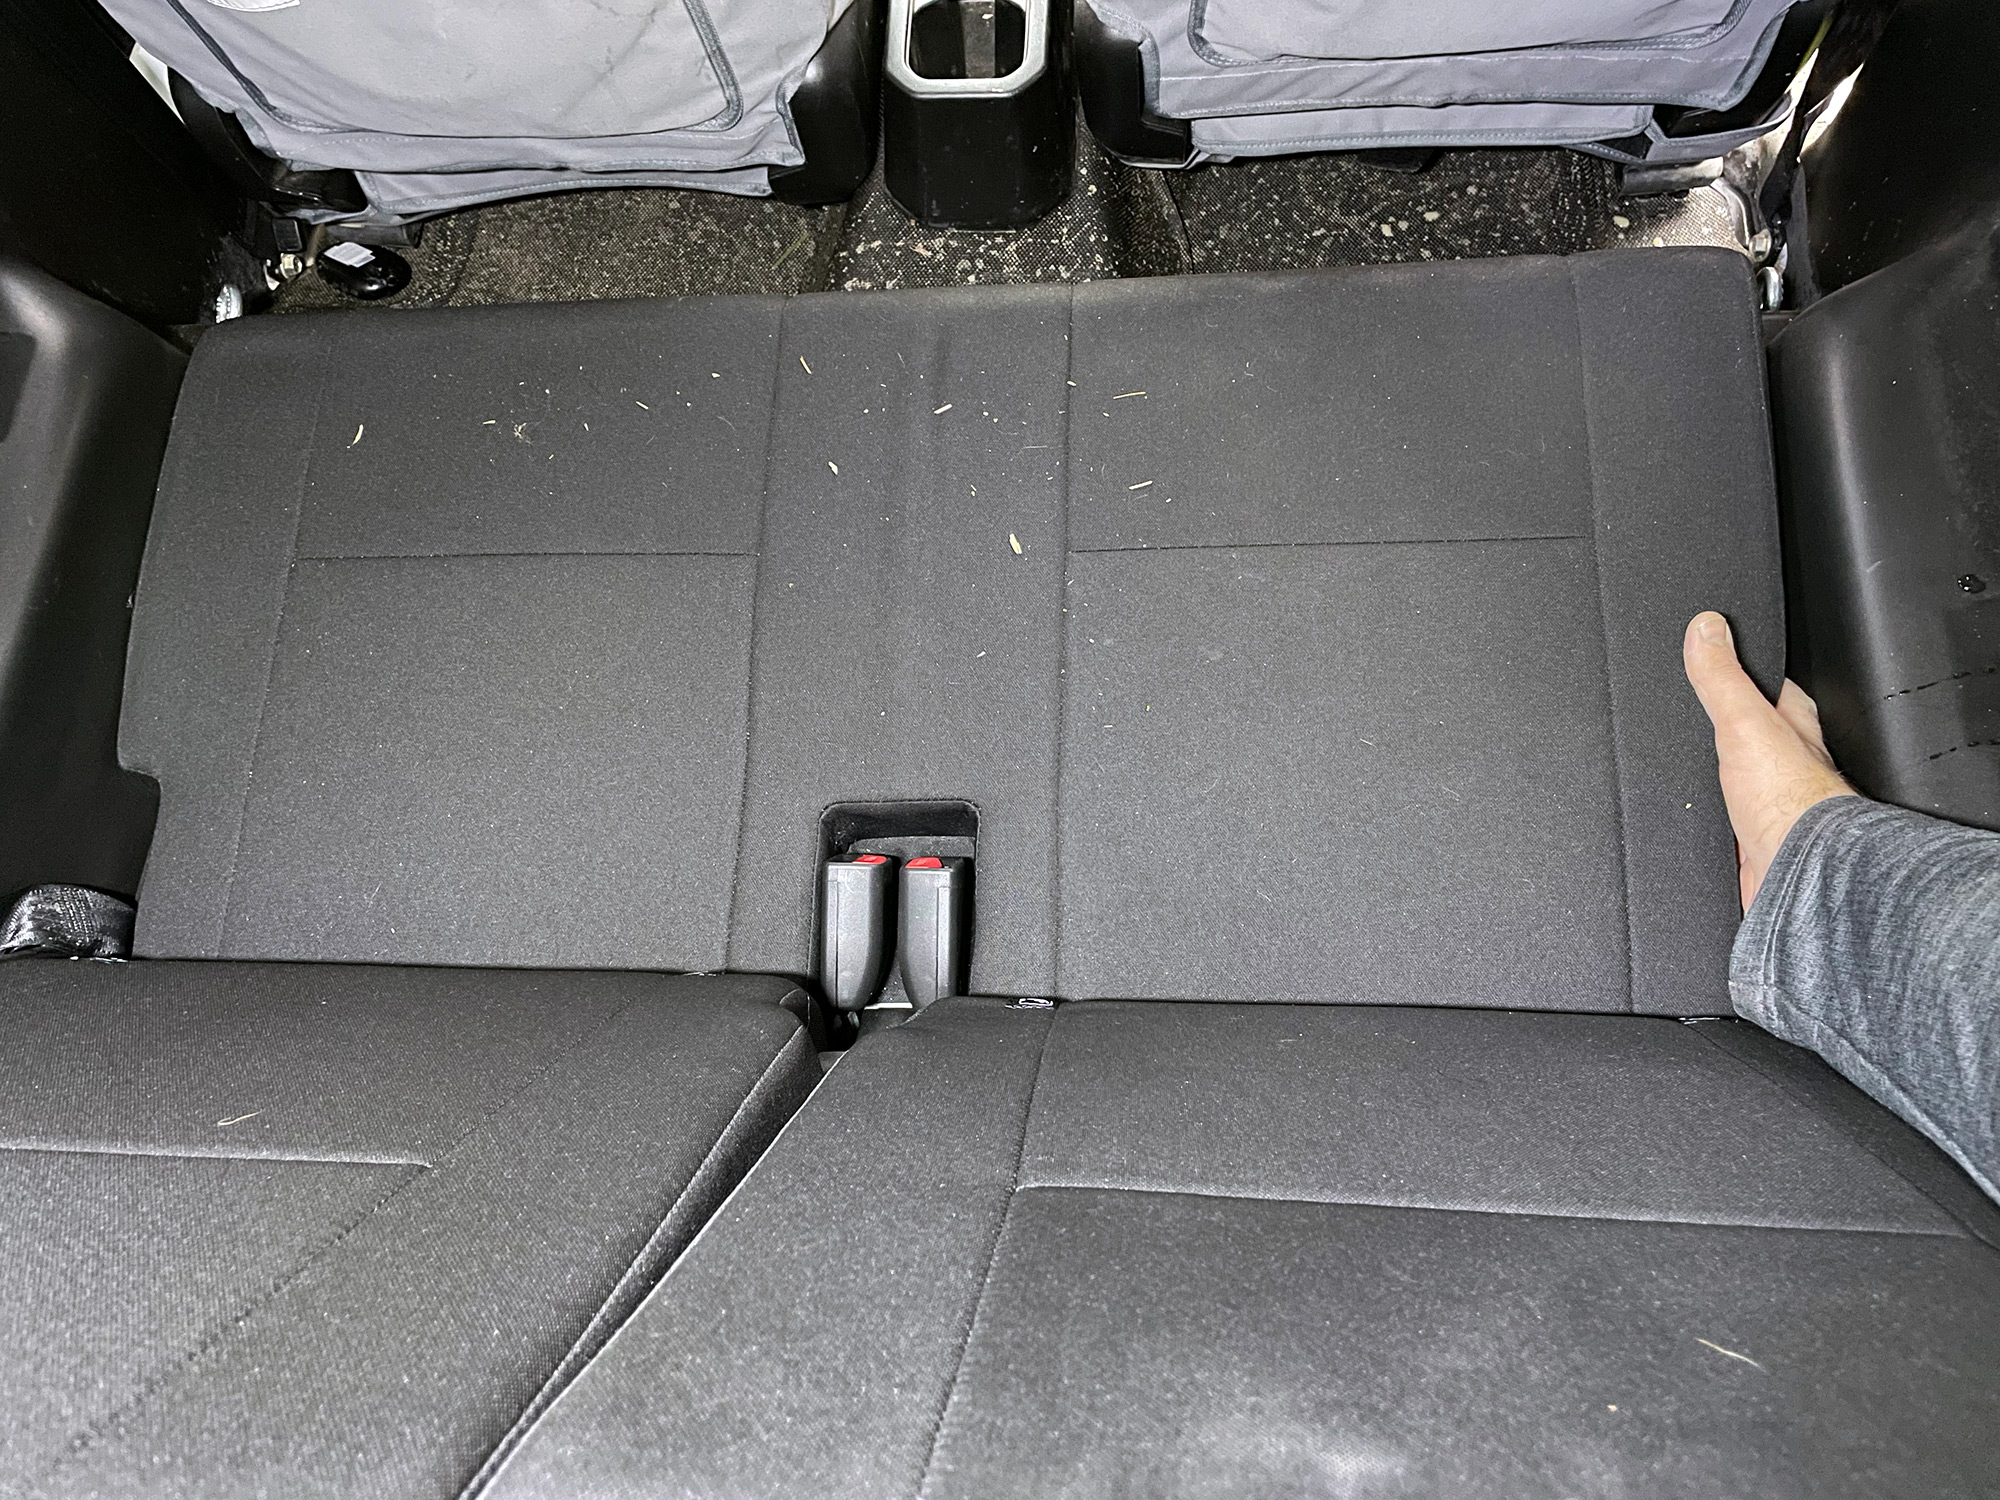
To give myself access, I lifted the seats up a bit at this point and removed the seat base. The seat base just lifts up and then kinda forwards a bit. Note there are some cables to unplug from the base of the seat so don’t yank it all the way out.
Seat with the backs folded up first…
… then lift up and a bit forwards, but not all the way.
You can now access the two outer wires – one on each side – which connect to the seat base. This tells the car if you have someone sitting in the seat.
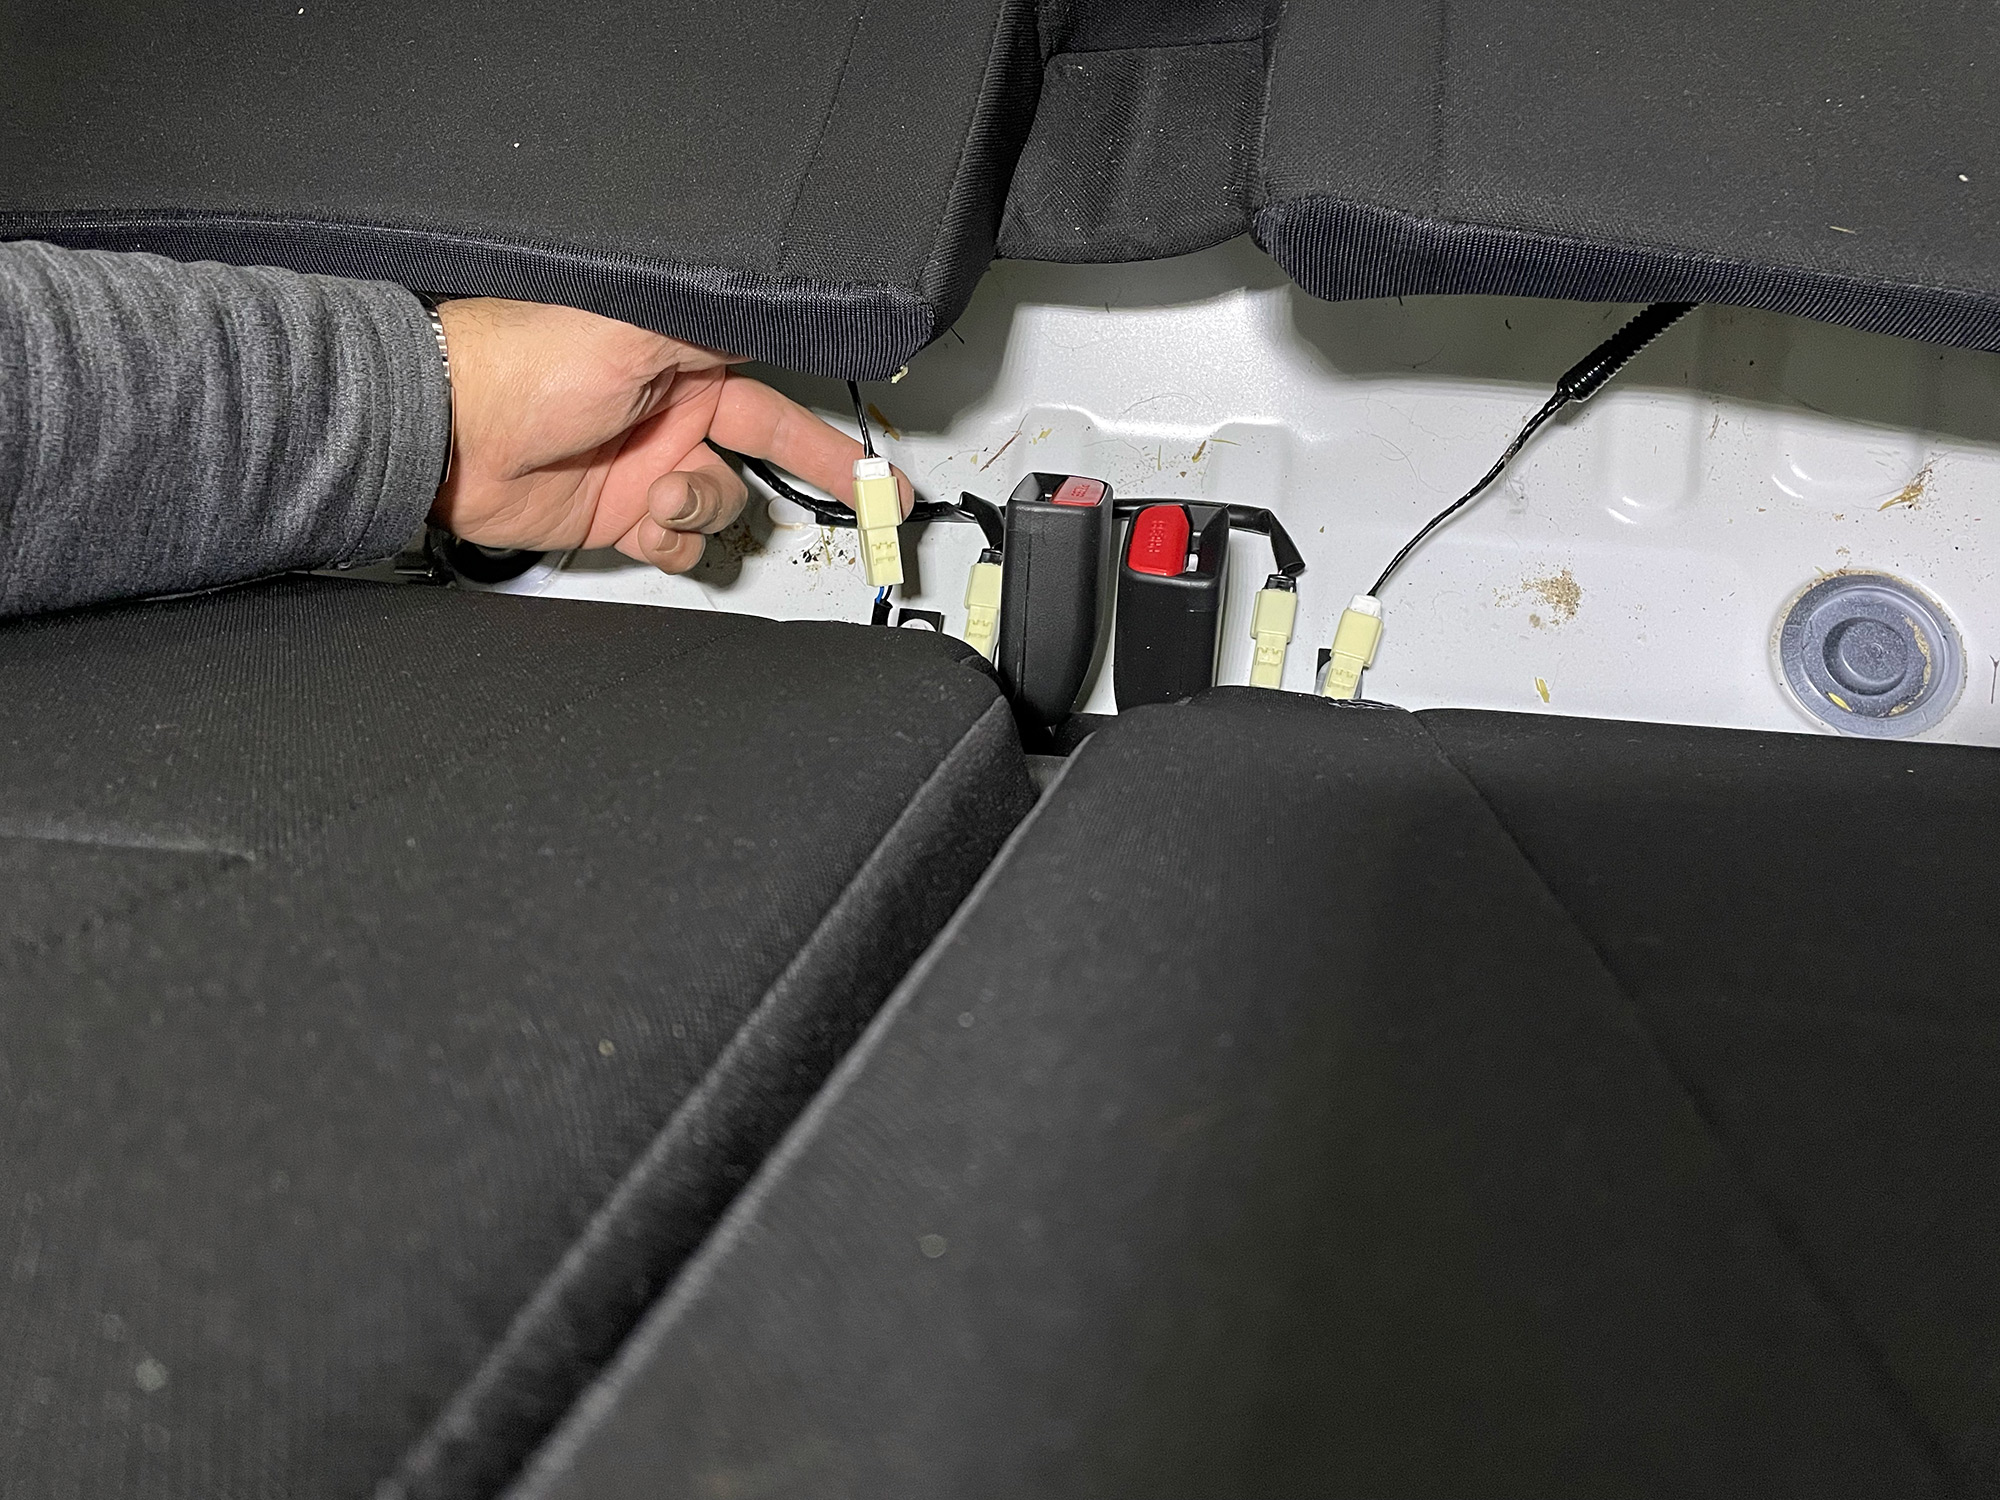
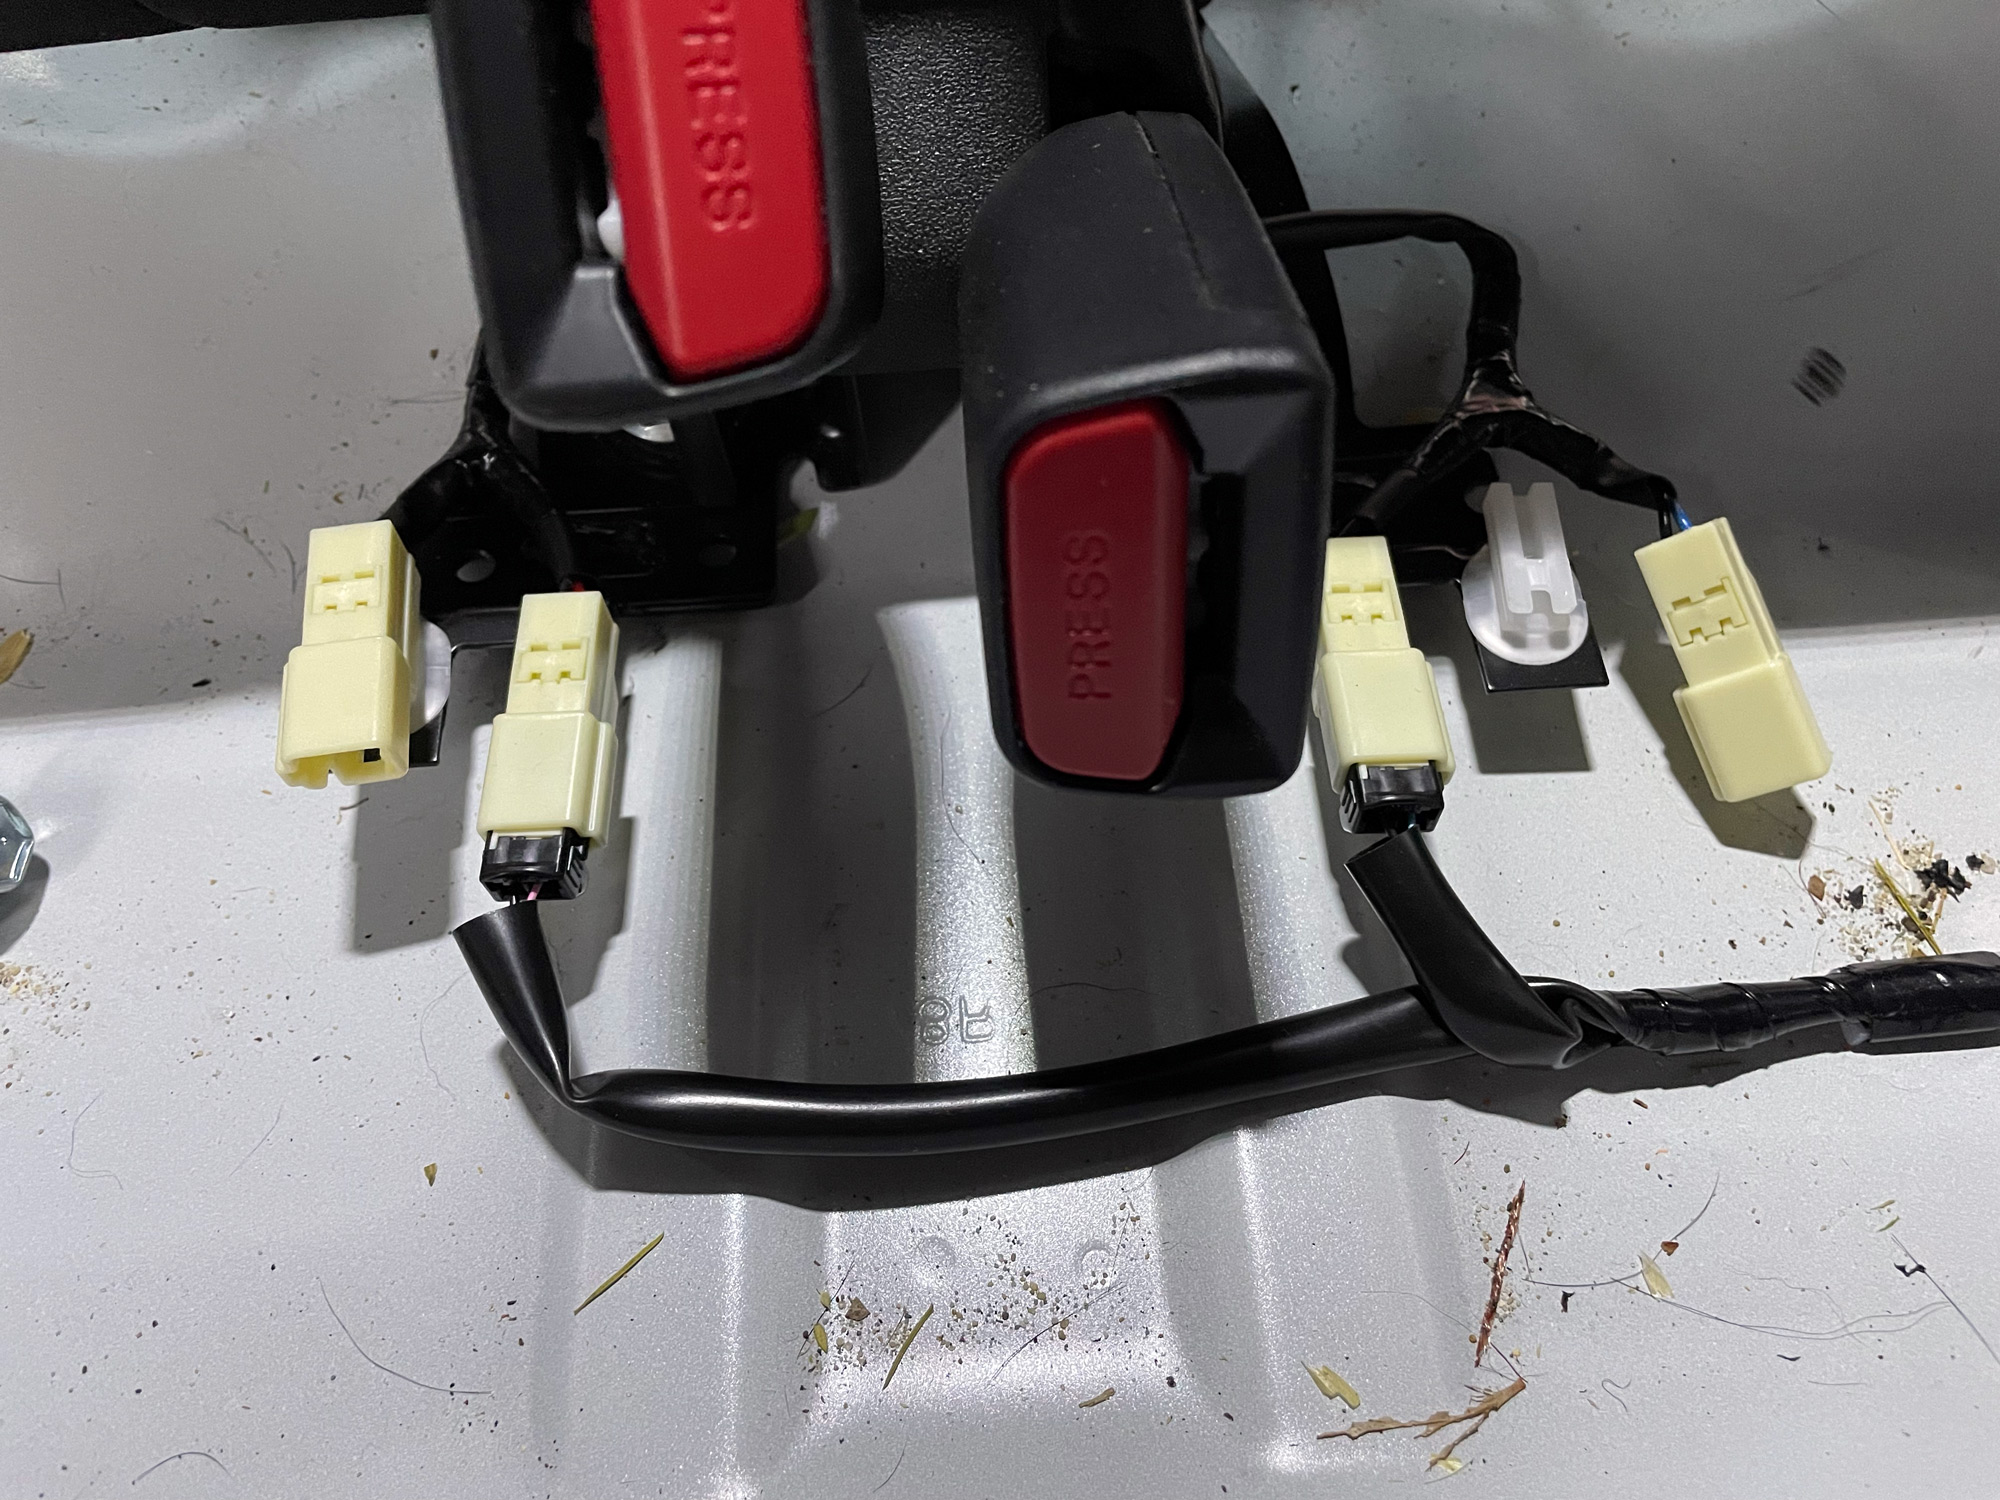
The white clip in the above phooto on the right hand side is from yanking the seat base up a bit far, but the wiring harness is easily pushed back onto this.
The inner two connectors are for the car knowing if a seatbelt for each rear passenger has been put on. You don’t have to unclip these now, but remember to do so when you remove the seat backs.
There are 4 bolts to undo at the front, one on each side of the base and then two in the middle. These are 14mm headed bolts. Word of caution if you need to replace these bolts: seatbelt and seat mounting bolts are actually imperial threaded bolts, don’t be confused by the metric head on these! The seat mounting bolts and seat belt threaded studs are 7/16-20 UNF fasteners; child anchorages (the 2 at the rear of the car by the luggage box) are 5/16-18 UNC fasteners.
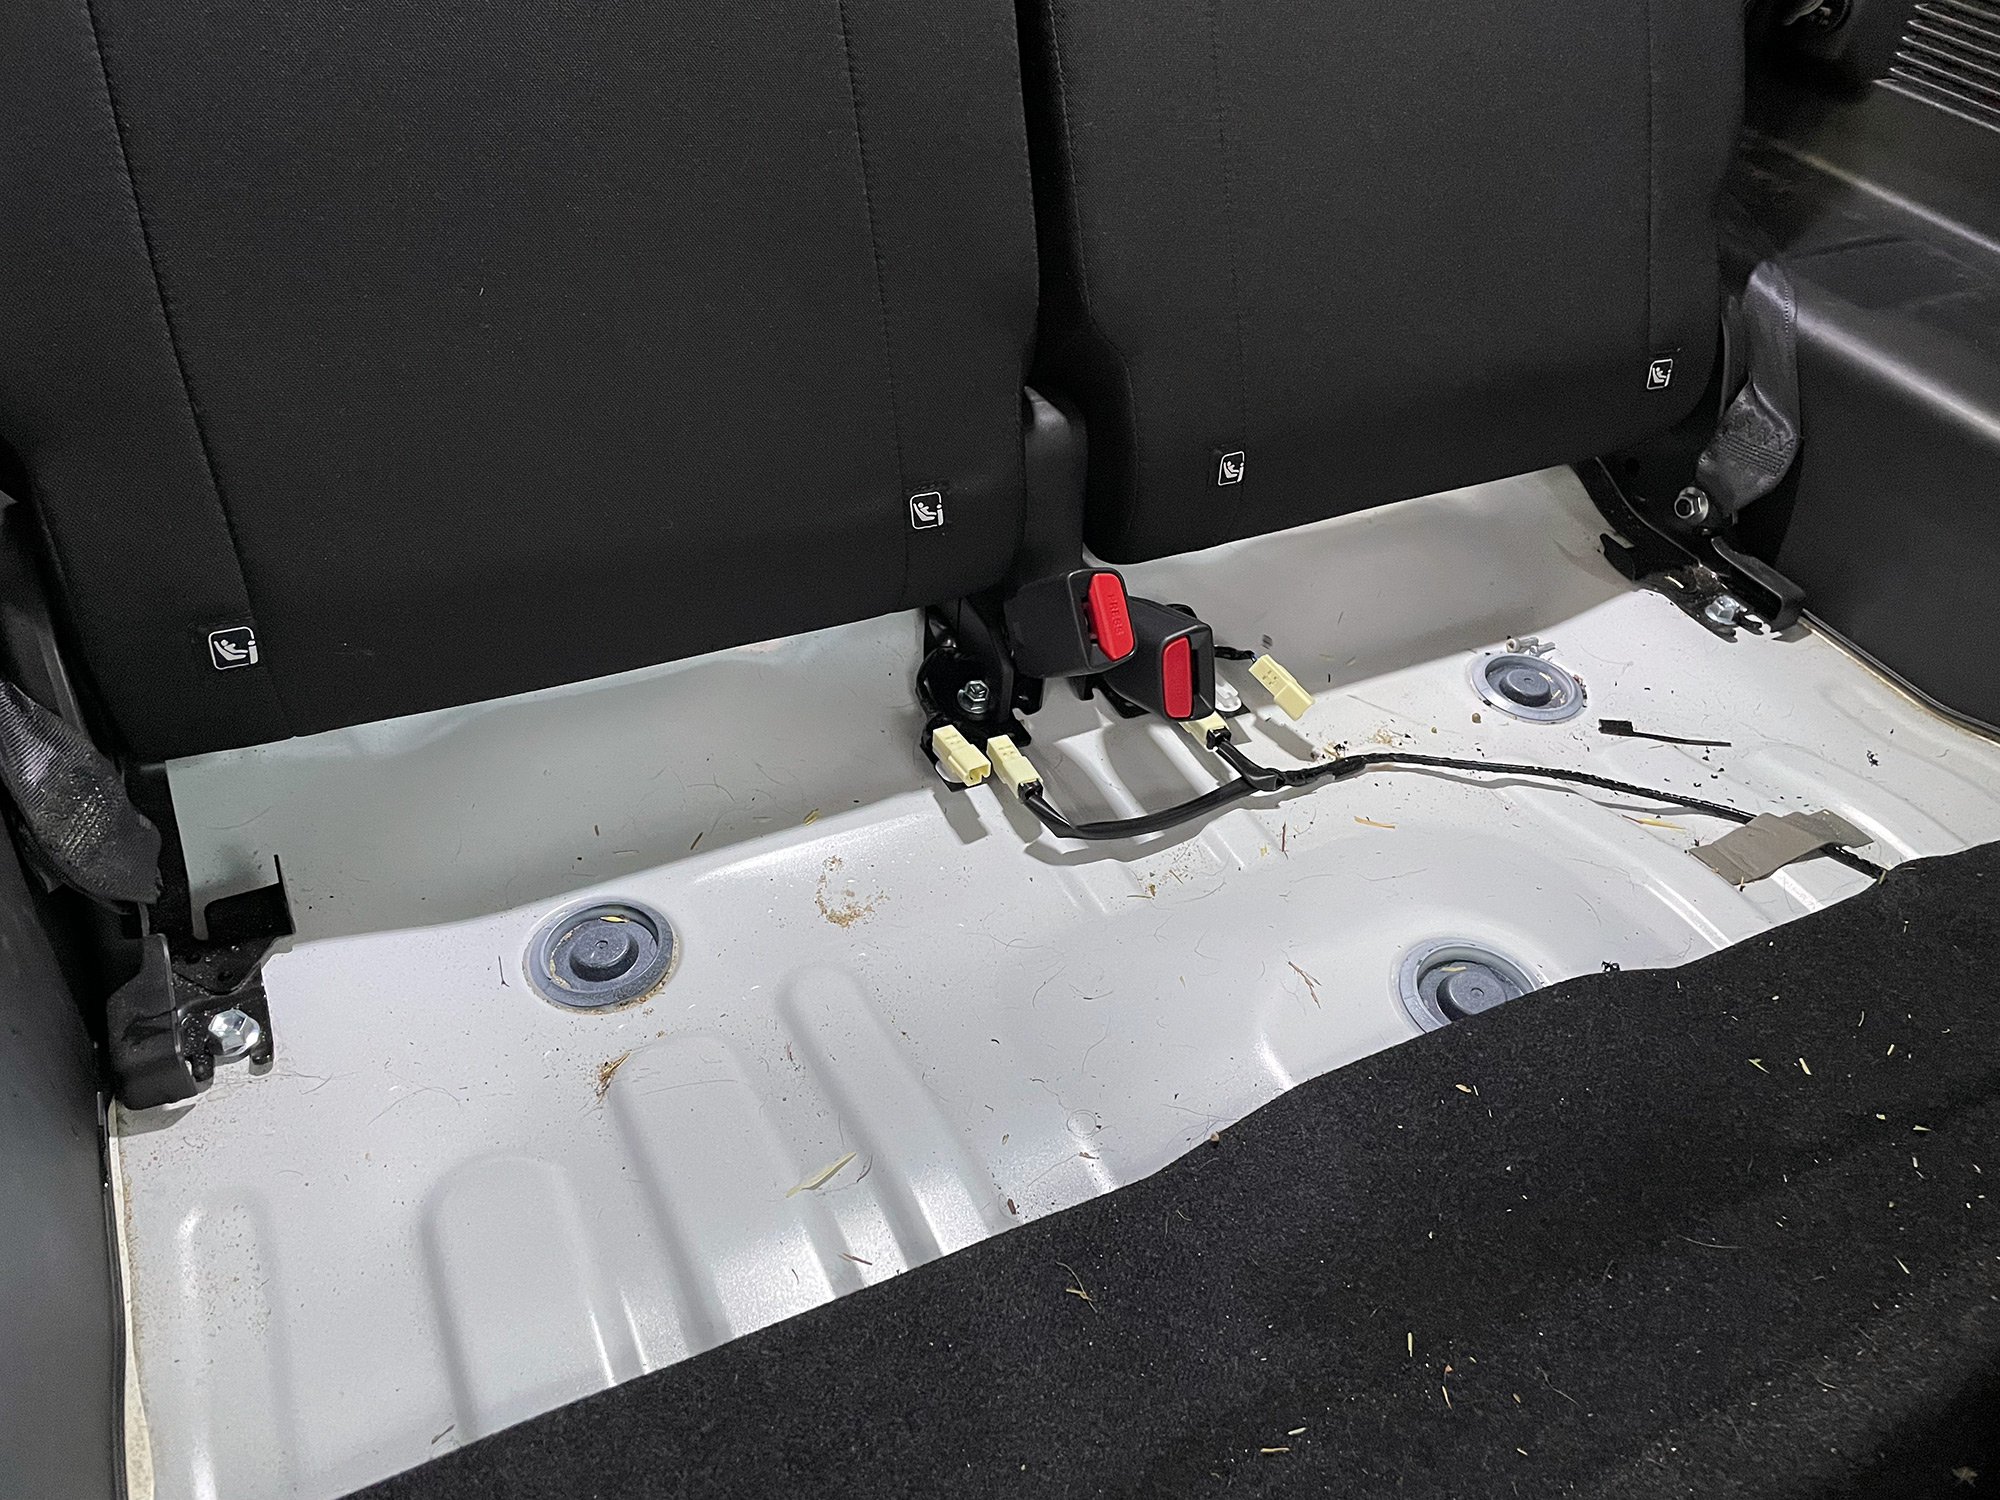
You need to pull the centre plastic part forwards and a bit upwards between the two seat belt buckles to access the two bolts a bit more easily in the centre.
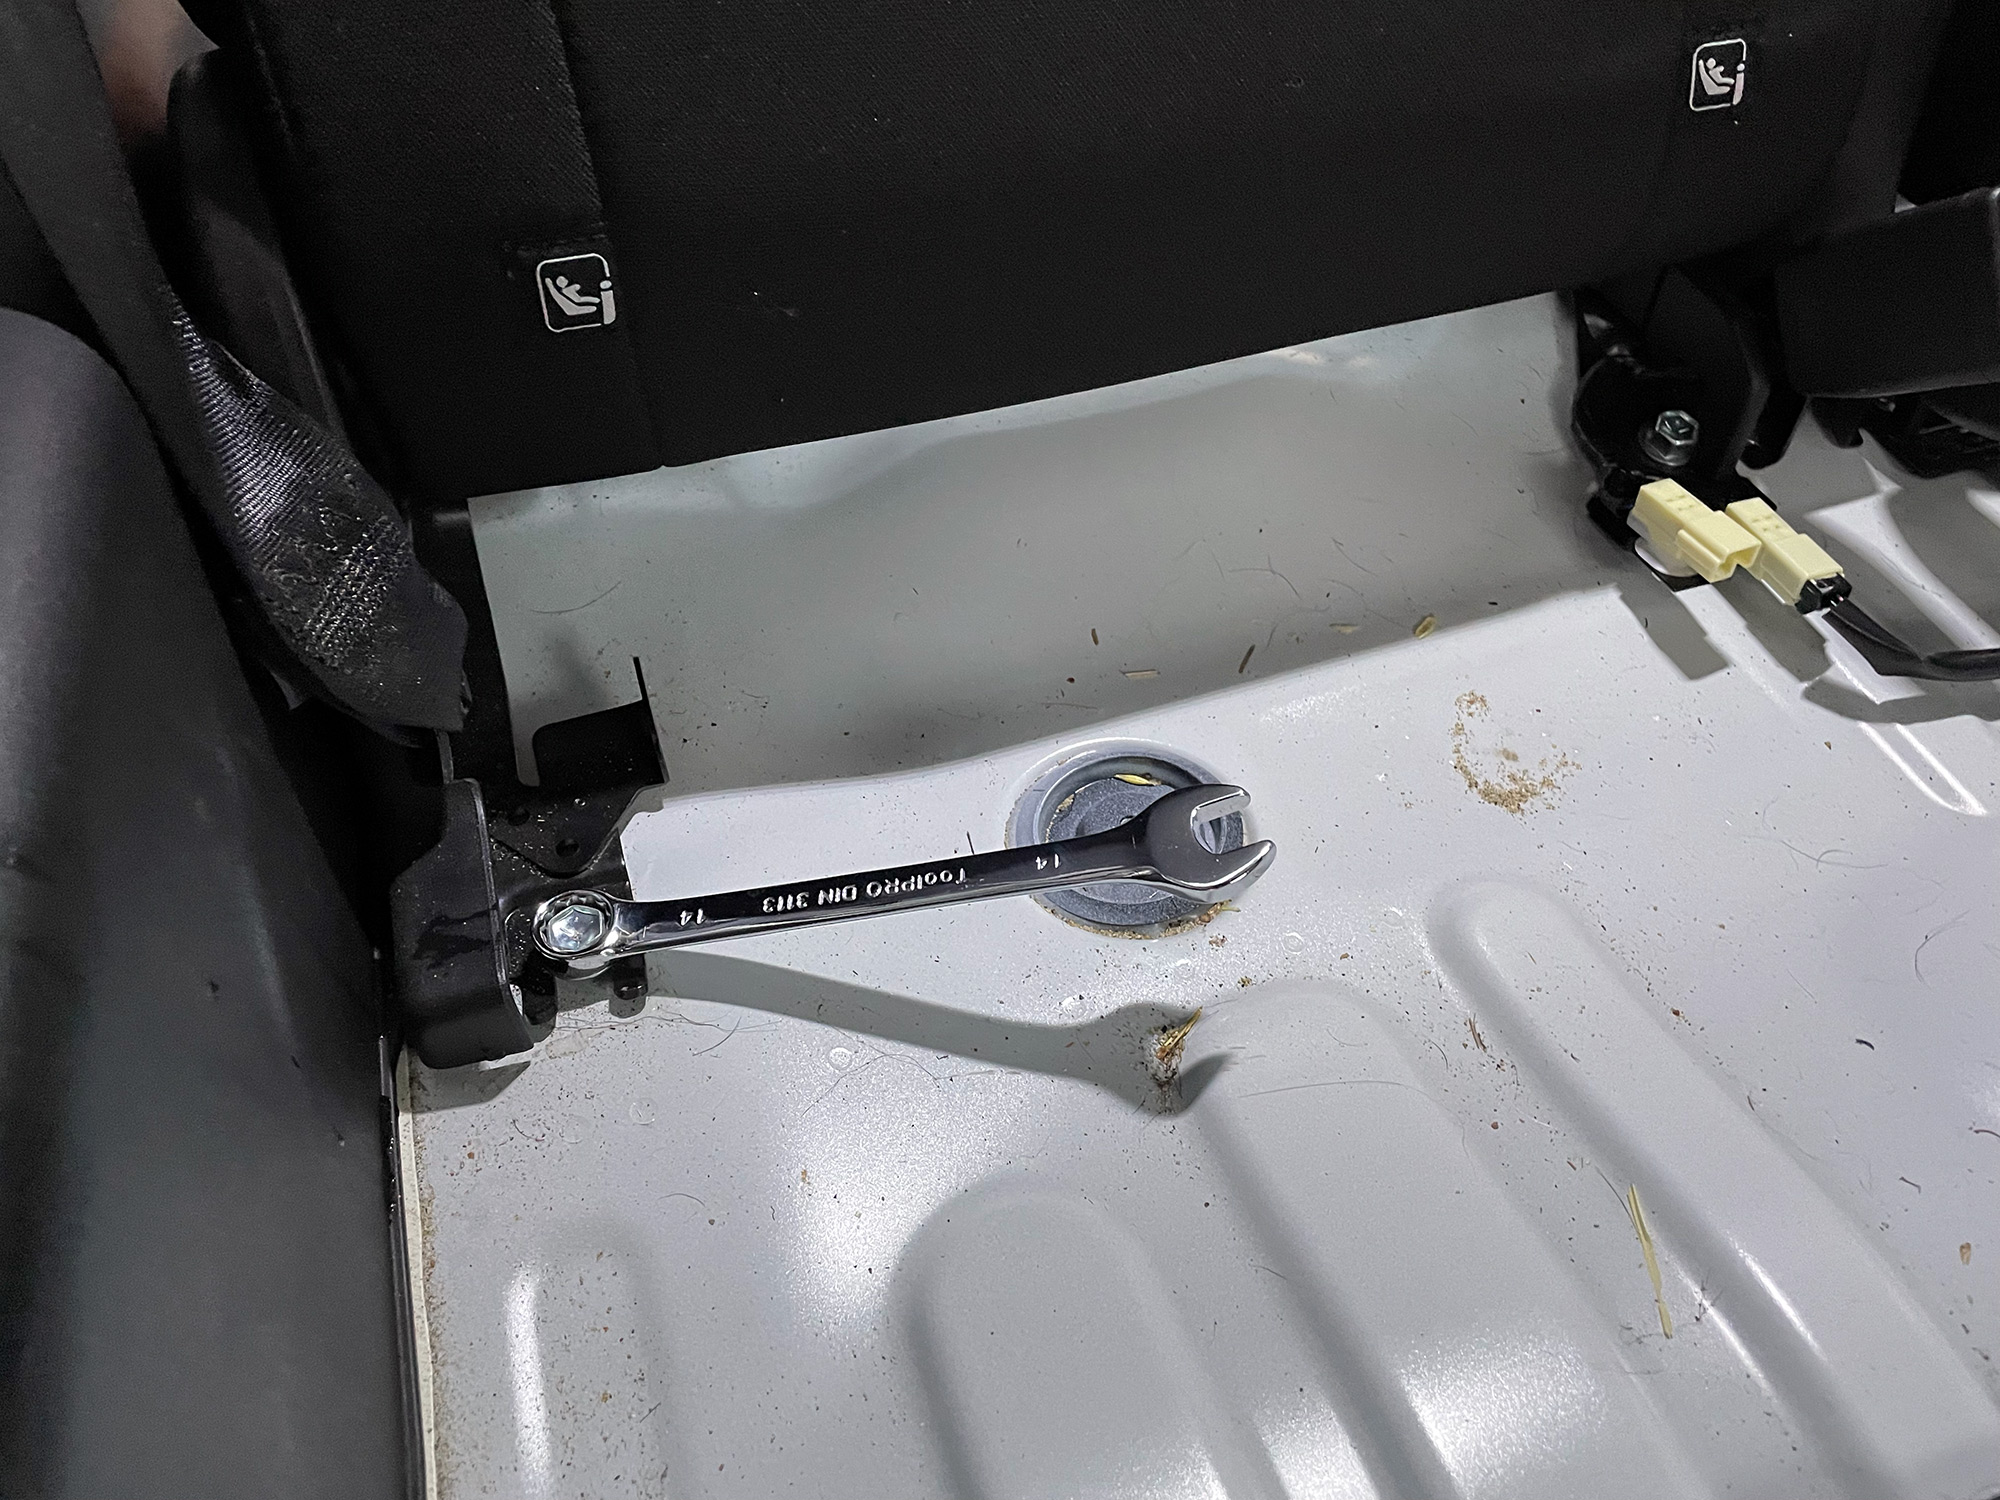
There is also 1 14mm nut on each side of the seat base at the front to mount the end of the seatbelt to. These can be a bit tight so it can be useful to use a socket to get in there to first loosen them up.

All of the work at the front side of the seat is done now. At this point the seat backs are just held in with 4 bolts at the back but they’re covered in plastic. These just lift up although use a trim removal tool and lift them up carefully but with a bit of force.
There is a piece of plastic at the back on each side…
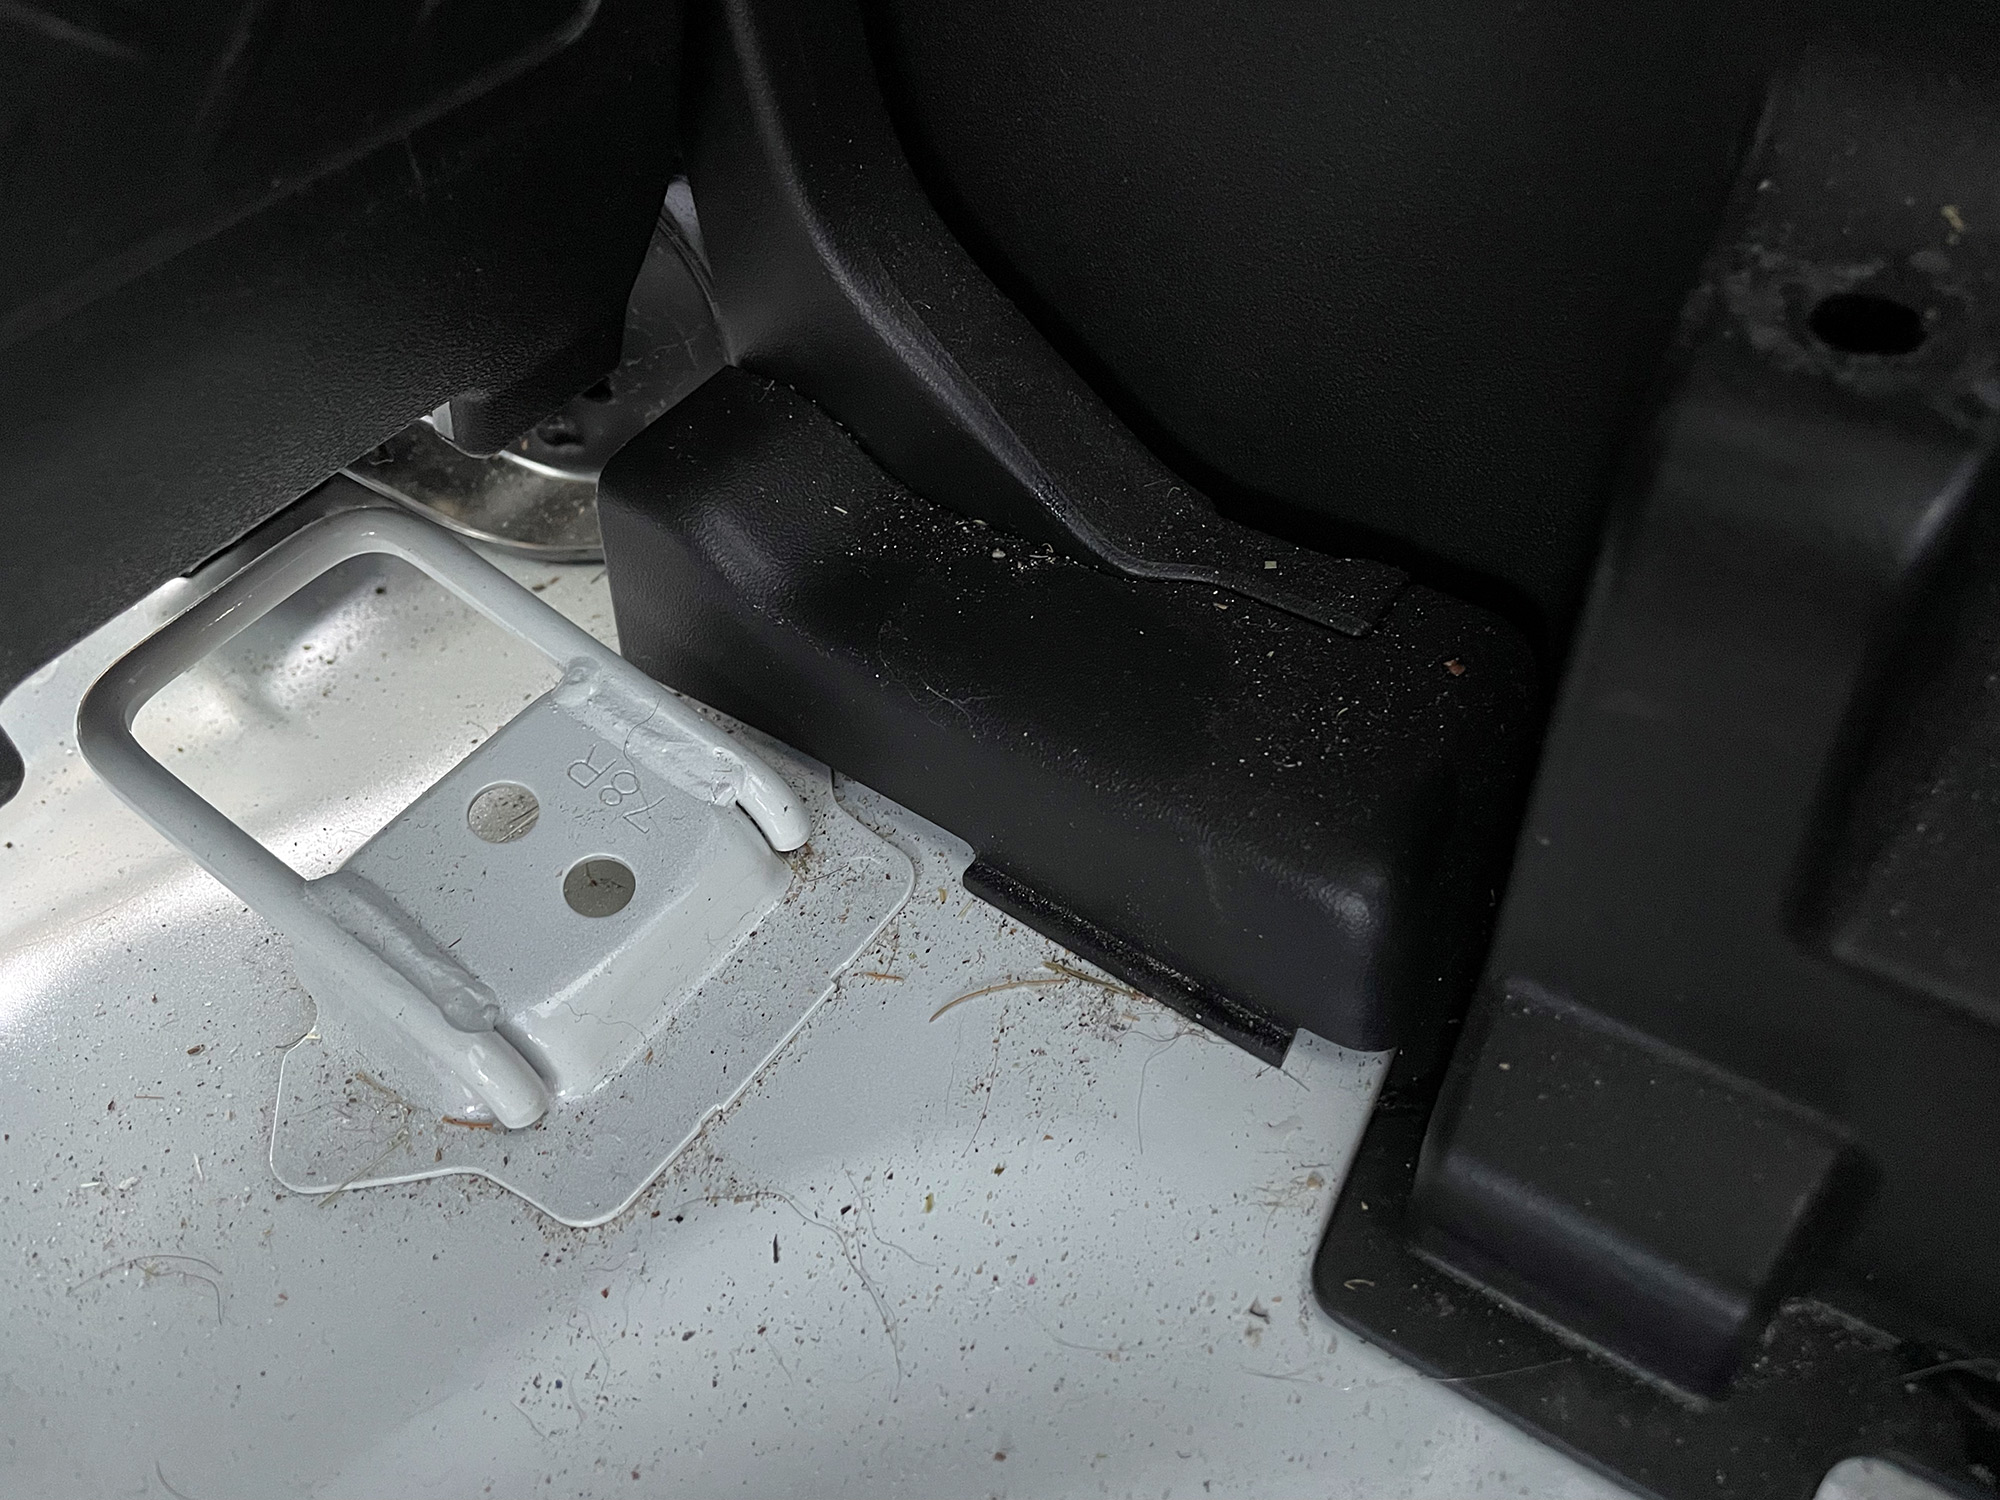
… which reveals a bolt per side…
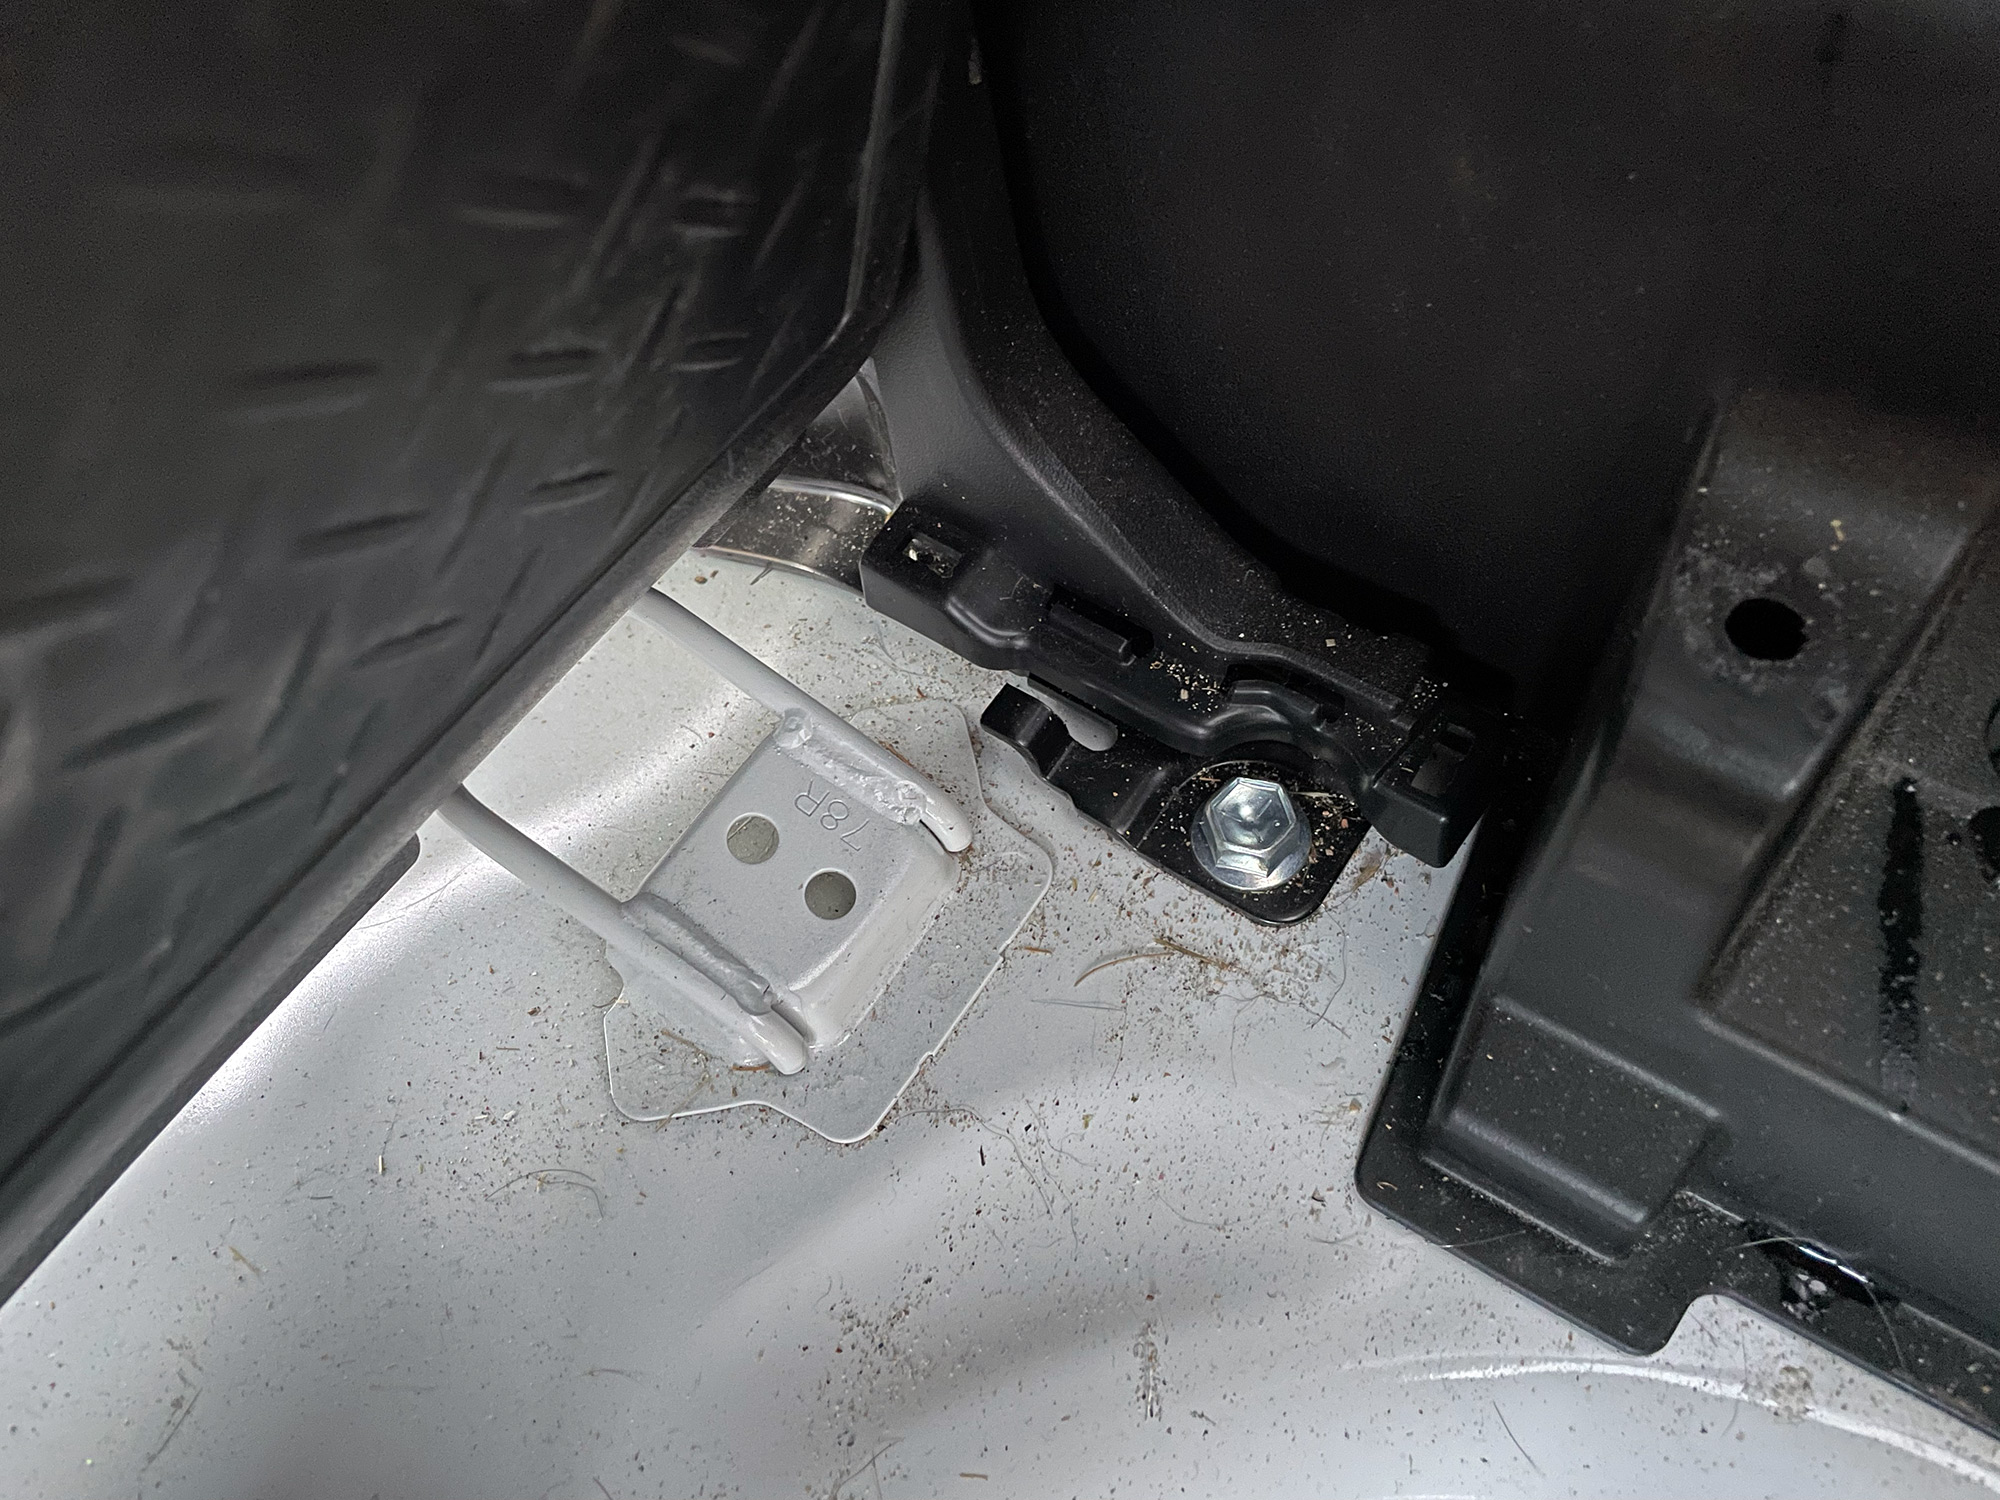
Also lift this up and kinda a bit back, again potentially using a trim removal tool to start prising it up first.
This reveals the centre two bolts – undo these and the seat backs can be lifted out.
With that you’re now all clear. This is a good time to clean out under the seats – hell, even if you aren’t removing the seats permanently, doing this periodically and cleaning out the floor pan is worthwhile just from a cleanliness perspective!
If you ever want to refit the seats, the bolts holding the rear seats in are tightened to 43 Nm, as are the two nuts for the ends of the seatbelts. You also need to make sure the end of the seatbelt sits between the raised bits of metal on the seat frame, as the angle that the belt comes across your body is an important thing in an accident.
Cutting out the main false floor
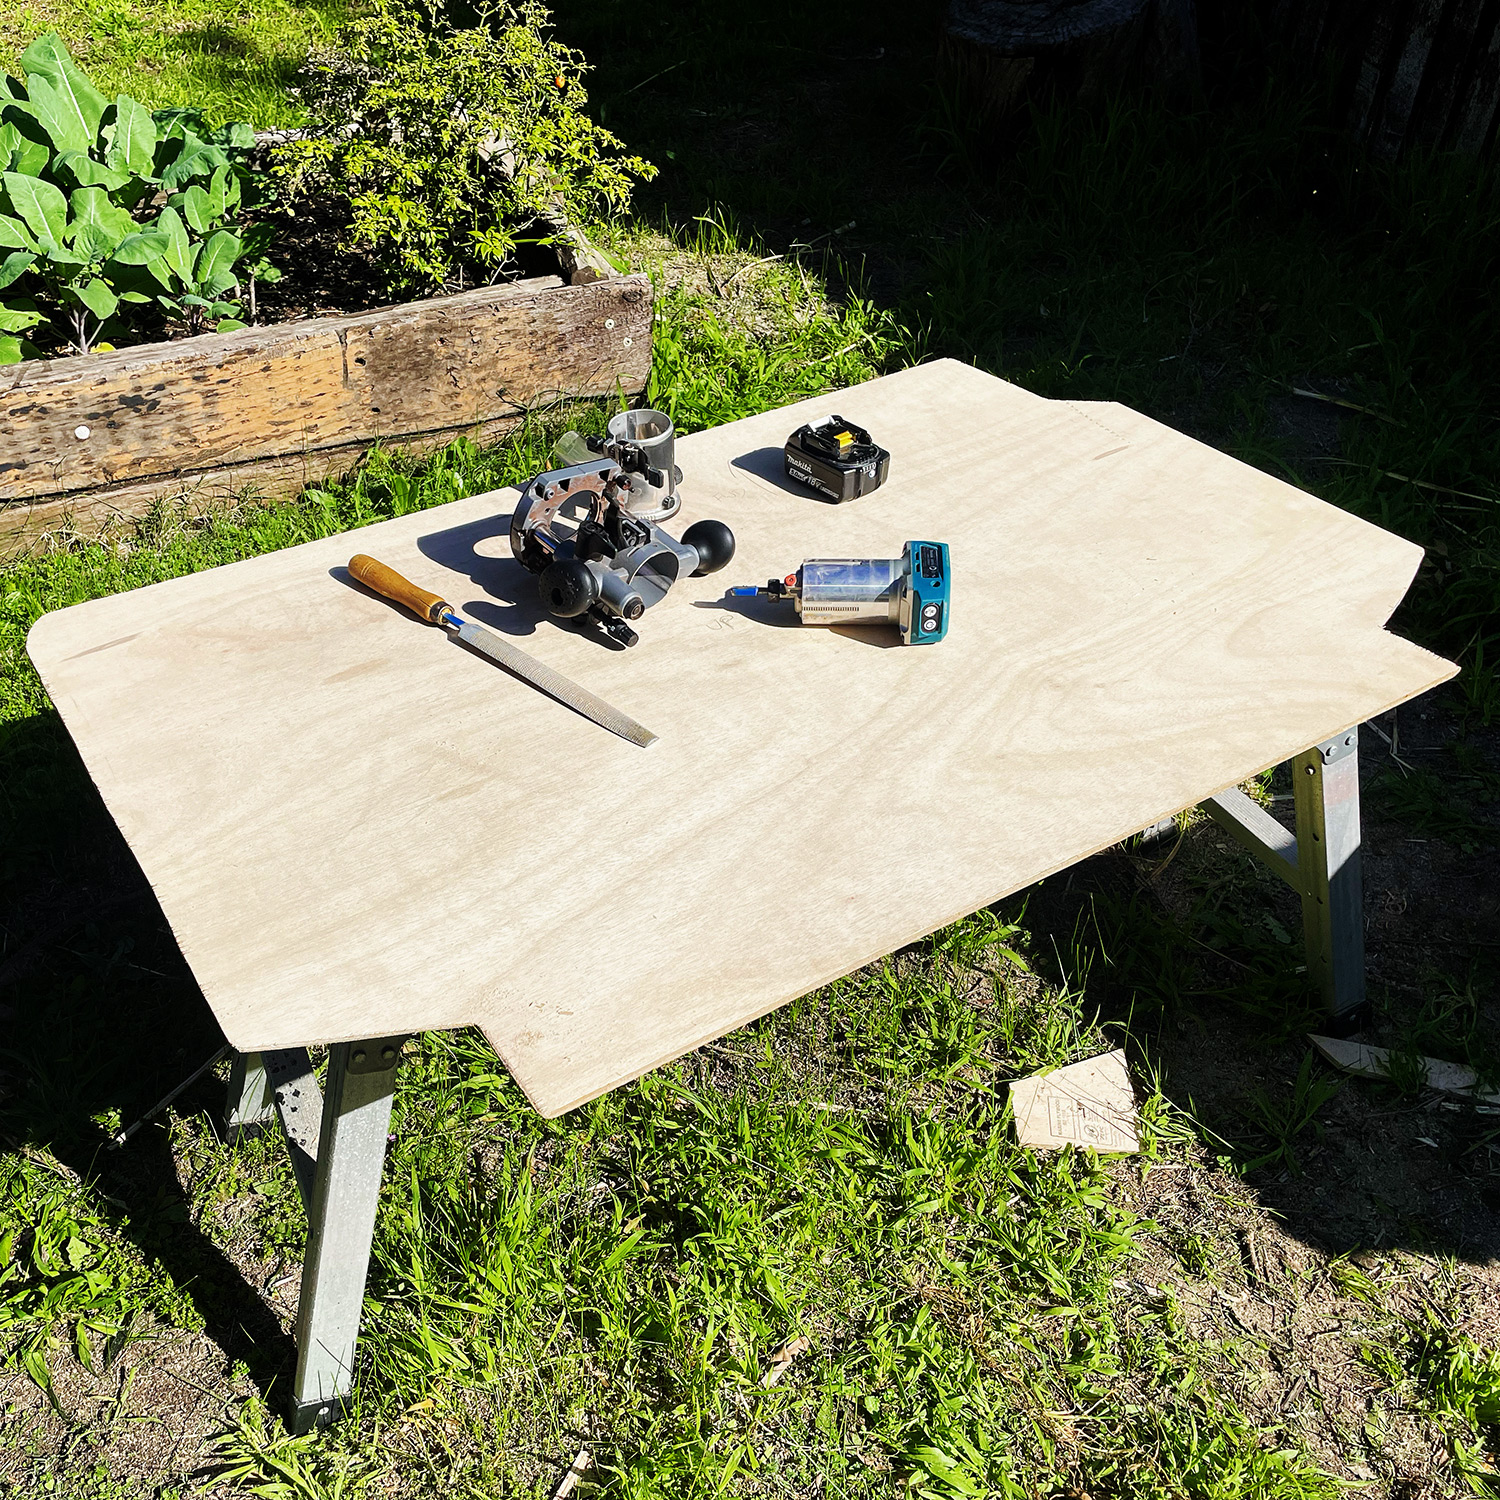
For my floor I chose to use 9mm plywood. Many commercial van outfitters use this for smaller areas and if you reinforce the sides and the middle with a basic frame it’ll be more than strong enough for anything I’ll want to put in the back of the car. Remember that if you support something at half its length you have an 8x increase in resistance to bending… this is incredibly useful to remember to make something stiff but also light.
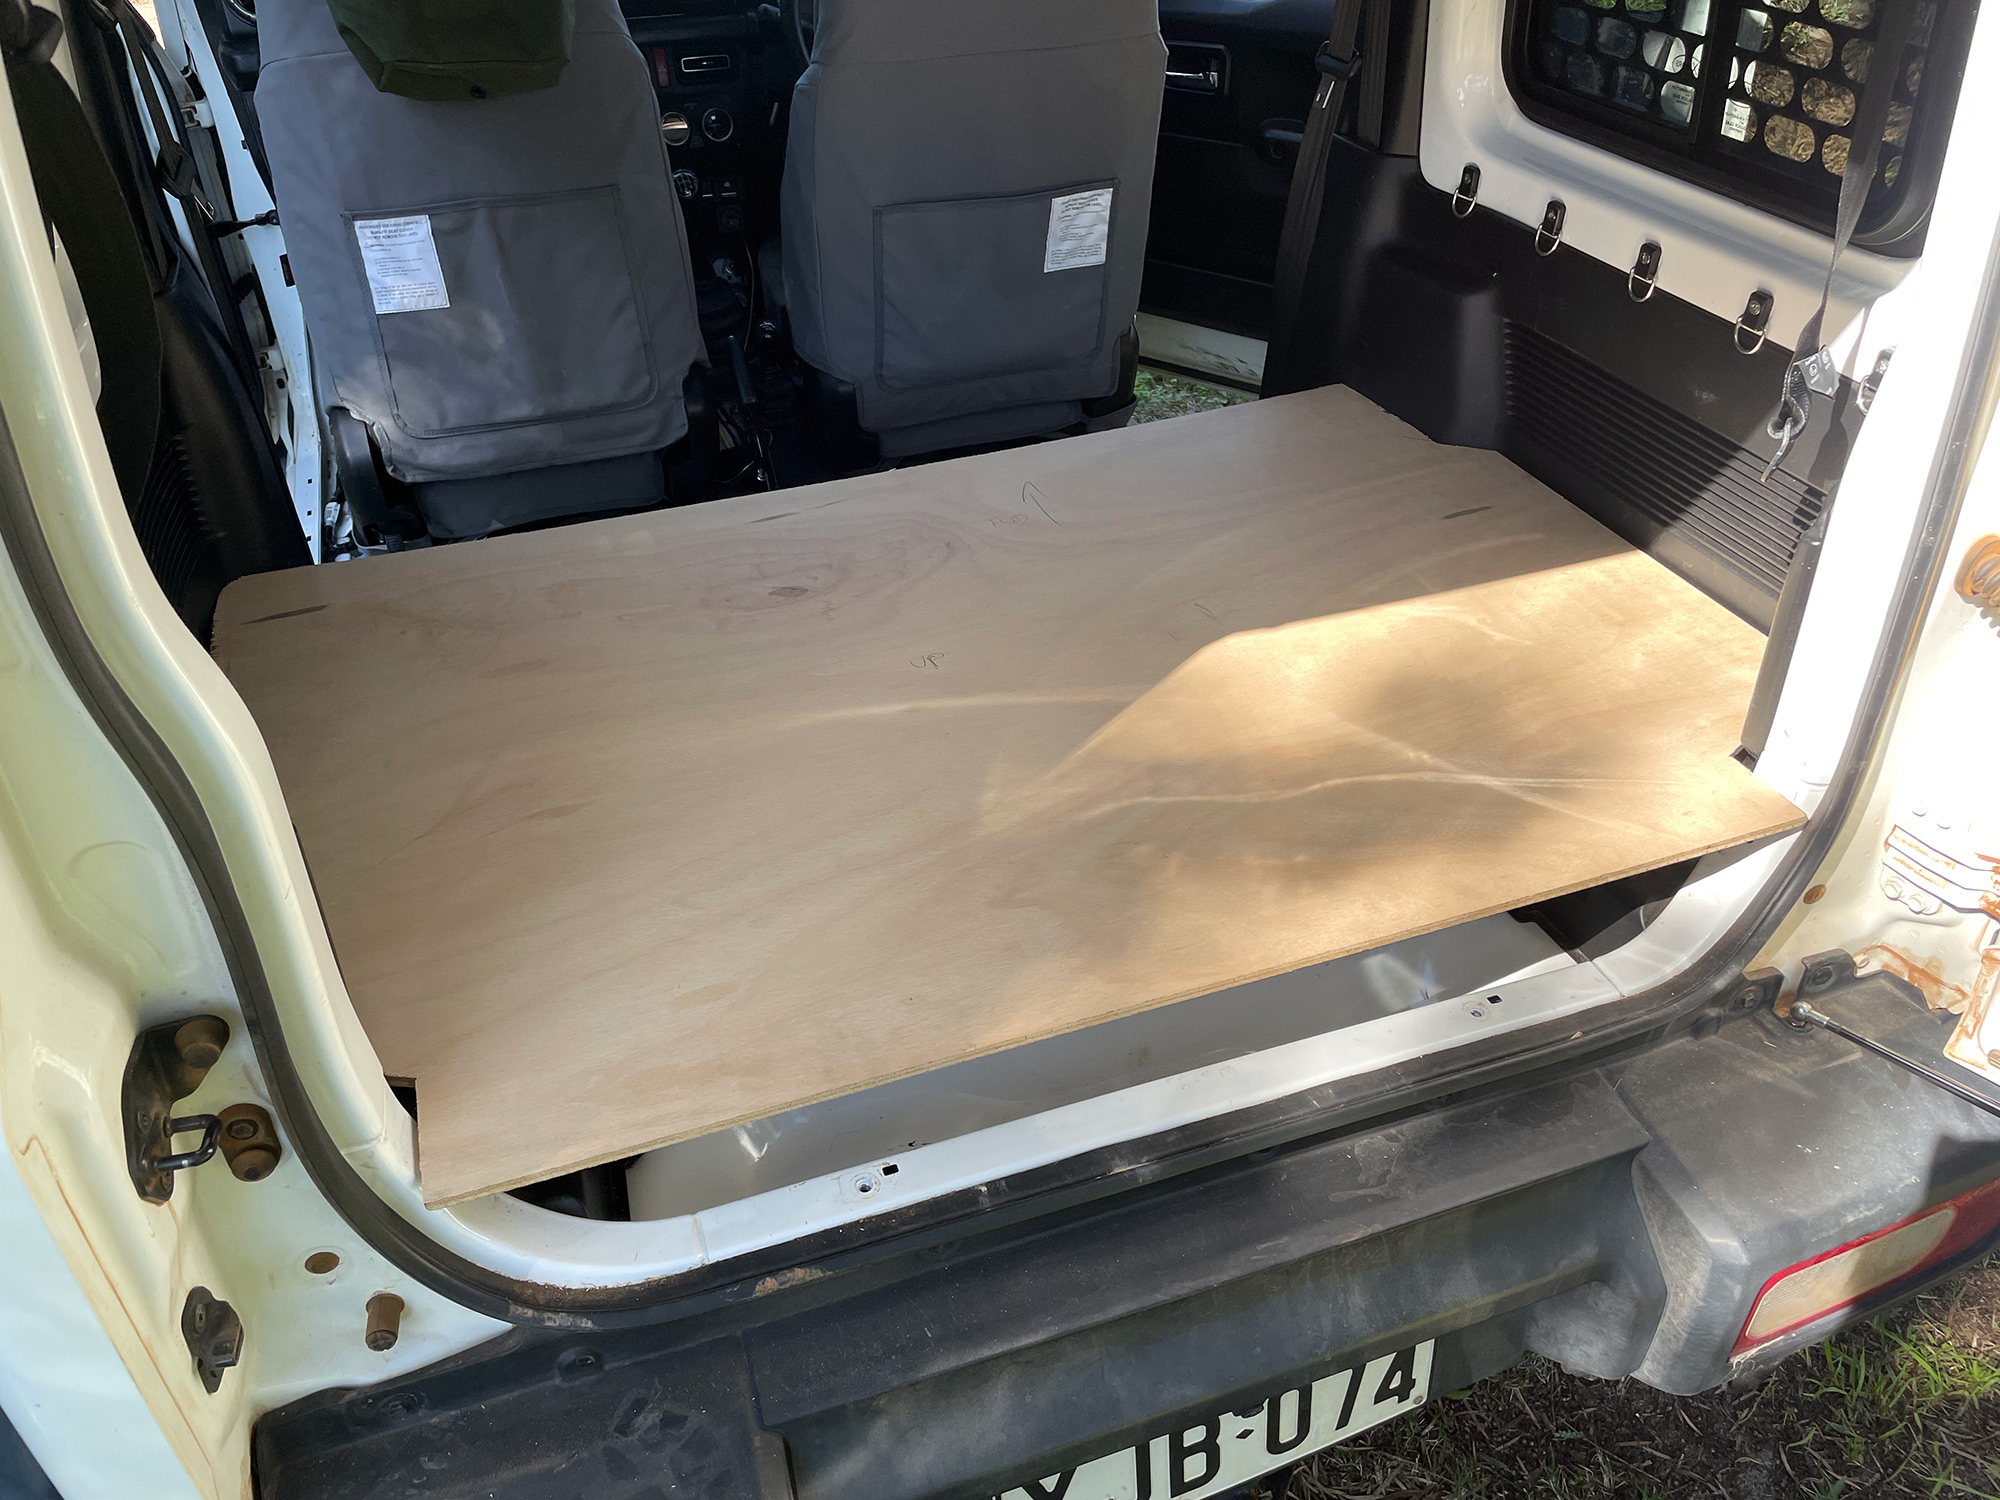
To make the basic shape, I used the Suzuki factory rear rubber mat to trace out an outline for my intended floor. Apparently I only took an artistic picture doing this.
Tracing was just a rough template, to revise some of the angles and stuff I figured I’d get extra fancy and use my speed square to get various angles for some of the cuts.
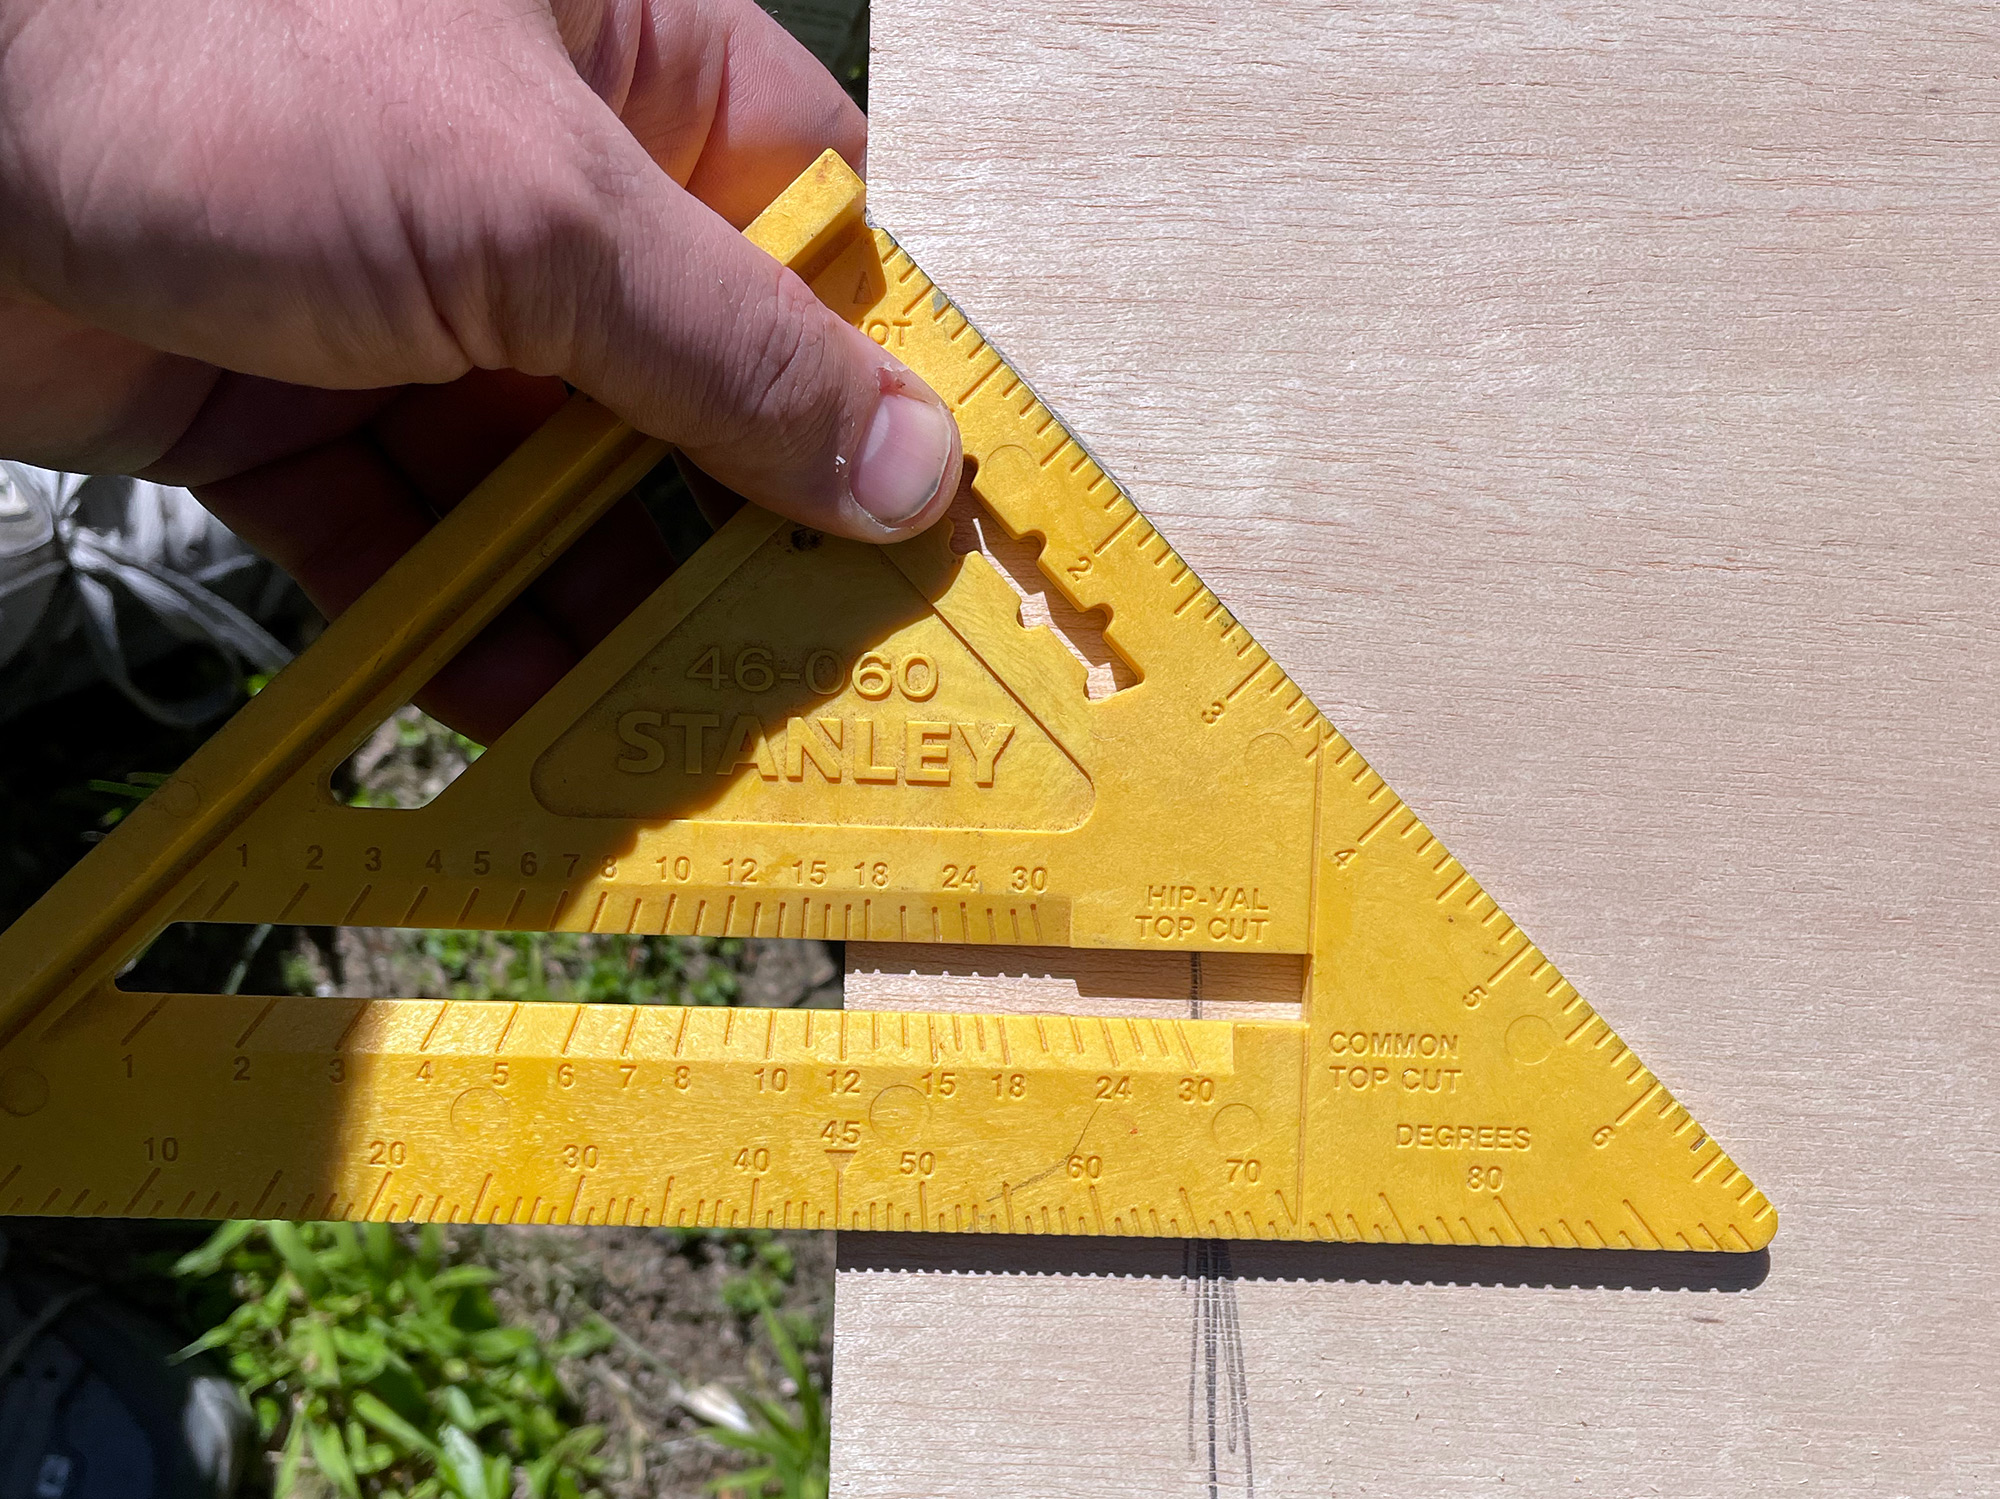
I needed to do a fair bit of careful shaping with a rasp and a file so it sat nicely but it came together pretty quickly. Making it in 2 parts would make it easier to get it in and out but if you are careful about angles and doing a lot of pivoting, even a full sized one goes in and out easily.
To do a bit of refinding of the shape I used a hand rasp and also a couple of roundover and plunge router bits to try to shave bits off here and there. The basic shape didn’t take very long to whip up though.
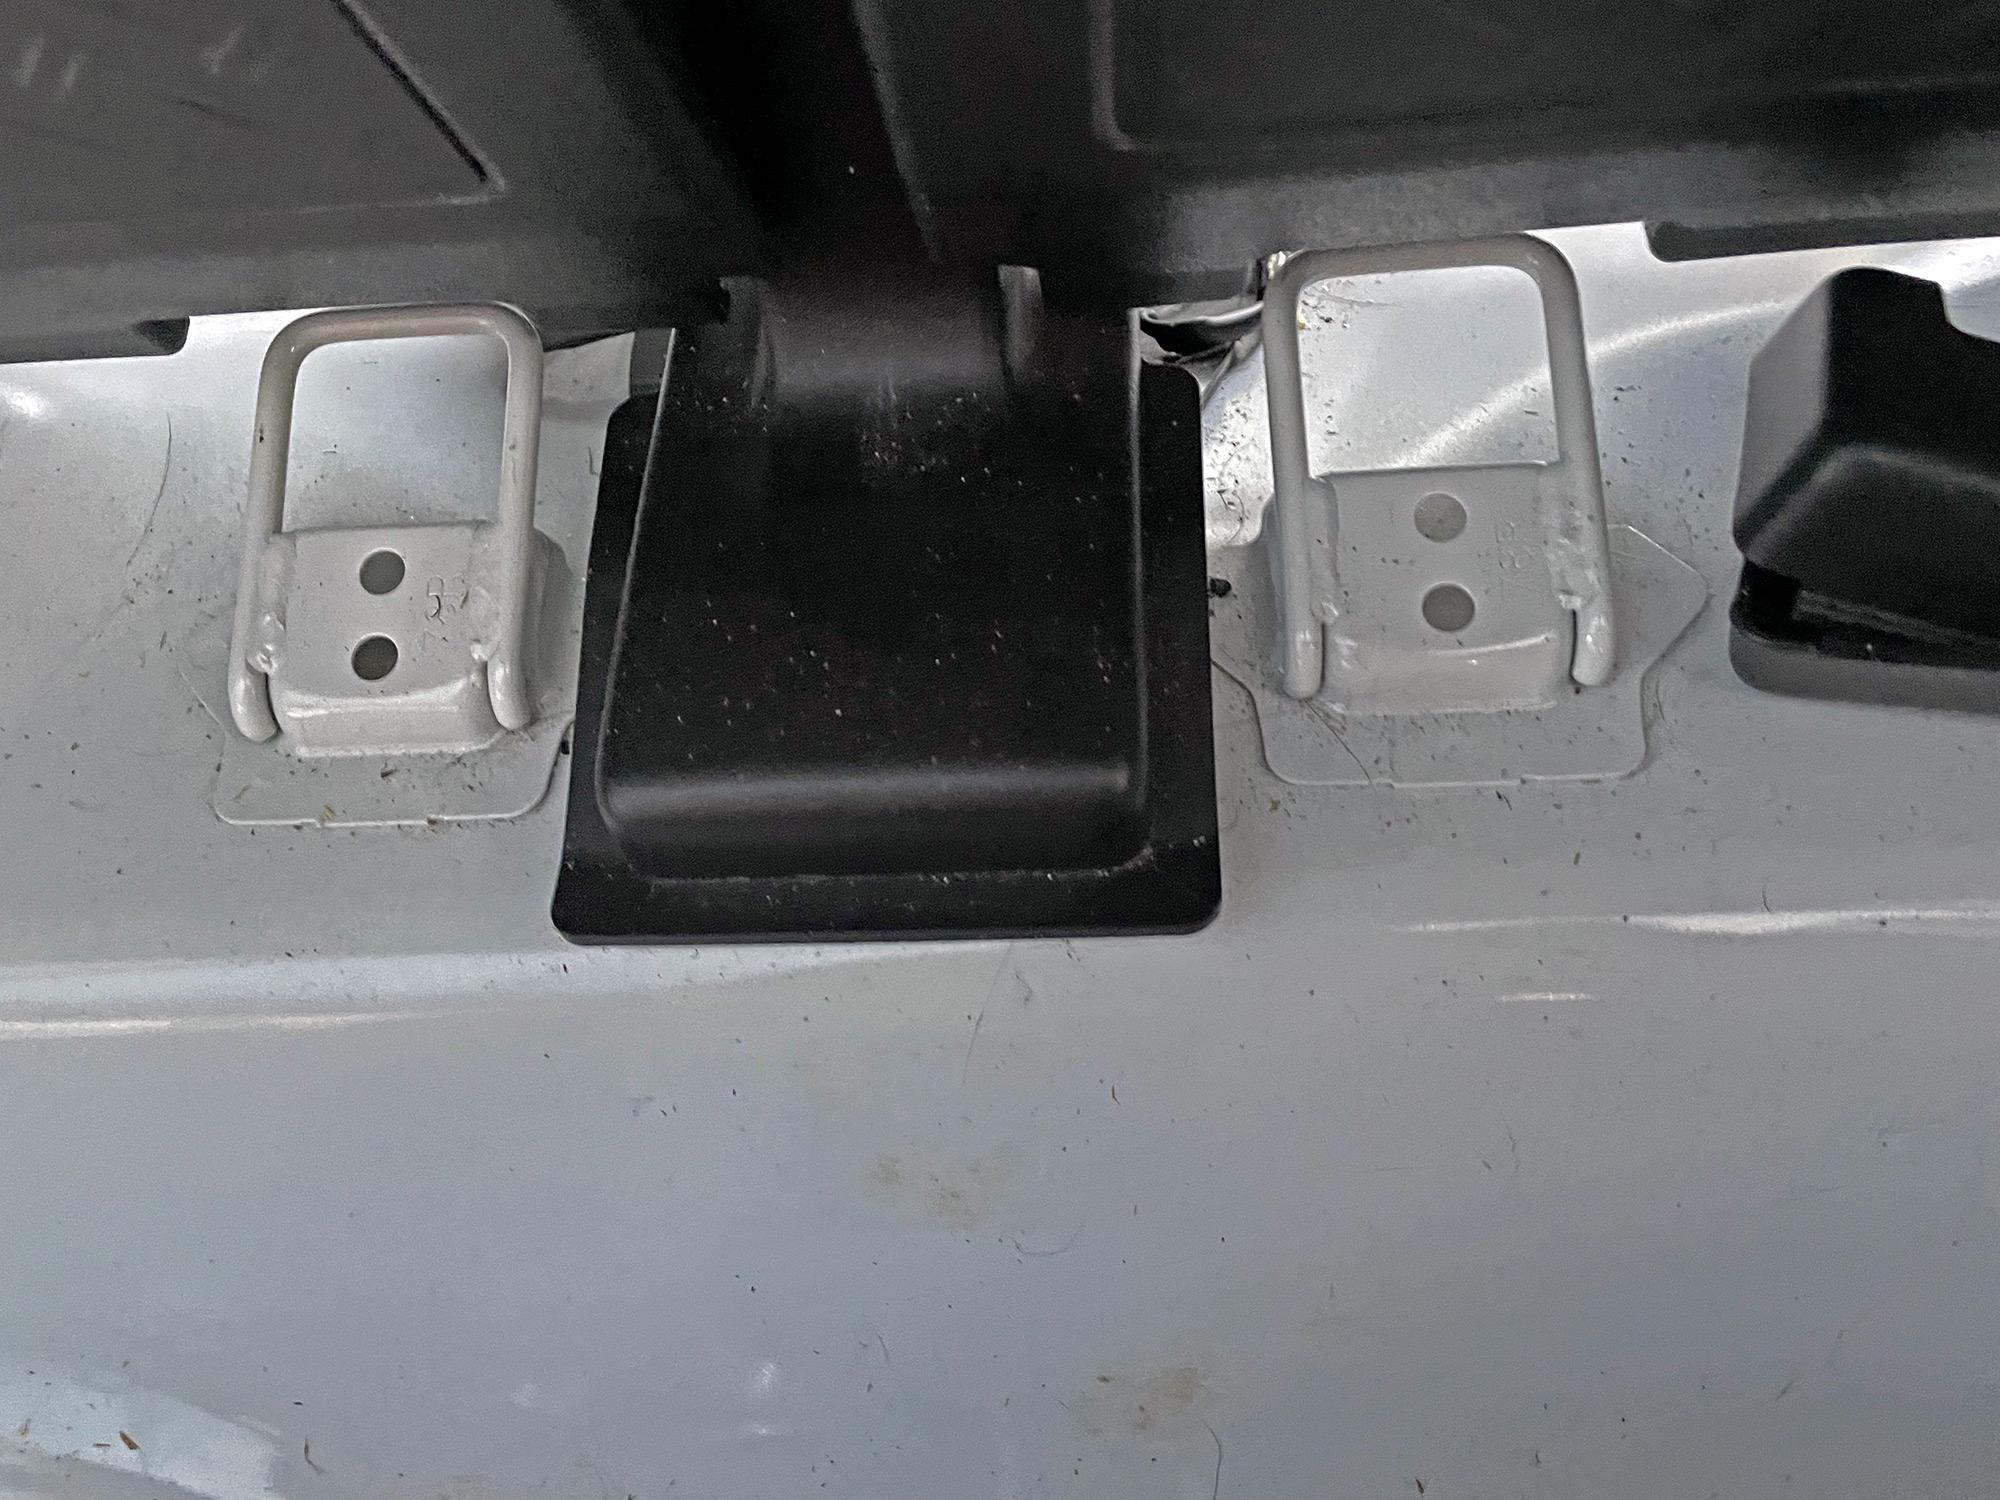
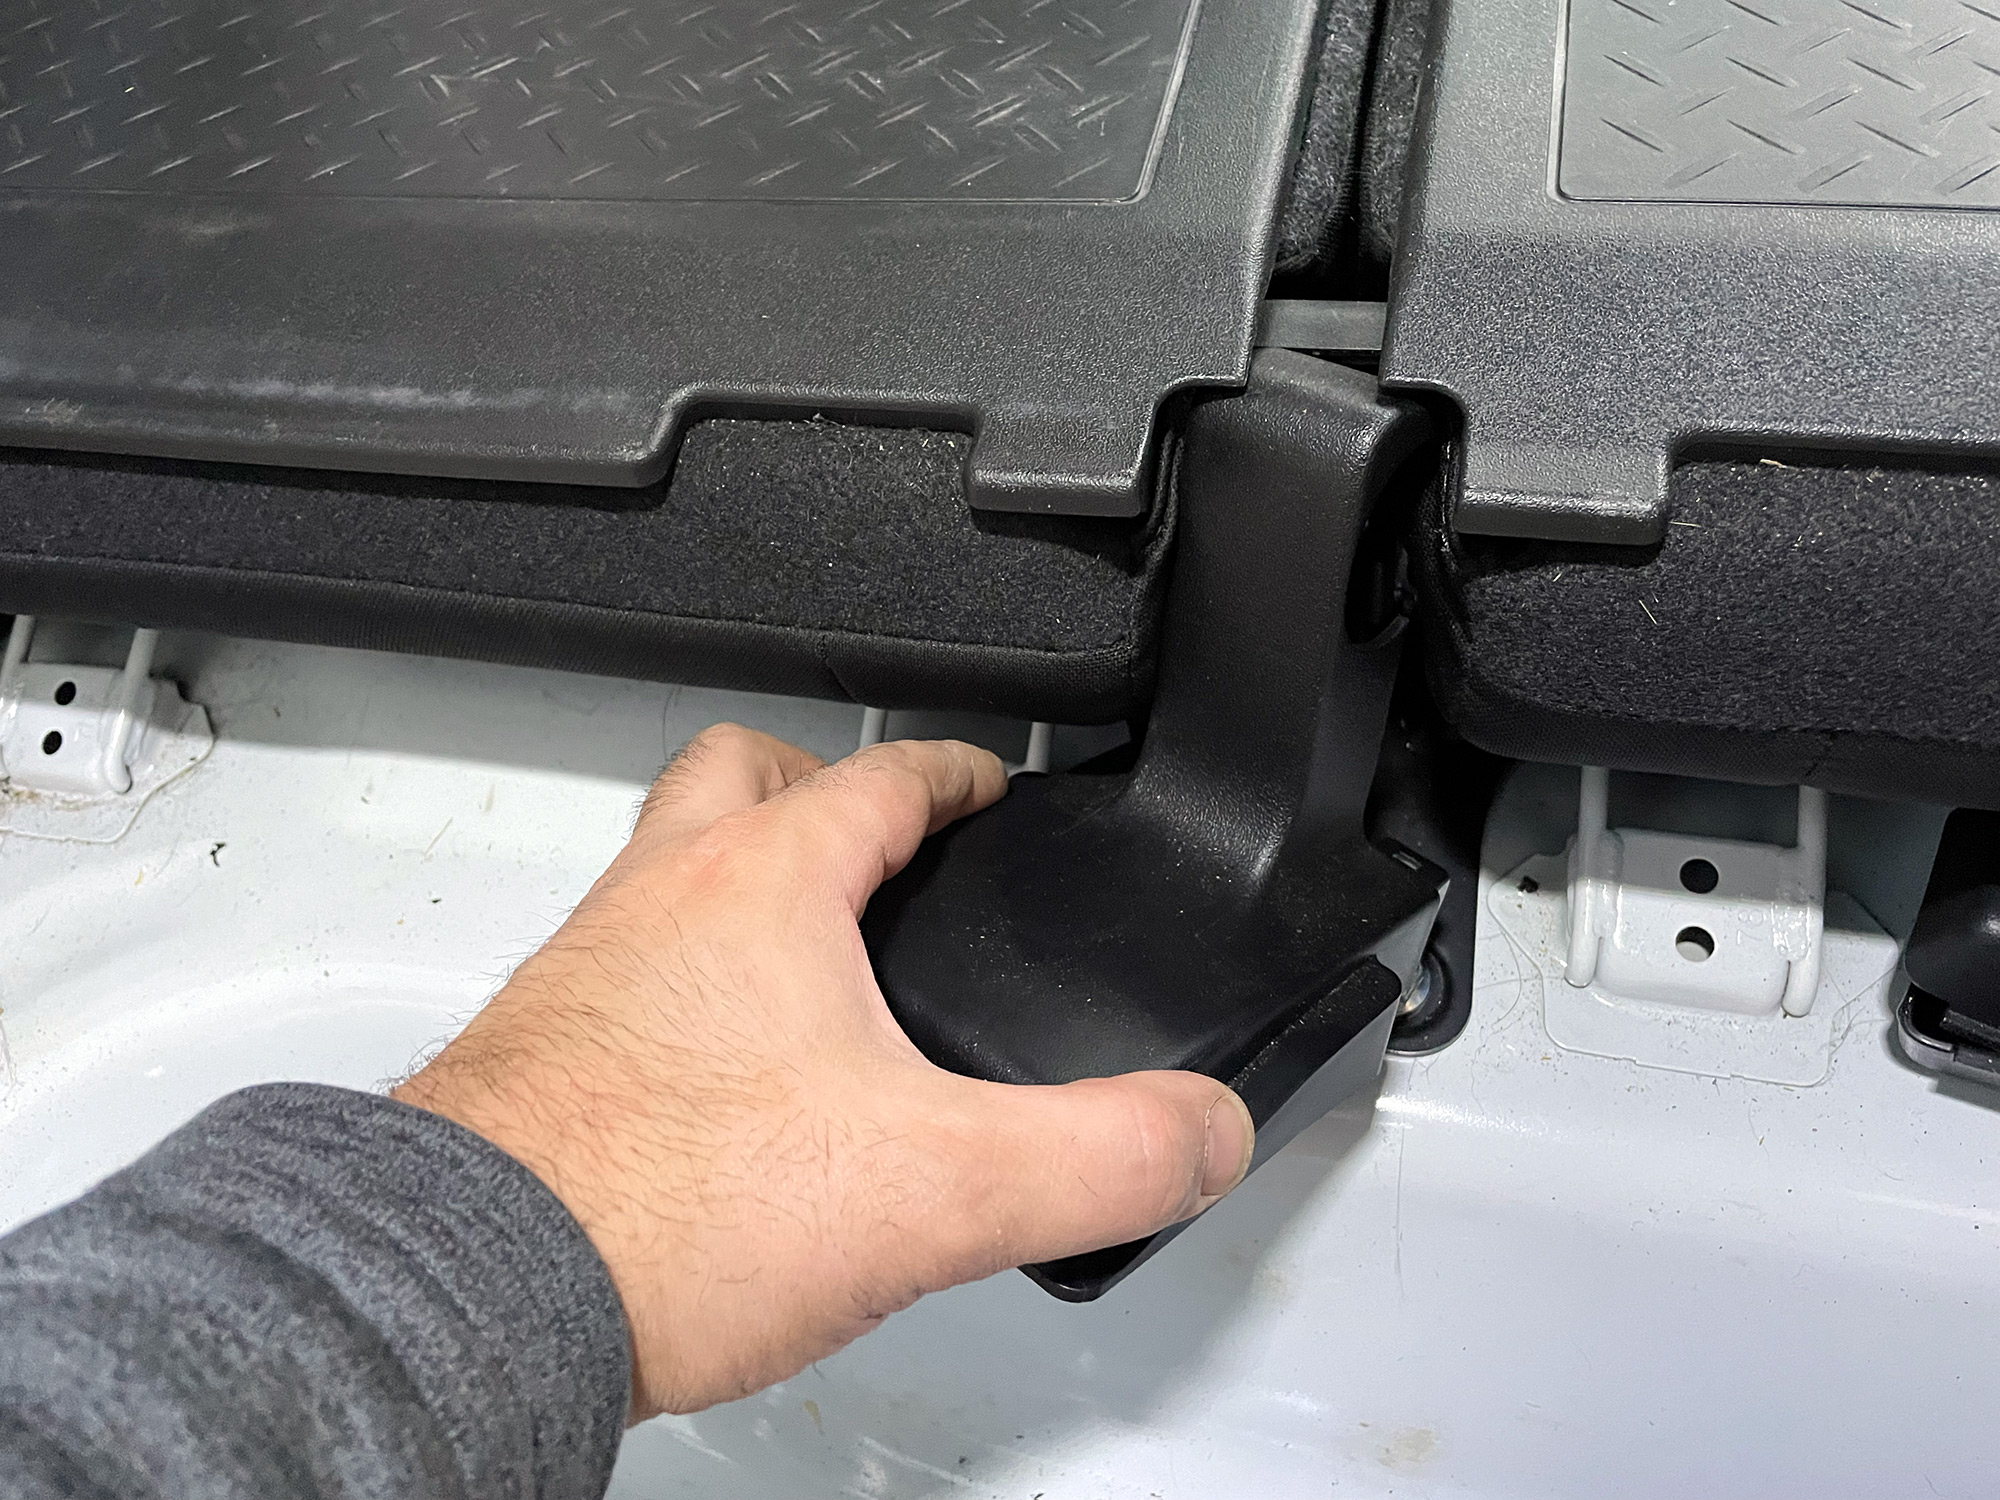
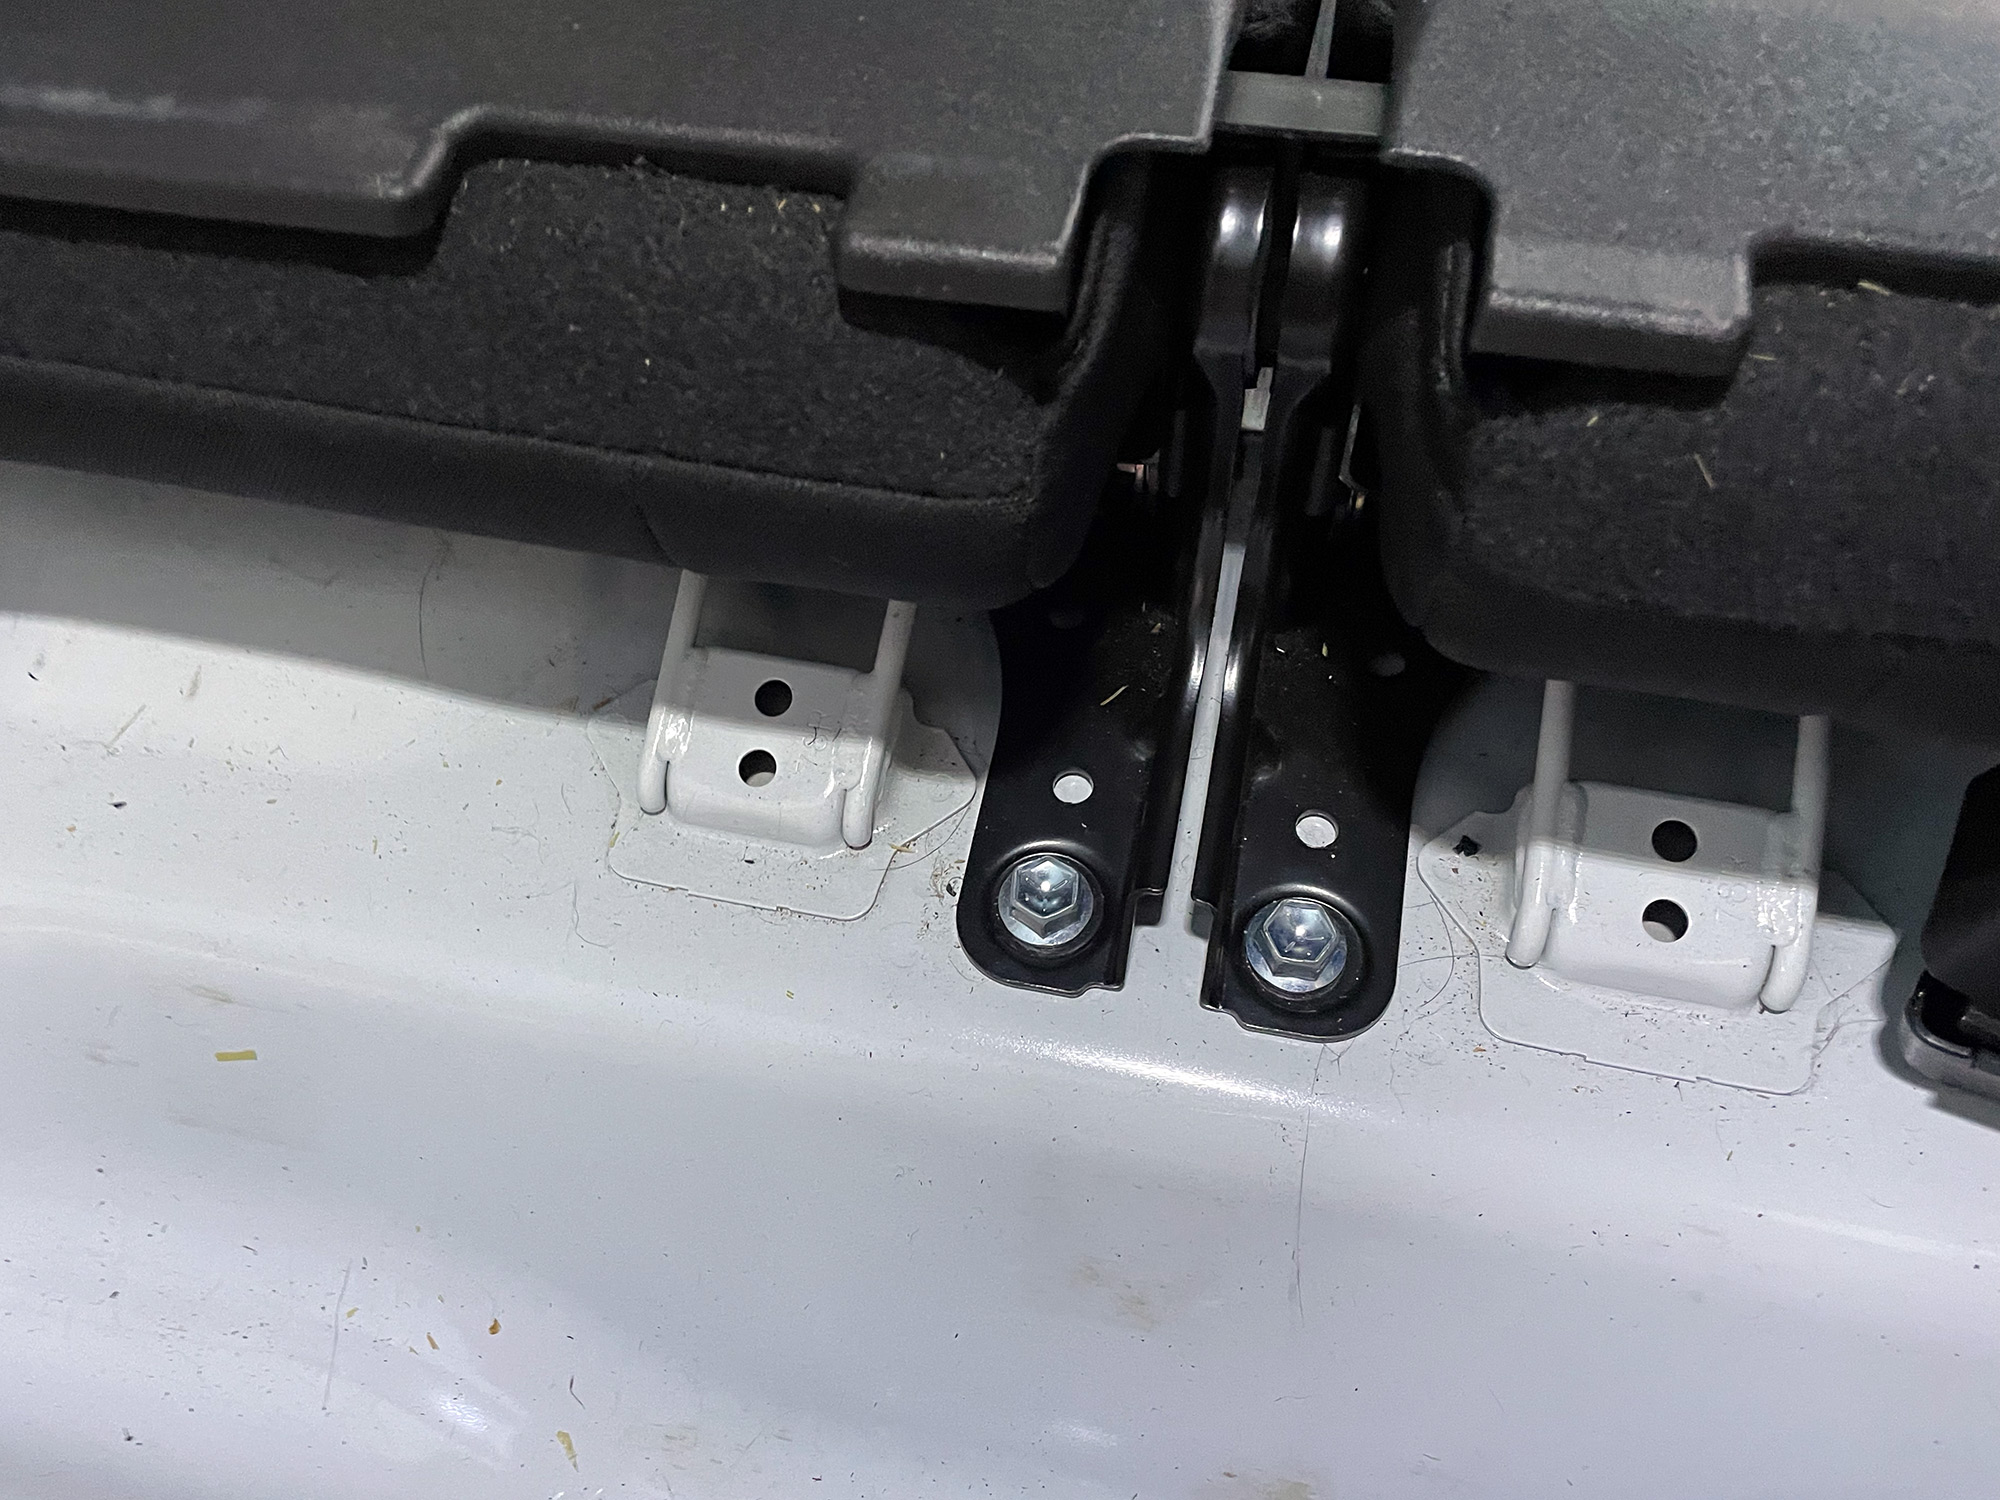
To make up brackets to hold the base up in the corners at the back, I used the M6 threads for the factory tiedowns and some aluminium angle. I cut the angle into a short segment and then bent it a bit so it had the right angle to fit the door angle with the top part still flat.
Support frame
With the rear supported nicely, you can use the false floor itself to get the right height for the support frame. You can use the seat mounting bolts and the original Suzuki bolts to put in some angle brackets to then hold the frame in place. If you wanted to replace these with other bolts,
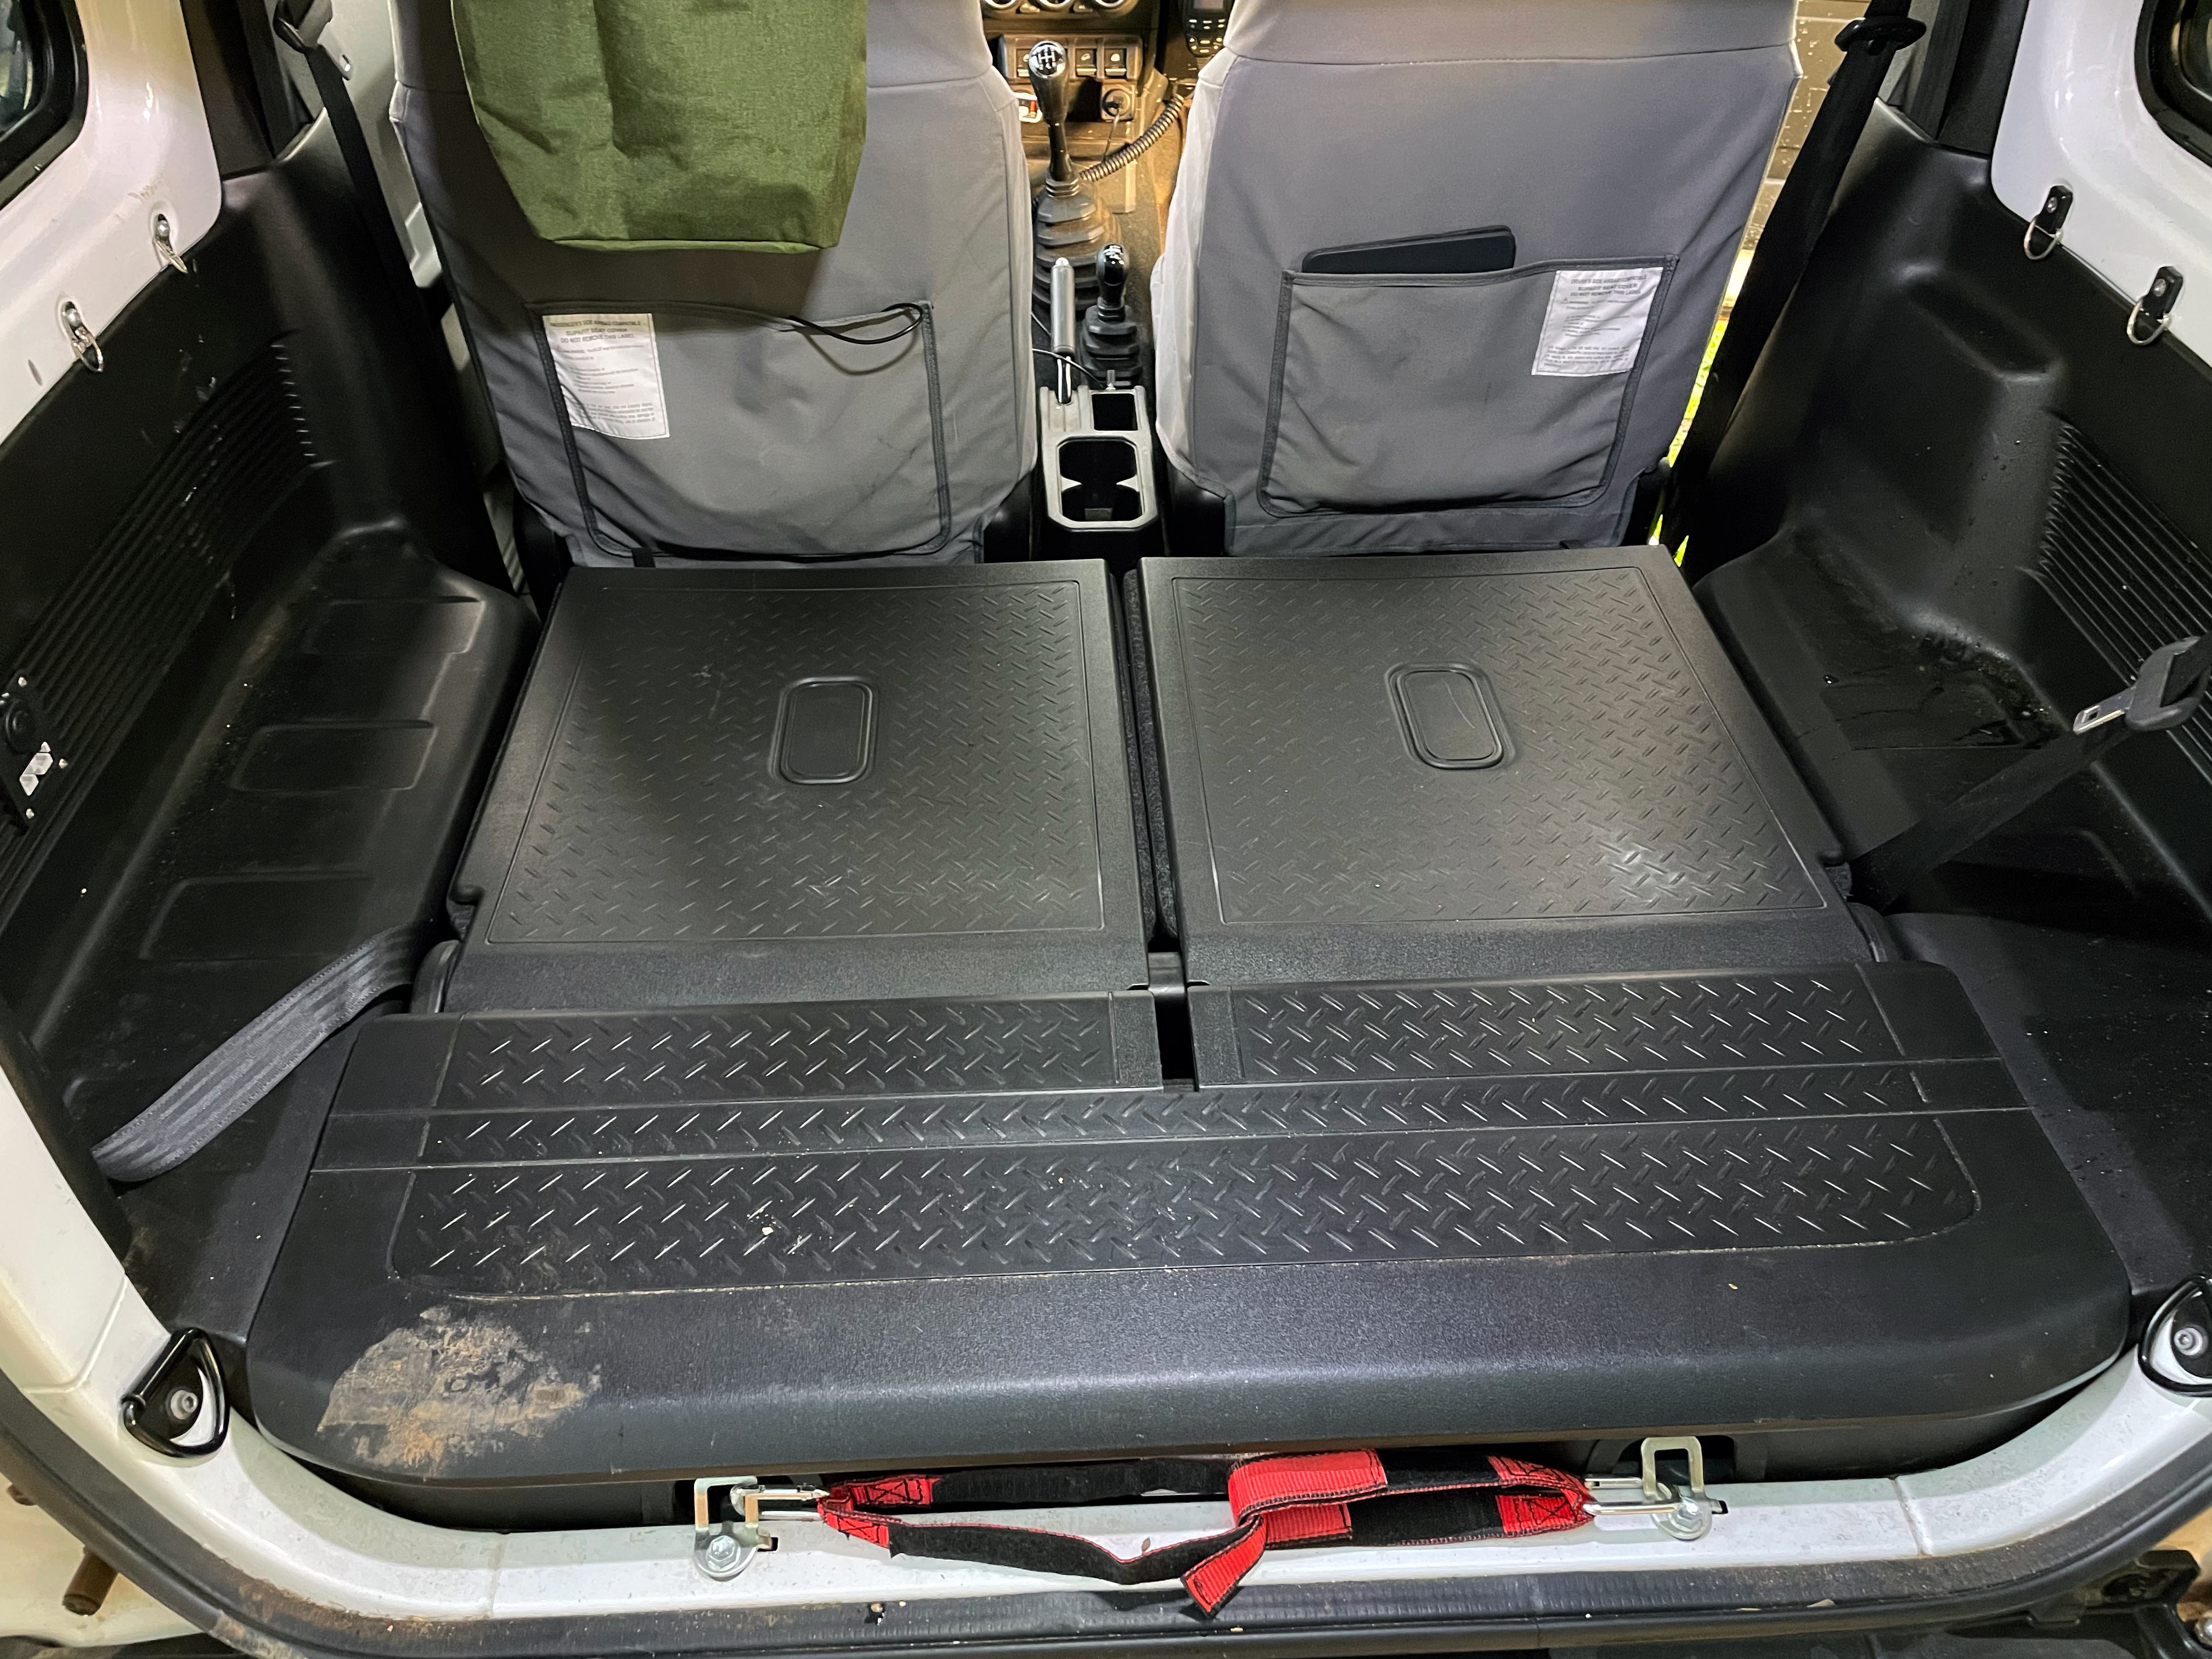
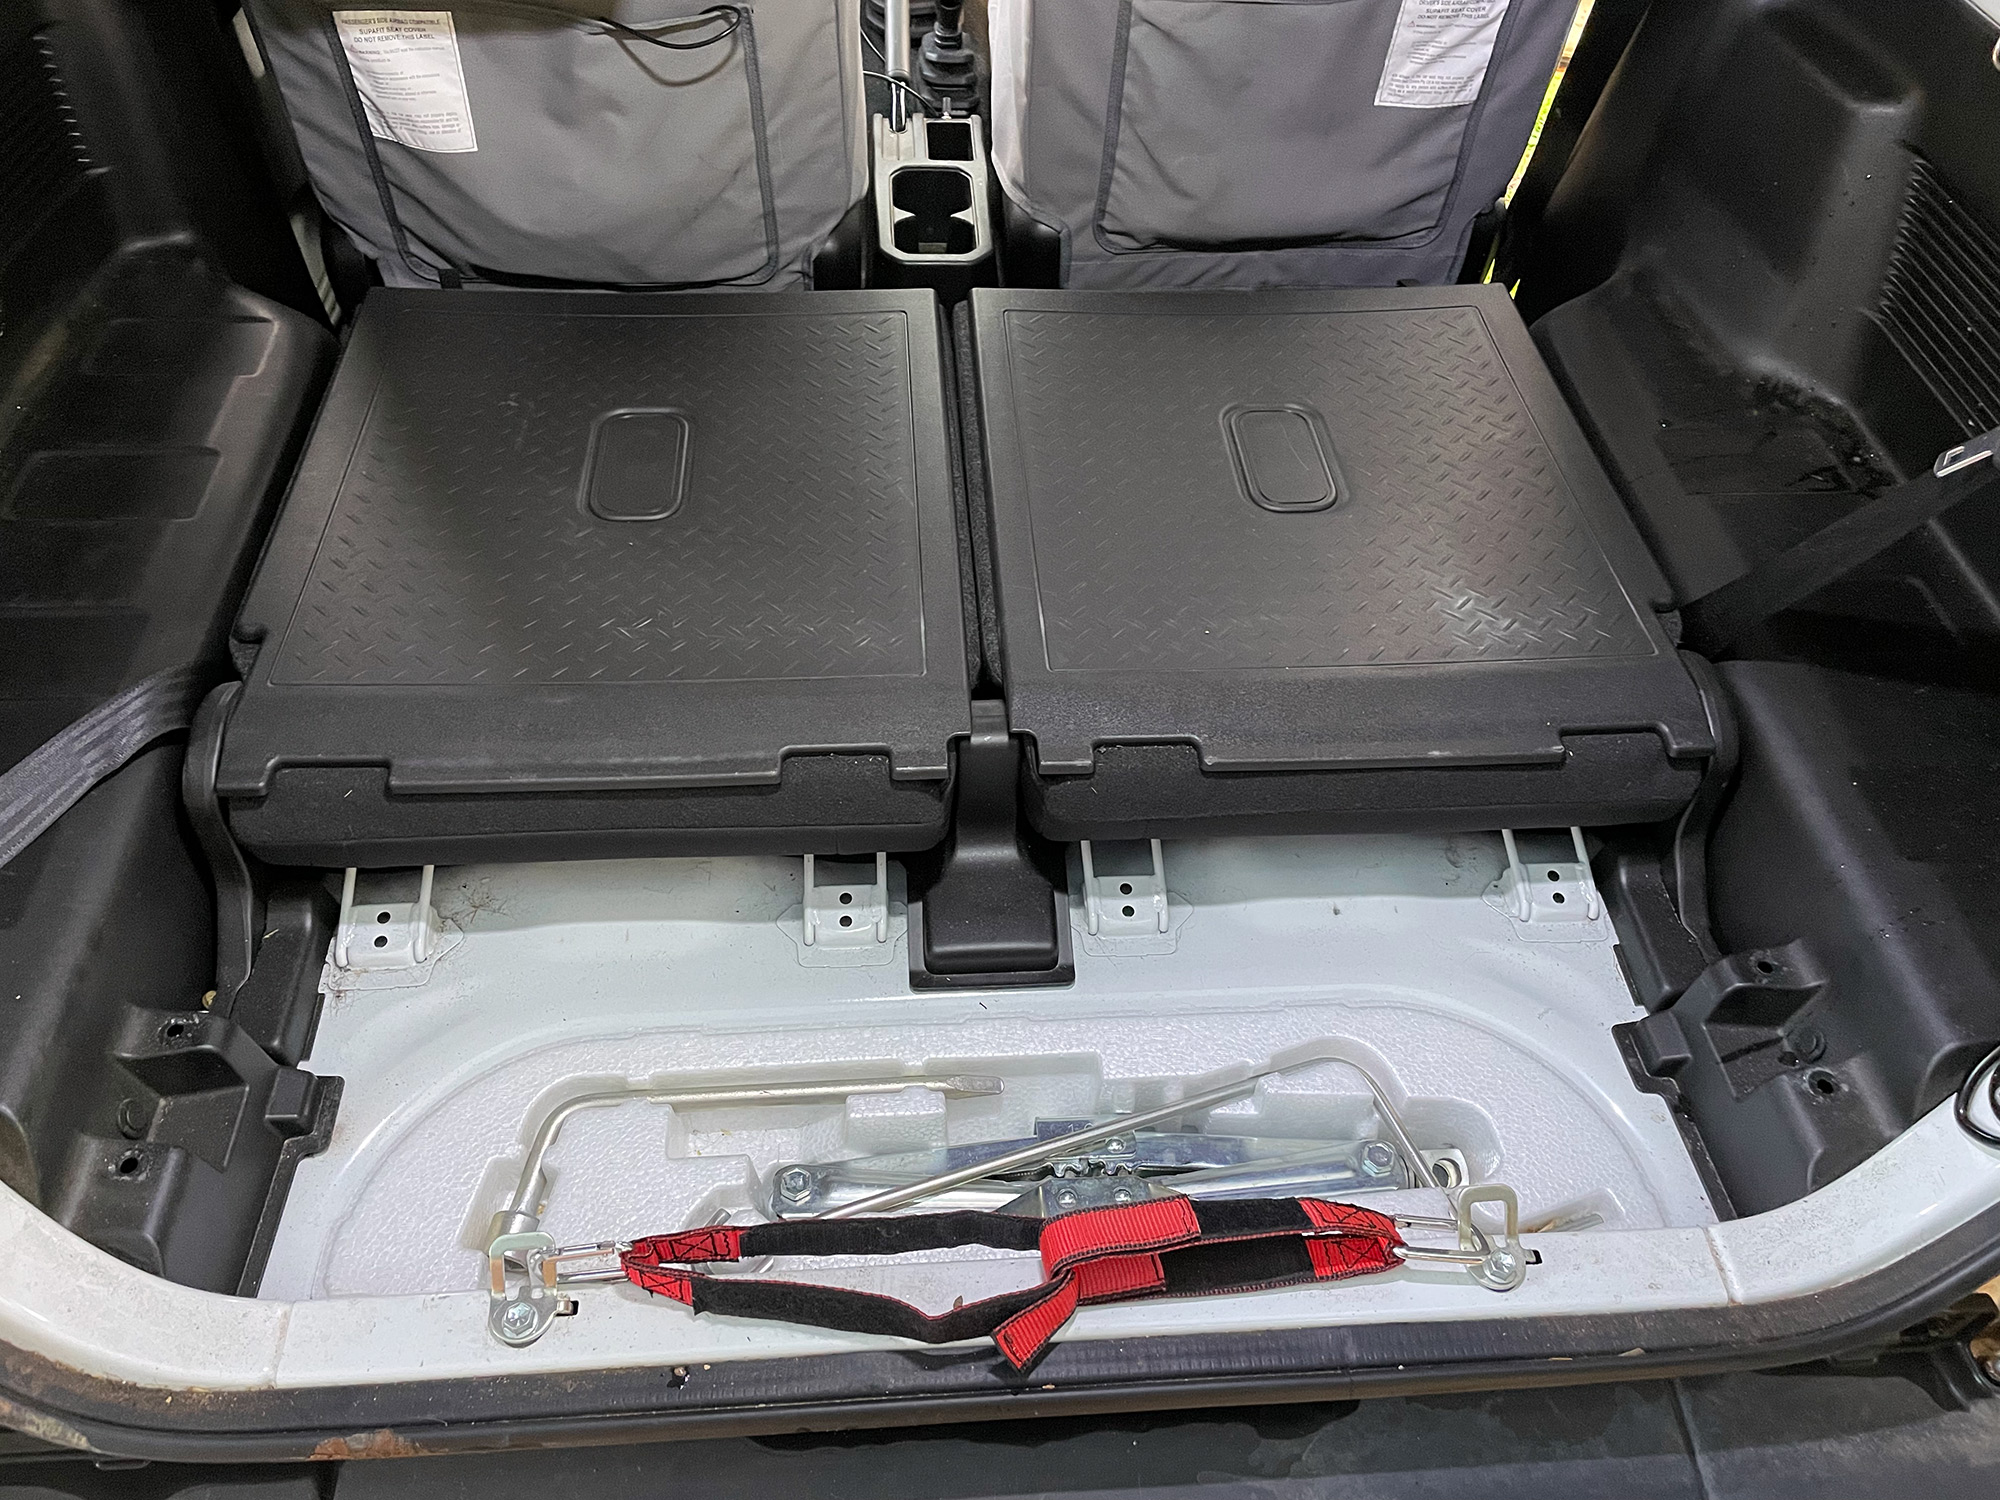
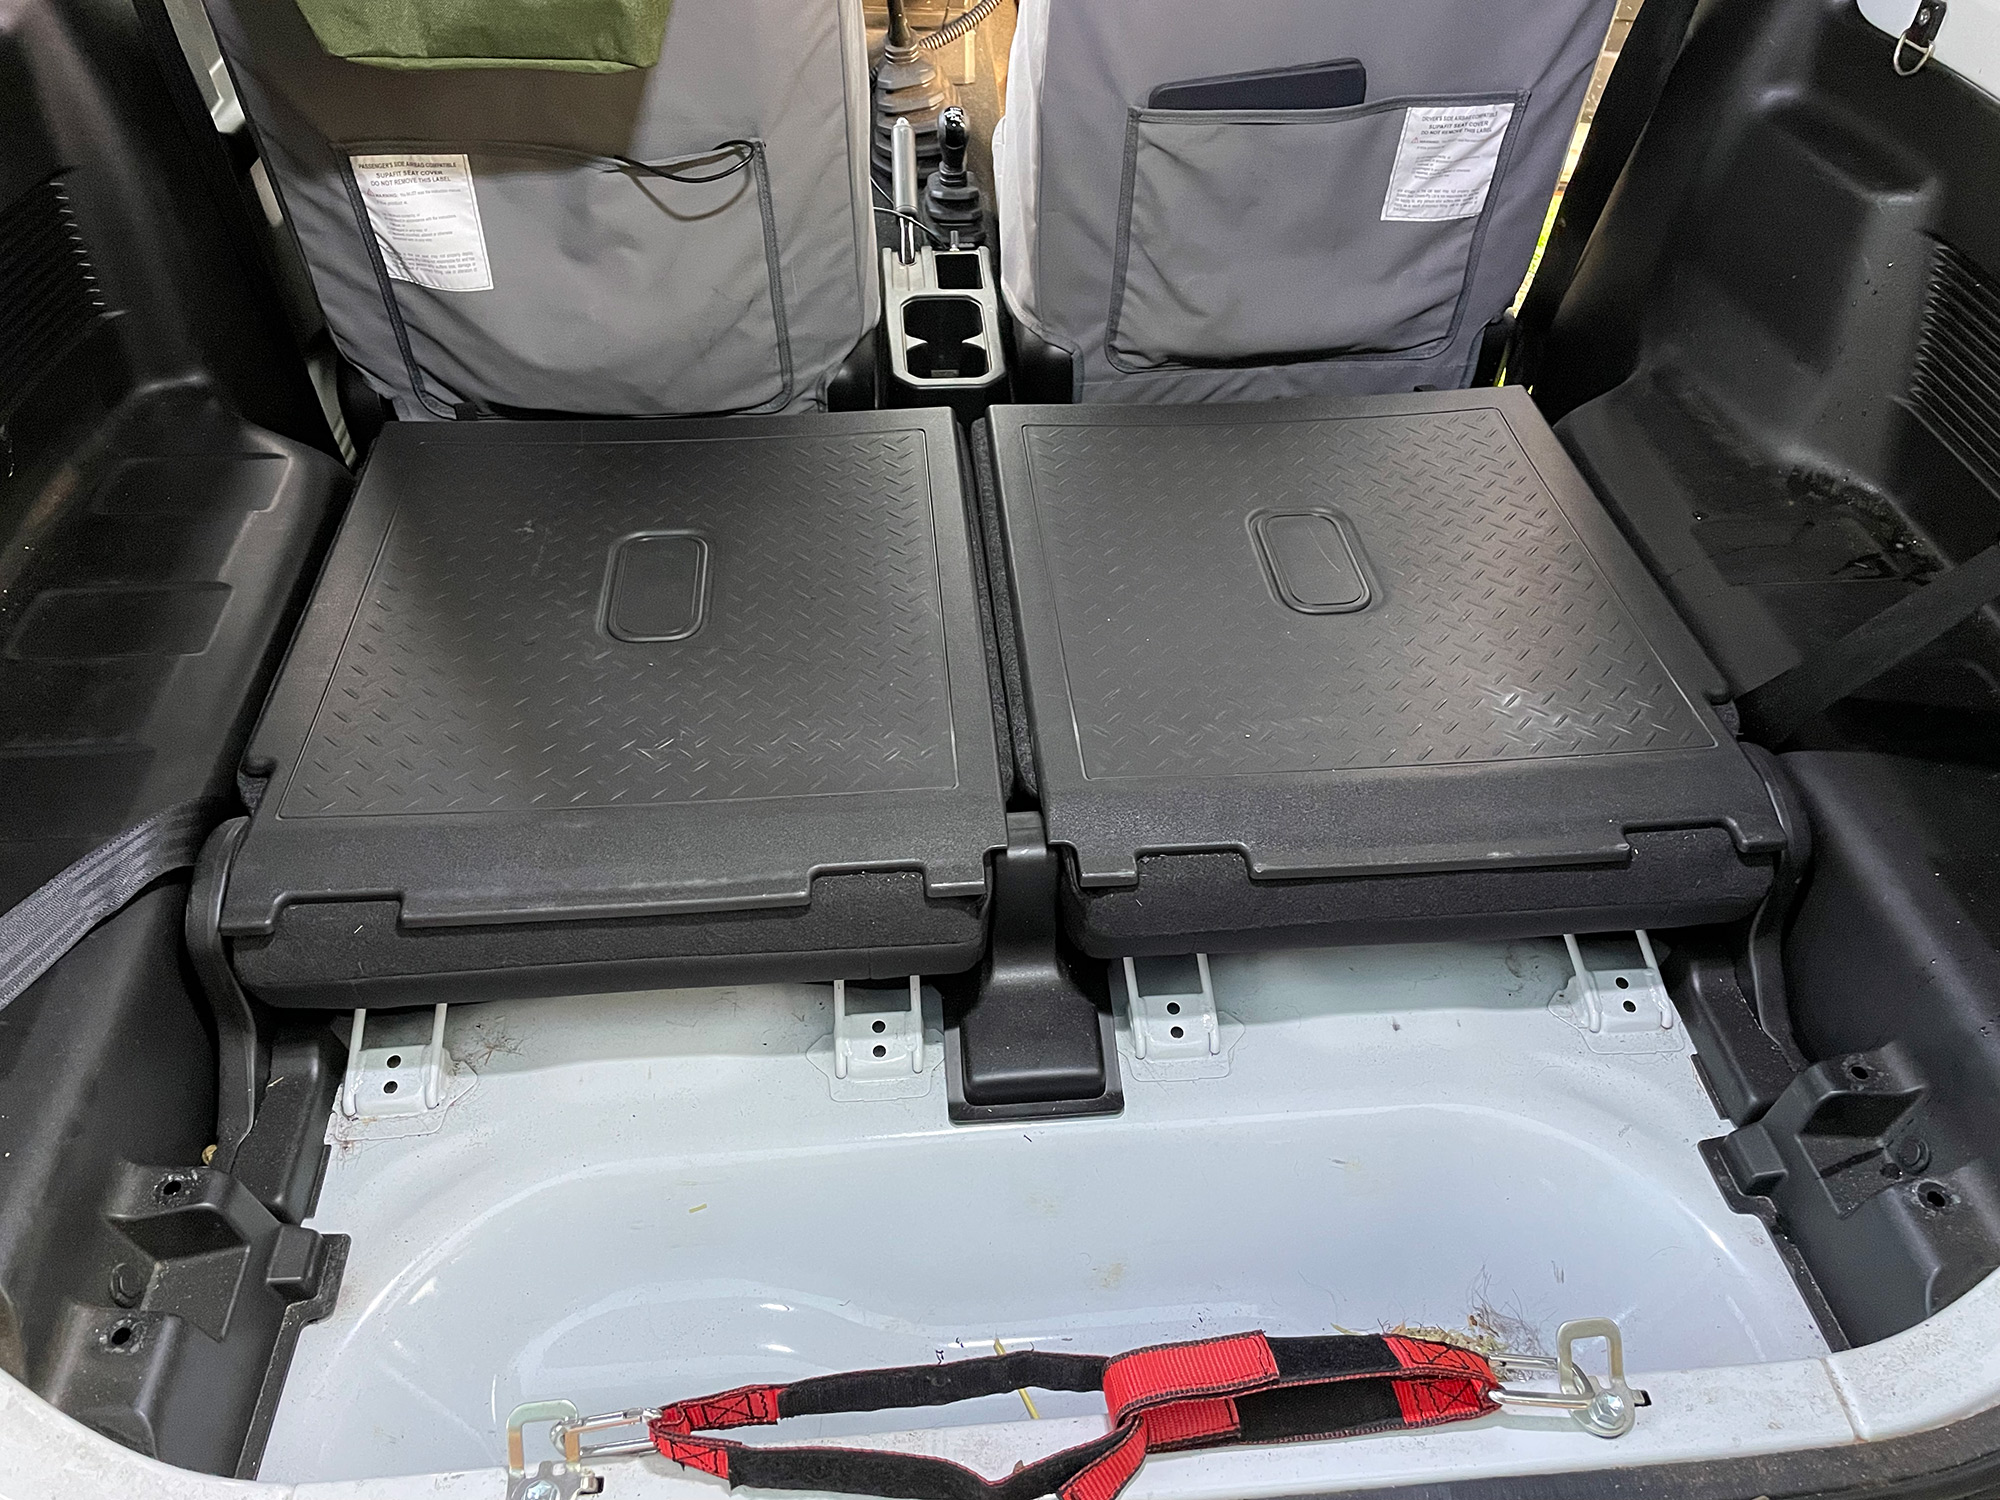
Access hatches
Finished product
To finish off the false floor, I wanted to use a nice marine carpet