
Hayman Reese Towbar and factory wiring
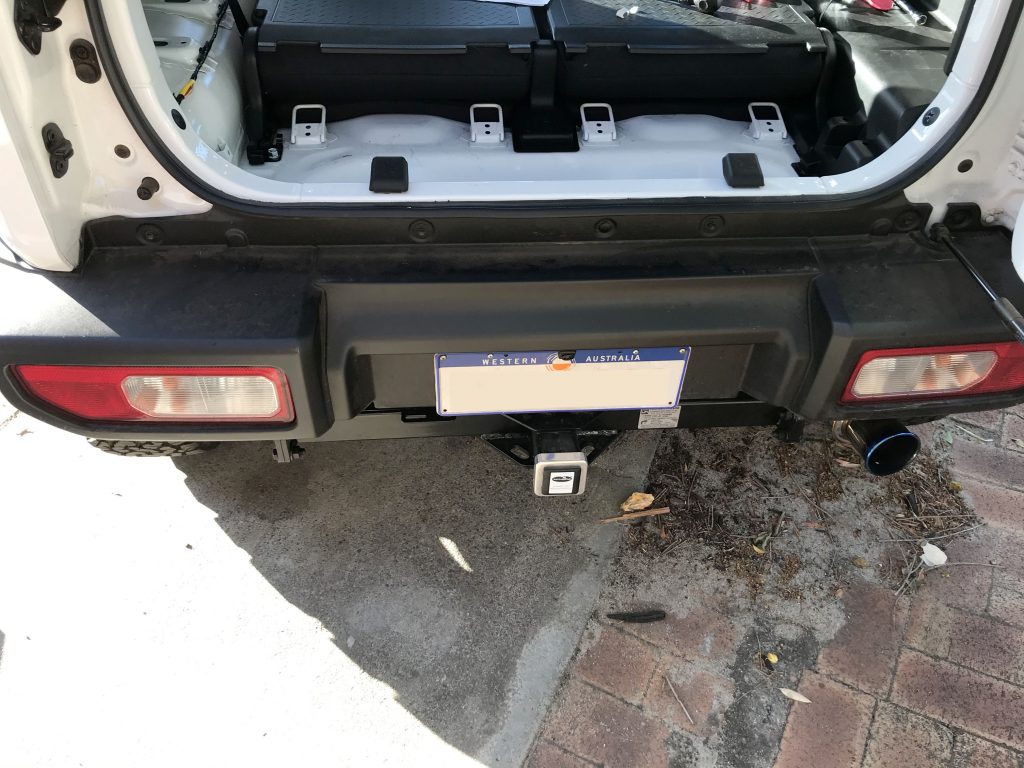
The factory towbar looks pretty ugly (at least in Australia) and doesn’t feature a great departure angle. It took a bit of time, but Hayman Reese developed a medium to heavy duty bar for the JB74 Jimny instead which is a very tidy solution. The Hayman Reese part number for the bar kit is 03289RW if you’re searching for one. Retail on this is about AU$550 + fitting, which is something like 45 minutes to an hour worth of labour.
I used an authorised reseller to do the installation because I’m lazy and it seemed the easiest solution. Here in Perth I can definitely recommend Auto Extra in Osborne Park as an authorised Hayman Reese dealer for your installation.

Hayman Reese also developed a wiring solution complete with control unit for the wiring so you get no CANBUS errors, but I erred on the side of the factory wiring. At least for Australia and the standard 7 pin plug used here the part number you’re looking for is 990AA-01709-P03 which comes with the wiring, detailed instructions and a wiring control unit to suit. Retail on this is about $150 or a bit more and available from Suzuki dealers. My installer were fine with installing just the bar and letting me sort out the wiring.
Installing the factory wiring is pretty easy. The included instructions are really clear and you need almost no tools but I thought I’d add my own pictures and documentation to help out anyone looking to go down this route.
Wiring installation instructions
This took me bang on an hour to do, complete with writing notes and taking photos.
Tool wise you need a 10mm ratchet or spanner, a pair of sidecutters or flush cut pliers to trim cable ties, a plastic trim removal tool, a drill and a method to drill a 20mm hole in steel, some alcohol cleaning wipes/isopropyl alcohol spray/wax and grease remover, and some paint or rust protector for where you drill the hole in the body for the wiring loom.
The factory kit comes with a bunch of cable ties and a paper template you need to cut out and use to position a hole in the boot floor.
To kick off this worklog: step one is to fold the rear seats flat.
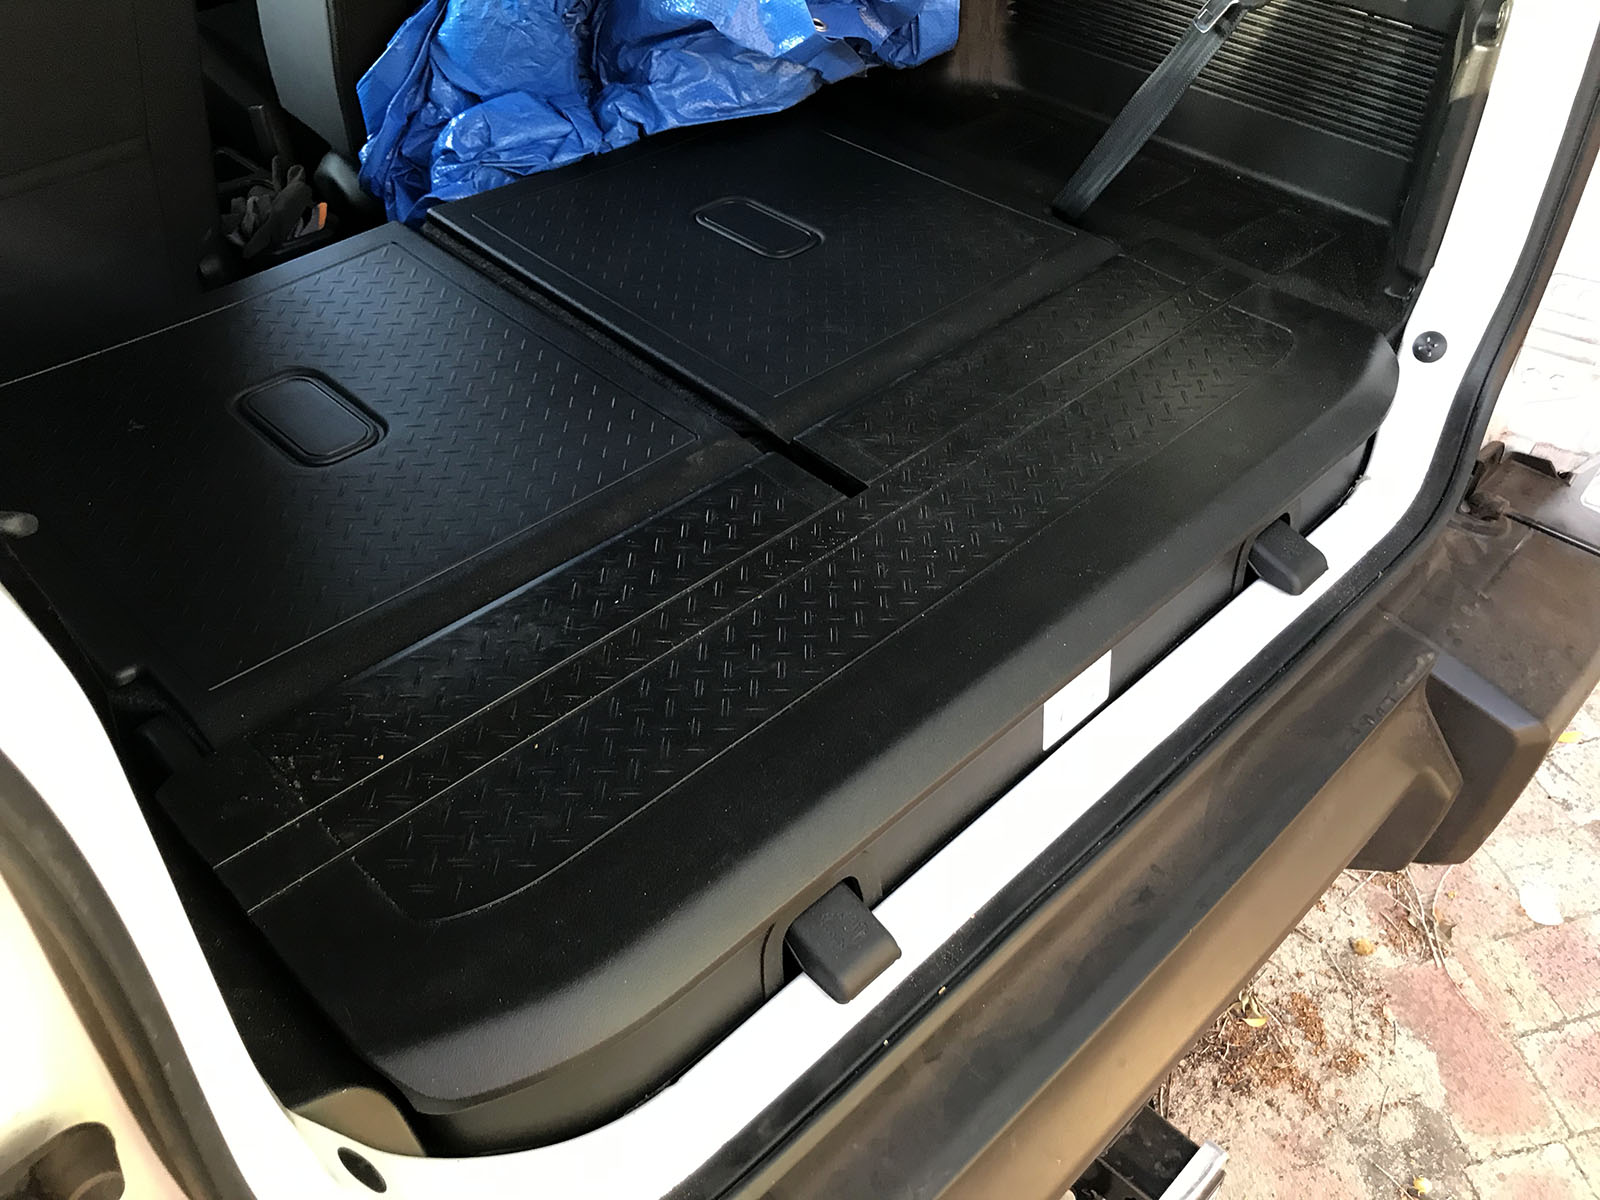
Now lift up the little cargo holder thing.
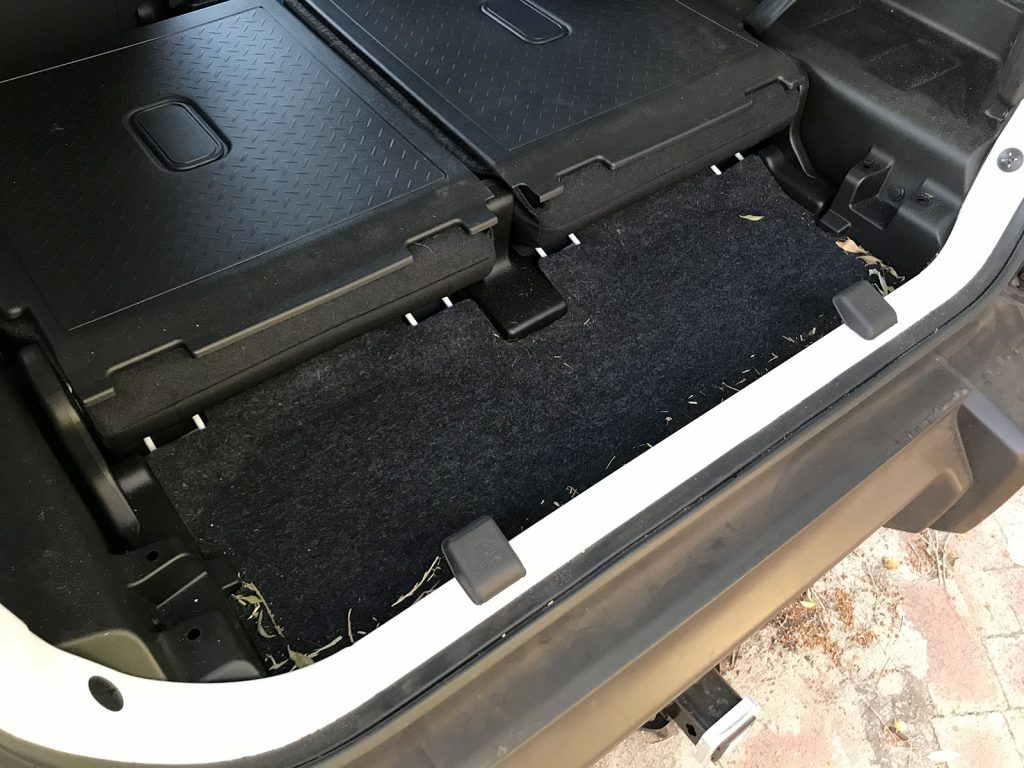
With that lifted up you can lift up the carpet to expose the jack and the foam that it is stored in.
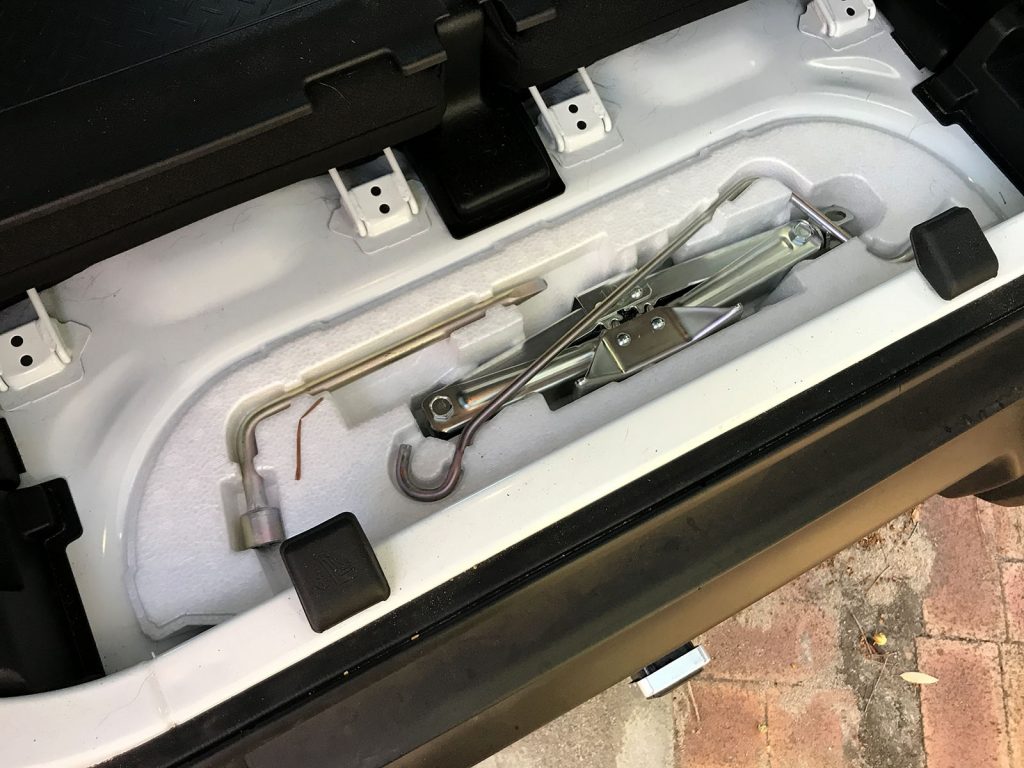
Lift out that foam too.
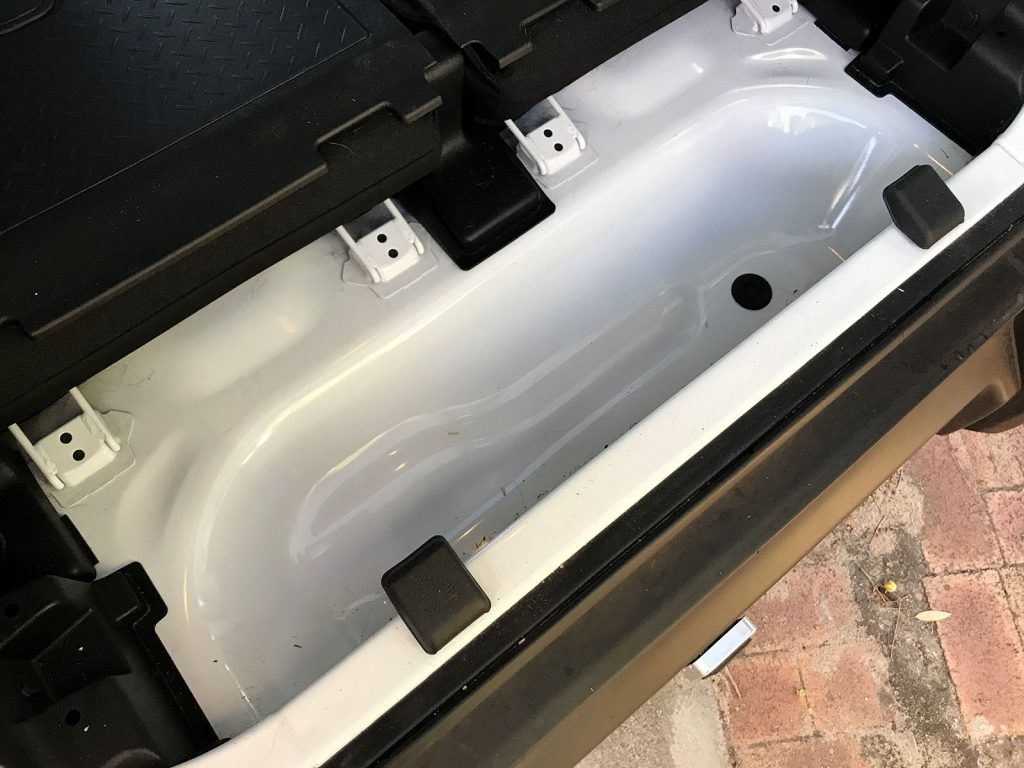
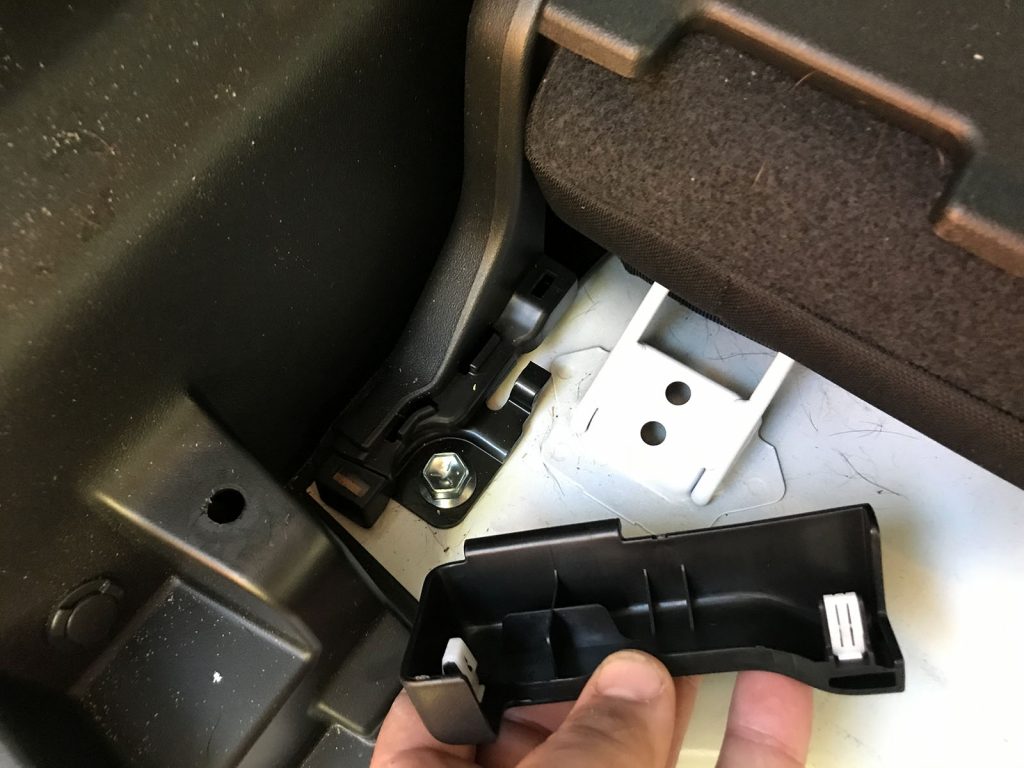
Next up remove the plastic that hides the back mount of the passenger’s side rear seat.
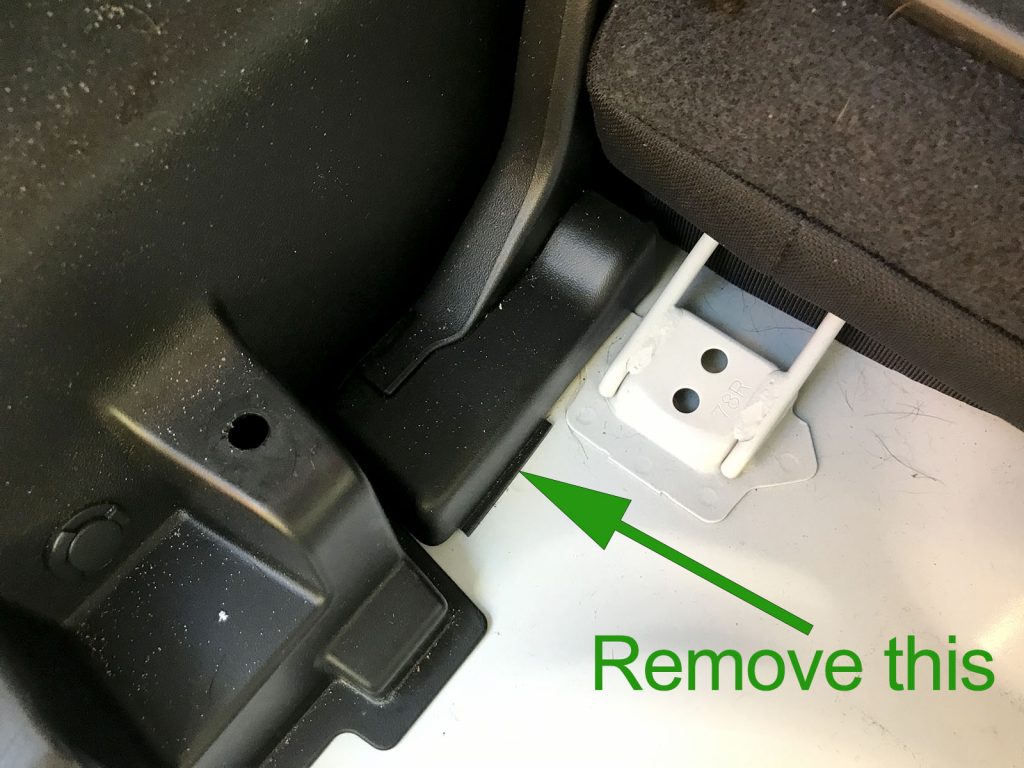
It’s just held in with a couple of plastic clips so use a trim removal tool to start lifting it up and then pull it up with your fingers.
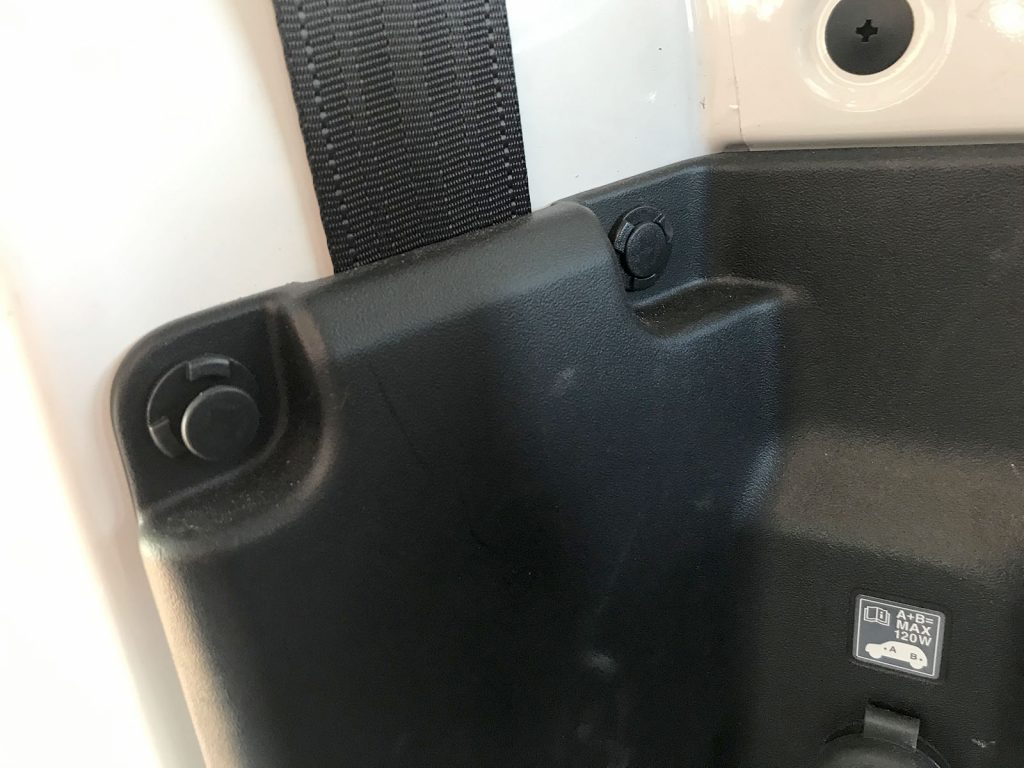
Now remove the 5 push in plastic rivets that hold the passenger’s side plastic trim piece in place. You just need to pull out the middle part and then you can pull out the main body along side it. Good idea to use a plastic trim removal lever here to help make it easier to lift the middle part out.
Now you can start to pull the plastic trim piece away. You don’t totally need to lift it out of the way but it is easier. Just bear in mind it tucks in beneath the plastic sill cover in the passenger’s side door and also into the trim by the passenger’s side shoulder strap for the seatbelt. Some people say it’s easier to get this trim piece fully out if you take the rear seat out but I didn’t find I needed to.
You do, however, need to unplug the auxiliary power socket wiring at the back of the trim piece.
Now the bumper comes off. There’s 5 screws at the back and two plastic rivets along the top…
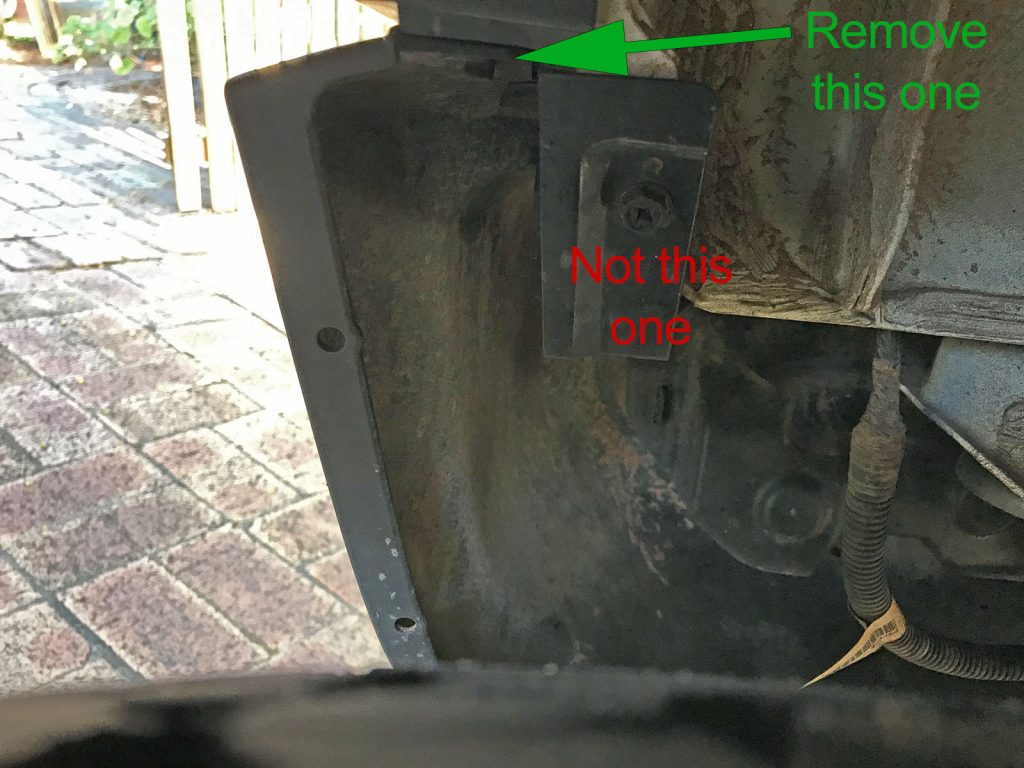
… there’s also a screw either side in the back of the rear wheel arches. Note you undo the uppermost ones, not the ones that are easier to see.
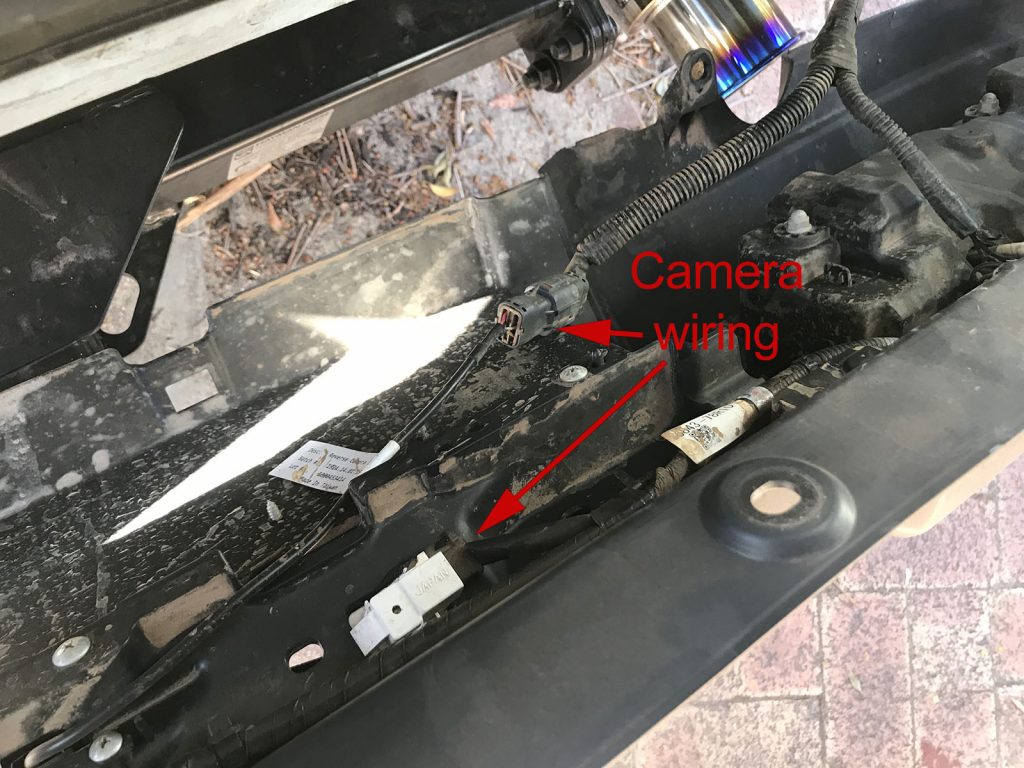
With those removed, you can tilt the bumper away to get access to the wiring. Start by disconnecting the two leads that are used for the factory rear vision camera (if fitted – they aren’t to overseas models for the non Australian readers!)…
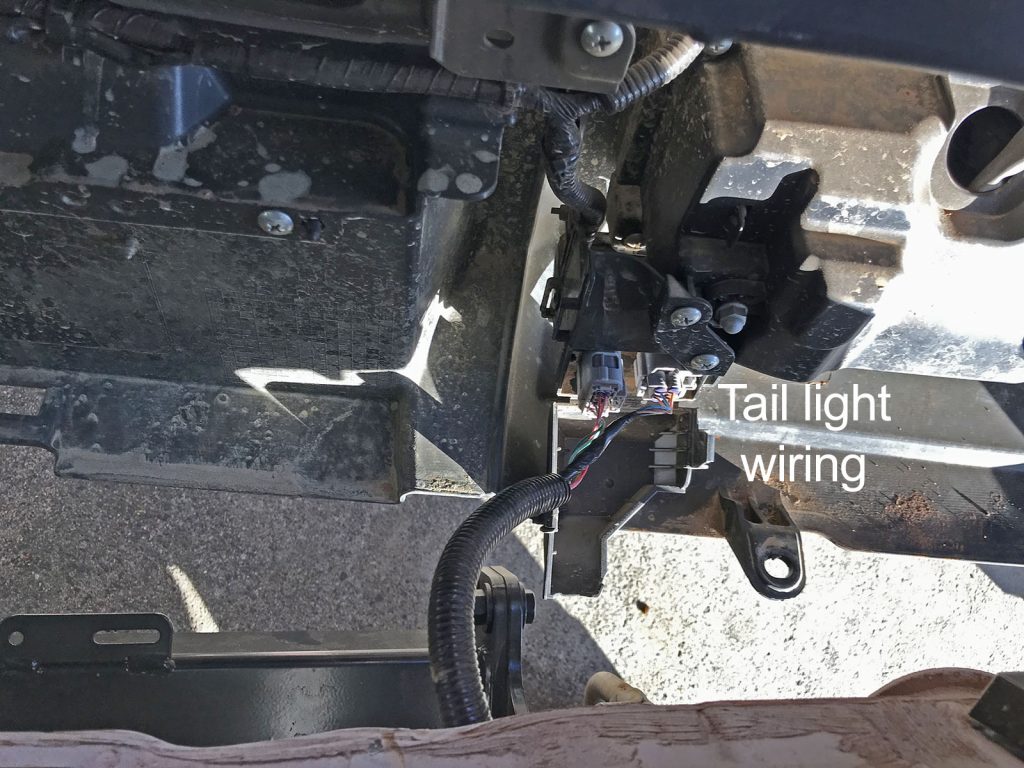
… then over on the left hand side of the bumper you need to disconnect the tail light wiring. Note these wiring plugs all have push in clips that you hold while pulling the plug back out. Don’t just yank on the wires hoping it’ll come out.
Included in the factory wiring instructions is a little template. You need to cut this out to align it with the existing grommet and back of seat mount to locate a hole you’ll drill in the boot floor.
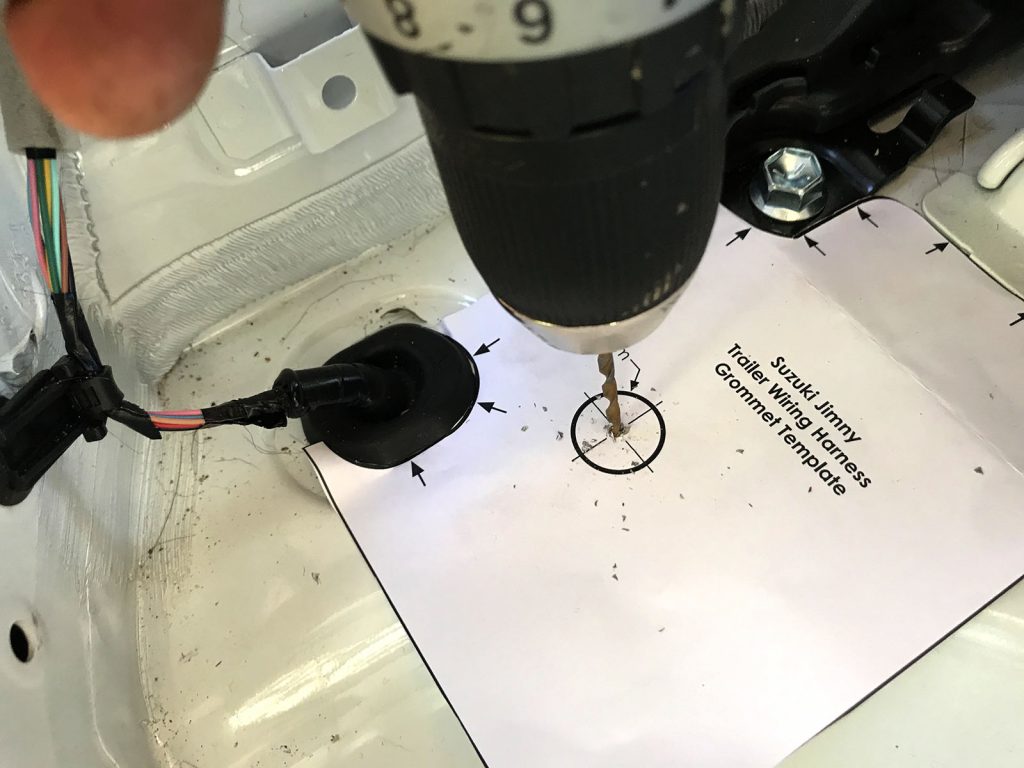
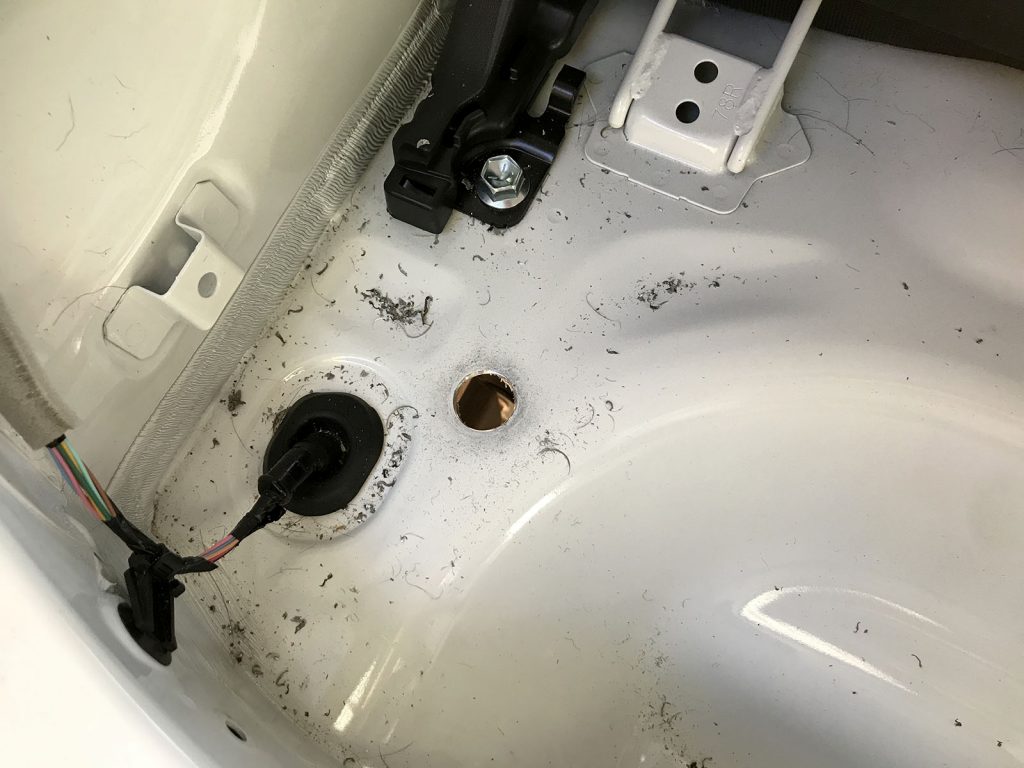
Start with a pilot drill and then work your way up to a 20mm hole.
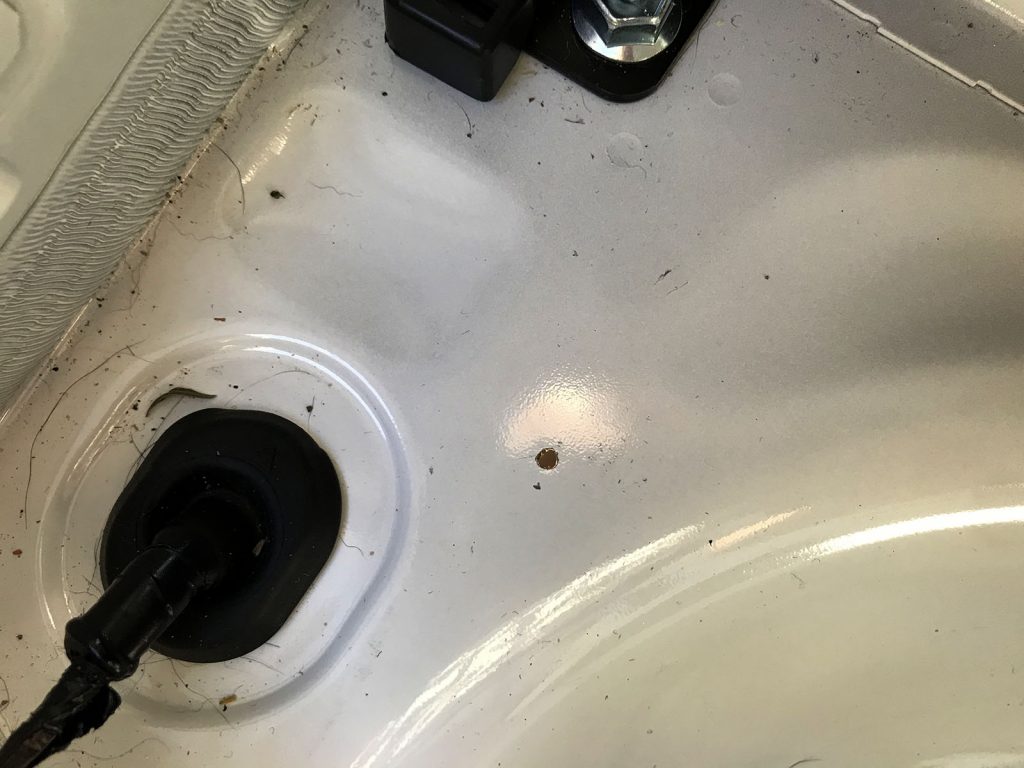
A metric step drill is a good choice here but whatever will get you a 20mm hole in steel will do.
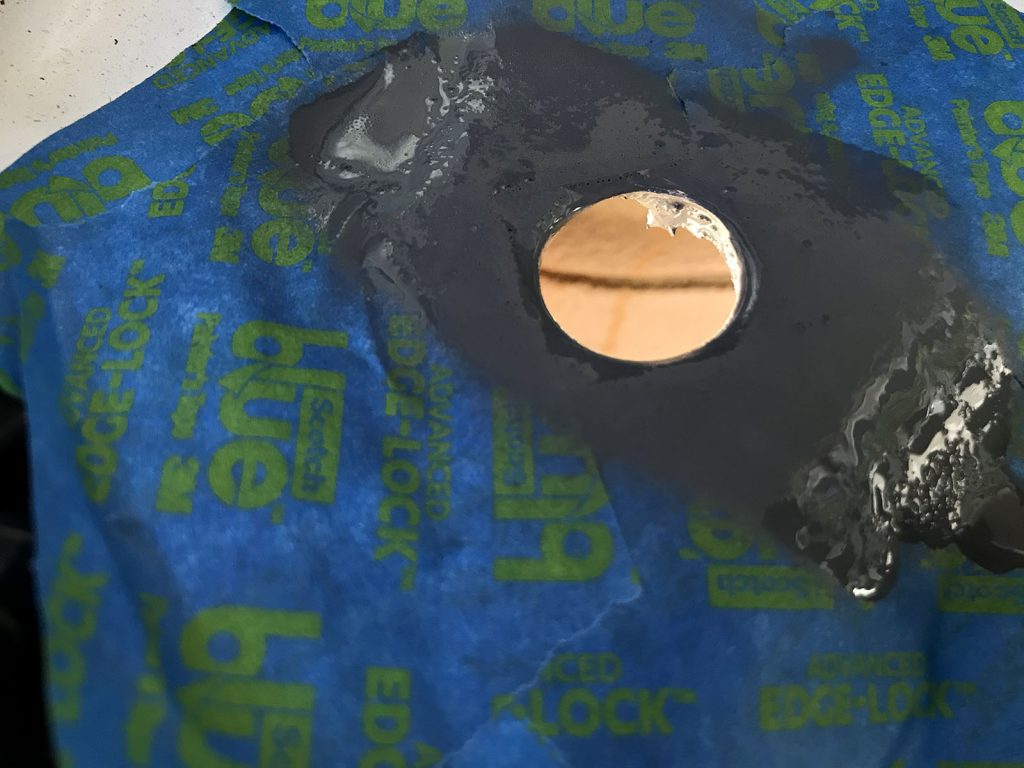
Factory instructions say to use some rust inhibitor in the hole, I prefer paint. I also prefer my mostly white car to stay mostly white, so I masked up around the hole so I was only painting the bare metal inner and a little bit into the paint on the other side.
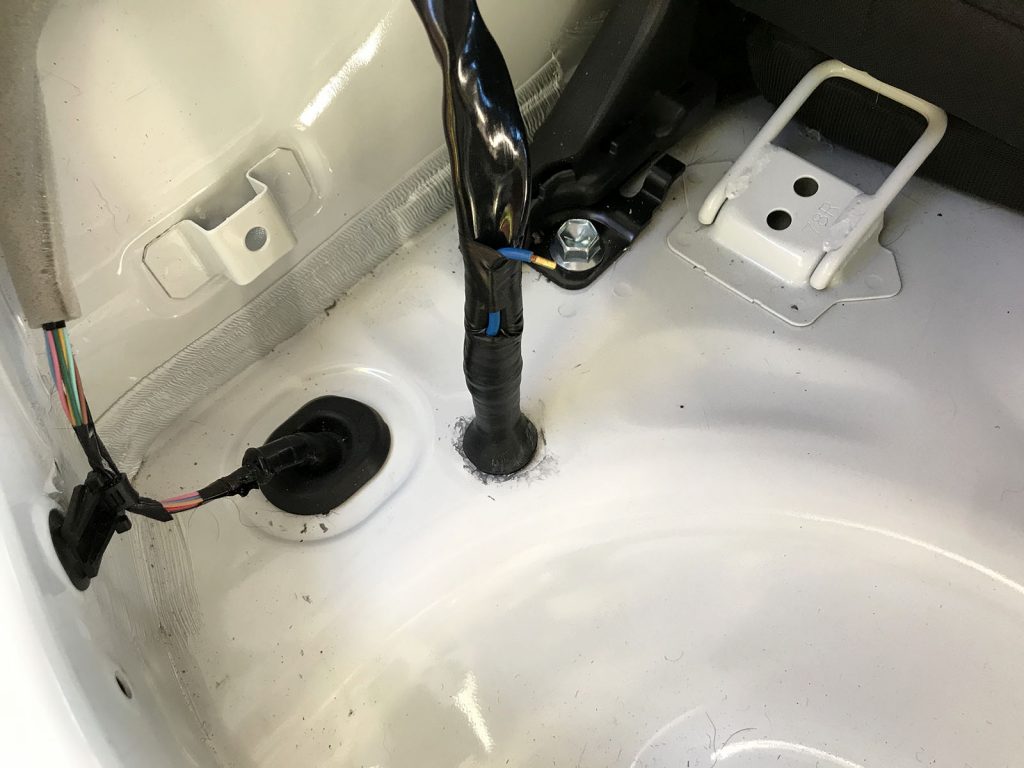
At this point you feed the wiring in from underneath the car. The end with all the loose terminals goes inside the car, leaving the waterproof plugs for the tail light end of the car’s wiring outside.
Now the fun begins of wiring in the plug for the electrical control unit. Follow the instructions included in terms of what wire goes to what pin of the connector block carefully.
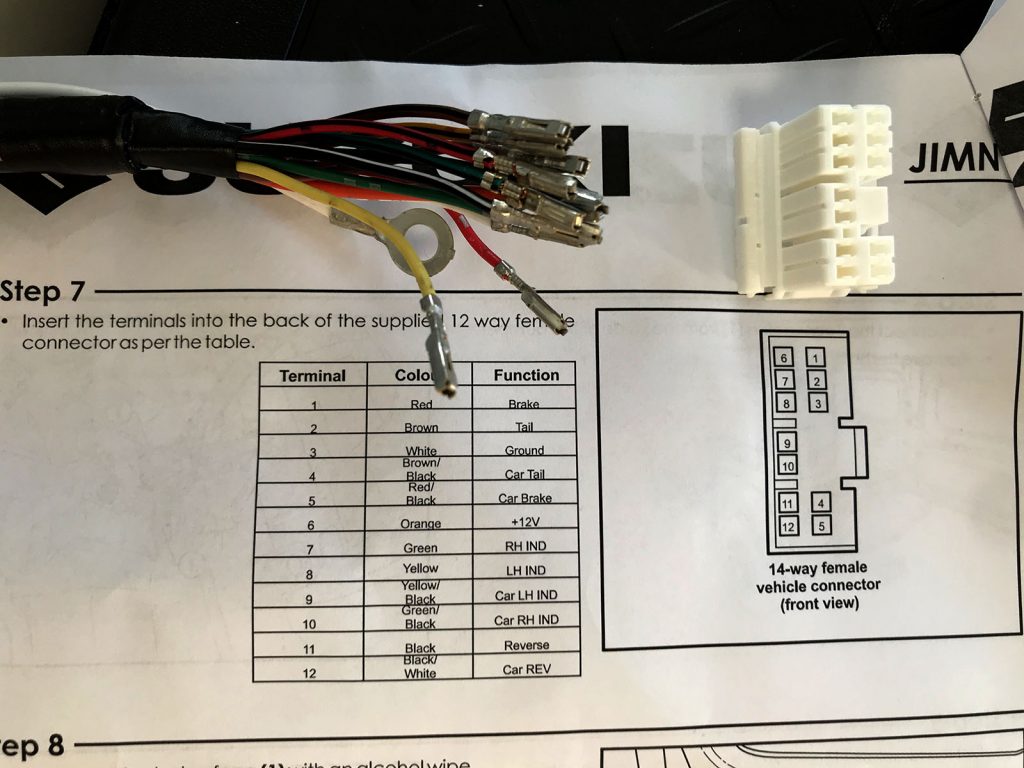
The pins will only go in one way into the terminal block and audibly click into place. At that point they won’t pull back out unless you use a set of terminal removal pins; if you put them in around the wrong way they won’t click and they will pull back out with a tug on the wire.
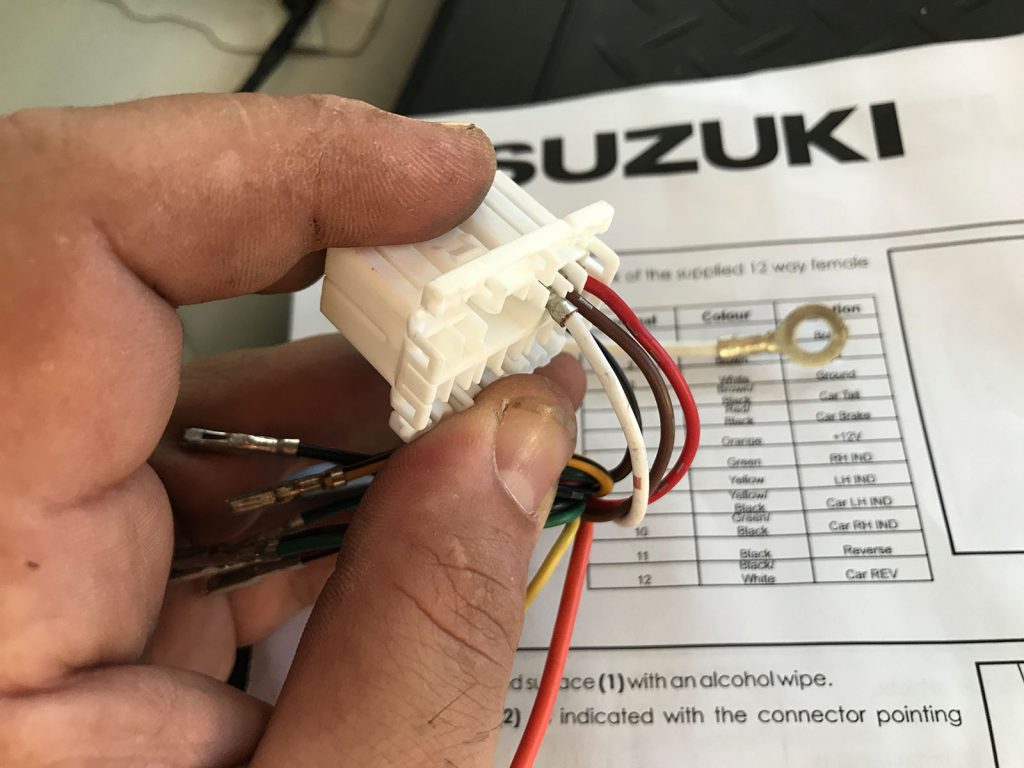
Work slowly and methodically and verify each one is seated before moving onto the next wire.

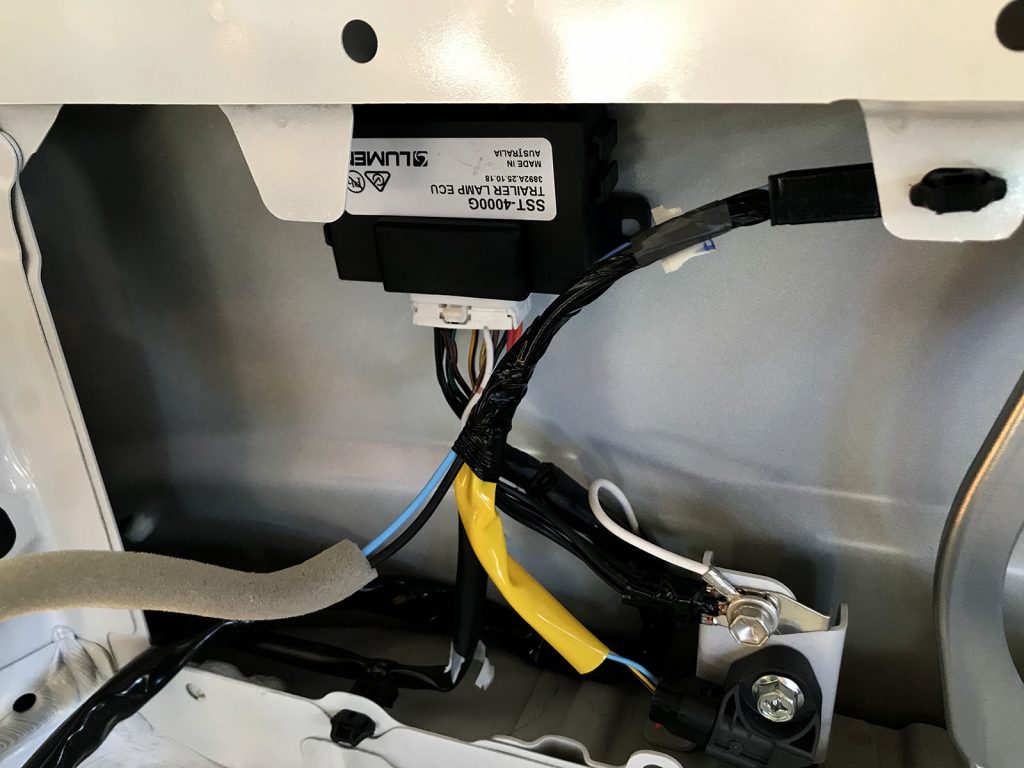
Control unit goes into the passenger’s side arch and is held into place with the supplied double-sided tape. Factory instructions tell you to clean off the back of the unit and the paint with some isopropyl alcohol. Prepsol/wax and grease remover also works well.

Route the wires down so they won’t get pinched when the side trim piece is reinstalled, connect the white earth terminal to the M6/10mm hex bolt earth point inside the back of the trim, and push the control unit against the inside of the inner part of the guard.
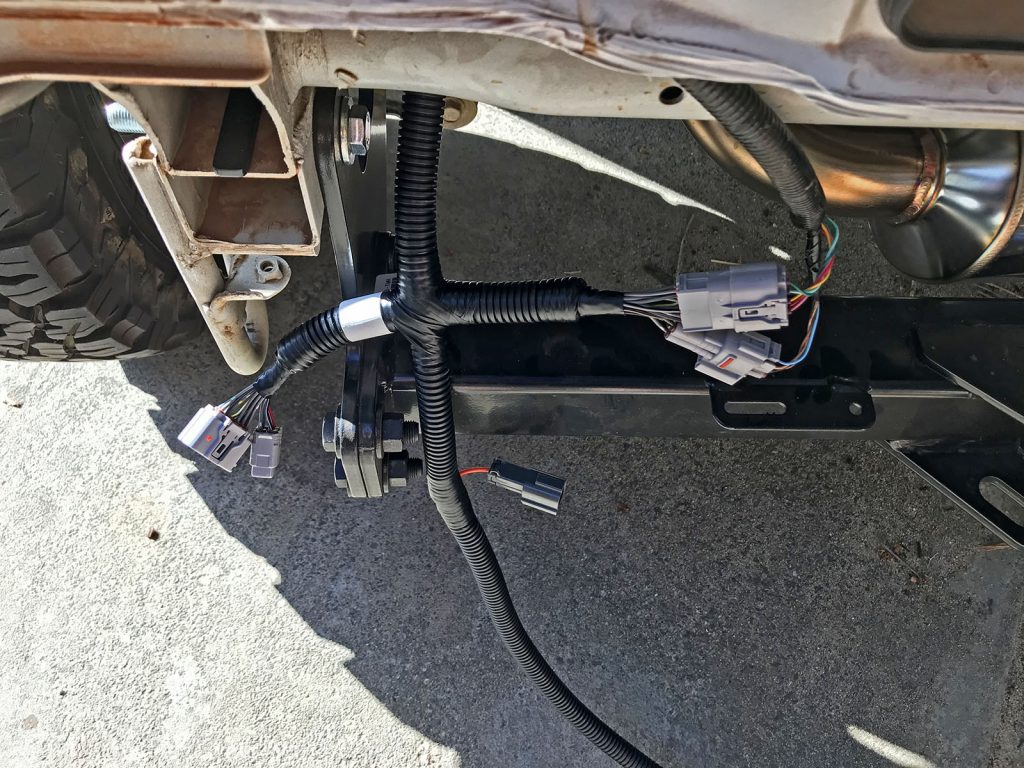
Now route the wiring nicely along the back and make sure the tail to the trailer connector isn’t going to get melted by the exhaust etc. Note I have an aftermarket exhaust on mine so your muffler will look different. Also note that the factory wiring puts the trailer connector on the other side of the hitch so you have more wire here for the trailer connector than you need.
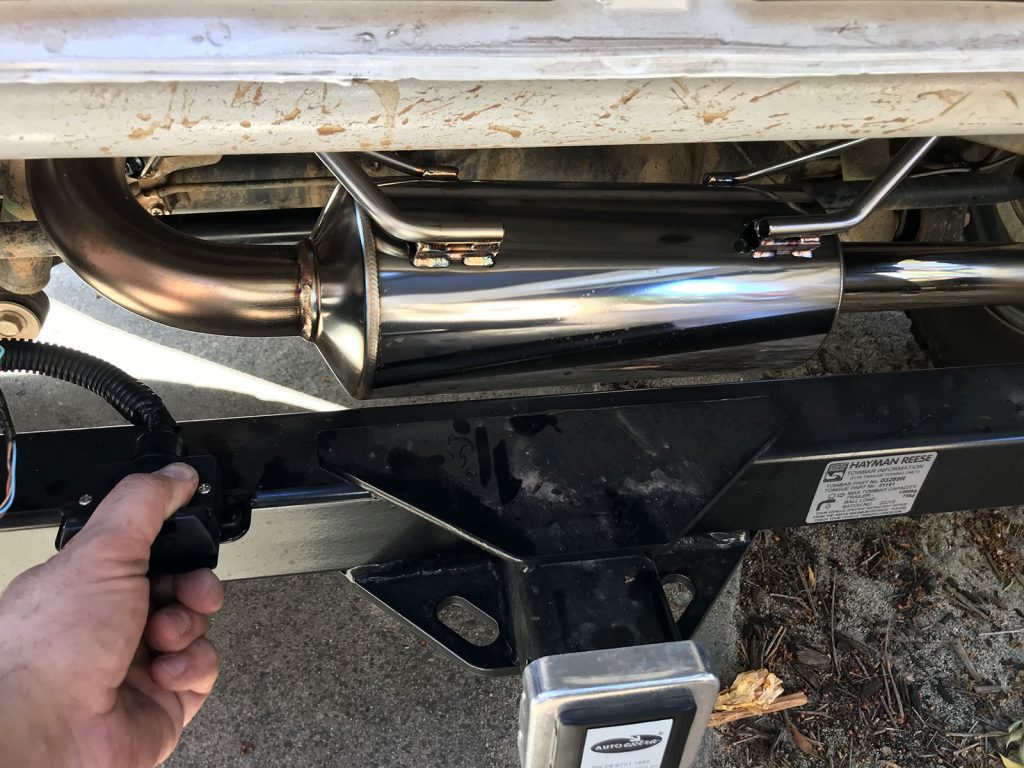
Place the trailer connector down, use the supplied bolts and nuts to hold it into place.
The last remaining thing wiring wise is to run power down from the battery to the trailer wiring harness.
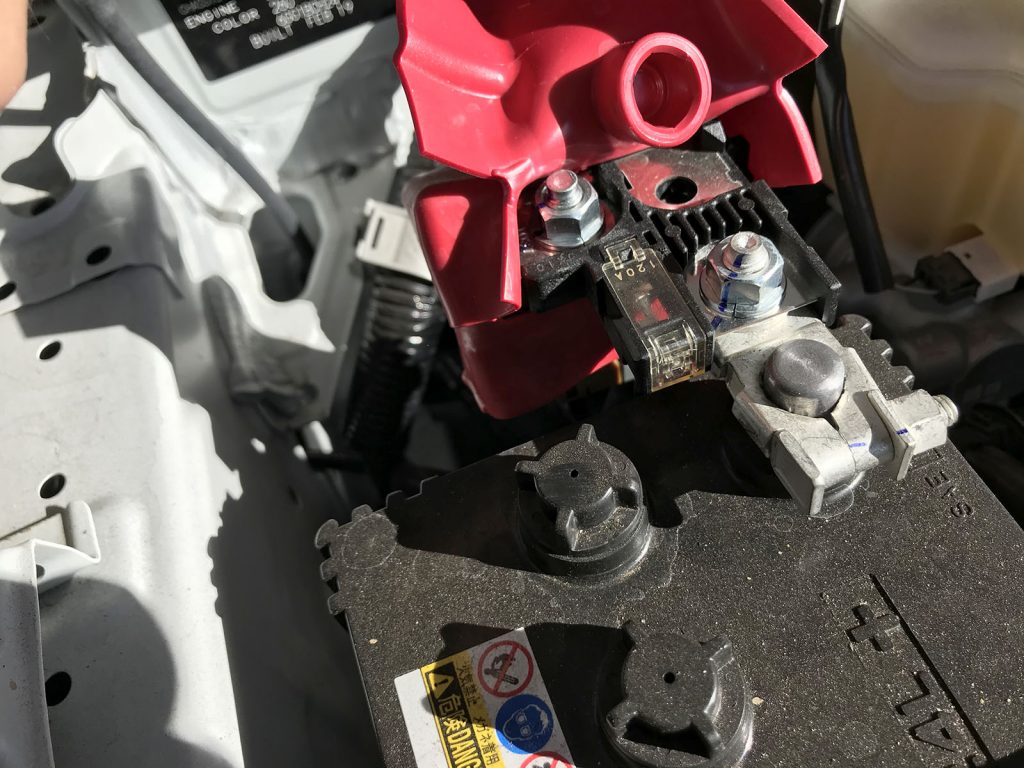
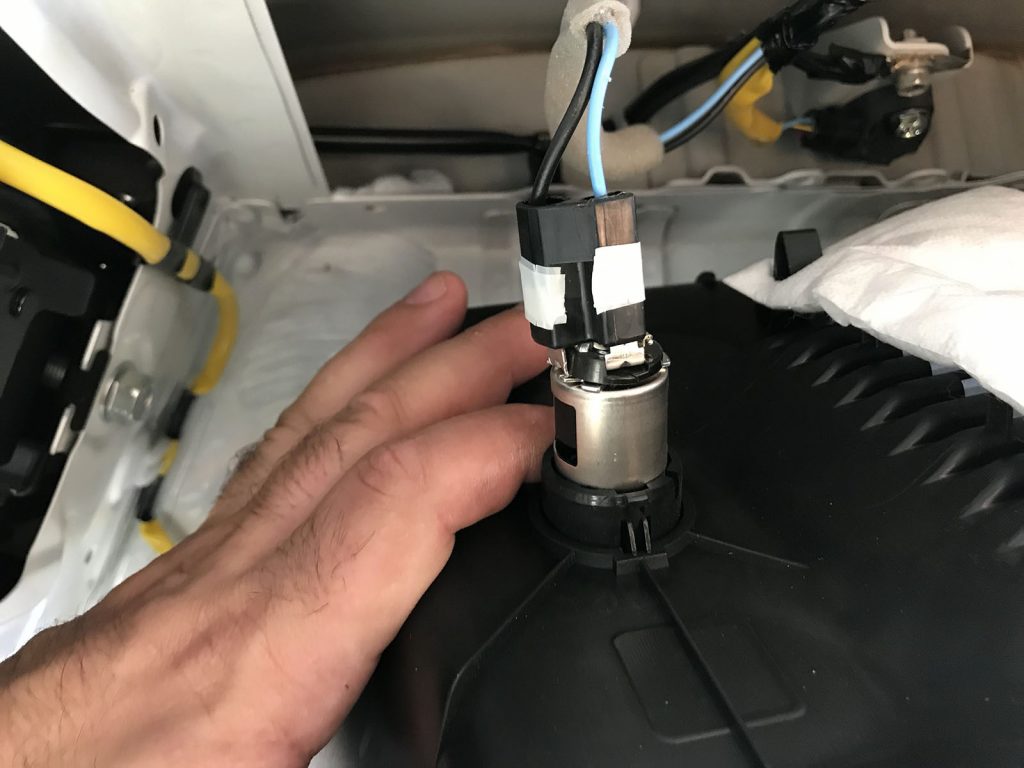
Wiring connects up to the main bolt beside the 120A circuit breaker inside the positive terminal boot. Route the ring terminal end of the power harness through the boot connector and connect up underneath the main nut. Note here mine has the factory blue marking indicating this nut has been done up at the factory and hasn’t been touched since leaving Japan.
Route the wire down and then back towards the firewall, connecting up with a cable tie where it meets the main engine bay wiring harness.
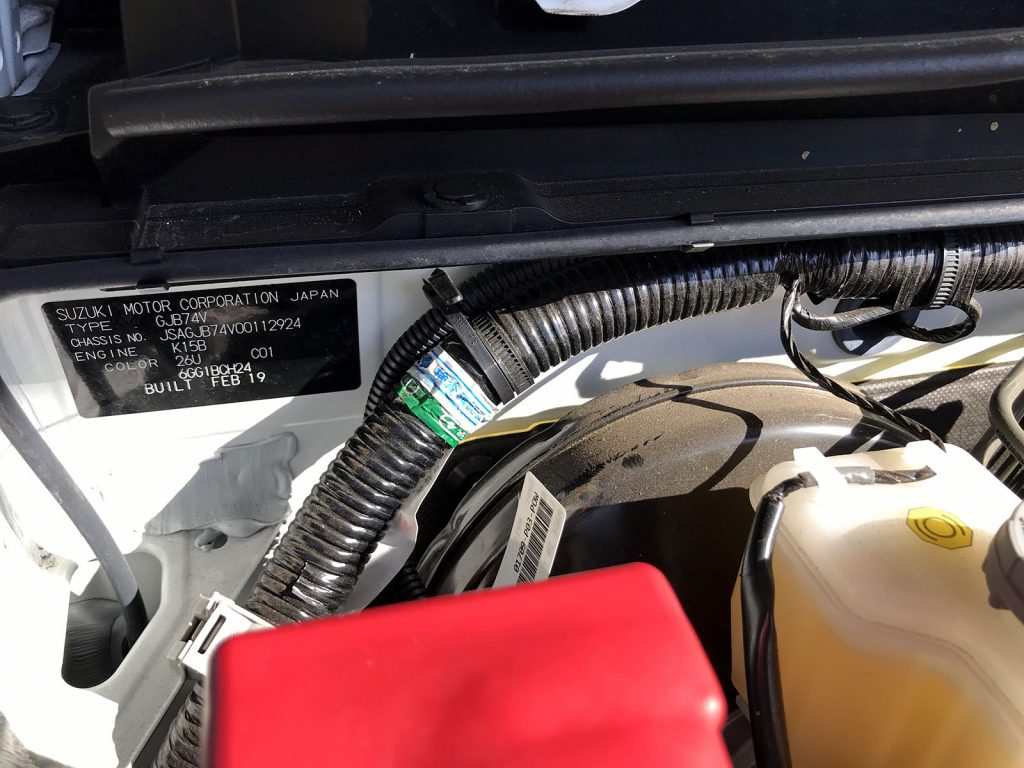
Use this main wiring harness as a guide and route the power wire harness all the way across the top of the firewall and then down towards the passenger’s side chassis rail on the other side of the engine bay.
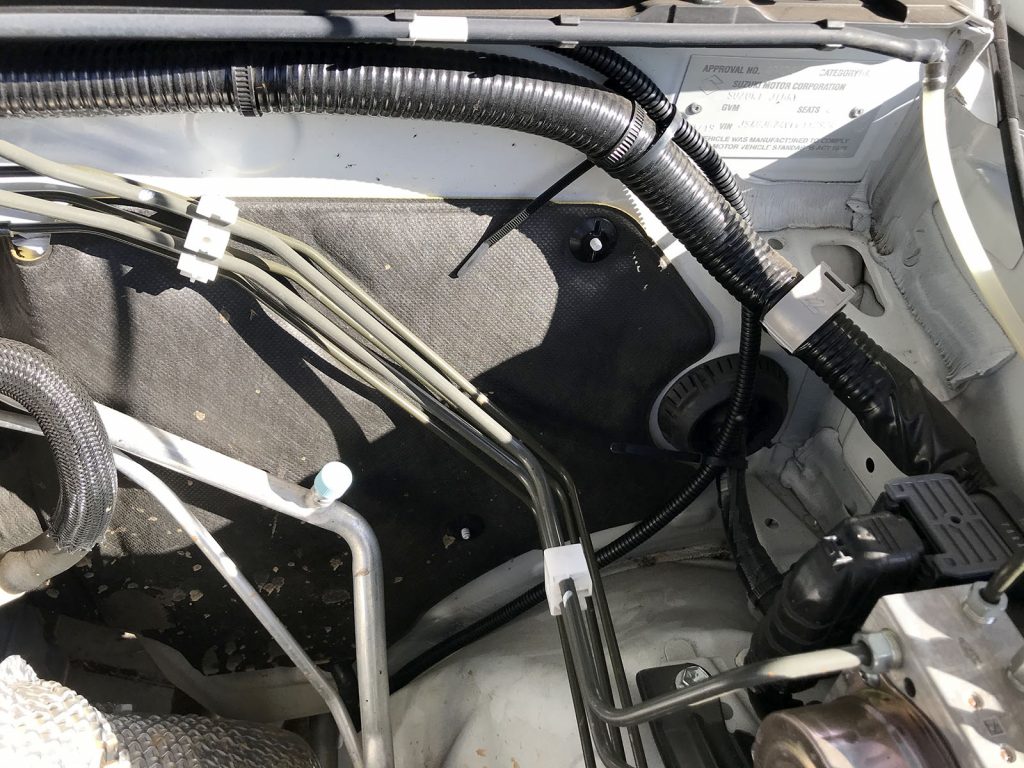
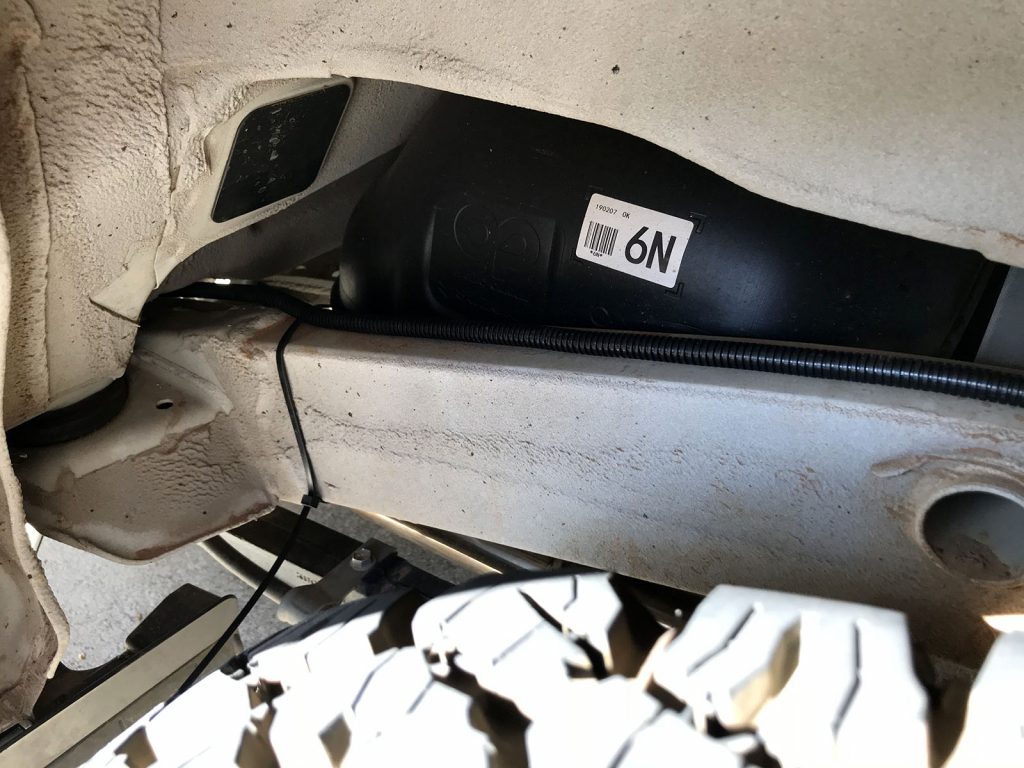
Then run the power wiring harness all the way along the top of the chassis rail, securing it every 300-450mm with the supplied cable ties from the factory kit.
With that done, connect it to the power terminal on the trailer wiring harness. Connect the wiring to the tail light harness of the bumper, connect the rear vision camera wiring up, and refit the bumper. Refit all of the trim and stuff inside the cabin and you’re all done and ready to tow!