
Jimny interior/carpet/headlining removal
Let’s just say you had a little failure to proceed and your car is a bit soggy inside. Or, perhaps, you’d like to add some sound deadening to make your Jimny a little bit nicer place to be and drive. Perhaps you have a complicated 12V installation and want options to really make it easier to get everything just how it needs to be. This article will take you through ways to remove the Jimny’s interior, headlining and carpet.
Sections
Carpet removal
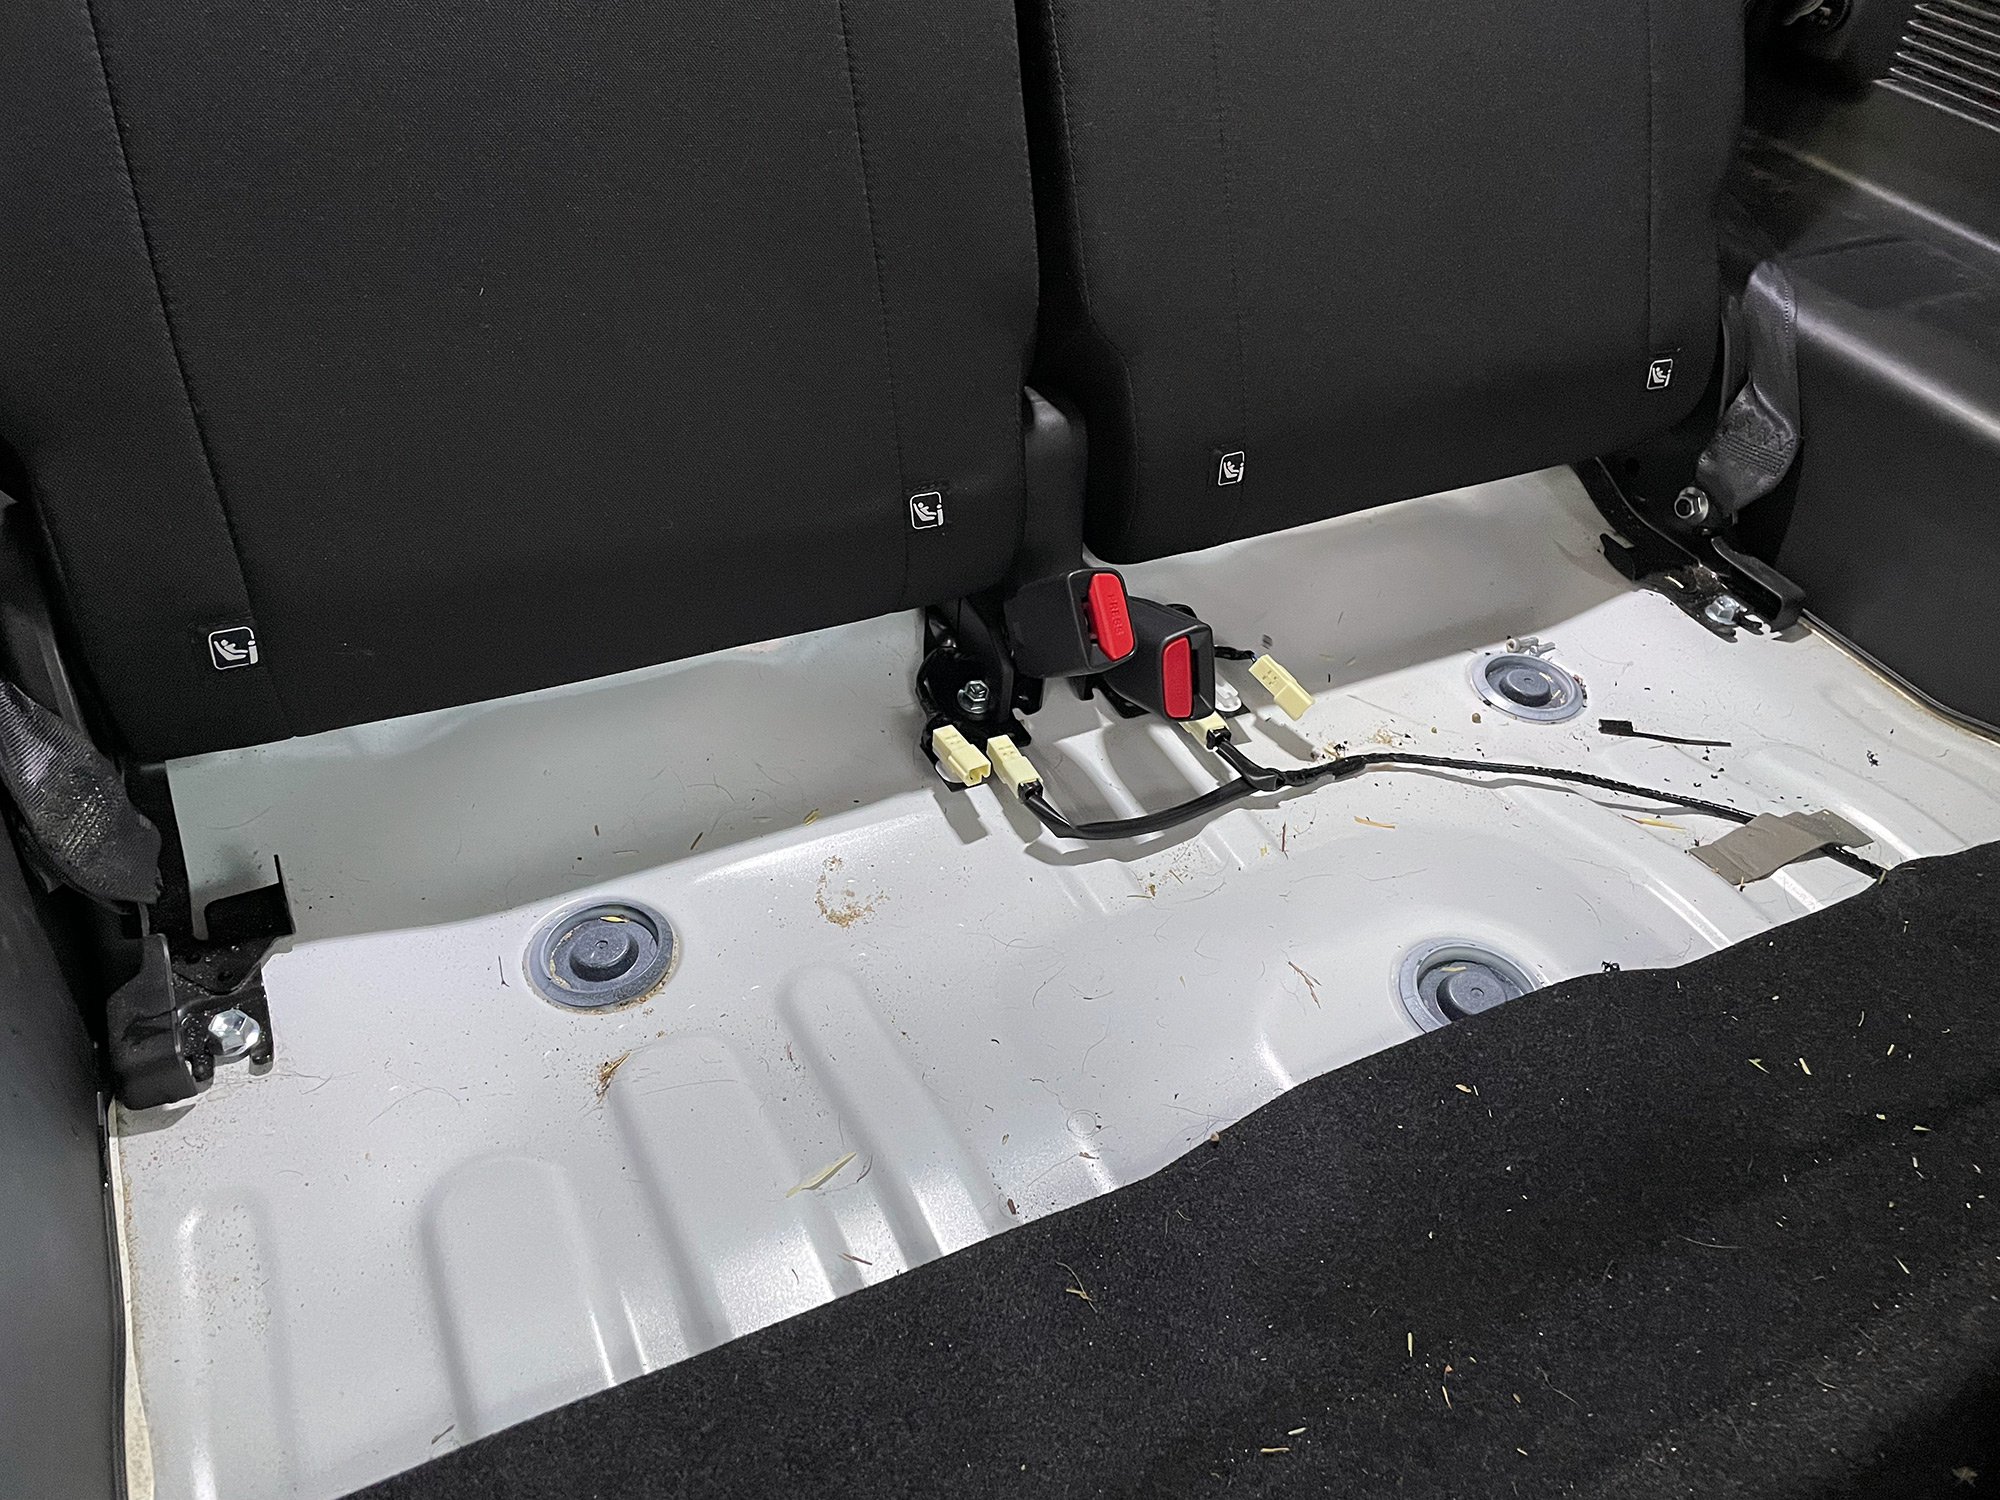
I had to do this because I had a little issue involving some water ingress from getting hung up mid boghole and unable to go forwards or backwards. Just one of those things; Suzuki did put a huge amount of thought into dealing with such situations so it’s not a problem at all. The carpet is marine style carpet so doesn’t suffer hugely from some water, and they’ve tucked all of the wiring up and out of the way with no connectors down low save for some waterproof connectors for the seat airbags and the seat belt alarms.
For reference, it took me about 30 minutes to get it all apart including taking the photos for this article. I took a couple of shortcuts I’ll mention but it really doesn’t take long at all.
Tools wise you will need a 14mm spanner or socket, a T40 torx socket, and a couple of plastic trim removal tools. That’s it!
Automatics are a bit harder, as the centre console is more complete in them and the shifter is a bit harder to take apart. One day I’ll help someone do this and I’ll photograph the differences… till then, just know that the auto is a little tricky but it is still achievable.
Steps involved
- Luggage box removal
- Rear seat removal
- Front seat removal
- Trim removal
- Carpet removal
Procedure: interior removal
Remove the luggage box and tool kit
There’s a few things hidden underneath the luggage box like the tools, and if you’ve drowned the car properly you’ll also want to make sure there’s no water under the rear seats or in the area where the jack sits.
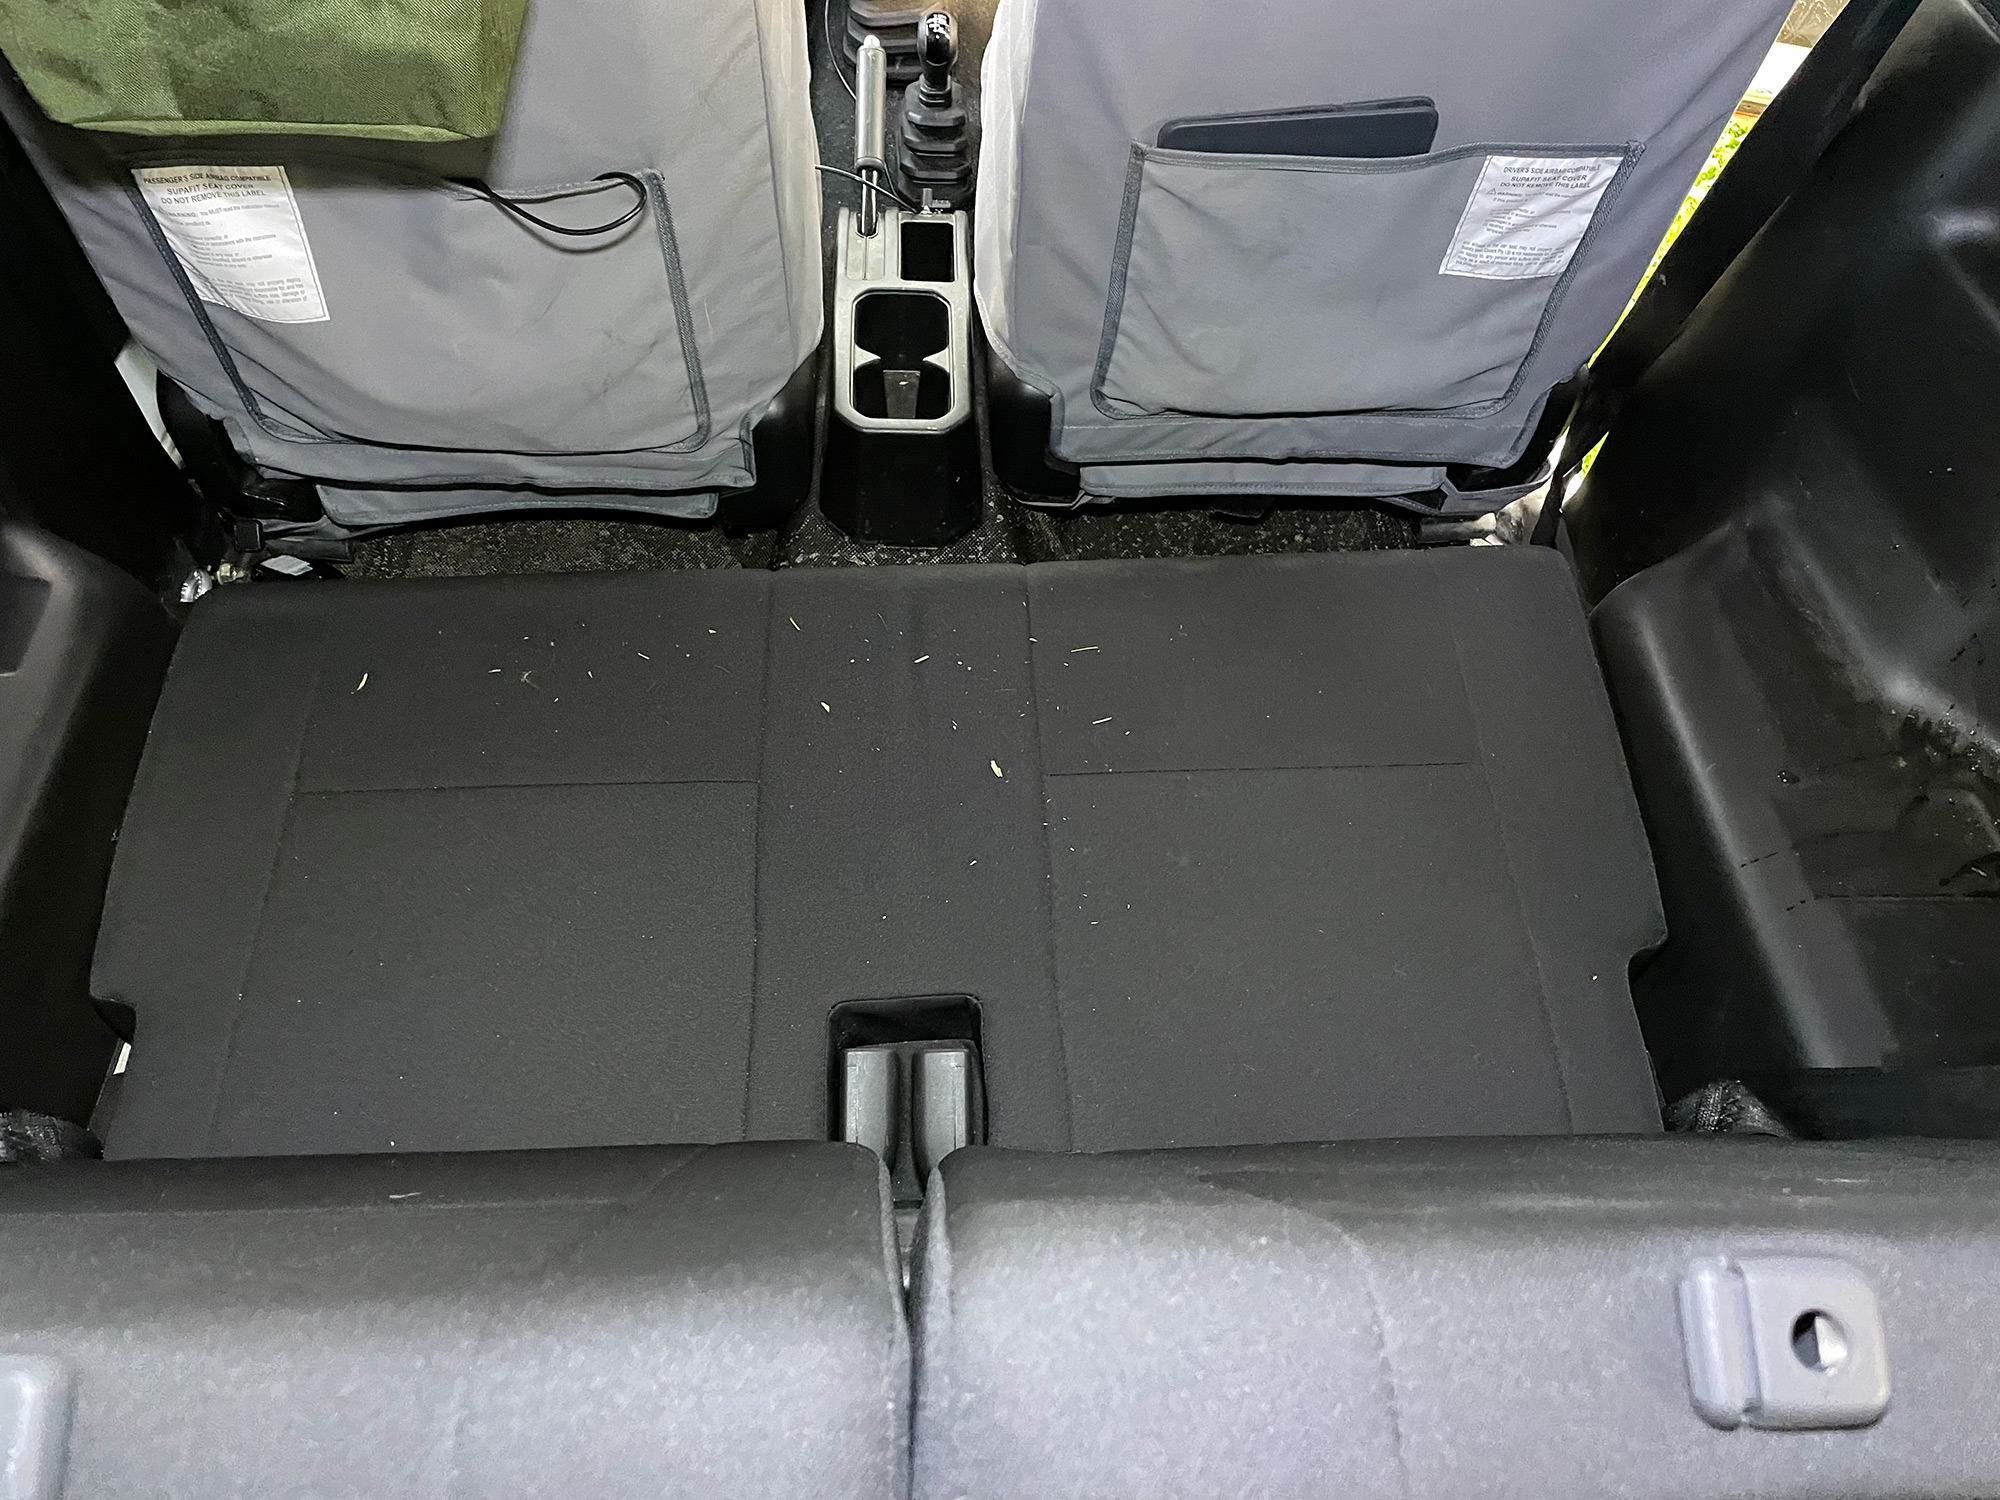
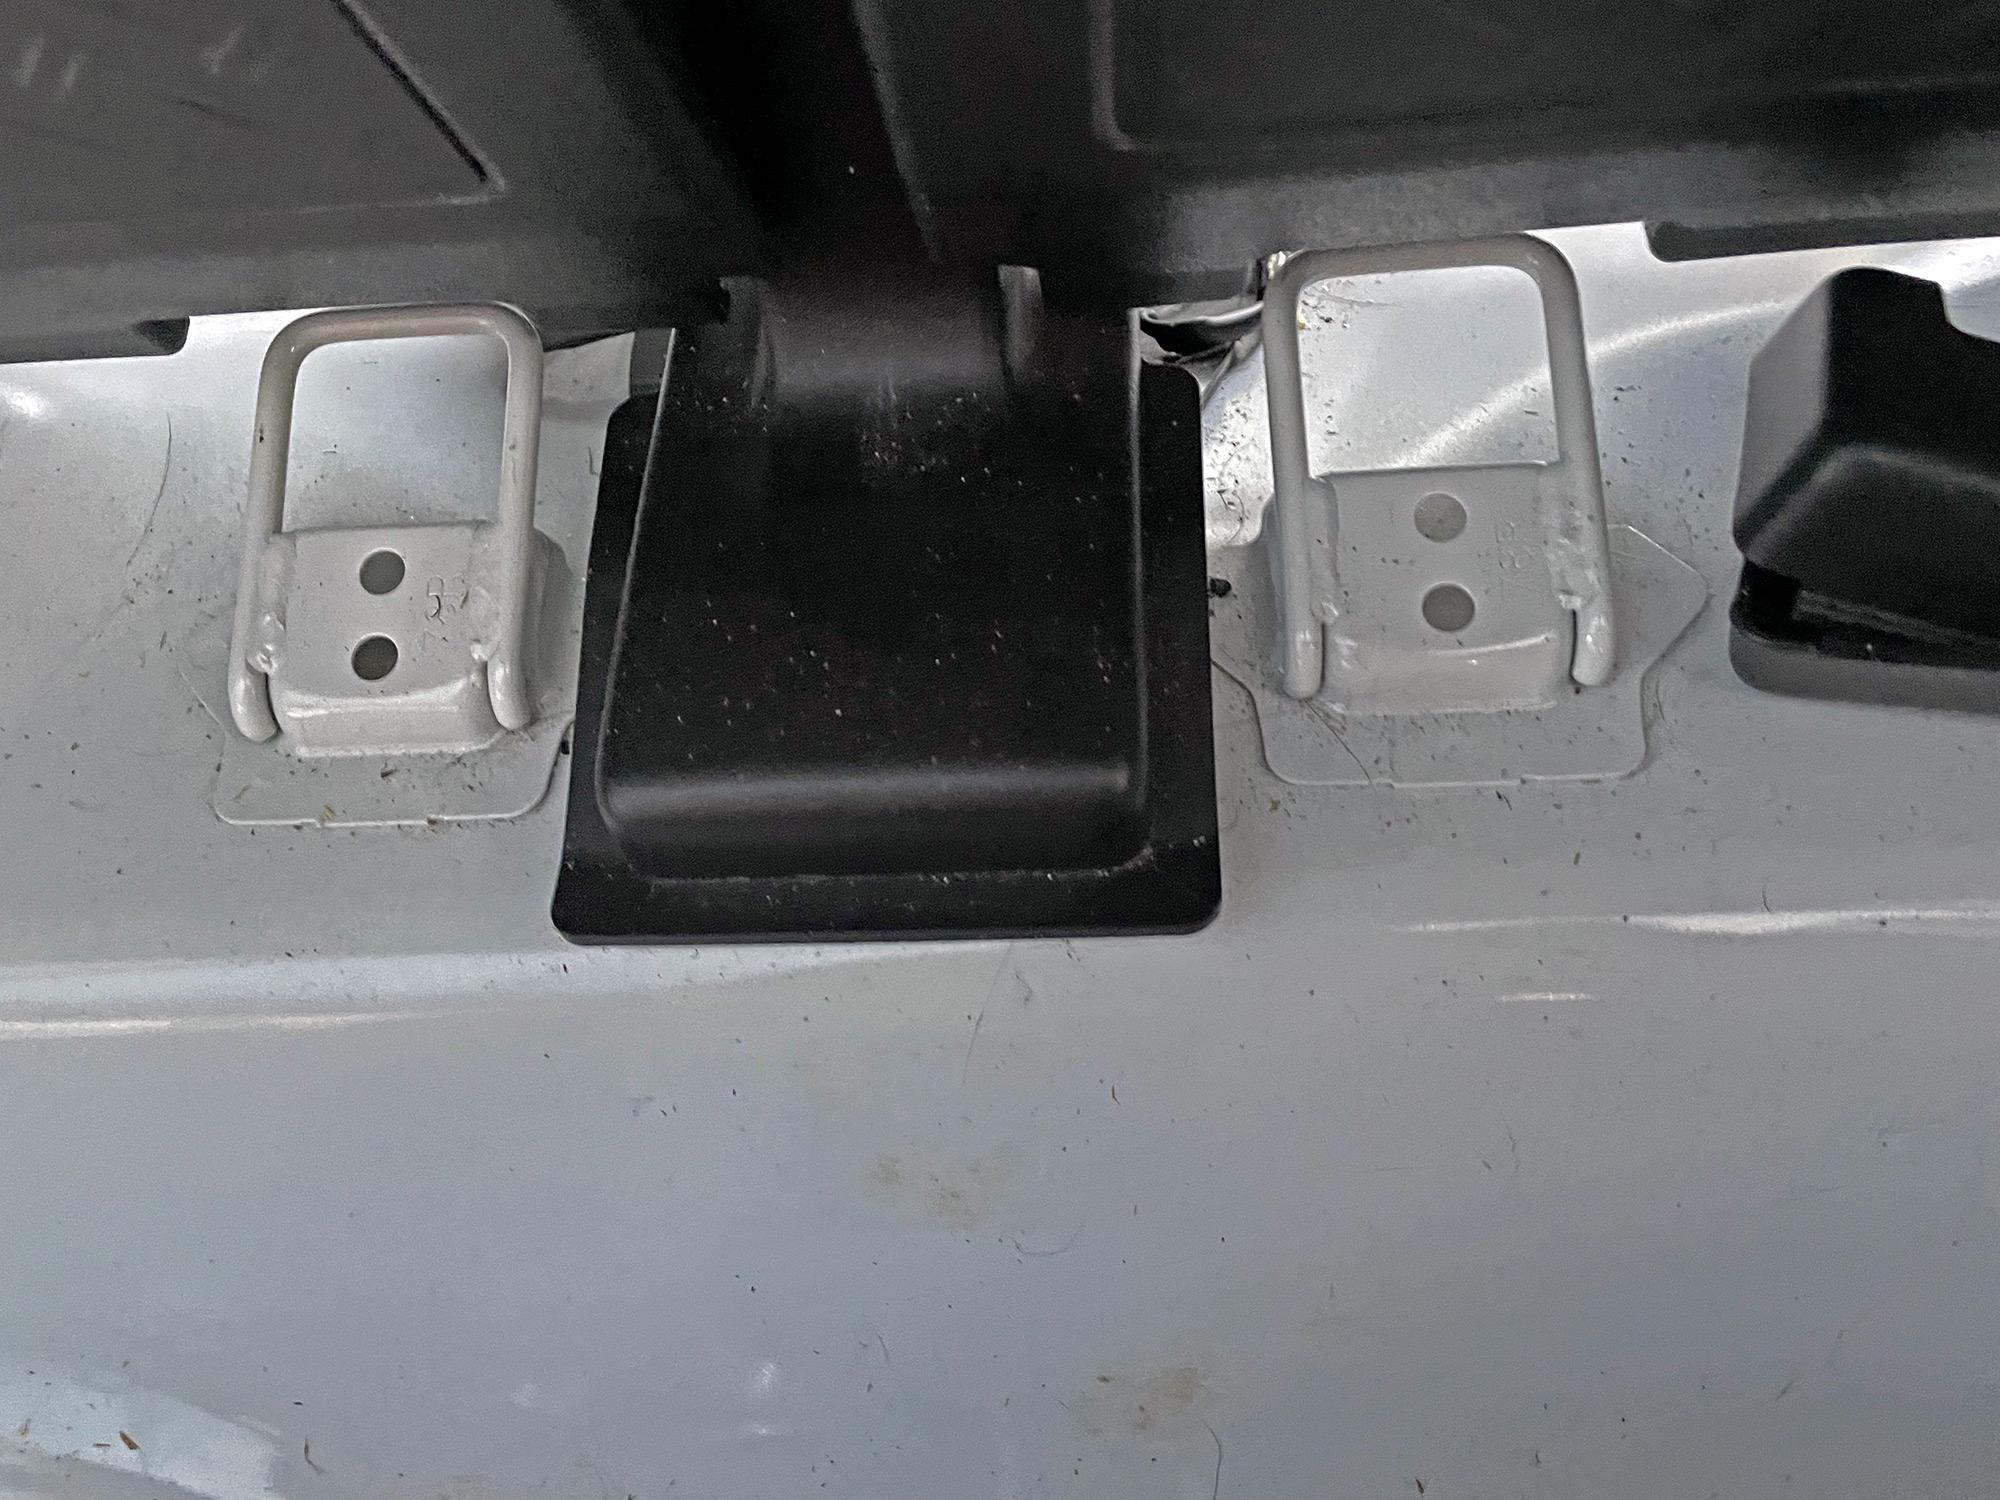
Start with a nice complete intact rear area.
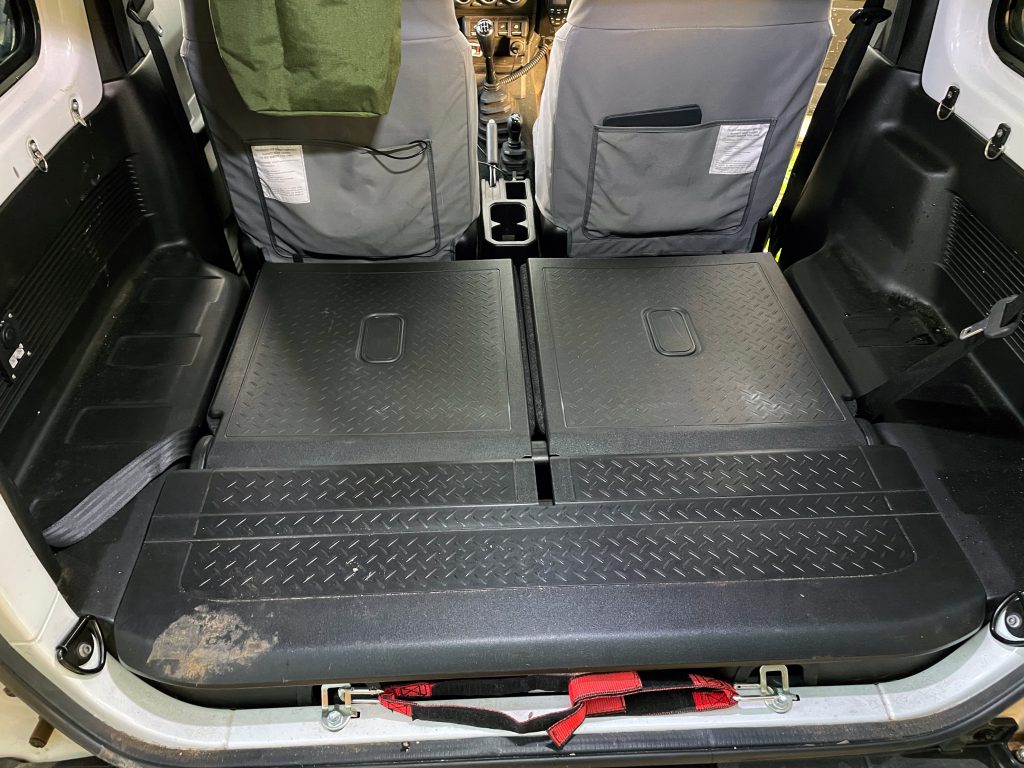
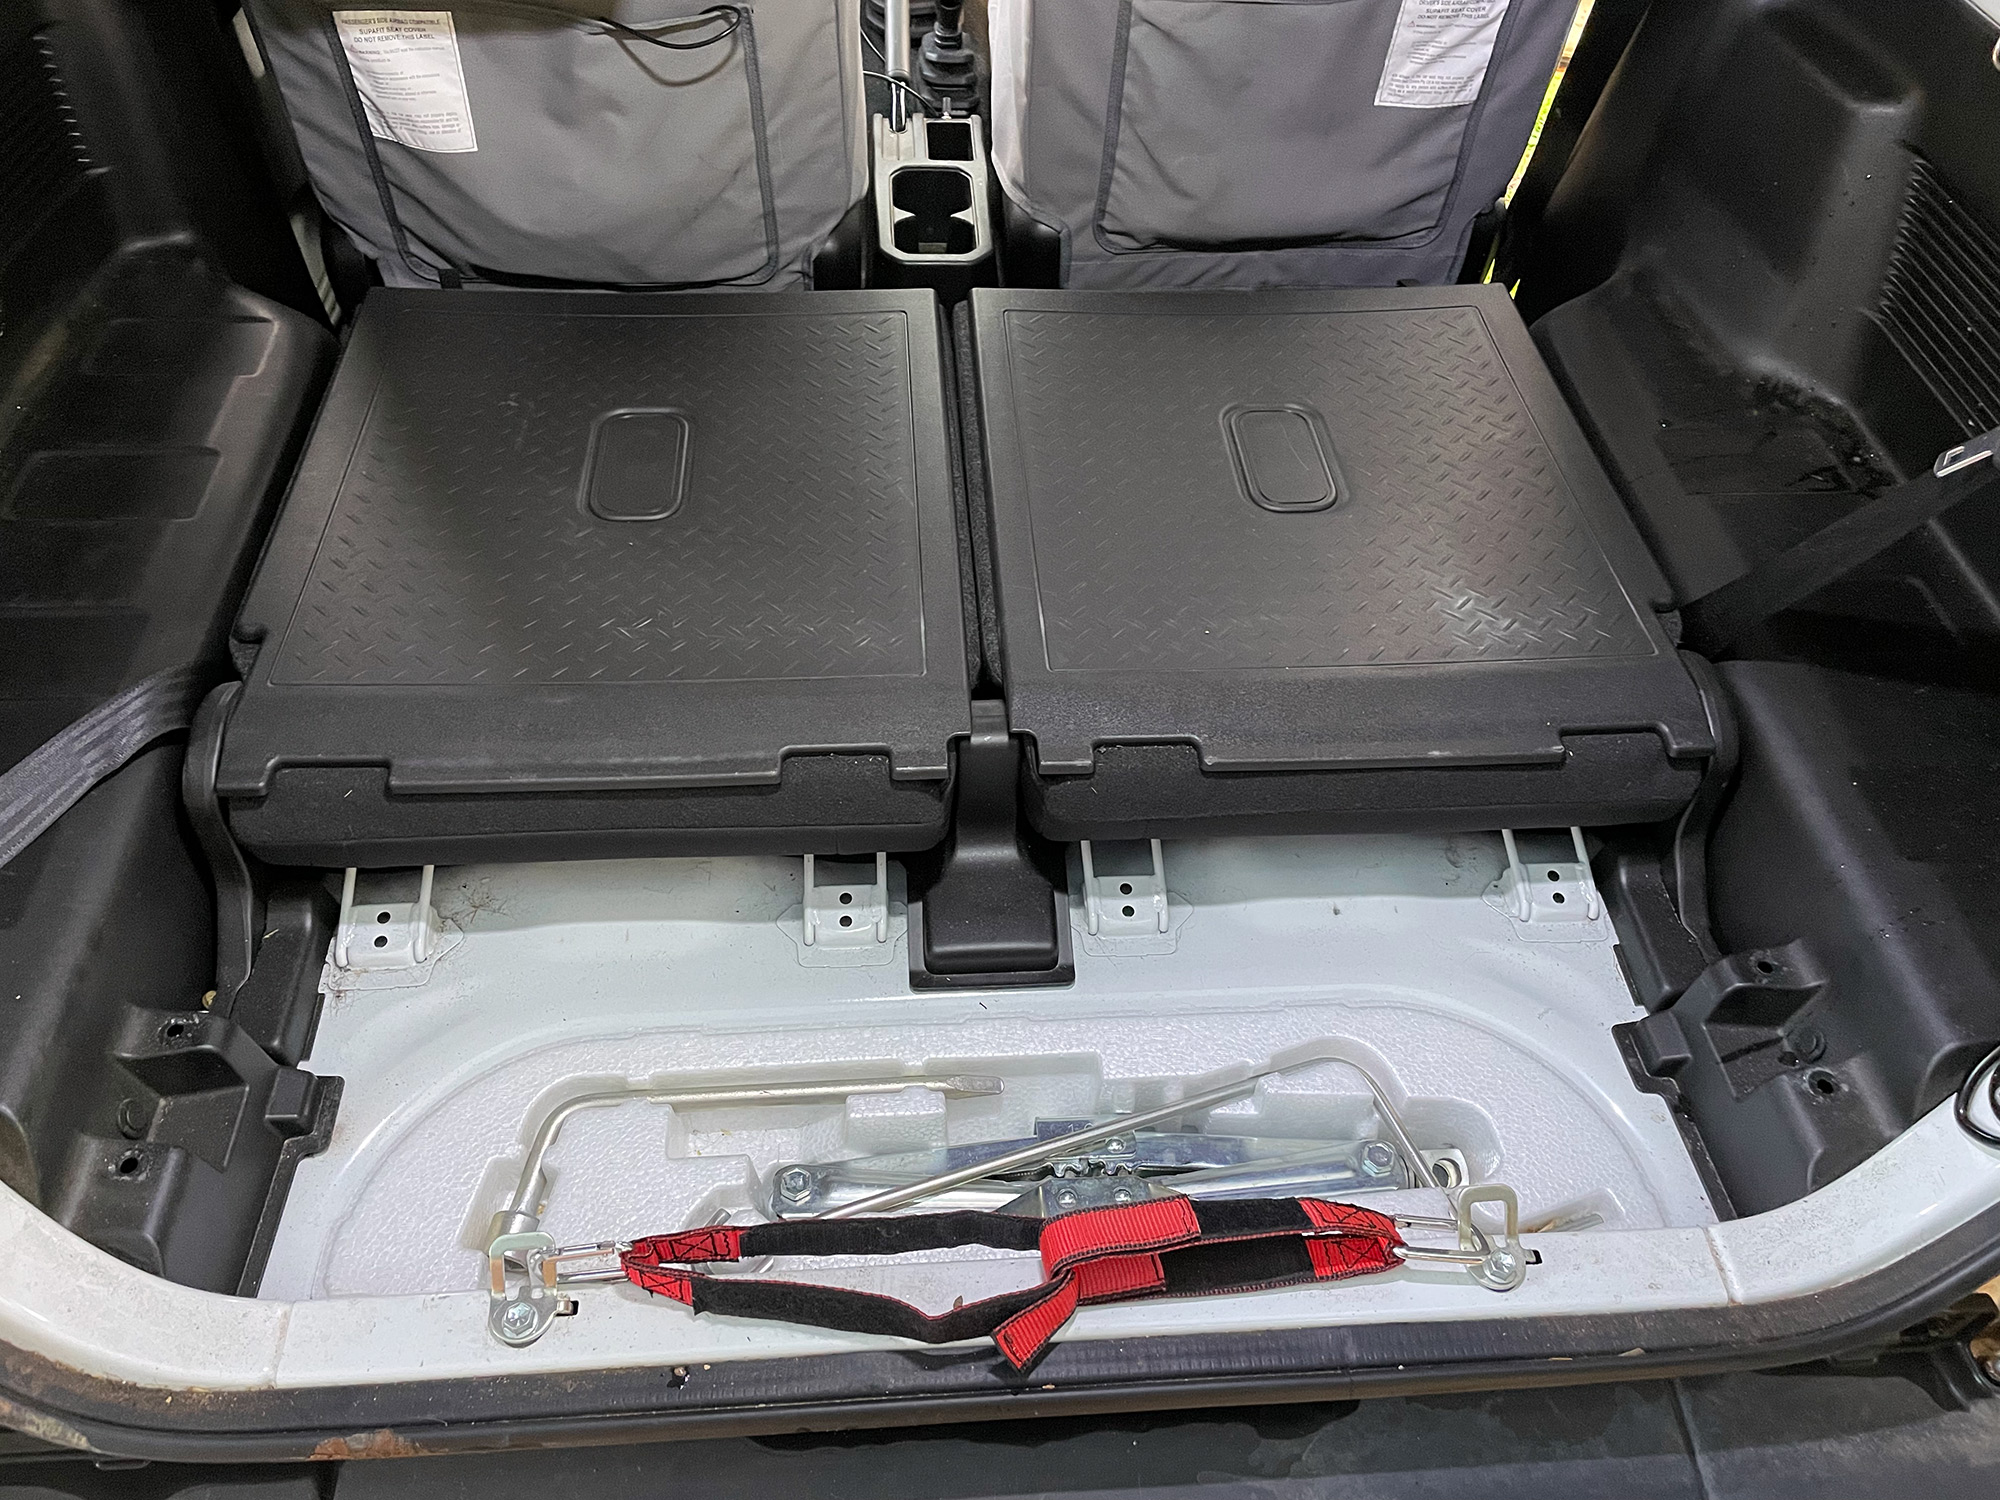
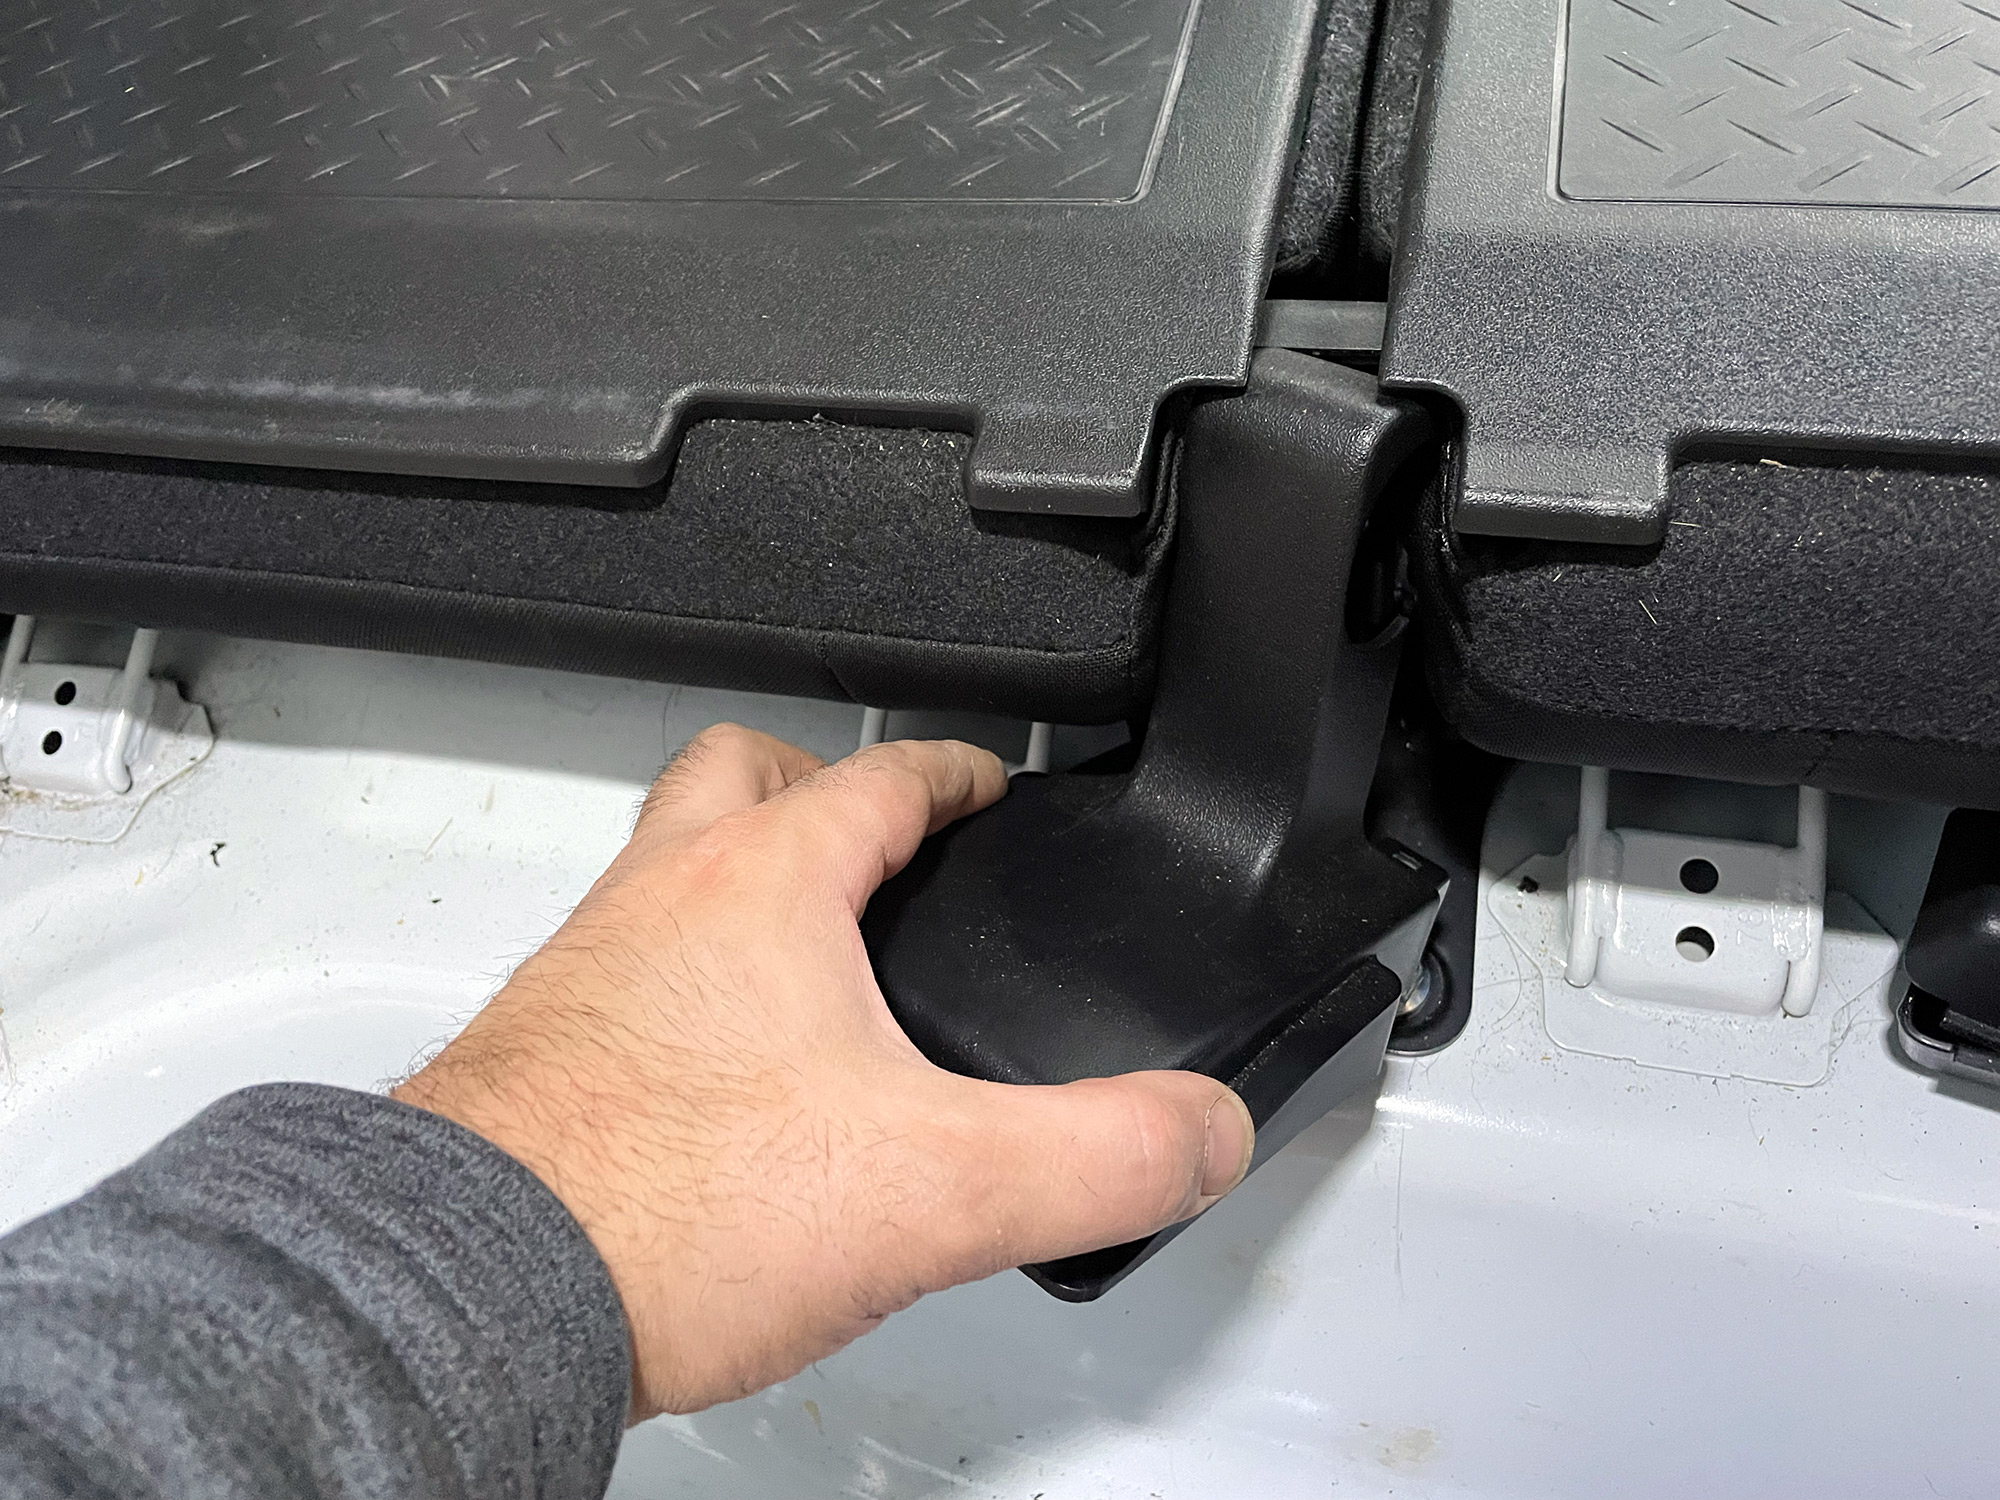
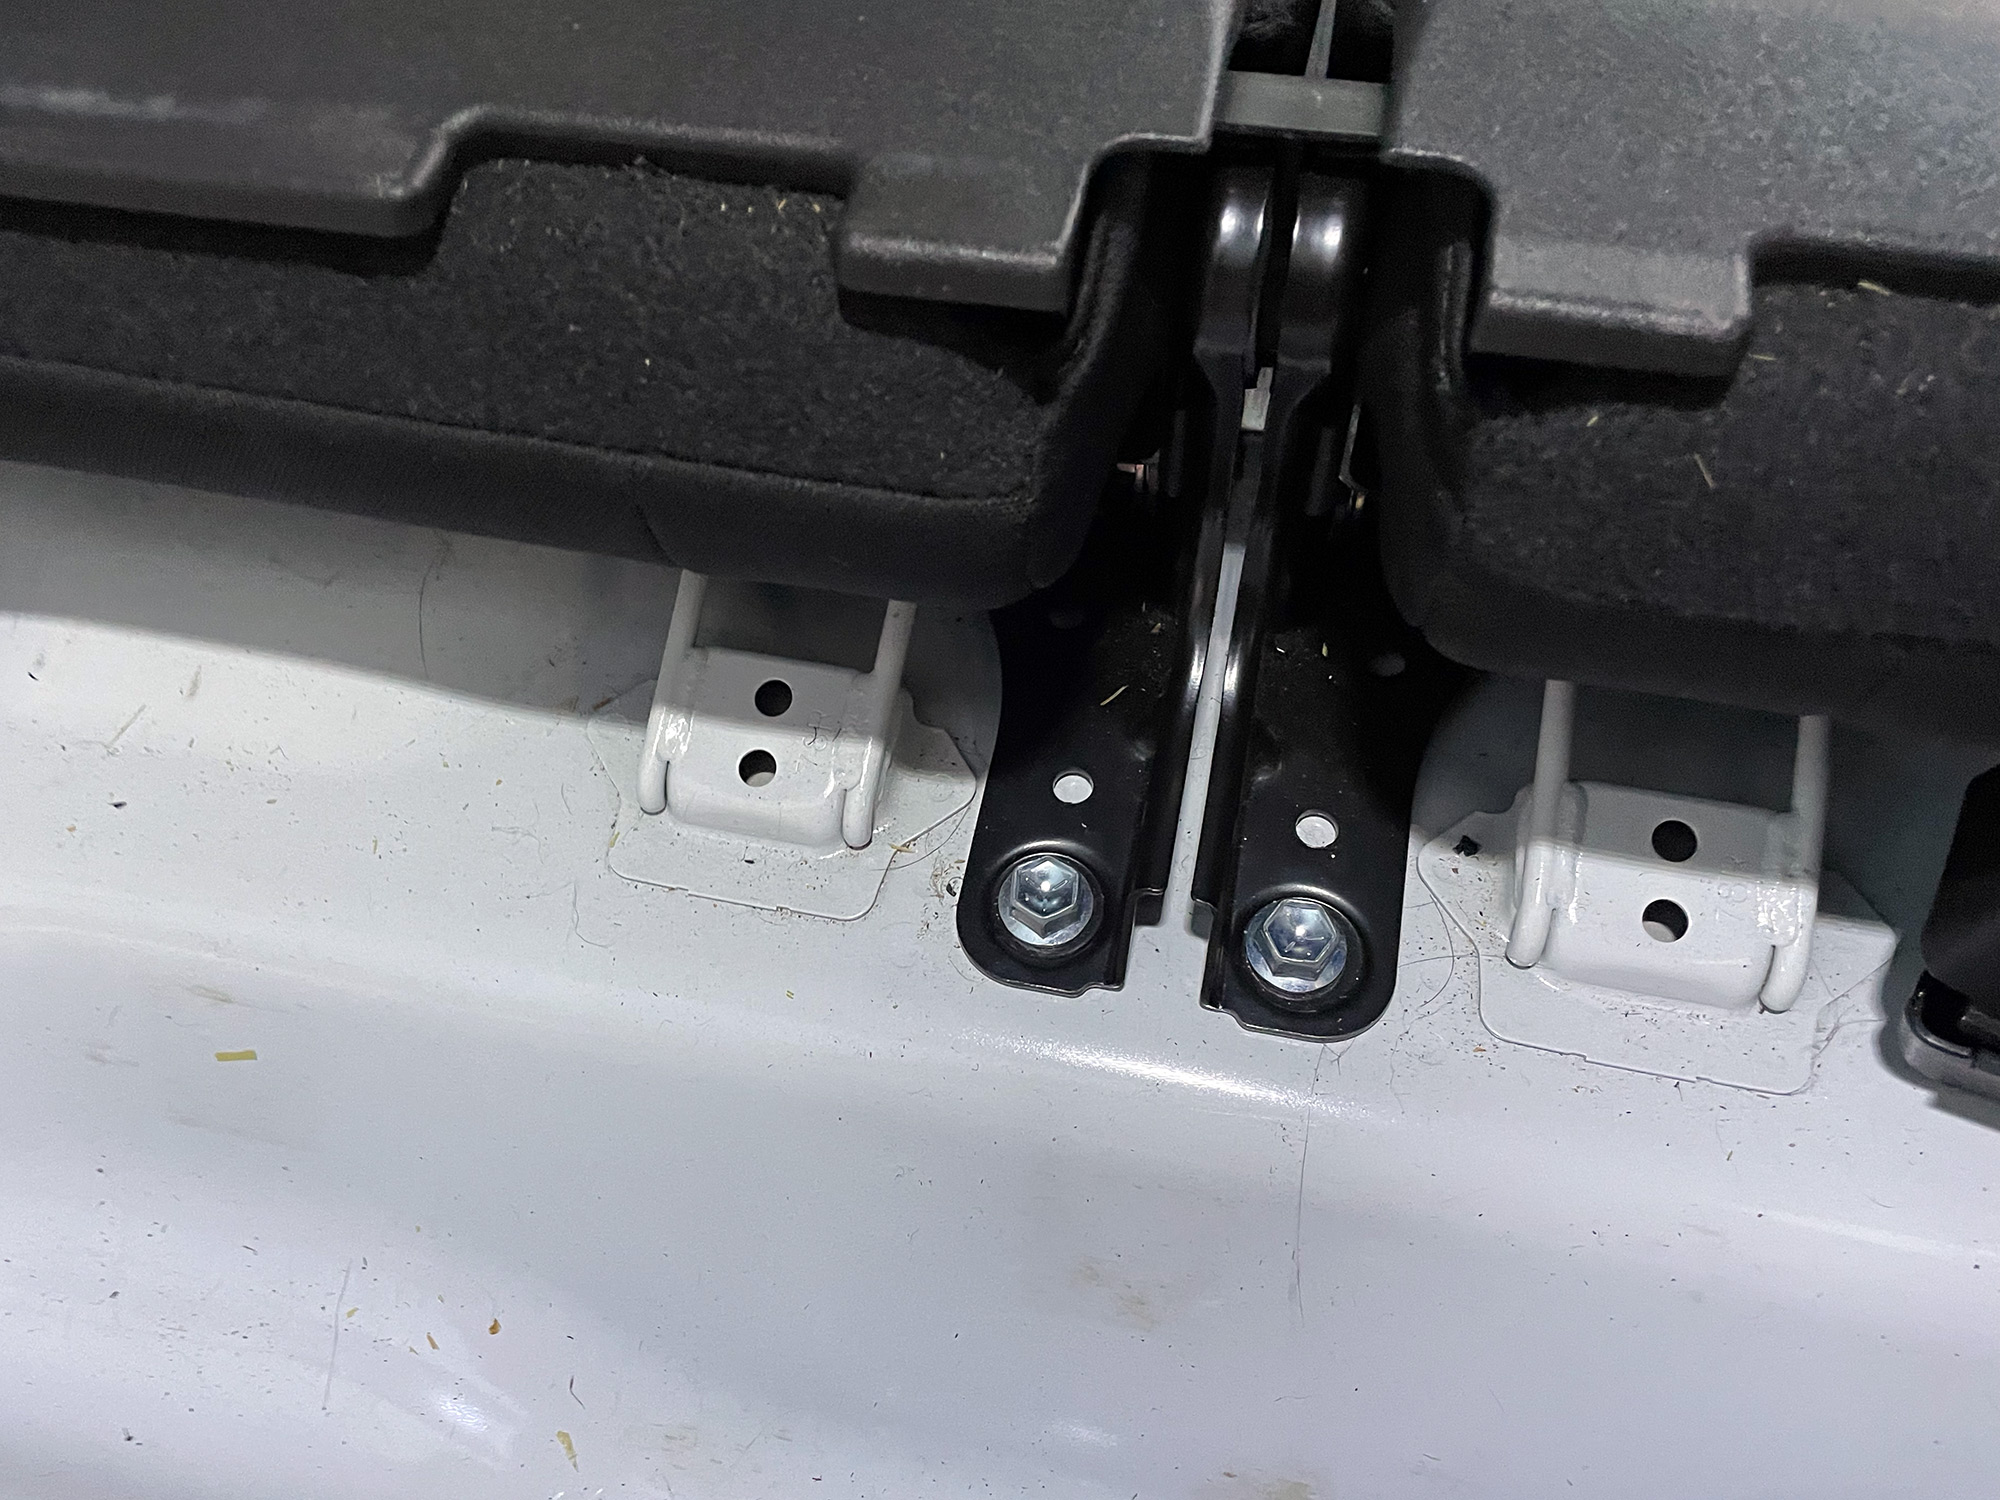
Lift out the rear luggage box by the sides, it just clips in using some trip clips.
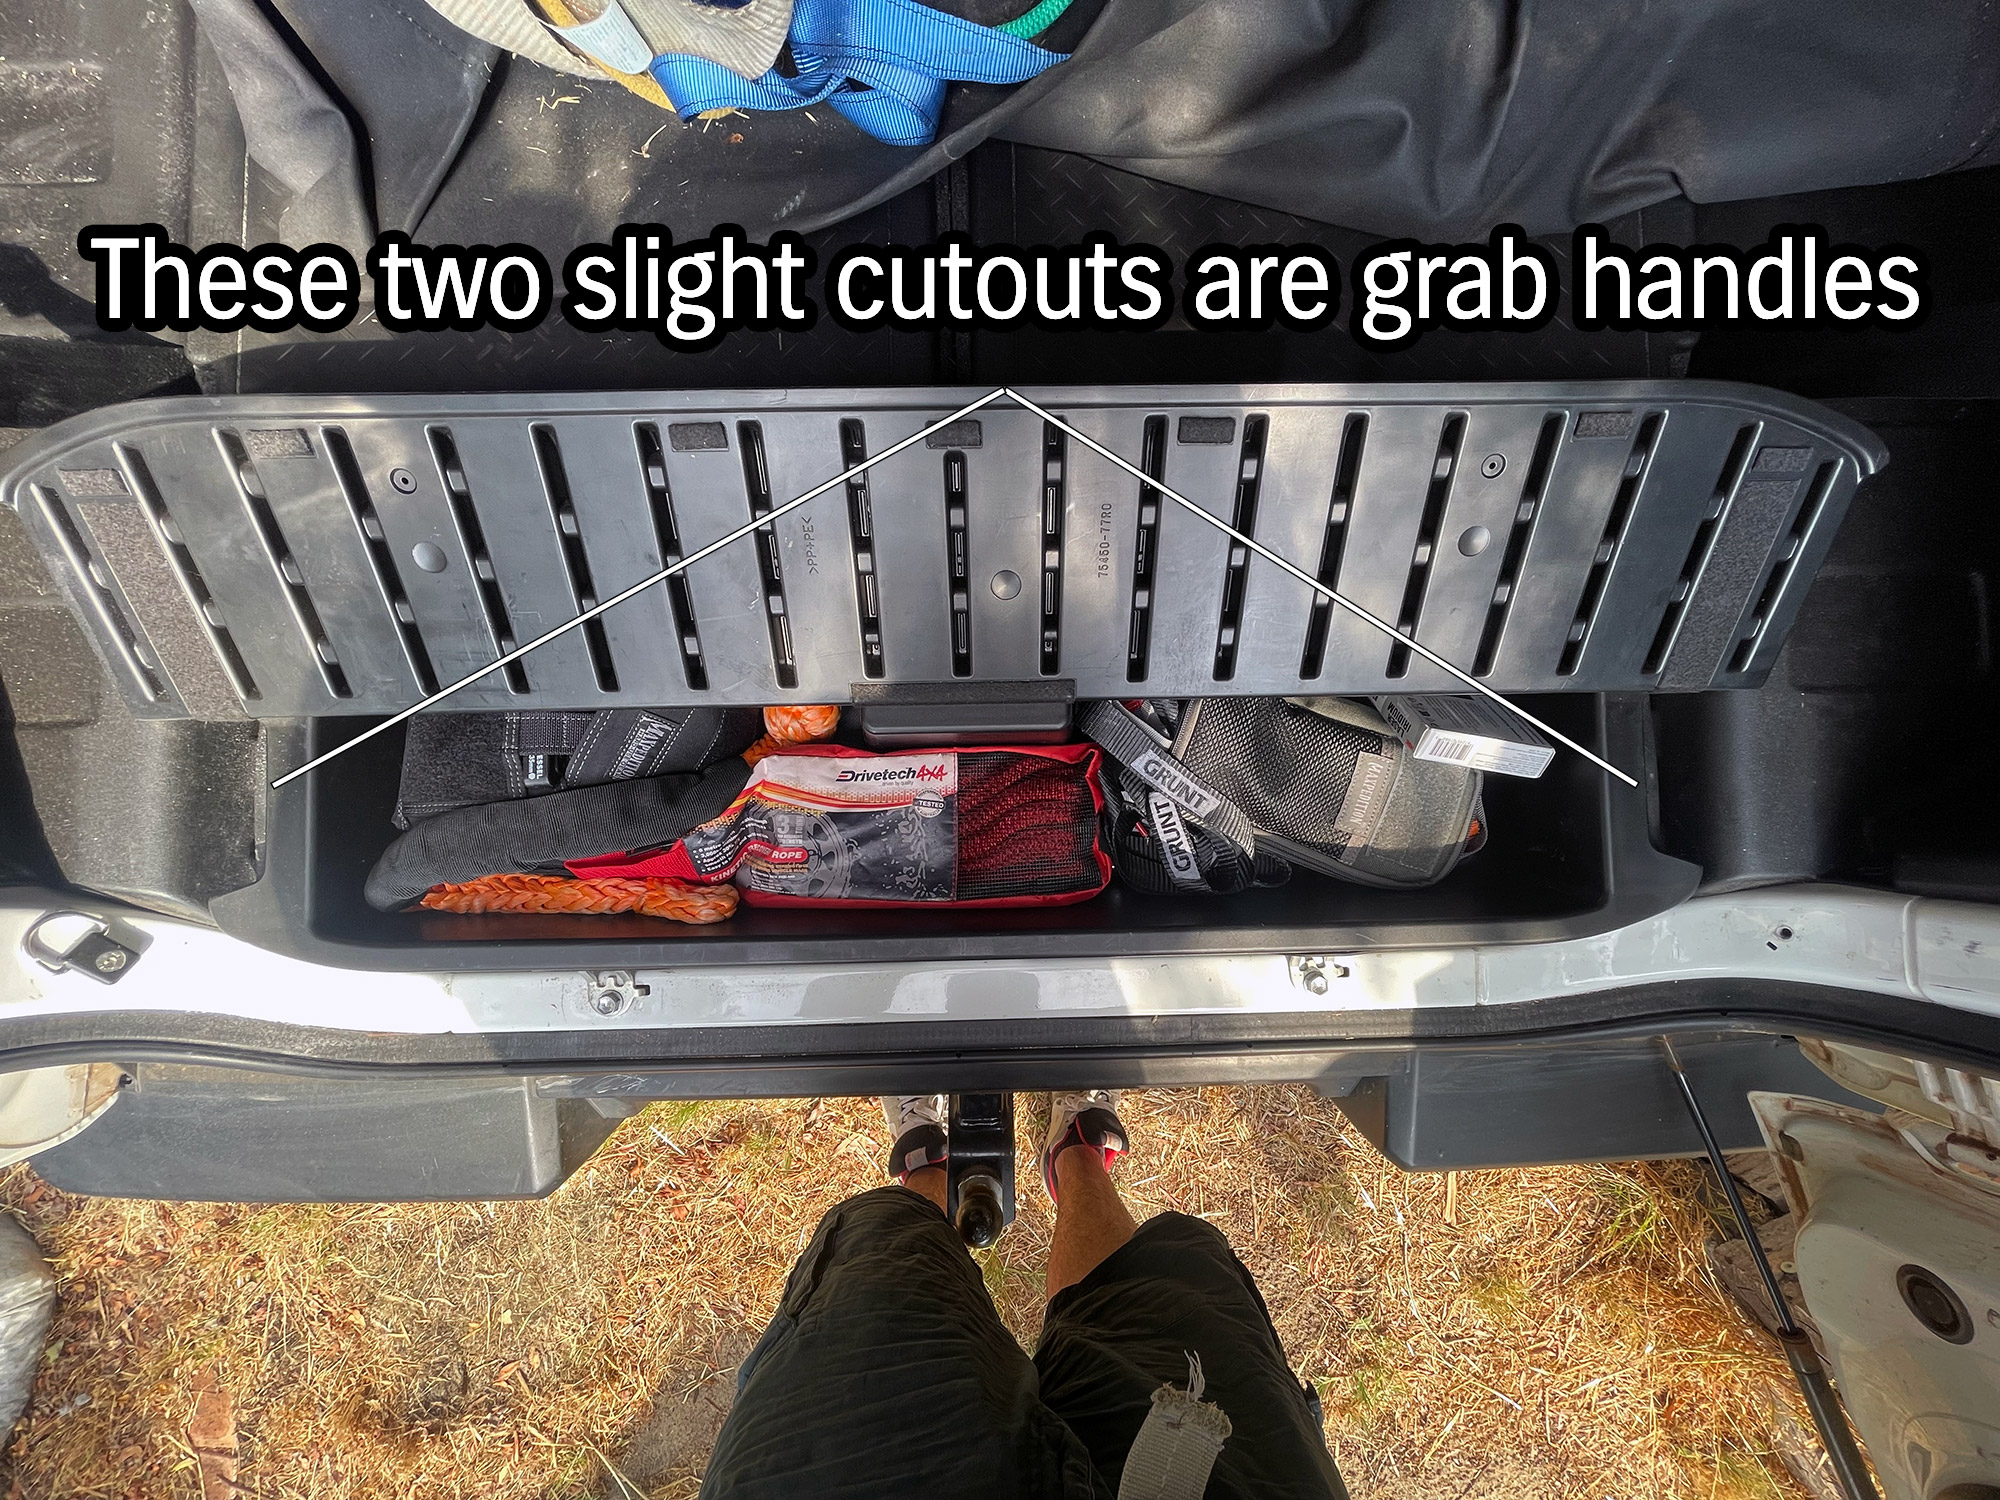
Note that normally these have a flap of carpet underneath protecting the tools but I haven’t ever refitted that to mine.
Might as well also lift out the jack and its foam too
To give myself access, I lifted the seats up a bit at this point and removed the seat base. The seat base just lifts up and then kinda forwards a bit. Note there are some cables to unplug from the base of the seat so don’t yank it all the way out.
Seat with the backs folded up first…
… then lift up and a bit forwards, but not all the way.
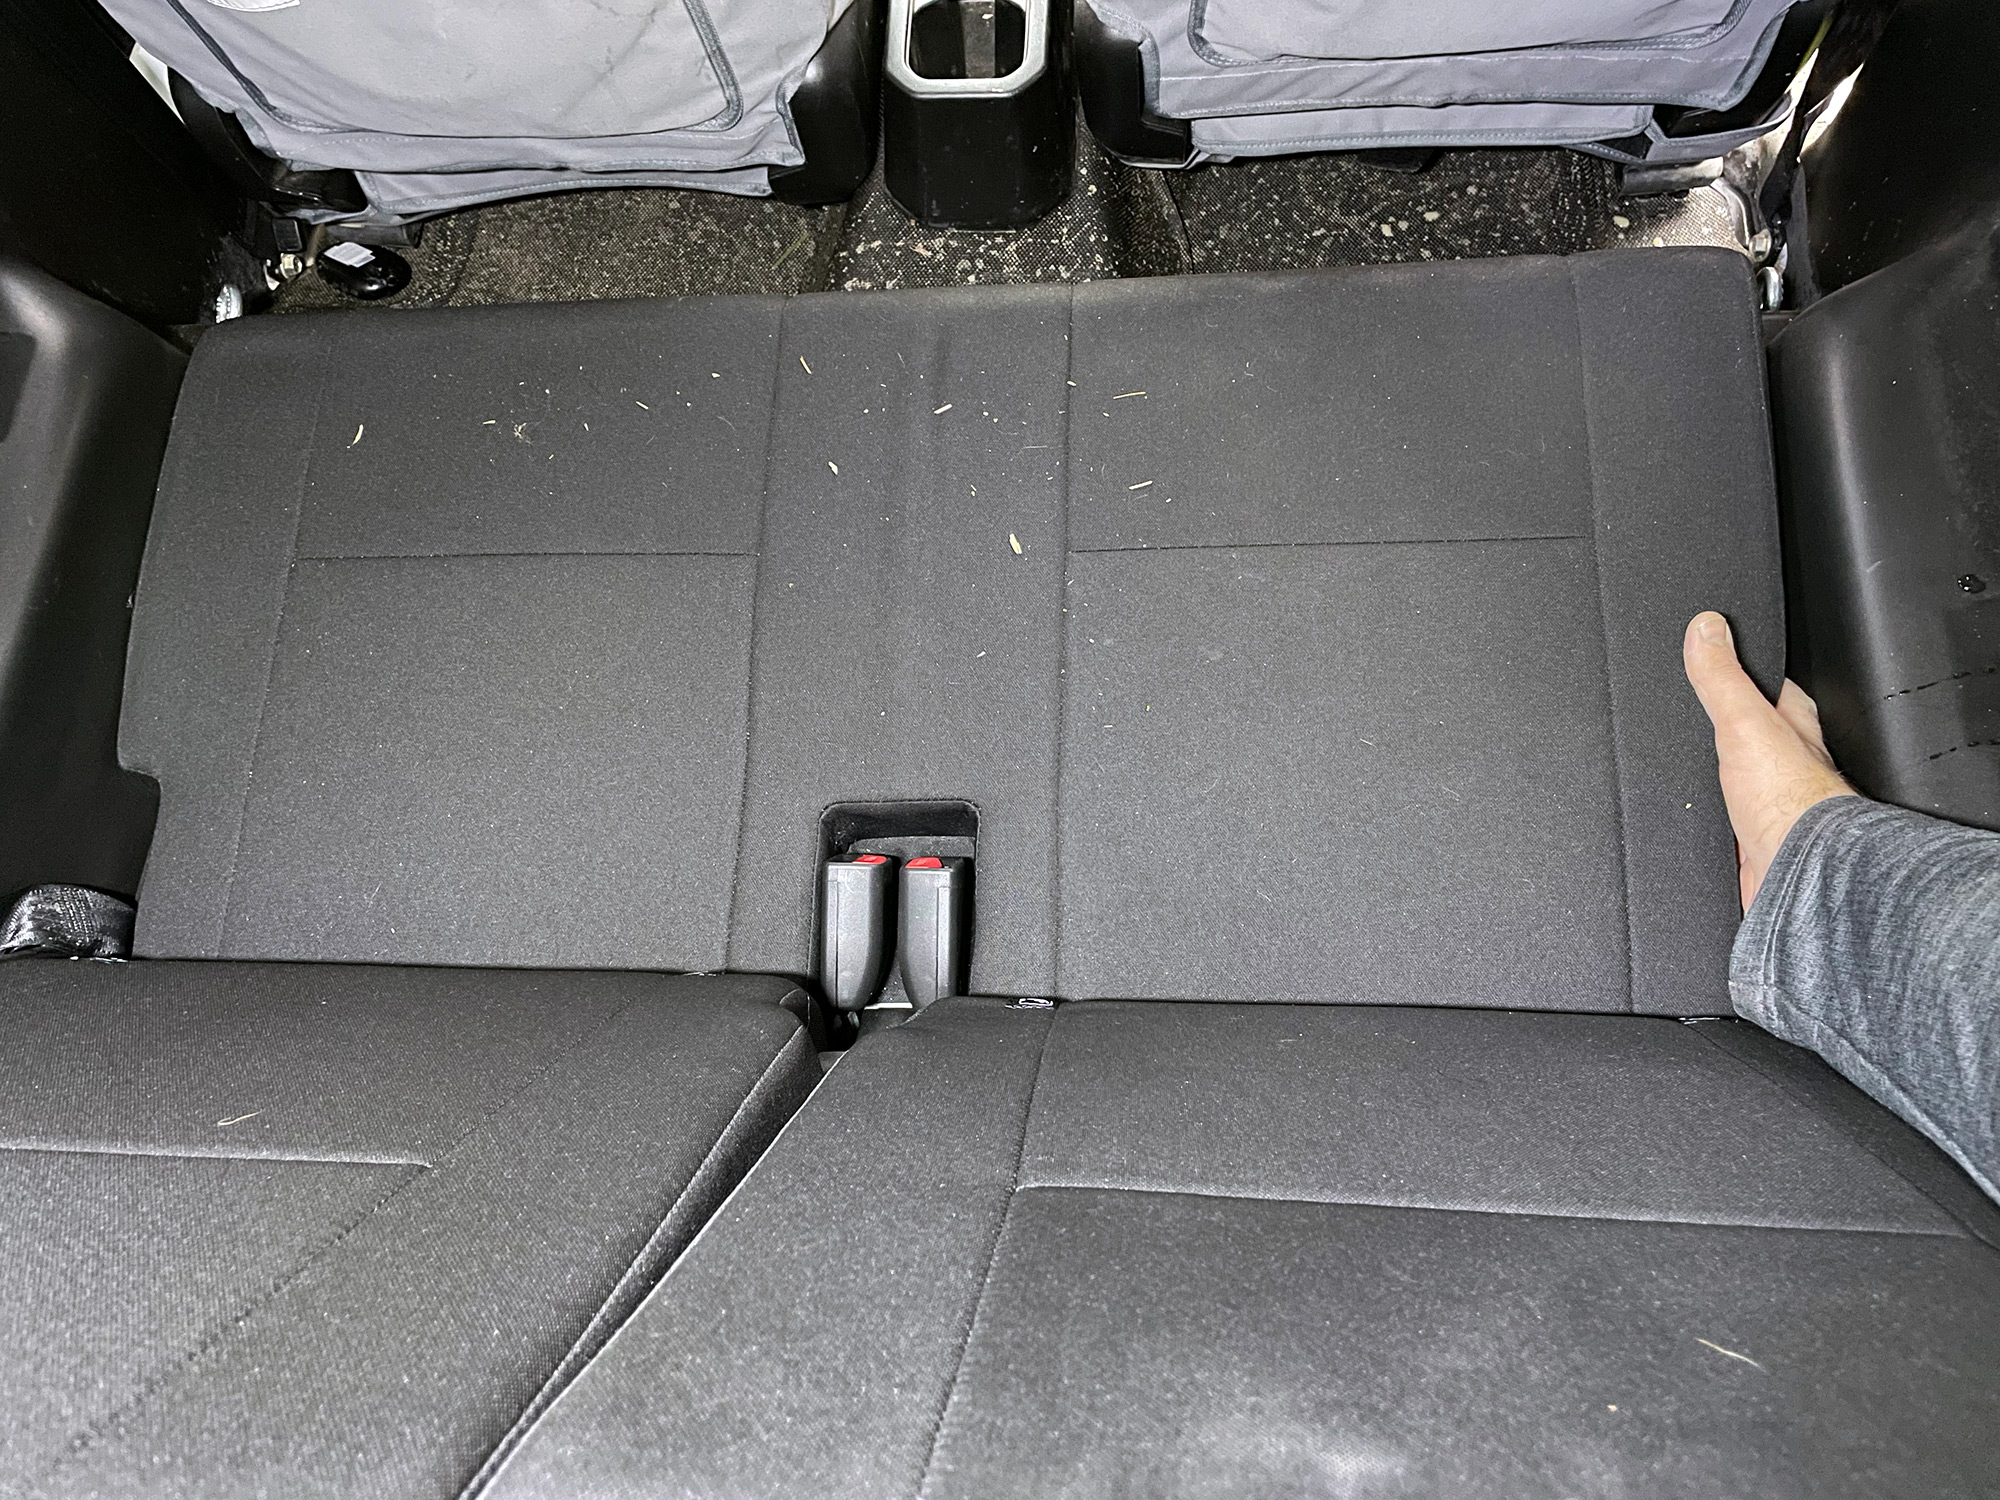
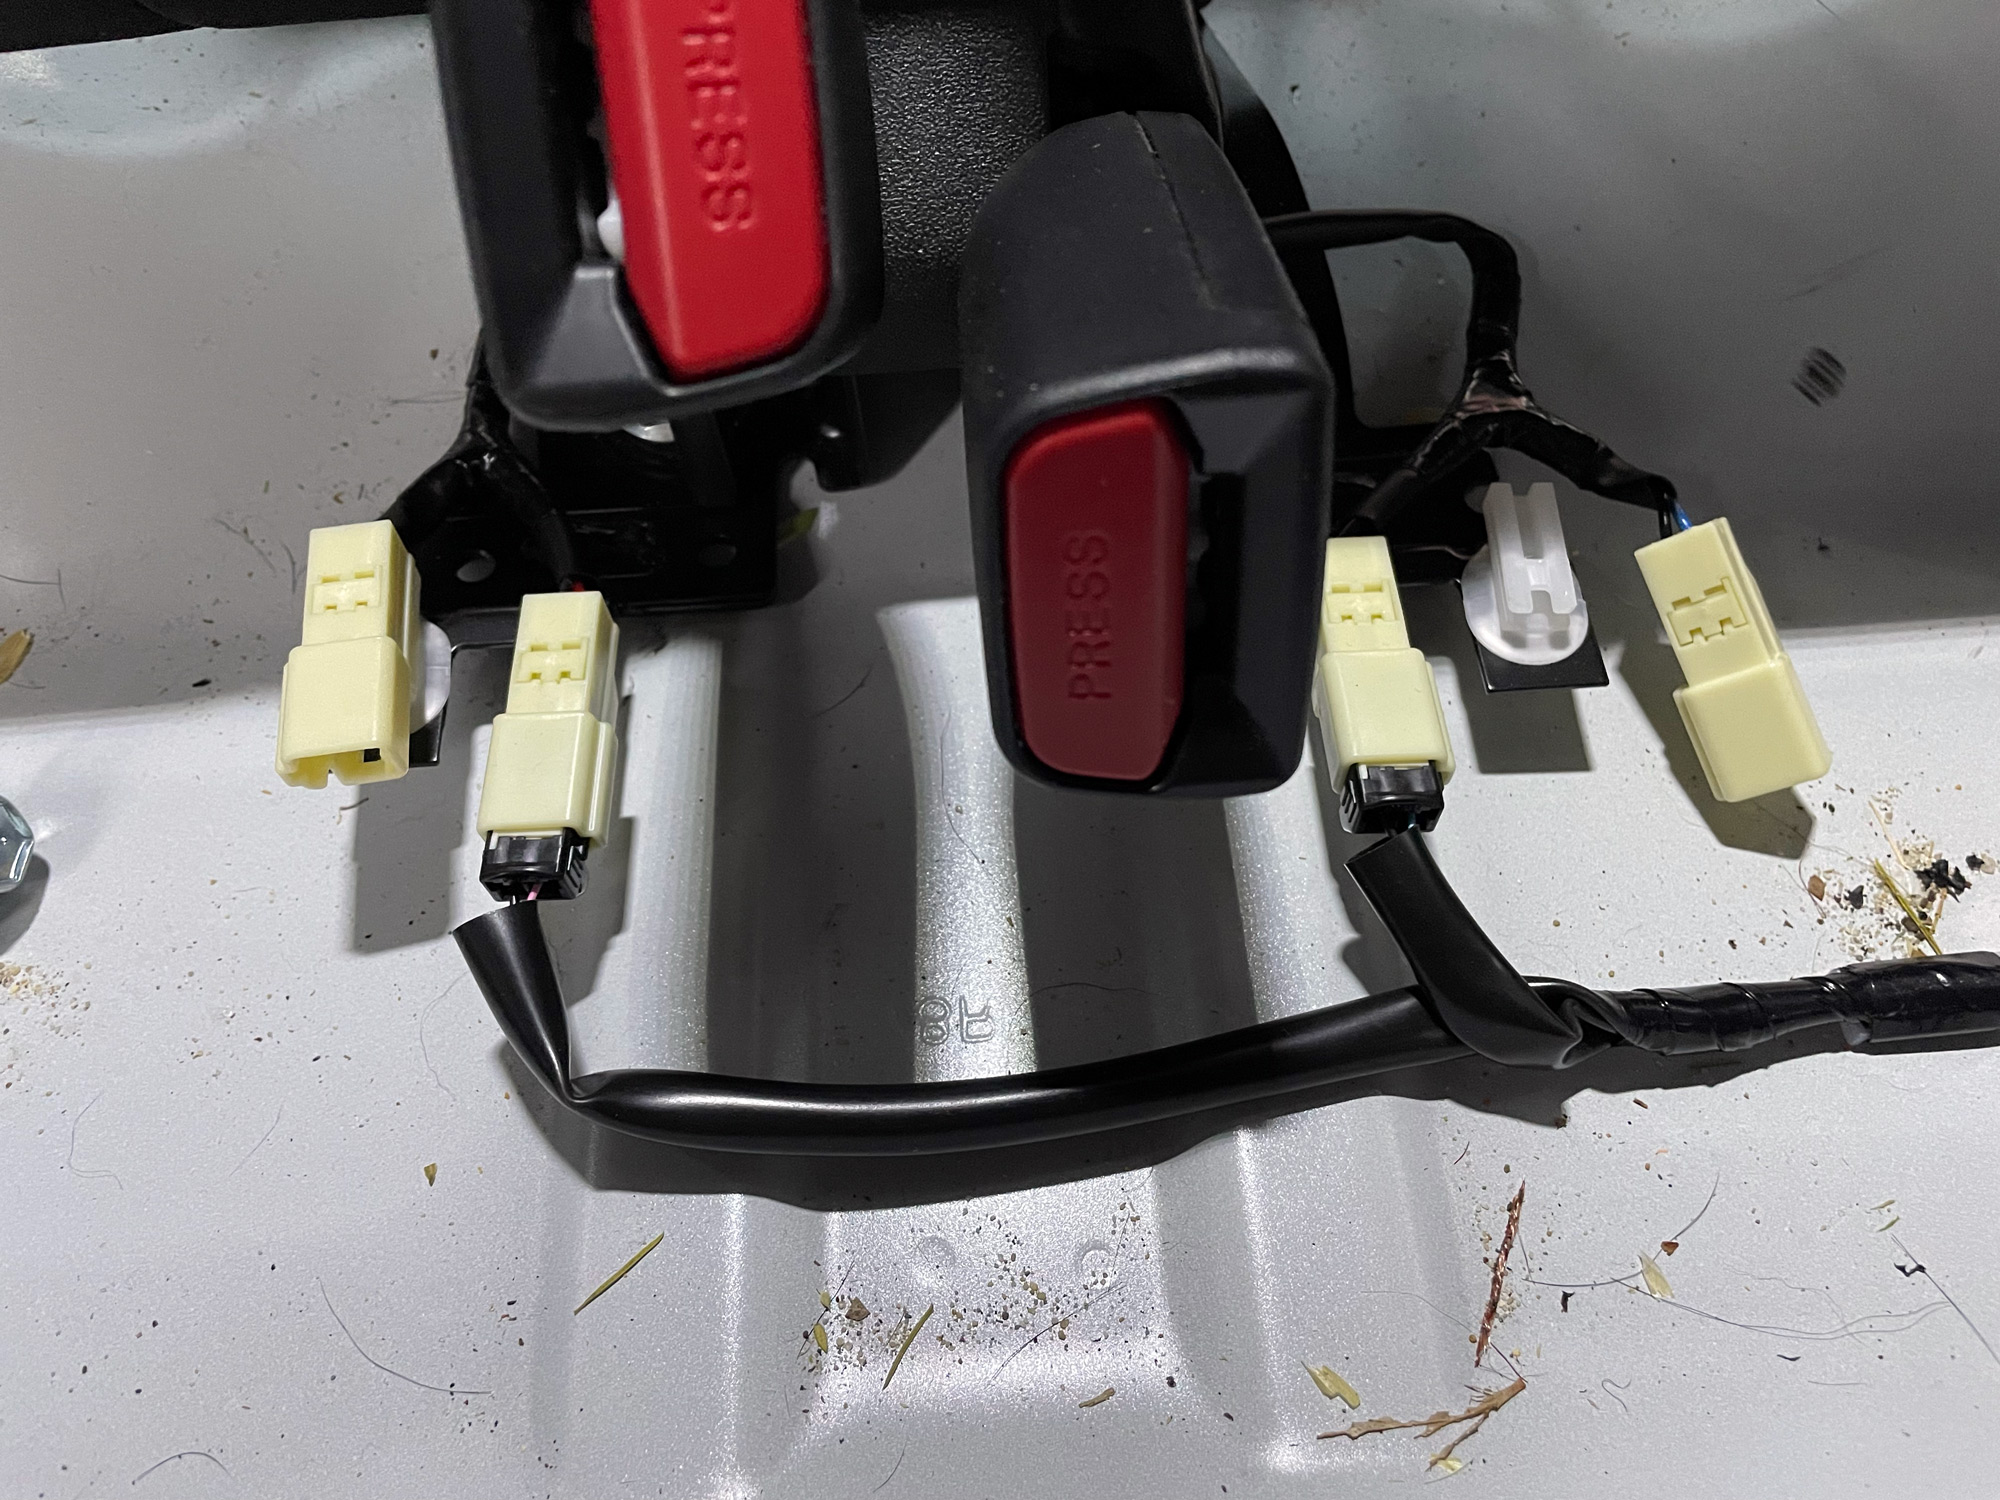
You can now access the two outer wires – one on each side – which connect to the seat base. This tells the car if you have someone sitting in the seat.
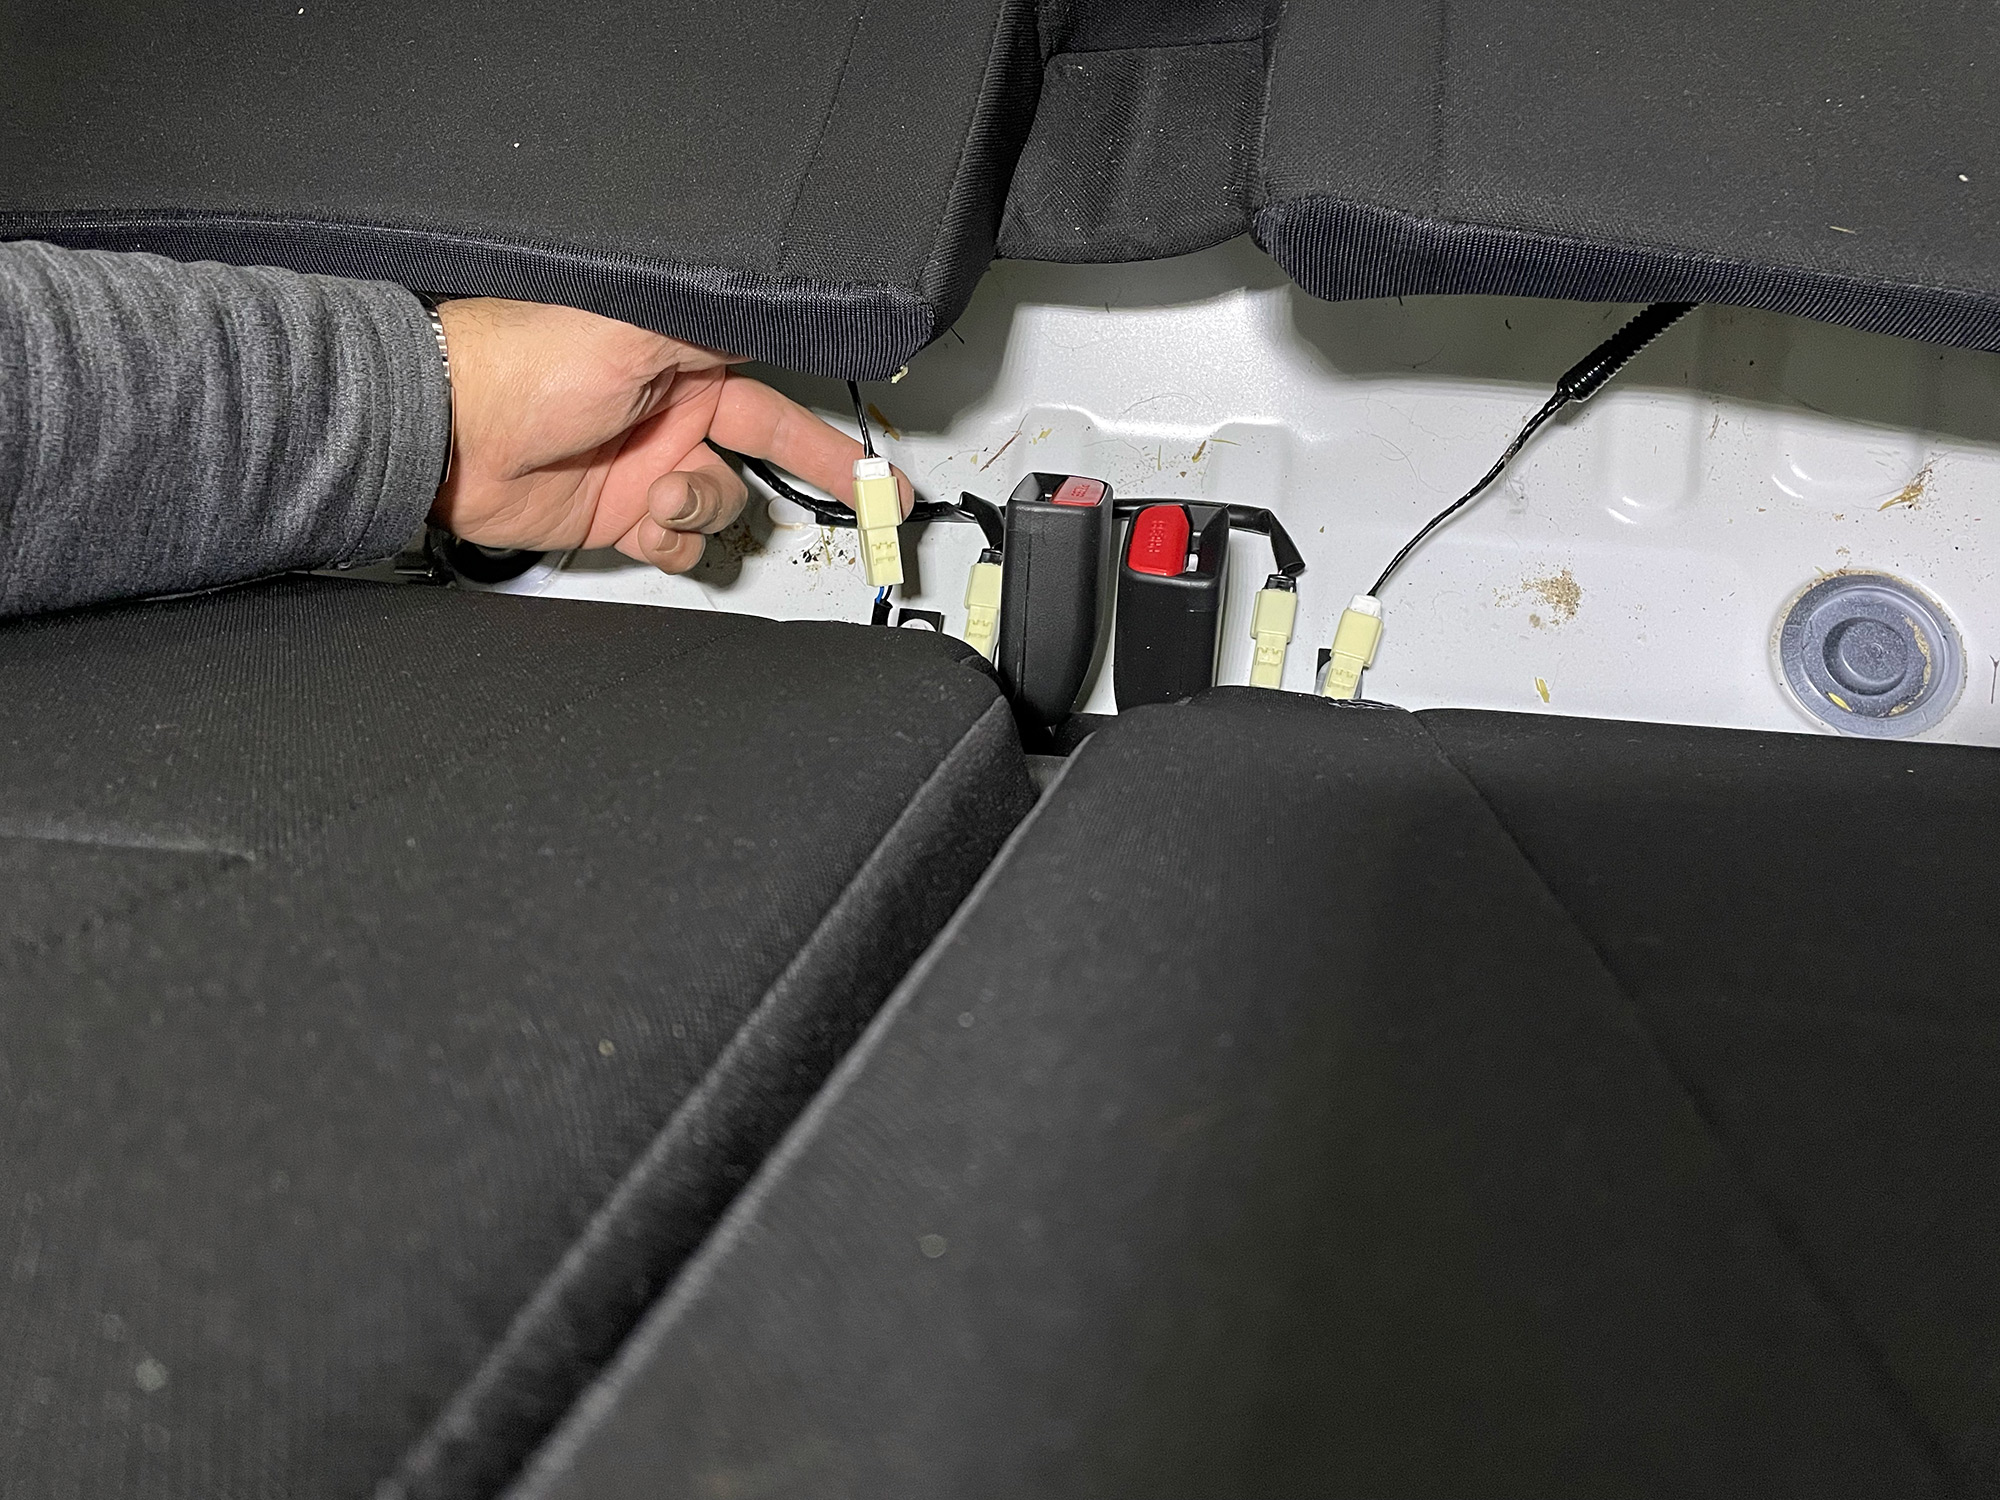
The white clip in the above phooto on the right hand side is from yanking the seat base up a bit far, but the wiring harness is easily pushed back onto this.
The inner two connectors are for the car knowing if a seatbelt for each rear passenger has been put on. You don’t have to unclip these now, but remember to do so when you remove the seat backs.
There are 4 bolts to undo at the front, one on each side of the base and then two in the middle. These are 14mm headed bolts. Word of caution if you need to replace these bolts: seatbelt and seat mounting bolts are actually imperial threaded bolts, don’t be confused by the metric head on these! The seat mounting bolts and seat belt threaded studs are 7/16-20 UNF fasteners; child anchorages (the 2 at the rear of the car by the luggage box) are 5/16-18 UNC fasteners.
You need to pull the centre plastic part forwards and a bit upwards between the two seat belt buckles to access the two bolts a bit more easily in the centre.
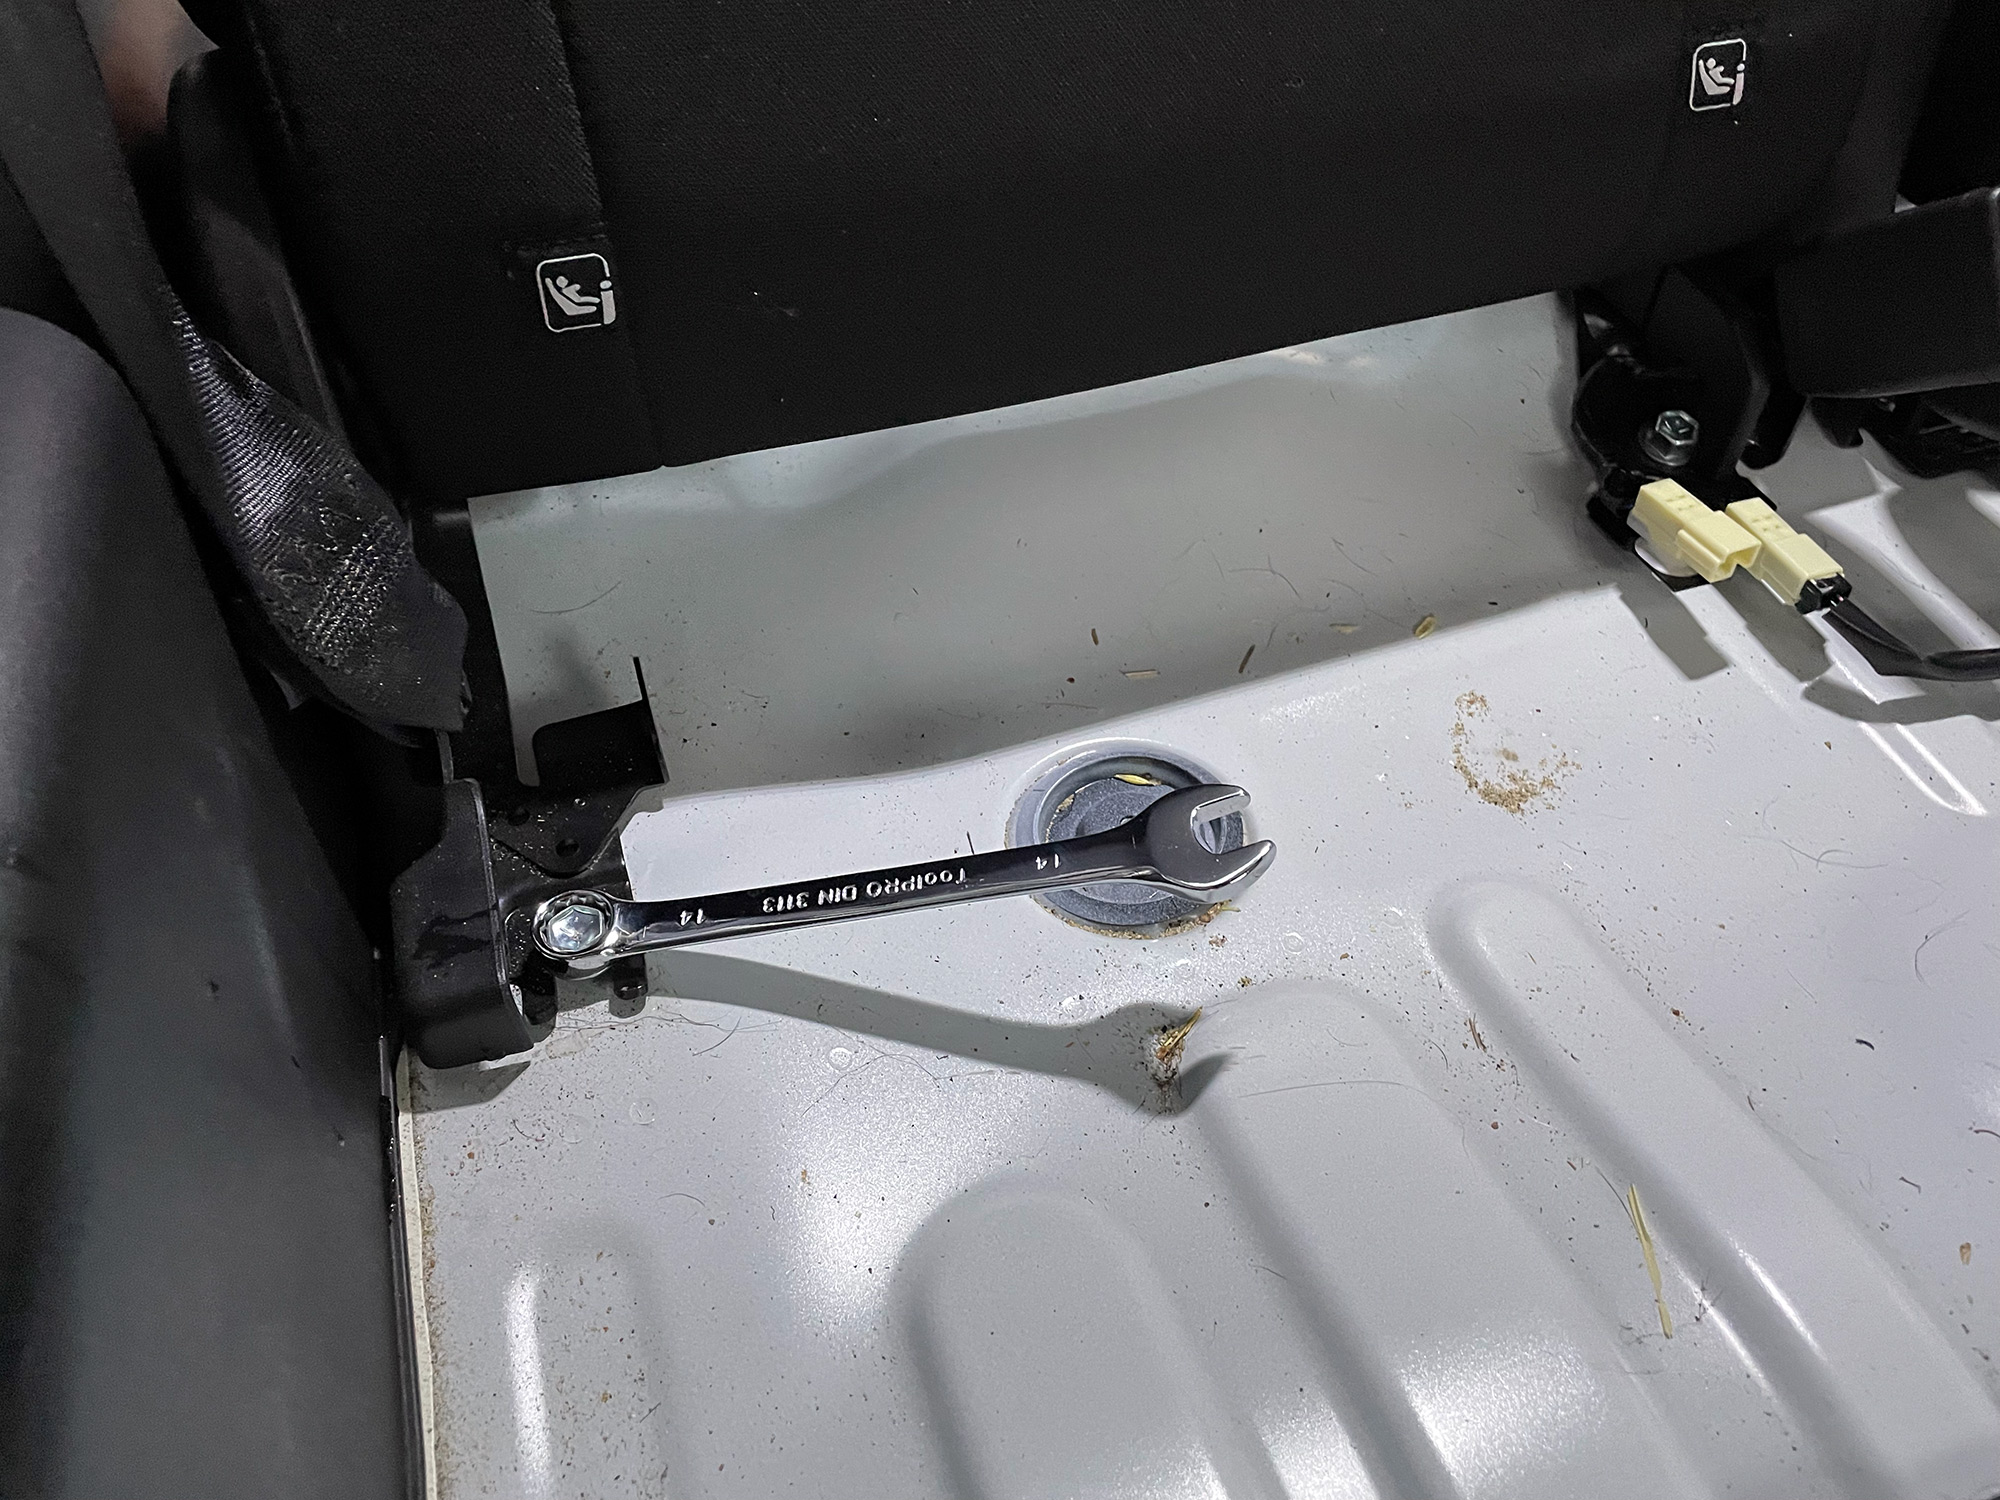
There is also 1 14mm nut on each side of the seat base at the front to mount the end of the seatbelt to. These can be a bit tight so it can be useful to use a socket to get in there to first loosen them up.

All of the work at the front side of the seat is done now. At this point the seat backs are just held in with 4 bolts at the back but they’re covered in plastic. These just lift up although use a trim removal tool and lift them up carefully but with a bit of force.
There is a piece of plastic at the back on each side…
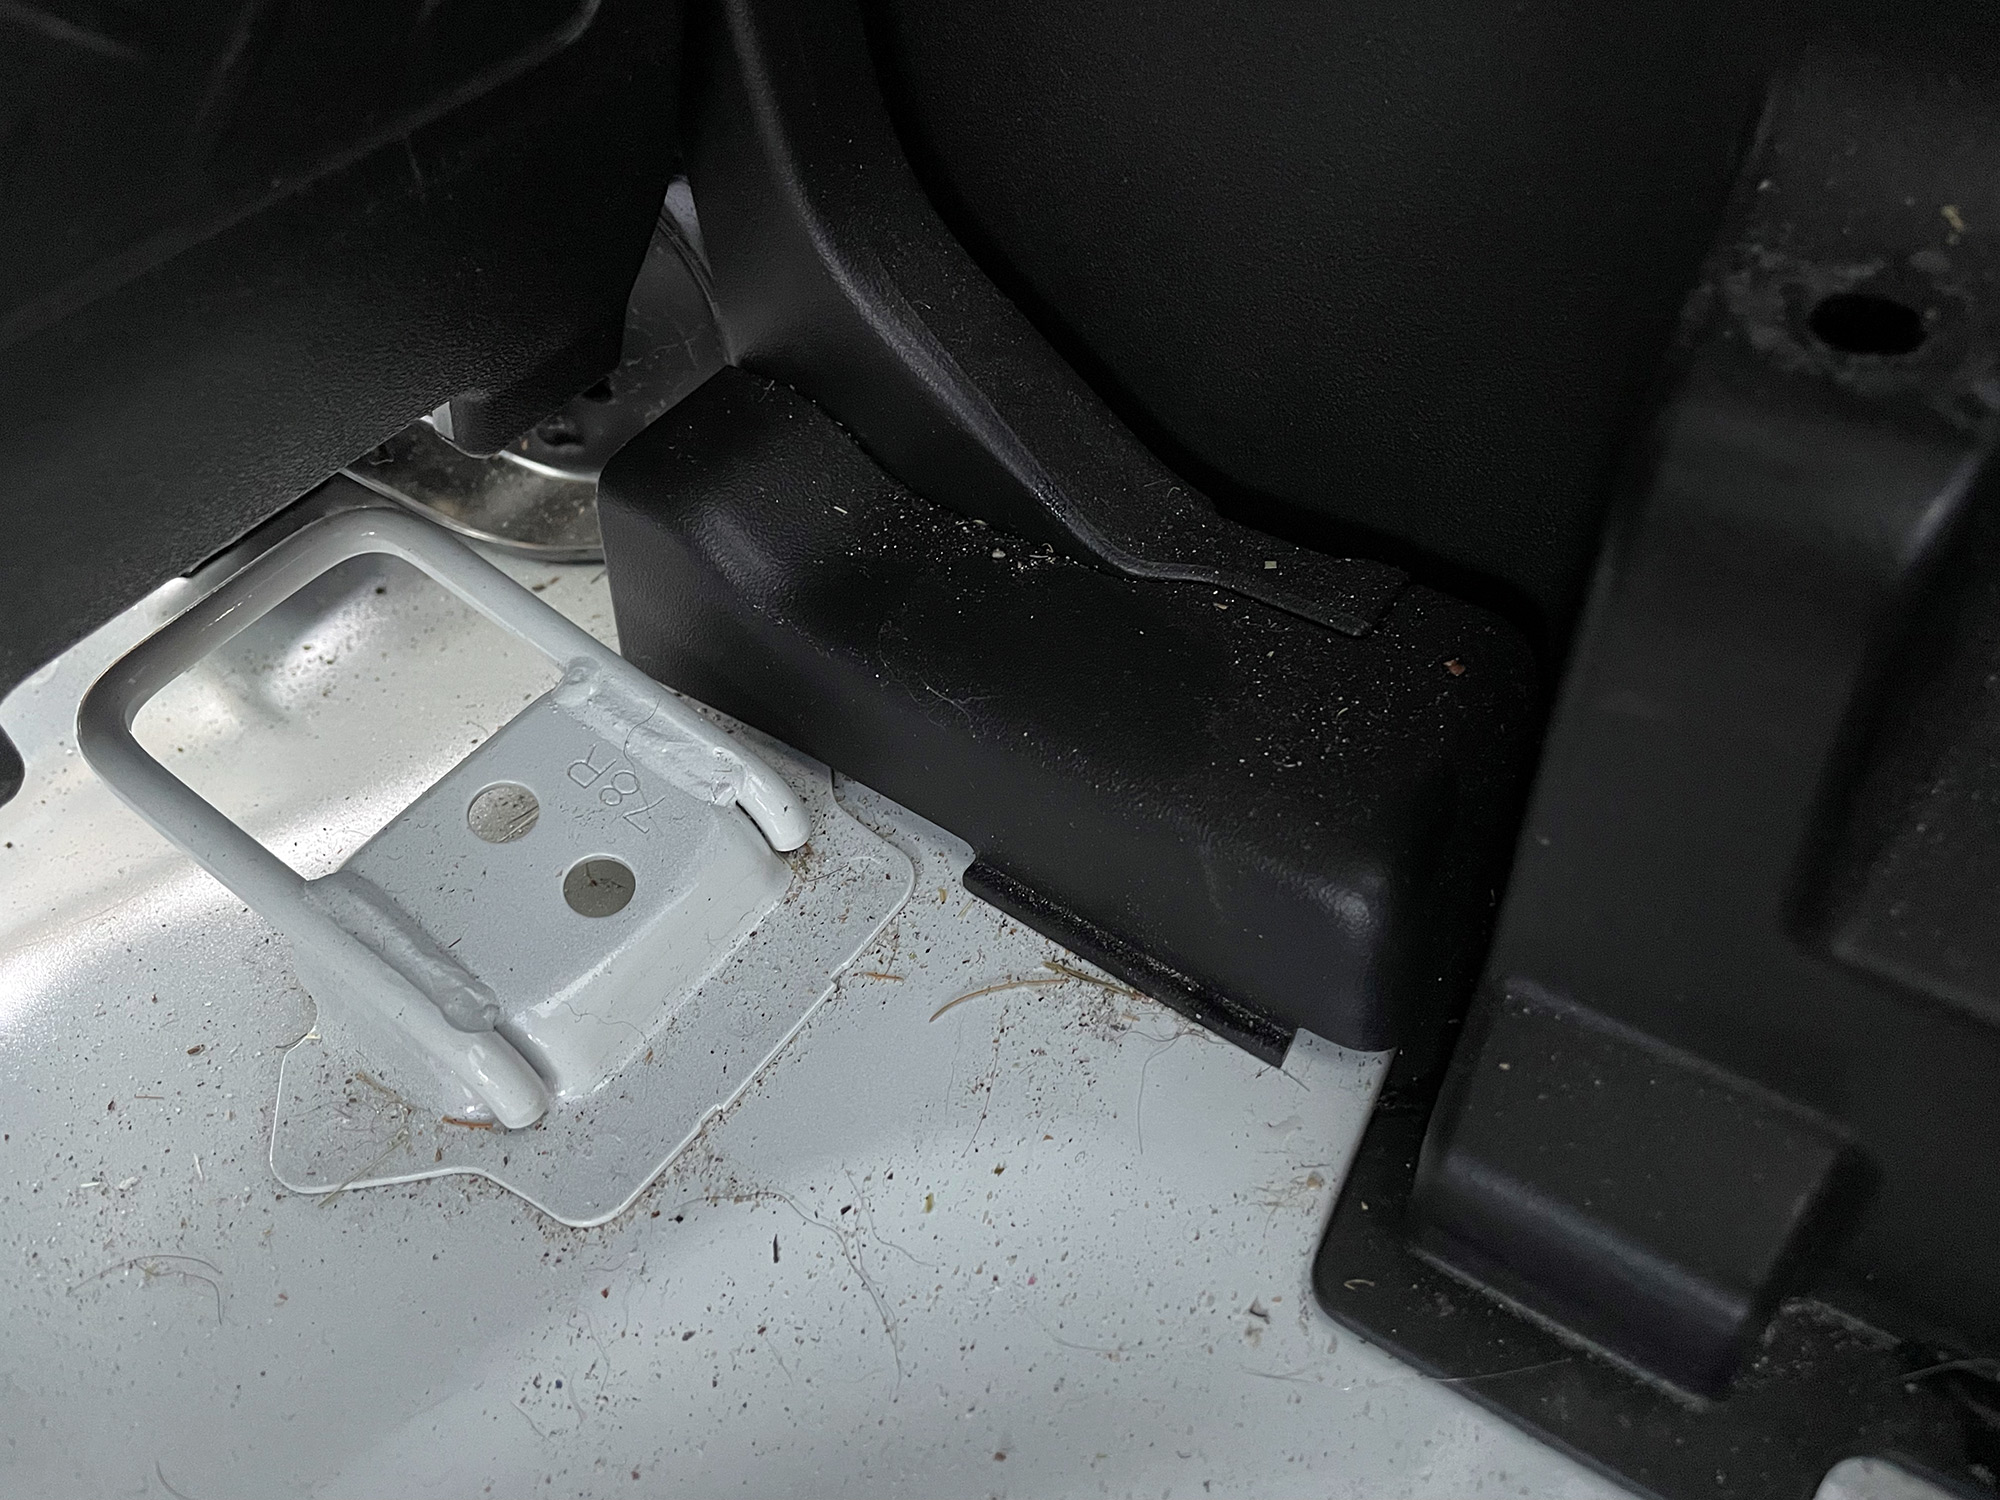
… which reveals a bolt per side…
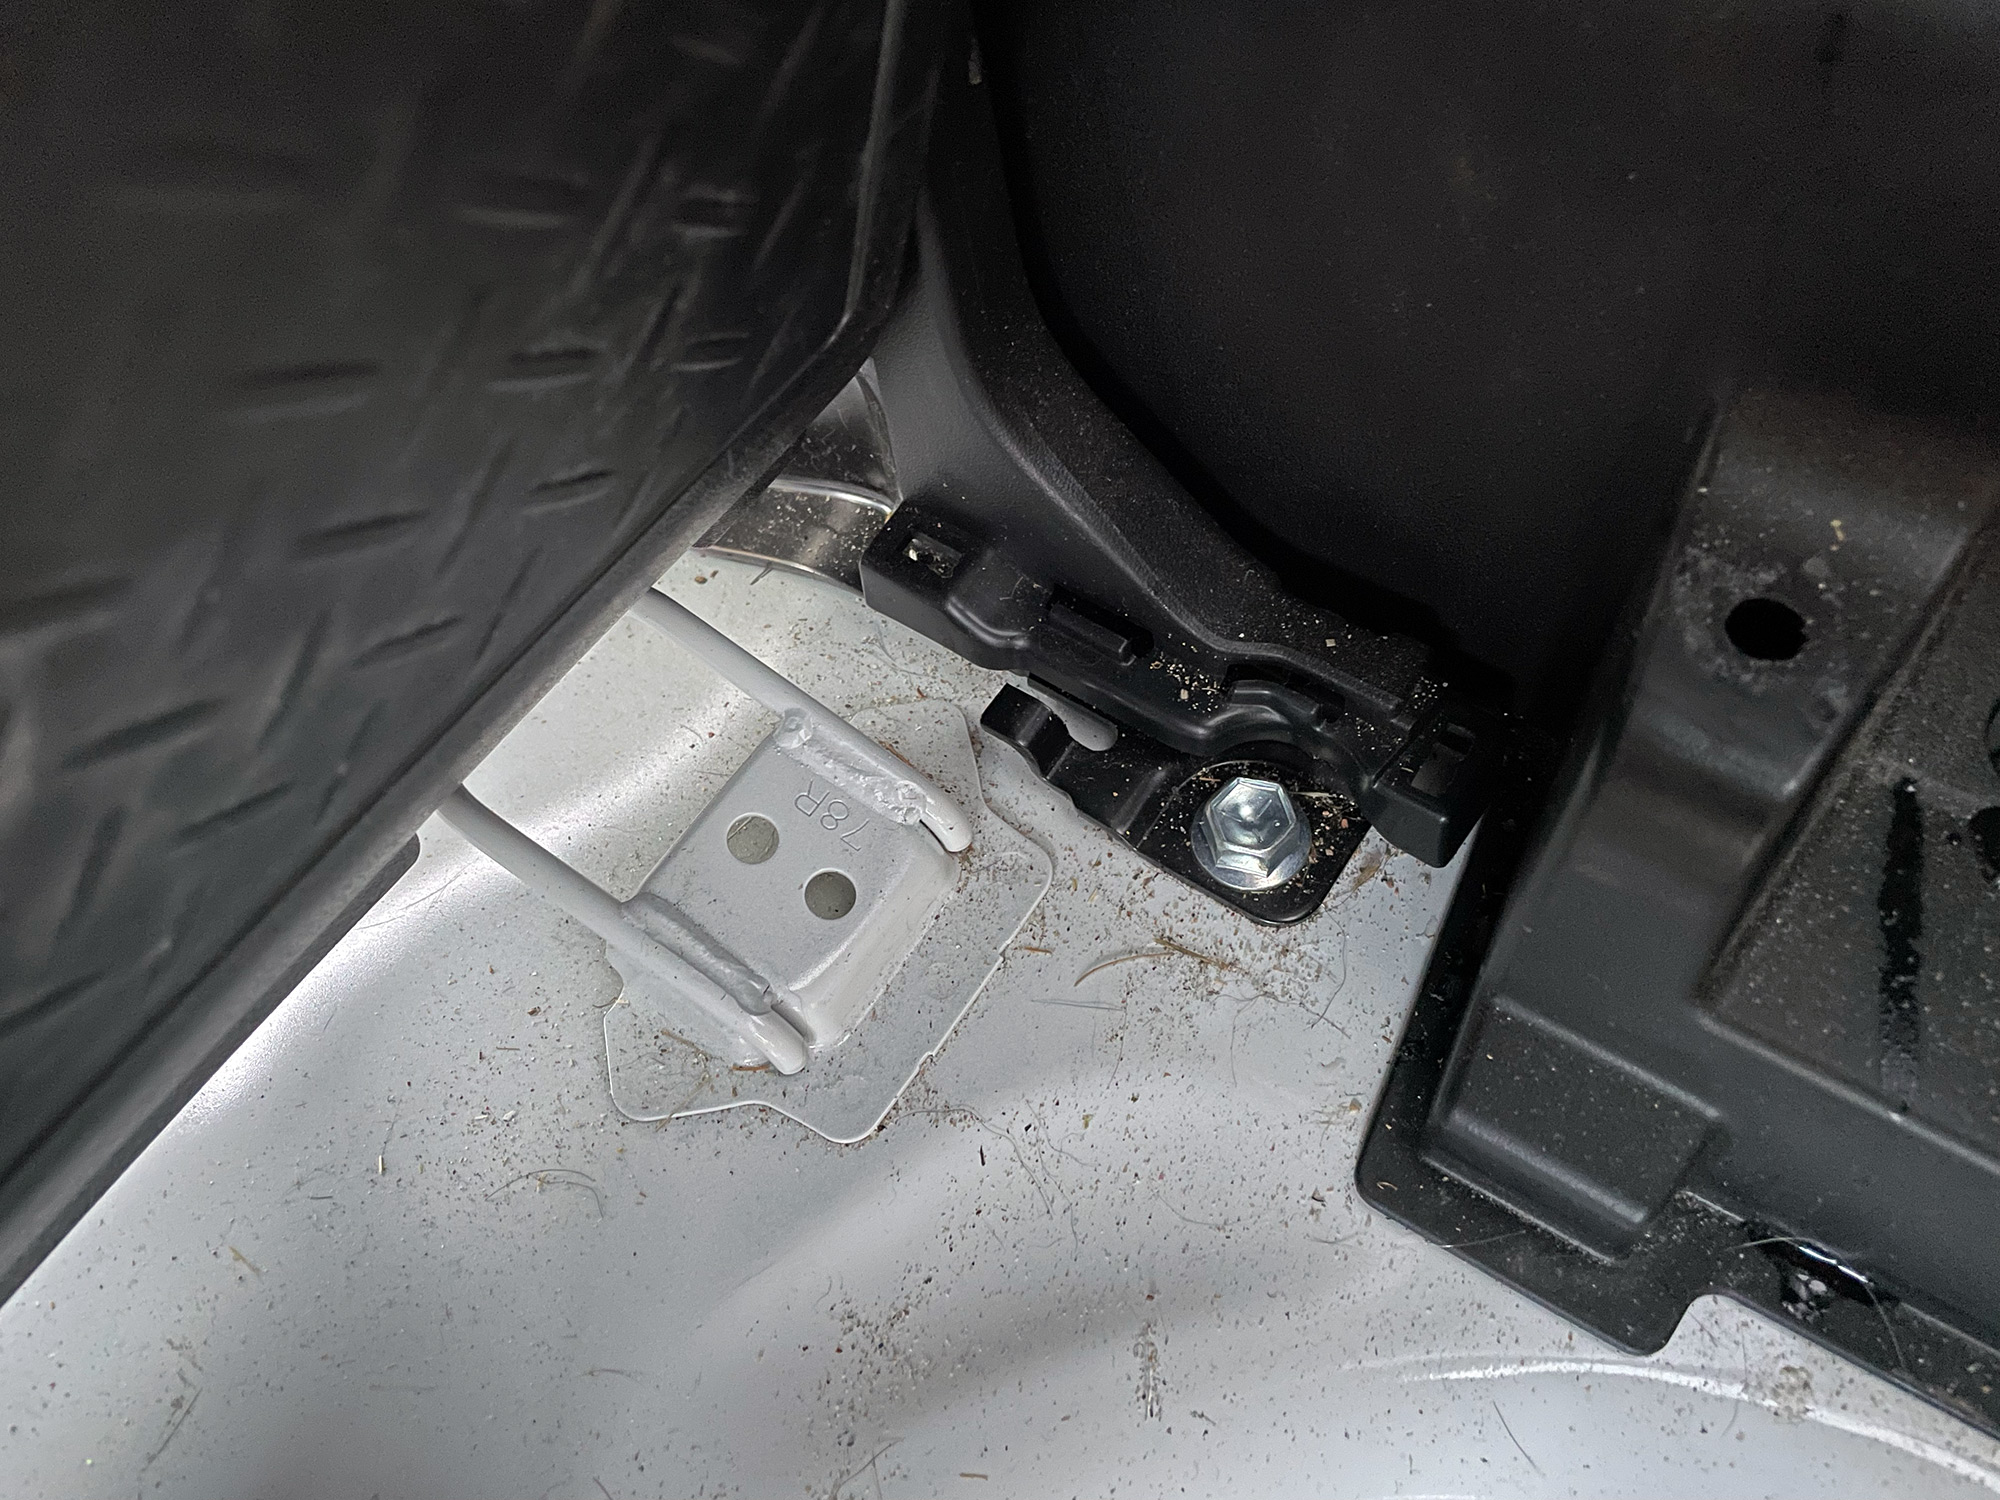
Also lift this up and kinda a bit back, again potentially using a trim removal tool to start prising it up first.
This reveals the centre two bolts – undo these and the seat backs can be lifted out.
With that you’re now all clear. This is a good time to clean out under the seats – hell, even if you aren’t removing the seats permanently, doing this periodically and cleaning out the floor pan is worthwhile just from a cleanliness perspective!
Remove the front seats
The front seats are really easy to remove. Each seat is bolted down by a T40 torx bolt at each corner, for a total of 8 bolts. There are also 2 wires clipped into the bottom of each seat: a small connector for the seat belt connector, and a larger yellow connector for the seat airbags.
Start by undoing the bolts. I undid the back before the front, but there’s no particular reason to do one over the over. Slide the seat all the way forwards or back, undo the bolts you can get to, slide it the other way, and undo the other bolts.
Small hint with torx bolts: if there’s any crap in the head of the bolt clean it out first. Also seat the torx bit nicely first with a couple of taps from a hammer or the something that resembles a hammer to make sure it’s nice and tightly into the bolt head.
With the bolts out of the way, you can kind of pivot the seat up a bit to release the wiring. The smaller one has a little clip you just push and then pull the connector out.
The airbag connector has a sliding clip you slide backwards.
Remove key interior trim panels
The carpet is clipped in in a few places by being placed over some hooks which are then hidden by the interior trim. You need to either get the trim lifted up enough to release these hooked parts or totally remove the trim.
Remove carpet
Headlining removal and reinstall
Want to really run neat wiring for dash cams? Wanting to add some sound deadening to the ceiling to make things a bit better? Head lining needs to come out.
Mine is slightly more complicated by having the MOD roof hammock for internal upper rear storage, but it doesn’t add much to the removal procedure.
Front seats forwards and folded down a bit: gives you more room when lowering the headliner down at the end (and rear seats down flat, too).

I worked from the back first and then tackled the front.
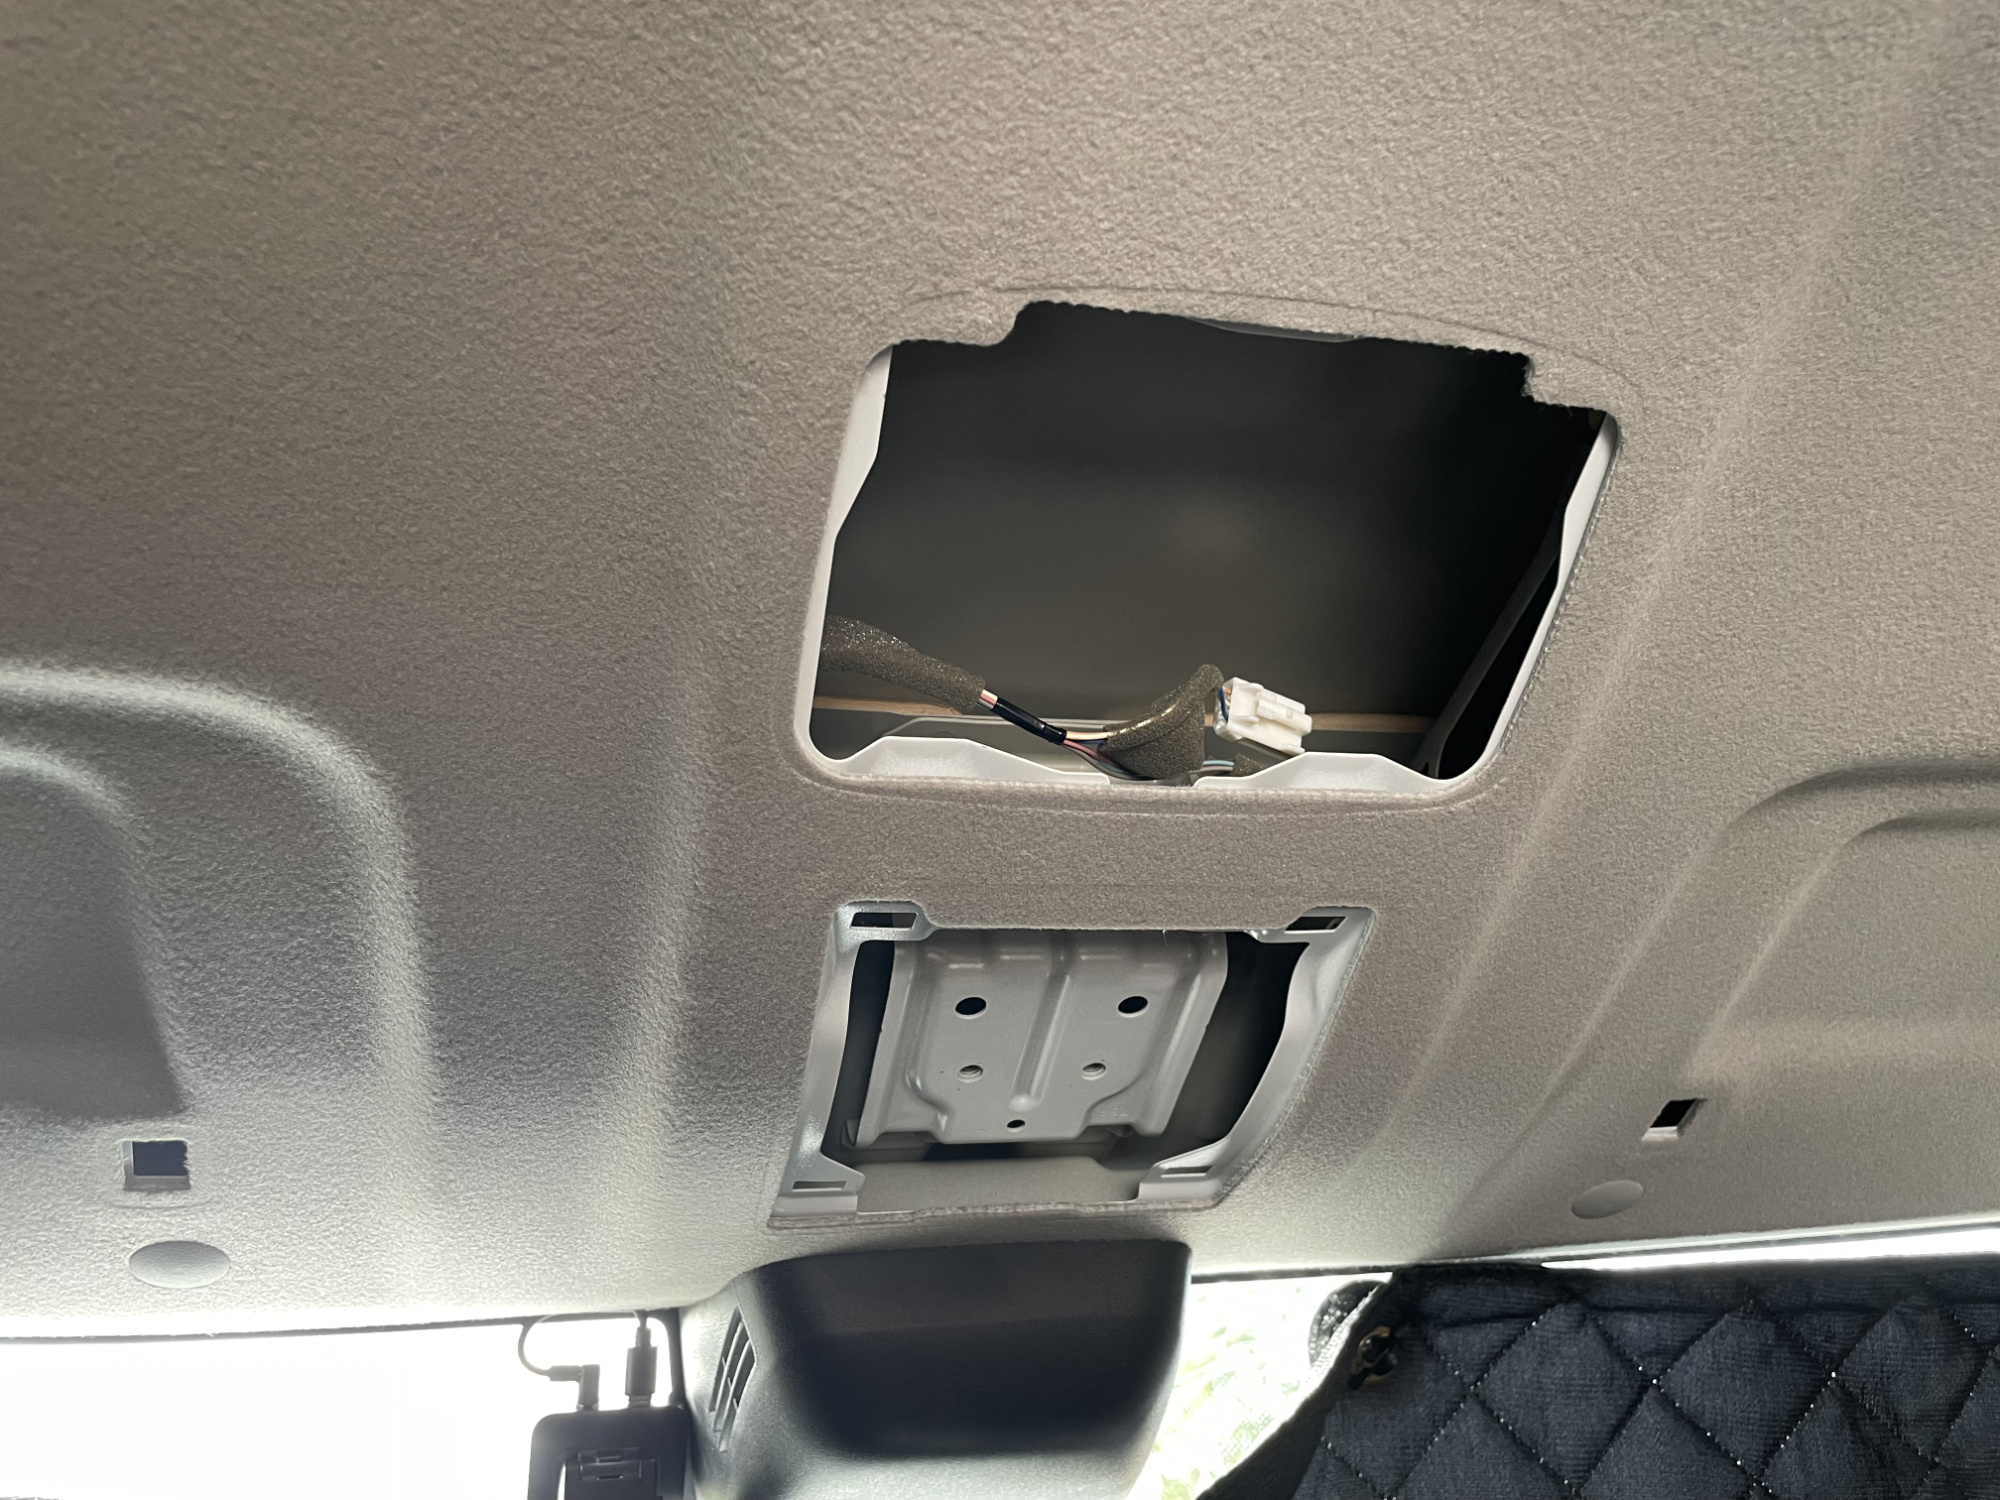
Start off with removing rear light, best done starting with a trim removal tool to prise it out of the headliner
Then you’ll have to disconnect the wiring.
You should also remove the rear headliner retaining plugs while you’re back here.

You also need to remove the rear grab handles if you have them fitted (neither of these last two steps applies to me, since I had removed these to mount the roof hammock for storage).

You’ll see the two mounting holes and now the headliner is loose near the grab handle area. Wiring hanging down was from me testing the rear dash cam.
Good time to go around to the front of the car (now the back’s sorted) and remove the front passengers side grab handle, too.

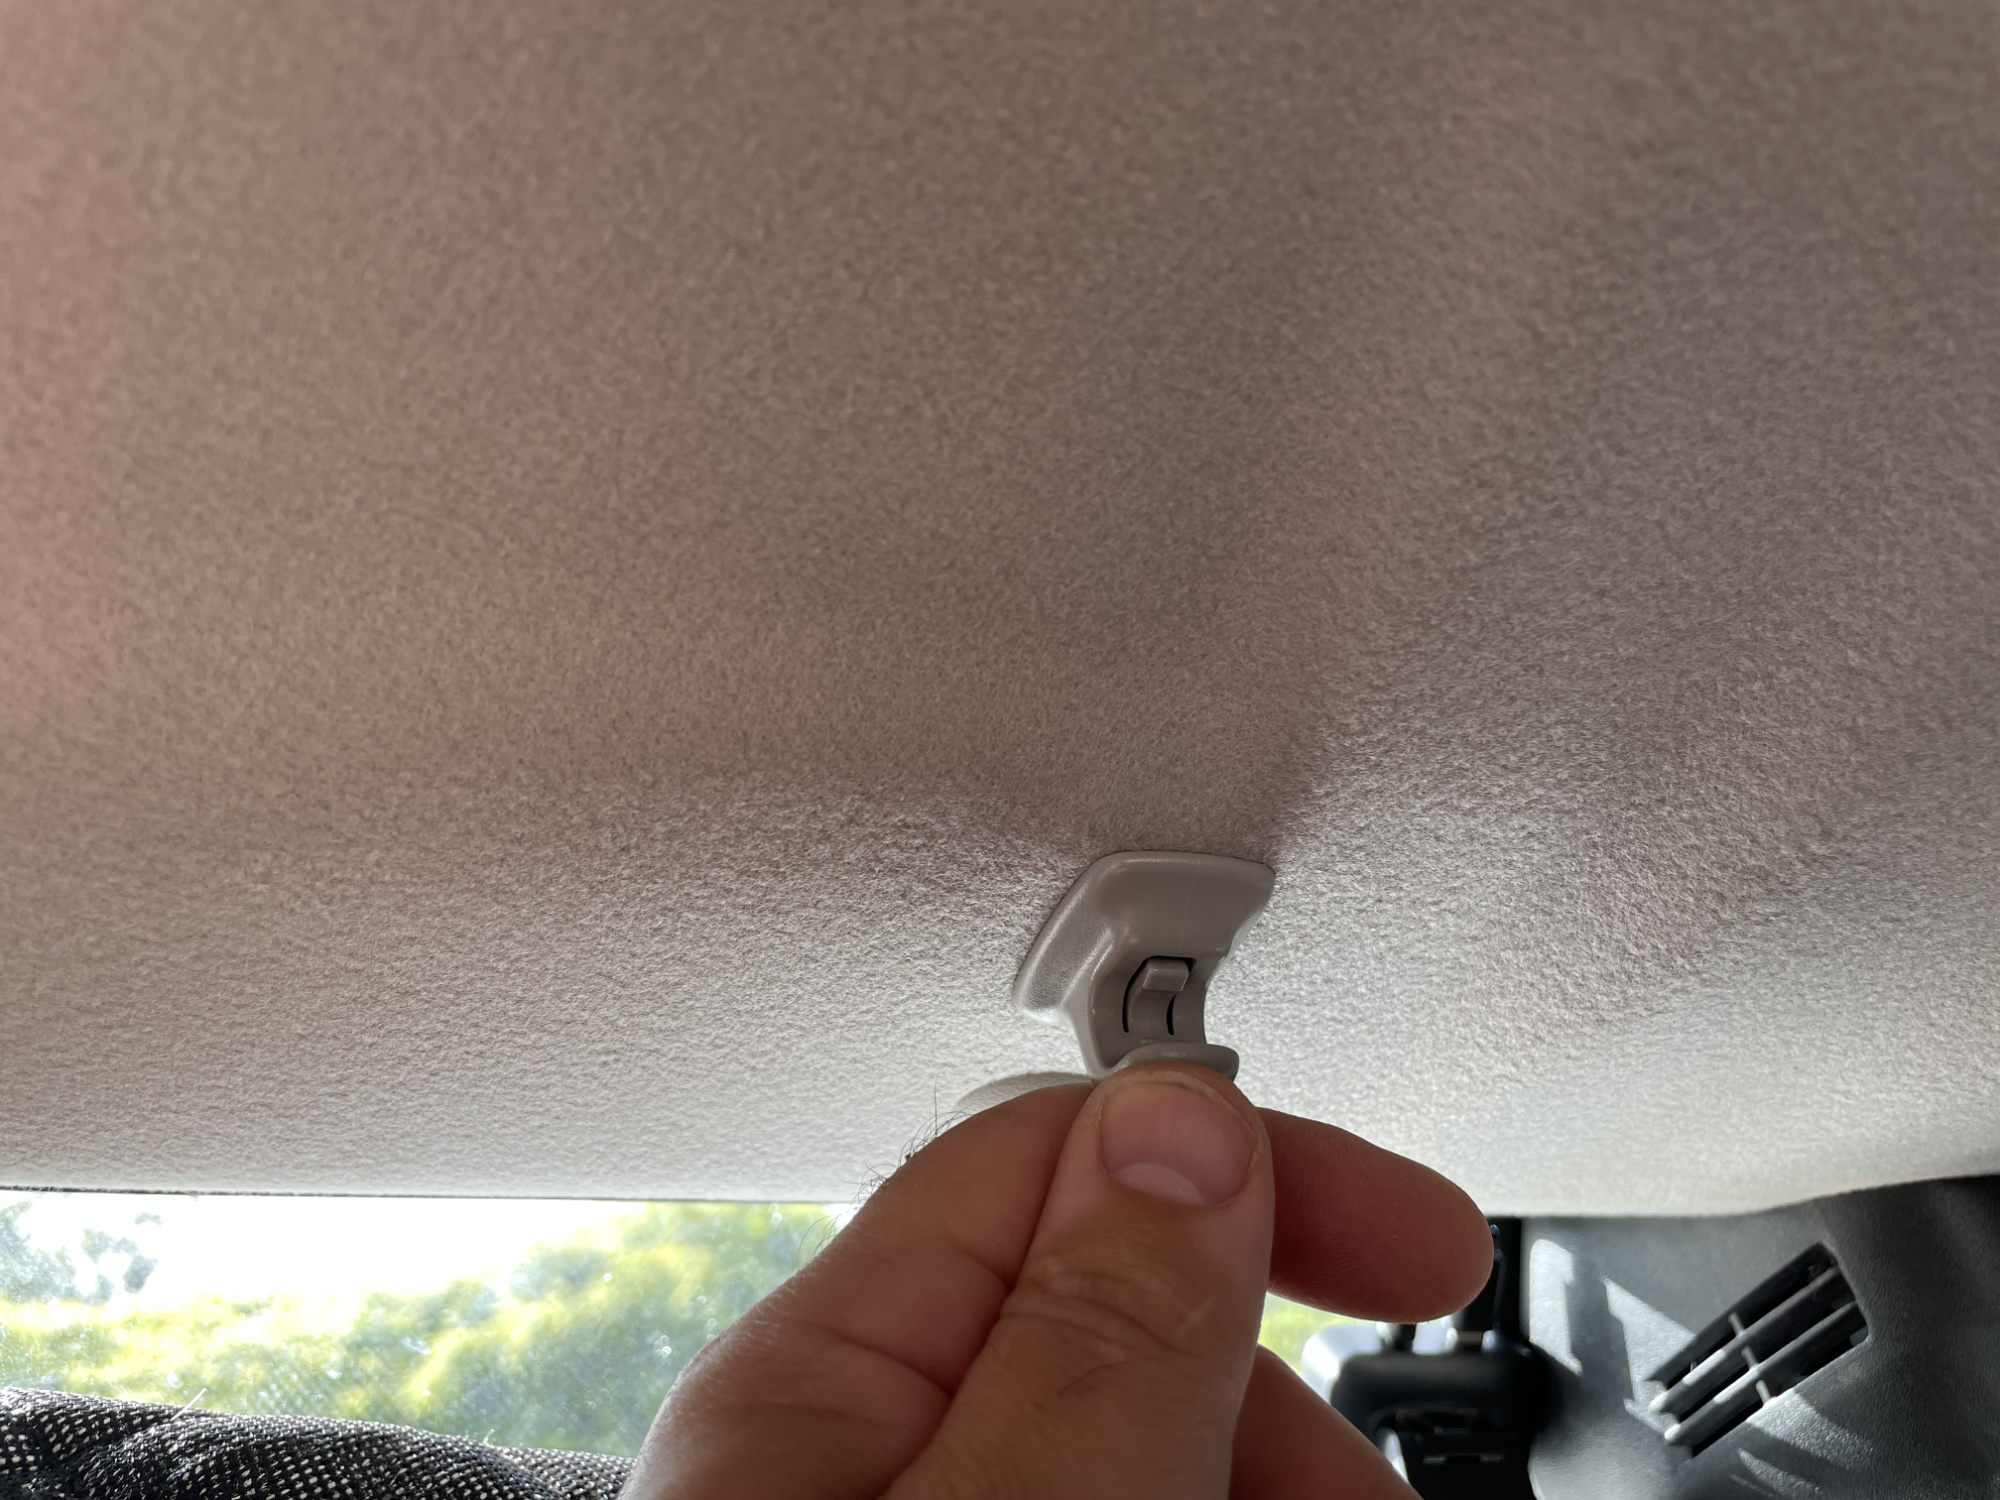
Time to unscrew sun visor pivot mounts. No good pic but there’s one screw per sunvisor, on the mount that’s closest to the outside of the car.
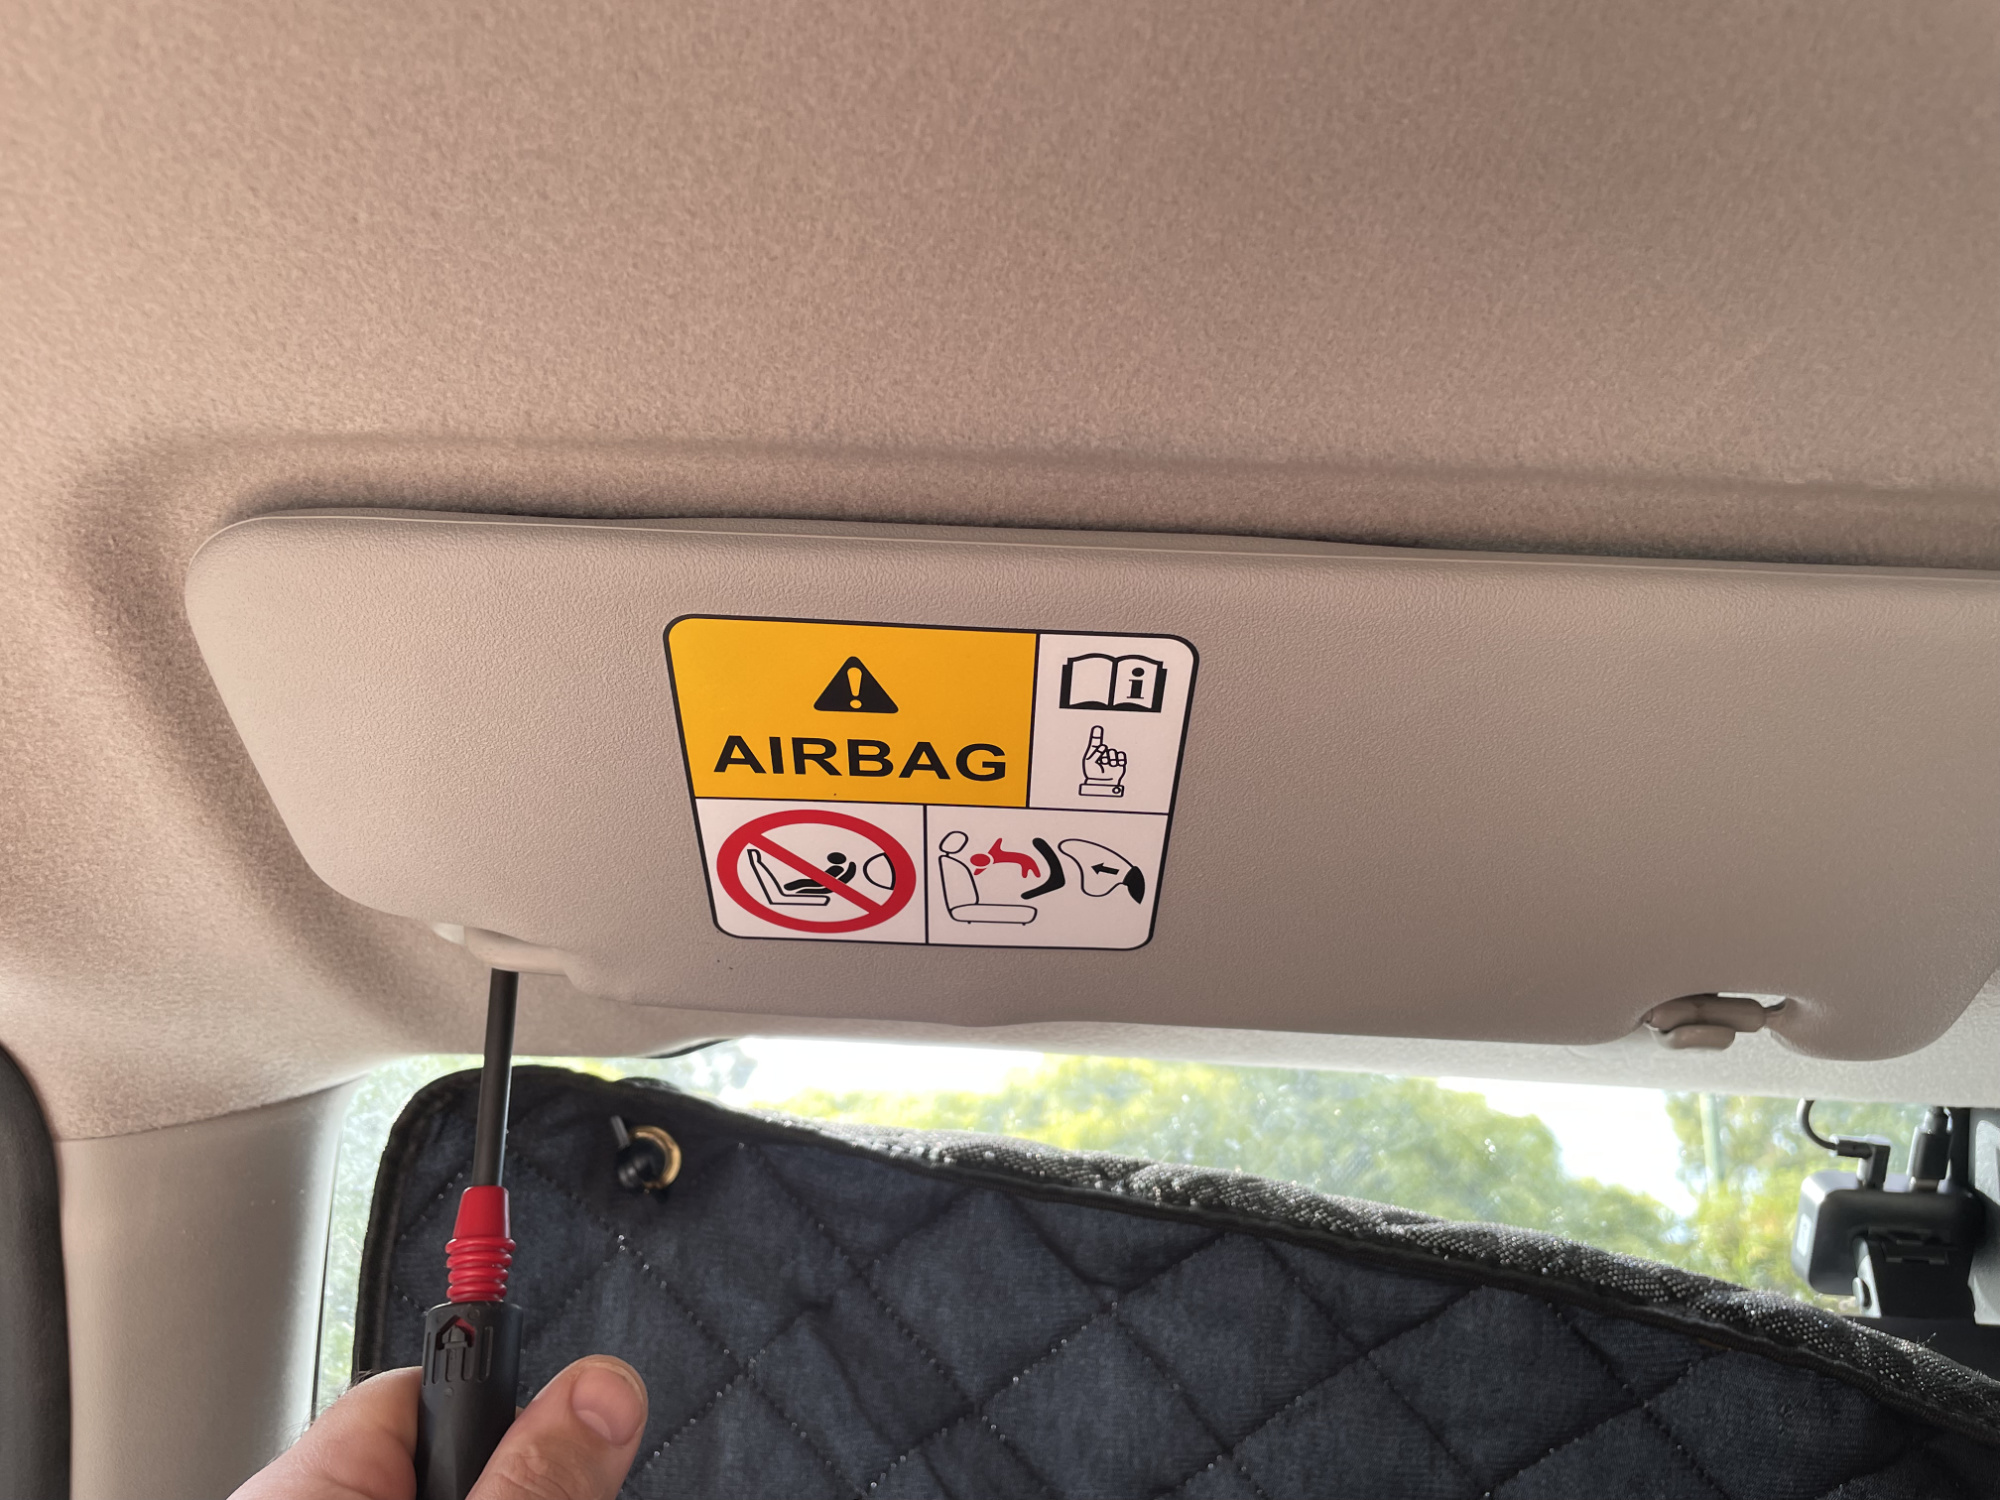
The sunvisor can unclip from the centre of the car clip, and then you can sort of pull it down and pivot the visor backwards a bit to release the clip on the outside of the car.
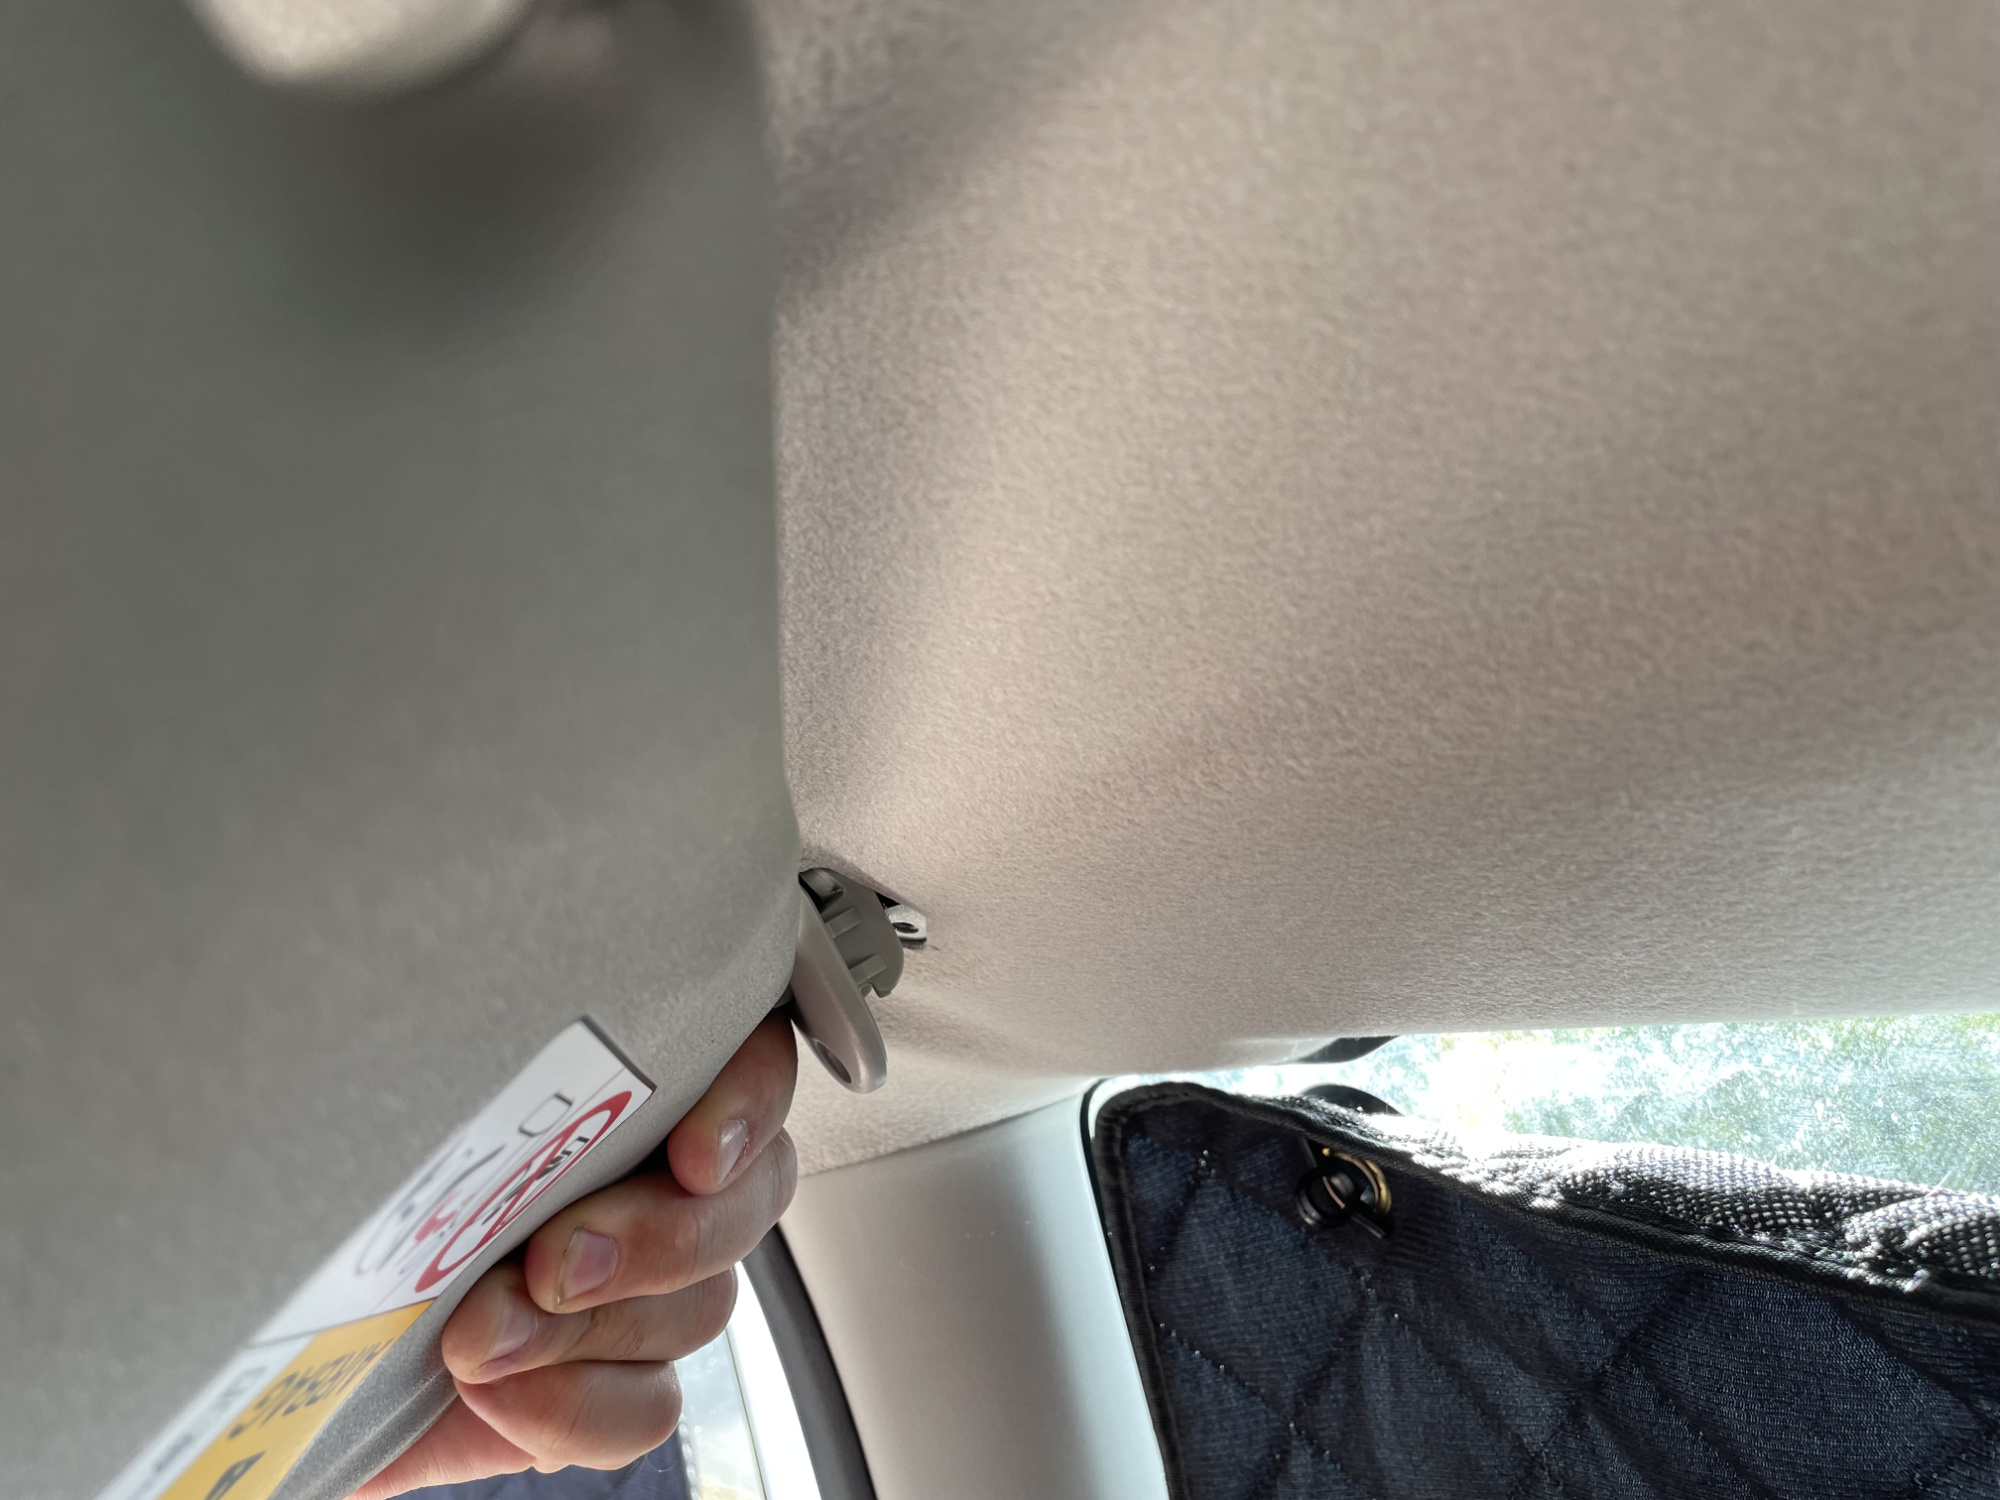
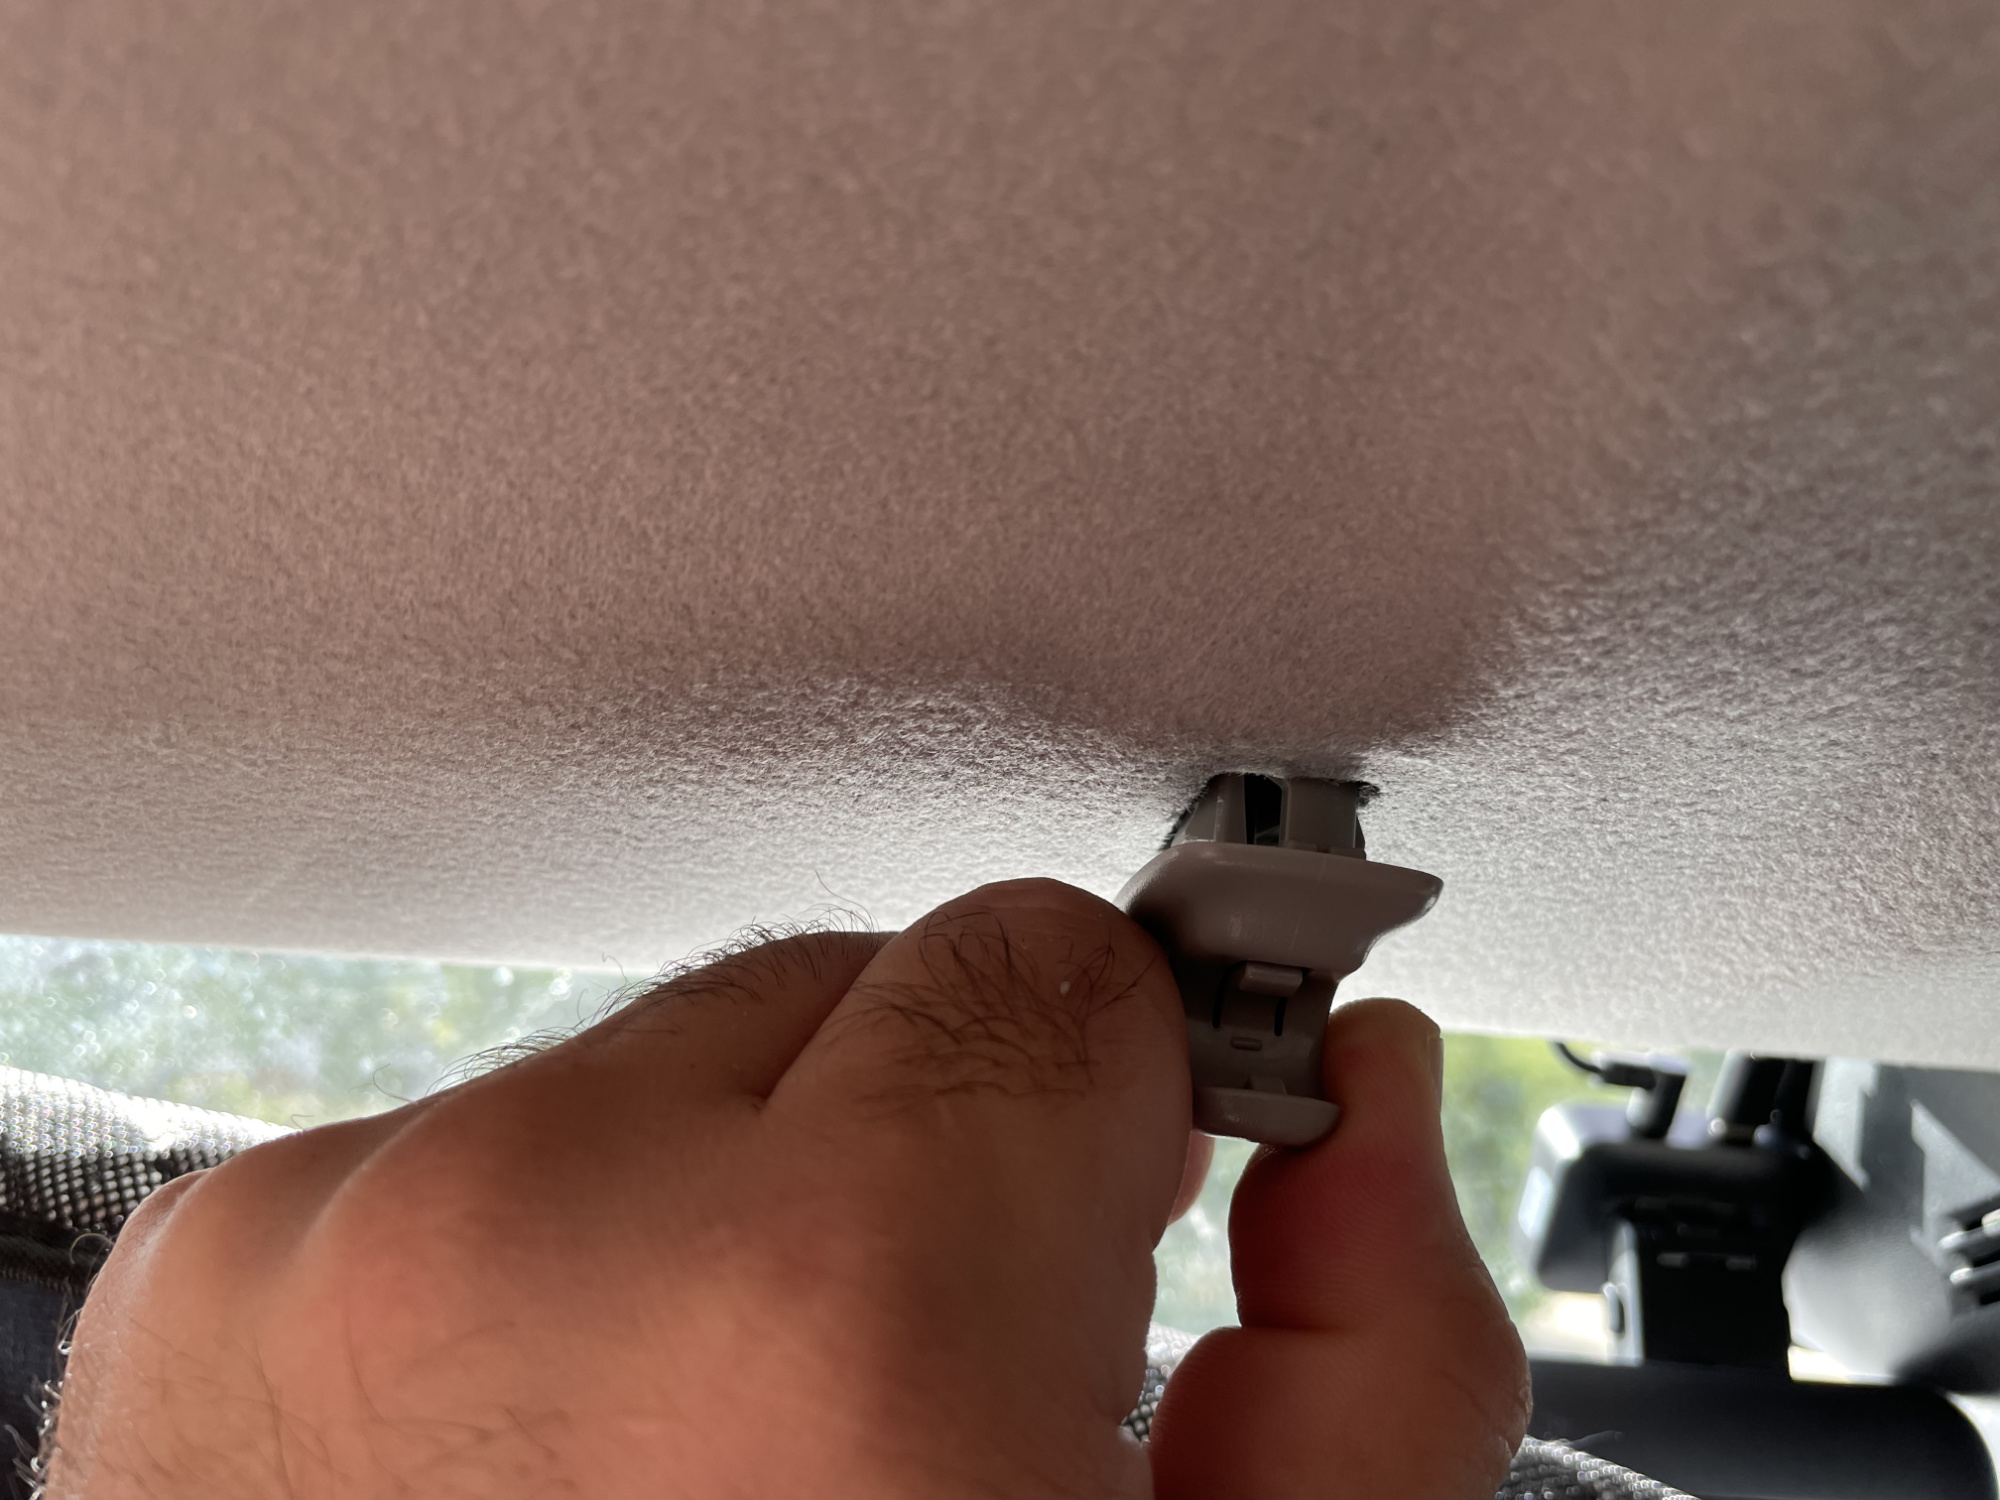
Now we tackle the other end of the sunvisor: the clip-in end mounts in the centre of the car.

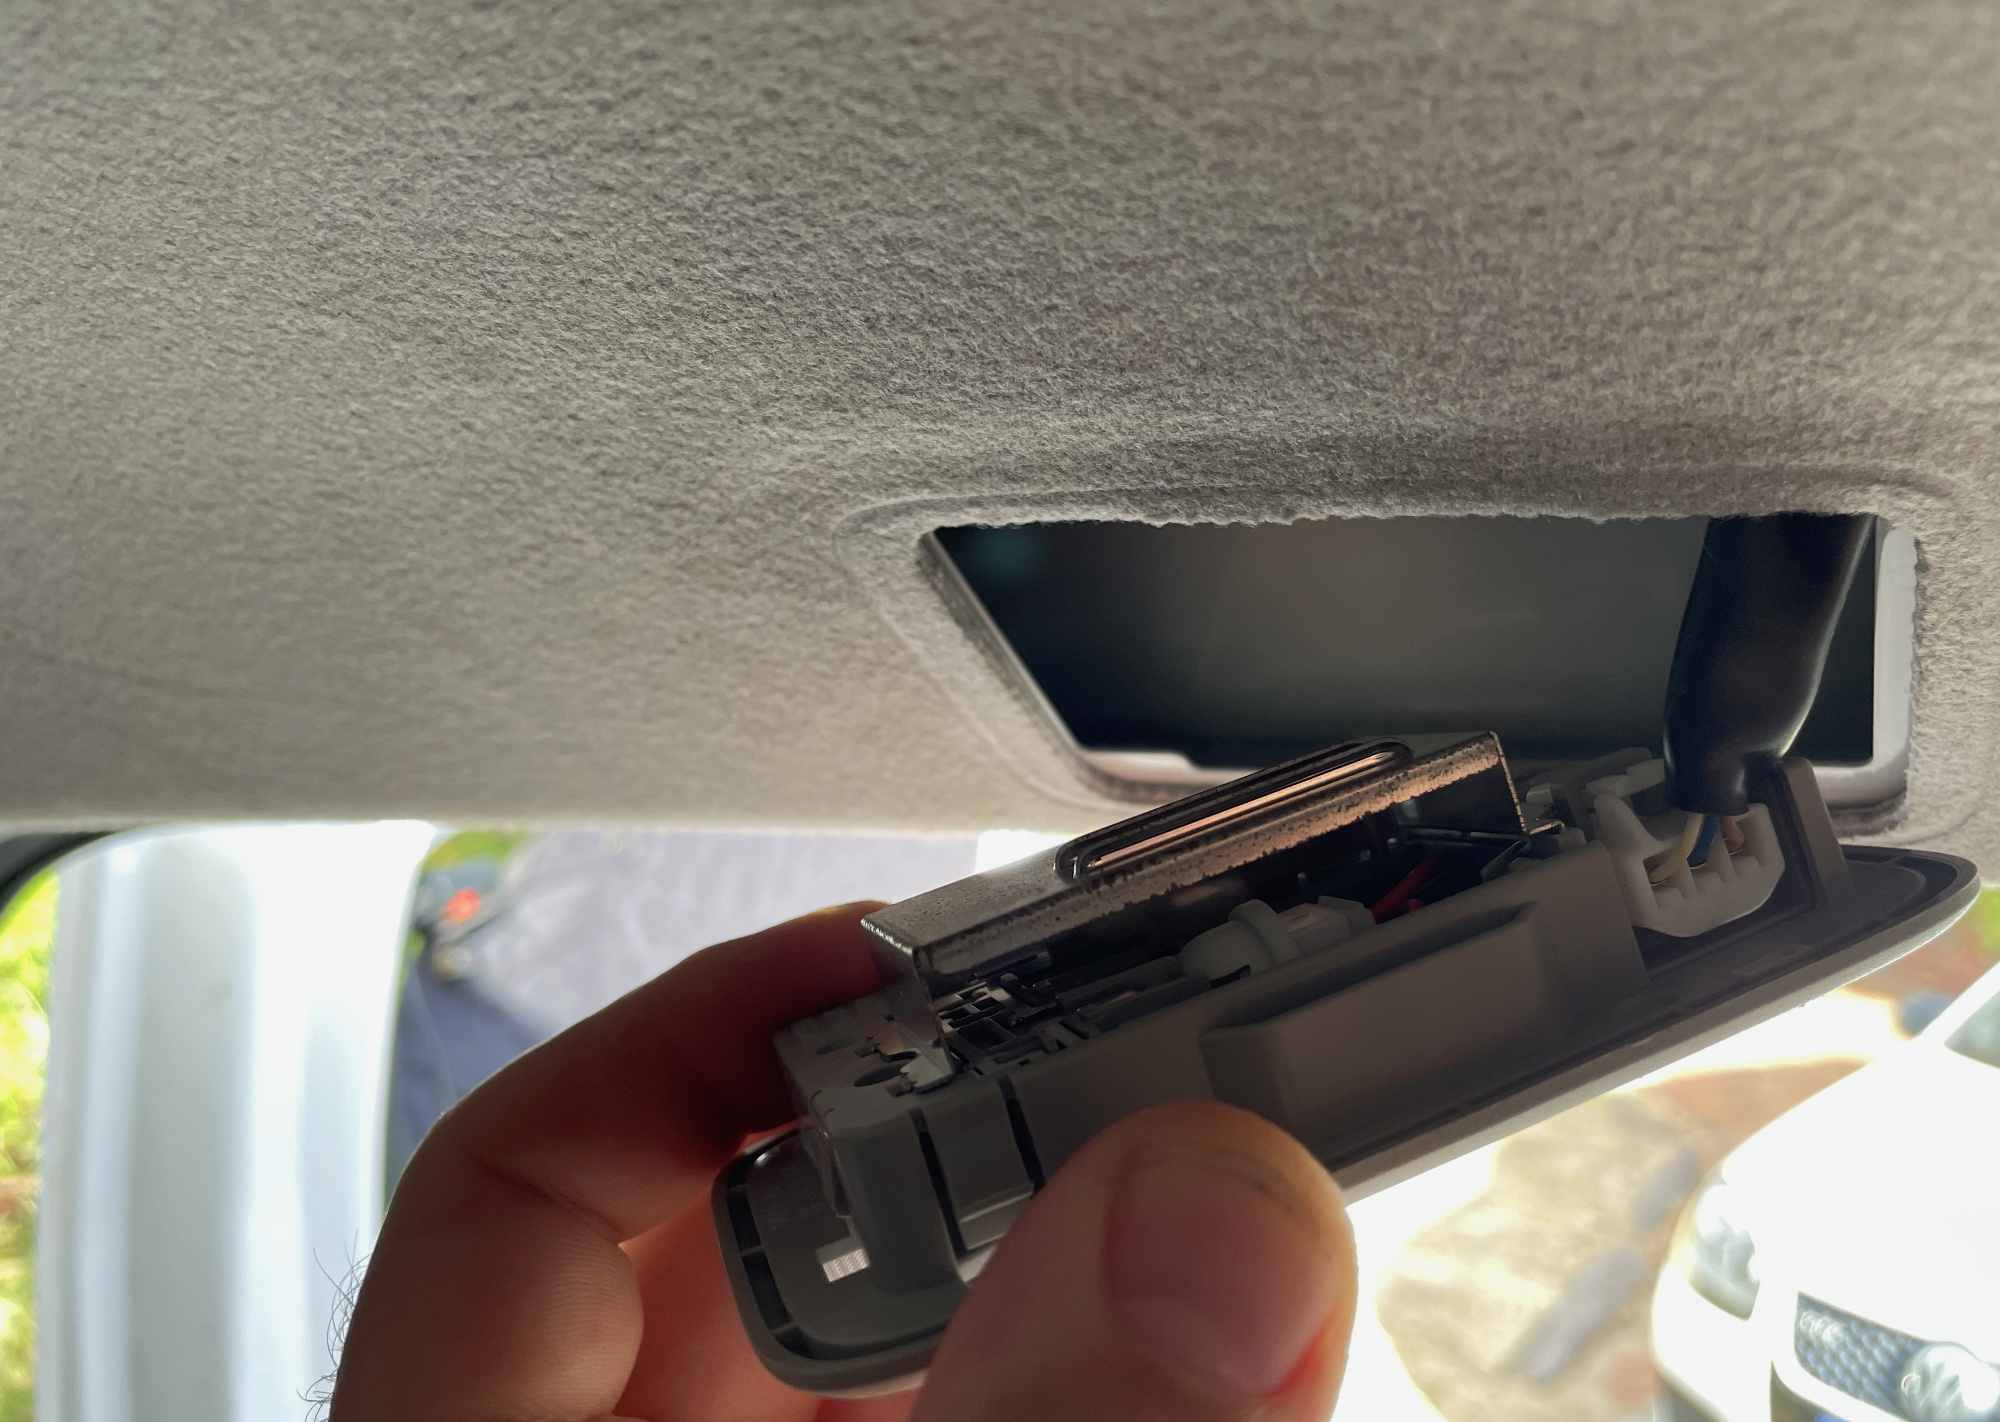
Remove cover for rear view mirror, this is clipped in pretty tightly. Start with one corner to help get in there.
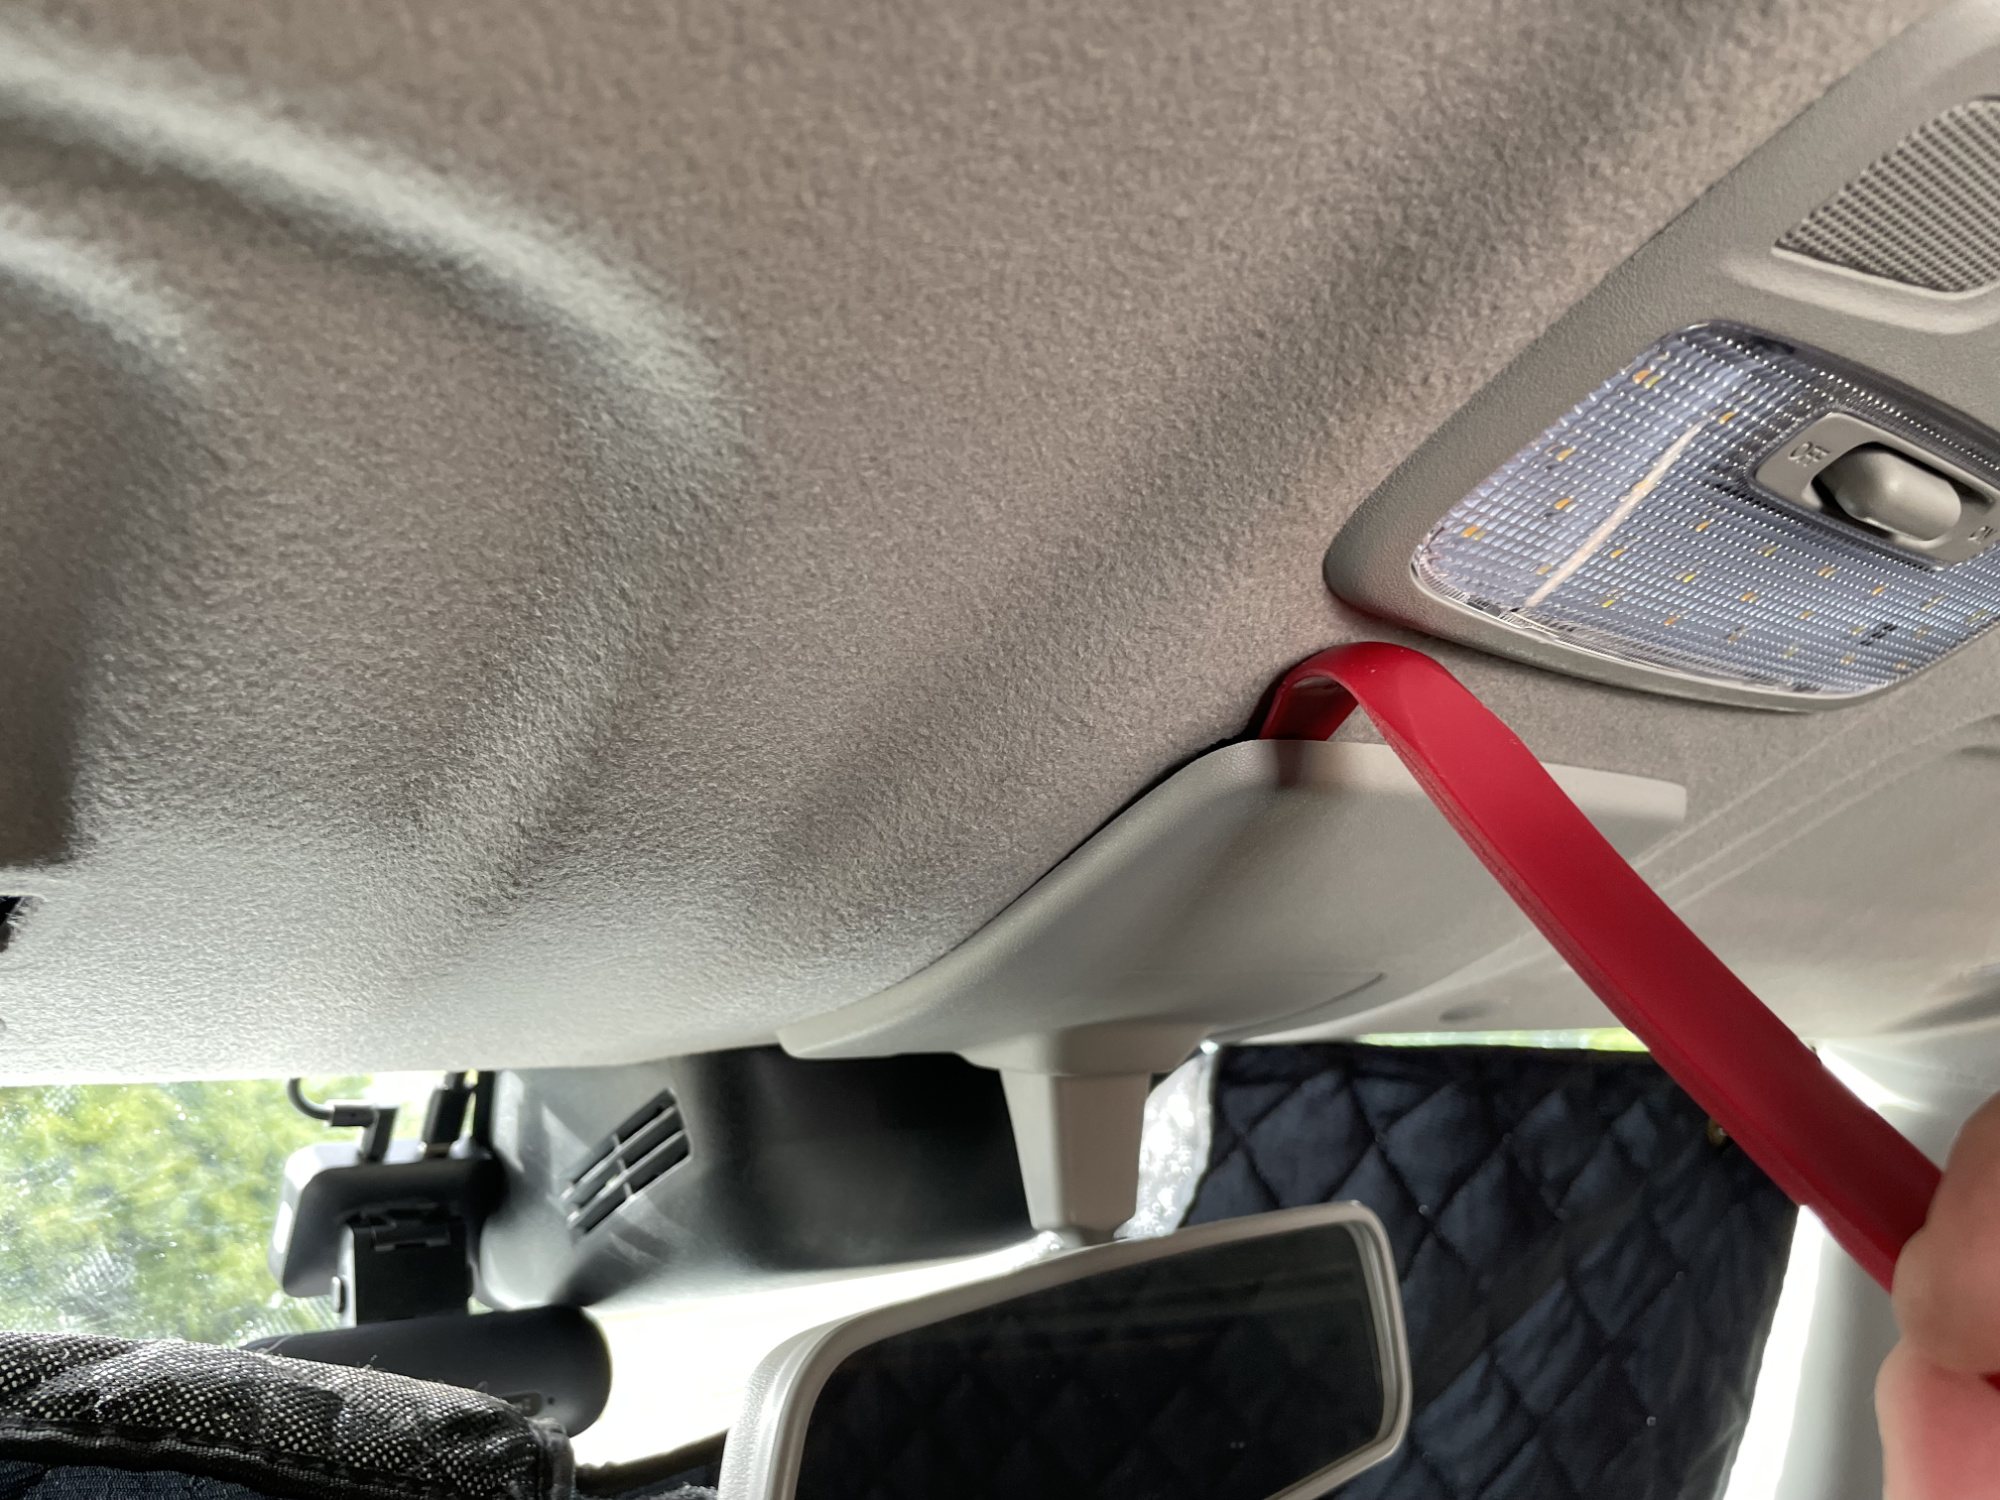
It’s a lot easier once you have one of the clips removed from the roof structure.
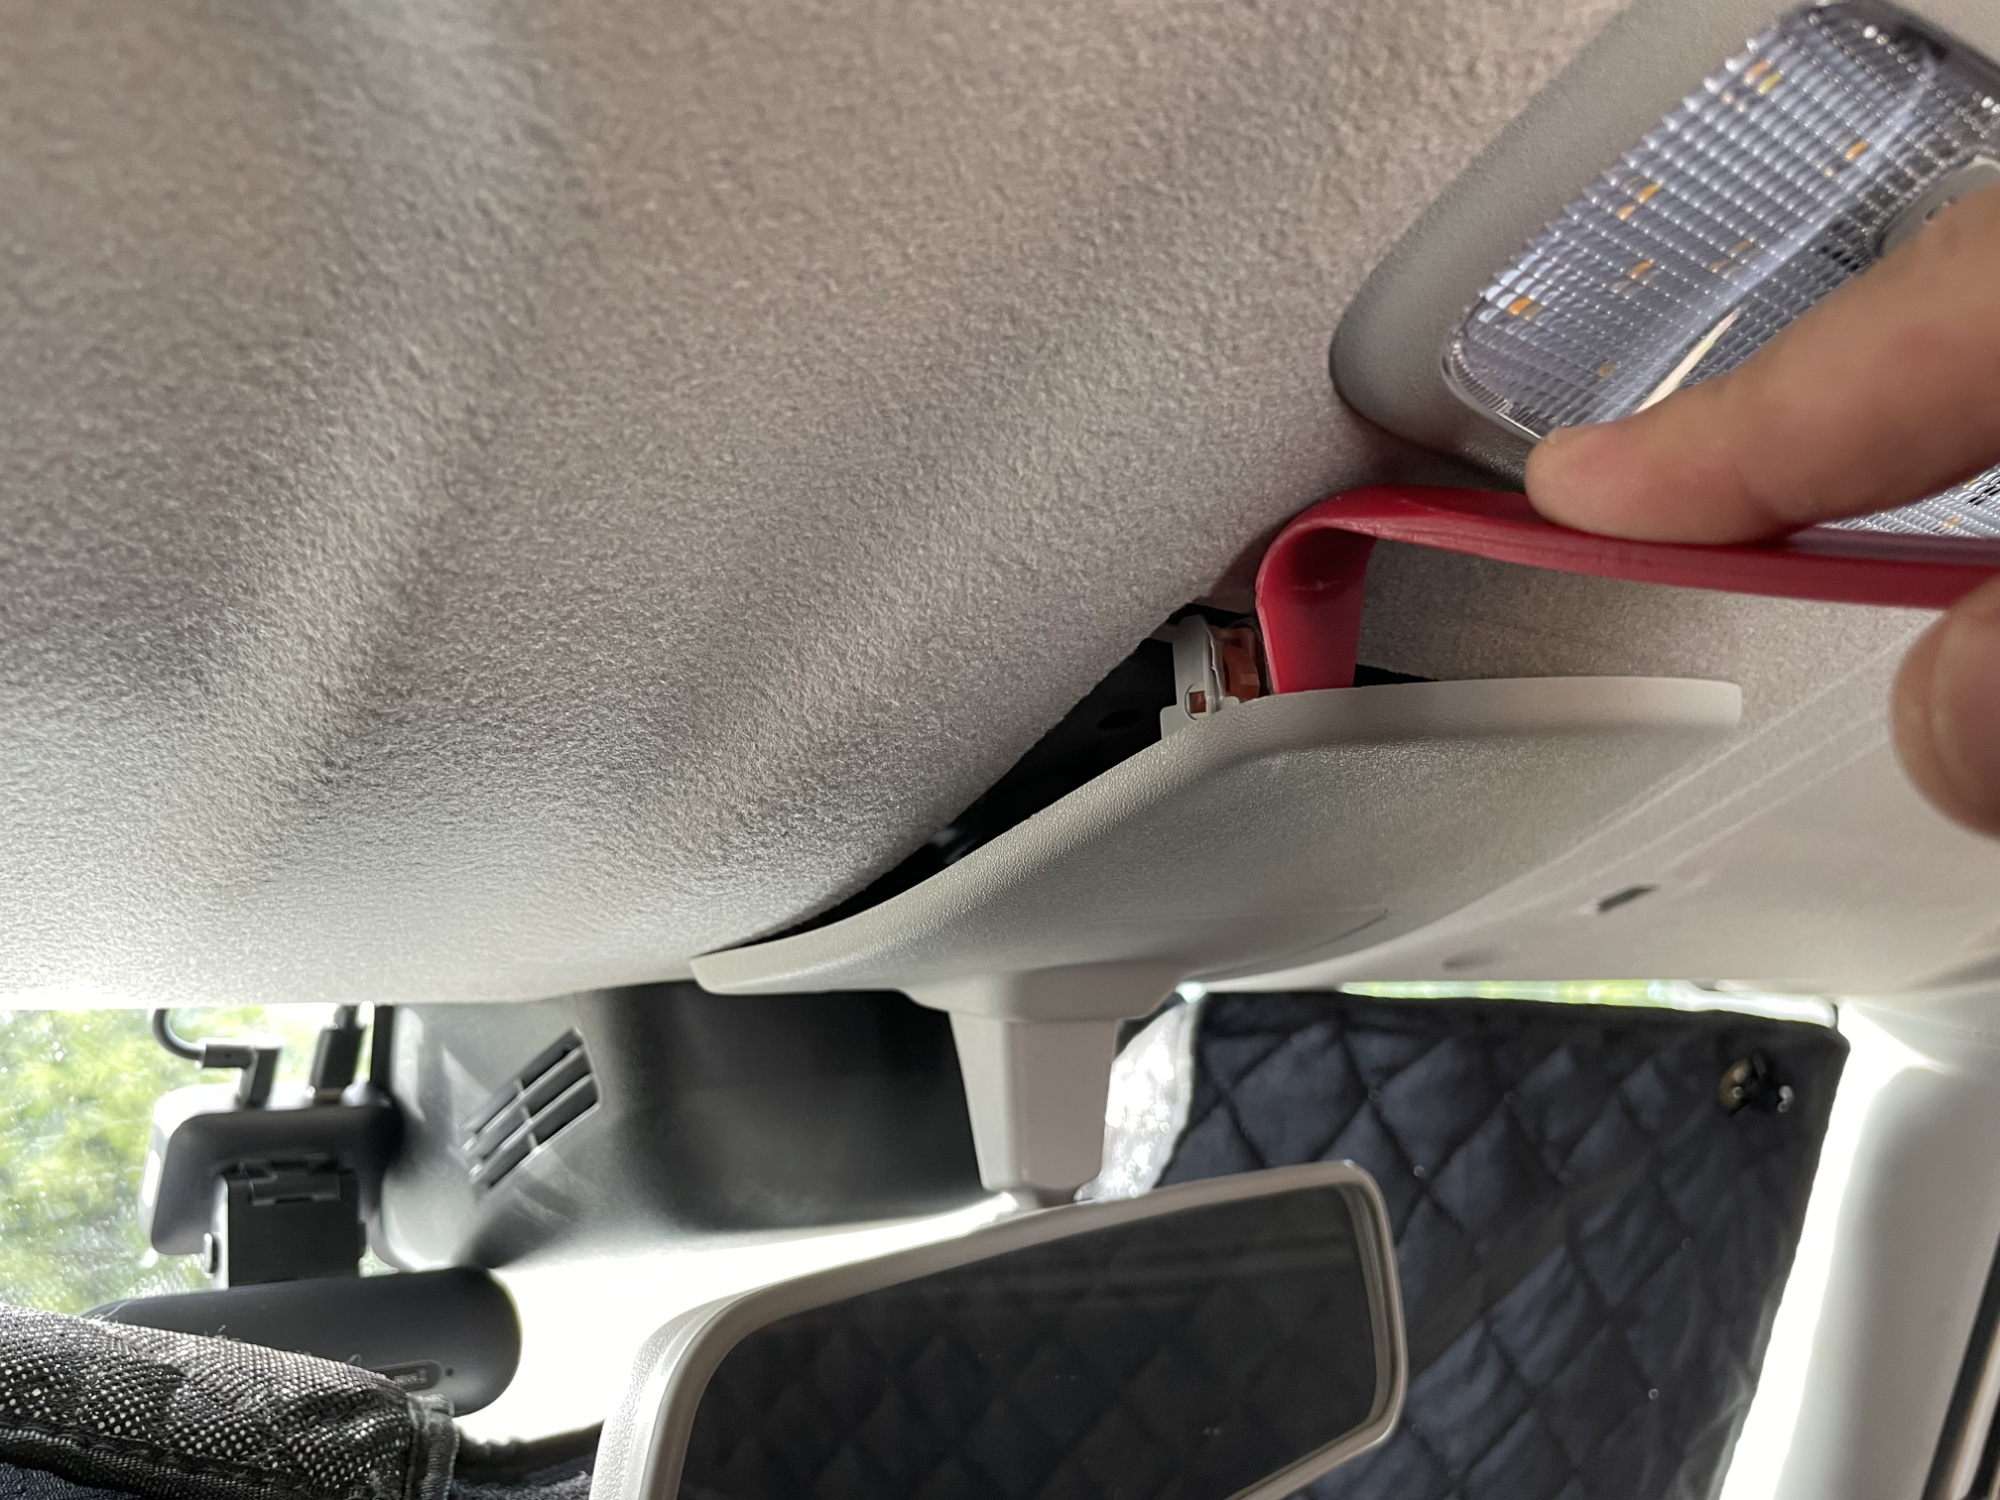
Twisting it a bit sideways makes it easier to get past the mirror mounting shaft.
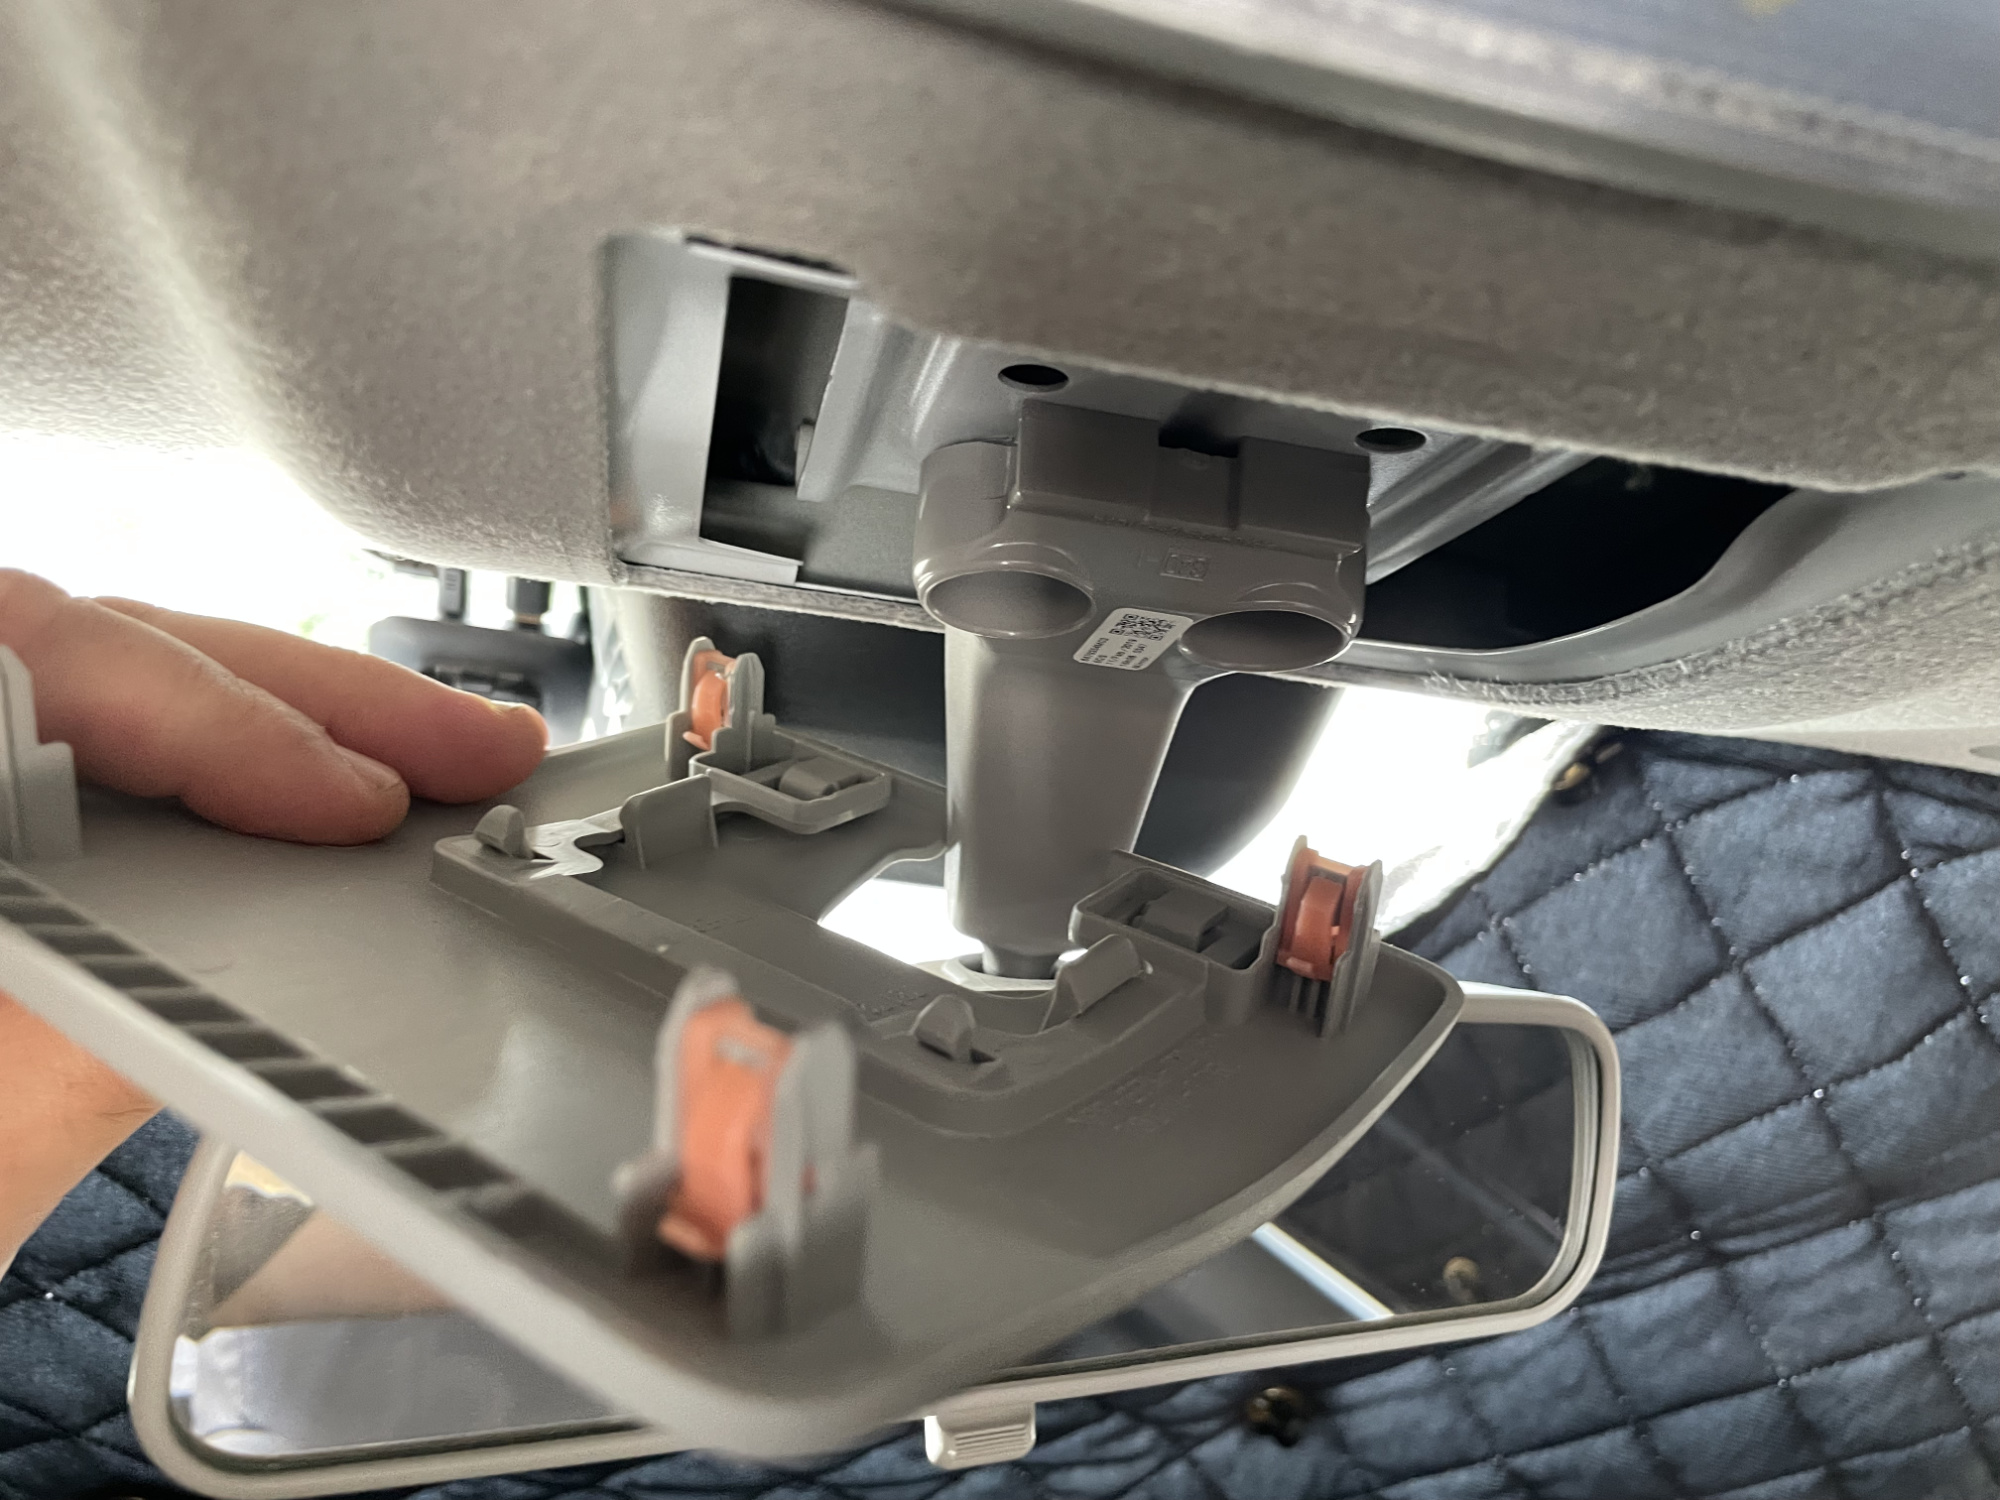
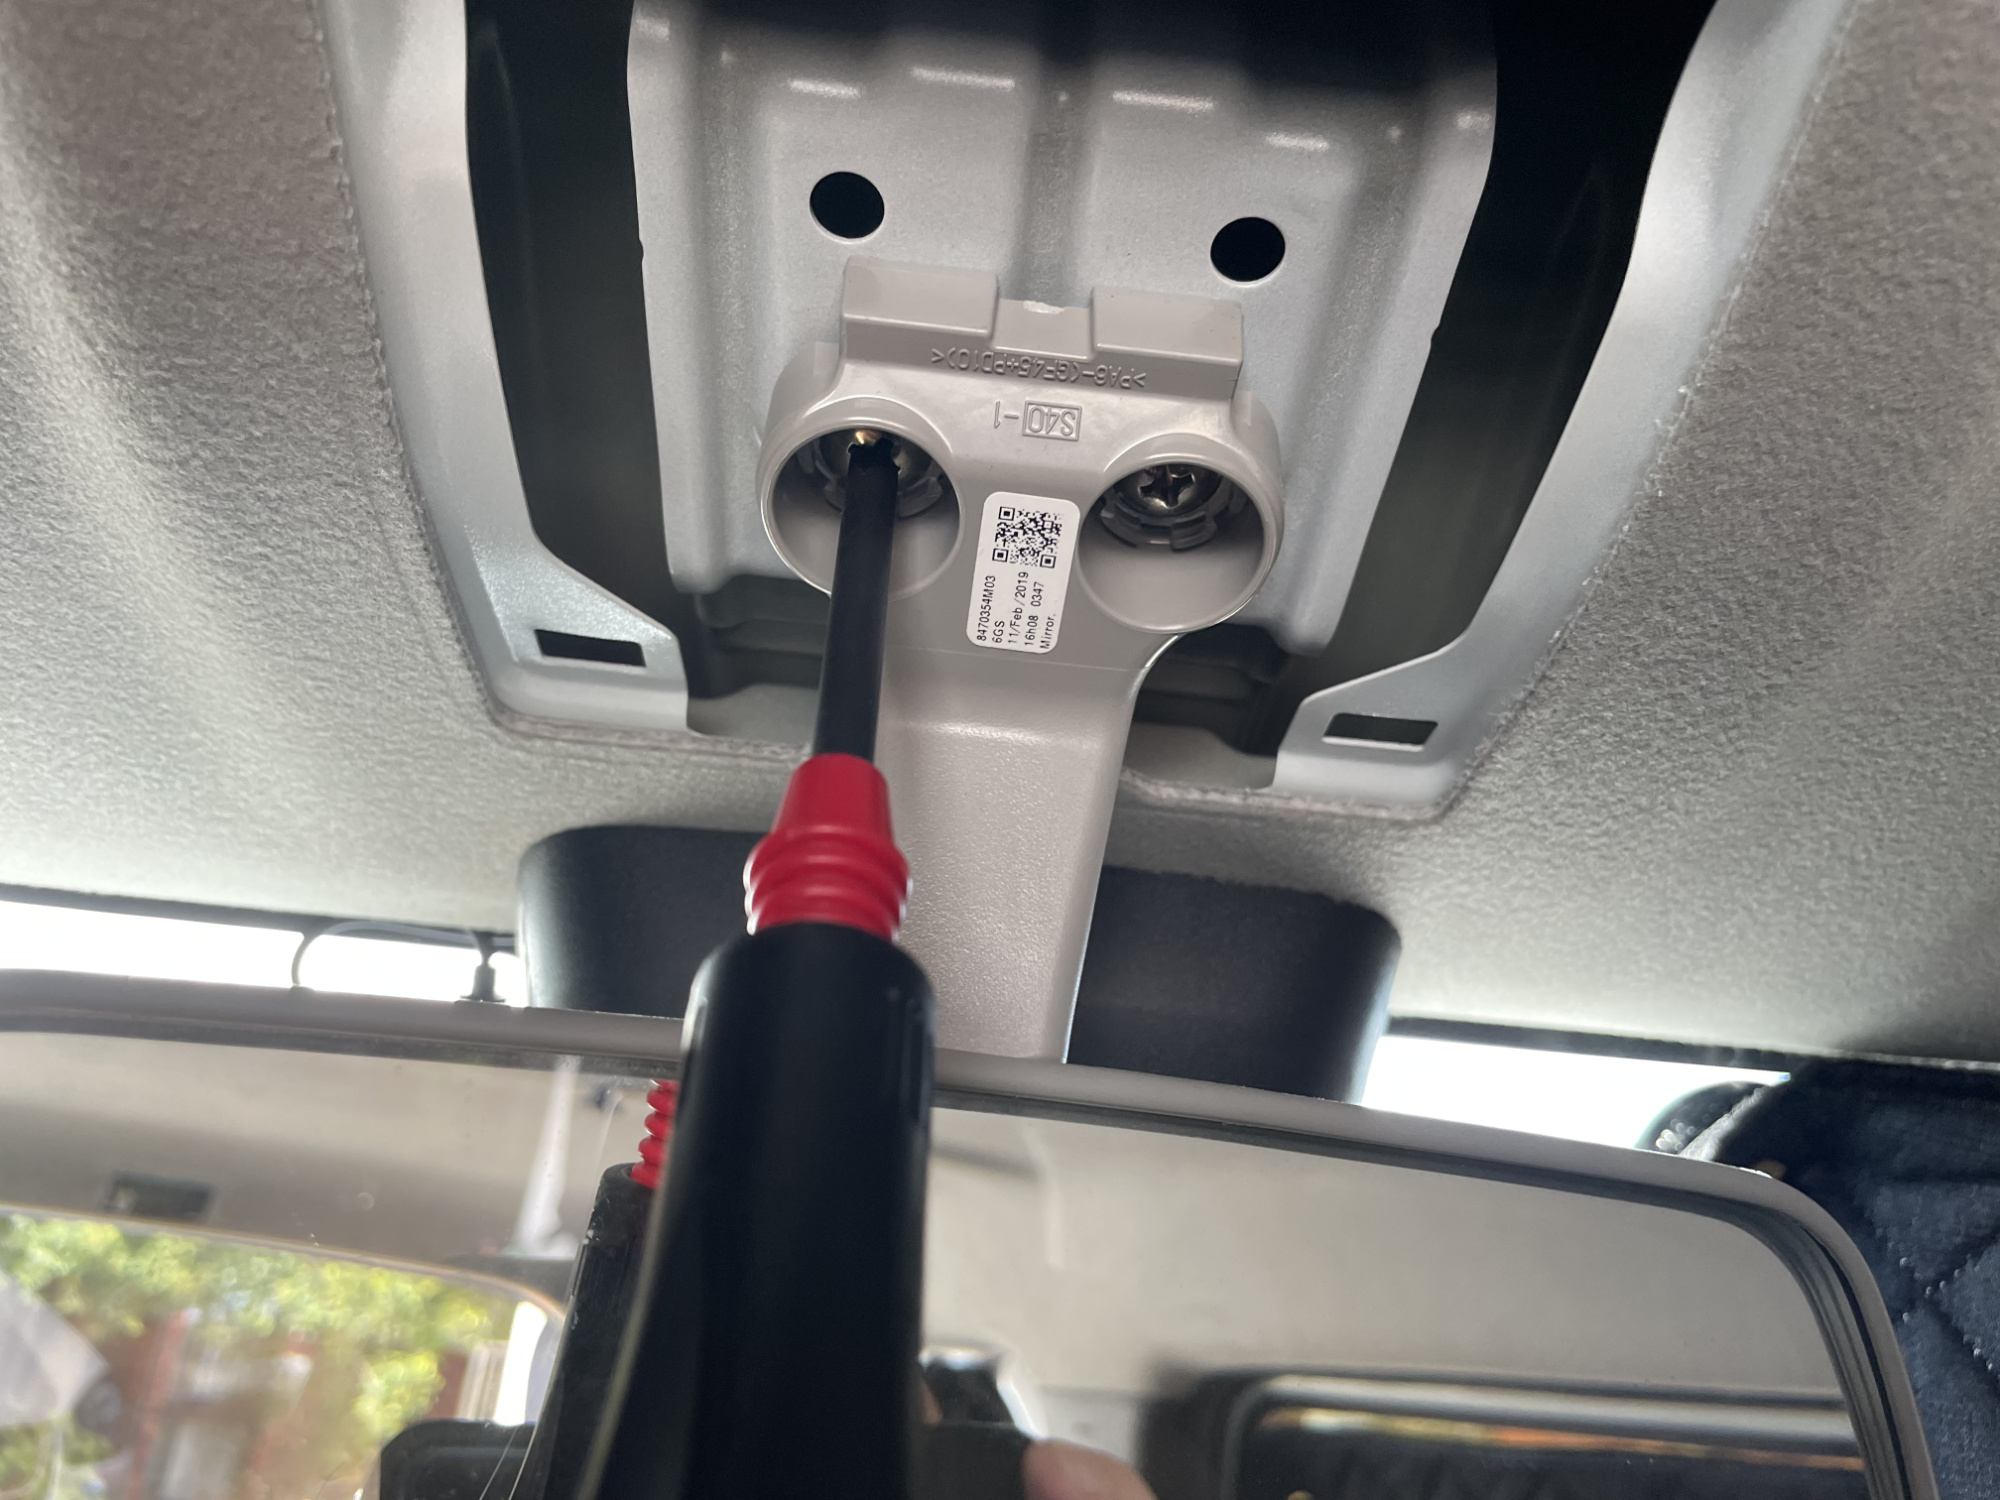
Unscrew rear view mirror mount and remove from car
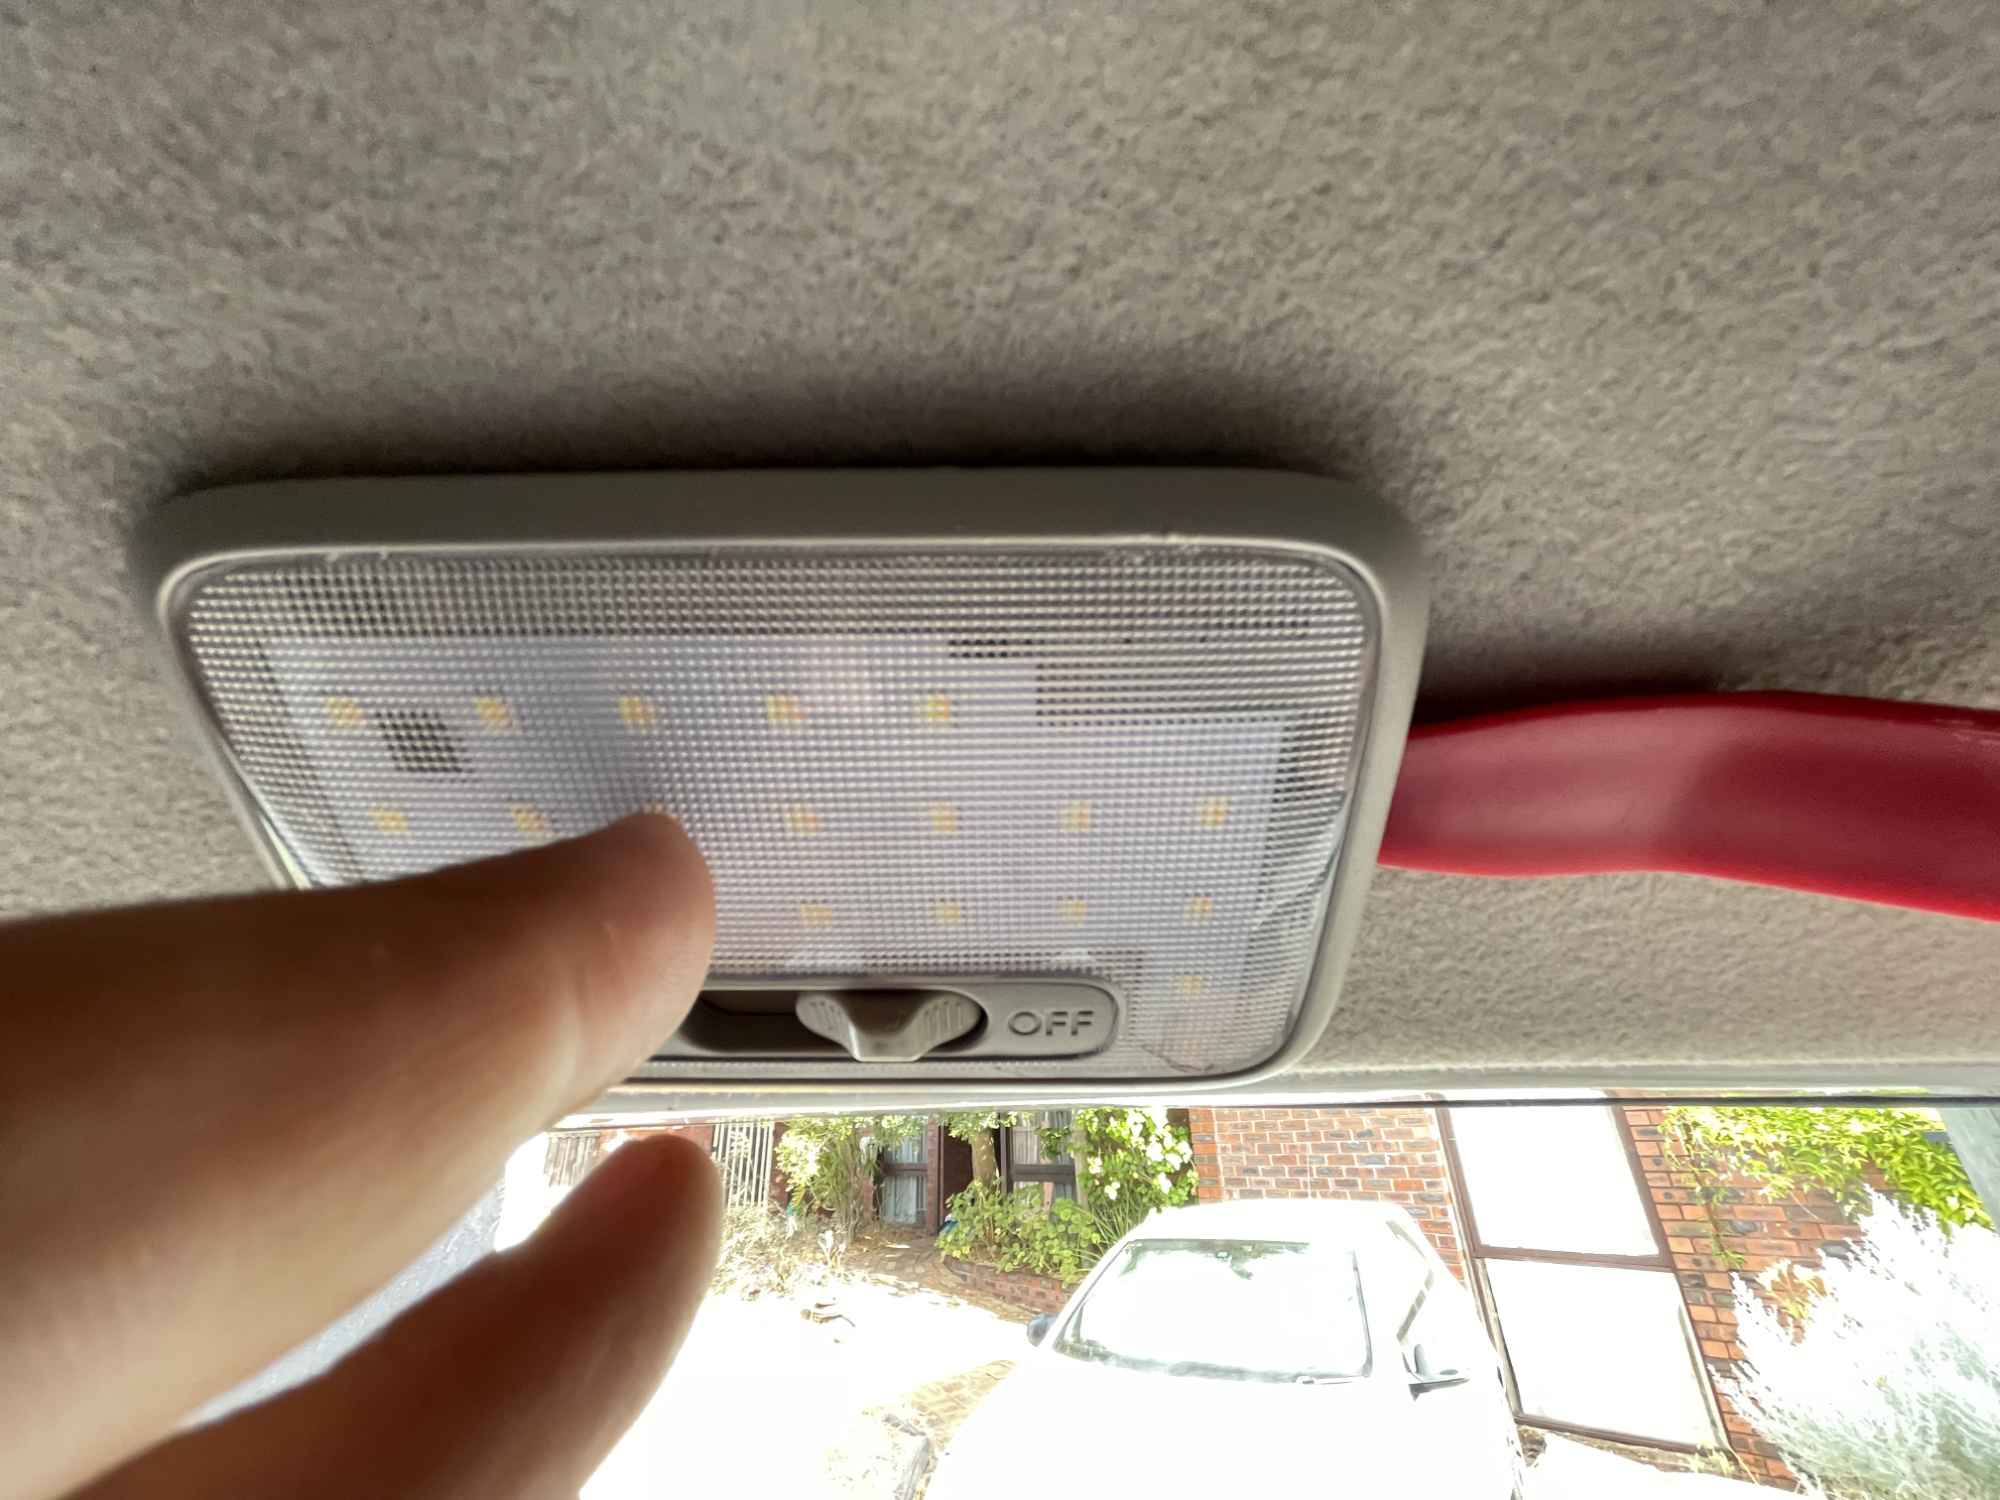
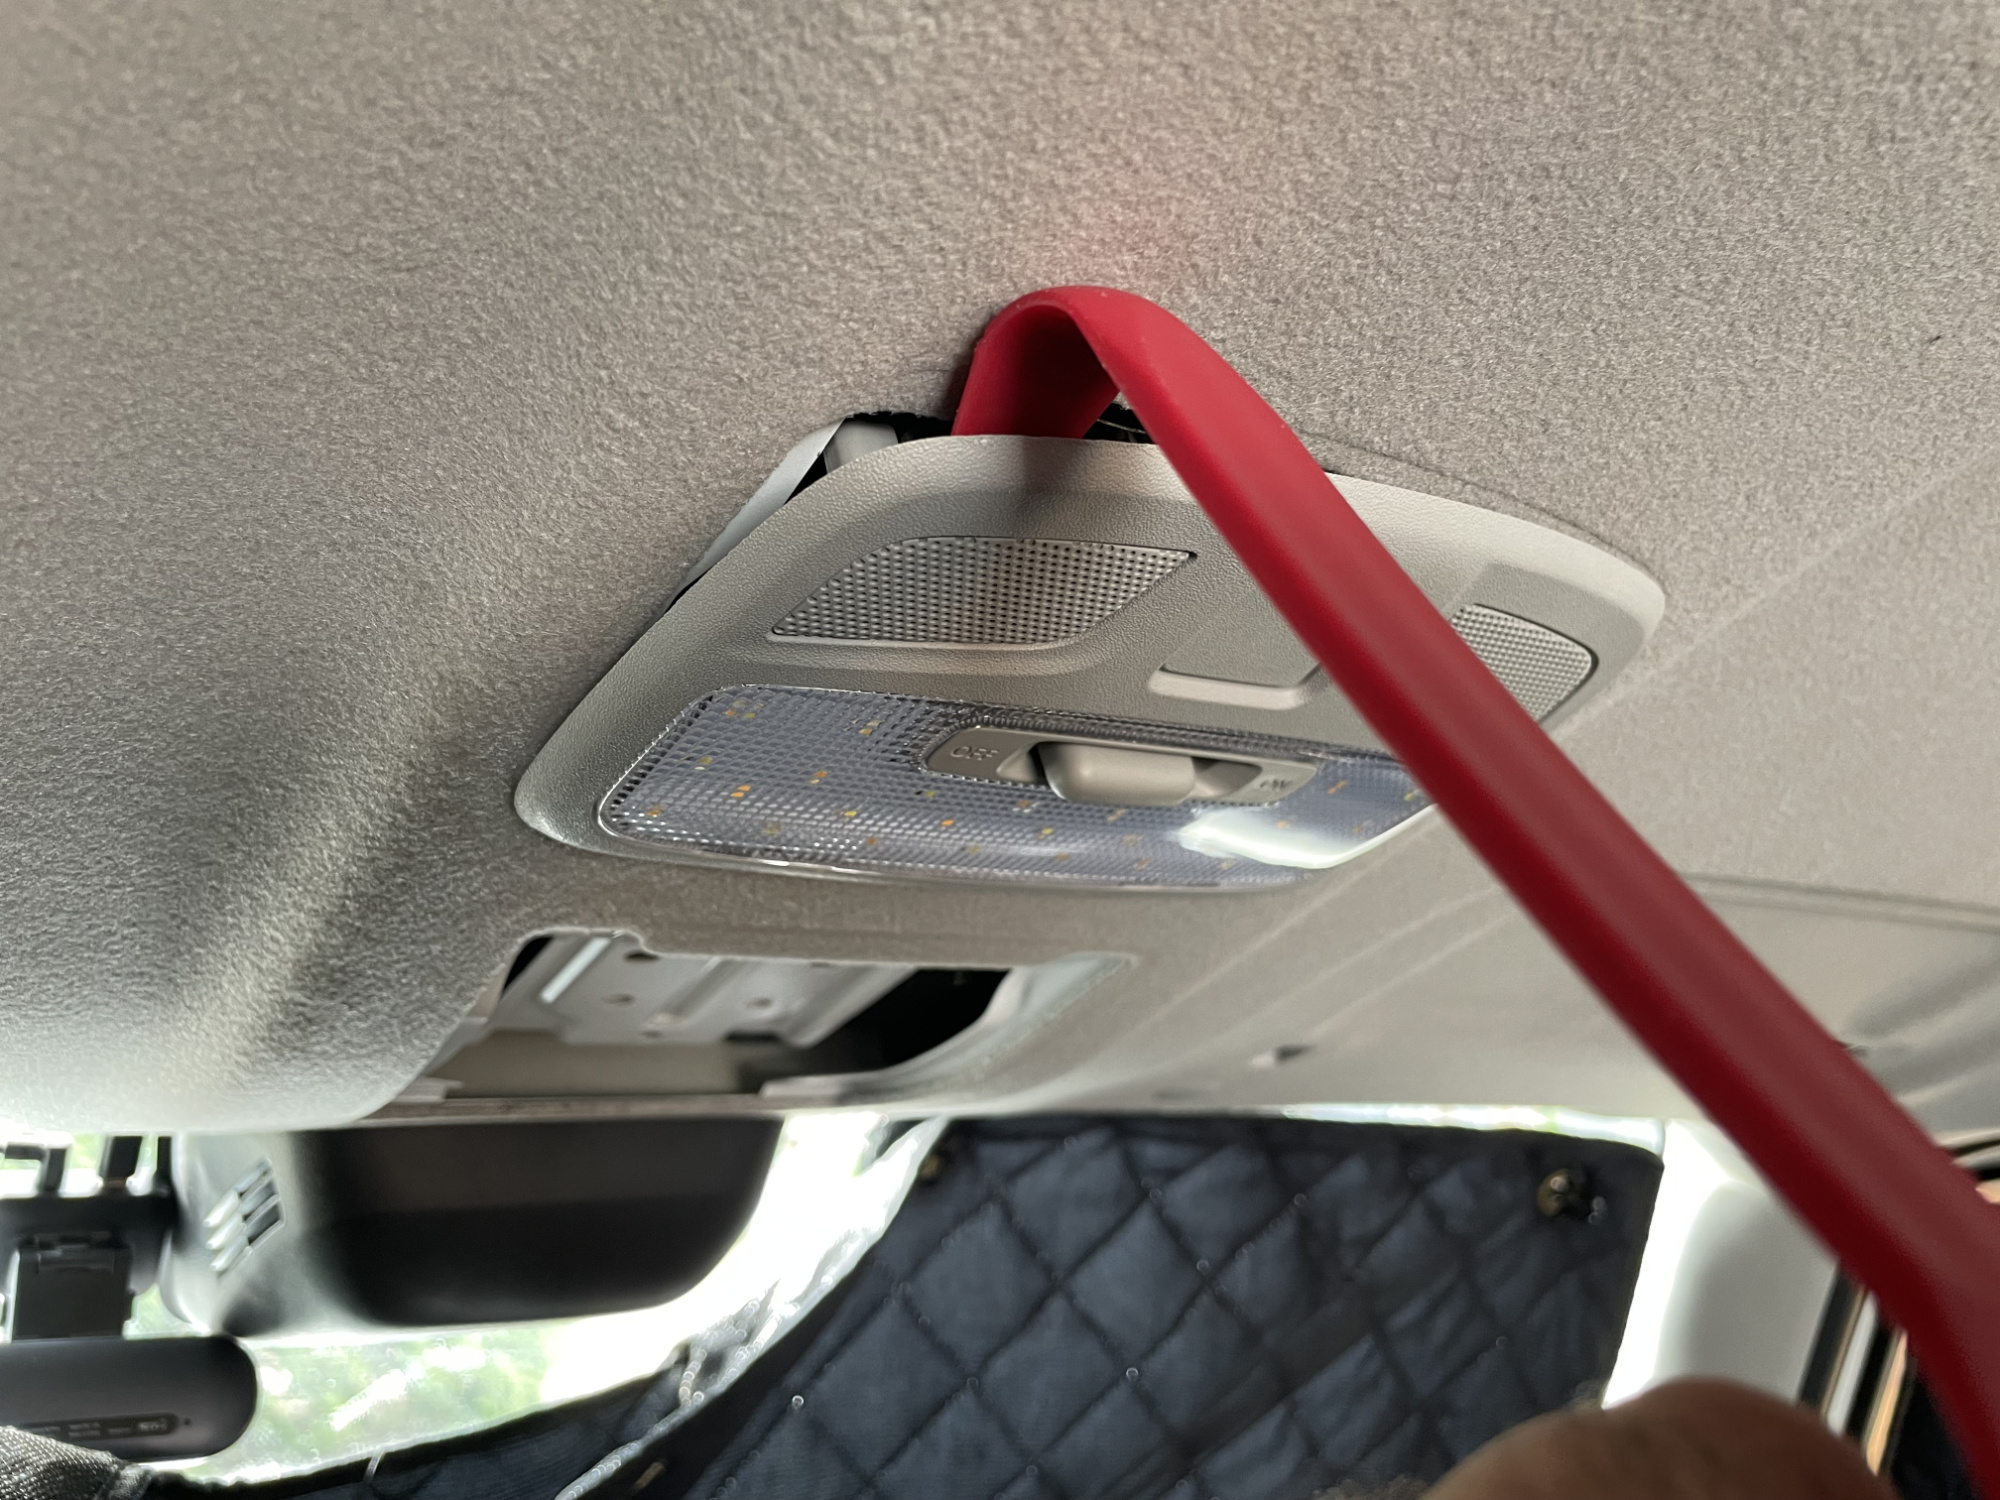
With the mirror removed, now we can remove the front interior light. Trim removal tool makes light work of this.
There’s two connectors here to unplug: the light wiring itself, and also the microphone for the infotainment system.
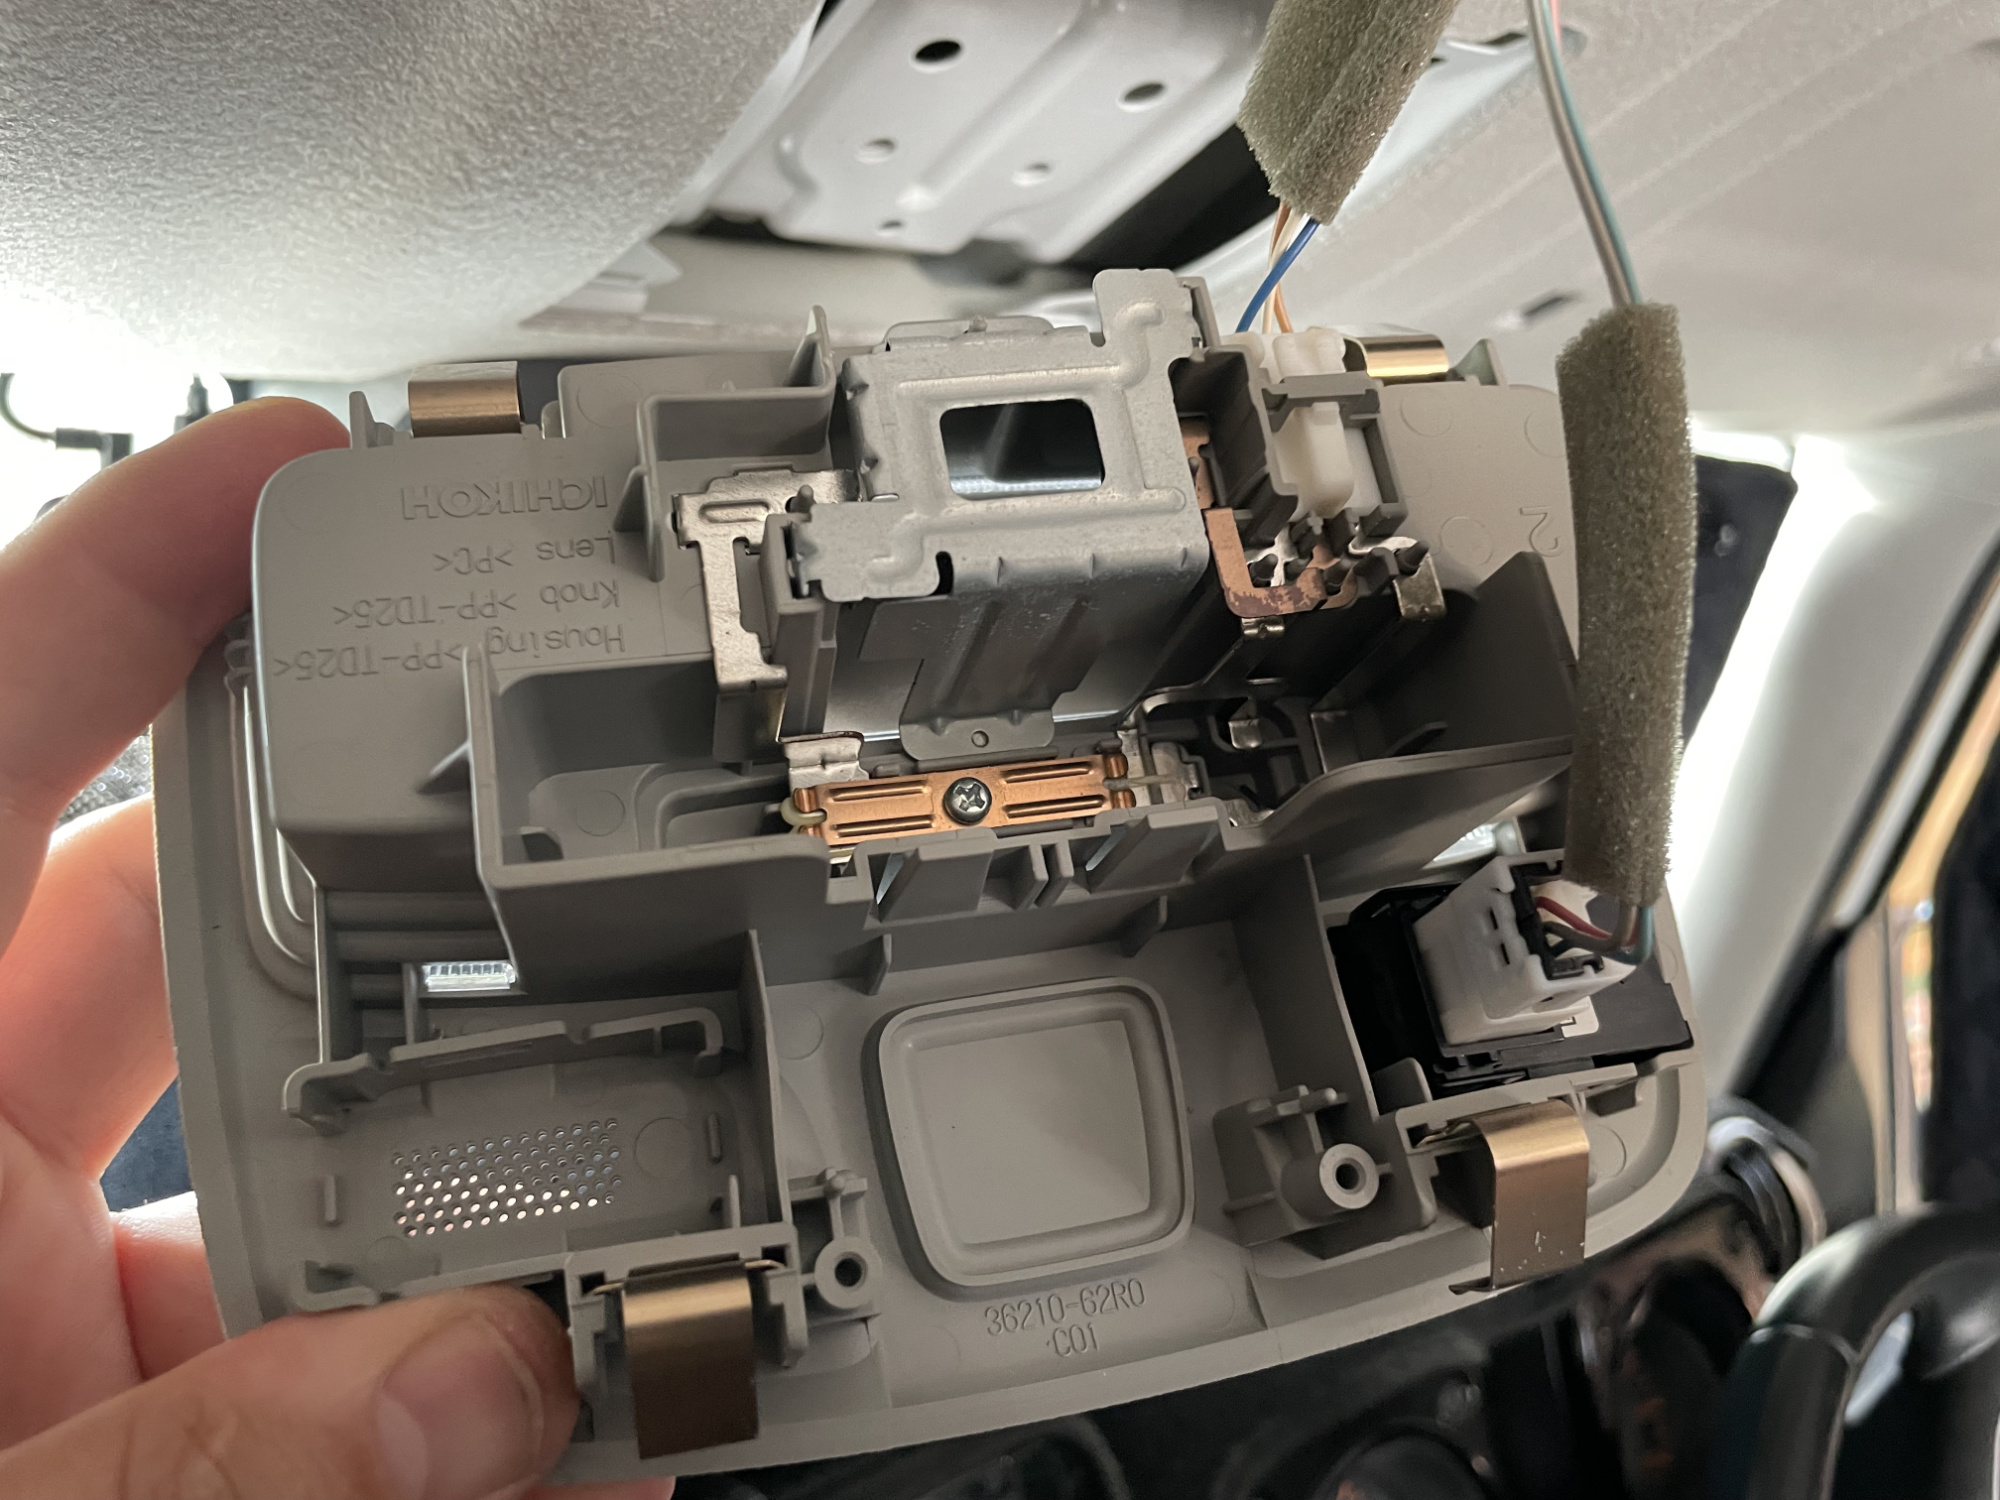
With the wiring unplugged the light can be put somewhere safely and you’ll then have freed up a lot of the stuff at the front.
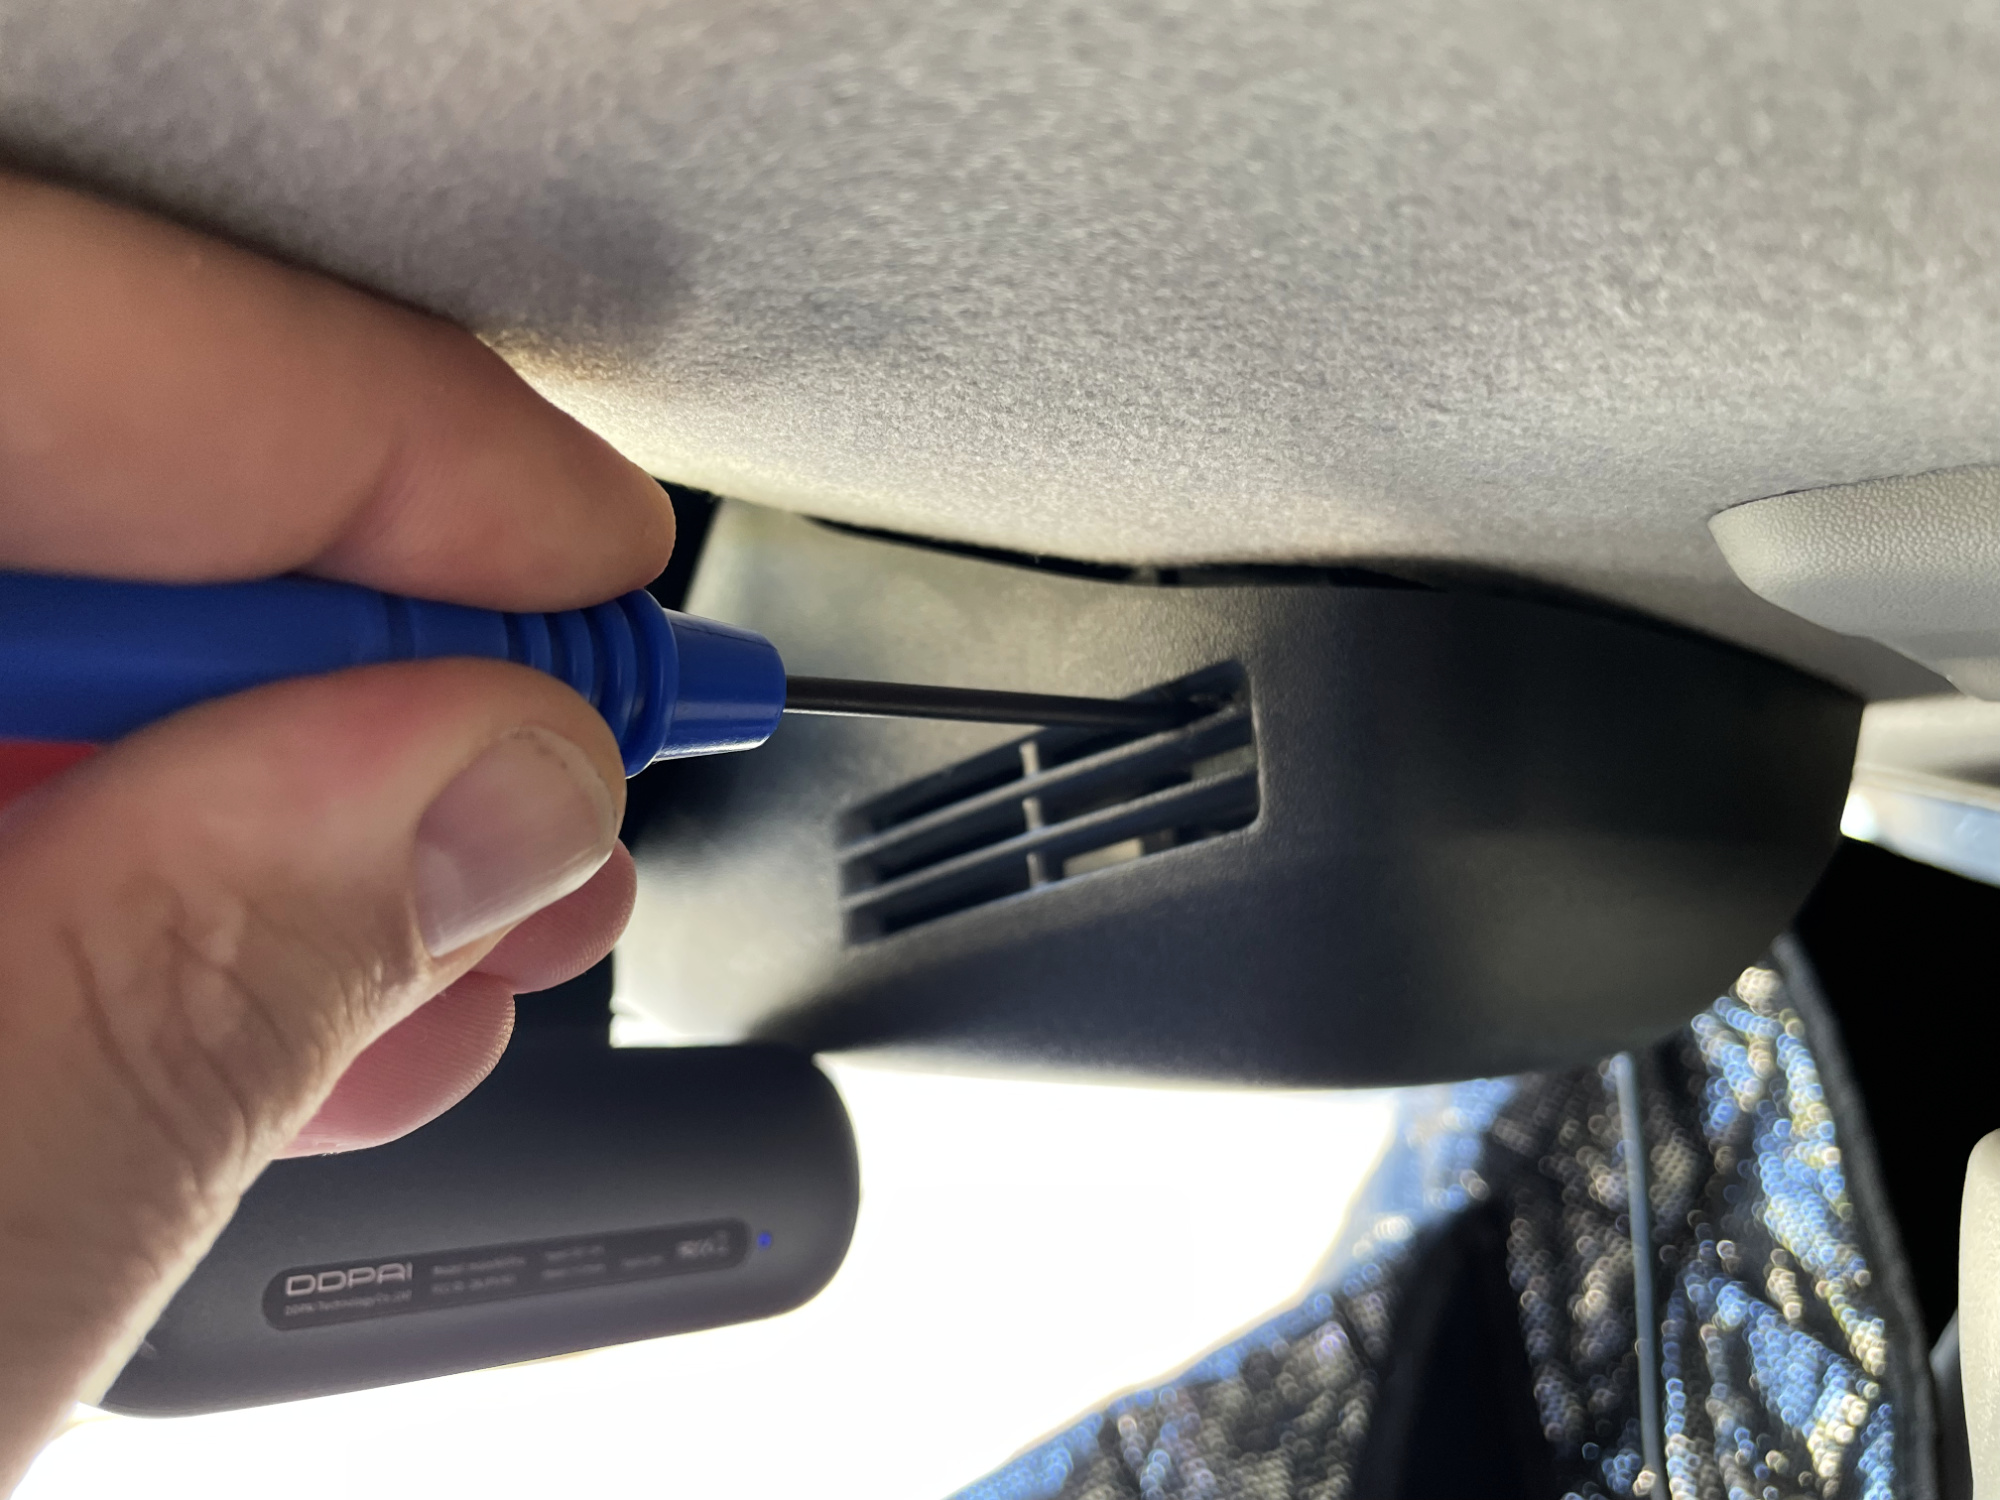
Remove the autonomous braking camera cover using a flat blade screwdriver to release clips.
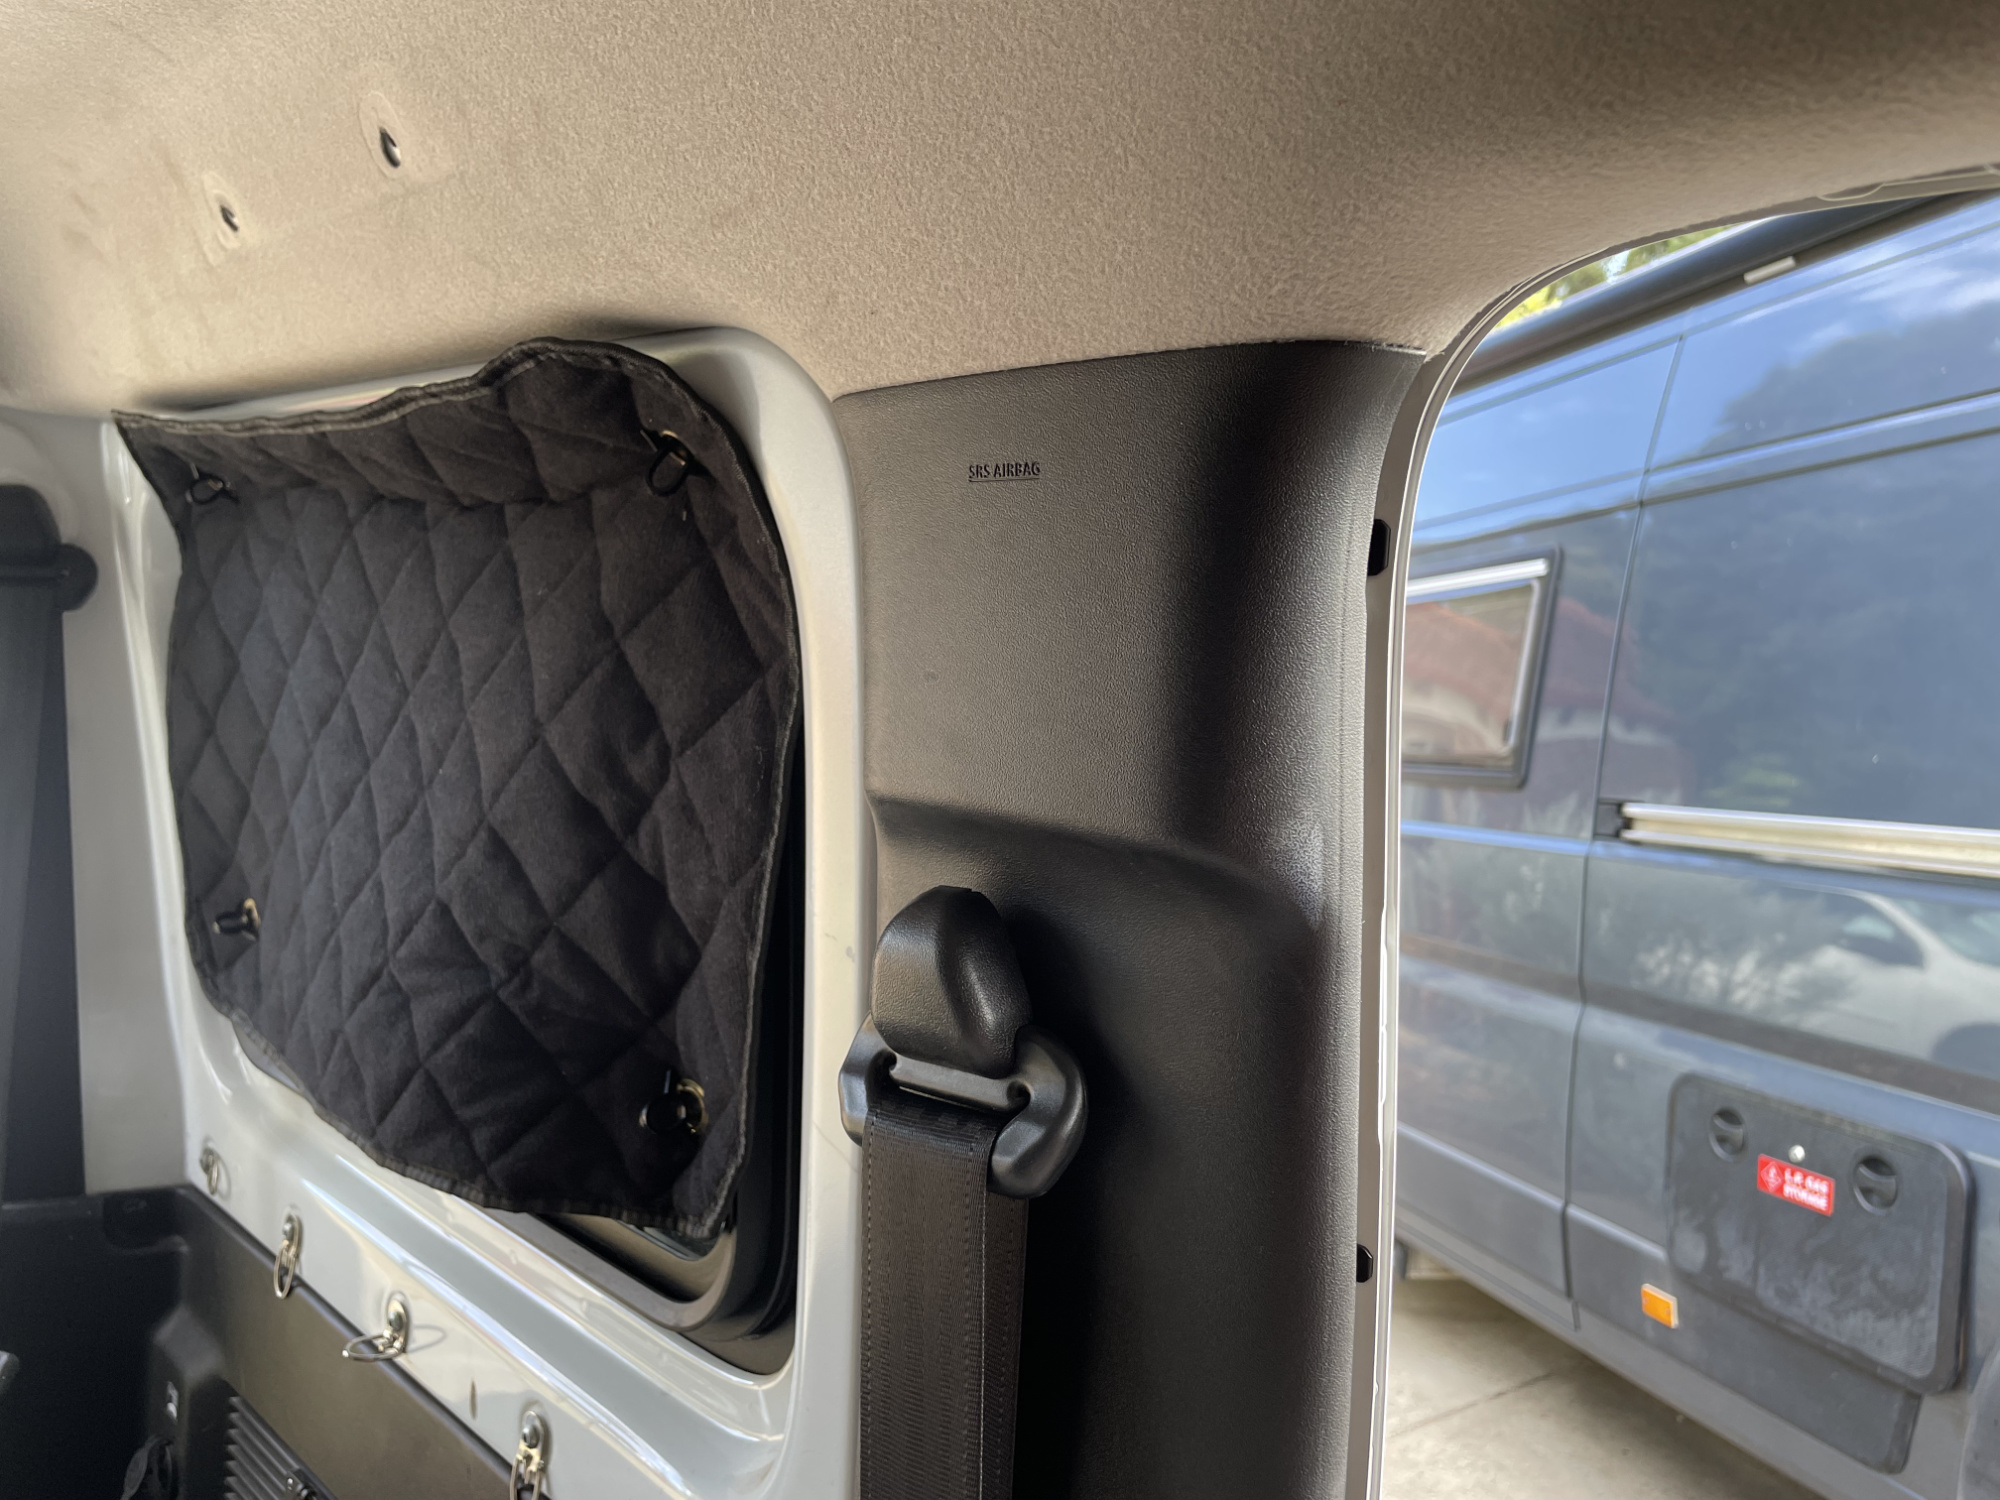
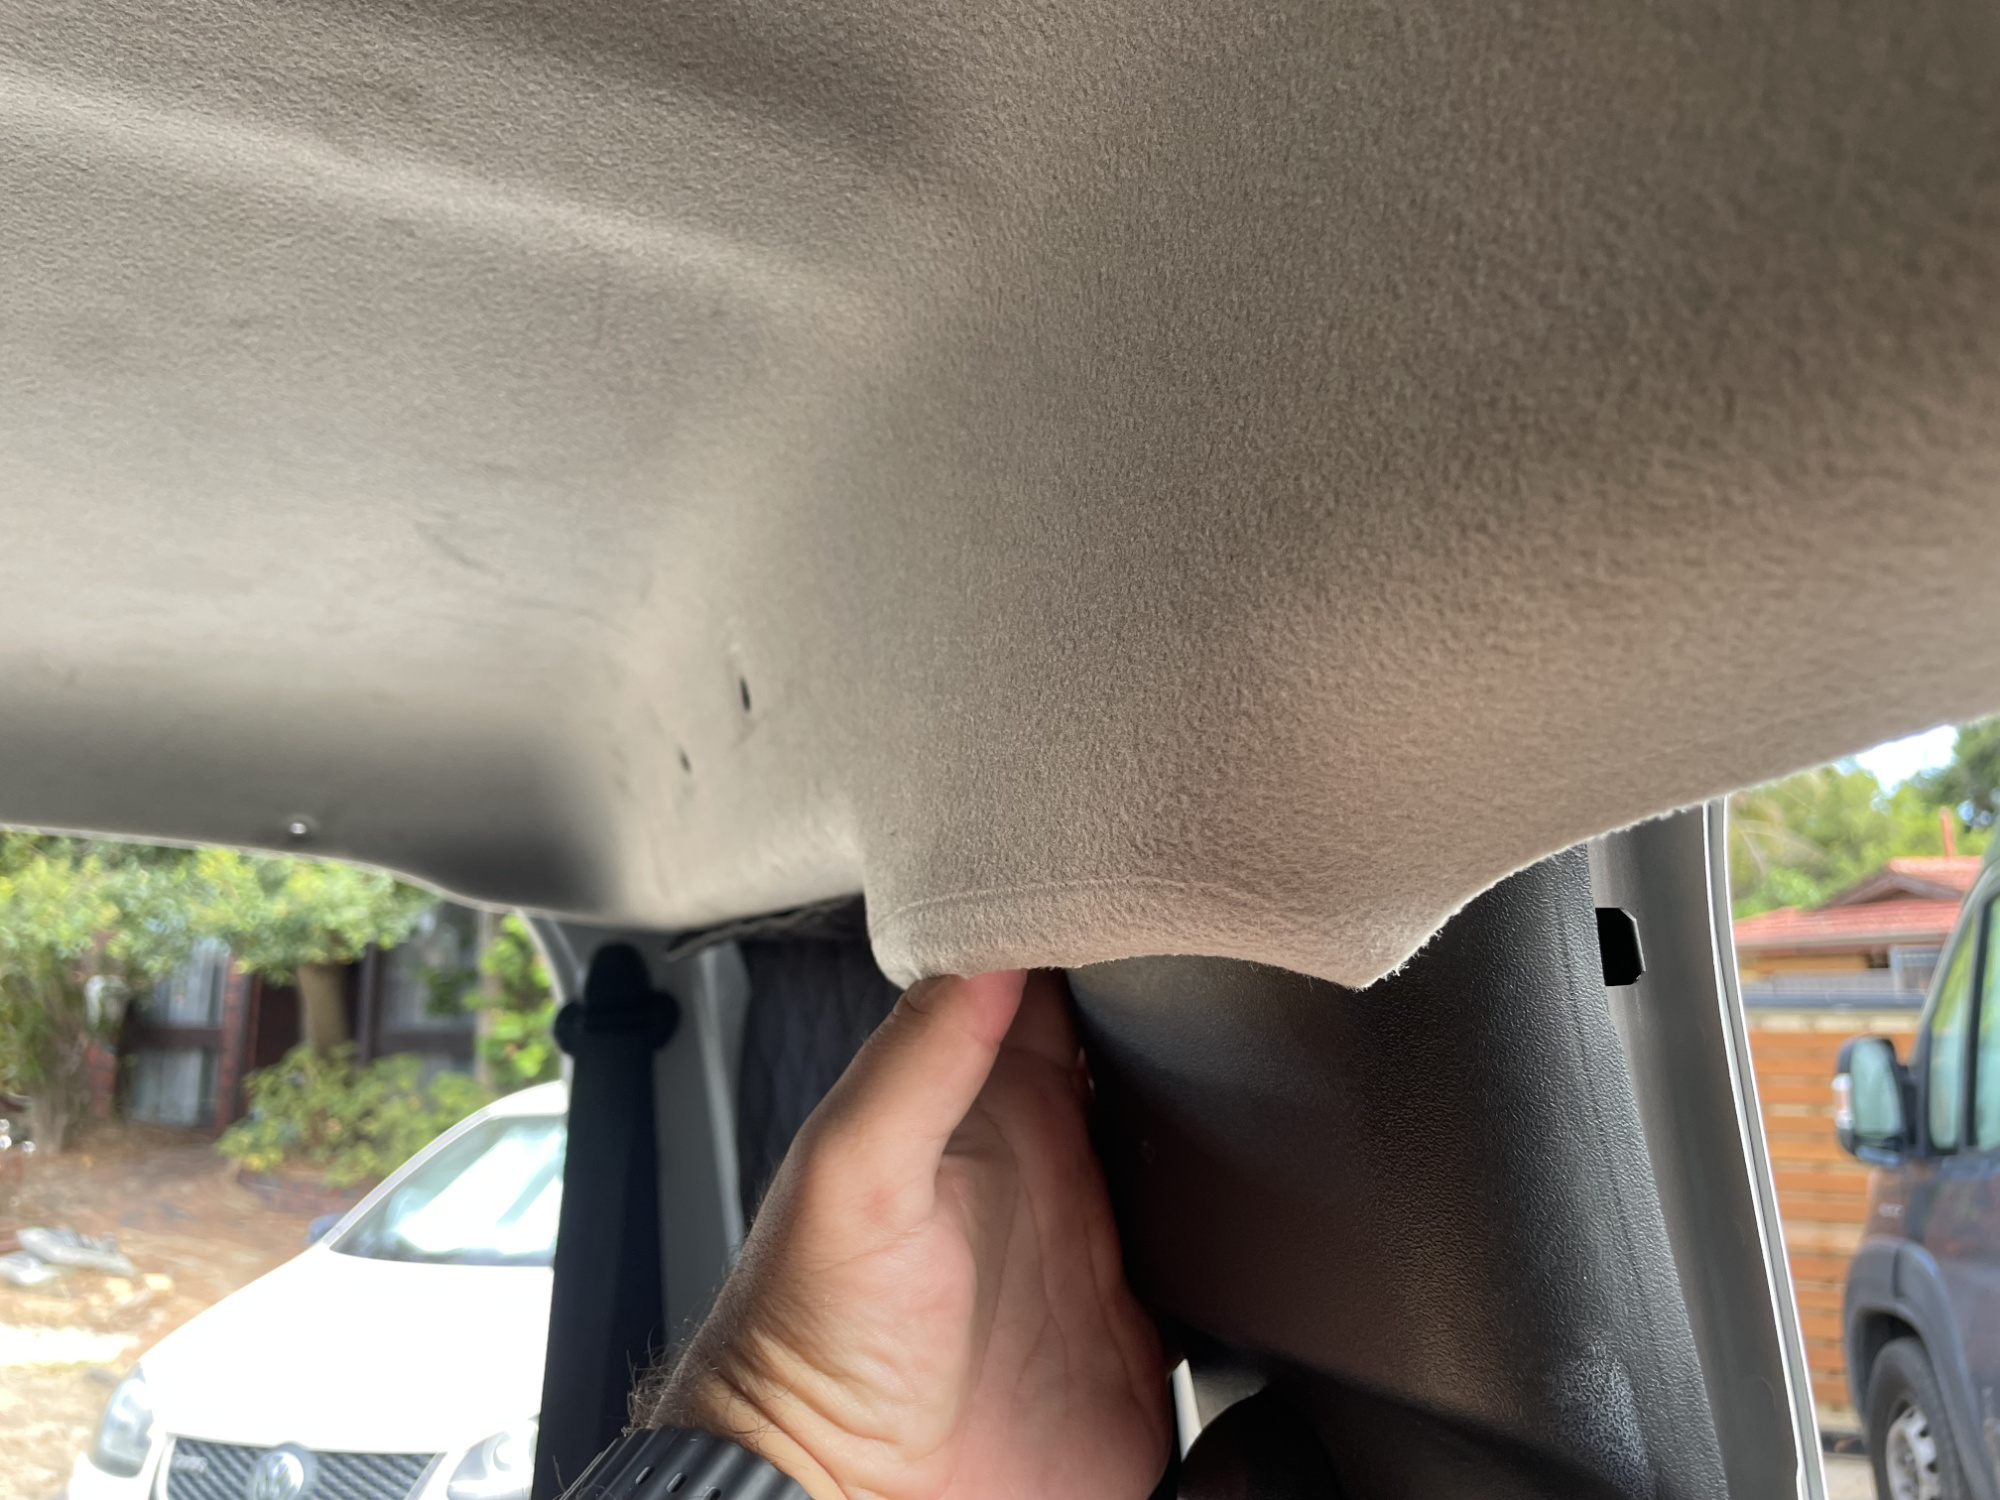
You need to also get the A and B pillar trims moved to release the headliner from behind them, plus also remove the pinchweld rubbers that act as door seals. The A-pillar trim is clipped in and the top and middle and you can tilt it towards the centre of the car to get it released.
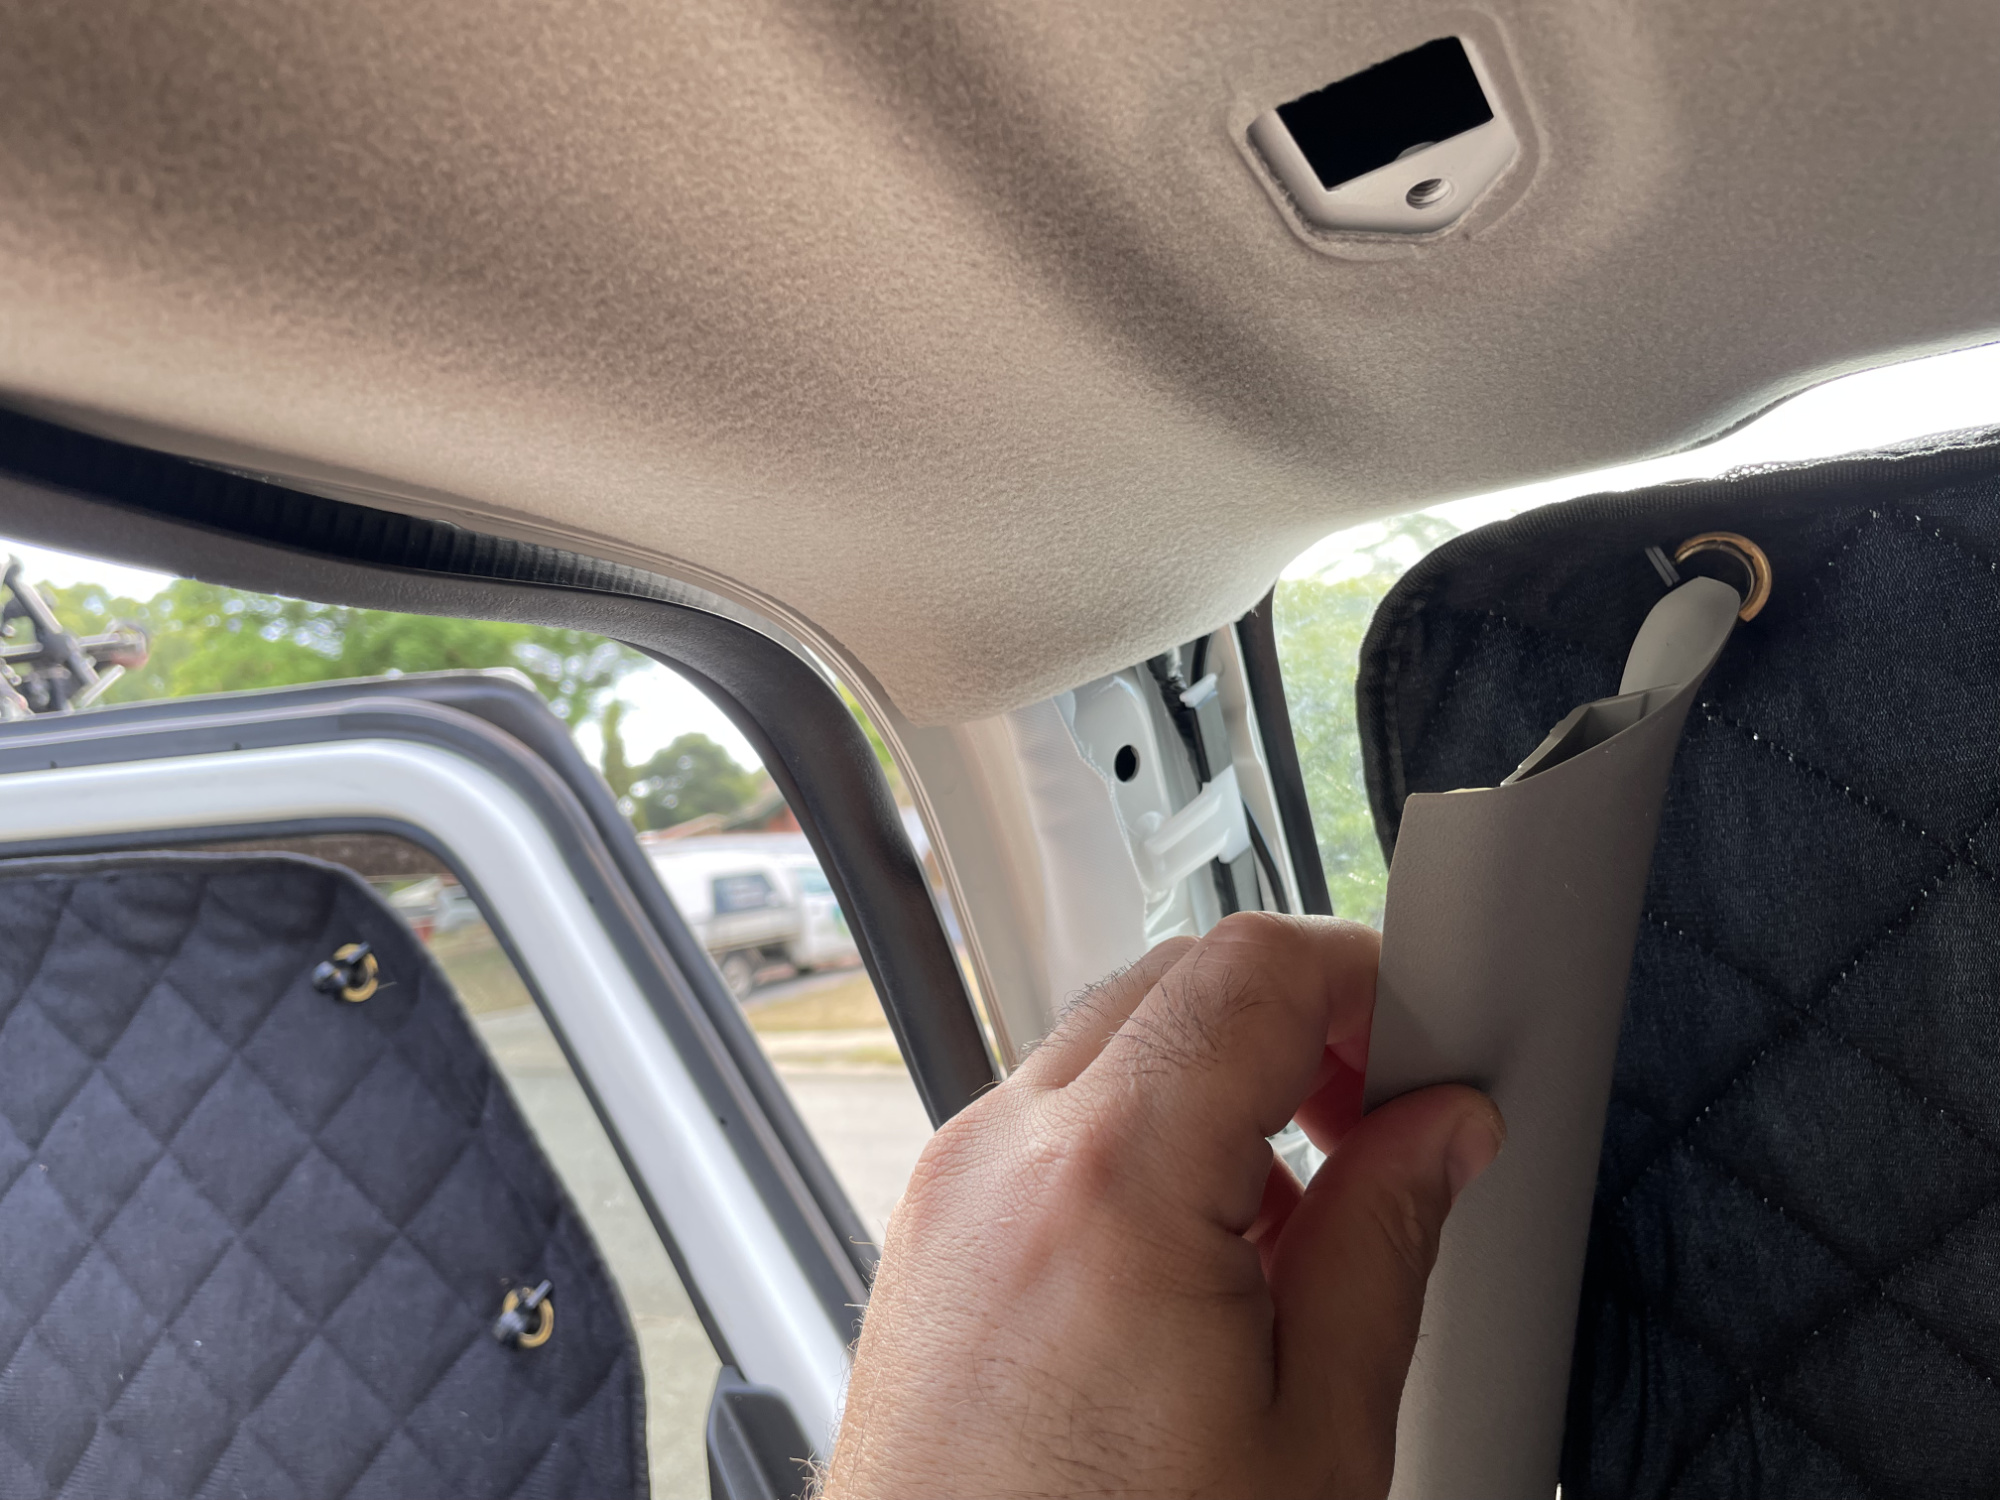
With the pinchweld rubber taken off, you’re also ready to do a bit of work on the B pillar trims.
Pull the top away (you can’t get it very far because of the seatbelt pivot/upper mount) but you’ll be able to release the headliner from the back of the B pillar.
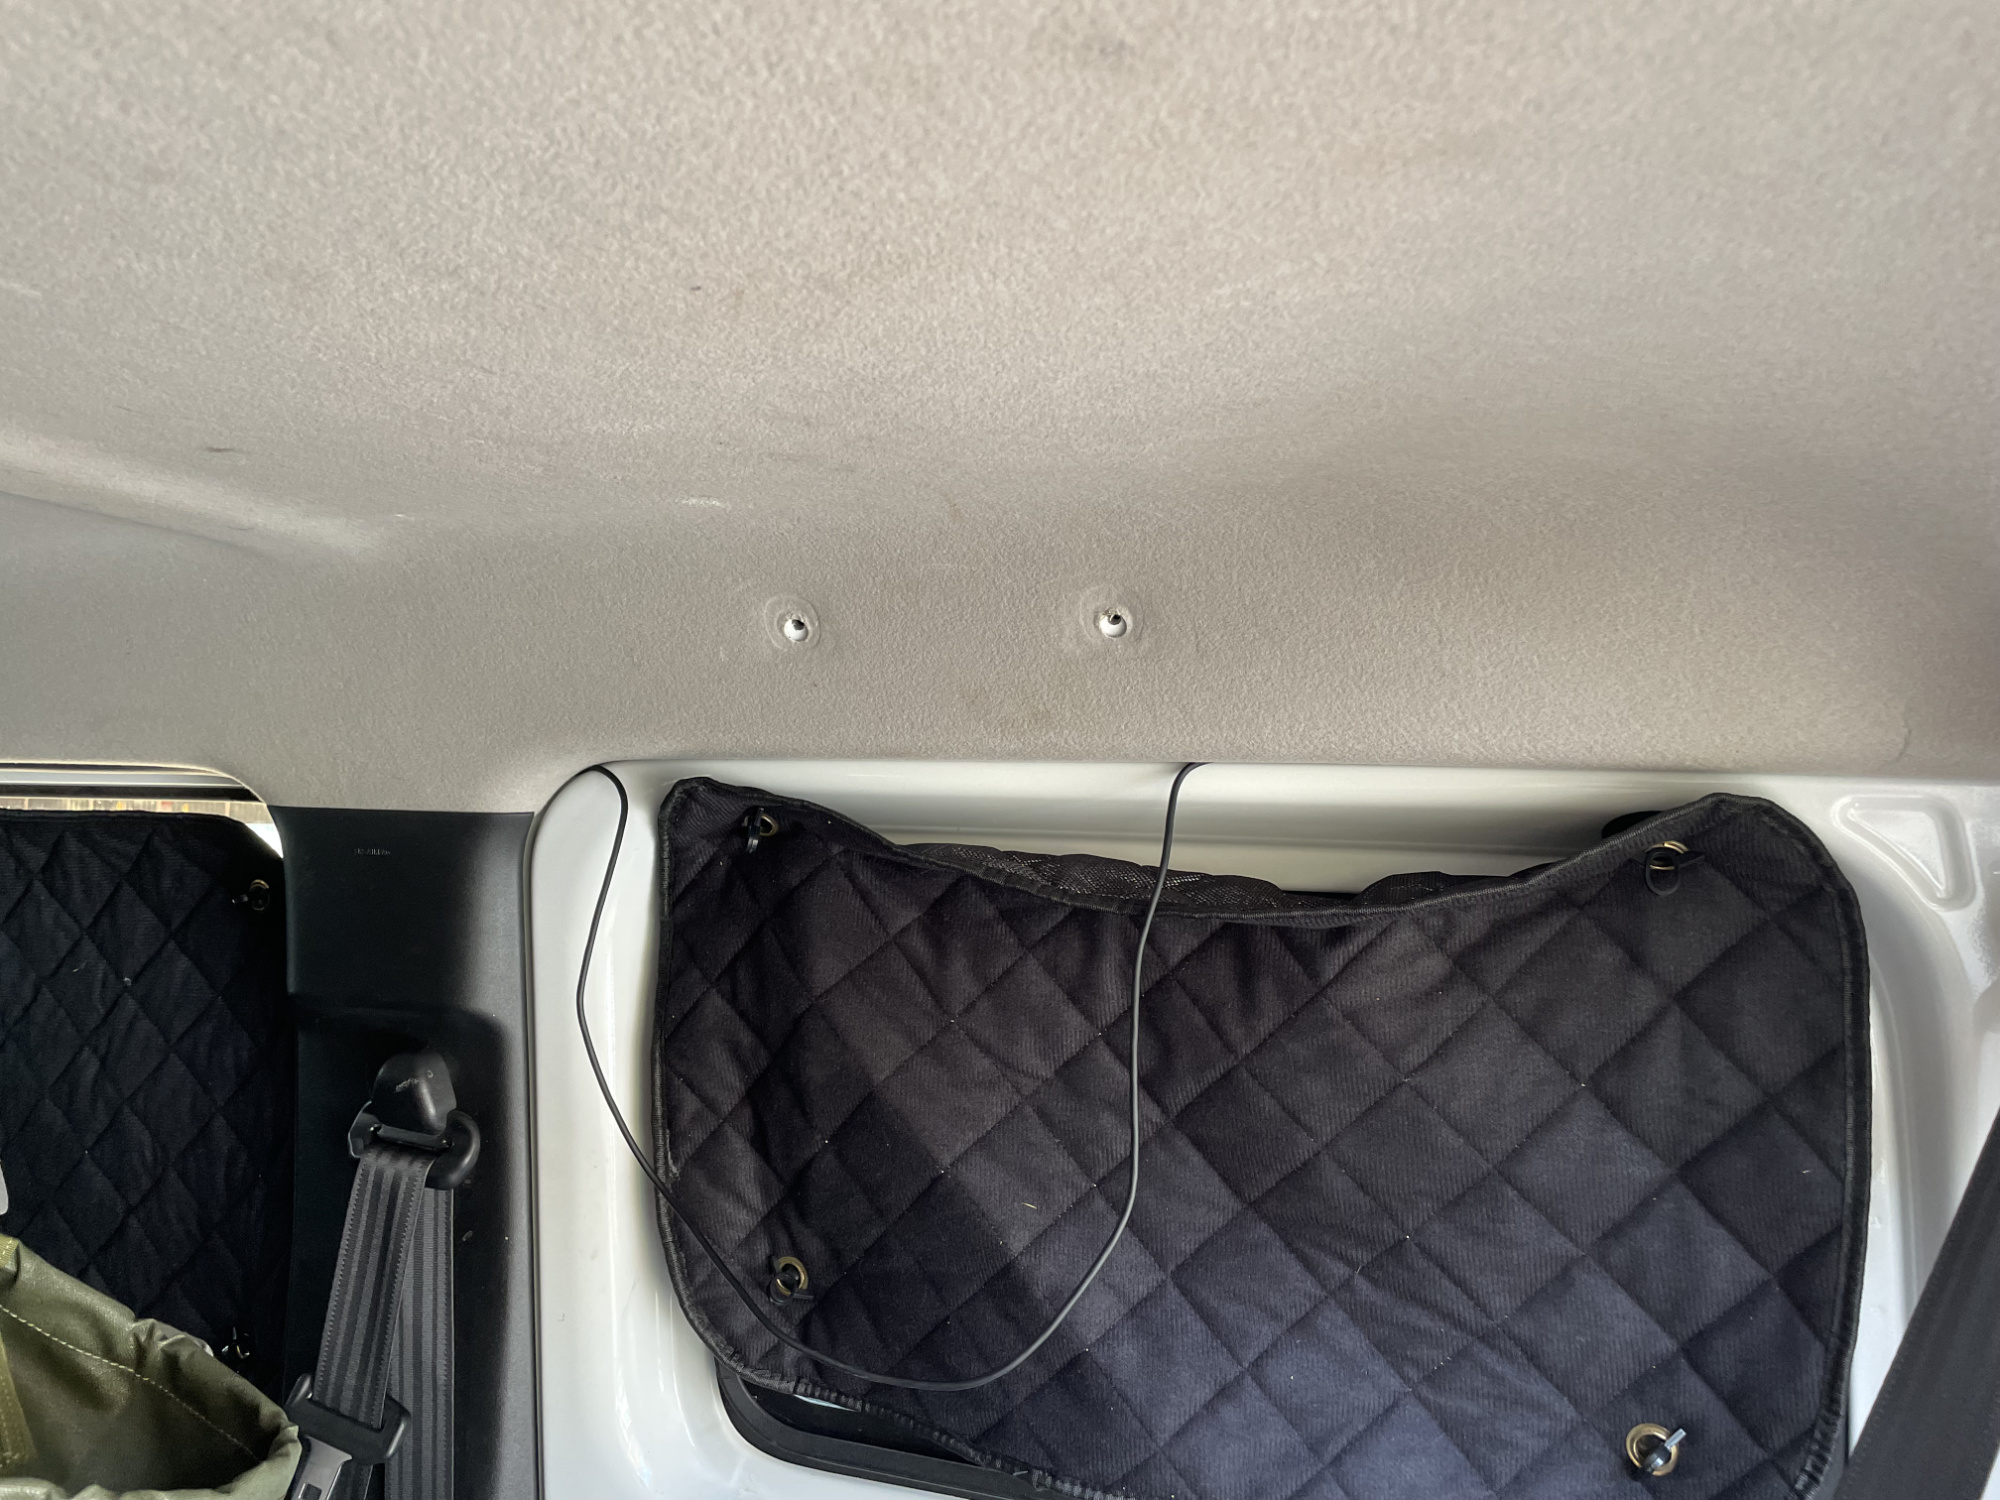
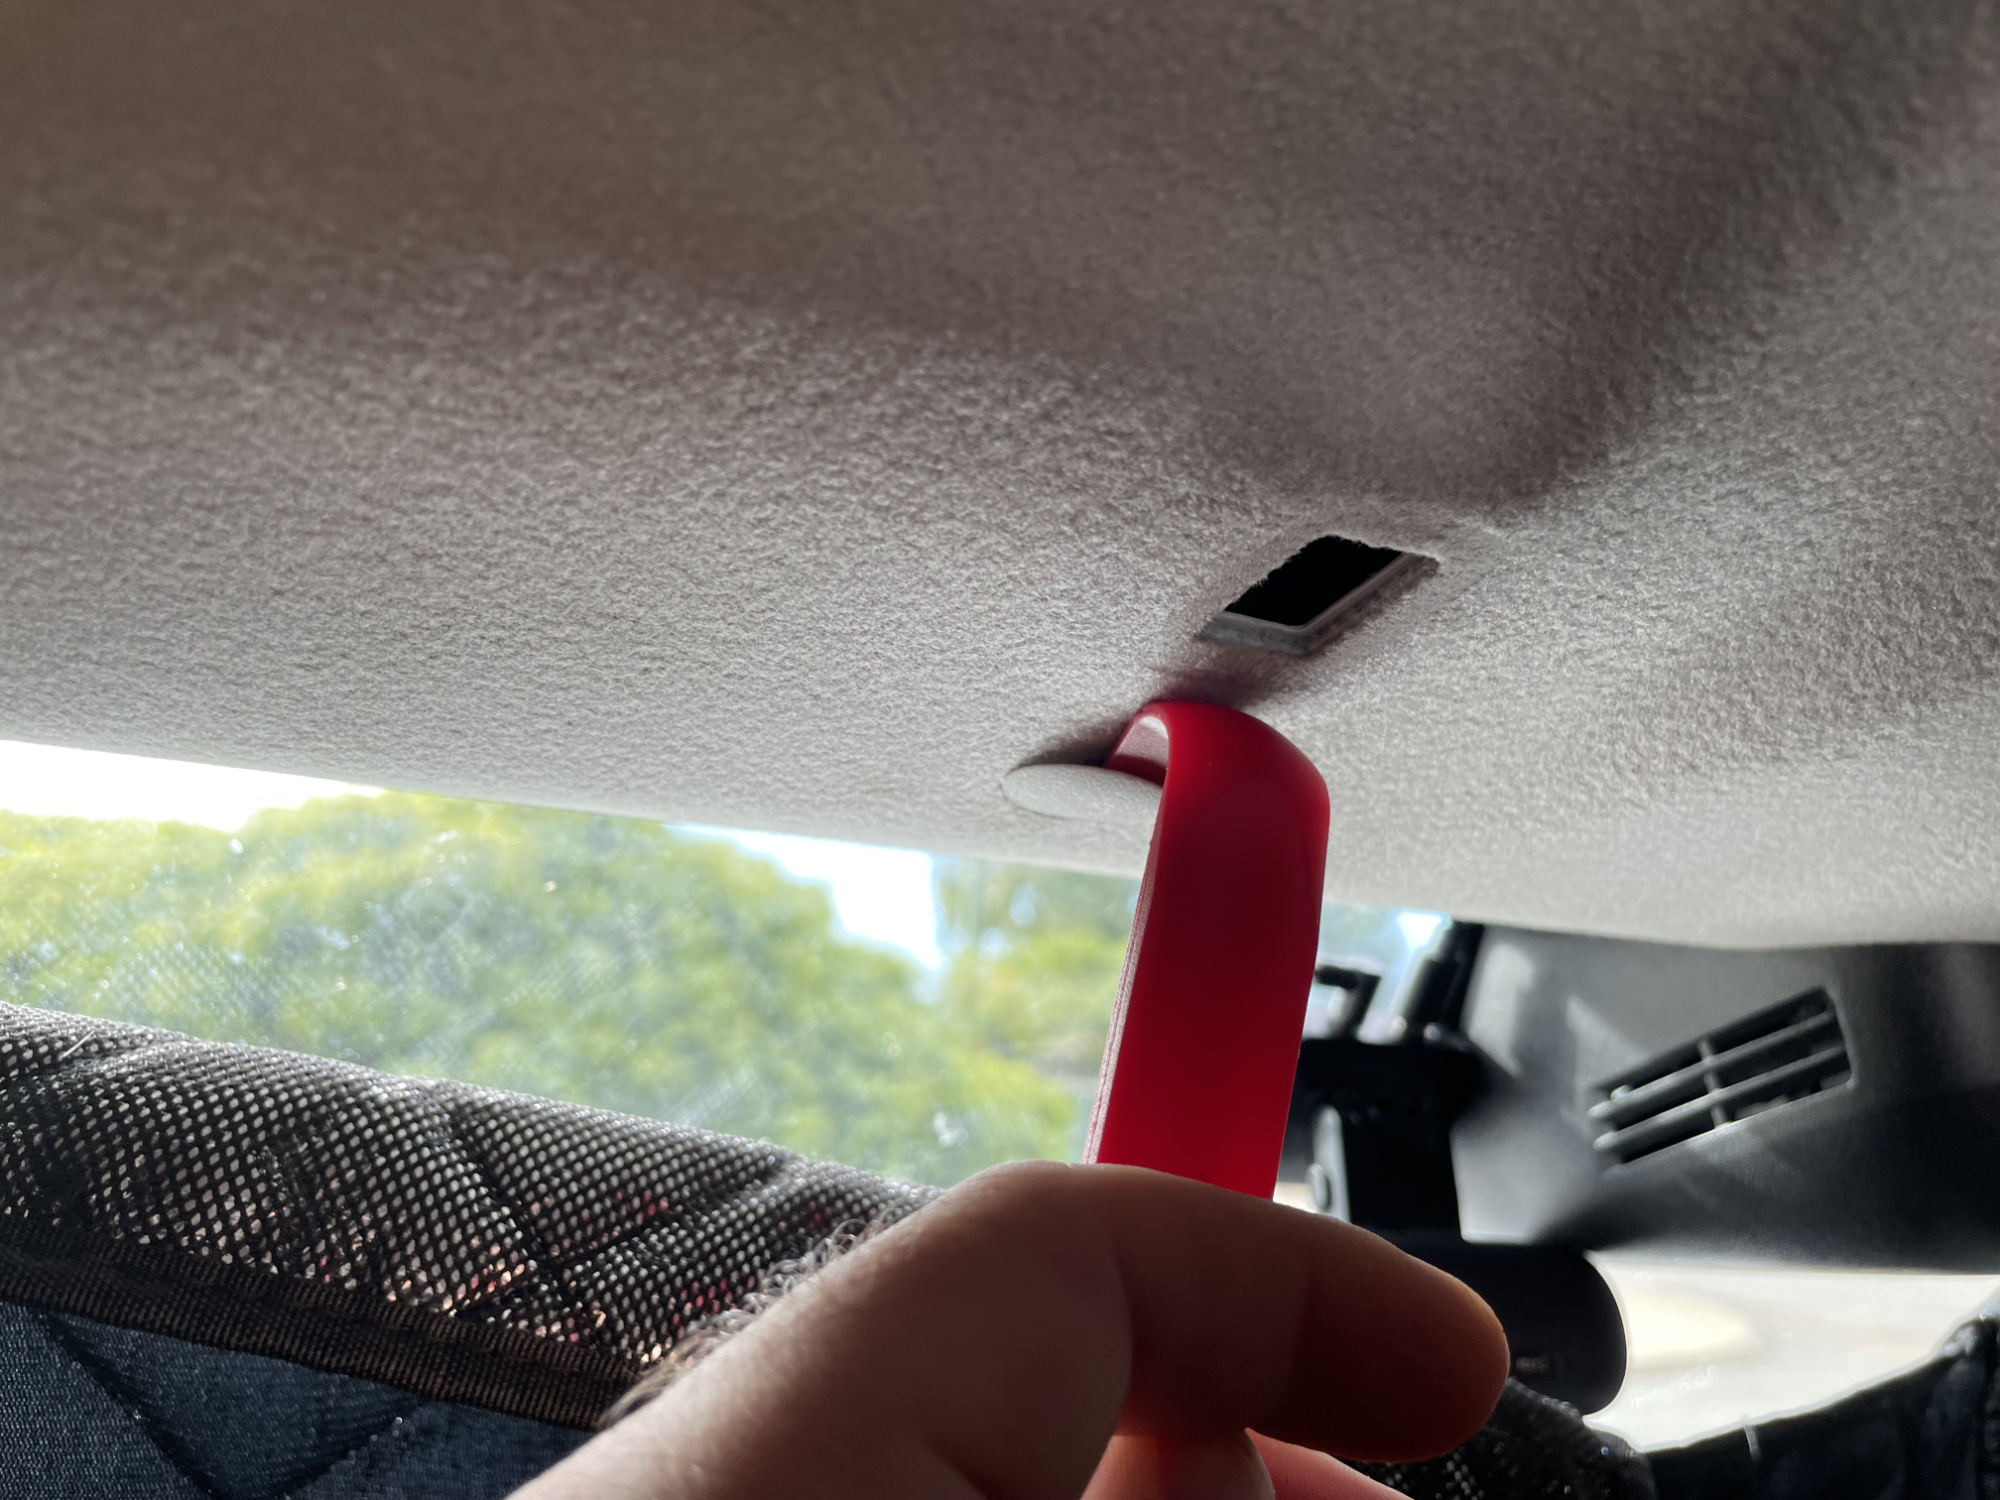
Remove front push-in clips that hold the headliner at the front.
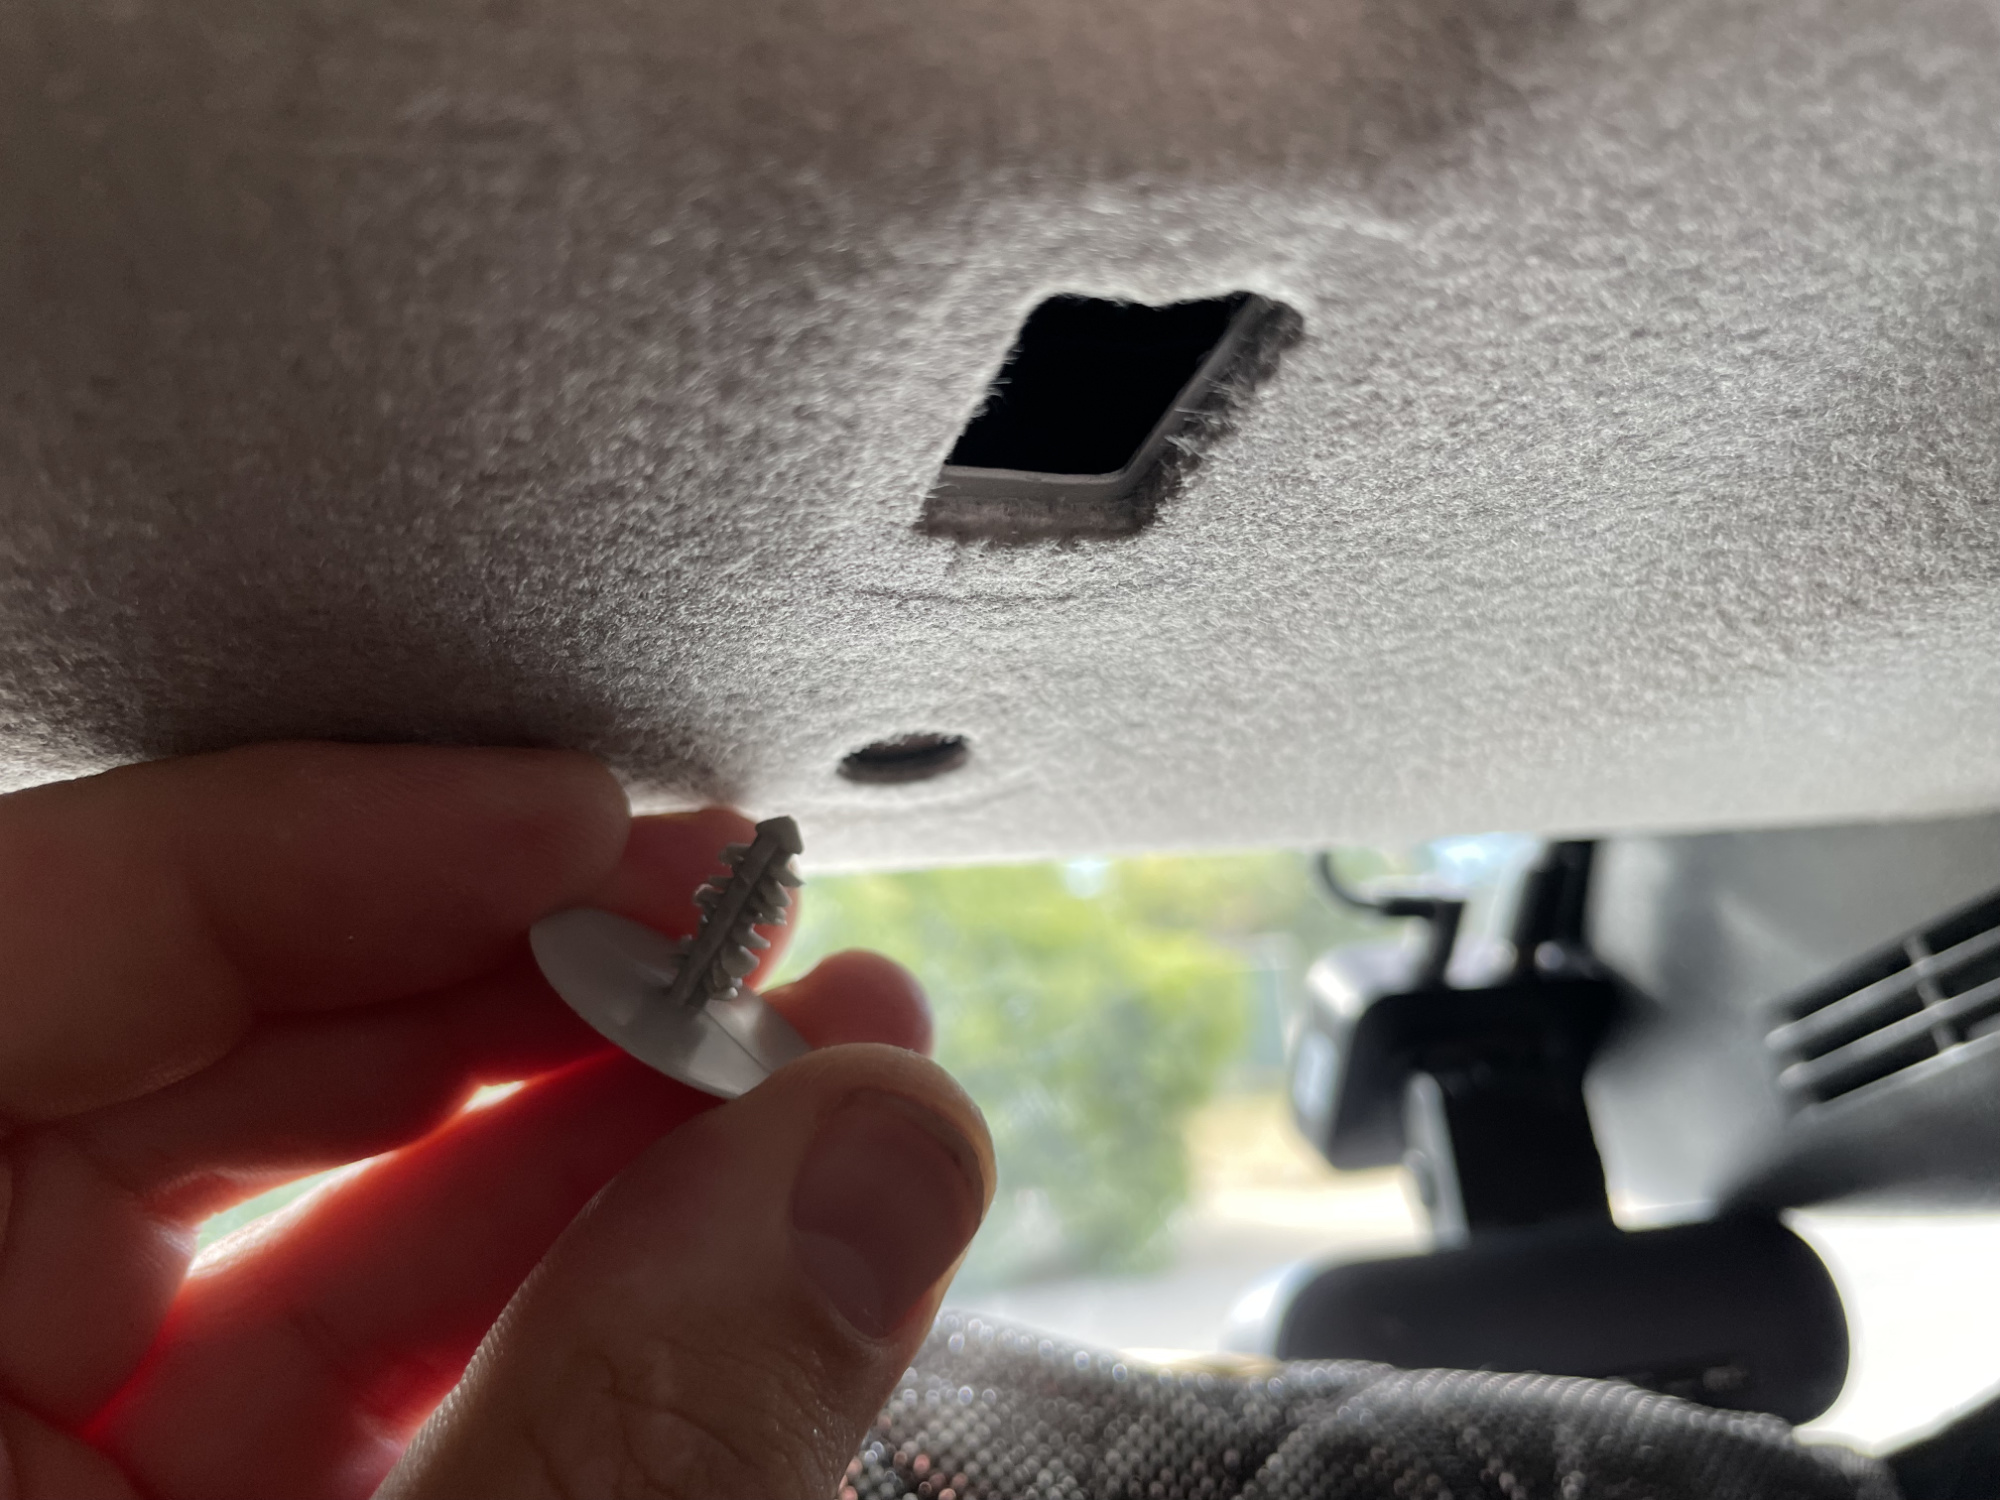
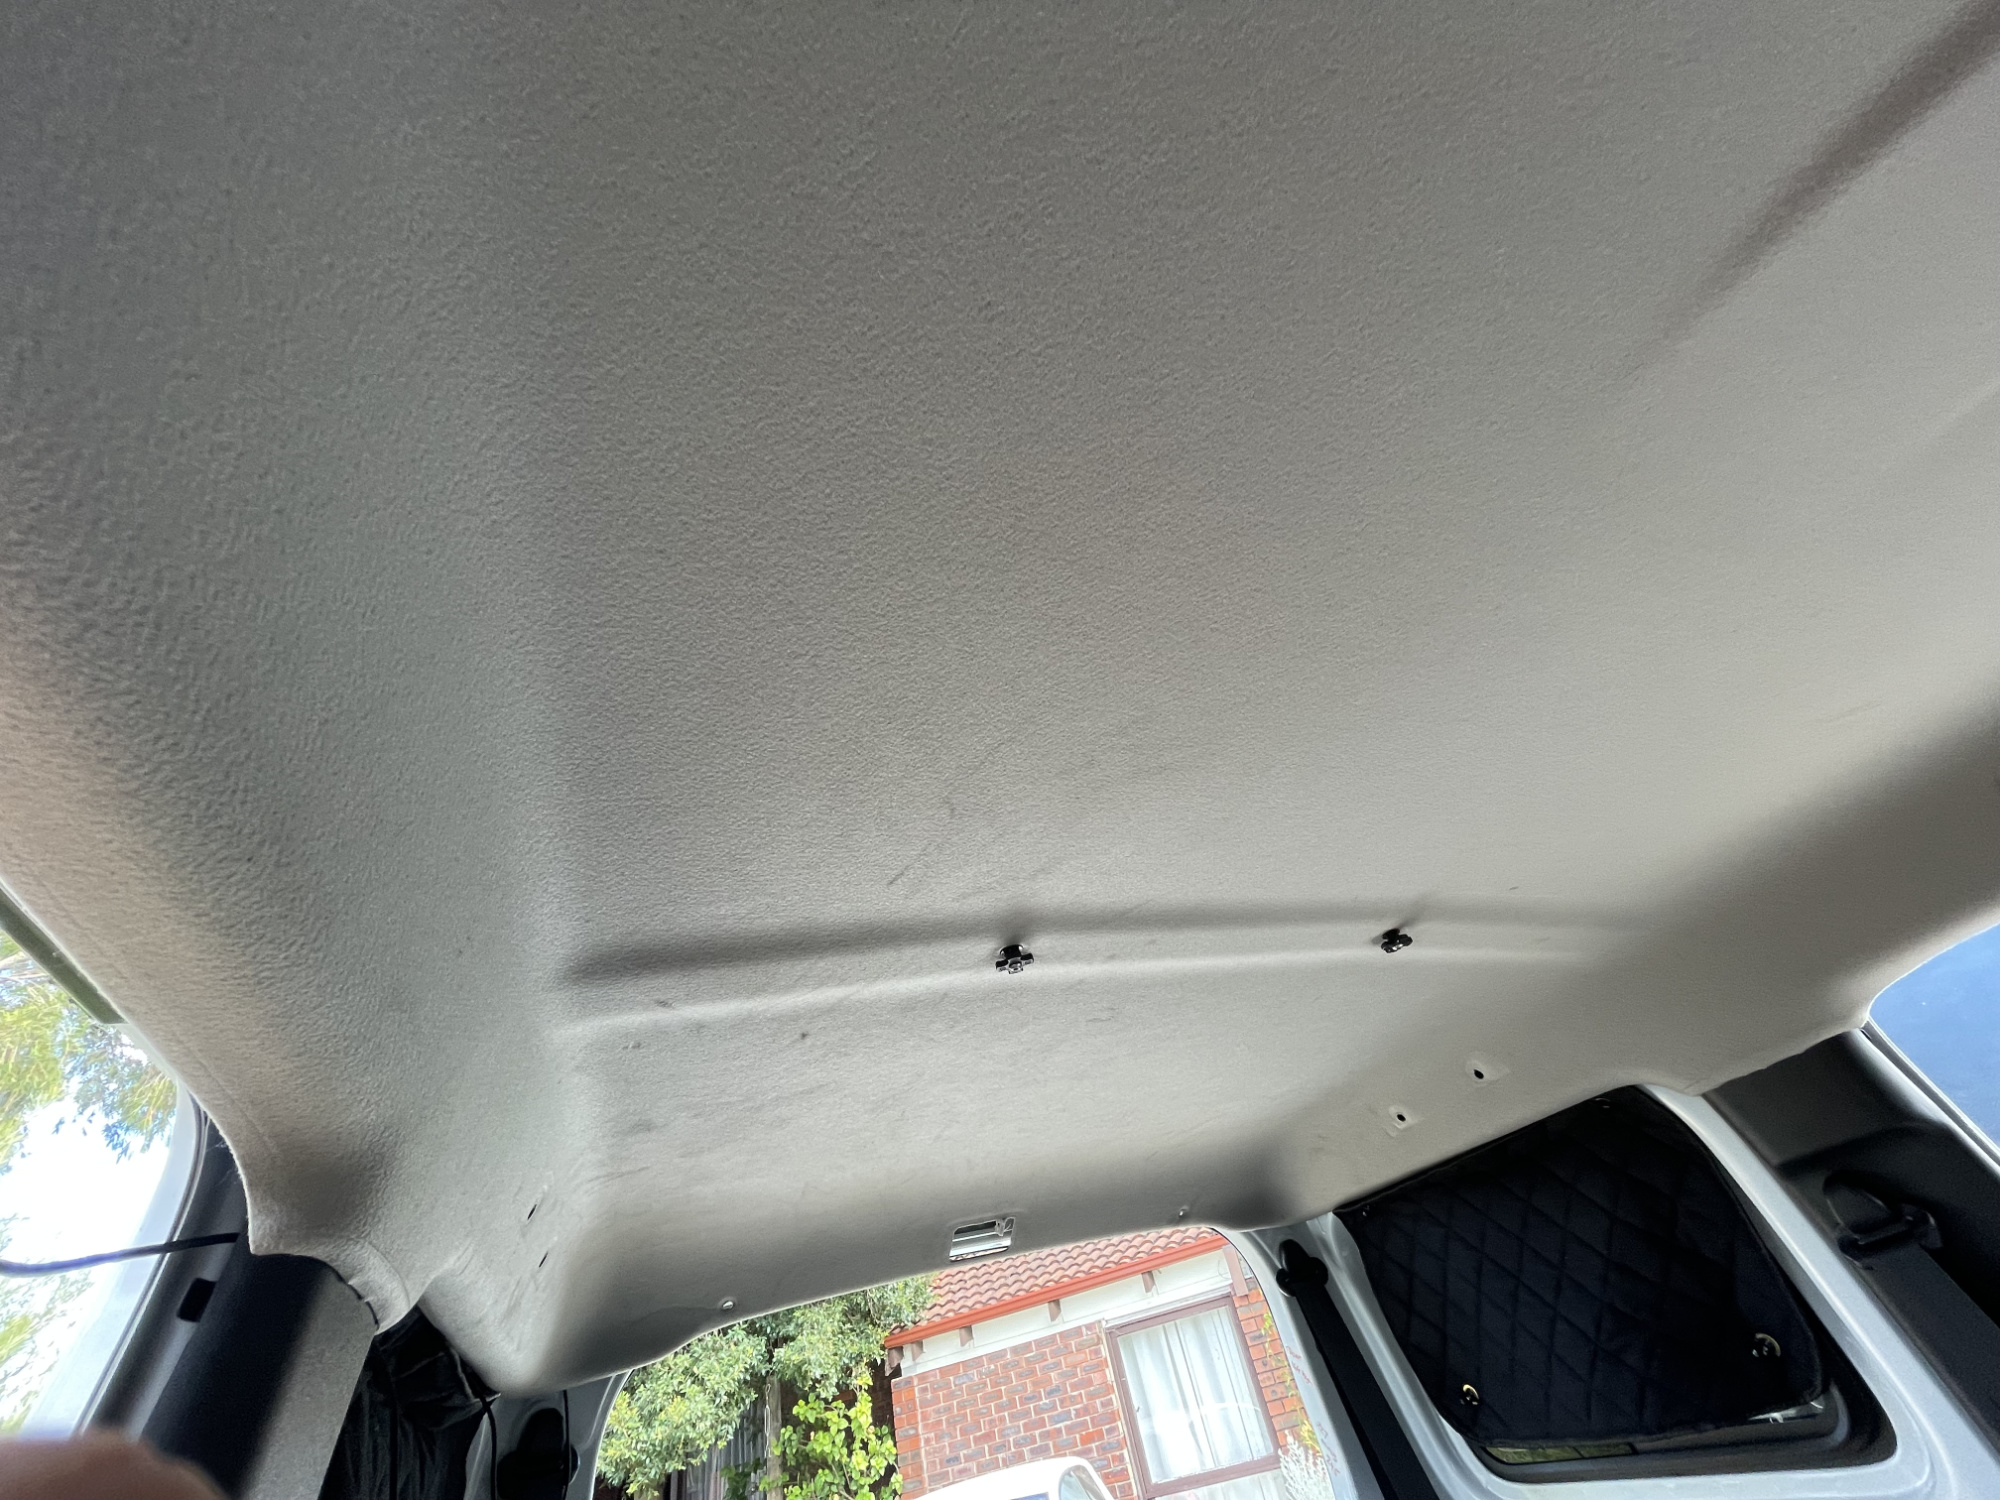
Now the only thing holding the headliner up is faith and the middle two push-in clips. Remove middle of the car push in clips (mine are already replaced with bolts for the roof hammock, so here’s an older photo; better to use a plastic trim tool but this is what I had to hand).

In my case, with the roof hammock, I have two bolts to remove here instead.

Do a final check front and rear that everything is ready to go.
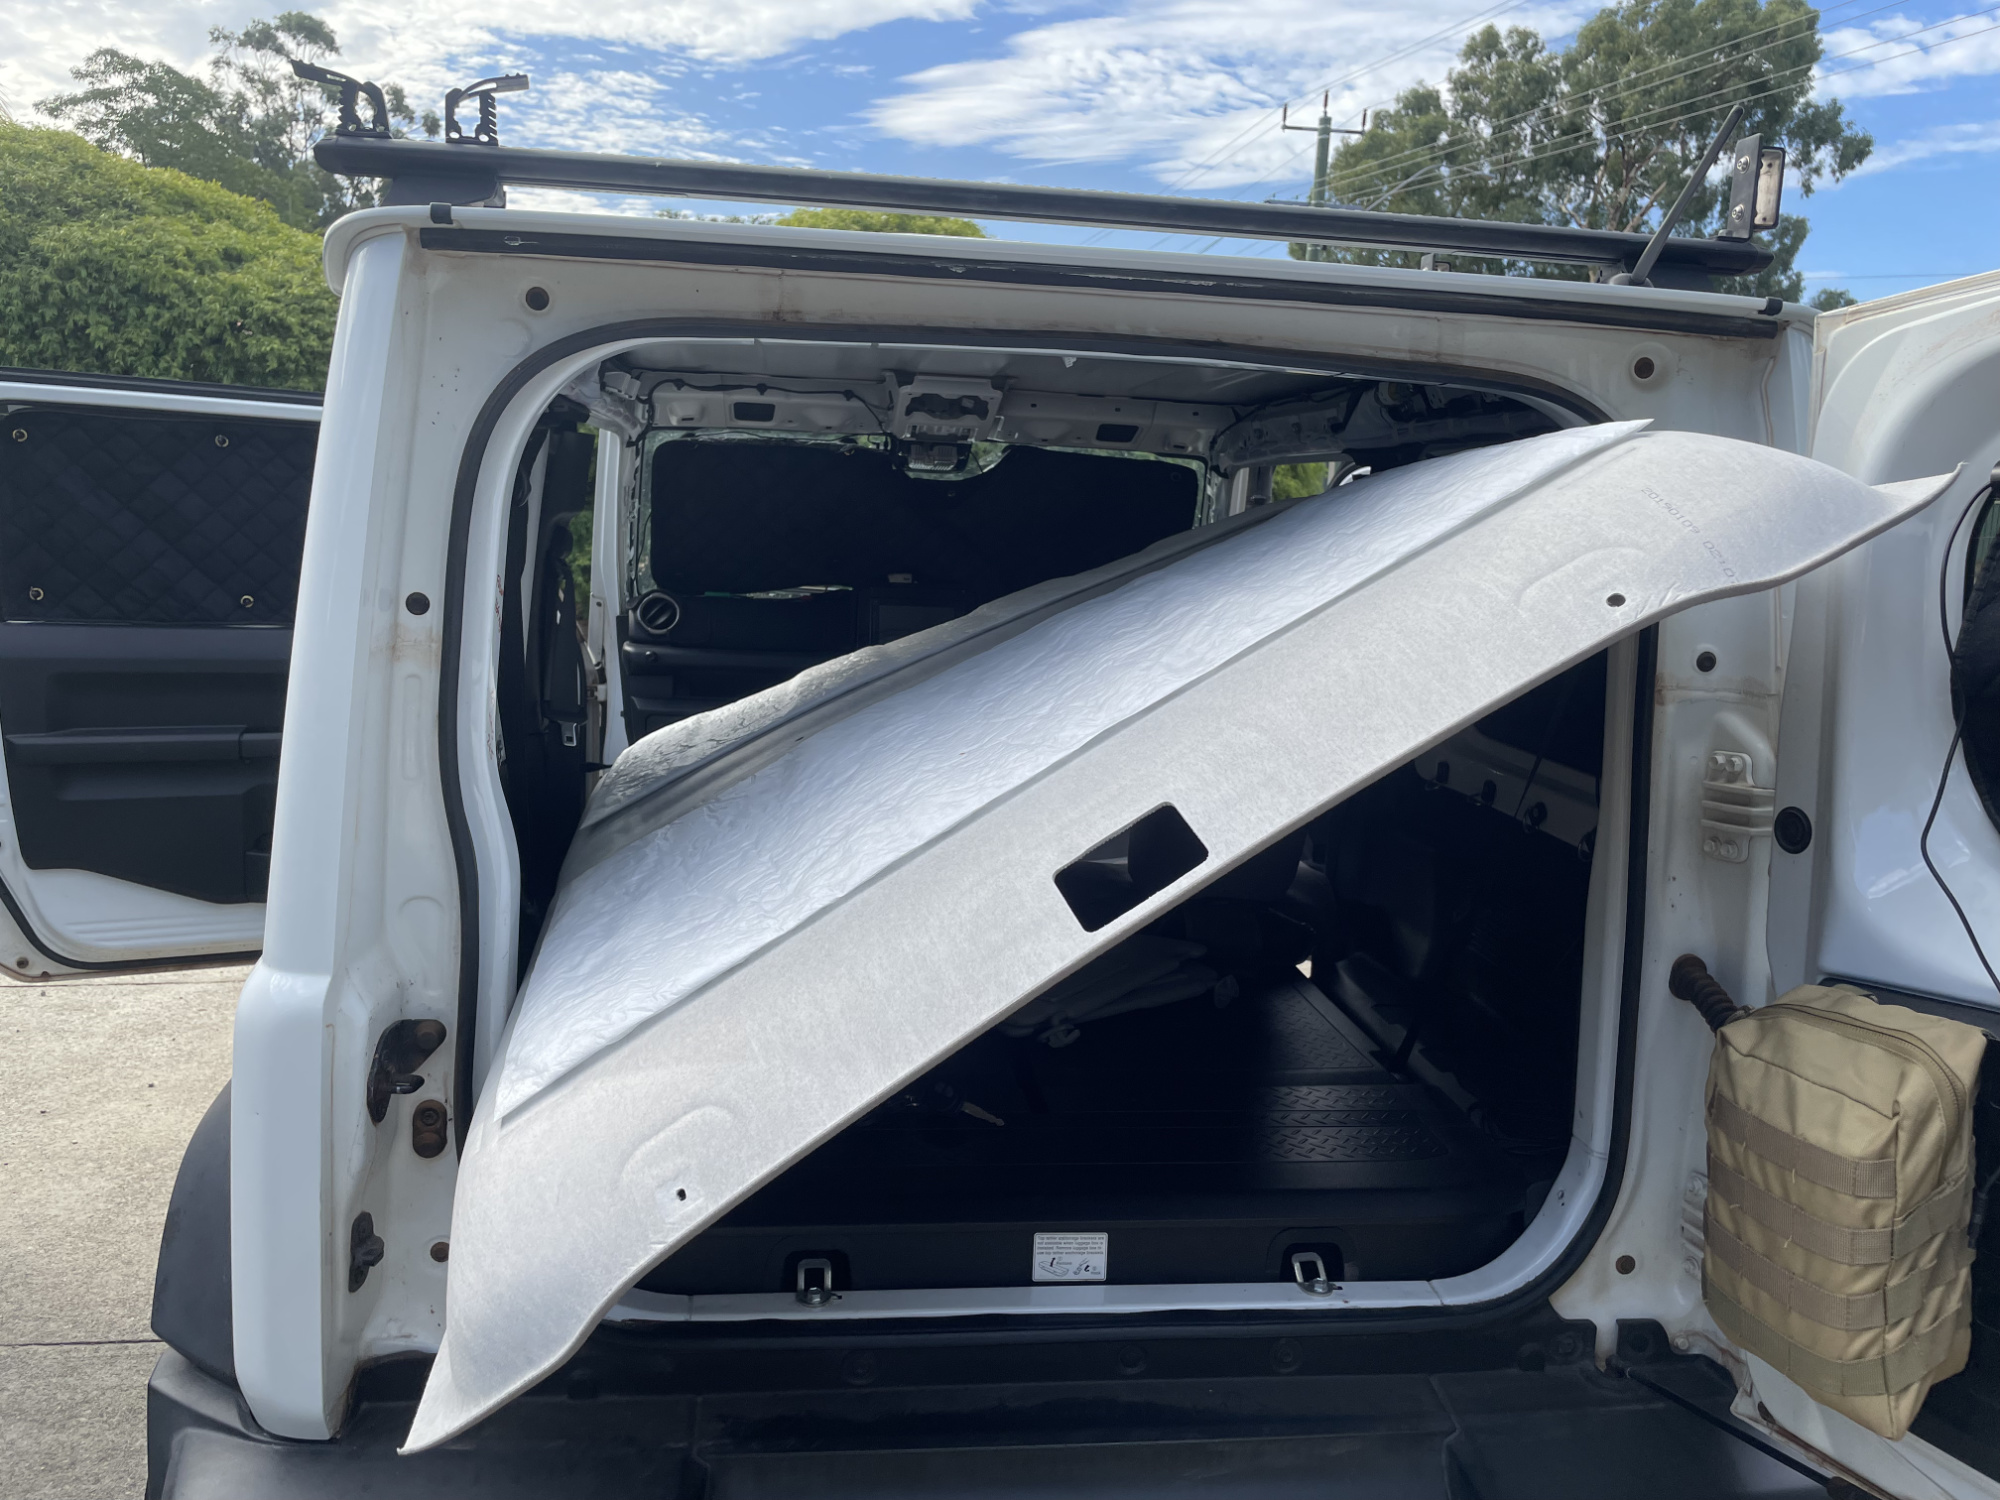
With any last retainers/clips/bolts/trim removed, you can then lower the headliner down. This is best done with the passengers side further down than the drivers side, as it gives you an easier time getting it out of the car without bending it (which will put marks into it).
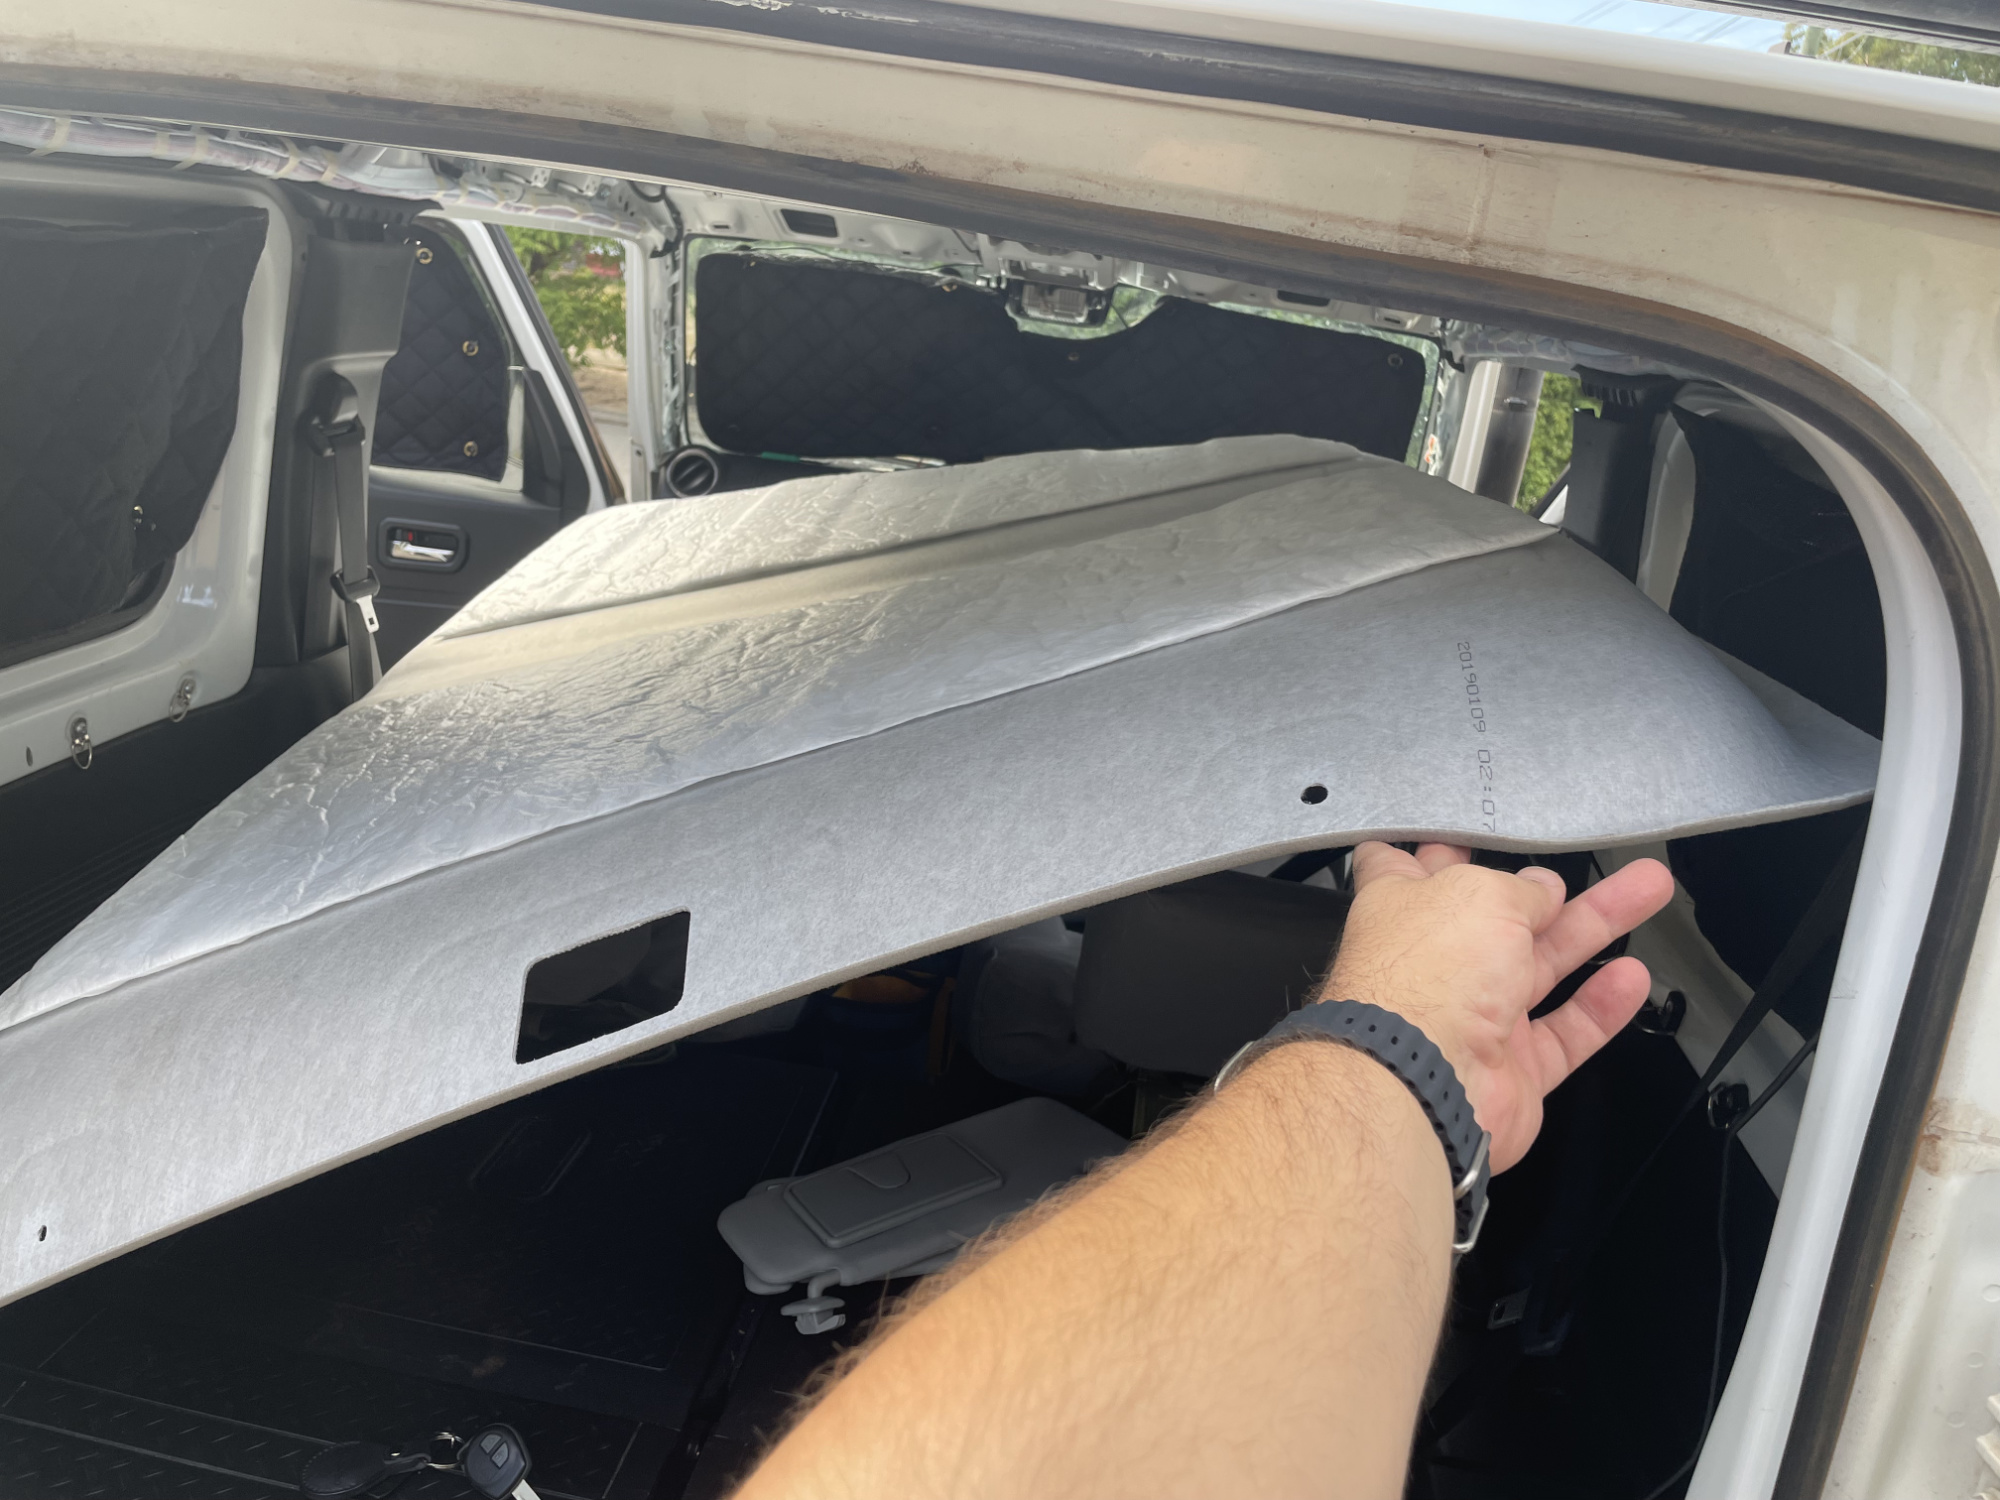
The headliner then comes out via the boot quite easily.
Refitting
Put it up, put in the push clips as appropriate
Sun visor clips push on and rotate
Sun visor screws torque to 3.5 Nm
Grab handle screws torque to 5.5 Nm
Mirror mount screws 5.5 Nm
Covers and trim on
Job done