
LED front indicators
With or without adding the DRL functionality: I show both here. I also go a bit into depth in the wiring to make sure people understand what’s involved.
Sections
To be completed once I complete the article, but this stub is so I’ve got some info written anyway.
Introduction
I’m writing an introduction here as I think a lot of people might not get why I’m going to the extra detail around wiring and things. “Surely you can just buy premade ones with the right wiring, right?”
The sad reality is that basically all of the premade wiring or ‘direct fit wiring harness’ Jimny accessories don’t. I’m not sure if it is down to poor specifications by the people commissioning them, people not really understanding what’s needed or even just a lack of care and QA/QC. Ultimately, you can spend big money on supposed ‘name’ brand Jimny LED lights and they will still produce issues e.g. high speed flashing indicators
What exactly is this fast flashing/hyper flashing when you fit LED indicators anyway?
I think a lot of people misunderstand this or don’t even appreciate that it’s a thing. Well, it is.
I can’t speak for the rest of the world, but in Australia (and anywhere where UN Regulation 48 is used to specify vehicle lgihting) it is a requirement that indicators do something different like fast flash when they detect there is a bulb out. This replicates the behaviour of oldschool mechanical flasher relays (which produce the clicking sound: also required to be produced when you indicator under the ADRs).
Operating tell-tale mandatory for direction-indicator lamps of categories 1, 1a, 1b, 2a and 2b. It may be visual or auditory or both. If it is visual, it shall be a flashing light which, at least in the event of the malfunction of any of these direction-indicator lamps, is either extinguished, or remains alight without flashing, or shows a marked change of frequency. If it is entirely auditory it shall be clearly audible and shall show a marked change of frequency, at least in the event of the malfunction of any of these direction-indicator lamps.
ADR13/00 – section UN Reg 48 – part 6.5.8 (emphasis added by me)
The actual requirement for ‘normal’ flashing is to flash between once and twice a second i.e. 60 to 120 flashes per minute:
The light shall be a flashing light flashing 90 ± 30 times per minute.
ADR13/00 – section UN Reg 48 – part 6.5.9
Anything faster (or slower) than that is noncompliant.
Why it happens is because the flashing system (inside the body control module, BCM) looks at the power consumption on the indicator circuit. If there is insufficient power drawn then the system assumes that an indicator bulb has brown. The problem is that LED indicators draw less power than incandescant bulbs used for the factory indicators on the Jimny, so the car thinks an LED has blown.
The solution are load resistors, and I’ll take you through how they are wired up shortly. They essentially draw extra power to make up for the LEDs and the car thinks everything is ok.
In older vehicles (and especially motorcycles) people would fit ‘solid state’ or LED compatible flasher relays. These themselves are noncompliant (since a blown globe won’t change the flashing rate) but they do solve the issue of fast flashing with LEDs without using load resistors. On the generation 4 Jimny, however, there is no flasher relay as it is built into the functionality of the BCM. This means you need load resistors added to the circuit to make it still function correctly.
Where to buy/what to look for
This is one of the huge profit centres for a lot of Jimny parts suppliers. One-stop shops make good money on these indicators (and in fact other LED lights) bought in bulk out of China (or even made just-in-time for them & shipped to their warehouse then to you after an order). I don’t want to name particular suppliers or even brands, however, paying $160 for a clear lens LED front indicator pair with DRL functionality is a lot of profit when you can buy the same thing through aliexpress for $50-$60 and you have about the same guarantee of the wiring actually working.
…and I know this because I did exactly that: bought the same thing off ol’ aliexpress and they’re identical to the $160 pair a friend bought and got me to help install.
So, where to buy?
- If you’re doing a big bulk purchase at an all-in-one shop and/or they have a deep sale then maybe it’s worth buying from them
- If not, buy direct off aliexpress. Yes, it feels riskier and you’re more guaranteed to have to do some work to make them work, but the quality will be the same and the $100 you save buys you all of the tools and connectors to do this more properly than the ‘premade’ ones.
You will have to put in about 15 minutes work as aliexpress search sucks and prices vary a huge amount. Only ever look at what it’ll end up costing you delivered (and account for GST in that pricing, so add 10% to the initial search display amount). If you pay via paypal or similar means you also have strong buyer protection in case it doesn’t turn up you can get a refund.
In terms of what to look for, it does depend what you’re after. I think smoked ones are a bad idea as they can be more of a cop magnet but also why make your indicators harder to see & risk an accident? If you want to add a DRL functionality to the front indicators then obviously you need to find ones with that function added. It’s also easiest if they come with load resistors already provided, even if not wired in, purely to save you buying them. That said, load resistors can be bought cheaply but it’s easier if you don’t have to separately source them (it’s just not impossible to do so).
Is this a legal change?
Most LED indicators are not ‘E-marked’ which is the key requirement for ensuring legality.
Is this something a police officer will pick you up for? Almost certainly not, unless they really have it in for you. This is especially true if the indicators are otherwise bright enough and visible enough from a distance and to the side. Without going into measuring the brightness of indicator lights in Australia, most LEDs will be fine & modern style LEDs are broad enough beam that they will be visible everywhere needed. Where you run a slight additional risk is with smoked or tinted lenses, as they are harder to see which can also be something that gets you pulled over.
You are more likely to get picked up for non E-marked lights with roadworthy inspections or at something like a NSW blue slip inspection. Again this depends entirely on the level of detail that the examiner wants to go into; most won’t, but it is an outside possibility.
If you do manage to find genuinely E-marked lights then all good, they’re legal. There’s very few on the market, but some do exist. Note that most/all bought from aliexpress, and indeed from most Australian resellers of said items, will not be E-marked.
Fitting them
I’ve broken this down into a lot of steps. I don’t anticipate everyone will need every step, but I hope to help people understand some of the traps
Removing the old indicators
Here’s the first point where it can be trickier than people might think. If you don’t have a bullbar (well, a looped bullbar) then it’s relatively easy to do; if you do then it gets a little fiddlier but totally doable.
The first thing to do, no matter how you are going to remove the indicators themselves, is to unplug their wiring. It’s up by the headlight and to the side: you kind of have to reach in there.
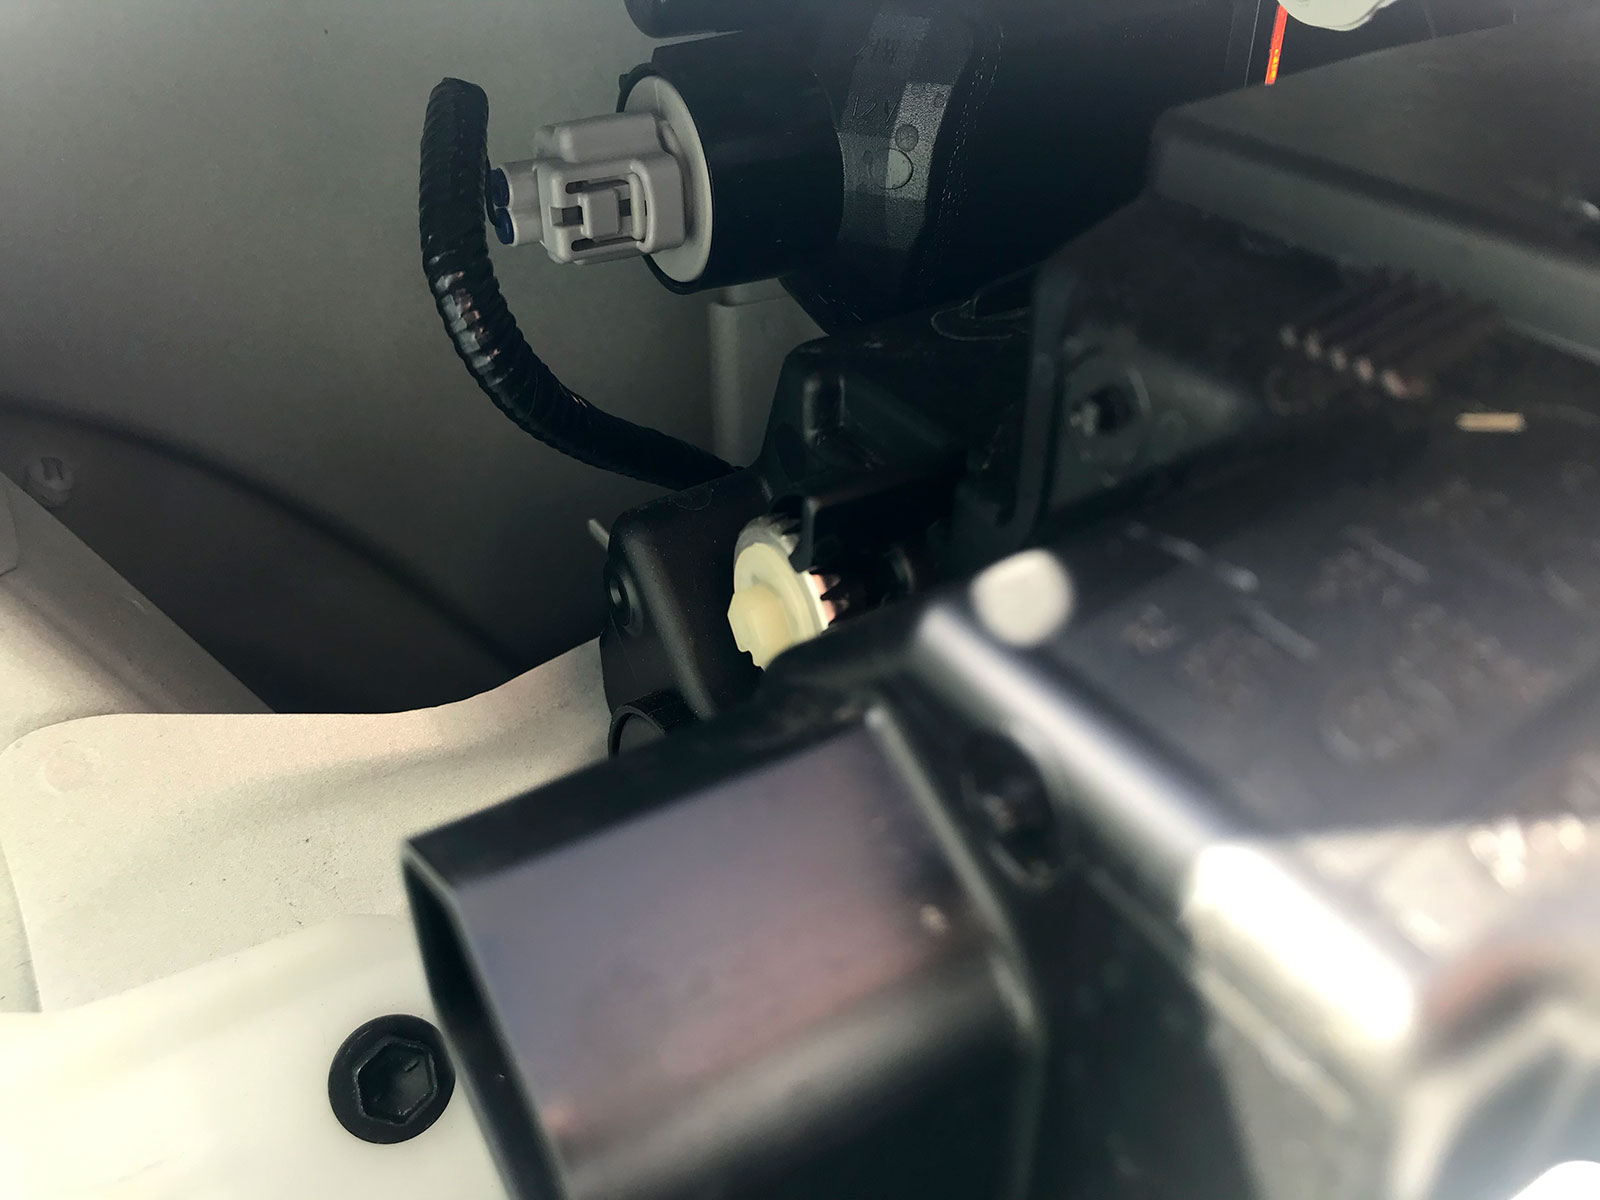
Just push down on the tab to unclip the wiring and then pull backwards to disconnect.
If you don’t have a bullbar
The easiest way to do this change is to remove the grille from the car entirely. There’s only a few clips and the indicator wiring to unclip. I cover removing the grille in my writeup on changing the grille. The biggest thing that catches people out are the two clips in the grille itself you twist 90º to release. Other than that there’s a few press style plastic rivets and a whole lot of push clips.
With the grille removed from the car you can just undo the two screws per indicator and take the indicator off the grille.

With a bullbar
Most looped bullbars do not allow you to fully remove the grille with the bullbar attached to the car. Bullbars are also quite heavy to remove off the car, so the best bet here is just to work around it. The indicators themselves are held in with two screws as shown above. With the right length screwdriver it’s possible to access these from the back in the gap next to the headlight.
To show this I’ve slightly pushed the grille forwards (too hard to photograph otherwise) but it is very doable with the grille entirely in place in the car.
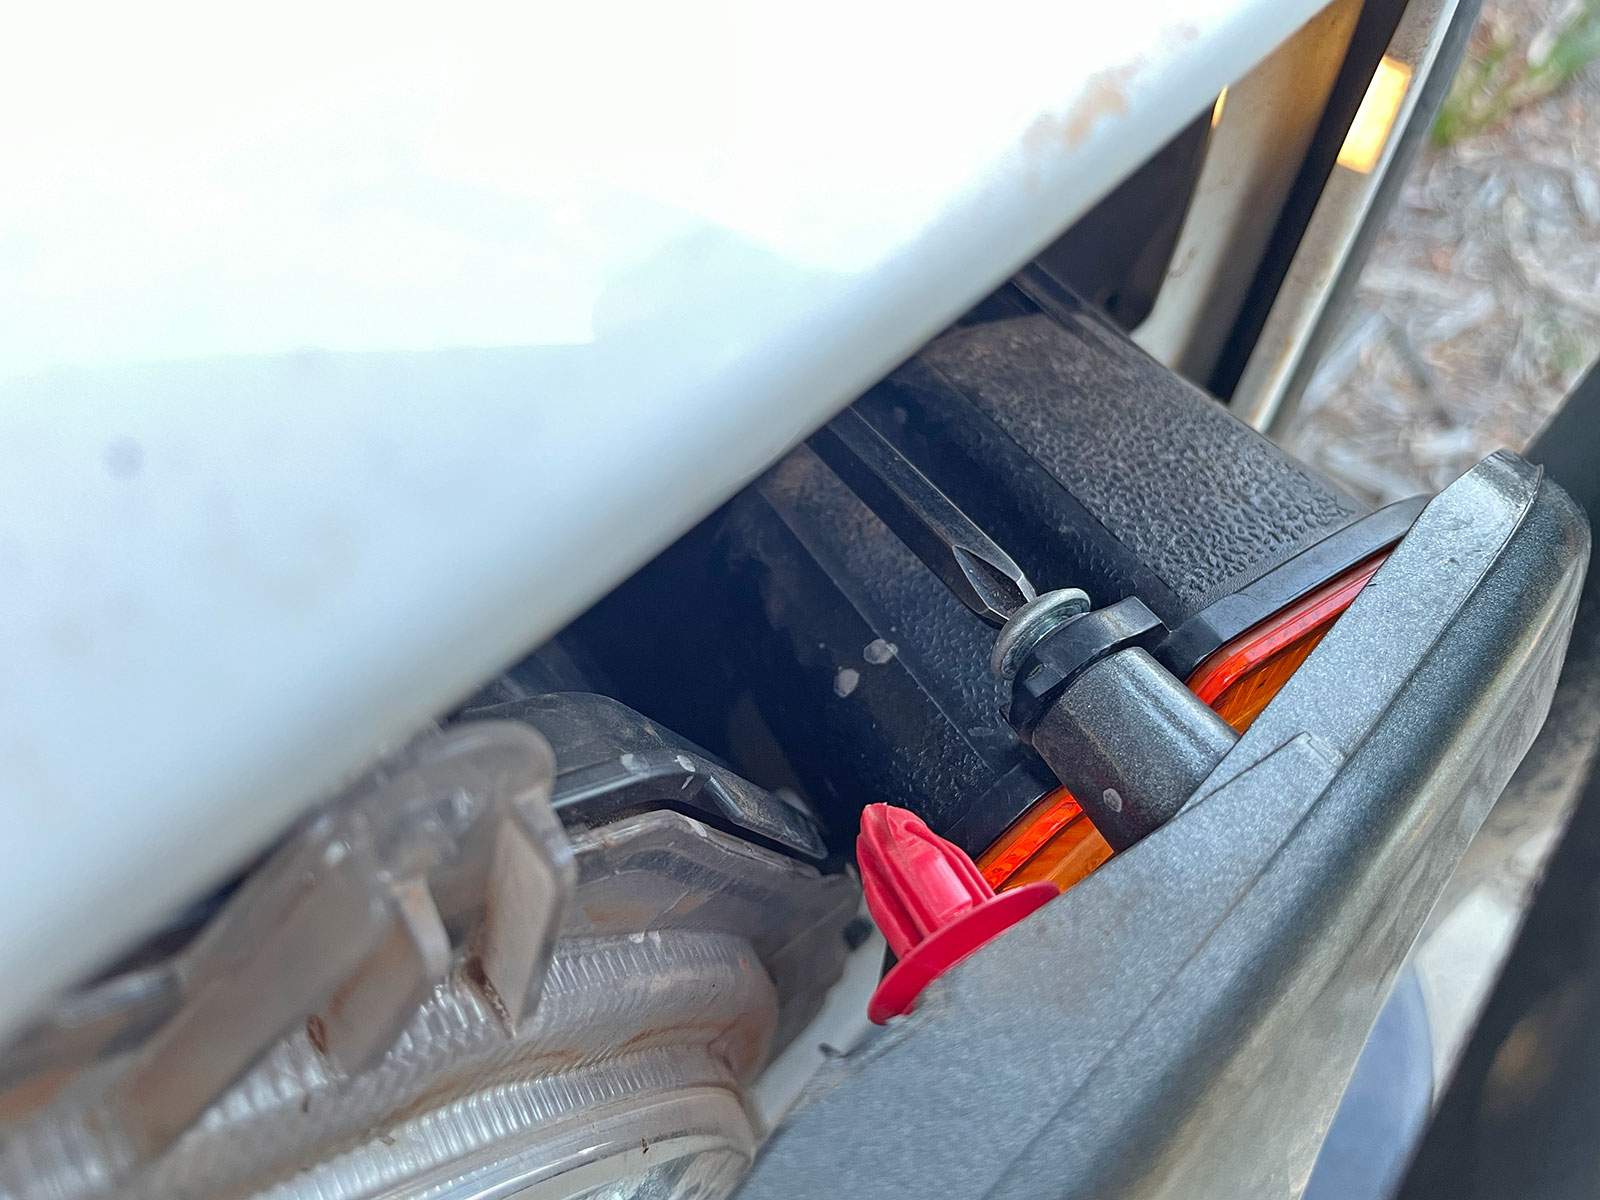
It does require you to work basically unsighted and takes a bit of time. It’s also easy to drop the screws so work somewhere that you can find the screws if they fall out!
Wiring details to make them work
Exactly how you’ll wire it depends on how you want things to work.
Load resistor
The load resistor has to be wired up in parallel with the LED light, not in series. In plain English it means across the two wires going to the LED, rather than just inline with one of the two wires. There is no orientation for a current resistor, so no need to worry about which end gets wired up to positive and which end is wired up to negative.
Wiring up DRL if it is included
There’s a few sources for the DRL functionality. Some people use them as additional park lights, some people use them in conjunction with the factory DRLs mounted in the bumper along with the fog lights, and some people use them instead of the factory DRLs.
Plugging them in
Some of the aftermarket ones advertise being direct fit but they do this via being wedge connectors and require you to reuse the factory bulb base, and then have a fitting to clip in a load resistor. An example for this are the JimnyStyle ones, which I have annotated their product image to help you understand.

A lot of people seem confused by the ones using the wedge globe adapters and I’ve seen plenty of people cut them off rather than using the factory globe holder as intended. I guess that’s a function of the quality of instructions supplied.
If you’ve chosen to do your own wiring to adapt to the factory wiring instead then you just simply clip them into the factory wiring and all good.
Testing
Obviously before you go to the effort of screwing them into the car you should test them. It’s a lot easier to return something that’s not working or at least diagnose what the issue is!
The biggest thing people seem to get are either non-functioning load resistors or just plain crappy wiring from the manufacturer if you’re using ‘prewired’ ones. This is why I have hopefully illustrated how to do the wiring: if you end up diagnosing that you have a wiring issue then hopefully you can rectify it.
A good diagnosis can be to look at what the resistance is between the two terminals for the indicators wiring where it plugs into the car. The factory globe is a 21W globe, implying an overall resistance of ~6.9 Ω. If you have a multimeter, you can use its resistance measuring function to determine if the overall resistance is around this value. If it isn’t then either you have a wiring issue (e.g. resistor actually isn’t properly connected) or you have a failed load resistor.
Refitting indicators
If you removed the grille then this becomes a problem of refitting the grille having tested it with the grille loose. If you didn’t remove the grille then the hardest challenge is keeping the screws on your screwdriver tip while lining them up with a hole you can barely see. No real advice here other than magnetised screwdrivers help a lot here, and sometimes also just lightly screwing the screws in by hand first so they stay in place can help. That latter option depends on your finger strength and dexterity.