
Jimny engine bay cleaning
The biggest problem writing this article up is I didn’t have a filthy engine bay beforehand (though it was far from clean)! Generally if my engine bay is filthy from a 4wd trip I just want to clean it and don’t snap photos, so bear that in mind with the shots here. The same principles apply, just you spend longer cleaning and potentially do a couple of rinses and washes.
Sections
- Rinsing alternator out
- Products I use
- Lifting the bonnet higher
- Detergent cleaning
- Scrubbing time
- Drying and dressing
- Some parting thoughts
Before you start: rinsing out alternator
Before we begin, a first piece of advice: after any decent 4wding involving a bit of mud or muddy water, it’s heavily recommended to rinse out the alternator with some fresh water. Alternators are pretty vulnerable on Jimnys and it’ll save heartache to keep it as fresh as possible.

You don’t need to blast this, though. You do risk blowing water into the bearing at the front of the alternator if you do, so it’s a case of low pressure fresh water to rinse all the mud and muddy water out of it. It won’t guarantee that the alternator won’t die a premature death from issues due to mud ingress but it’ll certainly help!
Products I use
Sadly, none of these are sponsored products but here’s what I find I use a lot when doing this.
- Detergent: I like the Autoglym shampoo but honestly a lot of reasonable priced good brand ones are fine
- Spray bottle: just a cheap 500 mL one from Bunnings
- Brushes: large soft bristle brush and also a set of detailing brushes
- Post-wash dressing: Autoglym Vinyl and Rubber Care is my product of choice here – it doesn’t attract dust and if you don’t let it soak it then it isn’t overly shiny, either.
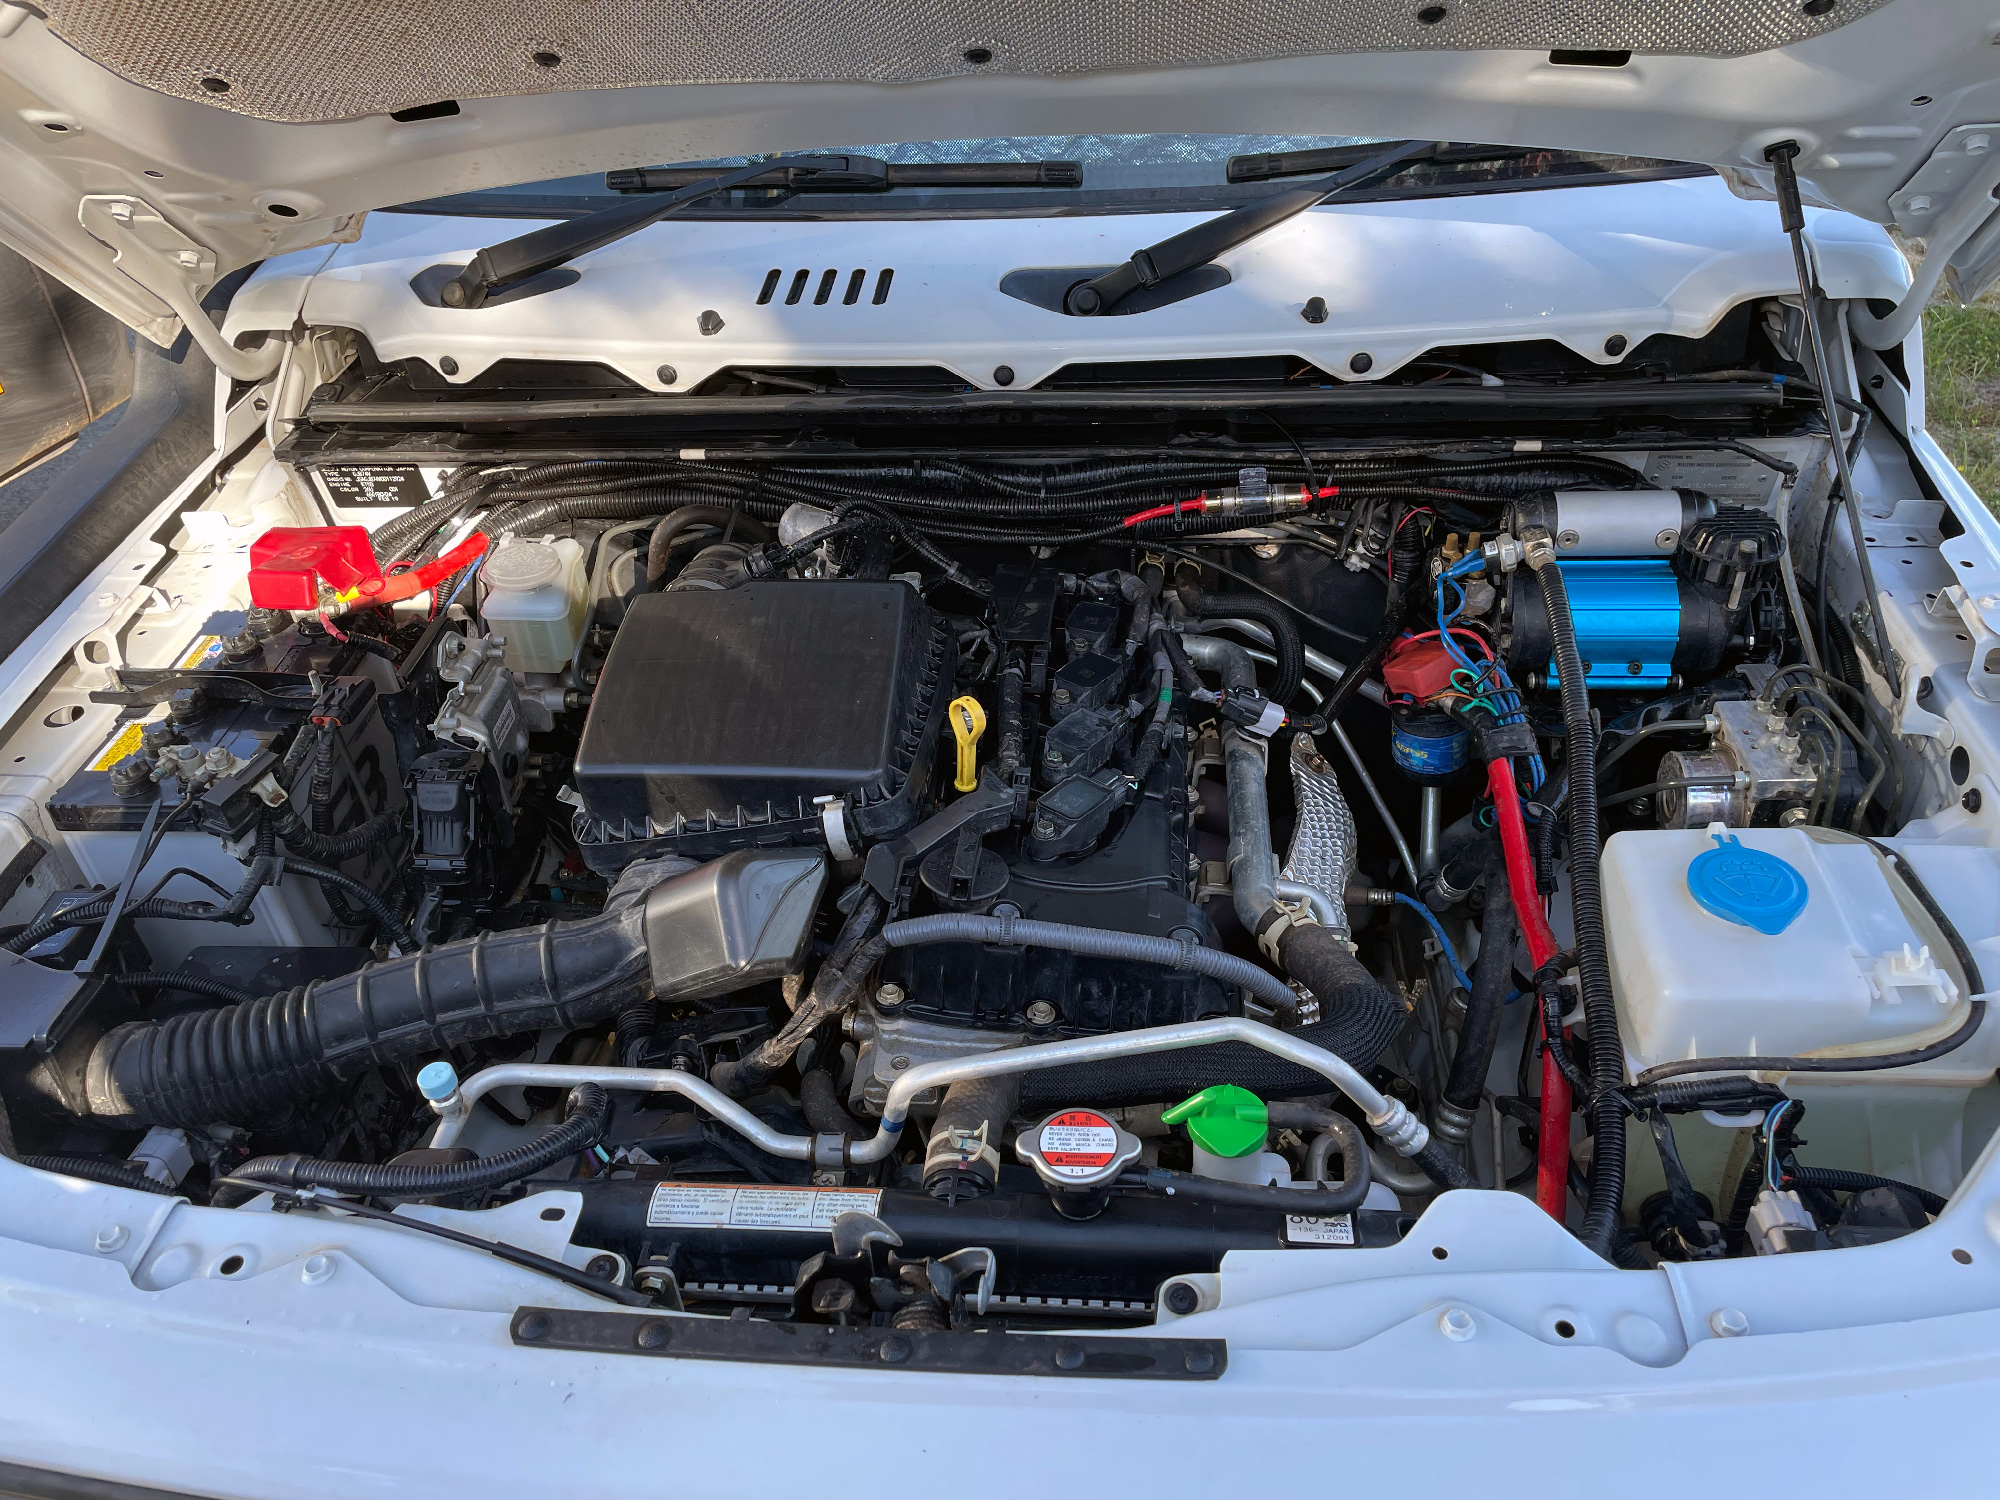
Opening the bonnet further than normal
The next piece of advice is to open the bonnet a bit further than normal as it helps you access things. Don’t do this if there’s a lot of wind around as it is going to stress the bonnet a little bit more, but it does help access a lot.
This is the normal bonnet stay position when you’re holding the bonnet open
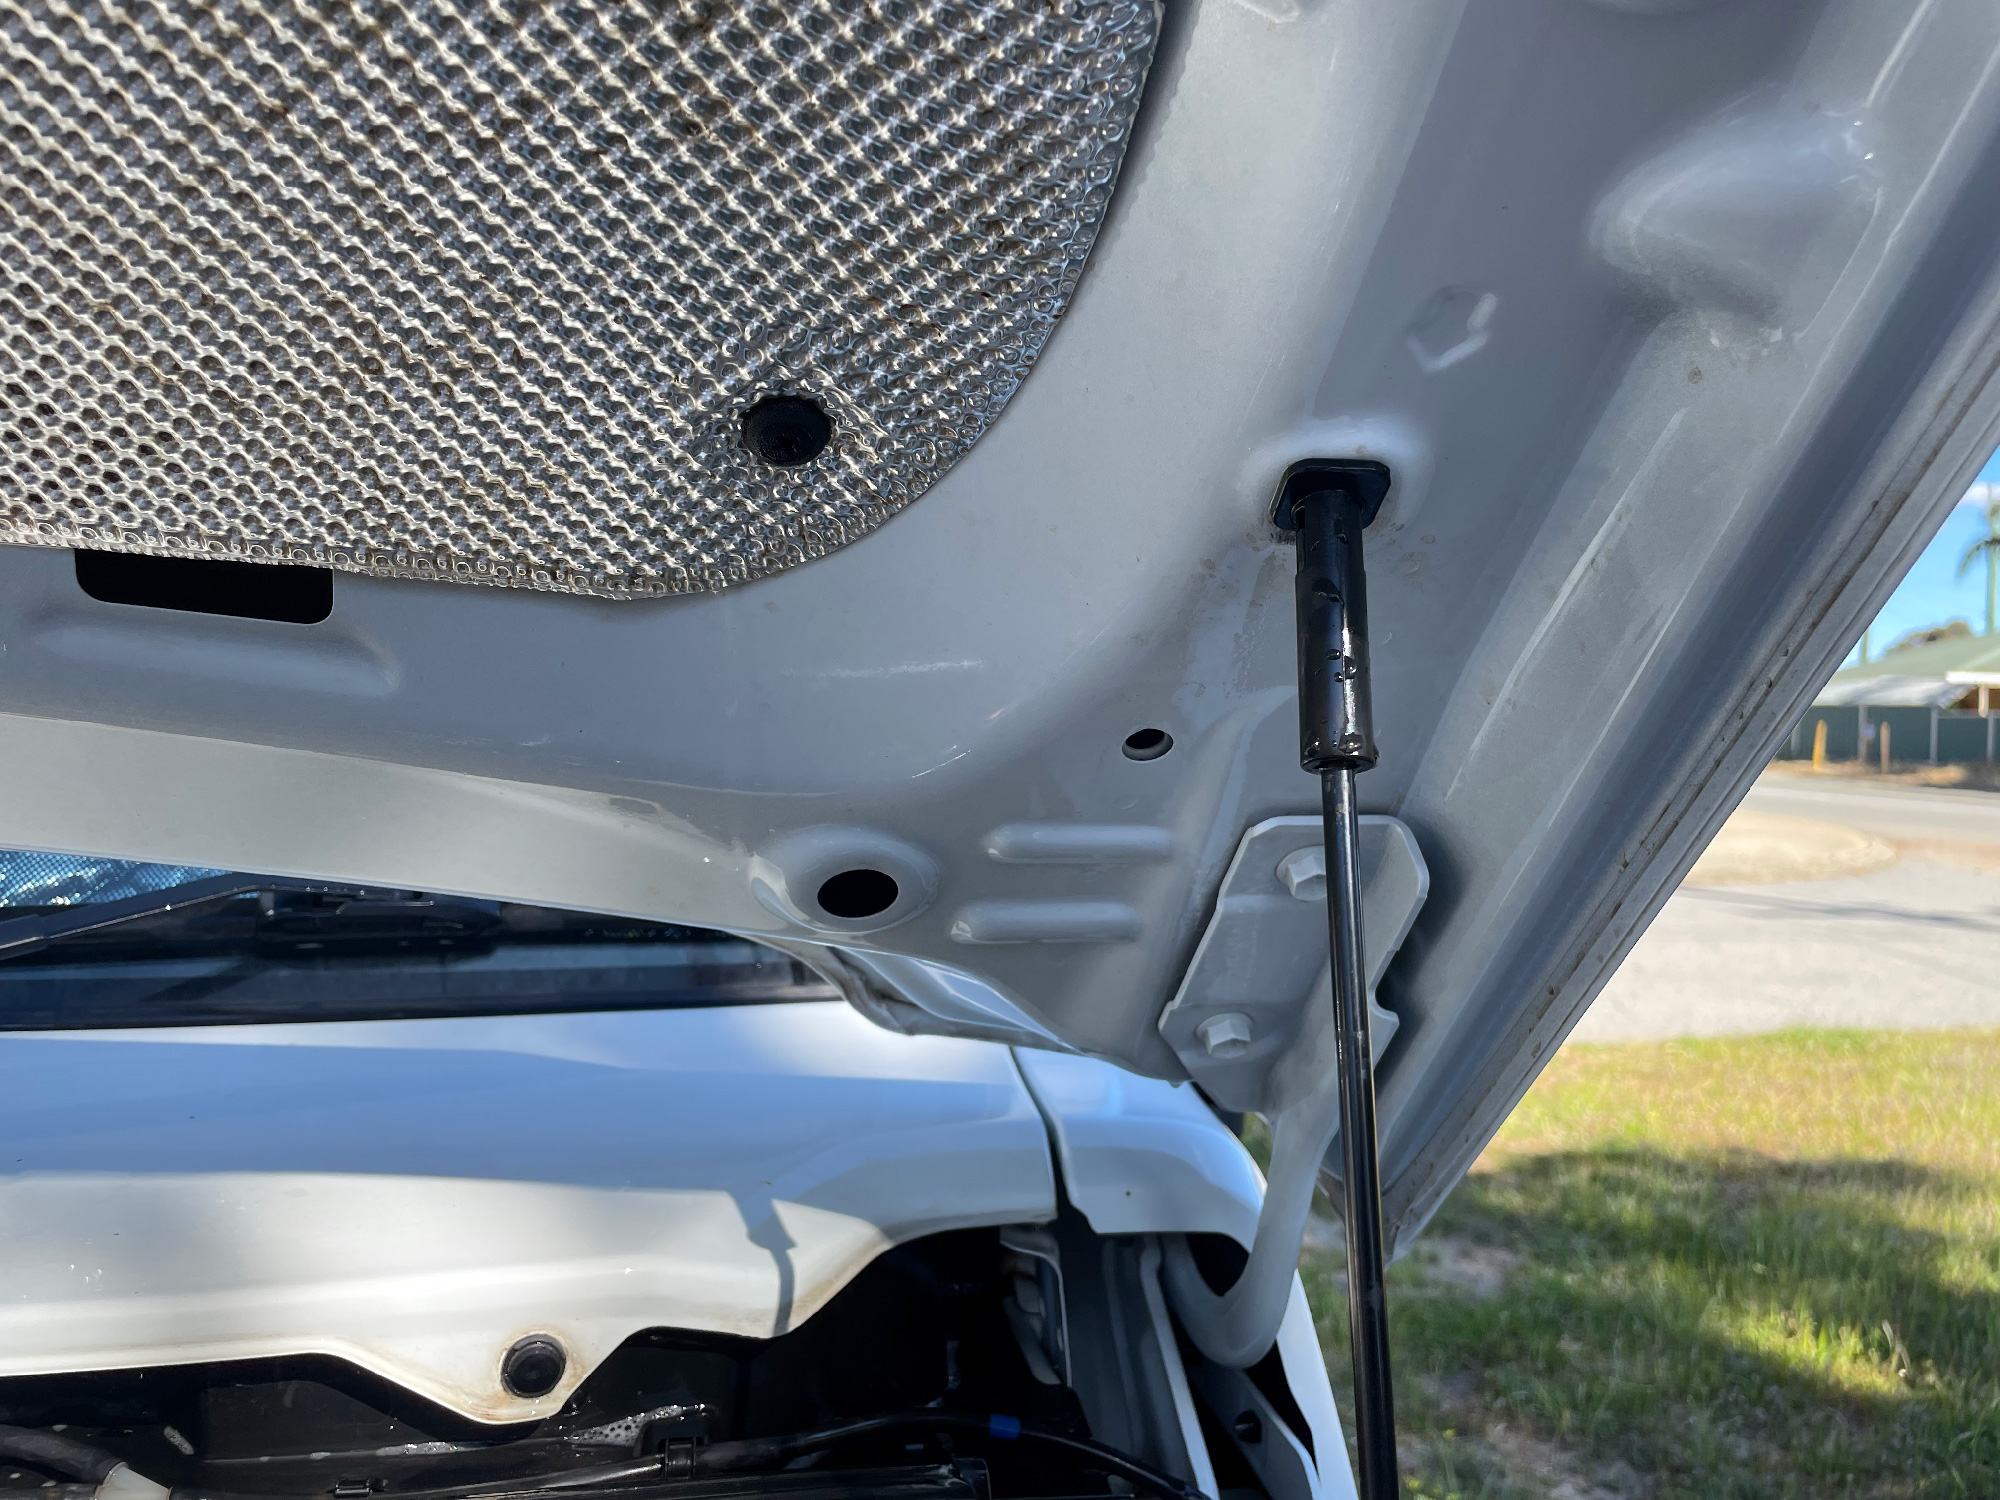
If you, instead, use the larger hole that’s in line with the hinge, the bonnet will be open further. This part of the bonnet is not fully reinforced and so it’s not ideal, but if there’s no wind and you don’t leave it up like this for long then it gives you that bit more access, especially at the back of the engine bay.

Now you’re ready to do some cleaning!
Rinsing the engine
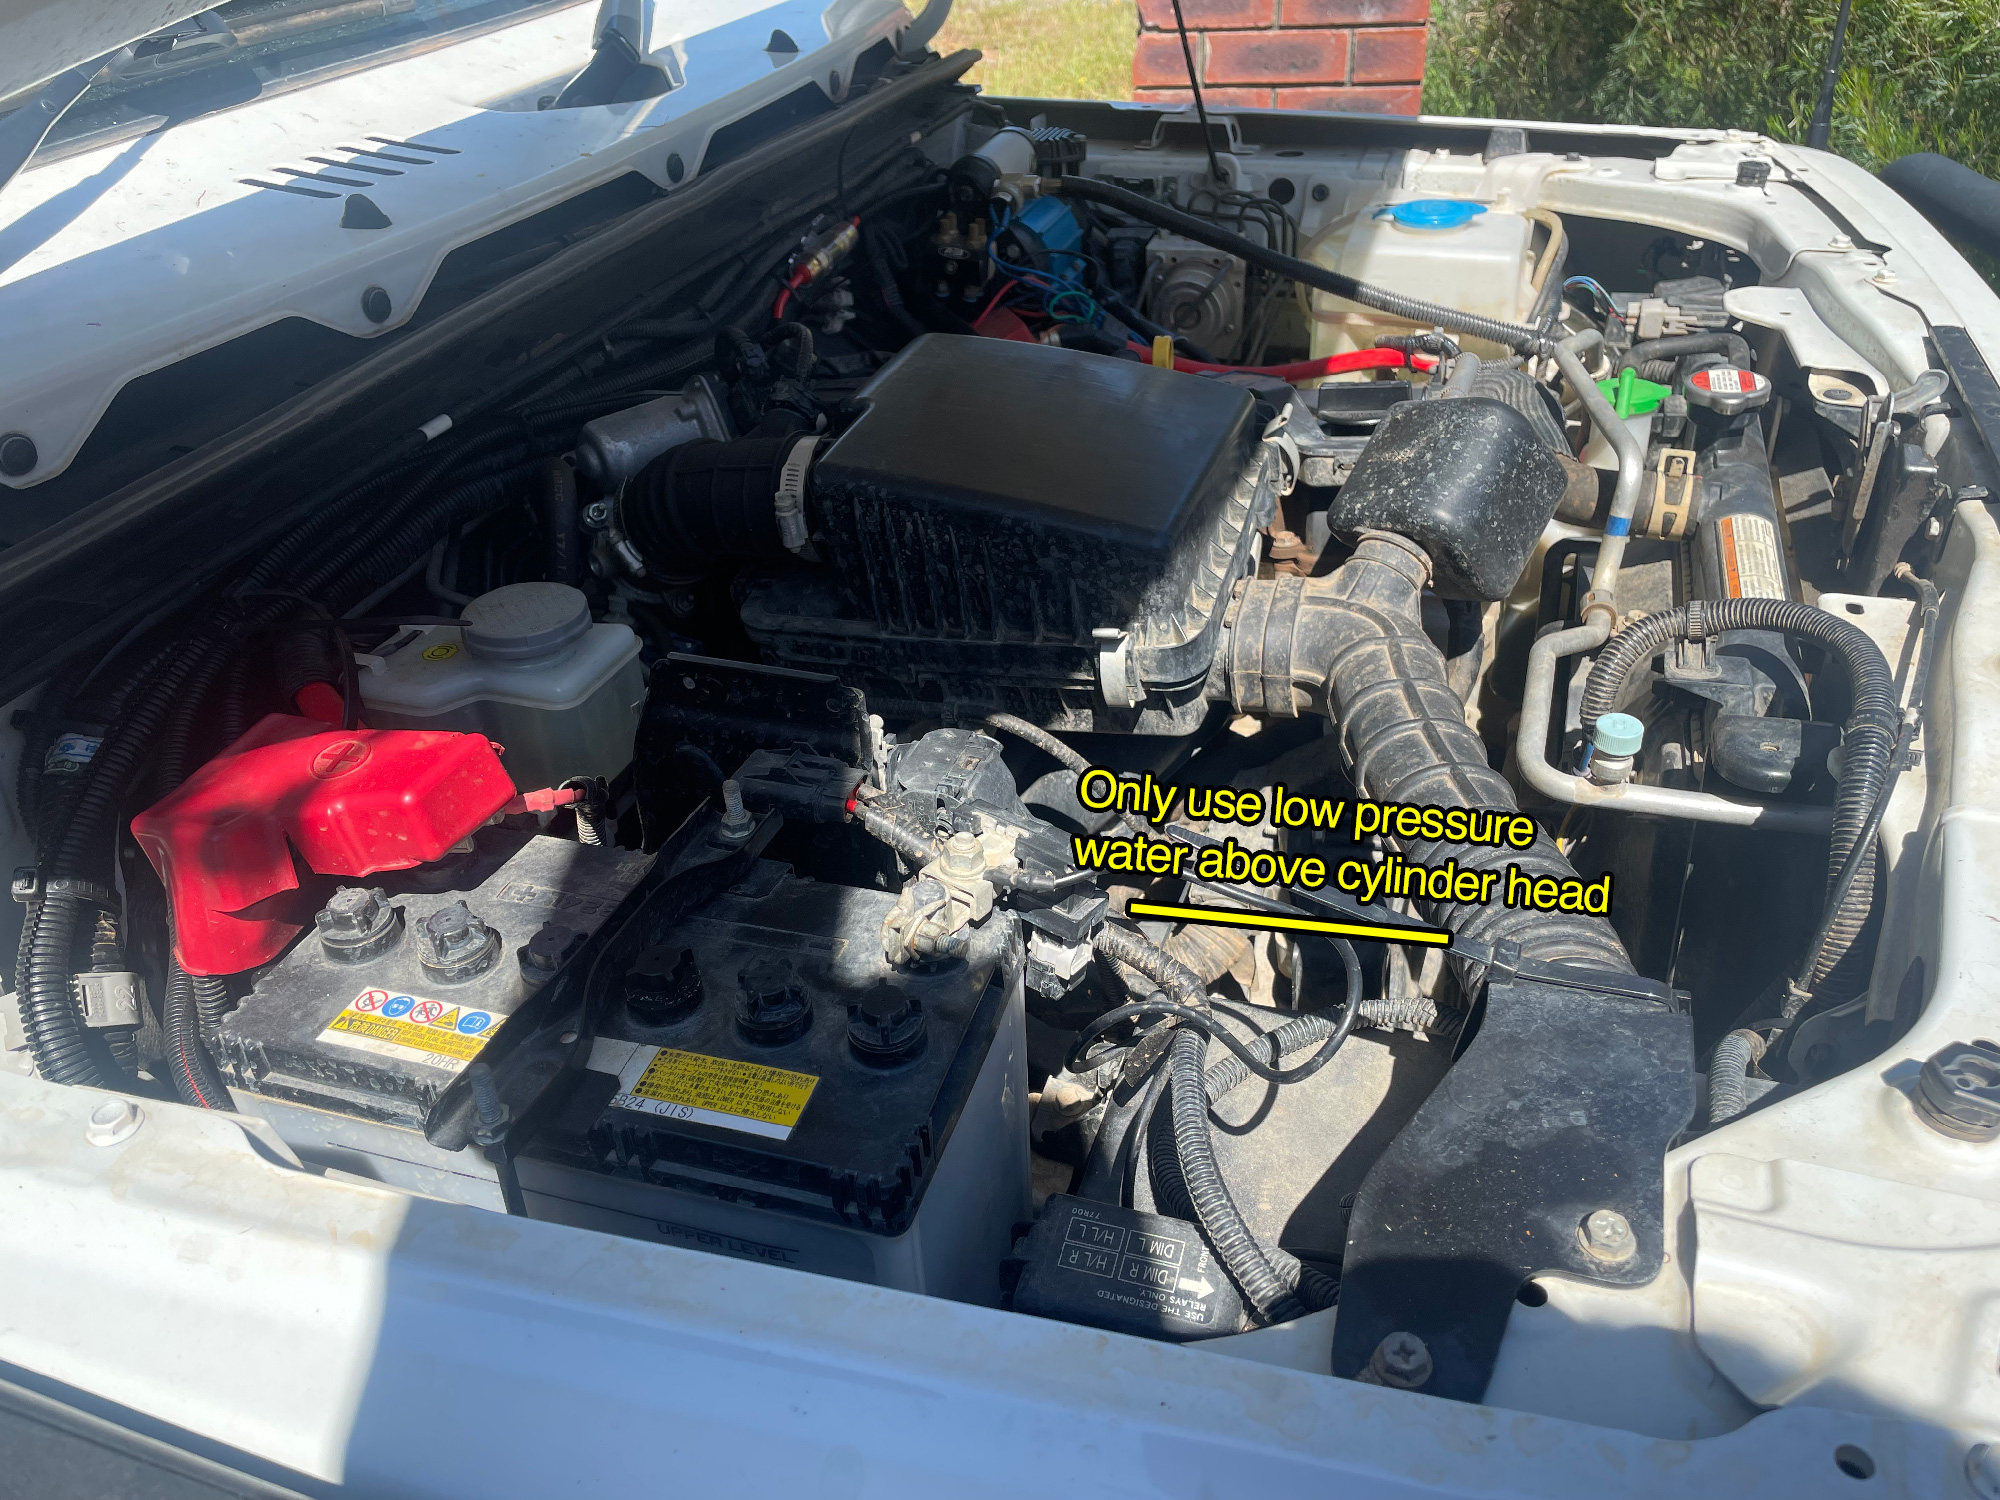
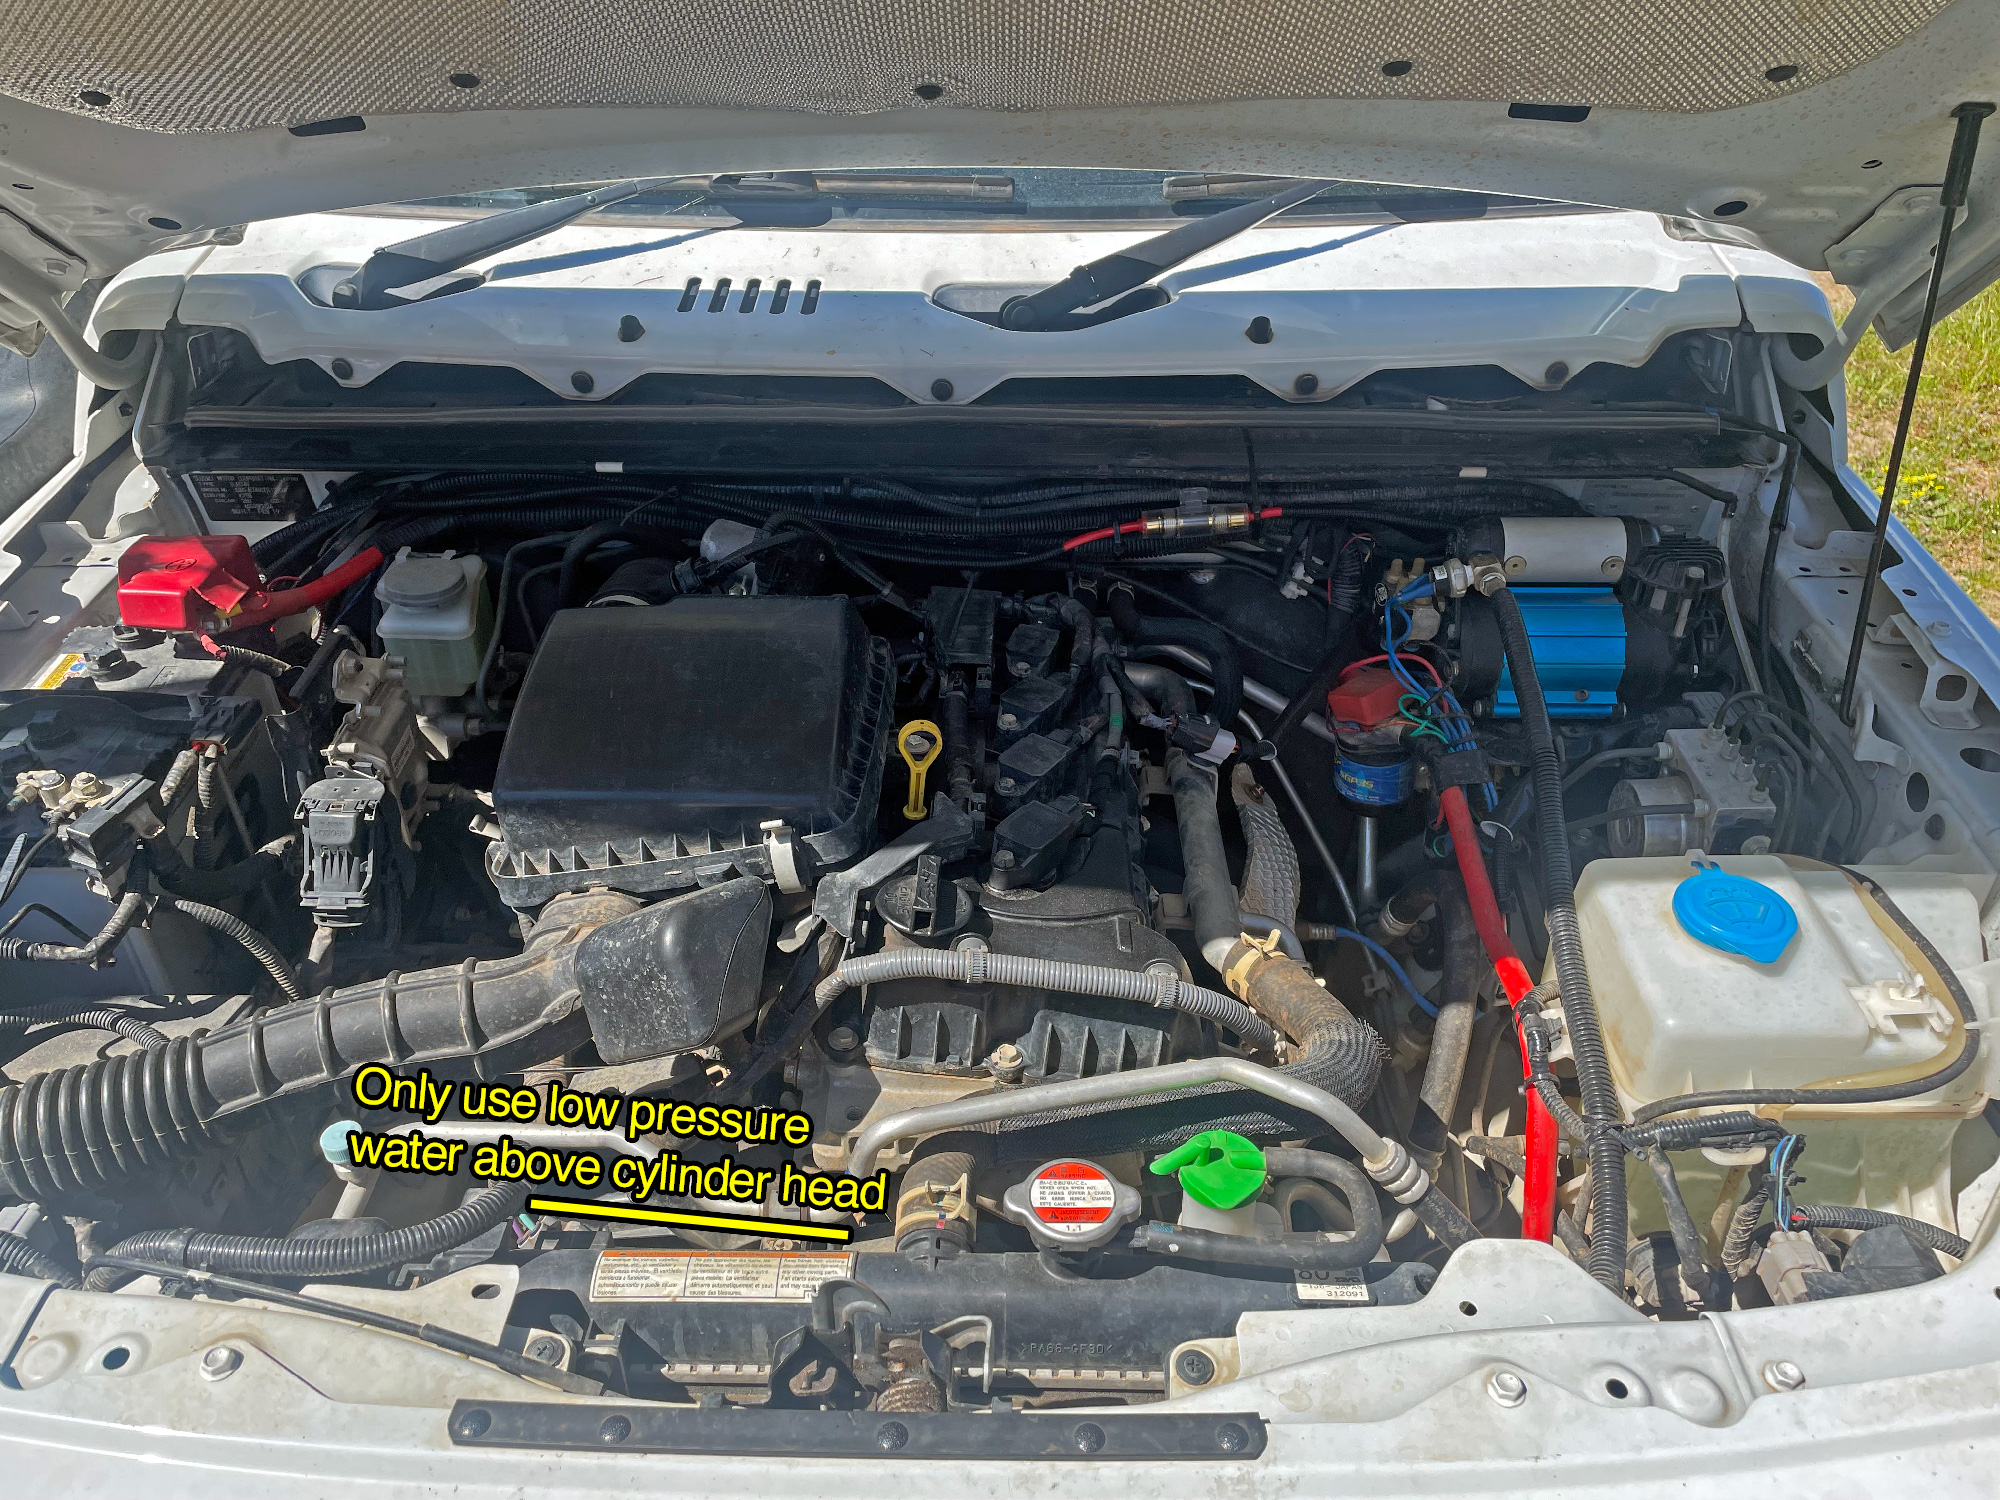
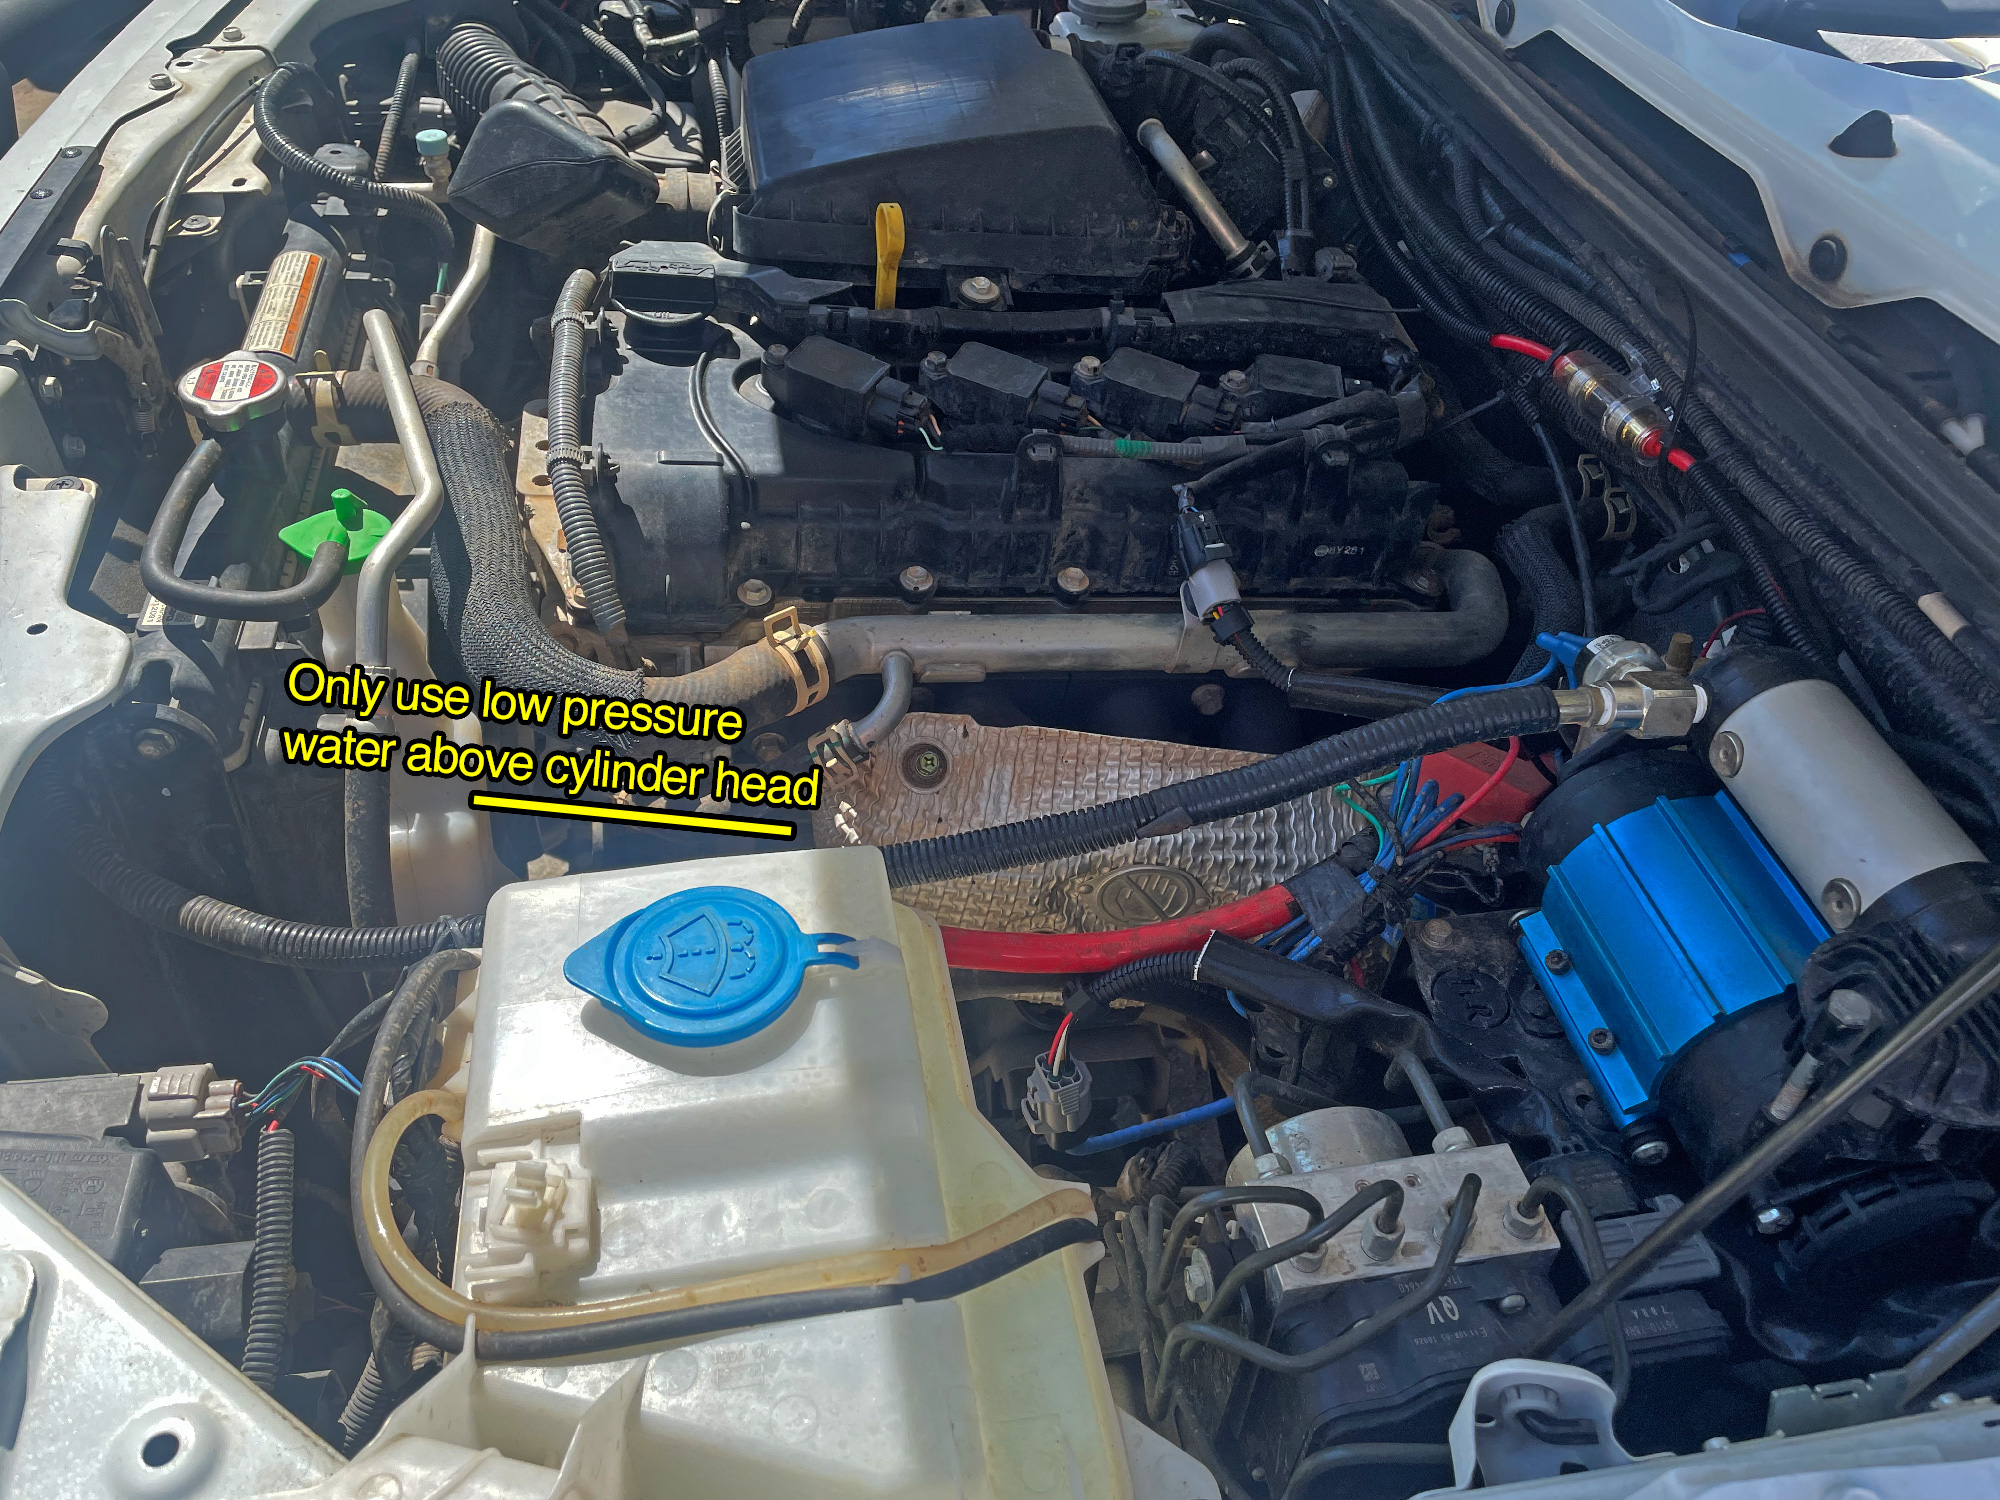
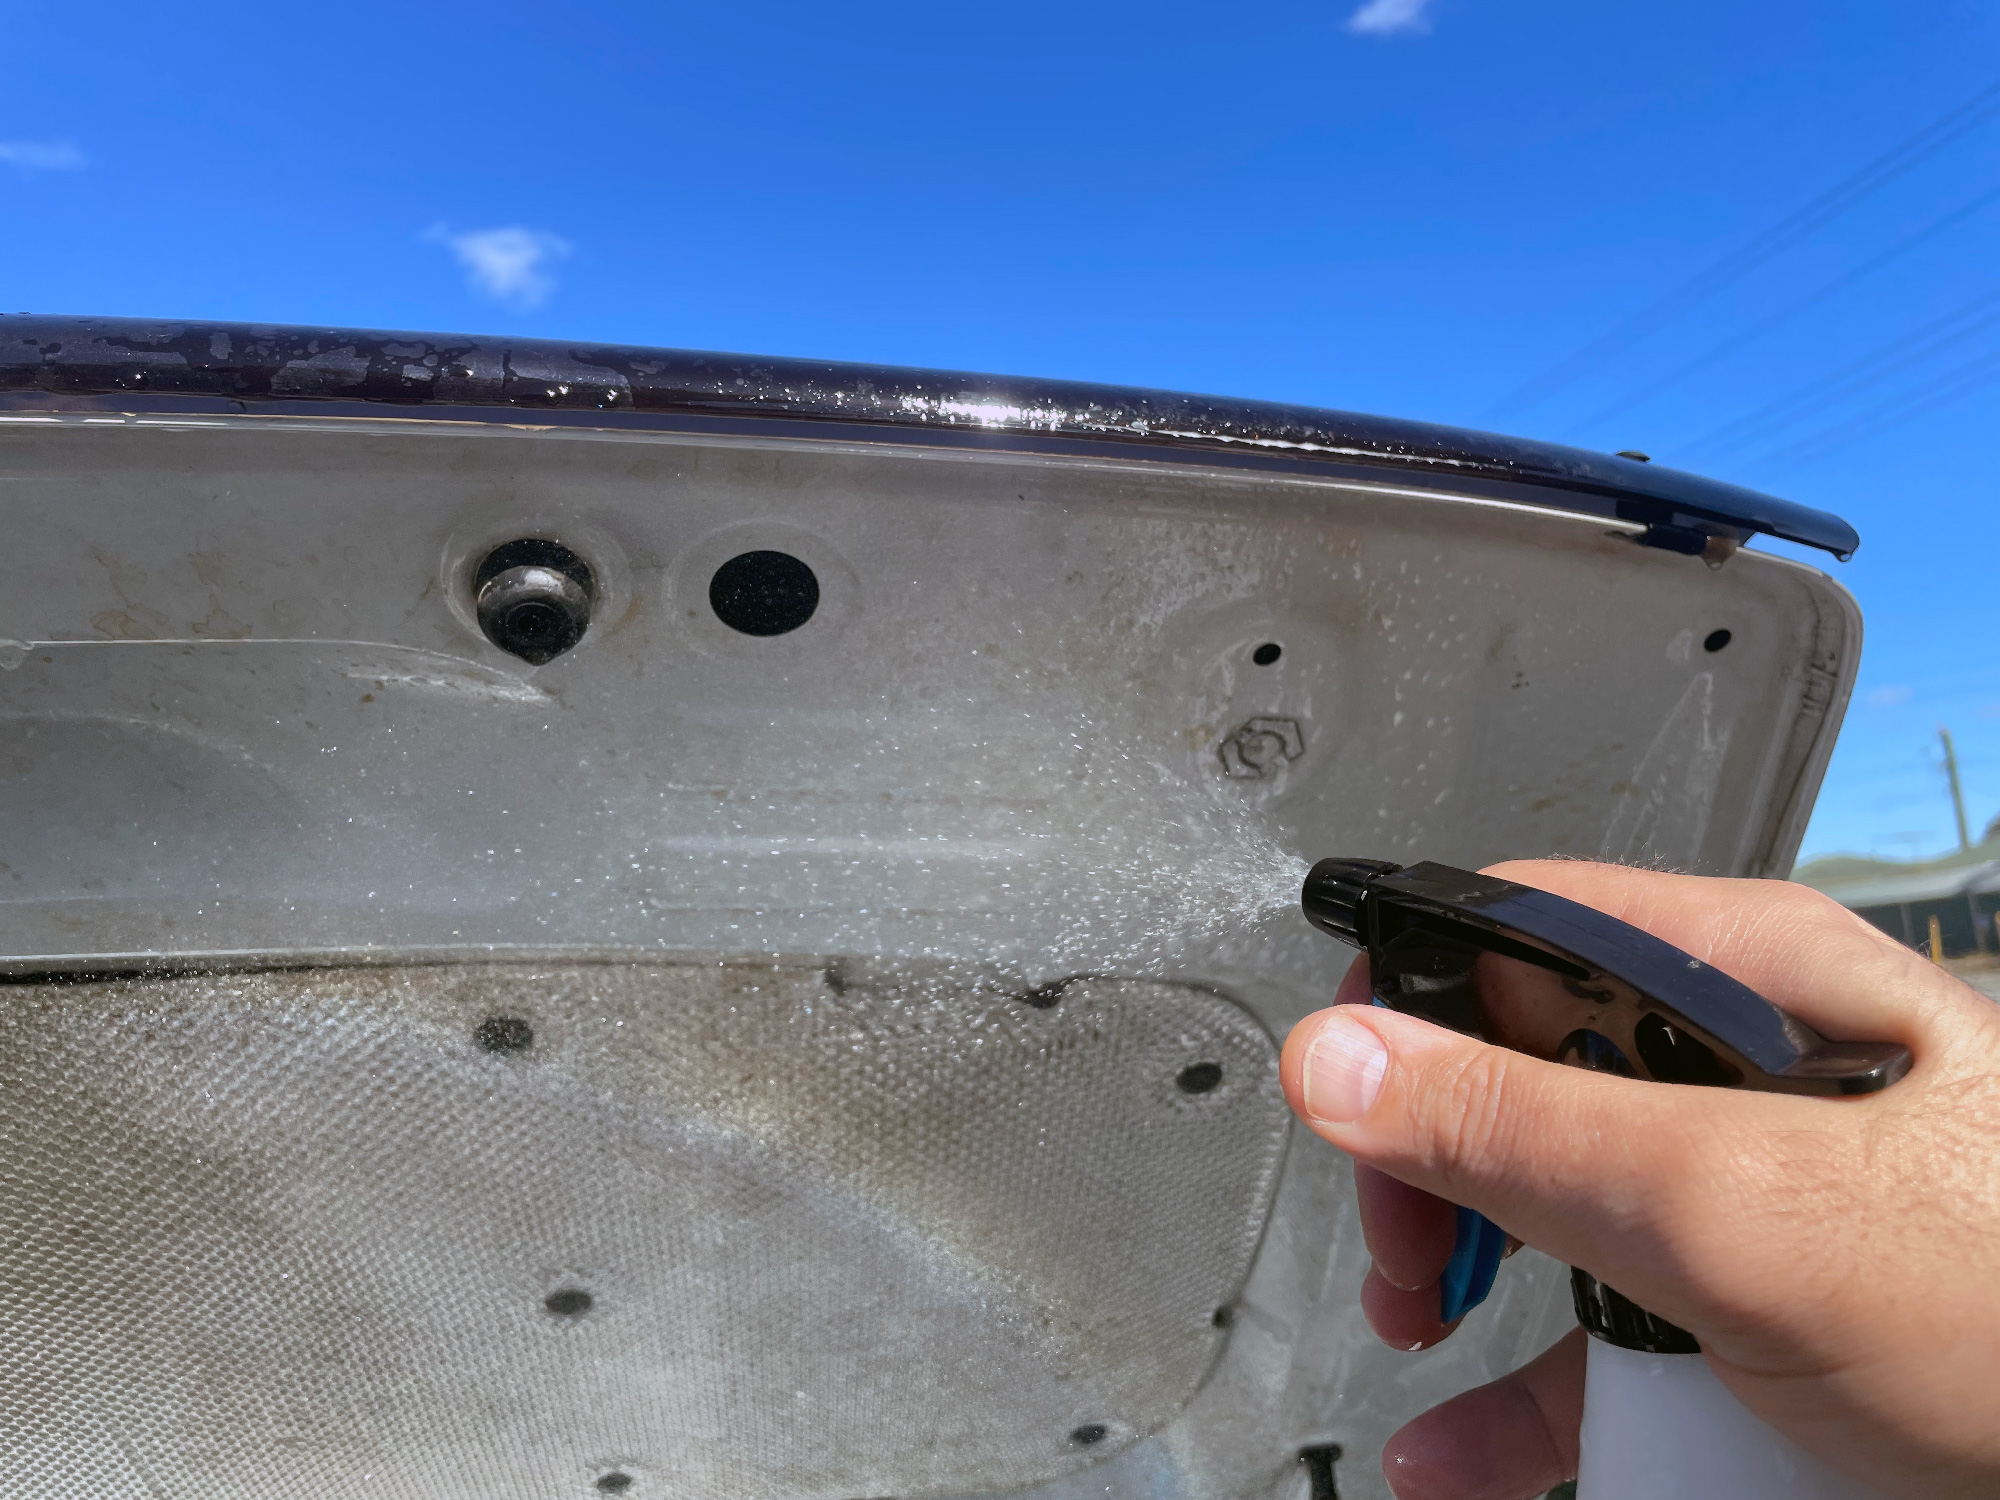
There’s nothing too special in here; the electrical connectors are generally quite well waterproofed (as you’d expect for a 4wd) but it is worth noting that you shouldn’t apply high pressure water to any electrical connections. The easiest rule here is to only use gentle showers of water above the base of the cylinder head. In my experience, you’re best off rinsing mud with lots of cleaning over trying to do it fast with high pressure water, anyway.
In the below pictures I’ve tried to mark where the base of the cylinder head is to help clarify what I mean. This line runs all the way to the back of the engine at the same level, it’s just hard to illustrate that in a 2D photo of a 3D engine bay!
With that in mind, I give the engine bay a nice little soft soaking all over to begin the process. No pictures as I am pretty sure you can imagine a wet engine bay. If there’s deep mud down low on the engine then I will use jets of water from a hose to try to start to shift it, but often just time and a bunch of water will move it on.
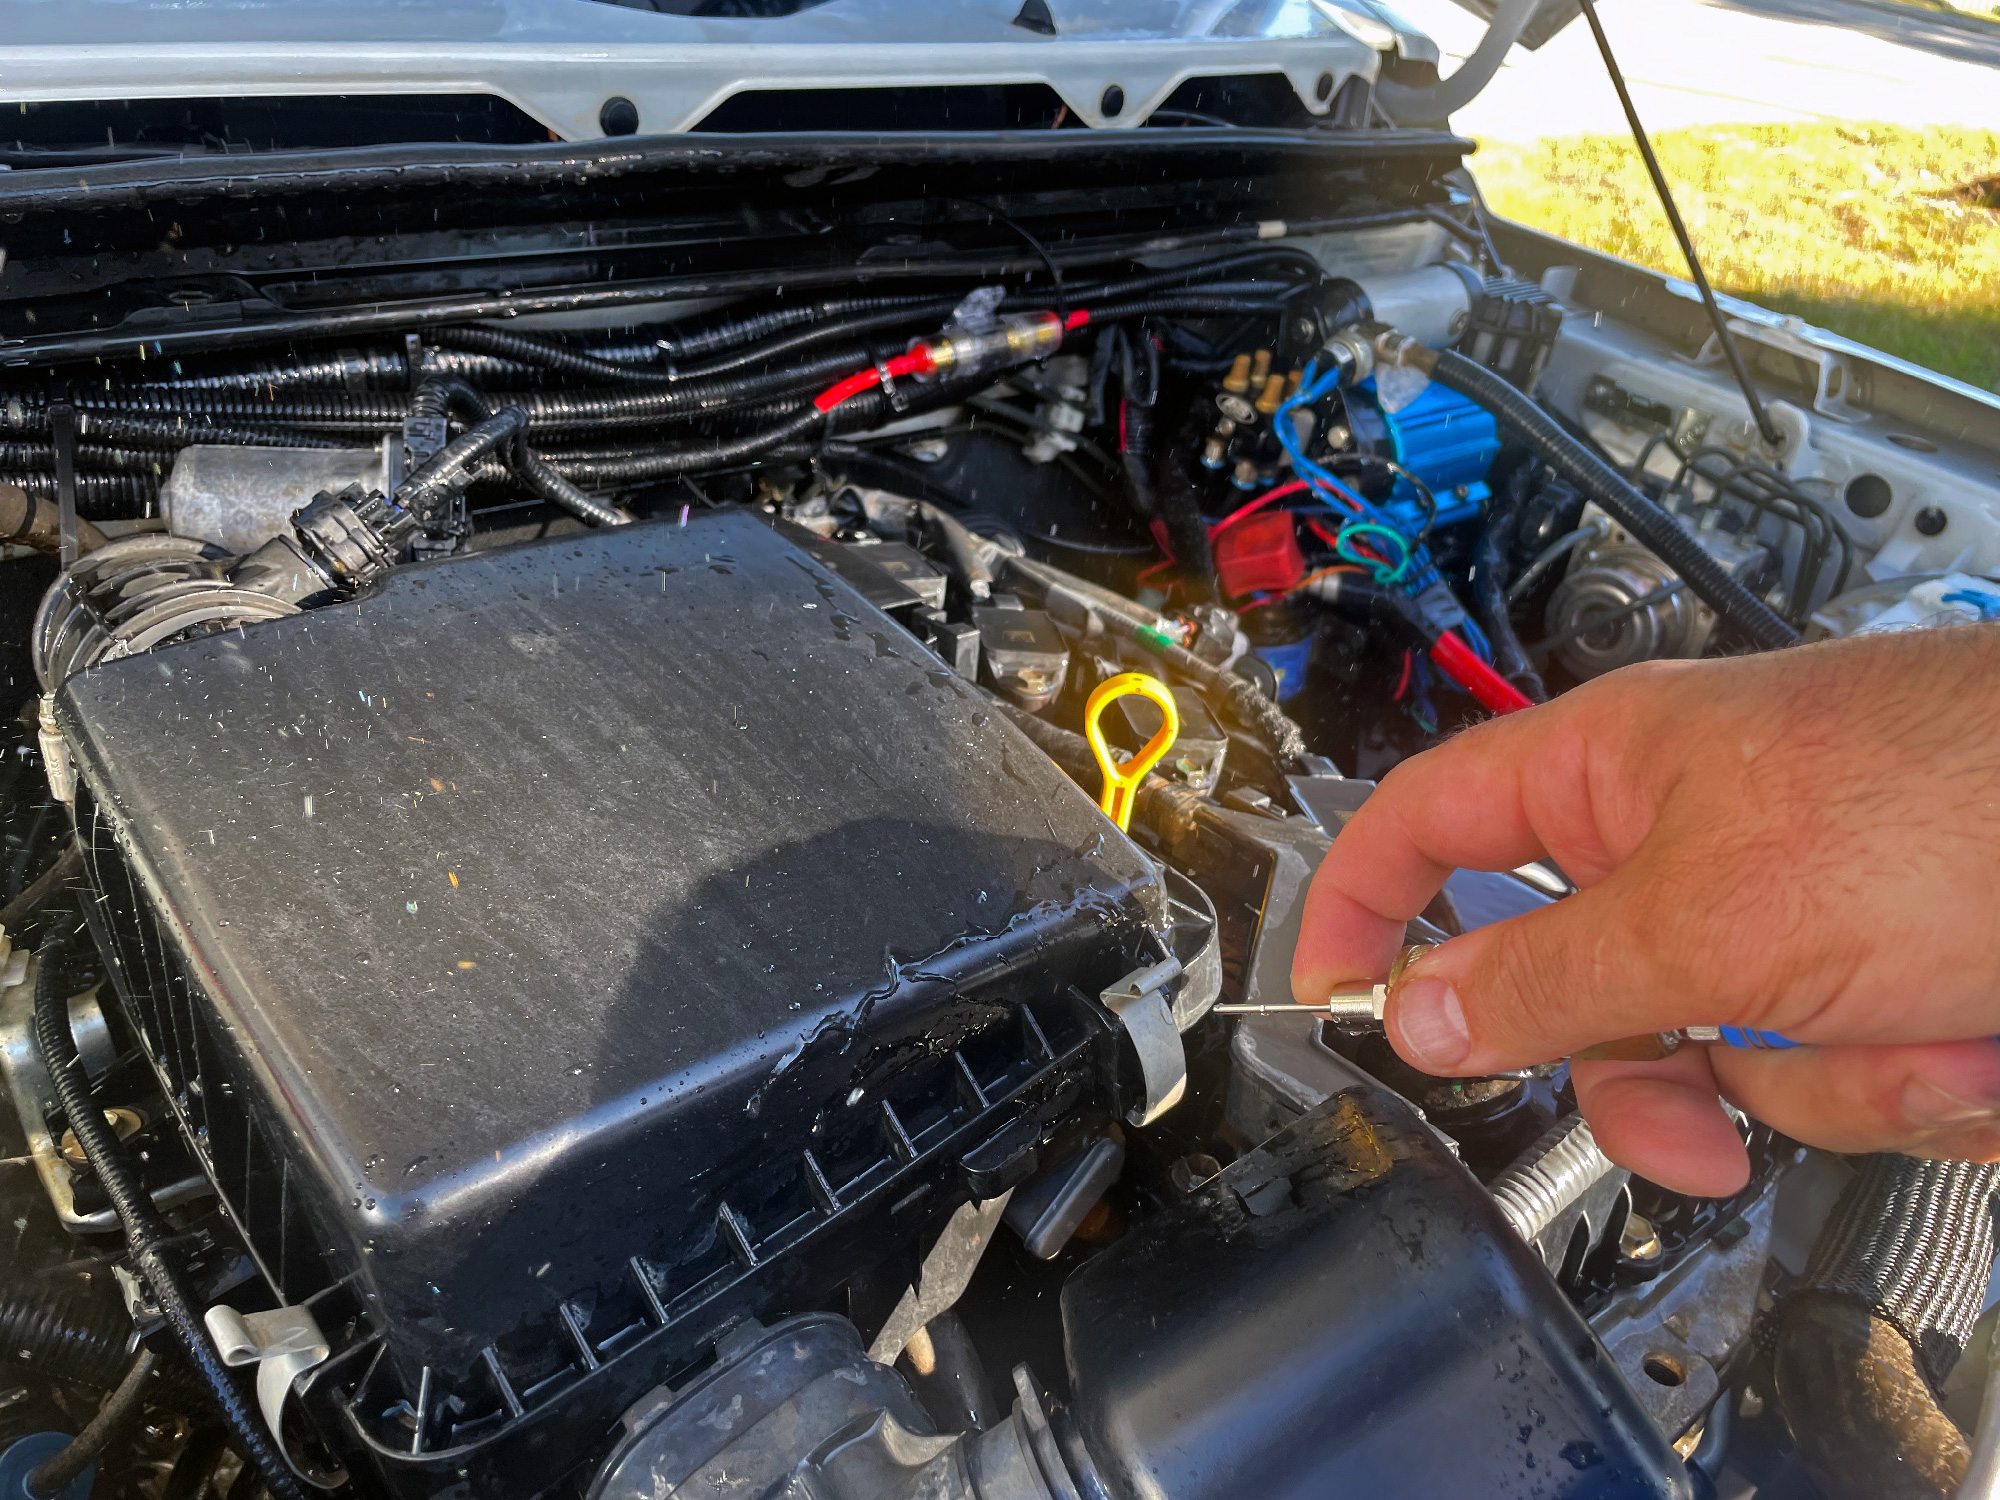
It can be worth covering up some electronic things if you’re really going at the cleaning, e.g. it might be smart to put a plastic bag over the battery or the ECU (the big electrical thing mounted next to the battery). I have a snorkel so I’m not too worried about water getting in the intake, but note that there are holes in the bottom of the stock hose into the air cleaner box so don’t spray lots of water up that way without then checking the bottom of the air filter box after you’re done.
Detergent cleaning
I personally haven’t found huge benefit in using aggressive cleaners & most ‘specialist’ 4wd cleaners are formulated the same as a normal car washing detergent anyway. They just happen to be marketed a little differently, so I wouldn’t go out and find some very special for most cleaning tasks.
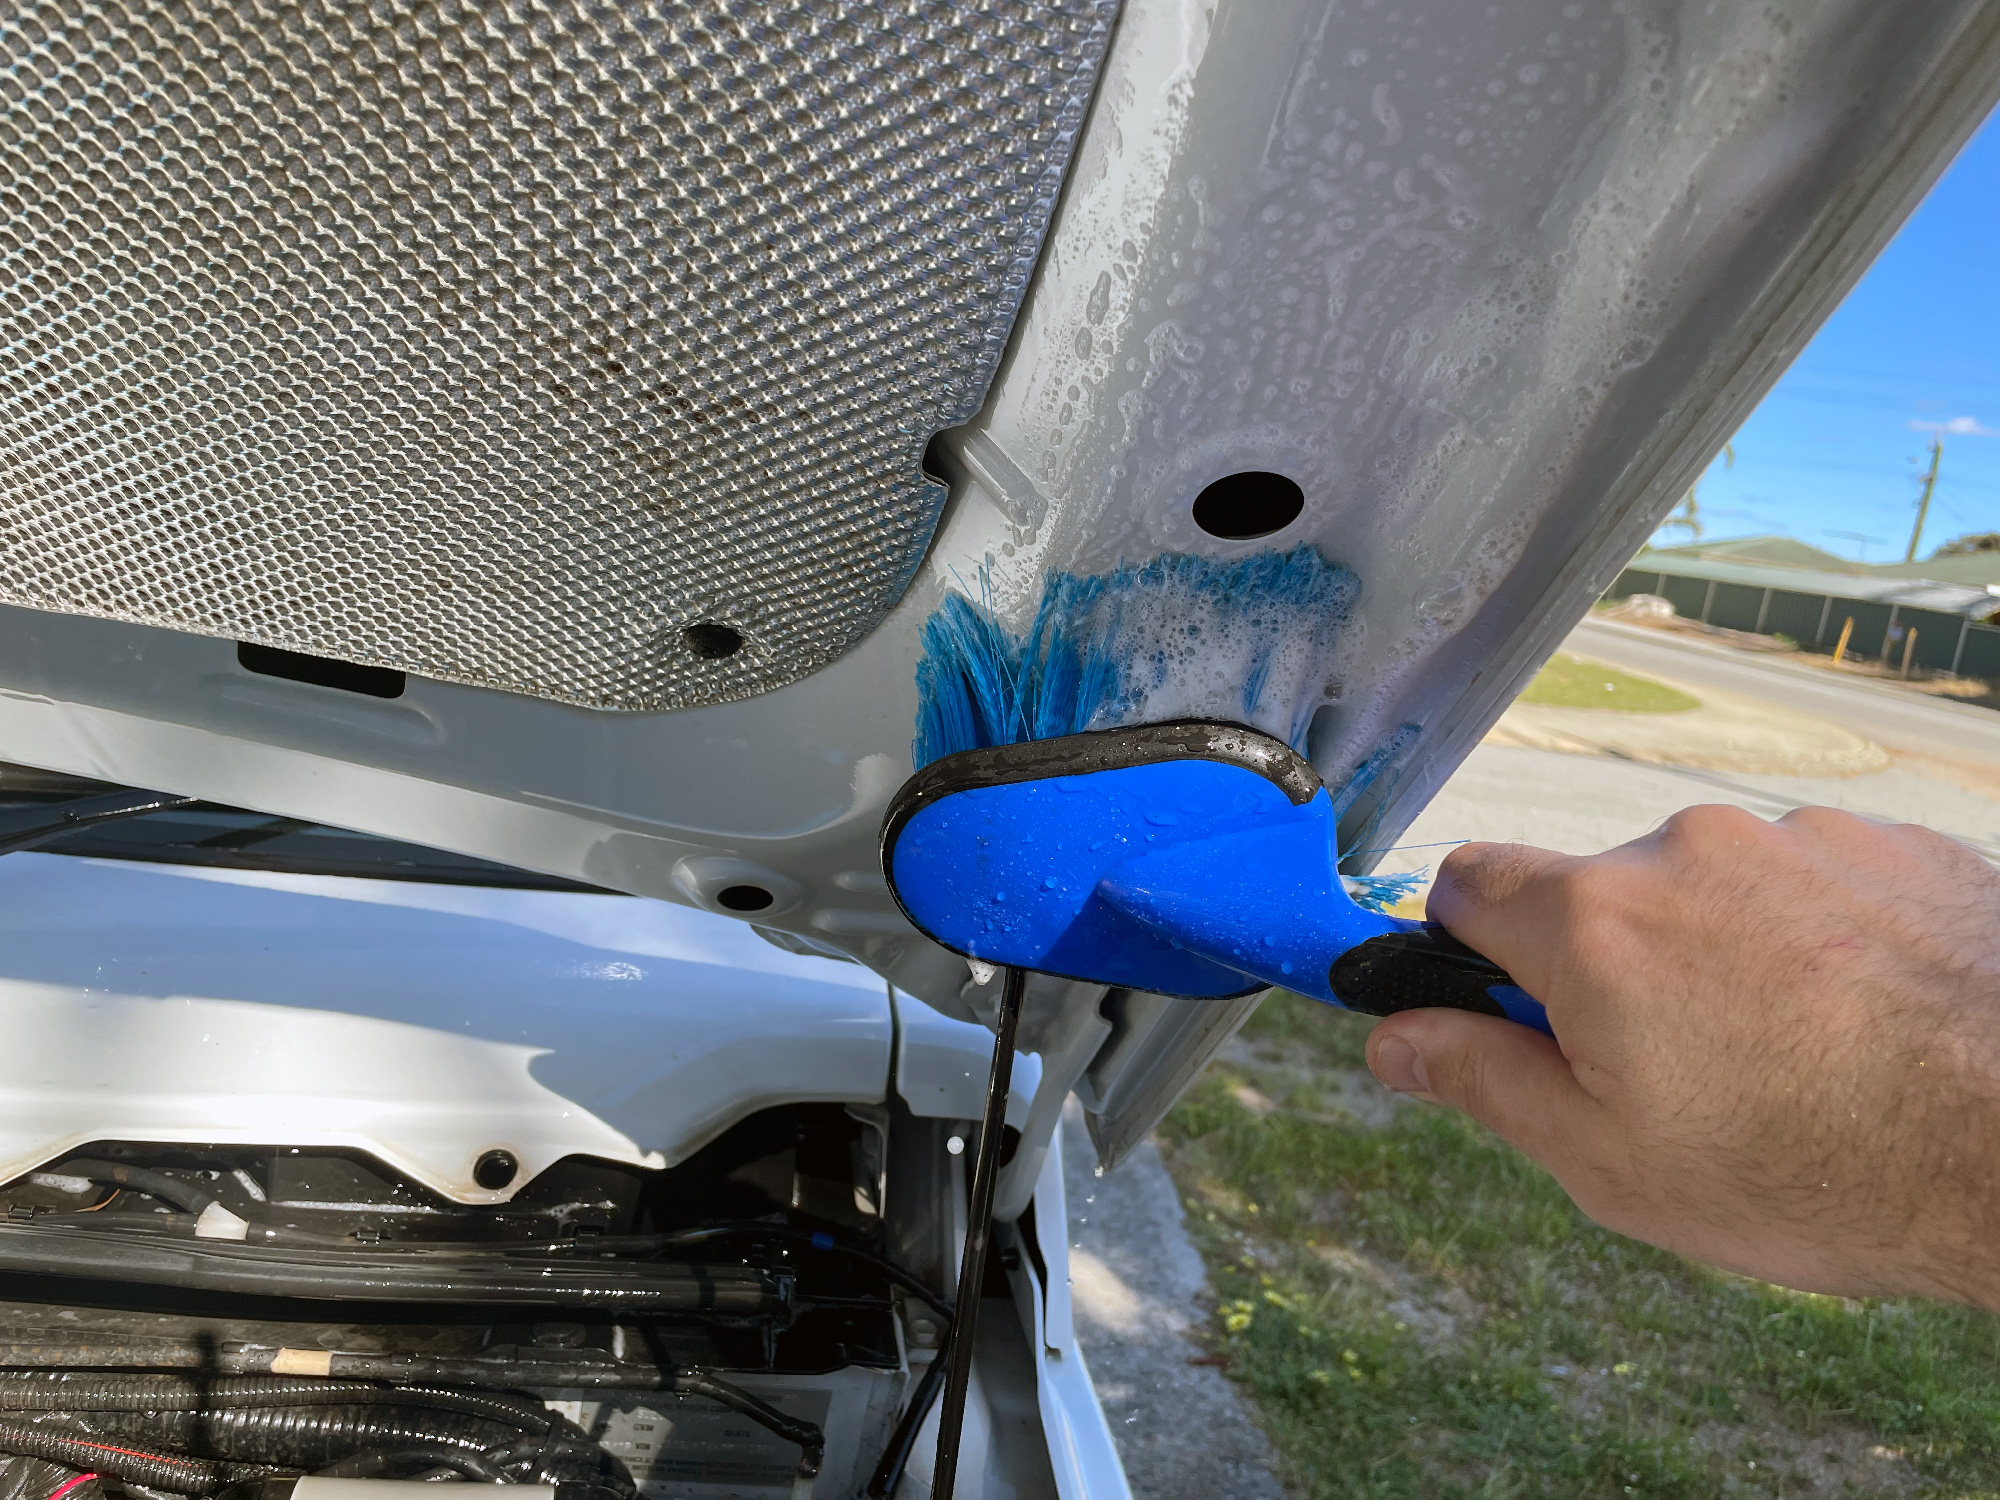
There’s lots of ways to do this but I like to spray it on using a small spray bottle & the detergent diluted down to a bit stronger than they tell you to if putting it in a bucket for application that way. I always start with the underside of the bonnet so that detergent will drip down and start washing the engine while I’m cleaning the bonnet.
Using a spray bottle to spread detergent is especially useful in making sure you get good coverage around all of the areas of the engine.

Scrubbing time!
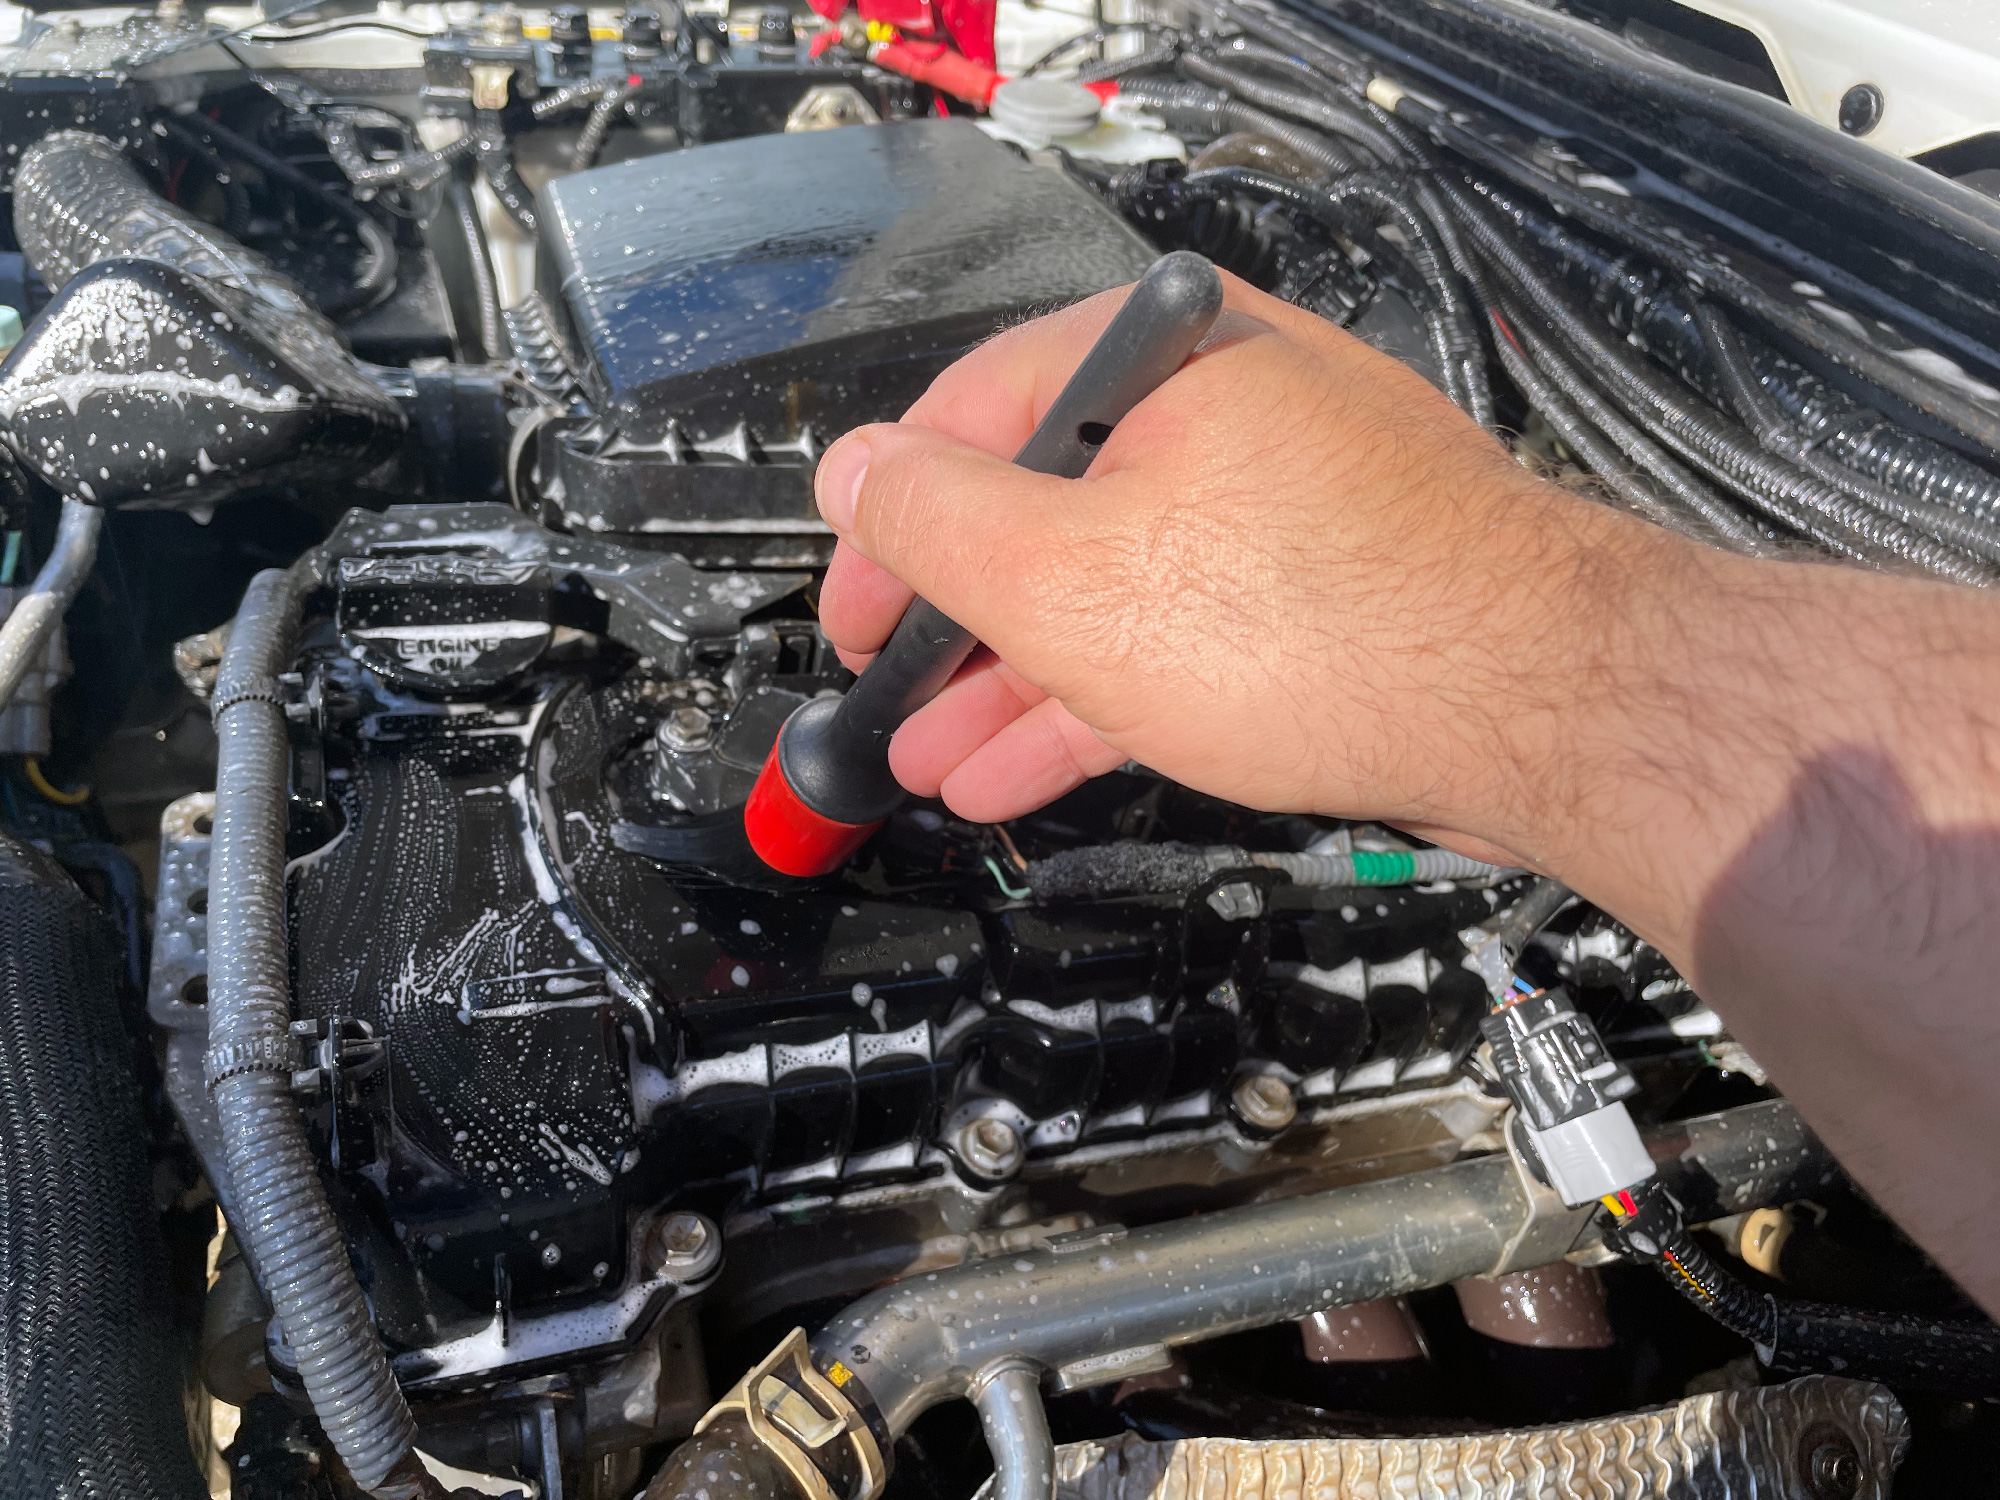
Then it’s time to give it a scrub with a brush; for large areas I use a soft wheel brush:
and for smaller/more detailed areas I use smaller detailing brushes.
After scrubbing a small section, it’s worth rinsing it off and seeing the work. Here I’ve done the right-hand half of the underneath bonnet. Sadly, no matter what I can do the aftermarket heat shielding refuses to look much cleaner!

Drying and dressing
Drying can be achieved as simply as just letting it dry with the bonnet open for a bit. If, however, you have an onboard air compressor or a sufficiently powerful portable one then you can always use an air blowing nozzle and dry it using a blast of air!
With a bit more time you can stand back and admire the handywork. As I said in the beginning I know it wasn’t that dirty to begin with, but it does look heaps better.
You can also apply a dressing product suitable for plastic/vinyl use, here I’ve put it on and given it a quick buff off and it does make it look that little bit cleaner.

Some parting thoughts
- How messy it is dictates how long it will take, but the methods are the same. The process is the same for a filthy engine bay, just more water soaking and perhaps more scrubbing time or repeated washing. The more you get into the habit of doing it straight after 4wding the easier it becomes.
- You don’t need 4wd specific chemicals/cleaning products, though if you drive in a lot of red sand/mud you might need specific chemicals to clean it. A good one is a specific ‘pindan wash’ to help remove any staining. I have found, though, regular cleaning helps more than overly specific chemicals.
- Focus on the small details. Getting into the nooks and crannies will really lift how an engine bay looks.