Jimny rear door strut options
A lot of people want to have a strut which opens the door up a bit further than standard. This provides access to drawers or similar. In addition, people often want a stronger strut to hold the door open on a slope or with a heavier rear tyre on the back. I want to dive into these but also there’s only so much you can do before you hit the physics of a) how the door on the Jimny works in relation to the mounting points and b) how weights and slopes work with rear doors opening and/or staying open.
There is an already excellent article on the opening angle stuff and trying a different strut by Geordie Jimny. I don’t aim to replicate that but provide info on some of the struts I have tried or ones where there’s info on them out there, plus debunk a few myths that sellers seem to make about this relatively straightforwards topic.
Comparison table
| Strut | Part # | Force | Closed/Open length | Open angle | Cost |
|---|---|---|---|---|---|
| Standard | 81850-77R00 / 81850-77R01 / Stabilus 249066/383634 | 280N | 460.5mm | 80º | $0 (comes on the car) $245 (replacement via Suzuki) $85 (replacement via Stabilus Australia) |
| Standard but extended | Stabilus 094560 | 250N | 485mm | 95º | |
| ‘Bunnings’ strut (medium strength) | 4230025 | 250N | 502mm | 110º | $21.35 + cost of a sausage at the bbq |
| ‘Bunnings’ strut (high strength) | 4230026 | 400N | 502mm | 110º | $21.35 + cost of a sausage at the bbq |
| Pirate Camp Co | SB-006 | 230N | 500mm | 110º | $40 + post |
| Taniguchi-PLOT free-stop door opener | W5W5RB0-161-460–004 050N | 50N | 460mm | 0-80º | ~$250 + post |
| Bushtech strut | K4045 | 250N | 450mm (advertised) ~494mm (FB user reported) | 105º (OzJimny’s own description) | $45 + post |
| Neoplot multi-stopper | NP81171 / W5W5G90-161-460–002 180N | 180N | 460mm (with 2 stops at shorter opening) | 25º, 40º, 80º | ~$230 + post |
How to change a door strut
Note that different aftermarket struts will have different end clips, but this example of fitting the classic ‘Bunnings’ strut shows you both the standard clip style and also the pin-clip which covers most of what you’ll see out there. You’ll notice in this guide I didn’t make much effort to clean the car and I make no apologies for this.
It’s a really quick change, takes a minute or two and you only really need a flat screwdriver or suitable other option to lever up and out clips; it’s also a good idea to grease the ball and socket to prevent excessive wear when fitting the new strut.
Before releasing the strut off the door, I like to use a rope or some other means to stop the door opening too far. Having a helper to hold it is another option.
First off, the clip on each end of the factory strut is a metal clip in a slot. Here it is on the car end of the strut…
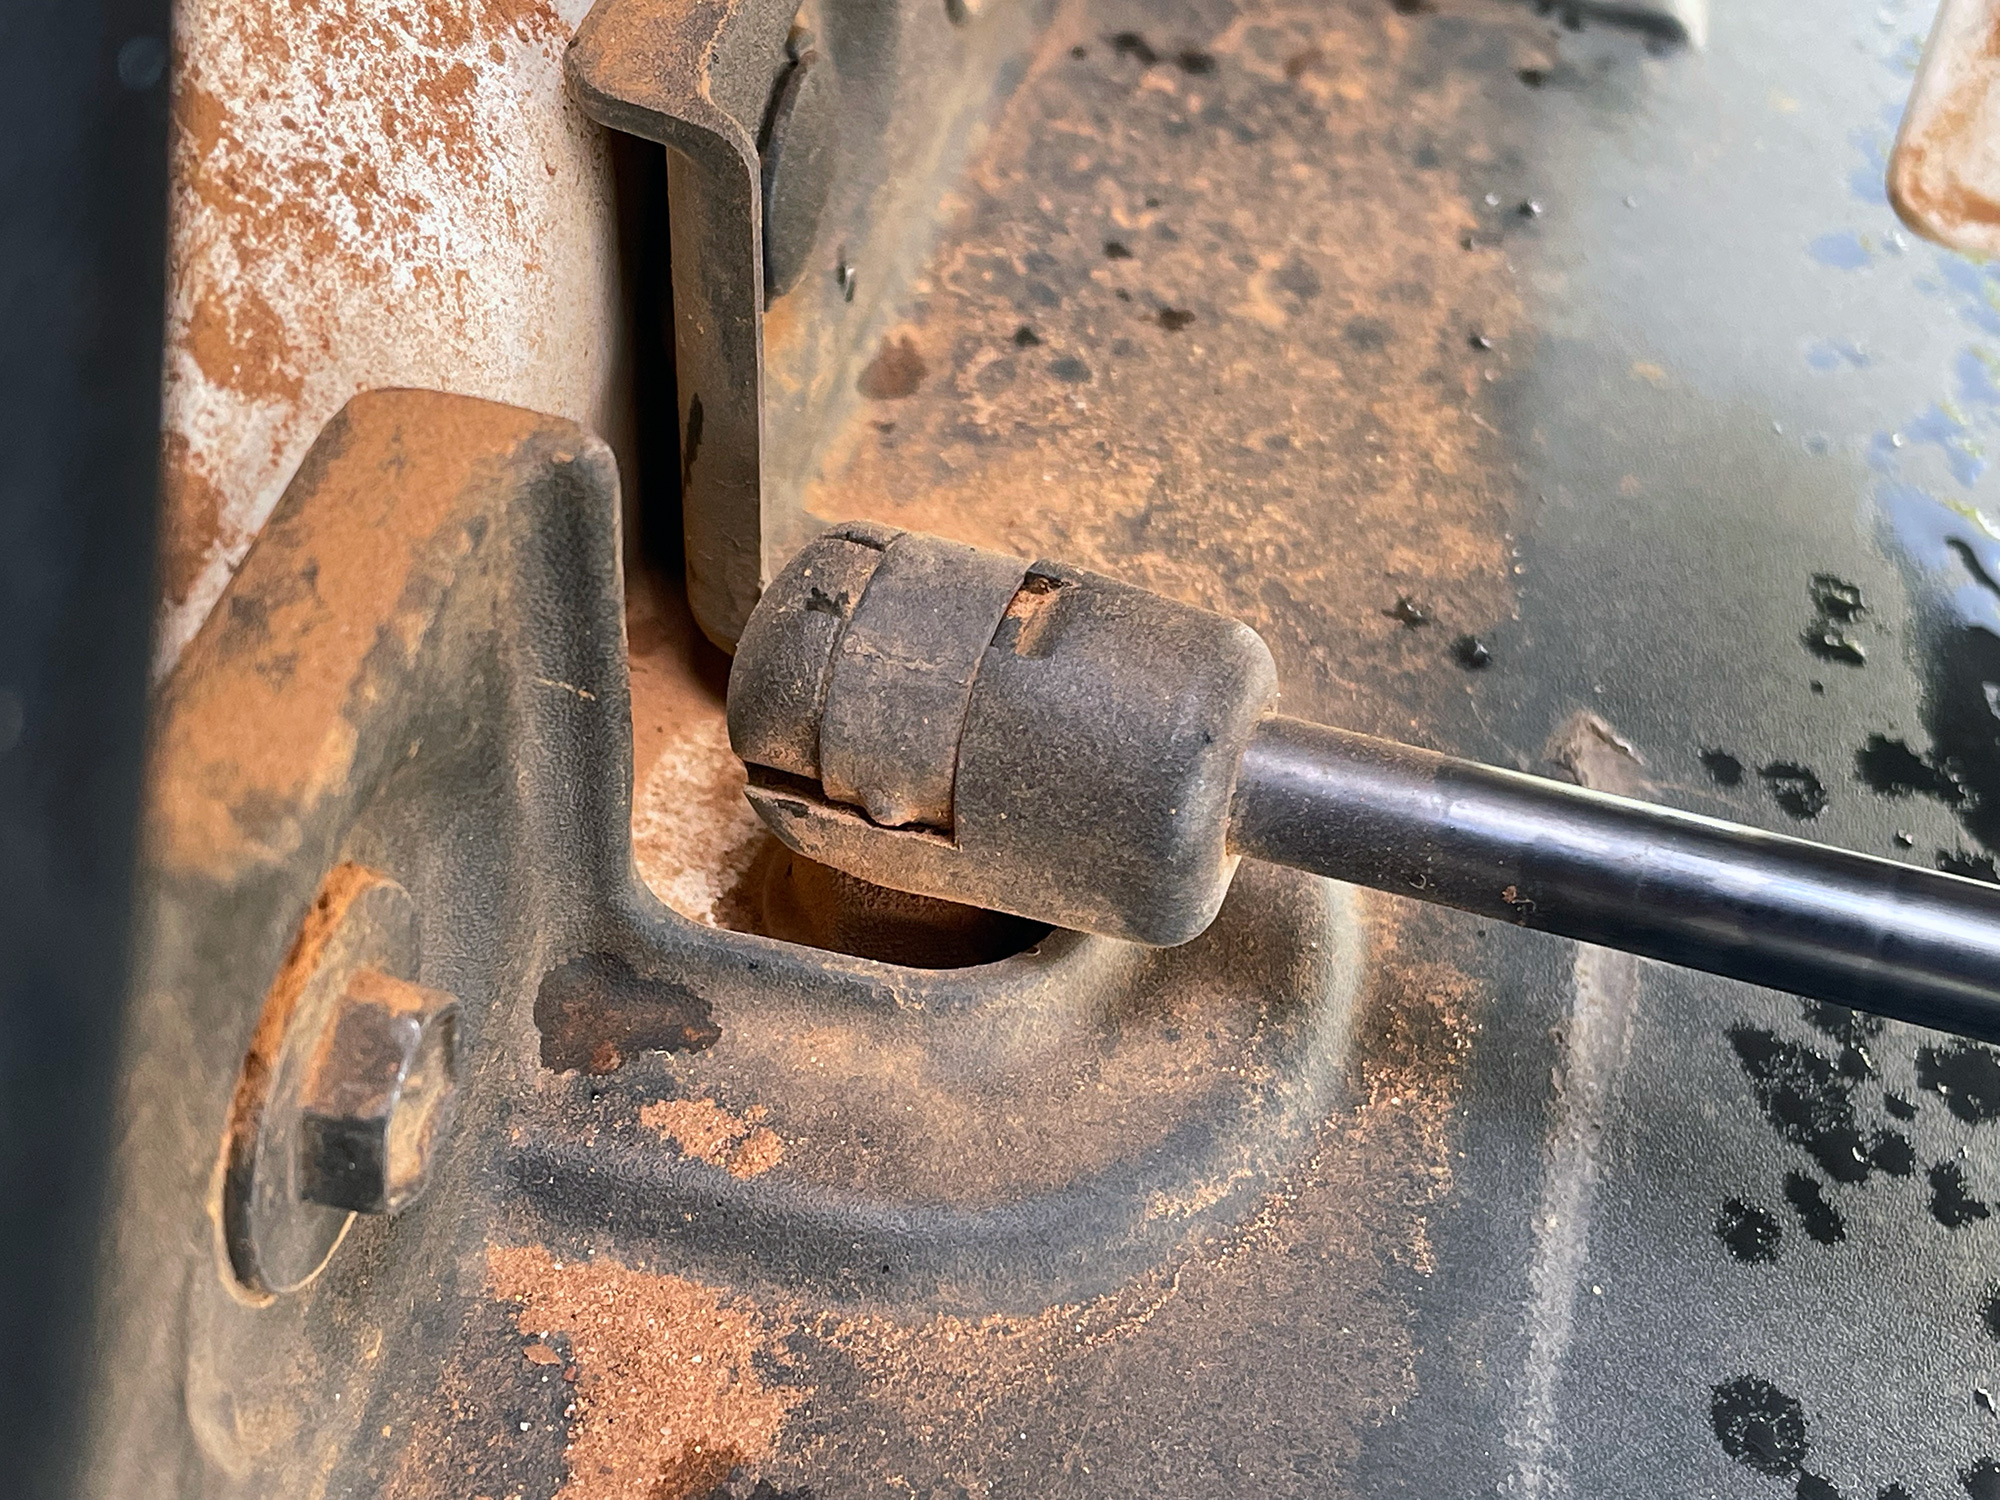
… and on the door end.
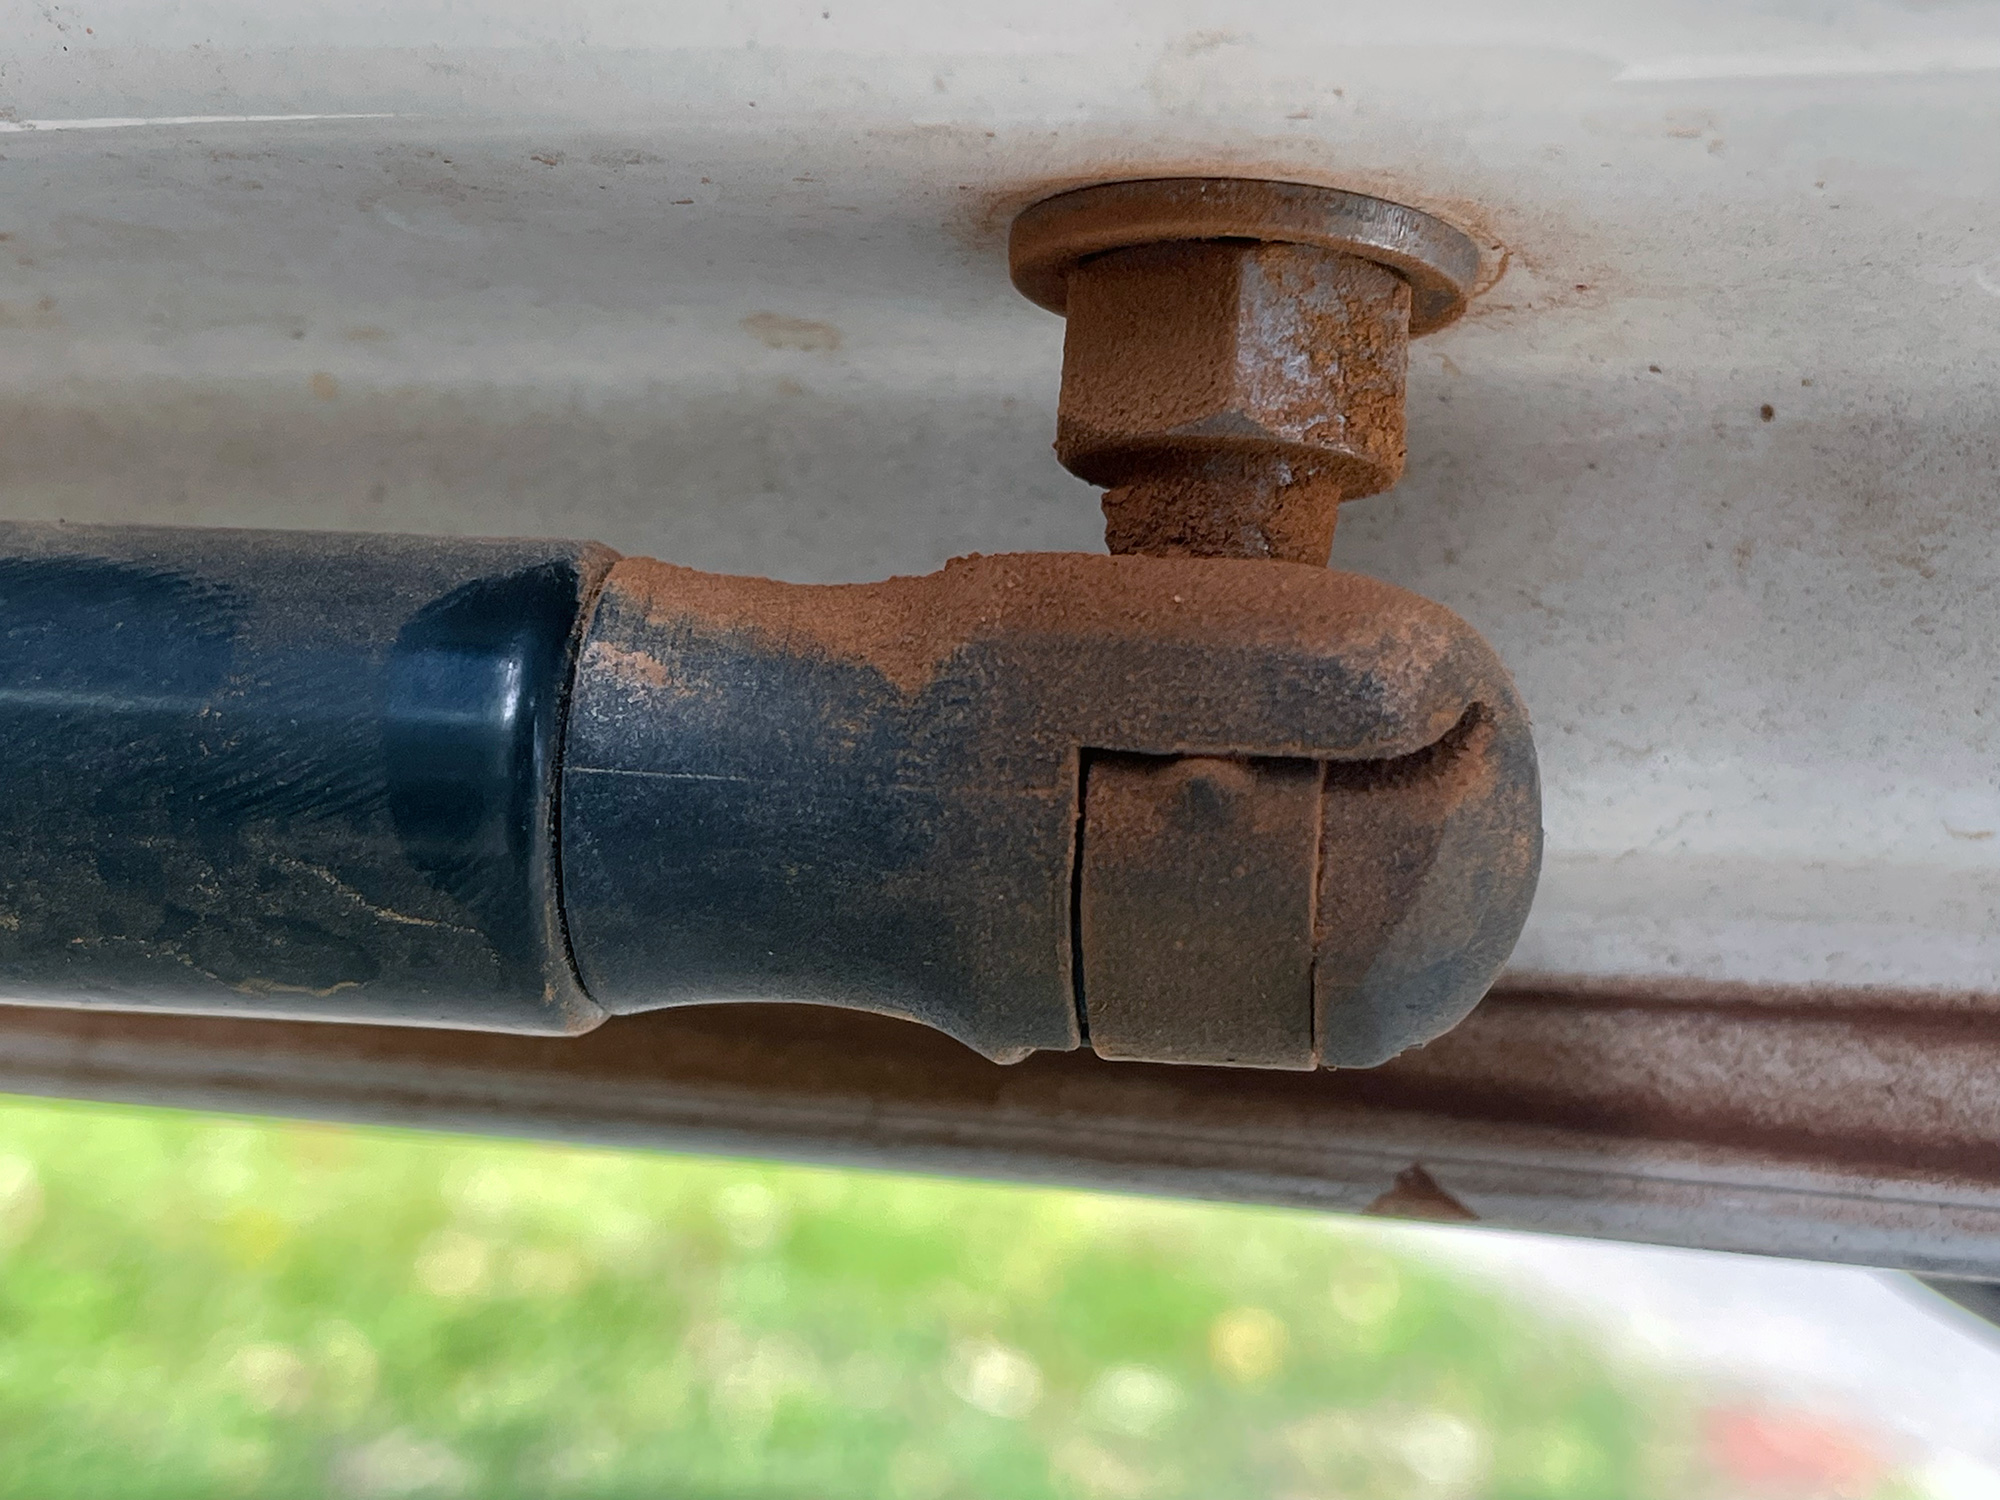
You fit it by sliding it down the slot and then push it onto the ball end, but to remove it you just lever it up. This takes a bit of force.
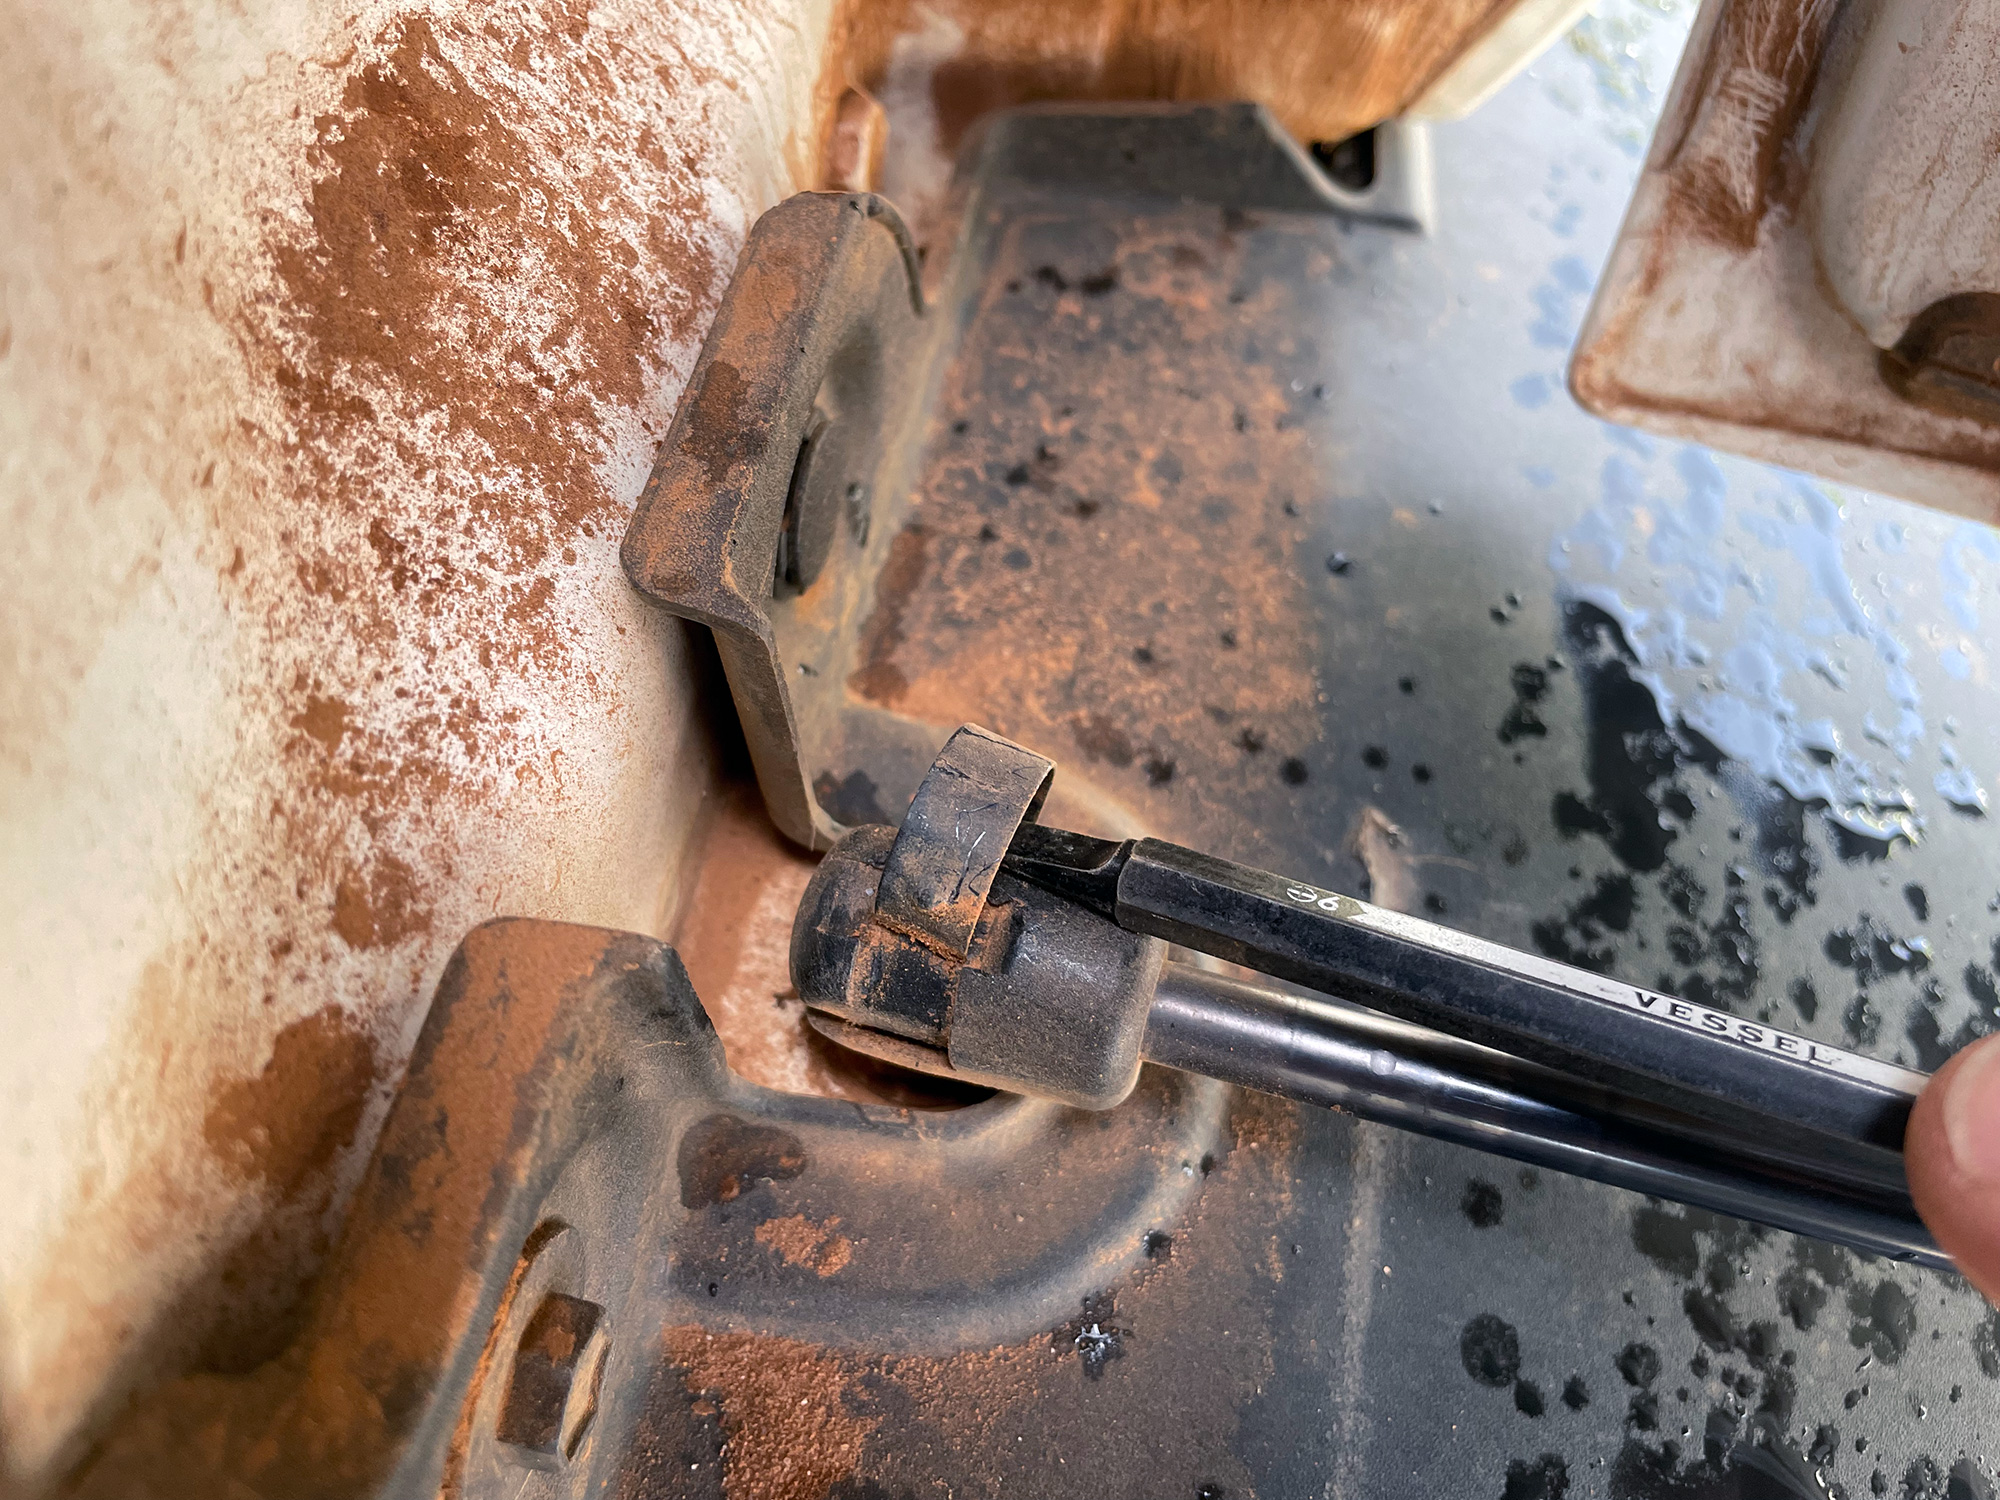
You can see a bit more of the slot I mentioned in a side view of levering the clip up.
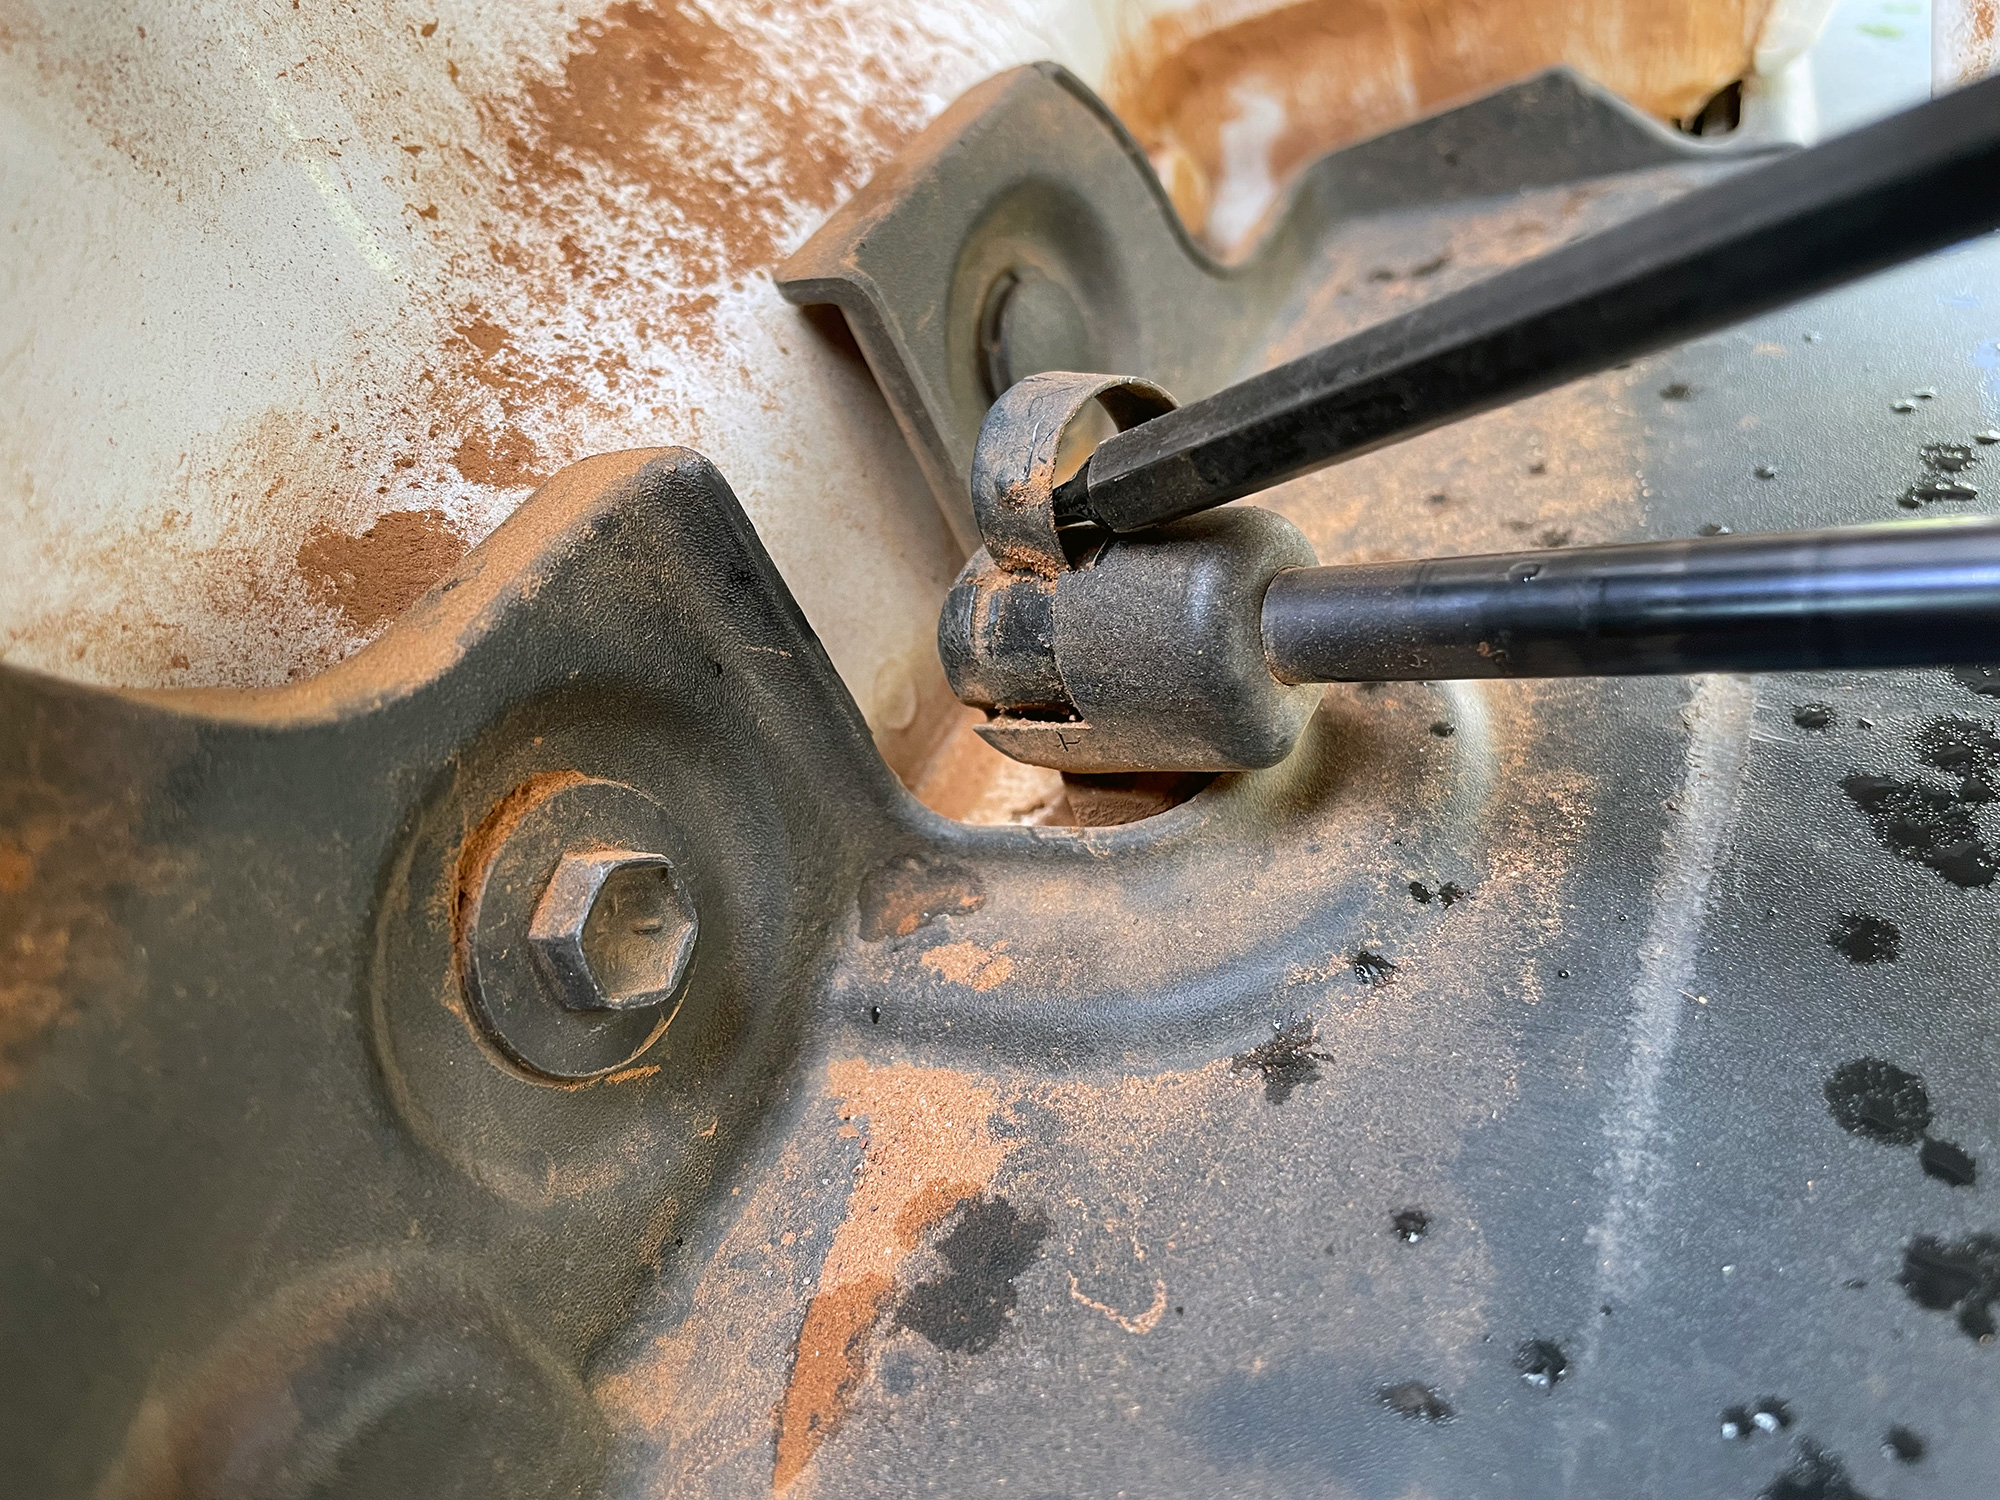
To fit a new strut, you first need to prepare its ends by getting the clips ready and also greasing the end. In the case of the Bunnings strut, the clip is first flicked up from wrapping around the shaft, and then pulled backwards out of the end.
This is flicking up the end where it goes over the shaft…
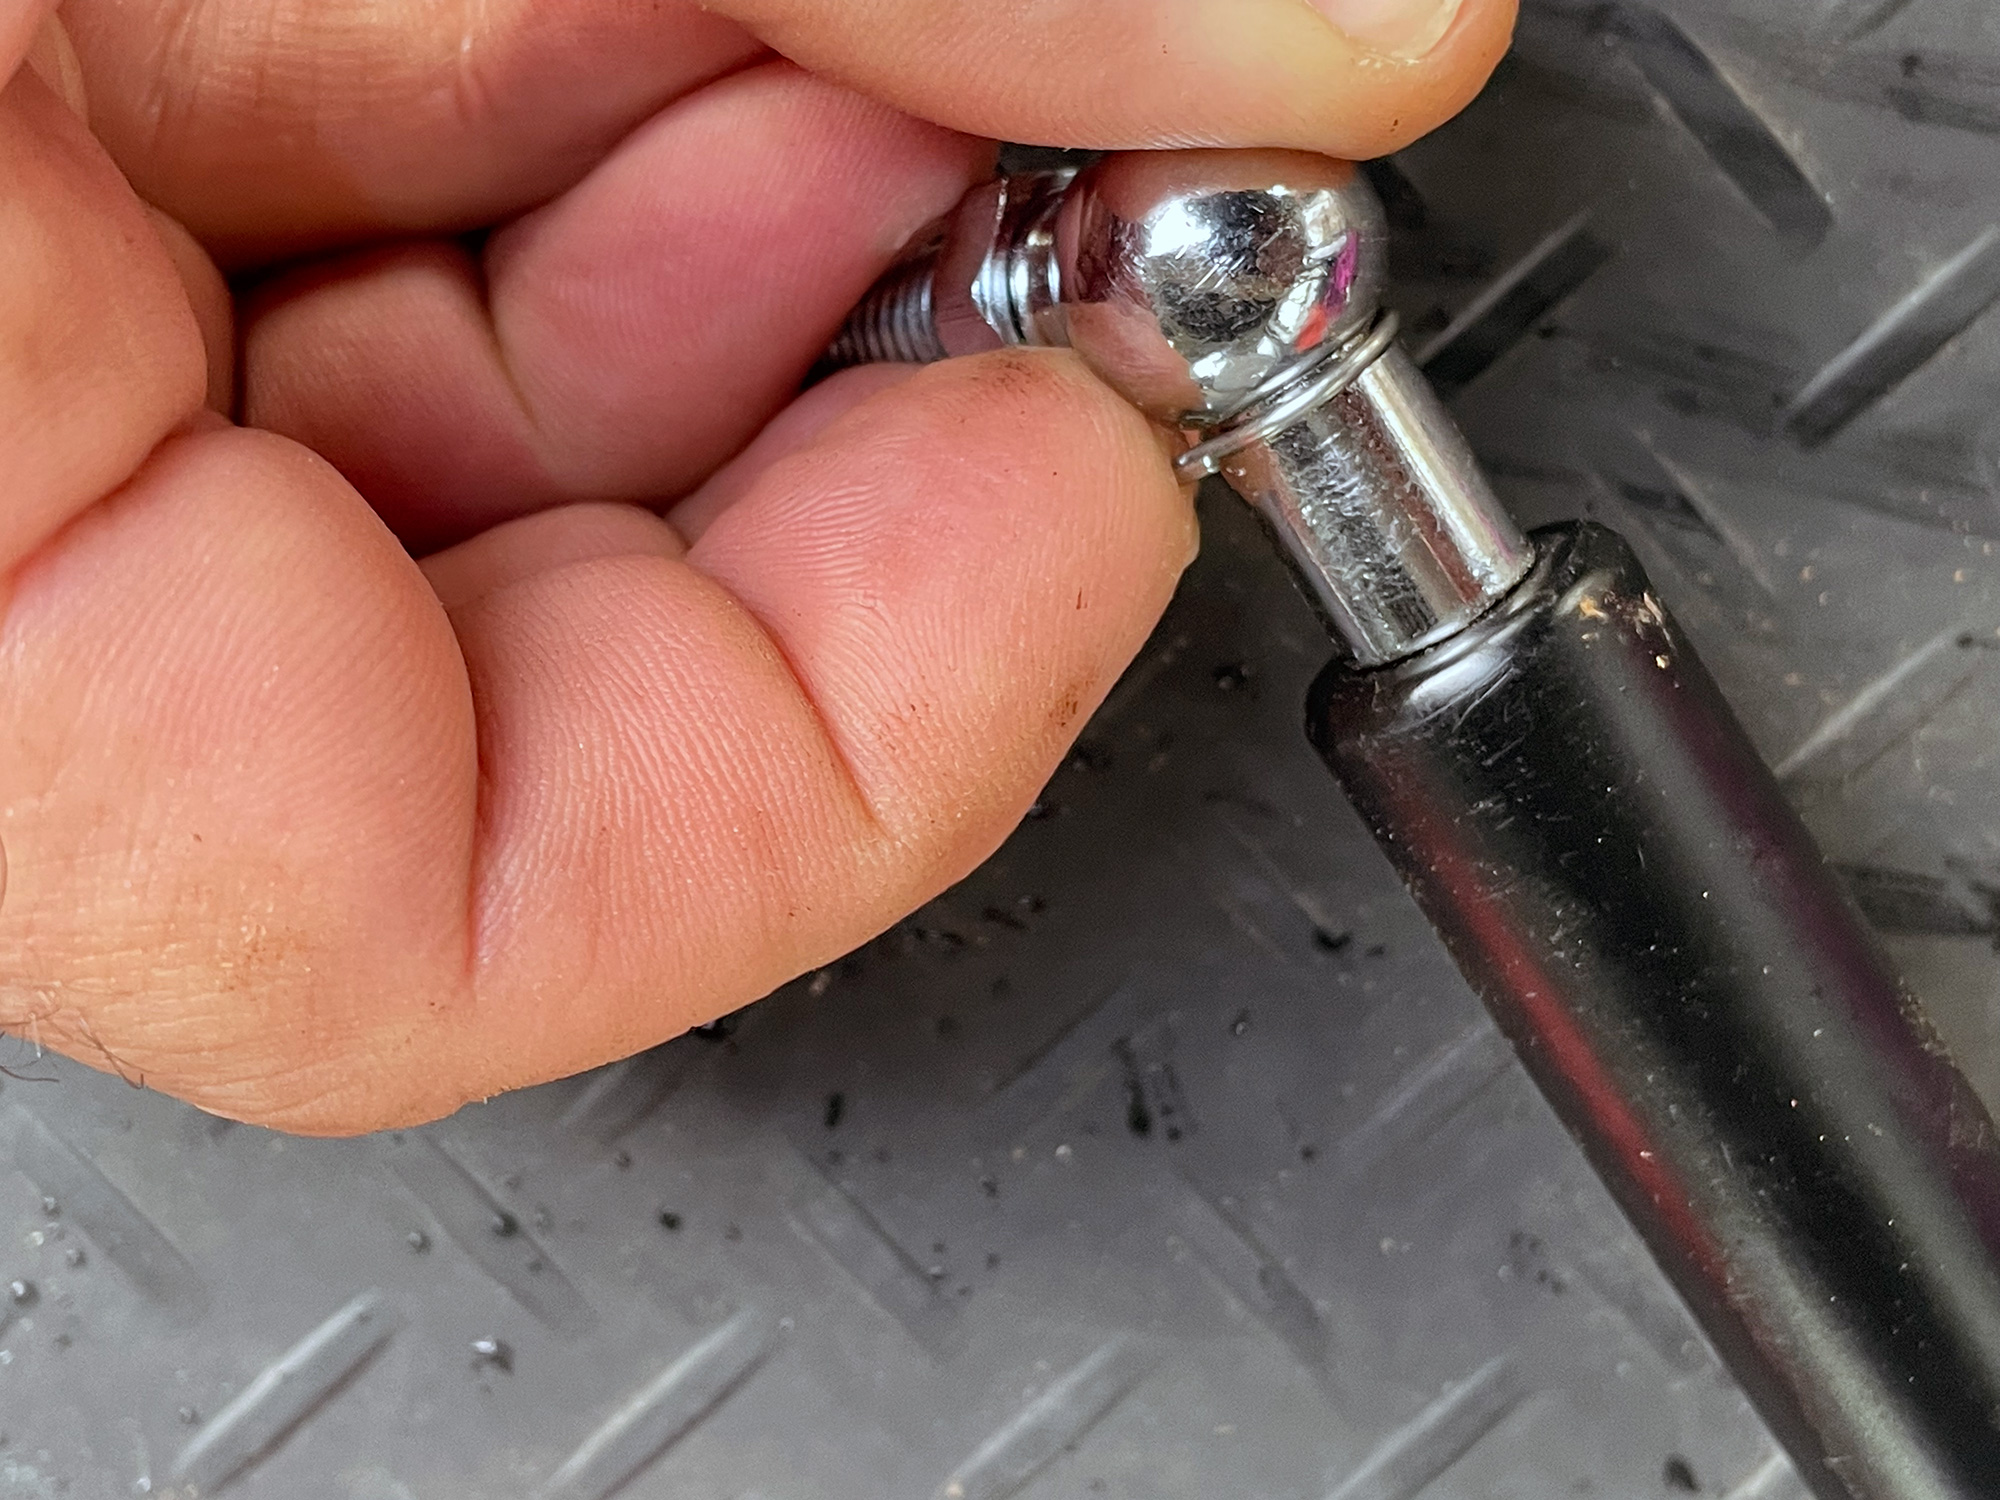
… and this is where you can see the clip goes through the end of the socket to retain the ball.
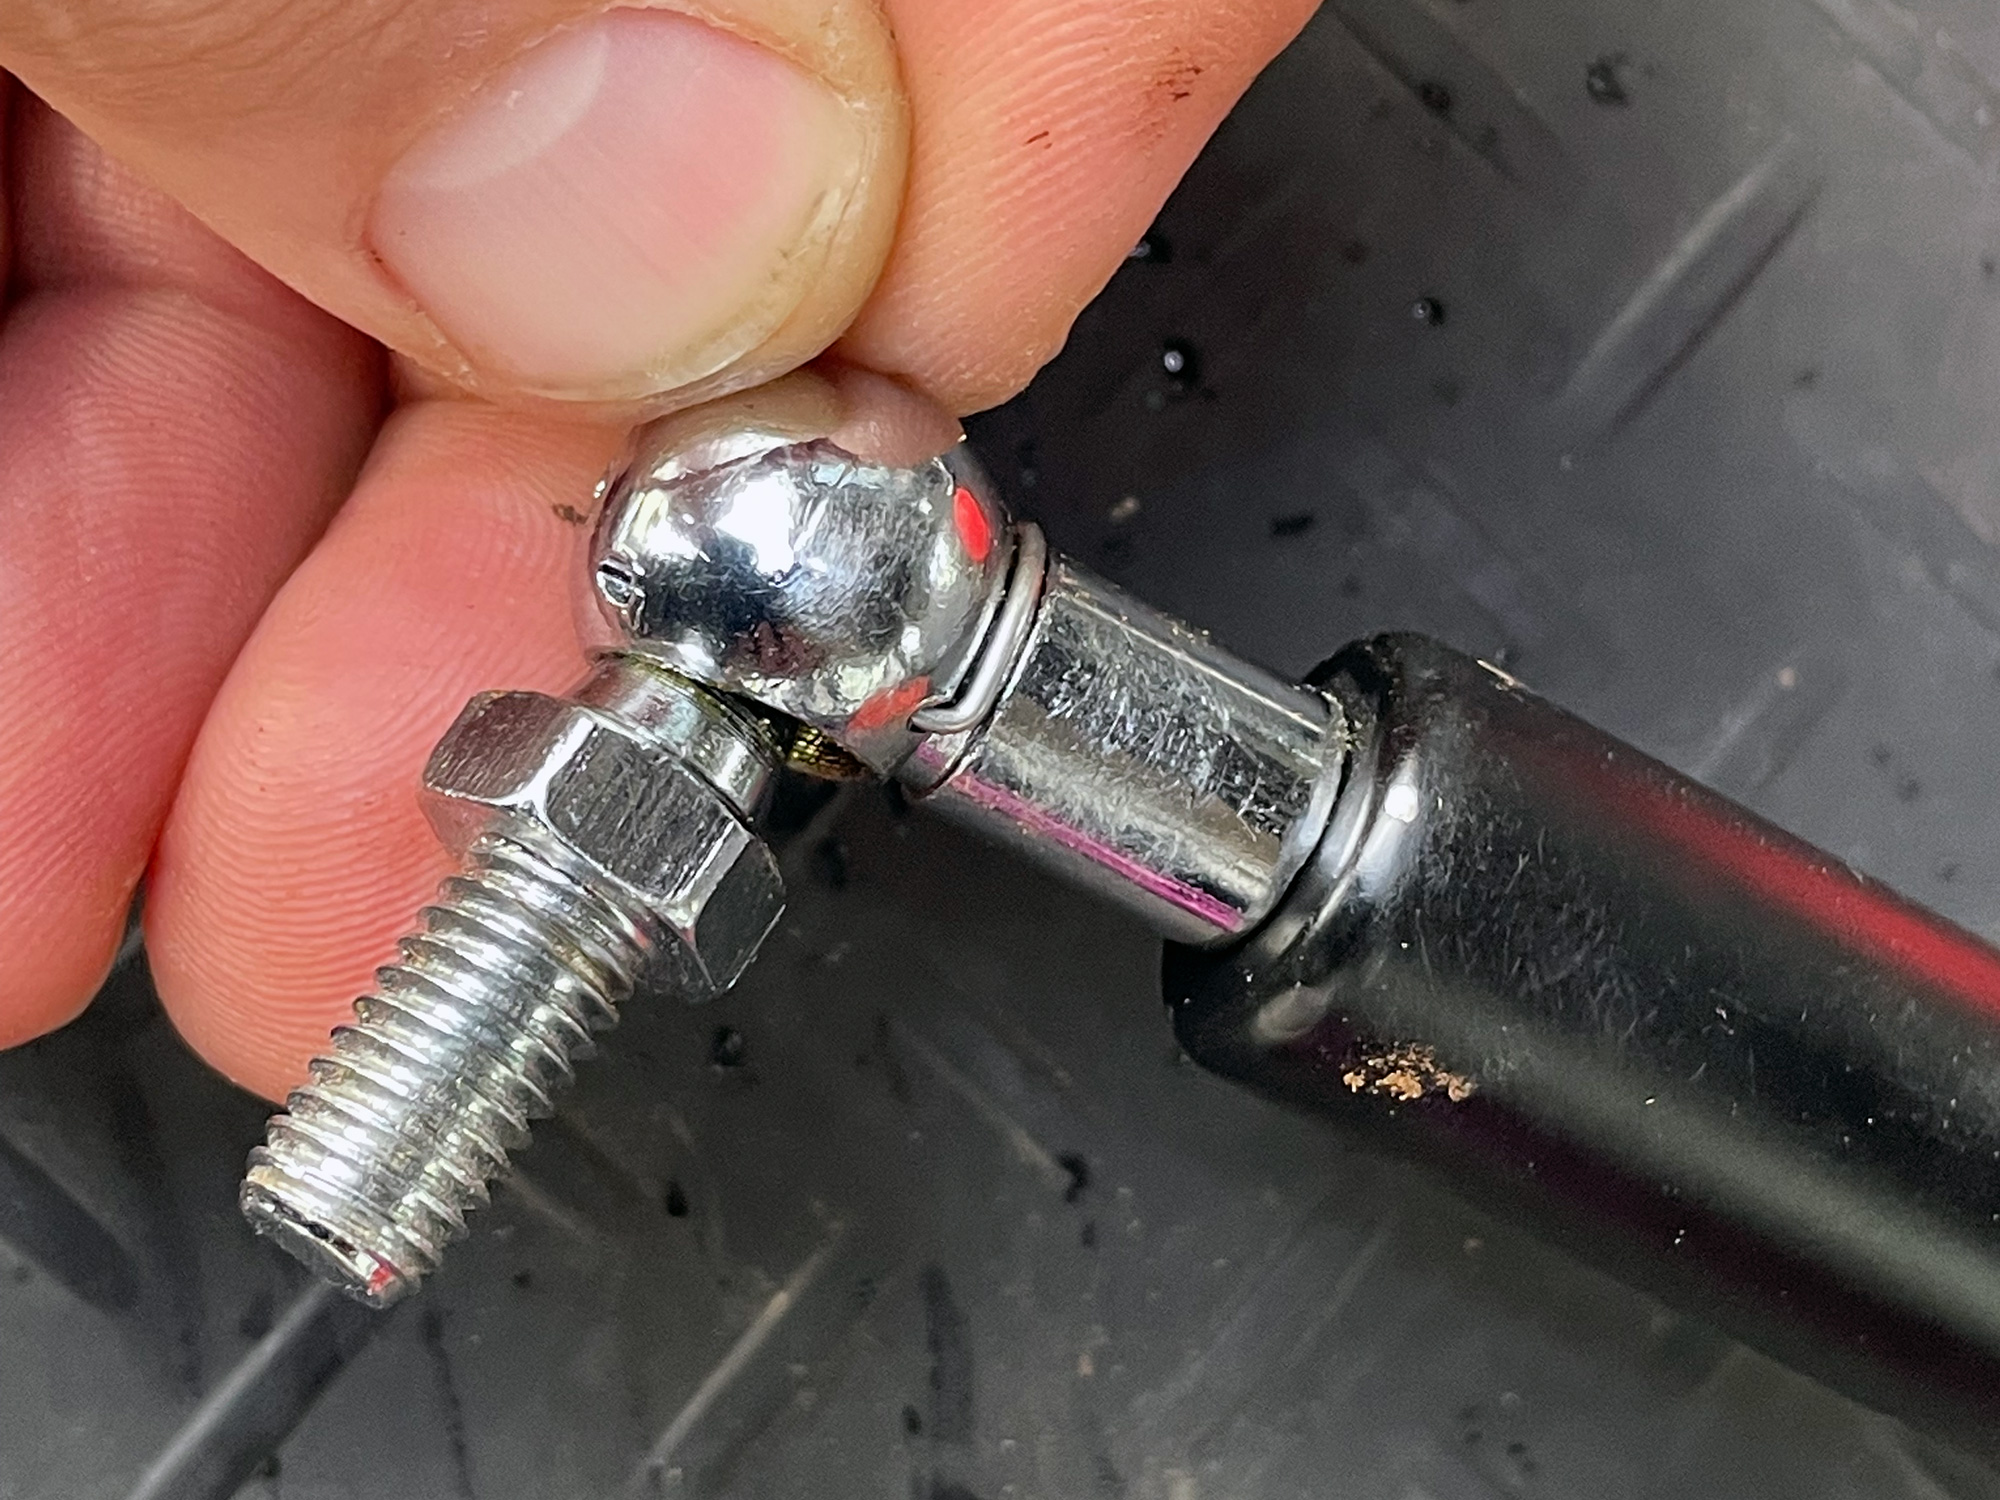
I find the OEM balls to be high quality so I wouldn’t use the replacement ones that come with many struts unless you break the ball on the car or something, so here is where you’d remove them.
Before fitting the strut to the car you should put some grease into the socket. The choice isn’t massive important, any reasonable automotive grease will work here.
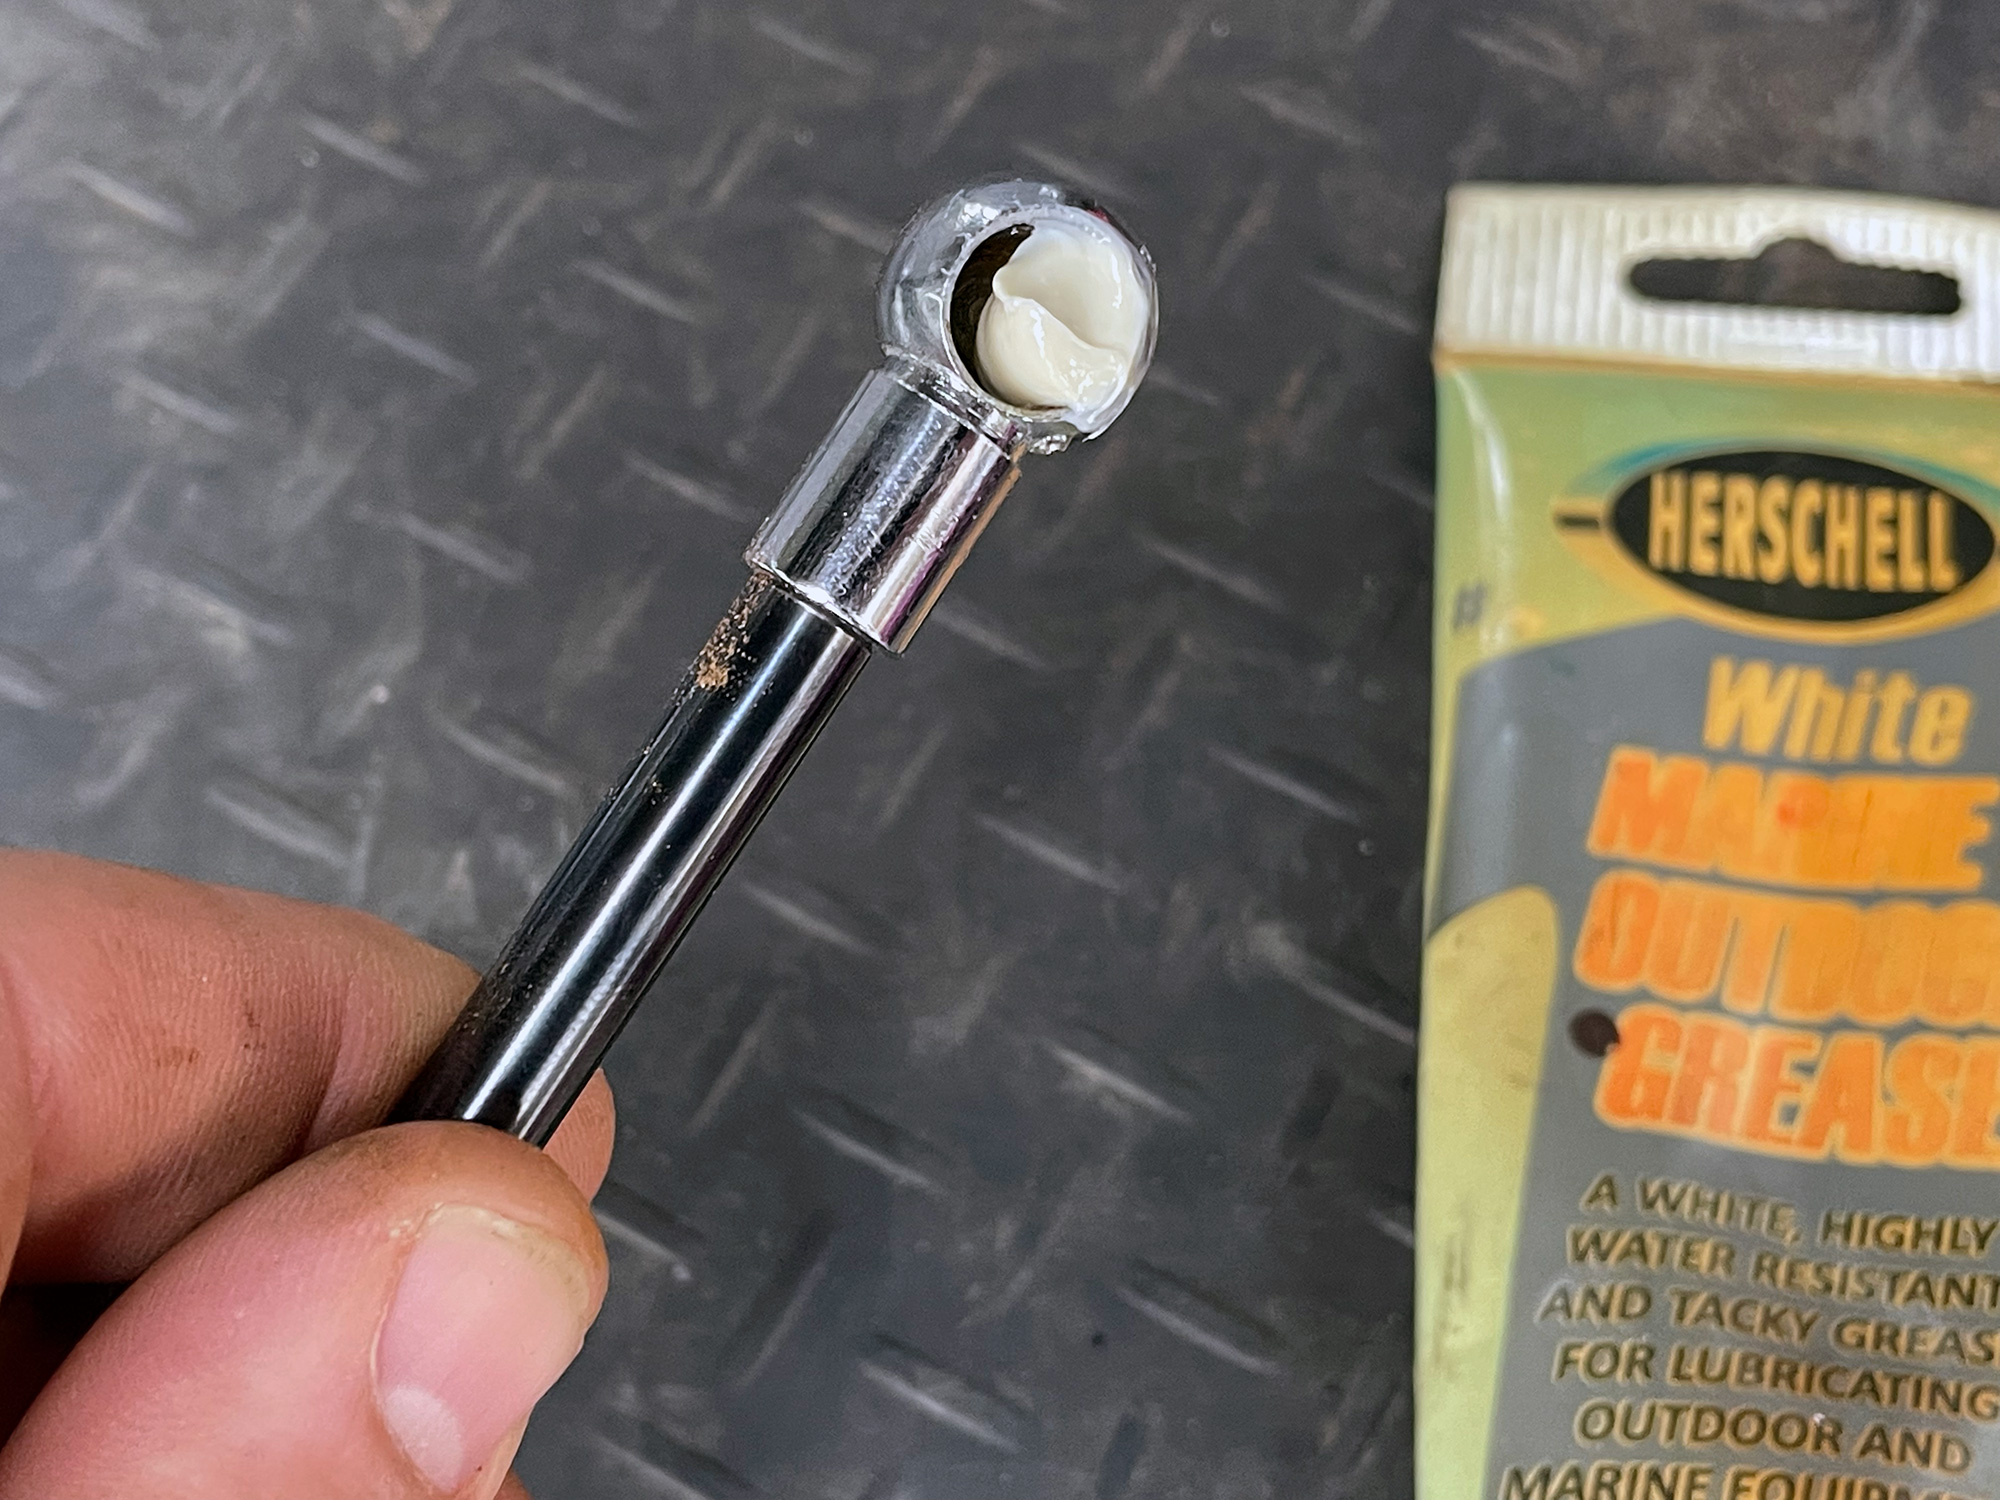
To fit this style of strut, you have the clip removed & push it into the balls. You then insert the clip along the socket to retain the ball…
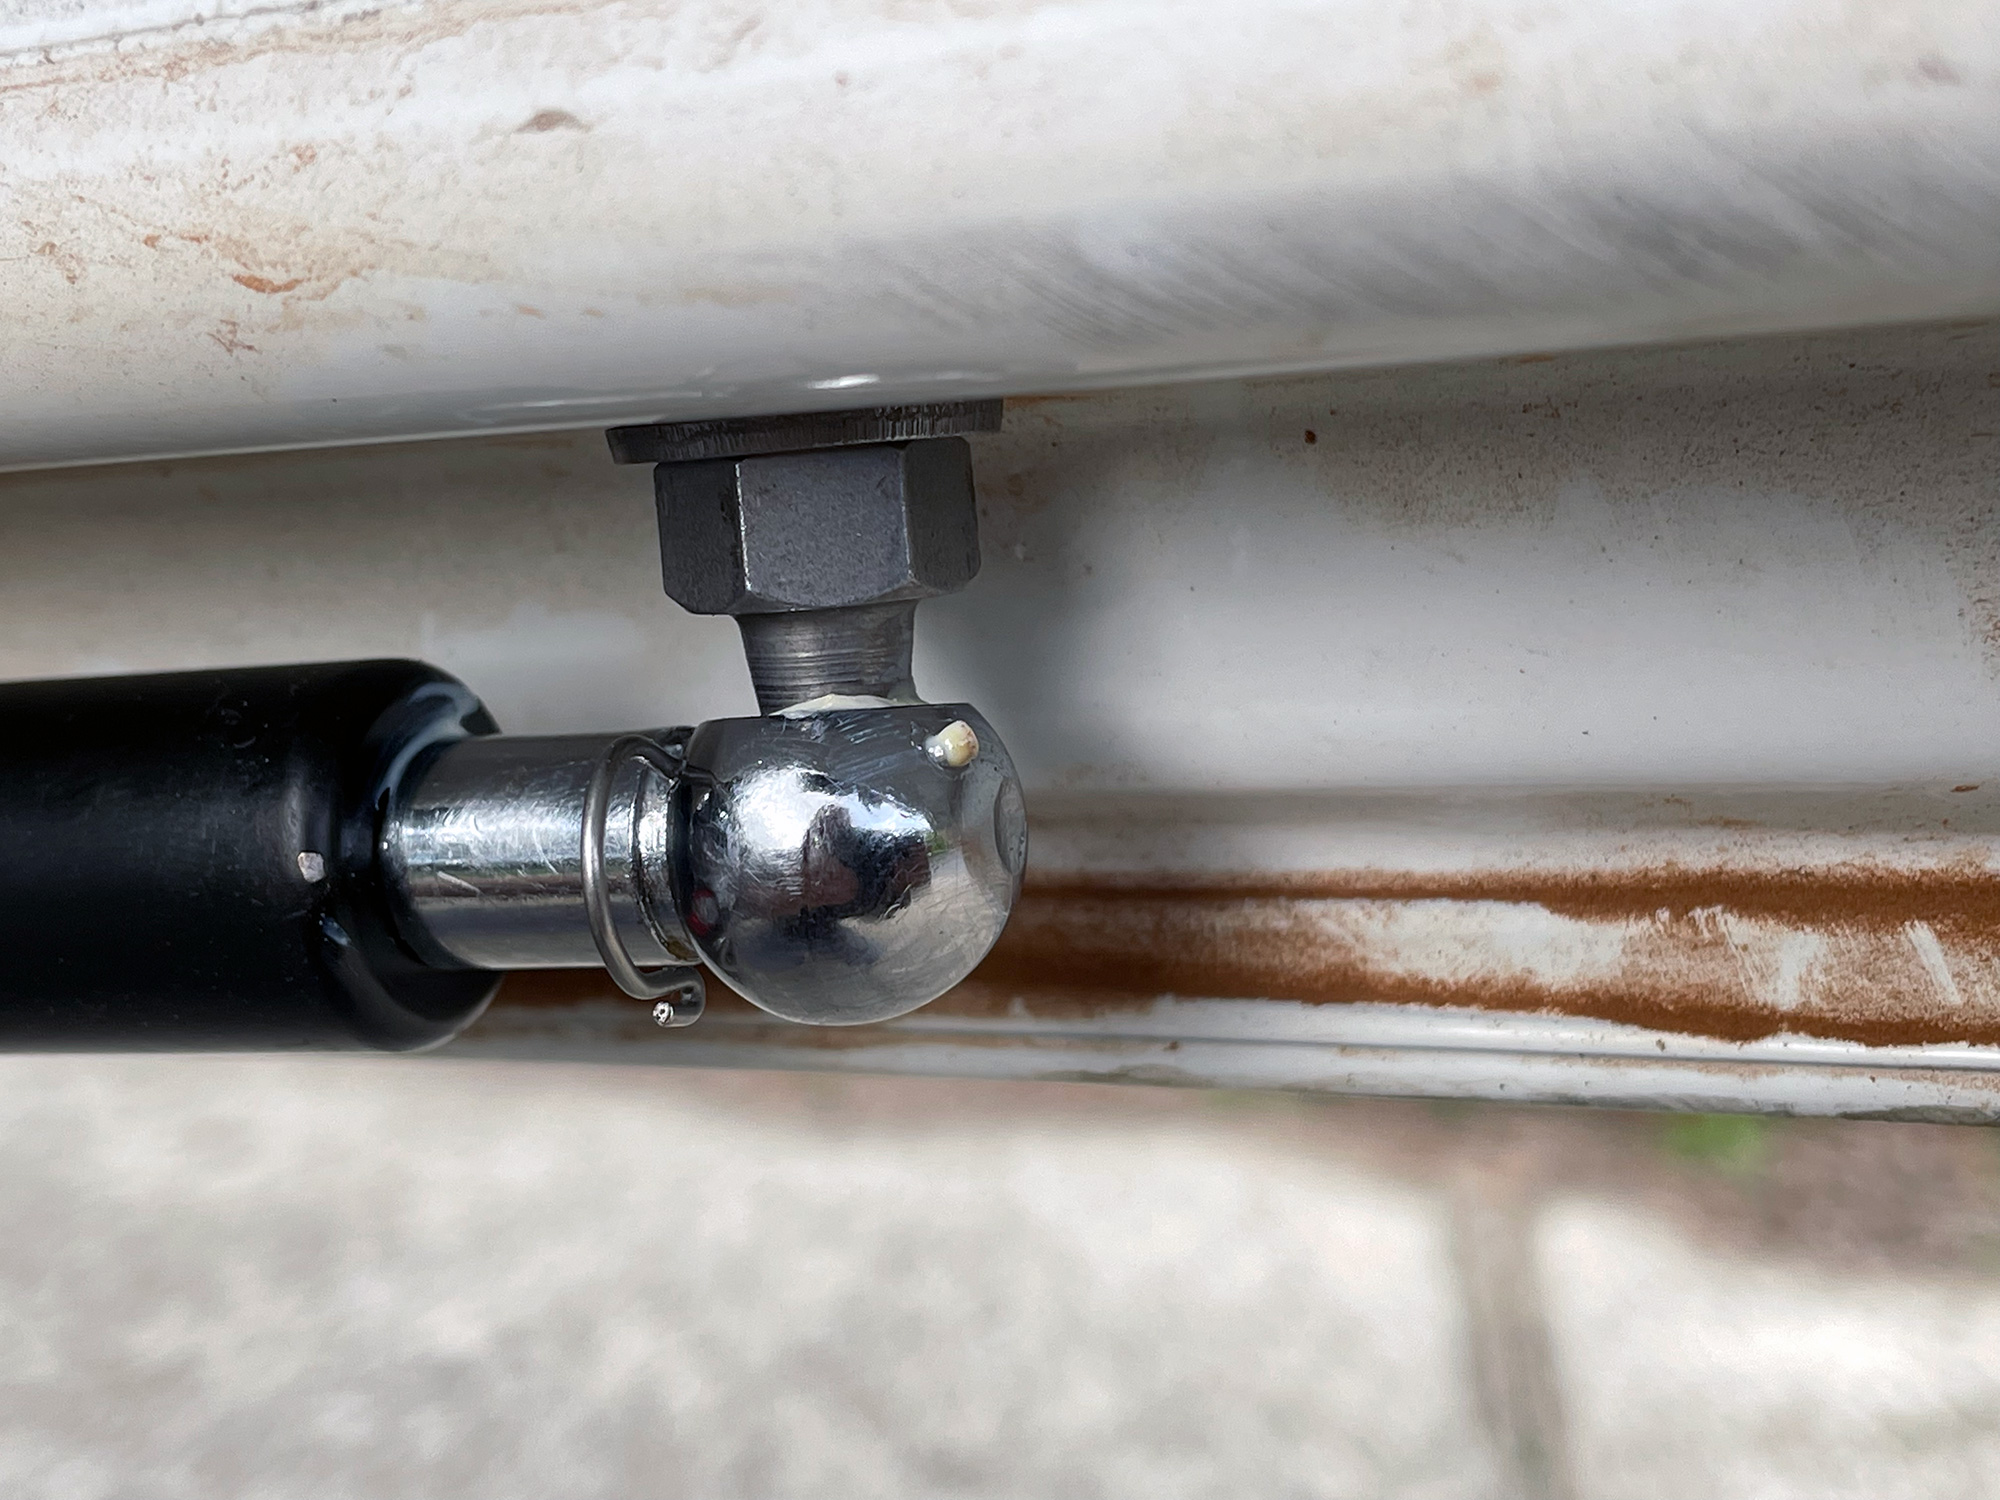
… and then just clip the end over the socket to fully retain it.
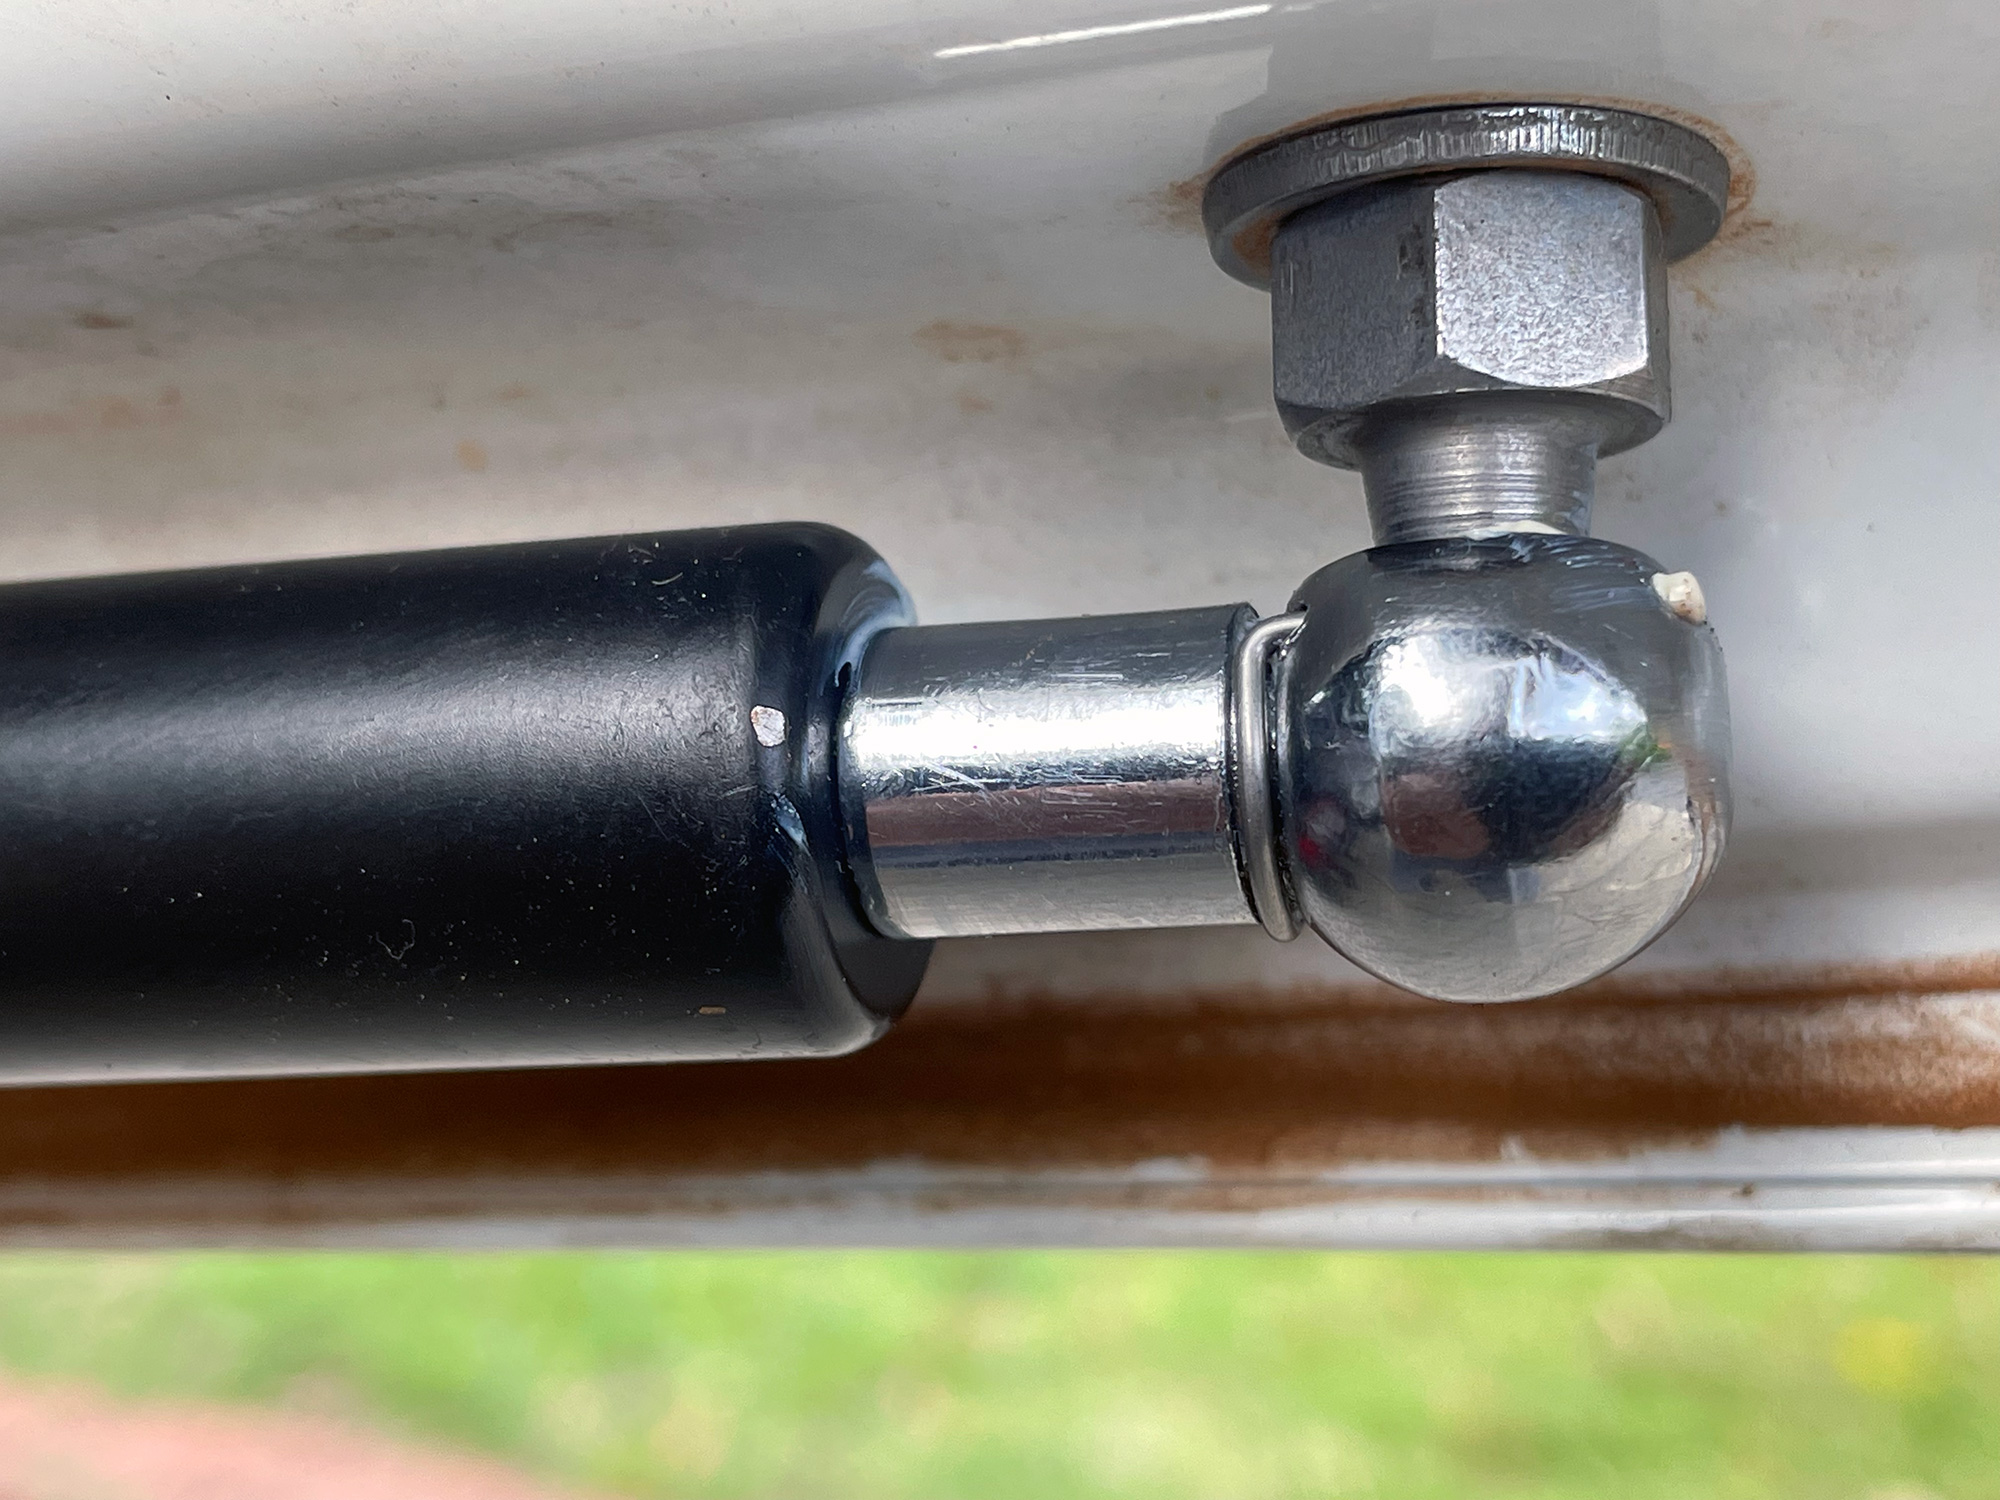
Repeat with the other end and you’re all done.
Other styles of clips involve having the clip installed already on the end and just pressing the socket over the ball; it pays to understand what style you have and how to fit it before battling with it on the car.
Stock strut
This is a bit hard to pin down as to actual force specs. The strut body has written on it numbers like “249066 0280N 154/19 A31” (quick example I found on ebay) or “249066 0280N 291/18 A31”. This leads me to assume the xxx/yy in the 3rd field is the day of the year and year that the strut was made, 249066 is the part number and 0280N relates to a strength i.e. 280N. So for my strut it was manufactured on day 291 of 2018, which as a piece of trivia is Thursday, 18 October 2018.
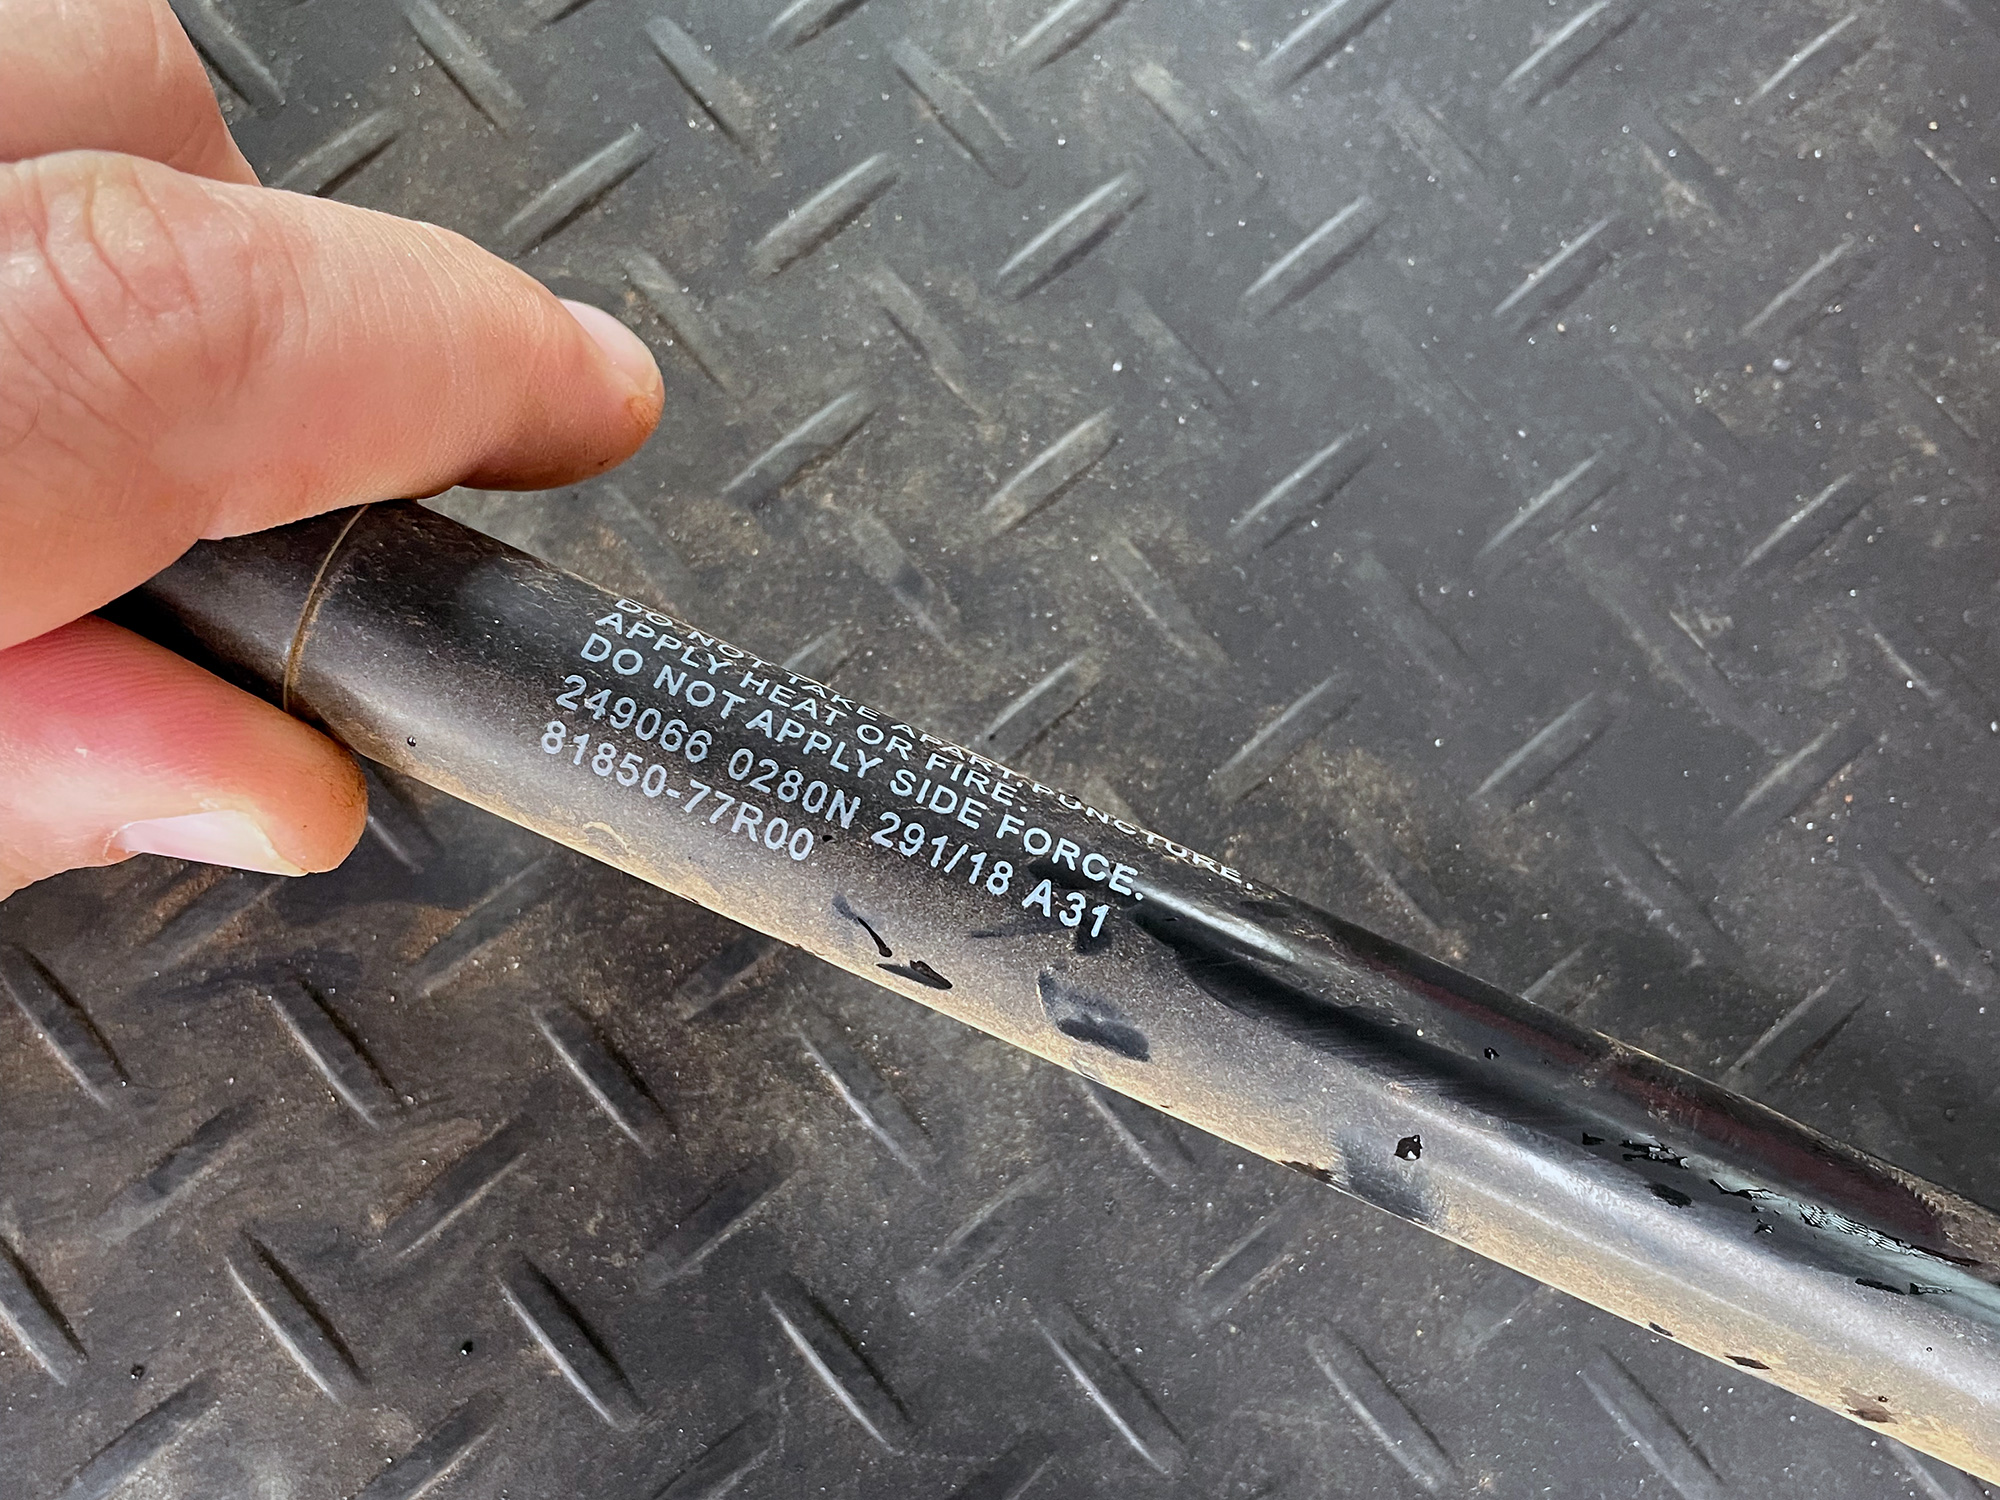
This is consistent with the way Stabilus Lift O Mat struts are labelled and Stabilus appears to be the brand on a lot of the Jimny boot struts. 249066 cross references in the Stabilus catalogue with part number 383634, and also lists 81850-77R00 and 81850-77R01 which are definitely Suzuki part numbers.
A bit more digging using this part number gives me a spec sheet which does indicate a 280N strength, 460.5mm length and a stroke of 147.5mm.
A longer version of the factory strut from Stabilus exists: this Stabilus strut is 485mm long, 250N rated and is part number 094560.
Bunnings strut
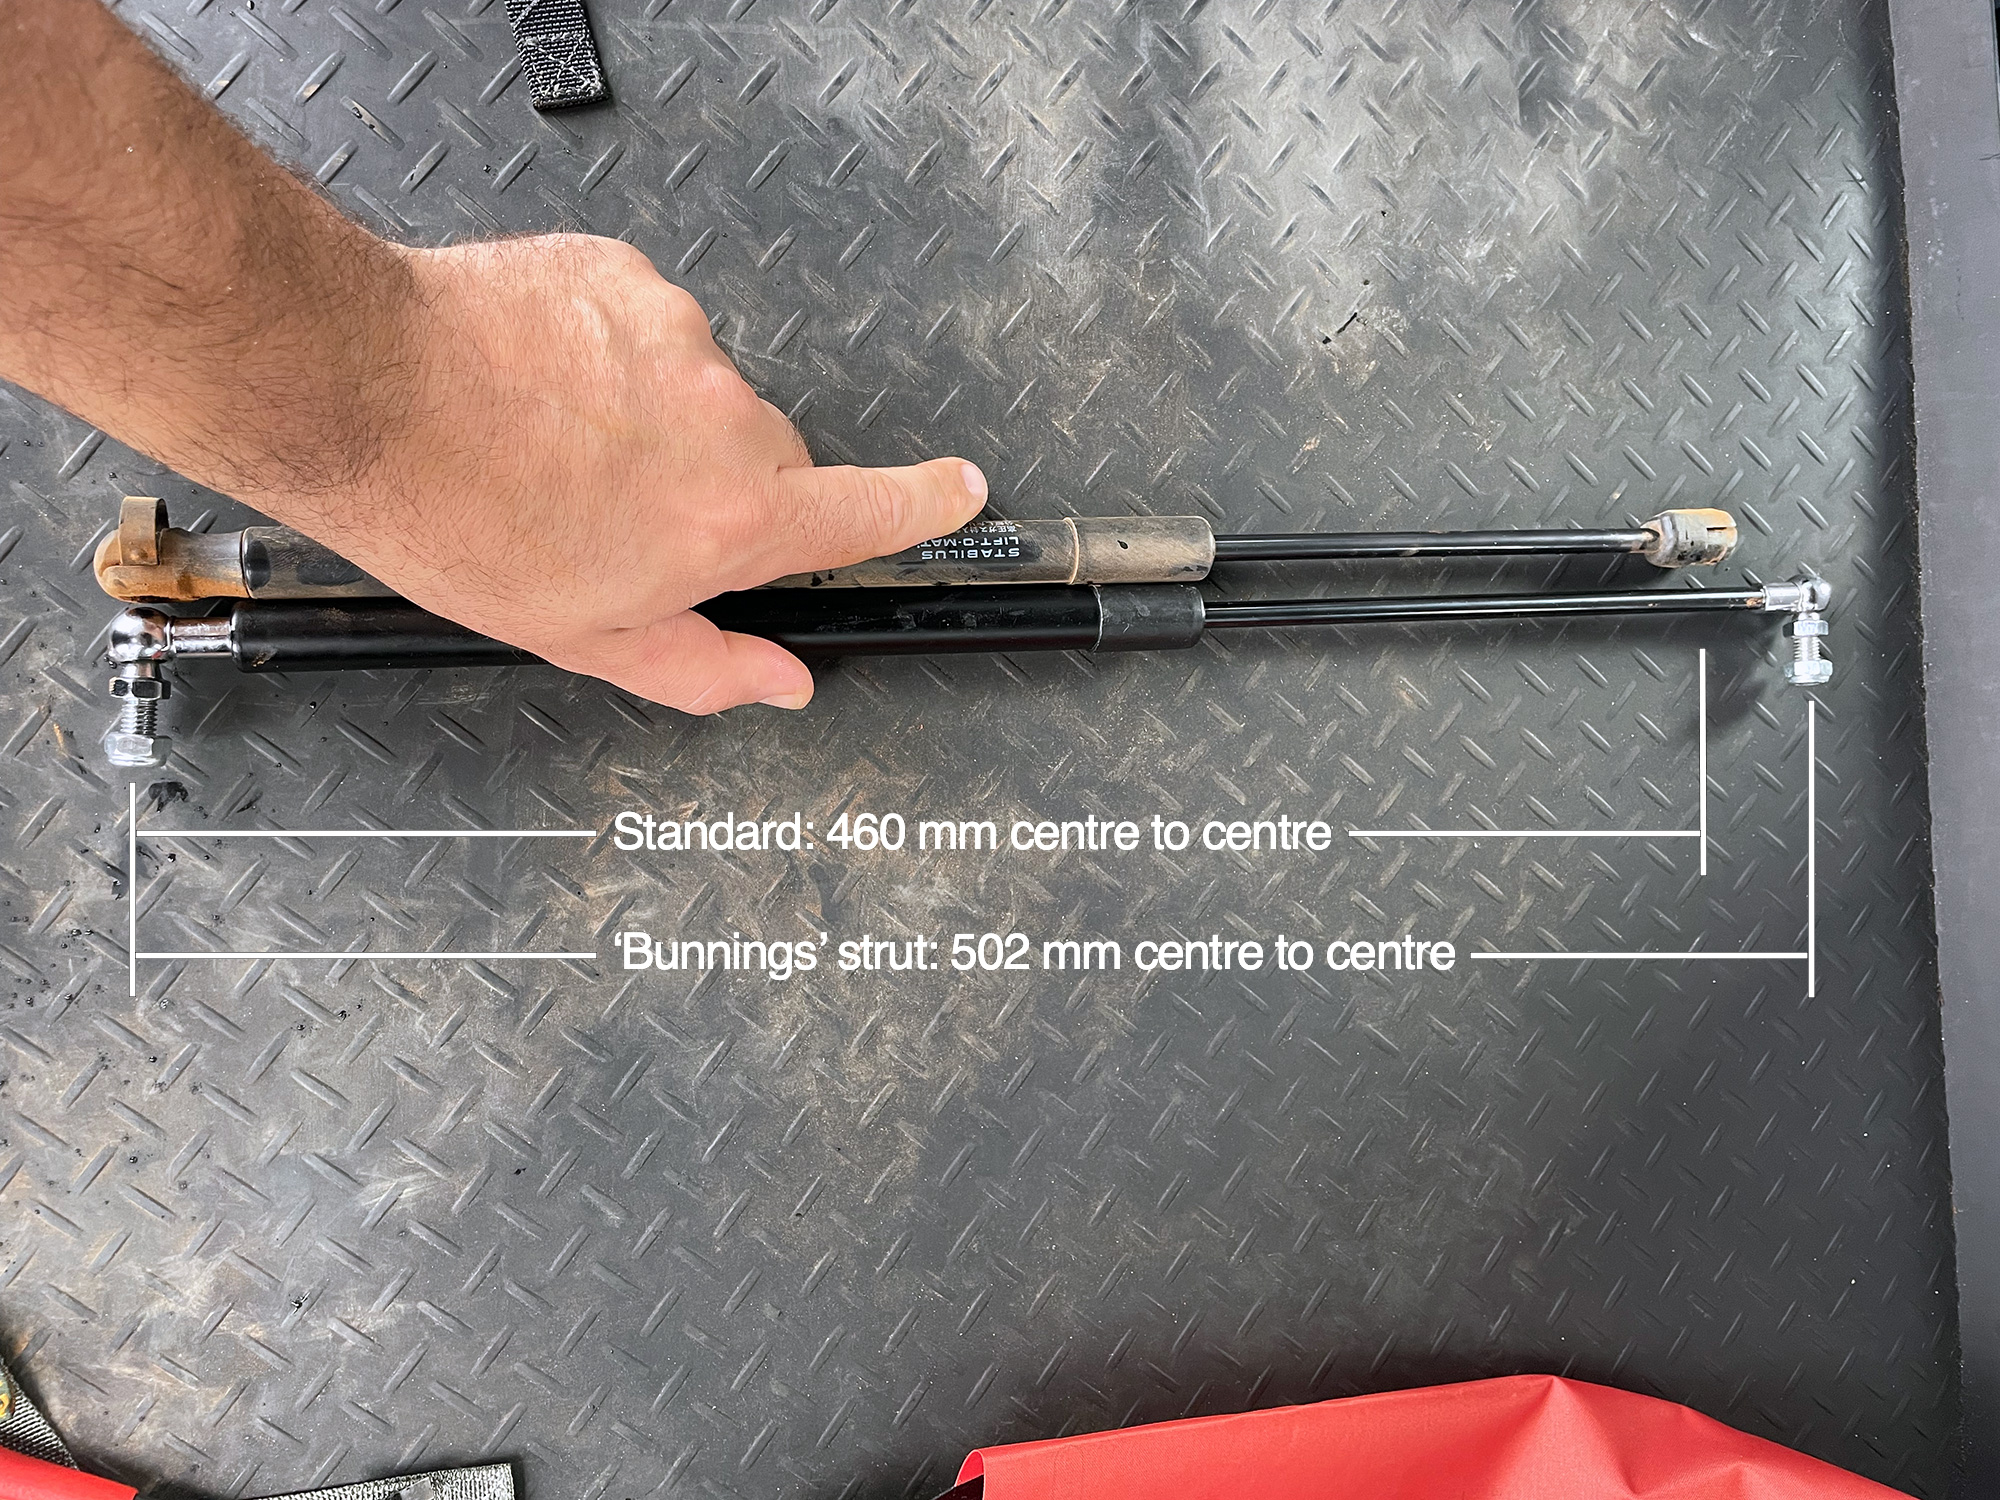
Early on these were the replacement of choice amongst Australian Jimny groups. However, a lot of people got the ‘high strength’ one at 400N, which definitely opens the door quite aggressively. They developed a reputation for breaking off the pivot point at the boot due to this force, although I’m not convinced it’s this strut’s problem, especially when people have used the ‘medium’ strength one at 250N.
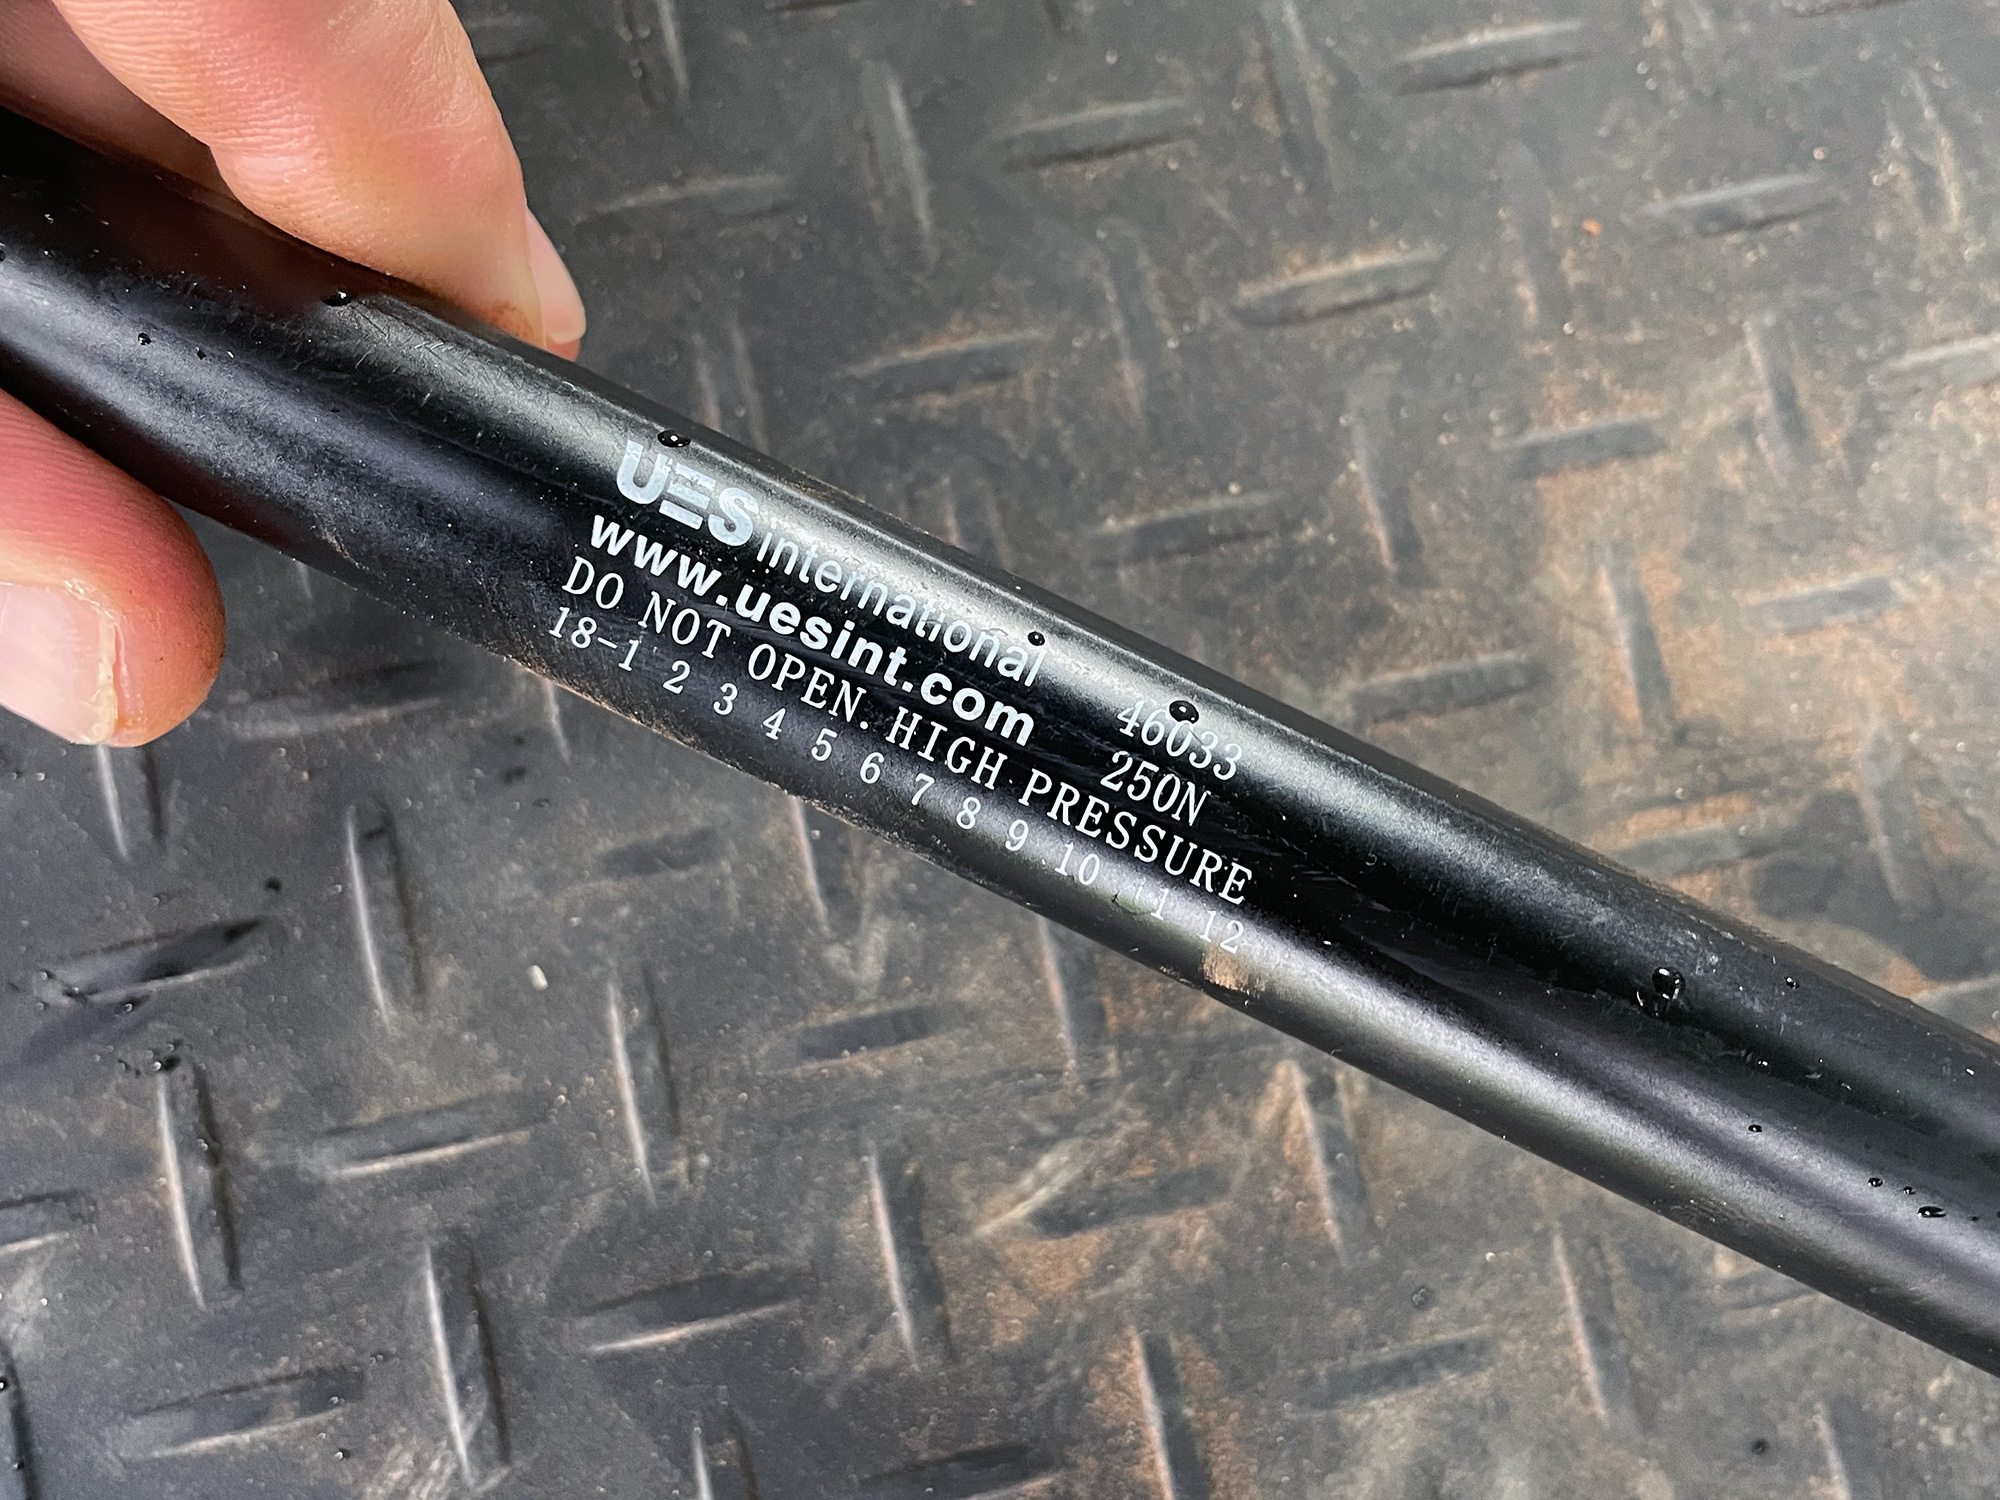
The medium strength one like this one comes in at basically identical specs to the Bushtech one, is available at a huge range of Bunnings stores, and is less than half the price so it’s a good option for that. The balls do not fit in the ends as well as some of the other struts due to the clip arrangement but the ends are metal and it does work pretty well in my experience.
Bushtech strut
This I haven’t tried, but what kicked off this investigation is people getting it and finding it ended up entirely similar to the medium strength strut from Bunnings. As per the pics available from sites selling this, the part number is K4045 and a length of 450mm. This corresponds to a South African gas strut supplier’s part number and length (albeit originally an Australian made strut!), and the force is noted on it as 250N. This ends up sounding quite a bit like the Bunnings medium strut in terms of force and given it opens the door to the same angle it has to also be the same length as the Bunnings option. Interestingly, OzJimny seem to suggest that the stock strut is 100N which does not at all line up with the actual rating on the stock boot struts I have seen. The total length of 450mm is also too short for opening the door even as far as the stock one, so presumably that’s the length before accounting for the fitting eyes.
At least one FB group user reports a total length of 490mm and opens to maybe 100-105º but I will likely have to confirm measurements in person. In addition, while some people say that this strut opens the door up less and less harshly than the Bunnings strut, other people also say it’s the same so it’s not totally clear cut.
In any case, I don’t see that it’s anything different to the Bunnings option in medium strength as it even has the same force; out of the two I’d just get the easier to get option that you can rock up to any Bunnings store. You may, however, wish to check clearance with things like ladders and stuff; at least with Bunnings you can pretty quickly take it back for a refund if you can’t clear the accessories you have on the back door of your car.
Pirate Camp Co
This one is a bit more recently to market. Their advertising blurb says it’s designed to be stronger than stock for dealing with larger tyres, but the details on the strut itself suggest 230N force i.e. a bit weaker than the standard one. It is marginally shorter than the Bunnings strut by 2-3mm, which shouldn’t significantly change the angle the door can open to.
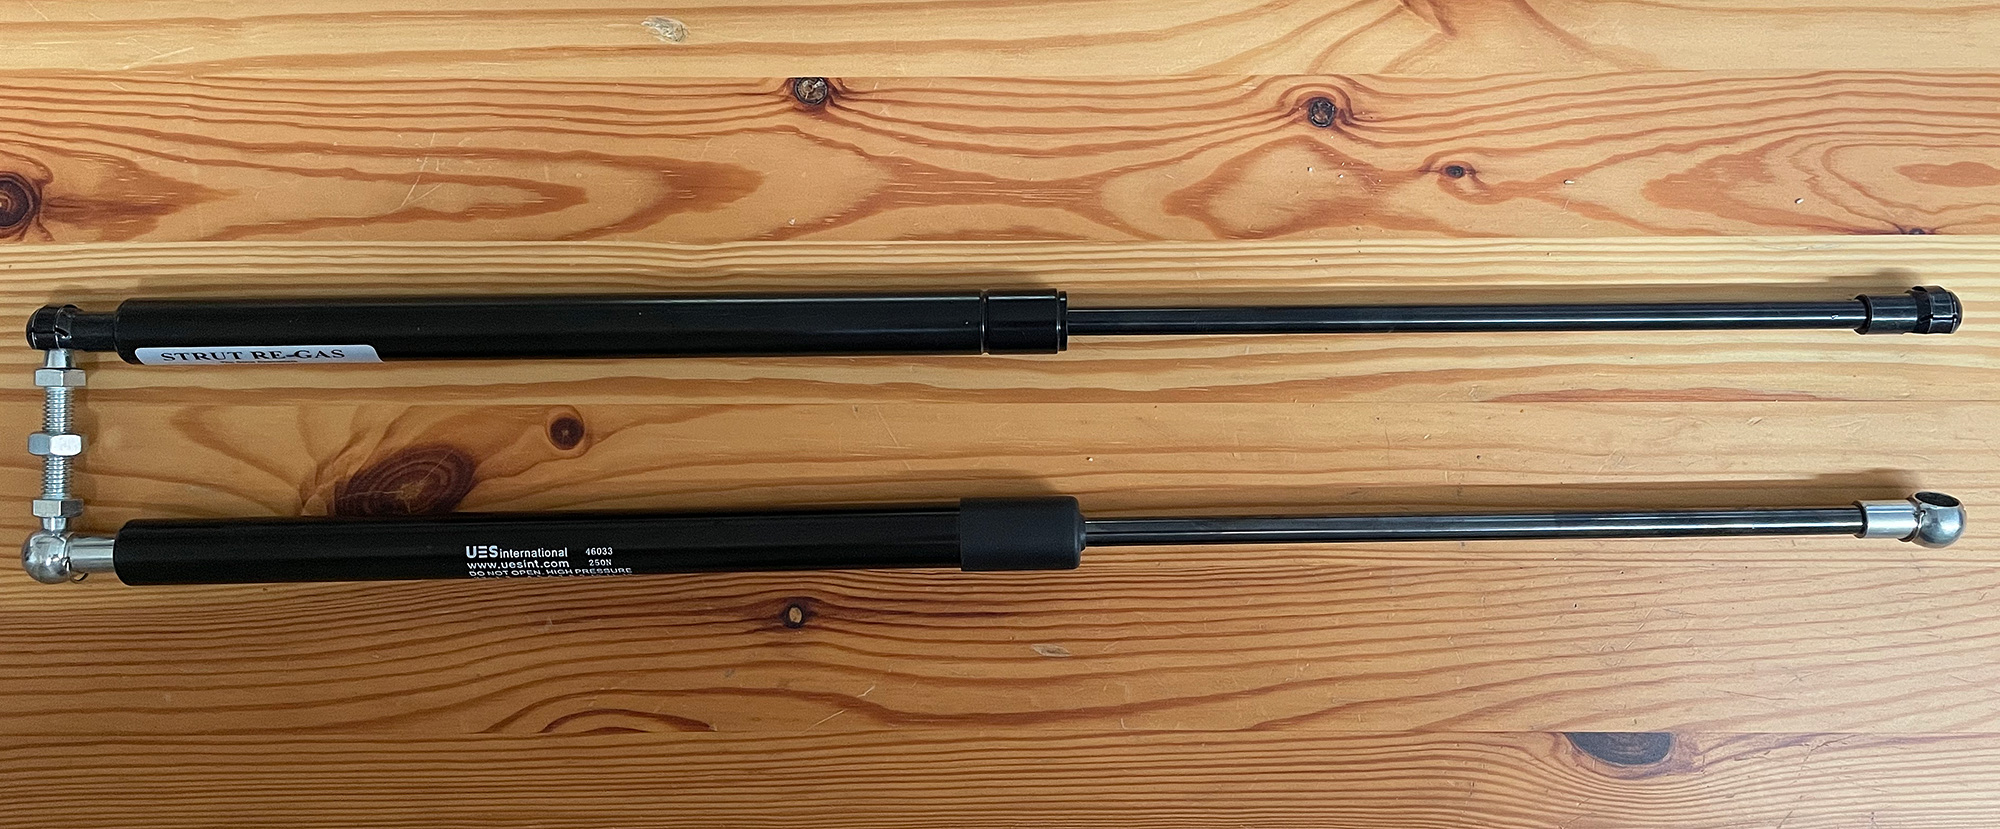
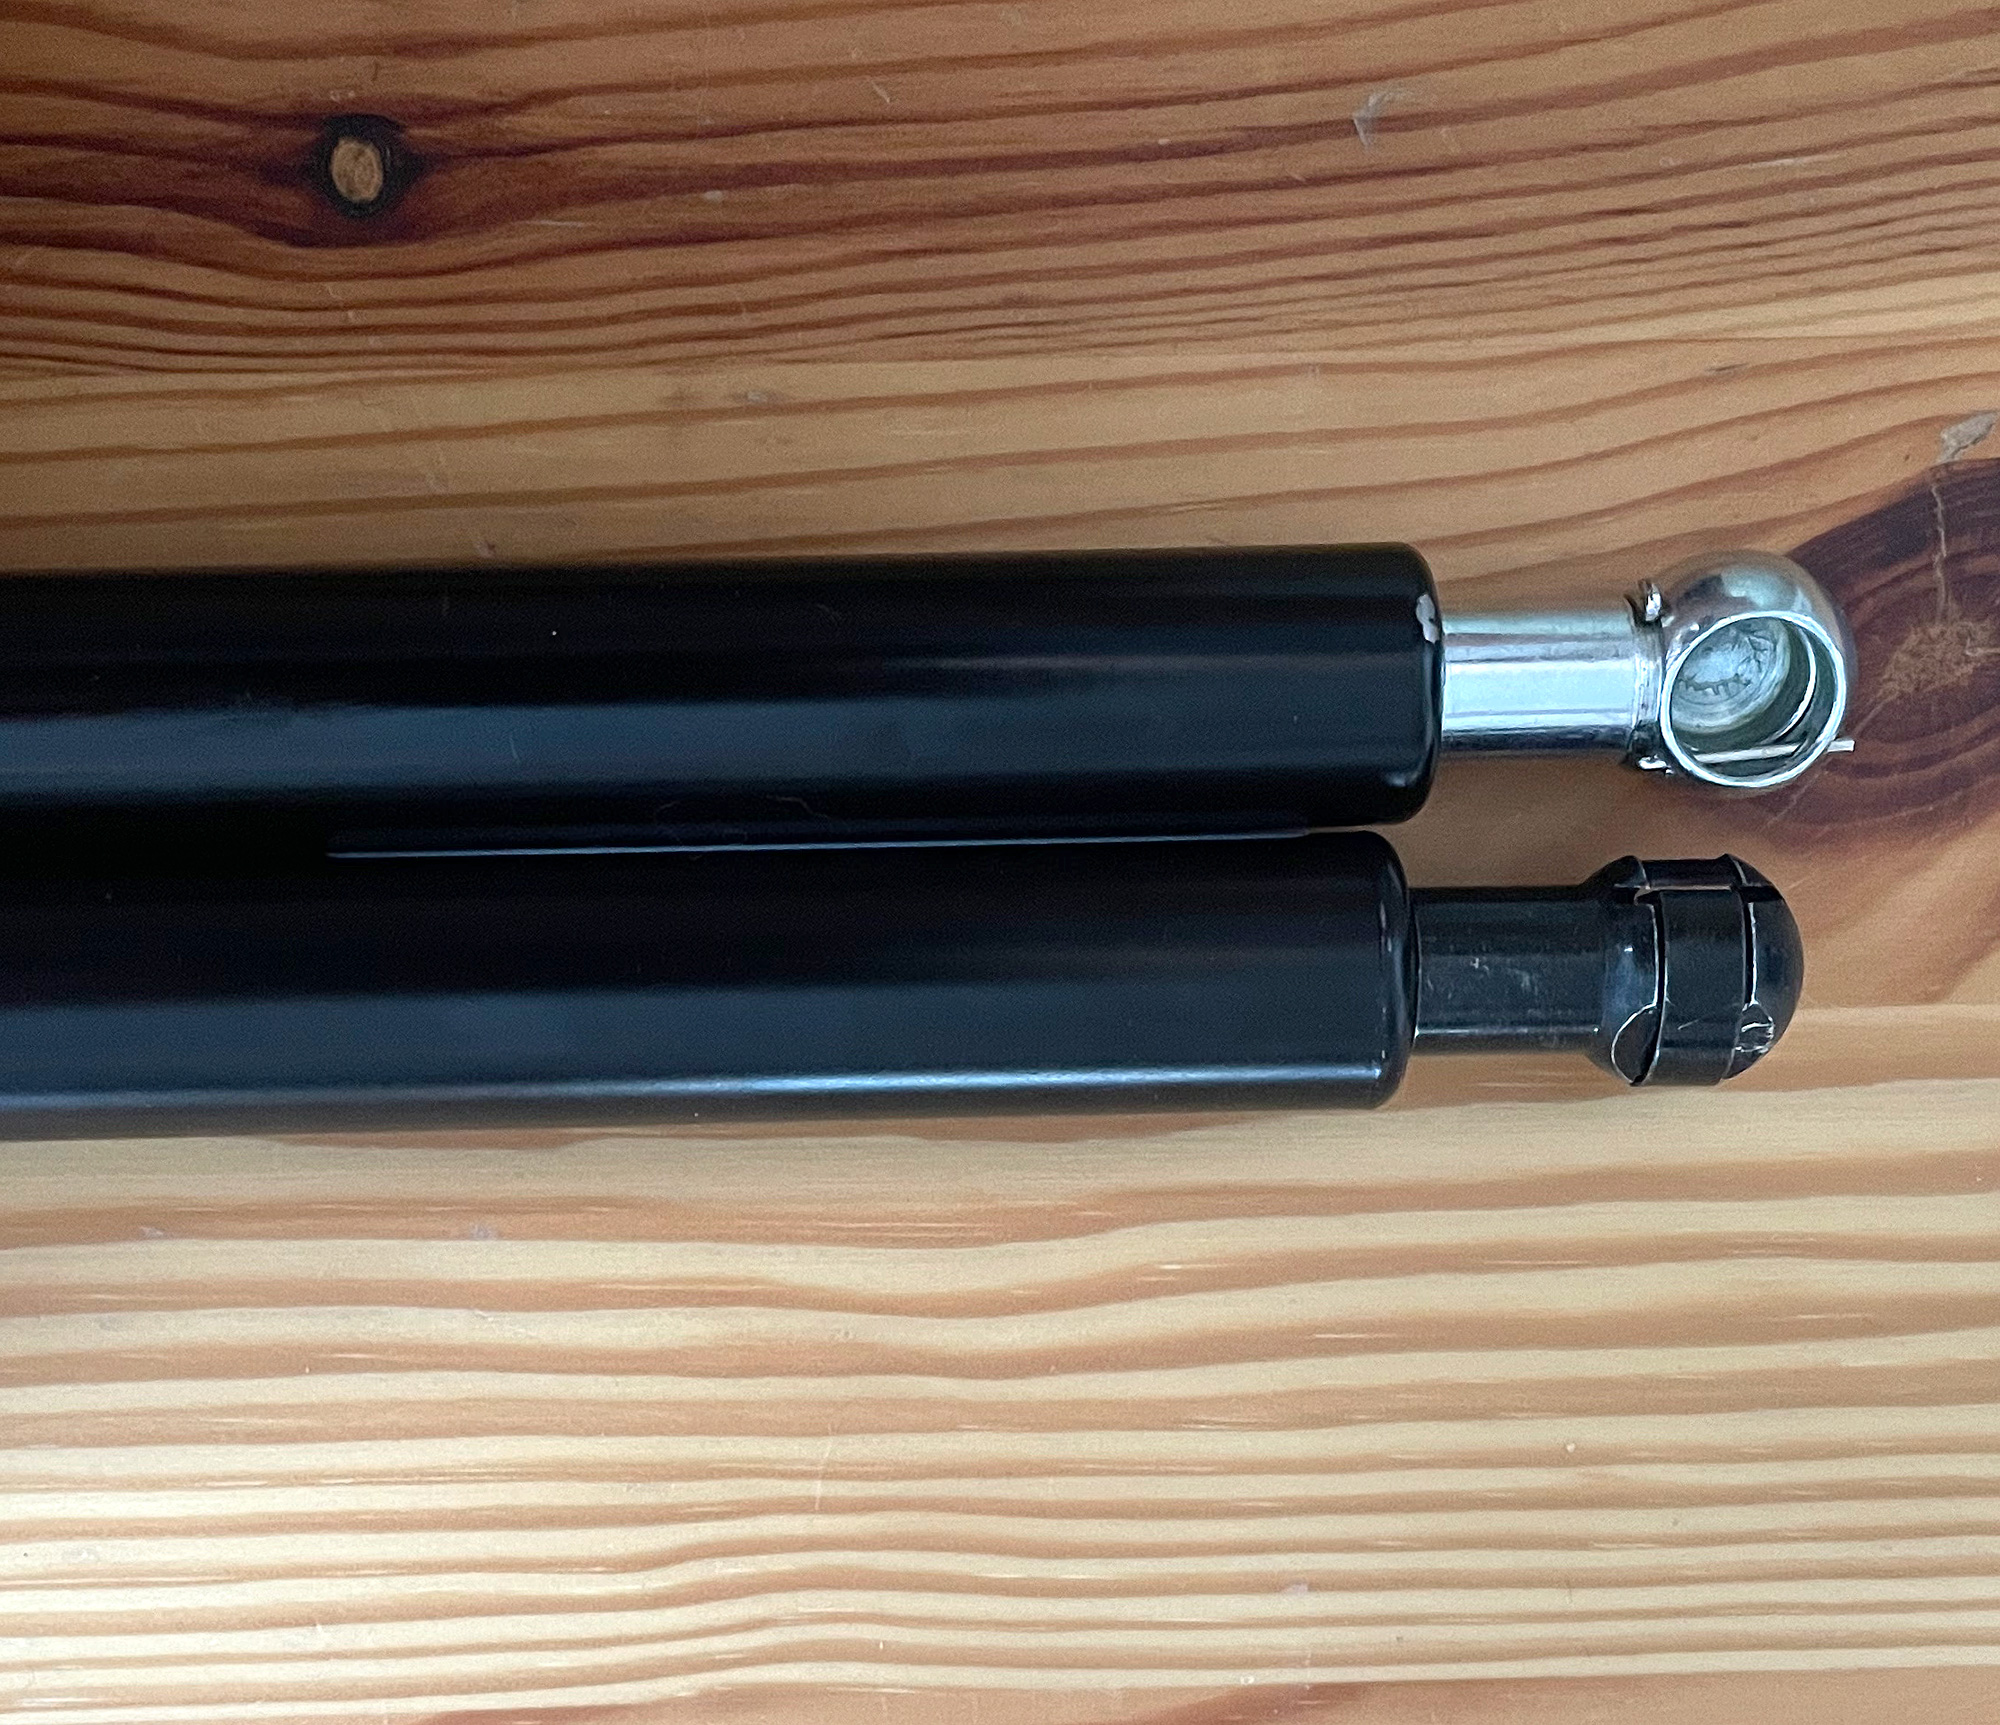
Both the Pirate Camp Co and the Bunnings struts have the same diameter shafts, both have metal ends and also feature the same body length, just a few mm shorter. The clips to retain the mounting balls are a bit more substantial on the PCC one than the Bunnings option. The Pirate Camp Co strut is marginally less strong (230N vs 250N) than the medium strength Bunnings strut.
If you want an extended rear door strut then it’s an ok option, and the better clip mechanism for each socket is probably an upgrade on the Bunnings strut. Hard to recommend one over the other, though, the 2mm difference in length probably isn’t the difference between a ladder fitting or not.
Taniguchi infinite stop opener
I’ve had this one on for a while; it isn’t a traditional gas strut per se but acts as a stopper at any angle you choose.
This strut is sourced from Bansbach in Germany and has the part number W5W5RB0-161-460–004 050N. Essentially this replicates the stock strut’s geometry, but with minimal opening pressure & enough friction to let you just stop the door wherever you want it.
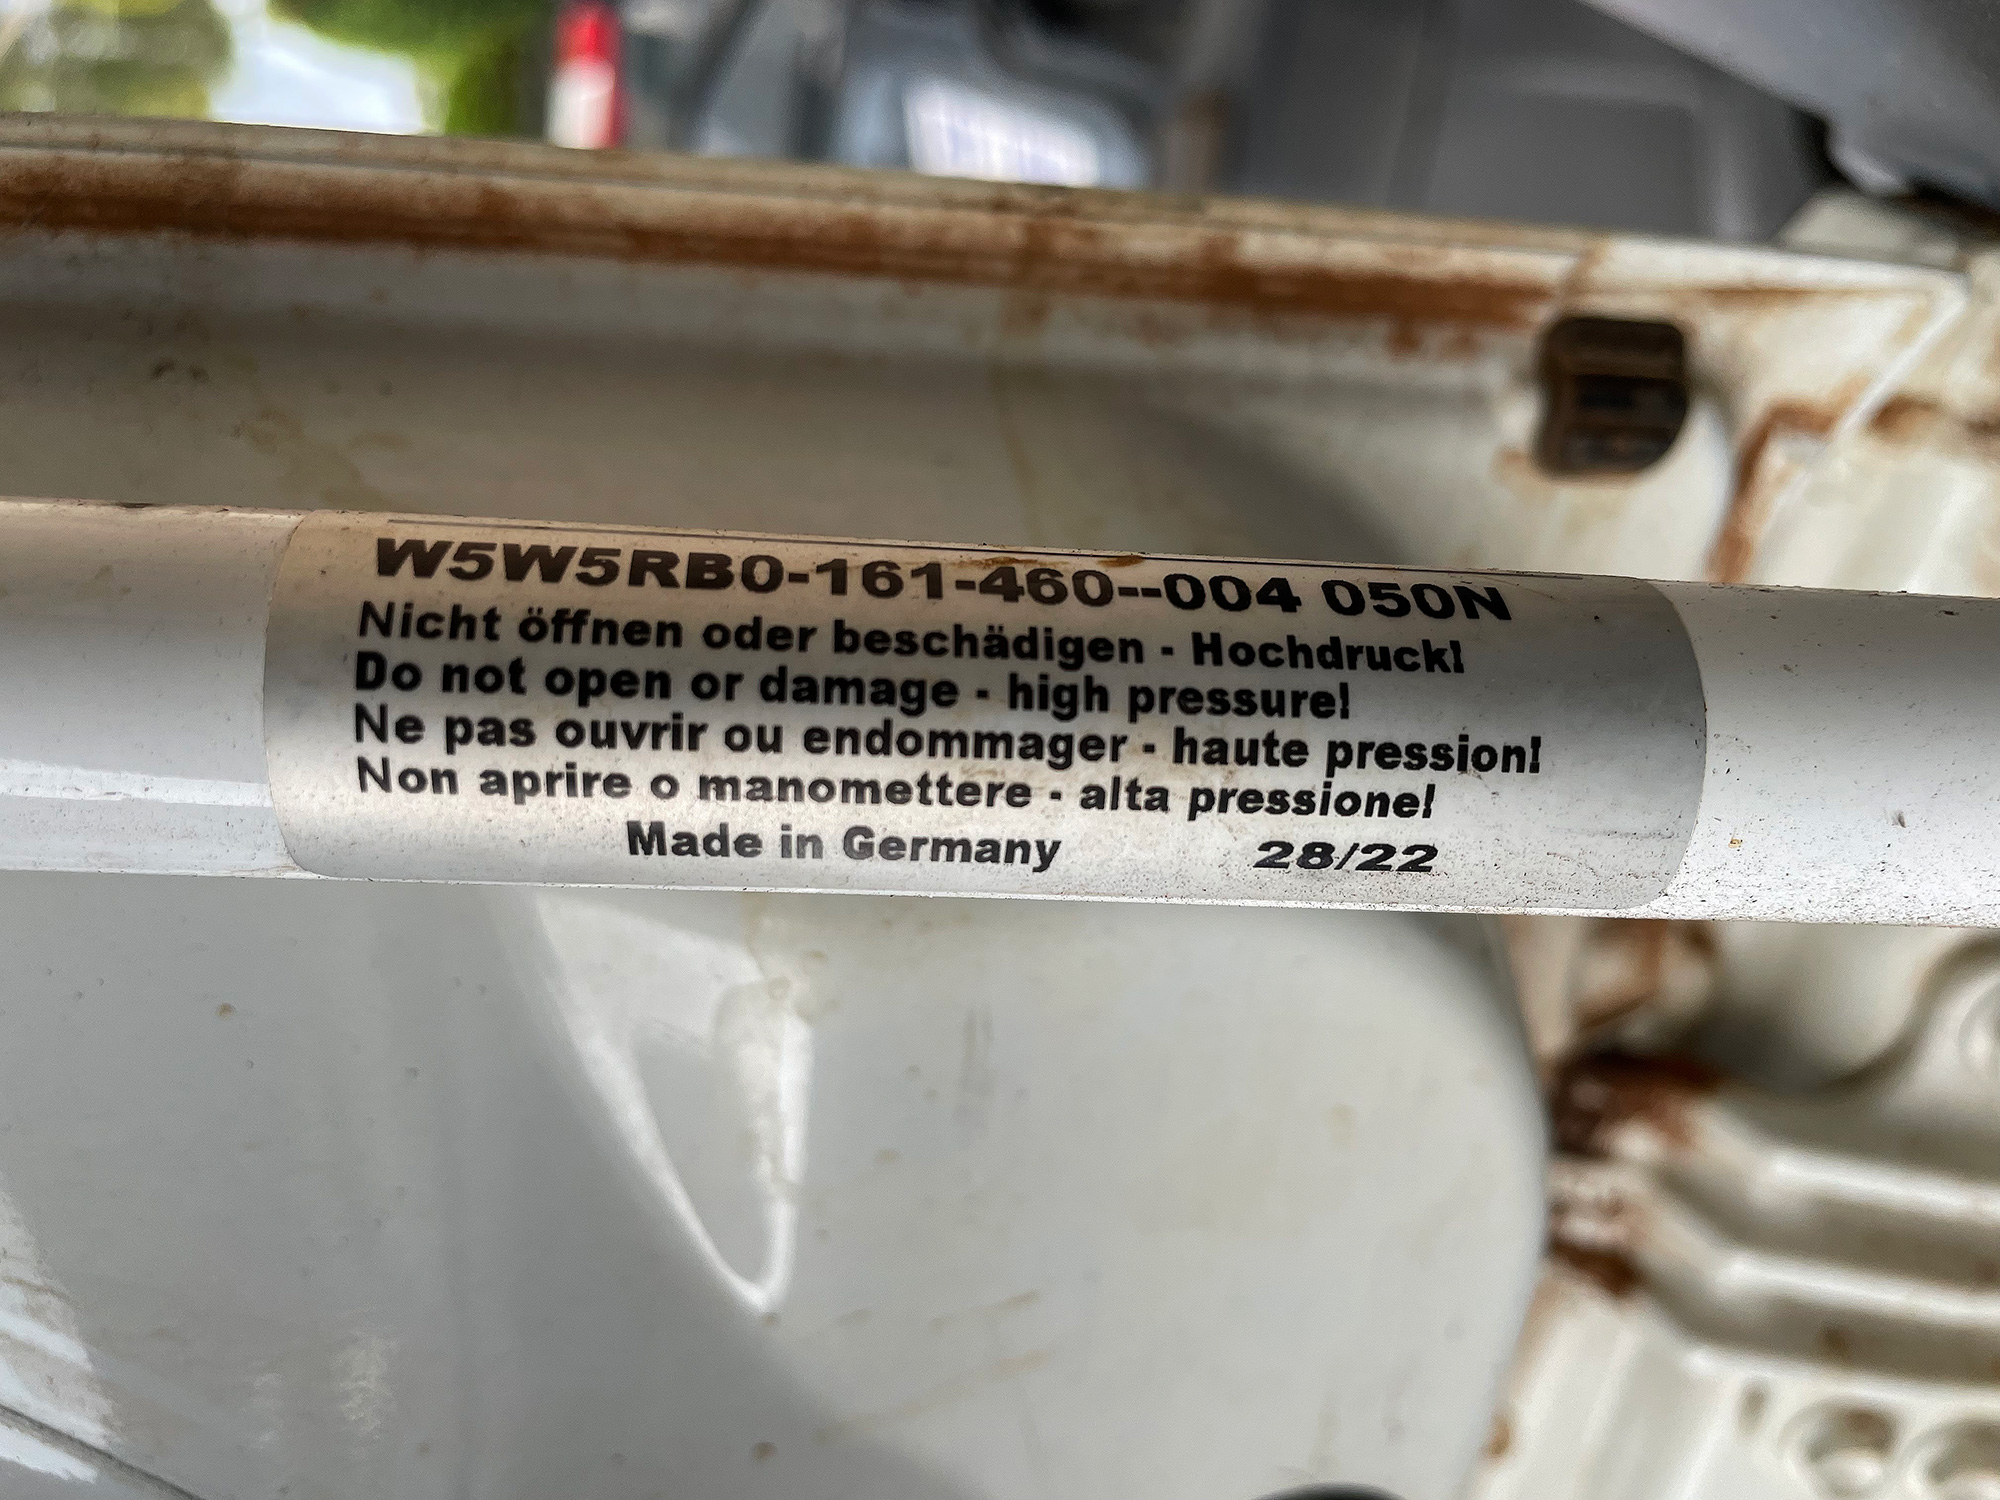
It’s weird to have in the car at first as the door doesn’t help open at all really, but then it stops wherever you want it. It’s nice for a daily driver but on a slope or with a heavier tyre on the rear door it doesn’t effectively stop the door from closing anyway. I think for people who can afford it, have a mostly stock car and like the idea of stopping the door at any angle then it’s a good option. If you want the door to open further than standard, however, you are out of luck as it is the same length as standard.
I did find it worked well with minimal extra weight on the back door, even with my upgraded wheel and tyre on as the spare, but with the stuff on the molle panel for rear storage it did struggle to hold the door in one position when loaded up.
Neoplot two-stop strut
This is another one I haven’t owned, but it has two intermediate stopping positions opening about 25º and 40º before getting to the maximum opening at 80º. Product images online give it the Bansbach product code W5W5G90-161-460–002, which I’ll have to do some translation on to see if there’s info on what length the intermediate stops are at.
With this style of strut, you have to slightly close the door at each stop to then get it past that stop and to the next one. The maximum length of 460mm is exactly the same as the standard strut so it won’t give you an extended opening.
Some geometry why longer struts could cause problems with door mounts
This is something I don’t think people are thinking enough about. There are incrementally smaller changes in distance between the car pivot and the door mount as you open the door further. This is hard to give you a nice trig relationship as the door hinge and the strut mounts aren’t in a perfectly line. It’s also a bit tricky to think about as the door side of the strut mount rotates around the door hinge, but the distance you care about is between that point and the fixed point on the car. Fortunately you can demonstrate it in a slightly clumsy diagram like so:
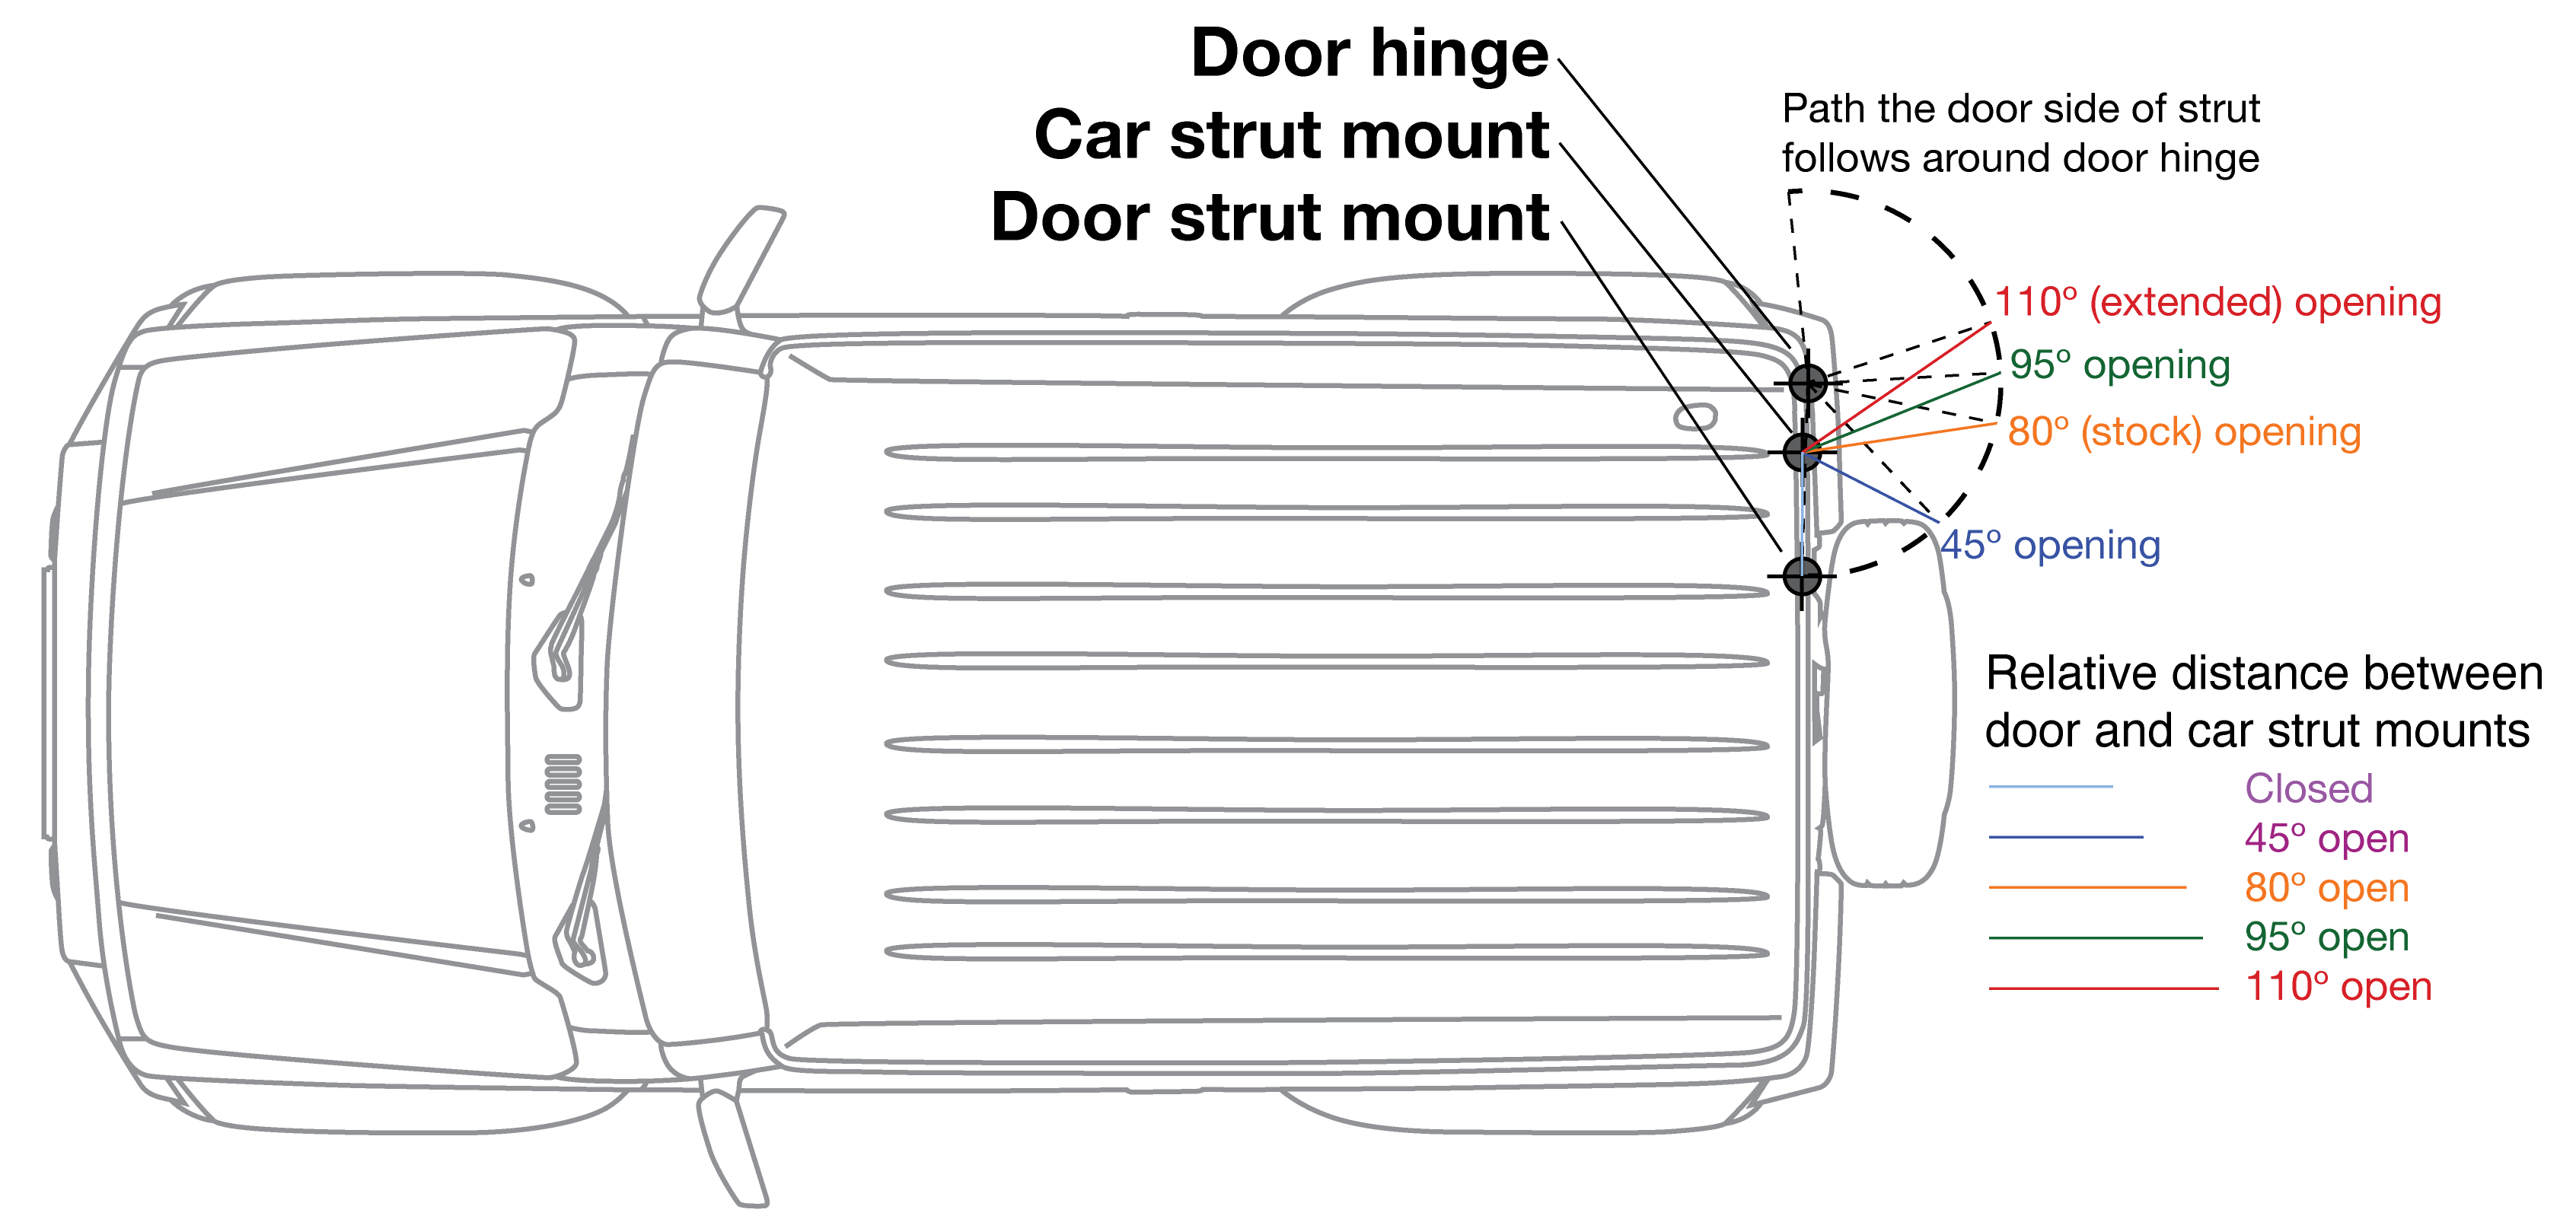
Just past 90º is where you get the door fully open, but at this stage the strut is no longer just pushing straight ‘out’ from the car, but it’s also having to push sideways which is serving to push the door more open. This, if anything, accelerates opening once you get to near 90º and why I think people spec less strong struts for bigger opening angles. It’s just funny that the sellers then say that the struts are stronger than the factory one, when in fact they are weaker – but the act of the geometry change pushing the door outwards near fully open makes them feel stronger. In contrast, the stock strut is basically done before it gets to the point of pushing the door fully open.
I suspect the best solution is a strut mount on the door positioned a bit further outwards so that the maximum stroke is reached just at the right point. It really depends if the door skin is strengthened at the point where it would need to be moved to as to the feasibility of doing such a change. Also, a lot of people aren’t super keen to drill into their relatively new car and install a nutsert or similar when people are suggesting you just can have a longer strut.
It’s just worth keeping in mind there is no free lunch here: if you want a strut that can deal with a heavier door due to a weighter spare etc then you might be better off sticking to a stock strut length. Equally well, if you want it to open further then the tradeoff is either: more vigilance so the door doesn’t aggressively open at the end of its travel as you break 90º; or, use a weaker strut that might not cope with a heavier wheel as well but won’t get away from you at the shops.
Suggestions on designing your own gas strut
It’s entirely possible to dial in all of the parameters and get a custom gas strut made up, even for an order quantity of 1 unit. It gets a lot cheaper if you make a lot, but, for the price of the options people sell you then you can also buy your own.
An example is the excellent product creator through Gas Struts Australia. All of the aftermarket options I have got my hands on, and the specs for others, indicate an 8/18 mm shaft is the option to go for. Gas Struts Australia seems to give the following lengths, which I’ve worked out the opening angles for:
- 460mm open, 270mm compressed, 190mm stroke: stock 80º opening
- 465mm open, 270mm compressed, 195mm stroke:
- 470mm open, 275mm compressed, 195mm stroke:
- 485mm open, 280mm compressed, 205mm stroke: Some people report the Bushtech one as being here or a bit longer than this
- 500mm open, 290mm compressed, 210mm stroke: same as Pirate Camp Co
- 505mm open, 290mm compressed, 215mm stroke: a bit more than the Bunnings/Bushtech options
Note that these custom options end up marginally more expensive than the specialist retailer options and more than twice the price over Bunnings; you’d only do this if you wanted to optimise everything I think rather than saving money.
