
Explore Glazing sliding rear windows
Fixing a big drawback with the new Jimny: fixed back windows. This has been on the mod wish list since day 1, but I wanted to wait till a quality product came out. Explore Glazing make such a product and here’s my install.
Details
What are they and what are the options?
Explore Glazing provide the windows, and they have two options: sliding, or gullwing. Gullwing is great if you want access to the back load area via the side but can’t be left open while you drive. The sliding windows have a much smaller opening but they can be open while you drive.
My primary aim with this modification is comfort for my dog who likes a bit of airflow, I went for the sliding windows. The install guide I provide also applies to the gullwings, though. In the following photos you’ll also see the aluminum security screens which are an added extra if you want them. The windows themselves weigh in at 4.8 kg including the security screen per side (factory glass is about 2kg a side). I’m not sure of the weight of the gullwings though, since I didn’t buy them.
Buying the windows
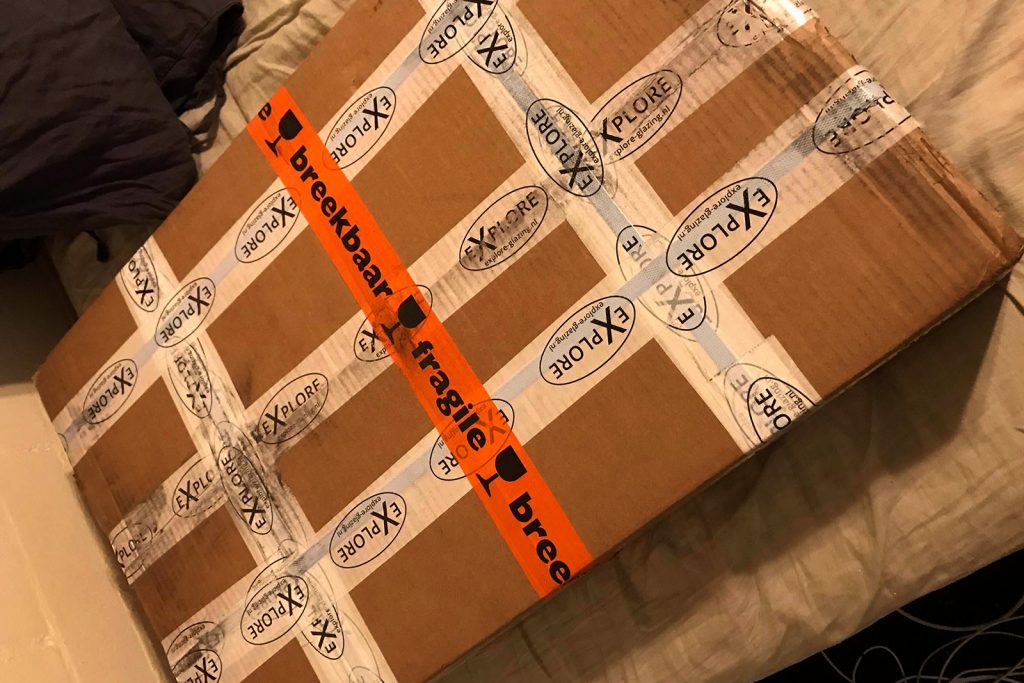
Considering these are windows made in the Netherlands and I’m in the western part of Australia, it was fairly impressive to go from my initial enquiry to having the windows in 8 days. Not 8 working days, 8 actual days. I was also very impressed with the packaging and how carefully they were shipped.
I won’t speak for the pricing because it’s liable to change, but all in it cost me about AU$850 in March 2020, including the €135 for shipping for the two windows plus a tube of adhesive to Australia.
DIY or pay someone to install?
The windows come with a good set of instructions, a TÜV approved adhesive and they certainly are able to be DIY installed. That said, glasswork is one of the things for which there’s a lot of ways it can not go well and it is a lot slower doing it yourself than the hour or two that it’d take an automotive glazier to do it.
You have to bear in mind with my following install guide it is based on the Explore Glazing guide, and whatever else I’ve been able to pick up along the way. I am not a glazier, I don’t pretend to be one, and if you read my writing and then decide to do it yourself and cock it up then don’t blame me. If you’re in doubt… I’d pay someone to do it.
I am happy with the results I achieved though I think a professional would have done it much faster and probably has a few things where the job is just that little bit neater than I did. In part I wanted to do it myself as there’s very little information out there on how to do this yourself so I was happy to try it myself to help demystify it. I certainly would do it again for my own car.
Having done the installation, you want a good half day if you’ve never done windows before. If you take your time and you’re careful it is fairly straightforwards, but without the knack of the professional glaziers then you need way more time to make sure you get it right.
Installation
What you need
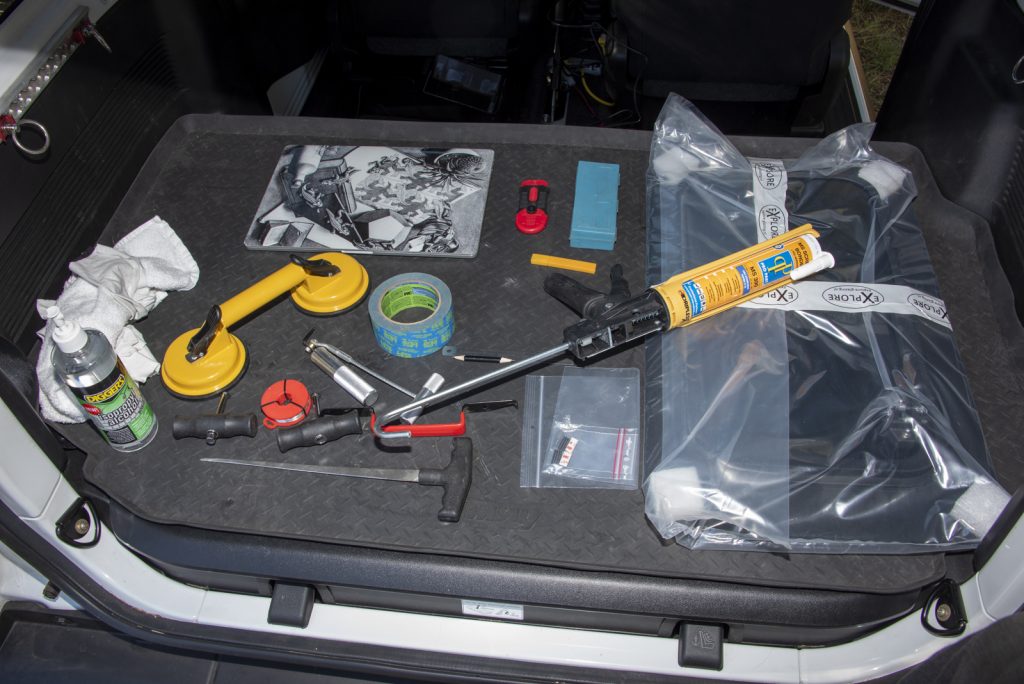
There’s a few things you’ll need to achieve this yourself. First up, you’ll need a windscreen removal kit so you can cut the old adhesive out. You’ll need a variety of blades and scalpels to trim the old adhesive down, too. A suction cup helps a lot to hold the old window for removal. Masking tape is also necessary. Cleaning the surfaces ready for adhesive means rags and isopropyl alcohol (or similar), and you’ll also want a caulking gun for the adhesive. Finally, I had my laptop handy so I could refer to instructions but also various youtube videos to make sure I was doing stuff right. The window kit came with replacement glass retaining adhesive clip things that are used in the upper back corner of the window.
Removing factory bonded windows
It’s removal time!
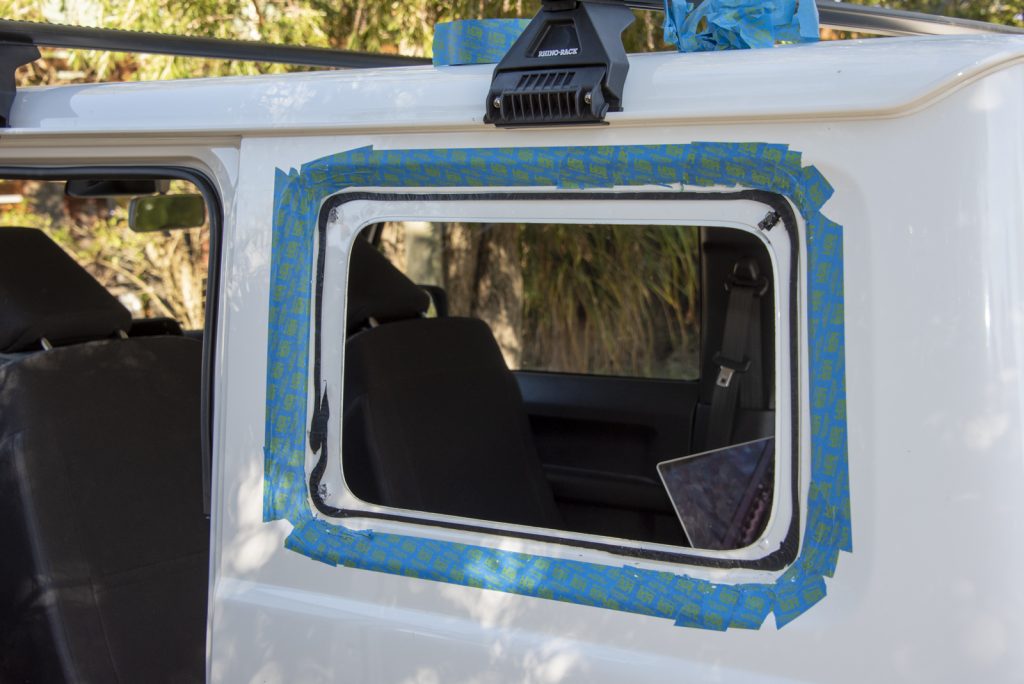
First and foremost it’s time for some protection to be added to the bodywork. Use masking tape for this and be generous. I found if I tore a big strip off and kept it taught and poked it down deep past the window it was easier to protect more of the paintwork.
Now you gotta poke some cutting wire through the adhesive. Using the flat eyelet thing from your windscreen removal kit, wrap a little wire through the end and poke it down through the adhesive. Try not to go too deep and gouge into the paintwork.

When the wire is through a little, keep the wire pushed down through the adhesive and withdraw the tool. Then using some very small pliers or similar you can hook the end and then pull it through.
Now is time you tuck your wire into the handles of your removal kit. Your specific handles are possibly going to be different to mine, but generally wire goes in somewhere, and pokes through to be held and the handle then pulls up retaining the wire.
Then fit a handle to the other end of the wire inside the car, and using the two handles you pull the wire through in a sawing motion and cut through the adhesive.
When you cut the adhesive it is very important you hold the wire in such a way to keep it away from the paintwork. Inside the car you want your handle and wire as close to the glass as possible. Outside the car you want it so the wire is just against the edge of the glass. The stainless wire is actually softer than the glass so it’s fine to rub against the glass – though eventually you will break the wire and have to poke more through. That’s preferable to having it closer to the paintwork and risking damaging your paintwork.
Not going to lie, I put a couple of small marks into the paintwork with the awl poking wire through initially and I would have put more in if I hadn’t been super fastidious with the masking tape.
I found a very useful thing to do is do a segment and then put some masking tape over the bit I cut, so that way the window is still retained.
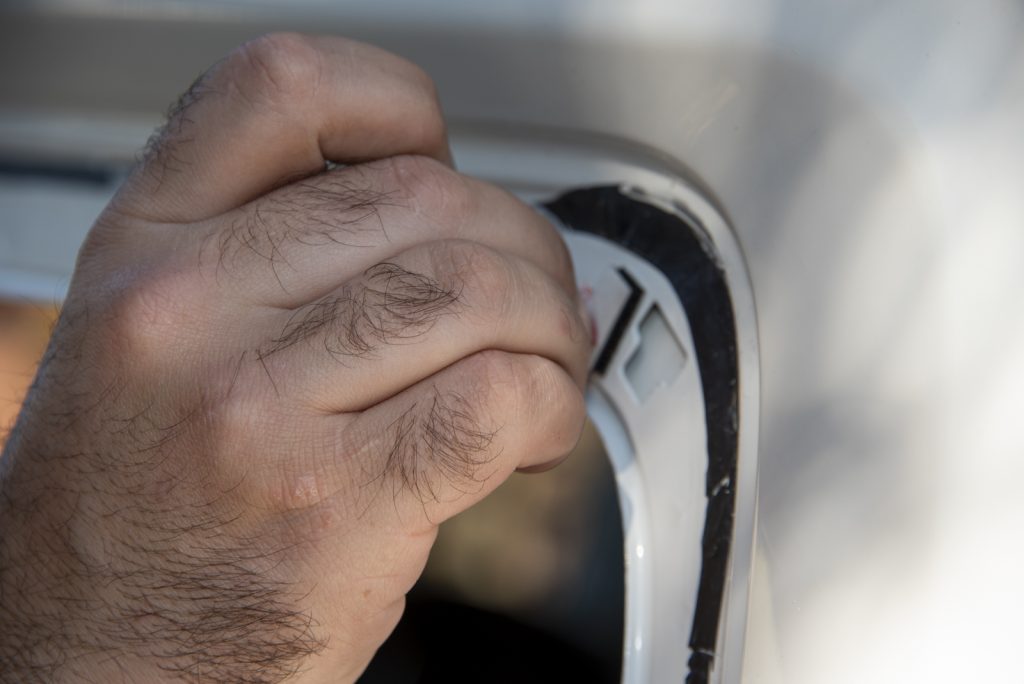
Another thing to note is that the adhesive in the corners is thicker and harder to cut, plus you do have retaining plastic pins at the upper and lower parts of the front of the window, and foam spacer at the bottom back of the window, and a retaining set of hook and loop thingo up the top back of the window. They also take more effort to saw through.
Cutting the adhesive on the right hand side of the car (where the back door hinges) is a lot harder to do solo than the left hand side of the car. Best to do the sawing of the adhesive with a friend but I did manage to do it all solo.
Once you’re nearly through the adhesive it is time for chucking the suction cup on so the window is easier to handle. I did the second window without this but it took some juggling.

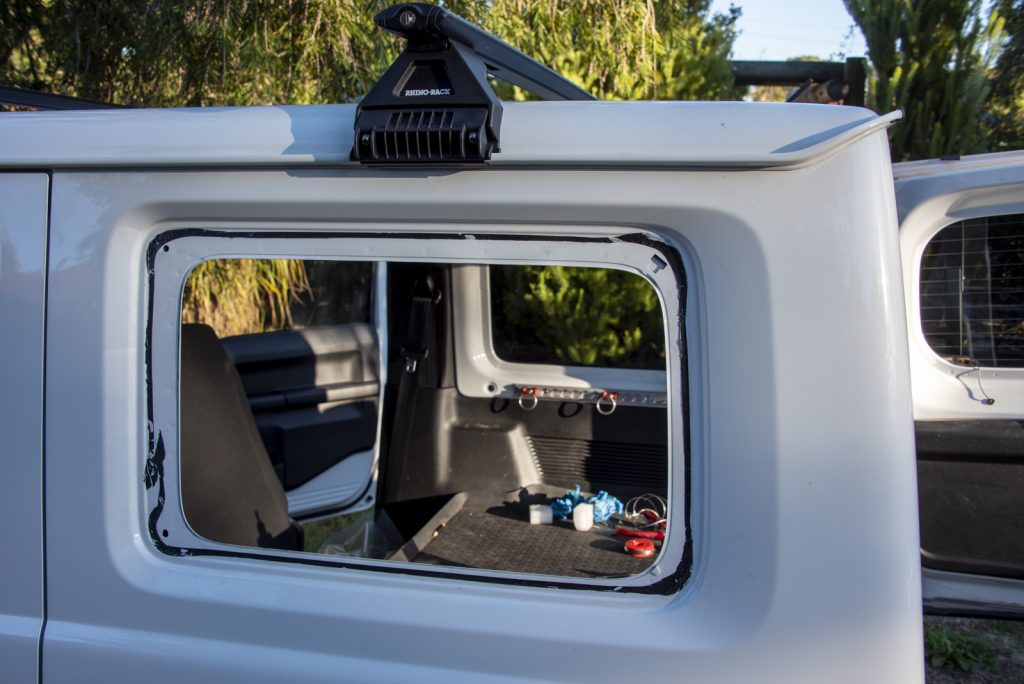
Pretty easy to remove, either if you’ve held it just with masking tape or you’re also using the suction cup. With that admire the fact you’re at the kind of midpoint of this upgrade.
Cleaning up the bond area
Once the window has been removed it is time to clean up the old adhesive to get the frame ready for bonding.
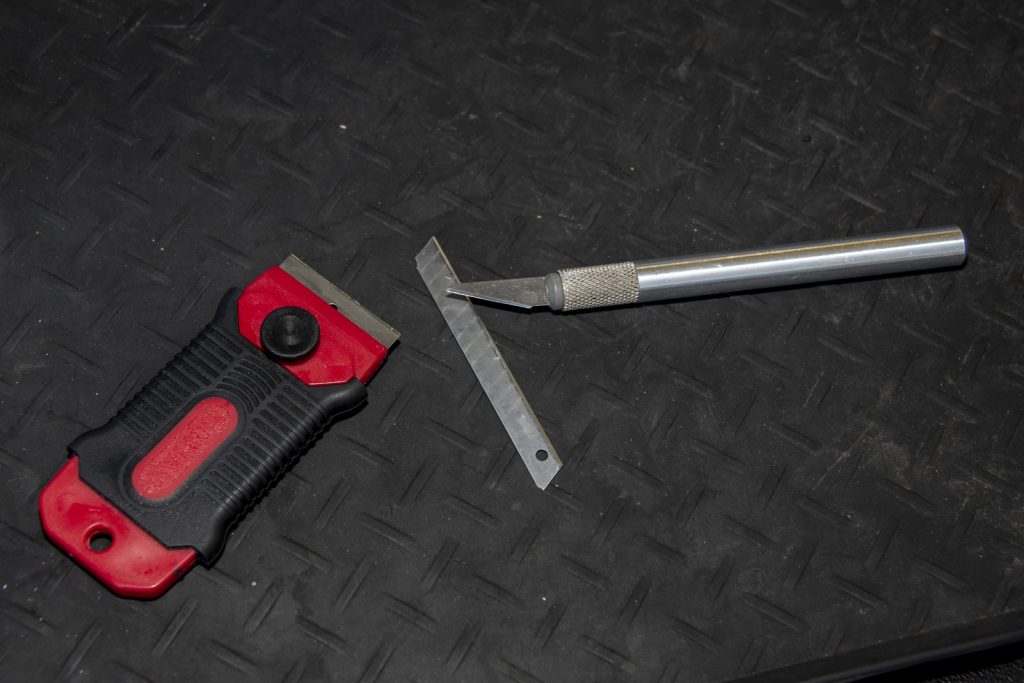
I found a combination of blades helped to cut the adhesive down. You want to get it to be a nice even and clear 1-2mm. I did nick in the paint a couple of points but easily touched up over with either primer or body coloured paint if you do go through… especially since it’ll be covered by the new adhesive anyway.
To help cut the adhesive, degrease your blade with some alcohol first and do it periodically as you cut.

Once you’ve cut the adhesive back and cleaned up any areas you have cut into the paint around the adhesive, it is time to prepare the new window for installation.
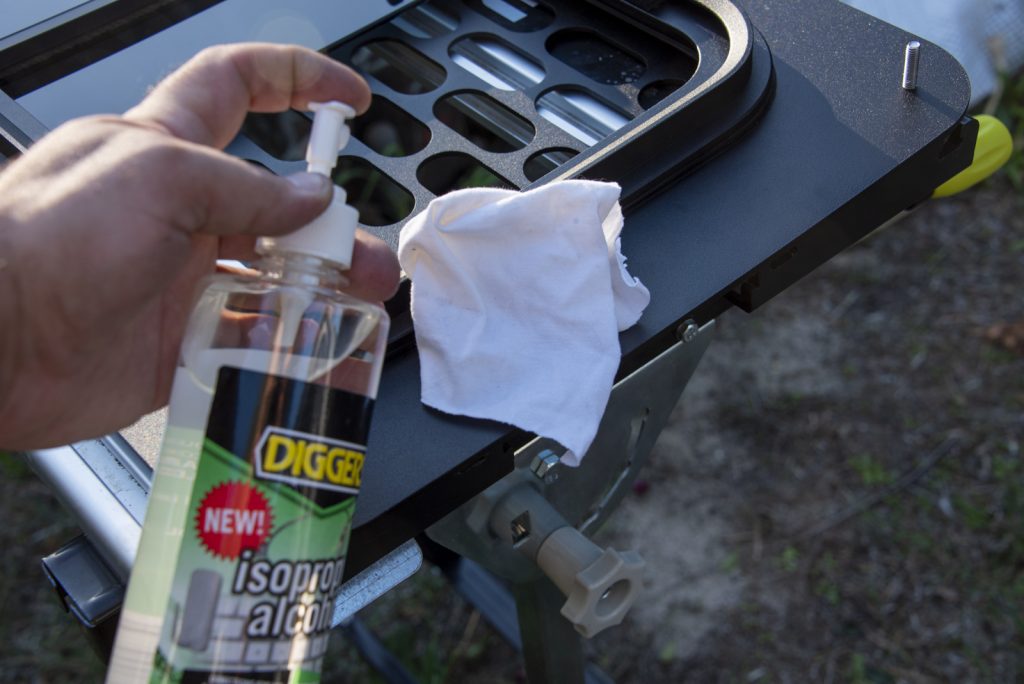
Preparing the frames
A key point for this is cleanliness is necessary, so get good at using alcohol and wiping down the surface.
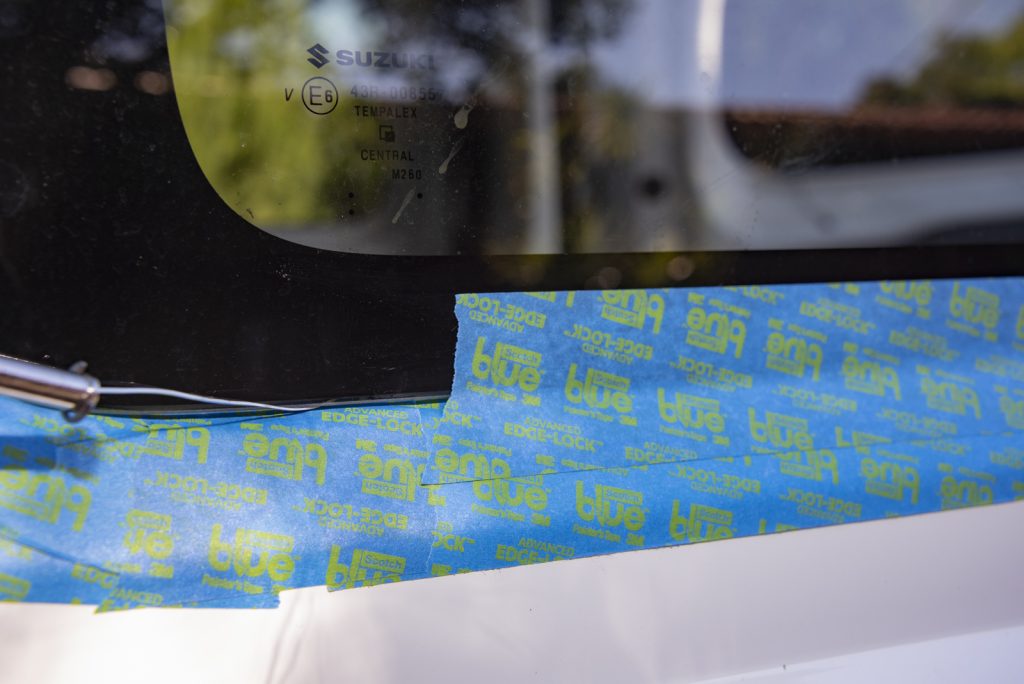
There are a couple of spacers to add. These come off the old window, with a rubber spacer at the bottom and a closed cell foam spacer in the bottom corner of the window at the back of the car.
To get these in the right spot, I placed the new window into the frame to line everything up and put the rubber bottom spacer in place using marks on the body from where the spacer originally sat. I would recommend a bunch of test fitting so you also get a really good muscle memory for exactly how to pick the window up and put it into the window hole. It makes installation flow a lot more easily if you’re practised at it.
I then marked the window frame with some pencil and transferred those marks onto the back of the frame.
The OEM double sided tape/adhesive was pretty rubbish on this and the closed cell foam spacer so I used a tiny bit of contact adhesive to hold them in place.
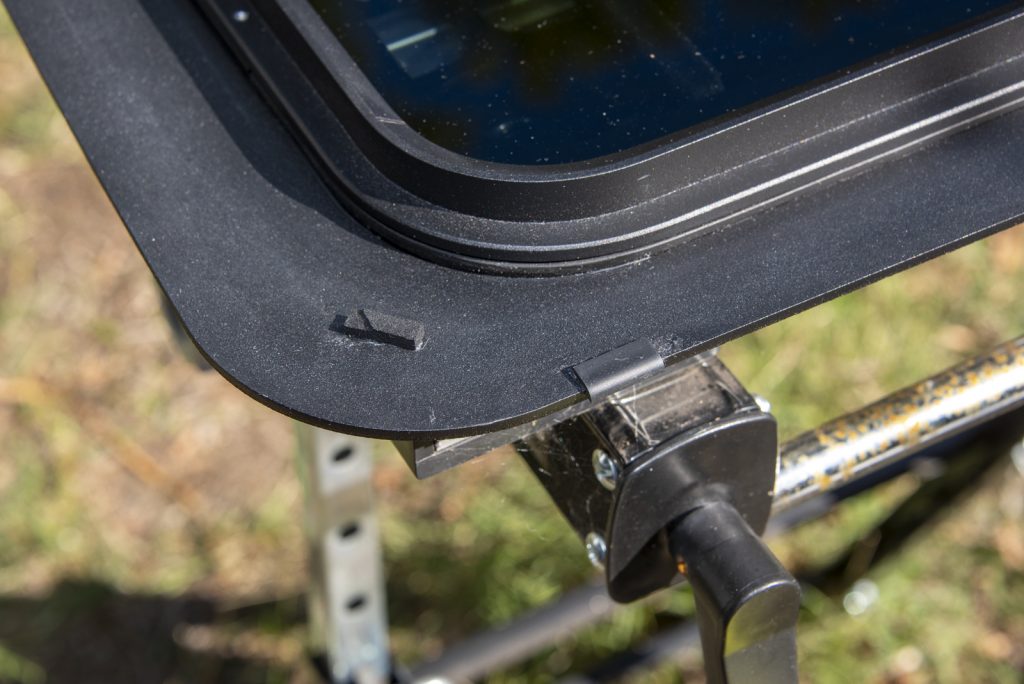
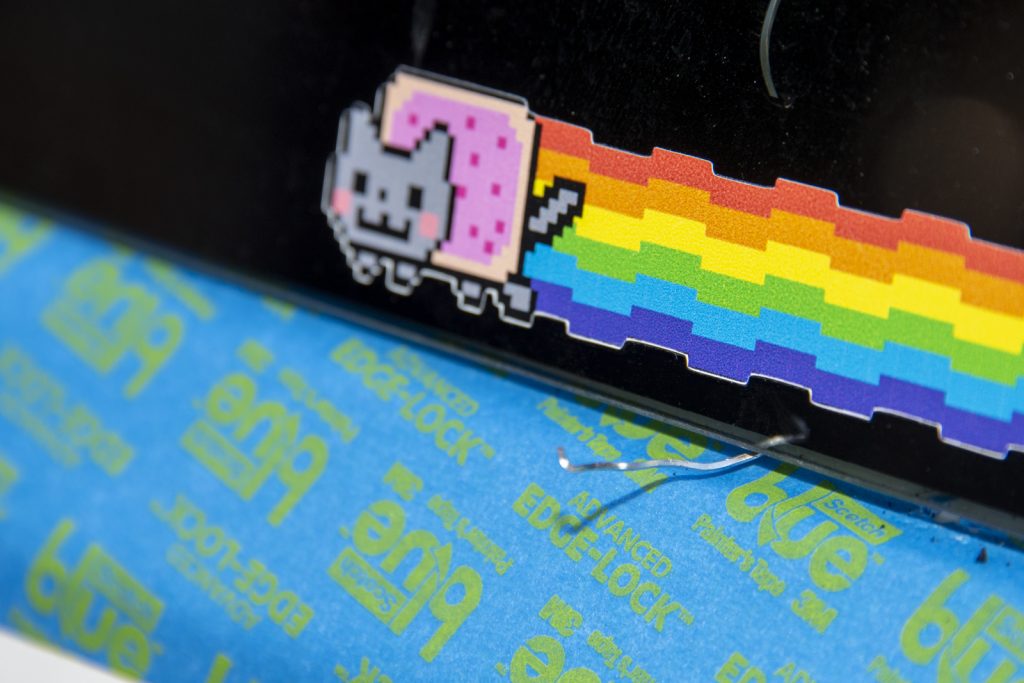
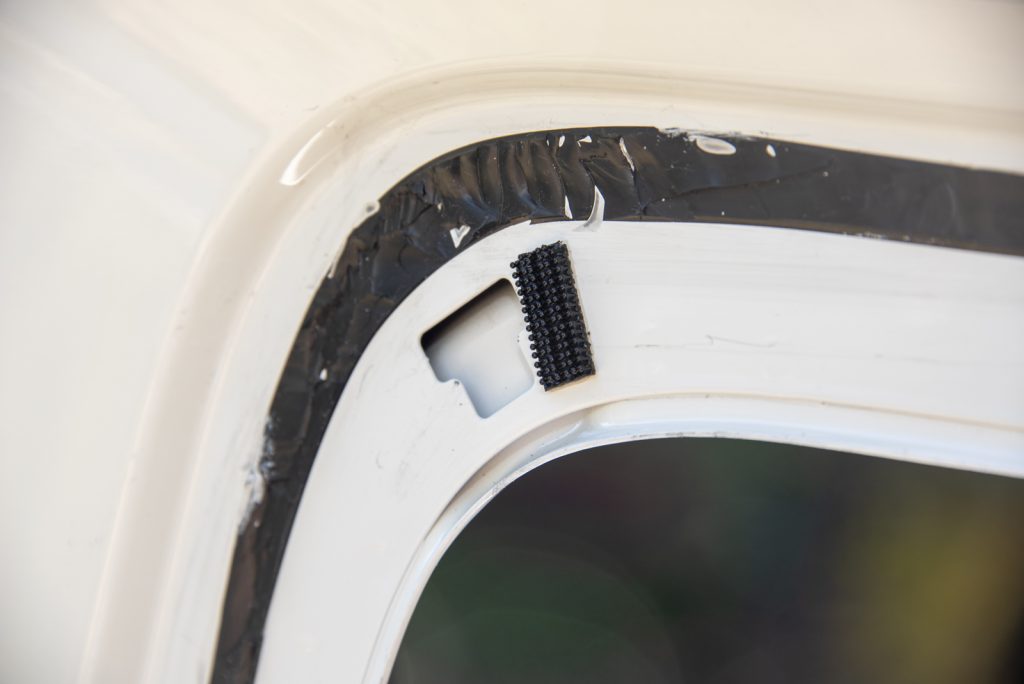
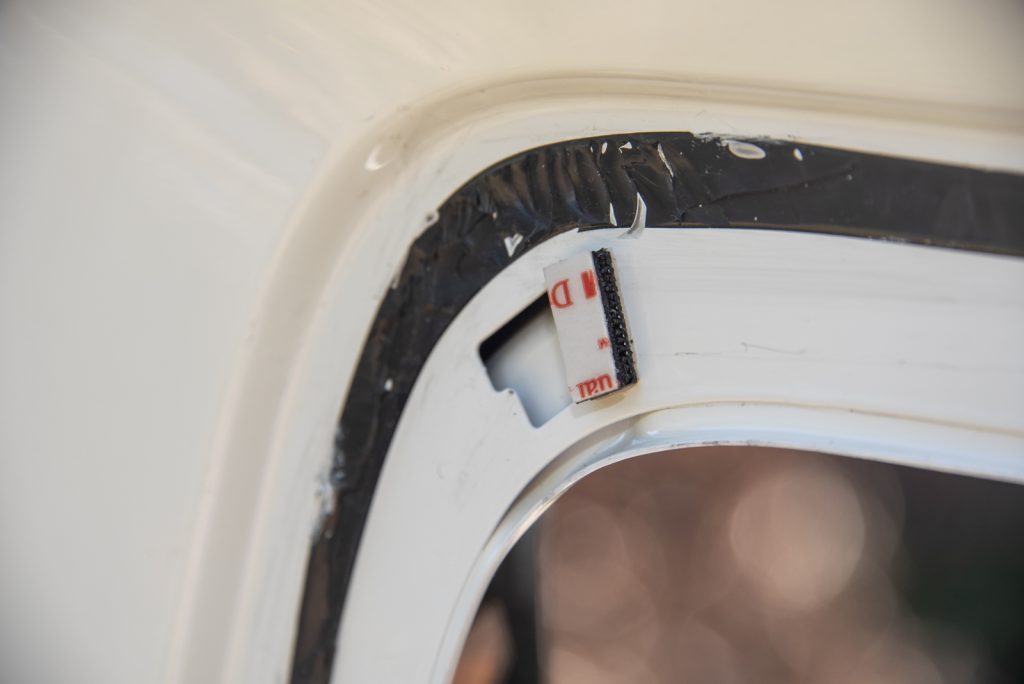
The upper part of the back window is spaced out from the frame using the provided 3M hook/loop style window retainers. One gets stuck to the bodywork and the other is attached in the appropriate corresponding position on the new window frame. Before you do that though you need to remove the OEM window retaining thing.
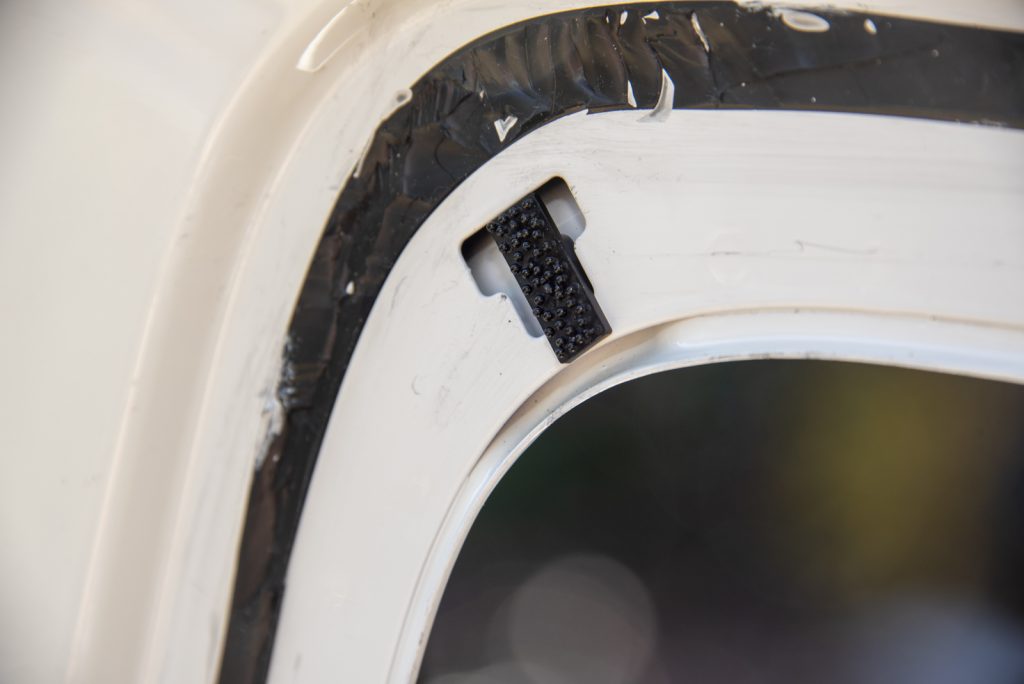
This OEM retainer pushes up and twists sideways to remove.
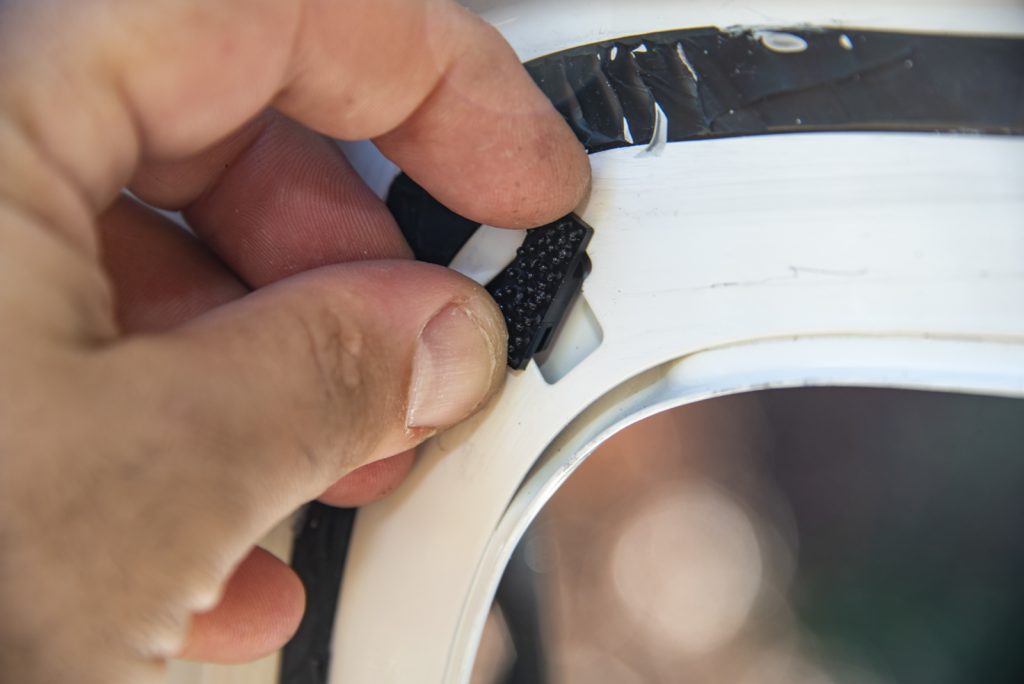
The new one attaches next to the hole. My shortcut here was to stick the one to the bodywork and then attach the 2nd one to the first. Just remember to peel off the backing for the backing tape before you install the window and it’ll stick in the right place when you fit the new window properly.
The other part to this shortcut is the Explore Glazing install guide says to use some masking tape to position the window and then cut the tape so you have alignment guides. I didn’t do that as dry fitting the window showed it basically aligned very well to the window recess. Your mileage may vary and when in doubt go with what the factory instructions are. Also, if you are using this guide and reinstalling factory glass you will have to use the masking tape to alignment guide method as the factory glass sits a lot further away from the body recess so it is a lot less forgiving on alignment.
Installing the new windows
Here’s where it gets fun (and probably the 2nd most stressful part – the cutting of the old adhesive was more stressful).
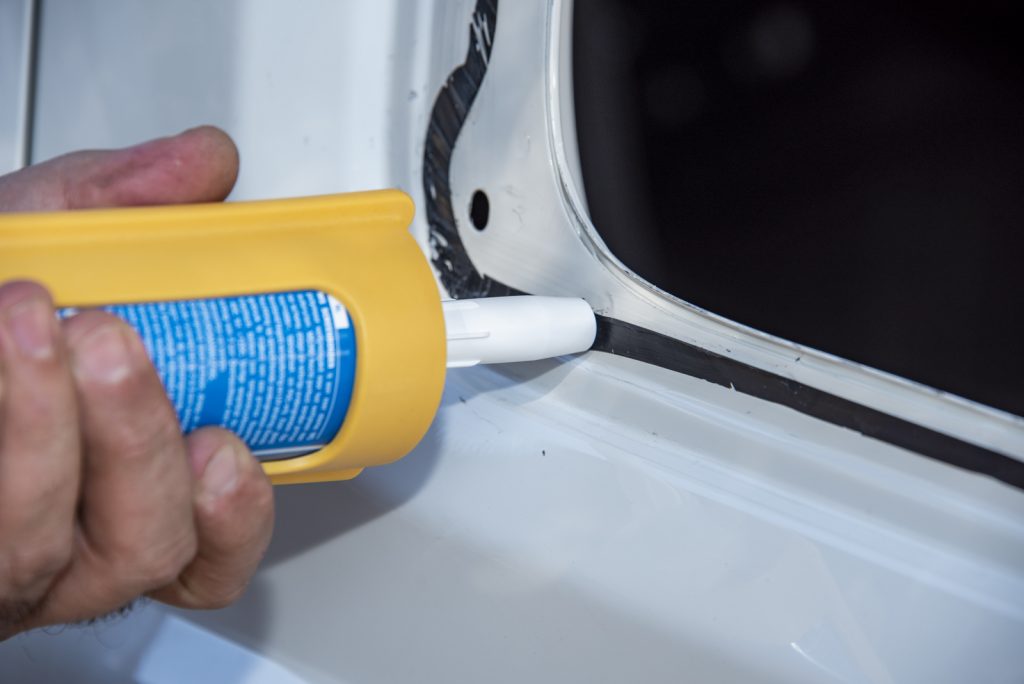
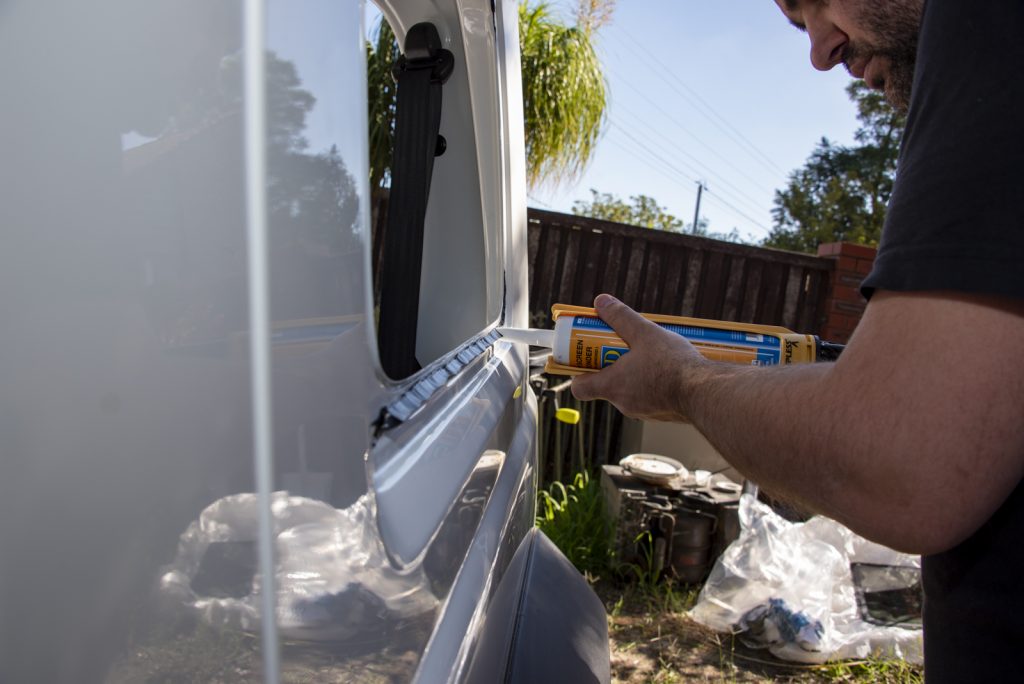
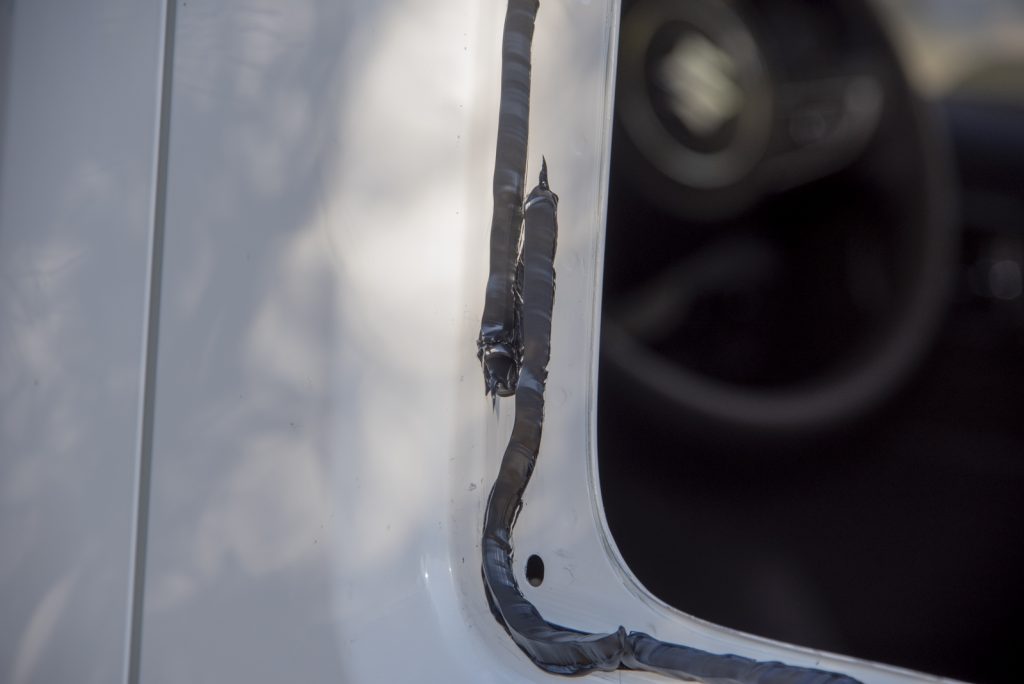
The install guide provided with the window says to use some paper to practise getting a good adhesive layup so I did. You’re looking for a nice triangular bead of adhesive with appropriate height and thickness as specified in the instructions.
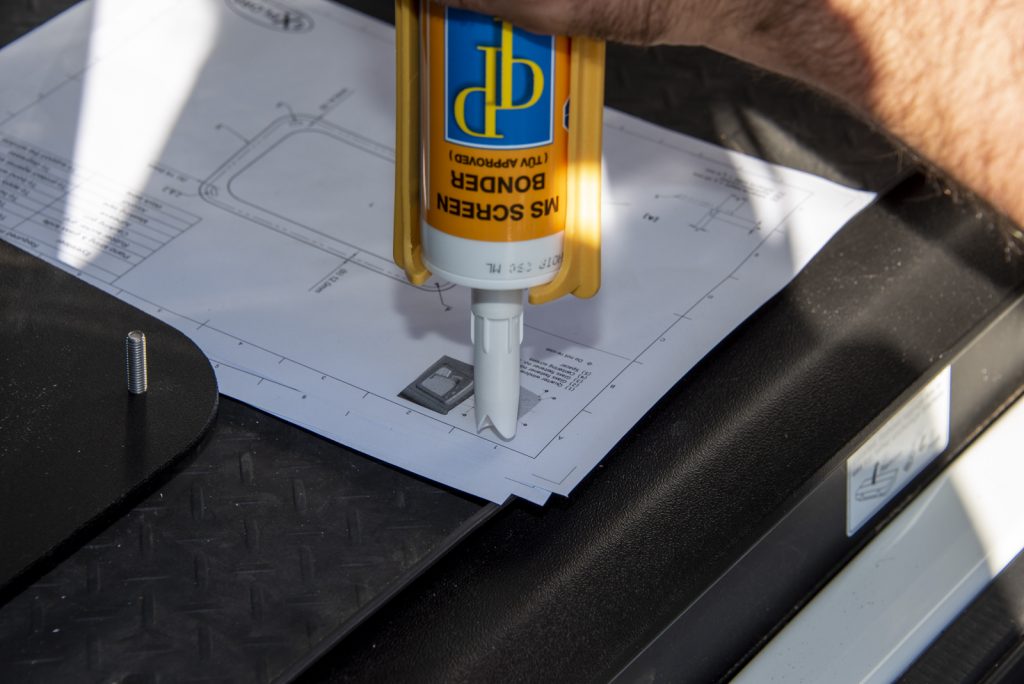
You want a nice steady squeeze on your caulking gun – better yet, use a pneumatic or powered gun – and a slow but consistent rate of travel.

Practise, without pulling on the trigger, on the path you’ll follow when you apply the sealant to the body of the car. It’s good to have a nice easy and comfortable path and make sure you’ve developed some muscle memory to make it flow nicely.
Remember that little plastic backing thing on the window retainer? Peel that back now before you forget.
Now is the time to start your adhesive application. In the following photo I started on the bottom as it made getting photos easier but you should start up just before you come to the corner around the front centering pin hole.
Now you really hit the point of no return. You pick up the window and place it into the window opening, making sure you’re putting it in perfectly aligned. Once again, I didn’t do anything special to ensure alignment over the proper rubber spacer at the bottom and the two screws used for alignment into the holes into the bodywork but you might want to do something to make alignment easier.
I found it easiest to line up the upper alignment screw with the upper hole, then lower alignment screw into the lower hole, then pivot from there and start putting the back of the window in. It’s hard to write but basically that helps you get it in the right height at the front of the window, and then you just adjust as you bring the back into line so the top and the bottom of the window frame nicely line up with the bodywork lines.
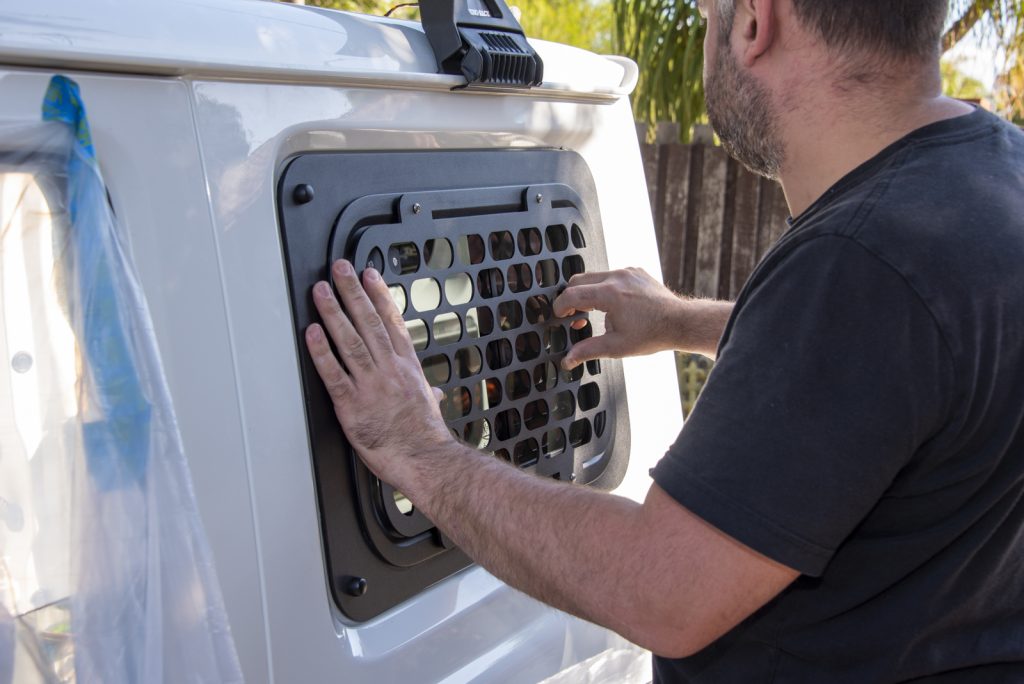
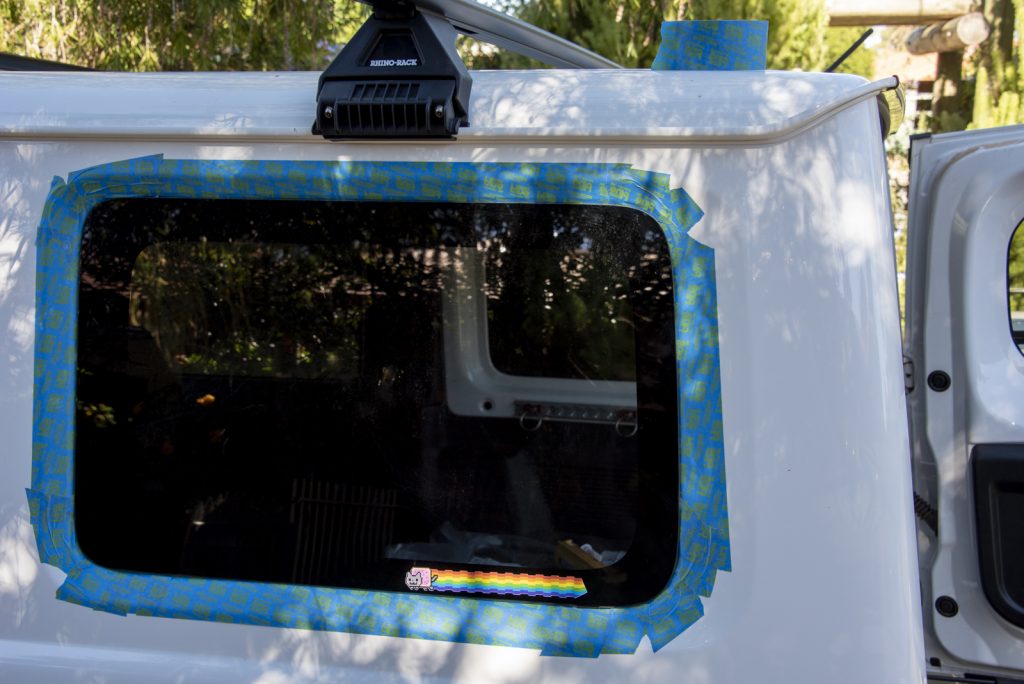
Finally, really push hard on the window to seat it against the adhesive and then quickly apply some masking tape to keep it perfectly still.

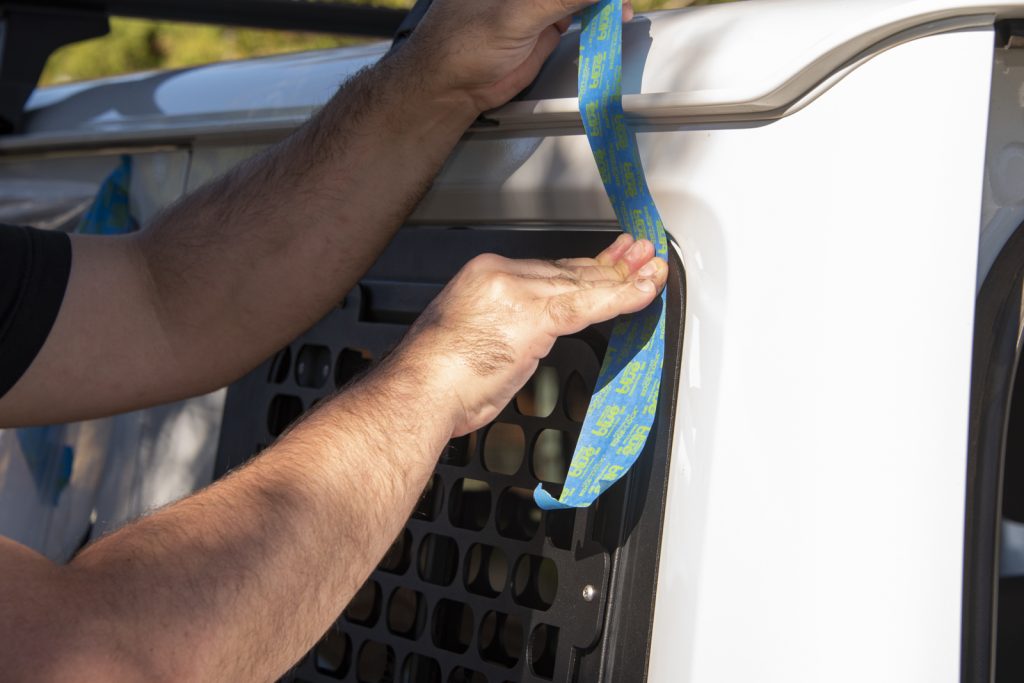
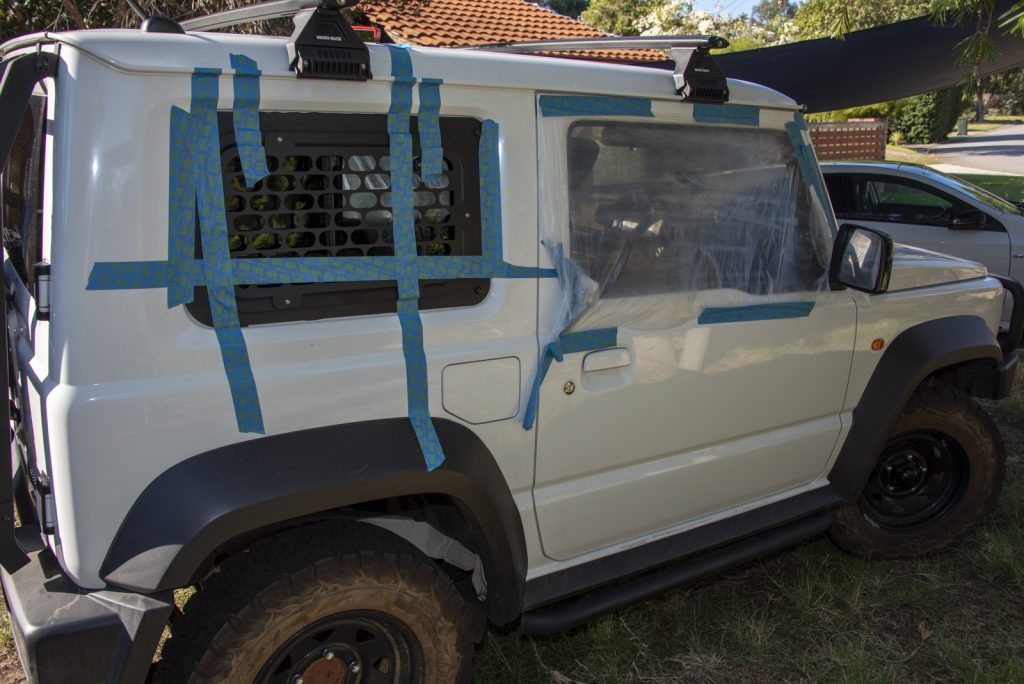
I added a bunch more tape to each window and then called it done to let the adhesive cure.
Post installation care
Installation guide is very clear here: don’t drive the car for a couple of hours, don’t close the doors unless you have a front window open and you close the door very slowly, and don’t operate the window for 72 hours.
To help with the closing of windows, I used some plastic drop sheets to mean I could have the front windows open but the interior of the car protected against dust etc.
I’m going to guess the 72 hours of not using the window is likely down to the gullwing windows putting more stress on the adhesive but I’m not super keen to find out.
Using the windows
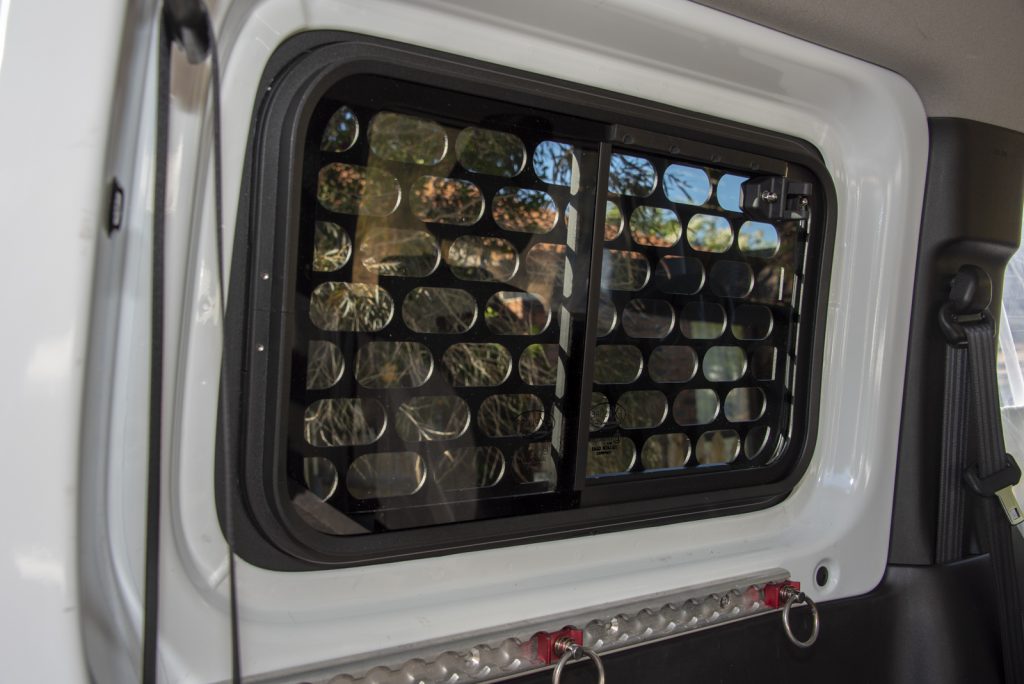
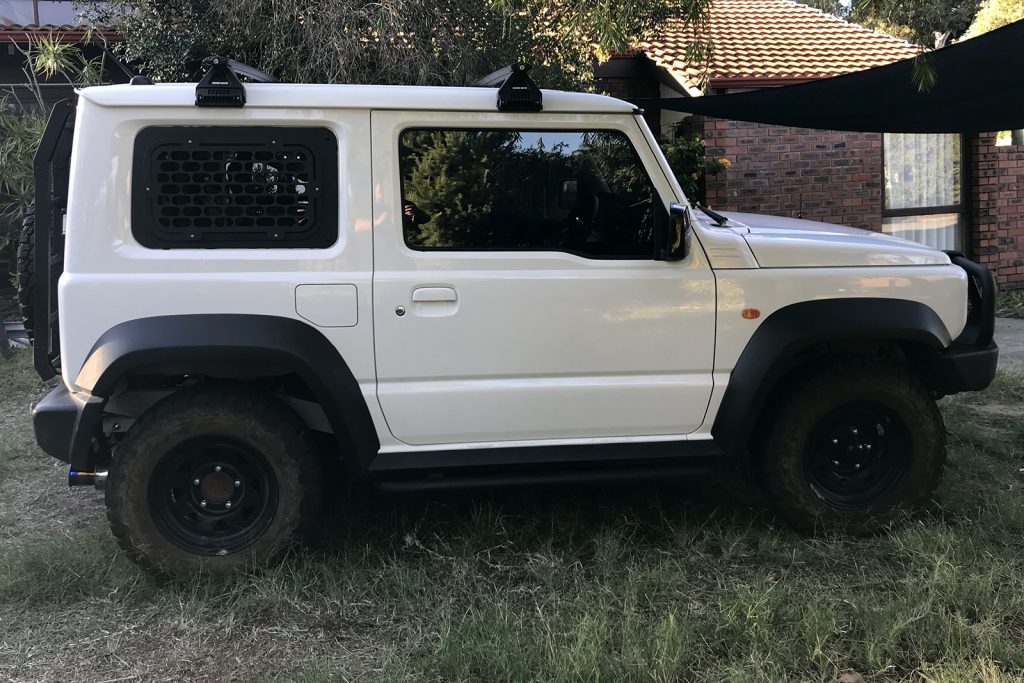
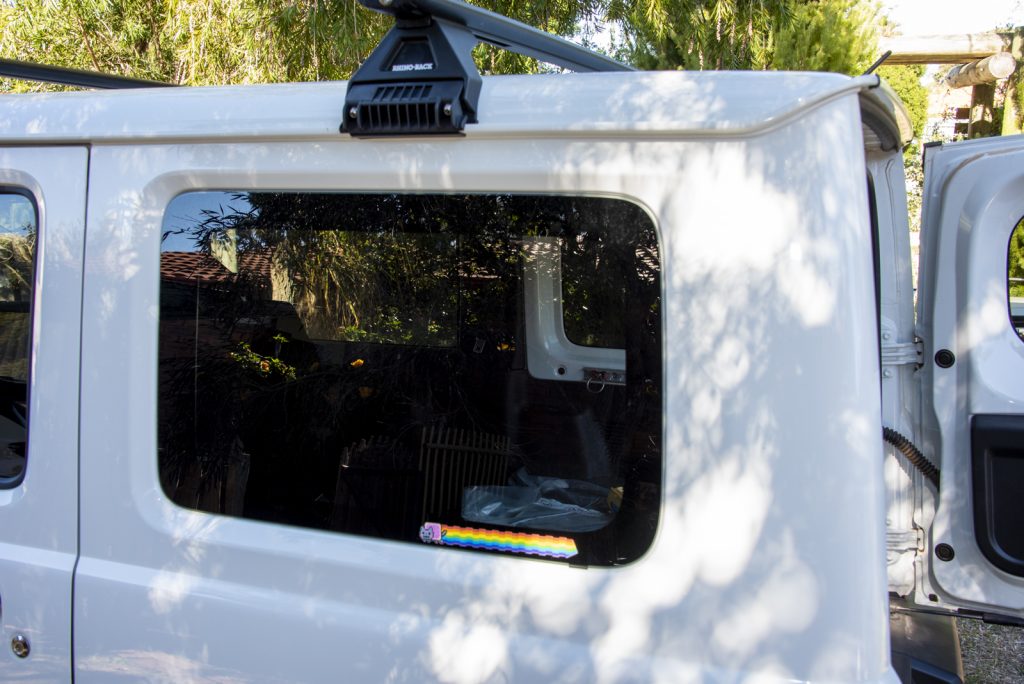
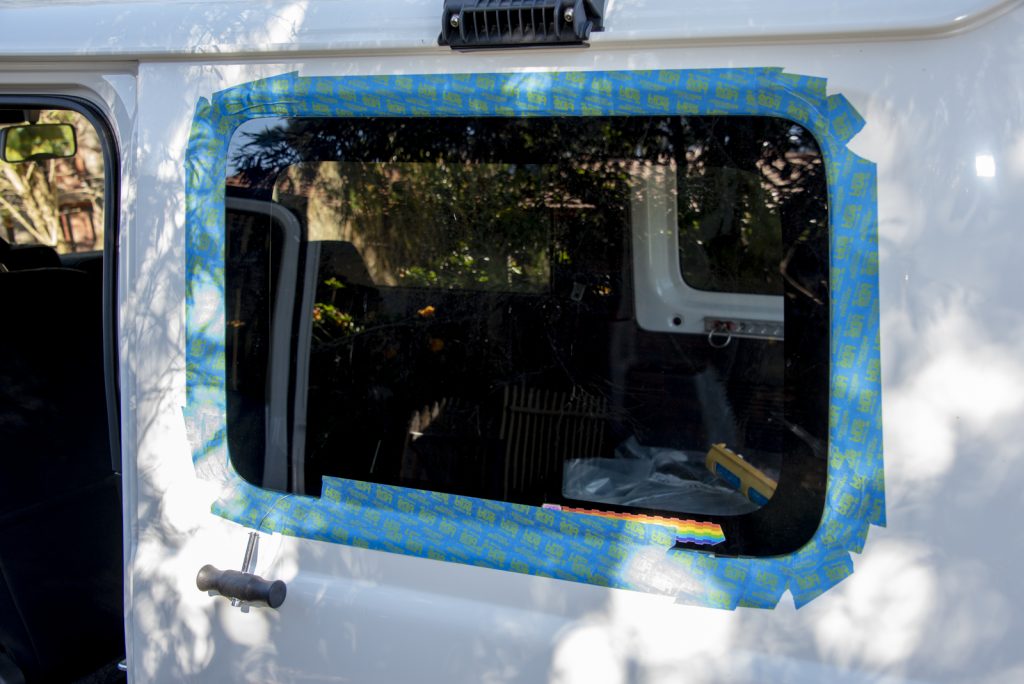
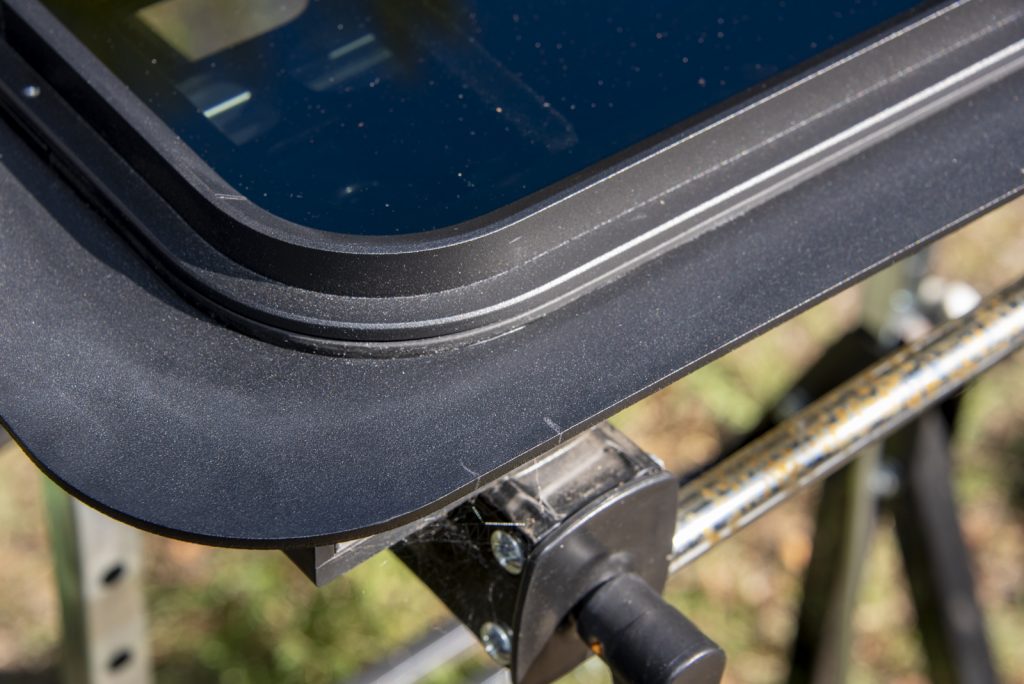
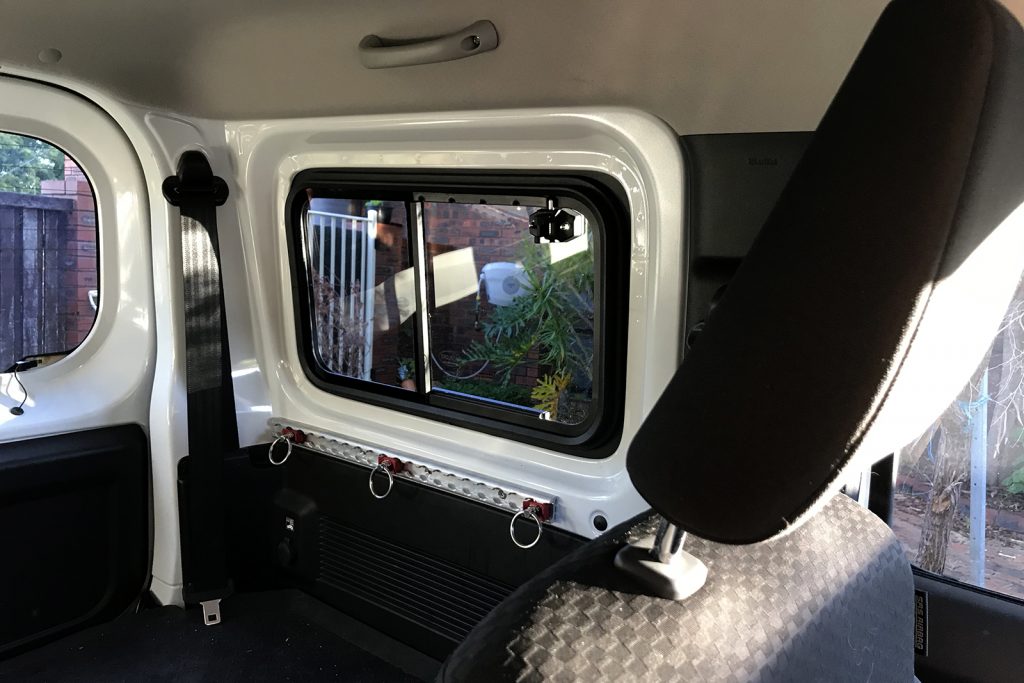
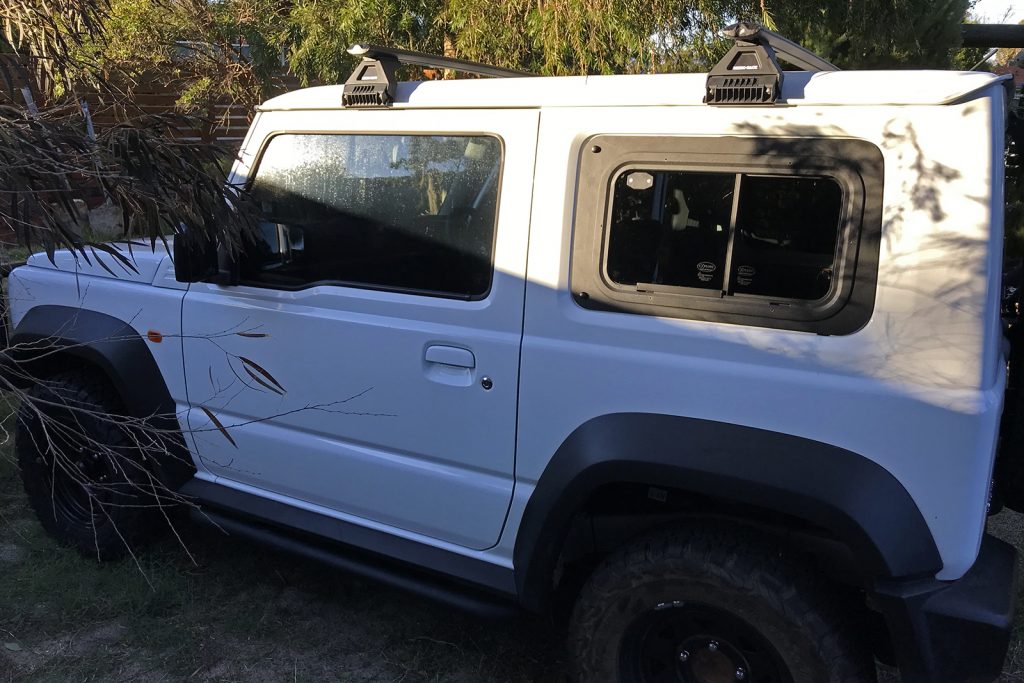
Above is the view from the back door looking at one of the windows. You can see they do poke into the cabin more and they provide a little less glass area than the factory windows. I really like the level of tint and they look nice and simple and functional.
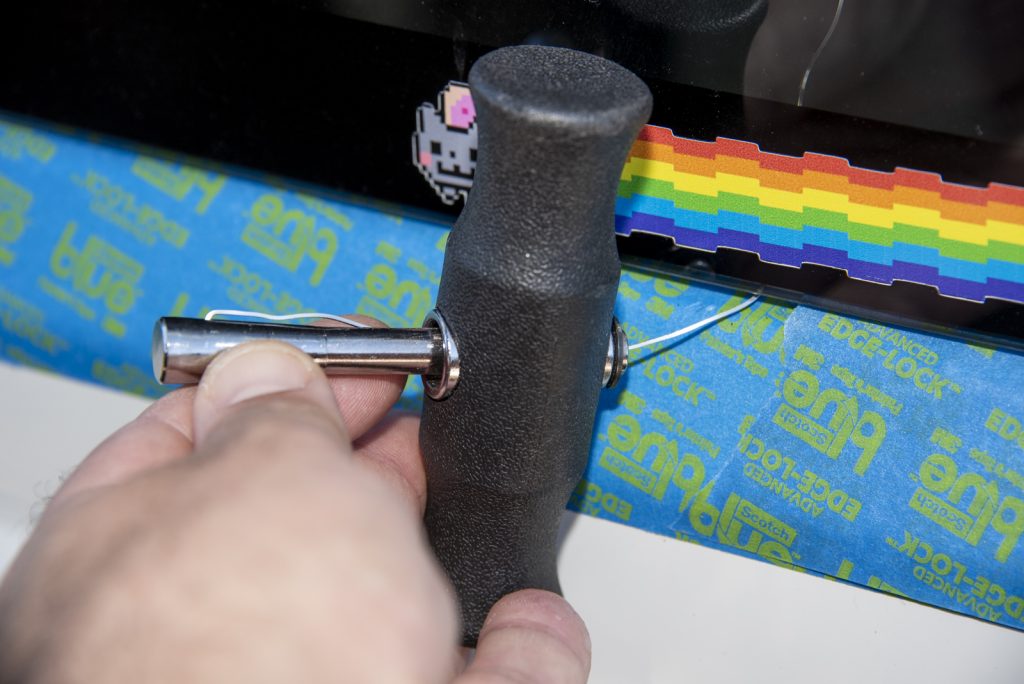
The windows open about 40% of the total area which is certainly adequate for use for airflow for the dog. There are a bunch of detents in the upper part of the window frame to allow you to open the window partially and have it unable to move.
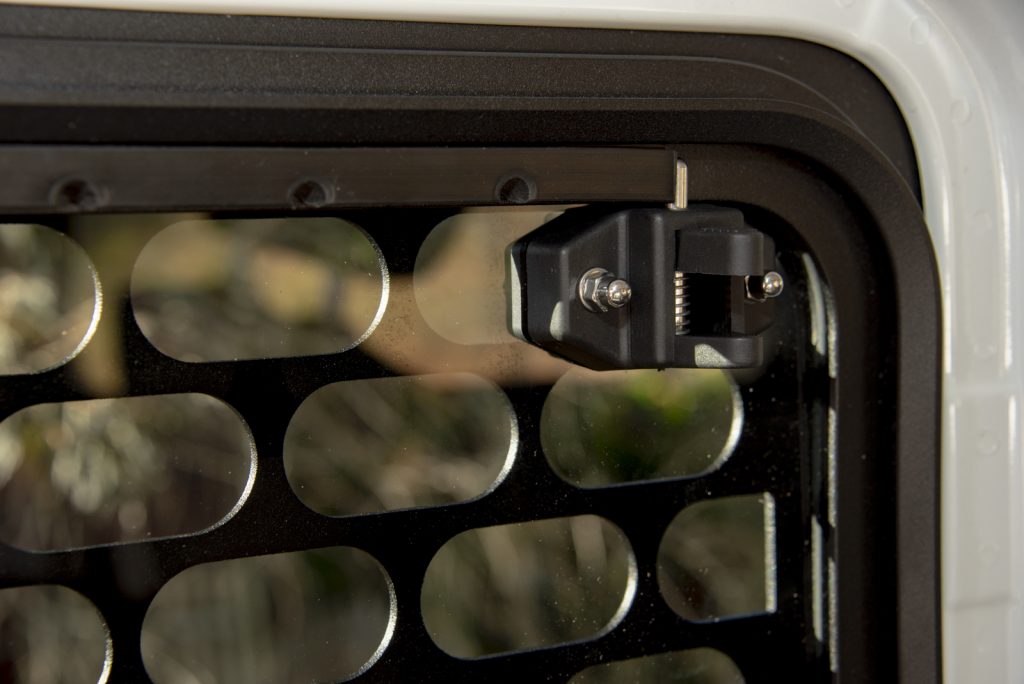
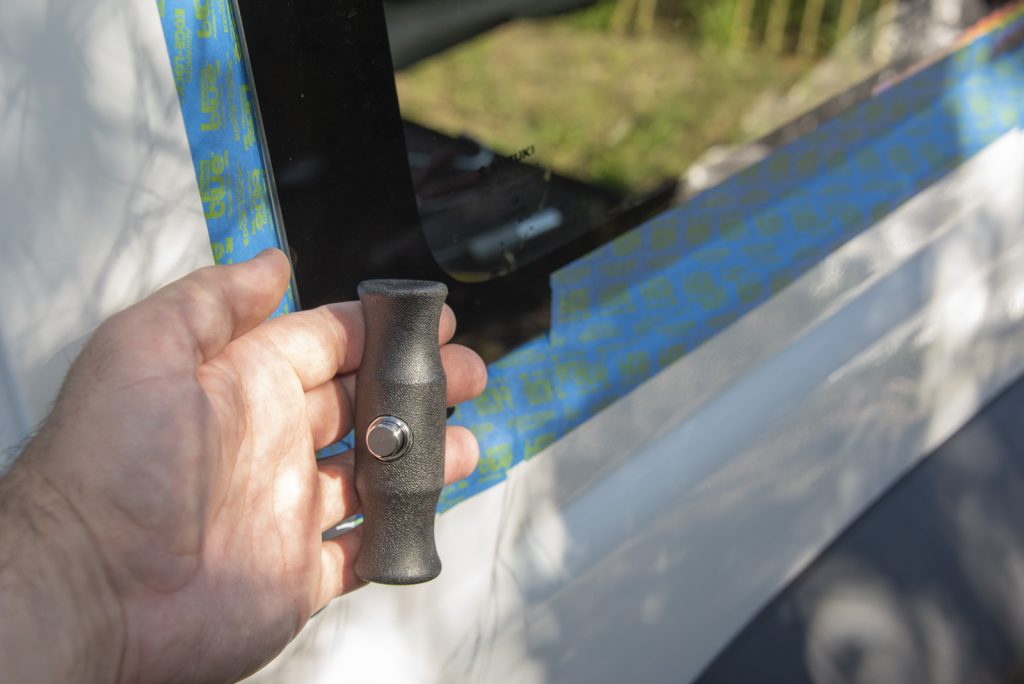
I’m very happy with the windows and the quality of the hardware etc they have installed. The latch feels very nice and easy to operate and the special draught and weatherproof seals on the sliding window give a very smooth slide to the window.
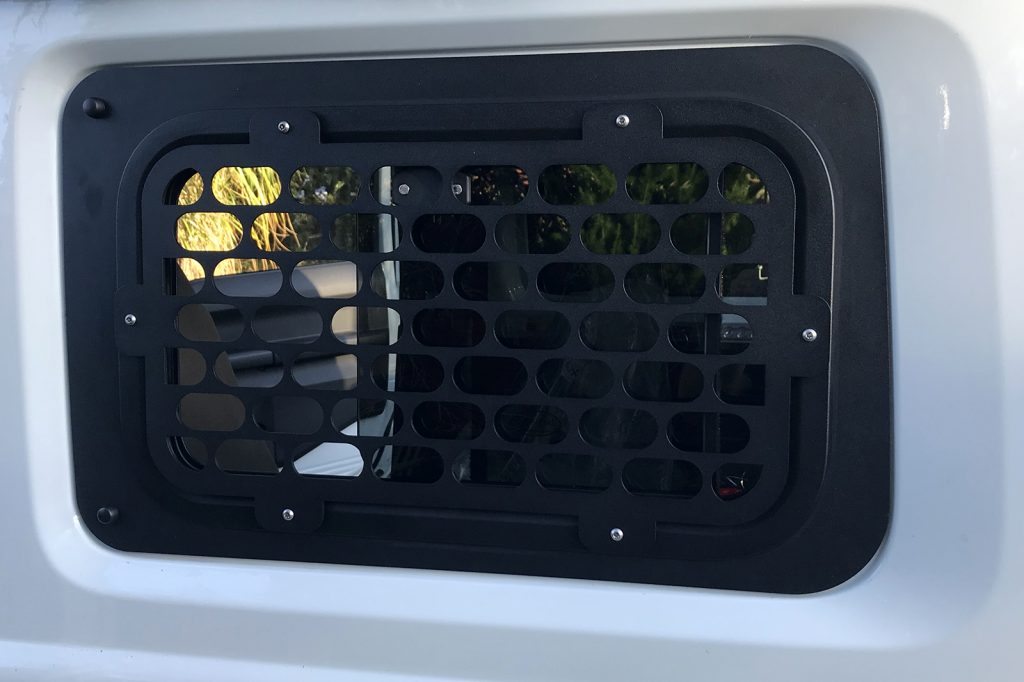
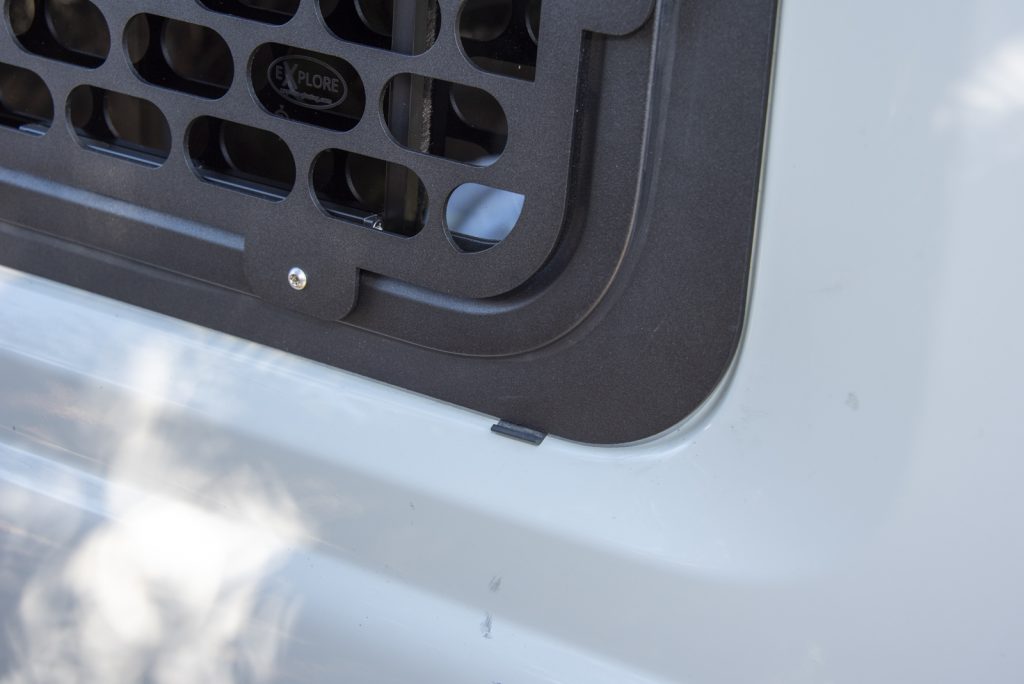
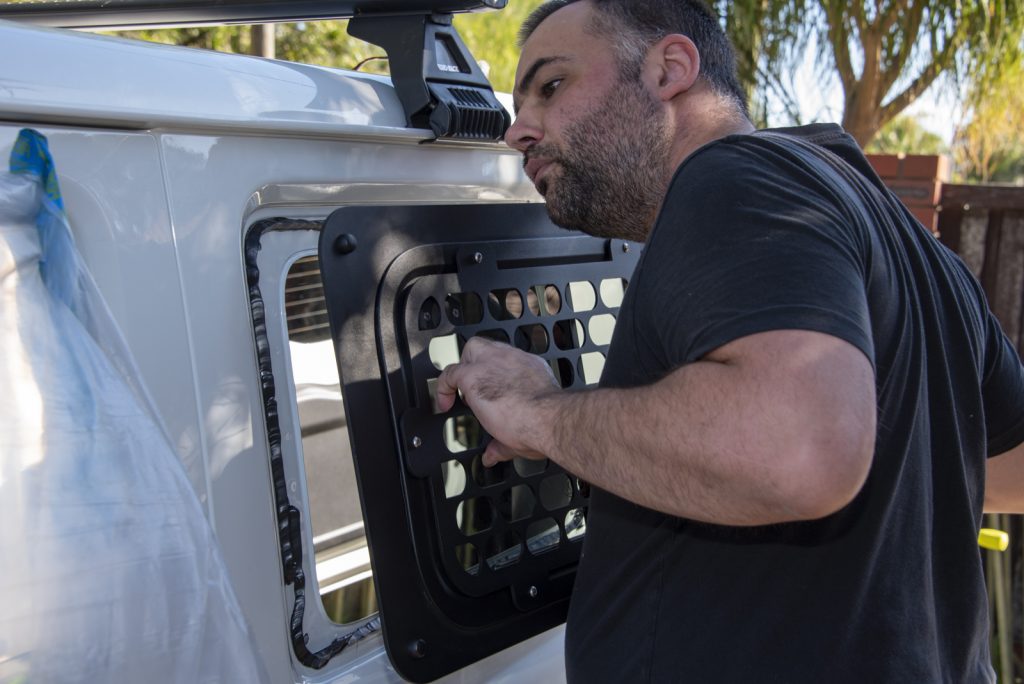
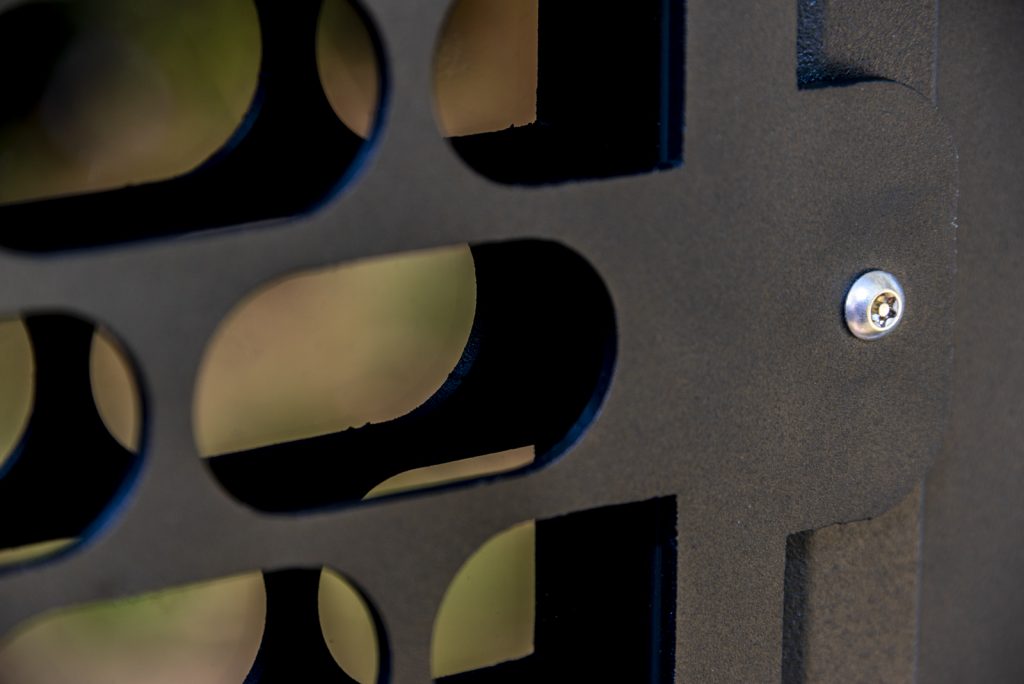
Note that the security grilles I’ve got on mine are an optional extra. I don’t think they cut out visibility significantly, I mean it’s not like I look through the back windows that often either… but also they are pretty minimal. The security screens attach to the window with security torx screws that match my ones used in my roof racks.
Since security torx bits are becoming more common I might swap them out for something a bit less common, but I mostly wanted the screens as it’s a good way to ensure that people can’t easily get in if I have the windows opened a crack when parked. It’s also good to know the dog can’t stick his head out far enough to whack it on a tree or something on a tight trail.
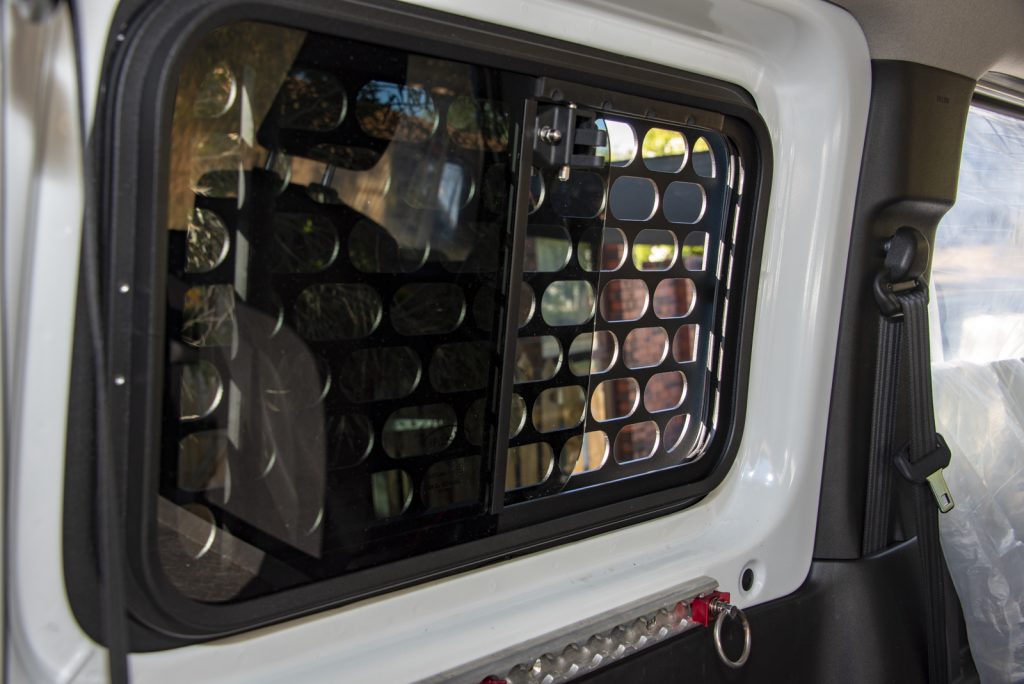
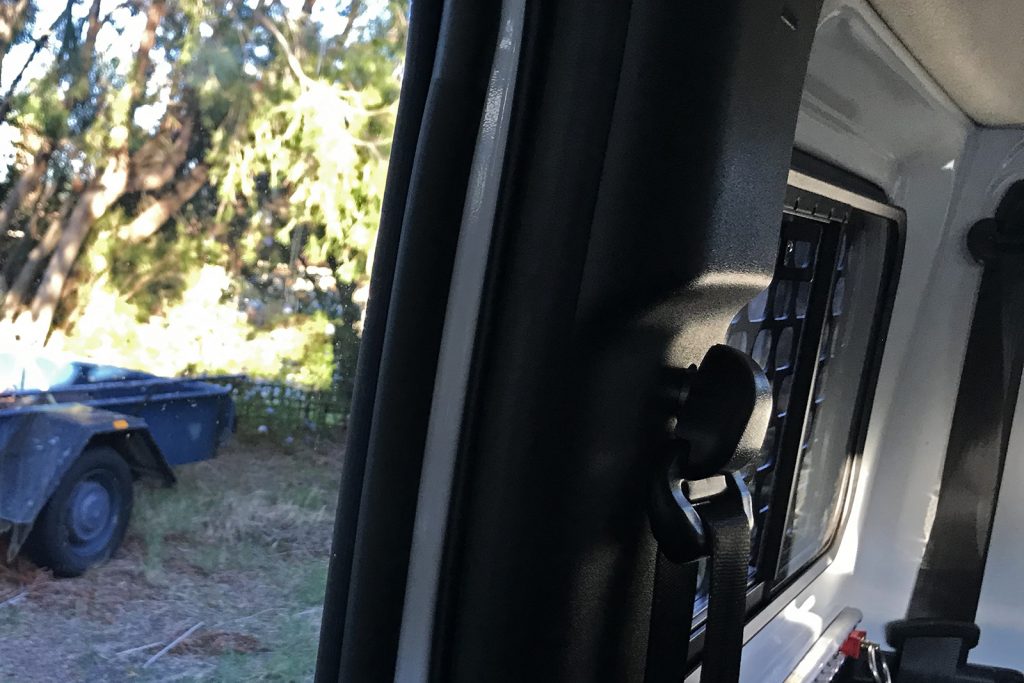
One pretty common question is about the visibility with the windows installed from the drivers seat. I don’t think the standard window is fantastic in this regard since there’s a pretty huge blind spot anyway and that’s what mirrors are for. In any case, below is the view with and without the security grille.

It certainly doesn’t take away too much with the grille there, and the visibility is 95% of the standard window if you don’t have the grille on. Certainly a worthwhile tradeoff for the functionality of openable windows in the back.
The windows look alright without the grille attached too, but potentially if you were going to run with them like this then I’d almost get the black outer aluminium frame painted to match the body colour. Removing the grille is really quick and easy, took about a minute with the 6 security torx screws easily undone. Just remember there’s a nylon washer between the grille and the window frame – don’t lose them so you have them for the reinstallation of the grille.
I’m certainly happy to drive around with the grilles installed all the time anyway.
The only thing I would like to add is to make a little magnetic flyscreen to go around the window frame to add to the ventilation options if I sleep in the back of the car when camping. If I do that, I’ll be sure to add the details on here.