
Recovery points
Front recovery points
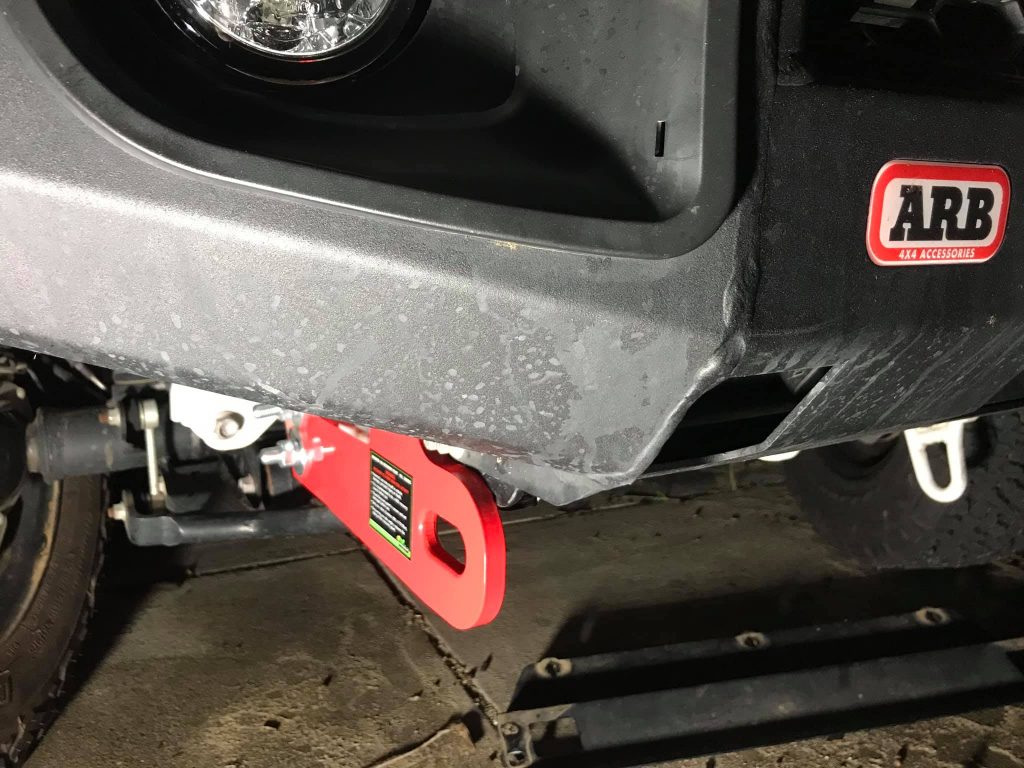
There’s a few options for recovery points at the time of writing (mid 2020), but I’ve opted for the Ironman rated recovery points. Given I’m not running an Ironman bullbar, there’s a few things to consider about fitting them
Test fitting
Below is me writing out how to do the installation based on an afterwork test fitting session. There’s a couple of hiccups that need to be taken into account, and I’ll be revising photos in the daylight based on this test fitting session.
The main difference is that the Ironman bar fits with a couple of M12 bolts versus the ARB bar which fits with M10 bolts. The ARB bar uses some crush tubes into the chassis legs so it’s not a case of just drilling them out: the simpler answer is run grade 10.9 M10 bolts that are shanked over the full thread M12 bolts that Ironman supply. That gets you very close to a similar level of shear and tensile strength for the front bolts. Additionally, the bolt holes at the front are slots so the bolts aren’t directly in shear immediately and mostly provide the clamping force which is what holds the recovery point on, so M10 bolts should still be sufficient to reach the load rating for the recovery point.
The other thing you need is some way to make a sandwich plate for the drivers and passengers side tiedown points. The left hand side is easy, a 75x75mm bolt plate lines up pretty well for the bottom bolt at the back, and the top bolt goes through one of the holes in the top of the mount. The right hand side is not so easy and I will probably make up my own from steel plate to be sufficient for what’s needed.
Recipe
- Ironman rated recovery points, IRP070 part number
- 4x M10x100mm shanked bolts, grade 10.9
- 4x M10 nuts to suit the bolt (I like nylocs, not everyone will)
- Metal plate to make up sandwich plates for the factory tiedown points
Right hand side install
Turn the steering wheel all the way to the right to make life easy.
Make up a sandwich plate for the factory tiedown point. Easy to do this with a bit of paper to make a template, cut it out and then cut out the steel.
Then paint it BLAAAAACK as that’s the only colour for dodgy DIY metalwork.
You’ll line it up and drill the holes once you align the recovery point using the front bolts.
Undo the 7 bolts that hold the bottom plate of the bullbar on.
Removing this bottom plate gives you access to the nuts at the back of the chassis leg. Undo these two bolts and remove them. If they are anything like mine then you need to pull them out with a bit of leverage while turning them as the ARB drilled holes are pretty tight.
Put the two M10x100mm bolts for the front two holes of the recovery point and line them up with the holes in the bullbar. The top one of my front bolt needed a fair bit of screwing in, the bottom one just took a little tapping to get in.
Mostly tighten up these bolts and line up the recovery point so it is nice and straight.
Now you need to take your sandwich plate and hold it up at the back of the tiedown point.
Use a 12mm drillbit to line up where the first hole (top or bottom – your choice) needs to be drilled.
Drill out this hole using a pilot bit and then a 13mm drillbit (gives you some flexibility in positioning).
Bolt up the first bolt to hold the recovery point in position, and mark the second hole. Unbolt the first bolt, and go and drill the 2nd hole.
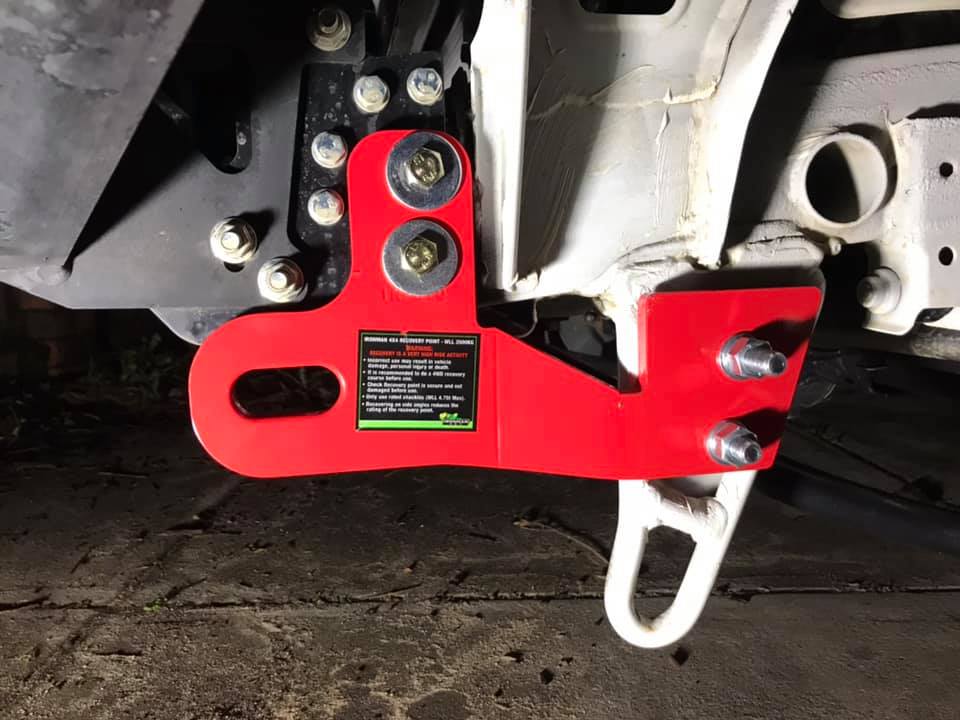
Although the Ironman instructions indicate that the bolts are installed with the bolt heads on the outside of the recovery point, I have installed them backwards as I was a little concerned with just how much thread was sticking through close to the swaybar. Shouldn’t hit it but this seemed safer and better. I will have to check it for wheel travel at full lock and compression on each corner. That said, shortening the bolts will give you minimum stickout towards the wheel anyway.
With that all done, paint the holes so it doesn’t rust, let the paint dry and bolt the recovery point up at the back using both bolts. With this done, you can measure where you can cut the bolts to shorten them so the thread just pokes through the nuts.
Trim the bolts, clean up the end with a file and bolt it all together for the final time.
Left hand side install
Turn the steering wheel all the way to the left to make life easy. If you didn’t remove the bottom plate from the bullbar as per the above, do it now.
Remove the front two bolts from the ARB mounting to the chassis leg. Same deal as the right hand side – the top bolt took some widing out, and the bottom one came out with a little persuasion.
Use the M10x100mm bolts here and push them through the recovery point to loosely mount it up.
The upper back bolt of the recovery point goes through the slot in the metal plate at the top of the recovery point. This makes lining up a sandwich plate for the bottom hole much easier.
For the sandwich plate for the bottom hole, I used a 75x75x3mm M16 square washer from the decking part of the local hardware store. This lines up nicely although you can give it a trim to make it more fitting with the tiedown point, and then also paint it BLAAAAACK.
Once the paint has dried, push the bolts in through from the back as per the right hand side, bolt them up and trim to length so they look less uggo. Then final boltup.
Rear recovery point
No point reinventing the wheel here: given I’ve got the Hayman Reese towbar, the classic method would just be doing recovery using the receiver hitch pin. Although some people don’t like doing this, it is sufficiently strong to cope with even hard core recoveries.
As part of my refresh and making my recovery gear a bit lighter and more modern, I have grabbed a 50x50mm aluminium receiver recovery point. Although I lust after a Factor55 one, these are generic and robust enough (it’s just a giant hunk of aluminium) that I got one along with the rest of my recovery straps.
Looks great, though I’m not sold on the colour of the shackle. This one is from George4x4, which is a venture out of Brisbane and is an expansion from a lifting/rigging company. I decided to try their gear to get into things like soft shackles and recovery ropes and the like as they offered good price, mostly Australian manufactured equipment that actually came with proof of testing. More about this in my recovery kit page (when I write it).