
Fitting Suzuki Jimny mudflaps
Mudflaps are often a necessary evil – either cause you like people you convoy with on gravel roads and don’t want to break their windscreens or because the police tell you that you need them. I originally bought both the front and rear factory accessory ones, however, the rears weren’t going to work quite so well with my aftermarket exhaust and I wanted some that had an easier way to lift them up and out of the way offroad. I also didn’t get all of the fasteners with my front ones and forgot to chase that up, so this isn’t exactly a step by step guide based on the factory setup there either.
Sections
Front
I bought the factory black mudflaps for the Jimny; when they turned up they didn’t have all of the fasteners with them & never chased up sorting that out. So this isn’t so much a how to fit them properly so much as how to make them work if you don’t have everything.
I haven’t finished writing this section up yet, so check back in a bit!
Rear
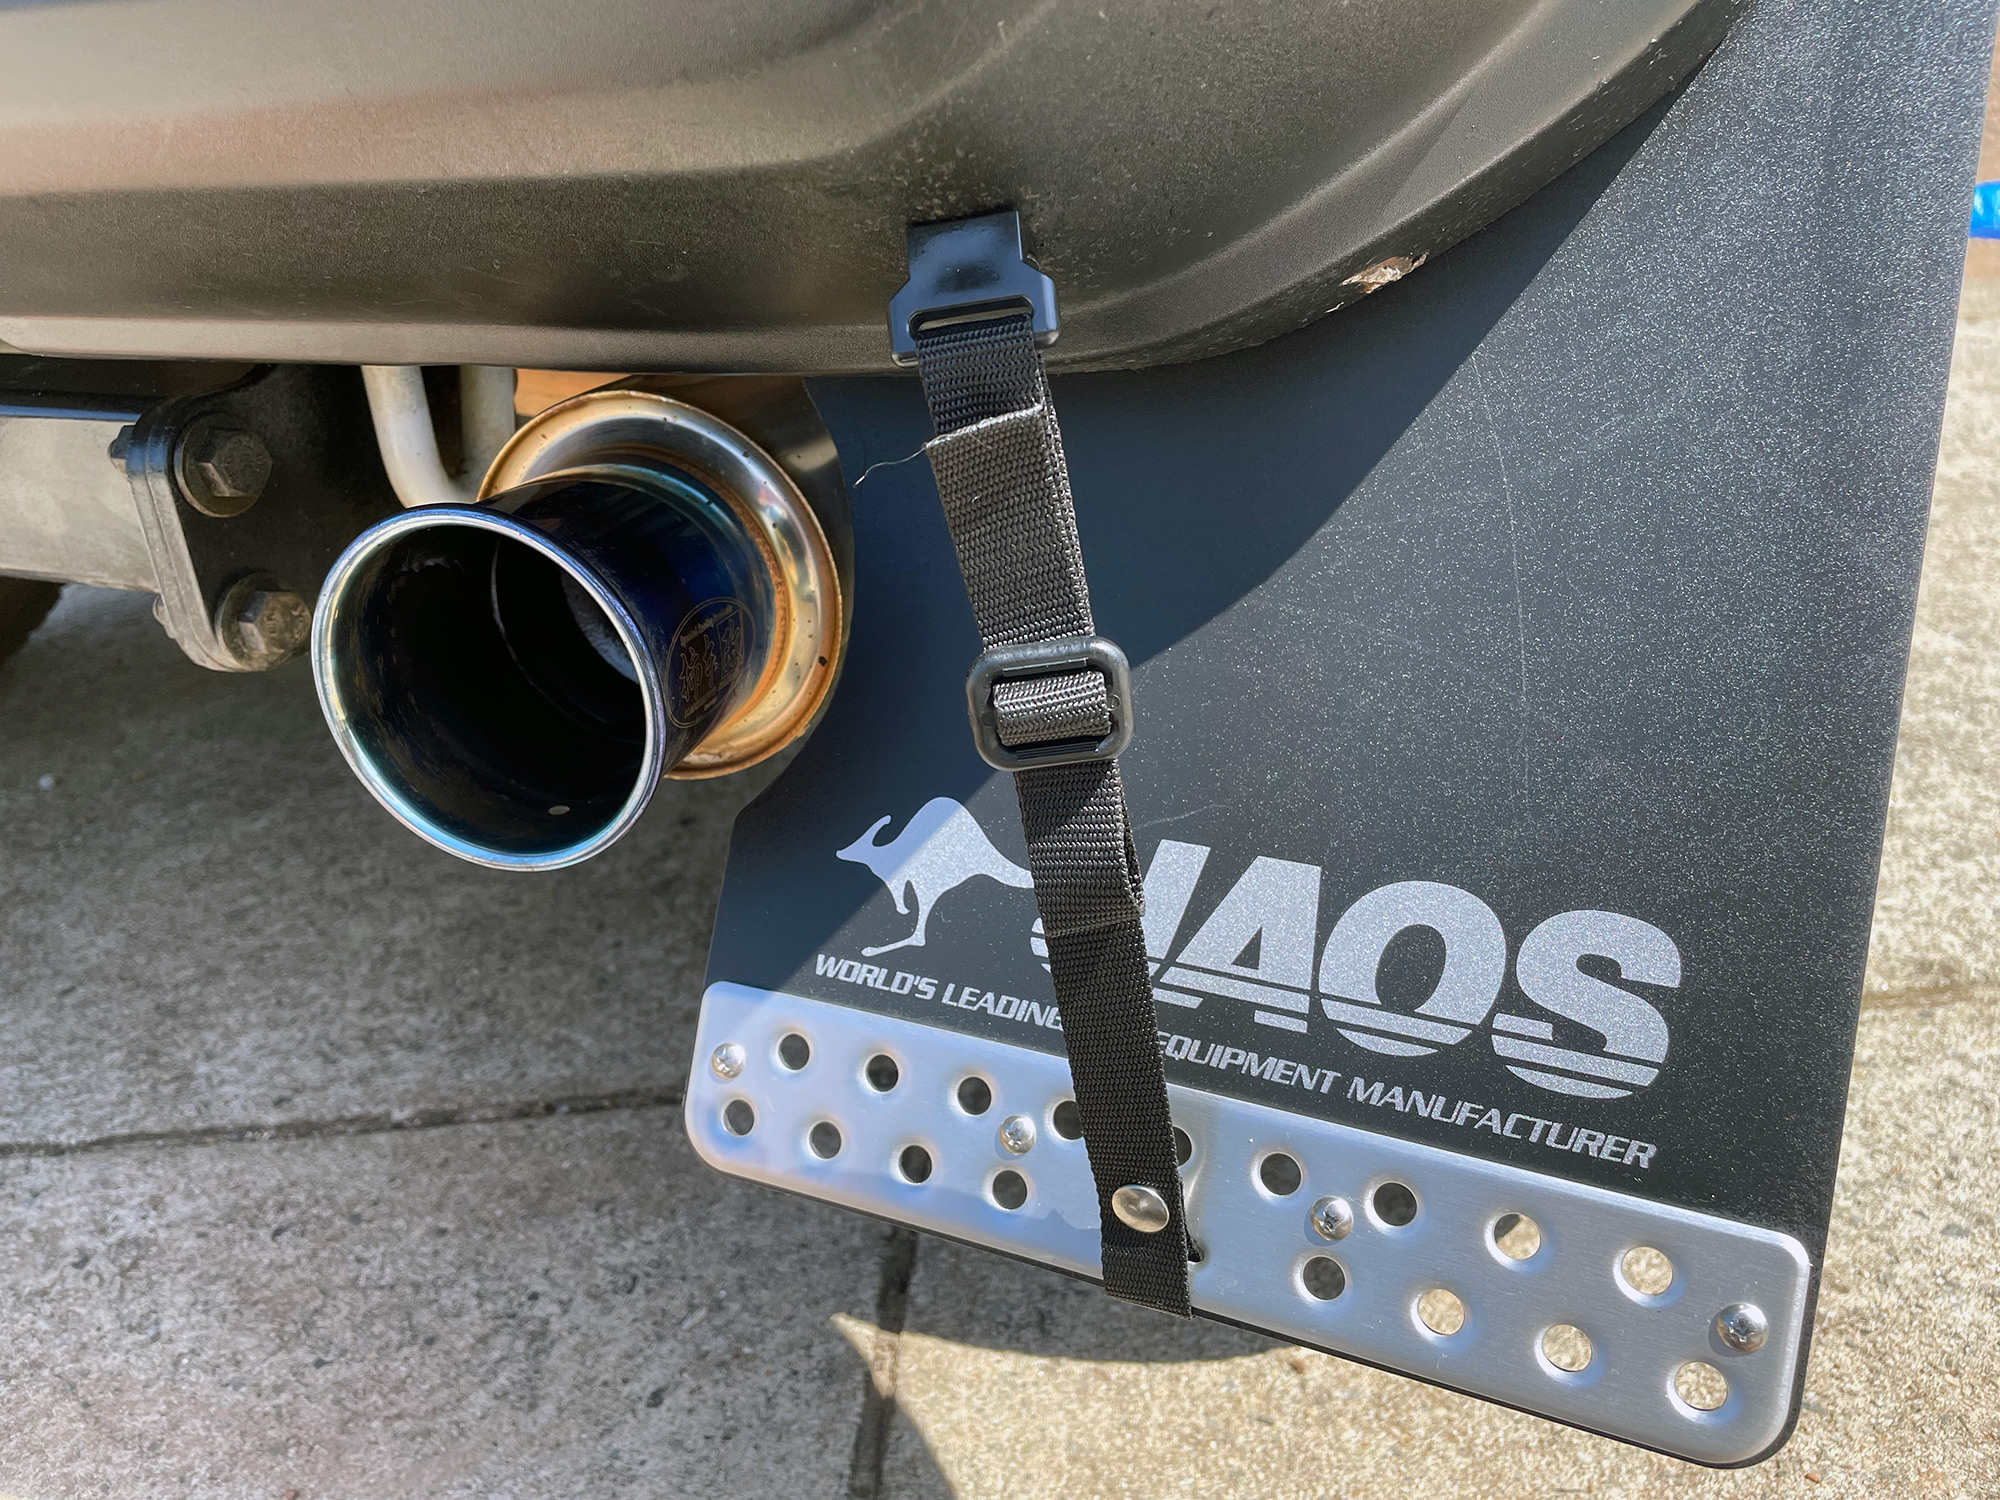
For the rears I have gone with Jaos ones, in part because I think it’s very useful to be able to pull them up a bit at the back when offroad in tricky situations. The instructions for these are in Japanese only, so I have taken the liberty to write my own to help out people with their installations.
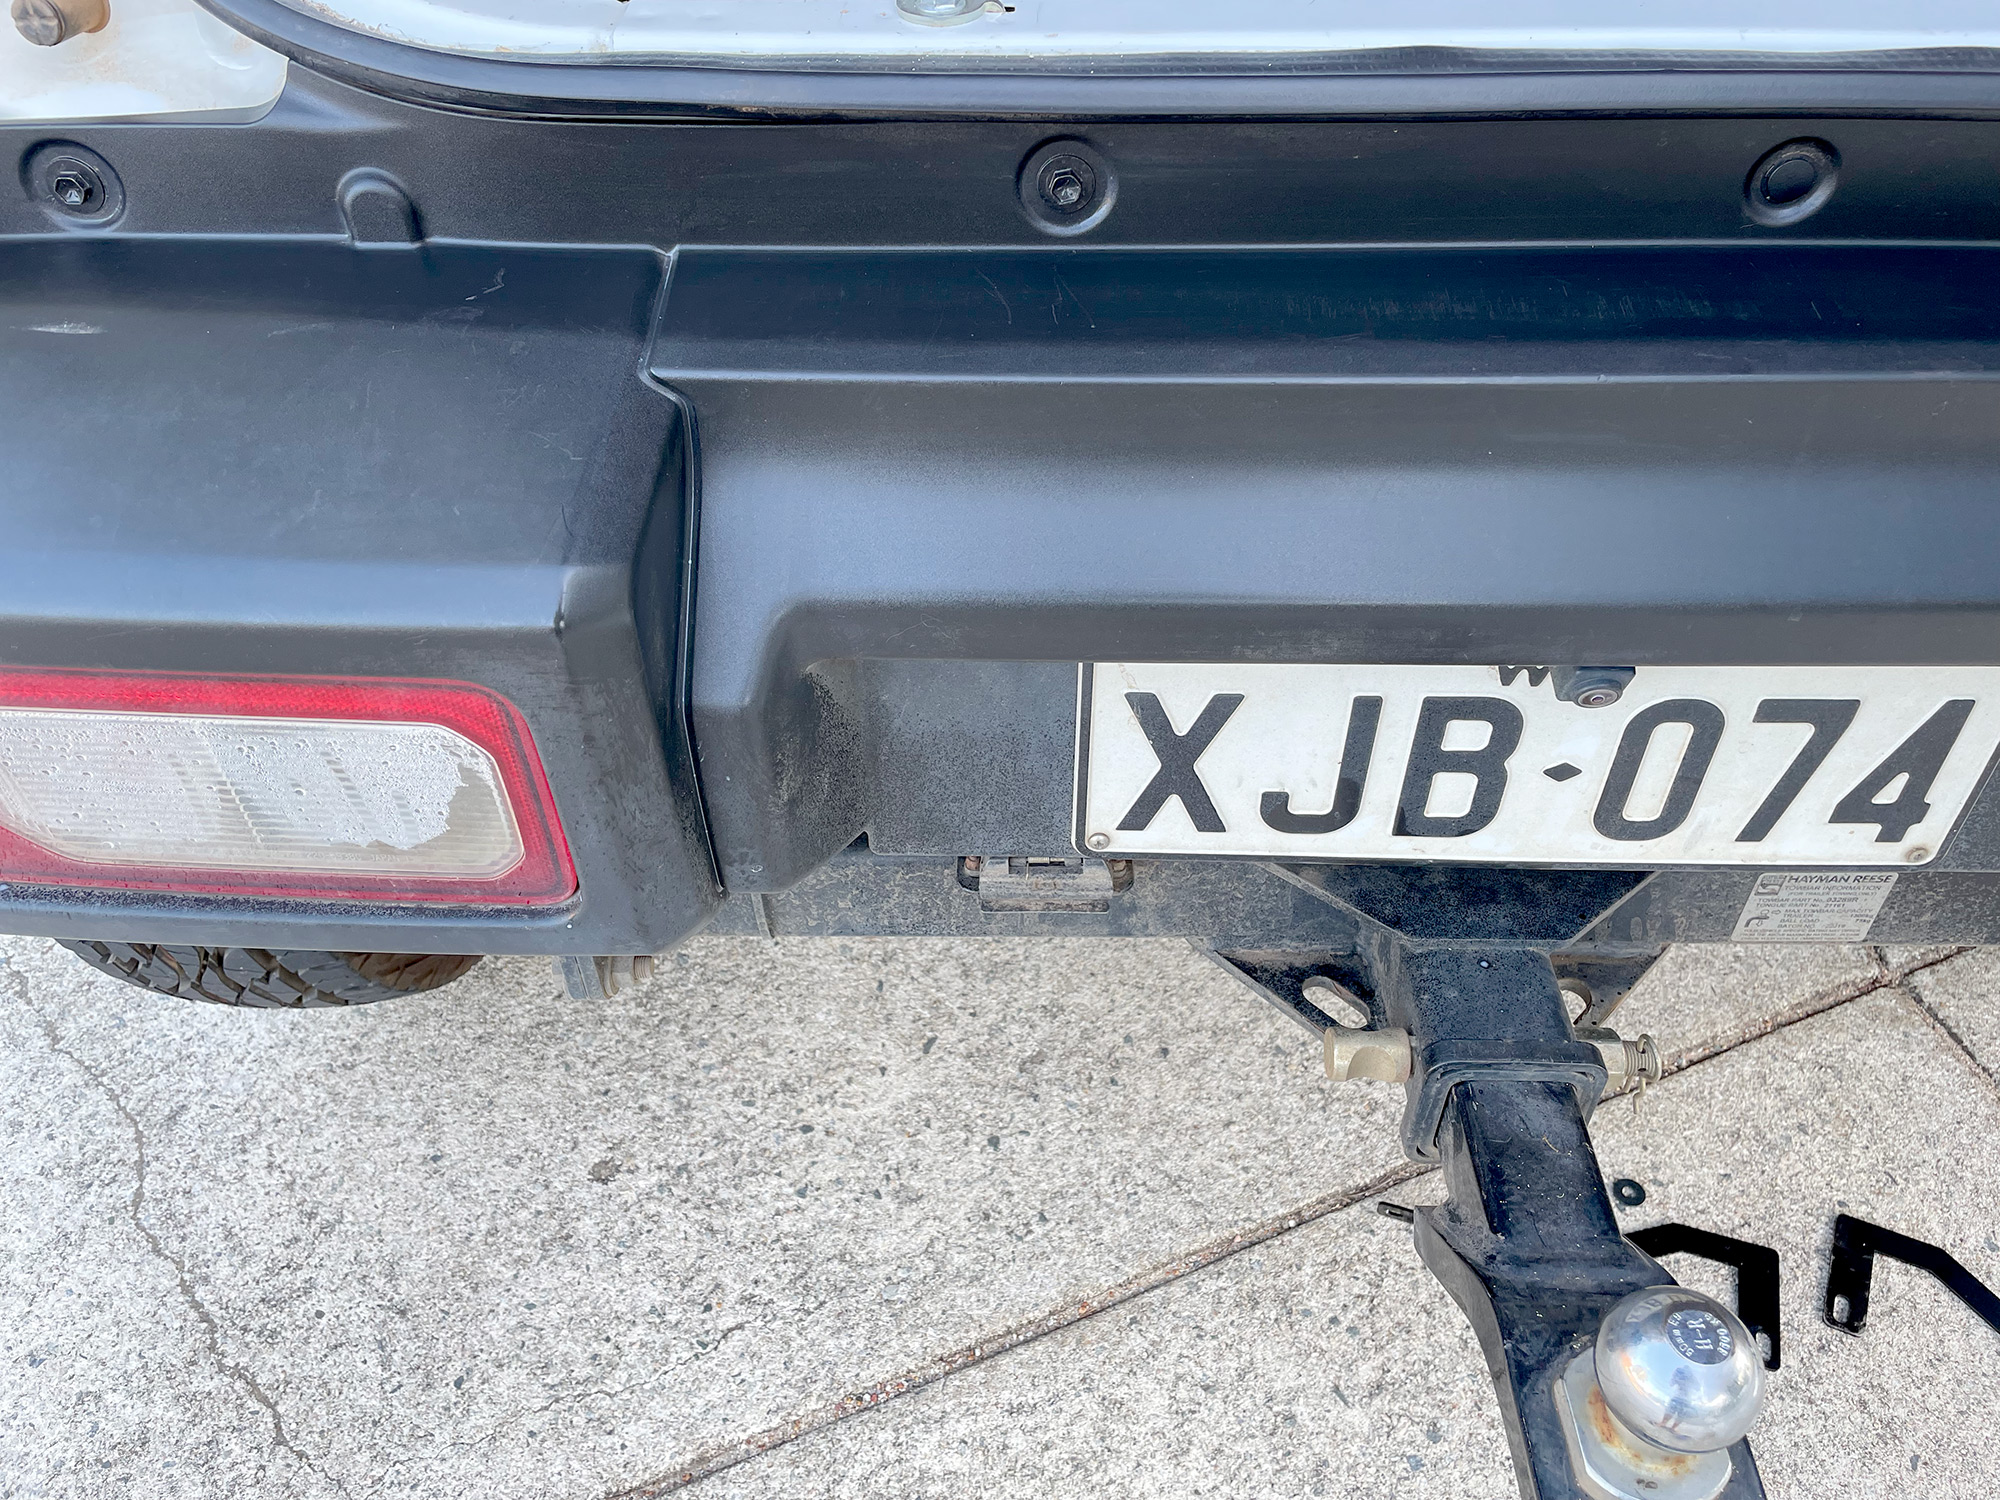
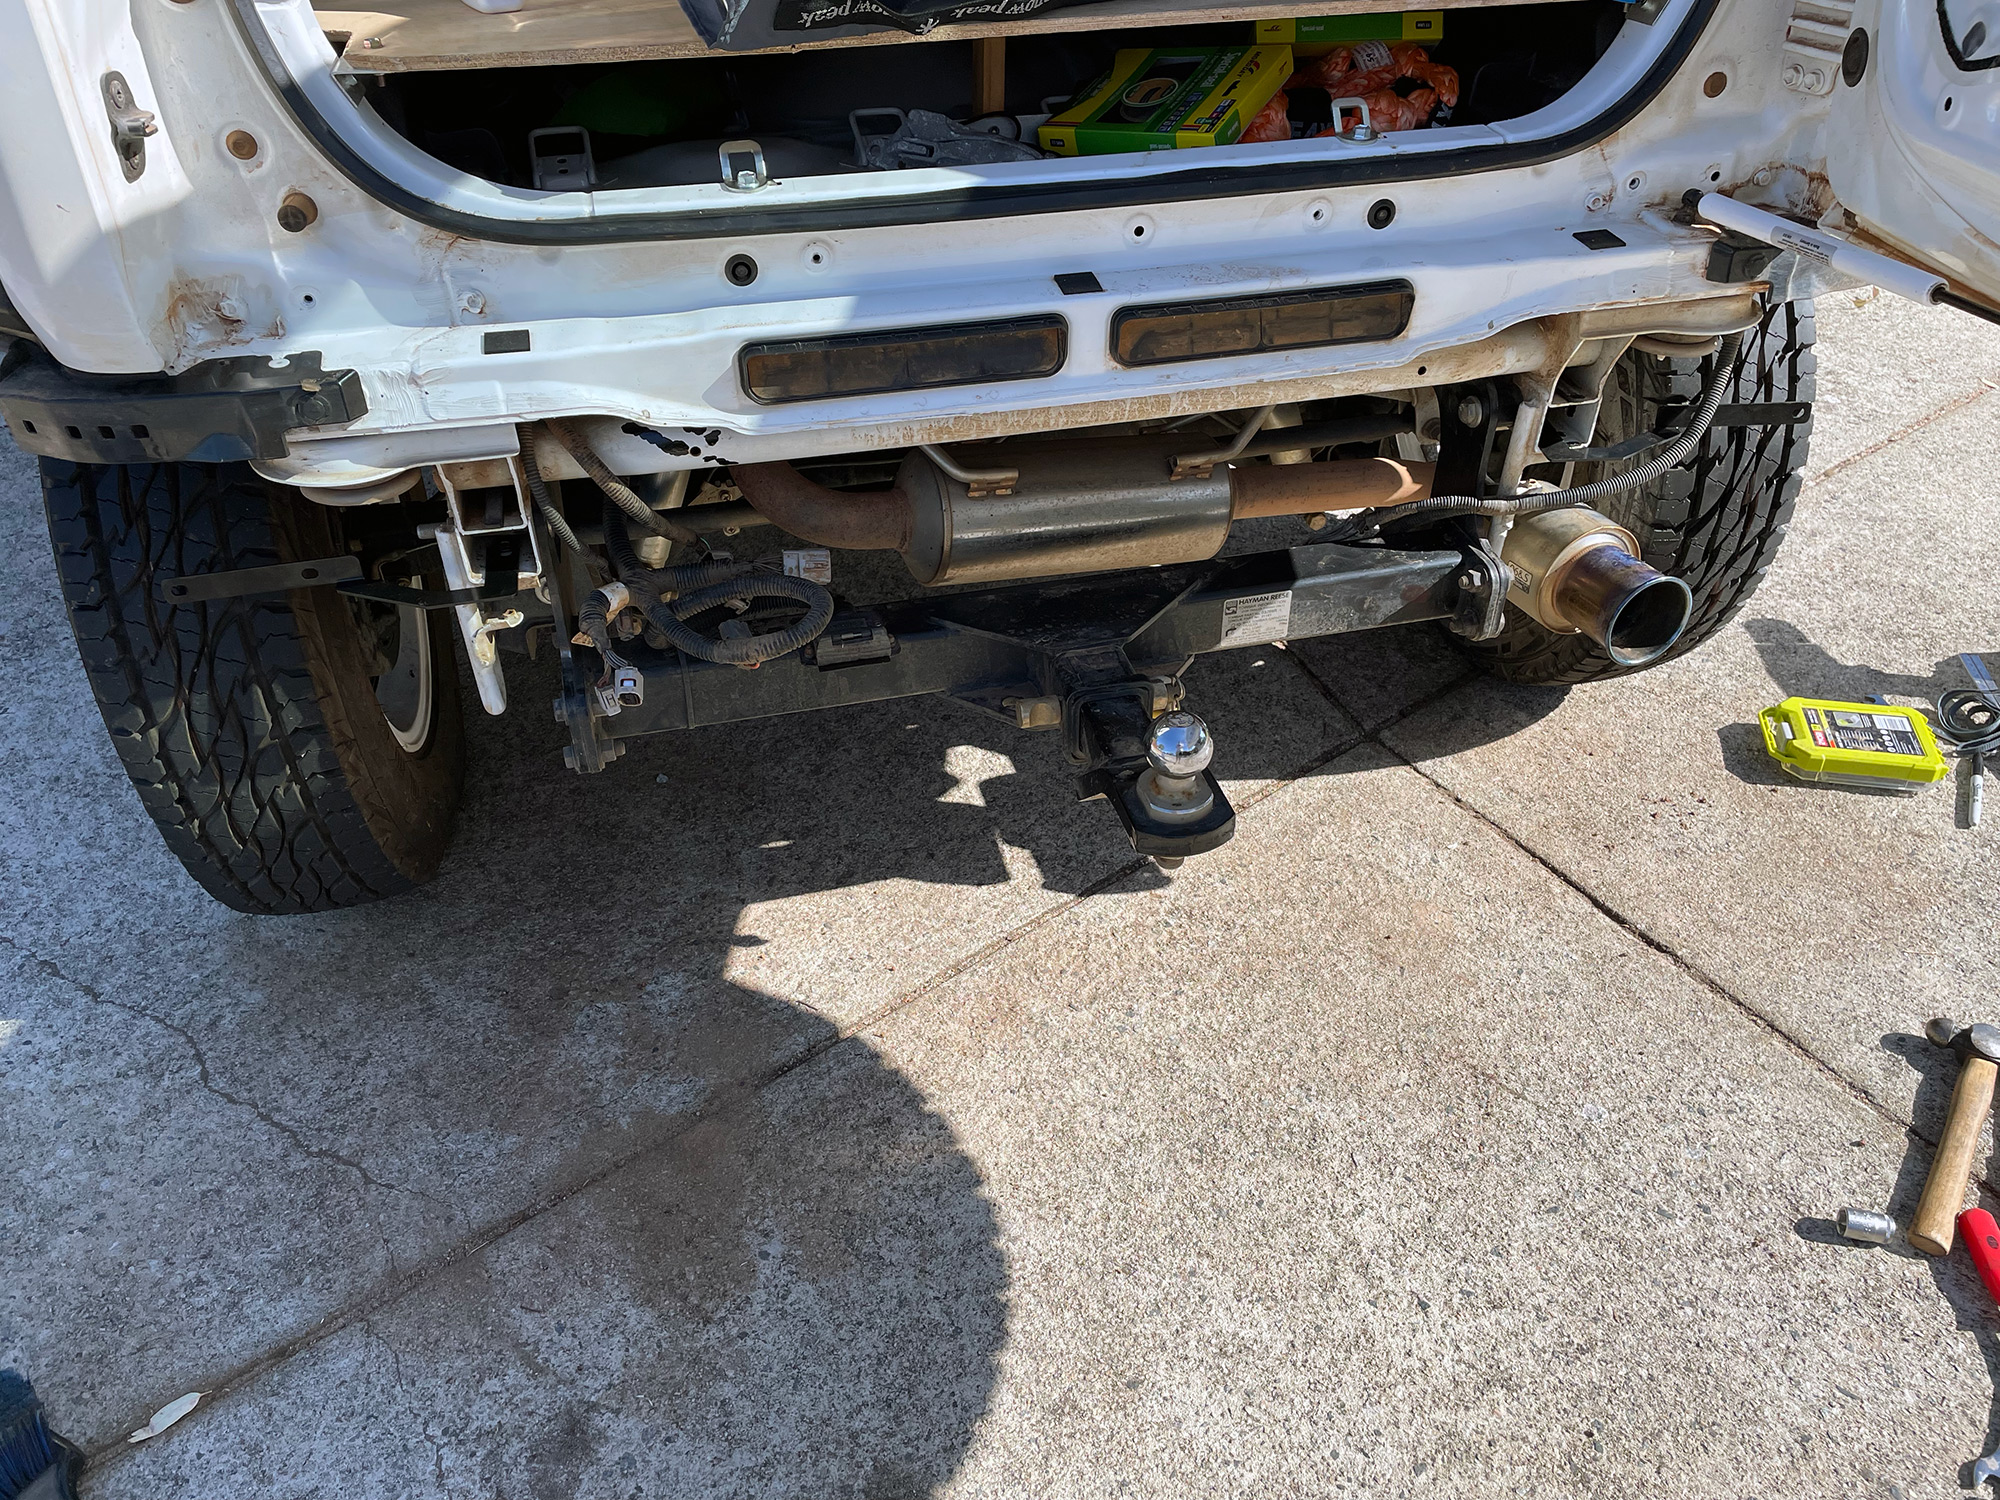
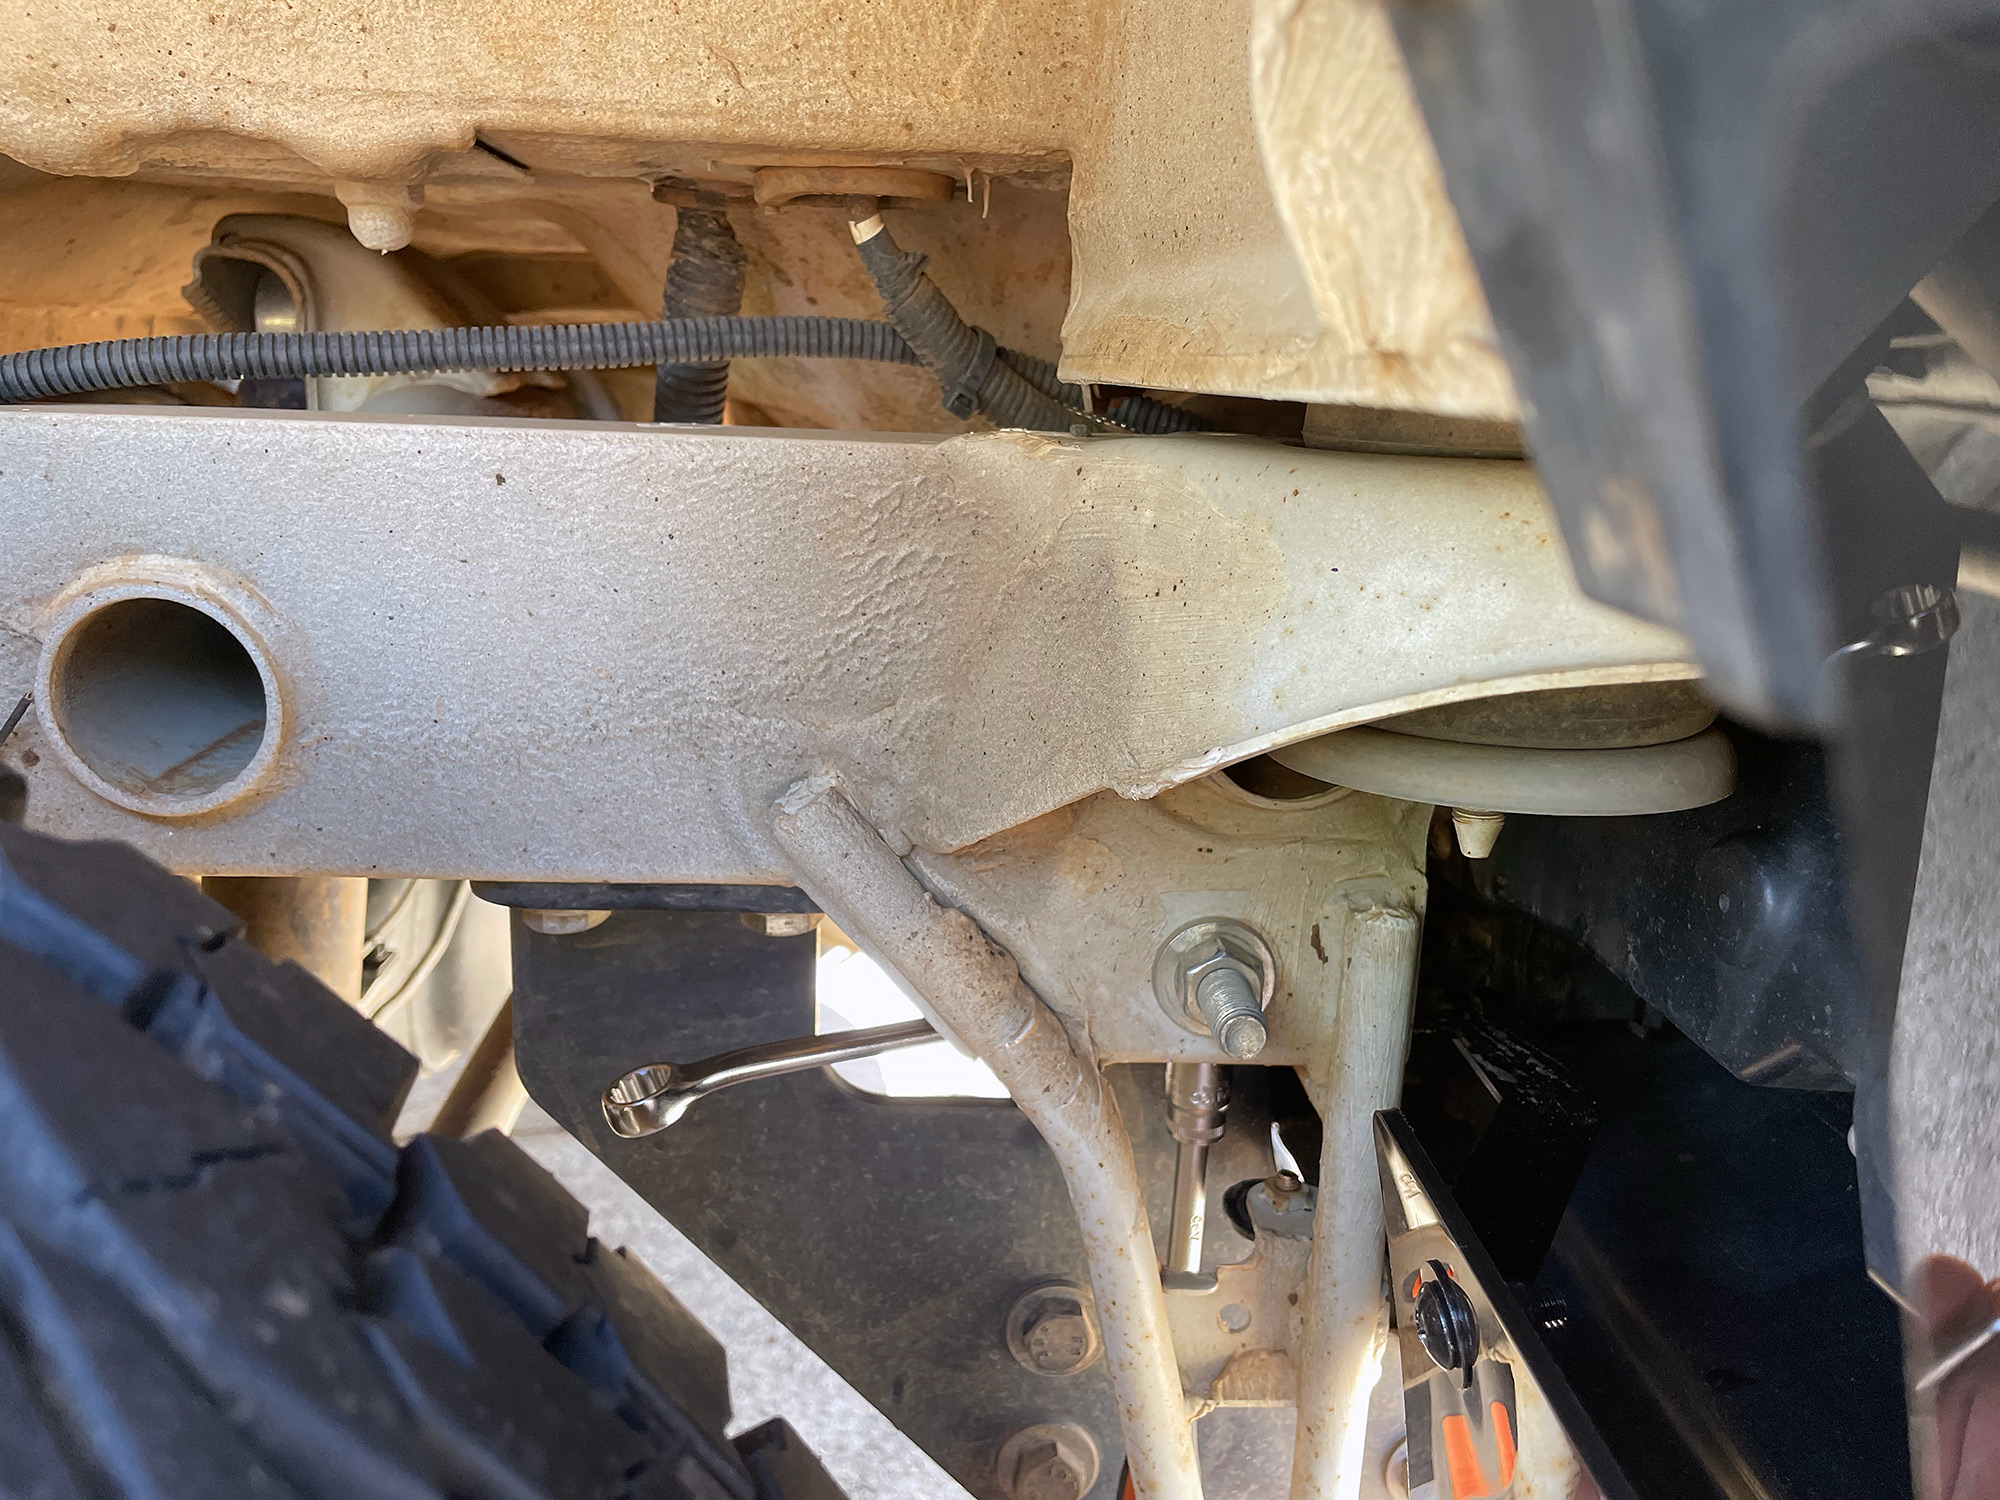
A couple of notes here: if you have at least the Hayman Reese towbar (I can’t speak for others) there is a crush tube inside each of the chassis extensions. This crush tube stops you getting the bolt in that holds the stabilising bracket to the chassis and really necessitates removing the rear bumper. Once you know you have to do this it’s not hard, but you’ll save yourself a lot of time if you just remove the bumper and sort this out immediately over trying to work out a way to work around it.
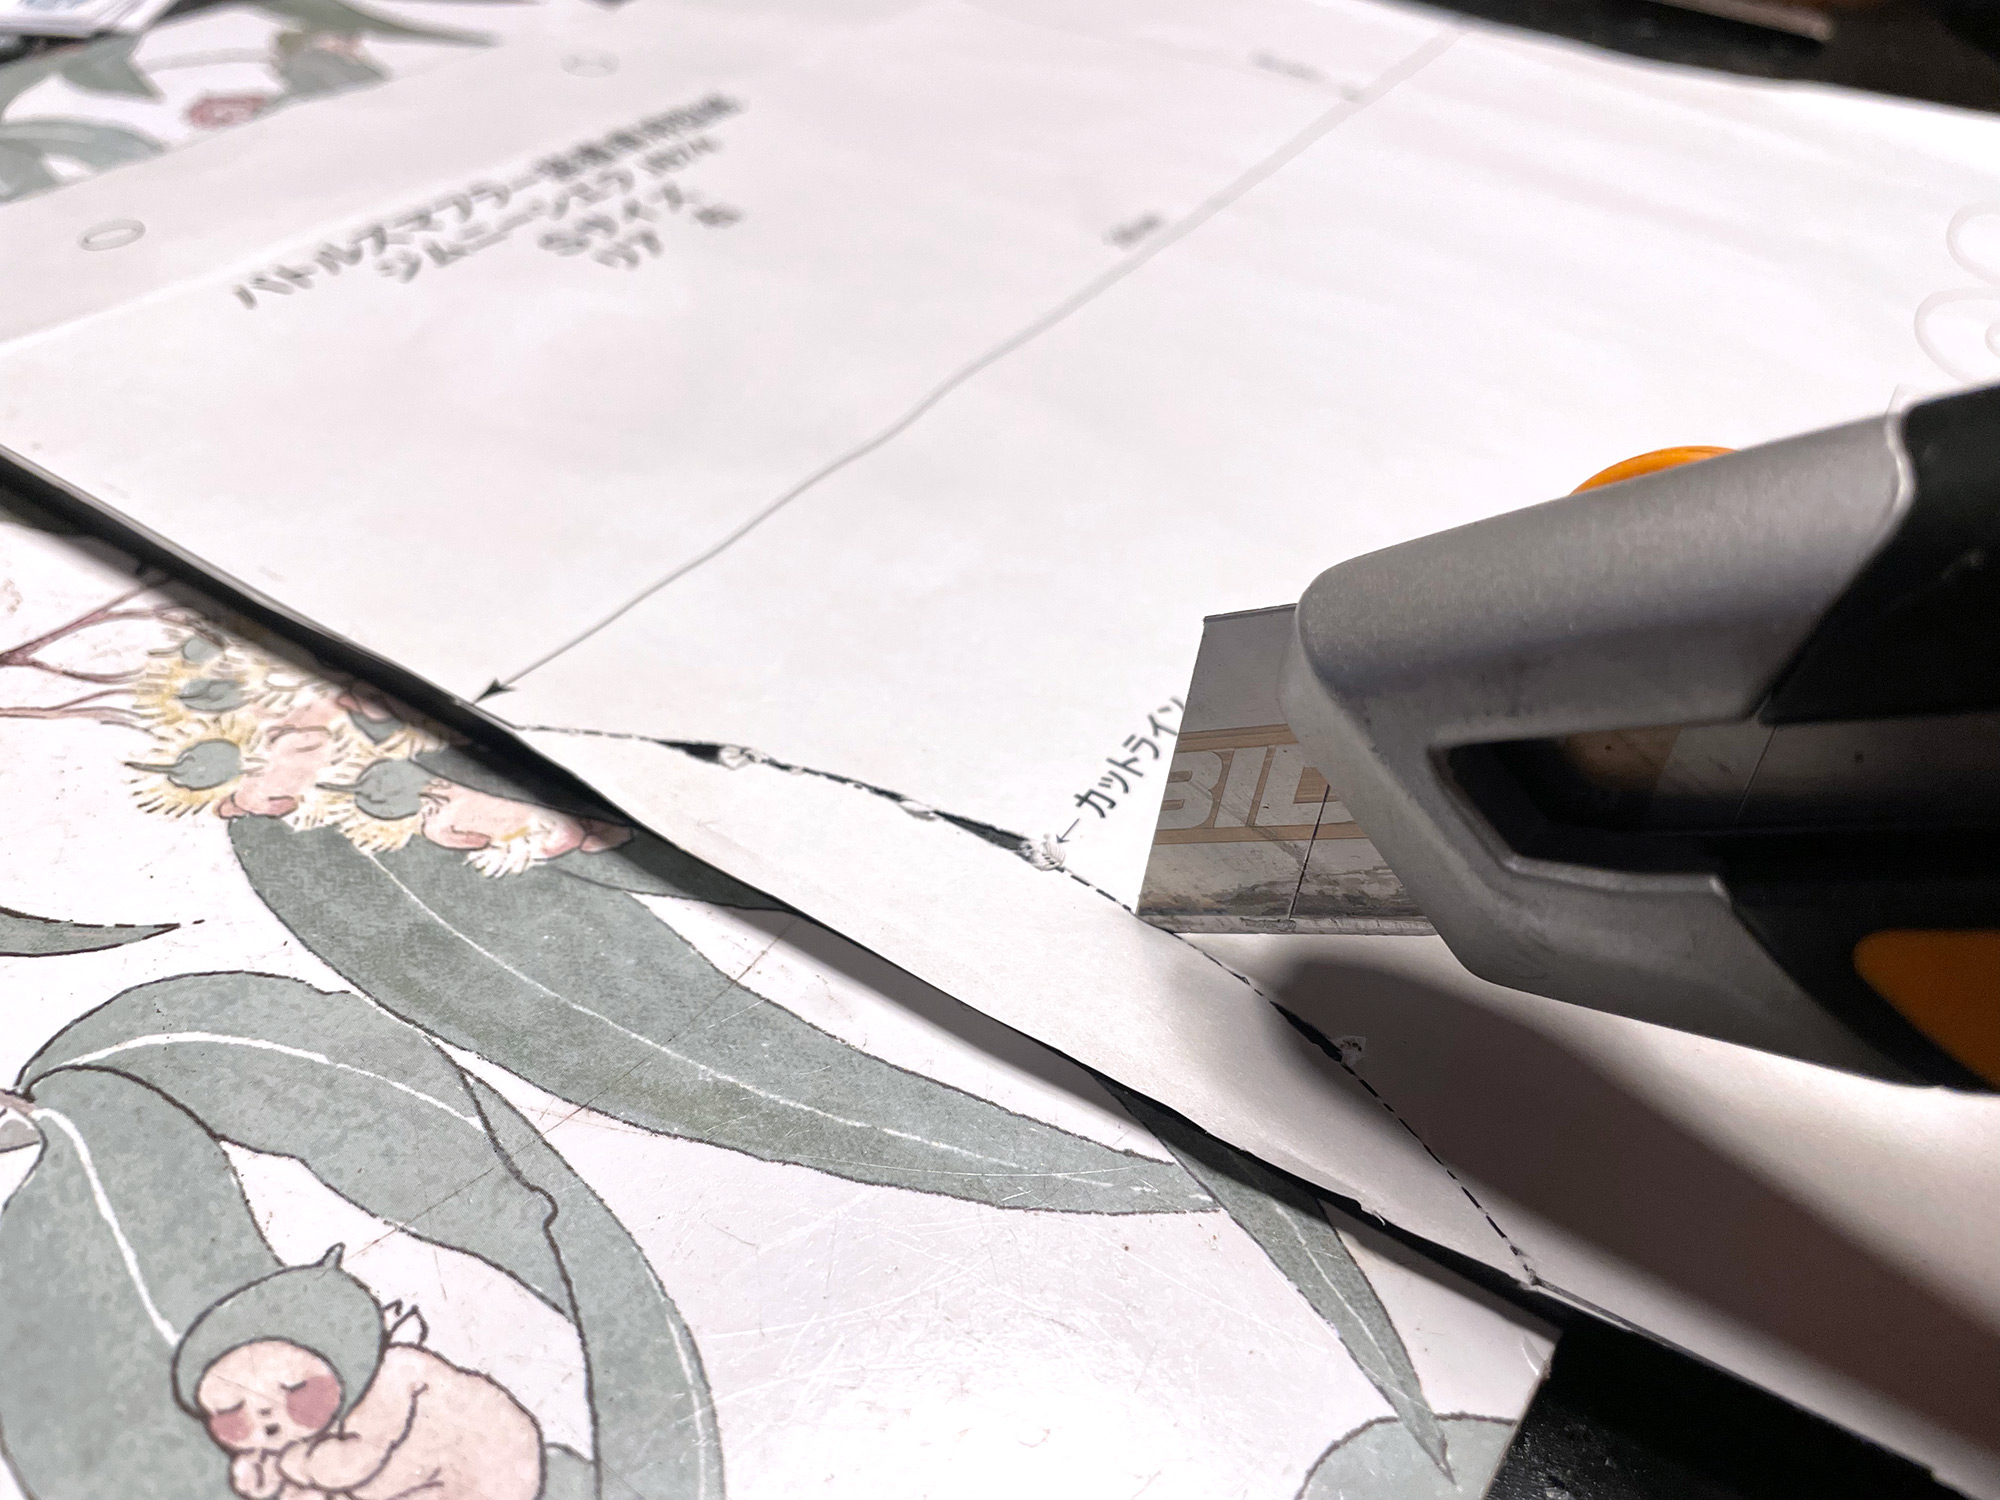
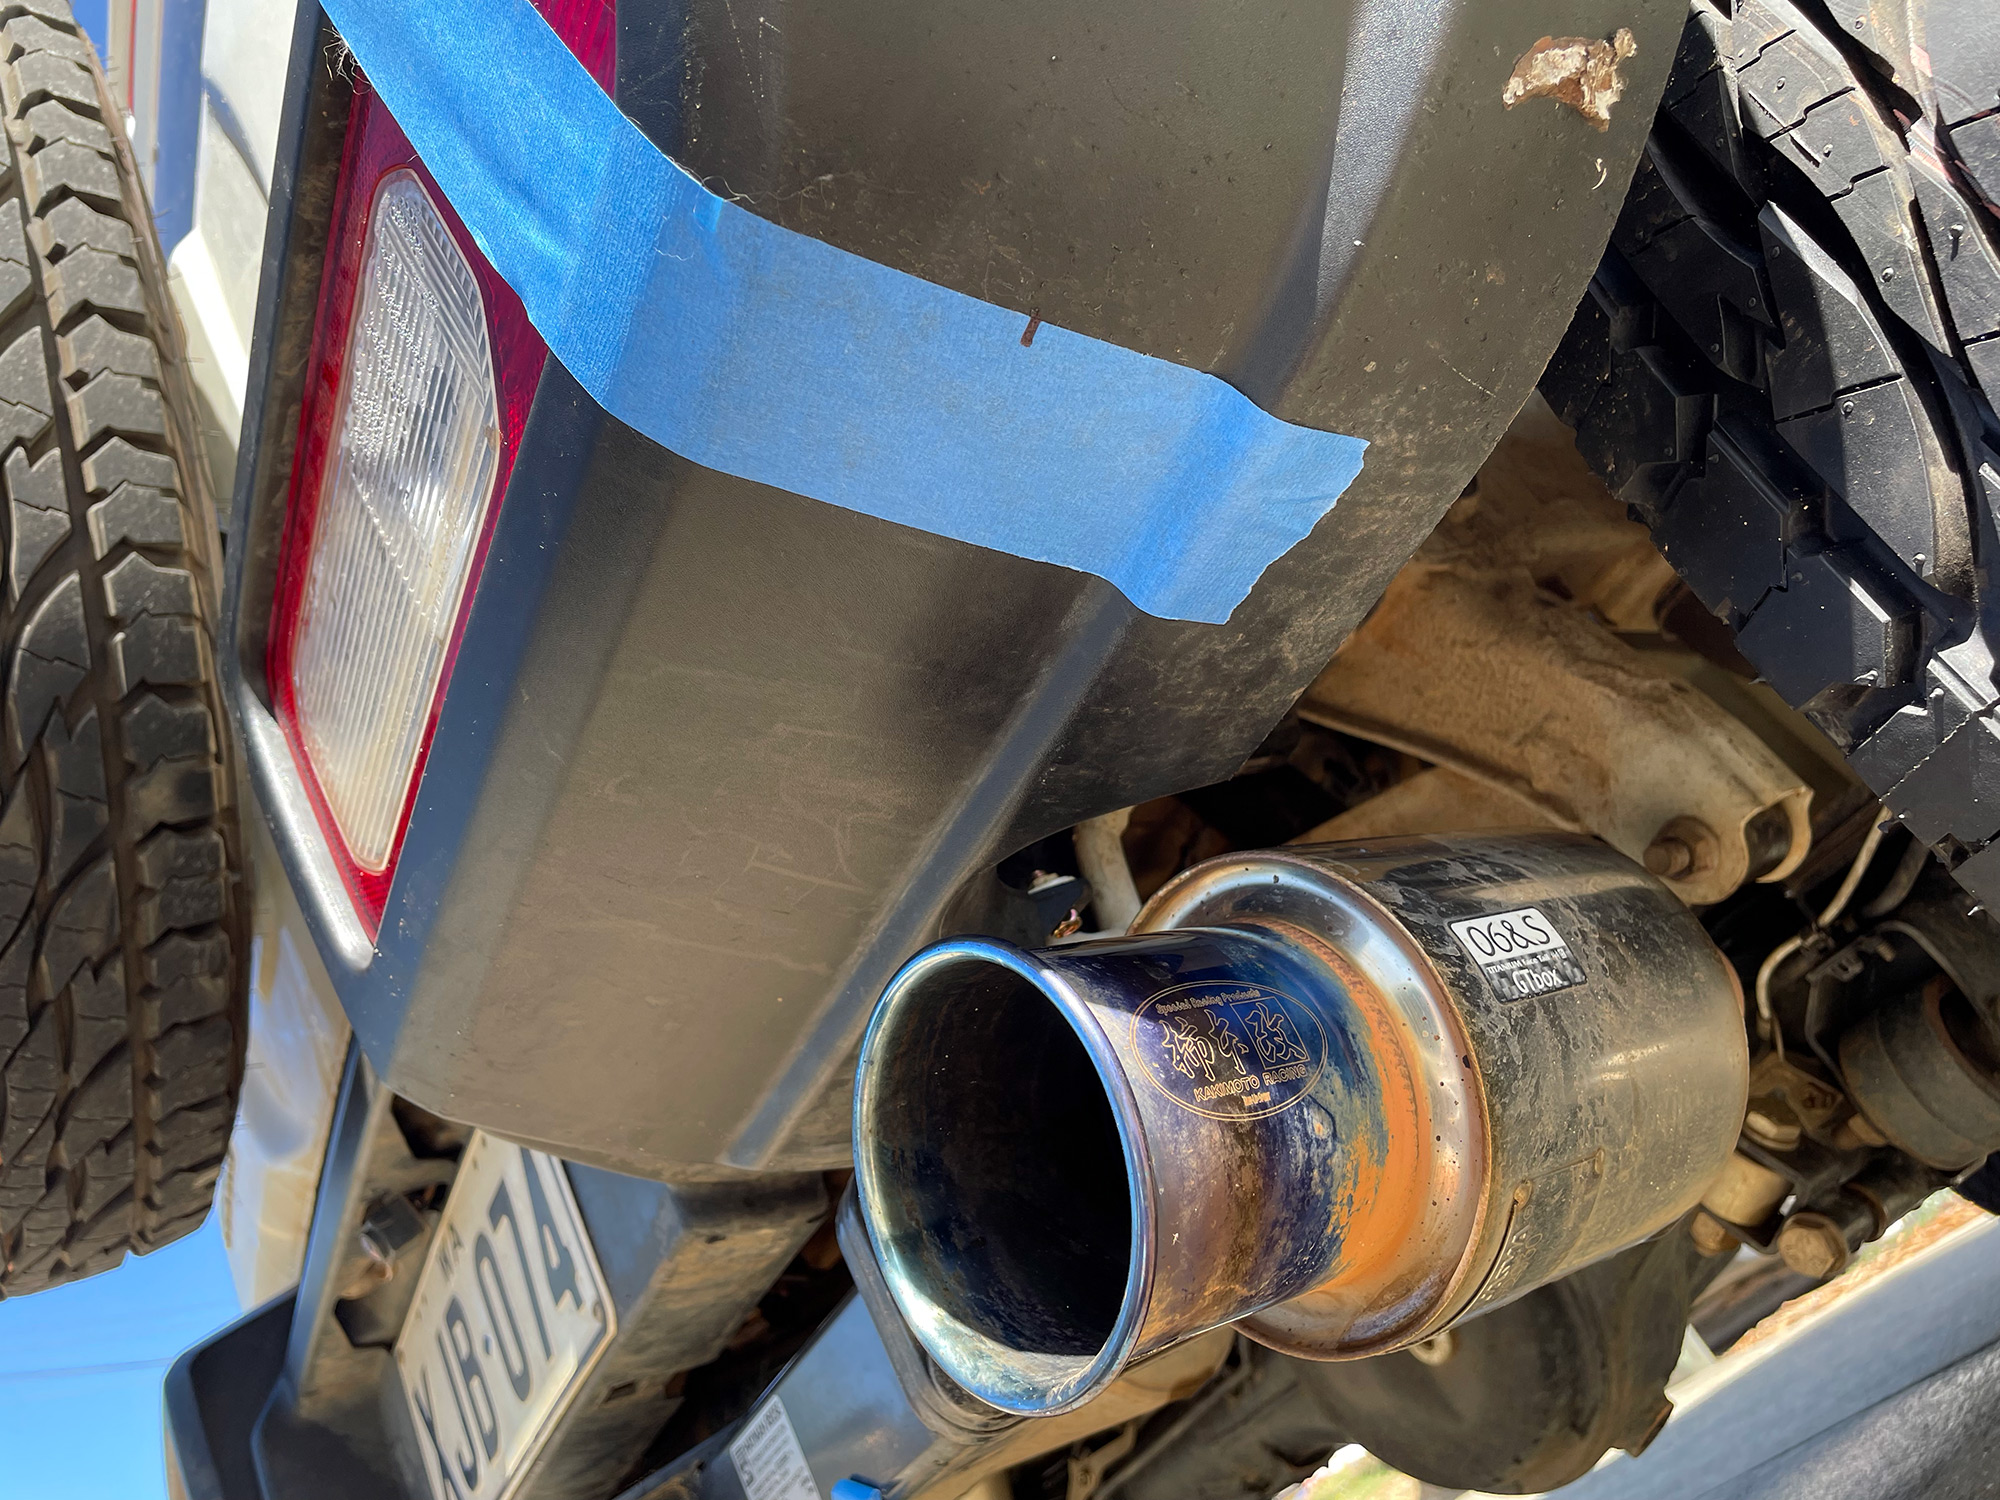
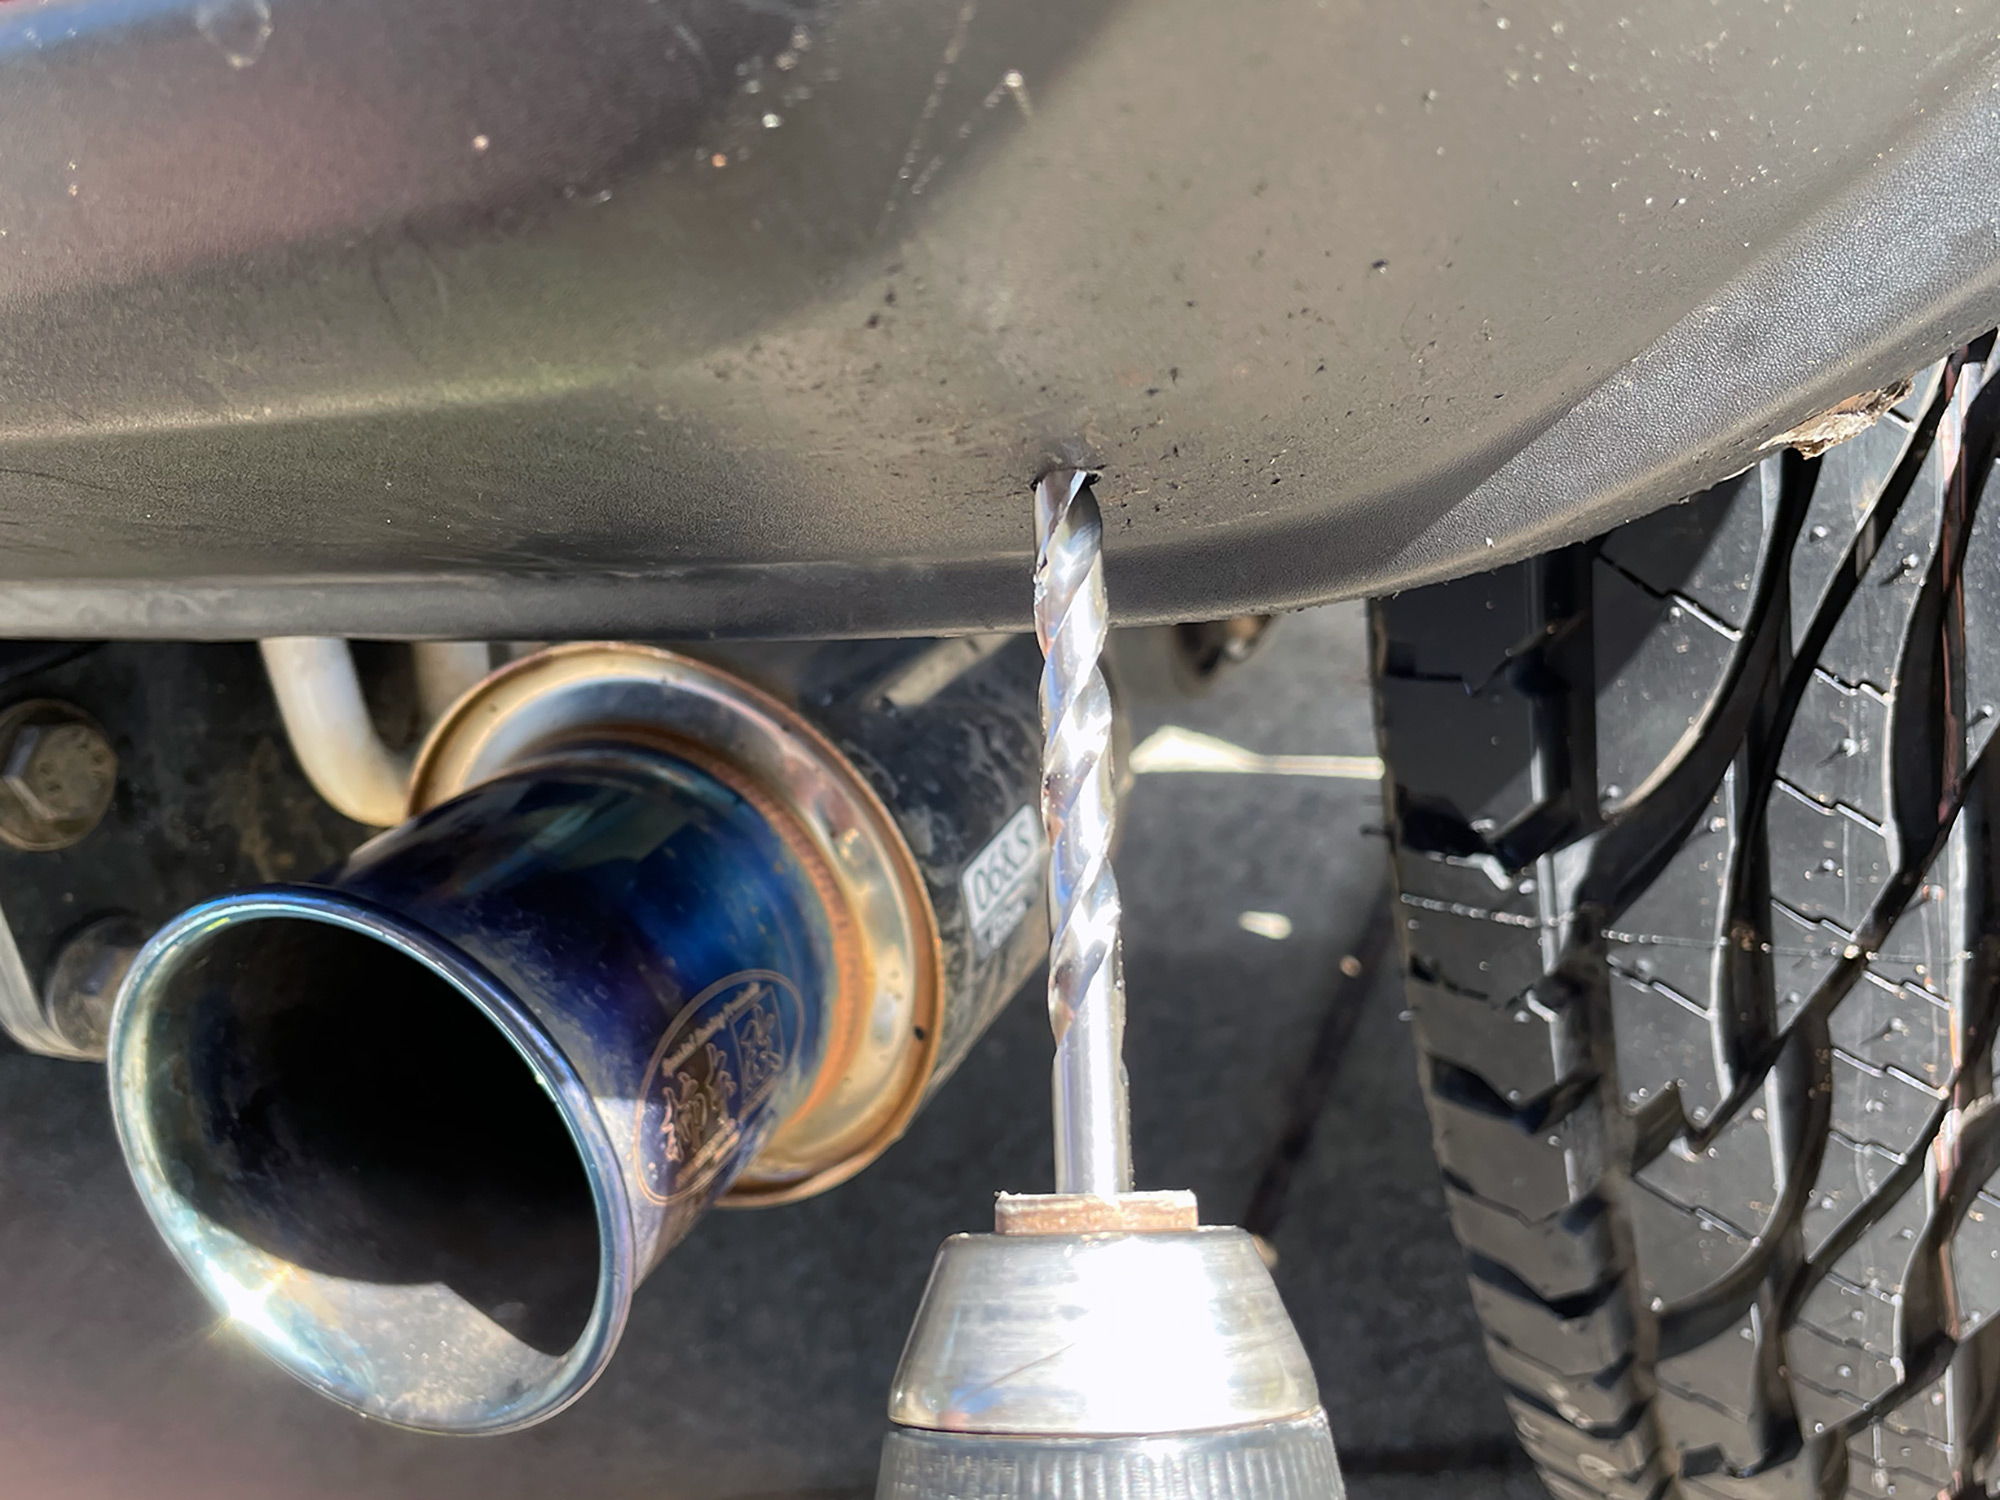
If you have an aftermarket exhaust, you will probably need to trim the mudflap to accommodate this. Jaos provide a template which matches their exhaust; I used this for my Kakimoto GTBox 06&S exhaust and it was still a bit tight. I added a full centimeter to the radius they get you to cut and it was perfect.
Trimming the mudflap
This is, as noted above, only if you have an aftermarket exhaust. Jaos provide a template for their exhaust which is probably a good match for most aftermarket exhausts. Cut out the paper template and lay it on the mudflap. Use a sharp cutting knife to score the mudflap and then fully cut it out.
Removing the rear bumper and moving crush tubes out of the way if you have a towbar
This is a step needed only if you have a towbar or something else with crush tubes inside the chassis.
Remove the bumper. There’s a bolt up each side at the rear of the arch, then 2 bolts underneath, and a few bolts and push pins along the back. Once the bumper is released you’ll need to undo all of the electrical connectors to the taillights, your towbar wiring and also reverse camera (if fitted) to fully take the bumper off.
With the bumper off you can see the crush tube. The bolt here had a 19mm head and an 18mm nut, and I needed a deep 18mm socket to get to one of the nuts.
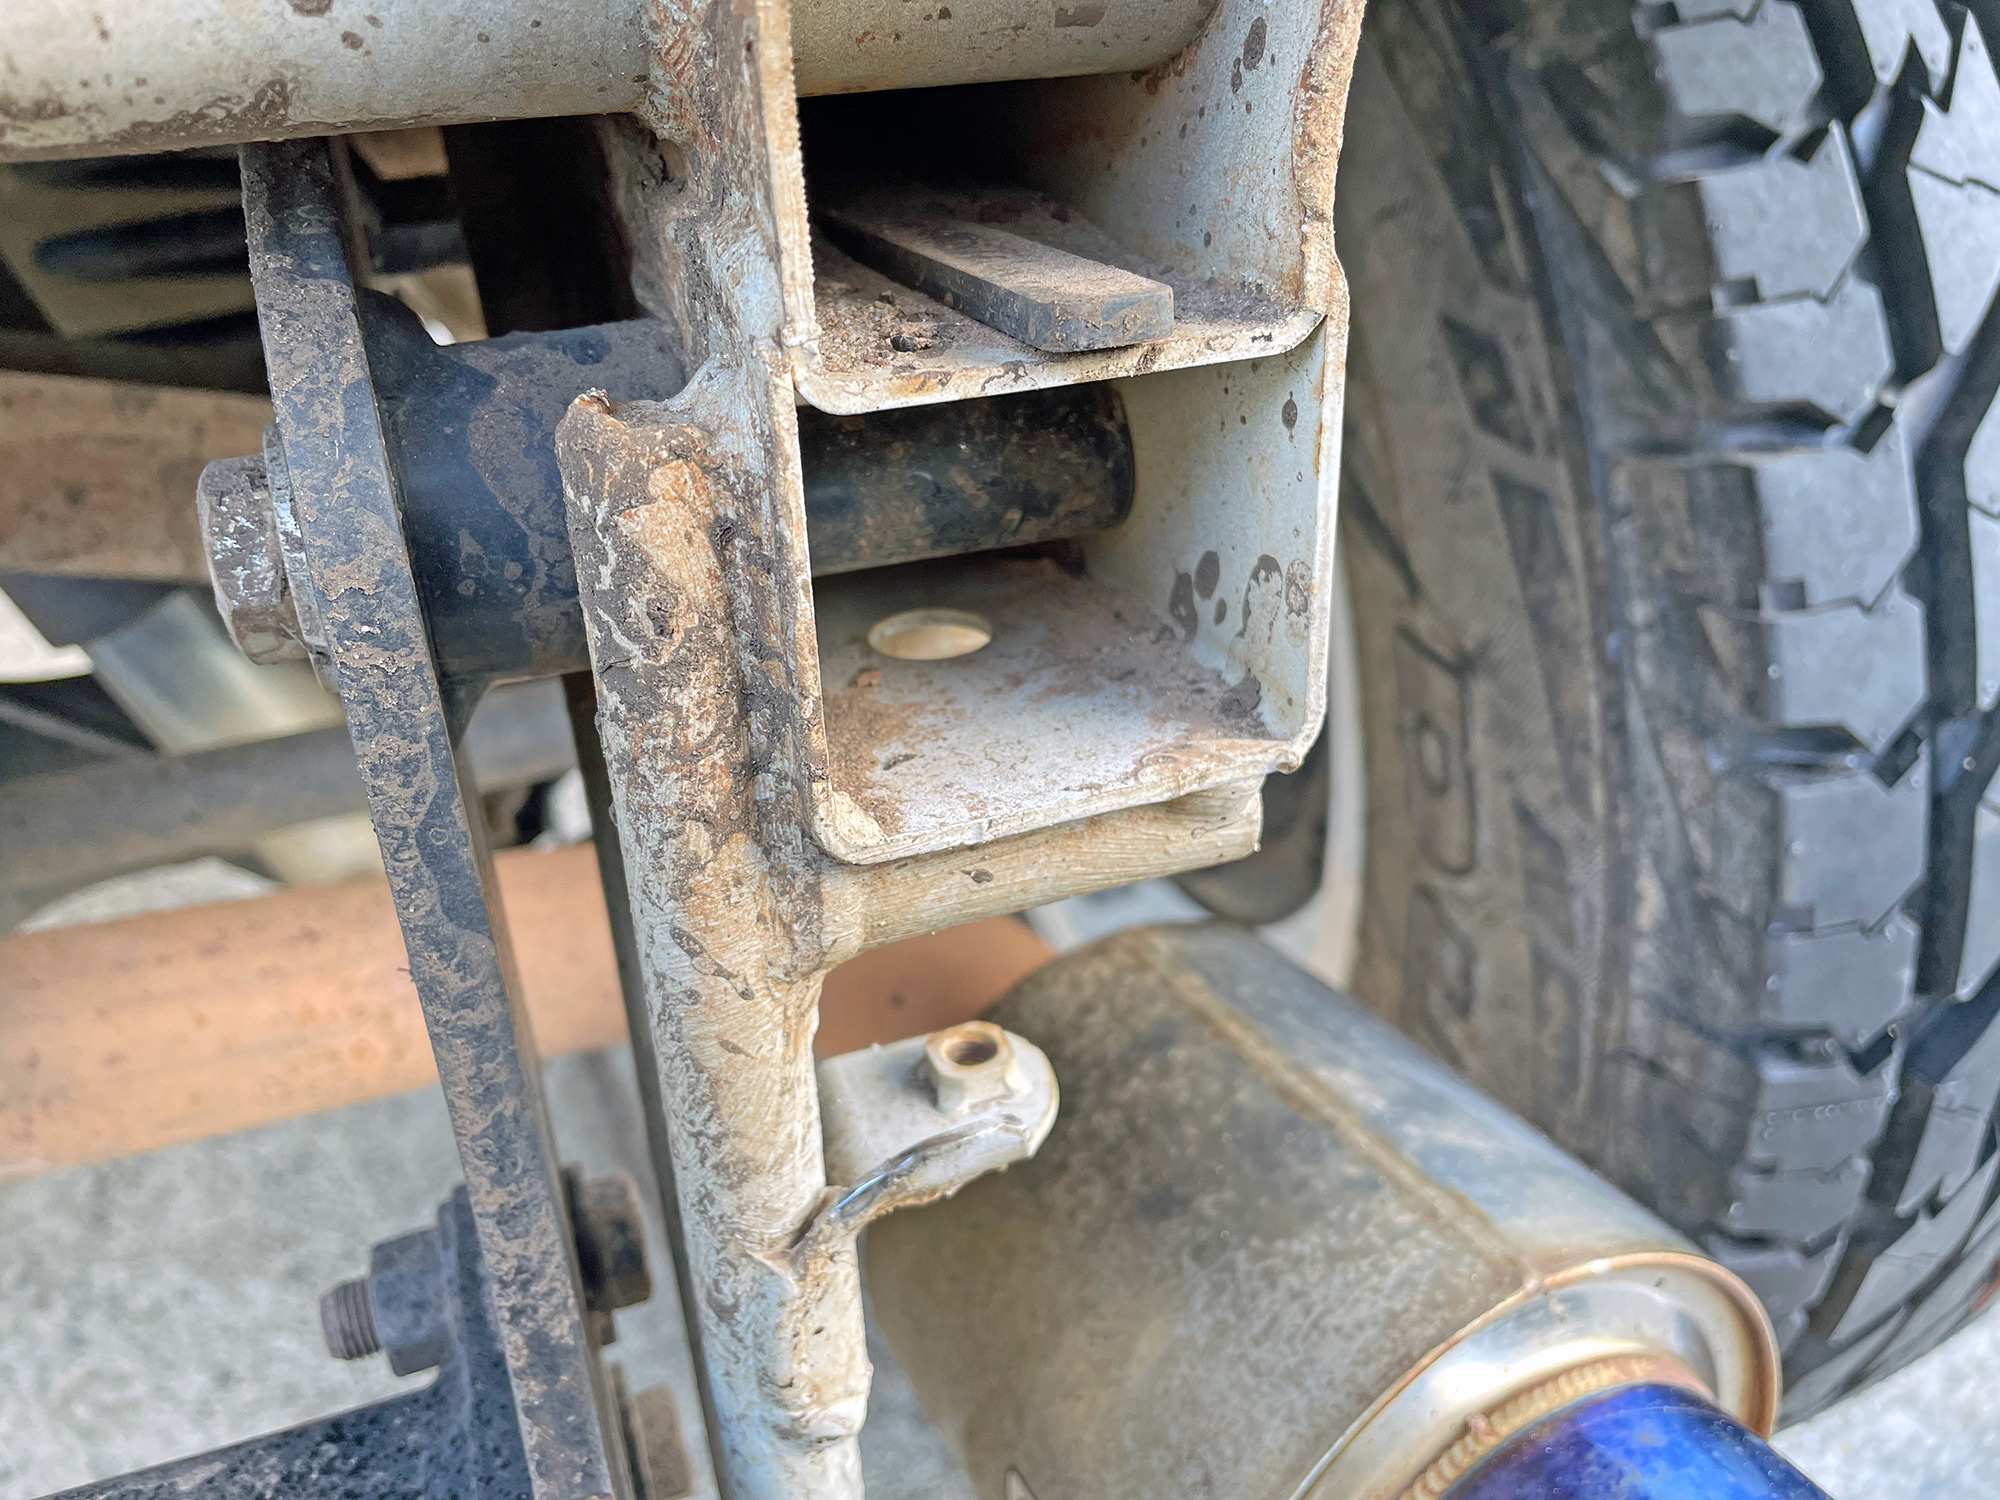
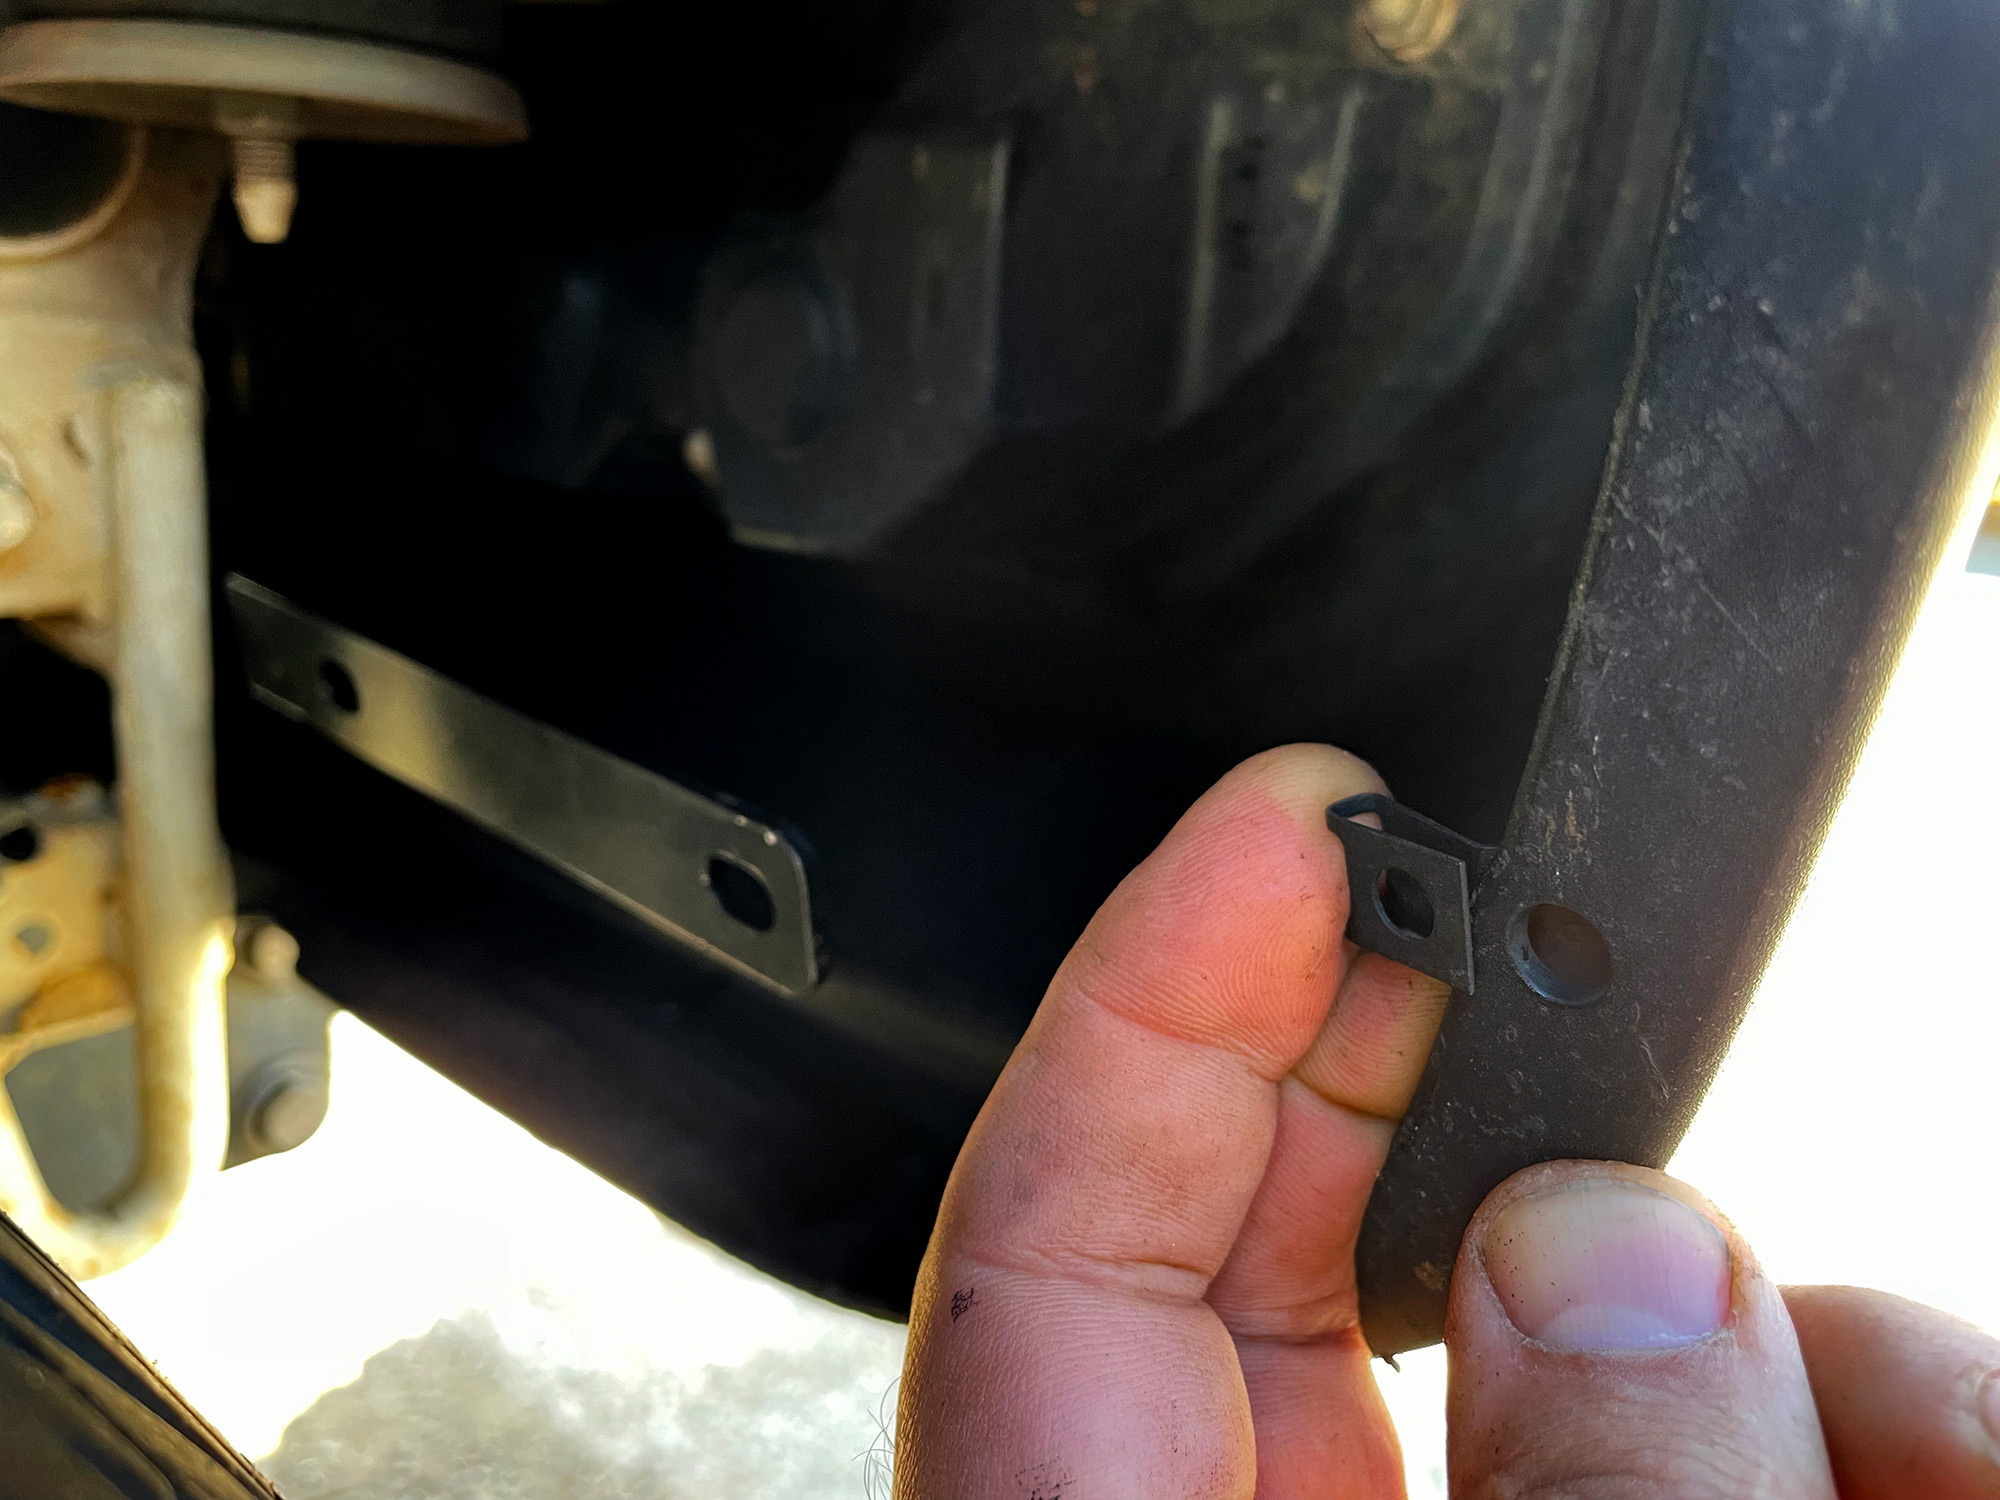
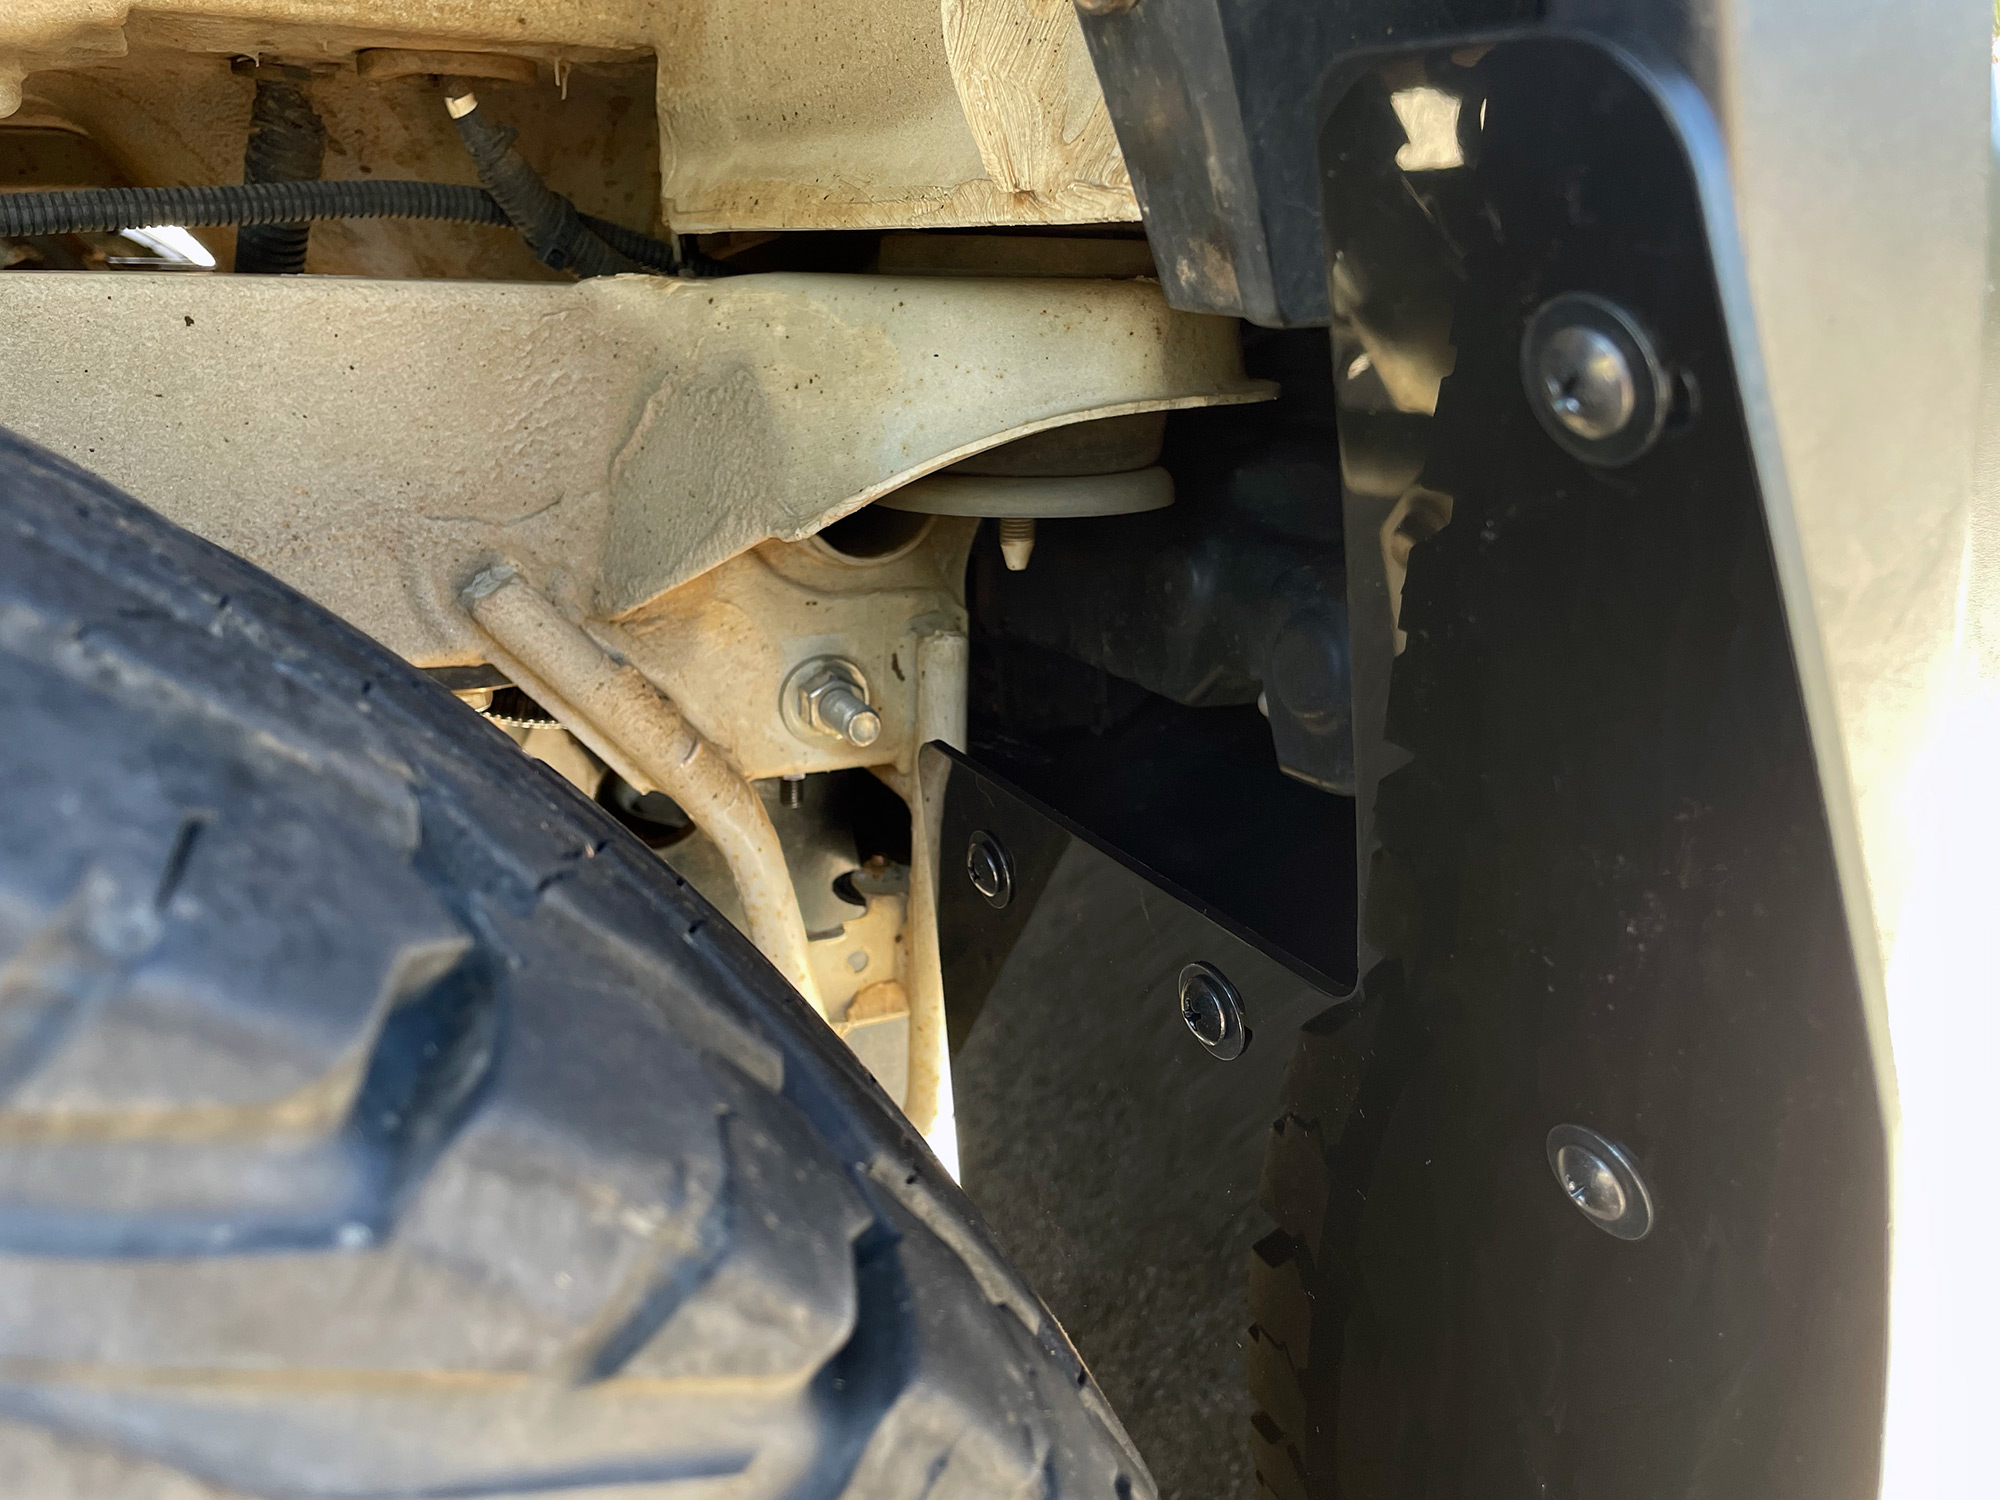
With the mounting bolt undone it is possible to lever the crush tube up a bit to give yourself just enough room to put the bracket in and get the bolt through the hole it needs to go through. The M8 bolts are used here, with a washer and a nut underneath the chassis to hold it in. Do not tigthen up this bolt beyond finger tight at this point – this will let you adjust the position of the mudflaps later on to get them looking just right. Note that the bracket here goes with the face part ‘up’ – you’ll see a picture of this further down this page.
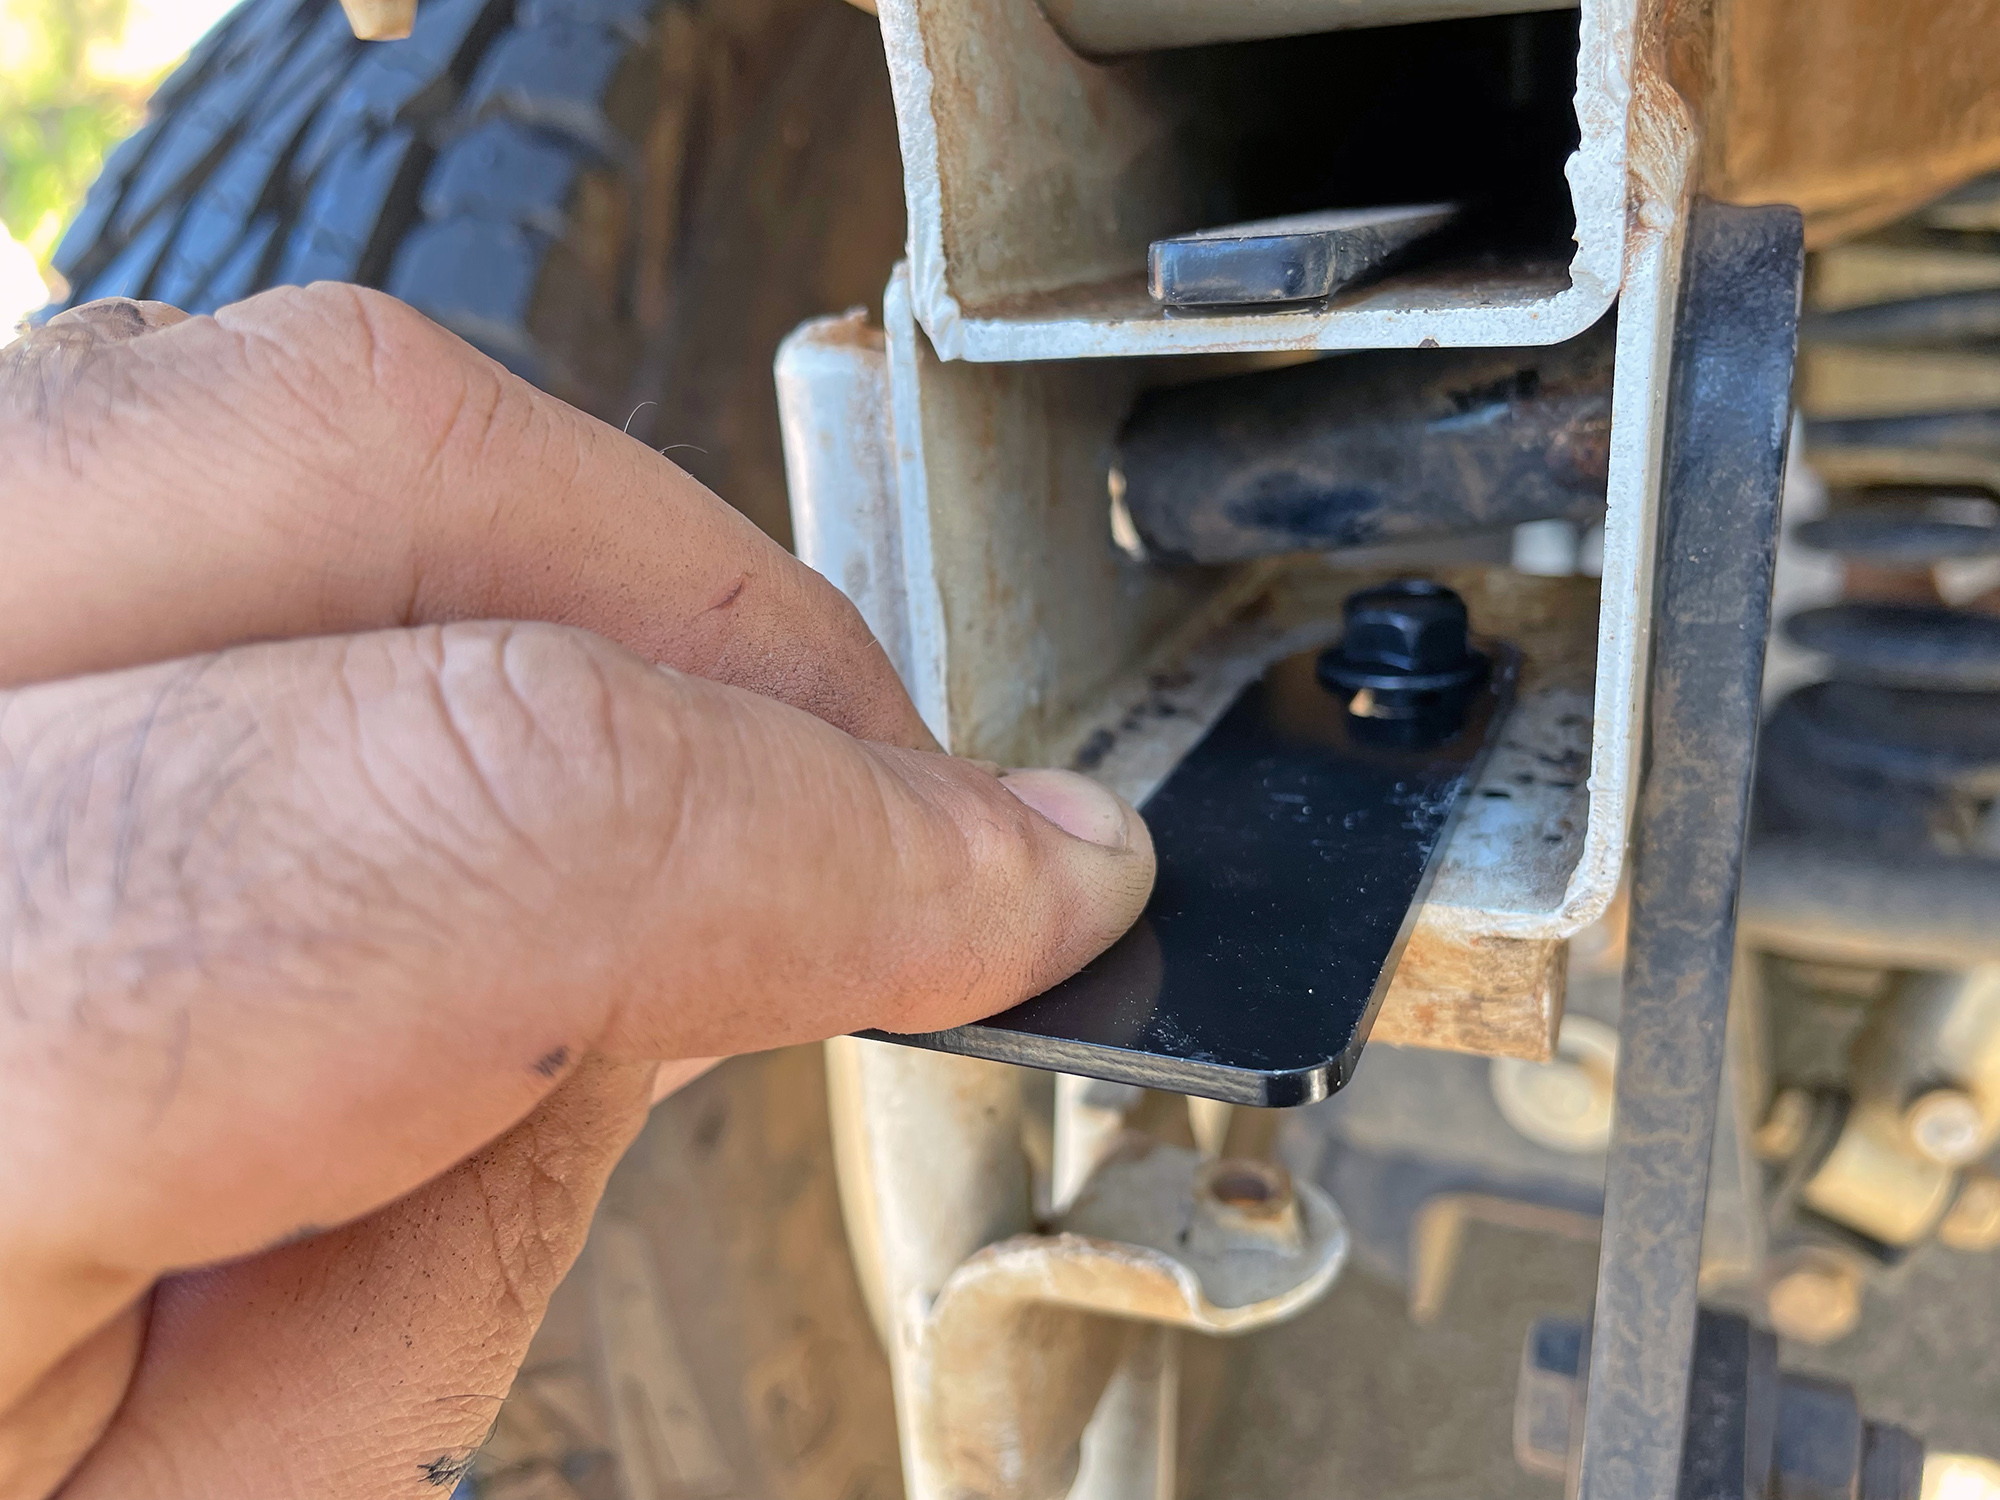
You then need to lever the crush tube back down and push the bolt back through. The torque setting for this for the Hayman Reese bar at least is 89 Nm.
This is also a good time to wash the back of the car underneath the bumper as a heap of mud collects here!
Now you just need to refit the bumper and proceed with the installation.
Support bracket and speed nuts installation
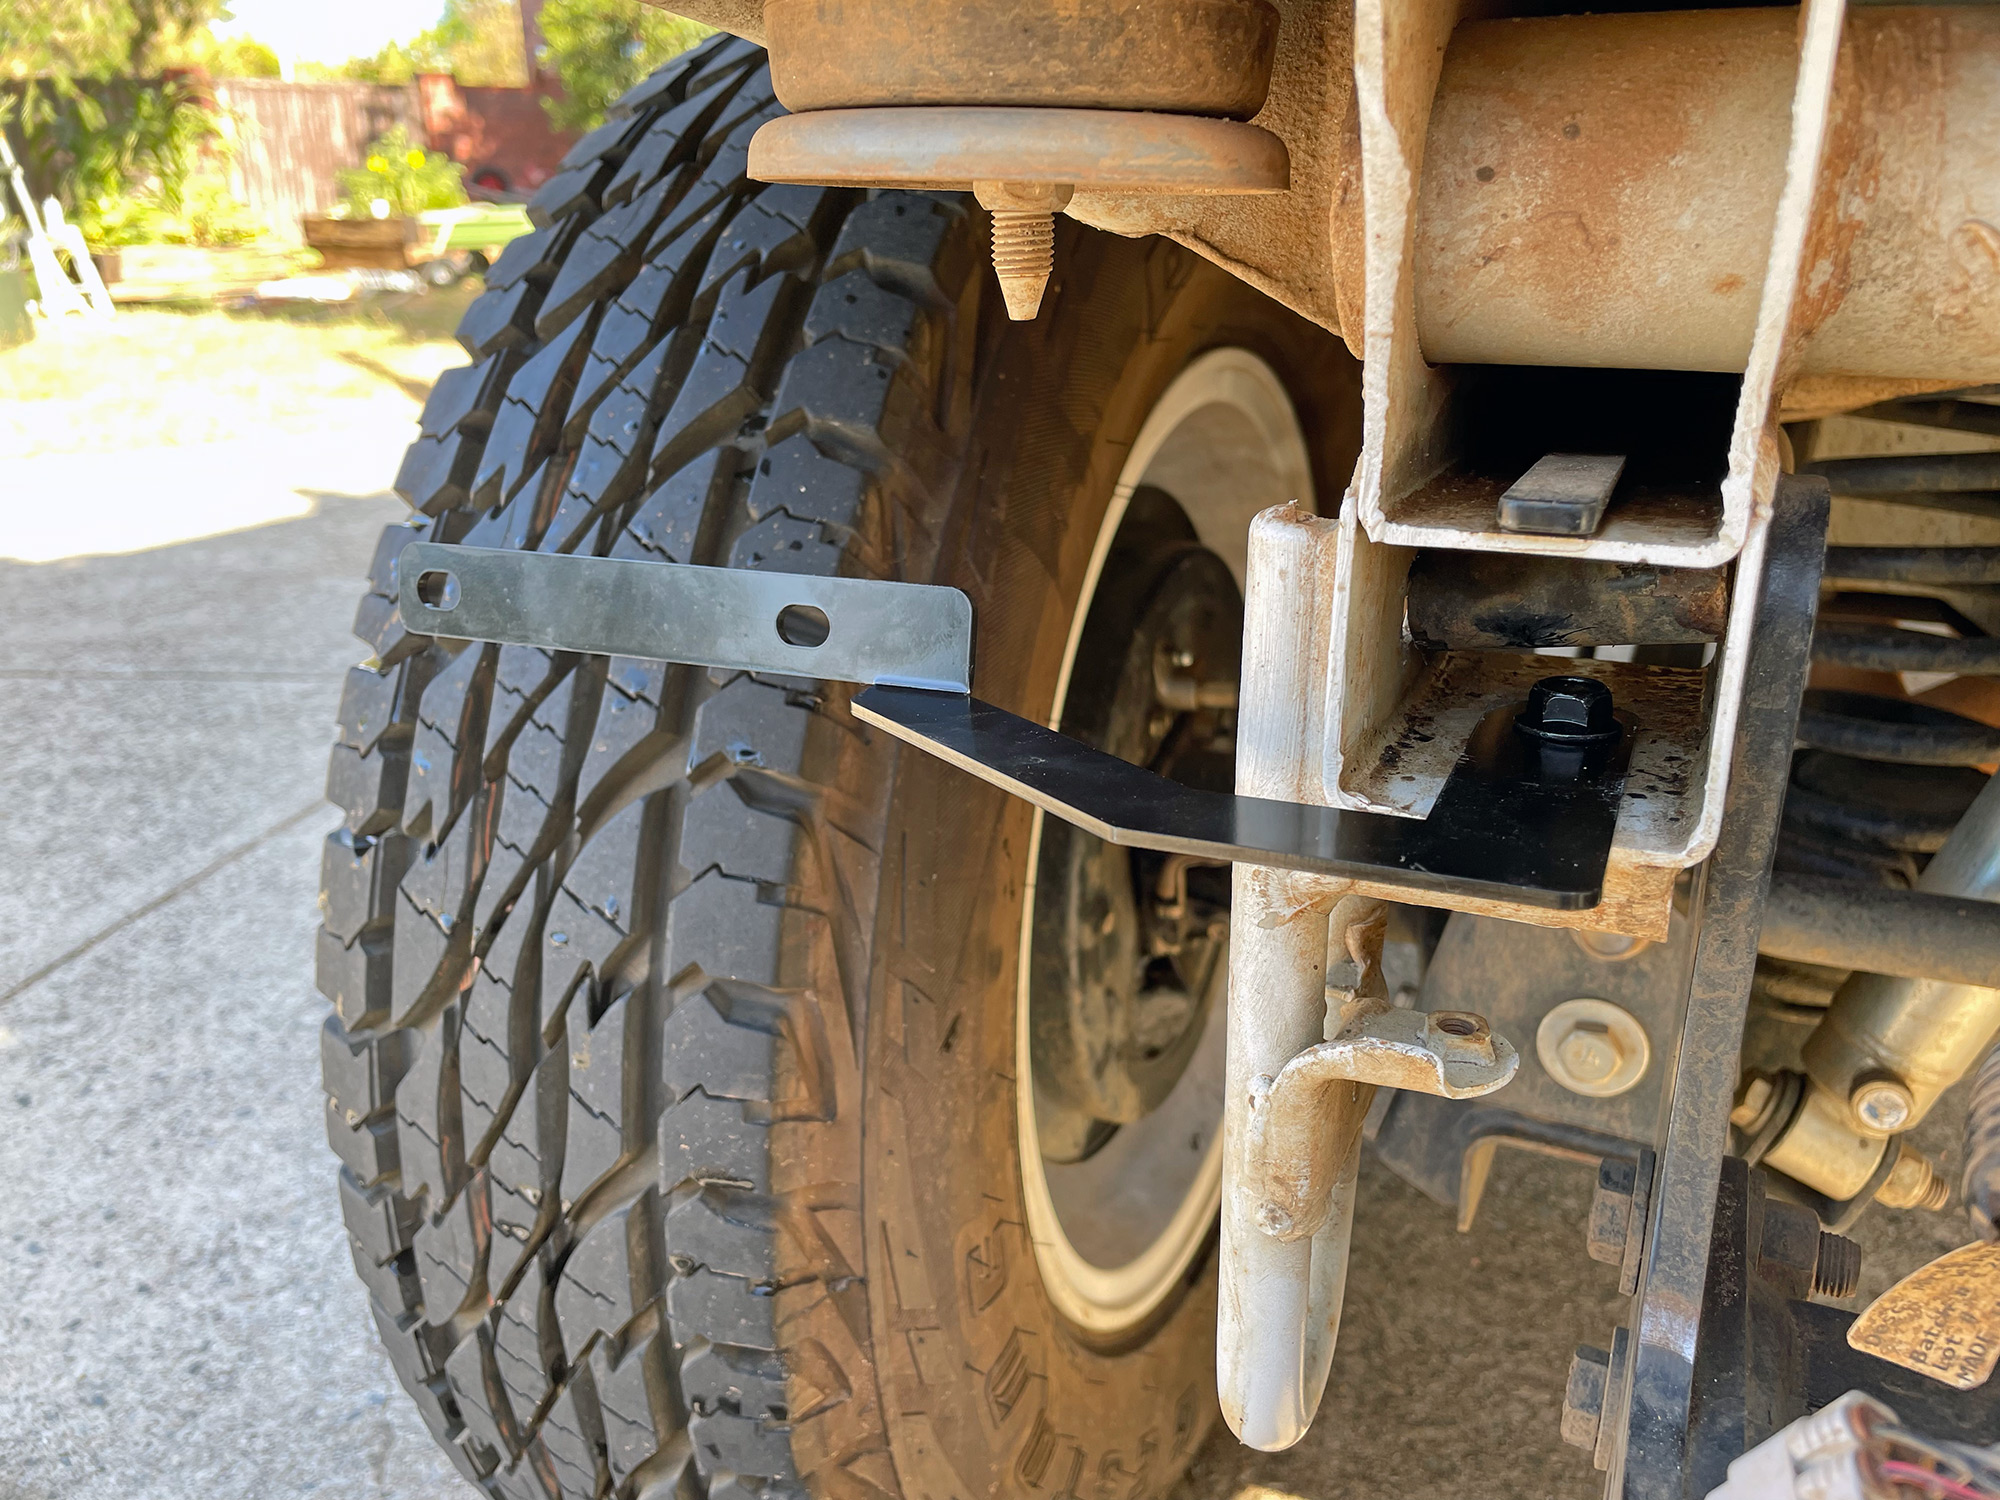
I don’t have a picture of this done without the towbar mounting bolt crush tubes in the chassis so have a repeat of the previous picture here. Bolt goes in, then the bracket, then the chassis, then underneath the other side of the chassis tube goes a washer and a nut. Finger tight with these bolts at this point.

A note on the alignment of these brackets: the bracket is placed with the face part pointing up, like the following picture. At this point you’ll probably have the bumper fitted but this makes it easier to see how the bracket is positioned.
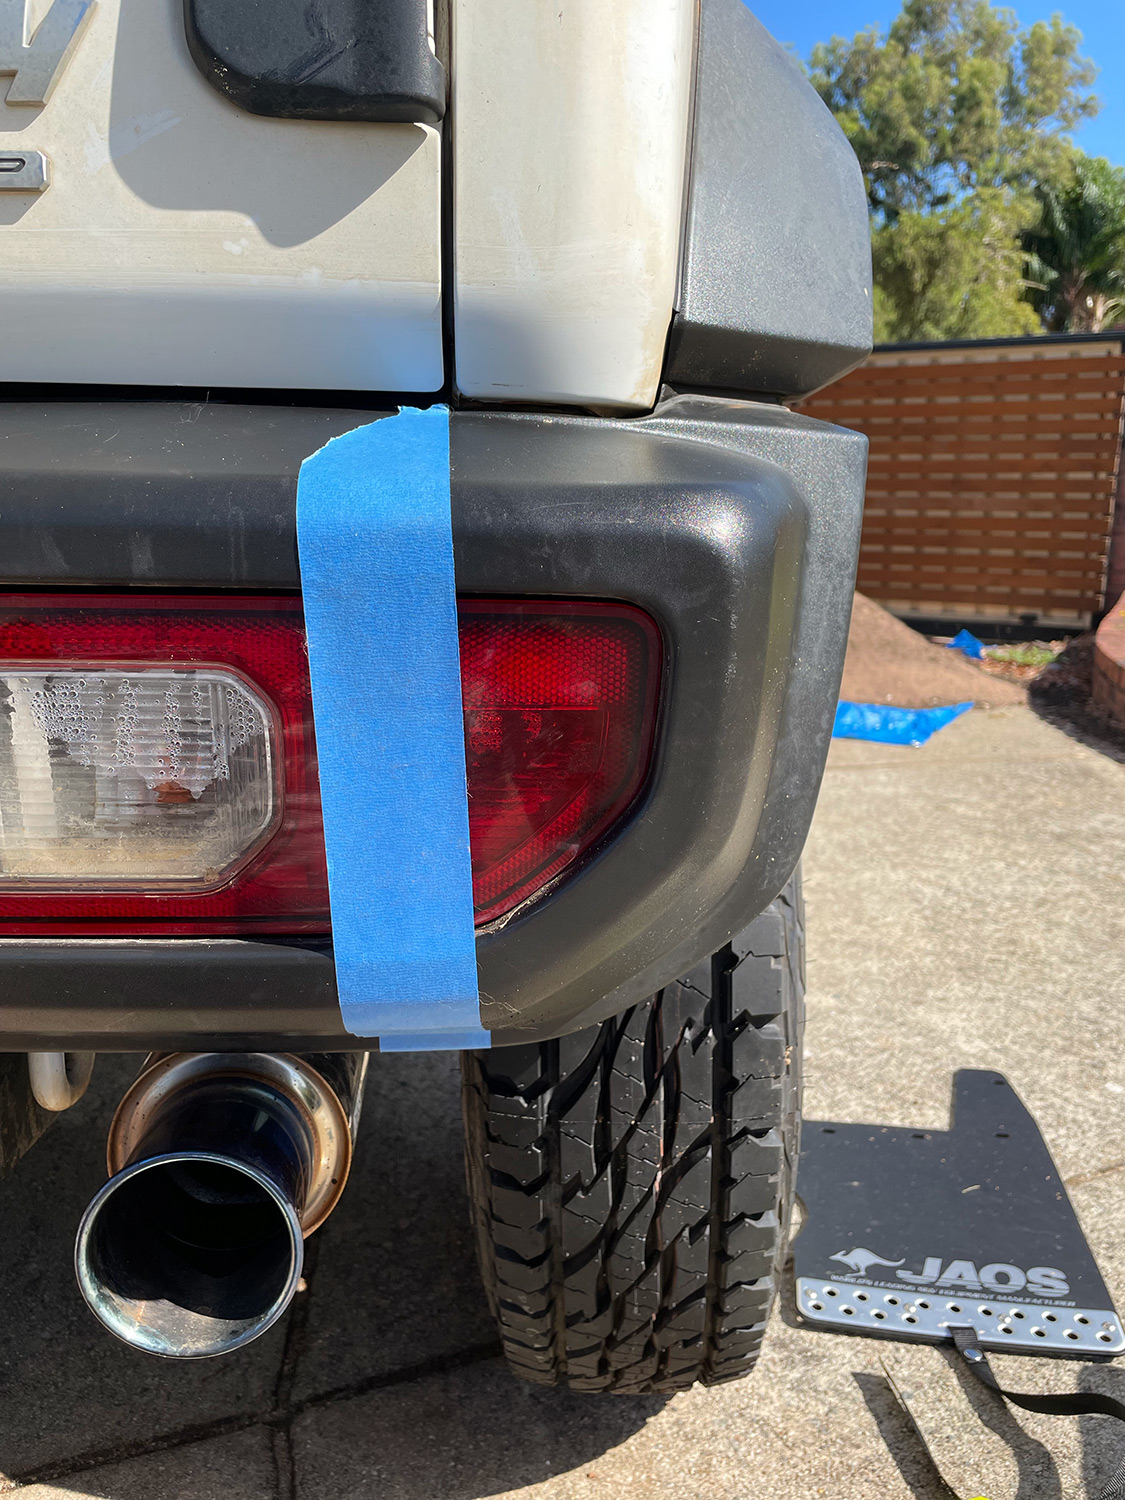
The mudguards also need 2 speed nuts installed on each side of the bumper.
Note how the flat side faces out towards where the mudflap will go.
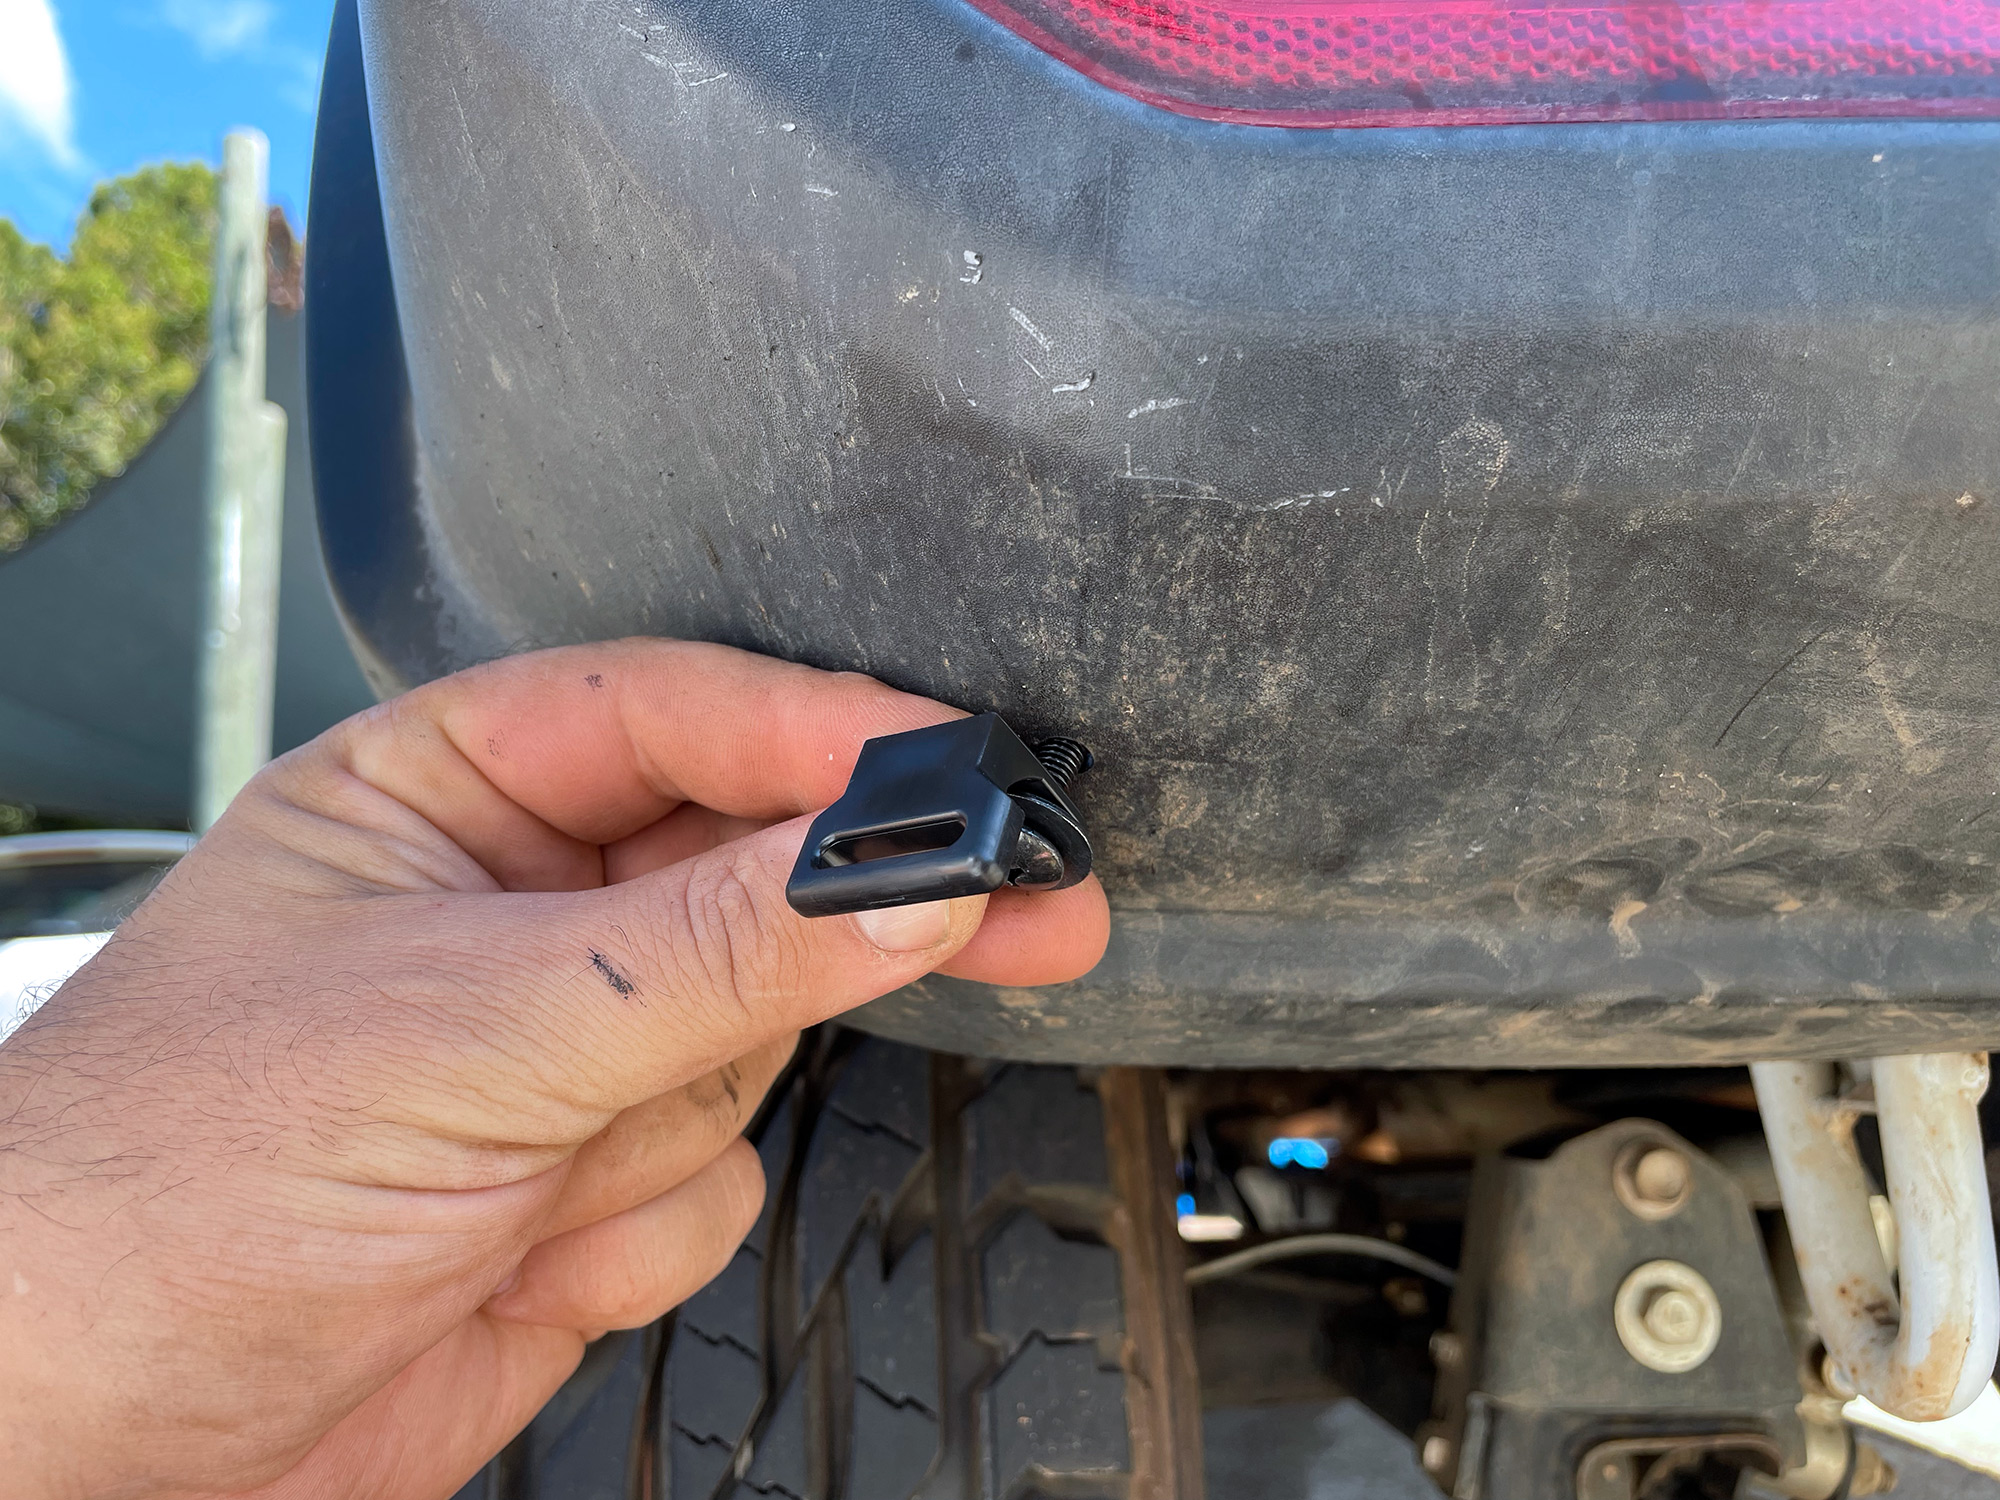
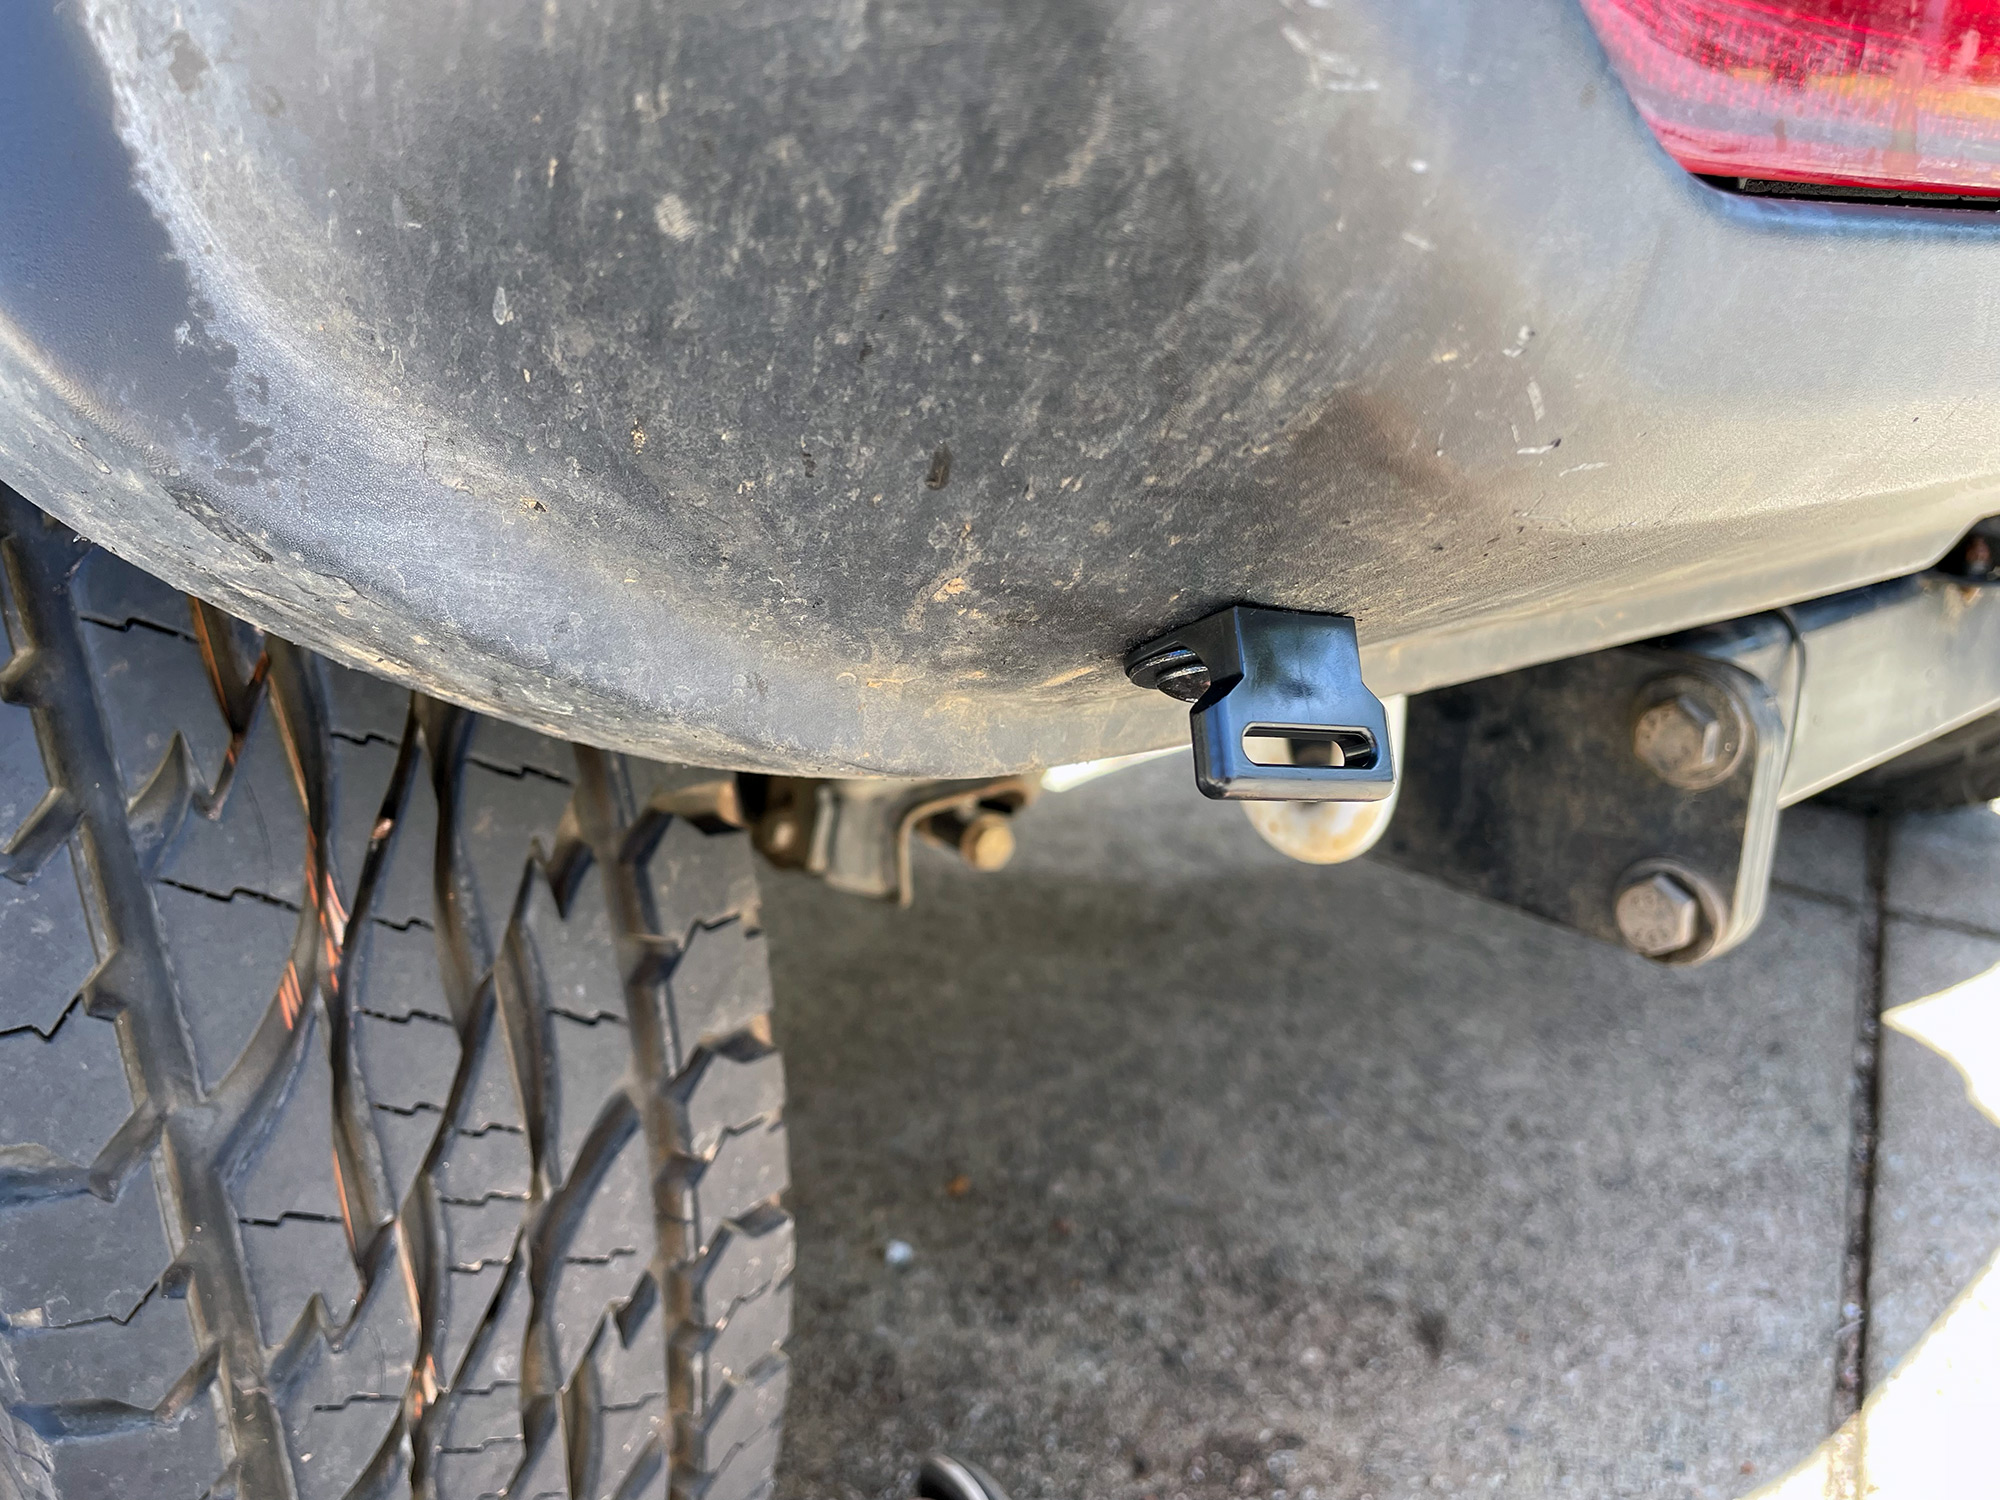
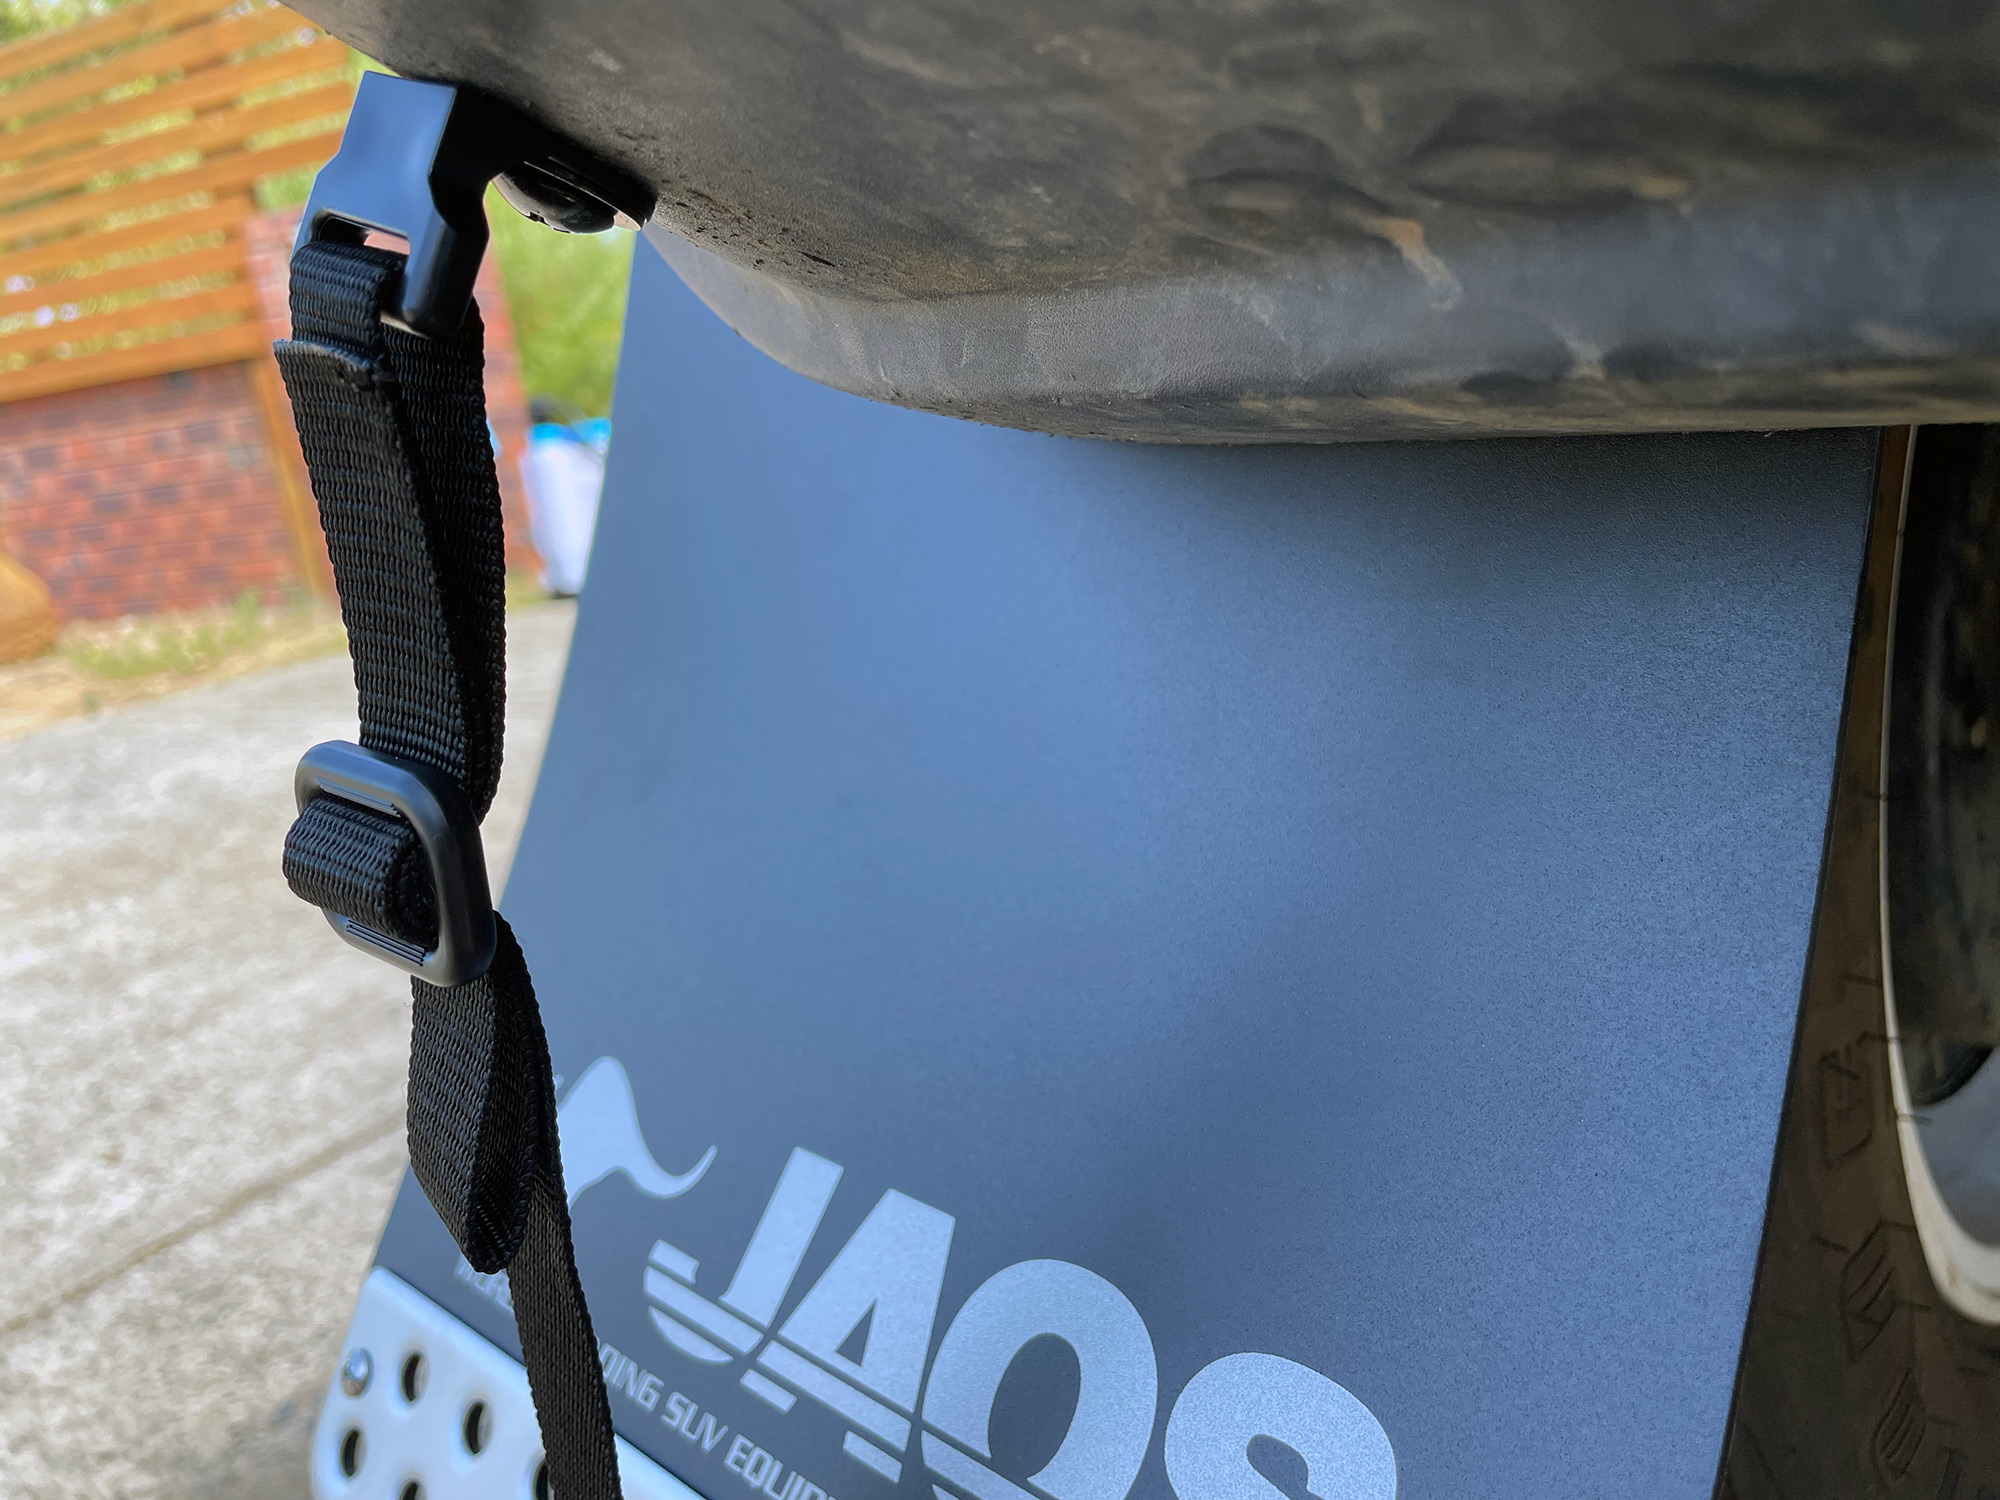
Fitting the restraining strap bracket
The Japanese instructions say to use the door lines as the guide for the position left-right with respect to the back of the car. I used some masking tape and kinda pulled that line down, more towards where the bumper tends to change position. You need the strap on the flatter part of the bumper but as far ‘outwards’ as you can make it so you can have the nicest pull on the restraining strap.
The strap hole is 35mm from the line along the bumper where it kicks downwards, or 45mm from the bit where the curve that changes it from vertical to horizontal ends. I used an adjustable square for this so I had the same measurement on both sides of the car so they were equal.
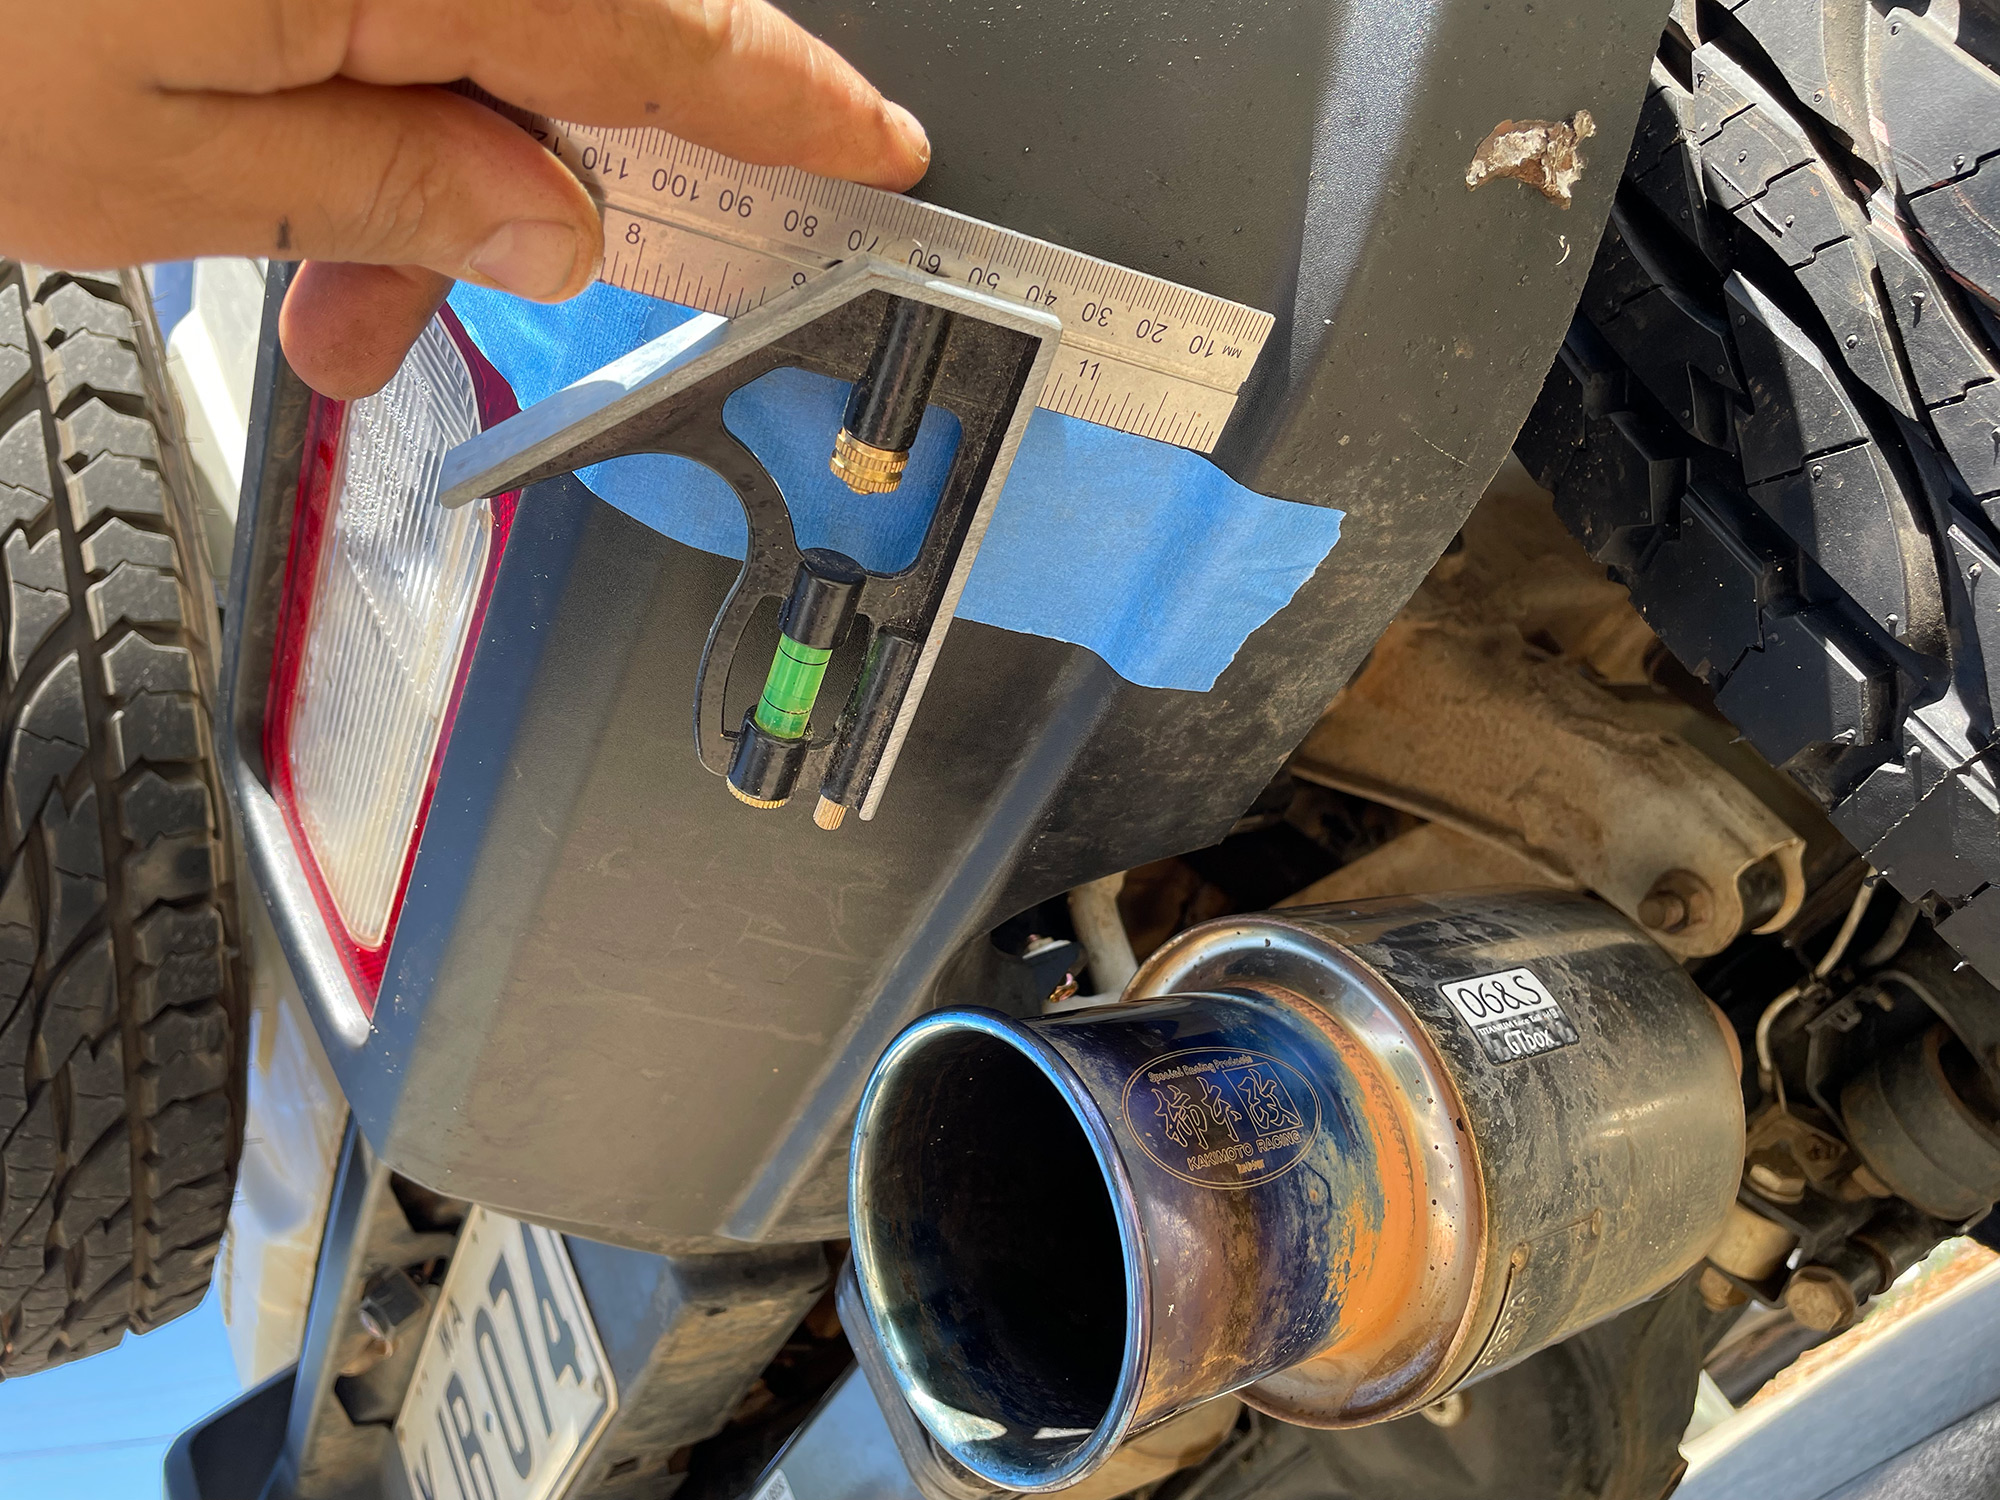
Mark this with a pen…
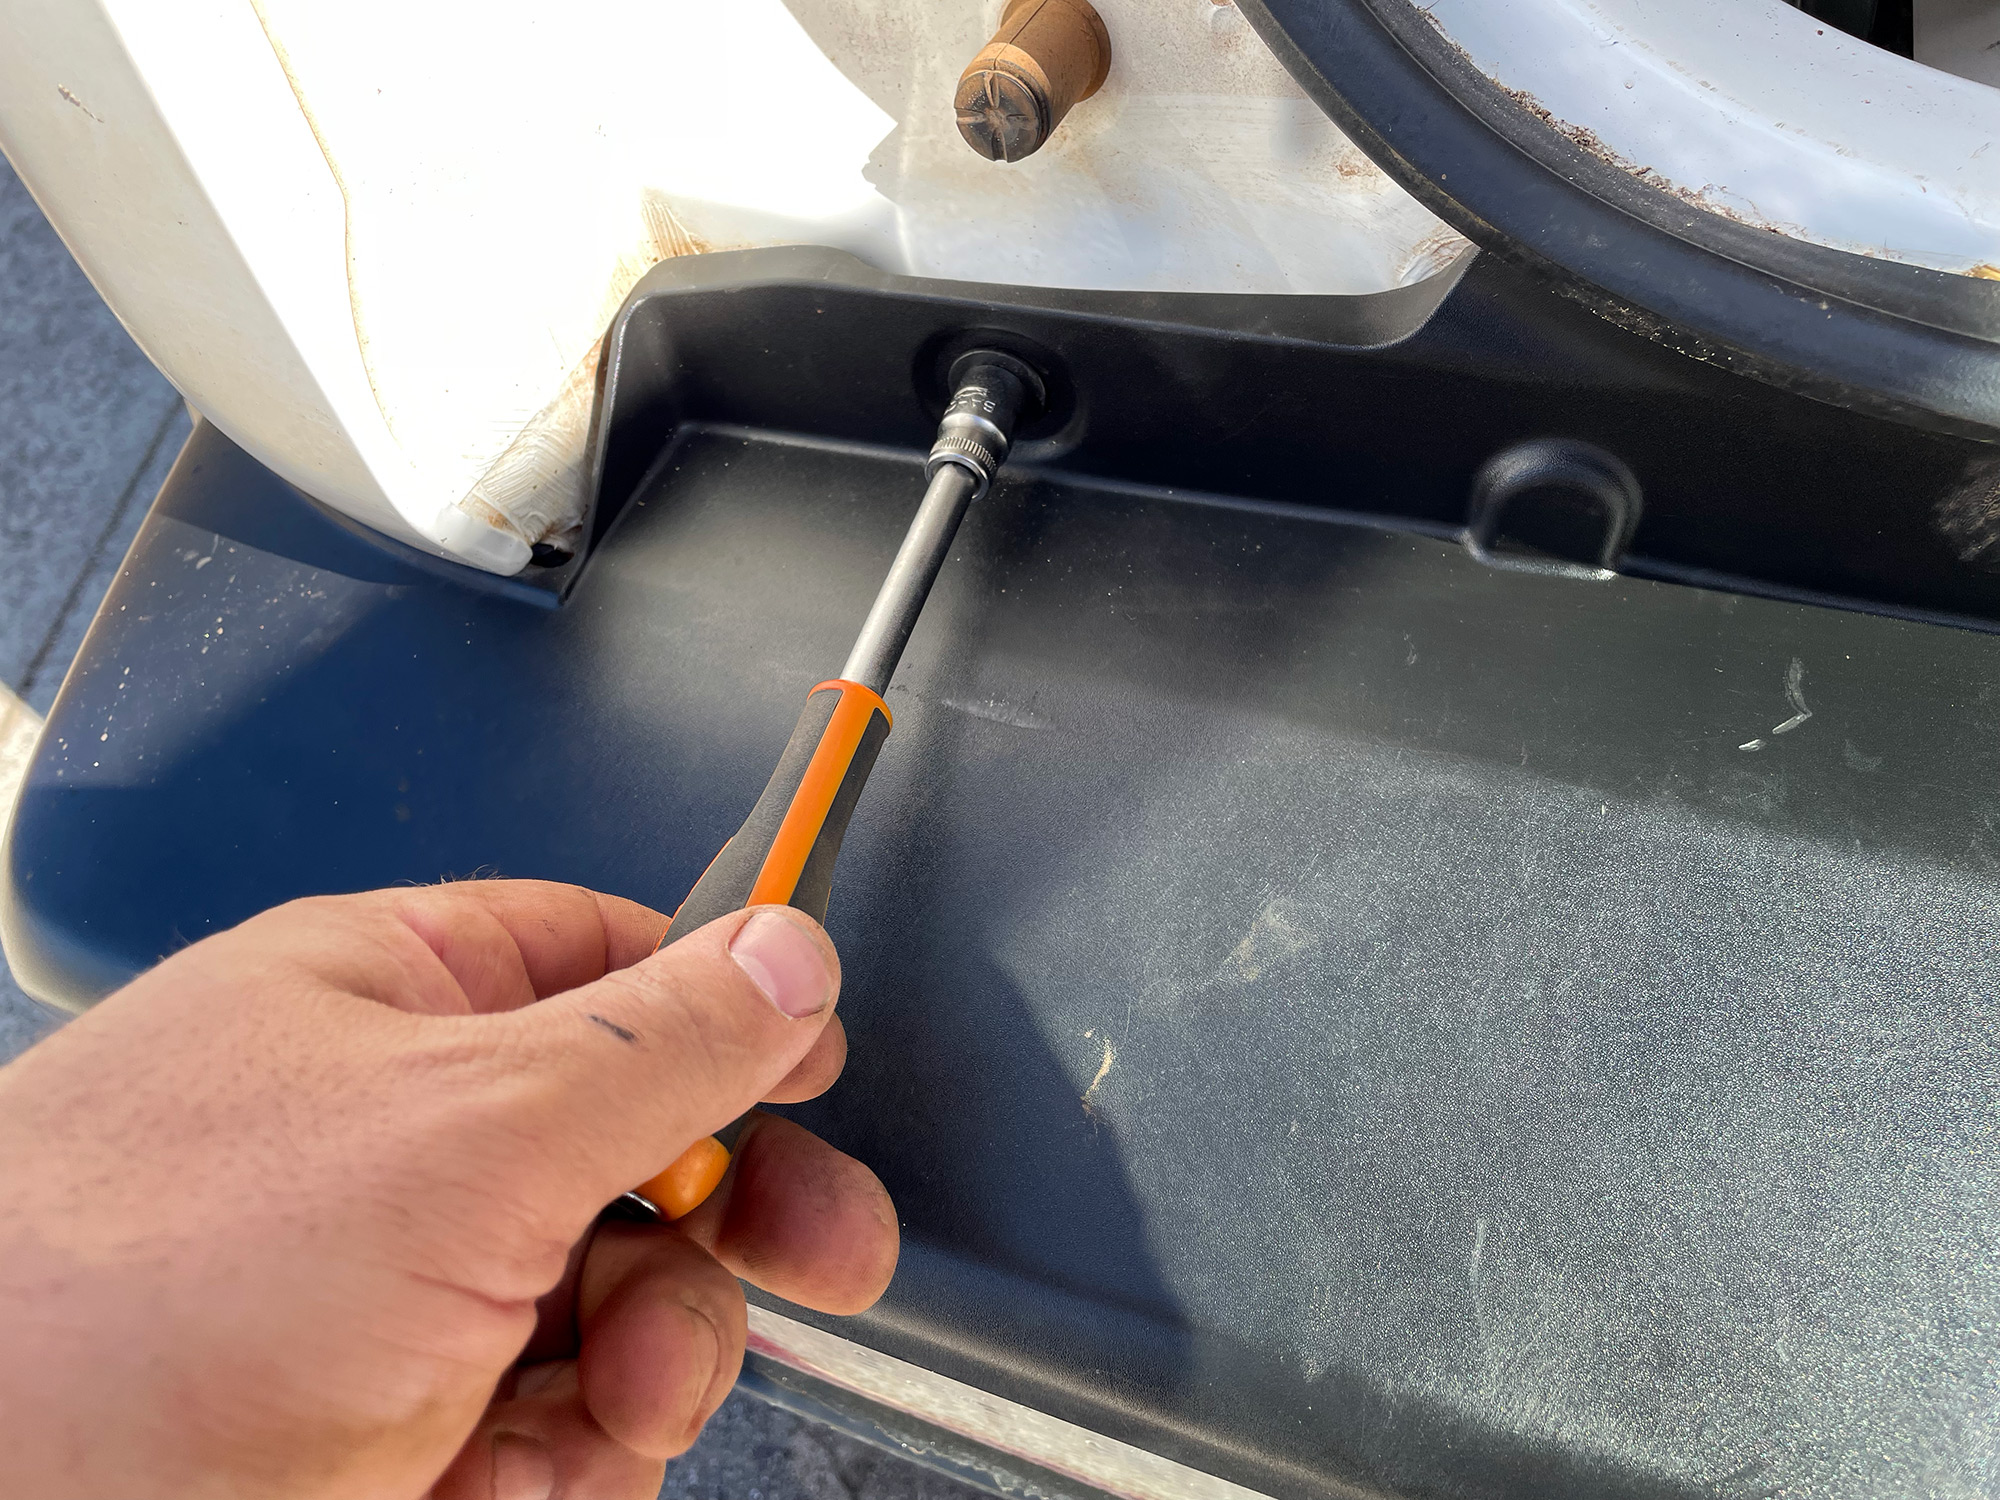
… and drill it out to 7mm for the mounting bolt.
The strap mounting bracket goes on with an M6 screw headed bolt, with a washer on the plastic bracket side. A nut goes on the bolt on the inside of the bumper to hold it. Again, just do it up finger tight so you can reposition it at this point.
Installing the mudflaps and restraining strap
Now into the fun stuff! The mudflaps can go on, finally! The upper two screws are the self tapping type into the speed nuts in the bumper, the lower 2 are M6 screws that attach the mudguard to the support bracket we installed earlier. These are easiest if you work from the bottom bolts upwards, and start on the inside (hardest to reach) bolt on the mounting bracket first. The nuts are a little annoying to get a spanner onto but it is doable. Remember to use a JIS screwdriver bit – this is easiest using the screwdriver bit in a ratchet 1/4″ spanner or use a ratchet head that can take a JIS screwdriver bit. With the wheel on the car there isn’t really room to get a full sized screwdriver in here.
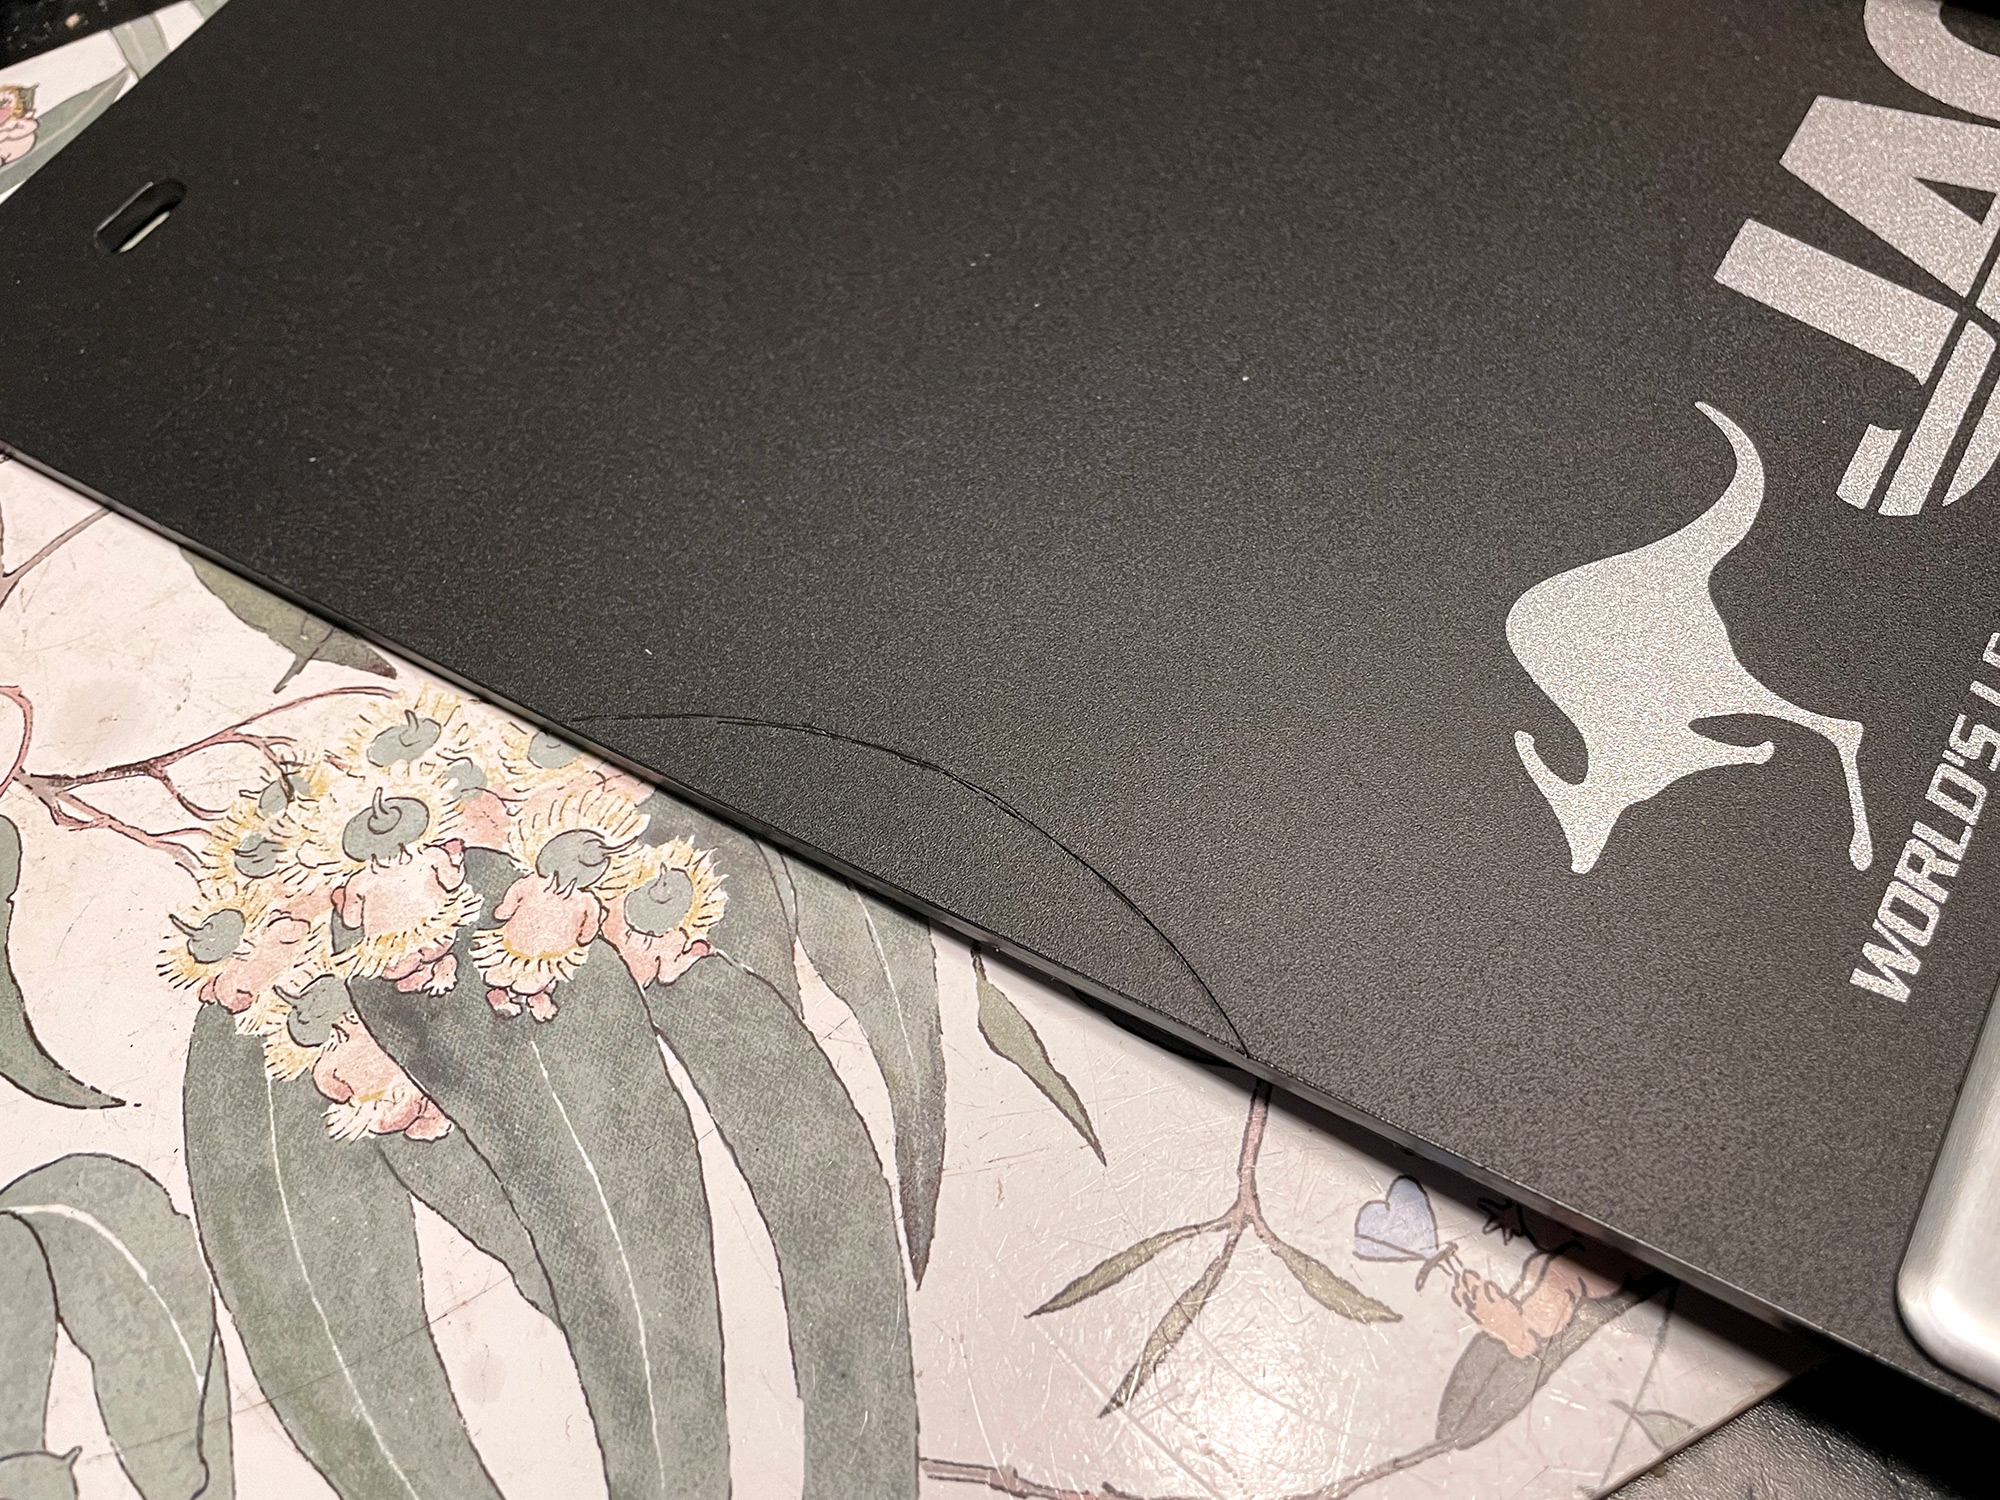
This is a good spot to check the alignment of any cuts you made to the mudflap to accommodate your exhaust. It’s a lot easier to trim off the car than it is on the car!
Once you’re happy with the alignment of the mudguard, you can do up these bolts first and then do up the bolt holding the mounting bracket to the chassis. You can just get a 12mm spanner in from the back of the chassis to hold onto the bolt head using the open-end of the spanner. With a long extension and a 12mm socket you can tighten up this bolt using the nut exposed at the bottom, too.
Restraining strap details and finishing up
The last thing to do here is get the restraining strap installed. It comes up through the buckle from underneath, up over the top and back through, and then through the bracket on the bumper from underneath.
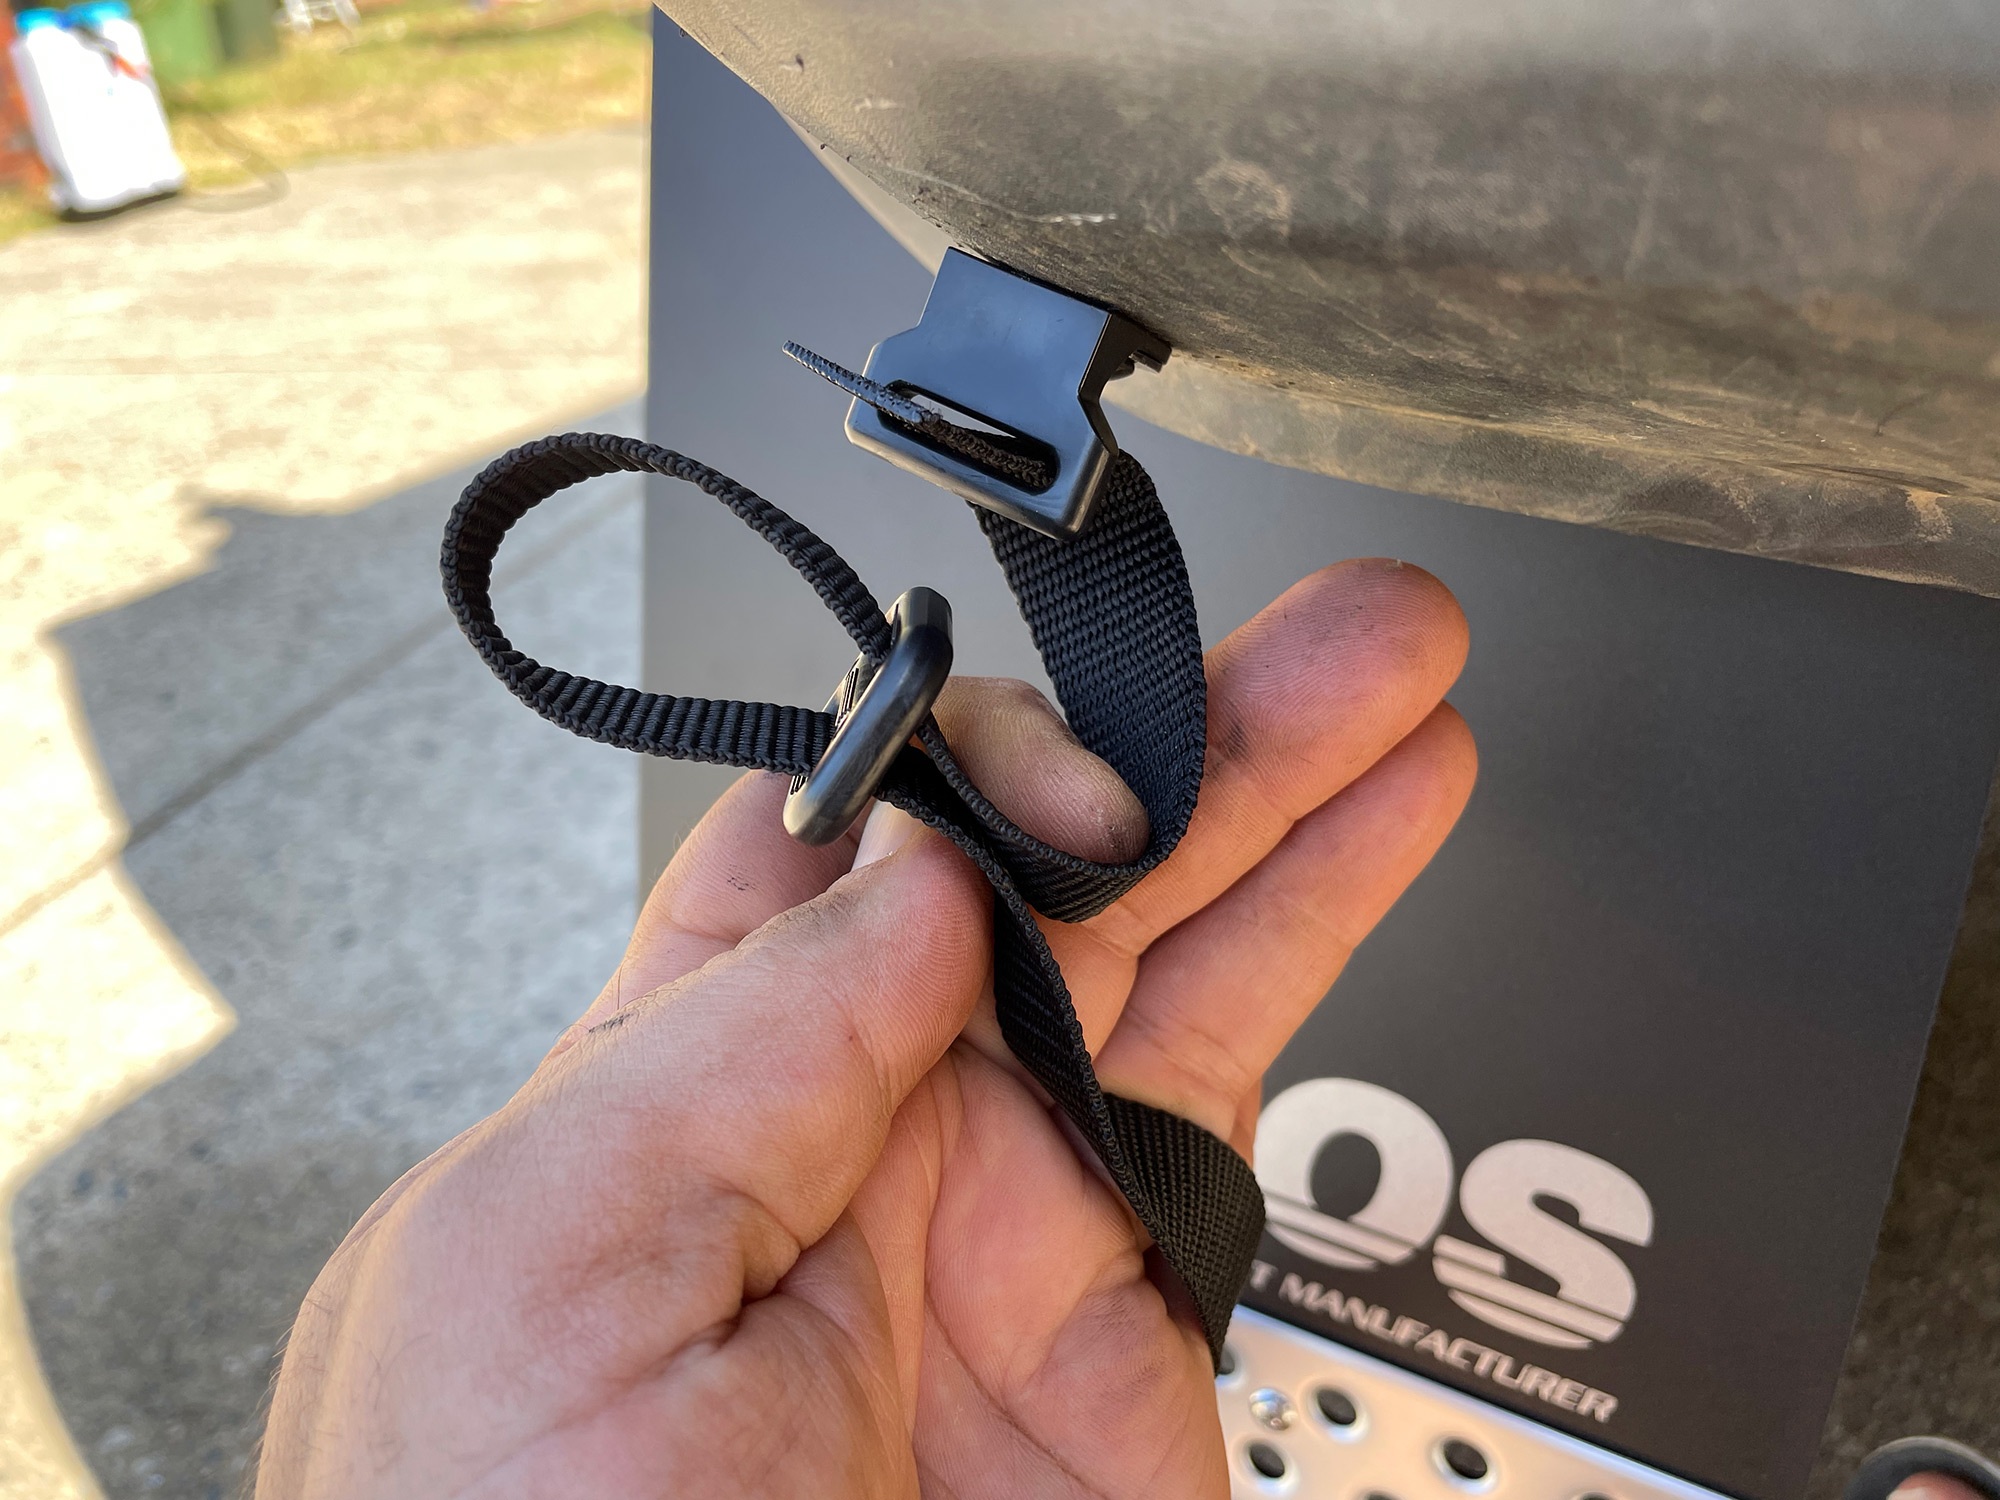
The strap then comes down, back into the buckle from underneath, over the top and back out the bottom.
You can then use the end of the strap to tighten it. Jaos suggest about 200mm from the tip of the mudguard to the restraining strap mount but it also depends how much coverage you want. Once it’s adjusted to the right length, Jaos suggest cutting it and melting the end of the strap with a cigarette lighter to prevent fraying. I decided to just loop the end back through one more time which holds it all very neatly.
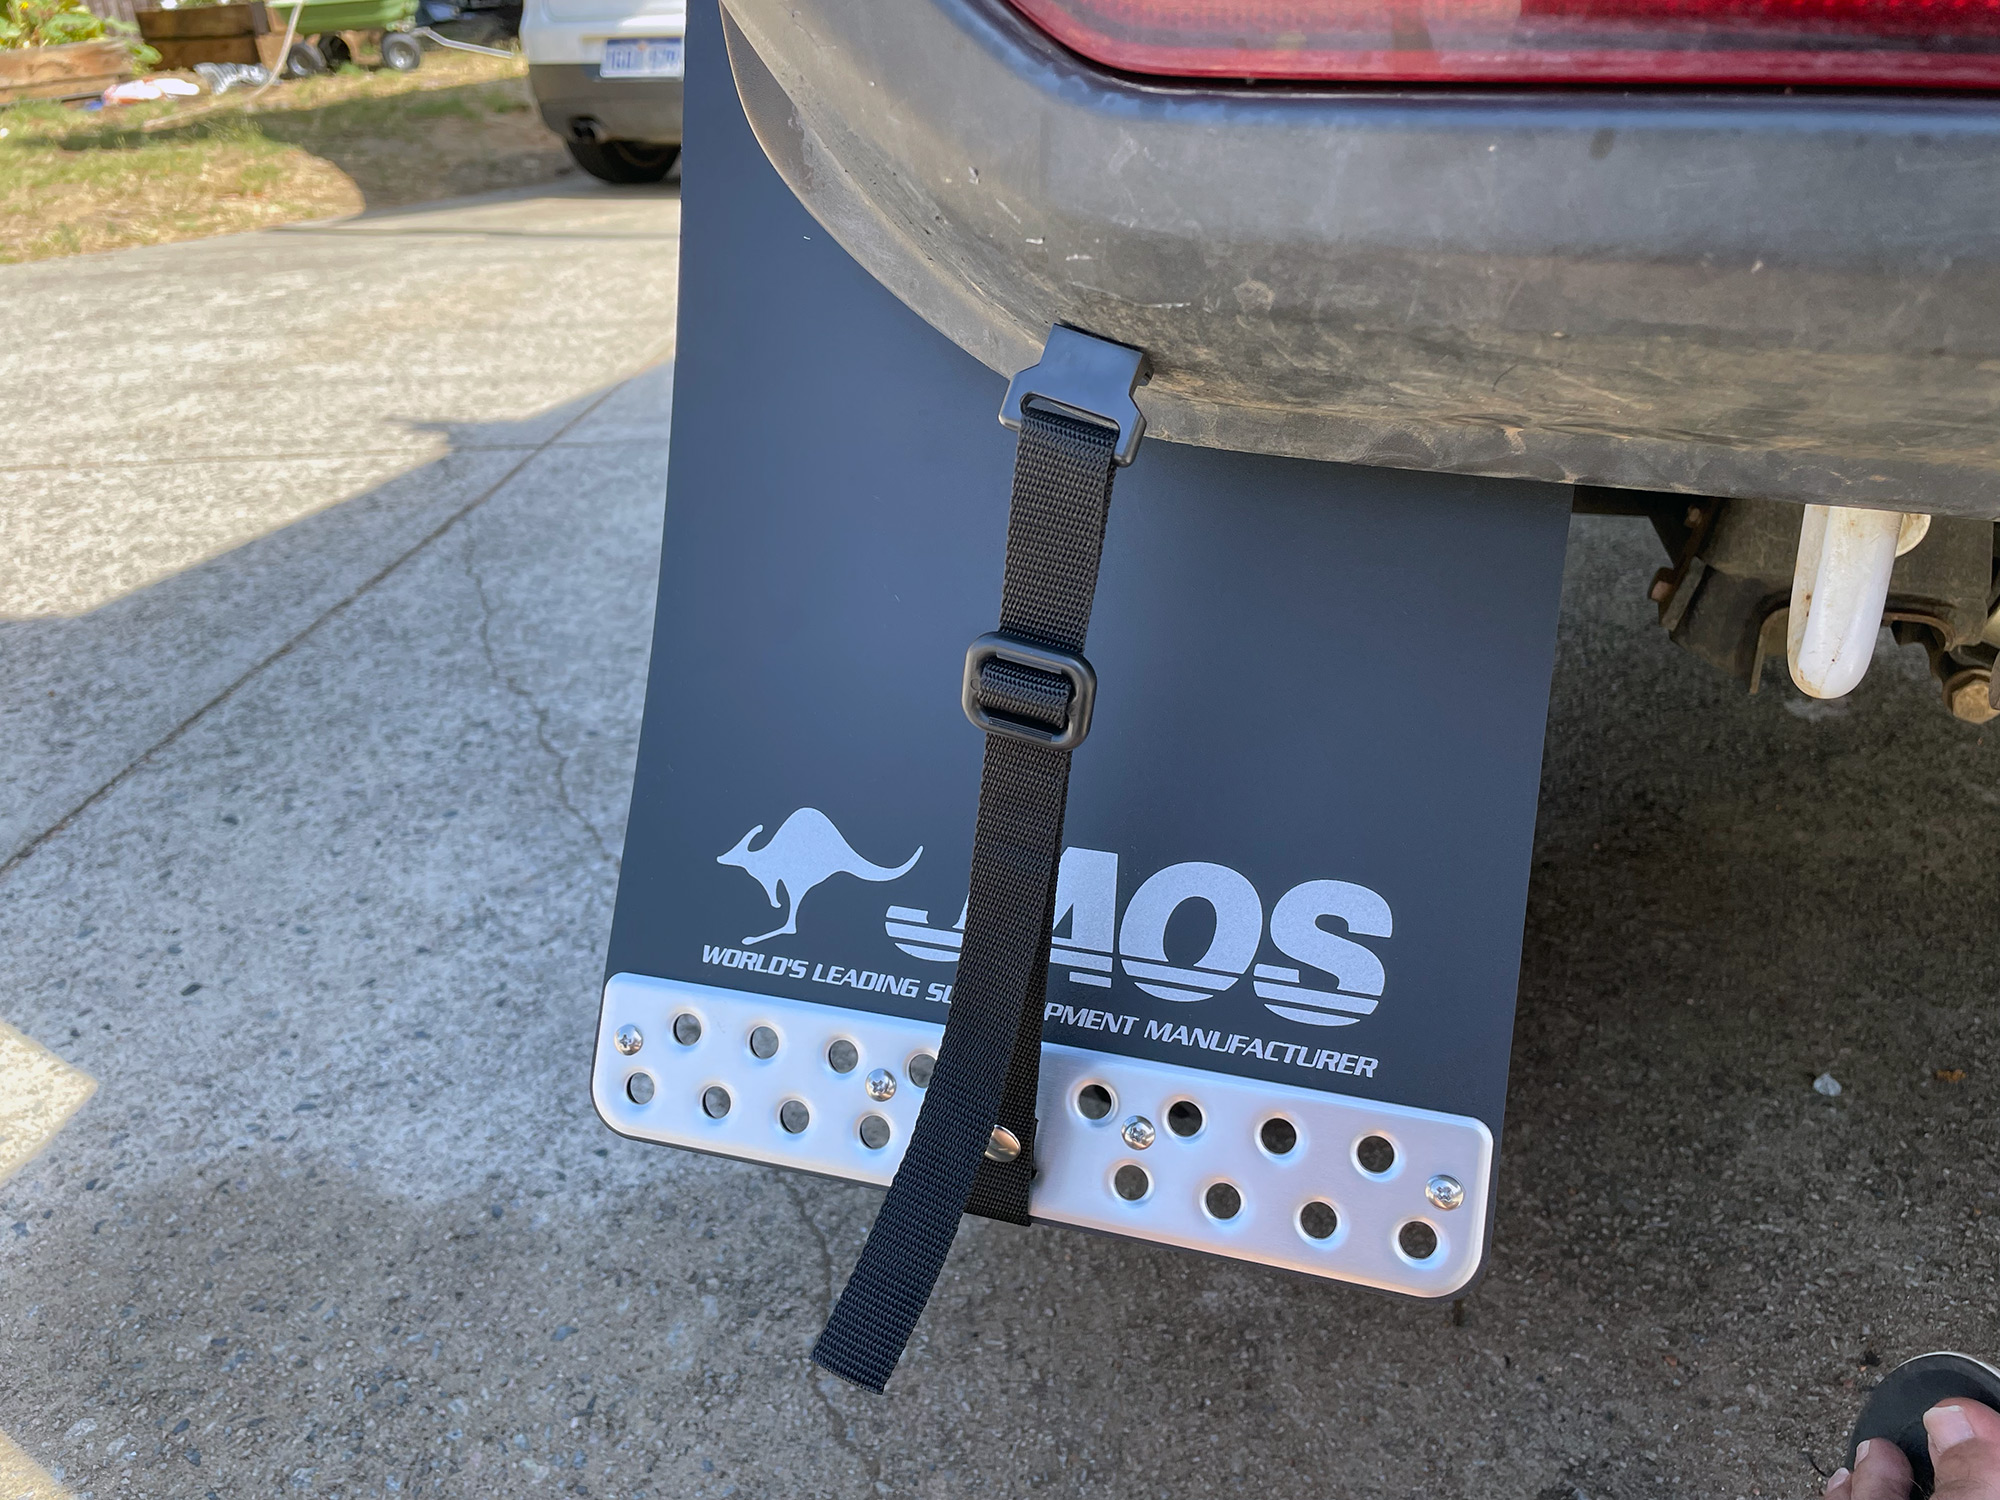
You can now step back with both mudflaps aligned and installed, and admire them.
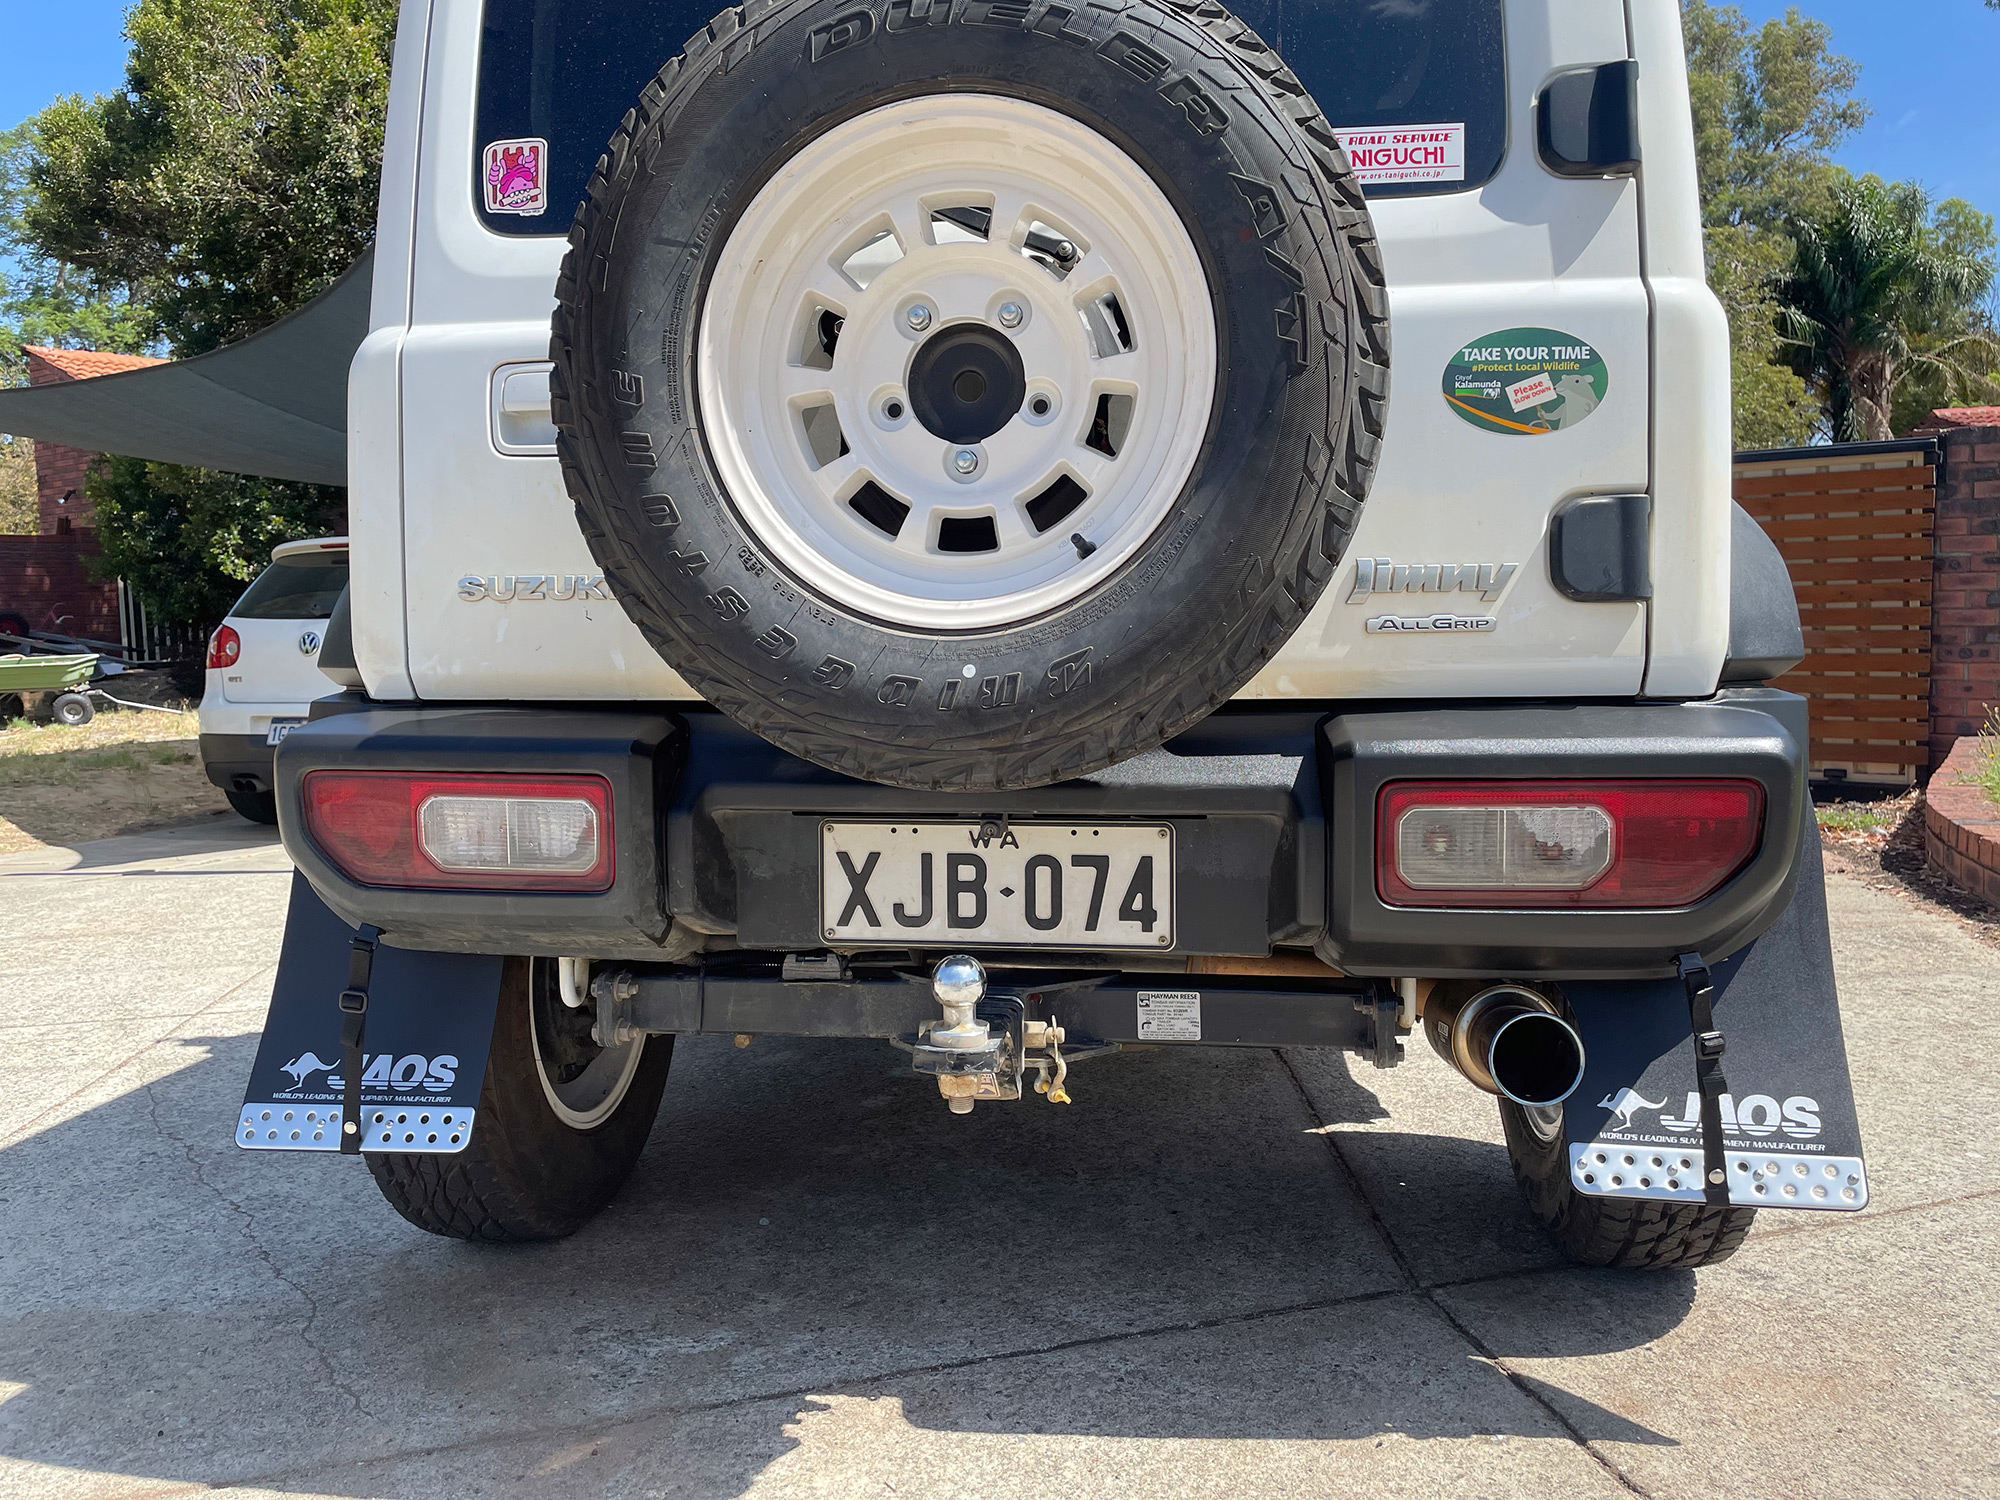
Very happy with them, and now the back of my car is fully legal where I live!