
Factory retro grille install

This is a super simple appearance mode but can really lift your car up.
I bought the factory retro grille (9911C-78R00-ZSC) although these instructions also apply to other aftermarket grilles.
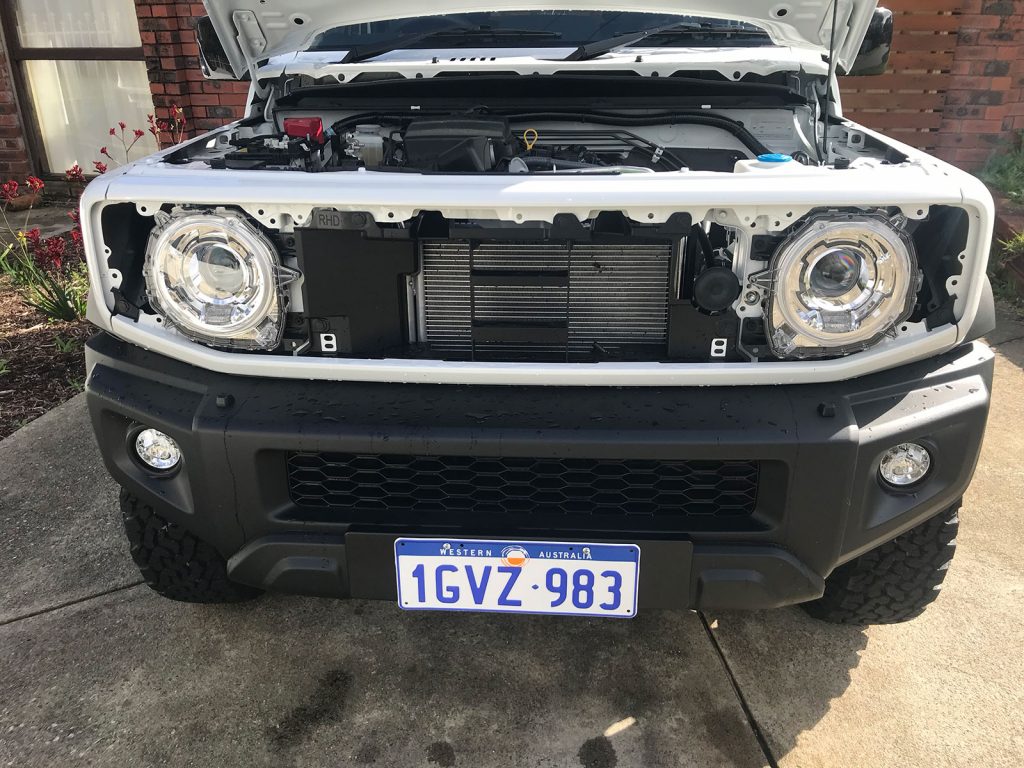
It starts with a simple wash and popping the bonnet to make the grille clips accessible

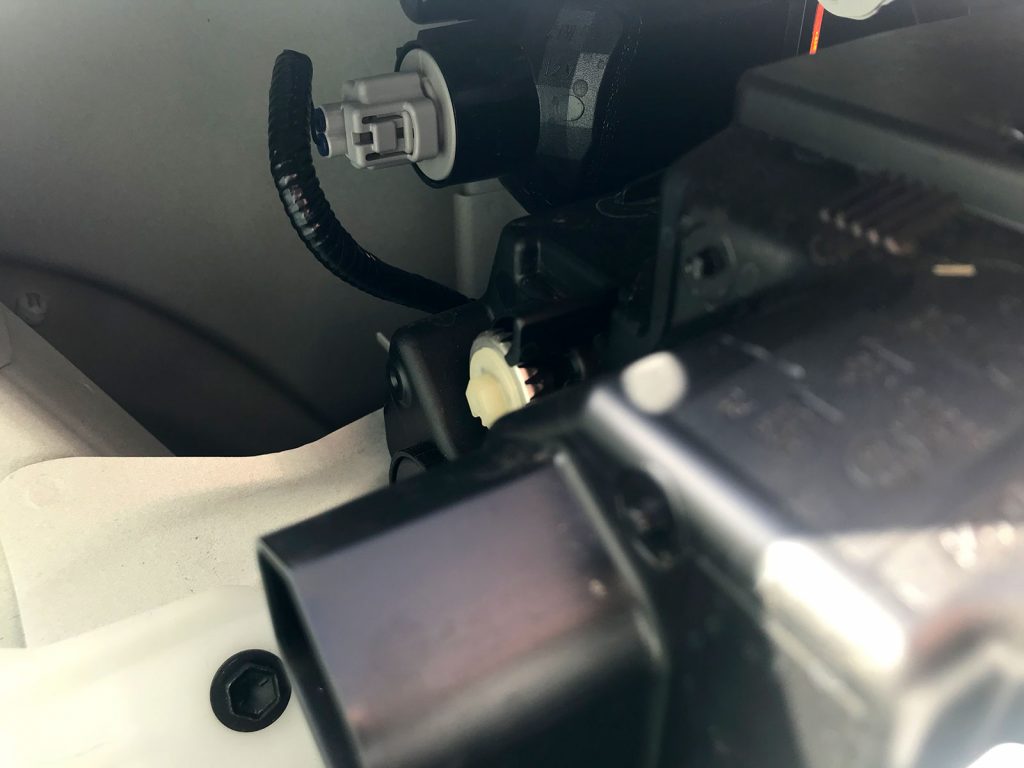
Indicators are attached to the grille – detach the electrical connector at the back of the indicators by the headlights.
There’s two little retaining things down the bottom of the grille. I’ve highlighted where they are below.
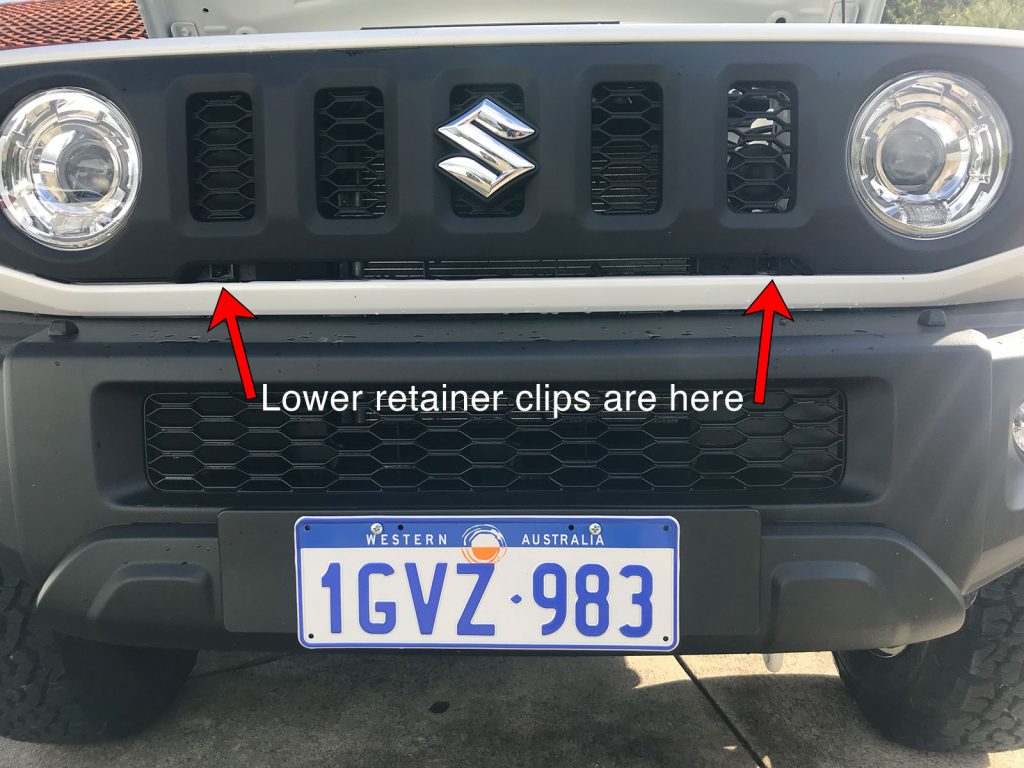
You turn these 90 degrees with a cross screwdriver to release them.
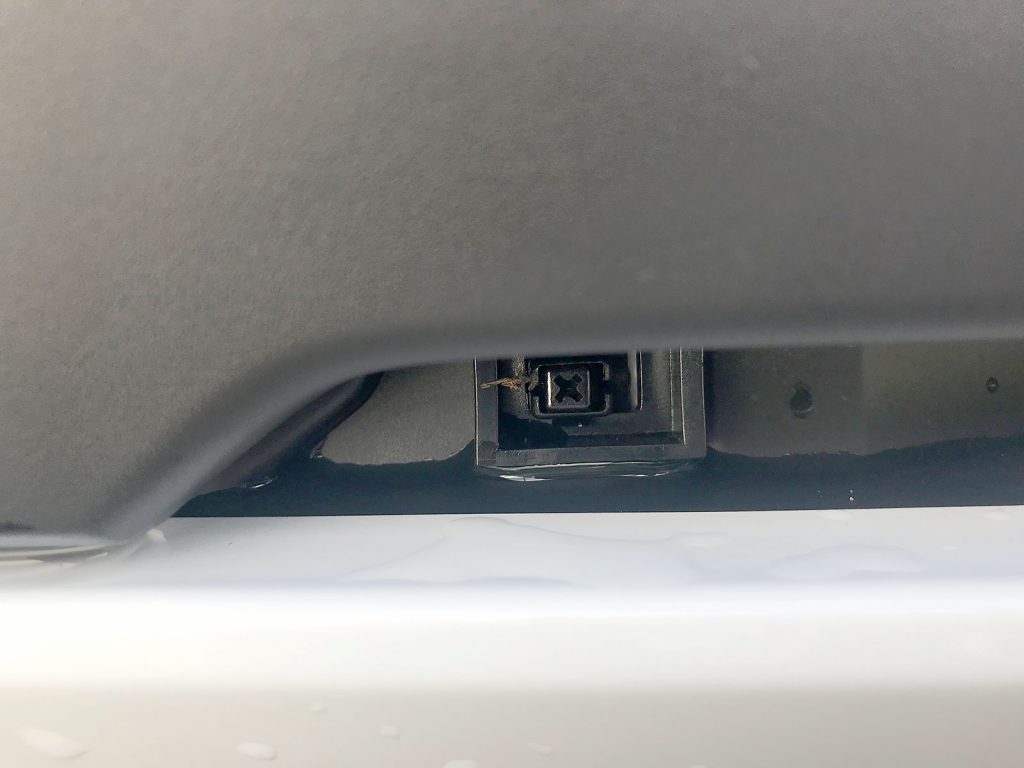
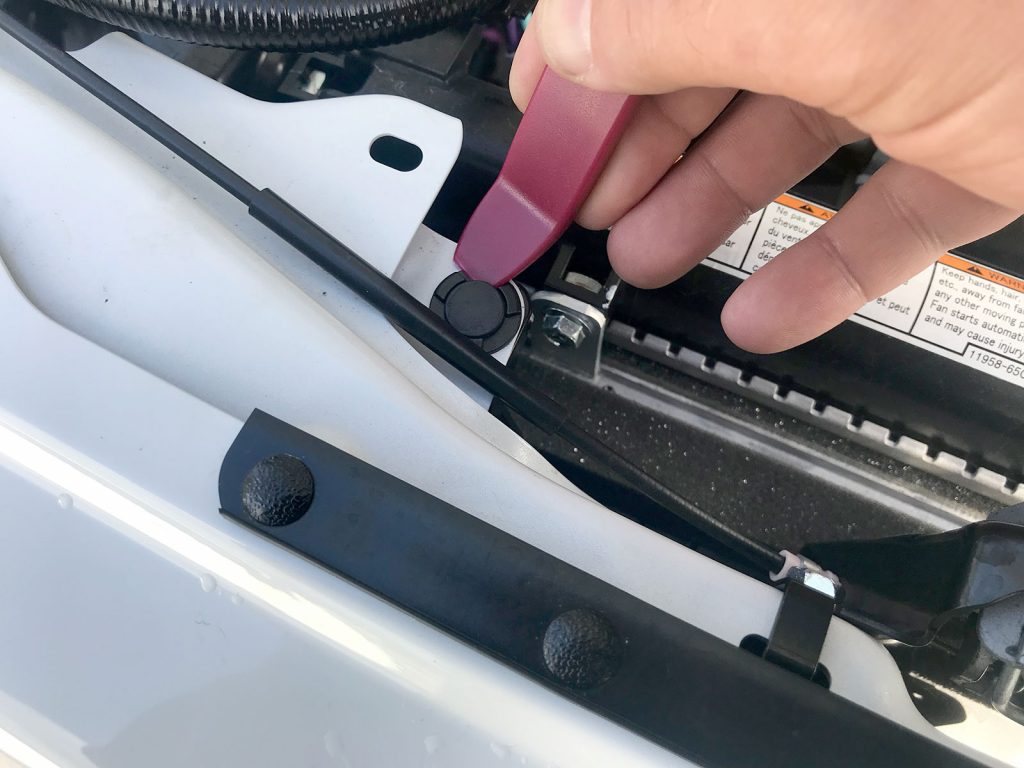
Up the top, by the bonnet latch, are two push pins.
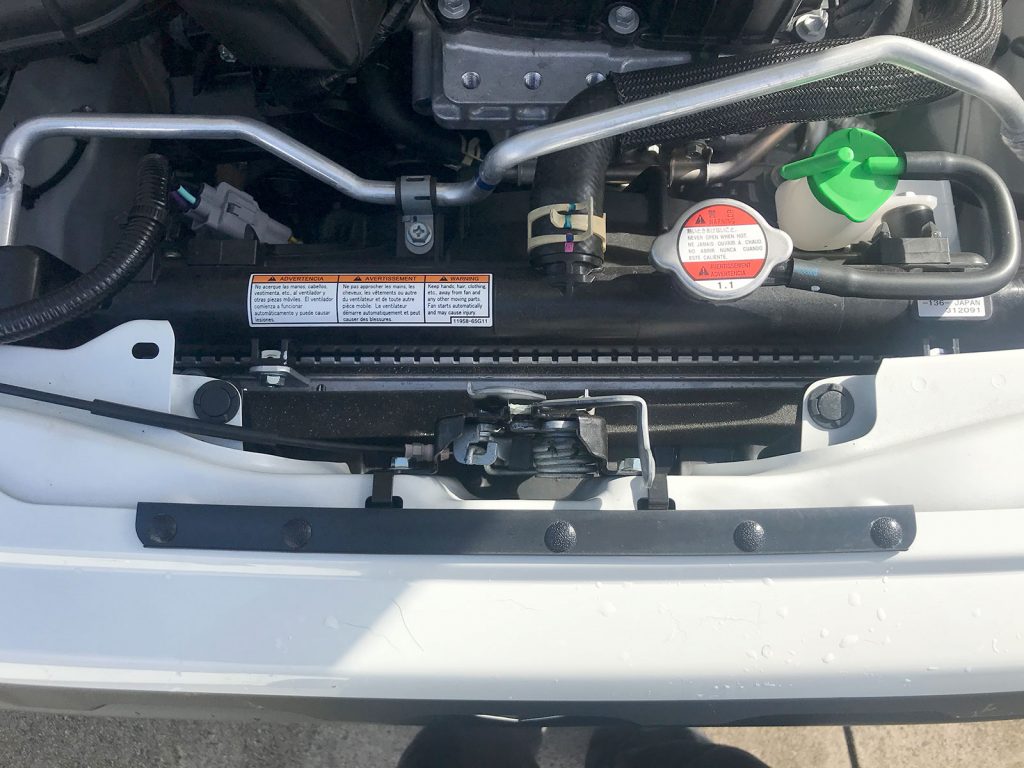
Release the centre using a plastic trim removal tool.
The grille then detaches from the car by pulling forwards. It can be quite tight with all the plastic trim connectors but so long as you make sure the push pins and the twist retainers are removed it will just come away.
You then need to swap over the indicators, which are held onto the grille using 2 screws.

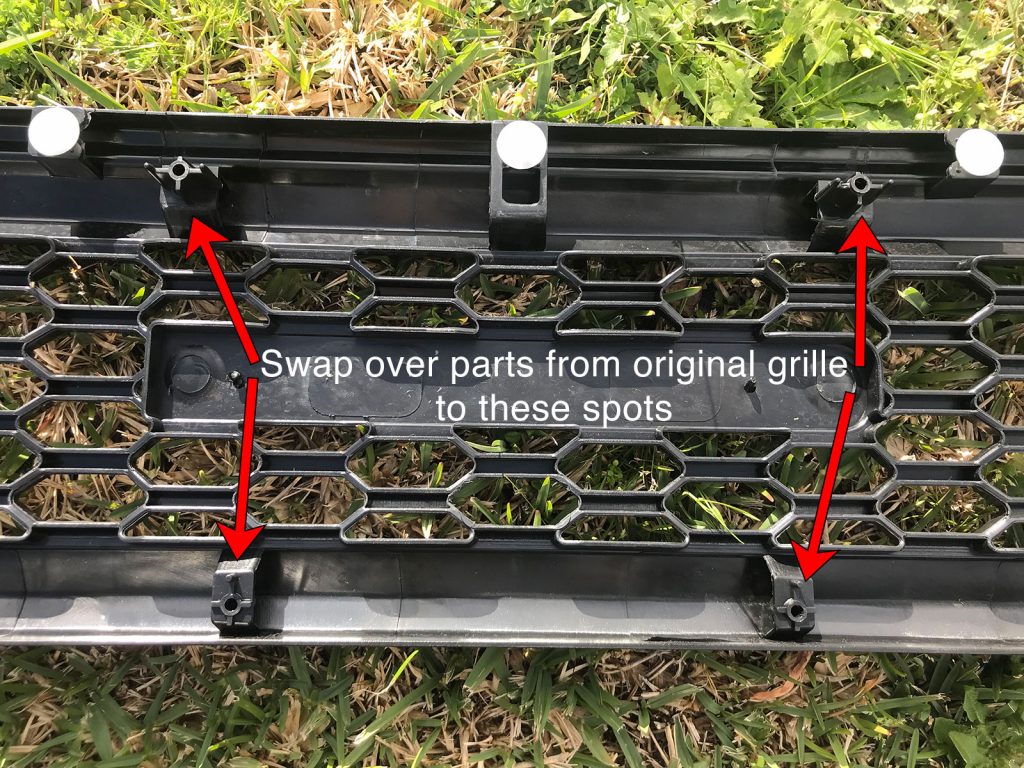
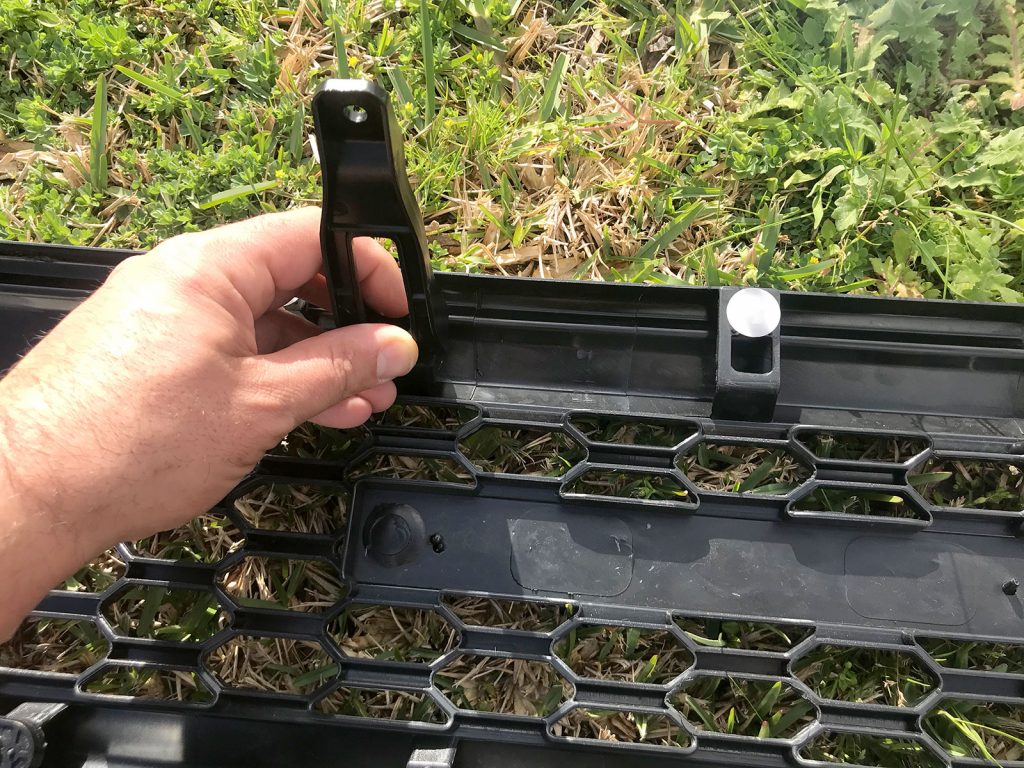
The other part to swap over are the two upper mount brackets which were not supplied with the retro grille, and the little lower brackets. Undo these from the original grill and install on the new grille.
Reinstall by carefully engaging all of the trim clips in their holes, and then turn the bottom retainers 90 degrees to lock the bottom in, and reinstall the push pins into the upper mounts. Reconnect the electrical connectors at the back of the indicators and you’re all done.

If you notice your indicators flash fast after doing this change in one direction or the other go back and check the electrical connections.
Very simple, as I said at the start, but quite a different look.