
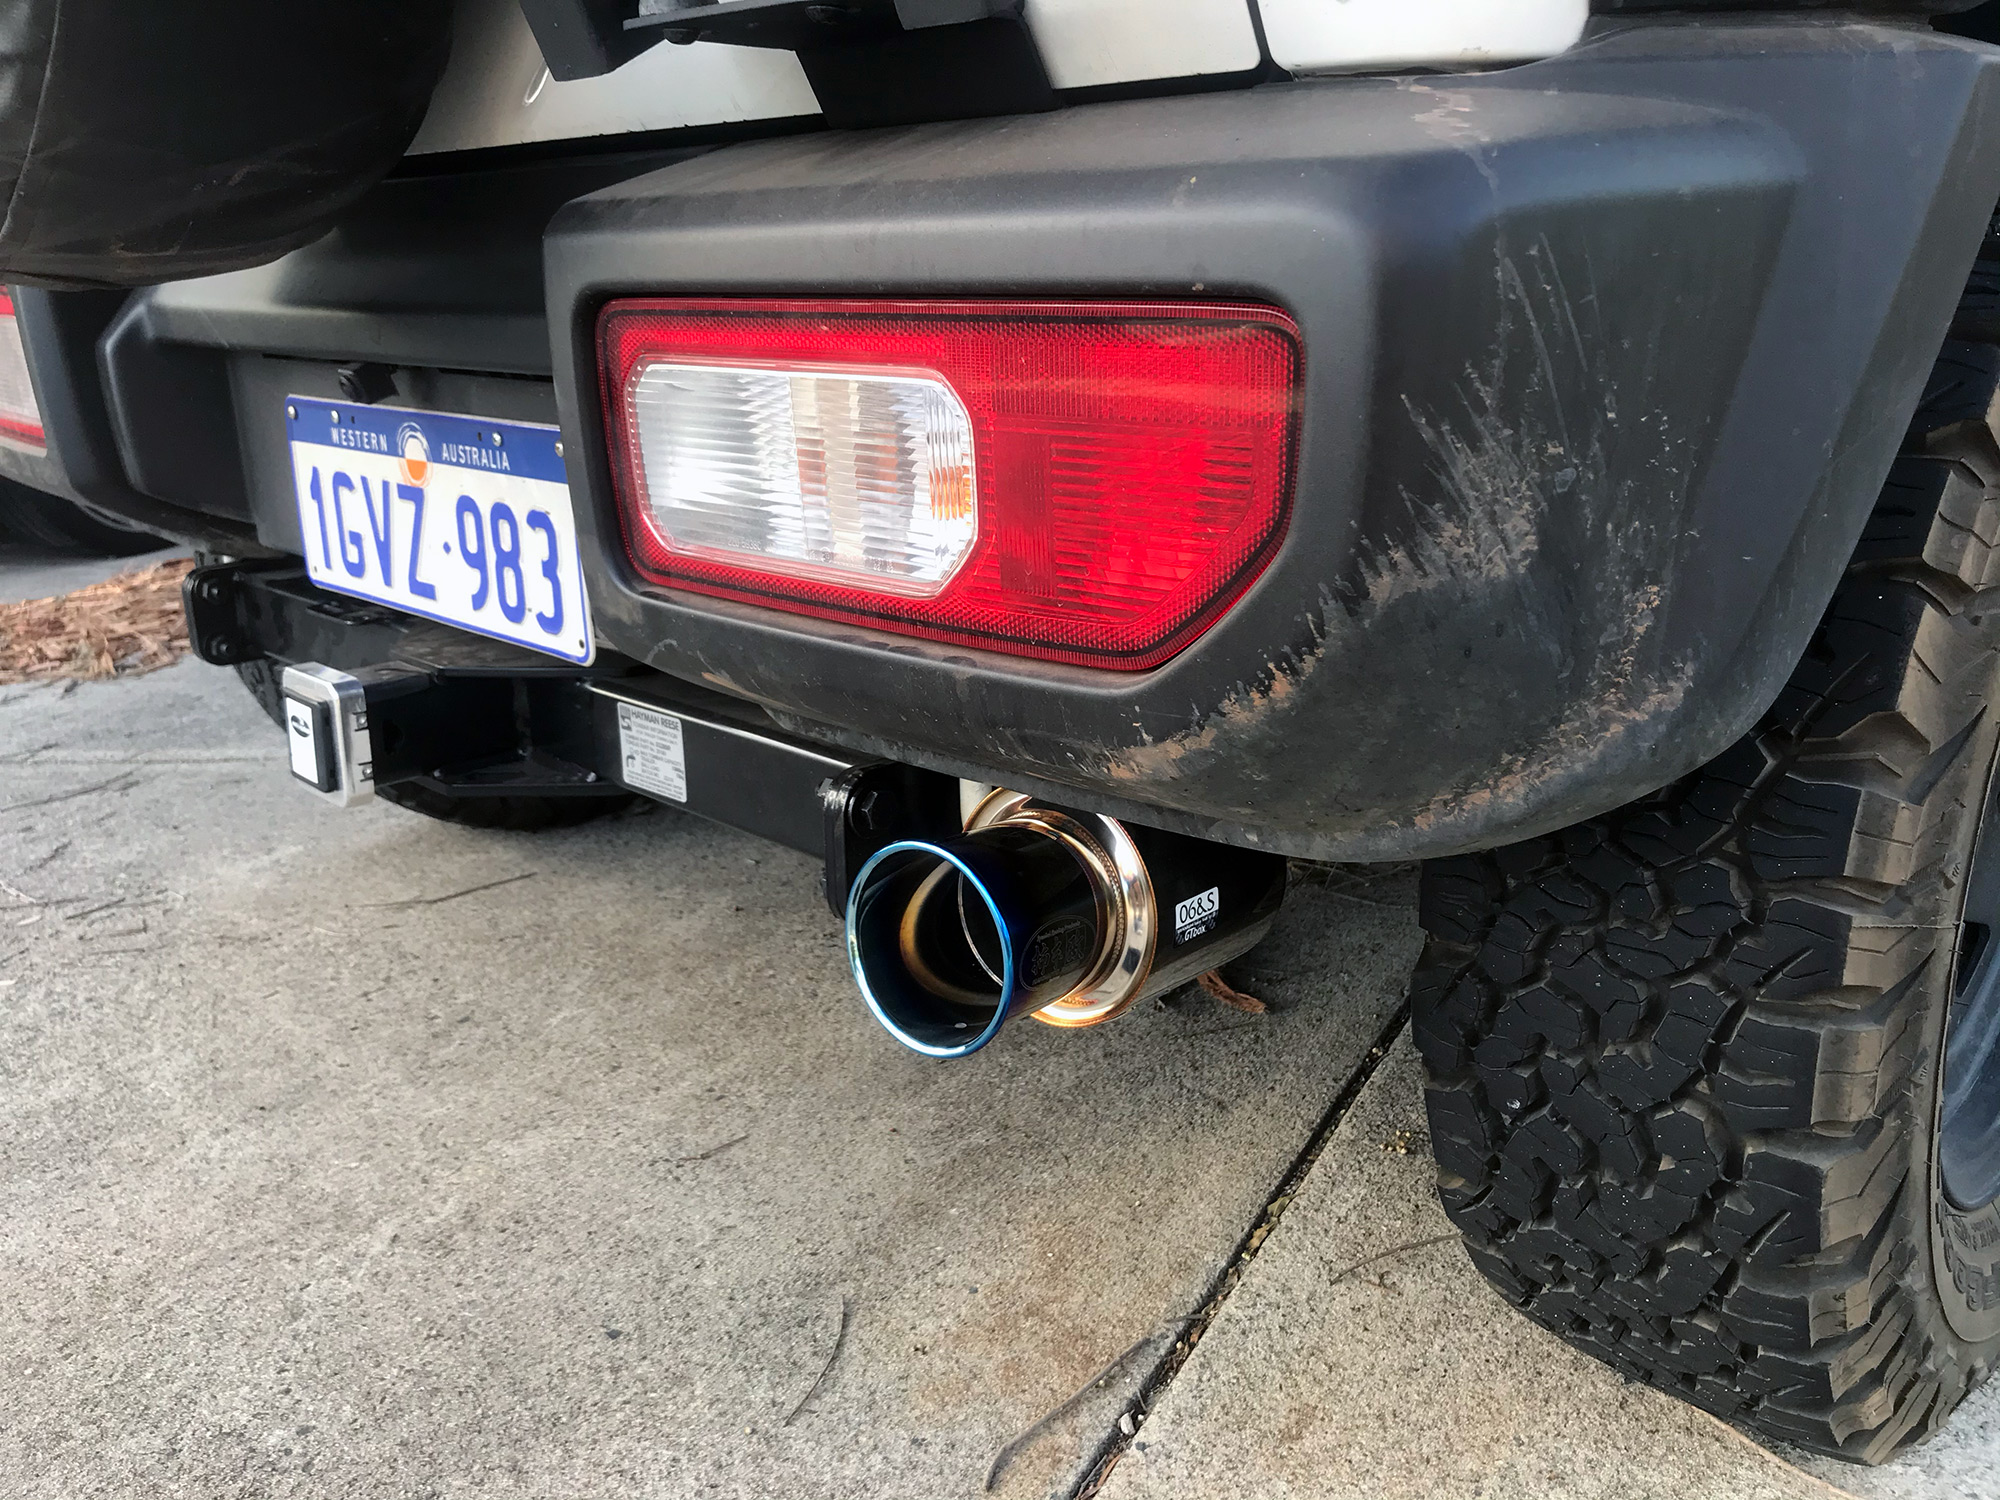
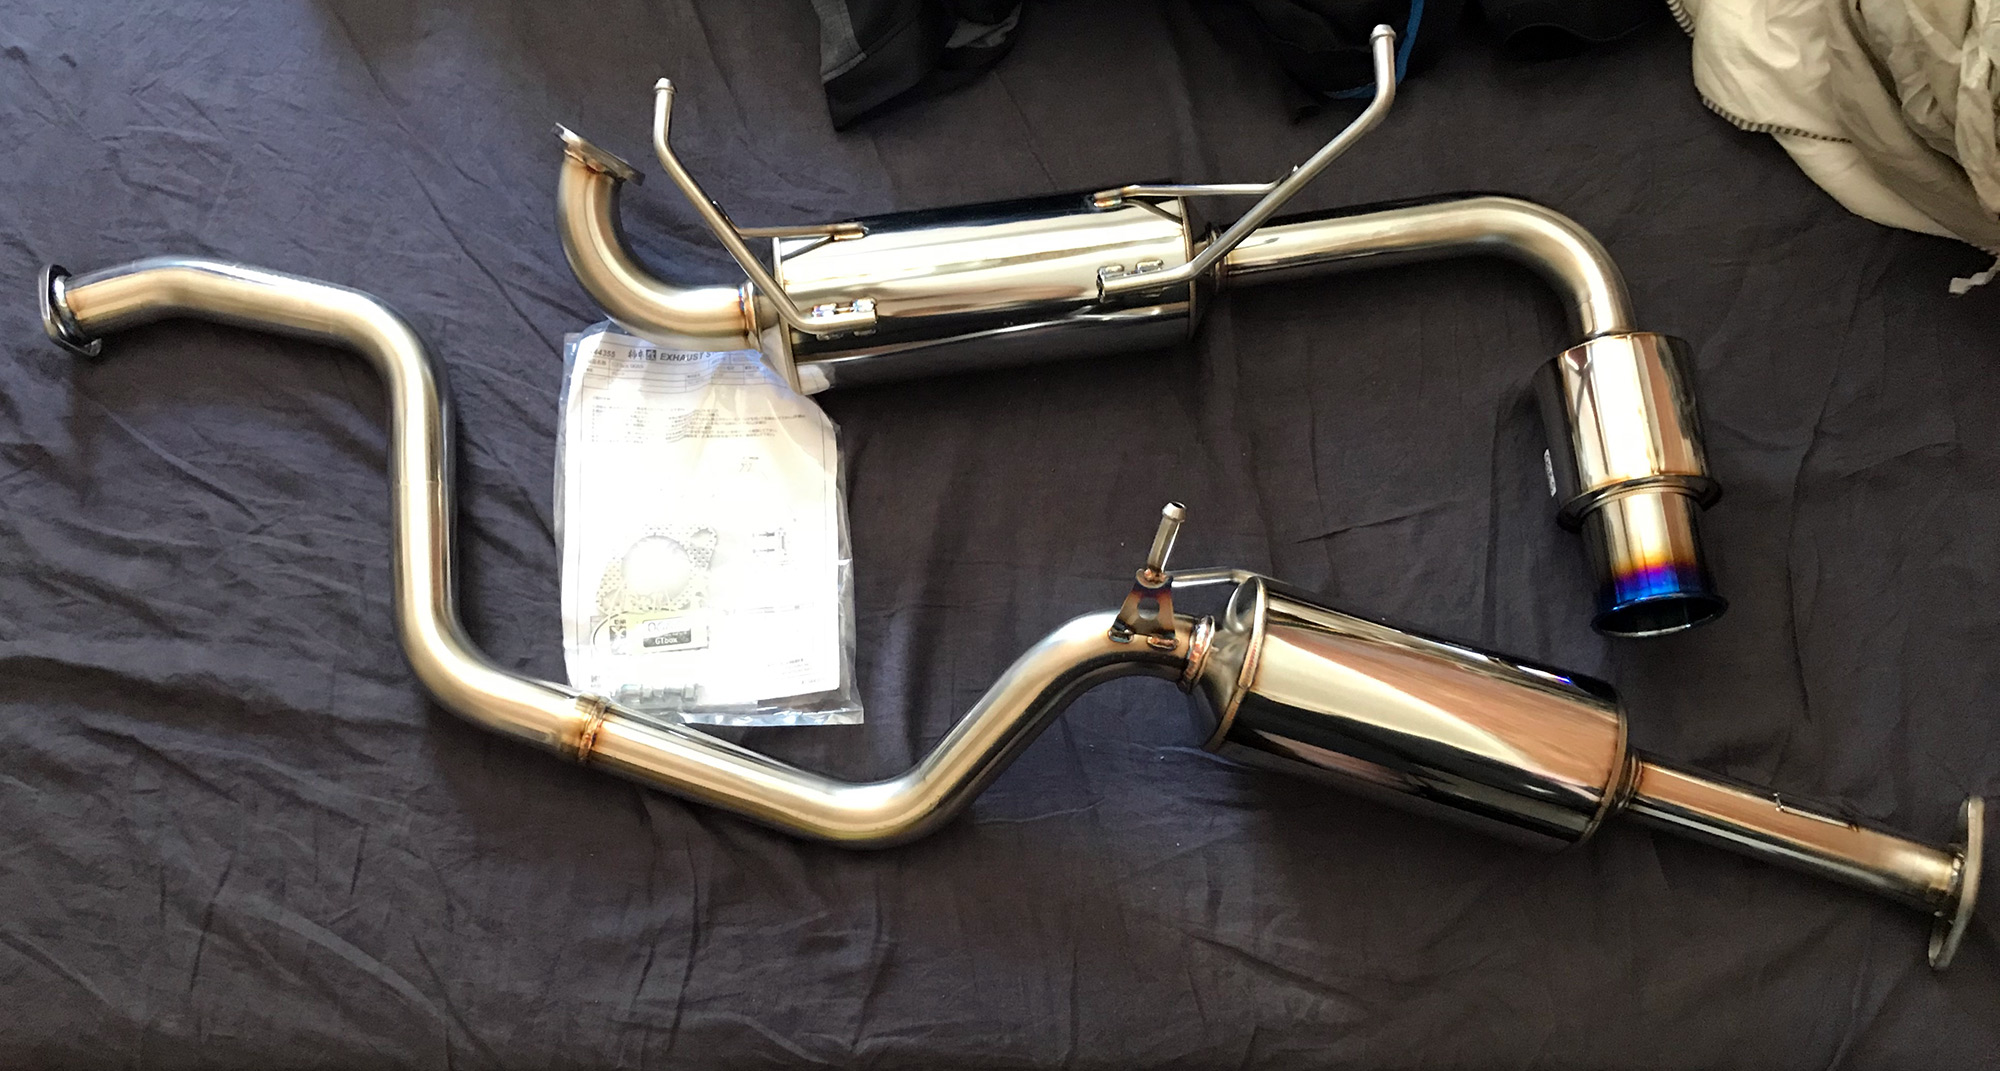
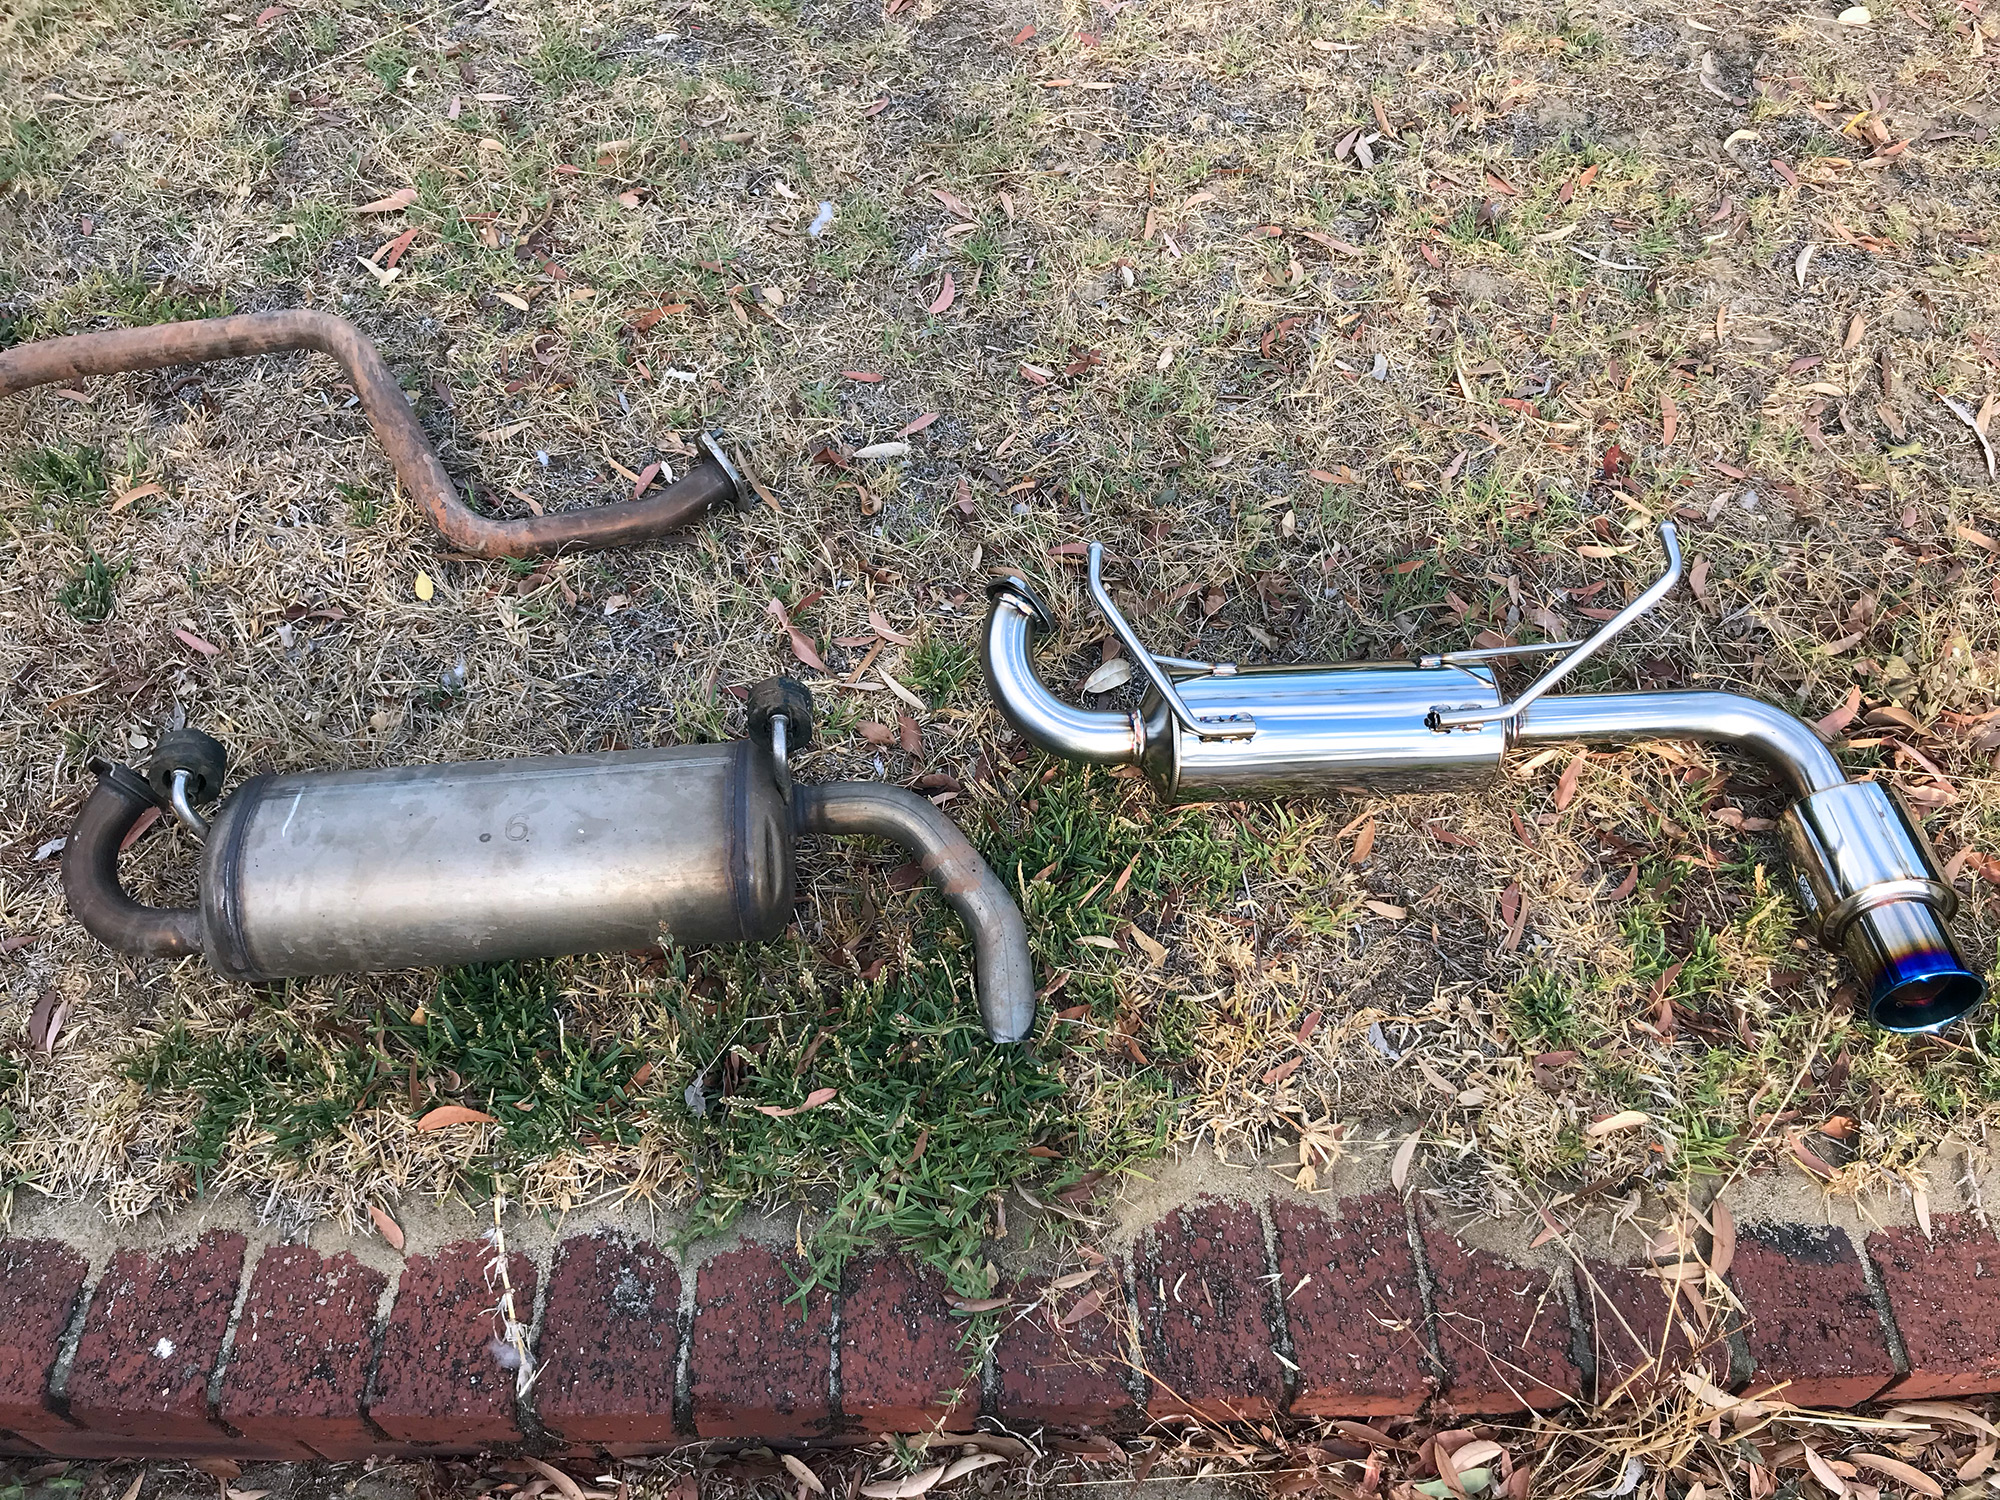
Exhaust: AVO manicat headers and Kakimoto GTBox 06&S catback
Almost everywhere I went after I got the Jimny people kept asking if it was electric – mostly cause it was so quiet! I decided to remedy this with an aftermarket exhaust. In late 2019 I added a Kakimoto GTBox 06&S catback exhaust, which really did open up the sound but didn’t add performance. This was reshaped in 2021 by a custom exhaust place to accommodate the long range fuel tank. Mid 2023 and with a possibility of a custom tune on the factory ECU, I elected to get the catalytic converter fitted header from AVO and fitted that.
Sections
BuT hOw DoEs It SoUnD!!!!!11!!!1!!!!
Almost everyone asks first how it sounds, so here’s some tests recorded via gopro suction cupped to the window for some POV action.
It also sounds good ripping through a bit of stuff offroad.
It sounds really, really nice. I’ve heard a few other aftermarket exhausts for the Jimny and I’m really happy I pulled the trigger on this one. Zero regrets.
After fitting the AVO header the sound didn’t really change, other than it being more eager to rev which is nice… so I haven’t bothered to get any footage (yet).
Fitting AVO headers
These weren’t hard to fit, though give yourself an hour or so. You’ll also want an M8 bolt to bolt the factory manifold brace onto the headers, copper antiseize, copper RTV suitable for manifold use, ideally an O2 sensor extension cable and perhaps some additional heat shielding/fire sleeve for the O2 sensor cable. If you want to do it truly correctly, also get a factory manifold gasket which is part number 14140-71L00.
I weighed both the factory manifold and these headers. The factory manifold came in at 3.7 kg, and the AVO headers at 4.2 kg. Not a huge weight difference despite the larger pipes etc.
Tools wise you need a 10, 12 and 14mm spanner and socket; a long breaker bar to make undoing bolts easier and an O2 sensor spanner or socket. If you elect to fit the AVO supplied nuts for their stainless steel studs then you’ll also need a 15mm spanner for them (I think).
Start by staring at the current arrangement.
Unclip the O2 sensor wire and then the exhaust side of it kinda pushes up the clip that it’s on.
O2 sensor itself is the next thing to remove. If you’re lucky and it’s not too seized in there then you can get it undone with a 22mm open-ended spanner. If it’s a bit tighter then you’ll want an O2 sensor socket or a pipe spanner with a cutout. I got lucky so mine came out with minimal fuss using an open-ended spanner but be warned that not all will be that easy.

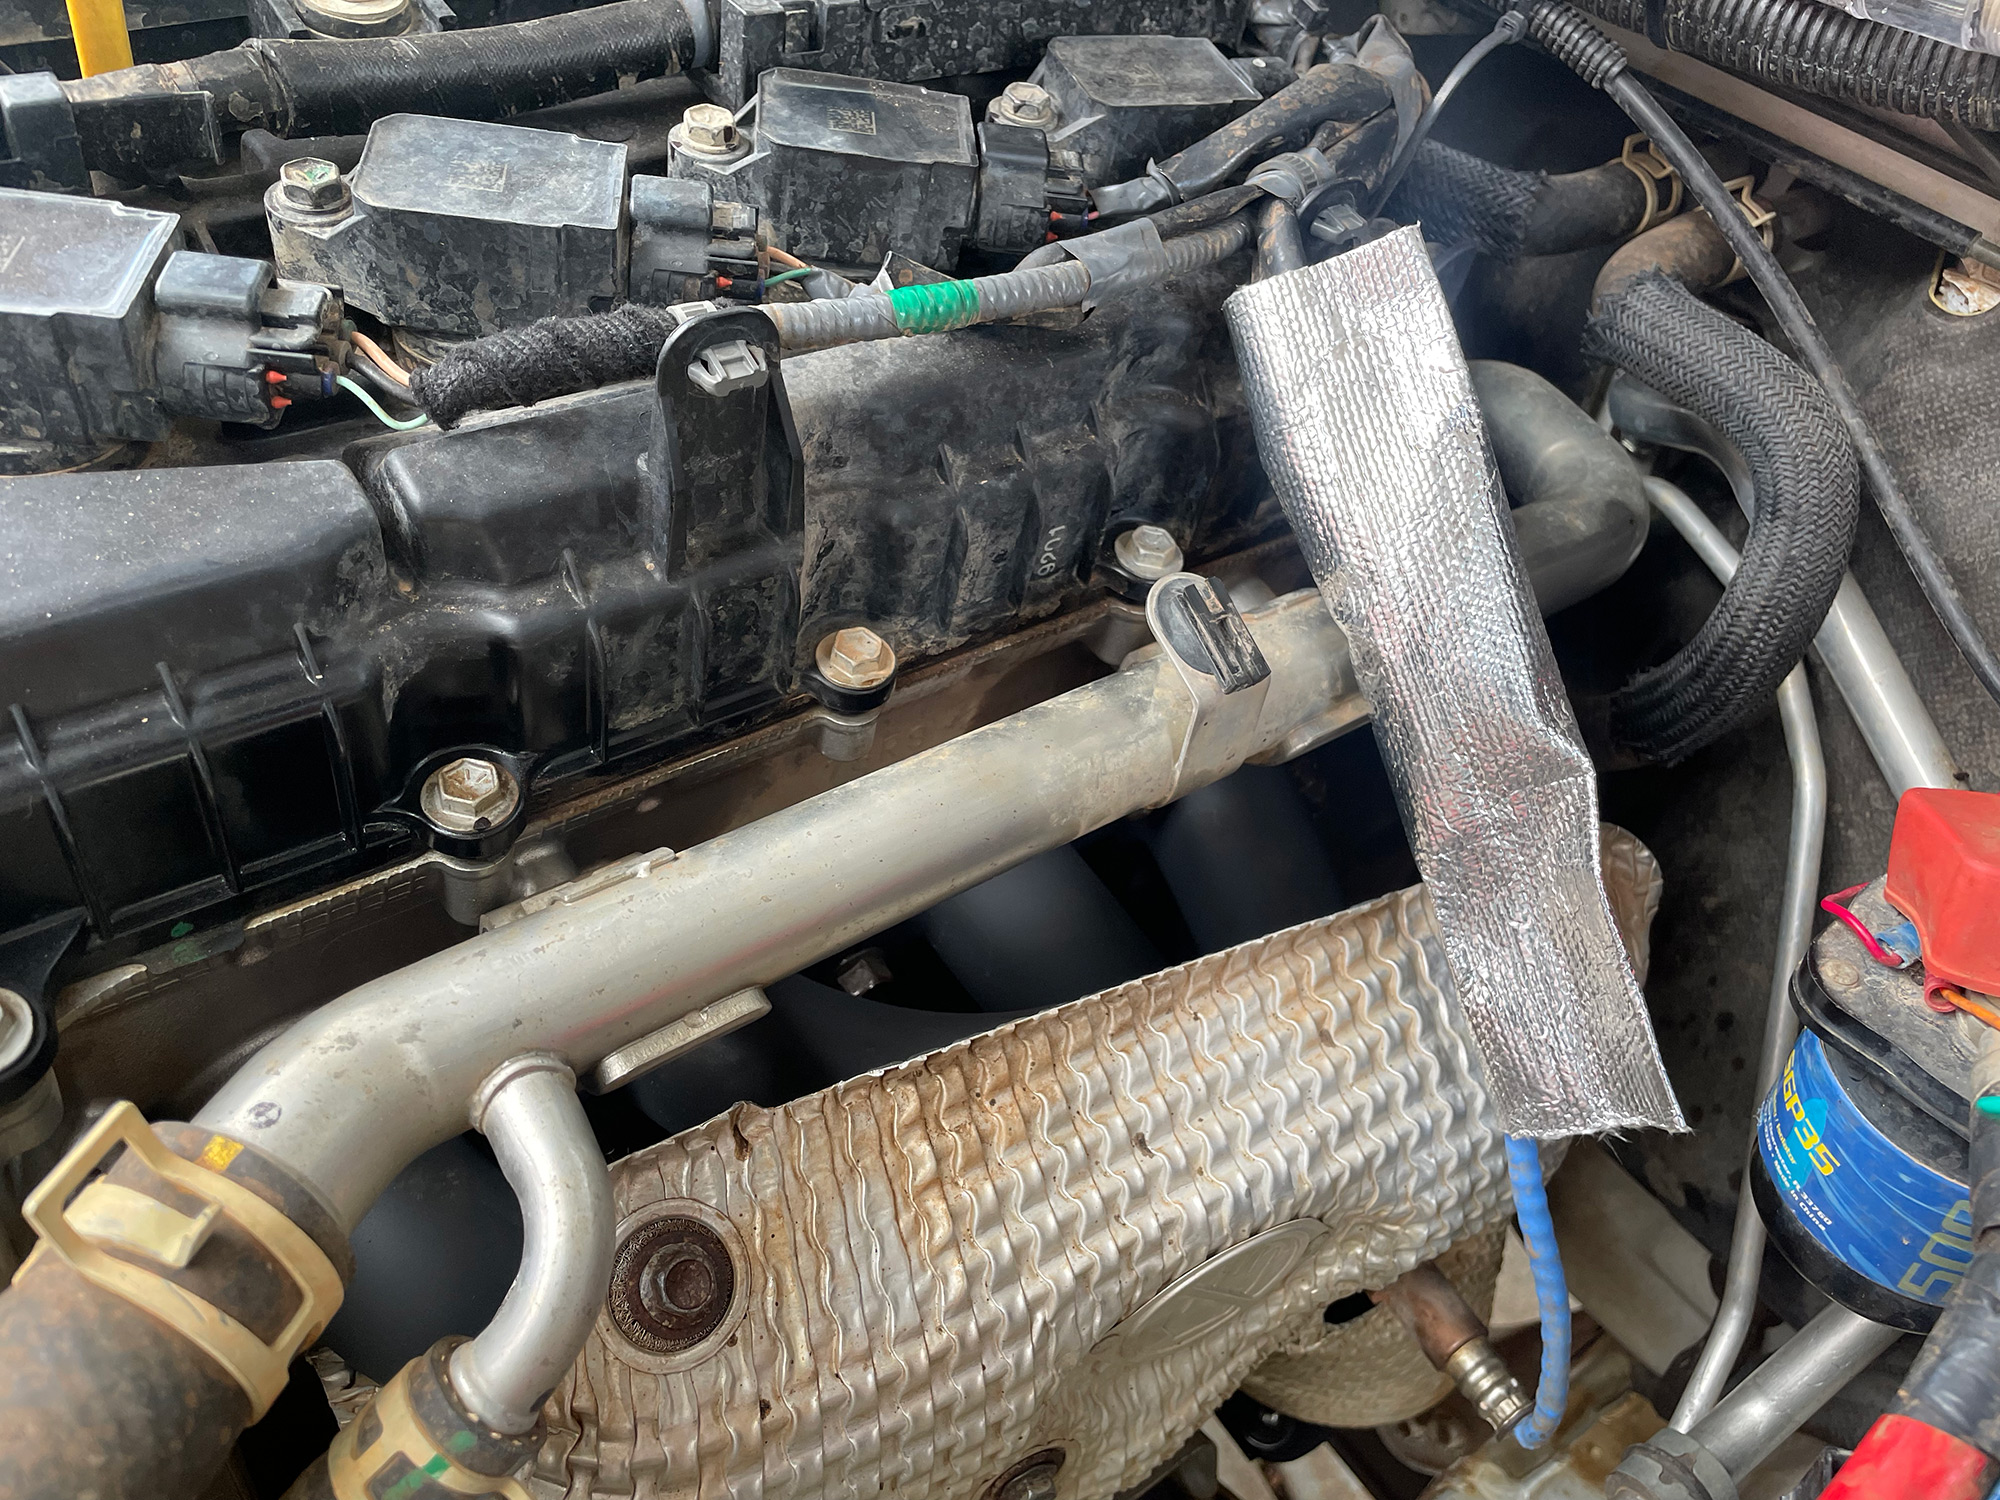
Even though my pics don’t show it in this order, undo the heat shield nuts now and remove the heat shielding. There are 4 10mm headed bolts for this. The front 2 are easy to get to, there’s one a bit underneath the heater pipe and then one down the back of the heat shield towards the firewall that’s a bit of a bastard to get to depending on the size of your hands.
In the previous pic you can see a bunch of oil like stuff – that’s where I’ve used a spray lubricant (in this case, Reducteur H-72 to break any corrosion and then Inox as the penetrant) to help release stuff. The reason I get the heat shield off first is to spray and soak all of the manifold bolts now, while I then go and work under the car to release the bolts to the rest of the exhaust system.
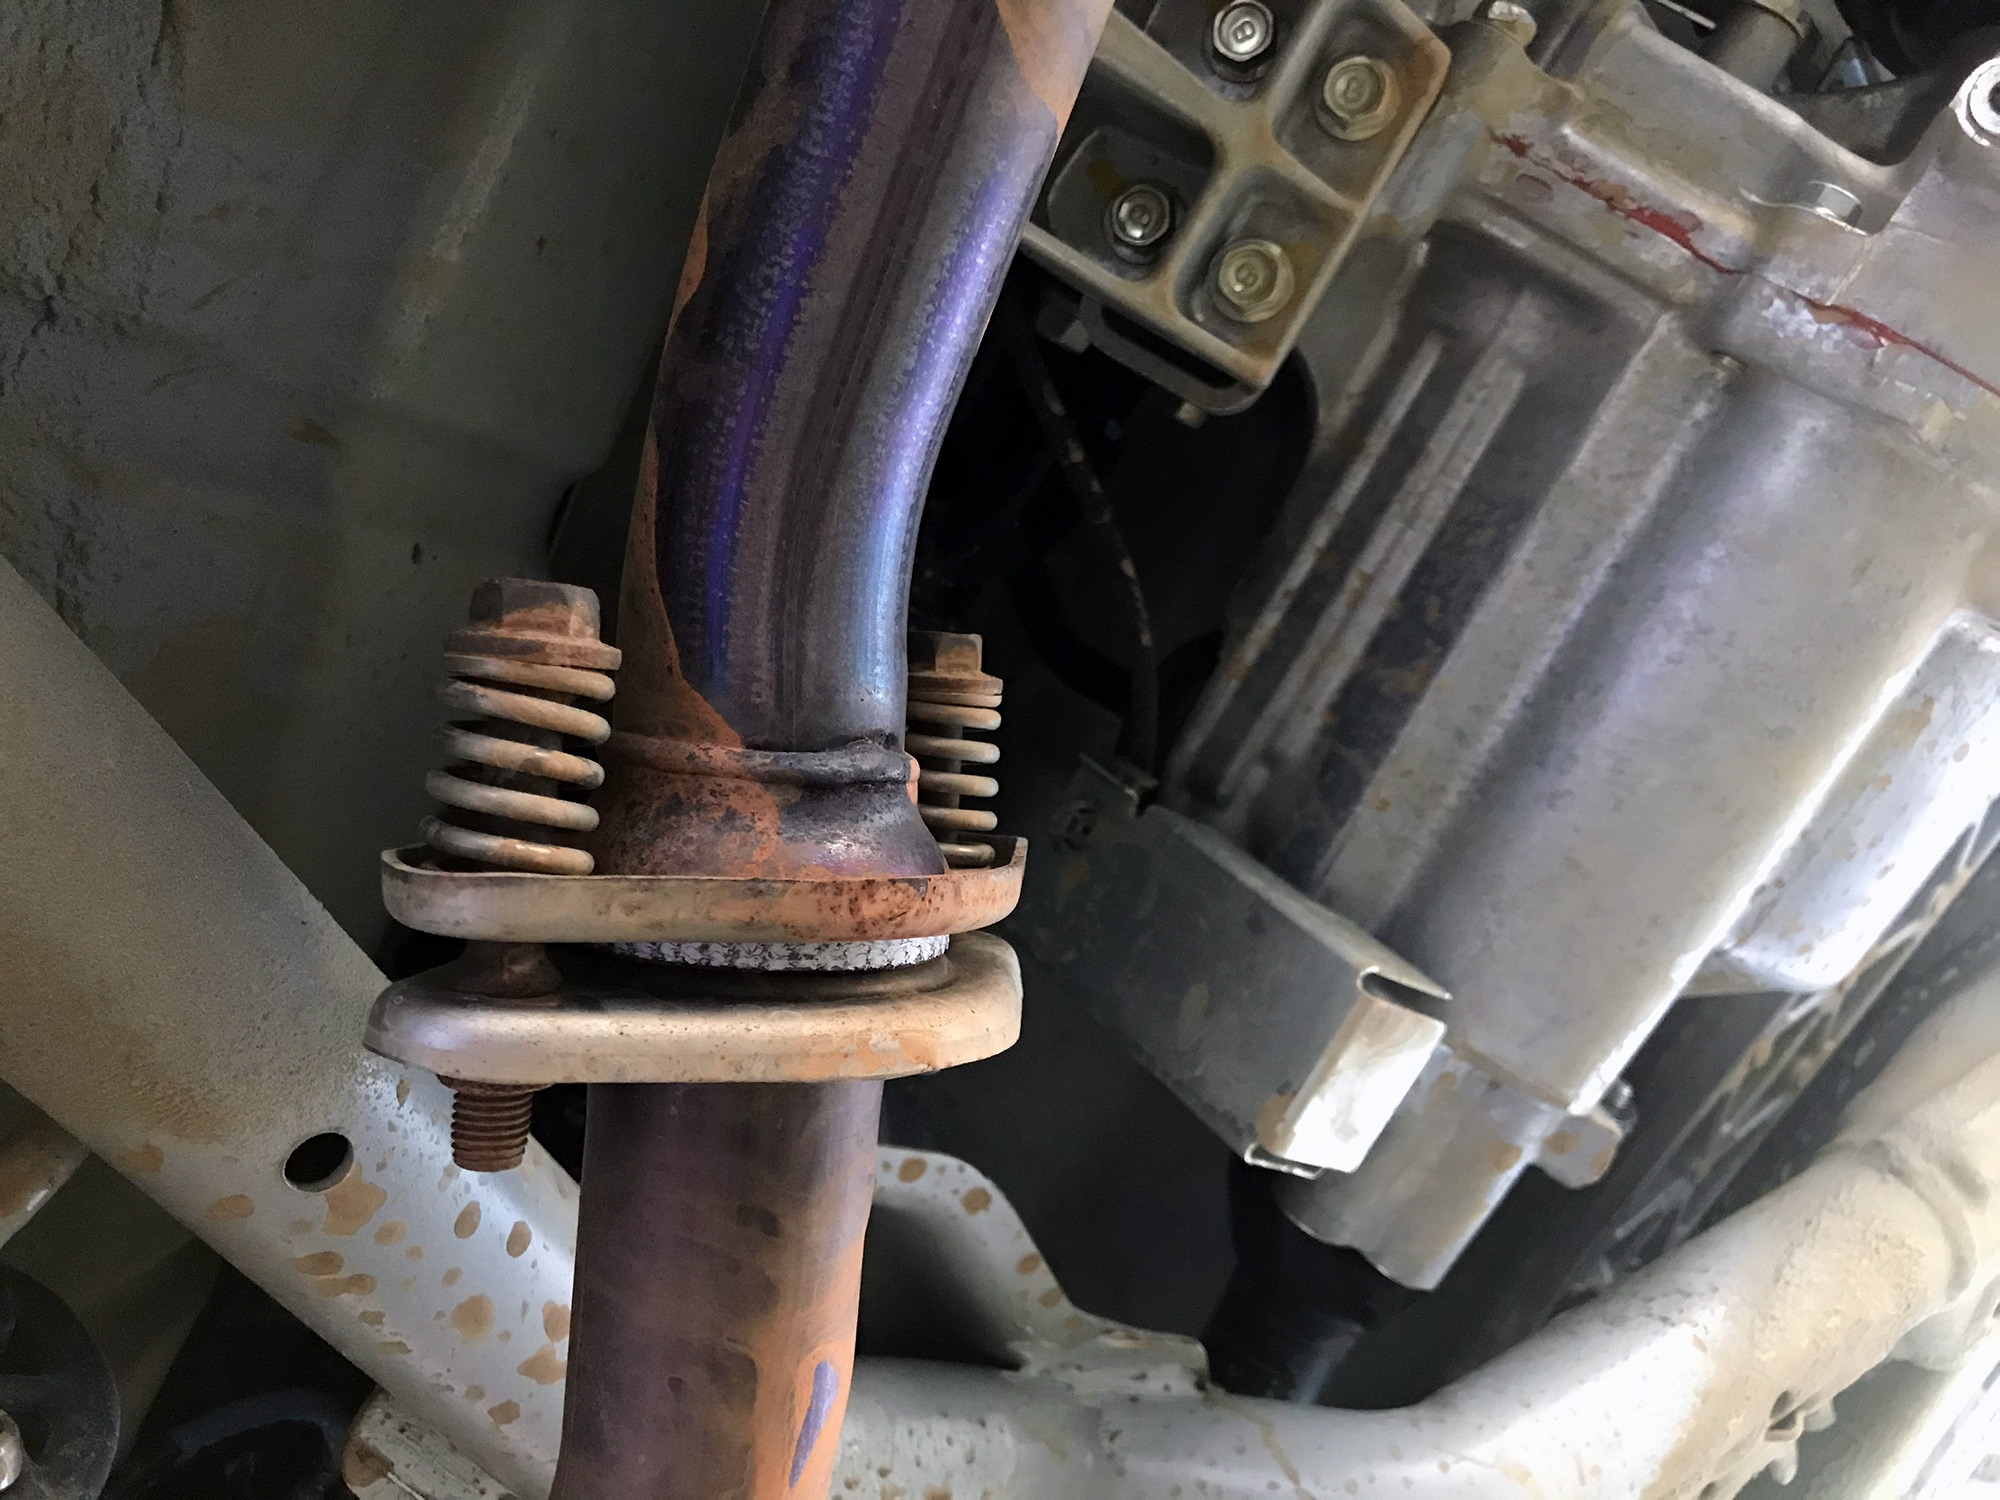
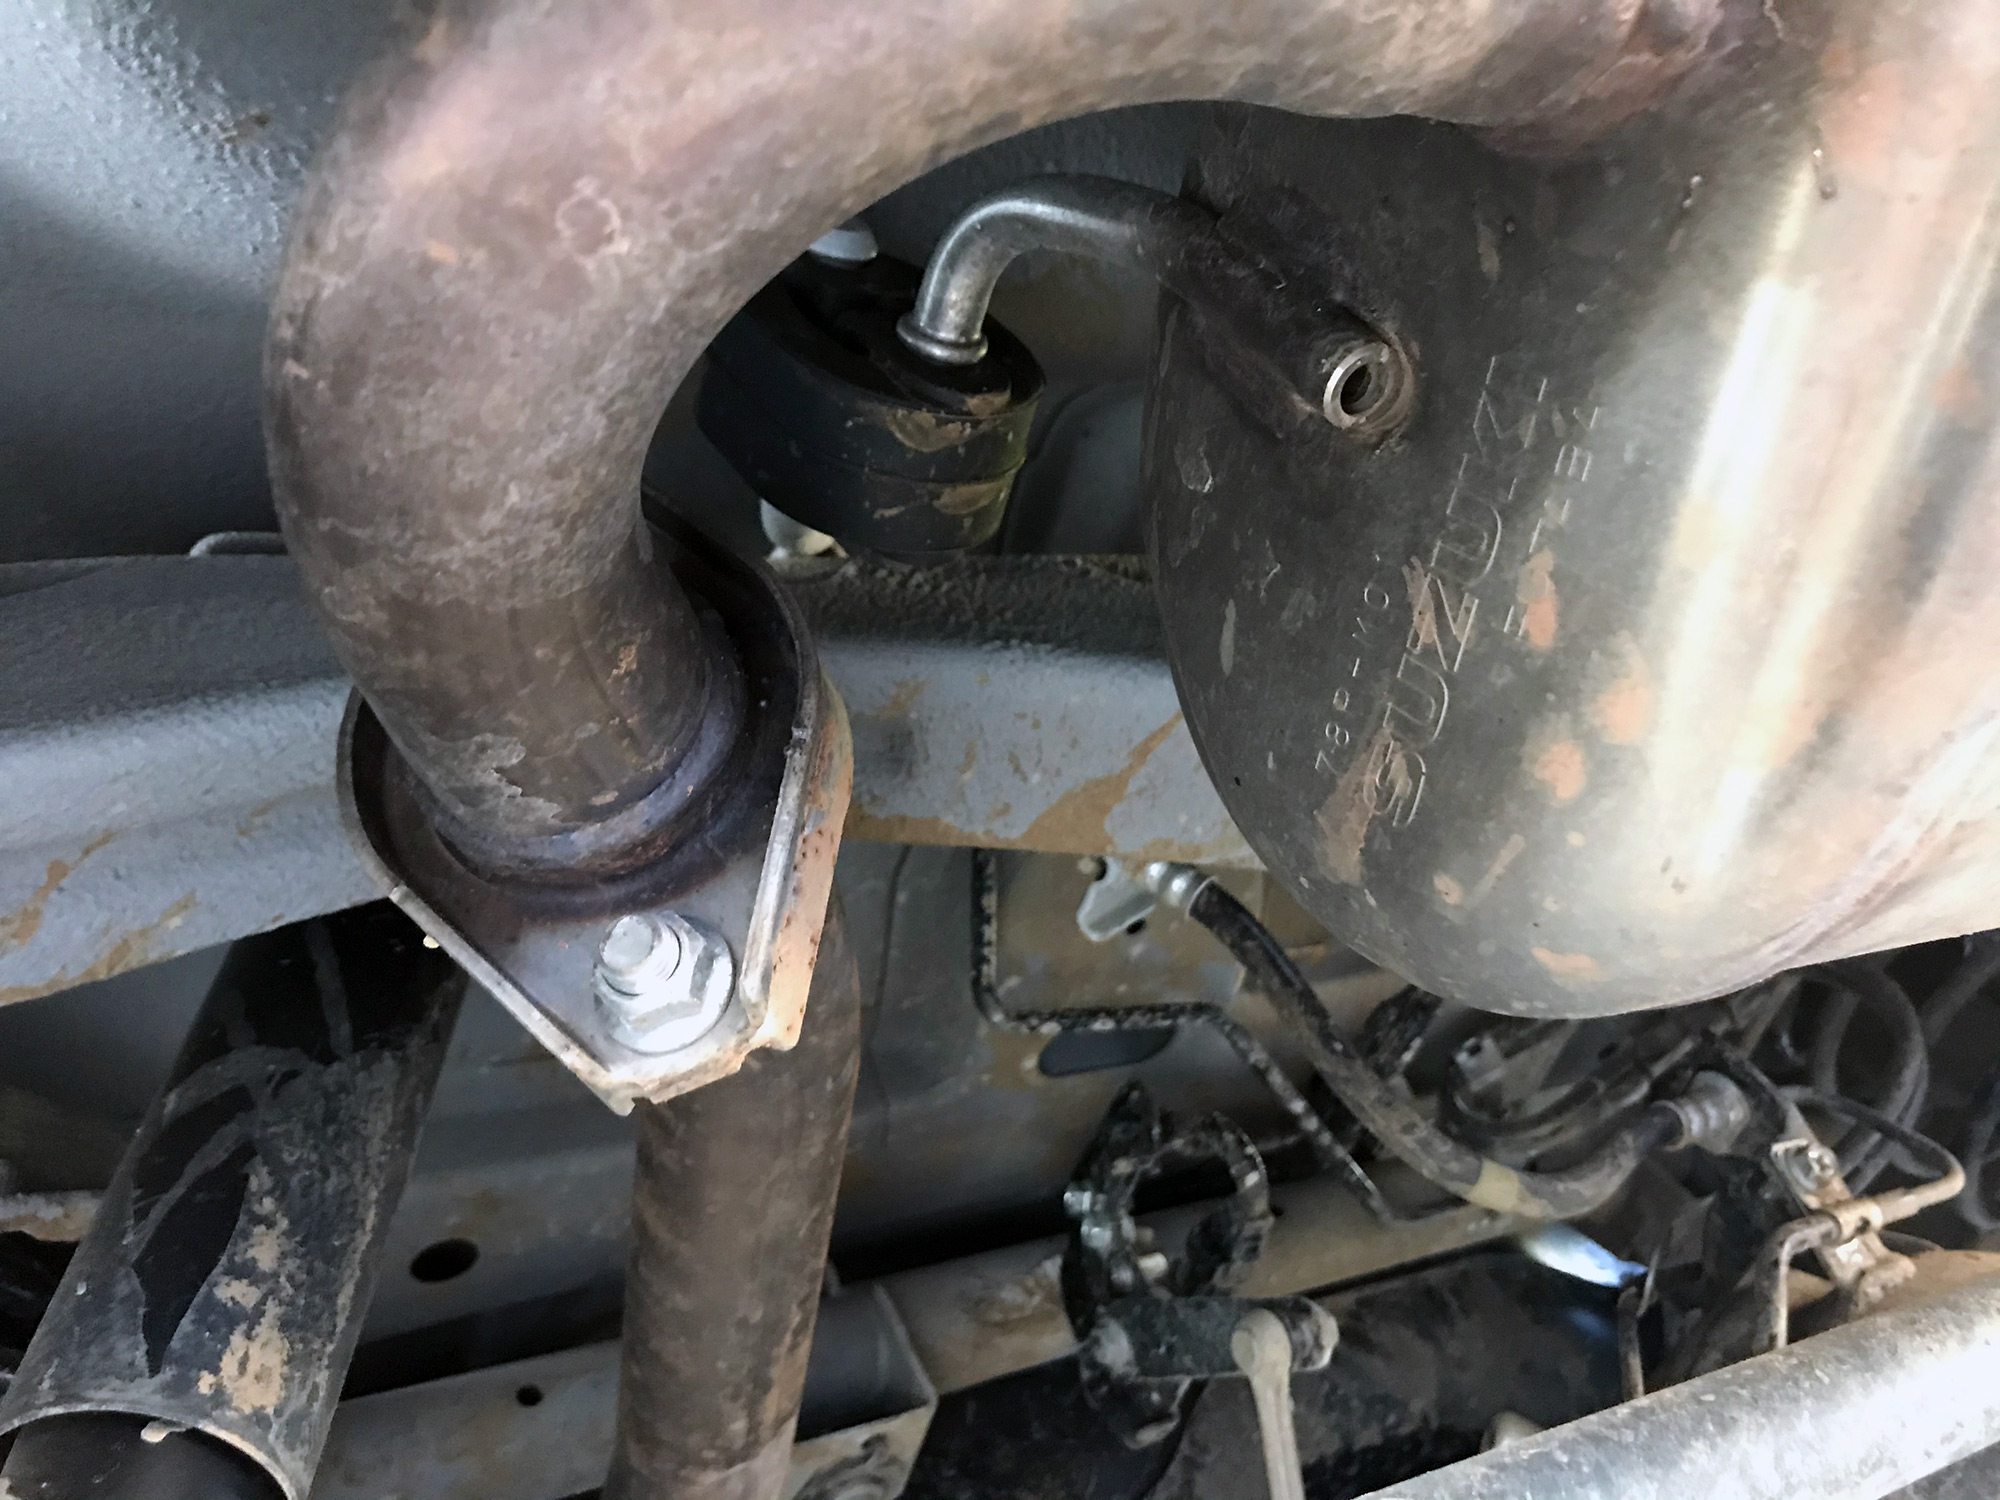
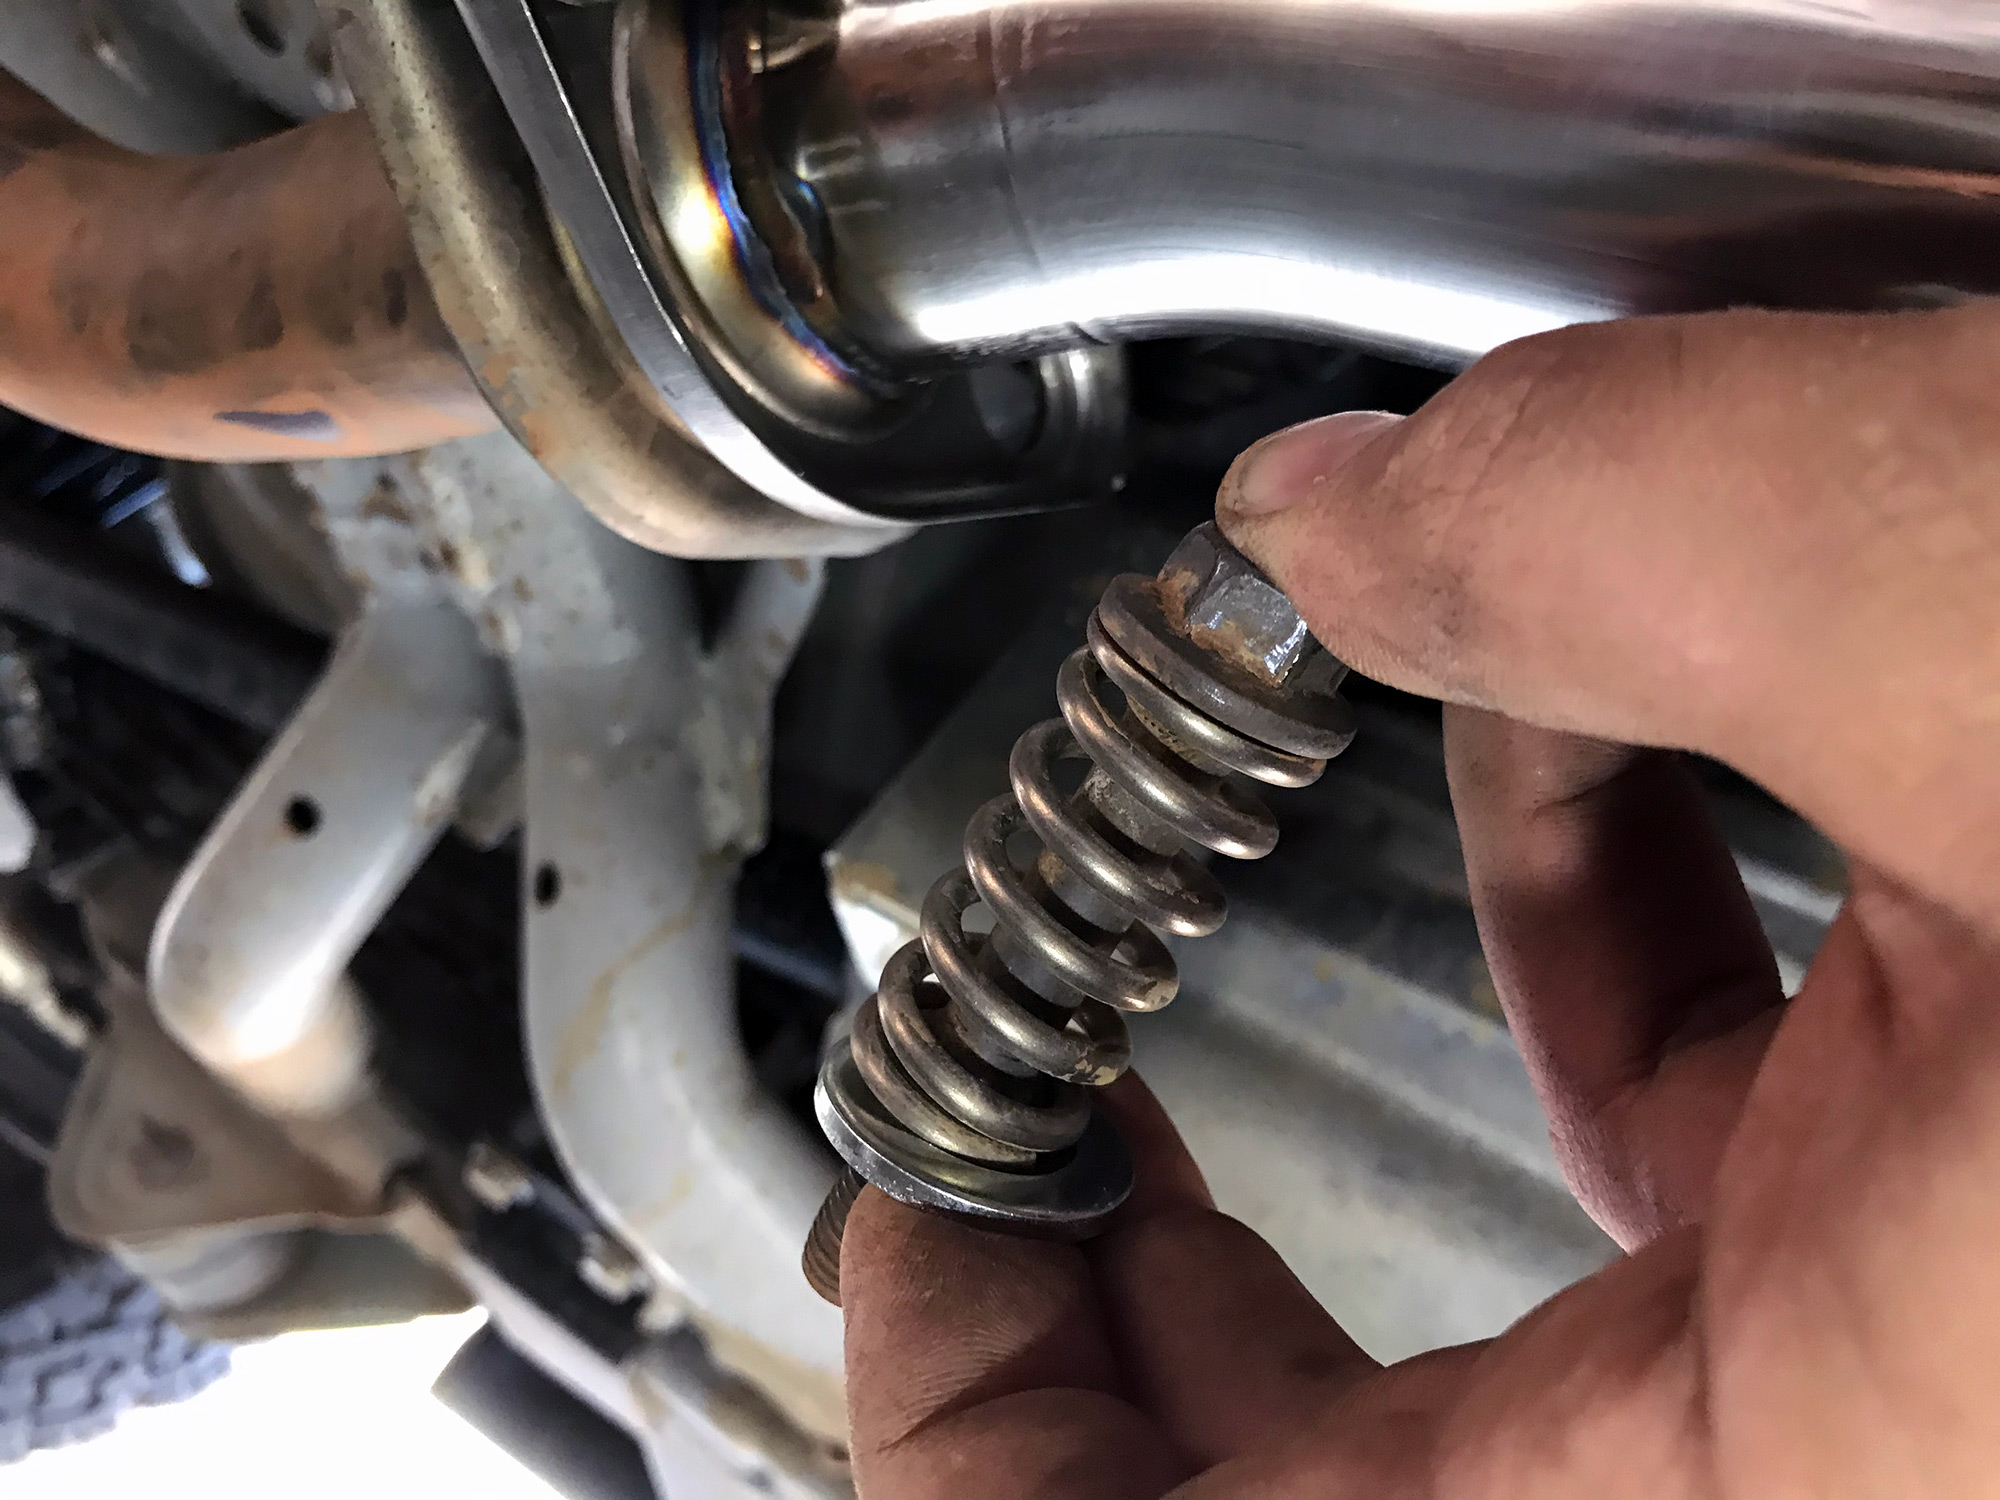
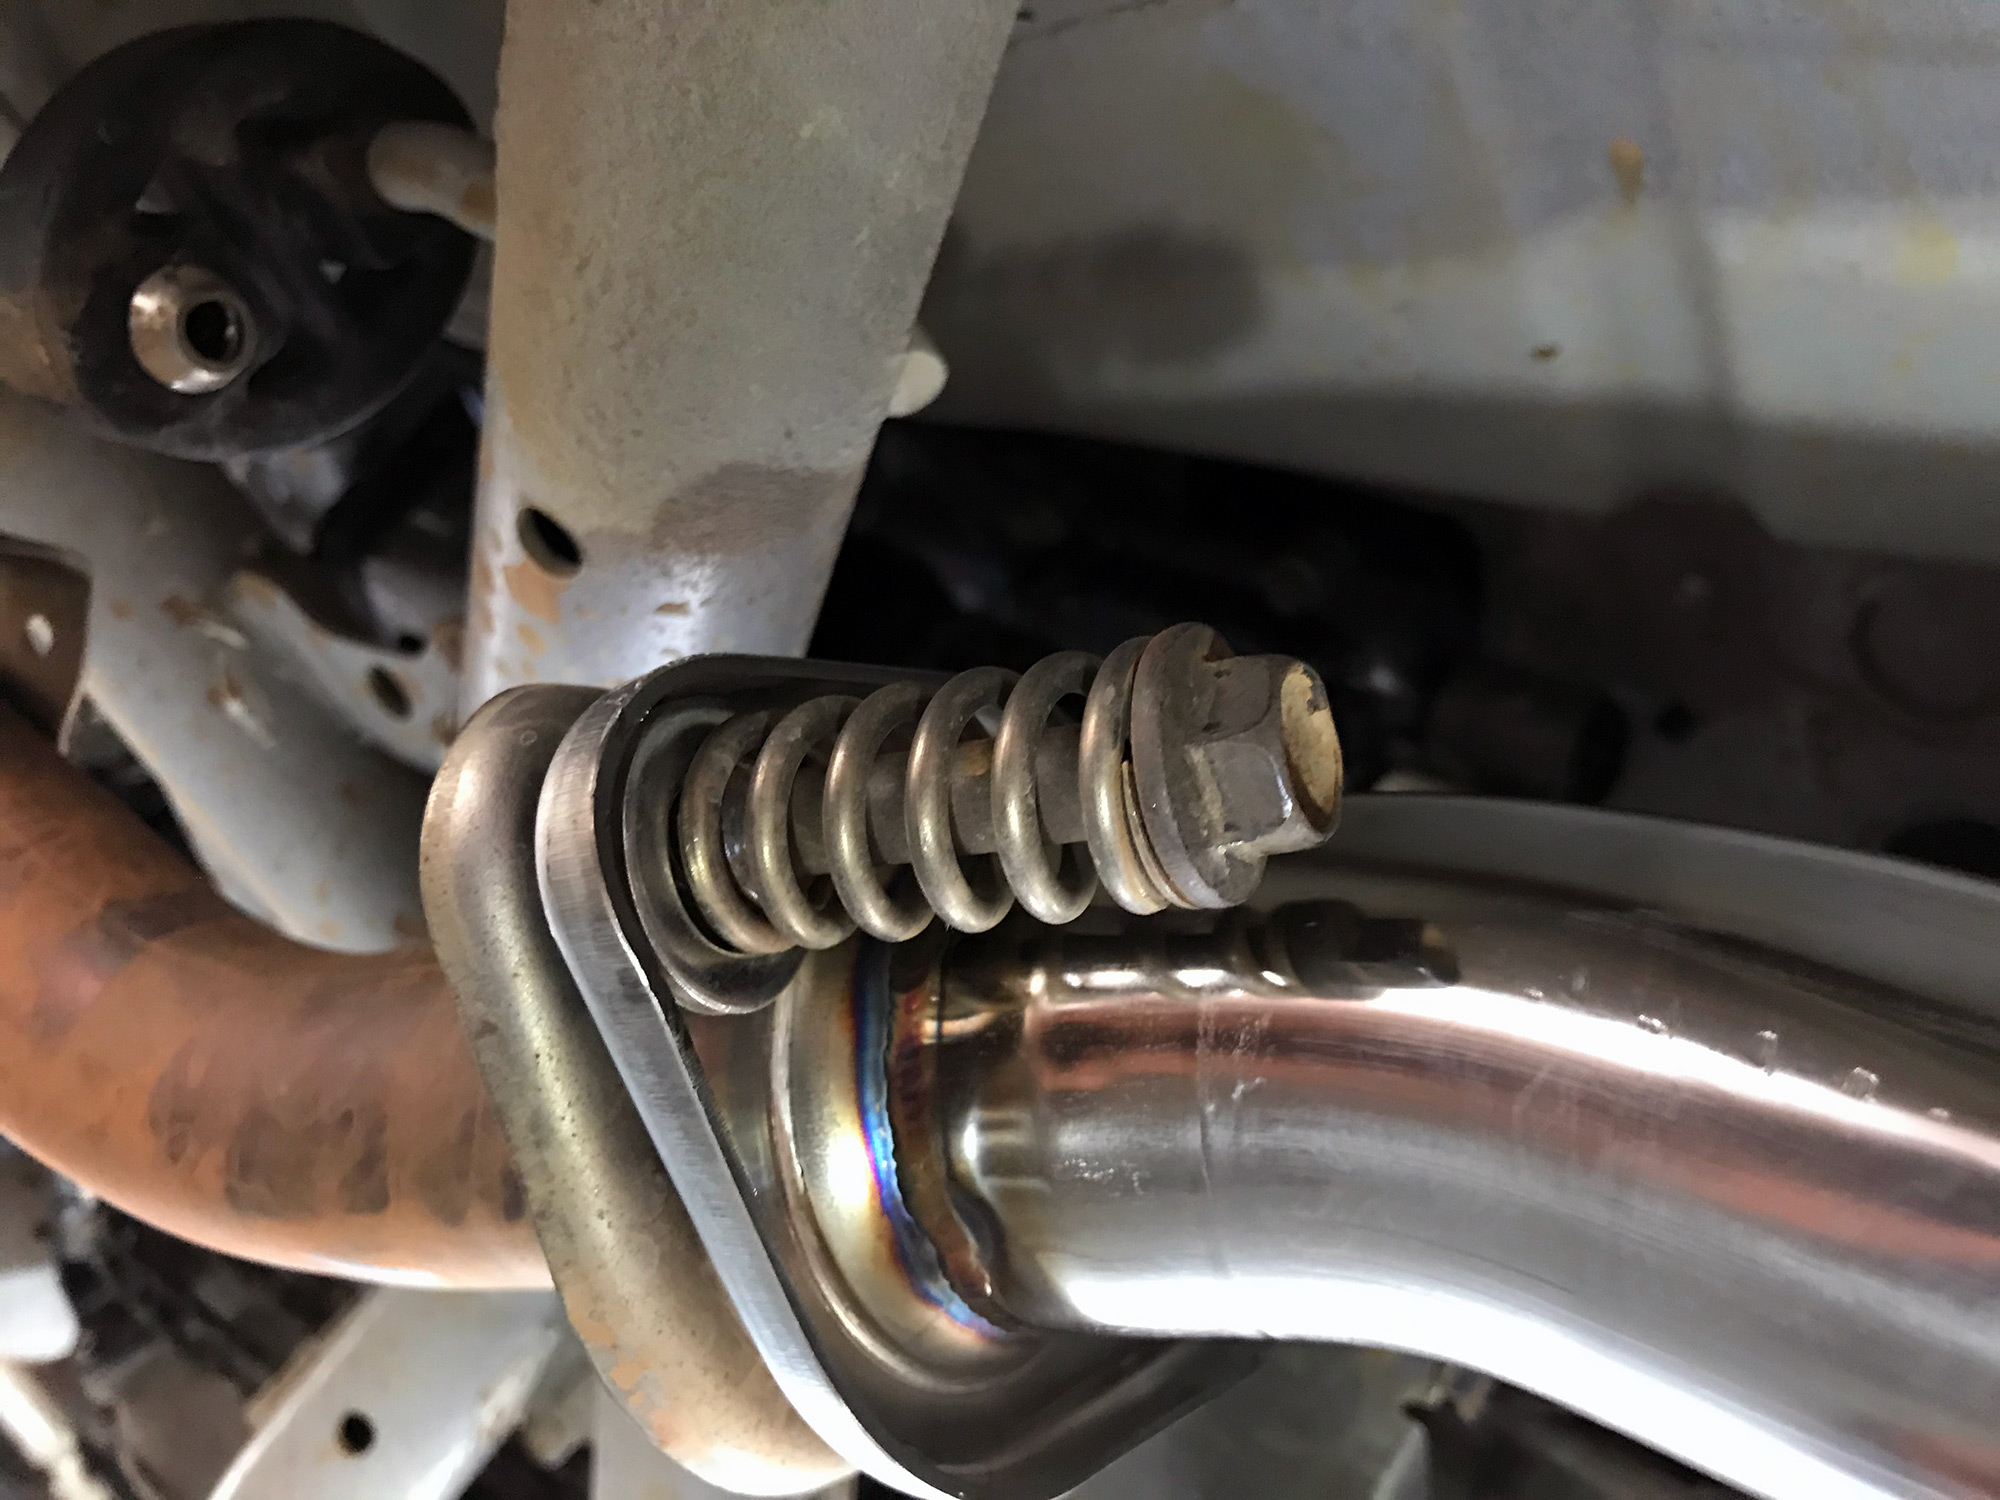
So spray down the manifold bolts, then get under the car and do the same to the bolts that connect the manifold to the 2nd cat pipe. These bolts with the springs were pretty tight, not unexpected but just something to bear in mind. I ended up using a good long breaker bar to make it easy to get them undone.
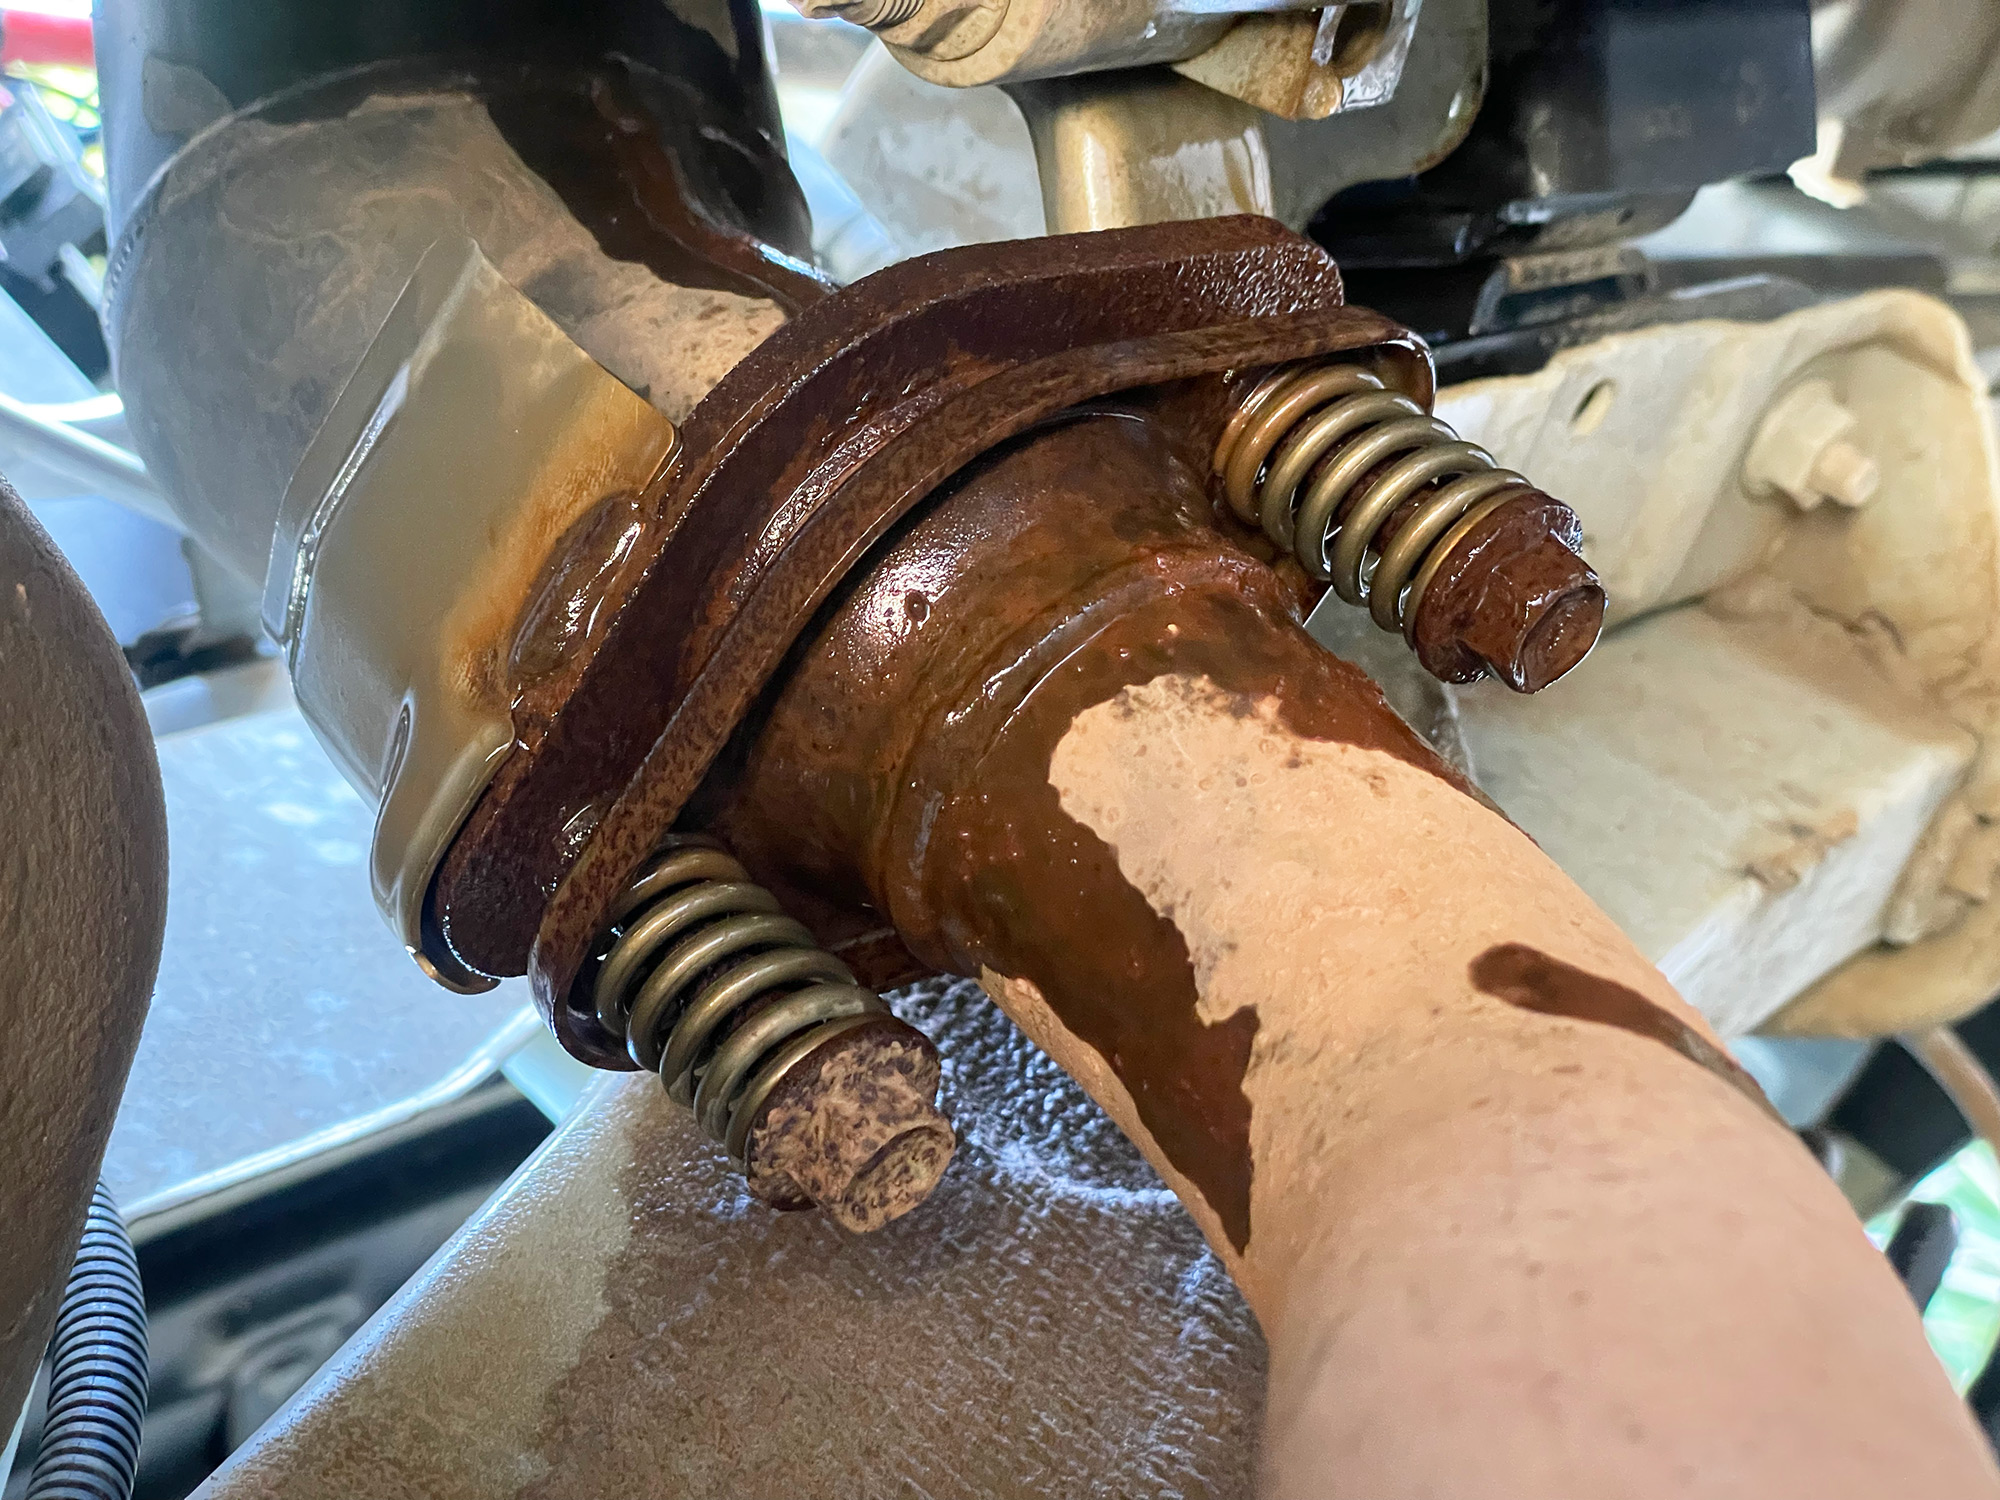
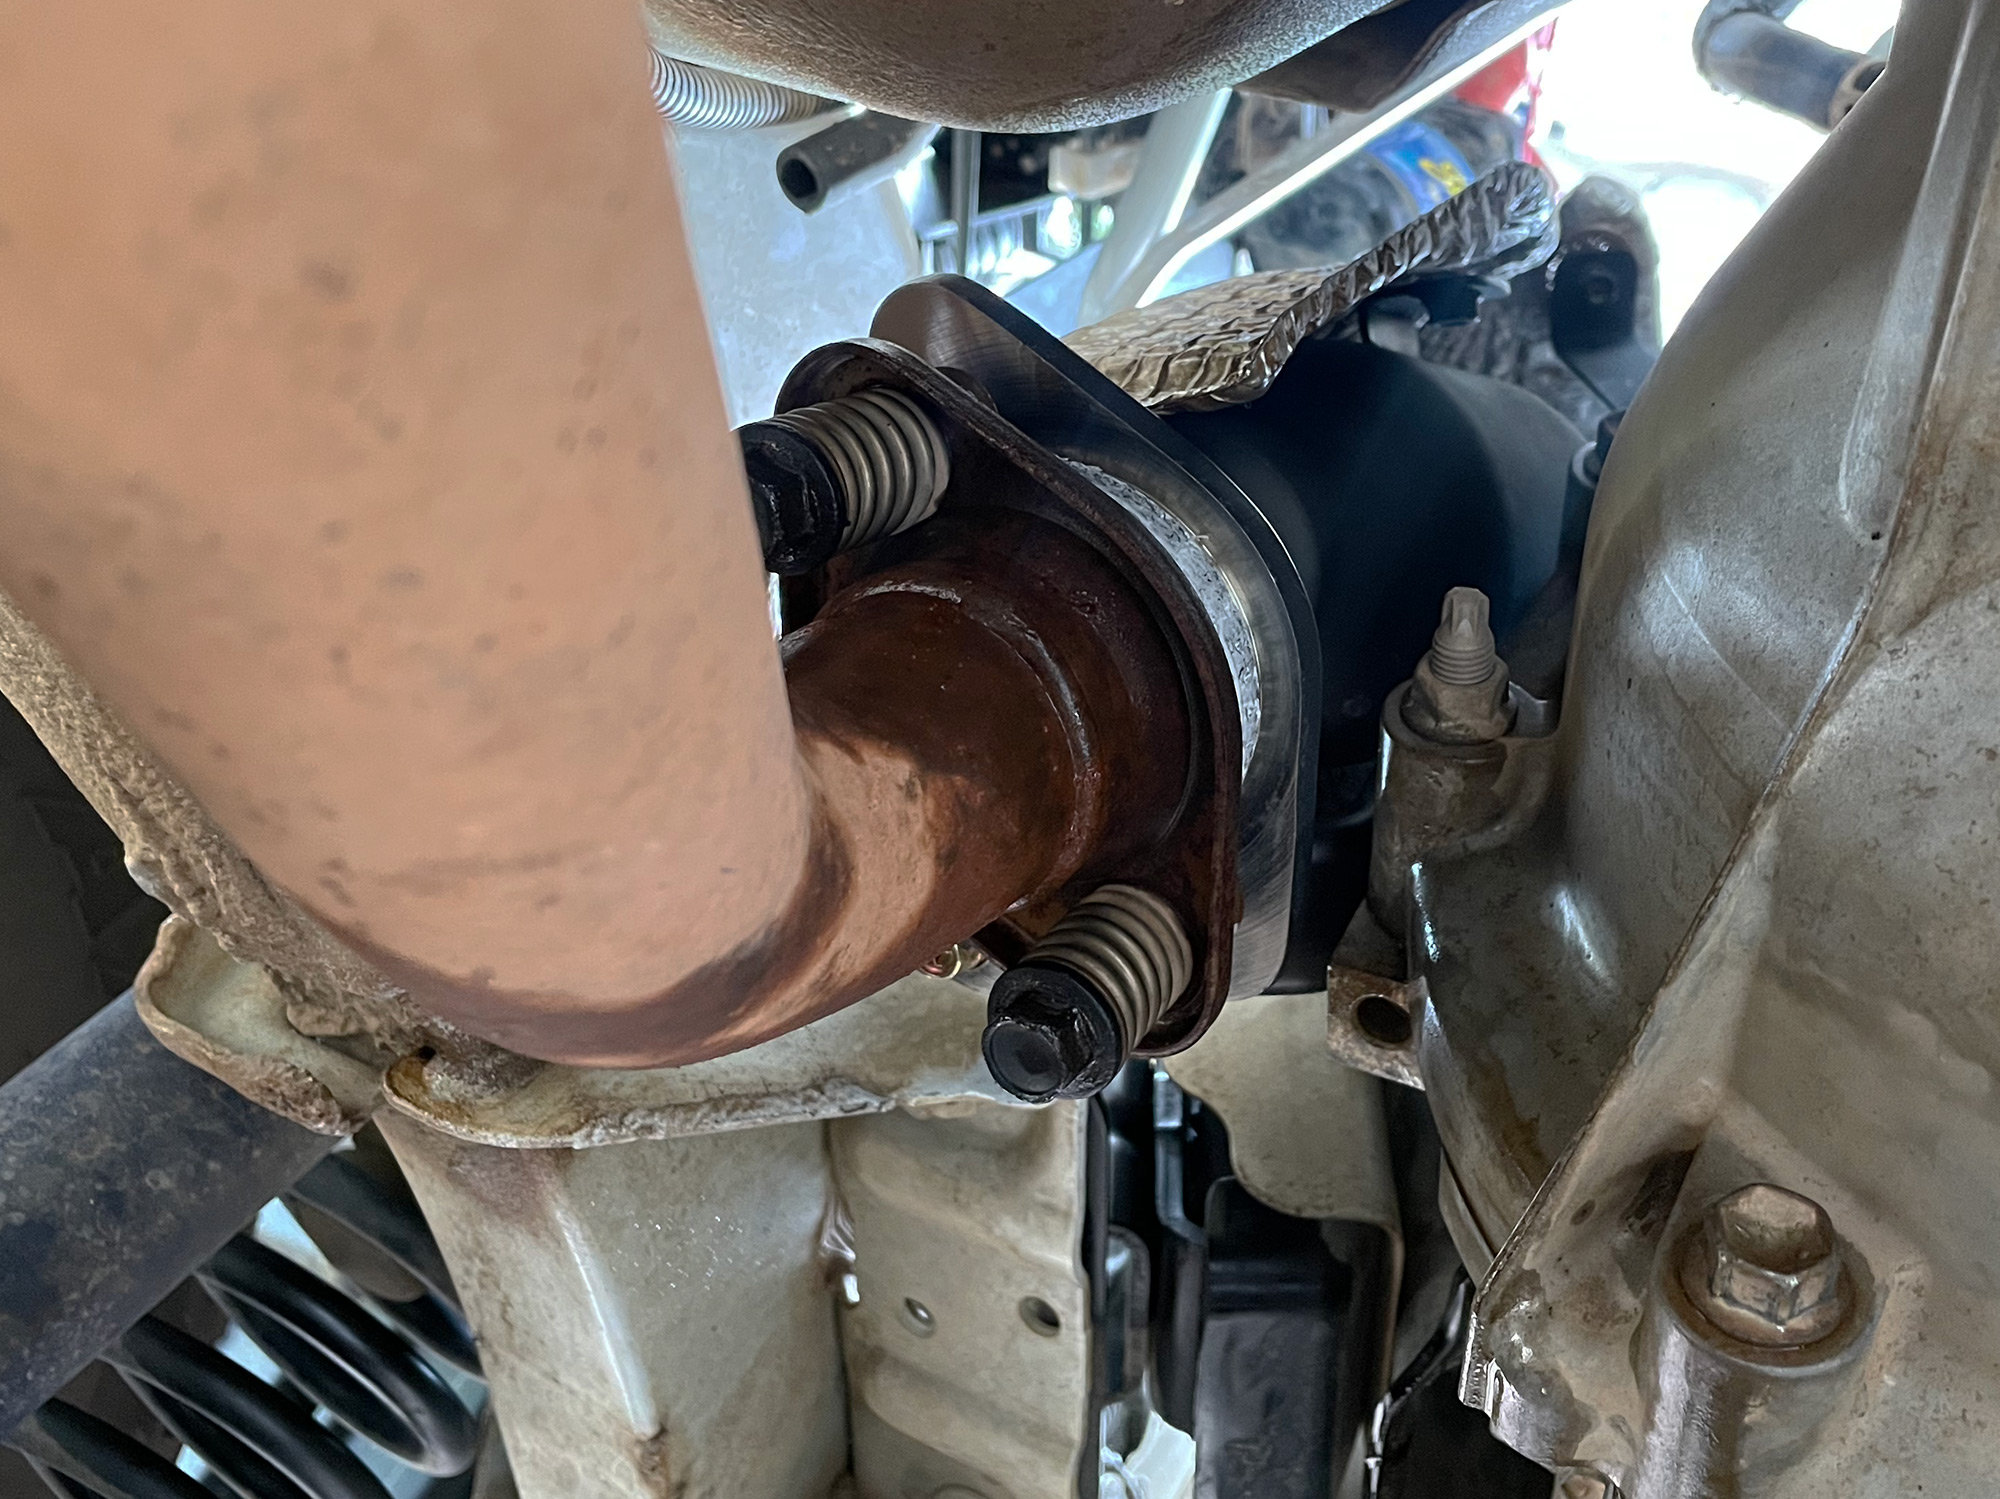
There is a third bolt visible down at the bottom, but this is welded to the factory headers and acts as the bolt for the bracket that connects the headers at the bottom to the engine block. This is most visible from above.
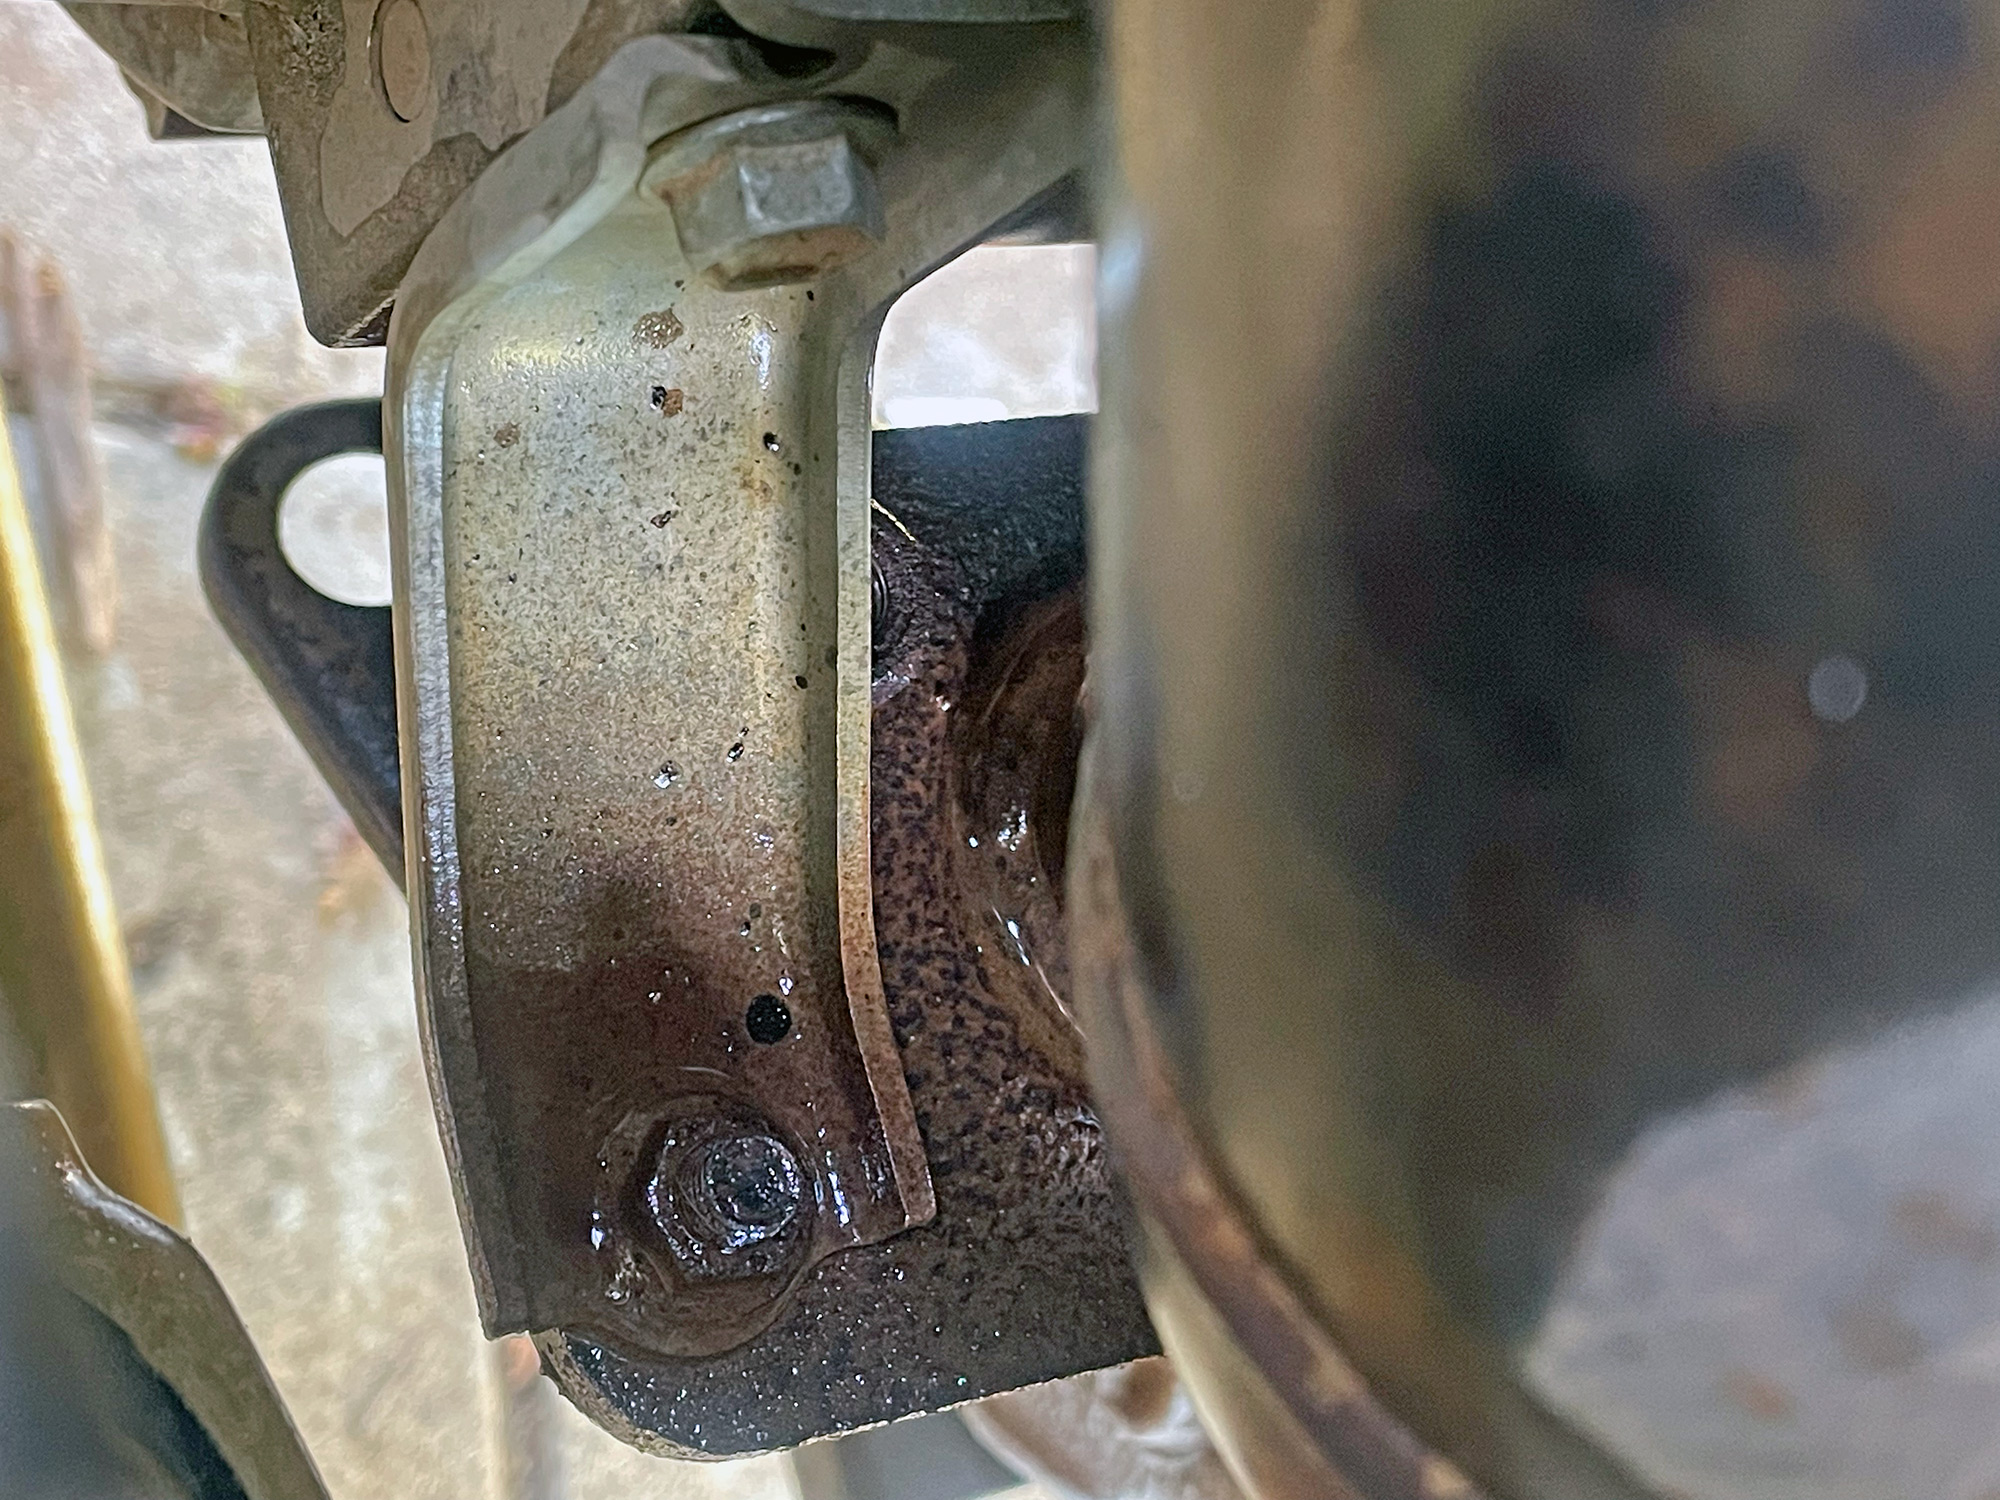
I didn’t find this nut easy to get to, so I ended up undoing the upper bolt that connects the bracket to the engine block instead. This was easiest done from underneath the car with a smallish ratchet (it’s a 12mm headed bolt).
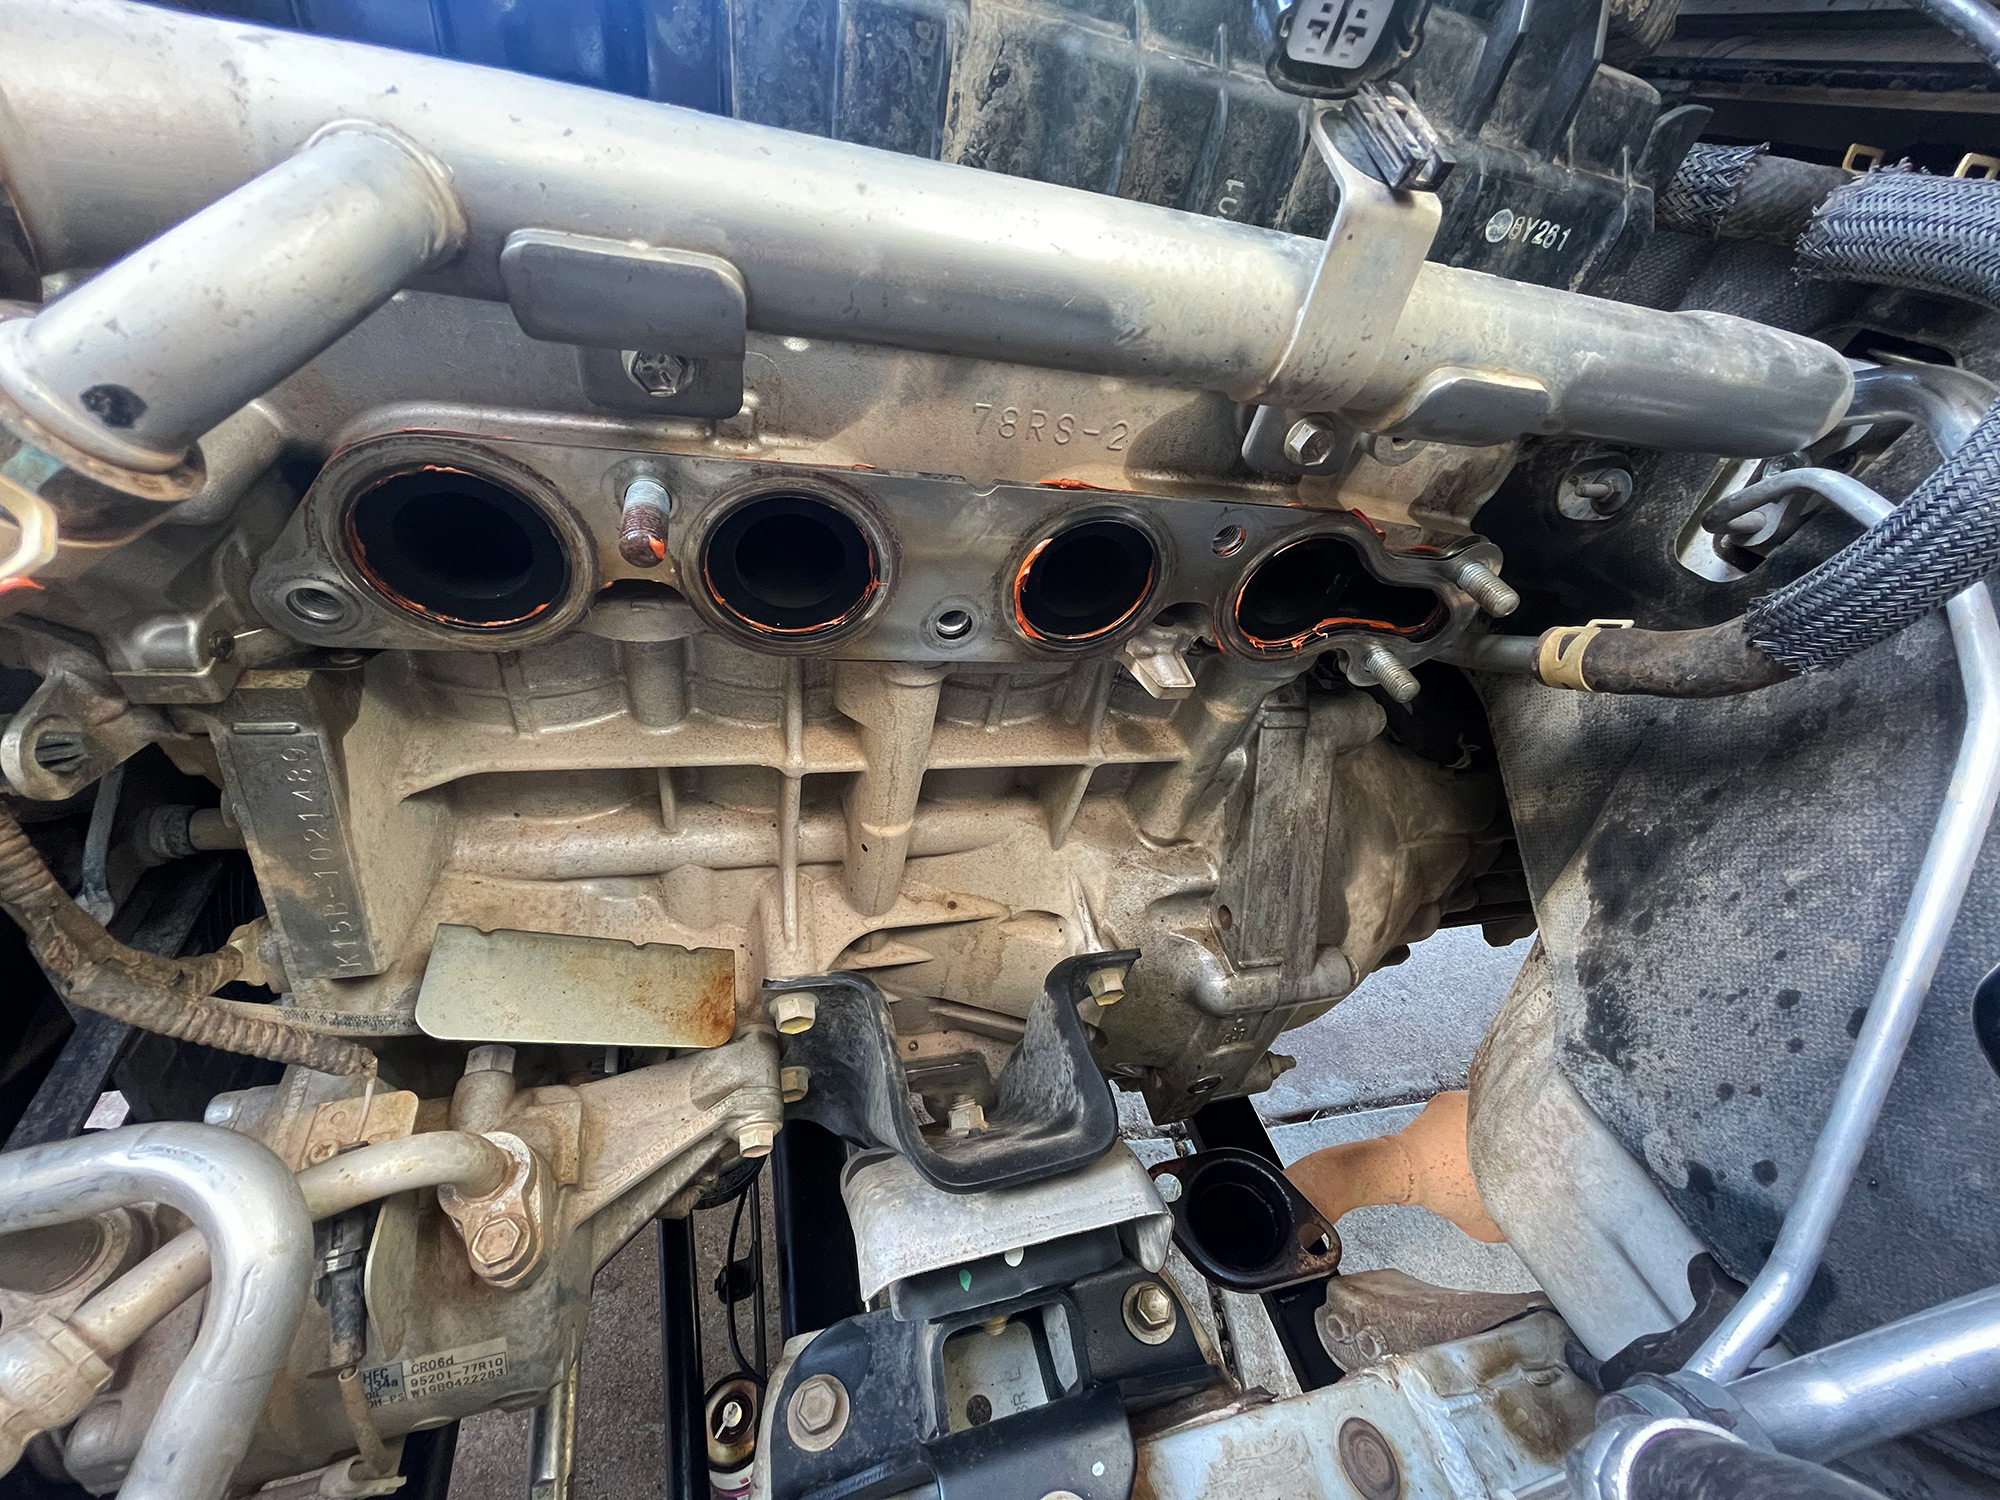
Now all of the lower bolts are undone, you can go back up to the top and undo the manifold to cylinder head nuts and bolts.
The manifold bolts and nuts were pretty tight. Again this isn’t uncommon: exhaust manifolds get hot and this promotes unhappiness with bolts. I used a large breaker bar (carefully) to break them loose, and then slowly worked them out with a ratchet.
One thing to bear in mind is that it can help to slowly back out bolts and nuts like this. Just get them loose and undone a little bit, and then do them back up a little bit, and slowly work them off back-and-forth like this. This helps make sure that you don’t break bolts and studs against the inevitable corrosion that occurs around exhaust systems.
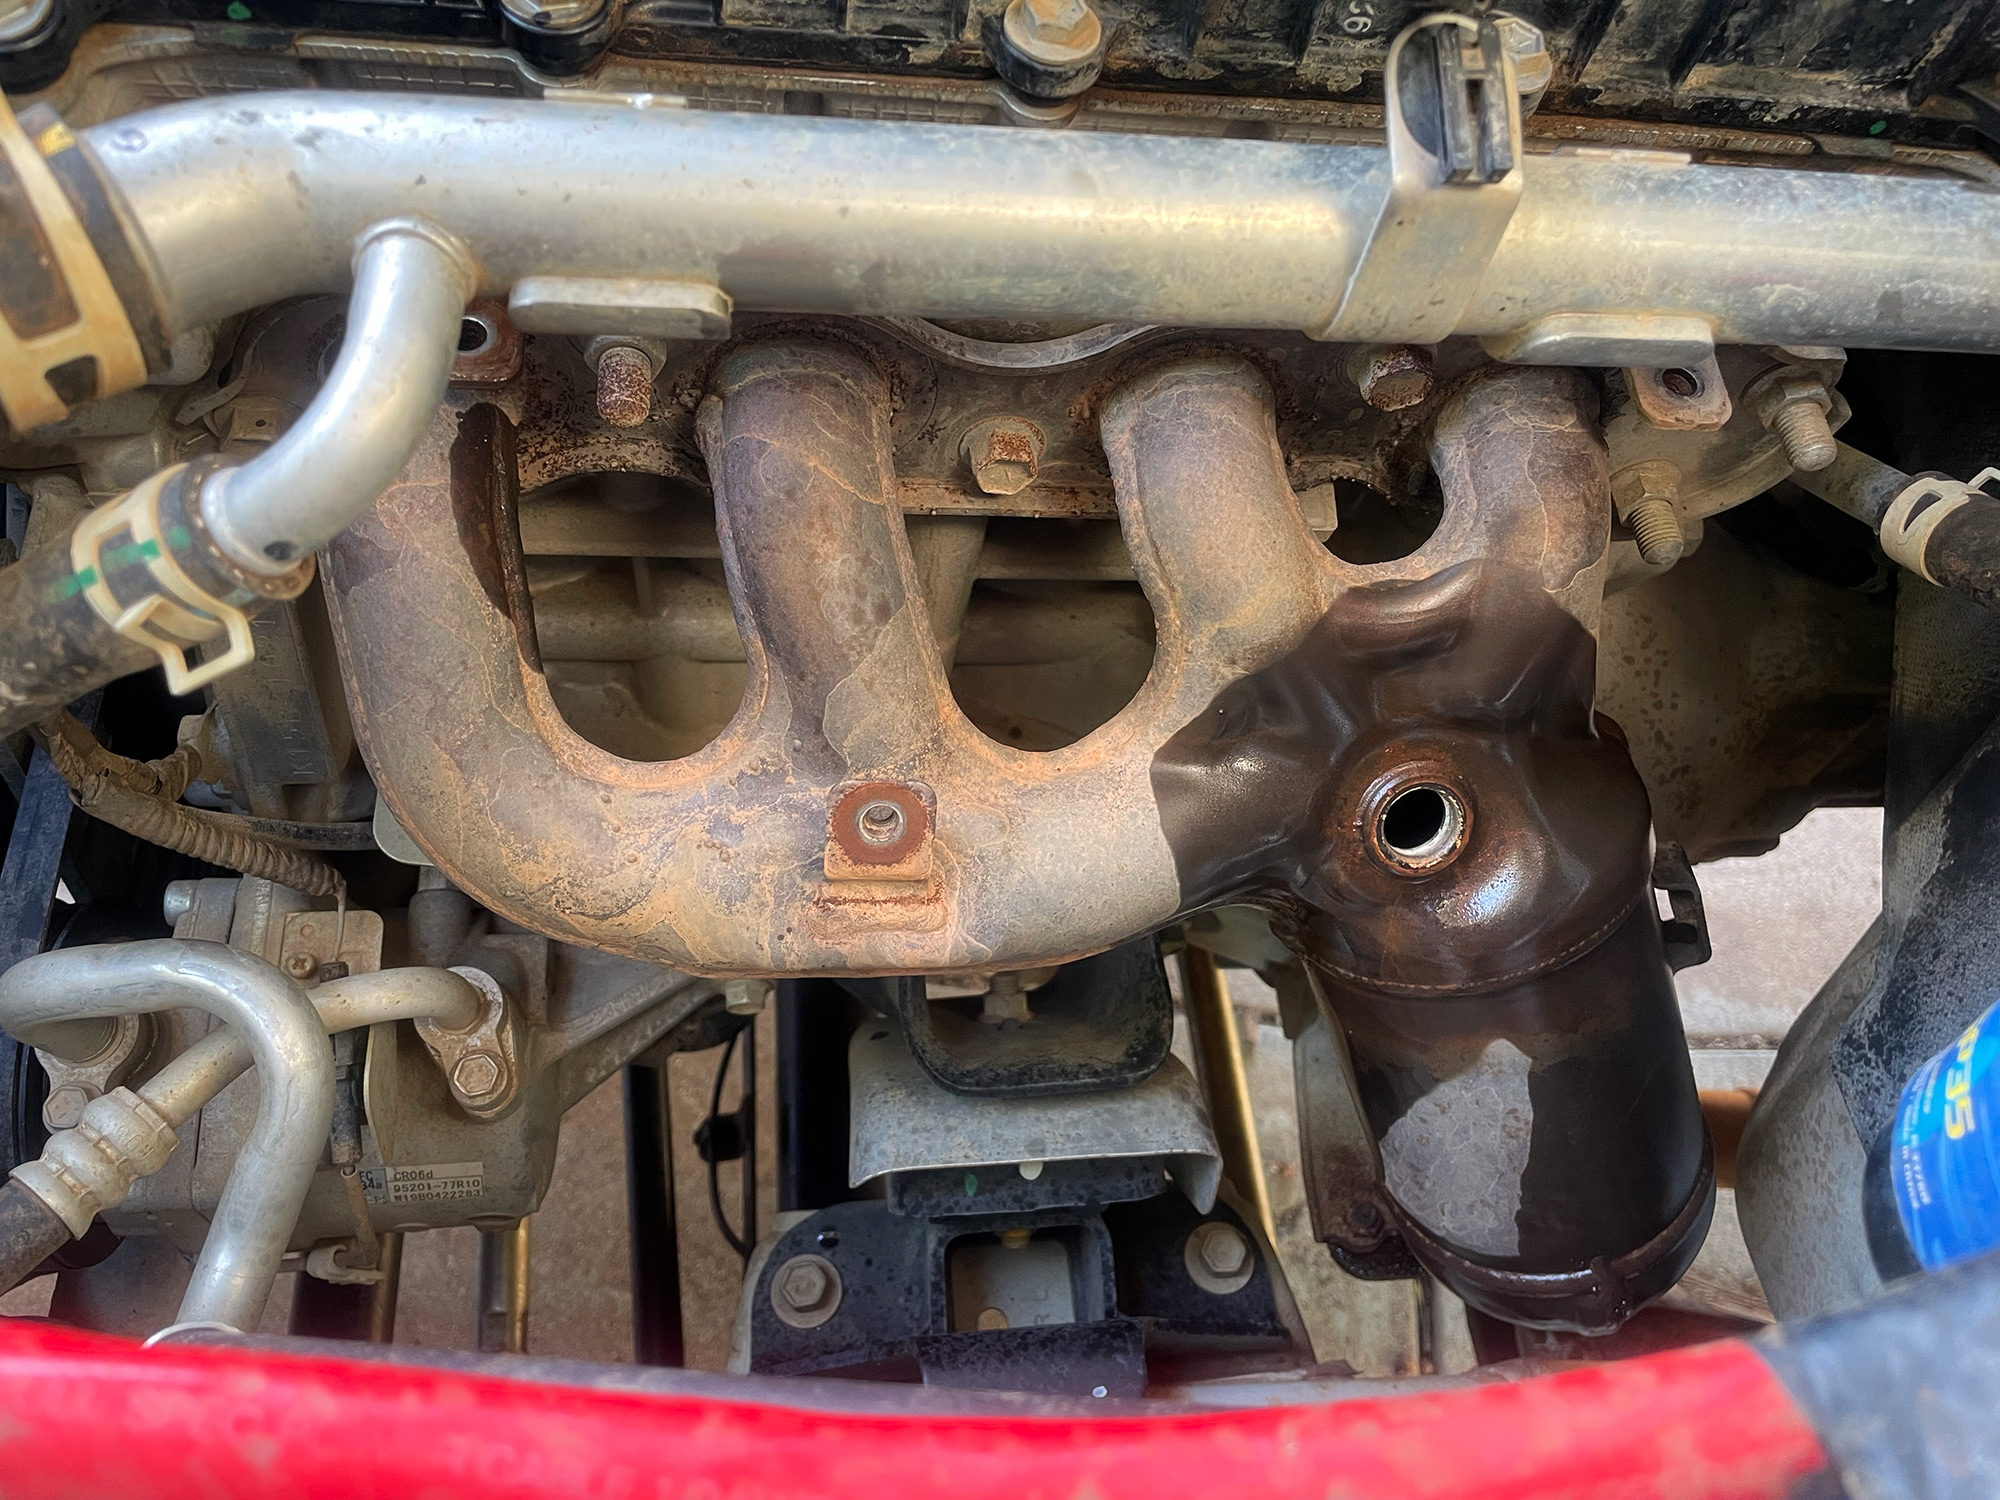
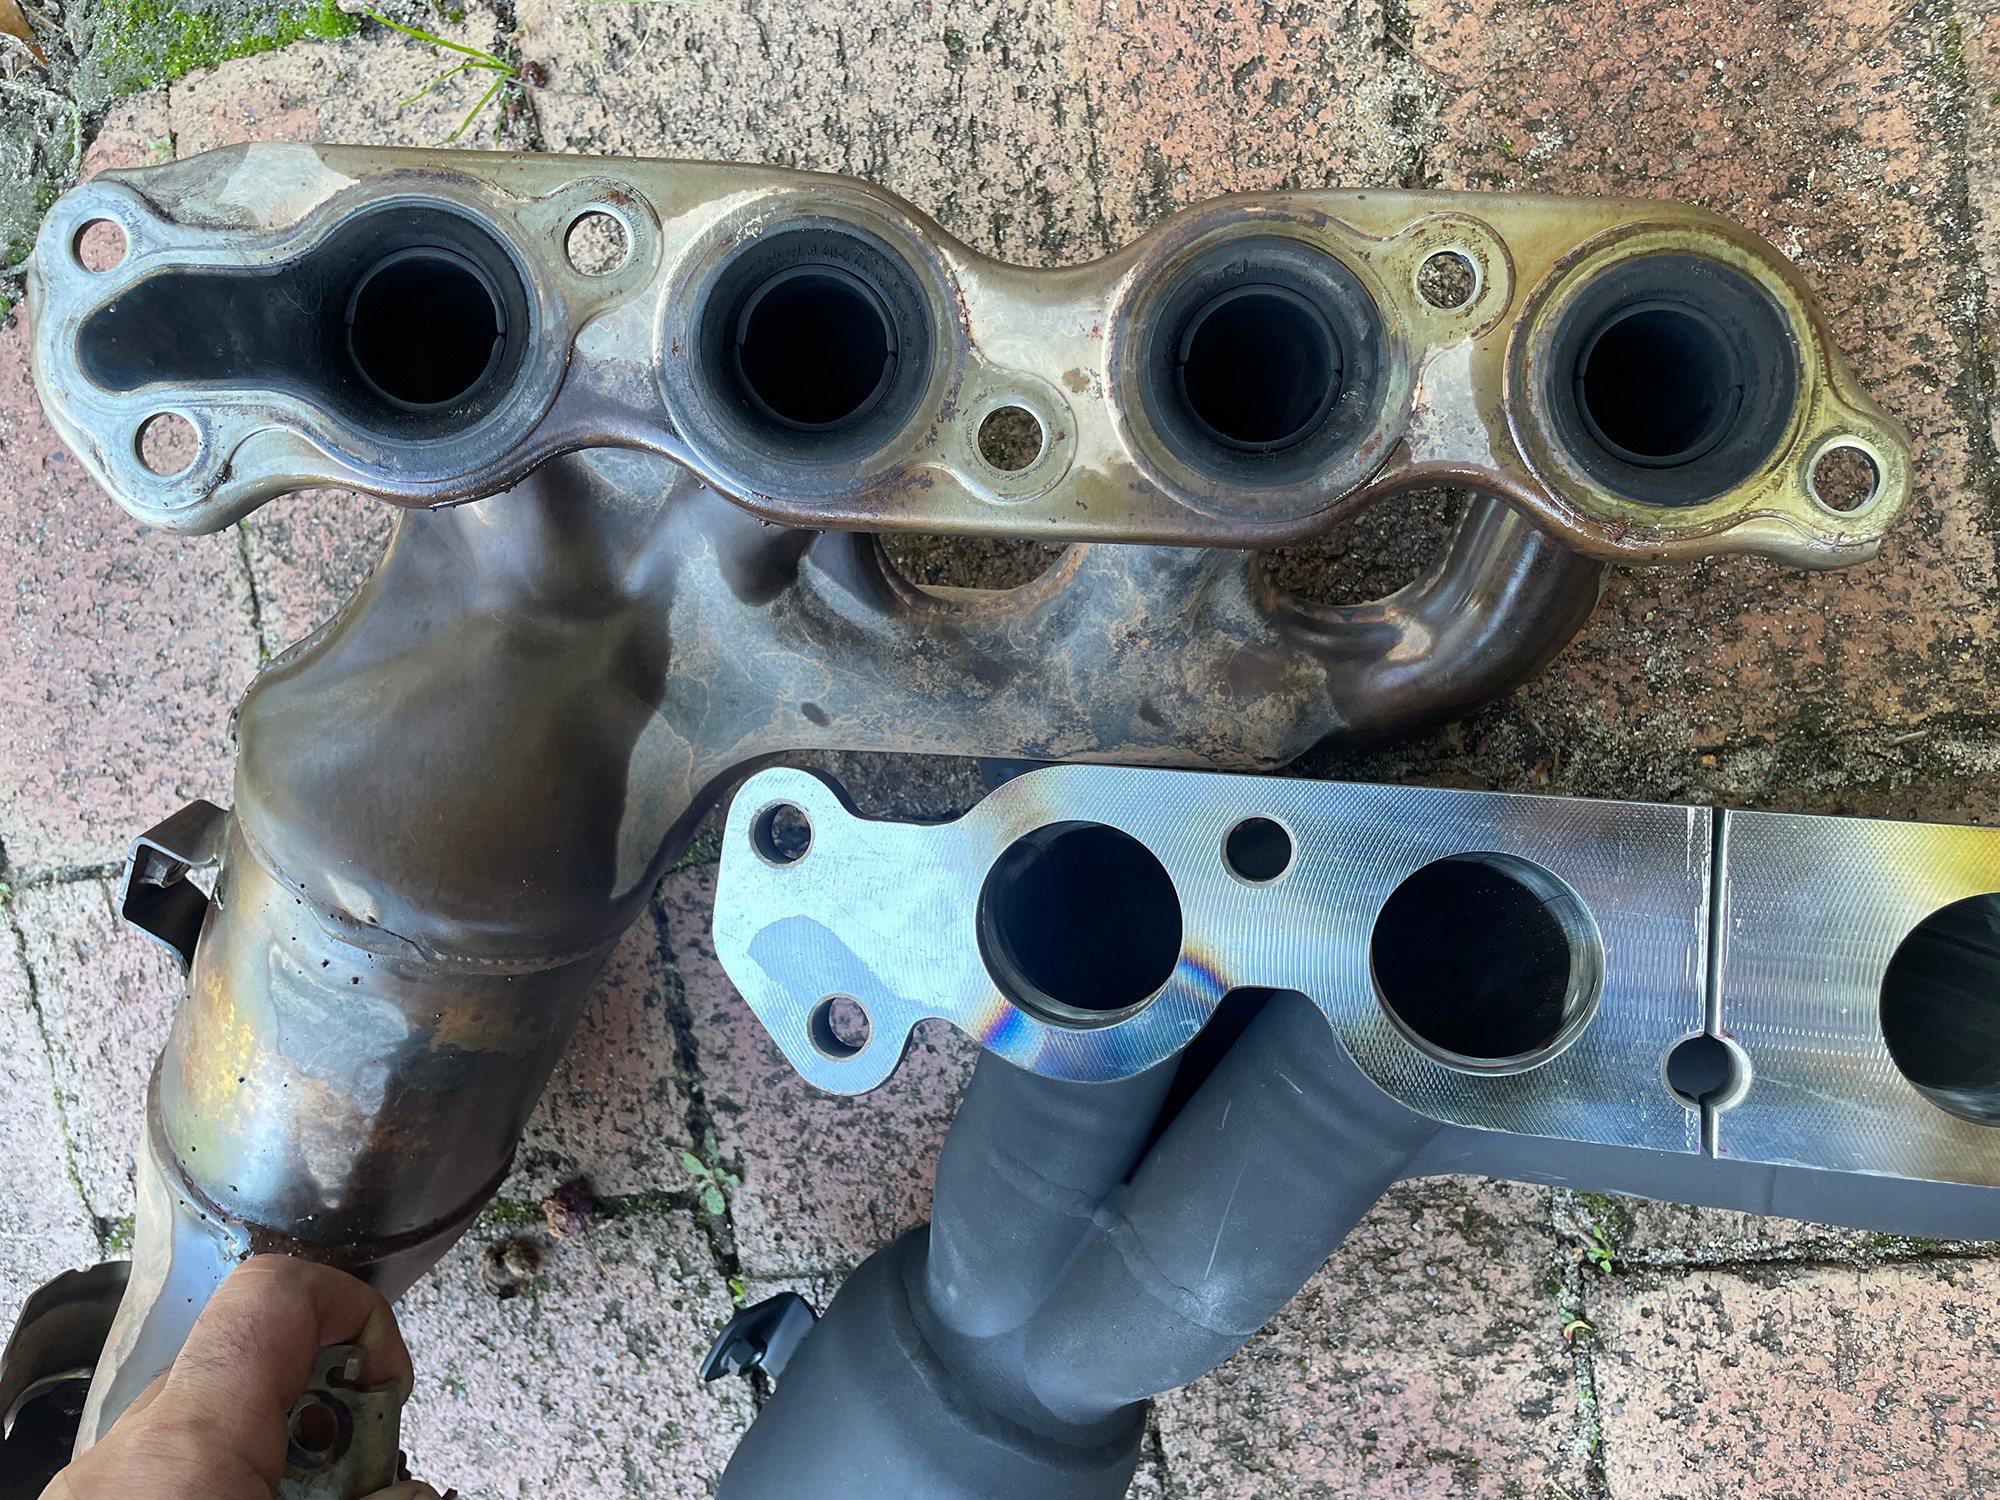
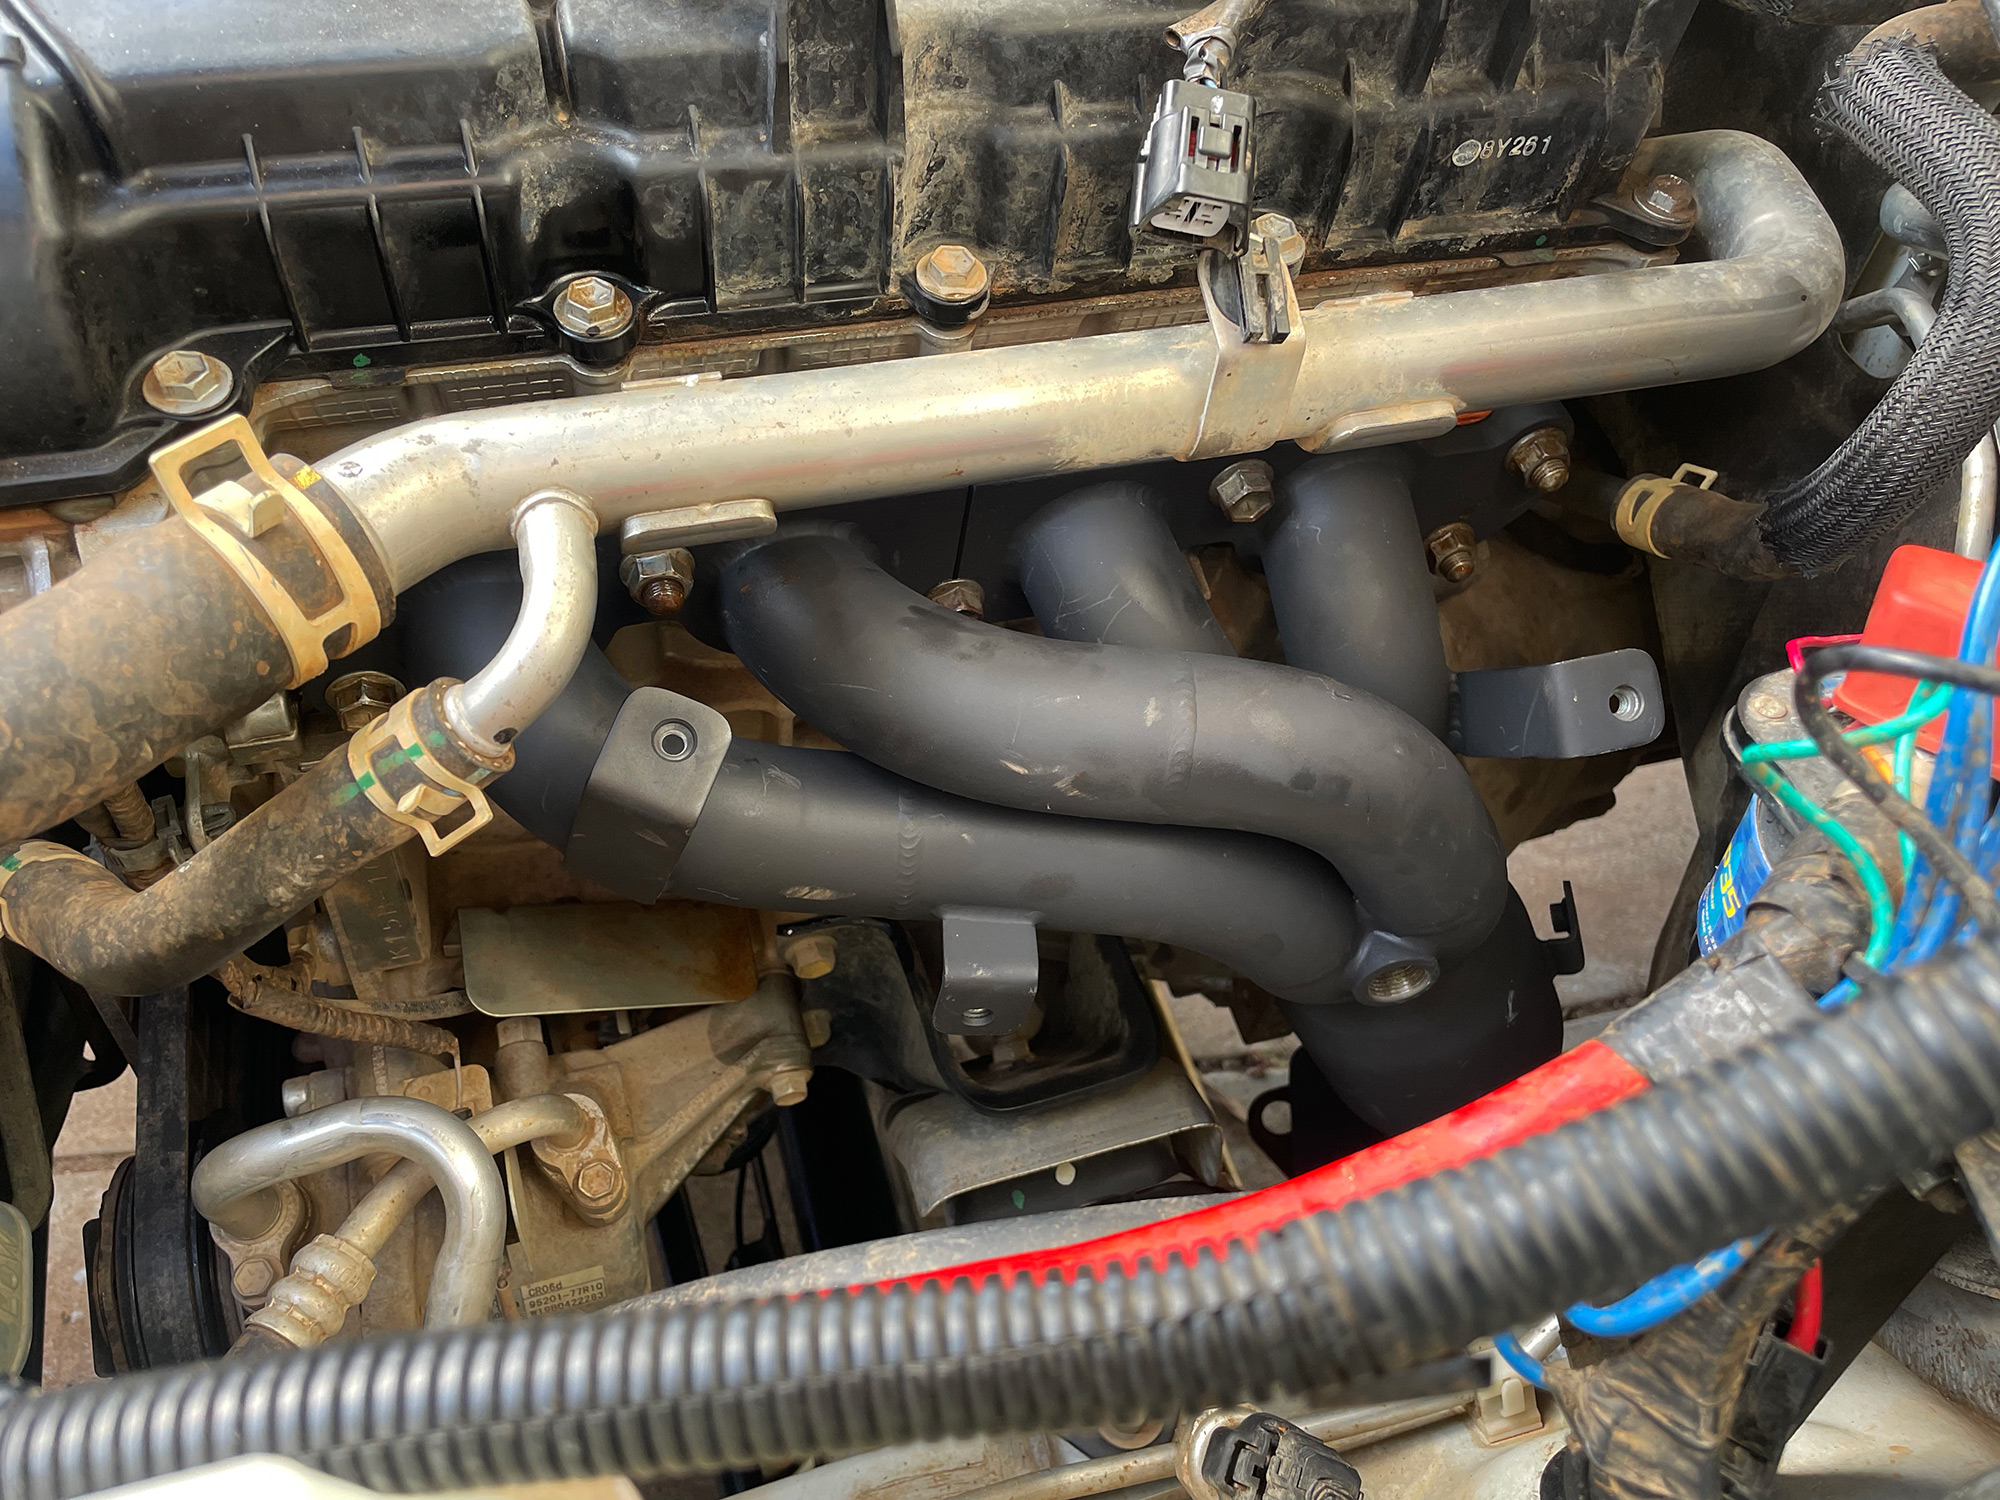
The manifold will now just lift out with a bit of wriggling. This will let you compare the old and the new for just how dramatic a change this mod is.
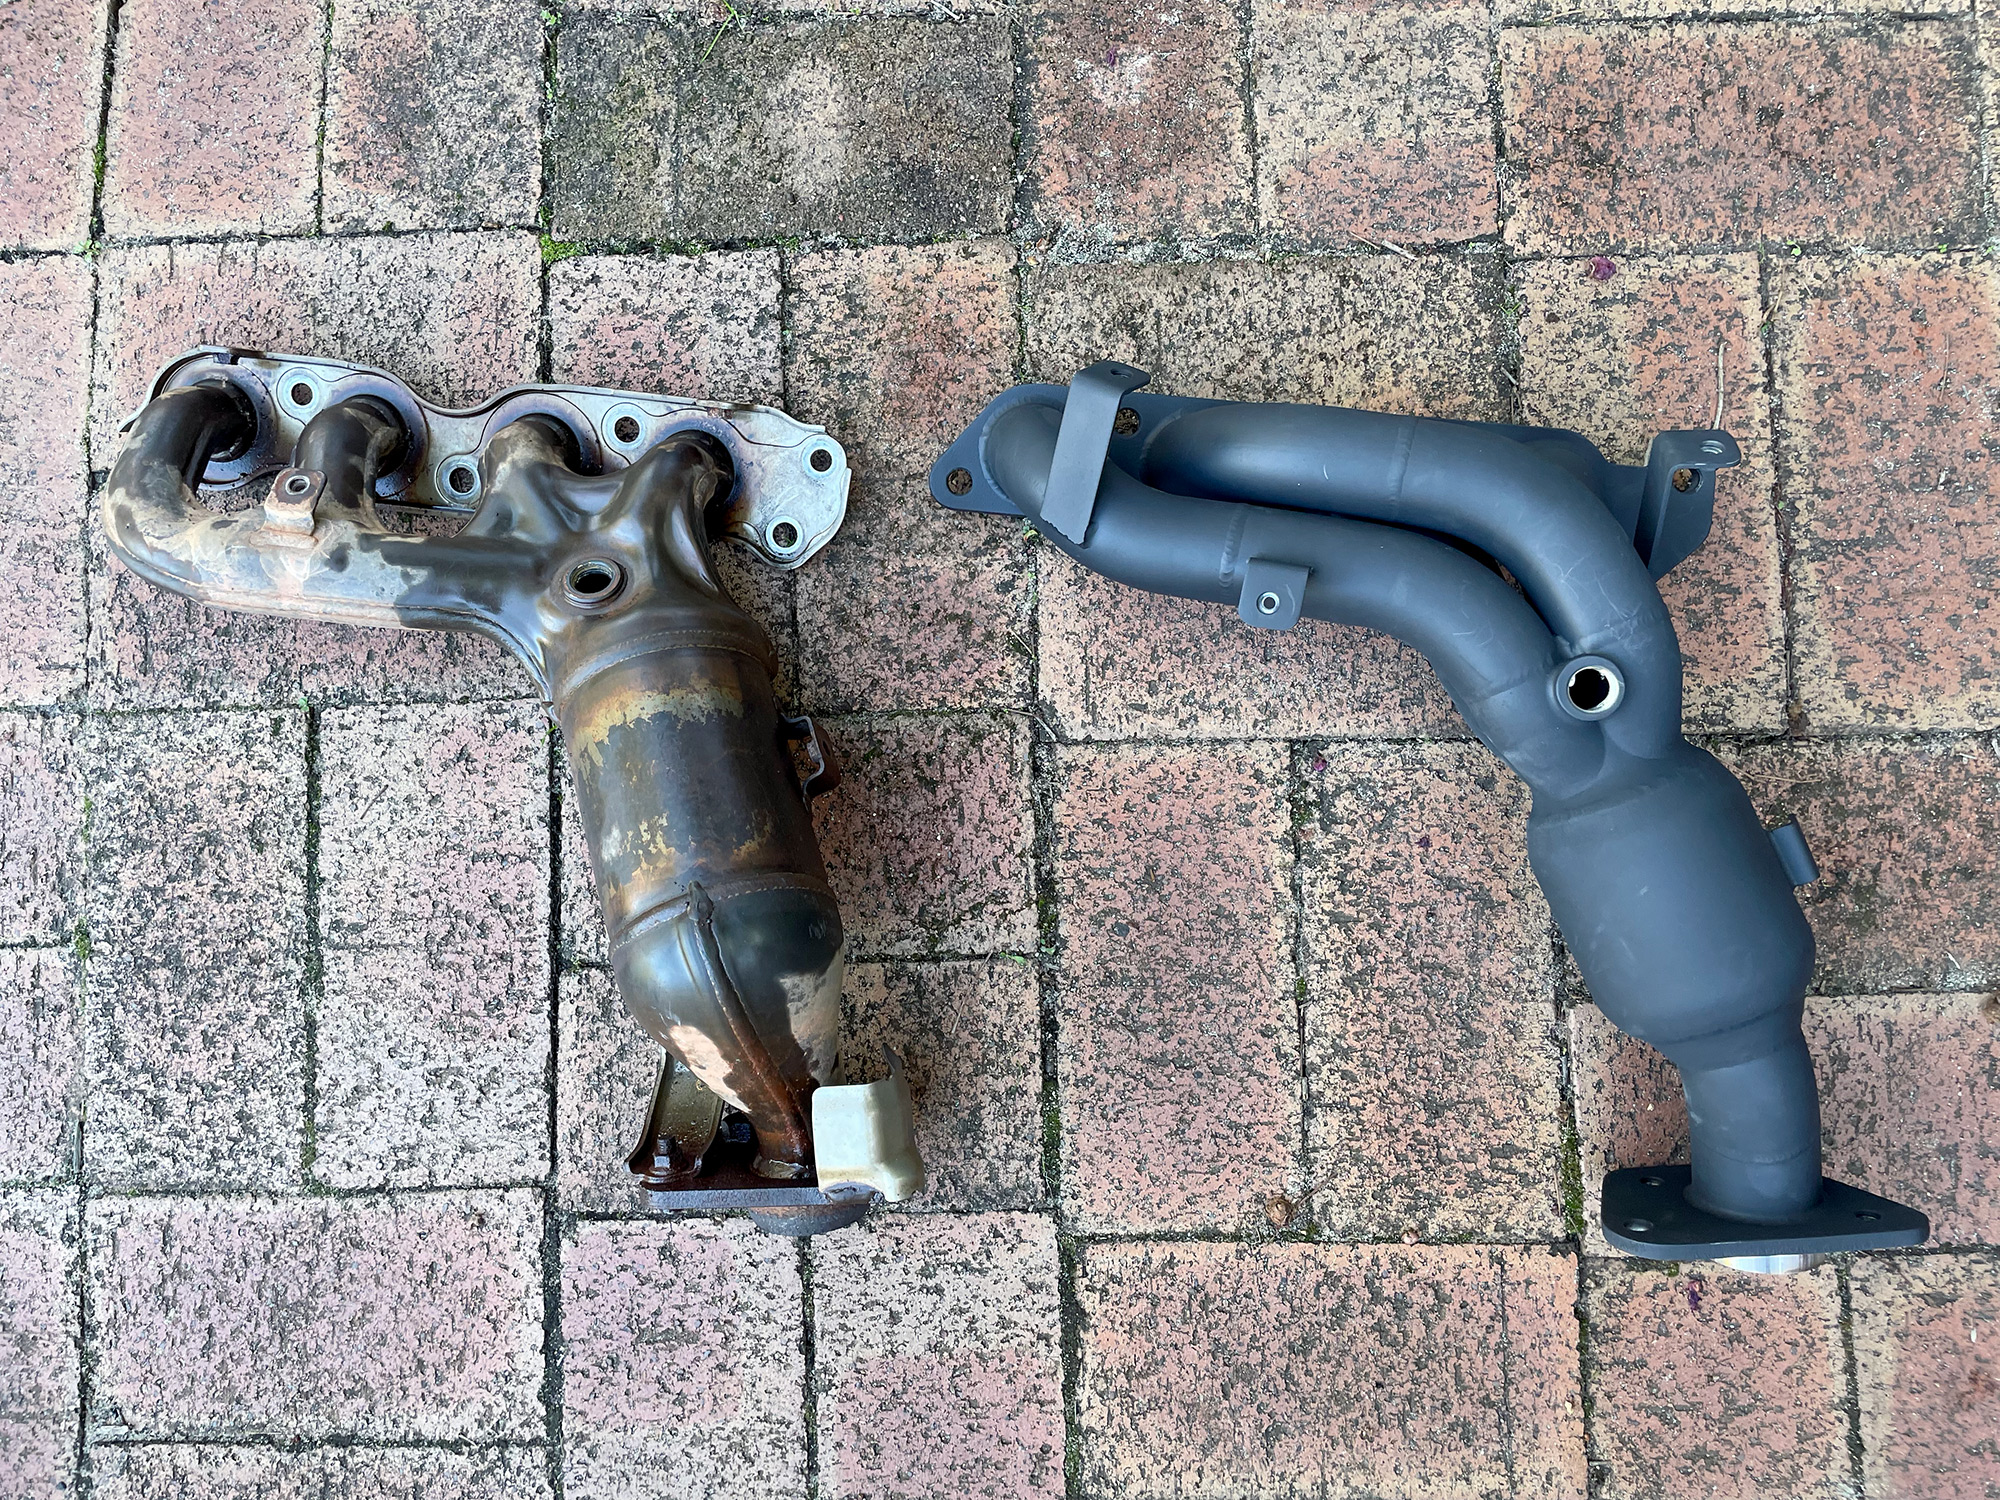
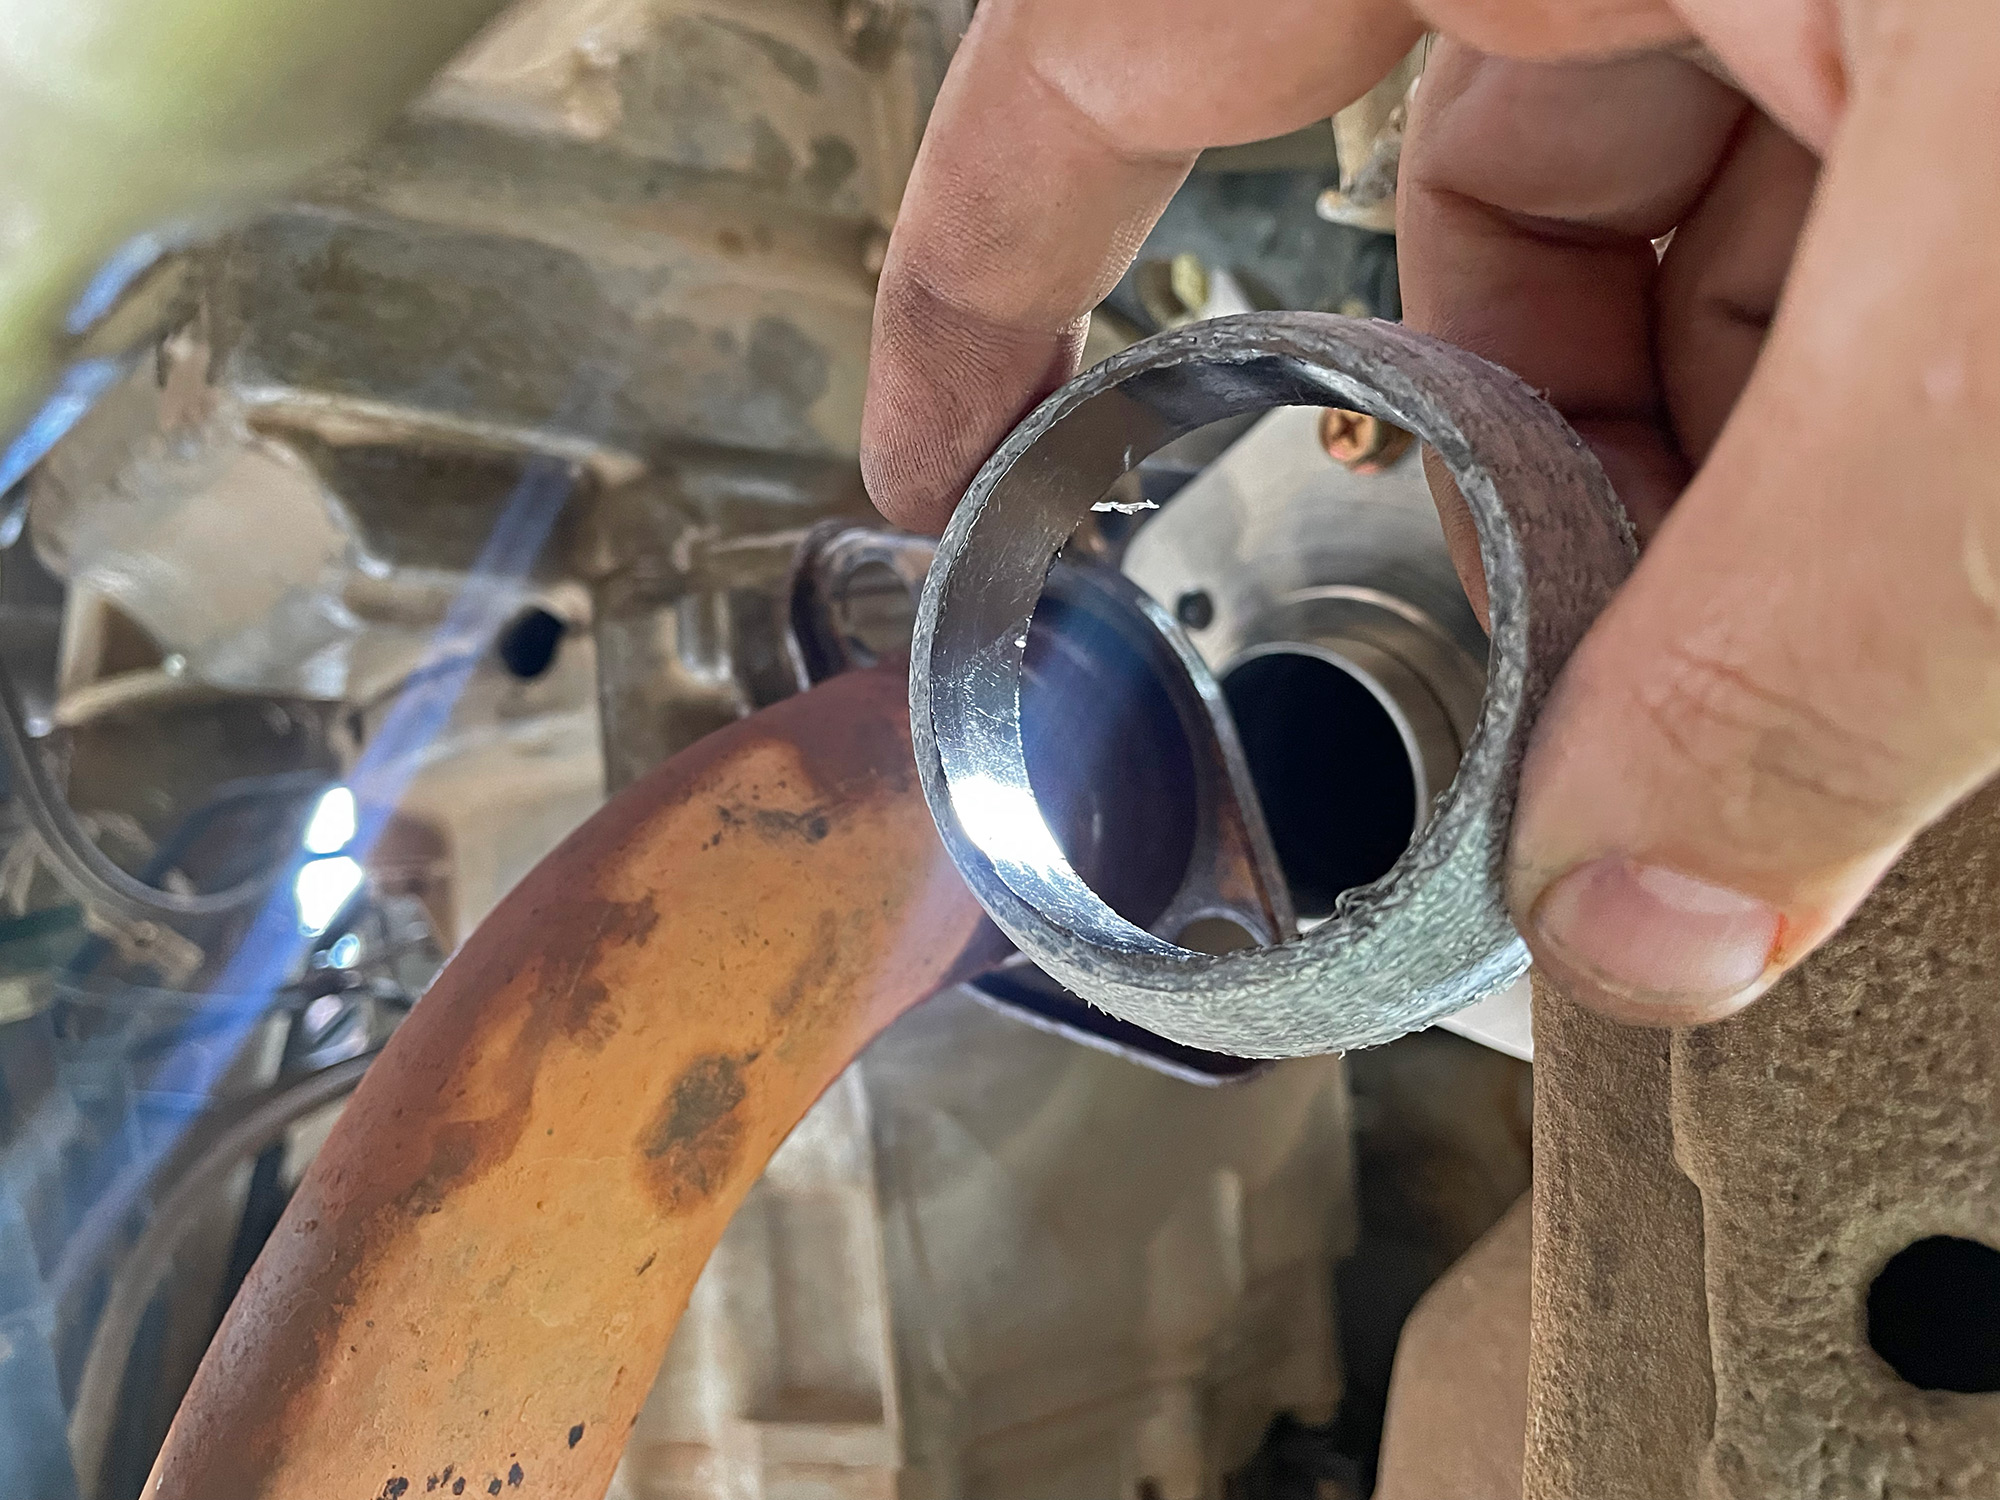
The primaries are a whole heap bigger with the AVO headers.
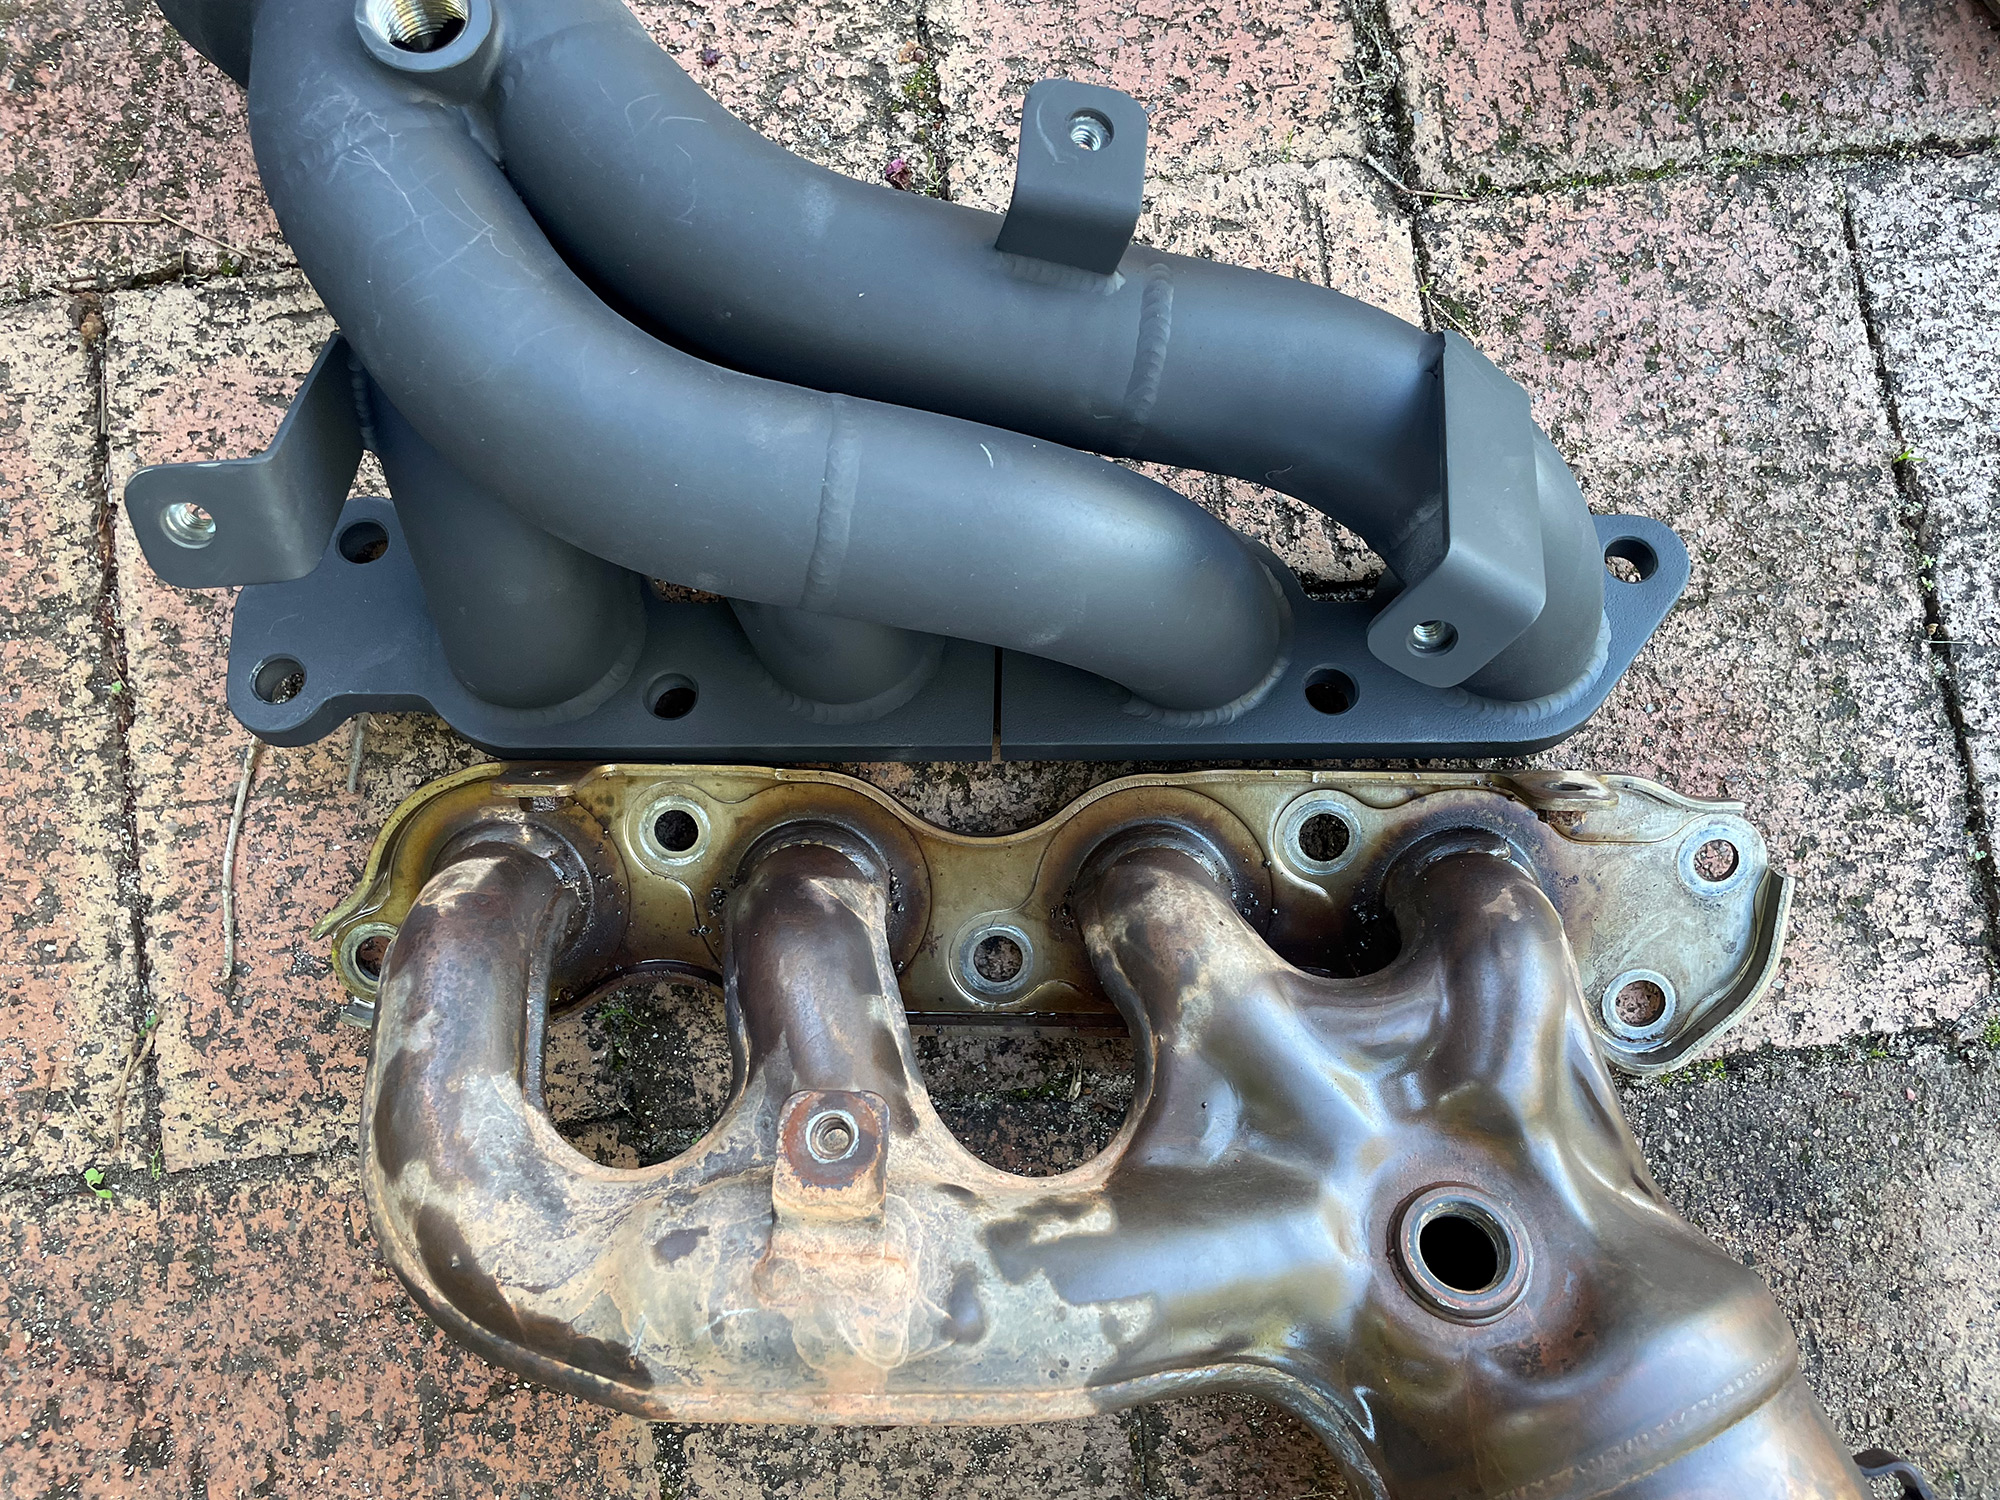
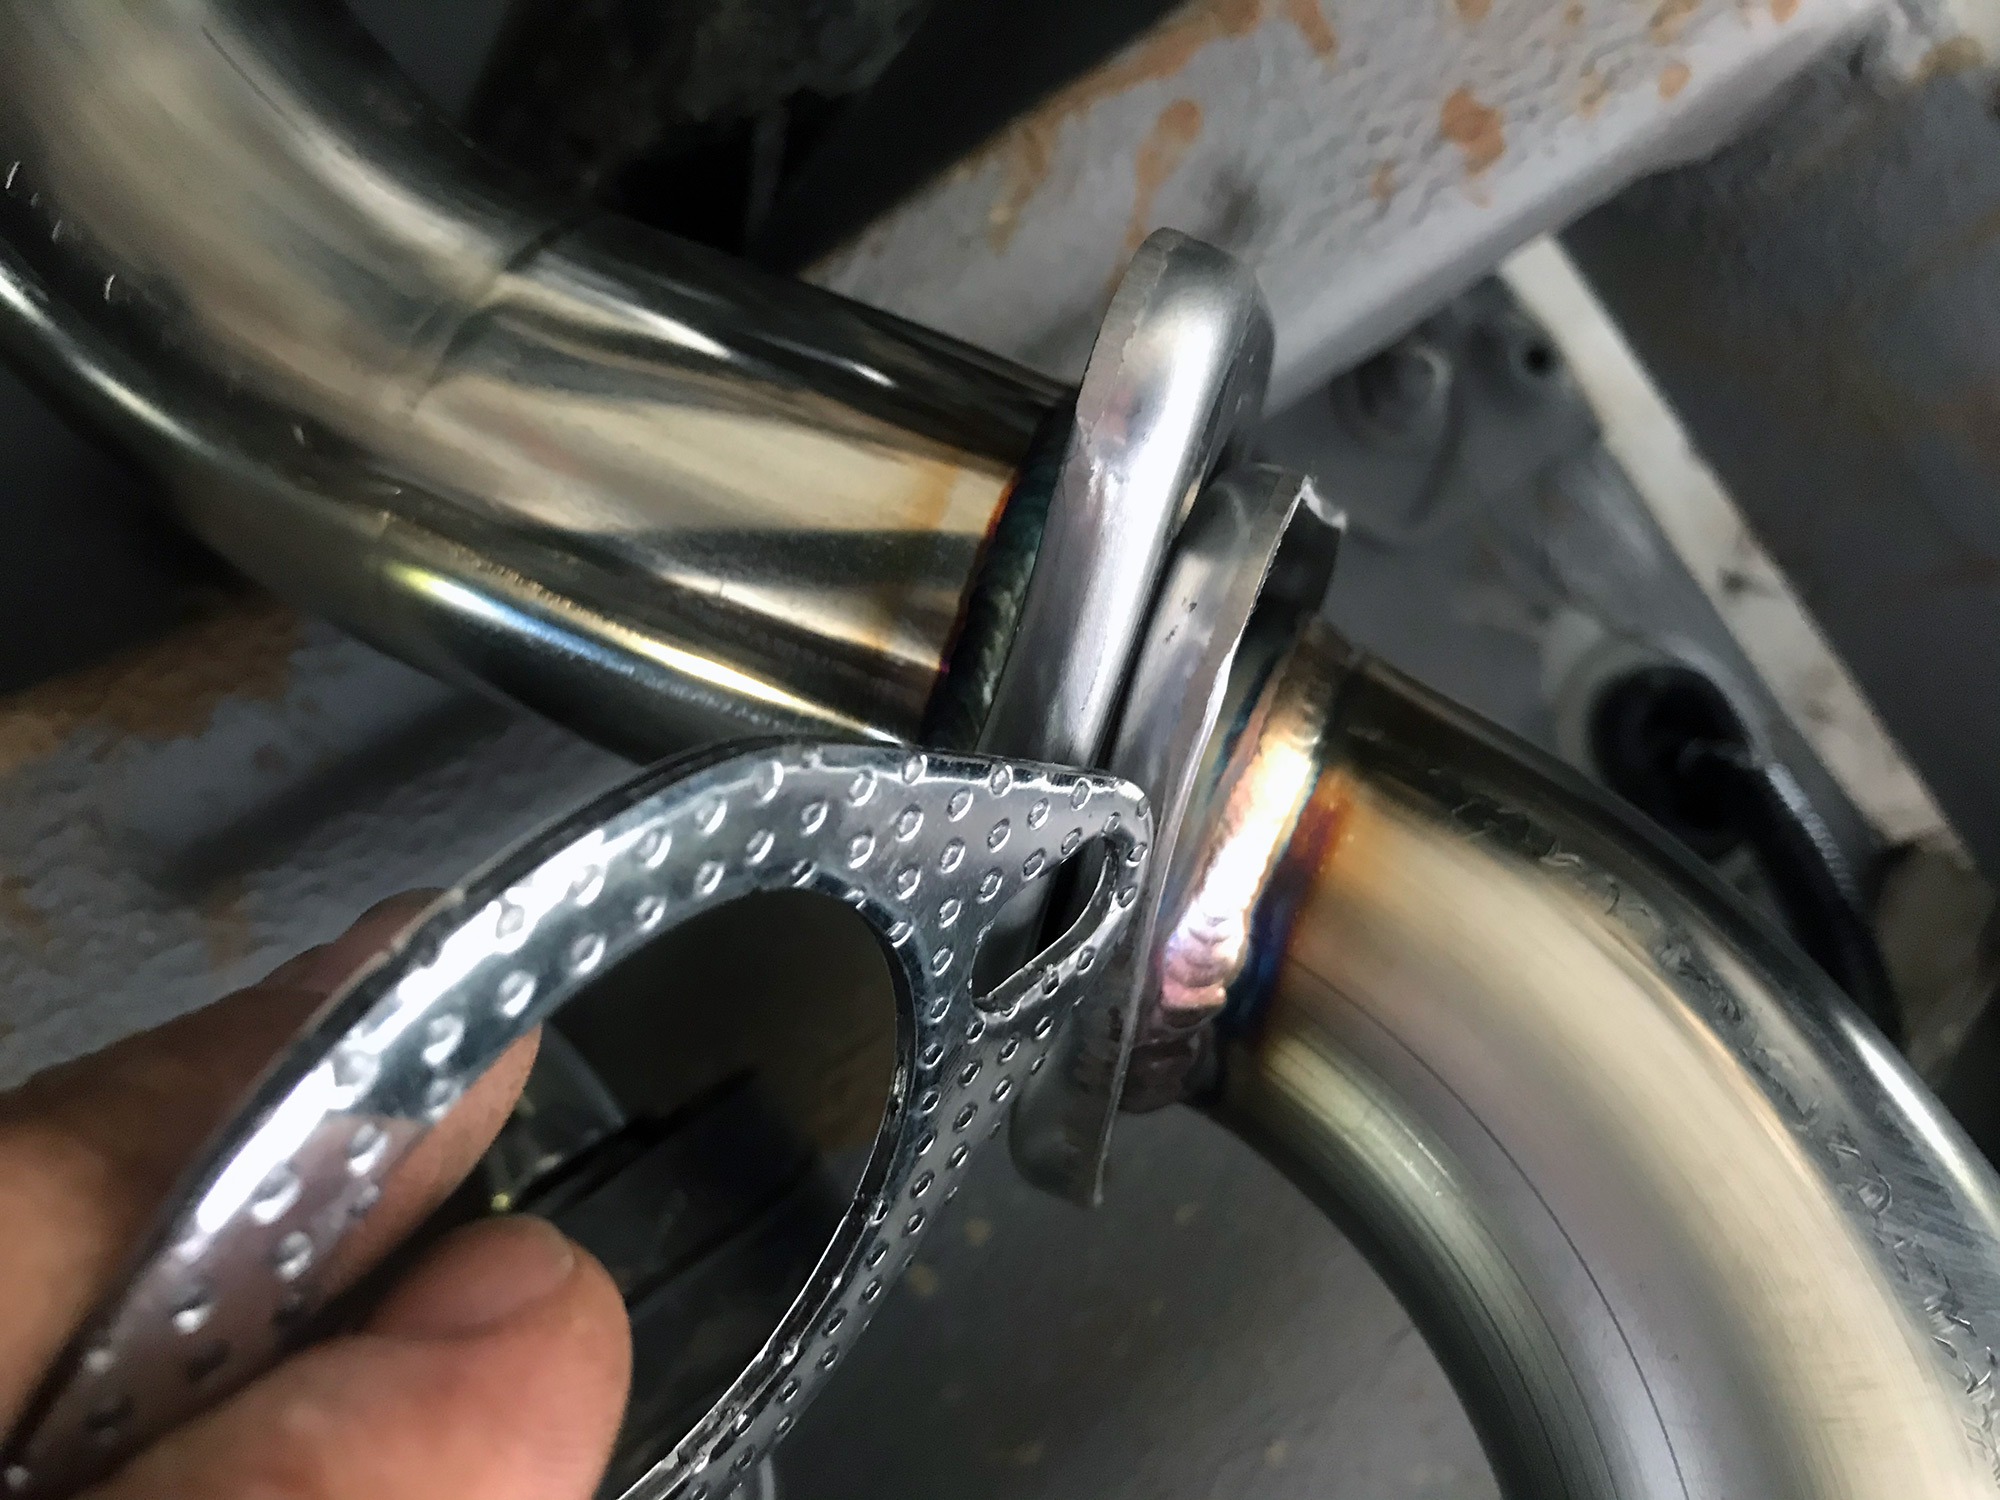
Although the next pic makes it look like there’s a step in the AVO headers, that’s just the transition from the flange to the pipe and it’s actually not a step. They are also very well matched to the cylinder head port size. In contrast, the factory ones are considerably smaller than the head ports.
I then used a wire wheel and cleaned up the bolts that go to the 2nd cat pipe and also the engine block to manifold bracket and painted them heatproof black. No pics of this as it’s kinda boring.
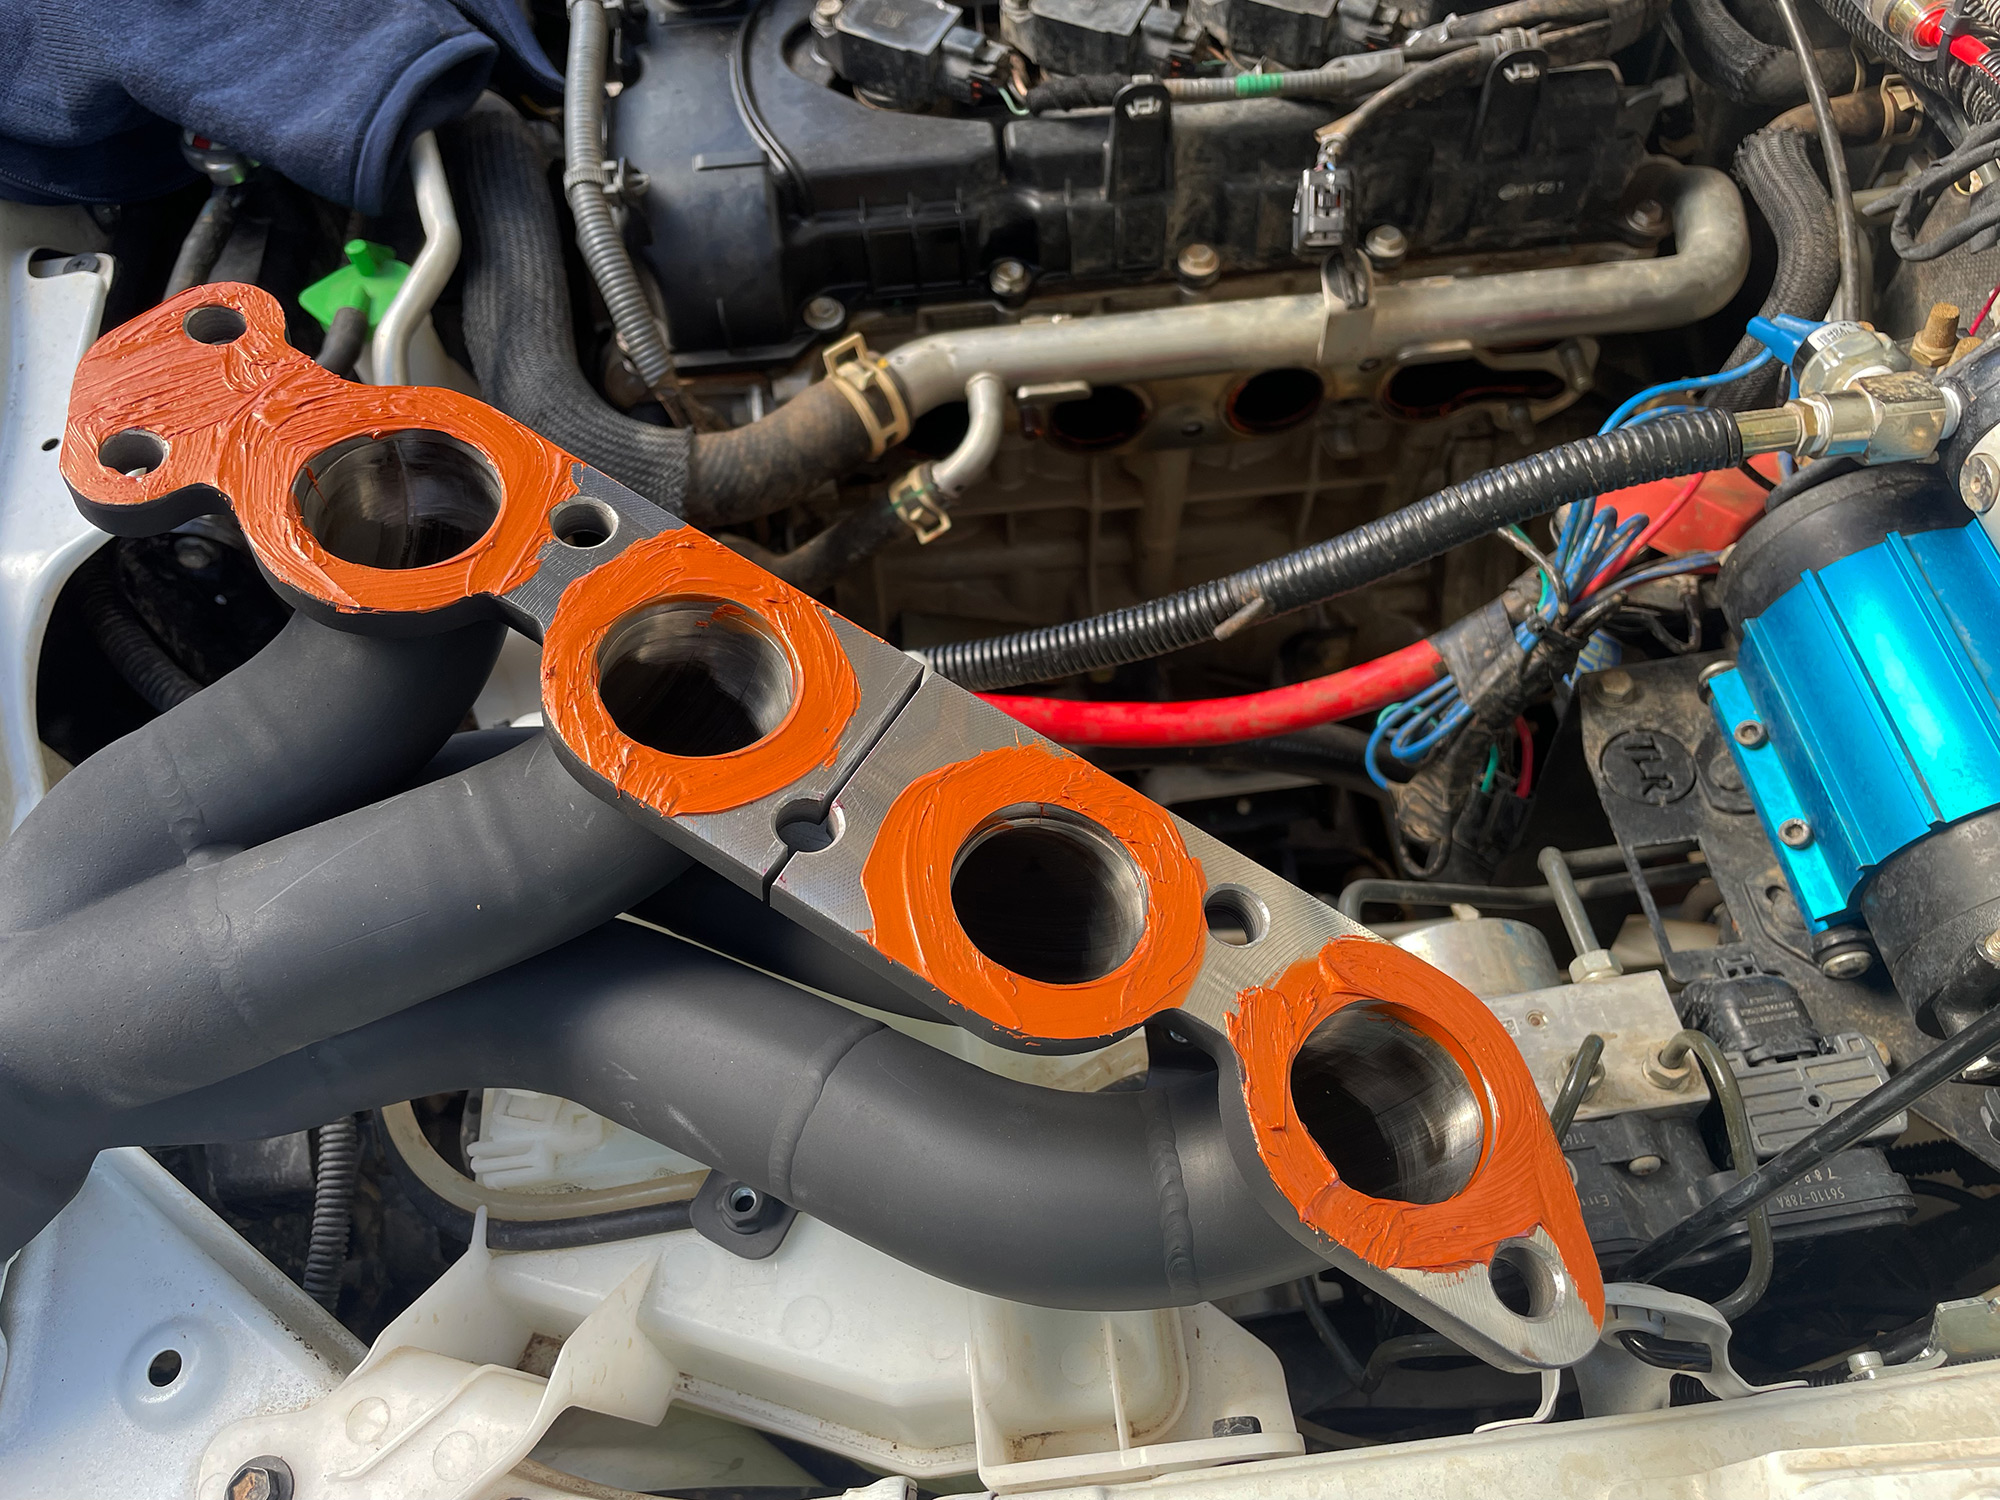
Because I didn’t have a new manifold gasket, I used copper gasket sealant on both the gasket where it meets the head and also on the new manifold. Ideally you’d use a new gasket but quite often I’ve got away with using a proper copper sealant suitable for manifold use like this. You can just see the copper sealant in a couple of the ports where I’ve put it on and smooshed the gasket onto the head.
You really don’t need much of this sealant, just an even application so it’ll seal around all of the ports.
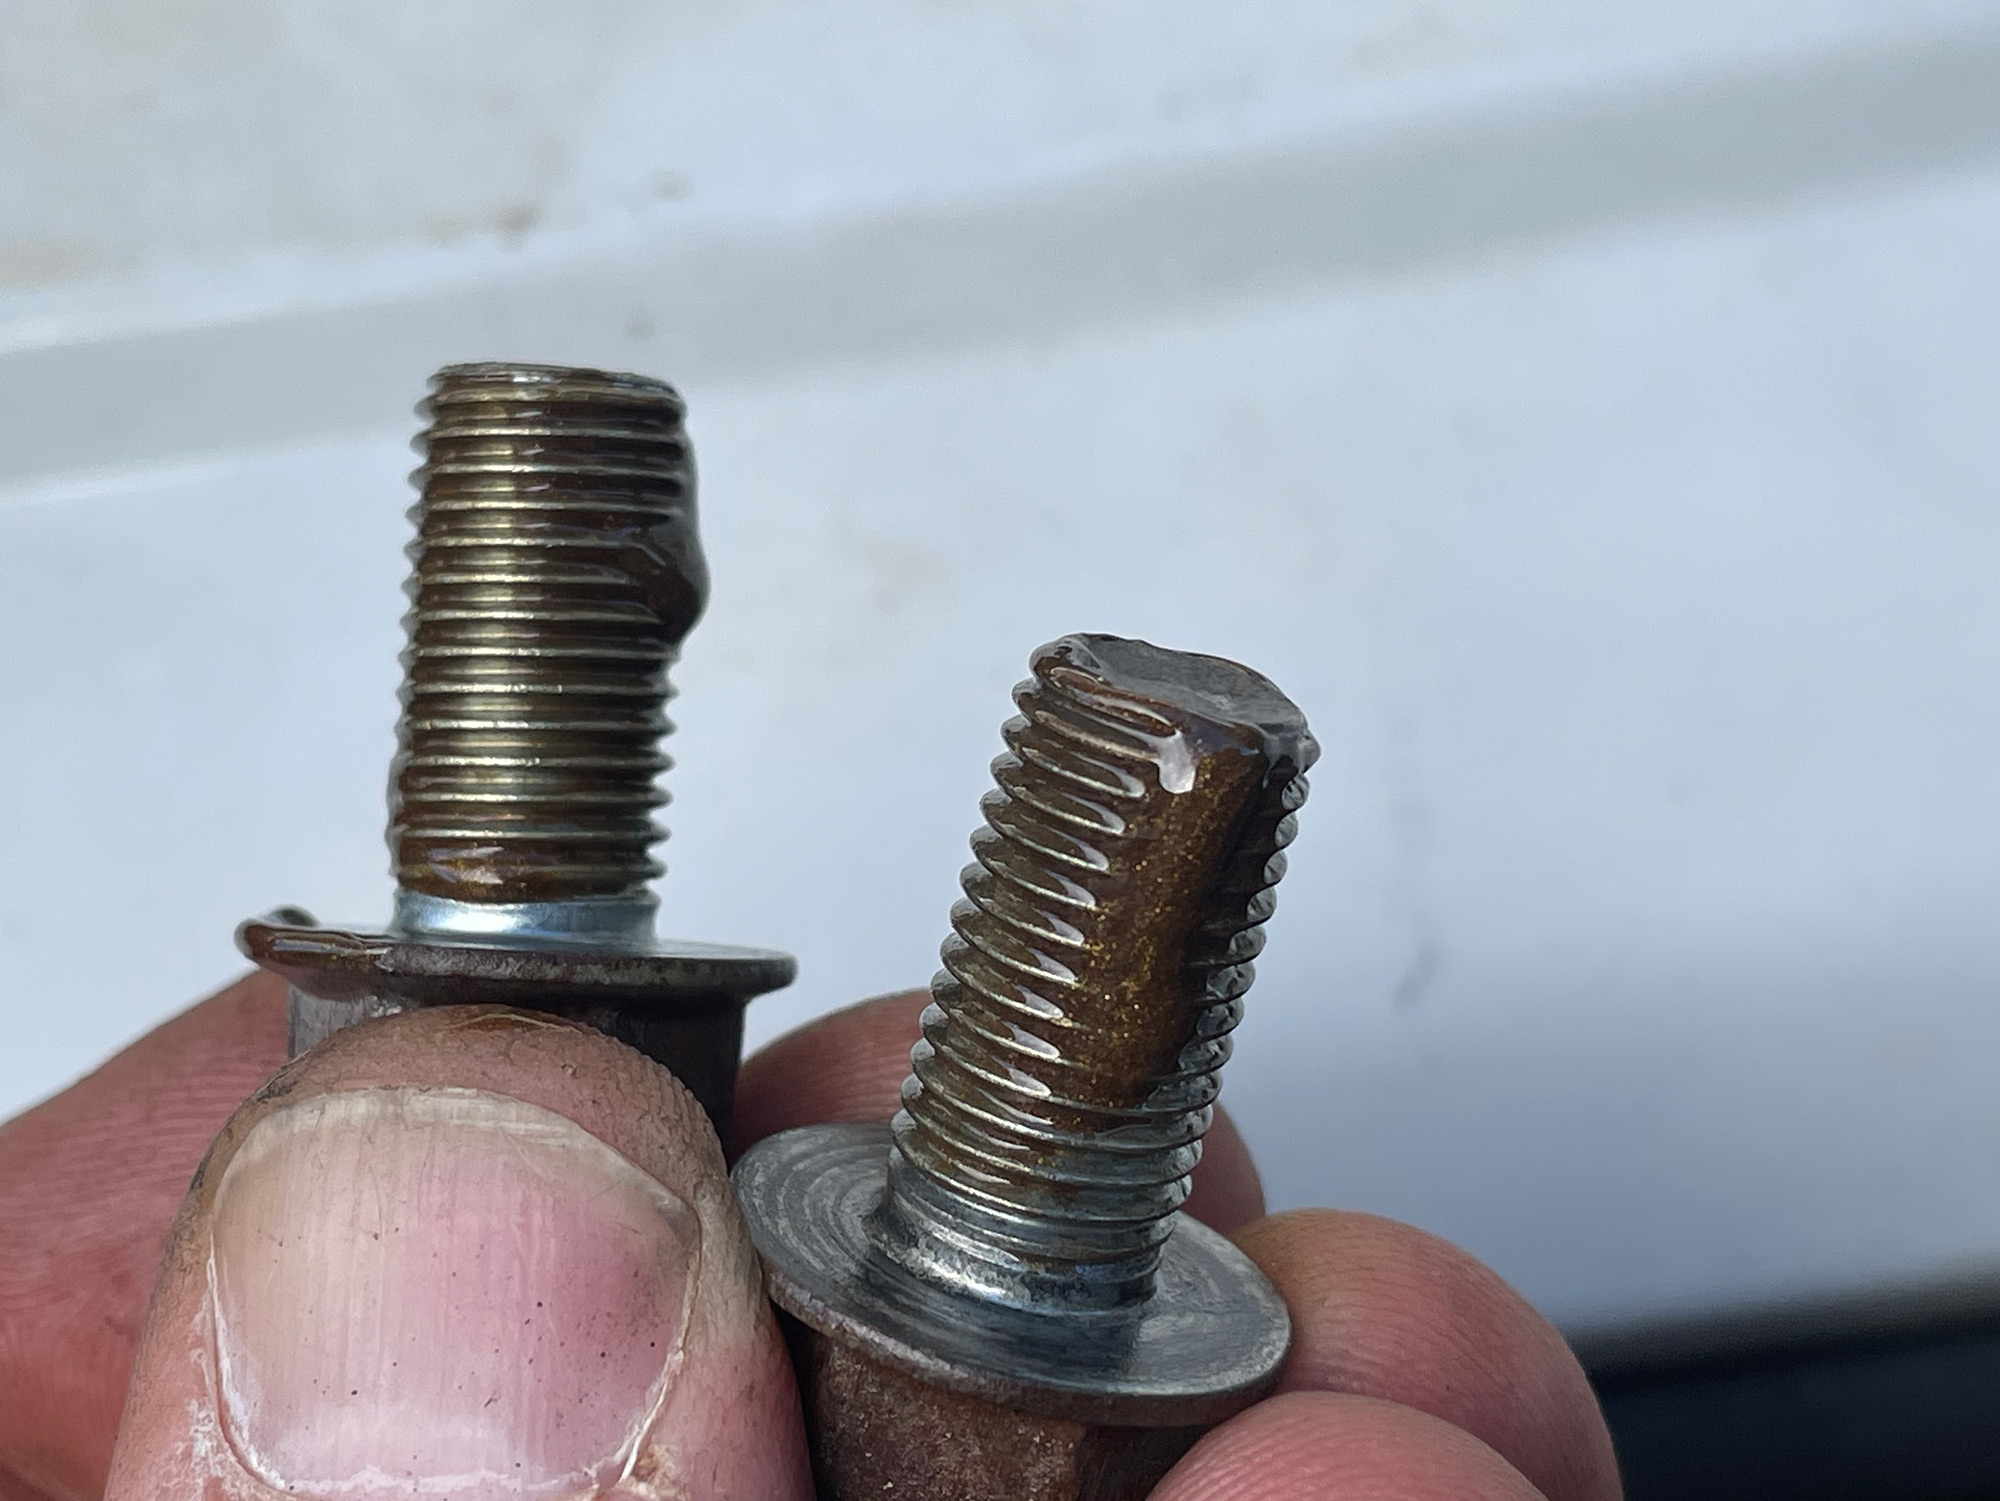
While the AVO headers come with new stainless studs and nuts, I elected not to use them as my standard ones were fine. If you use these, note that the nuts provided with them are 15mm heads not 14mm like the factory ones.
I always use antiseize on manifold bolts and also on studs. Makes it easy on the next person to work on the car… and that next person might well be you.
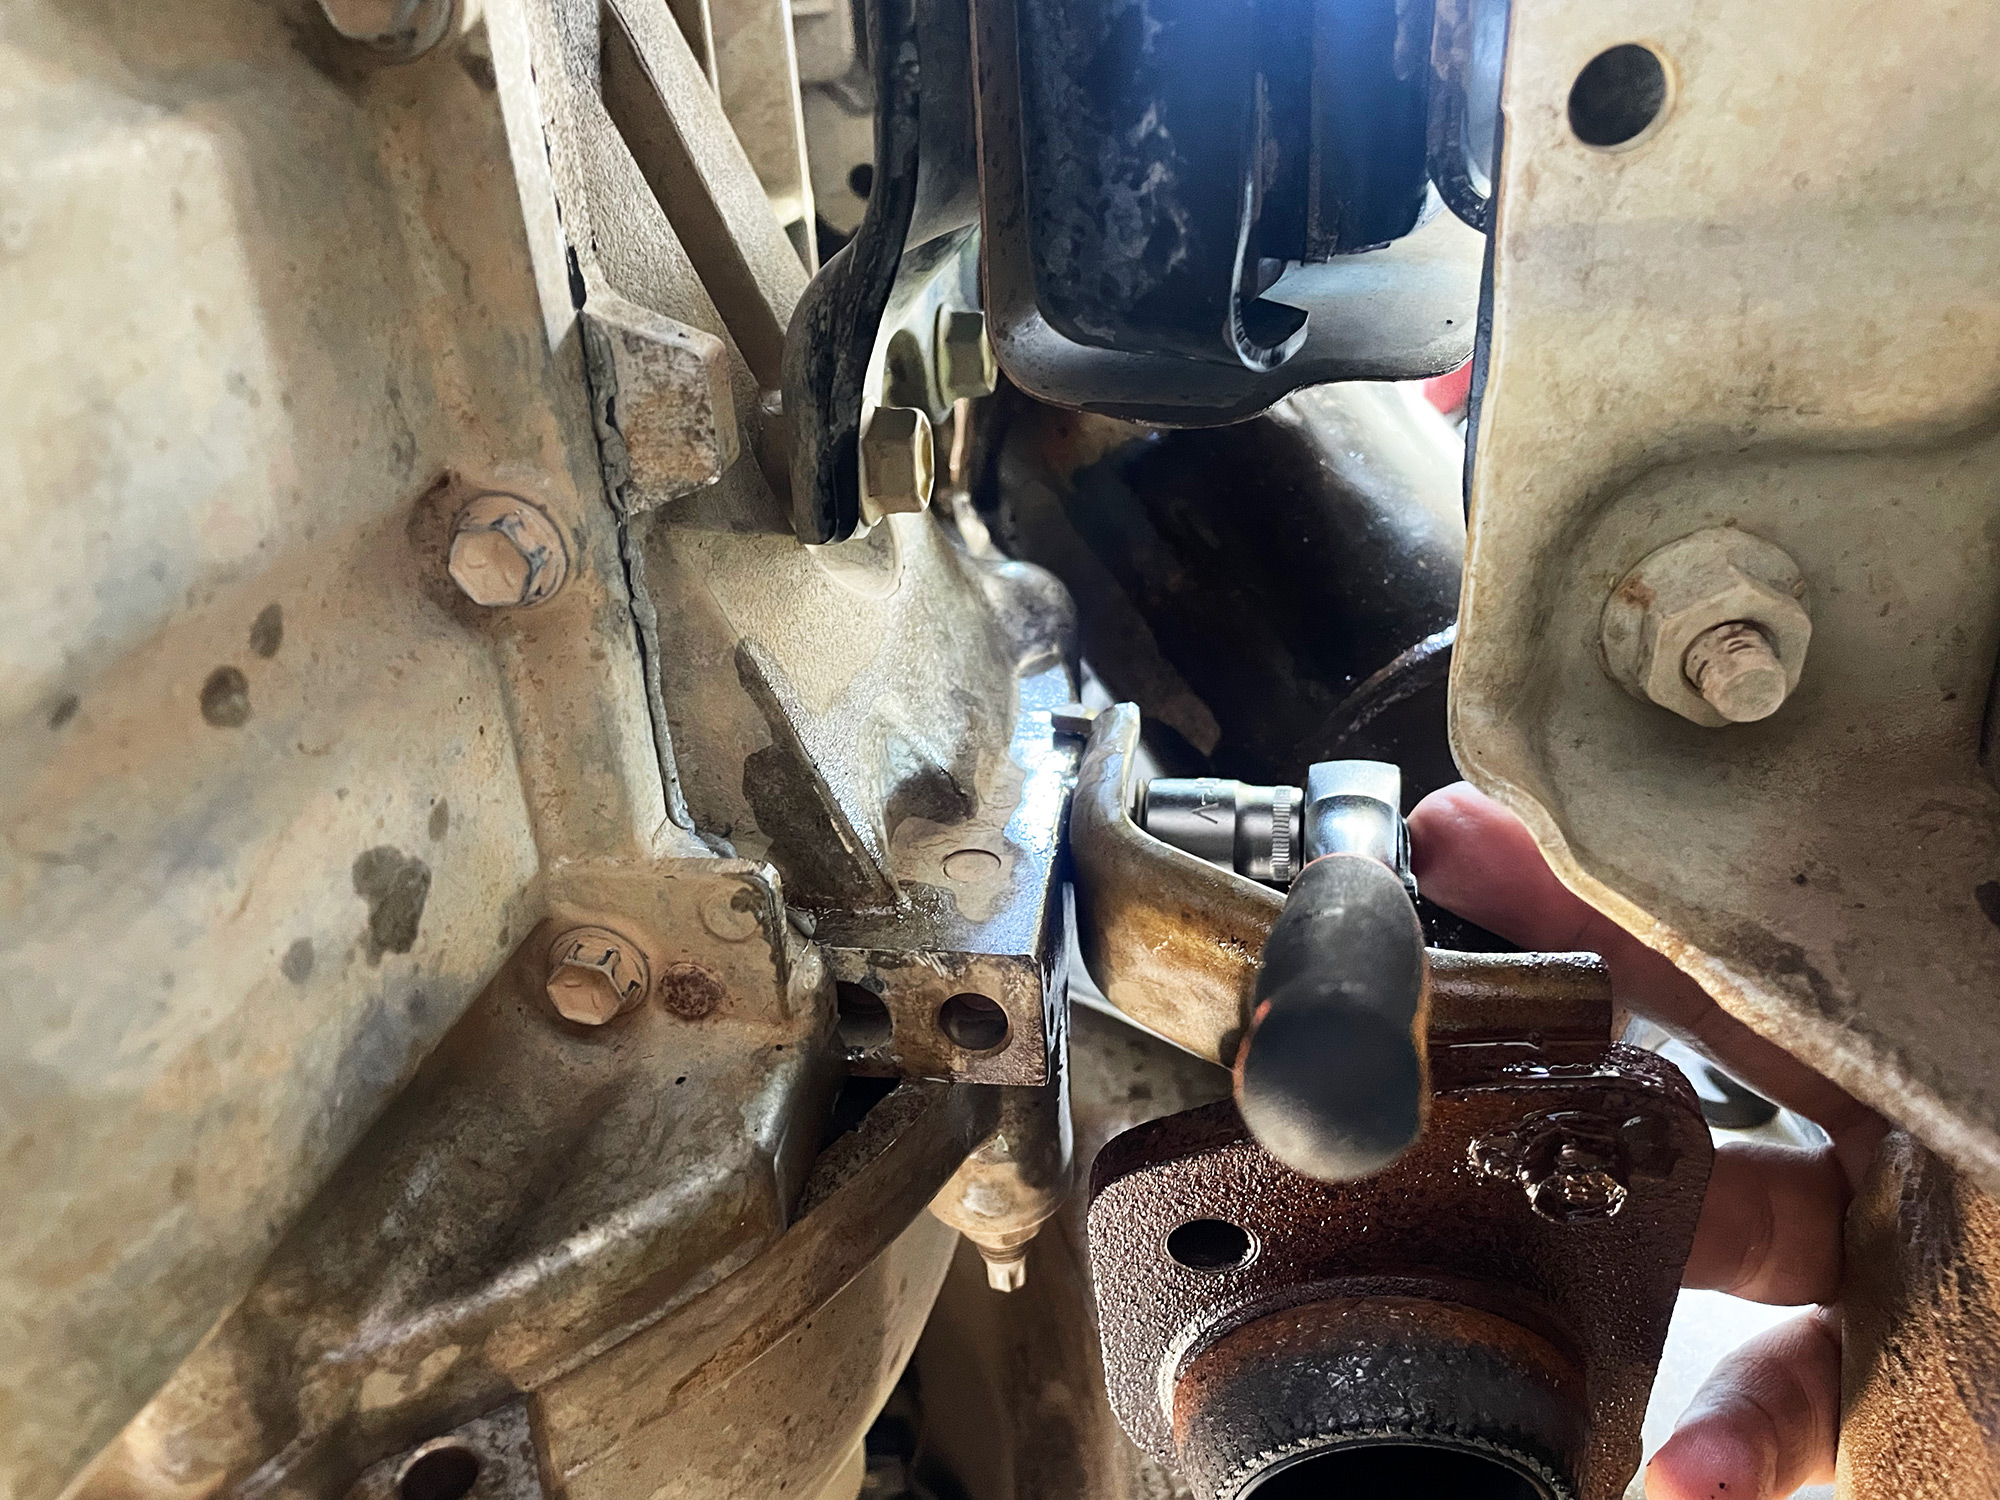
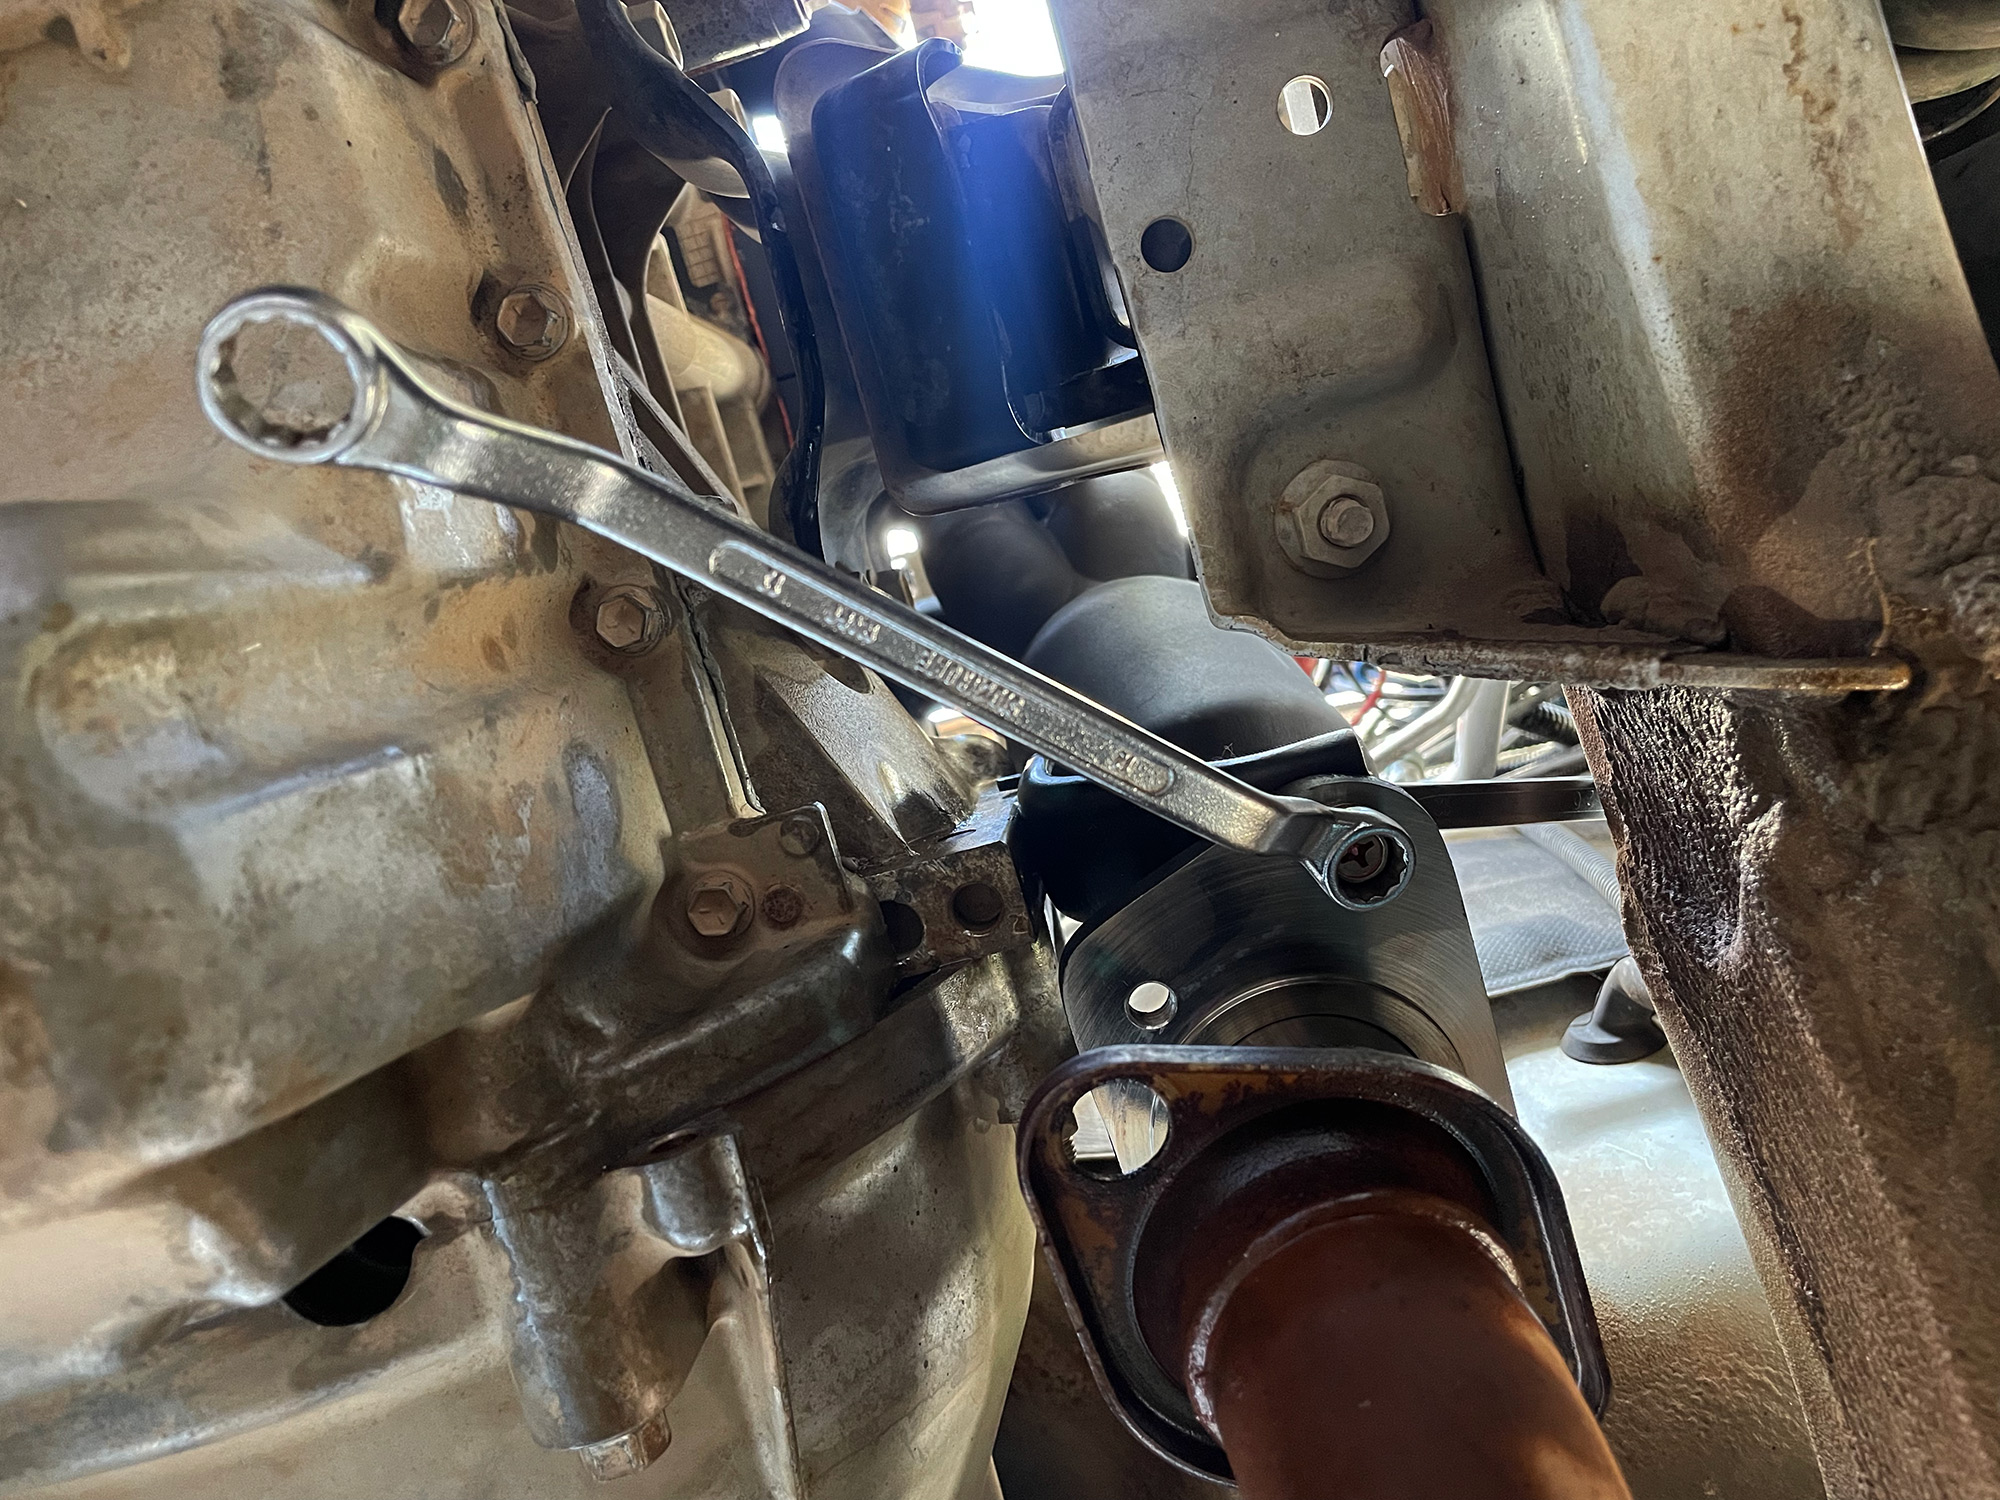
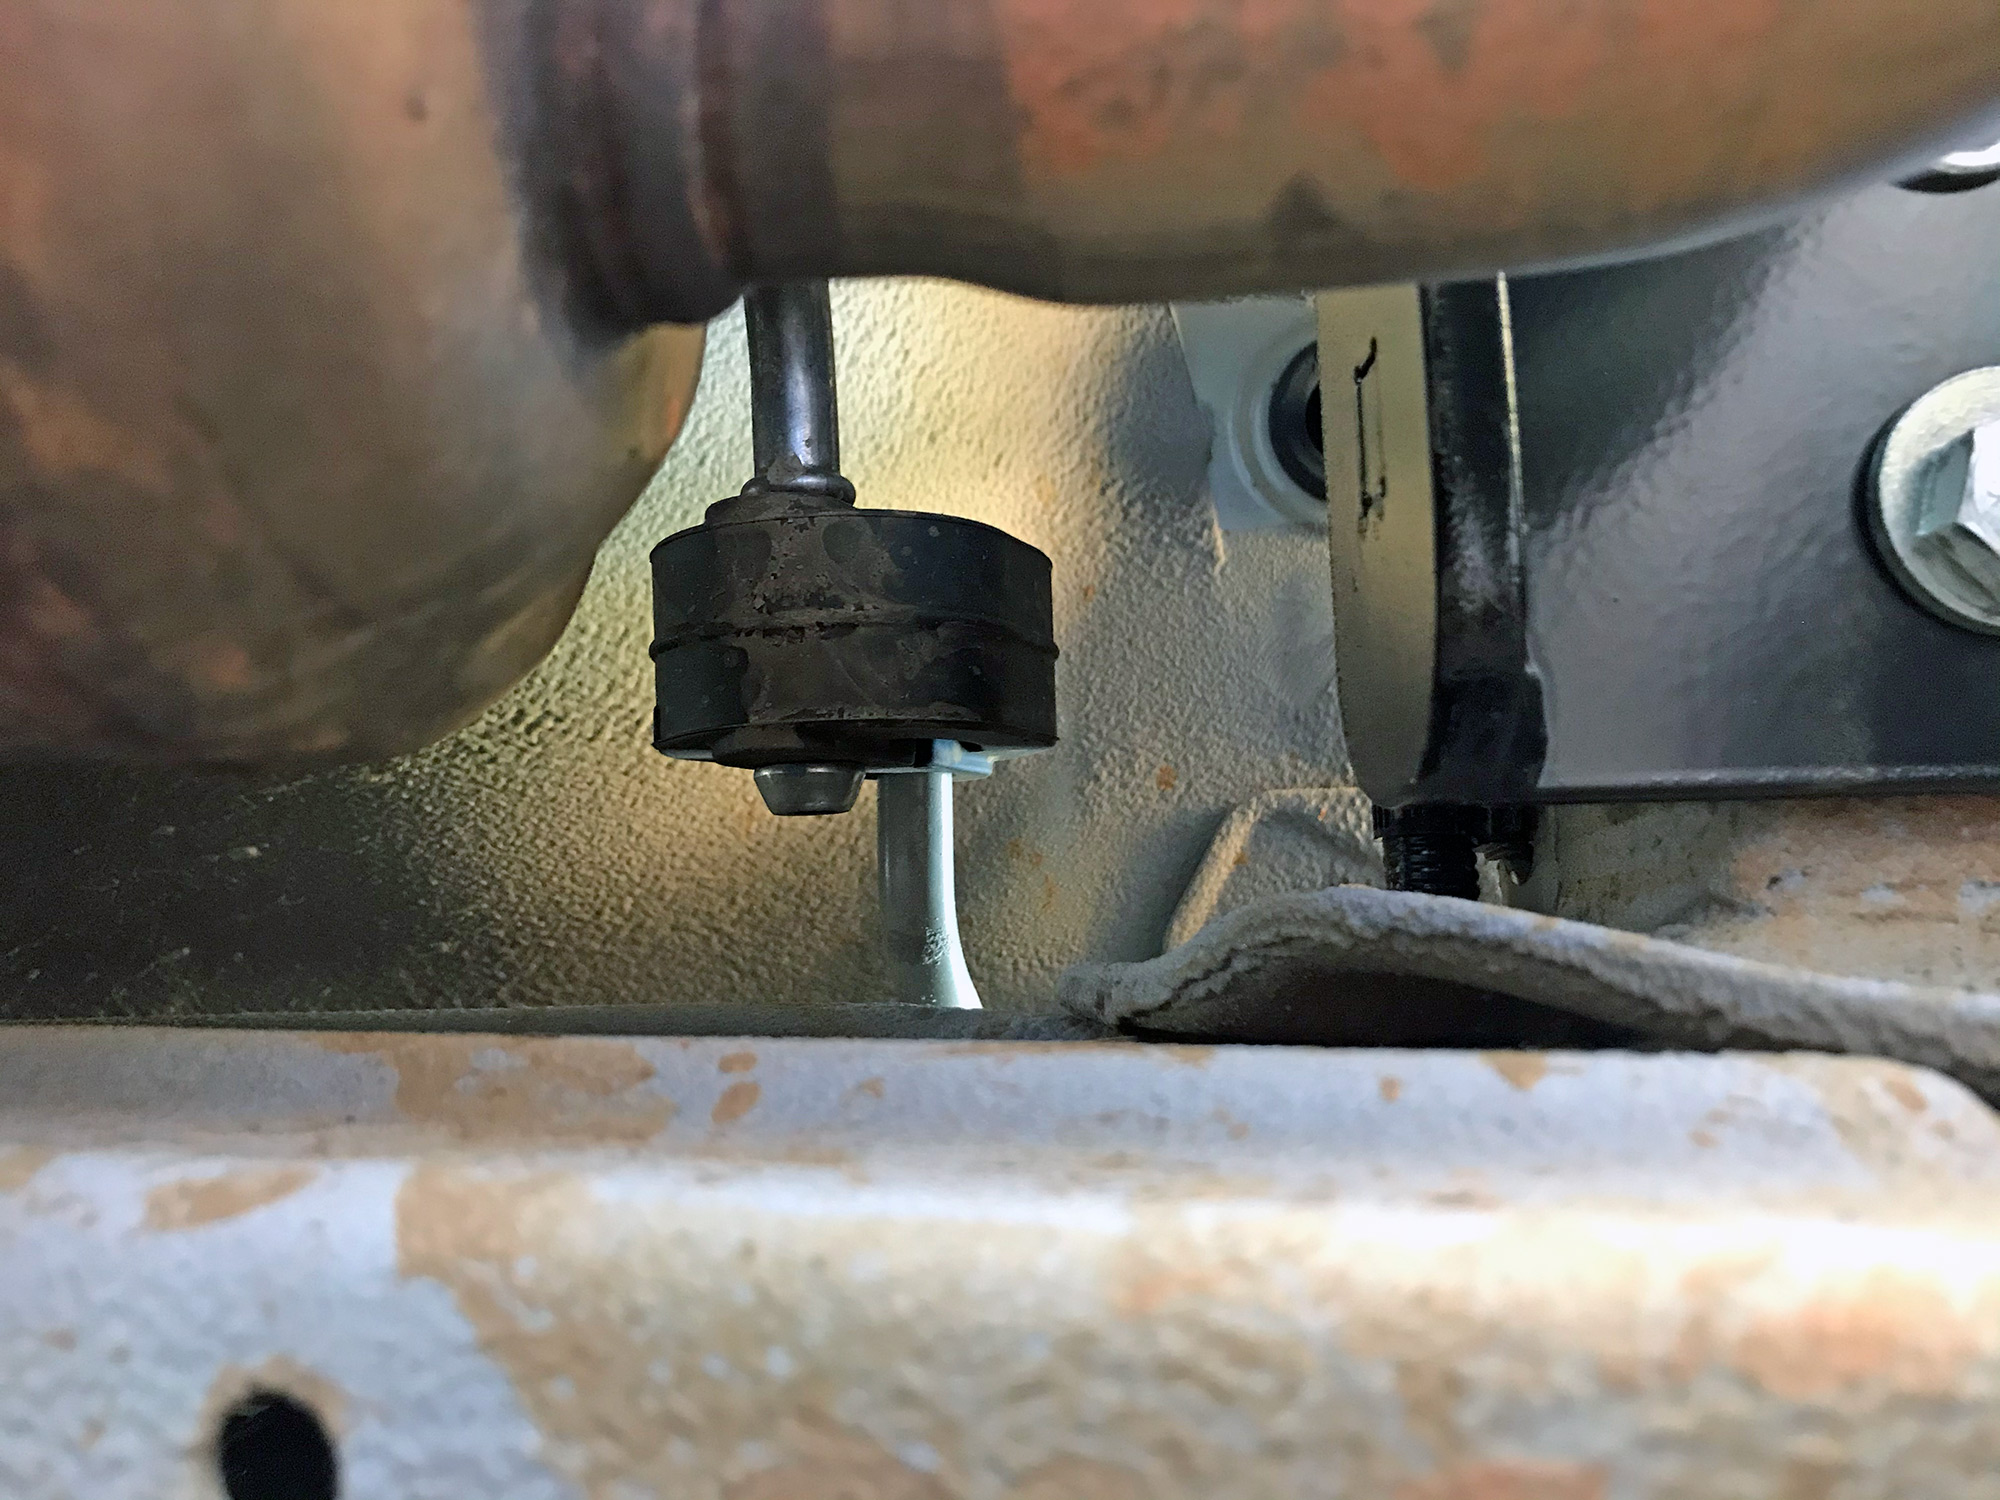
Before you fully tighten everything up, now get under the car and fit the brace between the manifold and the engine block. I used a new JIS spec bolt and a metal locking nut to do this and get it all lined up. Since this new manifold doesn’t have a stud or anything here like the factory one, you’ll need to be creative to get an angle on a spanner on each side to get it done up. I had just enough room above the chassis rail to get to an upper spanner while doing it up from underneath with an offset spanner.
Now the manifold bolts can get done up fully. The factory torque spec on these is 60 Nm, but with antiseize it’d be a bit lower… roughly about 45 Nm or so. Don’t go too tight on these bolts, stripping out the threads in the head sucks a whole heap.
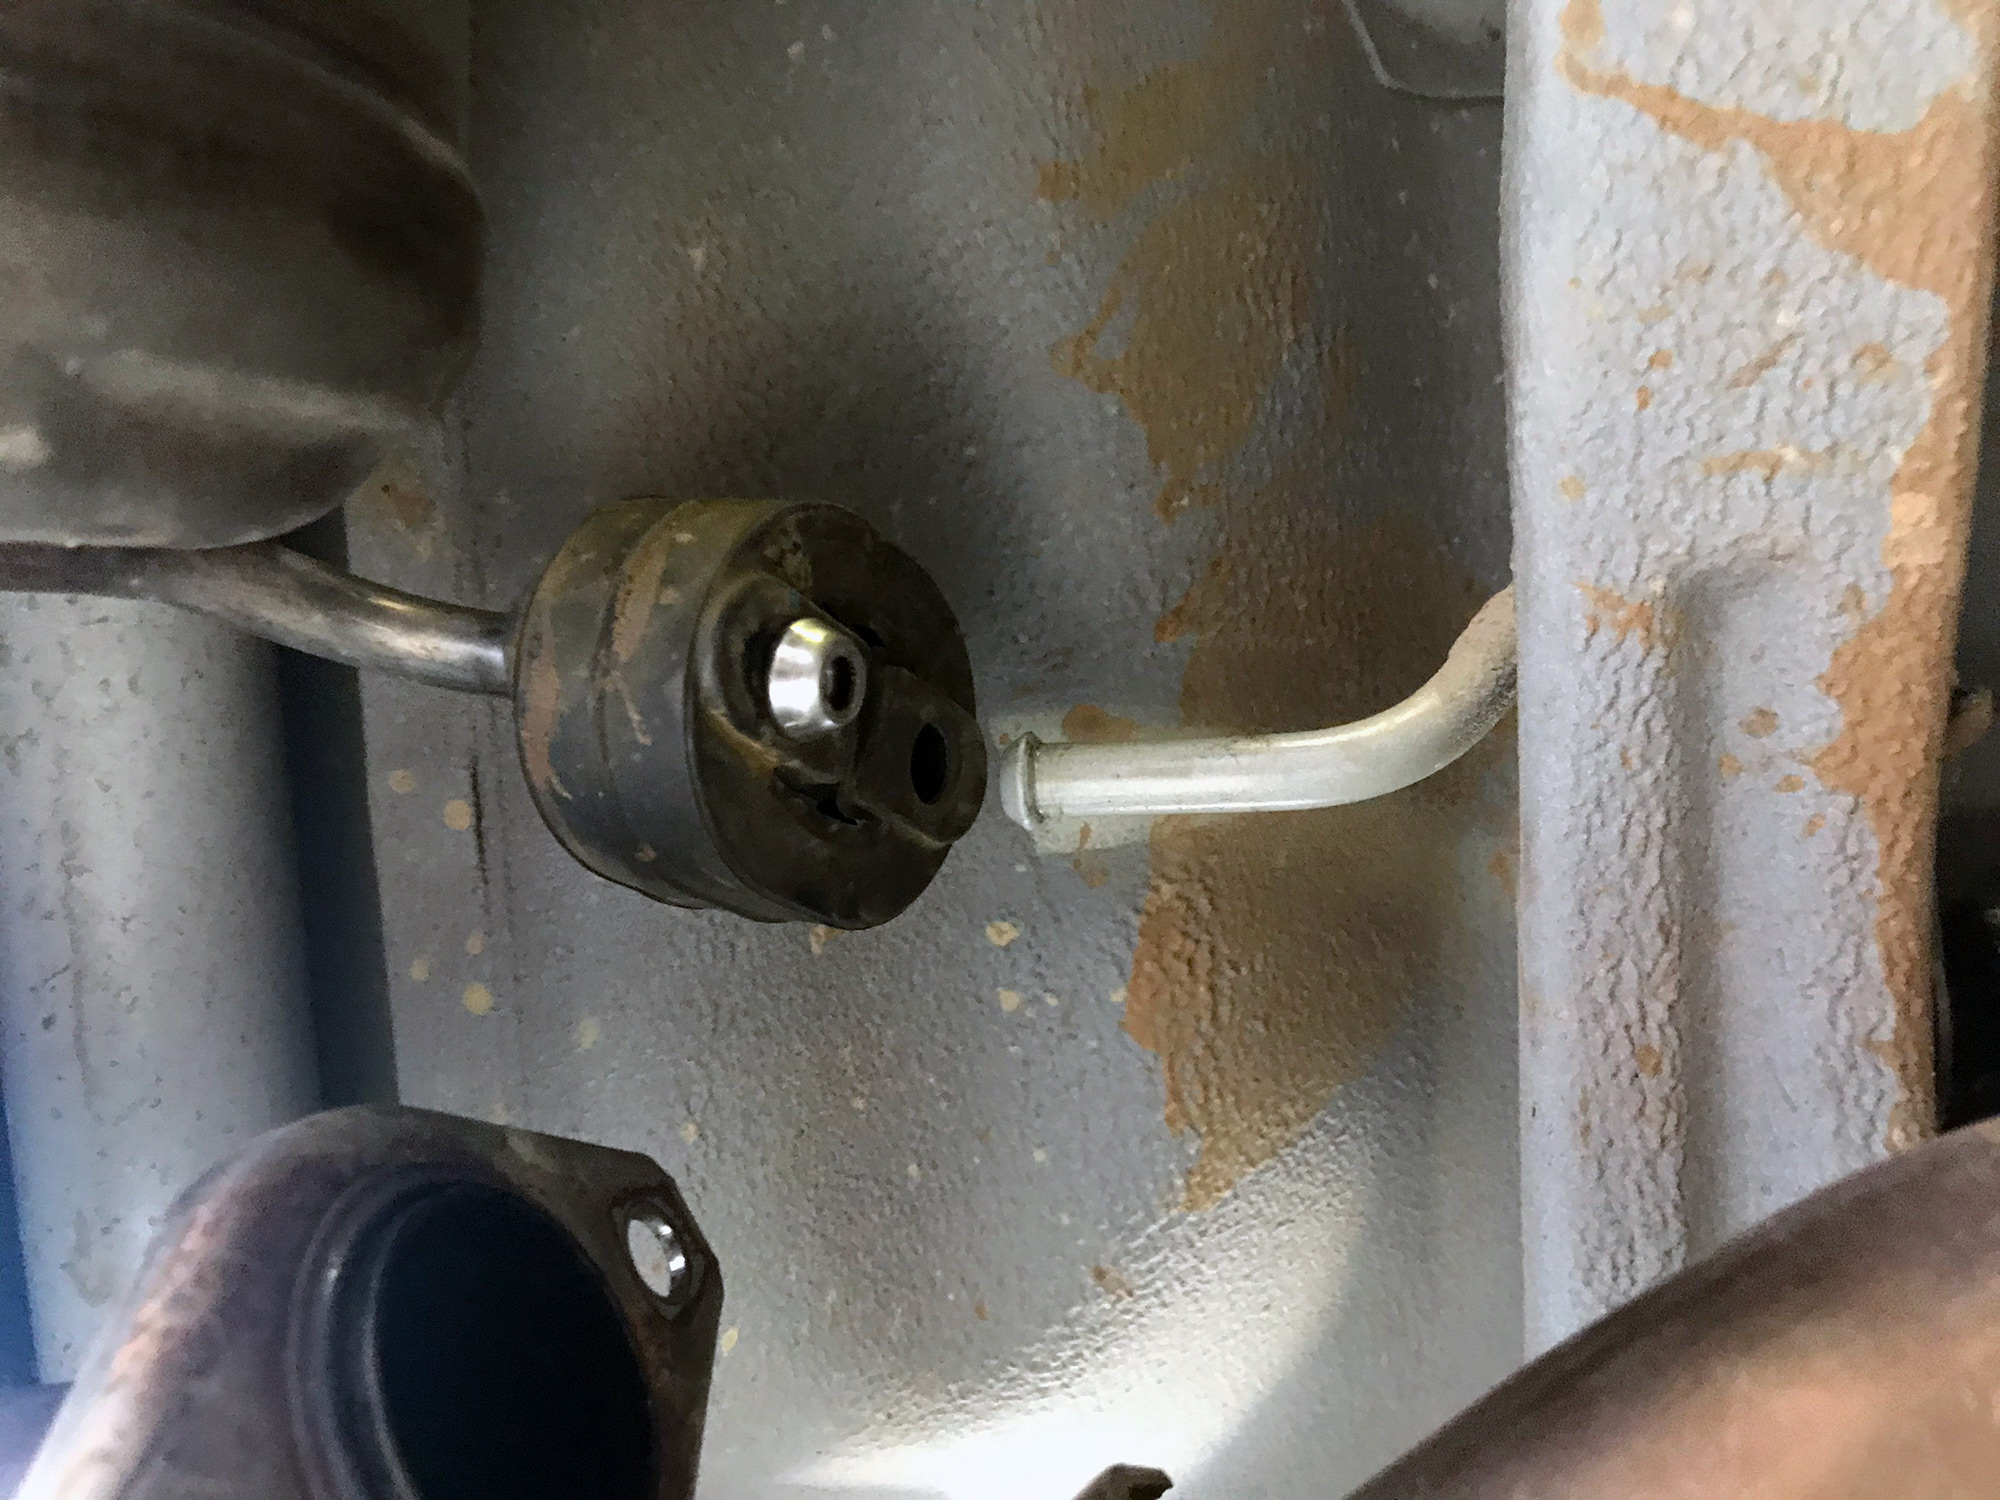
You can also go ahead and get the bolts with the springs at the 2nd cat pipe connection started, but remember to put the cone-shaped manifold gasket down over the pipe of the new headers. The lower bolts with the springs don’t get done up till the spring compresses: they have shoulders that stop then before this, so snug them up to this shoulder and then a little more is enough.
Next up the heat shield can go on. While the manifold has provision for all 4 of the bolts, I found the one at the back near the firewall down low was too hard to get to with my hands so I didn’t bother.
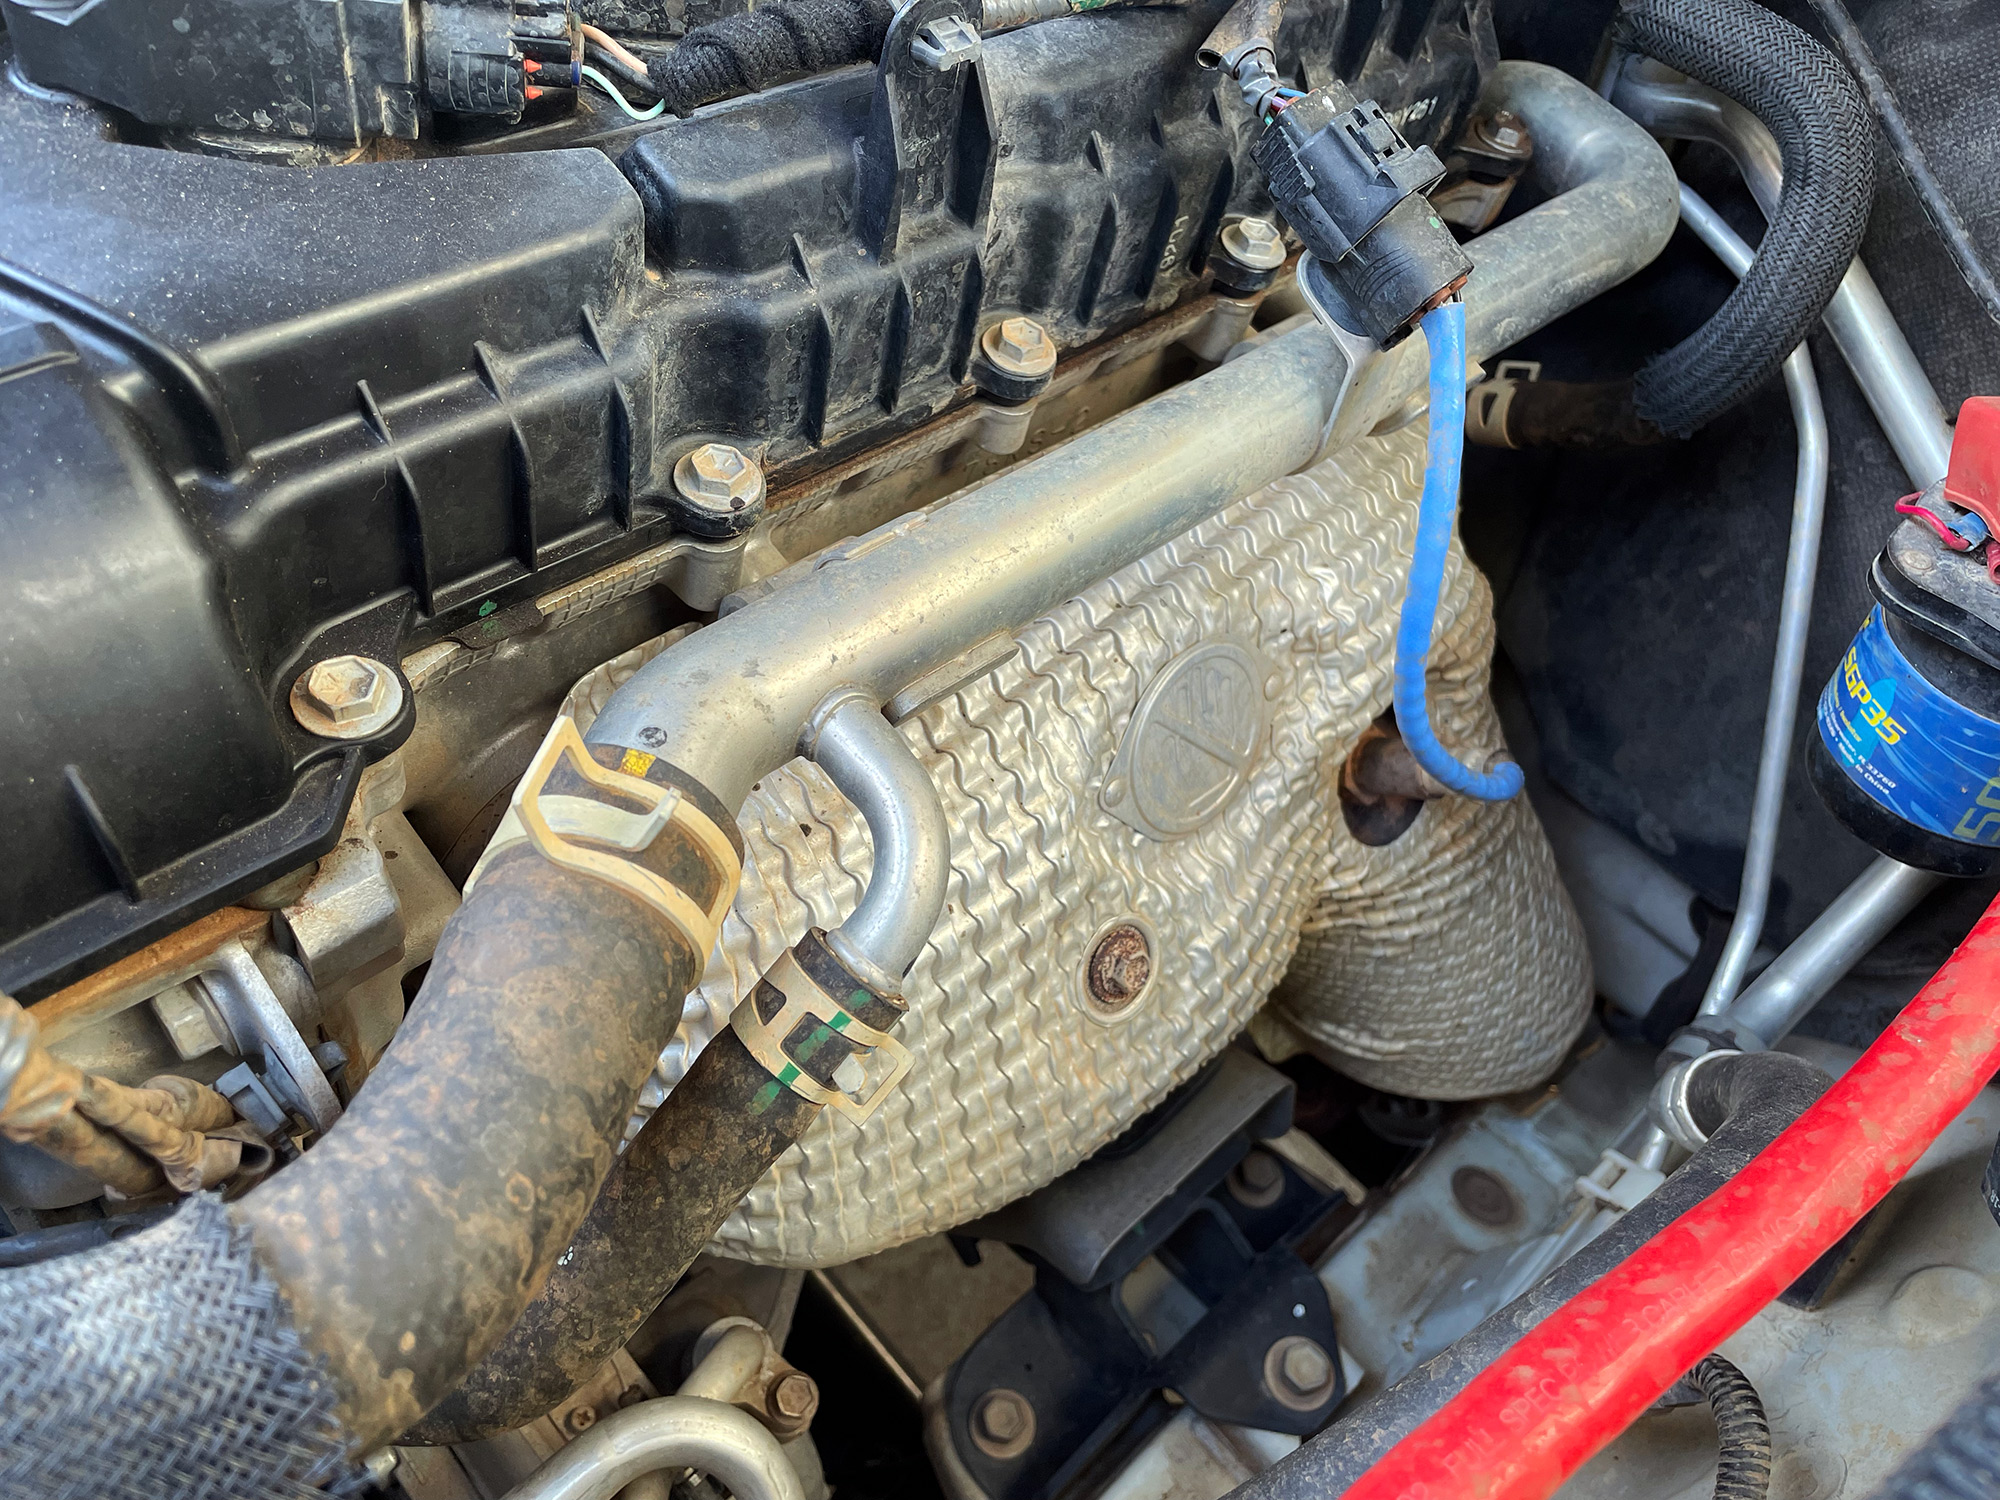
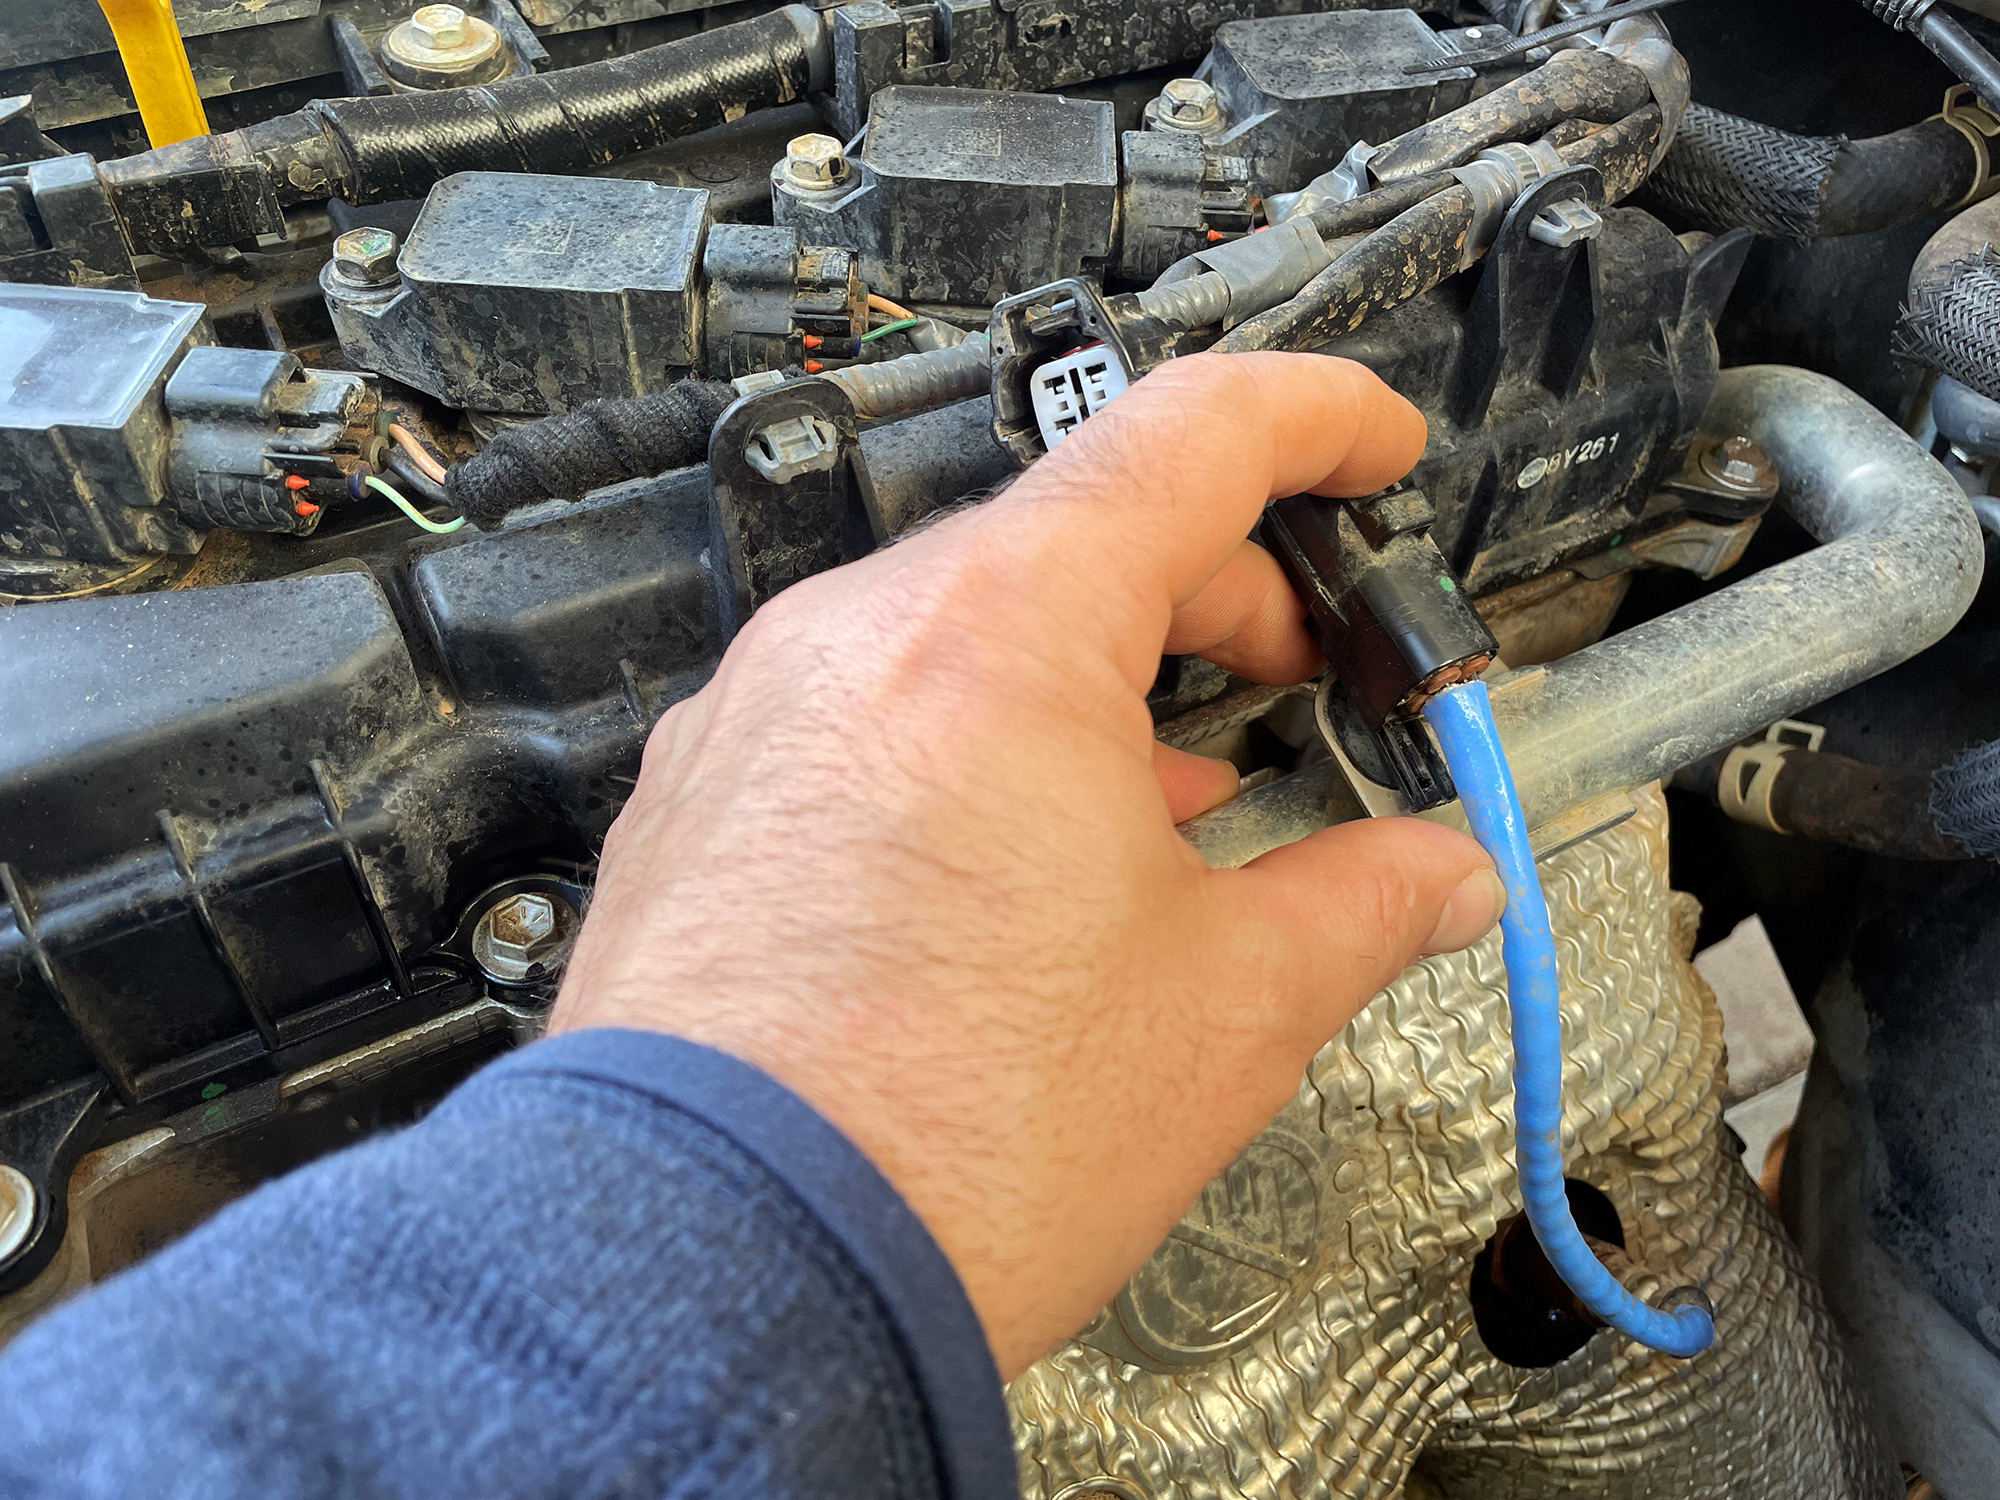
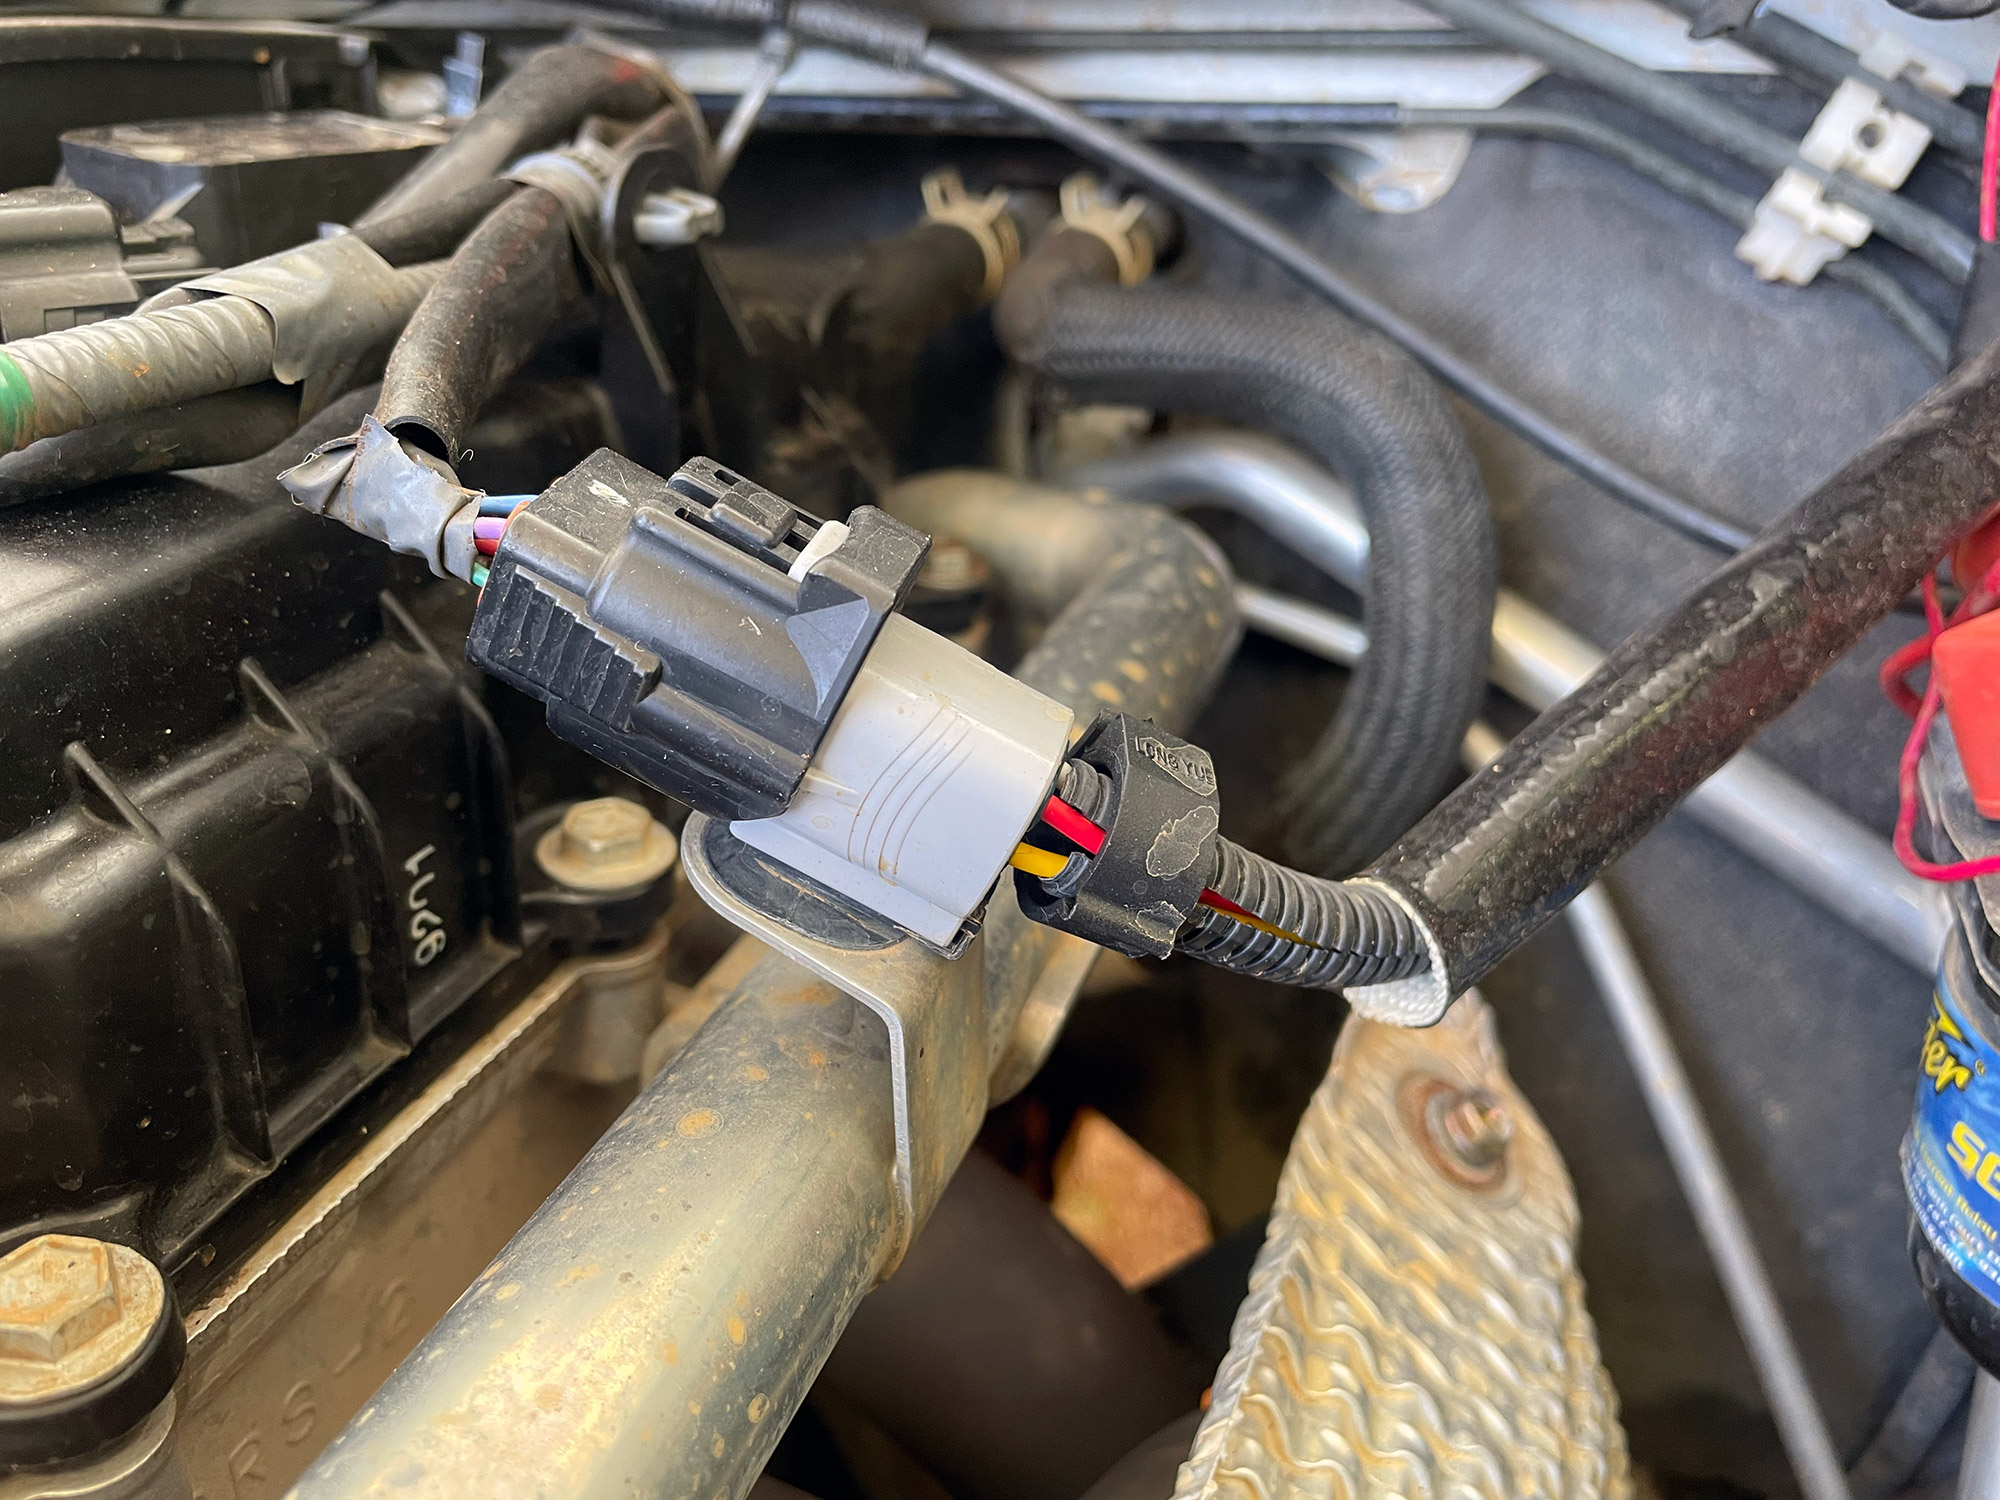
The O2 sensor goes in and gets tightened up – not excessively but good tightness – and clip it into the harness. Note that the factory wiring just works, but it’s very tight so I’d recommend an O2 harness extension. I’m currently searching for one, I’ll update it when I find the right one.
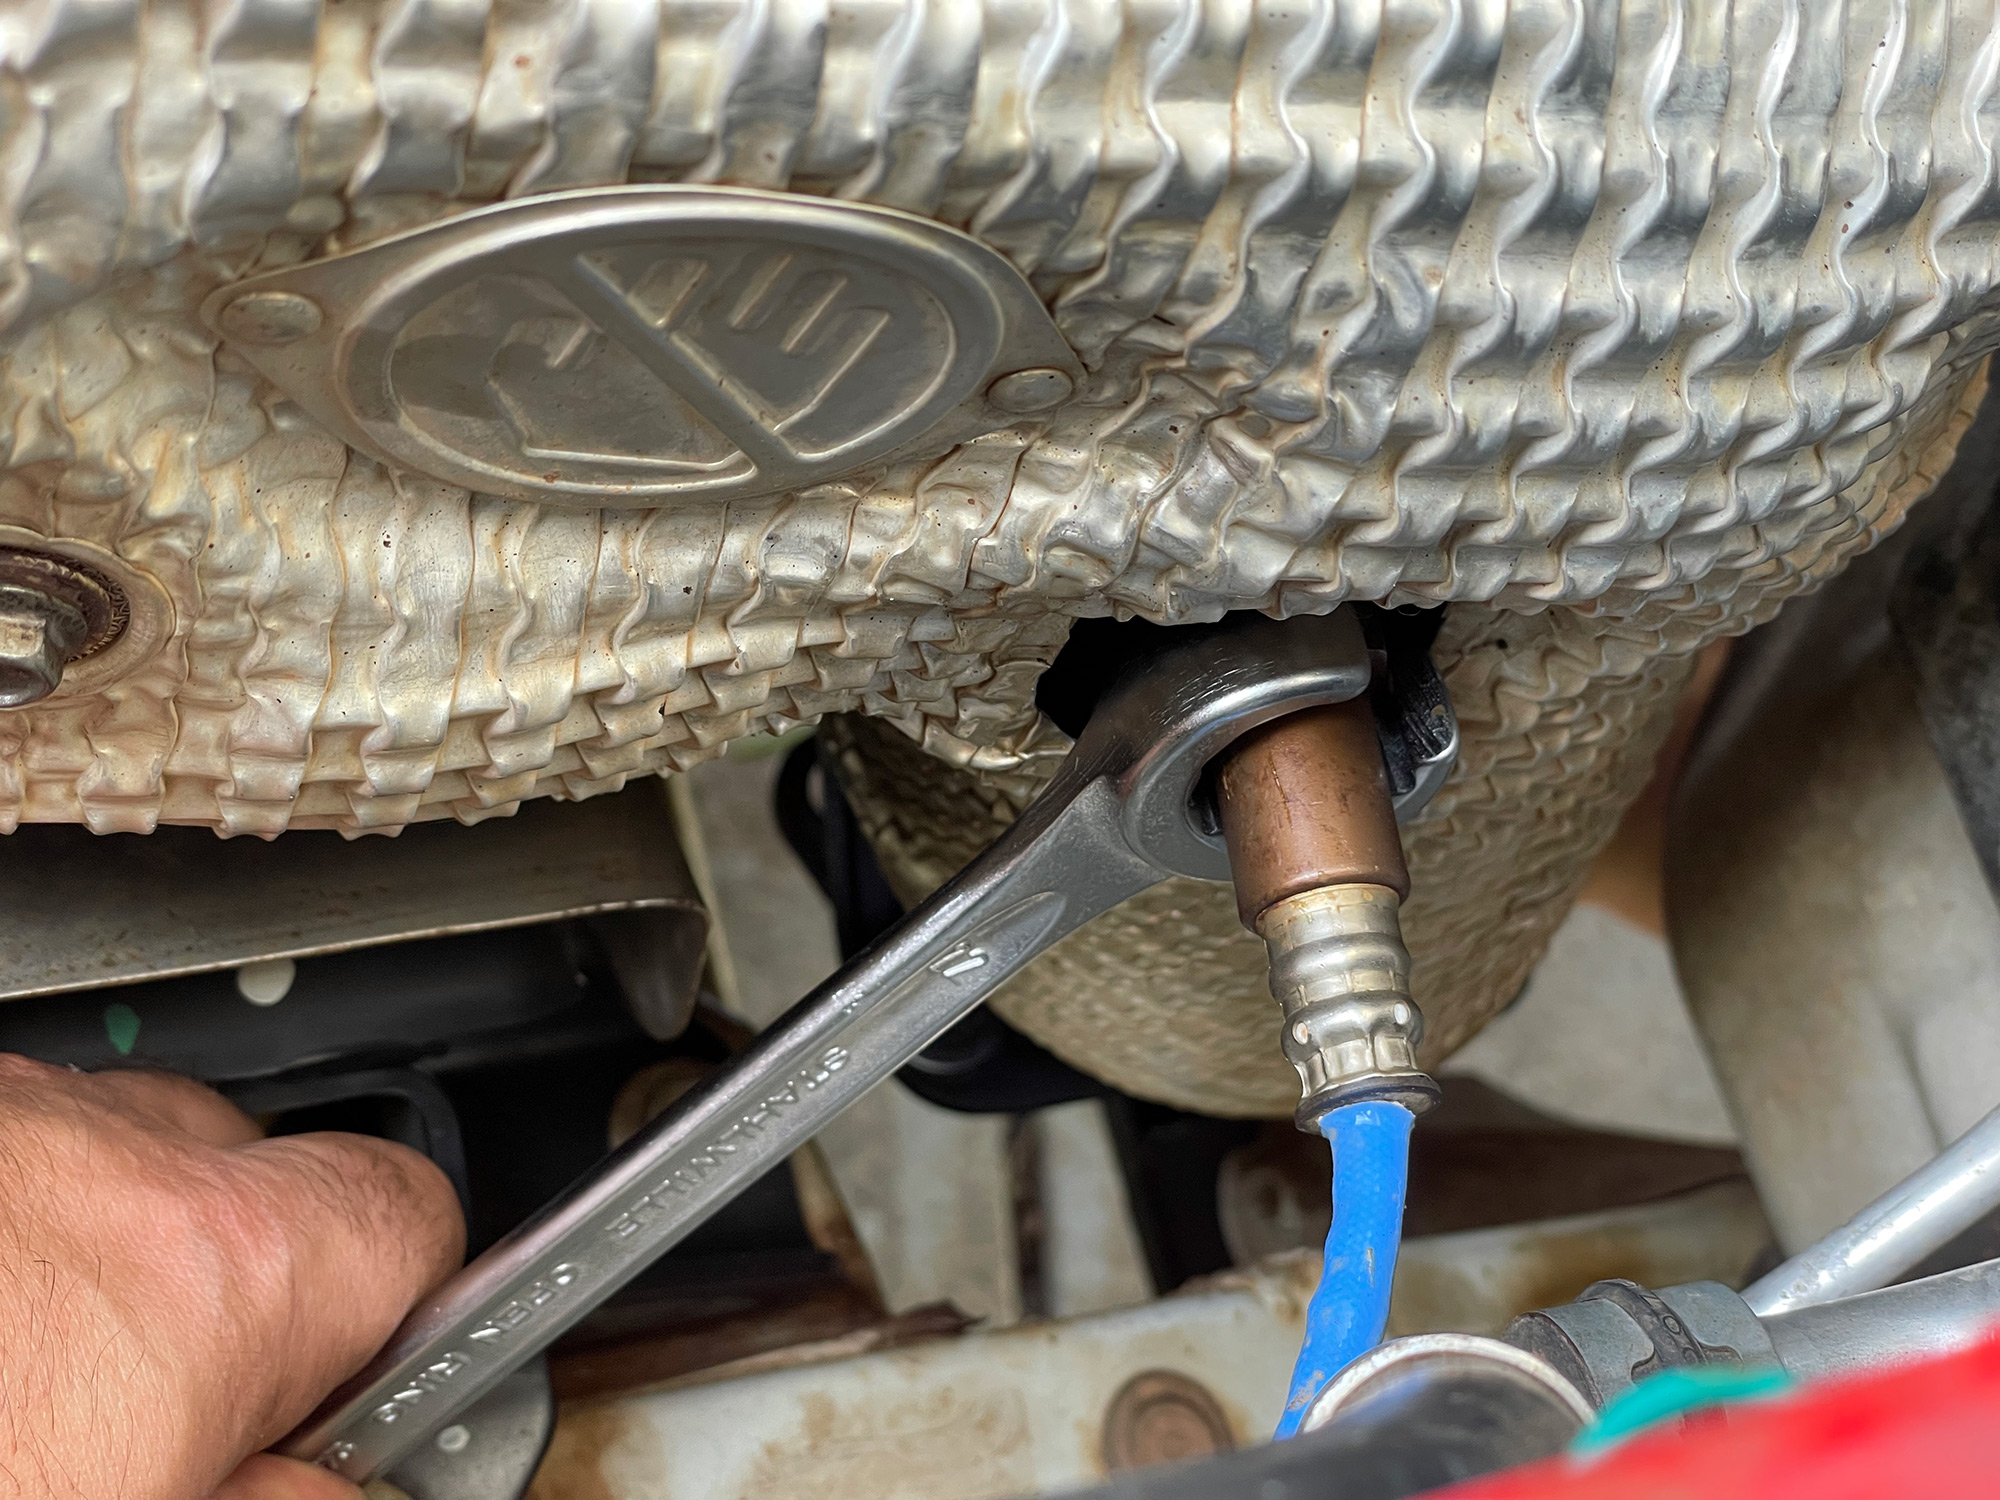
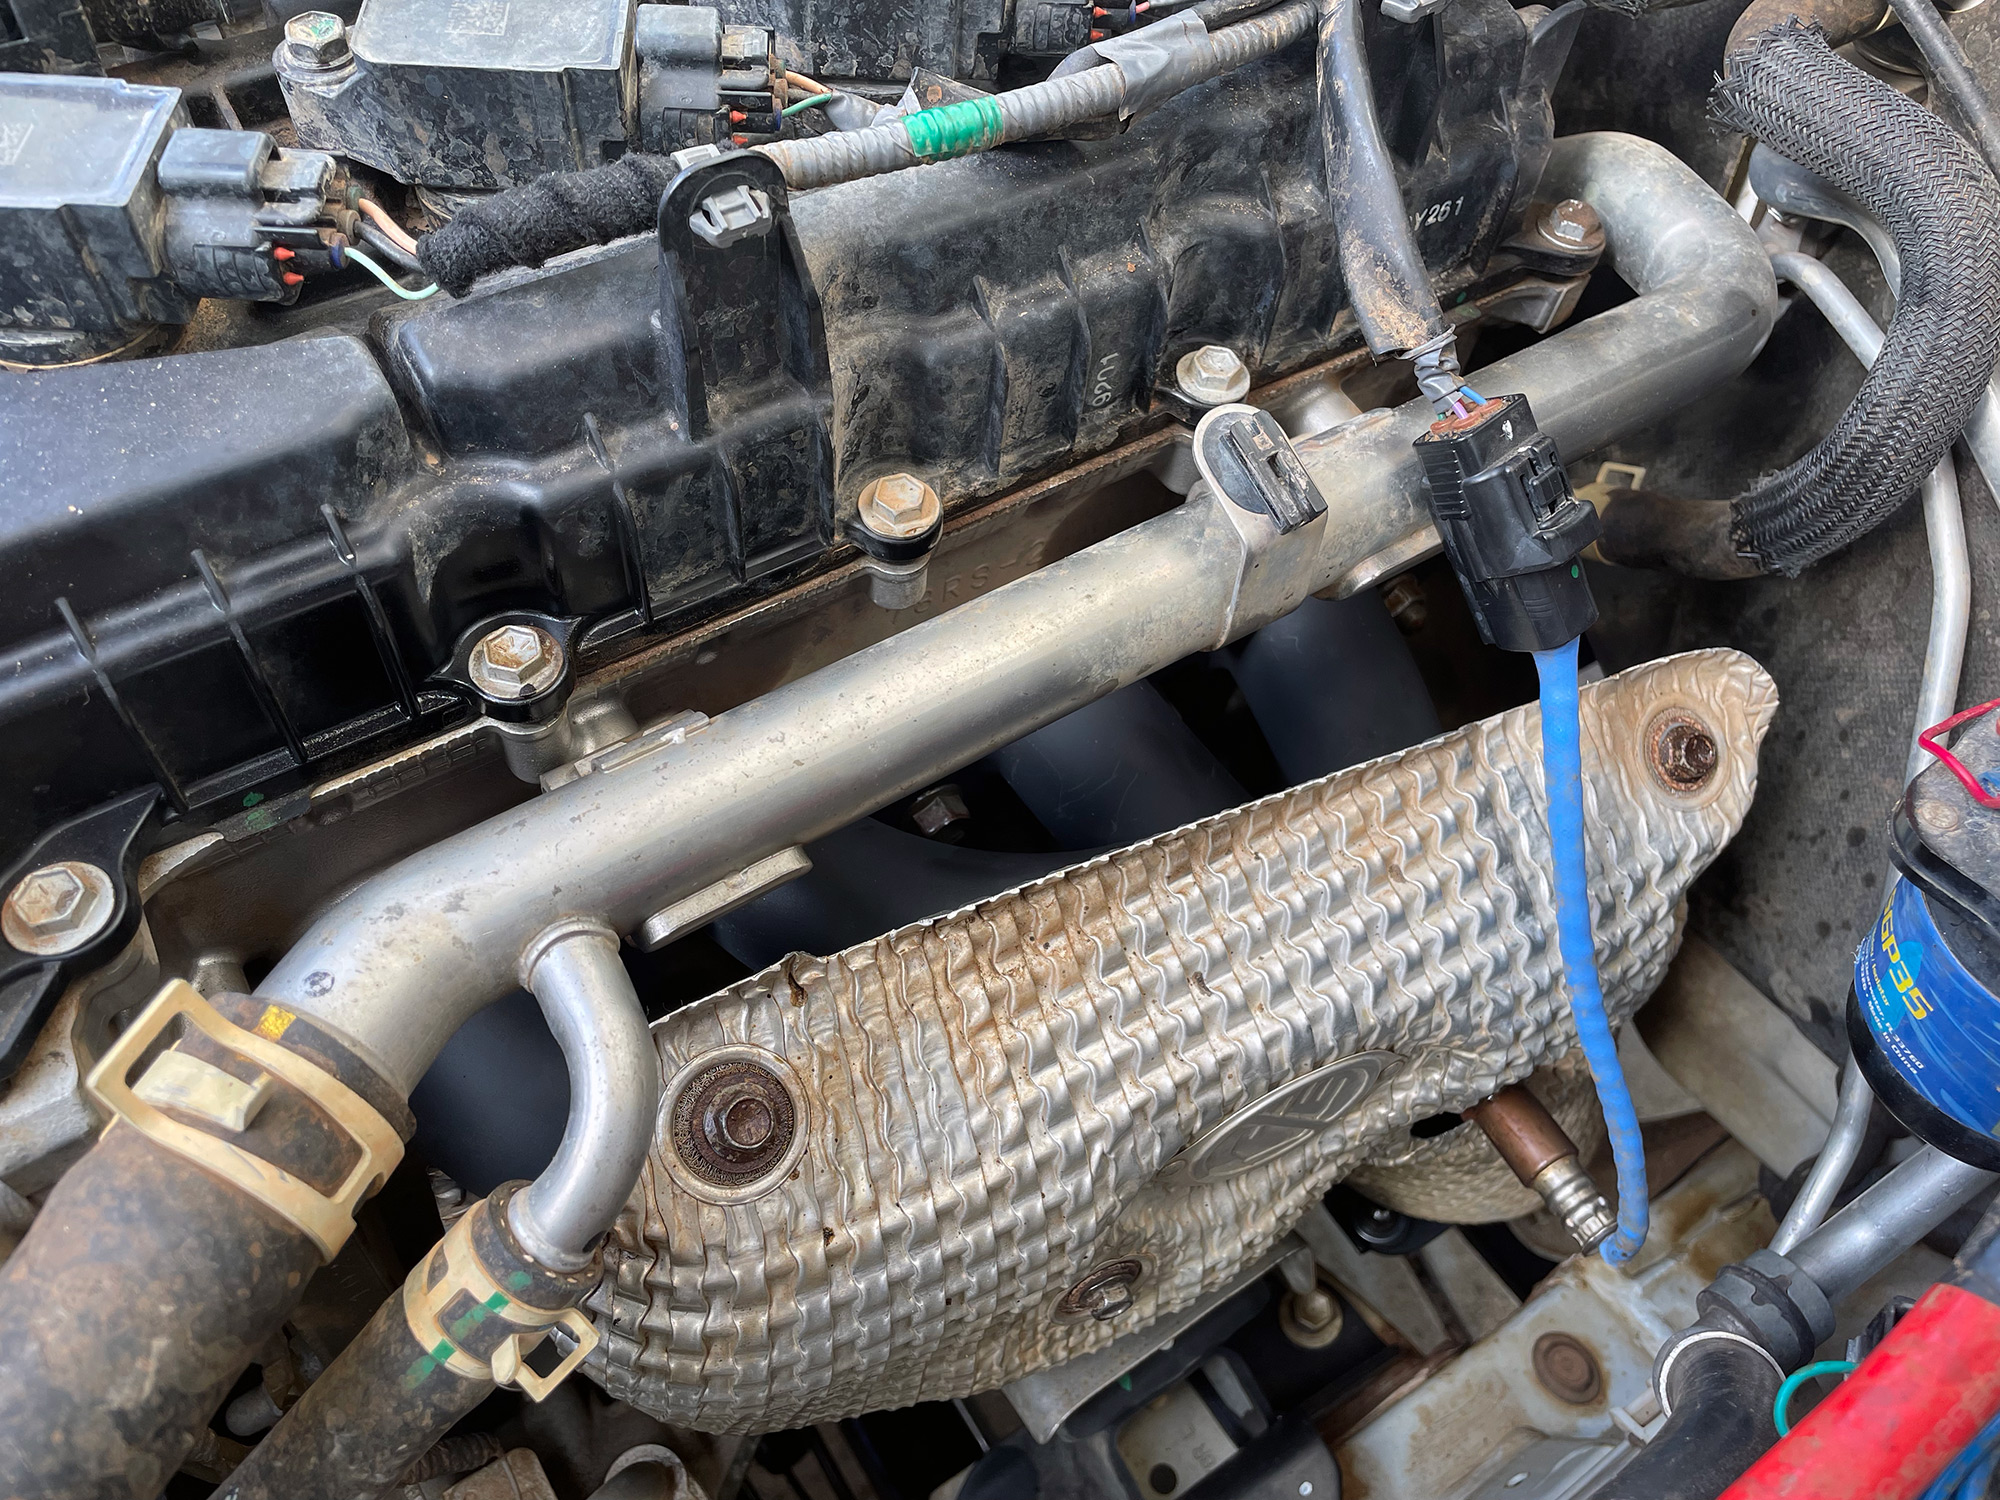
As an interim measure, I used some heat shielding I had in the garage to make a little ghetto heat sleeve for the connector to save it from any damage on the coolant pipe. I’d recommend proper fire sleeve along with the extended cable just to make it the best possible routing you can.
And that’s it! New manifold installed and works pretty well even with the factory 2nd cat pipe.
O2 sensor extension cable
I wasn’t able to find a correct off the shelf extension cable for the oxygen sensor. Apparently AVO might be releasing one later in 2023 compared to when I have done this writeup, however. I tried a few options that people talk about and all appeared wrong.
Fortunately making your own is easy. Here’s each end of mine.
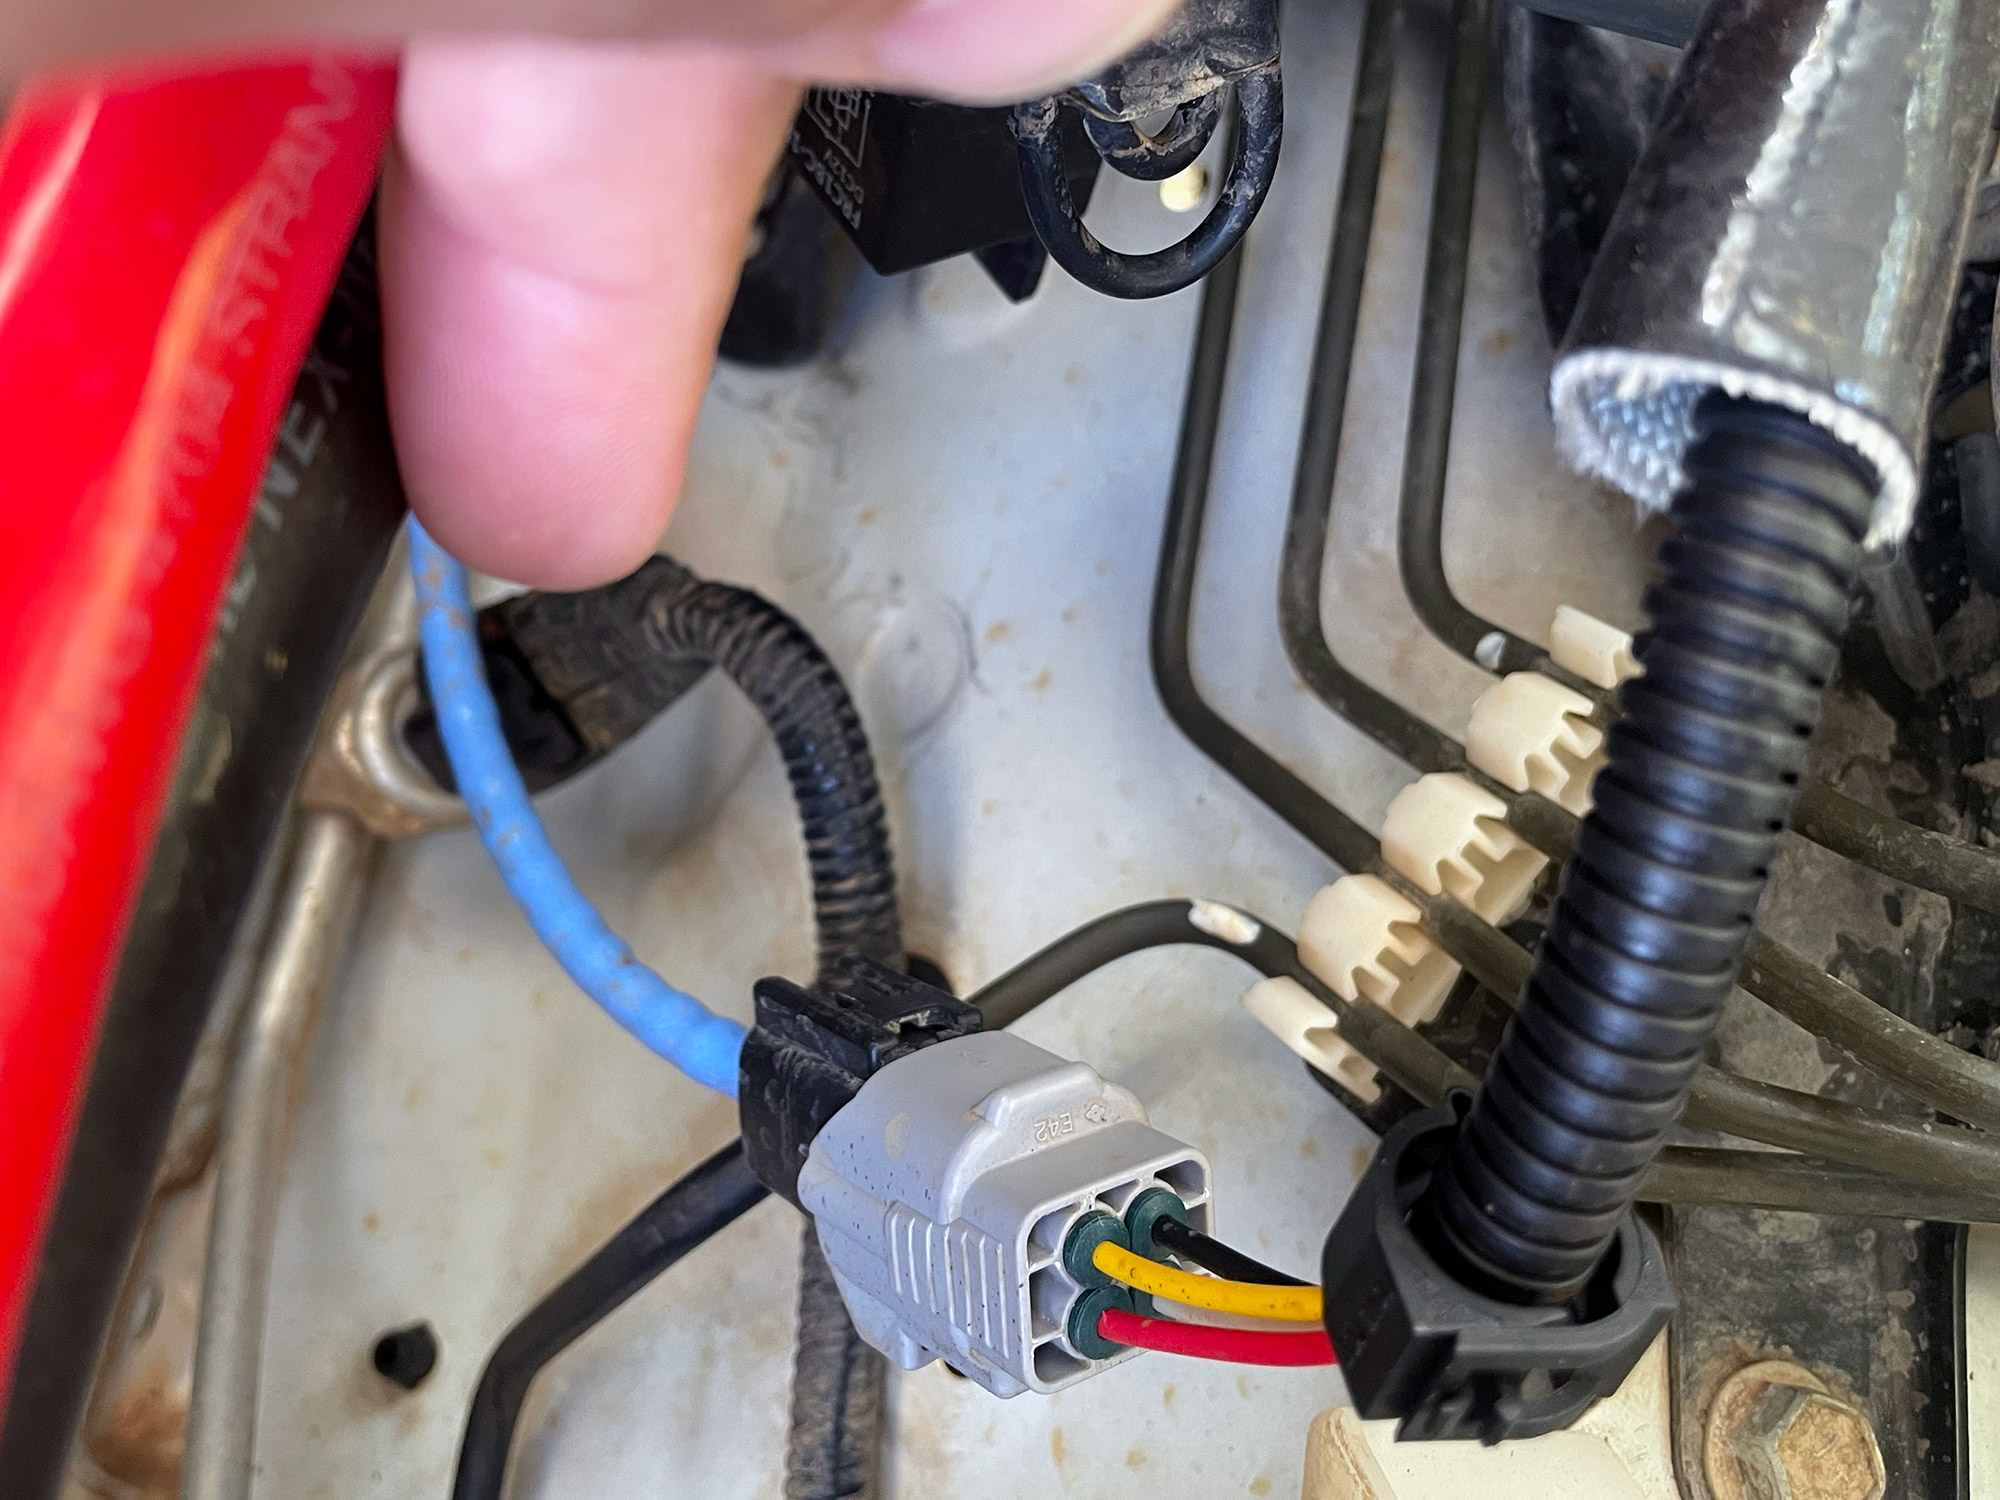
To get good heat proof wiring it might be easiest to buy an extension cable, and then just swap the plugs on the end. You don’t need much length, but I made one about 45cm long as that’s what I bought as one of the test cables. This lets me route it around the back of the ABS pump and my onboard compressor. You could definitely get away with much shorter, around 10cm or so of extension would fit the cable like standard.
The connectors you need are Sumitomo TS connectors. I bought mine from Eastern Beaver, but any supplier of 0.090″ pin Sumitomo TS connector shells will do. Pretty much these are like any crimp terminals so not hard to assemble, assuming you have an ok set of crimpers. I also used some silicone wire/hose sleeving to help with heat protection.
Crimp on one end of cable, put on the various sleeving products you want to keep the wires organised, and crimp on the other end of the cable.
Fitting catback system
Fitting it wasn’t hard at all, about a 30 minute job. Rottweiler for scale as to the size of the package it came in. He’s a big dog though, so it’s clearly a big package.
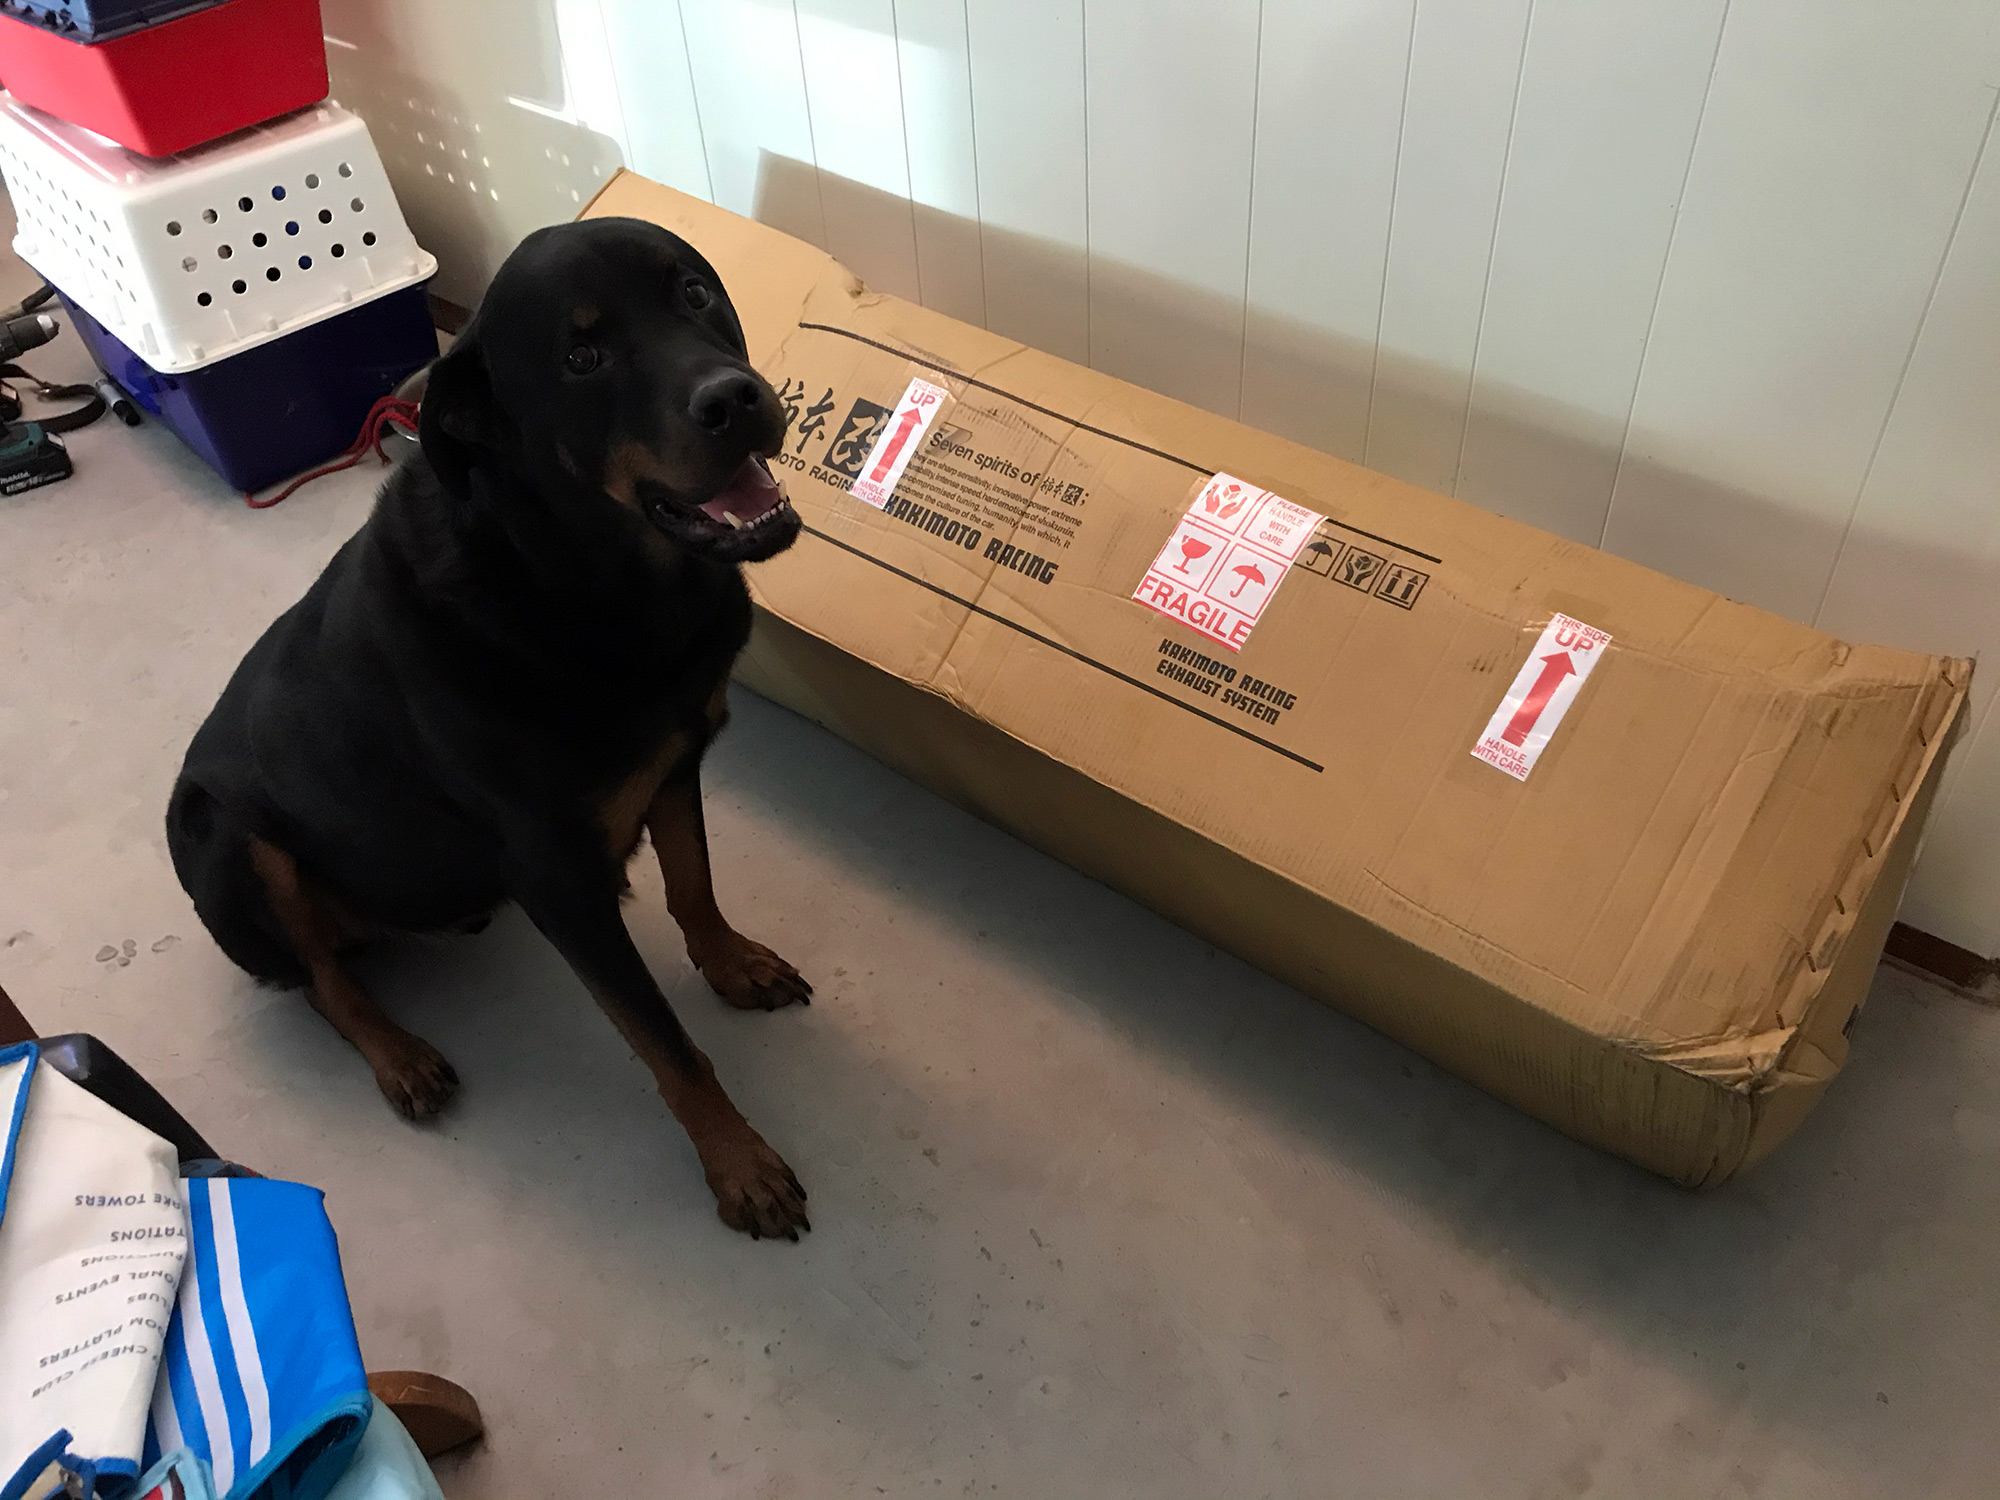
The midpipe is the vast majority of the package though.
It almost exactly follows the routing of the factory pipe.
Pretty easy to fit, start at the front and work backwards to remove the standard exhaust and reverse that for fitting the new one.
A bit of silicone spray helps encourage the rubber hangers off.
The hangers do come off relatively easily although my car was < 6 months old at this point. Maybe they’ll be worse on a newer car.
There is a good size difference in the pipework and also the muffler itself, but nothing huge where it’d be a problem to fit in the car either.
Hangers obviously need to be swapped over to the new exhaust before you put the stuff under the car.
I found it easier with the car’s axles weighted to get the midpipe through, interestingly enough. The movement forwards as the axle comes down made it a bit more annoying to route despite having more room.
The front bolts when refitting need to have a washer put underneath them; these washers are supplied with the exhaust.
All goes back on fairly easily really since it follows the factory routing.
There is also a supplied gasket for the rear of the midpipe to join to the back section. Remember to put this in!
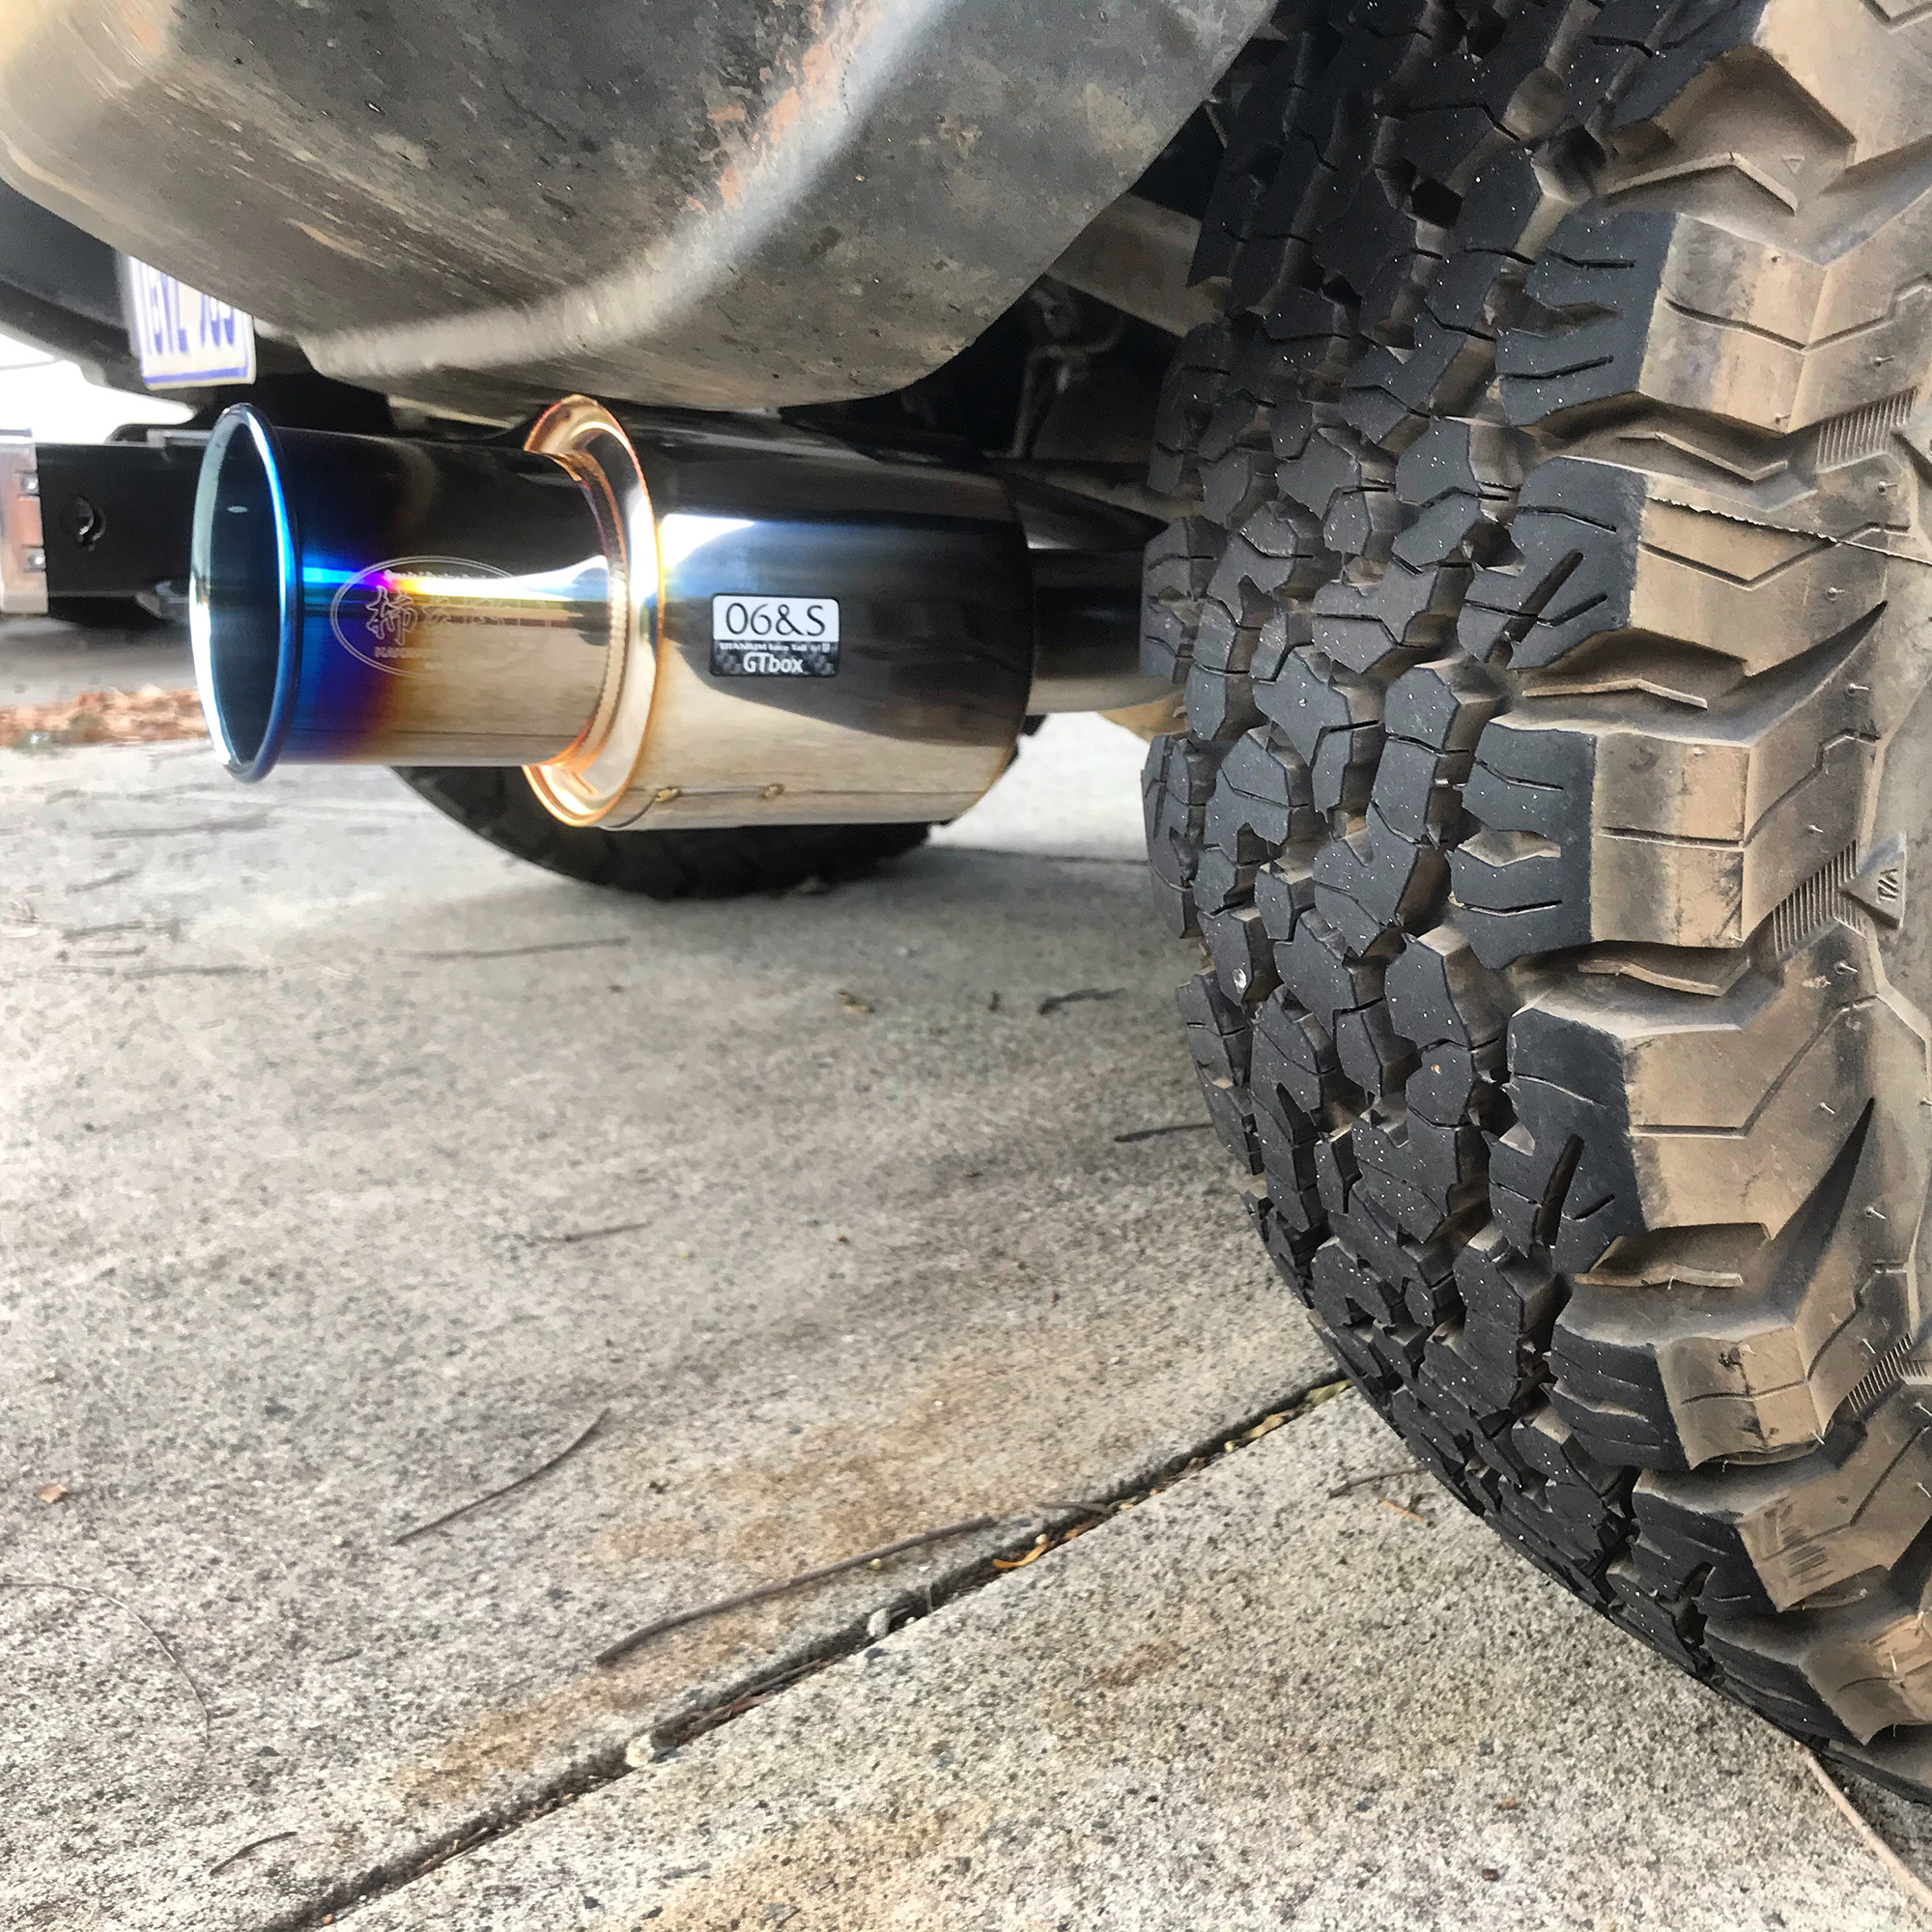
Once all fitted all you really see is the large tip, which I actually quite like the look of even if it is a bit incongruous on a 4wd.
As noted, I had it rerouted with the midpipe to suit the 80L Long Ranger tank. No details of doing this, I paid someone to do it and they did a good job, though I’ve never photographed it as I instantly buried the car in mud afterwards and it looks less nice like that.
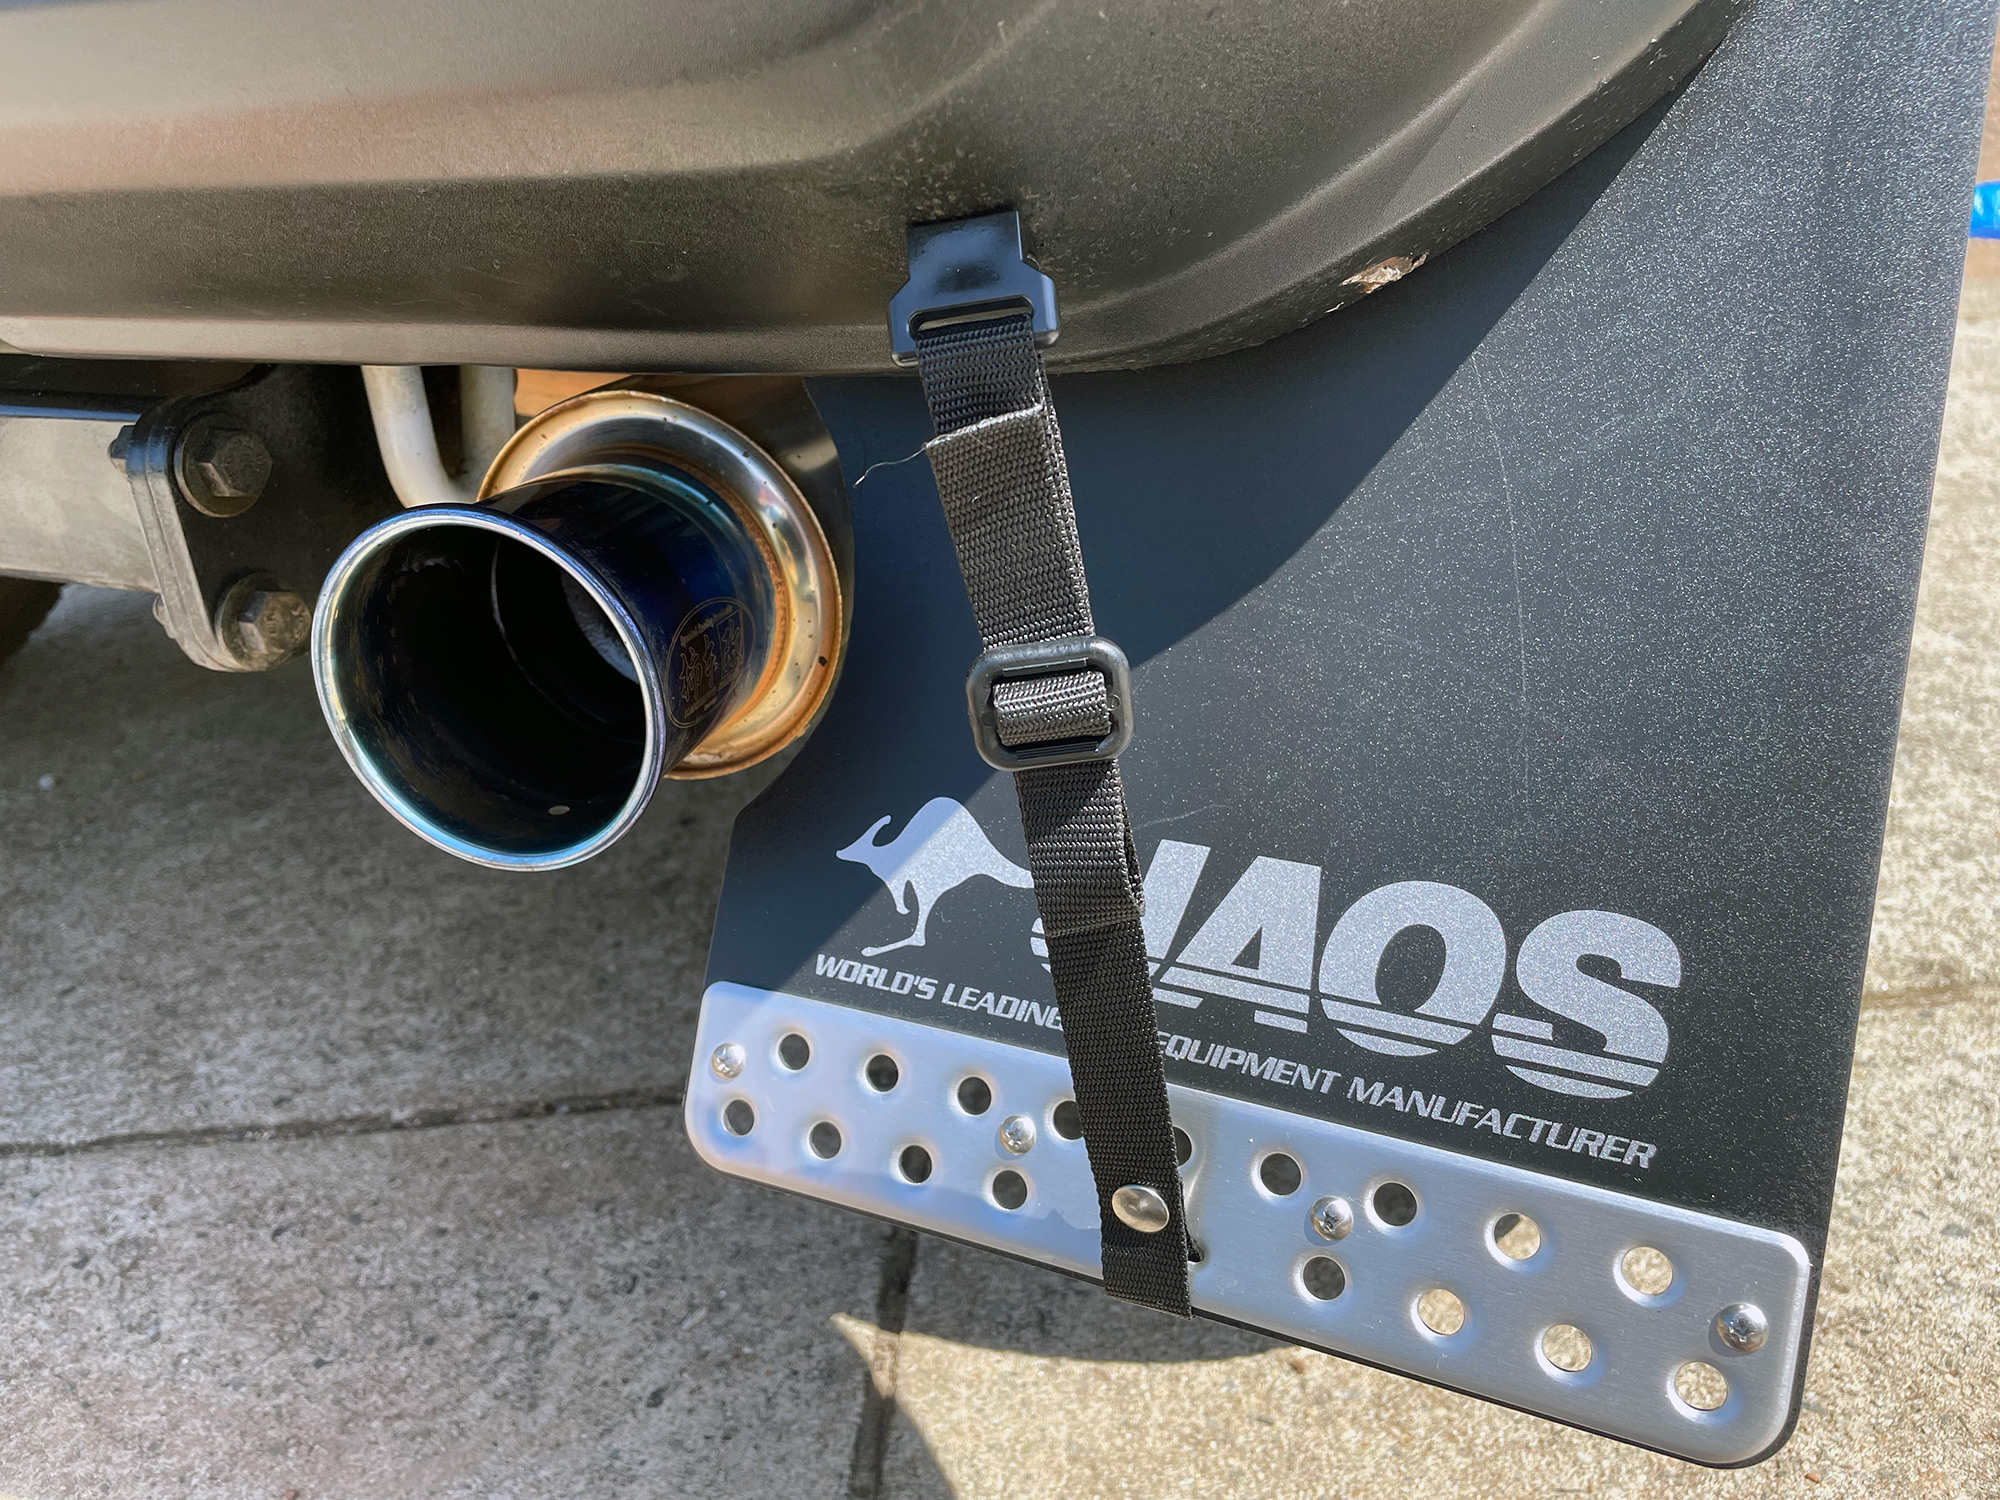
I also had to trim the rear mudflaps to make them work with the muffler, no biggie.
The FAQs cause I get so many Qs about the exhaust
To answer most of the questions I get about it:
Where did you get it? How much was freight?
I bought it pre covid, so stuff was different. I’d search Kakimoto GTBox 06&S and see what you can find. For the headers, AVO Turbo World in Australia are the suppliers.
Does it make more power?
Just a catback: I really don’t think it does. It sounds meaner and so I rev the car more which makes the car faster, though.
With the headers: it feels like it, but will wait for a dyno tune to see how it’s doing. I didn’t get a dyno run before fitting the headers so there is no true back to back comparison.
Does it make the fuel economy worse/better?
It’s probably worse because it sounds awesome and I rev it more. If I drive it sensibly I get the economy I got before installing it, though. It’s not better, and it’s not worse. Just sounds amazing and that’s what matters.
Aren’t you worried about ruining it offroad?
Mud and stuff just adds character. It’s tucked up really well and I’ve not caught it on anything; there’s other bits of the car that would get caught before it did.