Jimny camping gear options
This isn’t meant to be an exhaustive list but it’s focussed on what I use camping and some rationale for doing so. There’s lots of ways to do it, and by no means is my gear ideal for everyone. I just wanted to put together some ideas for people to consider. I aim to be more comprehensive and help people understand camping options and tradeoffs in my broader writeup on camping 101.
Sections
- Chairs and tables
- Camp lighting
- Coffee!
- Tent, shelter and sleeping stuff
- Cooking and fire
- Fridge or other cold storage option
- Food, utensil and water storage
- Other storage
Chairs and tables
I’ve gone through a heap of camp chairs over the years and basically settled on some Helinox chairs. They are light and I find their pole arrangement pretty intuitive and fast to set up. Given I like a high backed chair, the two I have are the:
I was fine with the Sunset chair, but needed a 2nd one for a trip and the Savanna was all I could get locally in a high backed chair. It’s fine, but I’d also have been just as fine with two Sunset chairs.
I have two tables for camping: a small aluminium slat one I bought on ebay for next to nothing, and a fancy stainless steel Snow Peak Takibi My Table (LV-039) which can take an extra shelf beneath the top using the IGT tray part CK-085. The Snow Peak table is awesome, especially with the extra shelf, but don’t discount the super cheap ebay table either.
I’ve done a bit of a comparison of tables here.
Some people like a rear door table but I prefer mine for dedicated storage, and, I often want a table away from the car. If I need a table in the back of the car then the rear part of my false floor suffices nicely!
Camp lighting
People often ask about Jimny camp lighting. I’m a fan of a minimal setup so I don’t want anything permanent etc. I also carry a torch permanently in the car so I’ll add details of that here, too.
The best thing I’ve found for camp lighting has been some Hardkorr magnetic small lithium camp lights. I got the 4 pack as it’s a good number to have around. With magnetic backs and cords to hang them off a hook or around a tent/awning pole it’s a really good option. They double up as excellent additional lighting within the car if you need it, and are a godsend if you’re working on the car deep up in somewhere that’s dark.
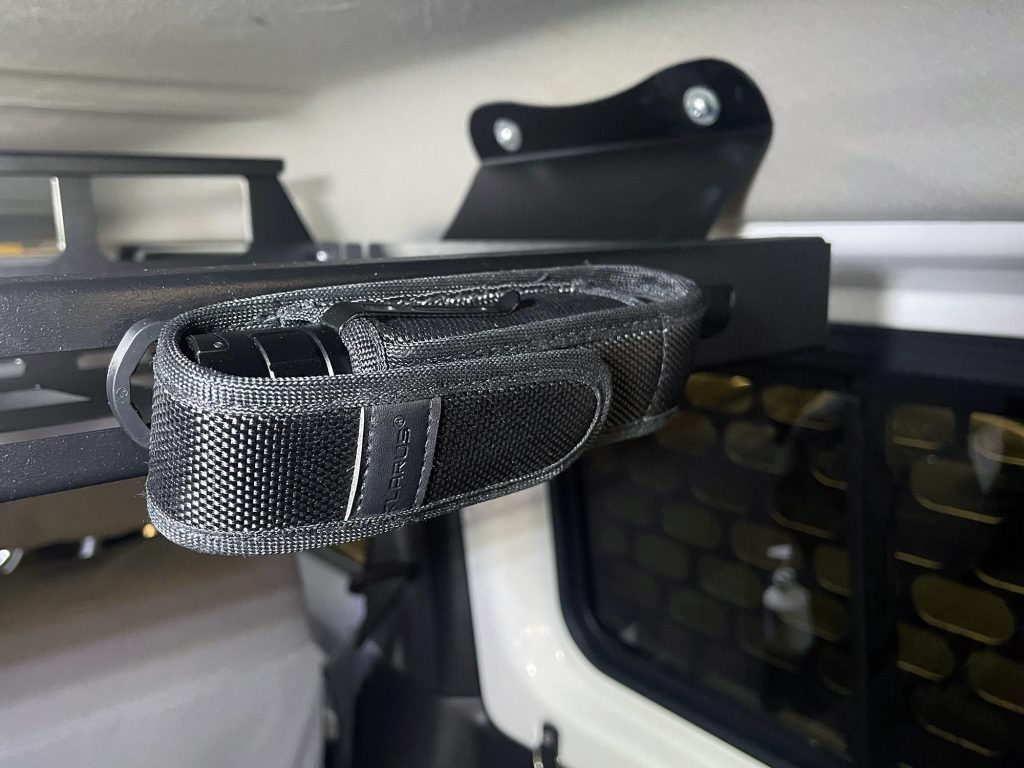
For a torch for the car, I have a Klarus XT2CR torch. It’s pretty bright with a few modes, but the best thing about it: USB-C rechargable. It also comes on a nice pouch that I can hang off the rear of the TLR roof shelf so it’s always in the car and available if I need it.
Finally, head torches. I have some, they work, I would recommend you have one for camping these days. Battery power and LEDs now are good enough that you can get bright and lightweight ones. The technology moves too fast for me to recommend something specifically. The two I use are the Black Diamond SpotLite 200 and the Petzl eLITE headlamp. The Petzl is smaller and comes in a cool protective case, the Black Diamond is brighter and takes an easier to replace battery (AAA versus a large cell battery). The Black Diamond has been discontinued but there are other options they sell which are like it, just brighter.
Coffee!
The single most important thing for me. I’m not really a snob about coffee – happy to drink lots of different options, including instant – but I do have a system and a setup I prefer. It’s pretty much all depicted in this picture:
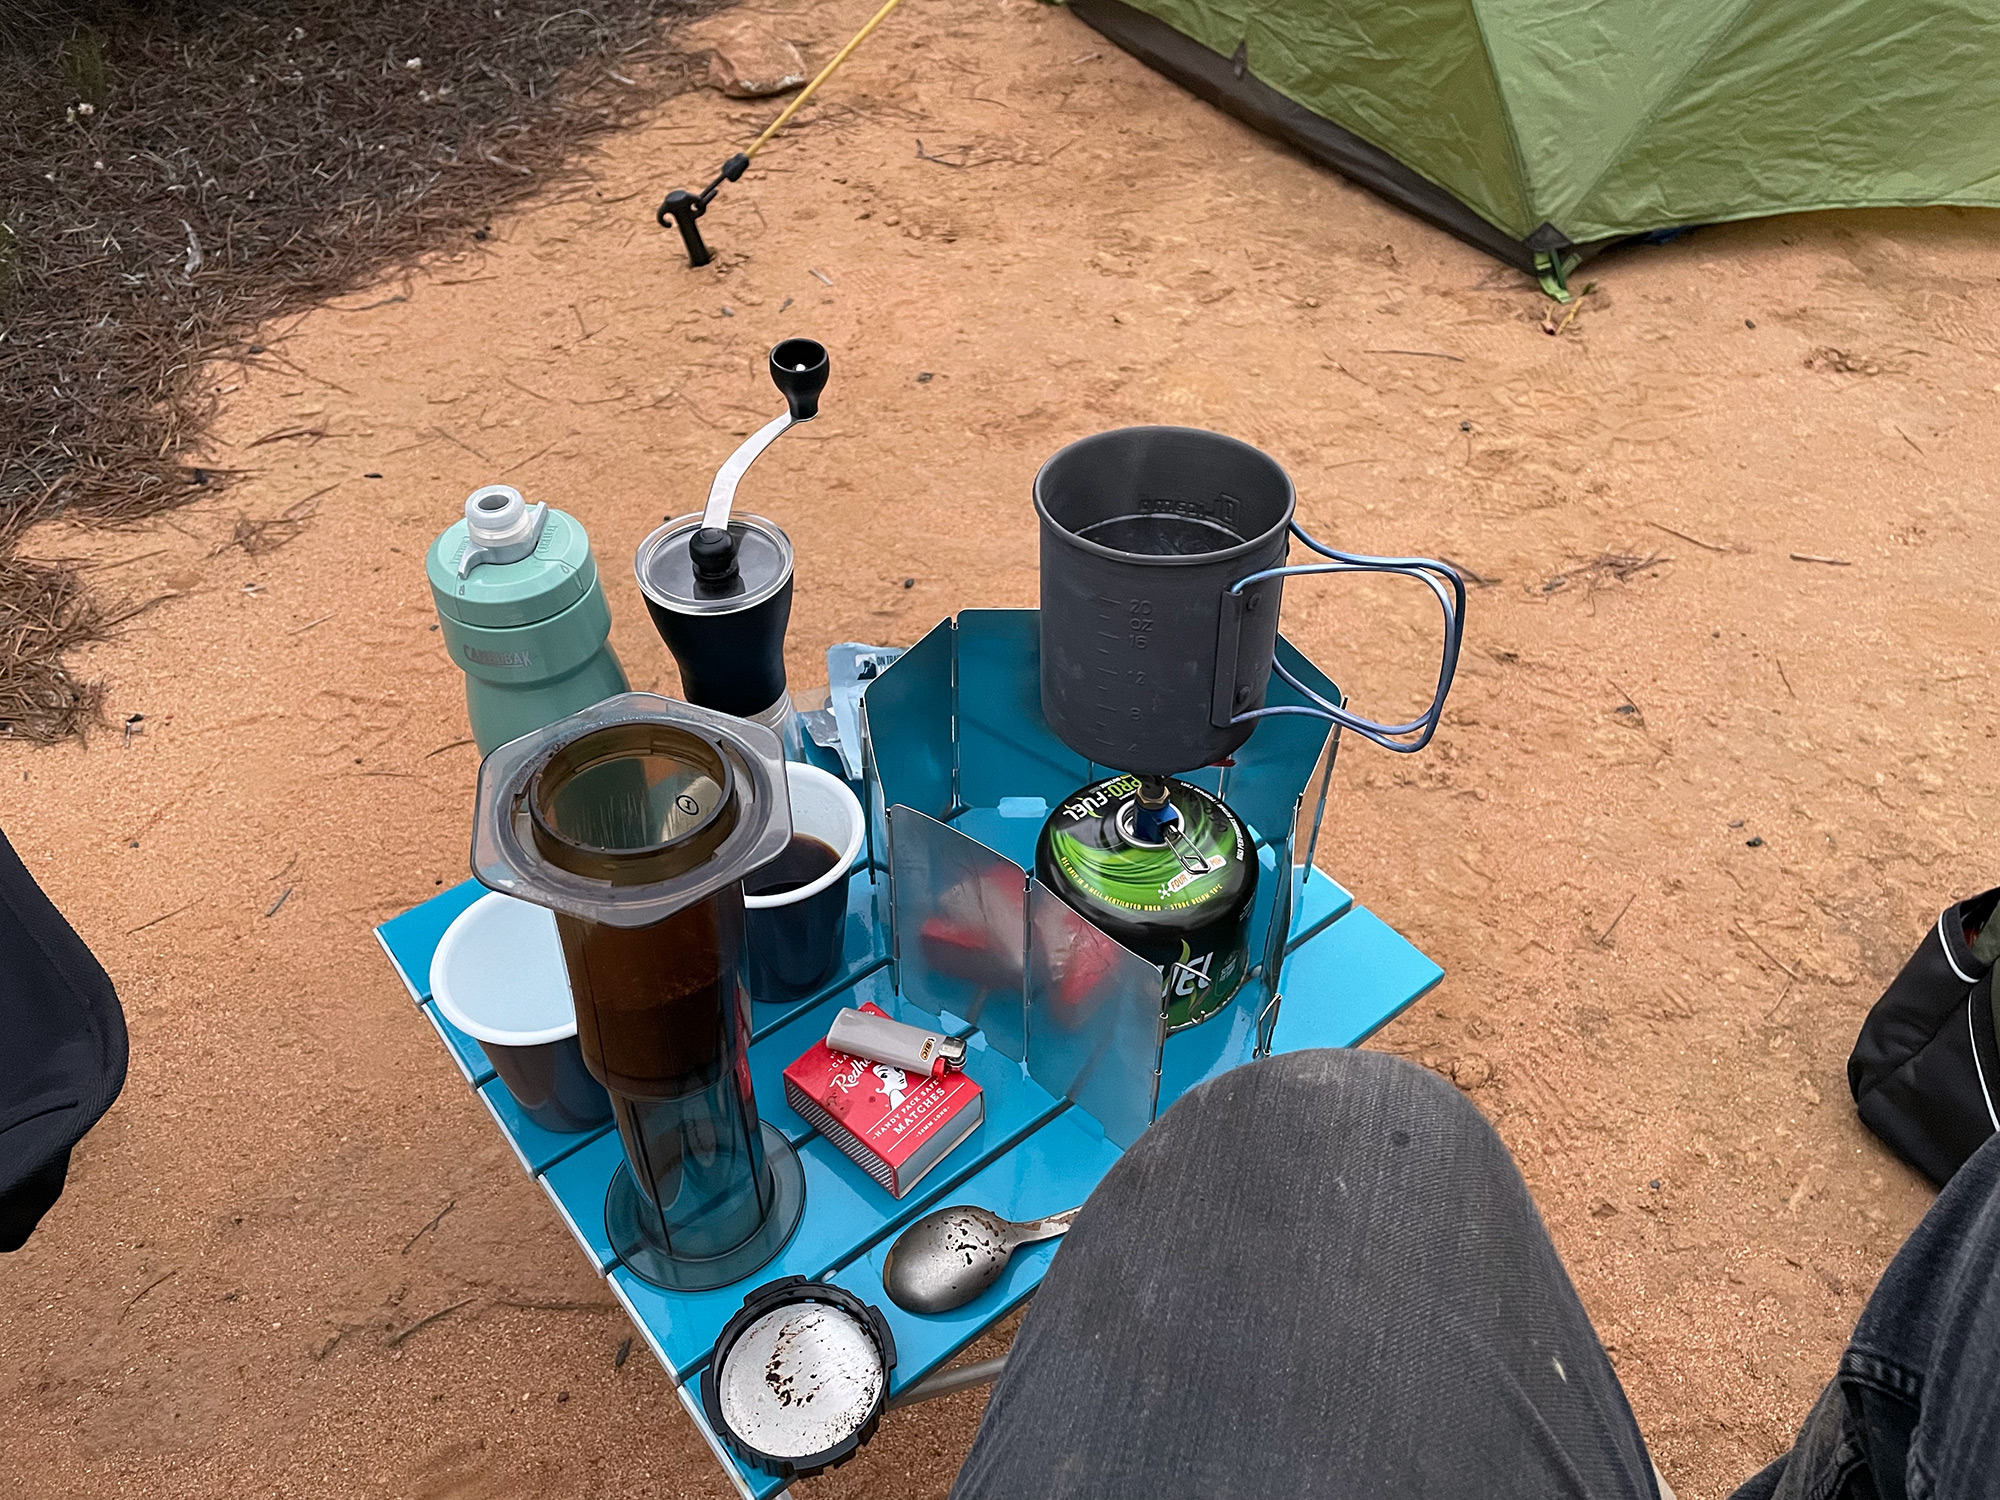
I like being able to grind my own beans and for that the Hario Mini Mill is perfect. General coffee making on the go I usually go for an aeropress brew, using a reusable metal filter. A hiking stove and cup is the easiest way to heat up the water; I discuss my cooking stuff elsewhere on this page for more details of that. If I’m not using a fridge then small UHT milk cartons are a good option, or tubes of sweetened condensed milk; if, however, I do have the fridge then in goes the milk. I don’t froth or steam milk when camping, a long black with a dash of milk is my camping coffee of choice.
If I wanted to brew coffee for a larger group of people, a French press is the best option. My preference here these days is the double walled Espro P7 press. Expensive, but also easier to brew 3-6 cups of coffee in one hit.
My other sleeper option for camp coffee is a naked moka pot. The Bialetti mini express 2 cup does require you to have a couple of espresso sized cups handy but it’s an easy way to get 2 shots out and works great on a camping stove, not to mention takes up very minimal space. If you get in some practise at brewing with something like this you can produce really nice coffee for 2 people; if you don’t want it as espresso then just heat up some extra water and make it up to your taste.
The out there option I’m restoring up at the moment is a La Pavoni europiccola. It’s incredibly bulky and not at all the best way to do it, but you look hilarious pulling this out at camp. The heating element is only 1000W so it’s very doable off an inverter and a 2nd battery in a Jimny, although I am a little tempted to find a way to gas convert it using a hiking stove. No pics of using this in the bush yet, but one day I’ll go get some.
Tent, shelter and sleeping stuff
Tent
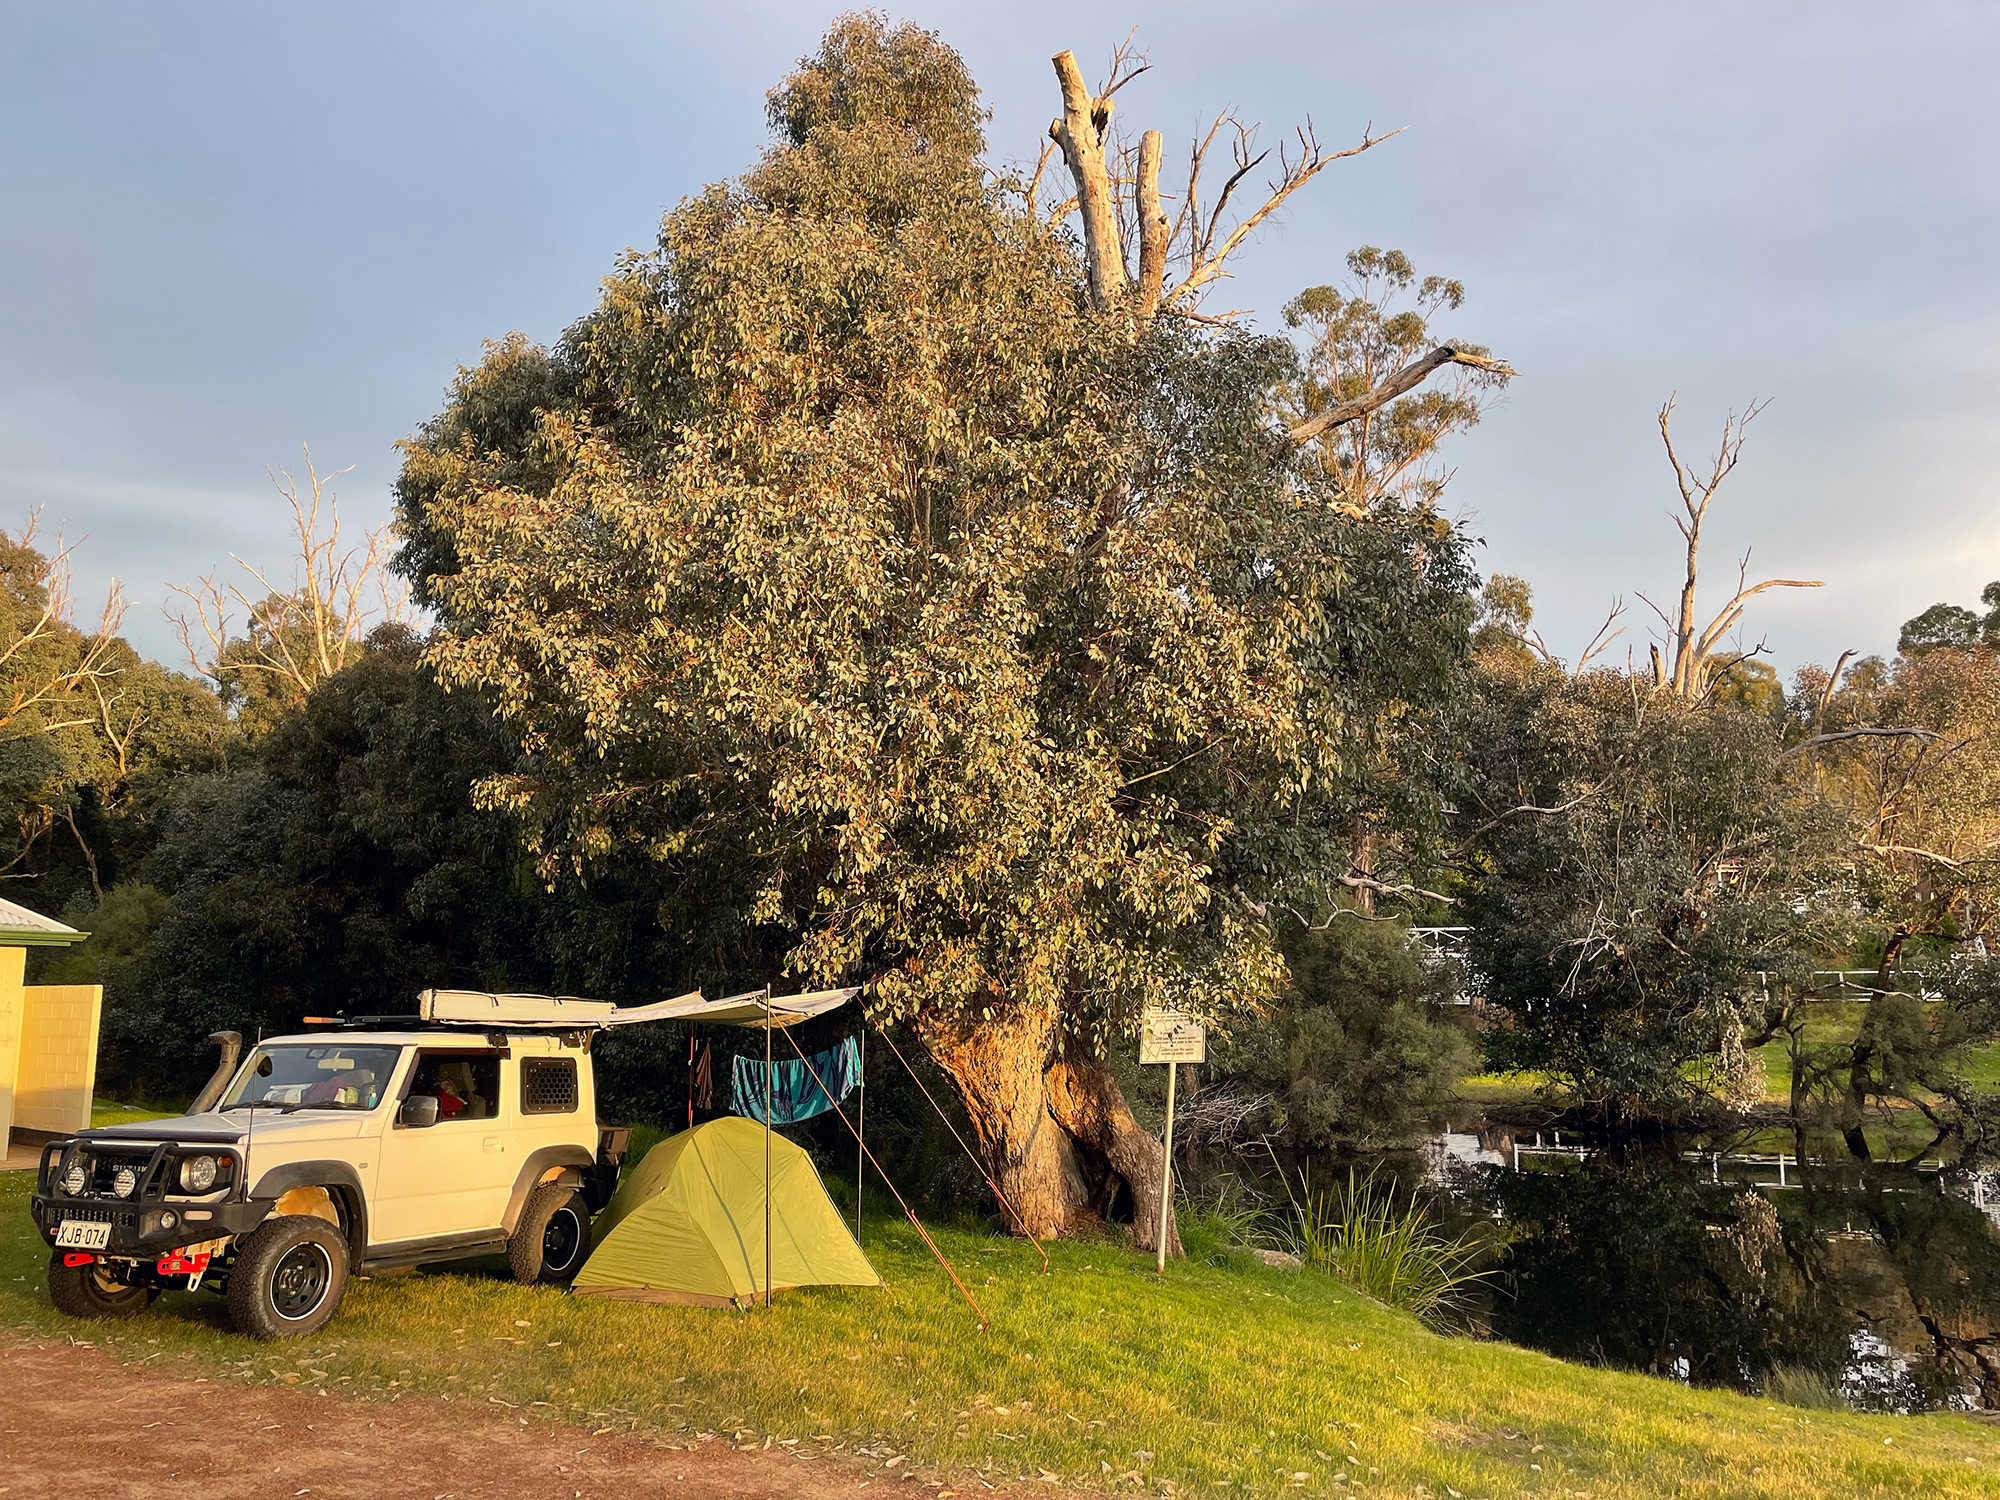
This can be an almost religious thing for some people. Plenty of people love swags, or roof top tents, or small fold out camper trailers. For me, though, I prefer a nice simple hiking tent. They’re light weight, resilient against heaps of weather, can be fast to set up if you get a good one, and very comfortable.
My current tents of choice are the MSR Hubba series: I have an older Hubba Hubba 2 person tent, and also a recent Mutha Hubba 3 person tent. While light, they aren’t light enough to get into a serious lightweight backpacking setup – but at under 2kg for the entire thing you’re still miles ahead of a swag or plenty of other tents.
The older 2 person tent can be pitched with the ground sheet first, then the fly first, then you finalise the pitching of the inner tent. This can be great when it is raining. I haven’t found how to do this
I do have nice lightweight sand pegs for use in the sandy ground you often find in Western Australia. I got the MSR sand pegs mostly so they match the tent, but also because they were easily available and are small enough when I use the tent bike camping or for work trips.
I don’t have any pictures of my sleeping mat or my sleeping bag; neither are anything special. I generally use a sea to summit inflatable sleeping mat, I really like its inflation sack and I find it’s warm enough for me even in pretty cold condition. I use a few different down sleeping bags, I go as light as I can just for ease of packing it in – but a good stuff sack helps a lot no matter the kind of sleeping bag you use.
Camping window shades
This is a pretty quick one, but I have some camp shades for all of the windows. There are some genuine Suzuki ones but they are pretty pricey as a set, and these work ok. They are “Jimny camp window shades”; bought via ebay, pretty sure they are sourced out of China and probably findable on aliexpress too. They came with a storage bag which I don’t use.
They work ok, although there is some light leakage. Some custom well manufactured ones would be worthwhile if you were sleeping in the car a lot; I mostly use these to keep the car cool when I have parked it somewhere.
These don’t work great with the sliding rear windows but I can make them work to block out all of the light.
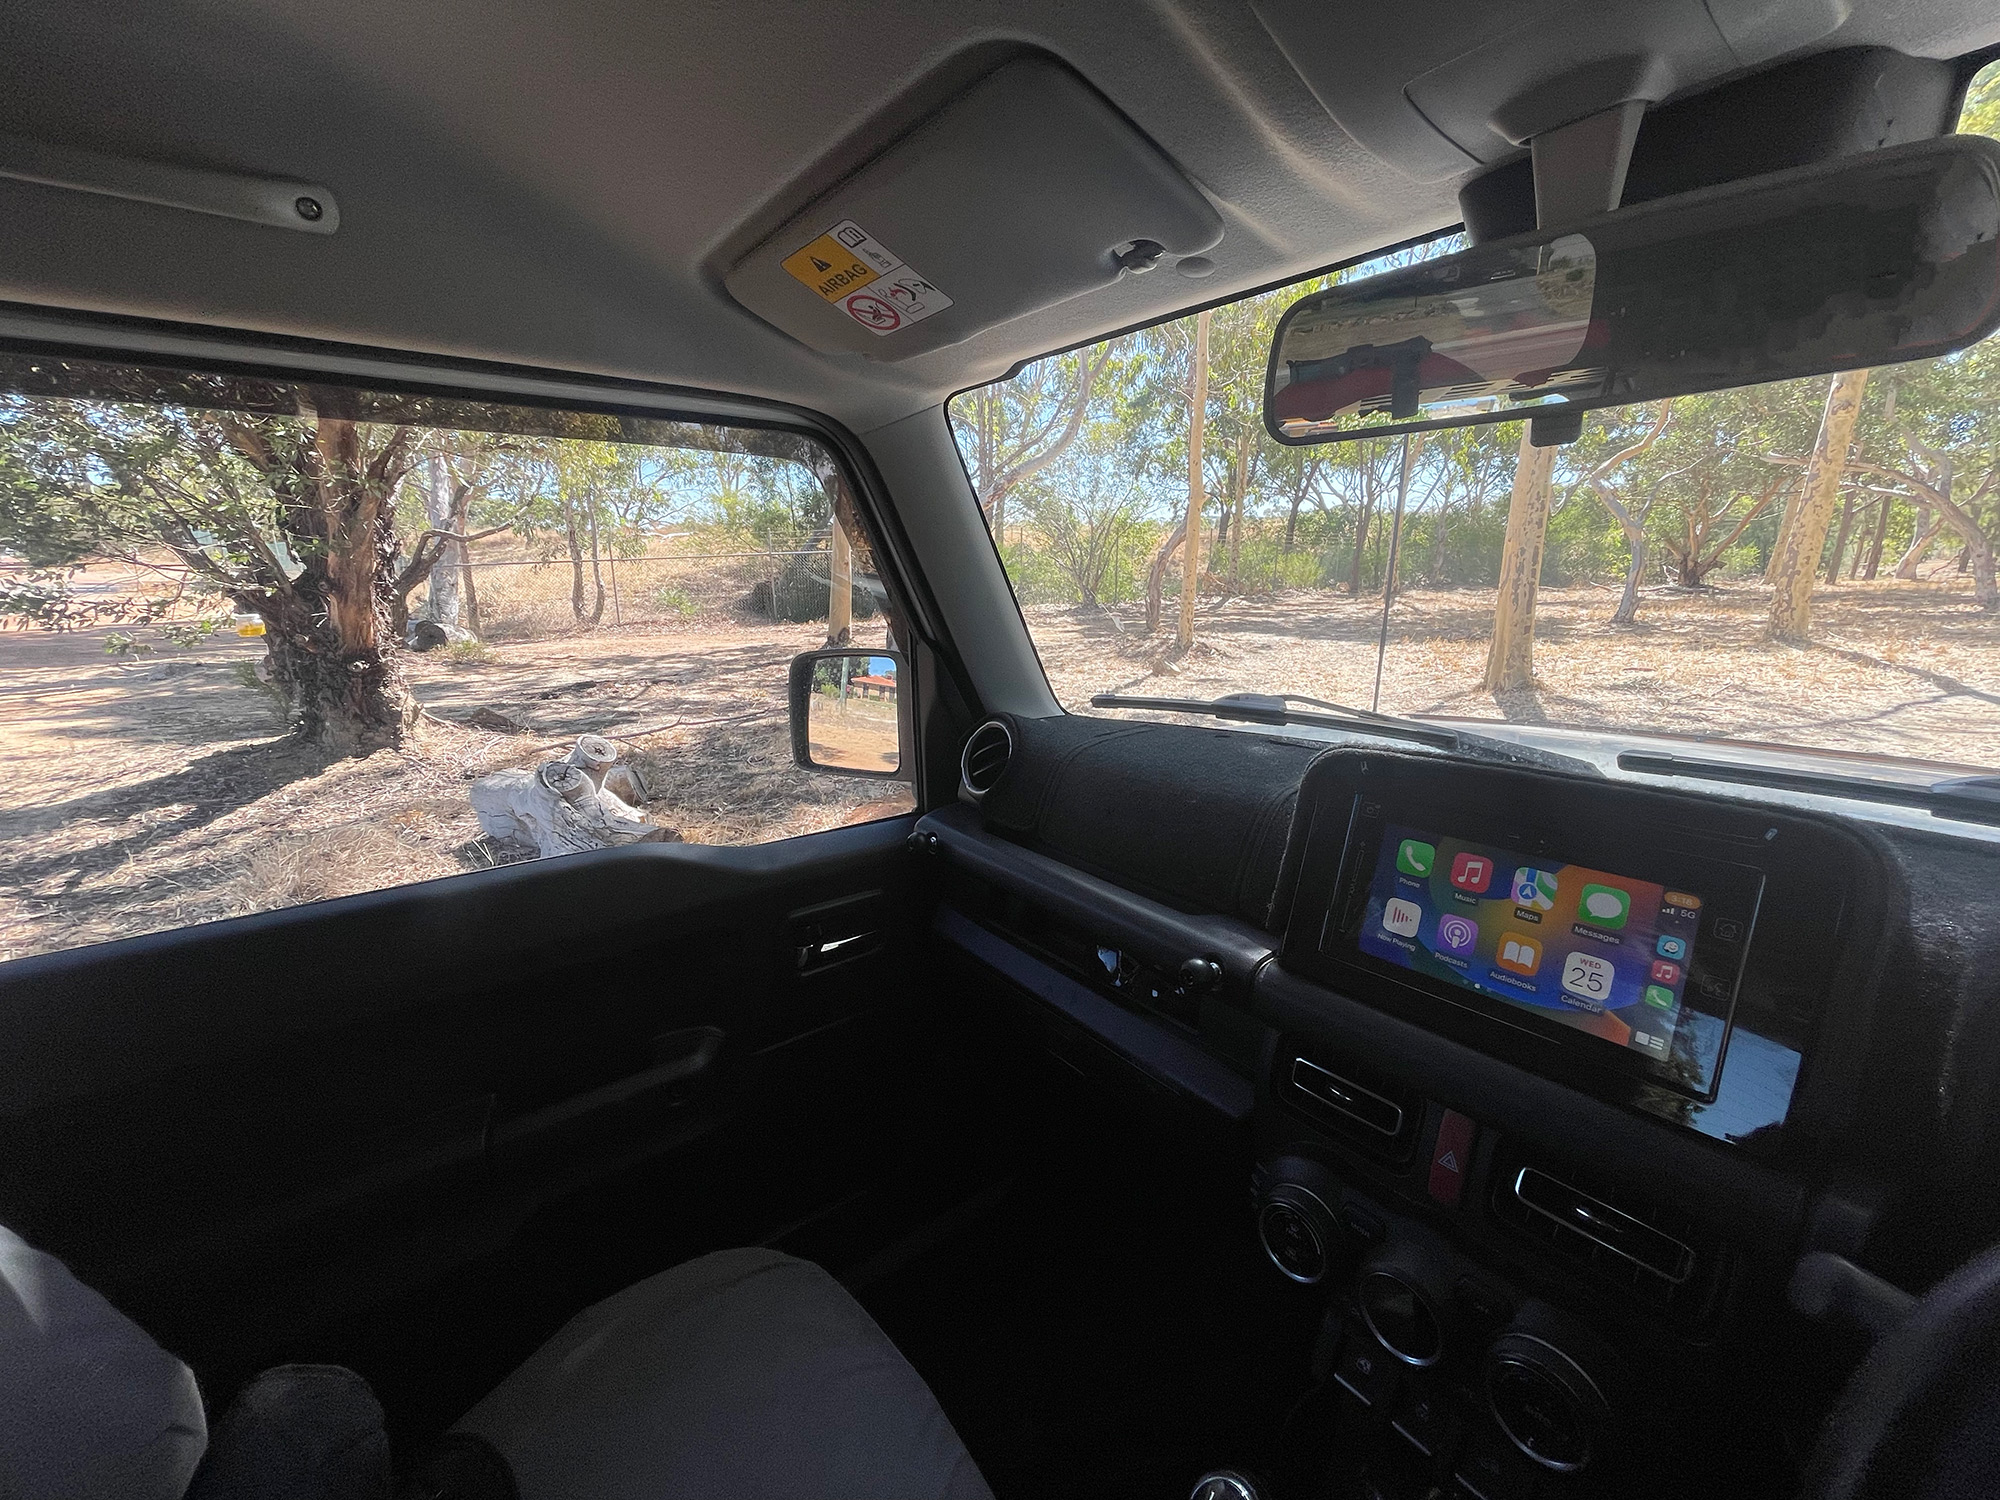
As a demonstration, I parked off the road facing directly into 3pm afternoon summer WA sun for the worst case scenario for light leakage. I exposed both pictures off the centre screen to control the picture brightness but the before photo cannot fully contain just how bright the car is inside without the shades.
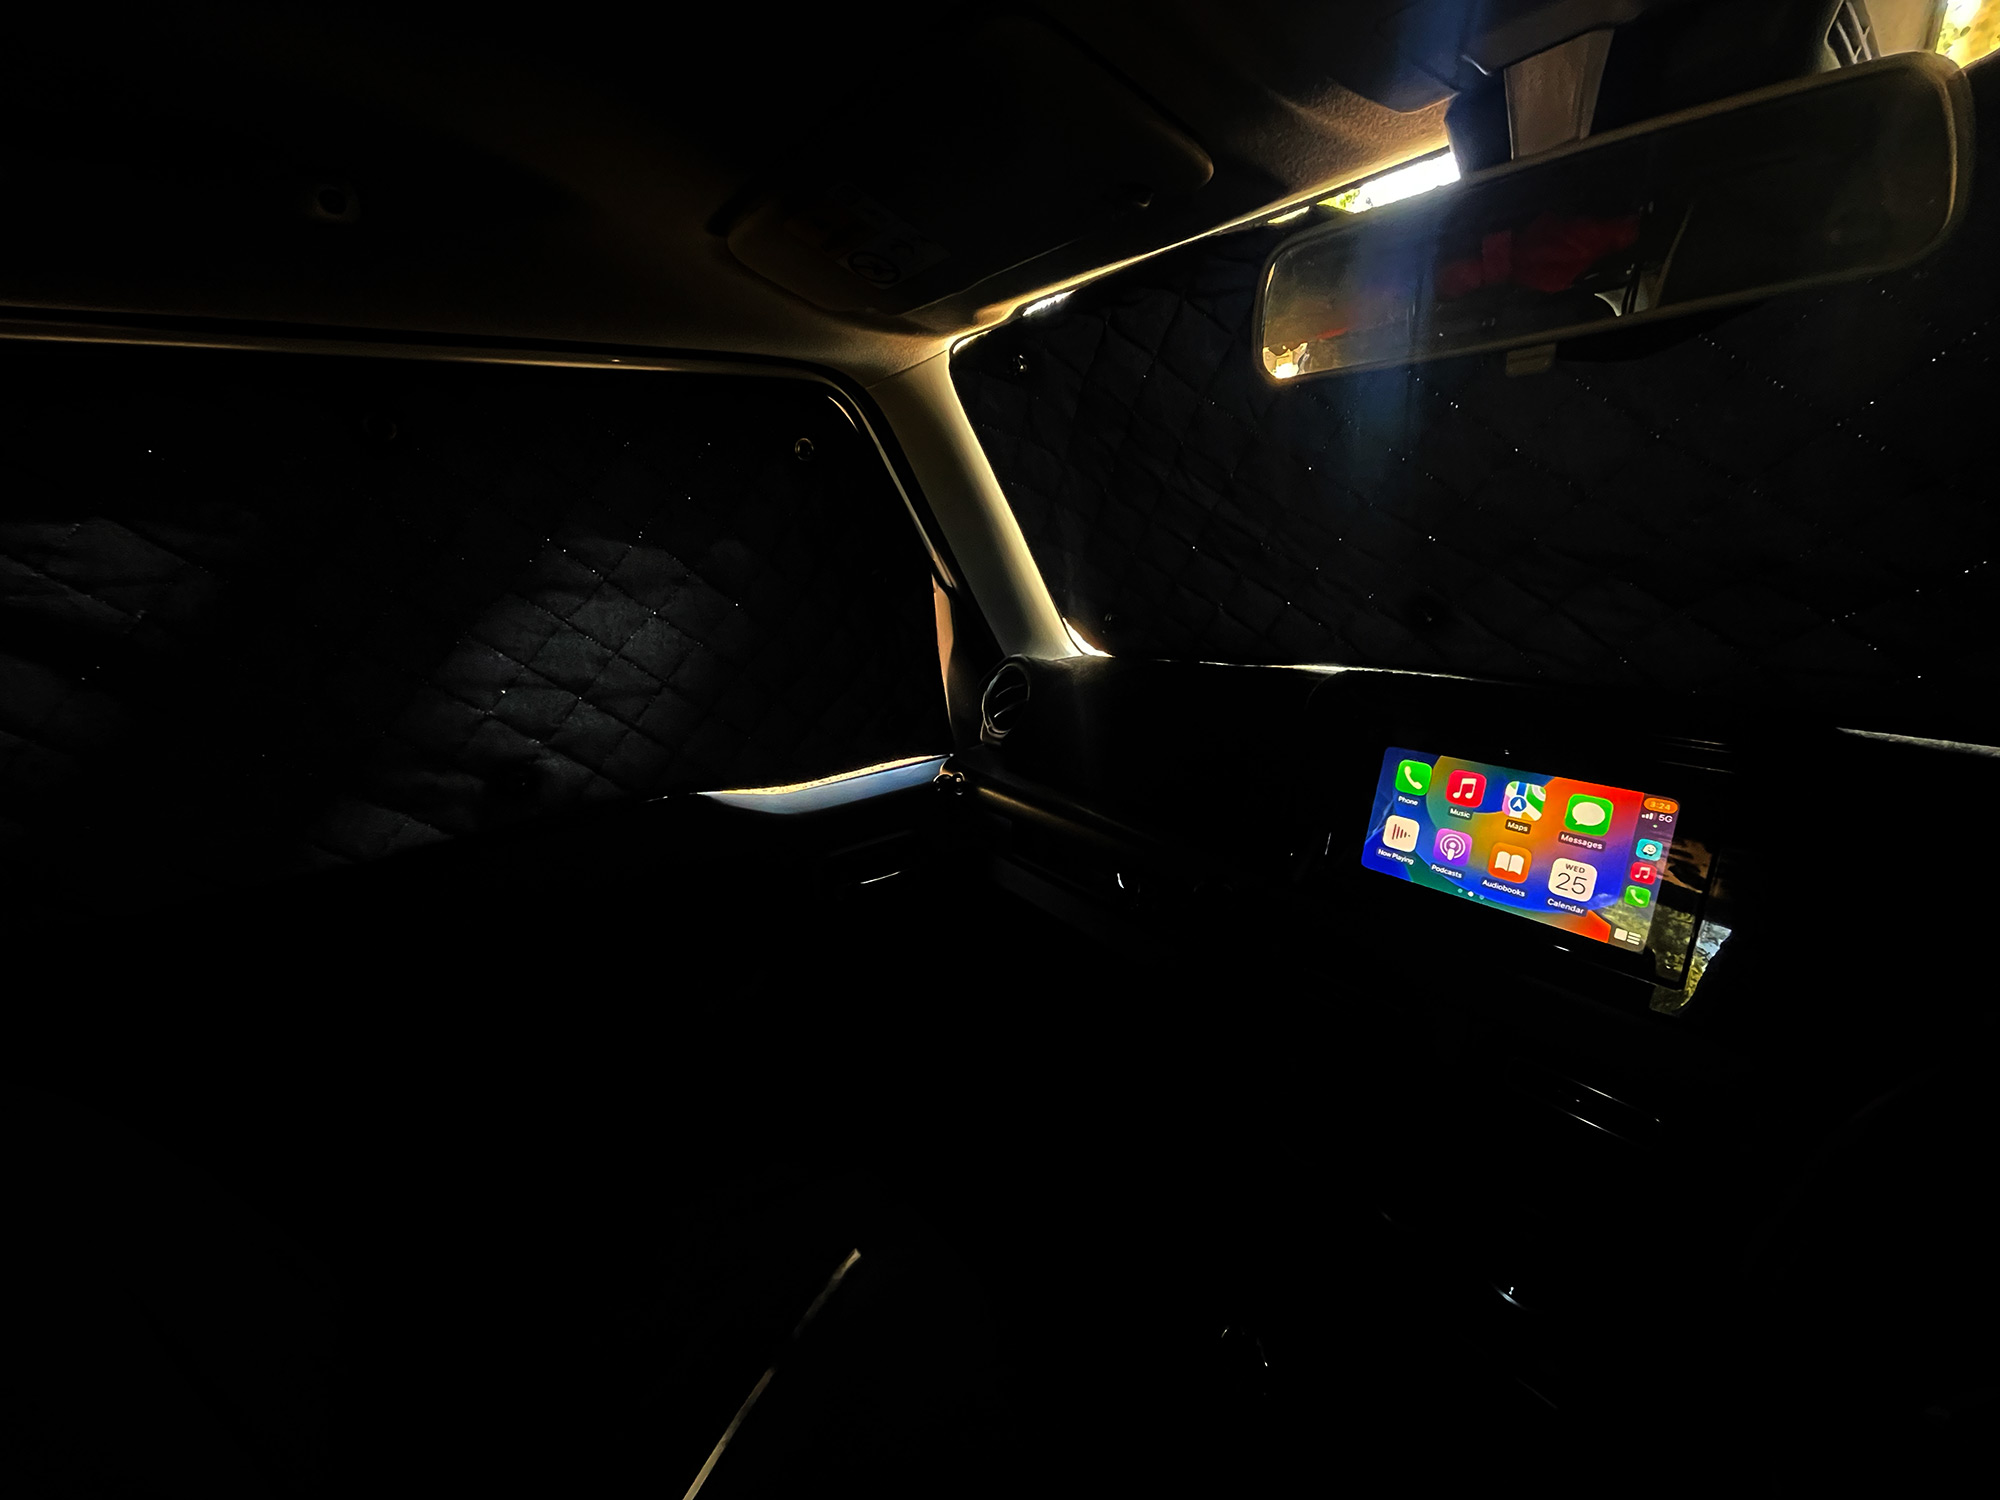
Most of the light leakage is around the autonomous braking camera. It has a flap there for suctioning cupping it to the cover on the camera but it just doesn’t work well. I’ll probably cut it out and refit edge trim.
I might attempt to make some magnetic fastening ones for all windows but the windscreen and see if I can’t block more light and heat out, but these work ok in the meantime.
Additional shelter stuff
Pitching a tent underneath an awning can be good, especially if a bit of rain is expected. For various reasons I ditched having an awning fixed to the car and bought a Snow Peak hexatarp instead. This is free standing, and it can be erected by a single person in limited winds – in high winds you’ll want a second person to help. It’s much more stable in winds than any awning I’ve seen except those that are as tightly pegged down as the tarp is anyway. I also have an inner part to the tarp to allow a fire to be lit underneath it and not damage the tarp.
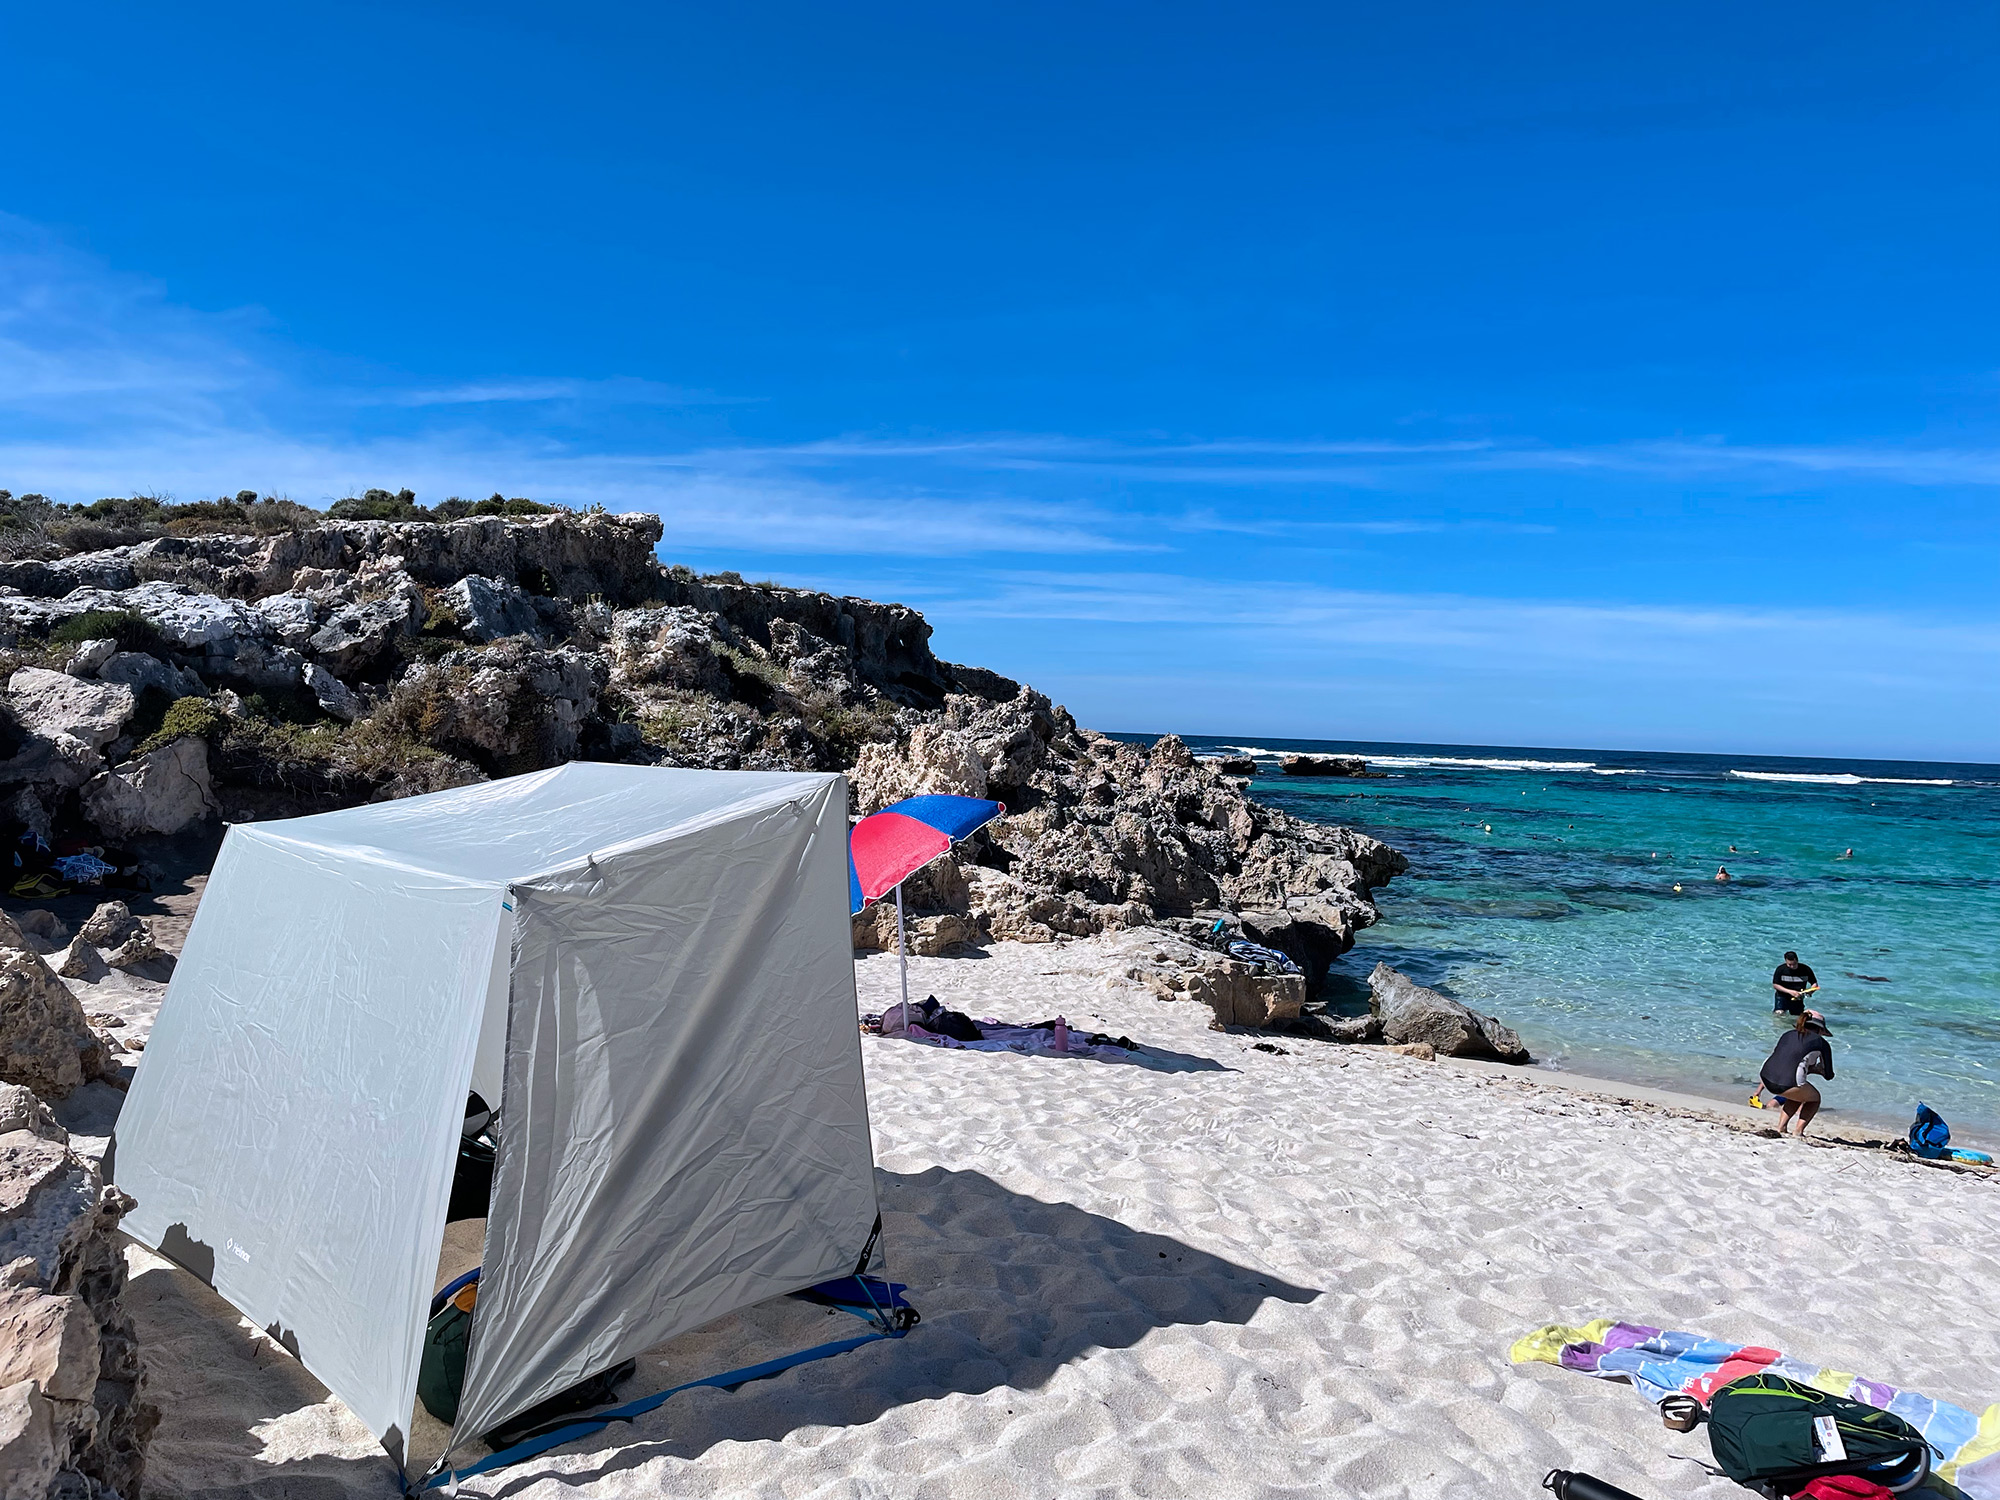
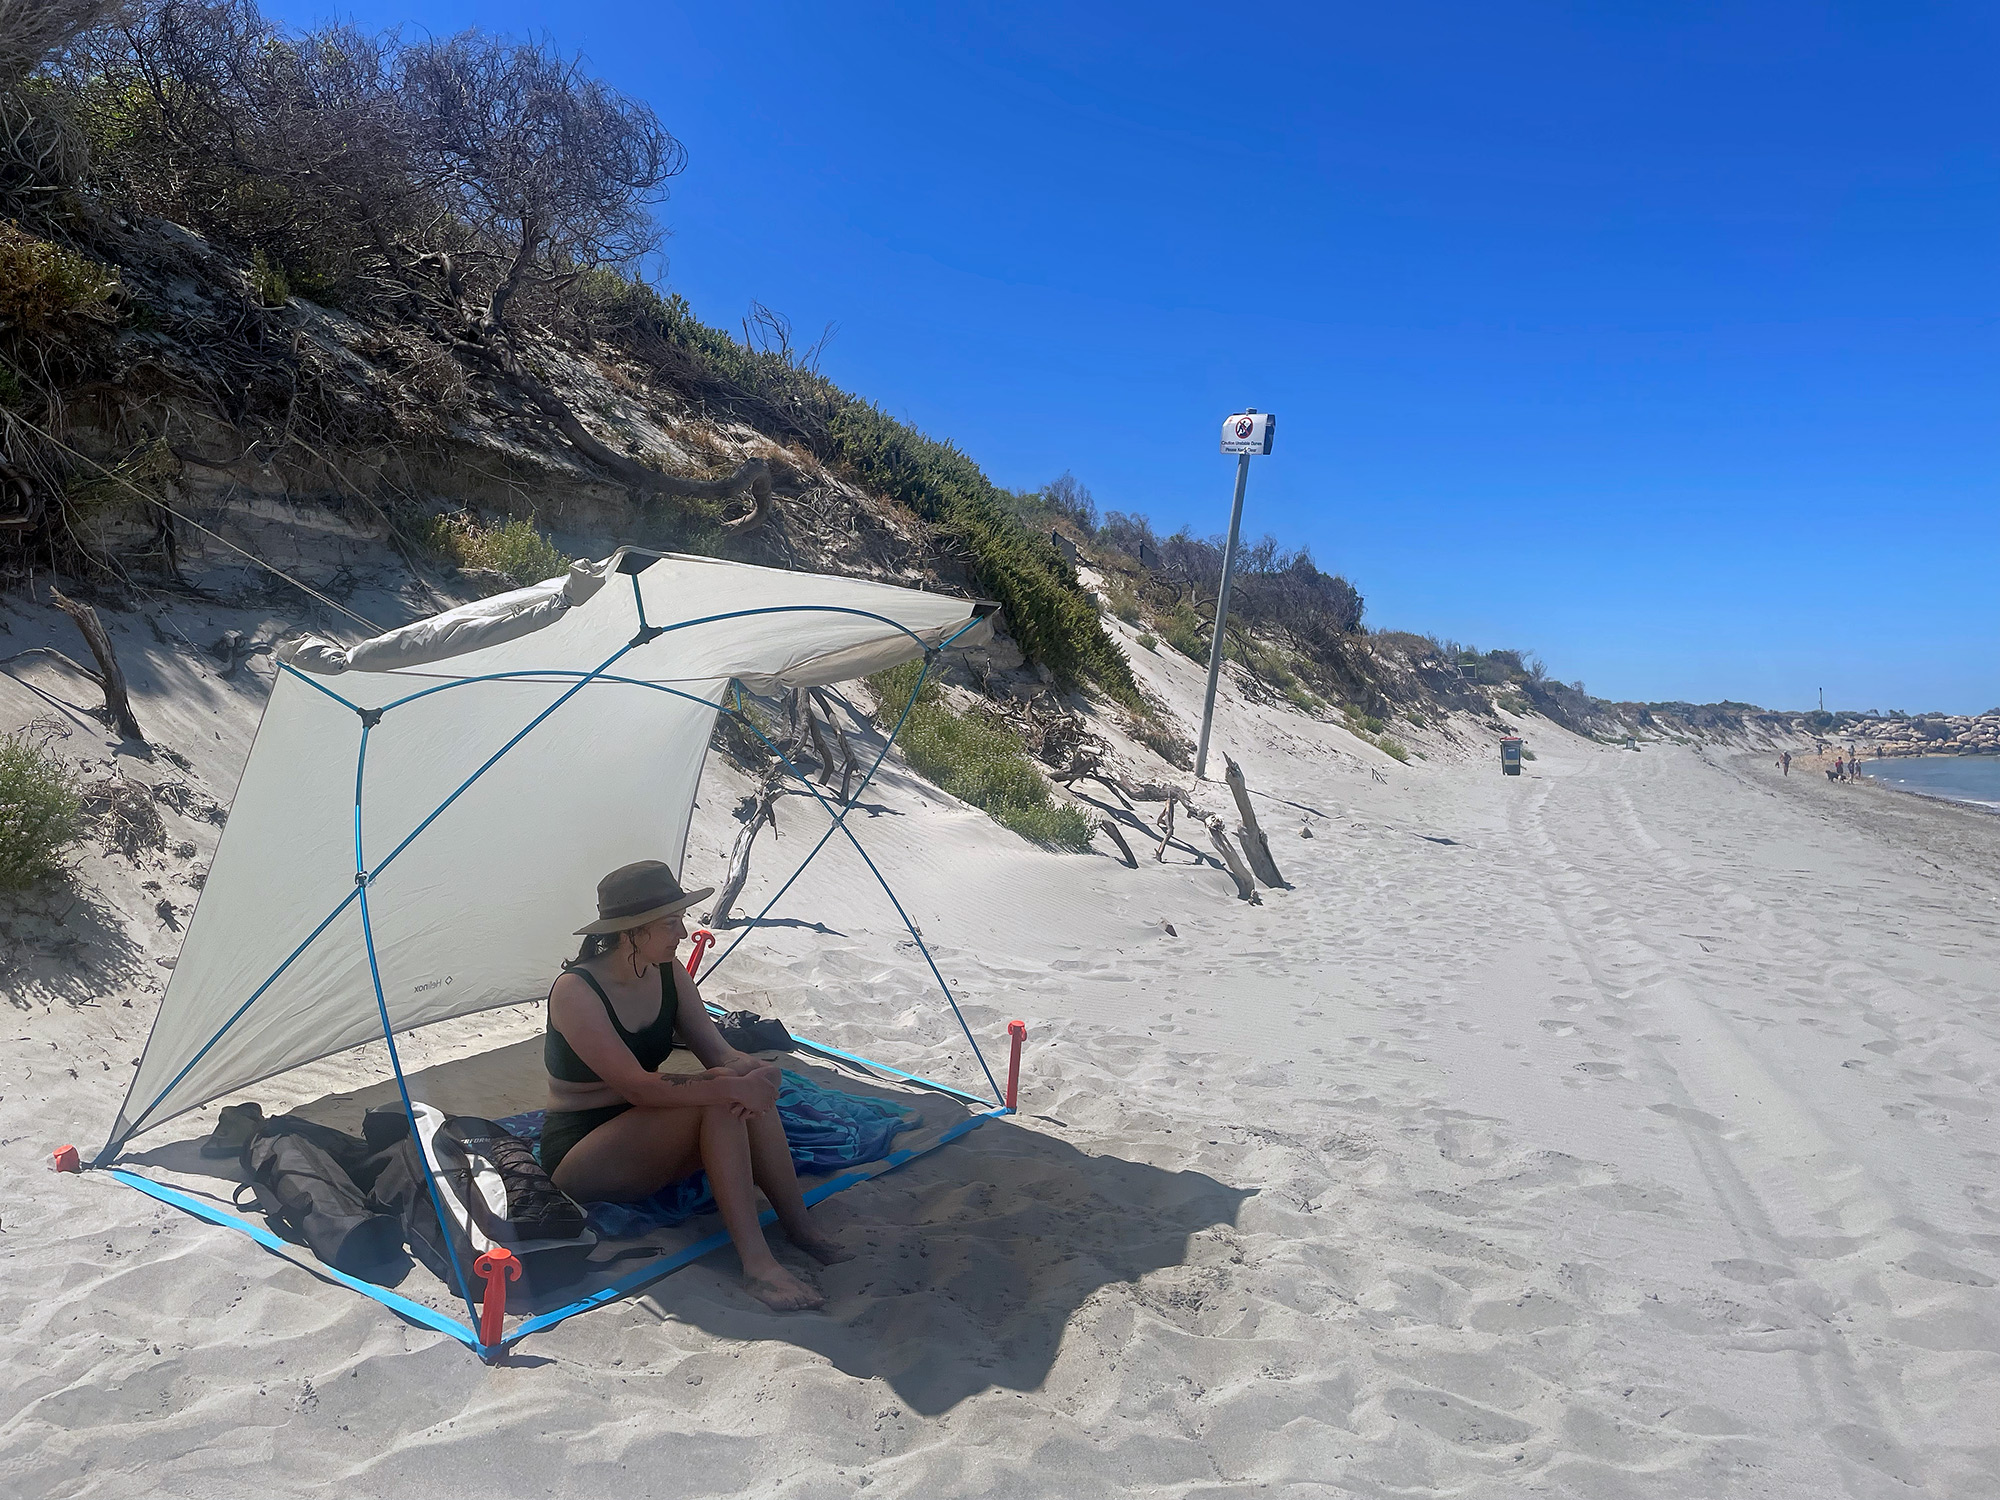
Quite a lot of my time using the Jimny can be beach use. For these situations I invested in a really nice beach shelter: the Helinox Royal Box. This is also lightweight and super portable. It packs in nicely and mostly lives in the car in the roof shelf so I always have it. Quite often you’ll be at a beach you can’t always drive down, and it’s nice to have something small you can shelter in. They can be hard to come by, however, I’m really glad I invested in this one. It gets a lot of use away from the Jimny too, but it’s a good consideration if you mostly do beach stuff and want something lightweight for an individual or 2 person beach shelter.
Sand pegs are a must with these on WA beaches. The soft sand doesn’t work well with the standard pegs, so I bought some much larger sand pegs which work great, even in moderate winds. I bought Supapeg sand pegs in plastic for this shelter, which work really well at holding it down.
Cooking and fire
I have a few Jimny appropriate things. For a lot of trips I really prefer to use small hiking stoves that screw onto tiny propane/butane tanks obtainable from camping stores. These do work well, but you are going to be limited in the food you can cook with them. That said, I like dehydrated meals or small individual ration meals and I don’t need to cook a massive steak every night.
For a fire pit I’ve gone for the Snow Peak Takibi Solo (ST-021) rectangular fire pit. While other people have emulated the square elevated fire pit, noone really seems to be doing ones like this. With all of the roasting trays/grilles etc it comes in at 4 kg which is really light. It also packs super small which helps fit it in. It’s great for 2 people sitting either side of it, but if you wanted to have a fire pit suitable for larger groups then this isn’t for you.
As I’m apparently a Snow Peak tragic, I have a couple of cast iron capsules for cooking and also their jaffle iron/toasted sandwich maker. The jaffle maker in particular is great because it folds up really small and packs away easily. I find for a lot of the things I want to roast when away the micro capsules work perfectly, and much smaller and easier to store in the car compared to a large cast iron pot, often which I also don’t want to build a big enough fire to heat up and use fully.
Fridge or other cold storage options
For a fridge, my preference for the Jimny is a fridge drawer to make best use of the space. I went for the Dometic 30L drawer fridge (CD30) mostly for one feature: you can mount the compressor on either side of the fridge as well as on the back. Being able to shorten the depth helps me fit it onto my false floor while also allowing me to have it far enough forwards to give space for the rear door storage pouches.
Powering it will require its own bit in a 12V electrical article, but I added an Anderson connector on each side of the back area so I can plug it in either side.
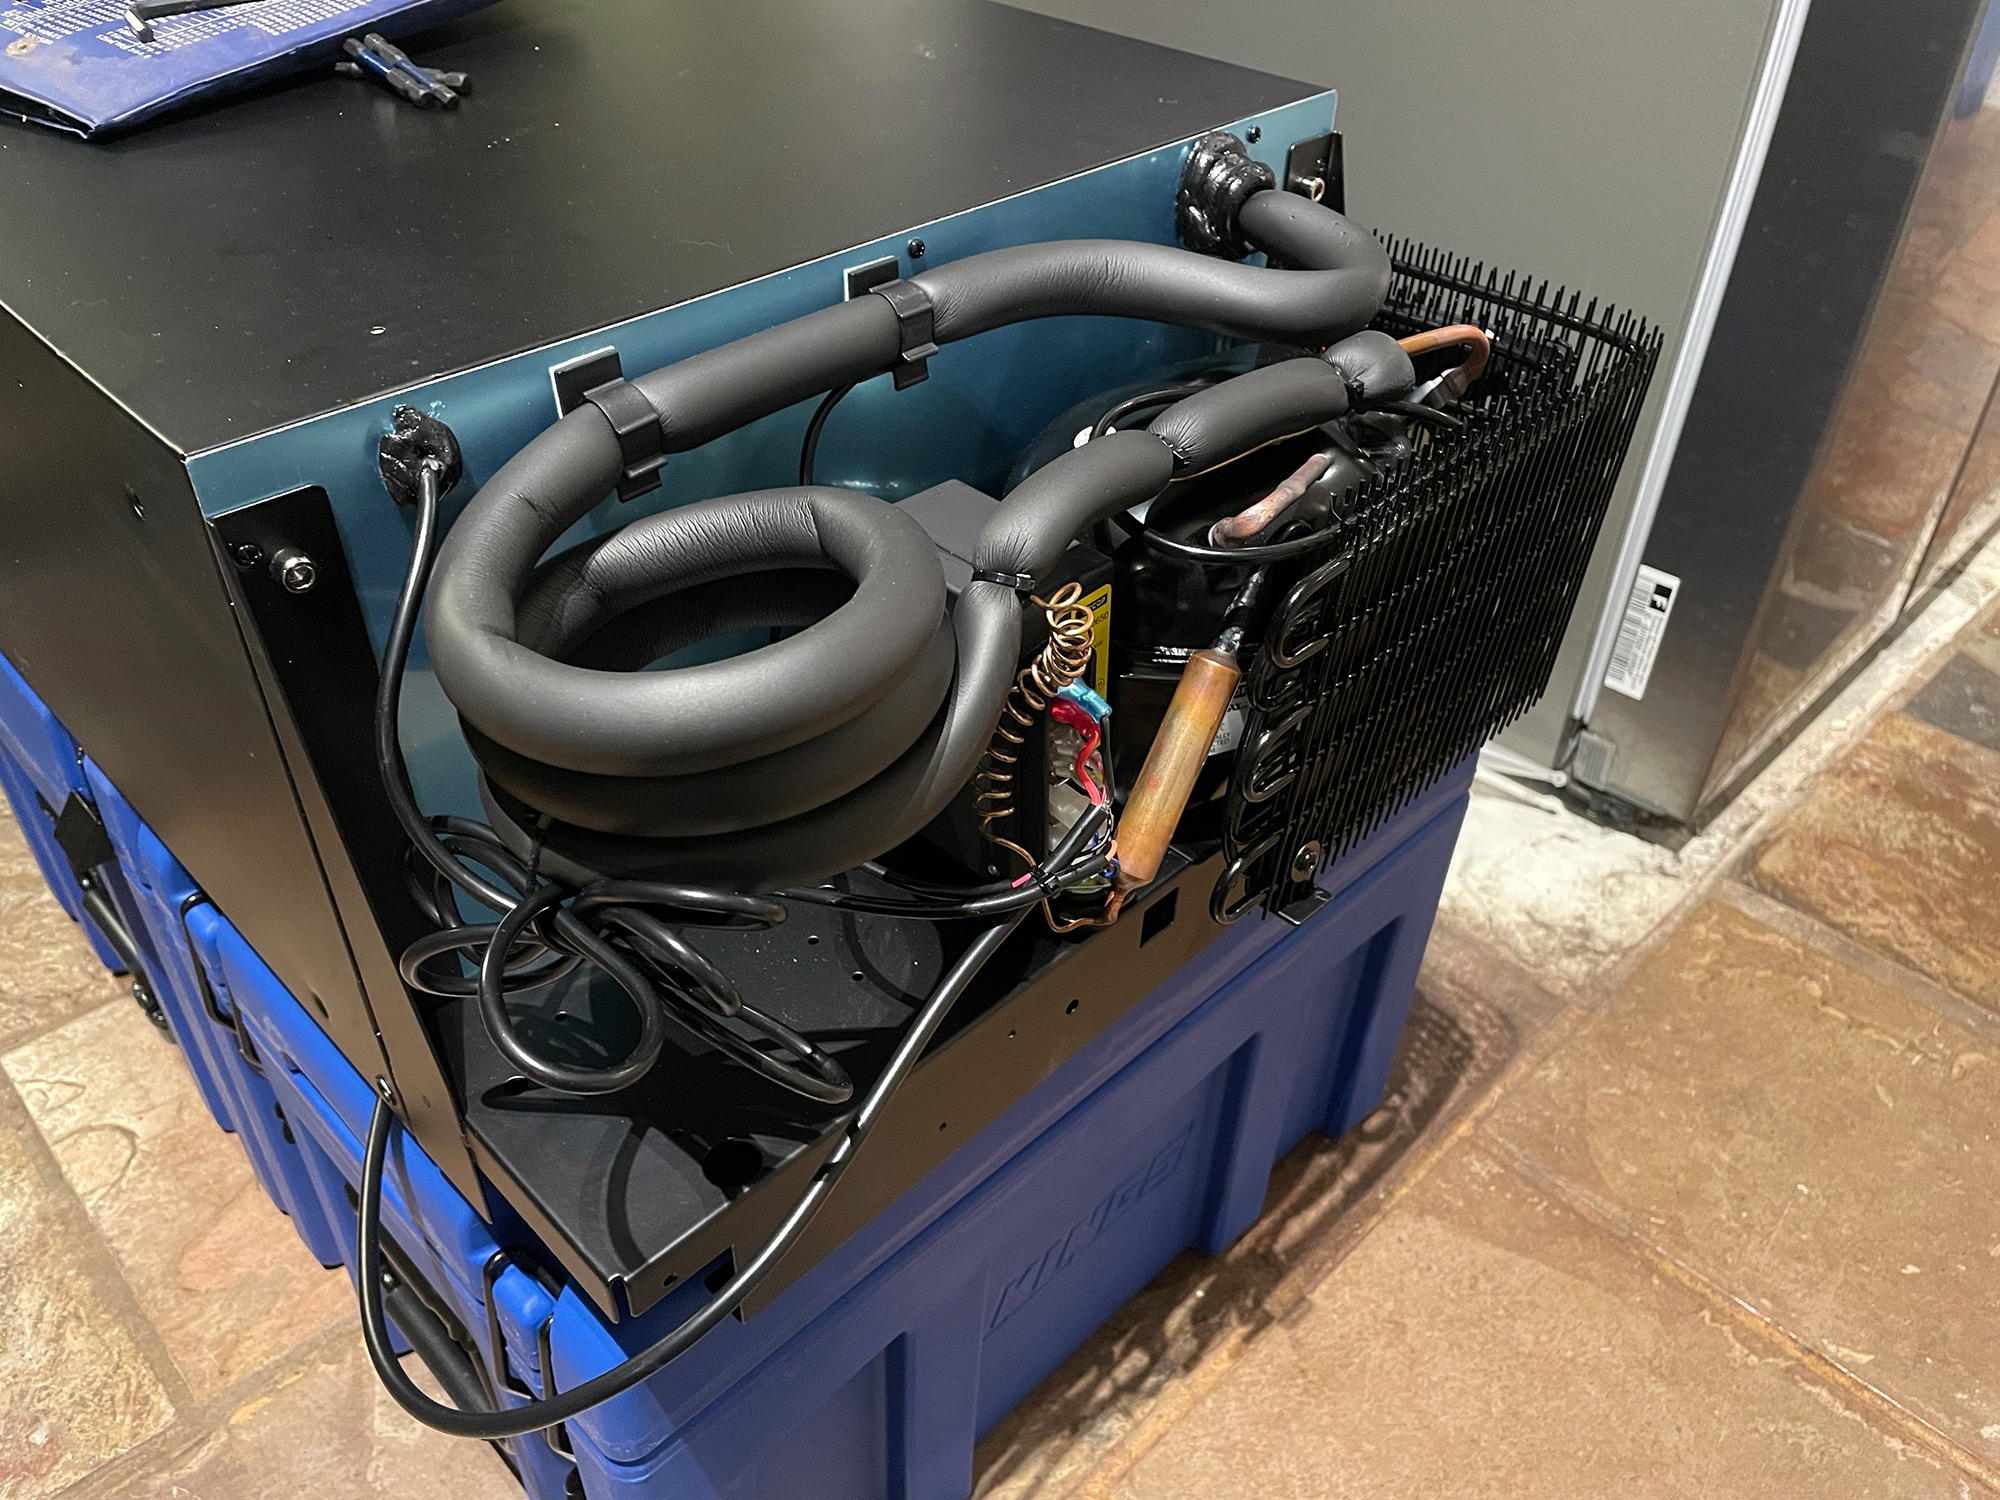
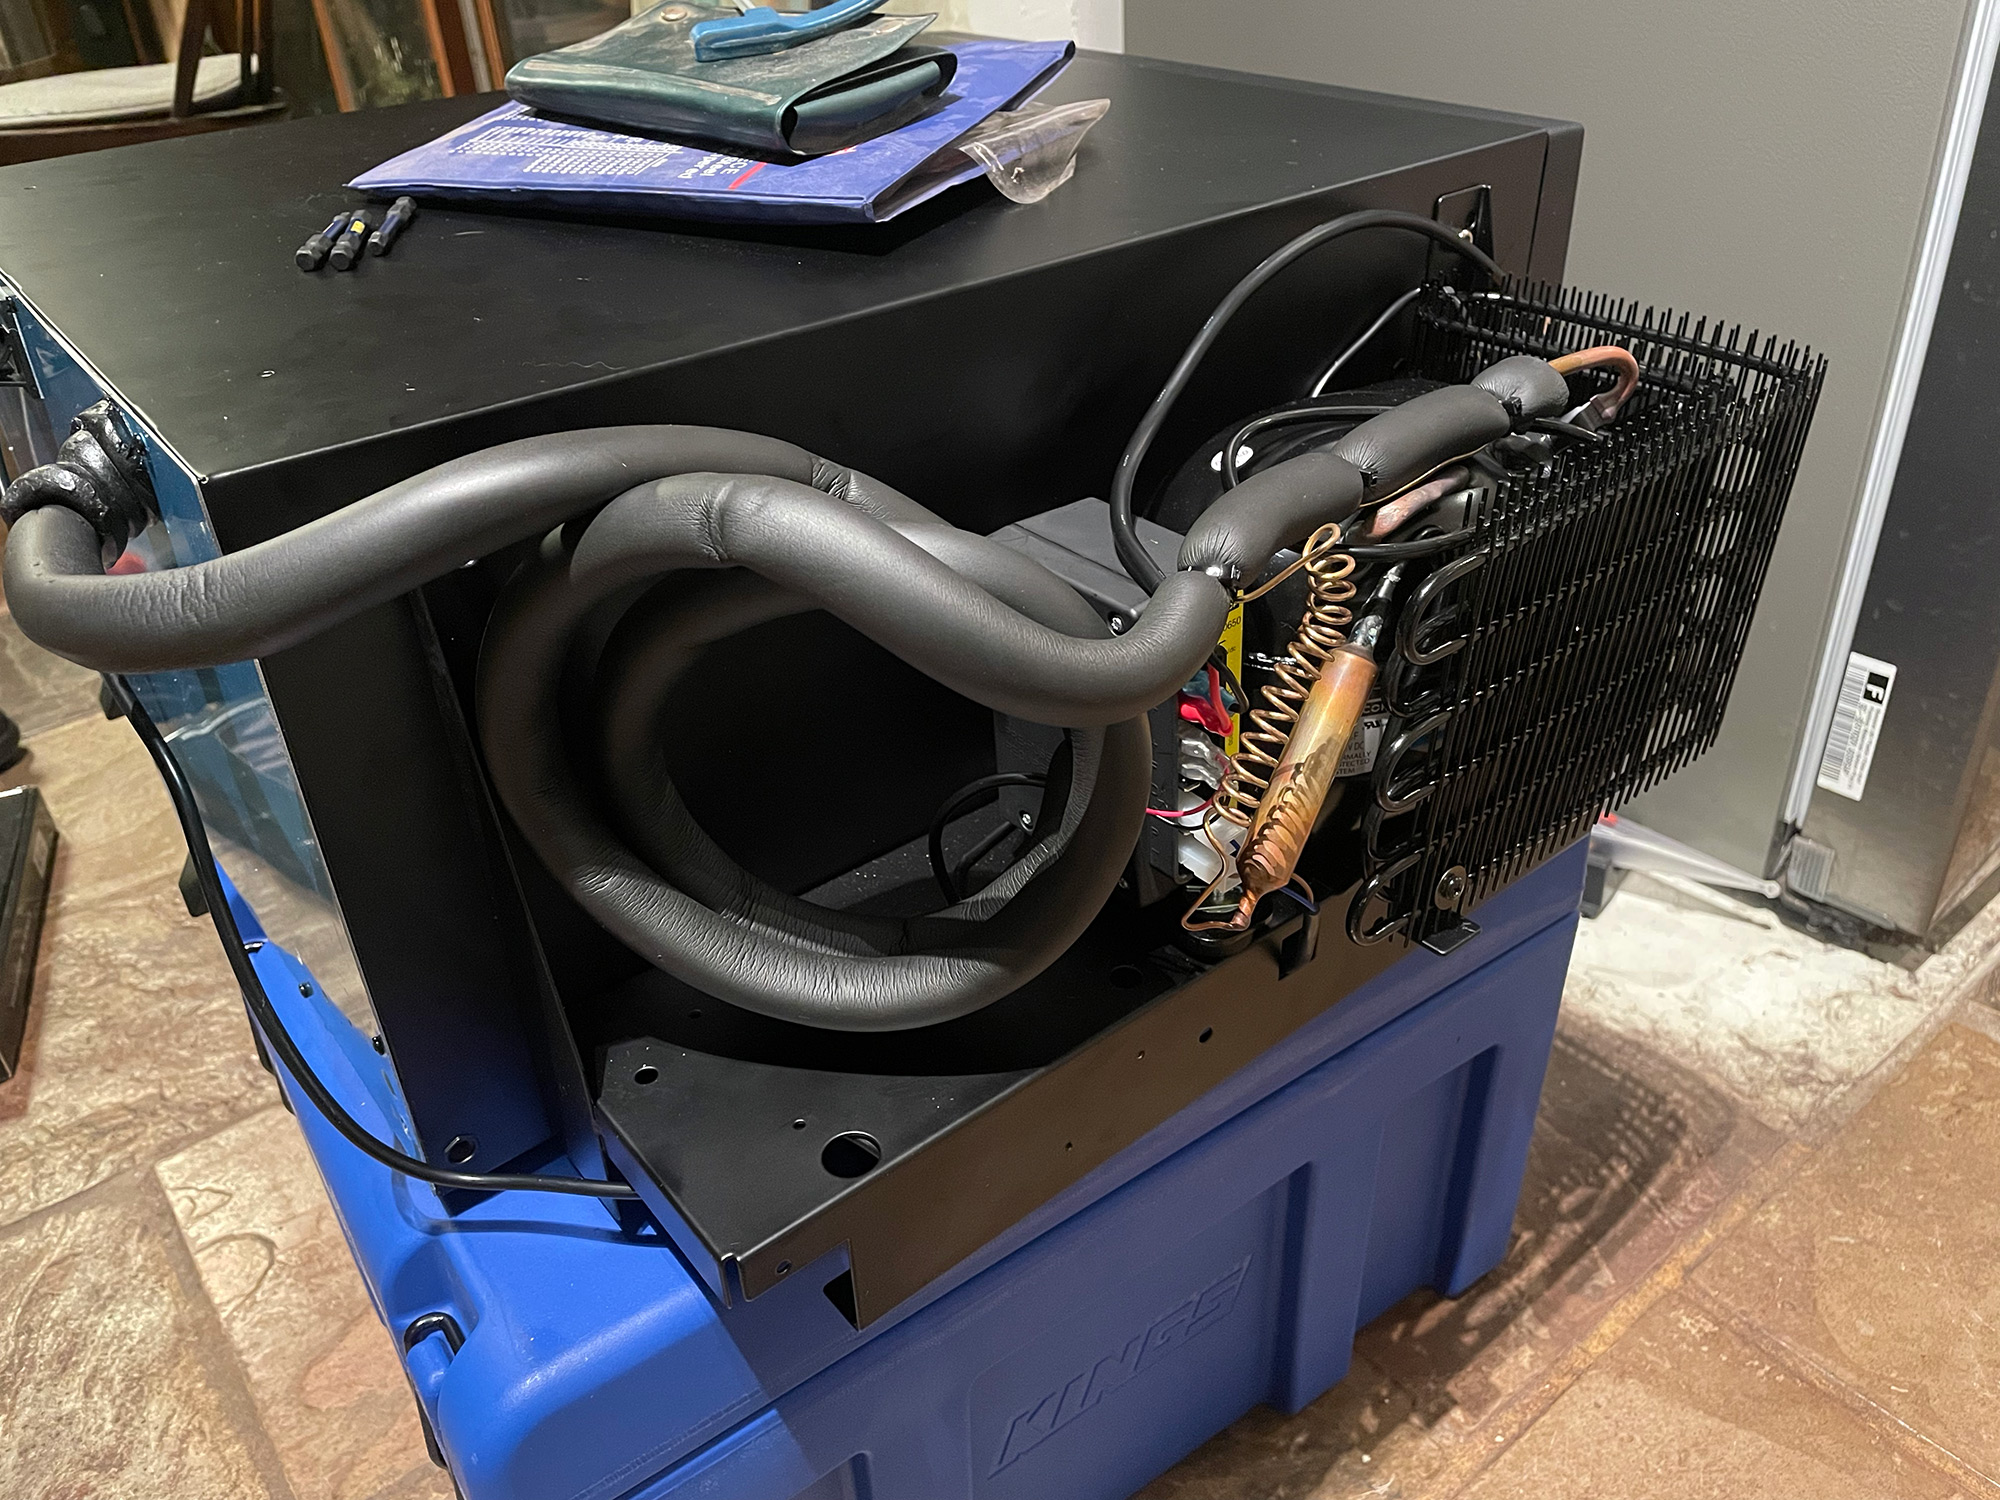
Because few people show you how to move the compressor around, I thought I’d document that here. It’s not hard, but useful to know how to do it and that it’s possible.
You start with the fridge as delivered, and the compressor & various other stuff mounted on a frame on the back.
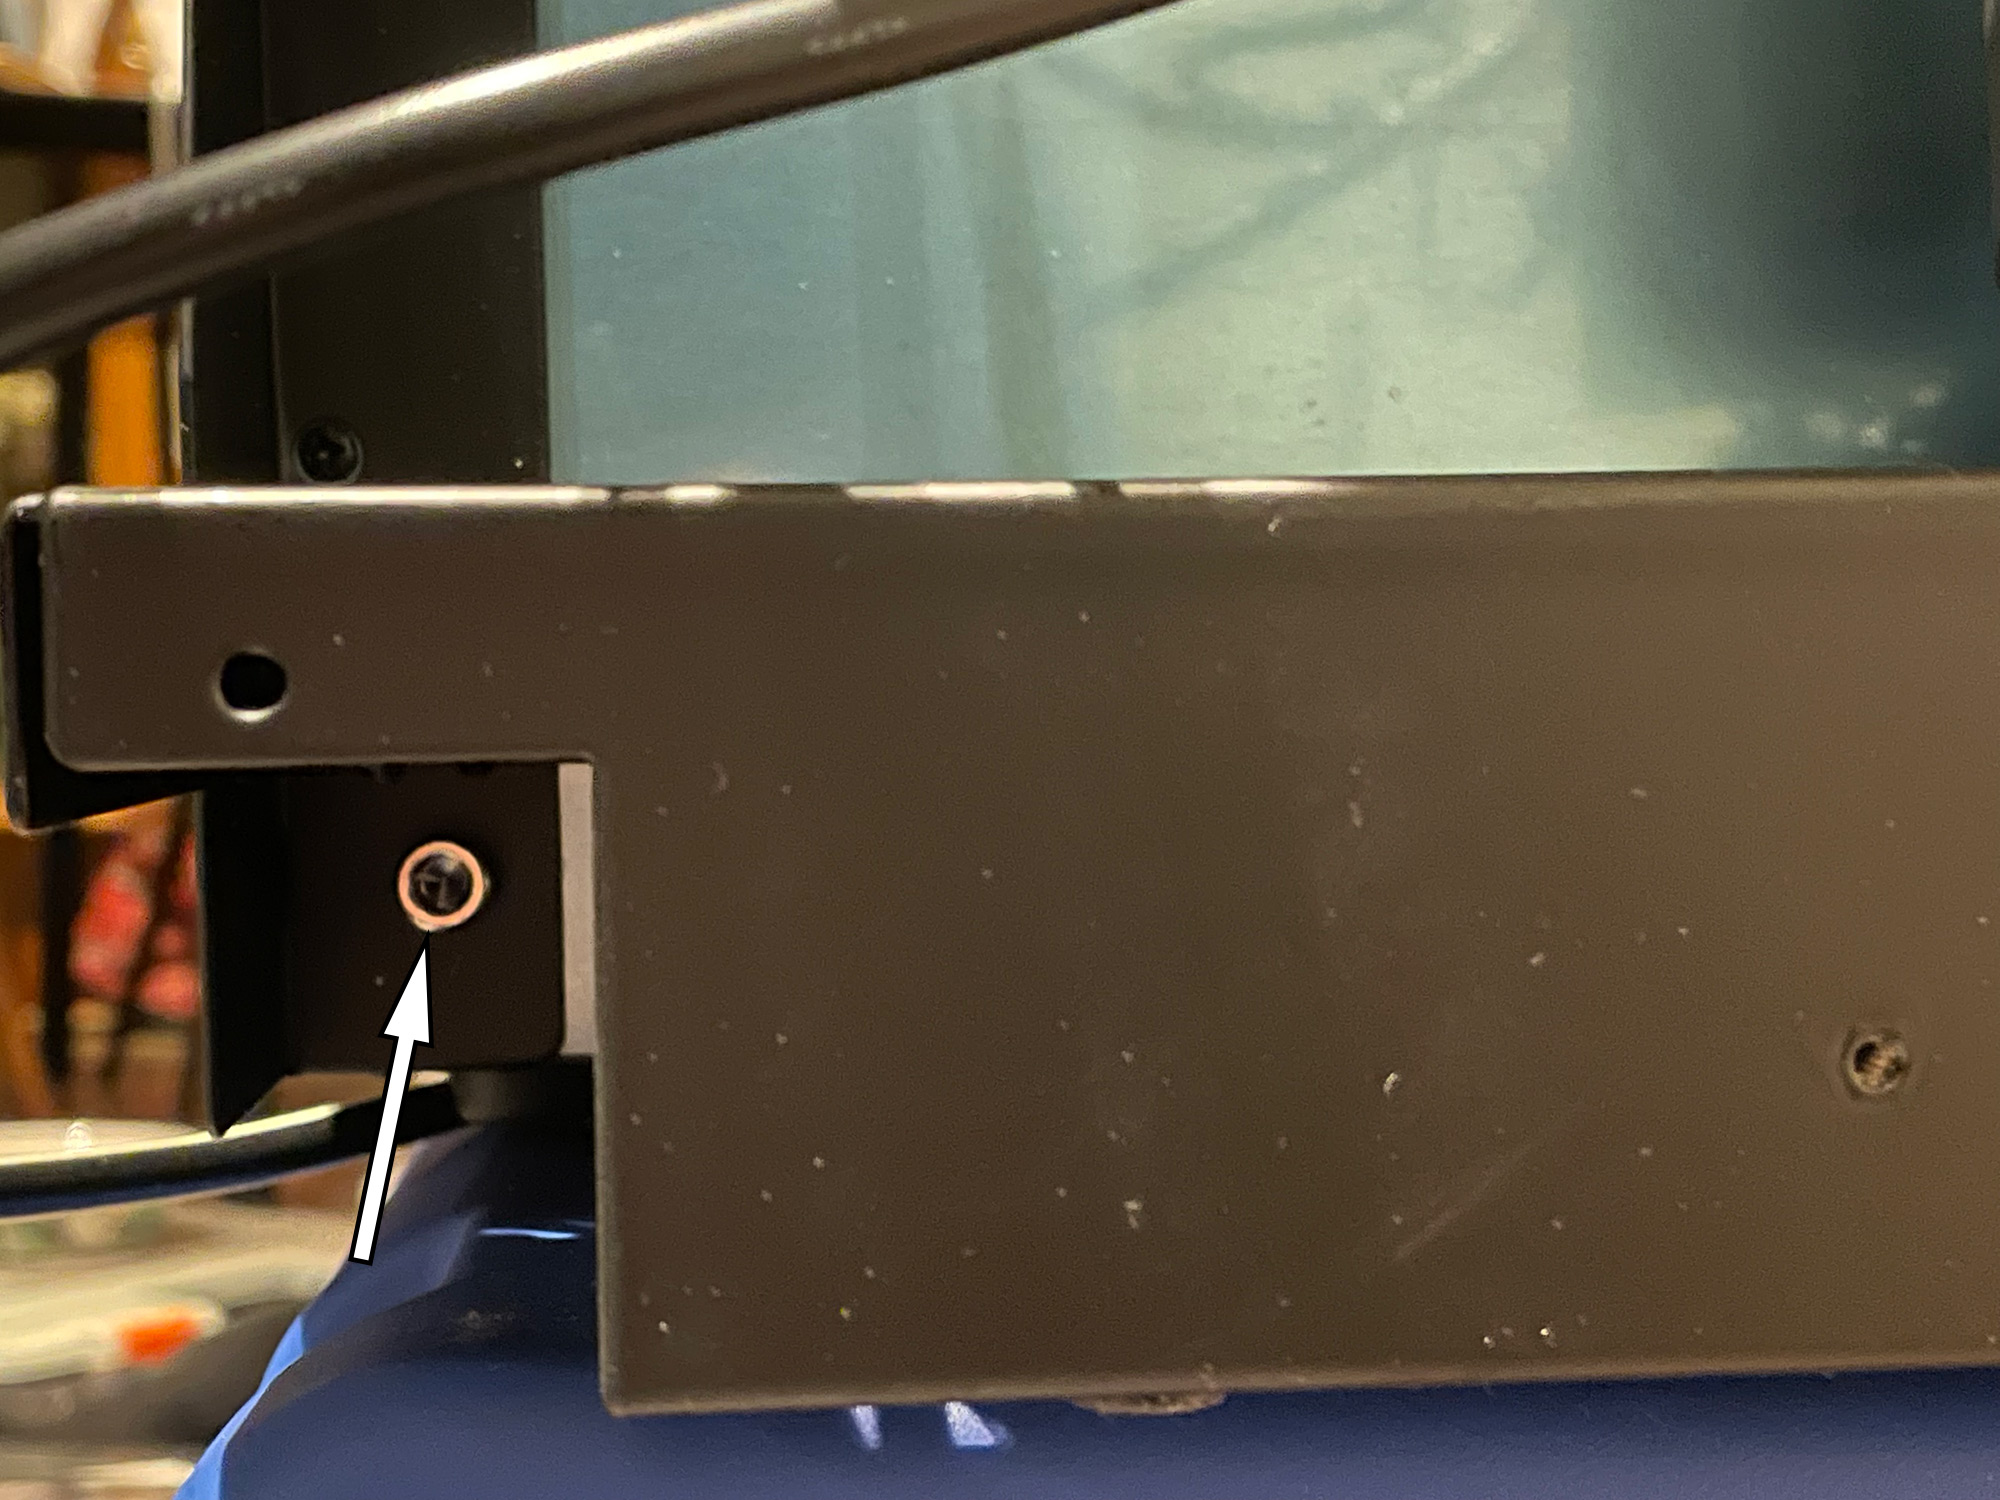
There are 4 bolts that hold this frame onto the fridge, all M6 with a 5mm allen head. A couple are hiding deep underneath the frame so undo them first as they’re annoying.
There are a couple of clips that retain one of the refrigerant lines to undo, too.
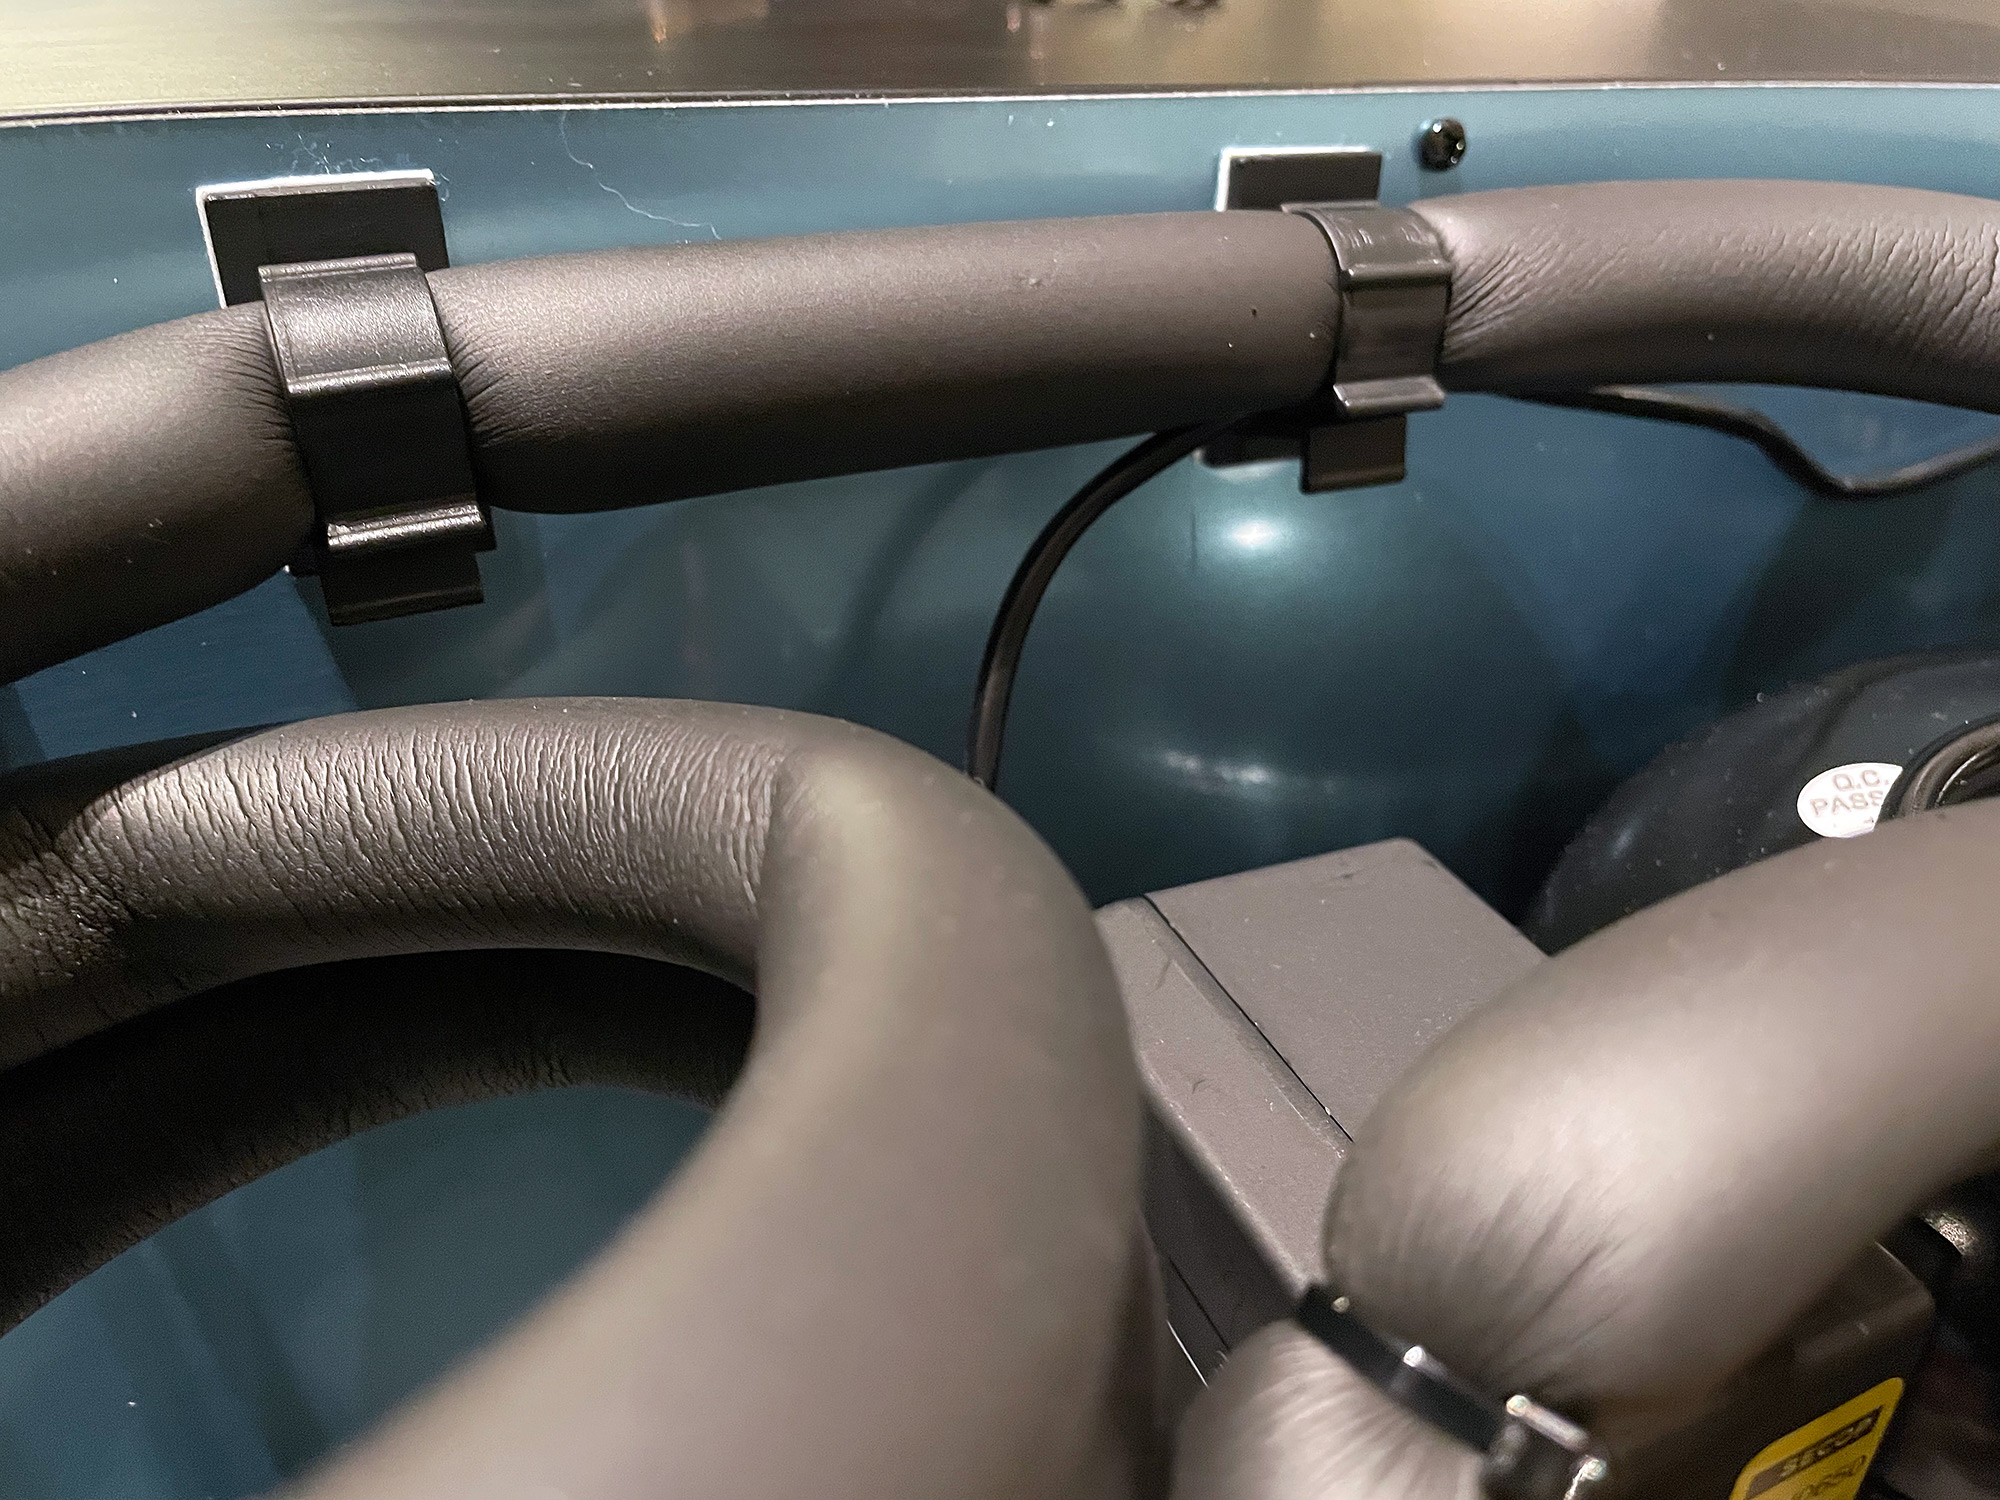
There’s a cabletie holding the power cable to the compressor, too, which needs to be cut.
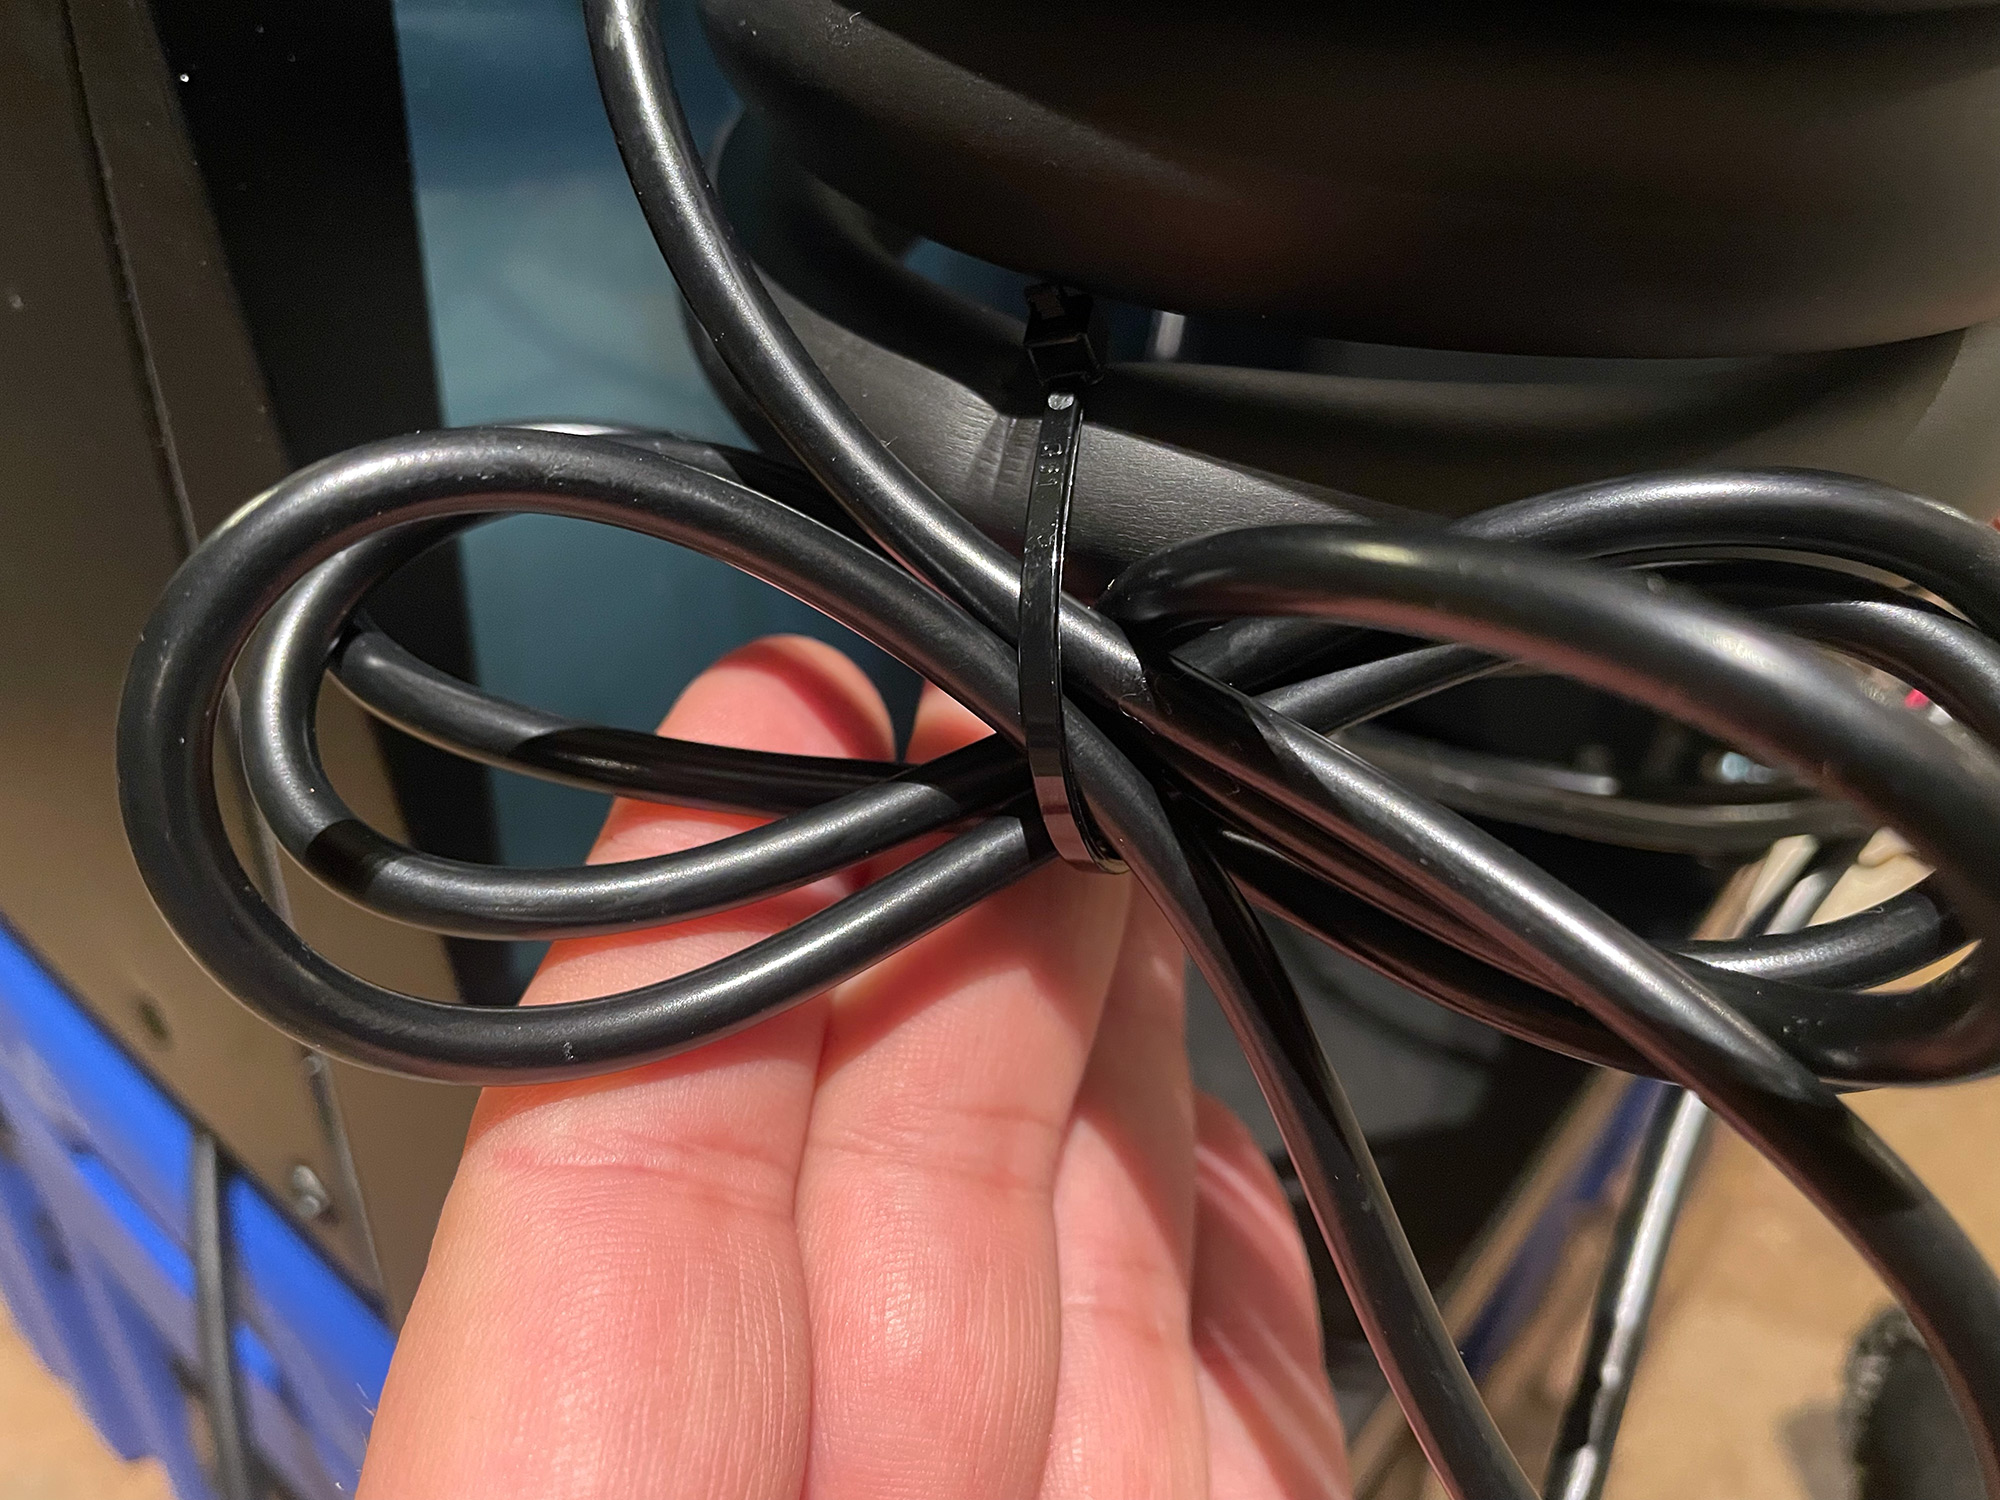
Finally, just move the compressor bracket around to whatever side you want it to be on and then you’re fine to bolt it up. The holes are already in place to correctly ount it, and it still leaves access to the holes for making mounting brackets for the fridge to however you’re installing it, too. The copper hose inside the insulation does bend pretty easily so it’s not hard to move it.
You can, in theory, also mount the compressor entirely remote to the fridge e.g. under a false floor, so long as it has good airflow, is about 1m away, and you have access to get the compressor there without undoing any of the refrigerant lines to the compressor.
The thing with fridges is they are moderately heavy, costly, and do require some power (though a compressor fridge is surprisingly efficient). Quite often I’ll not bother having the fridge in the car for a short trip, and prefer to take an insulated cooler and ice instead. If you get a top opening one which is more vertical in nature you can fit them pretty easily underneath one window in the back.
Food, utensil and water storage
Food storage
Covered really by the fridge above, but also I’m a big fan of hiking meals: either dehydrated meals or MRE style meals, too.
Utensils and tableware
Water
I have some broader generic advice around water and camping over here, which could be useful to read as well. This section is really about stuff I have found useful with the Jimny.
Water is another tricky thing to store as it becomes a weight challenge as much as a space challenge. Each L represents a kg, so if you’re working to stay under the Jimny’s low factory GVM rating then you need to be a bit tactical about this. My controversial opinion is most people over-advise for water usage for camping out of 4wds; you really need to think much more like a hiker although your water requirements also vary with climate, types of food you’re going to eat, if you expect to be able to shower etc.
My usual water storage method for the Jimny are water bladders.
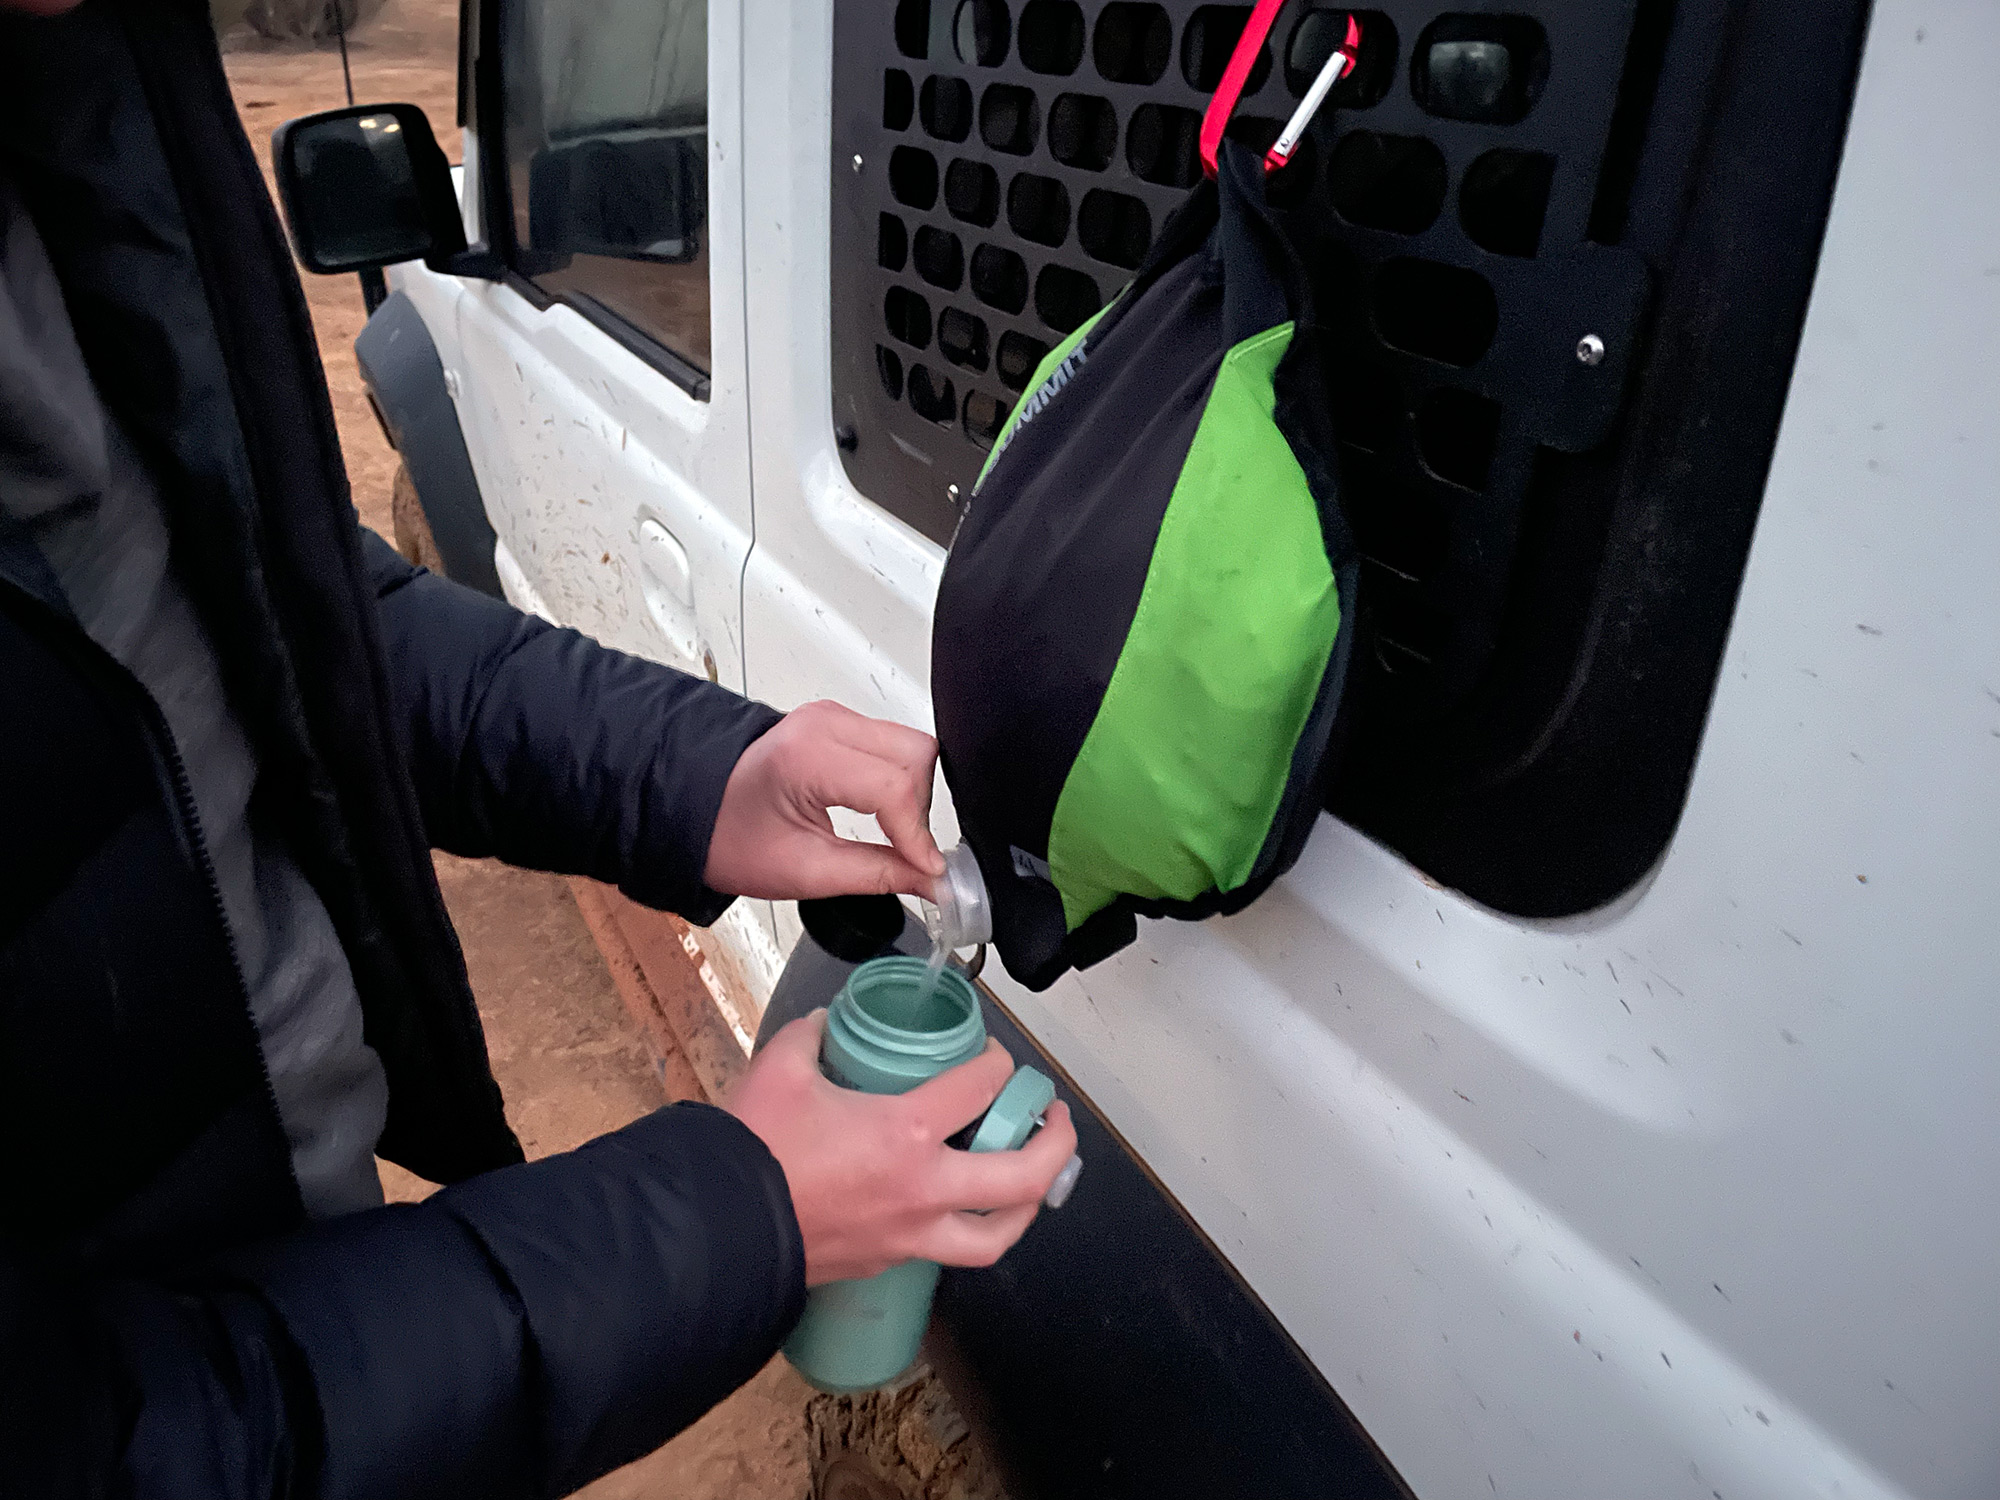
These stash nicely under the seats or a false floor. Just stick to 10L bladders or smaller: 20L bladders become really hard to move when full because they’re obviously heavy but also unwieldy. I’ve found the Sea to Summit mylar bladders the best for not introducing nasty taste to water, but there are multiple options out there. The Sea to Summit Watercell X bladders are good options too: they’re a dark colour, and have a shower nozzle as part of their attachments. If you put these in the sun for a while then you have access to a really good way to have a power free offgrid shower just by hanging it from a tree.
If I’m going to the beach and I want a bit more flexibility around shower water, and I’m not really off grid (or only shortly off grid) then I do use 10L plastic jerrycan water jugs. These can be great to store water you’d prefer not to drink; heat up the water somehow (e.g. using your stove, a camp fire or even a public bbq) and you can even have a nice warm shower.
Speaking of showers, I’ve also made up a power free temporary shower that fits nicely in the back of the Jimny just using a backpack sprayer from the hardware store plus some hose attachments. Pump away and you build some pressure and get a bit of a shower going.
These backpack sprayers also really nicely tie into the back of the car so are easy to transport, depending on how you have the back of your car arranged.
For much longer trips, I have bought a custom made water bladder to go behind the two front seats. This isn’t my idea but came from one of the Australian FB group users. These bladders are made up by Fleximake using the transmission tunnel cutout bladder, and the specs to ask them for are:
DW125BH- CUSTOM:
- 30L
- 1000GSM TPU
- 1100mm x 150mm x 300mm
- 250mm x 130mm transmission hump cut out
- 1 x 25mm fittings and cap,
- 1 x 13mm fittings and hose kit (Breather)
- 2 x 13mm fittings and hose kit (Outlets)
While not cheap at just over $300, it is a good option for longer multi-day trips with no other access to water. It, and a couple of bladders, would do me for a week long trip as long as I was conserving water where I could.
Other storage
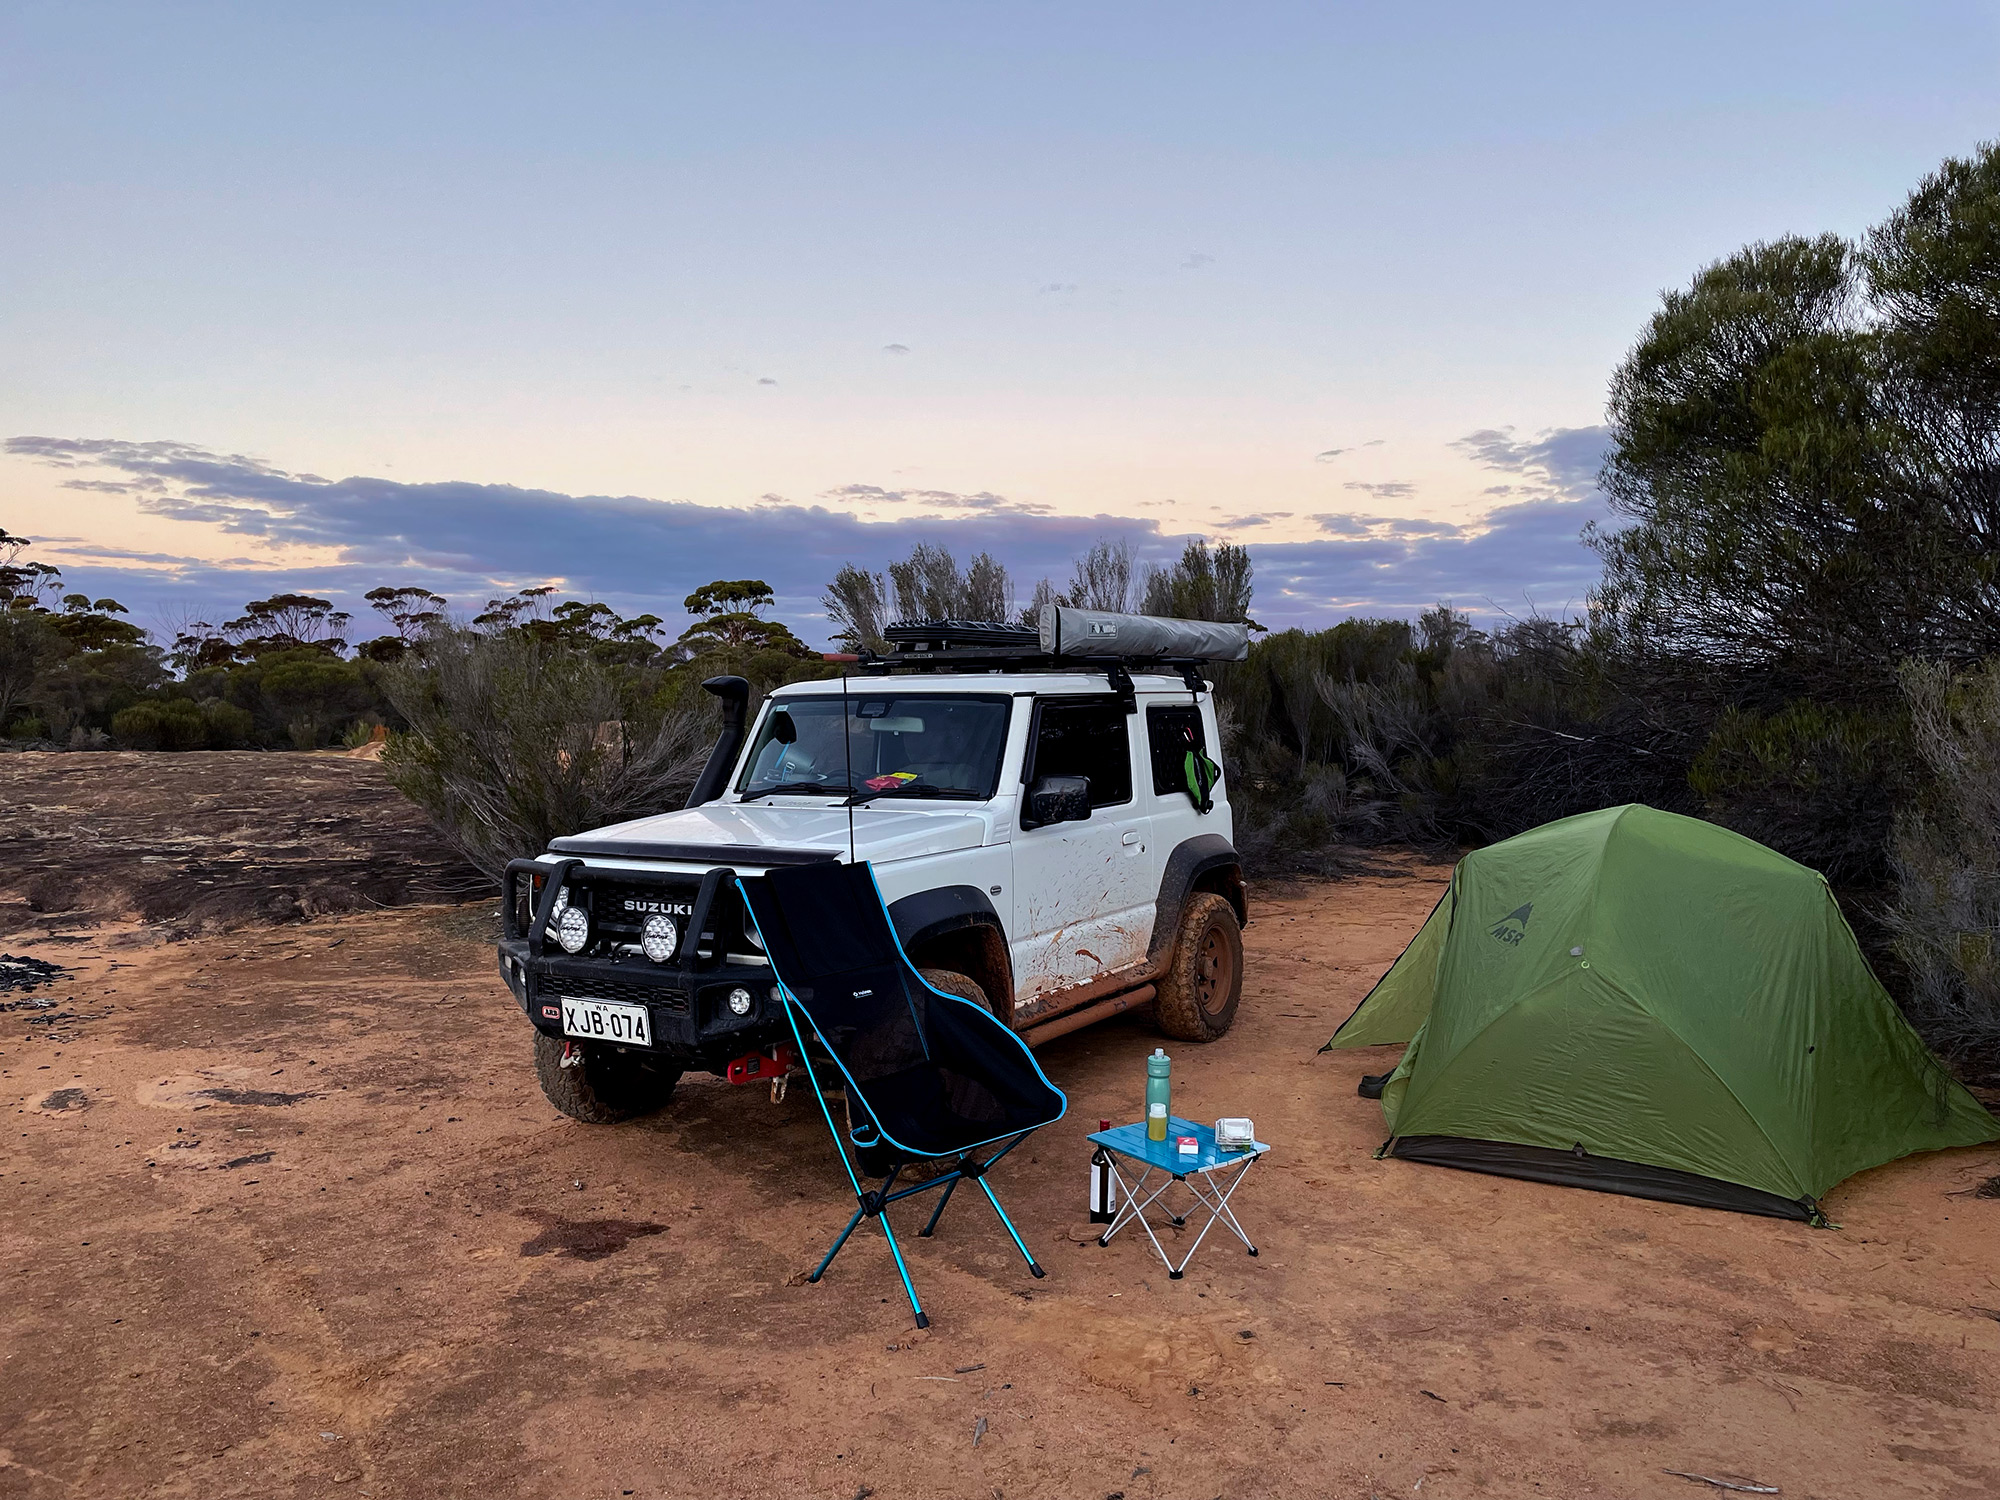
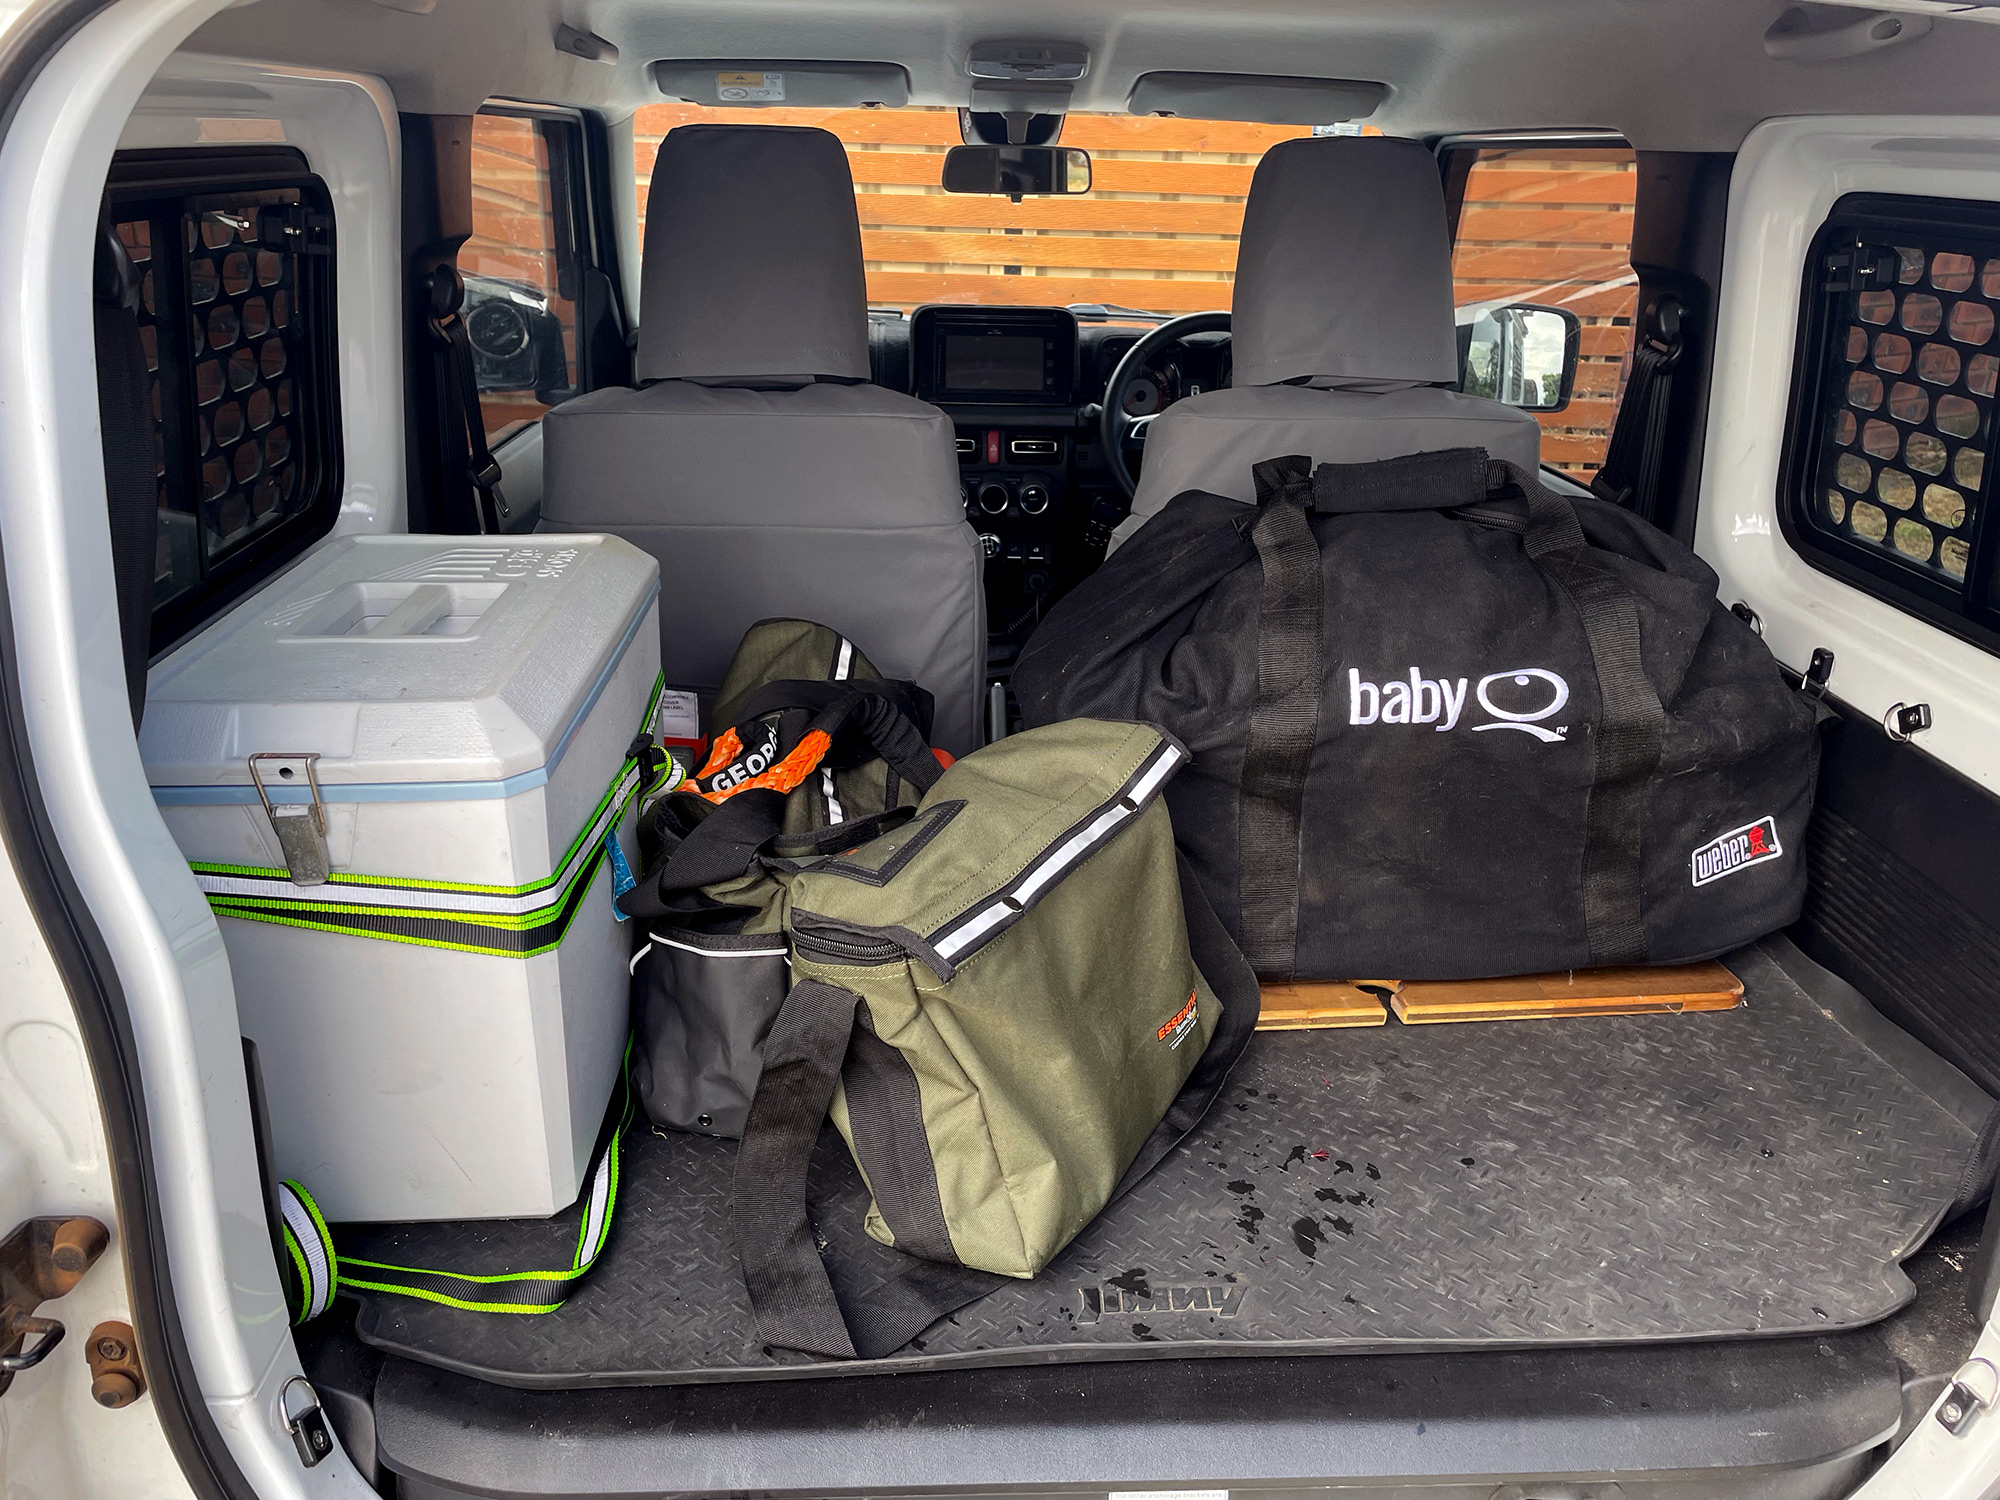
The Jimny can be good for storage but you do need to think about sizing things appropriately. Potentially soft bags are the go, or various crates that fit in the back. This is an example of a multi-day ~2000 km trip including a couple of days deep offroad: no fridge, stuff packed sensibly in soft bags, and there was a heap of extra room available.
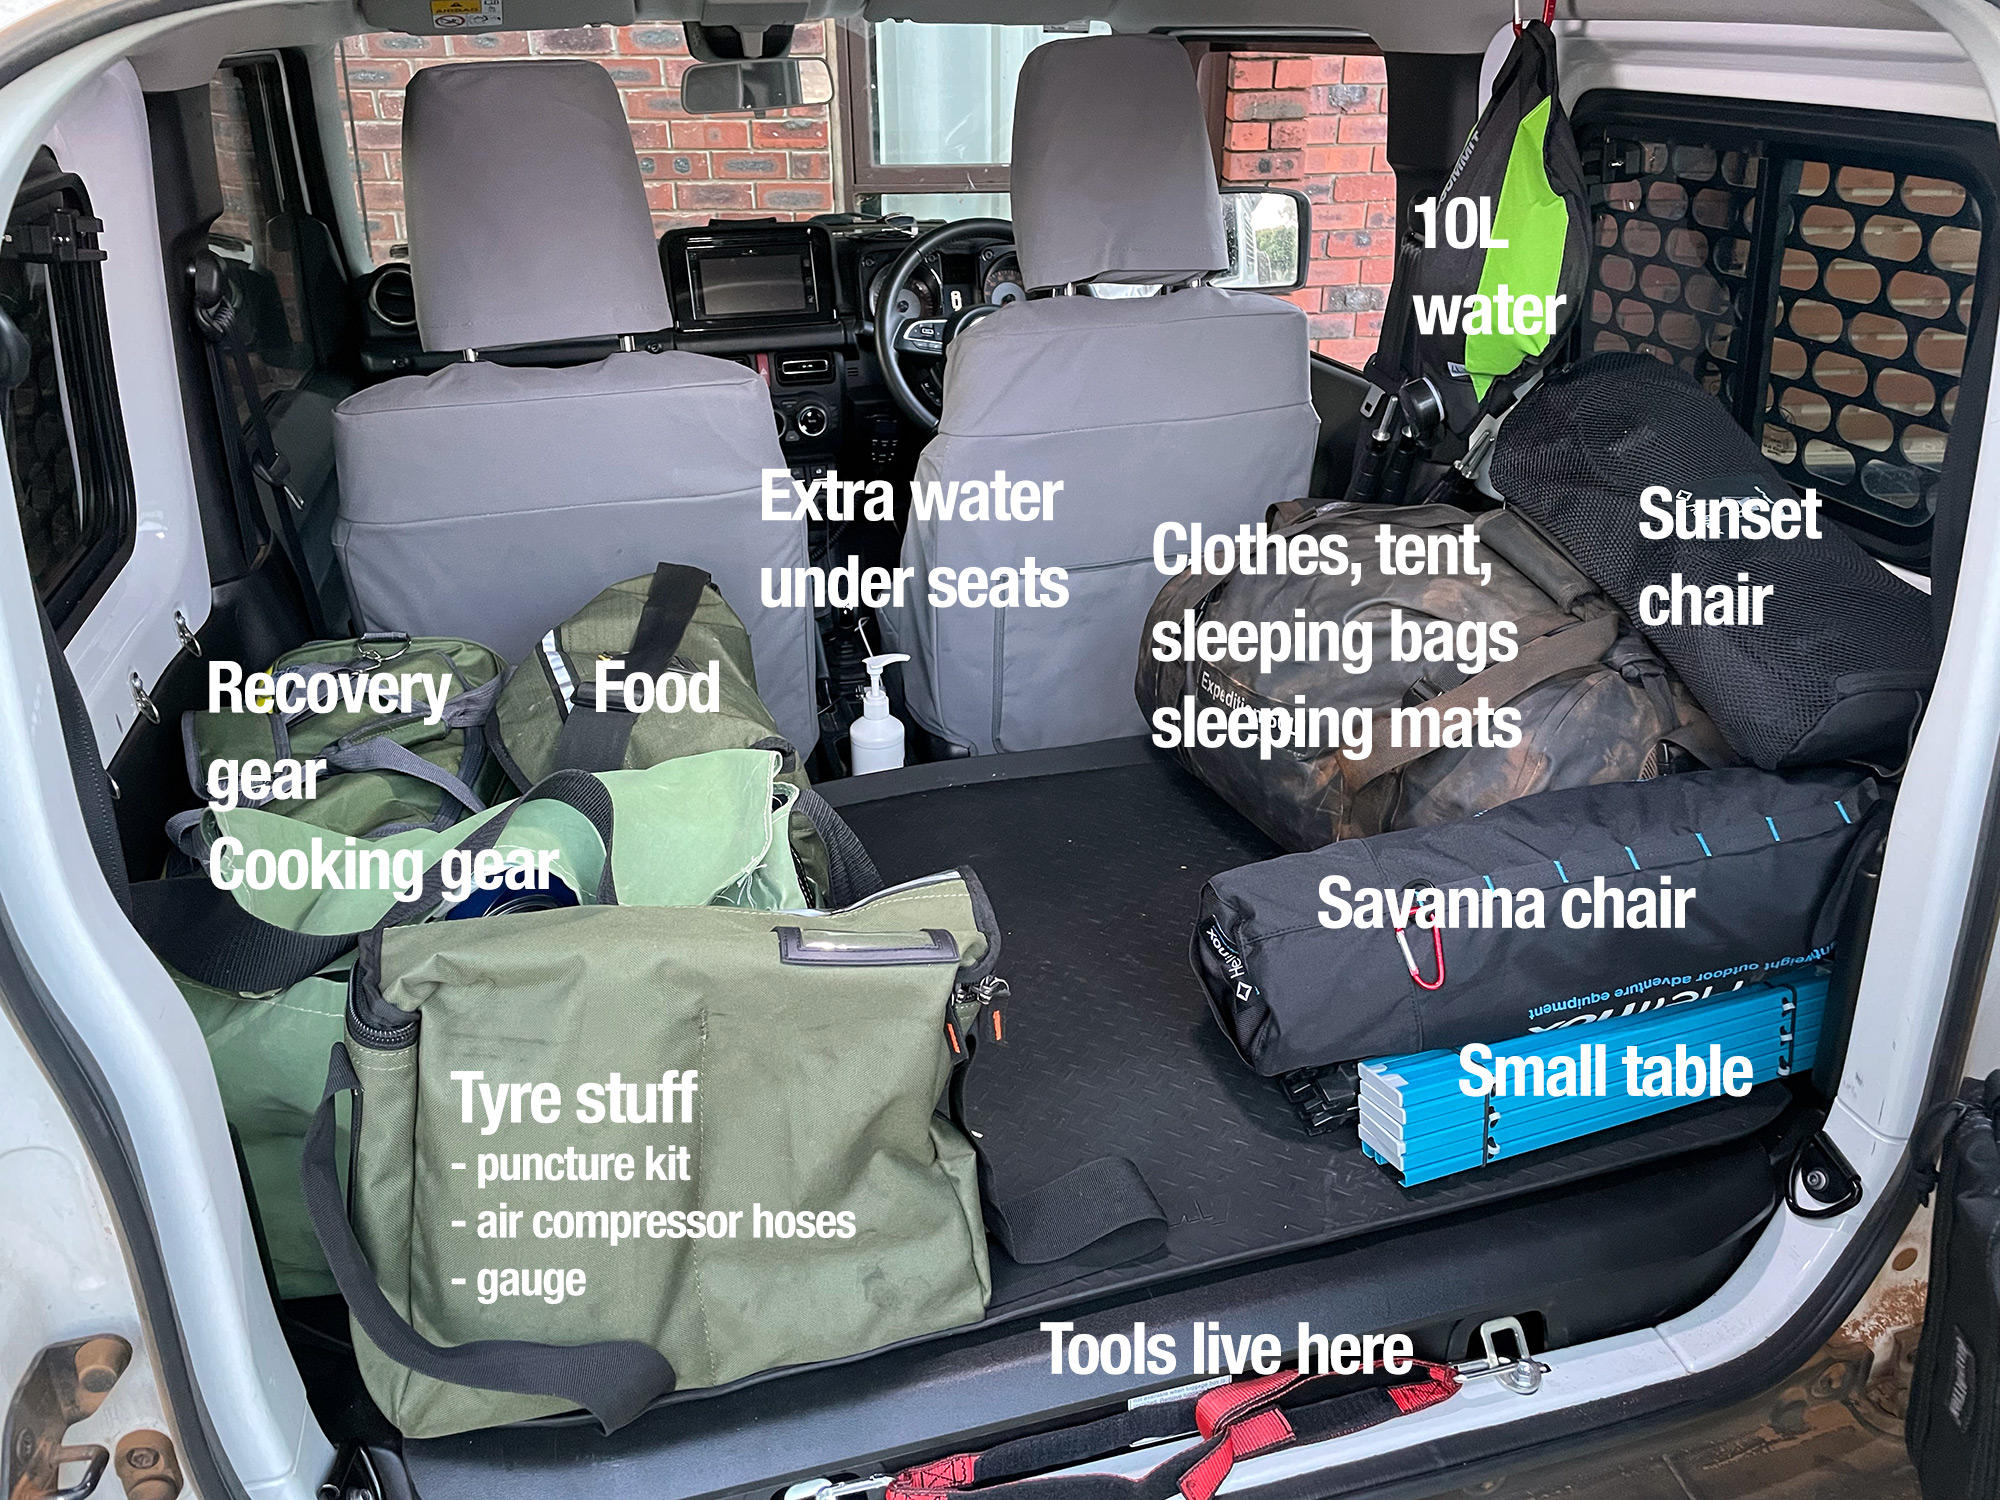
There’s obviously a lot of sacrifices in that: no fridge, only alcohol taken was a bottle of wine, meals were either MRE style or fully dehydrated… but you can definitely do it with minimal gear. This was the trip that convinced me I needed the roof shelf for organisation, too, so it would be even smaller without.
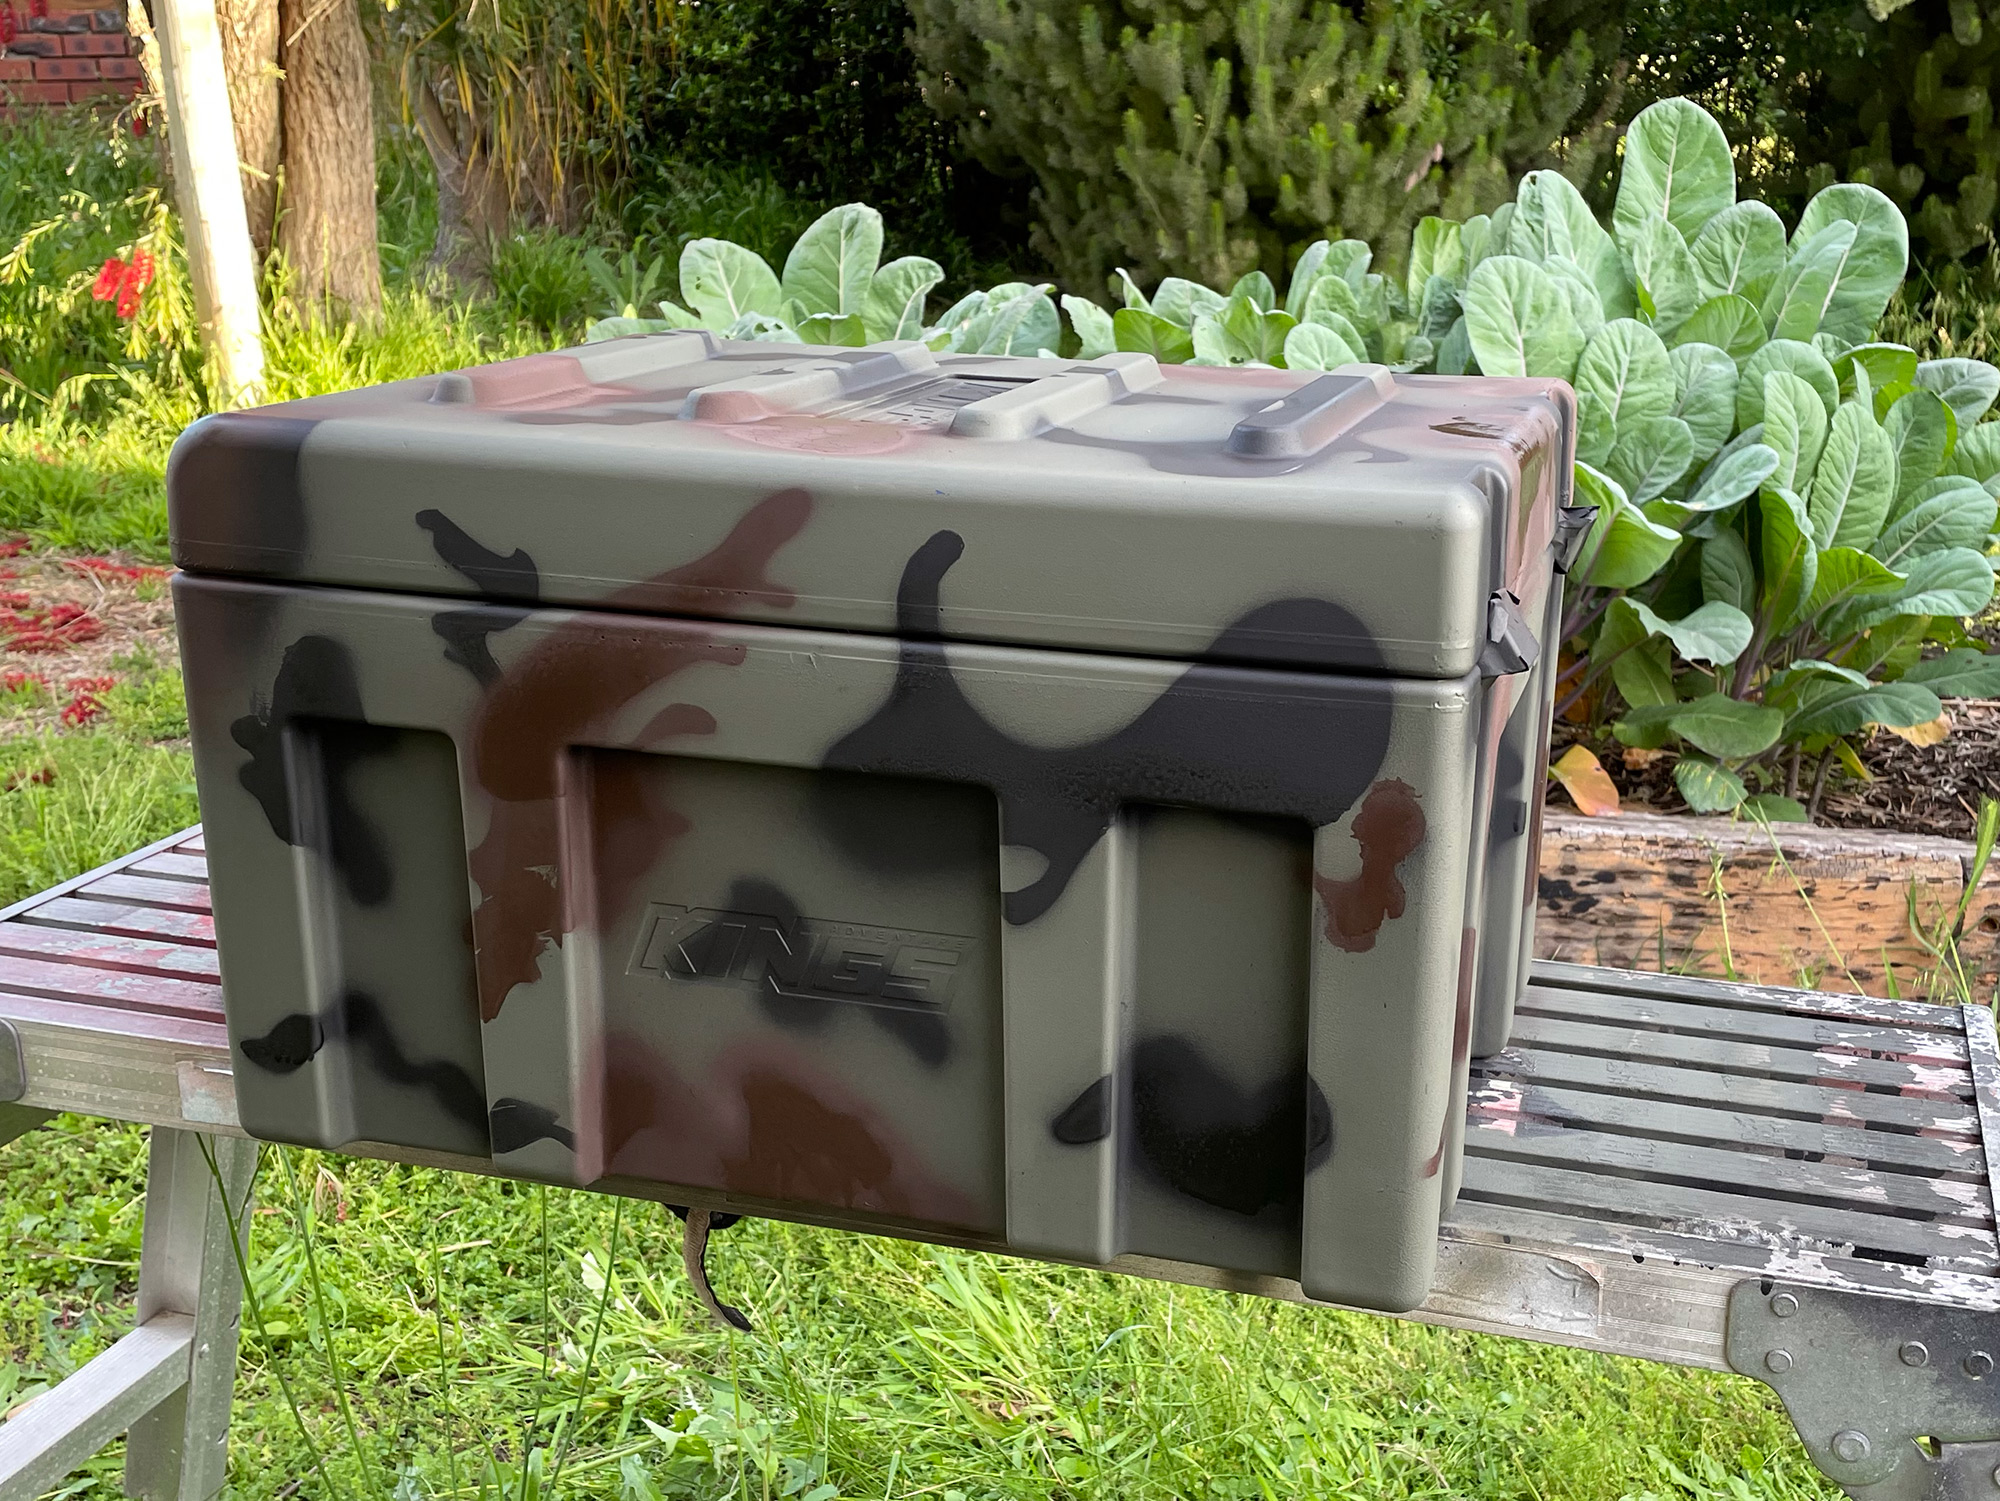
A really good option for modular storage are some small 45L Kings 4wd supacentre front opening luggage crates. These aren’t light and extra wide for what they are, but if you’re bouncing around and want your stuff to be able to be waterproof at the other end then these are great. They also fit neatly in the back: I can get 4 of them on one side of the car, plus also have the fridge in the car. I can do this even with the TLR roof shelf in, and part of the back of my rear area taken up by the pouches on the rear door.
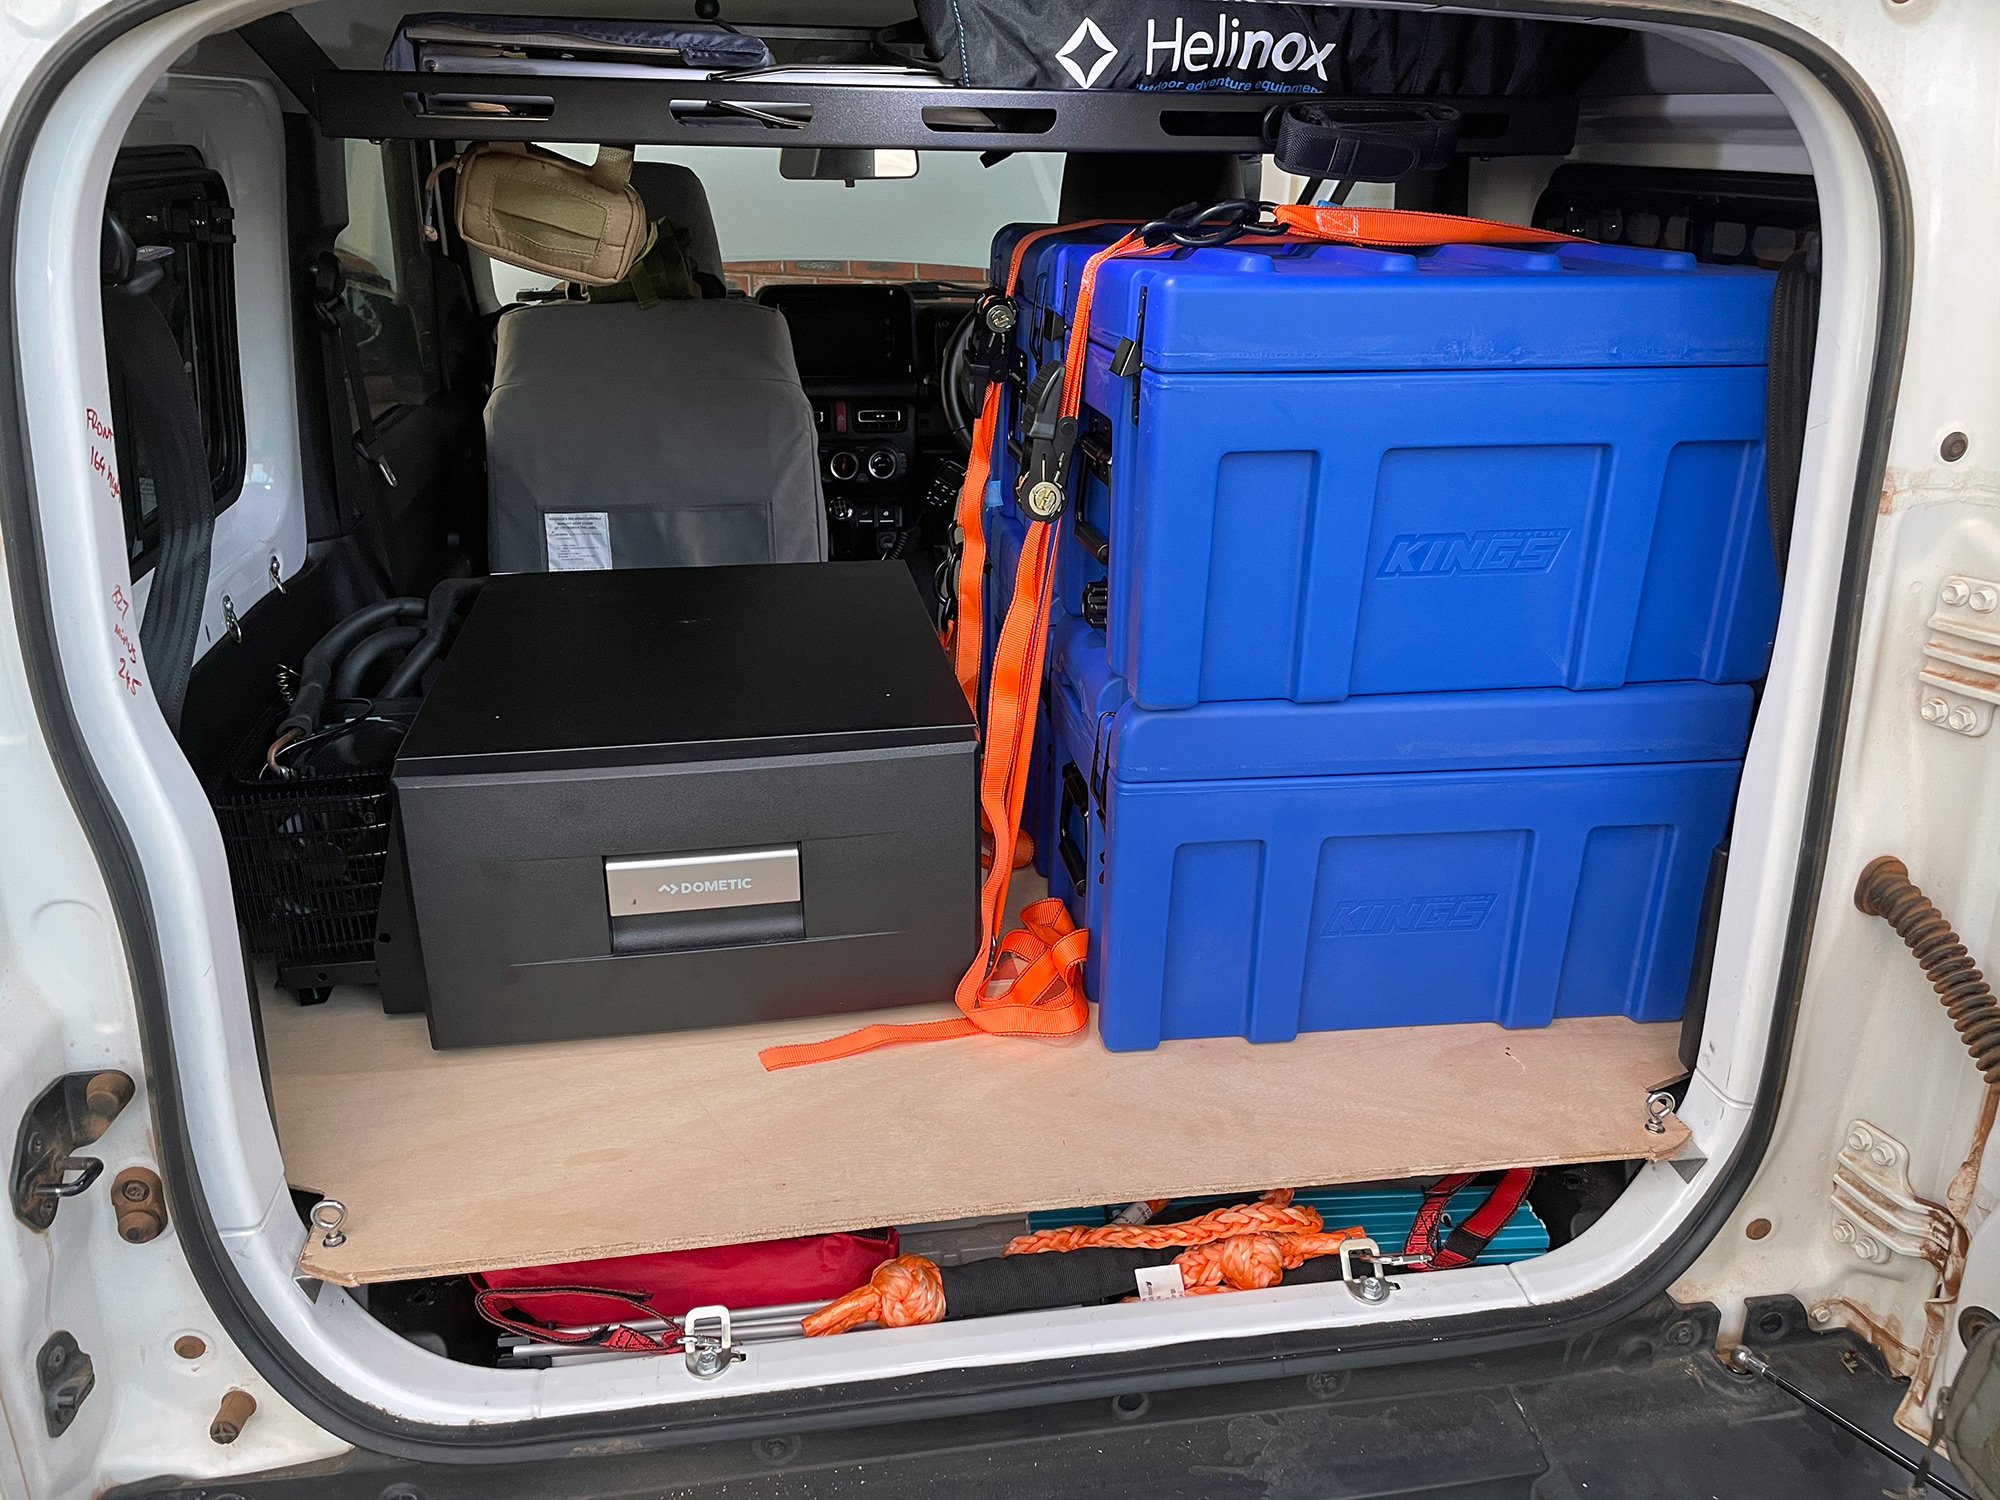
The blue annoyed me so I whipped out some plastic paint and made them camo.