
Extended breathers
Once you go any form of serious 4wding and encounter some water you’ll want extended breathers off the transmission, transfer case and both differentials. There’s a few tricks to installing them on a JB74 but I’ll go through some things to consider and your options.
What you will likely find is a lot of commercial 4wd shops with no experience of the Jimny agree to do the job and suddenly find it’s really painful. Or, you’ll find a 4wd shop that have some experience with the Jimny and either only agree to do the diffs or they don’t want to do it at all. There’s not a heap of ‘off the shelf’ options and doing it well is time consuming and well beyond what most people will pay current labour rates to get done.
It is DIYable, though you want a few hours and you want to be prepared with a bunch of hoses and tubing and a bit of a plan of attack before you get under the car 30 minutes before 4wding and suddenly realise it’s a lot trickier than a lot of larger 4wds.
Sections
Main challenges
The diffs don’t have an easy way to replace the spigots.
You can extend these using some larger hose that your chosen breather kit can use, or you can tap the inside to take press-on fittings that a lot of breather kits come with. There are also some kits available (e.g. https://des-sol.co.za/product/differential-breather-kit/) which provide you an ability to put on fittings without tapping the spigots but I’m not sure of their reliability.
There’s limited space to access the transfer case breather port.
This is smaller than the diff spigot, and the easiest way definitely is to push some hose over it and then use this to take a fitting
Automatic transmissions have awful access to put a breather on.
It’s horrendous. I still have arm scars and PTSD from helping someone do it. Manuals, on the other hand, have the breather already extended up to the engine bay so that’s nice.
Mounting a breather box
There’s a heap of options for breather boxes out there. You can get some that are long segments with multiple breathers, or ones that have an individual filter but take in up to 4 breather pipes. Some have fancier looking external filters (e.g. the ARB breather block), and some are hewn from a chunk of aluminium, such as the aironboard one I’ll be using in my guide. It’s even possible to plumb them into the airbox although not everyone likes this as a possibility.
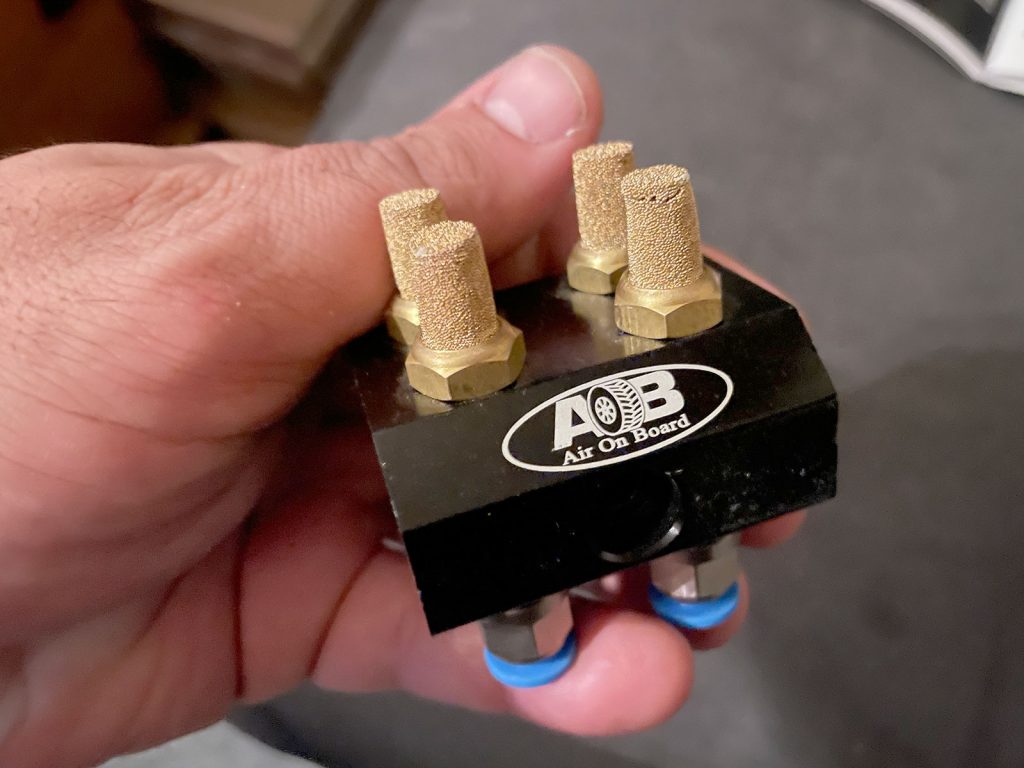
You need to find somewhere to mount the remote breather(s). Preference here is high up in the engine bay and back a bit in the bay to minimise any chance of water ingress.
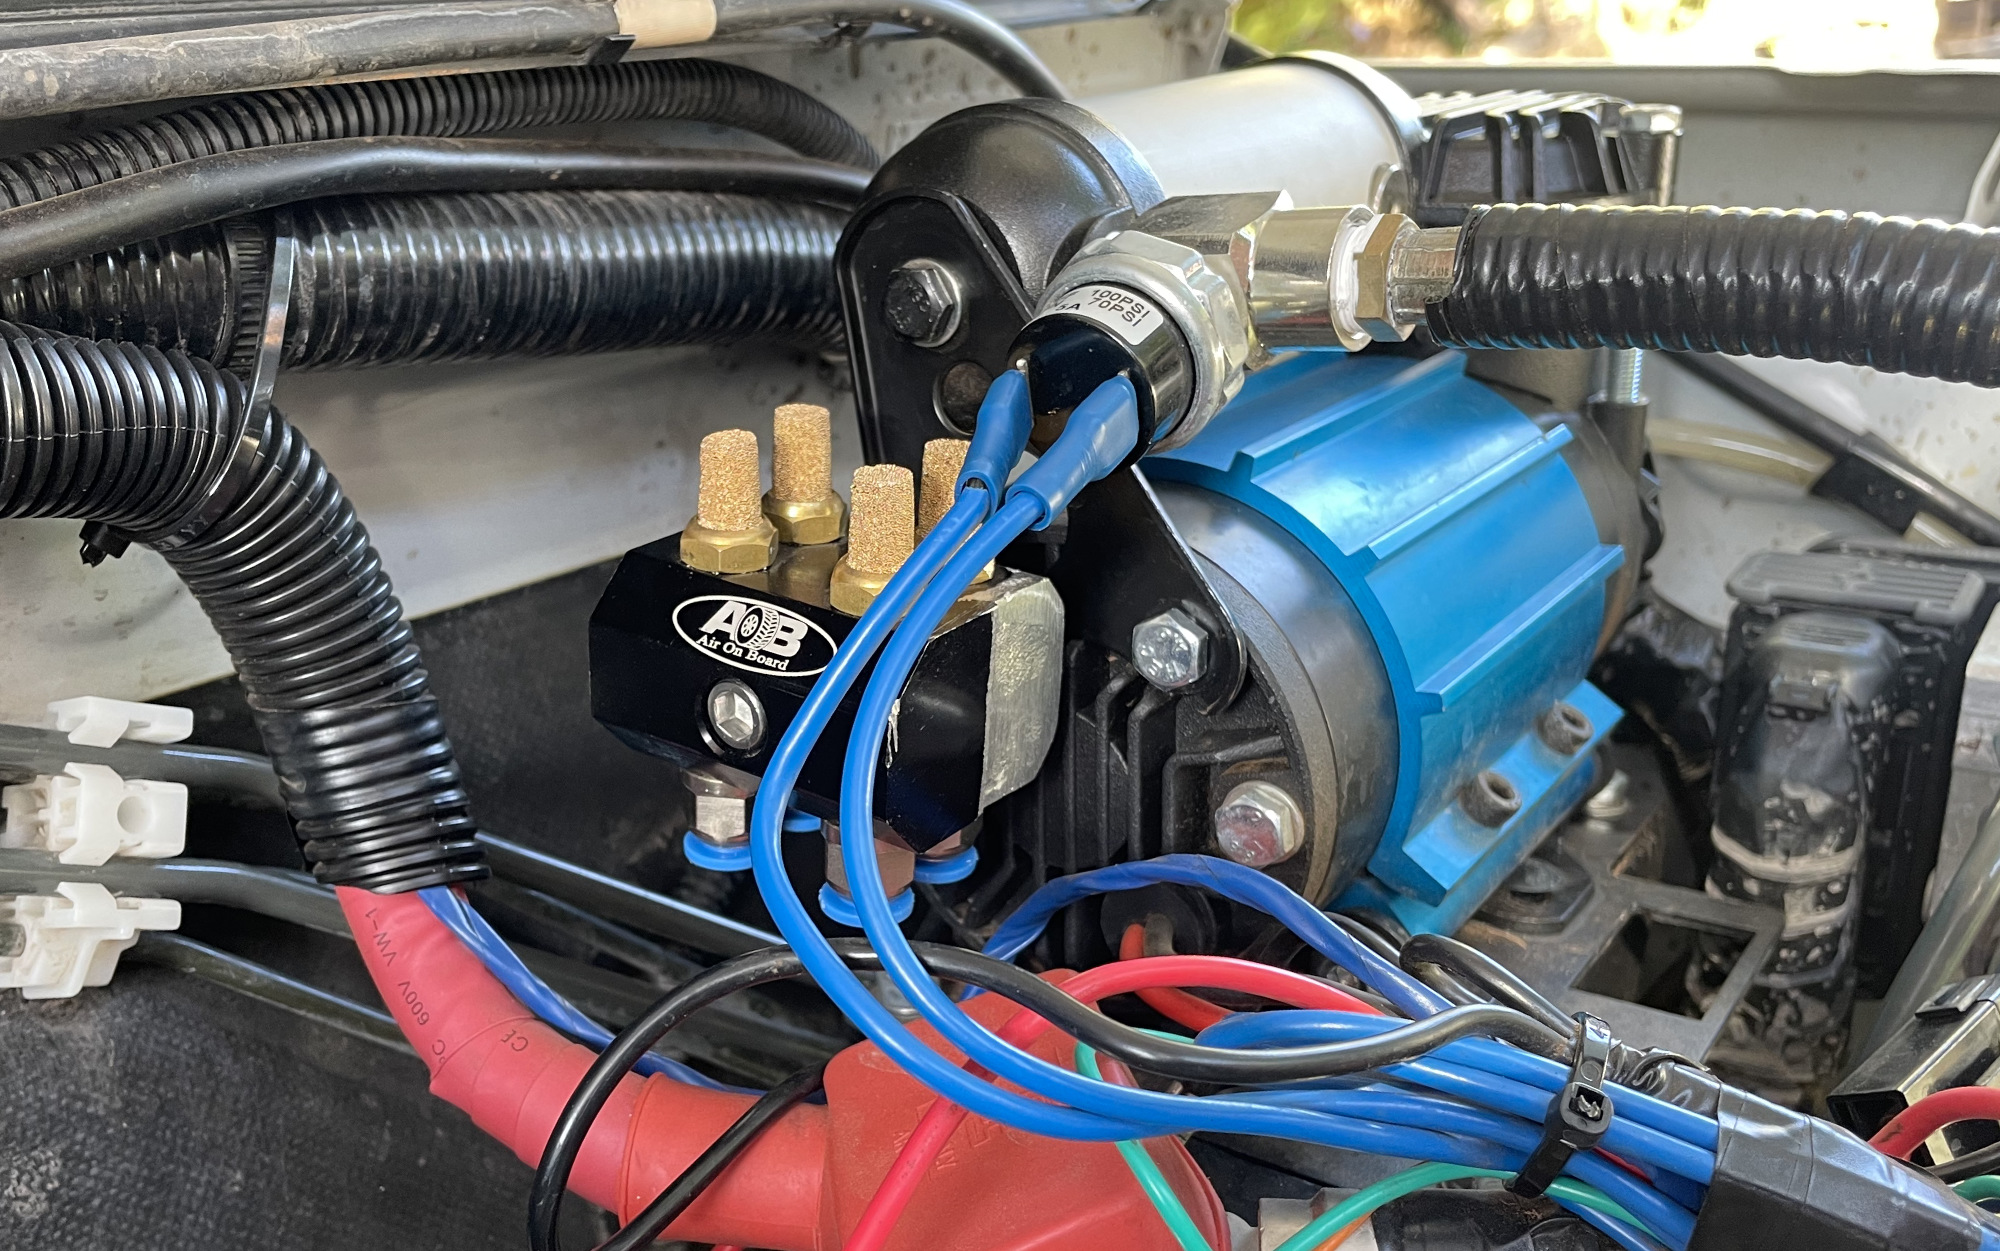
I actually mounted mine to one of the bolts on my under-bonnet air compressor but basically anywhere high will do. Yeah, in the following photo I have some wiring to tidy up.
Diff breathers
Two main options here as discussed above: poke a hose over the spigot in the diff housing or tap it to an appropriate size for a hose fitting. I’ll discuss both and the pros and cons of doing these options.
You can get as simple as poking a hose inside a larger hose to attach it, or use proper fittings and adapt them to your chosen hose. These are the easiest options; the nicest but much more time consuming is to tap the diff housings to take the appropriate fittings directly. If you tap the diff housing directly it’s best practice to change the diff oil after doing it – this can be an added expense or extra time you don’t want to spend on it and that’s ok. In that scenario it’s fine to just use a hose onto the spigot and go from there.
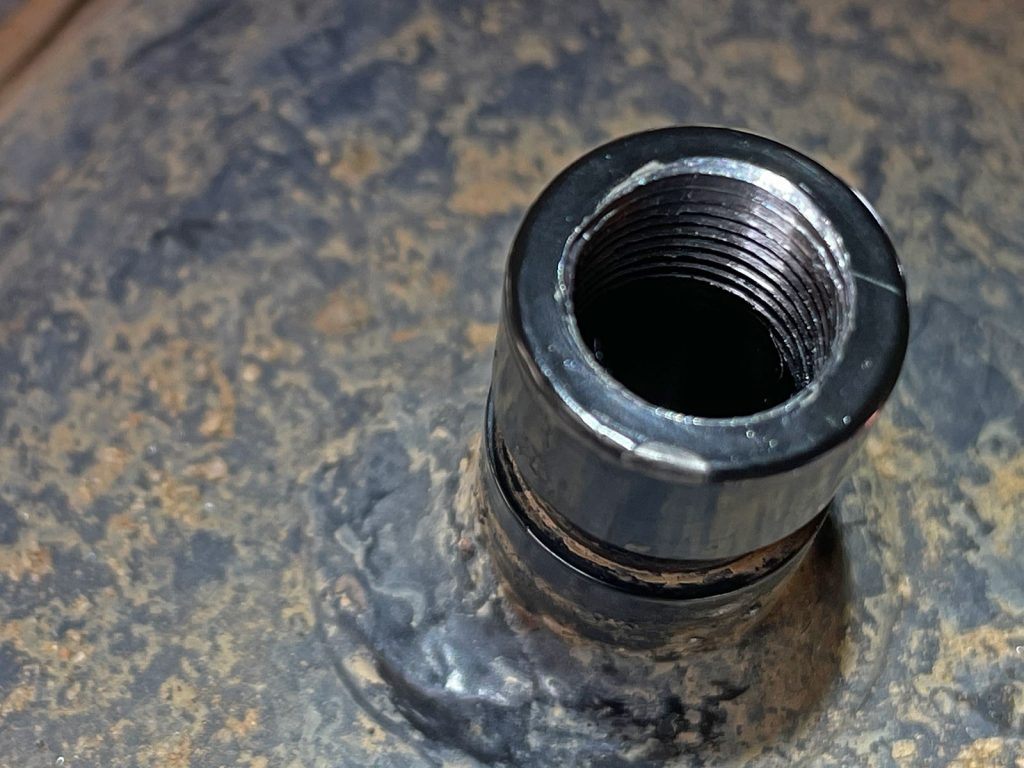
In any case, both options start by levering off the metal cap on the diff housing that acts as the factory breather.
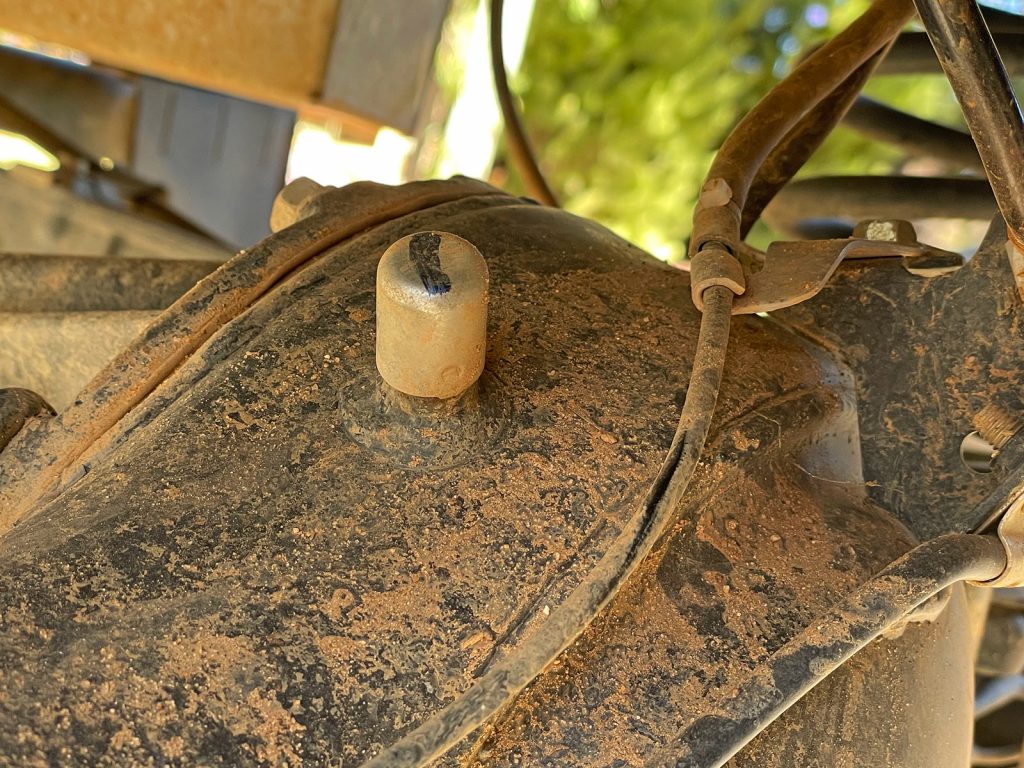
To get this off you basically lever it up with a screwdriver or some pliers or something. There’s little indentations that hold it into a ring, once they’re popped up then you can get the cap off. A spring and a rubber seal hide behind this.
After this you have to find some way to adapt a generic breather kit fitting or hose to this
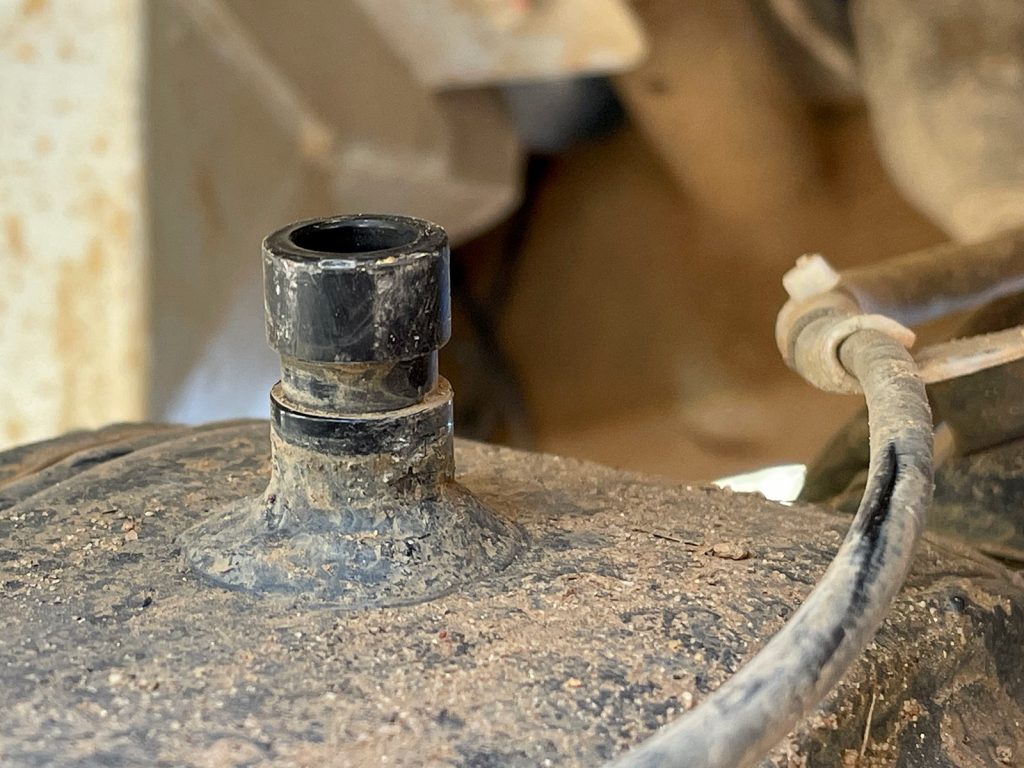
Using some hose to hold a fitting
Probably the simplest DIY option is to use some hose over the spigot to hold a fitting. The spigot outside diameter is a bit over 12mm for the most part so finding some 12mm or 1/2″ internal diameter hose and holding it on with a hose clamp is the easiest option here. Fuel hose with braided outer is a good option as it reduces some of the likelihood of kinking at the extremities of suspension movement.
You may wish to use some hot water to help stretch your hose over the spigot if it is a tight fight.
There is another consideration with this hose and that is how you’ll then adapt this hose down to the diameter used by most generic breather kits which generally want an ~6mm outer diameter hose. I go through the various options to do this below.
Option 1: Fittings to adapt hose sizes
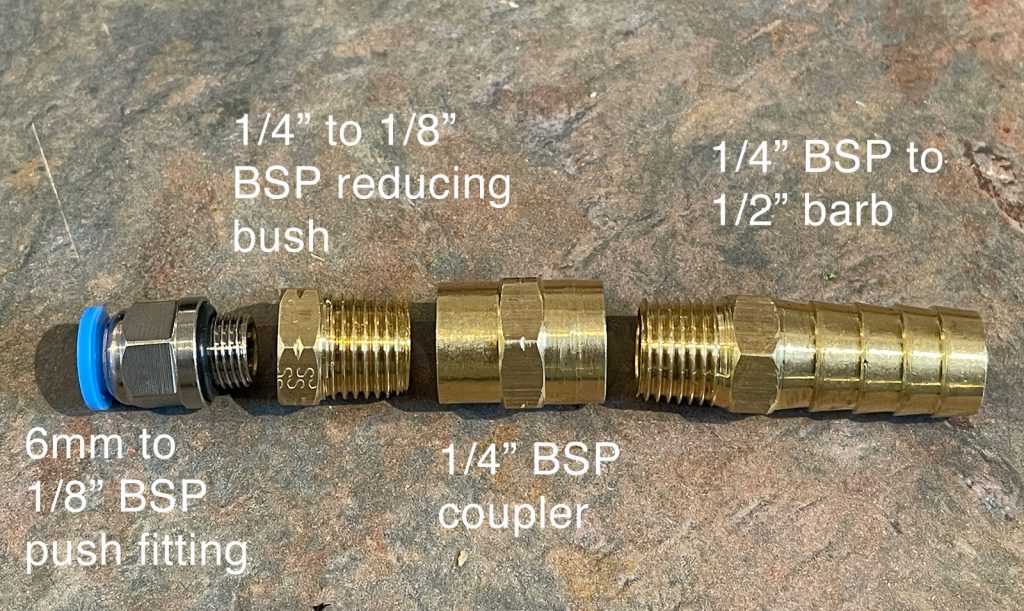
This is not the cheapest way to do it, but it does result in a nice option for your fitting. The easiest option here at hardware store/automotive stores would be to get a reducer bush for the push fitting, a coupler that matches the larger size of the reducing bush, and a hose barb to suit the coupler.
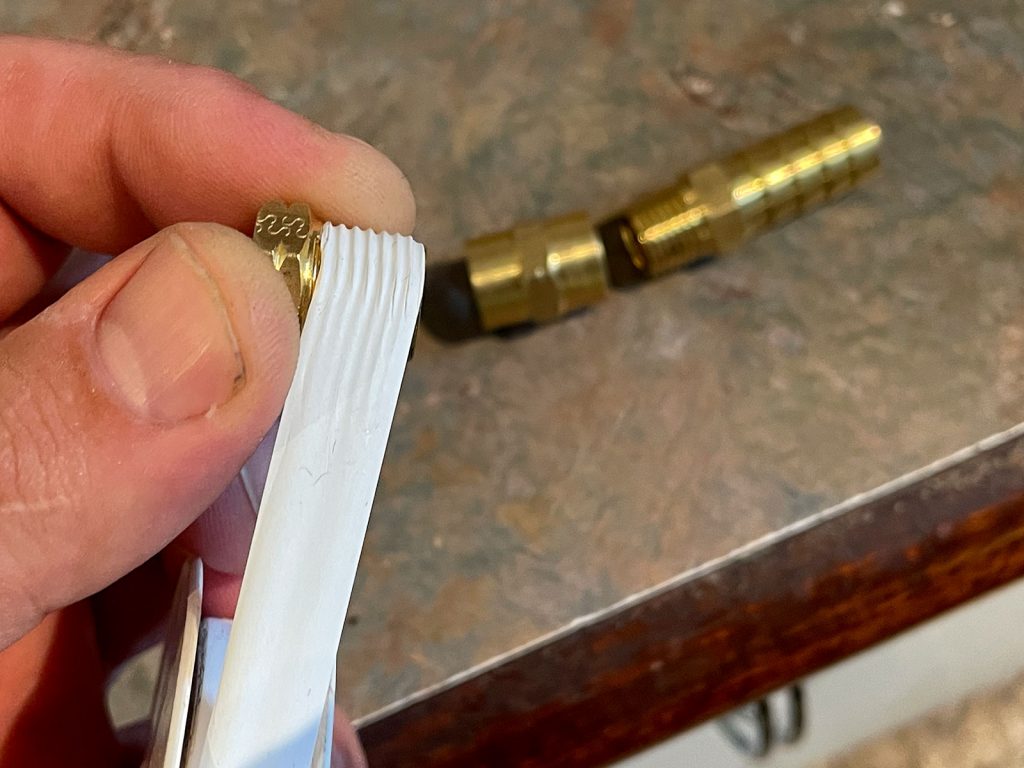
Obviously you’ll want to seal between the threads. Two options here: the first would be to use thread tape
Another option, and my preference, is to use a liquid thread sealant. My preference is the Permatex thread sealant. This used to be called Master Pipe Sealant but is now something along the lines of high-performance thread sealant.
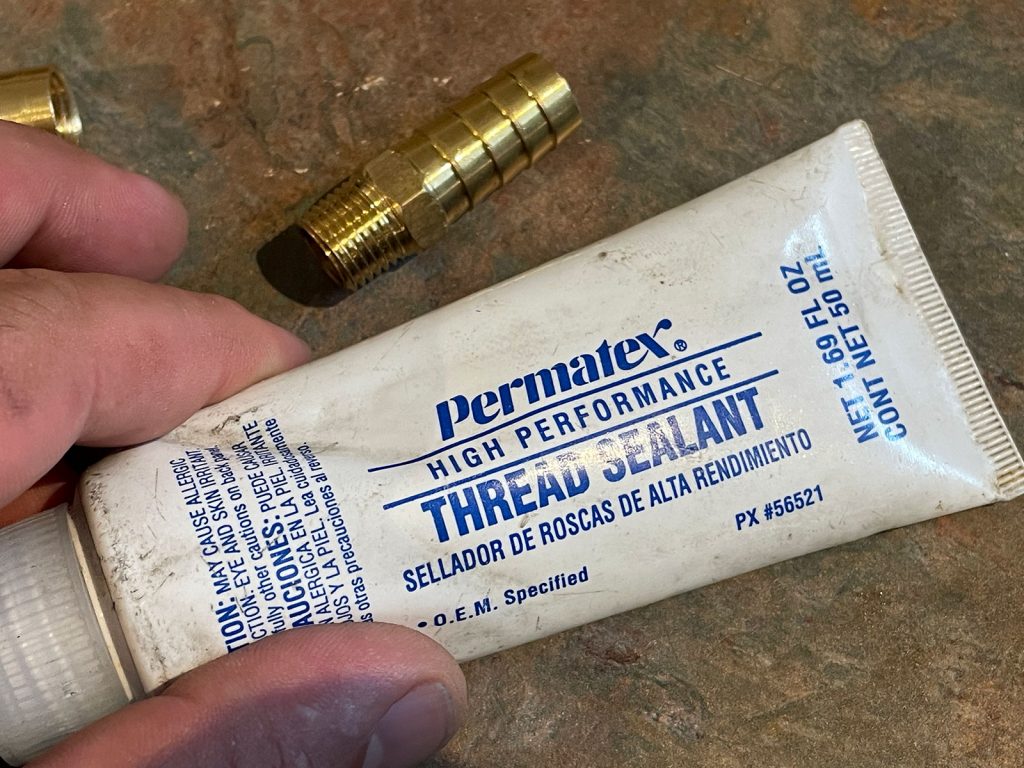
This is a lot easier to get a good seal with than thread tape, and you have less risk of splitting the fittings if you put on too much. The downside is it can be a bit messy.
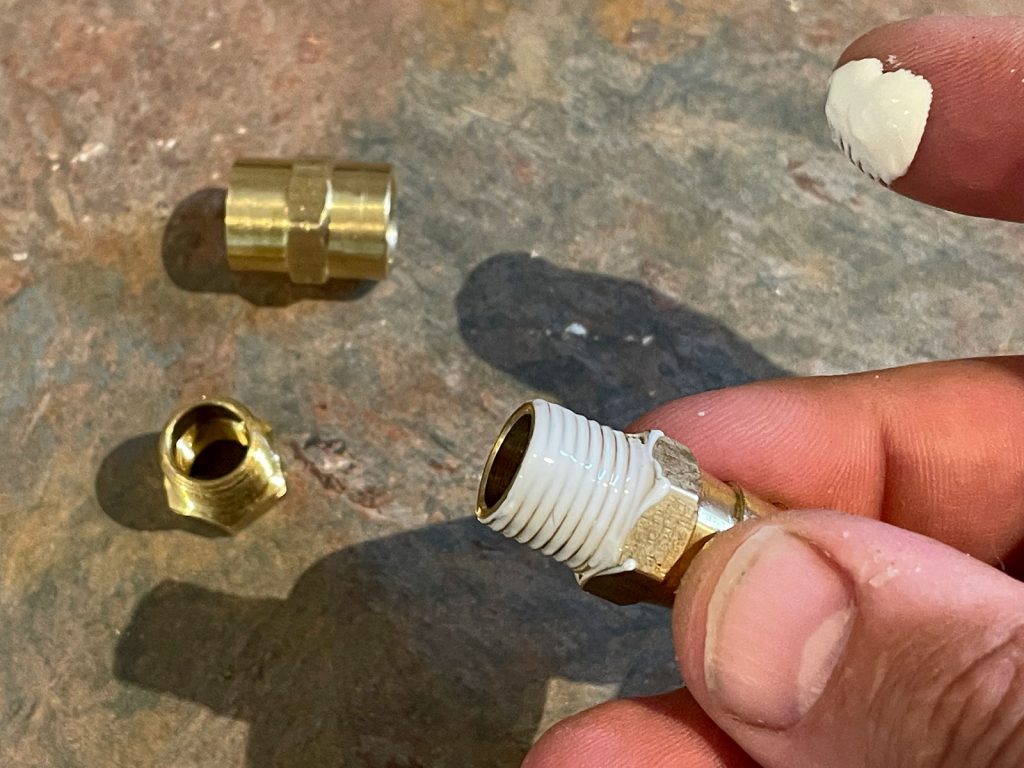
With the threads all sealed then just tighten everything up.
We’ve now successfully adapted the fitting to the 1/2″ (12mm) internal diameter hose needed to go over the diff spigot.
Option 2: Hose inside hose
Like everything DIY there’s yet another way. Most of the generic breather kits come with fittings that basically do fit pretty nicely inside 12mm ID hose so you can just put the fitting into the hose, and then push your breather hose into this. Again I’d seal it up with some heat shrink to ensure a good seal and also for it to not escape.
Option 3: Breather kit fitting directly inside larger hose.
For this one just use the 1/8 to 1/4″ BSP reducing coupler as shown above and place the 1/4″ BSP end straight in a hose. This is probably best done if you use hose a bit smaller than the 12mm required to get over the diff spigot.
Biggest risk with all of these options is the method of adapting the hose down to the generic breather kit sized hose pulling out esp under full suspension droop, so obviously make sure everything’s secure and won’t come out under load. I would either use a very short segment of large diameter hose or I would run it all the way up and secure it against the body so only one part is flexing rather than the flexing all happening where you’re also adapting everything.
Tapping the diff spigot
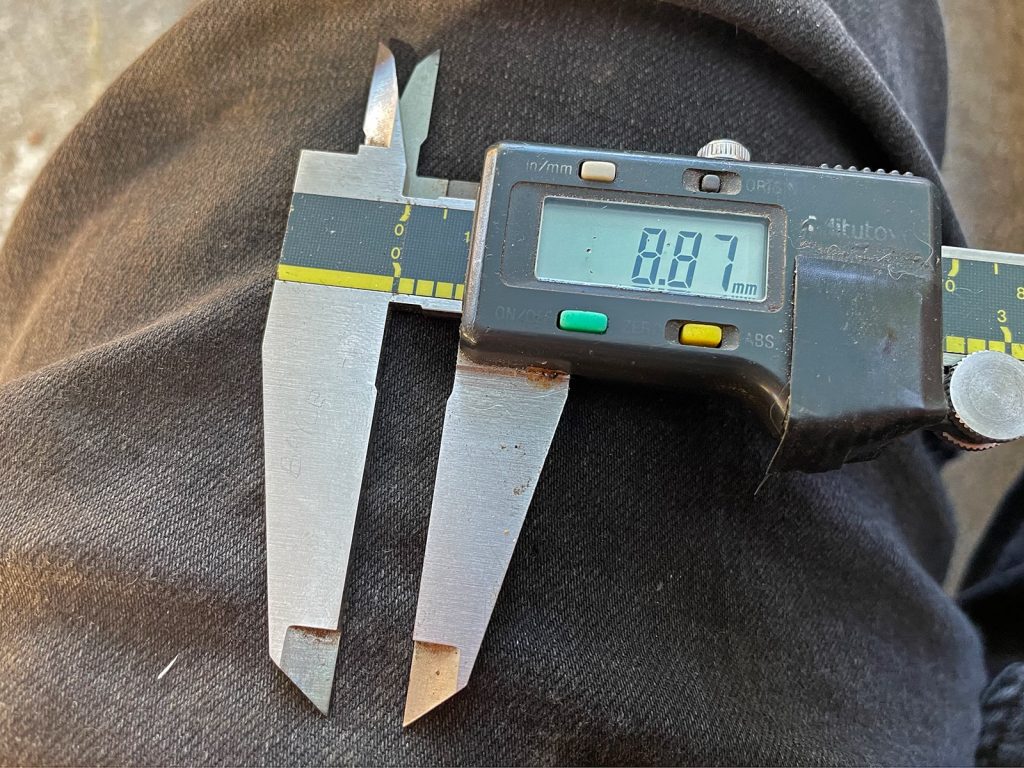
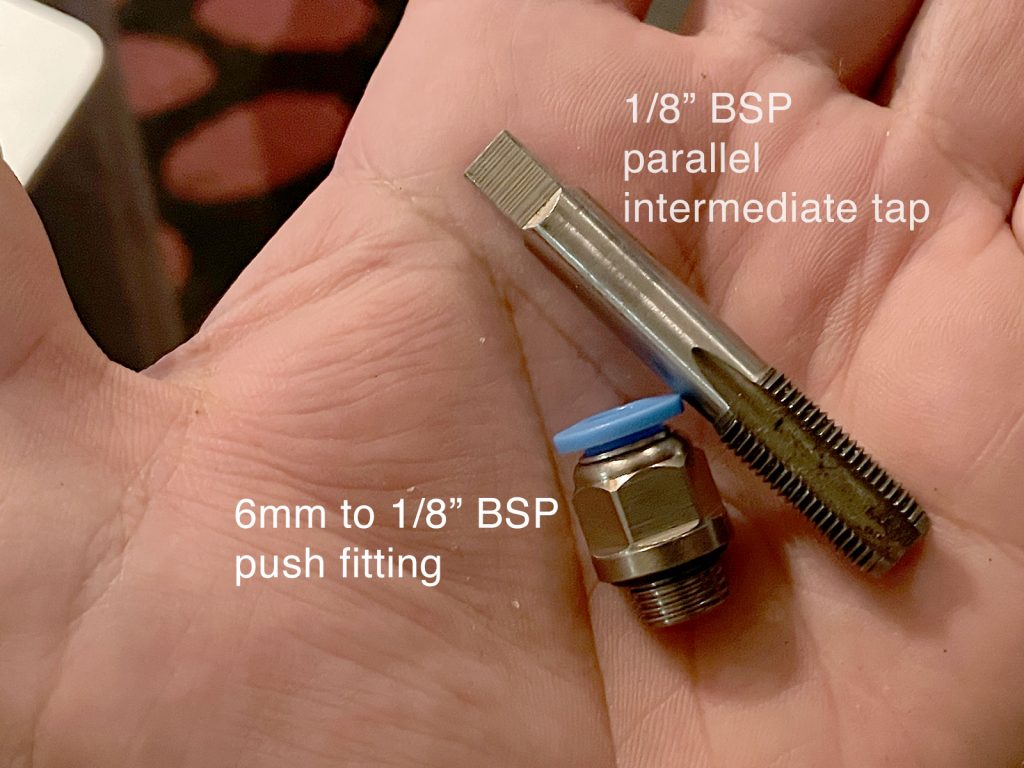
Most of the commercial push-on style hose fittings for generic breather kits are based around a 1/8″ BSP thread fitting (though it’s possible to buy M8 fittings). The inside of the spigot on the diffs is actually a very good match for a 1/8″ BSP fitting: the internal diameter of the spigots is ~8.9mm, which is a very close match to the 1/8″ BSP tapping drill size of 8.8mm.
These thread taps aren’t that easy to find at normal hardware stores; I found mine as a 2nd hand and rarely used one on ebay pretty cheaply.
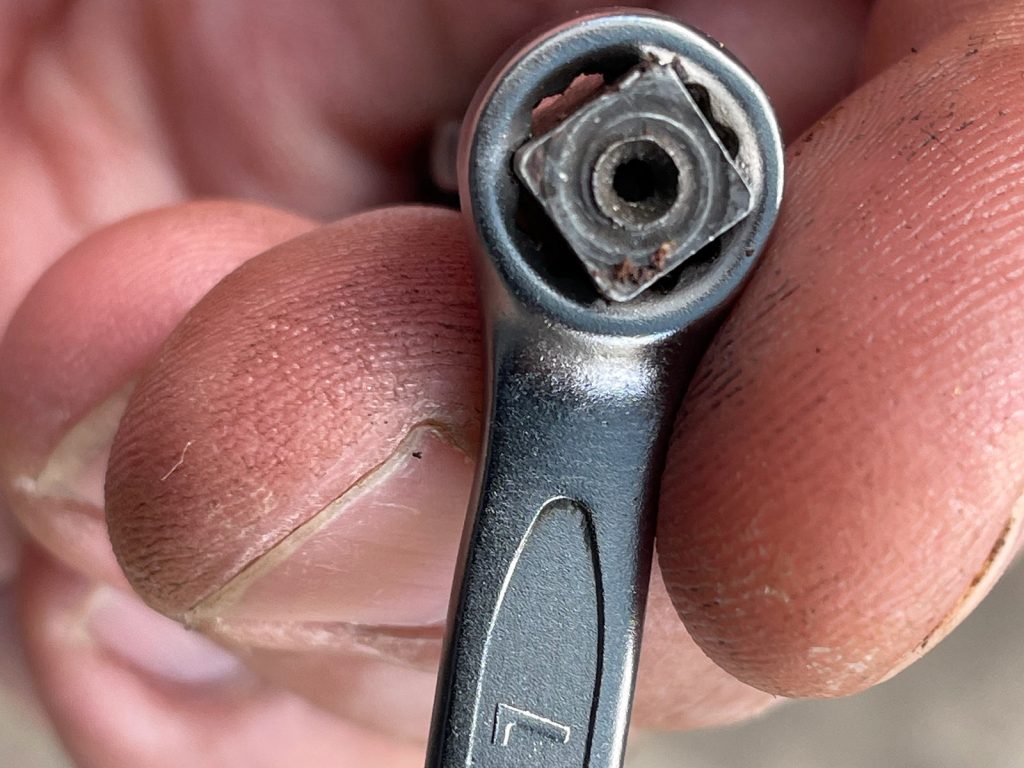
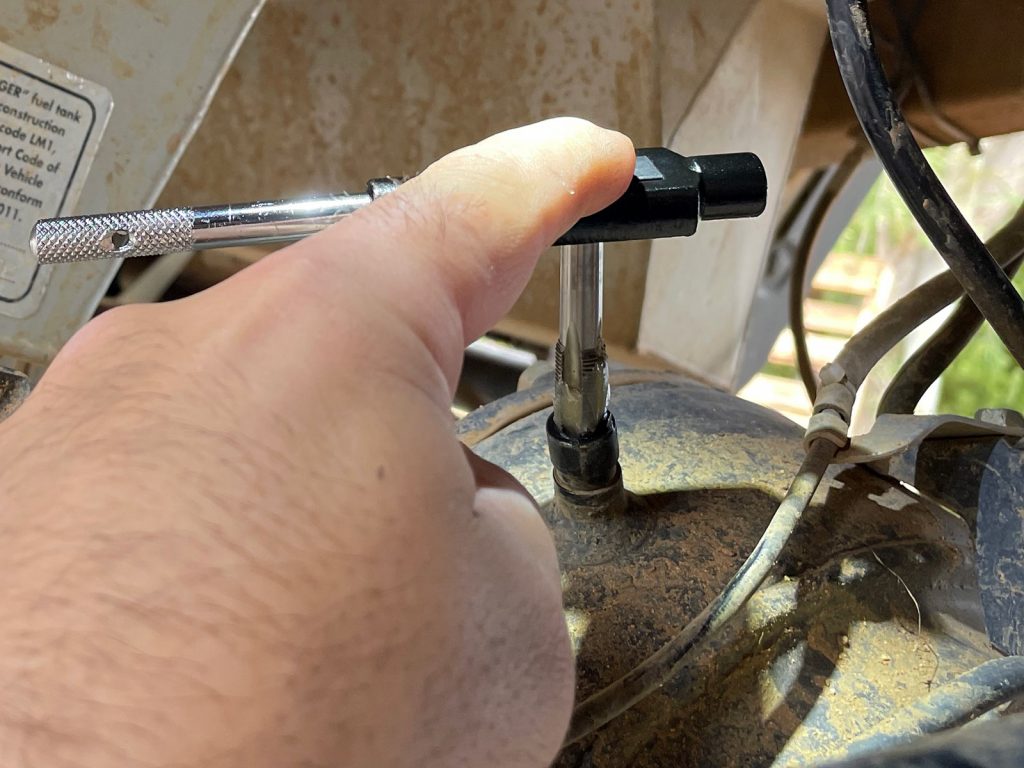
You’ll probably want a tap handle with a removable handle to make access easier. You can also drive taps with a square fitting at the end like these with a 12 pt spanner ring end or socket, or the flats of a spanner.
Now obviously the lazy way to do this is just to get the car jacked up, the diff as low as possible in full droop, and go at the tapping process.
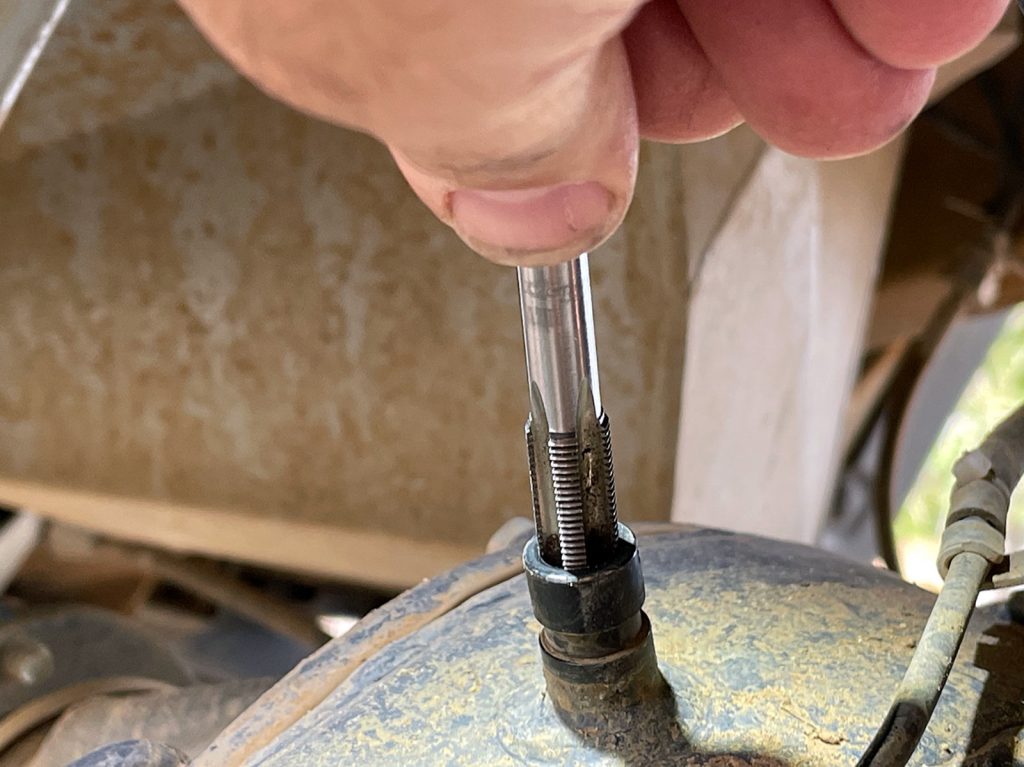
A consideration with this: you risk metal going into the diff oil when you tap it. The best way to mitigate this is not to go in dry like the previous picture but instead use some grease in the flutes of the tap to catch the grease. Any grease will do so long as it’s nice and sticky.
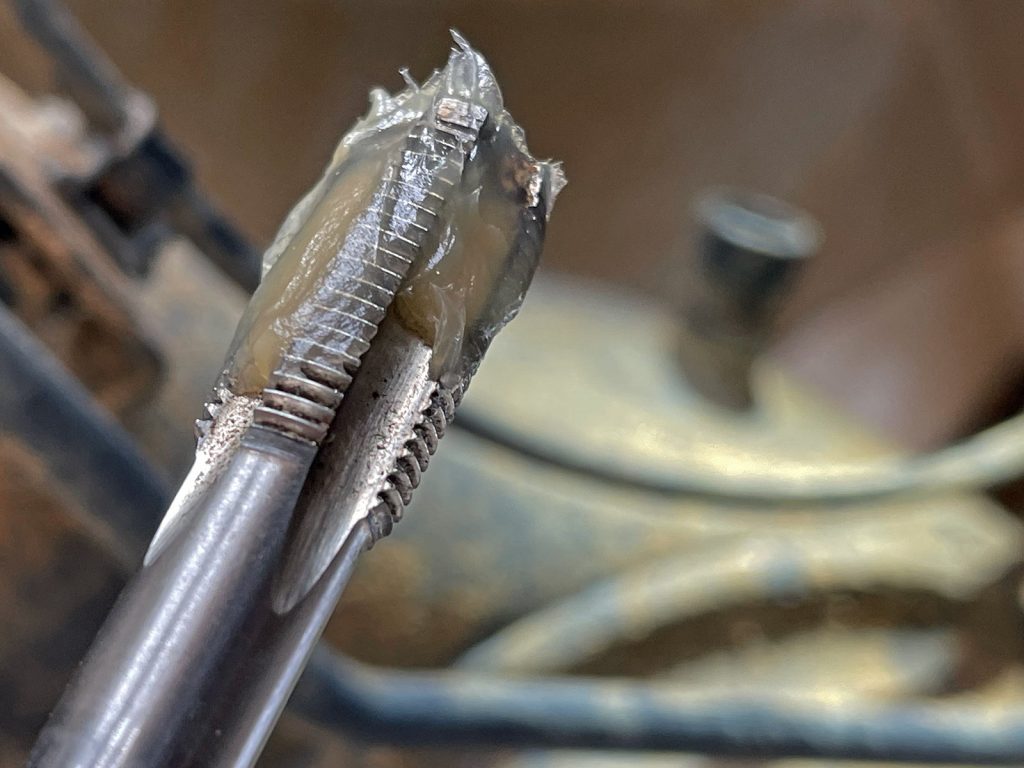
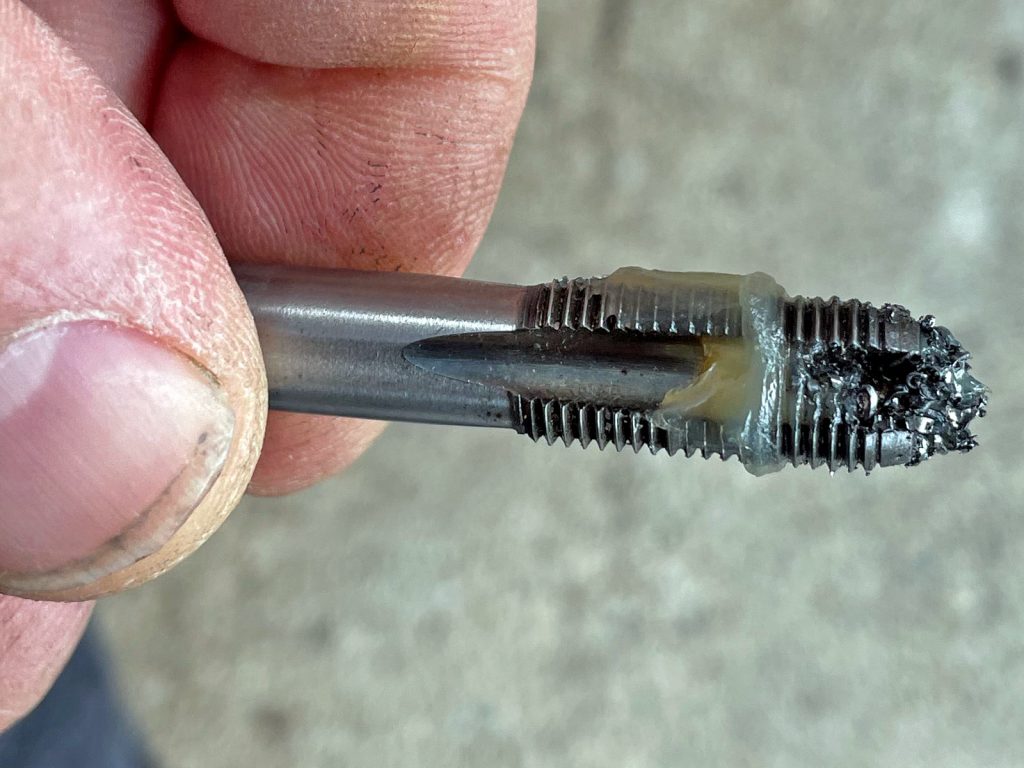
Now it’s a case of working the tap in nice and straight, turning it ~1/2 a turn each time, then backing it off 1/4 of a turn. This helps break the chips up and ensures you don’t break the tap off which would be very embarrassing. Periodically unwind the tap all of the way out and clean off the swarf and grease and put on new grease. This makes sure you’re less likely to drop chips into the diff oil.
Access is pretty tricky, I used my tap handle for the most part with one of the handles removed to give a 3/4 of a turn swing before needing to swap it around.
Once you’re done just give the hole a wipe out to remove any grease and admire the handiwork of a 1/8″ BSP thread tapped in a diff housing.
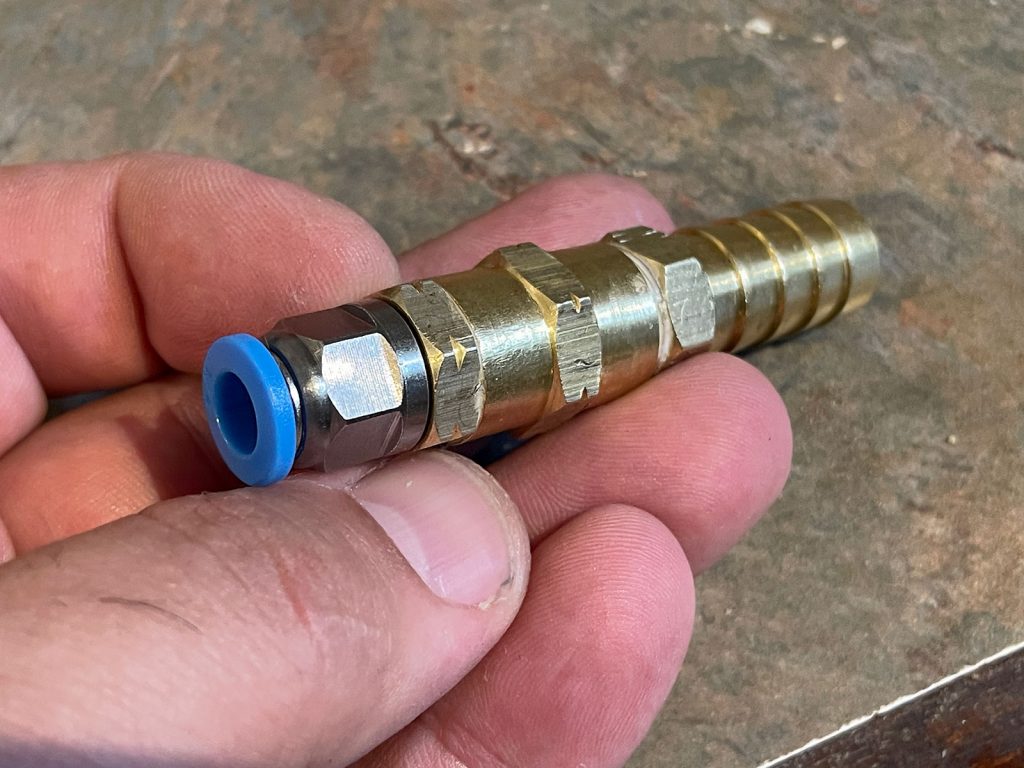
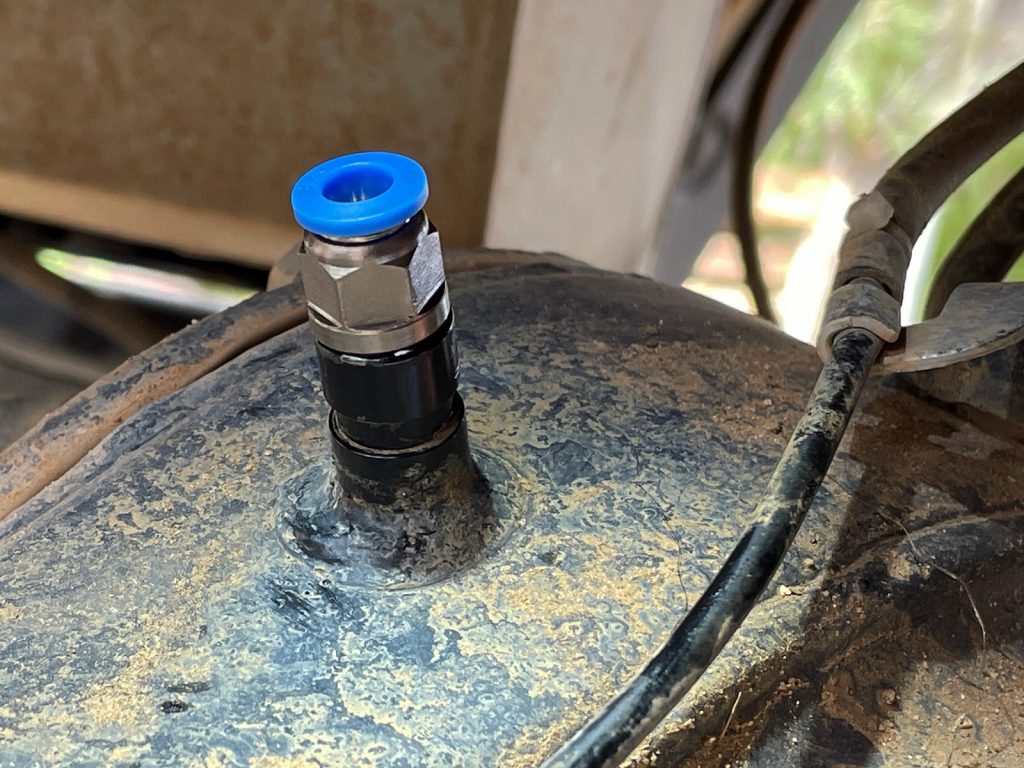
Now just screw in the fitting. The fitting I have has an o-ring in it so it seals up nicely.
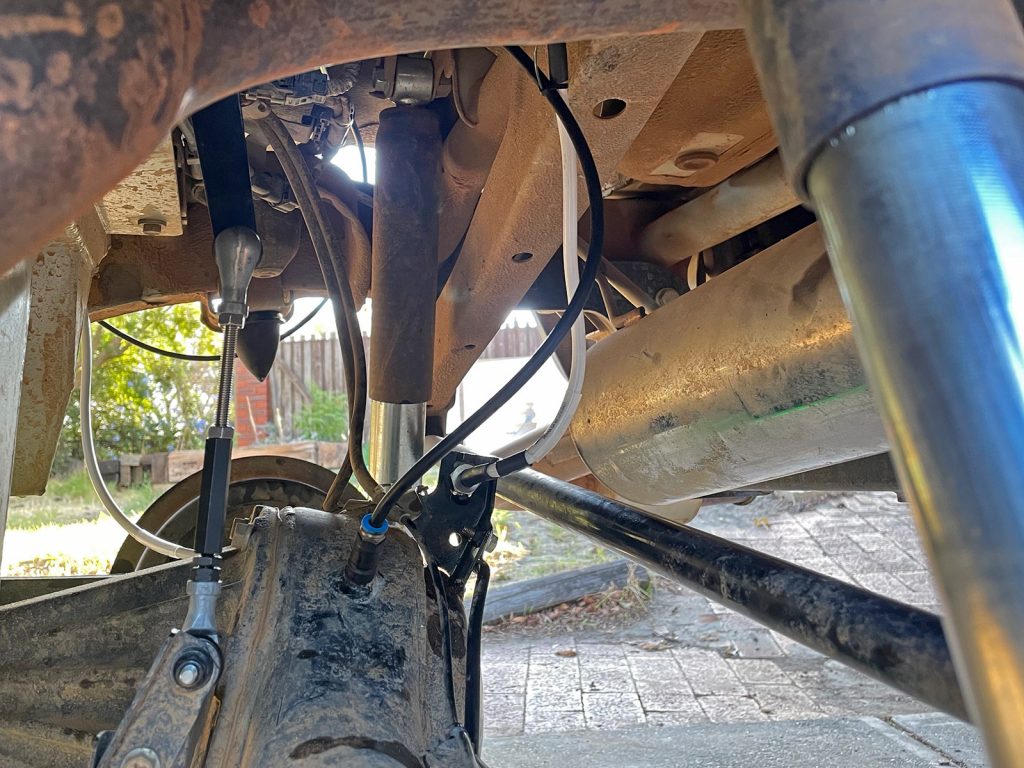
Now you get the joy of running the hose all of the way back to the front of the car. This isn’t so bad from the front diff but the back diff obviously has to run the full length of the car.
Another nice thing to do here is also put a bit of heat shrink over the fitting and also the diff spigot. This just makes it look a bit nicer, as well as providing a little bit more security with the seal to the diff housing.
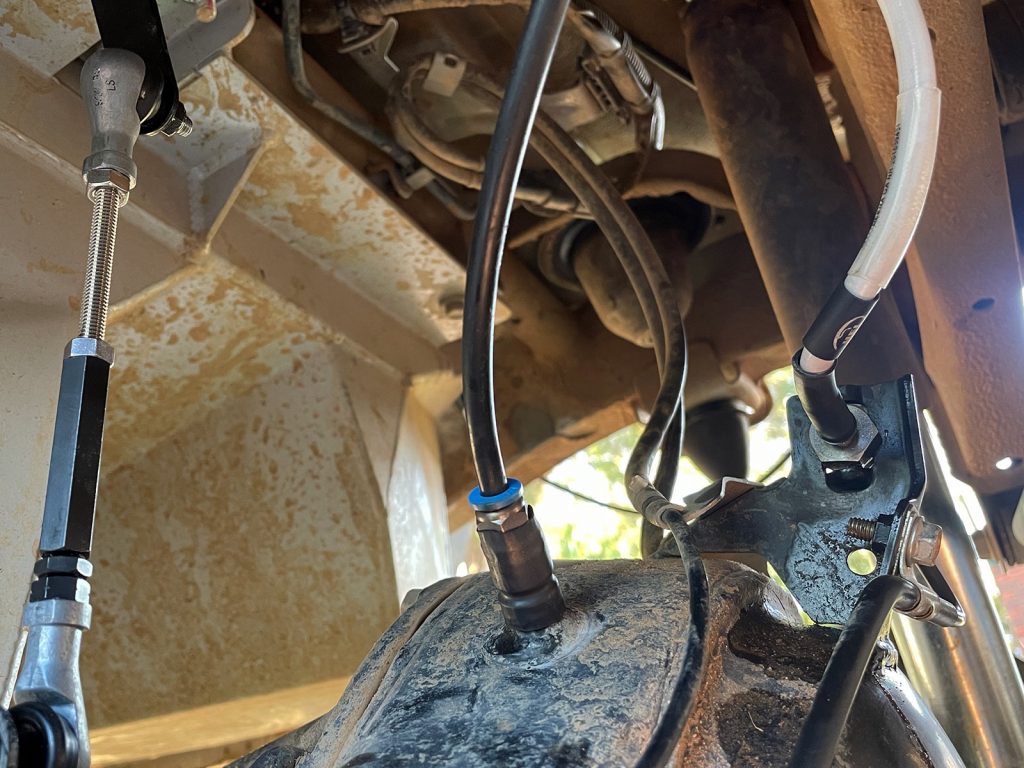
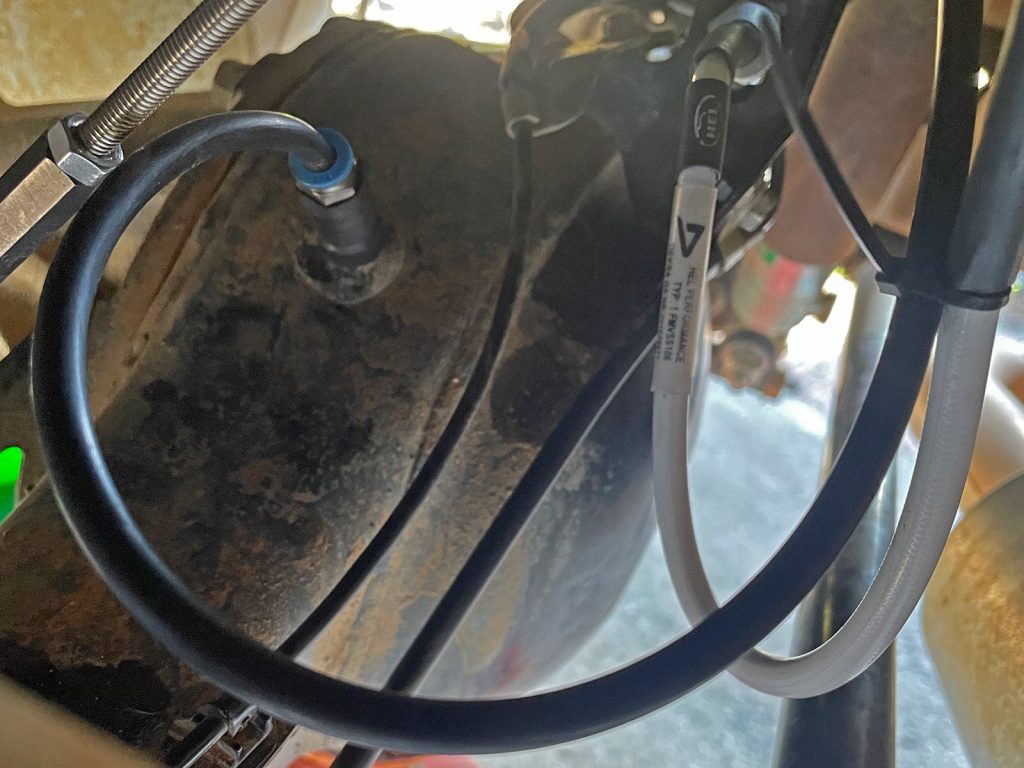
I chose to cabletie the rear diff hose up on the strain relief of the rear brake line which runs down to the diff housing just above the fitting. This means it’ll travel in a similar path with the suspension movement.
In an ideal world you should also check your diff travel. With the springs removed you can fully compress the suspension to the bump stops and check the clearance of your chosen routing of the hose.
The main thing to check at full droop is that the hose isn’t being pulled out of the fitting, as that gets very embarrassing the first time you lift a wheel offroad.
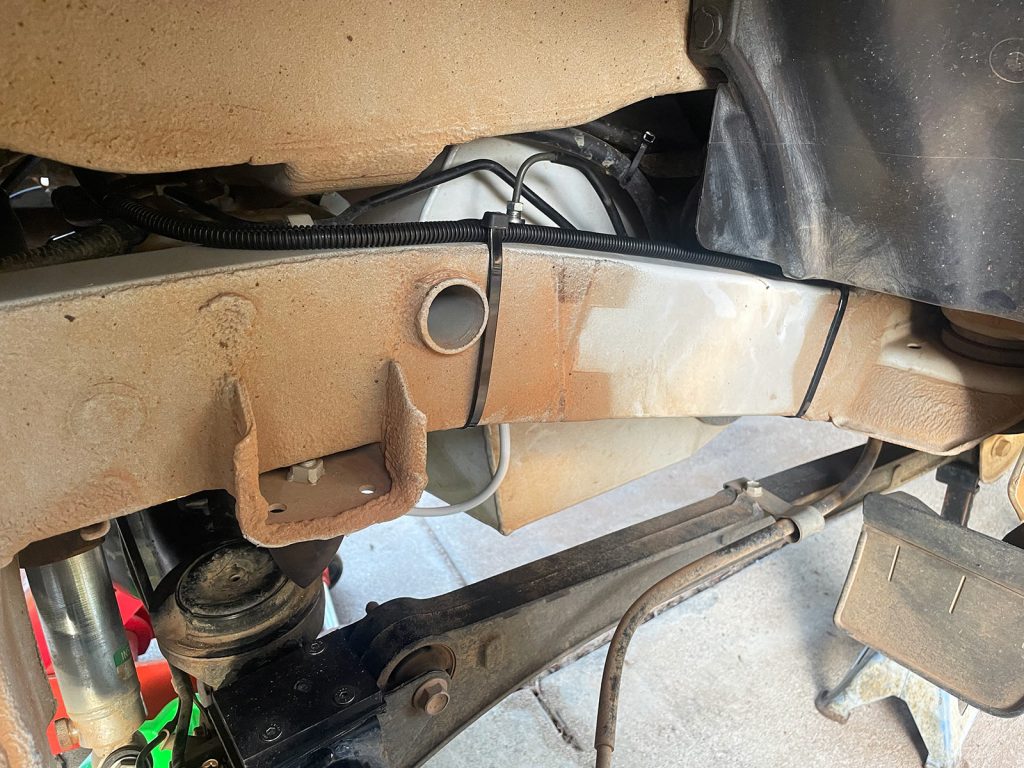
With the hose secured at the appropriate end of the car, it’s then a case of running it back to the engine bay and securing it against the chassis. I like to run my breather hoses in split loom tubing to help protect the hose from getting rubbed through.
That’s pretty much it for the breather hoses from the diffs. No matter how you chose to secure them to the diffs they’re relatively easy to do.
If you did tap the diff housings you should definitely consider changing your diff oil. Even if you used grease it’s well worth the time to put in some fresh diff oil, if nothing else you can verify you didn’t take in any water or mud in the diff oil before fitting the breathers!
Transfer case
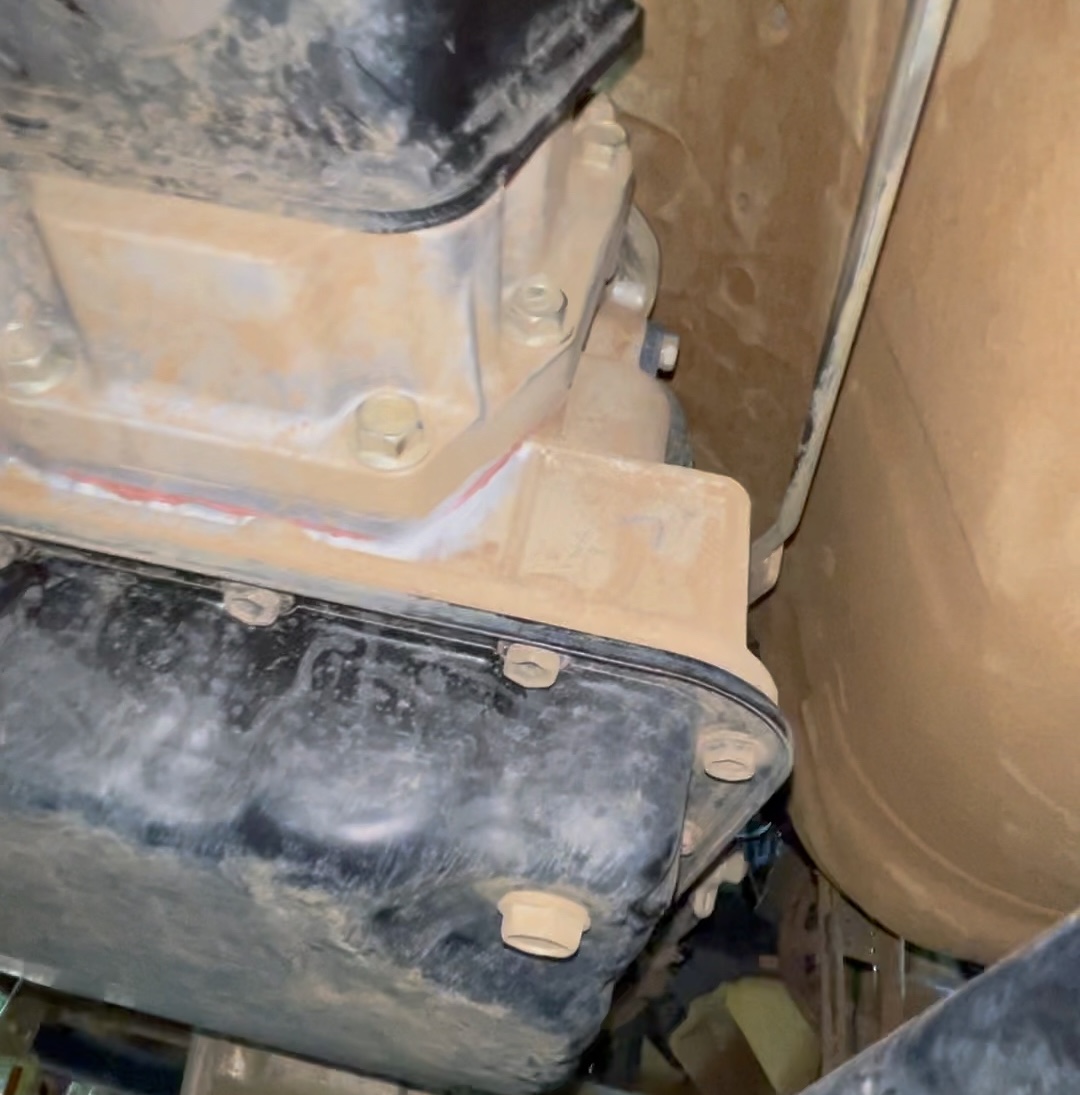
There’s not a heap of access in the tunnel for the transfer case breather. The breather itself is under a short spring-loaded cap at the rear of the transfer case on the left hand side (passenger’s side in Australia).
Just prise the cap off and you’ll reveal the spigot into the transfer case. It is just pressed into the case so in theory could be removed from the transfer case but not really enough height for a puller here.
You can get some extra access by dropping it down but there’s still not a heap of options. If yanking the case for replacing the drive chain or to put in reduction gears I would 110% tap it for a proper fitting, but the easiest option is definitely a hose over the top and a fitting into that hose.
Of note here the hose needs to be 3/8″ or 9.5mm internal diameter to fit over the spigot in the transfer case, and you should use a 90º fitting for the breather fitting to minimise rubbing of the hose against the floor of the car.
I shaved down the bottom of the fitting and removed the threads with a dremel to minimise height and make it a bit easier to seal into the hose. (Threads into rubber hose don’t actually seal that well).
You need pretty low profile hose clamps. If I was to do this again I’d probably actually use lockwire as the hoseclamps for even lower profile but this worked for me.
I ended up cutting the hose tail a little shorter till I got it to be the right height in the car. You can’t actually squeeze the hose clamp onto the transfer case spigot really tight or it’ll force the breather fitting off due to the low profile nature of the spigot. It needs to be tight enough to be secure and low enough down the hose so it is clamping onto the spigot as low as possible. Took a few tries to make this work nicely.
It’s lasted for me, though other people have not had so much luck.
Again, if you ever have the transfer case out then tap the spigot and thread in a 90 degree fitting and you’ll have a much more secure fitting. Mine has lasted several years now with no dramas, but it does require a lot of care to make sure it’s sitting right and going to stay on.
Transmissions
Manual transmission
This is easy: from the factory there is a breather right up at the back of the cylinder head. You can leave this alone or pull out the factory breather and fit a fitting into it and adapt this down to your chosen breather hose kit size if you really want. I didn’t, so I didn’t put anything in.
Automatic transmission
This one sucks. If you think the transfer case doesn’t have a lot of access… well then, you’re in for a treat here! I actually don’t have any photos of this, just a couple of stills from a video I recorded on my phone; that’s how poor the access is.
The actual fitting for the breather in the automatic transmission is about a 1/4″ or 6mm fitting once you prise the cap off it. This is done pretty easily using fuel hose and then adapting that down to the hose size for your breather kit which probably fits nicely inside 1/4″ hose.
There’s no easy way to describe access to it, you basically reach up and around and fumble in the dark. The easiest way is to come up from the drivers side (right hand side of the car) near the rear of the transmission.
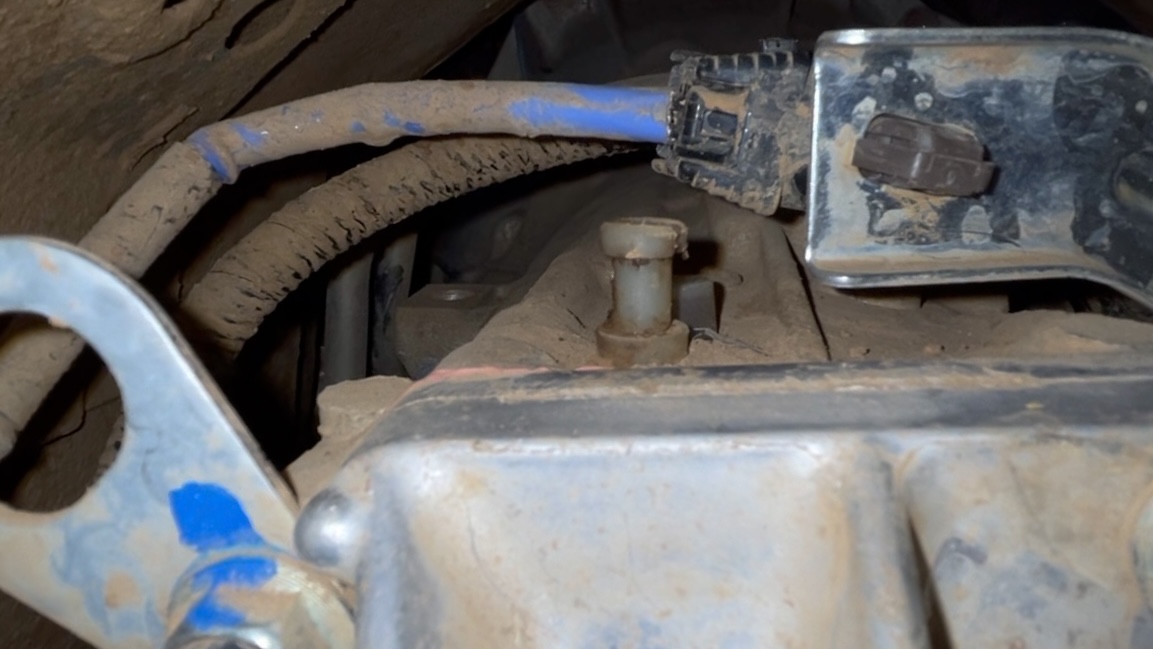
You’ll find up above the photo I’ve just shown is a bracket coming from the right hand side holding some wiring, and also a lifting point on the transmission over on the left hand side. Between those two is the breather, which you can feel as a little spring-loaded cap standing up from the top of the transmission.
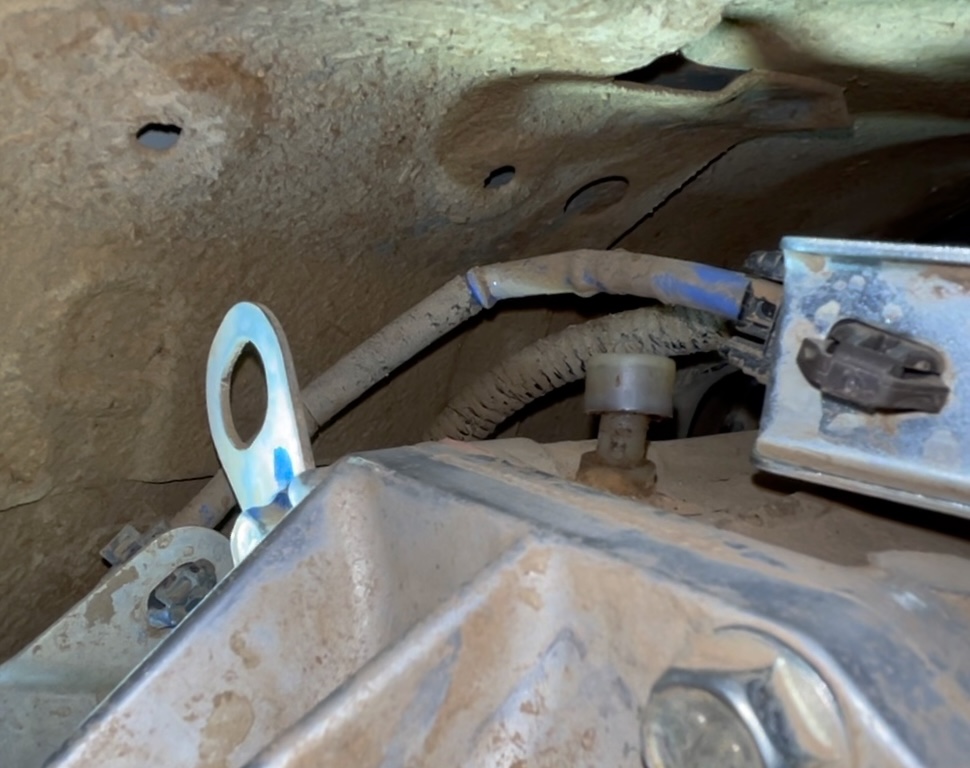
Prising the cap off requires a lot of finesse with a pair of needle nose pliers, and a lot of frustration. It took me about 30 minutes of swearing and cutting my arm on the side of the tunnel but I got there. Again, no decent pics but with it done you can see the plastic pipe that sticks up from the transmission.
Note that these plastic breather spigots into the transmissions can be variably well stuck into the transmission. The one I did was nice and solidly into the transmission, but other people report them to be a bit loose into the transmission. If that’s a case a little dab of sealant will help you get it sealed nicely into the transmission.
I have never pulled one out of a Jimny, but a thread on drive2.ru shows what the plastic spigot looks like.
Rather than trying to have the breather fitting close to this spigot, I think the best way is just to run hose straight off the spigot all the way up to the engine bay. Once you have it supported and sitting nicely then you can adapt it to match your particular breathers. I used 1/4″ / 6mm vacuum line and secured it to the plastic spigot with a hose clamp. Once you’ve exposed the spigot on the transmission case then you poke your hose over it (MAKE SURE YOU ALREADY HAVE THE HOSE CLAMP READY AND IN A GOOD ORIENTATION TO TIGHTEN) and then you’re done. It really sucks though. There was no way after that battle I was going back in there for a decent photo of the hose hooked up.
If you need to replace the breather it is part number 27991-66H10.
This job alone made me glad I bought a manual Jimny.