
Lighting upgrade: DRL, fog and reverse lights
Consider these auxiliary lighting upgrades. I upgraded the DRL globes to LEDs with a colour temperature to match the factory LED headlights; I also used brighter and yellow coloured LED globes in the fog lights which differentiates the fog lights from the DRLs. Finally, I added much brighter reverse lights which is a big improvement offroad at night.
I also have a related useful video: what different light modes do what. This demonstrates the upgraded DRLs and fog lights pretty nicely.
Sections
- Preamble
- Front indicators upgrade
- Side indicators upgrade
- DRL upgrade
- Fog light upgrade
- Reverse light upgrade
- Brake/tail upgrade
- Rear indicator upgrade
- Numberplate lights
- Third (upper) brake light
Preamble
Many people’s first foray into vehicle modifications is in the form of modifying the vehicle’s lighting, especially through the use of LED bulbs for a more ‘modern’ look. LED bulbs are generally brighter but also longer lived. This is especially true offroad where vibrations can break filaments inside incandescent bulbs like the Jimny uses pretty quickly.
Despite being relatively modern with its internal systems, in some ways the Jimny is oldschool and the wiring for the taillights etc is no exception. While it is controlled by the body control module, unlike very modern cars each light is not its own module and CAN controlled off the CANBUS. (If it was, the lights would just receive power, ground, and two signal wires. Instead, each wire provides full power direct to the appropriate bulb). This means you do not need to worry about ‘CANBUS compatible’ bulbs to some extent.
Nevertheless, the body control module isn’t completely stupid so very low current draw LEDs that do not use some kind of internal or external resistor to increase their current draw will (potentially) give a bulb out signal on the dashboard. In the case of indicators this results in a faster flash, sometimes termed by some people a ‘hyperflash’, down to how the car works when it assumes a bulb is blown. I discuss external resistor wiring in a section covering upgrading the in-grille front indicators. Side indicators are low enough current draw standard that LED replacements don’t seem to cause an issue here, though.
When selecting LED bulbs it is important to understand that by itself an LED will be very directional, resulting in quite different patterns out of the standard lights. LED replacements with diffusers or multi-directional elements are going to be best at replicating the incandescant light pattern and therefore have your best chance at keeping it legal. Speaking of legality, contrary to popular belief LEDs by themselves are not illegal under Australian Design Rules or the vehicle modification code of practise. Where you can be caught out is if the new bulb/LED element does not correctly illuminate at the correct angles and therefore the light isn’t bright enough from a visibility perspective.
Some people will perform upgrades here by things like entirely upgrading the taillights or similar. This is fine, although it ends up quite expensive in many cases.
Most upgraded replacement taillight assemblies don’t have the correct markings (‘E-markings’) to ensure conformity, so that’s something to look out for, and potentially their wiring can be complicated especially for newcomers. I considered doing this, but one of my favourite upgrades has been replacing the reverse lights with 1000 lumen LEDs. The extra light for reversing is fantastic and meant I haven’t added additional switchable reverse lights for offroad use. Most upgraded taillights are entirely fixed assemblies and nowhere near as bright for reverse light purposes.
Front indicators upgrade
This is intricate enough and likely involves some wiring, so I’ve put this into its own separate page discussion how you cover off on a front indicator upgrade.
Side indicators upgrade
Not as technical as the front indicator upgrade but I decided to put this upgrade to LED side indicators into its own page, too.
DRL upgrade
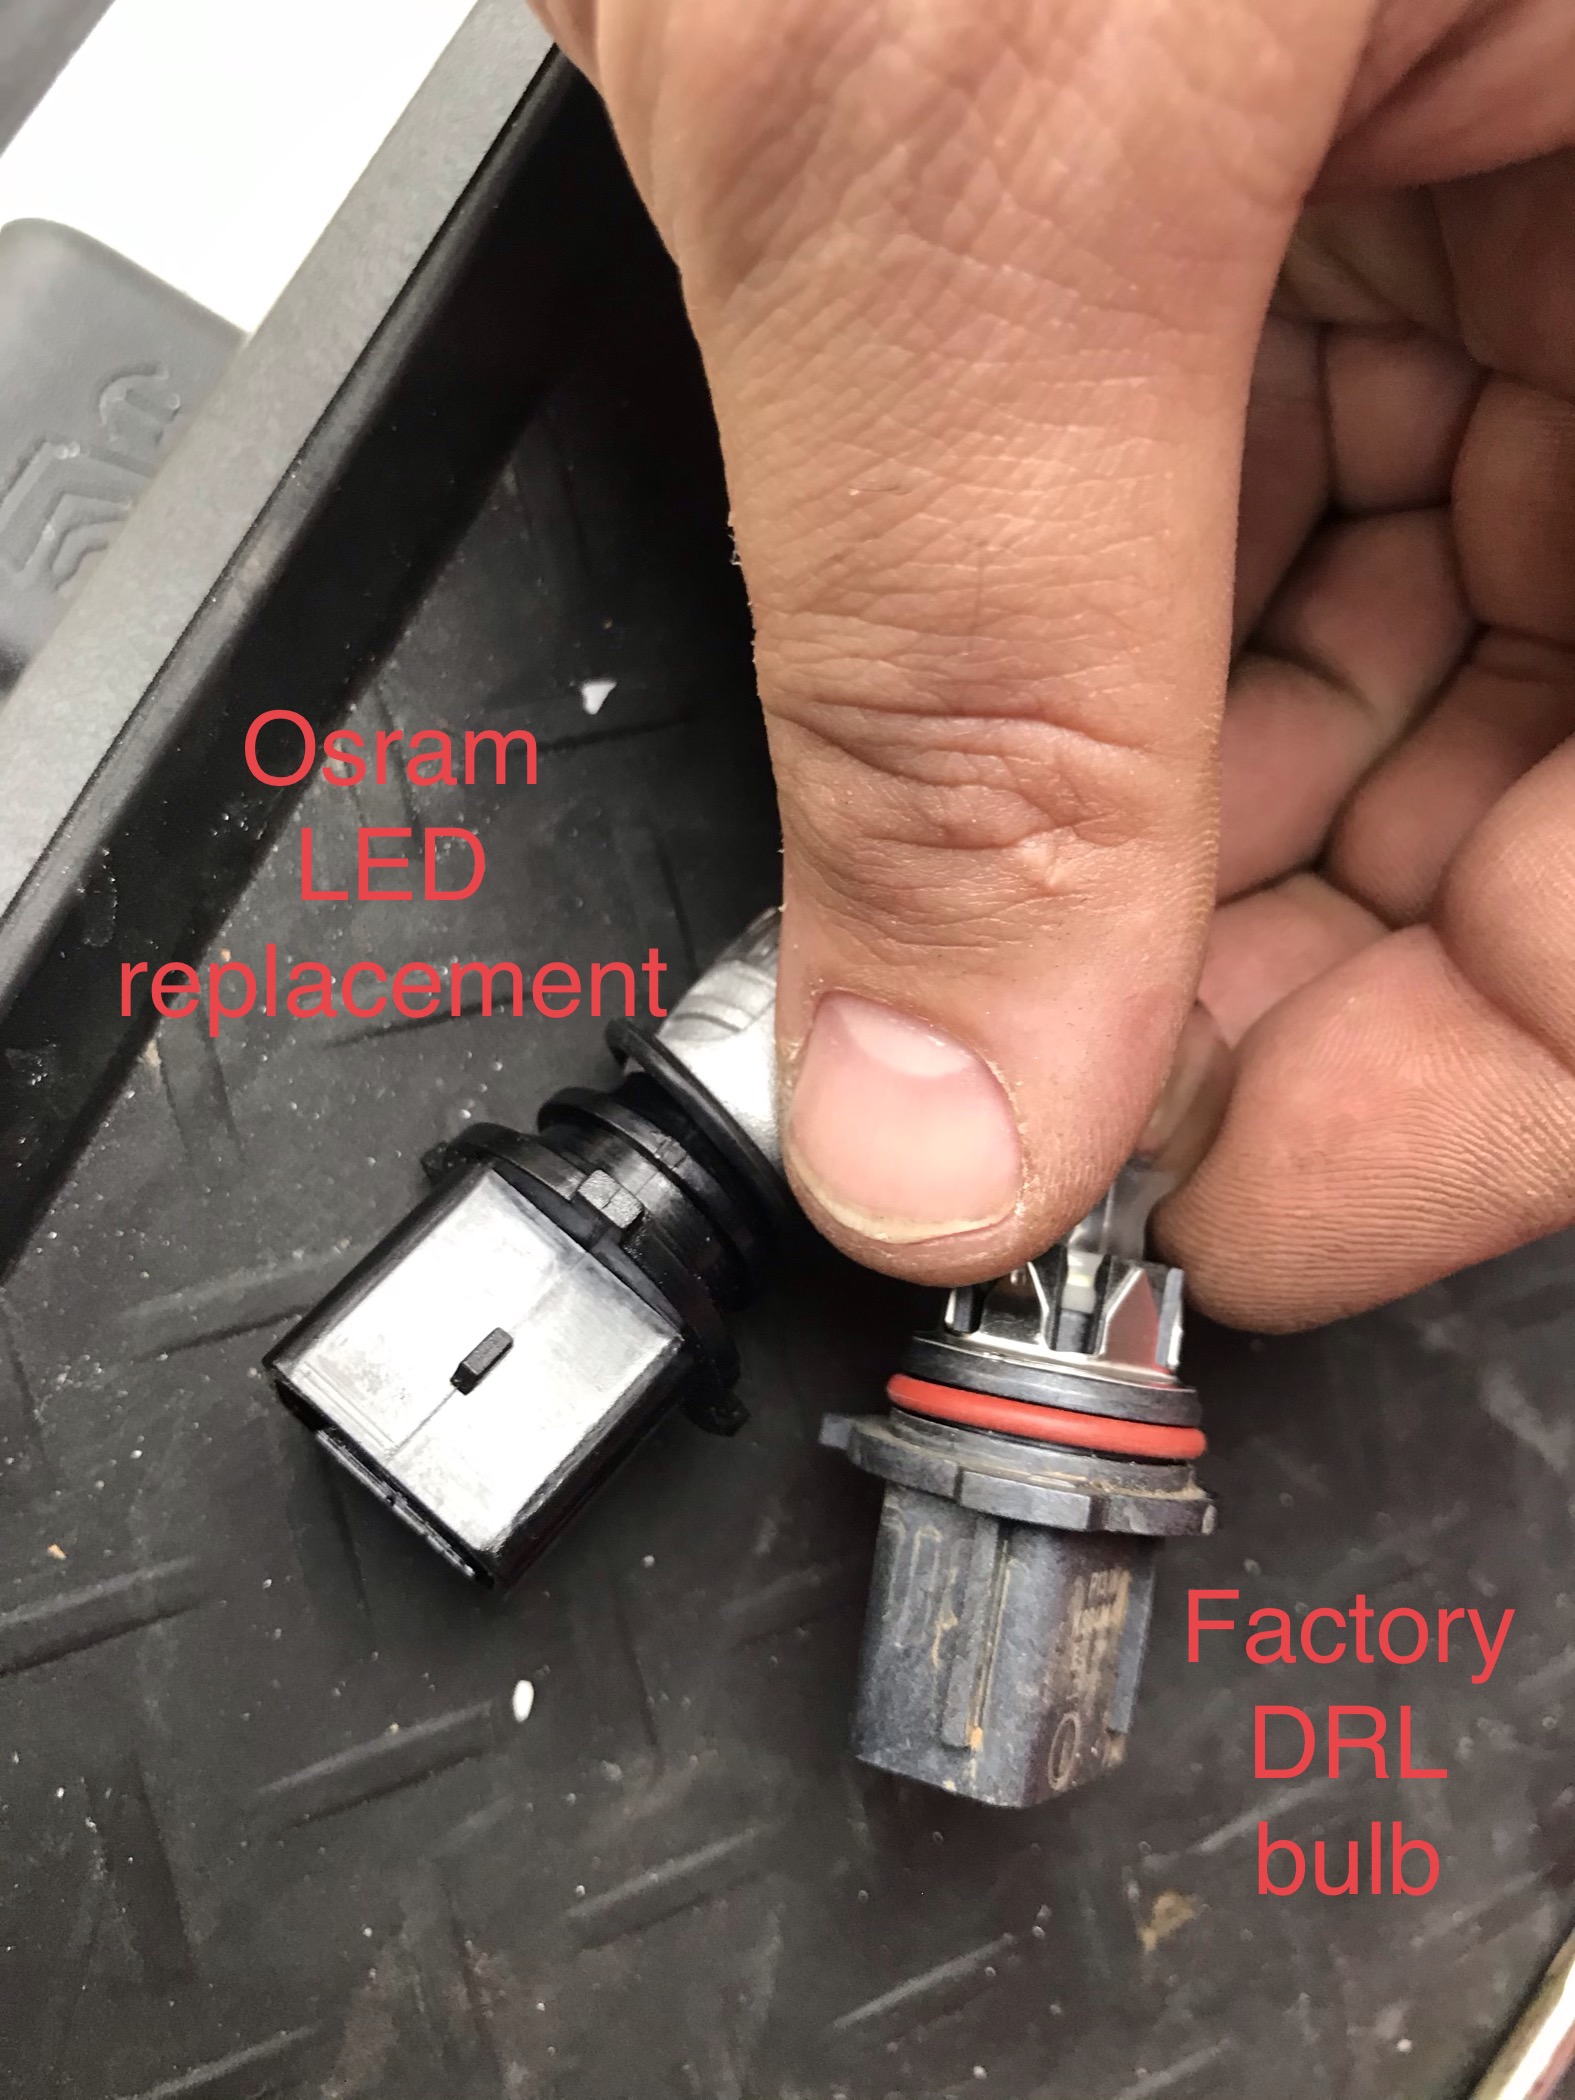
For these I used an Osram LED: a P13W globe with a colour temperature of 6000K. Part number is 5828CW; Osram describe this as a “premium DRL LED”. I can’t seem to find it for sale now but no doubt there is something equivalent.
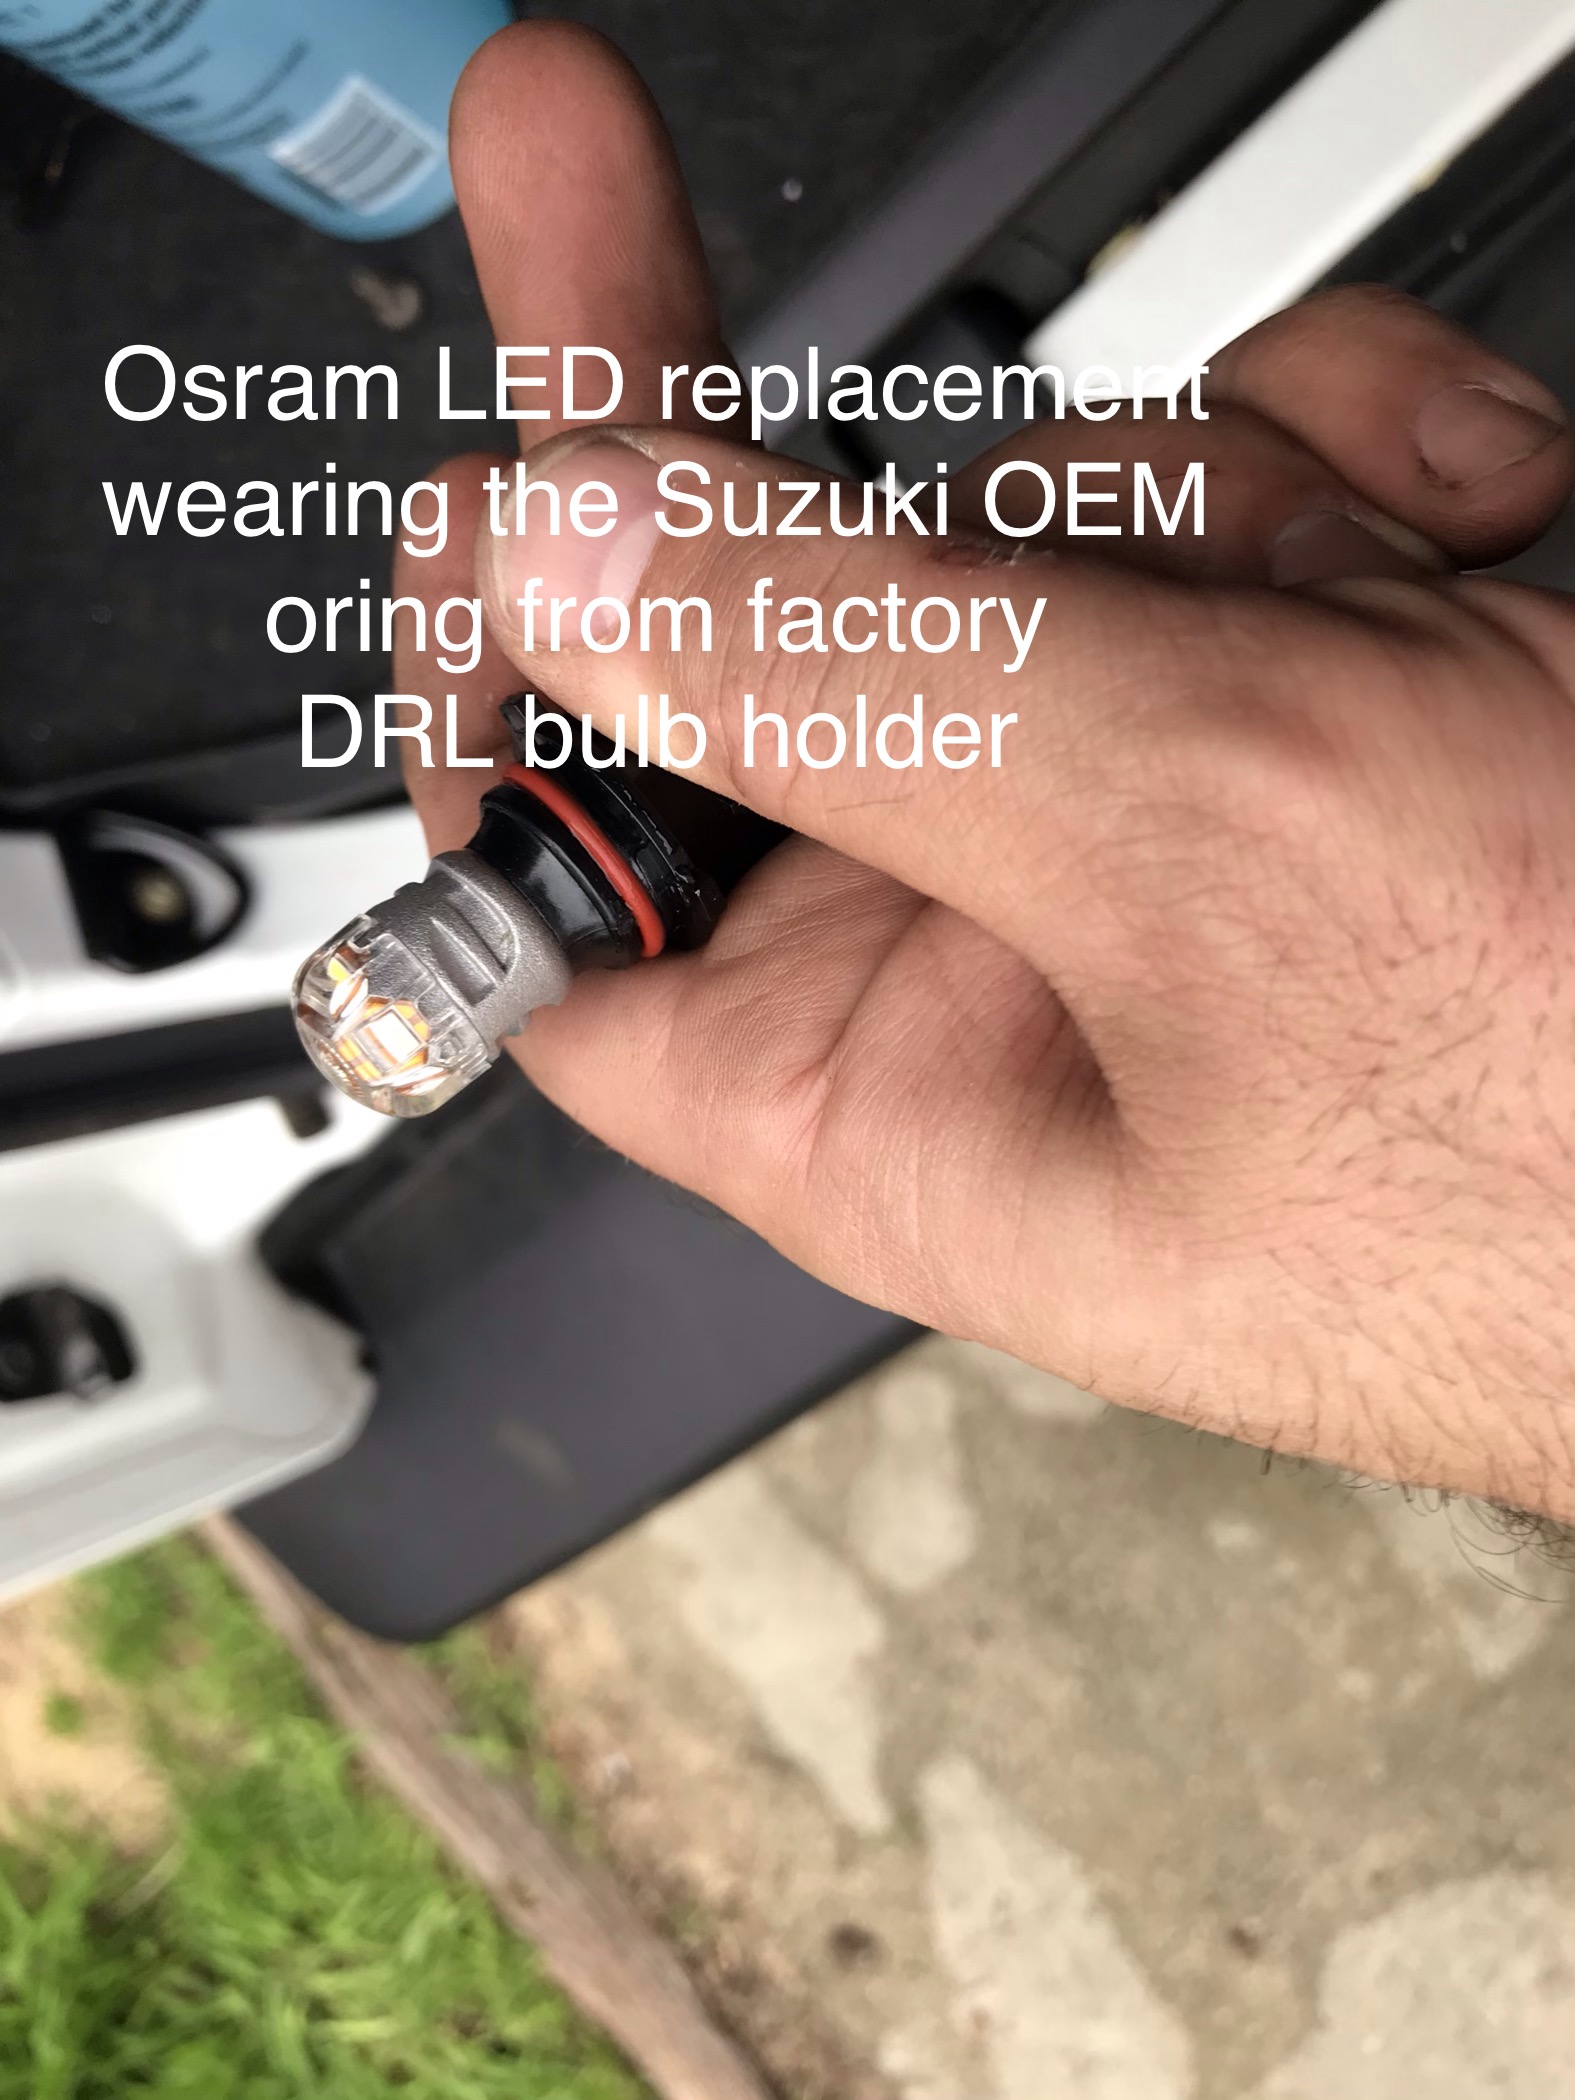
One thing to be aware of with these: I had to swap over the o-ring from the factory bulb housing to these LED replacements. The supplied o-ring on the Osram globes was slightly too large to fit in the housing correctly. With that done it was otherwise a straight swap over.
I don’t seem to have any pics of the install or a before/after comparison, but here’s the details on the o-ring swap.
Fog light upgrade
I apparently have zero pictures of this at all! For this I used a generic yellow LED fog light replacement. It is advertised as being H8-H9-H11-H16 compatible so presumably something that is the same would work for you.
Reverse light upgrade
This upgrade is a huge benefit to using the car, the factory reversing lights are pretty weak. Offroad this can be pretty annoying. I was anticipating putting on small additional reverse lights for use offroad but upgrading the bulbs has meant I didn’t need to.
Although there are multiple options you could go with to do this, I went with a Stedi upgrade to 1000 lumen globes for the reverse light. The reverse lights in the Jimny are a T20 wedge style globes. The Stedi ones fitted in the housing perfectly and the silicone boot around them should be water tight(ish).
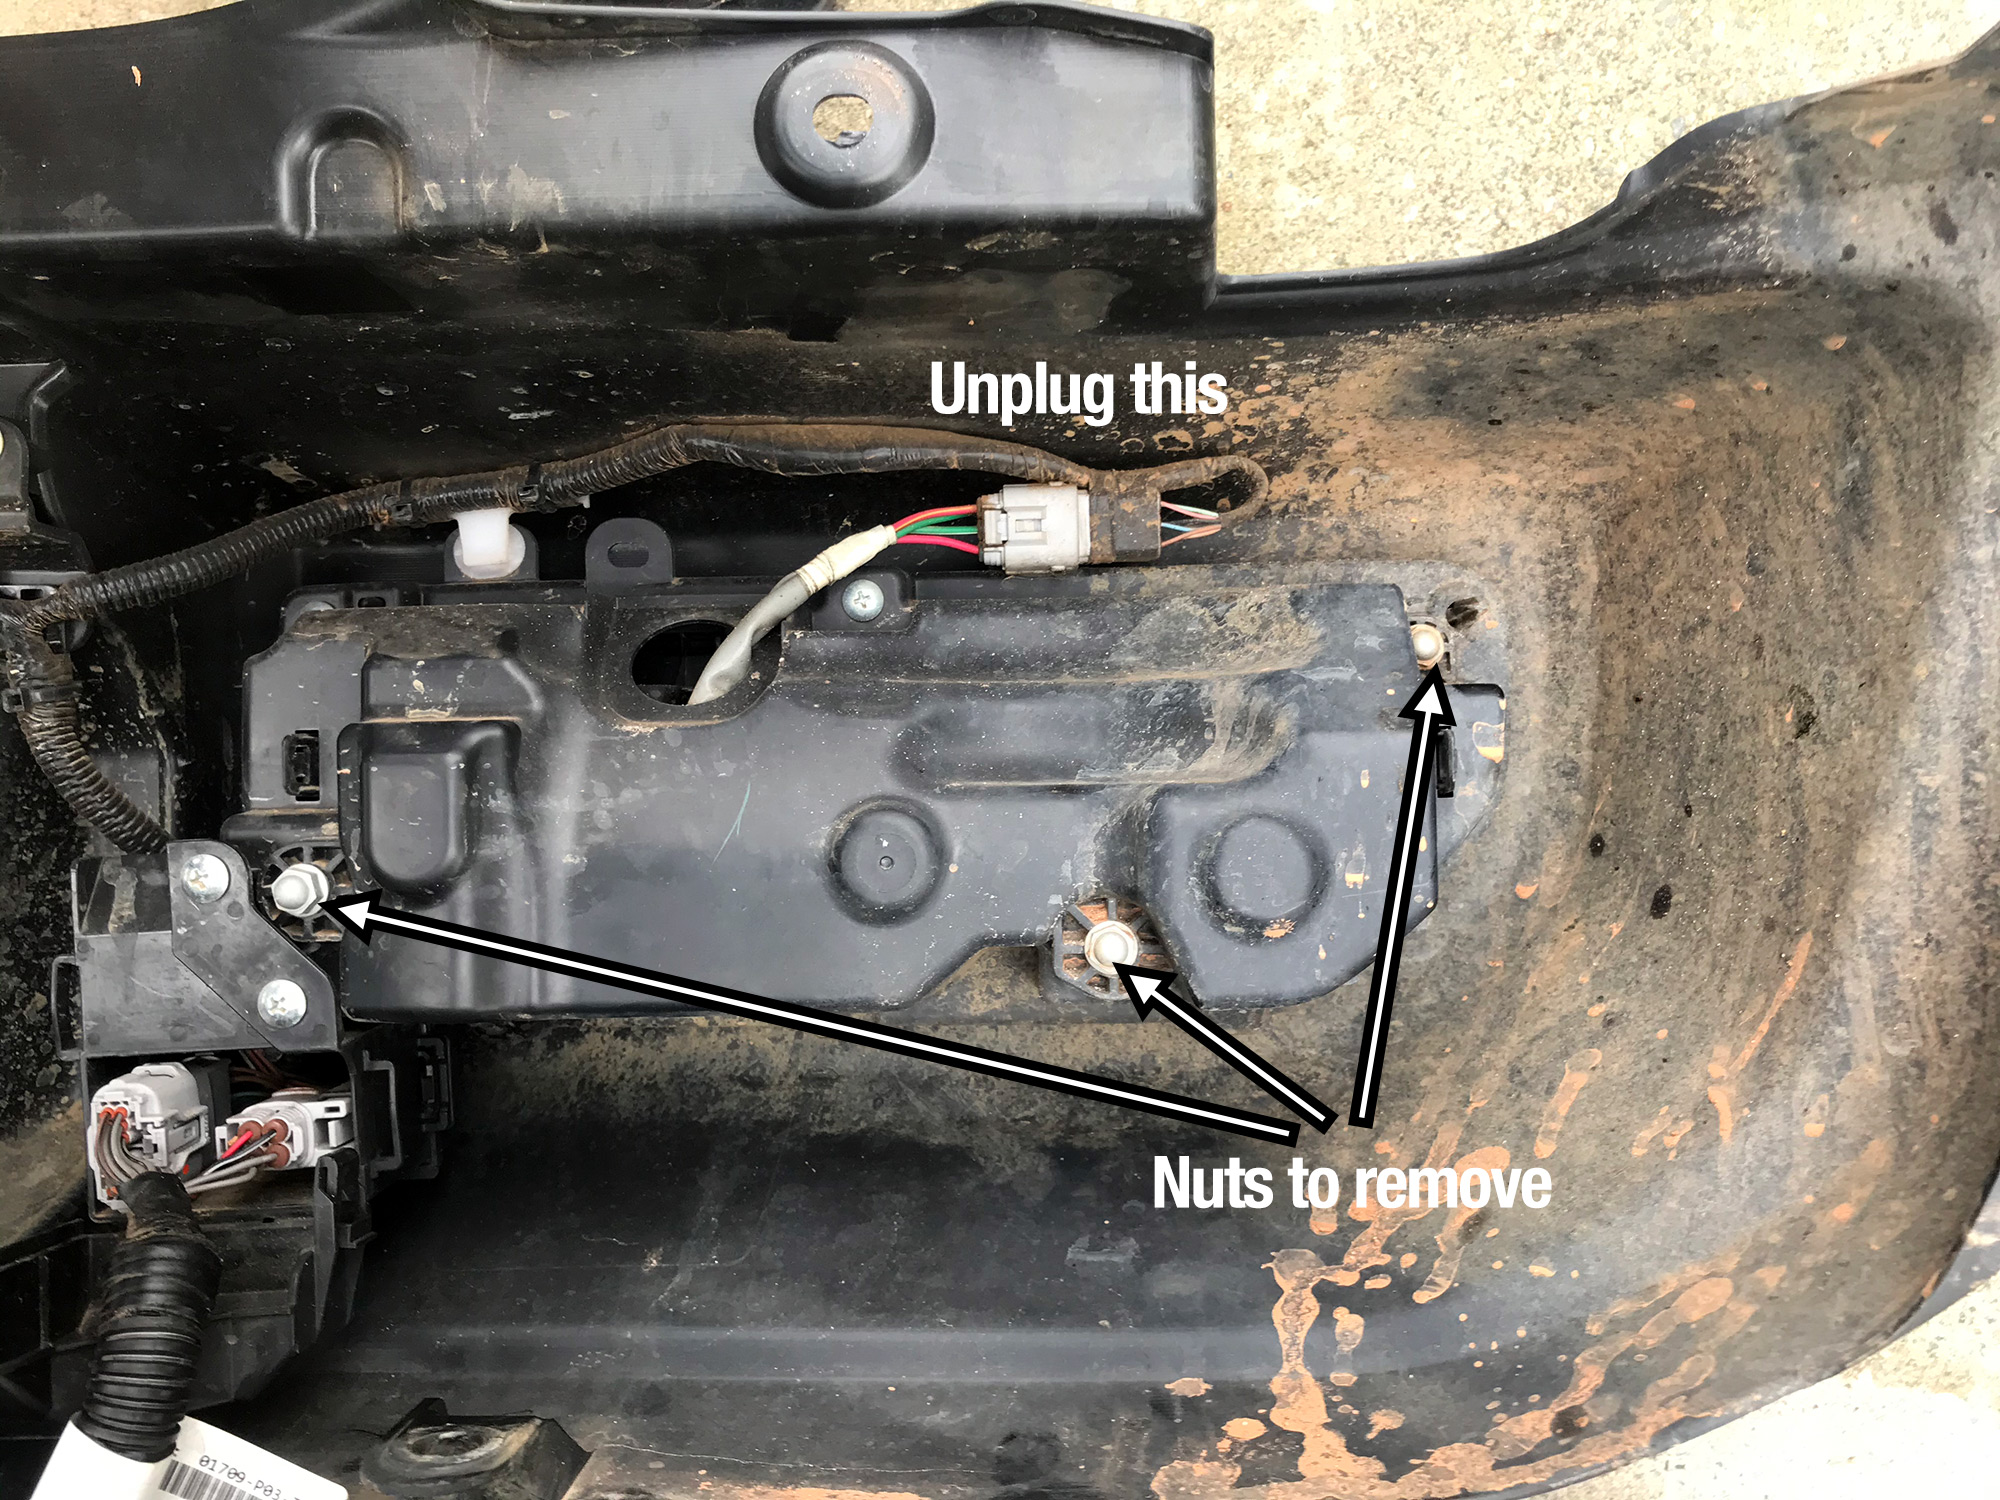
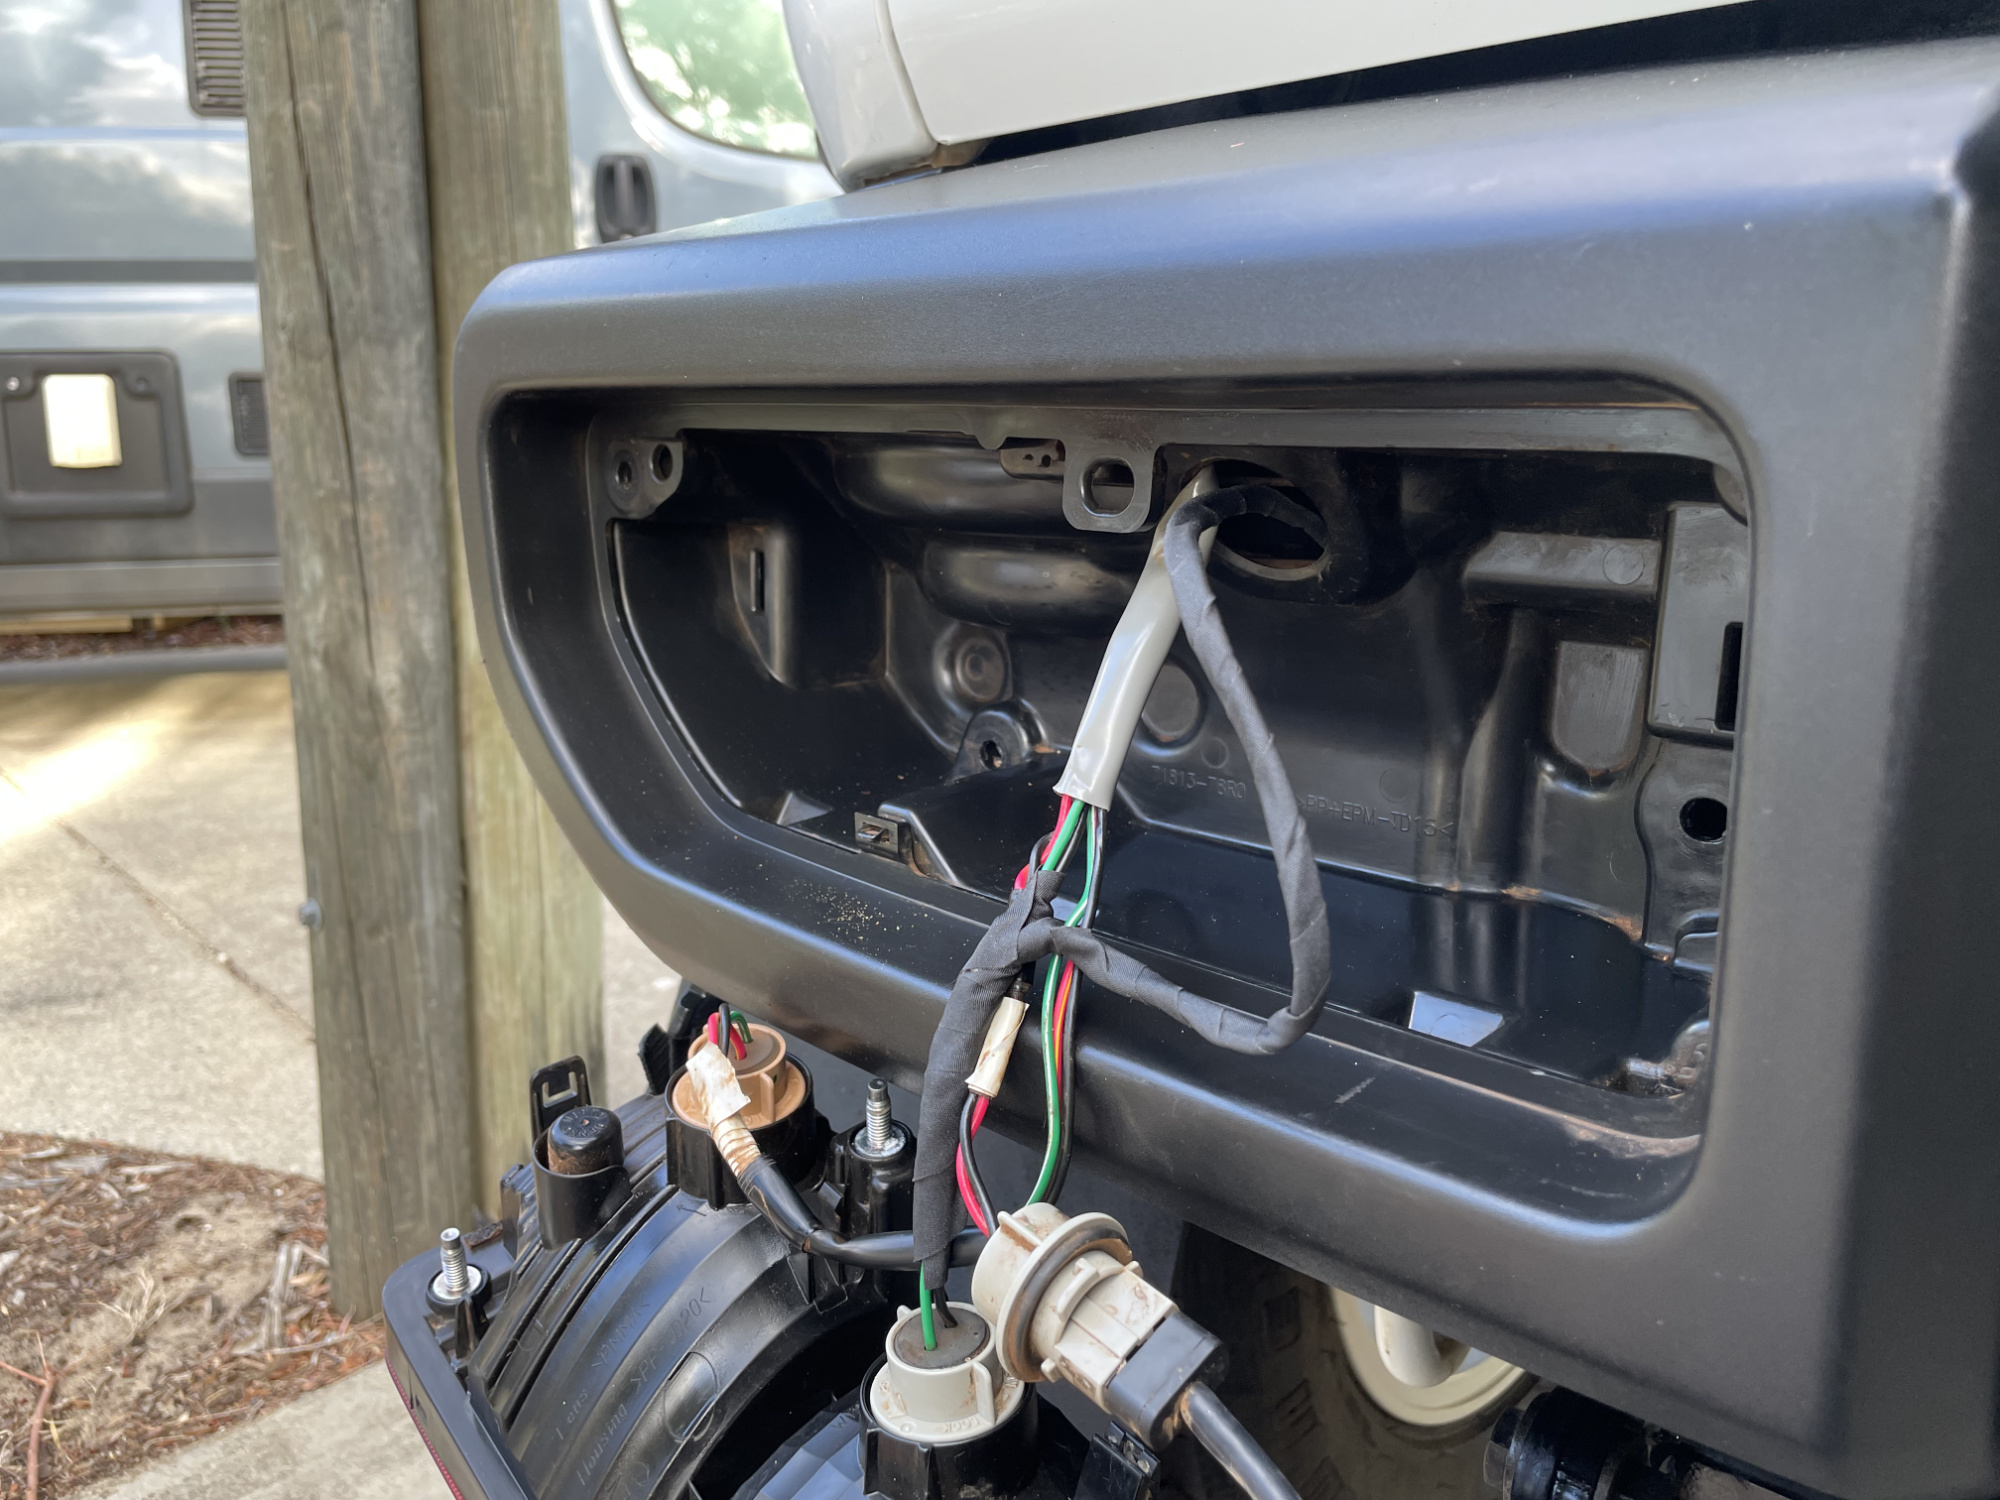
To get to these installed, I found it easier to pull the bumper off. There are 3 nuts per side and a connector to undo; with the towbar in my car it was a bit annoying to get to the 3 bolts hence taking the bumper off. It’s probably not necessary to remove the bumper, though.
With that you can remove the taillight assembly out of the bumper to get access to the globes.
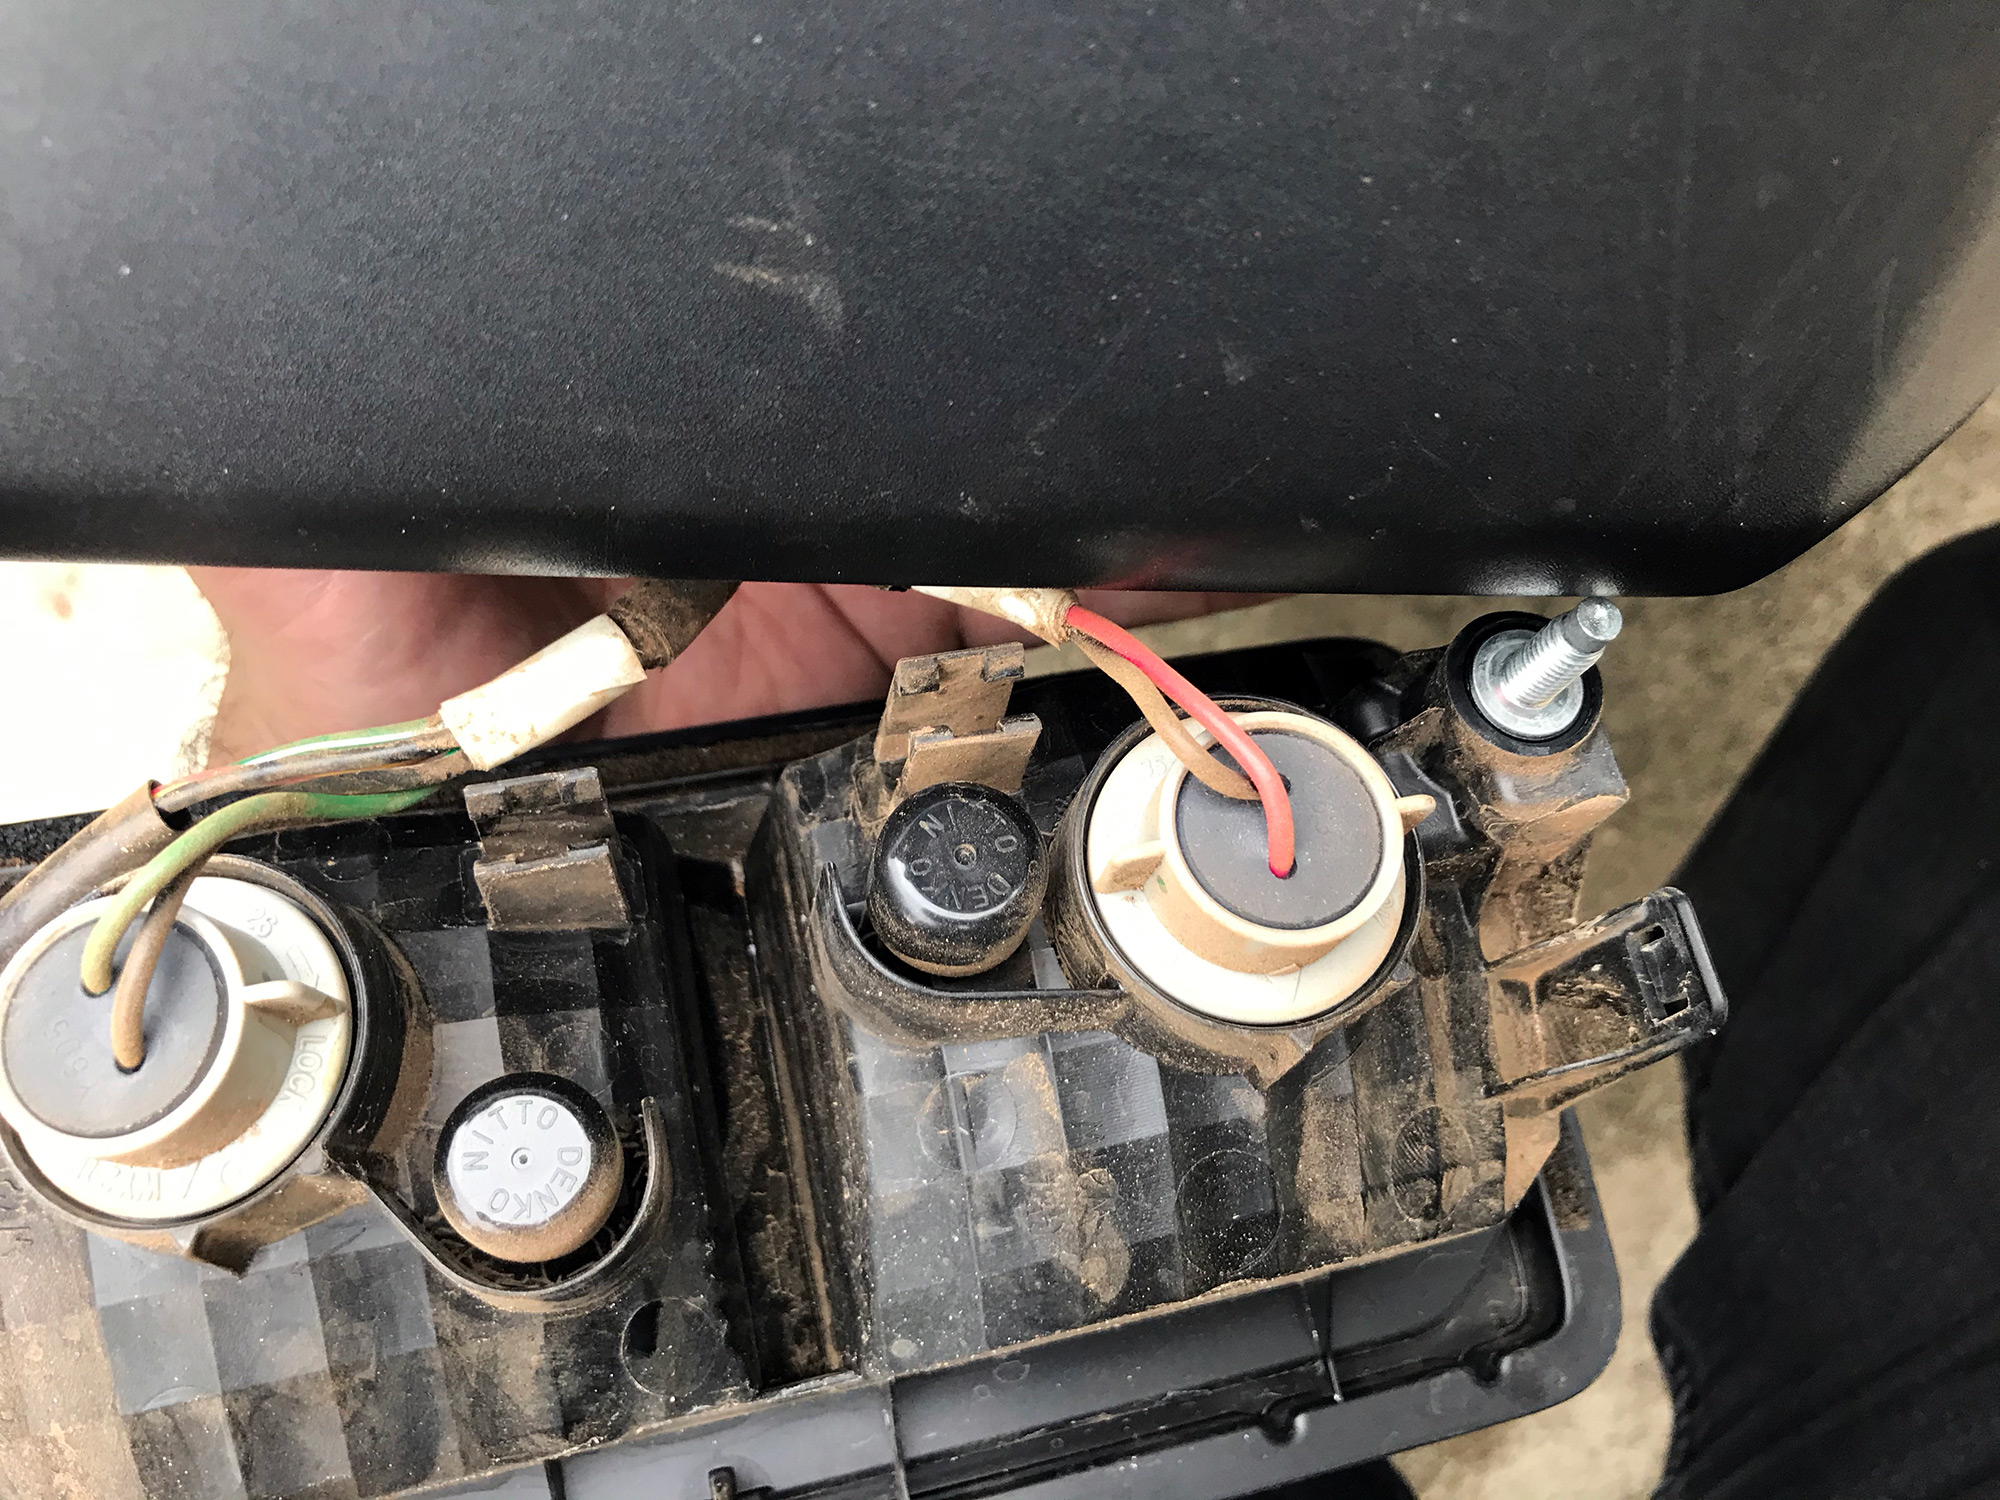
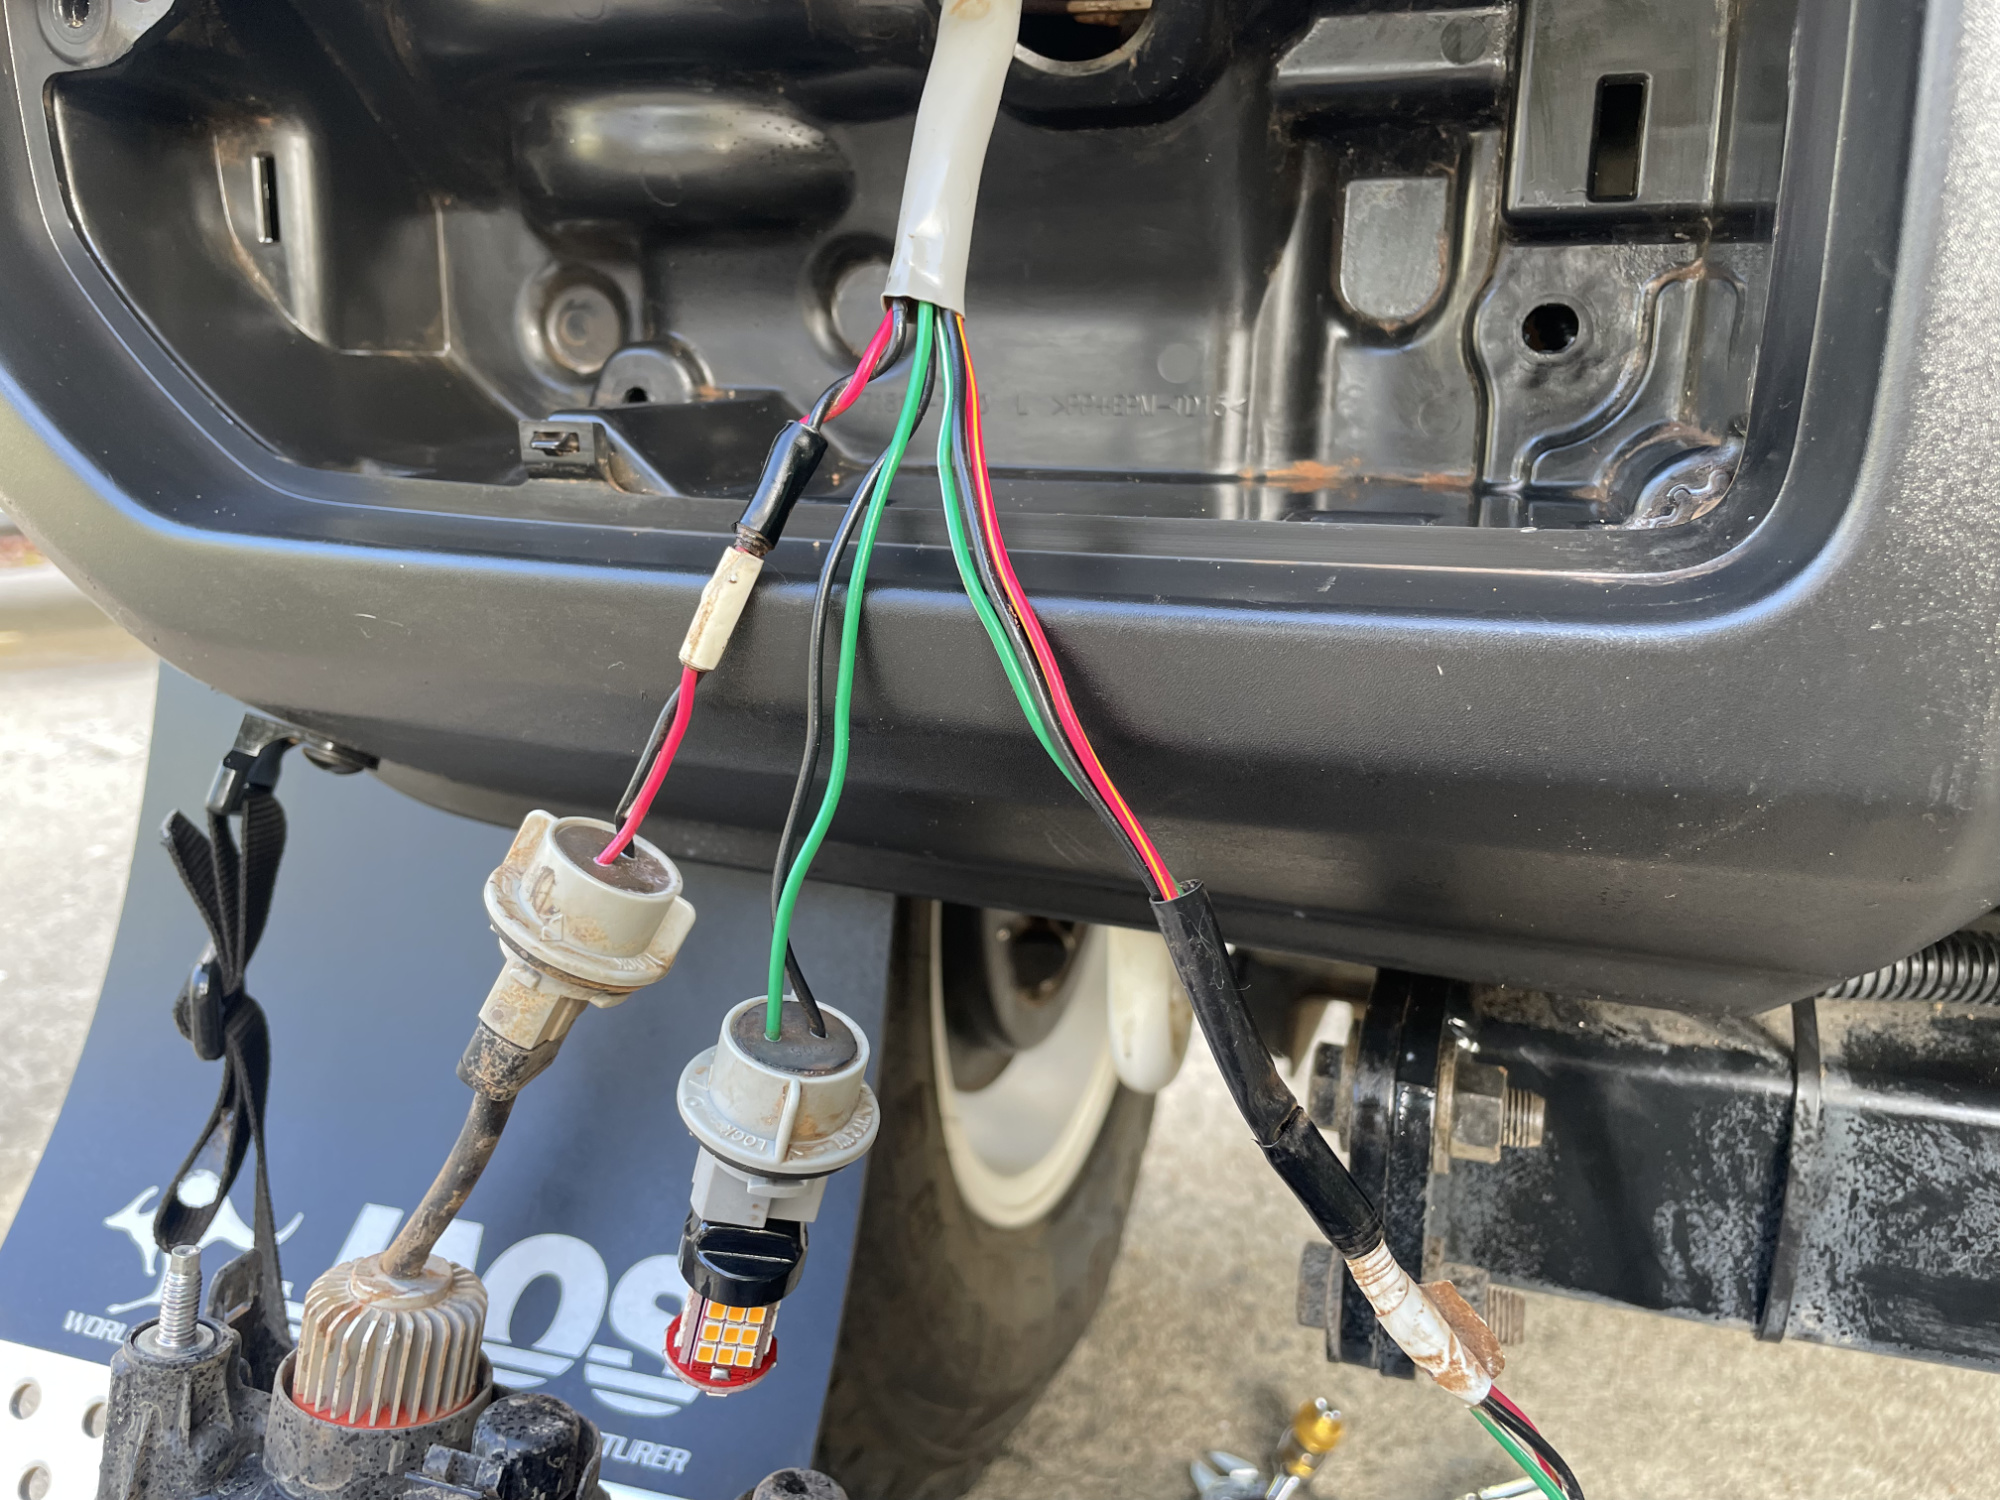
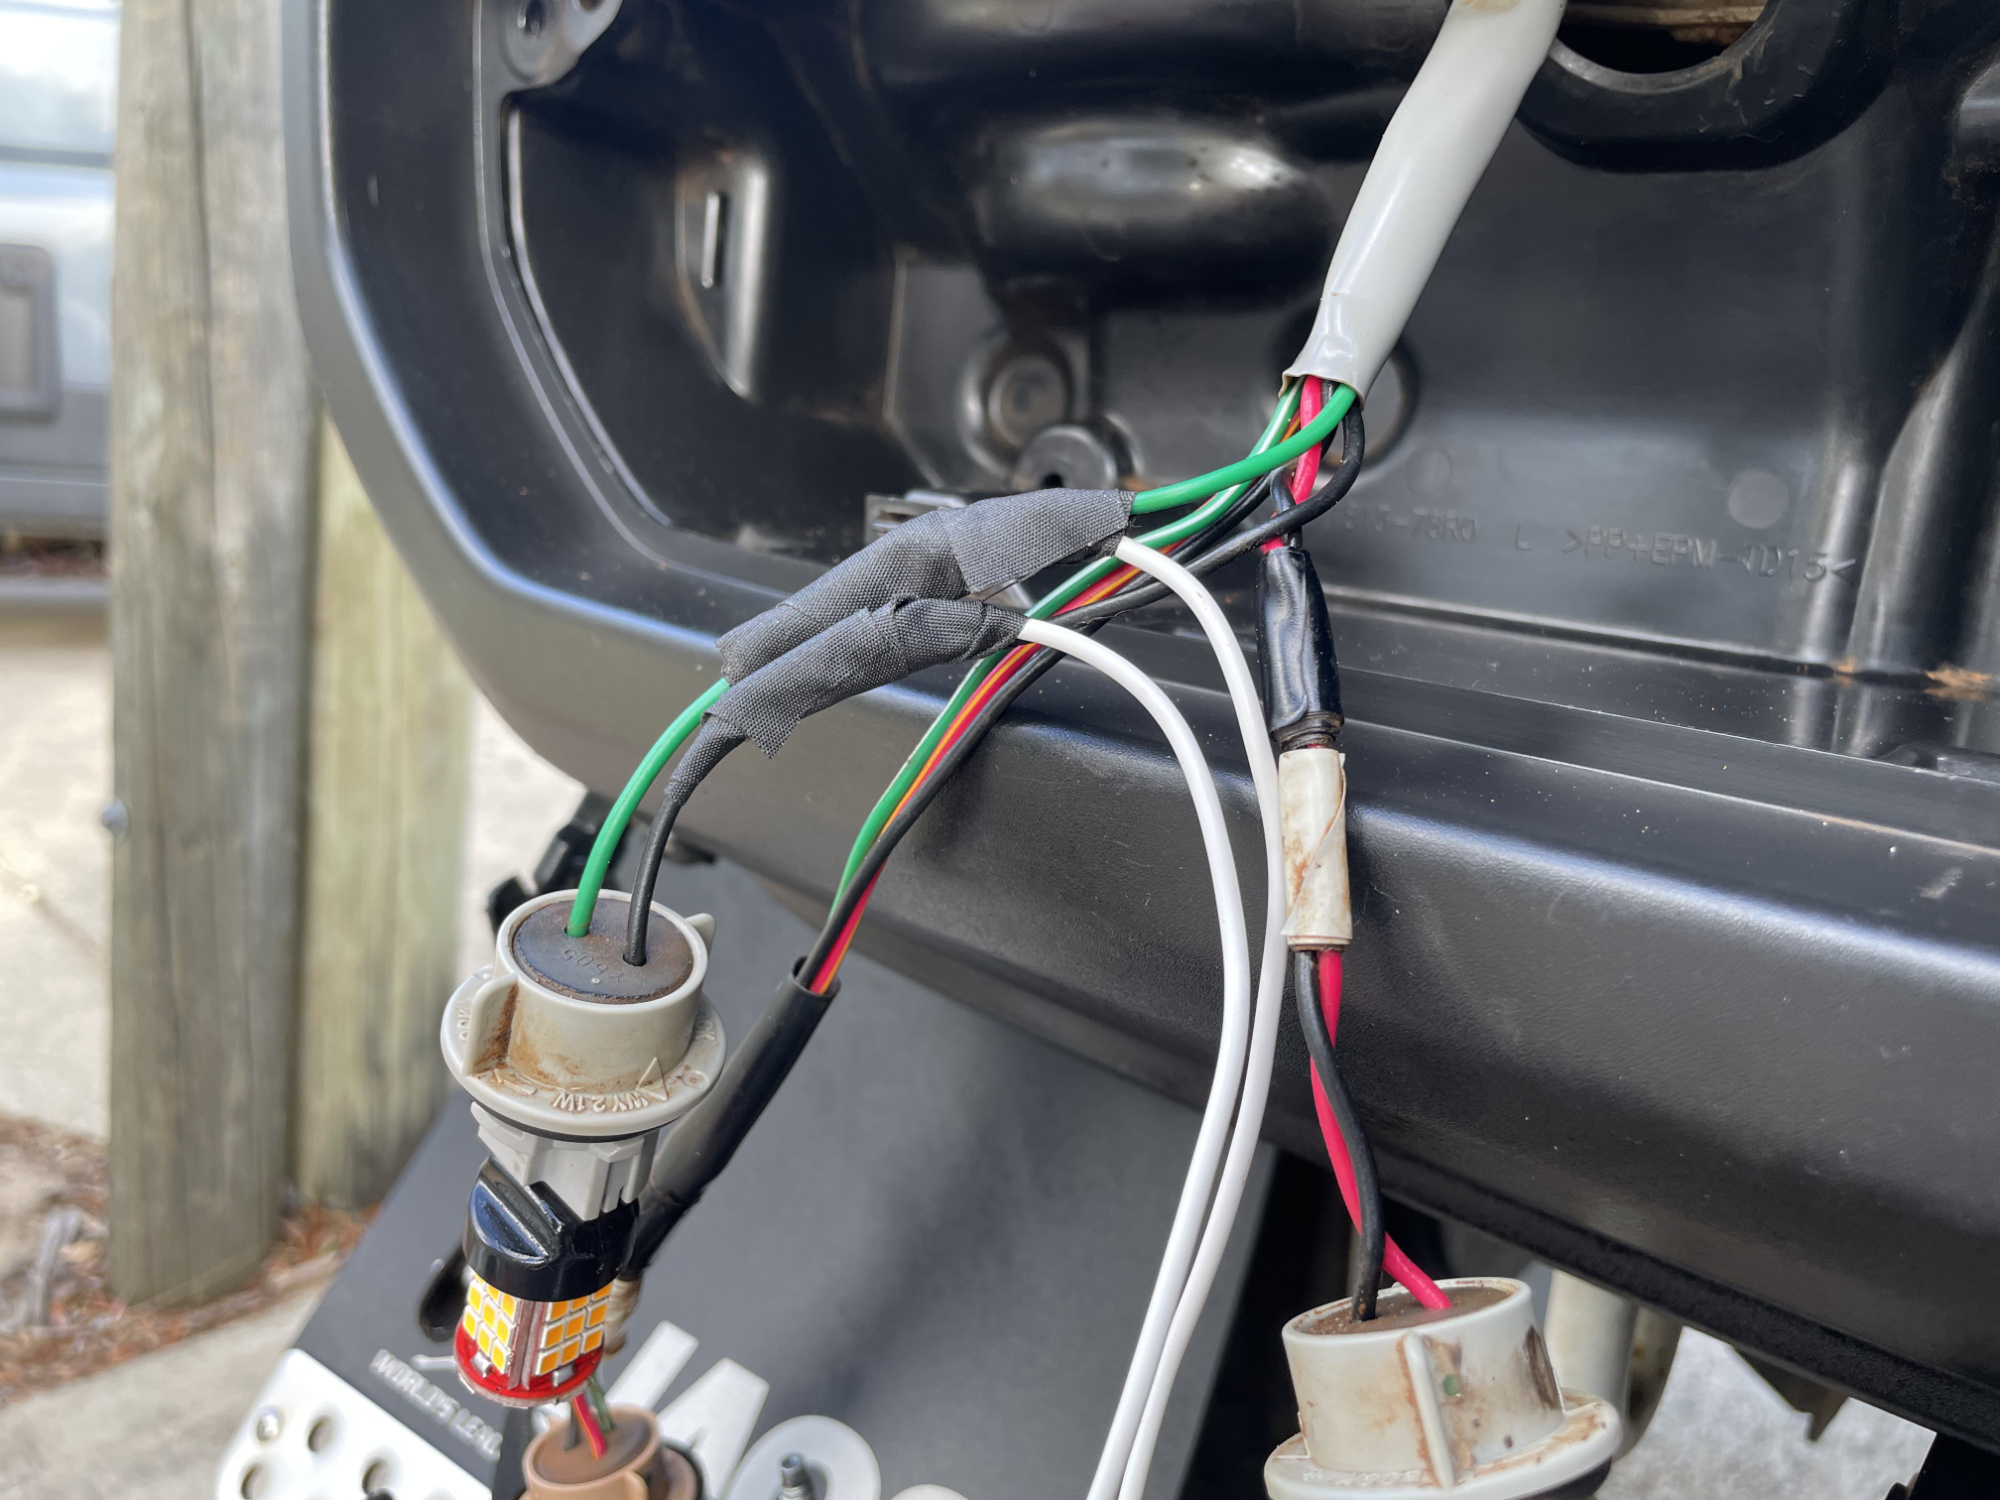
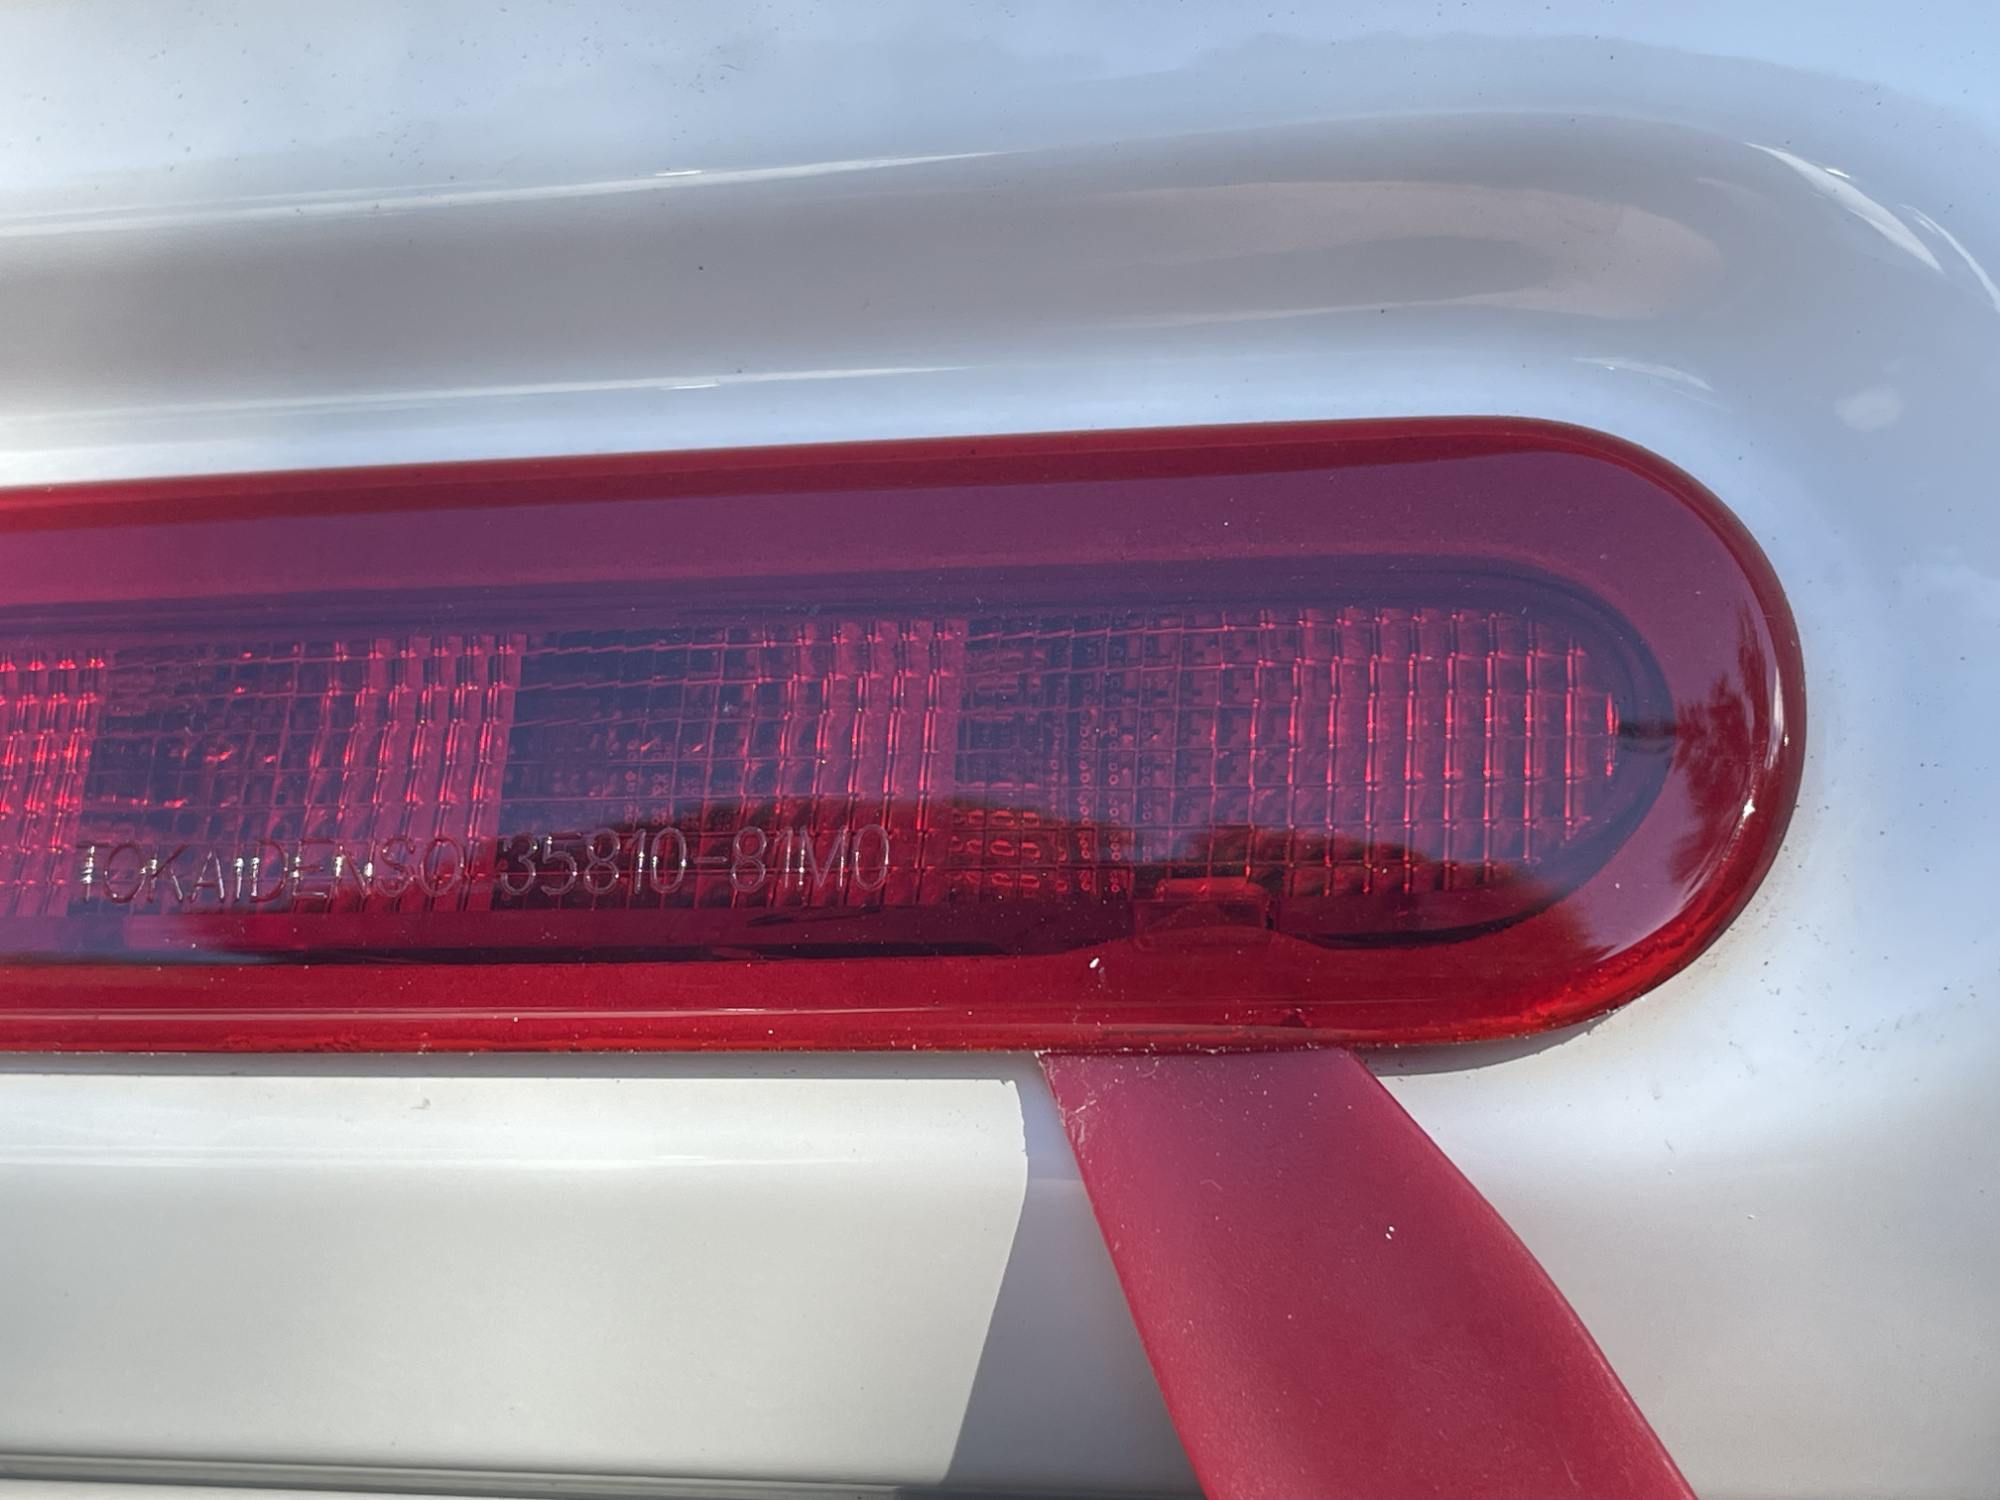
Unscrew the bulb housing that is to the right in this picture and you’ll extract the globe.
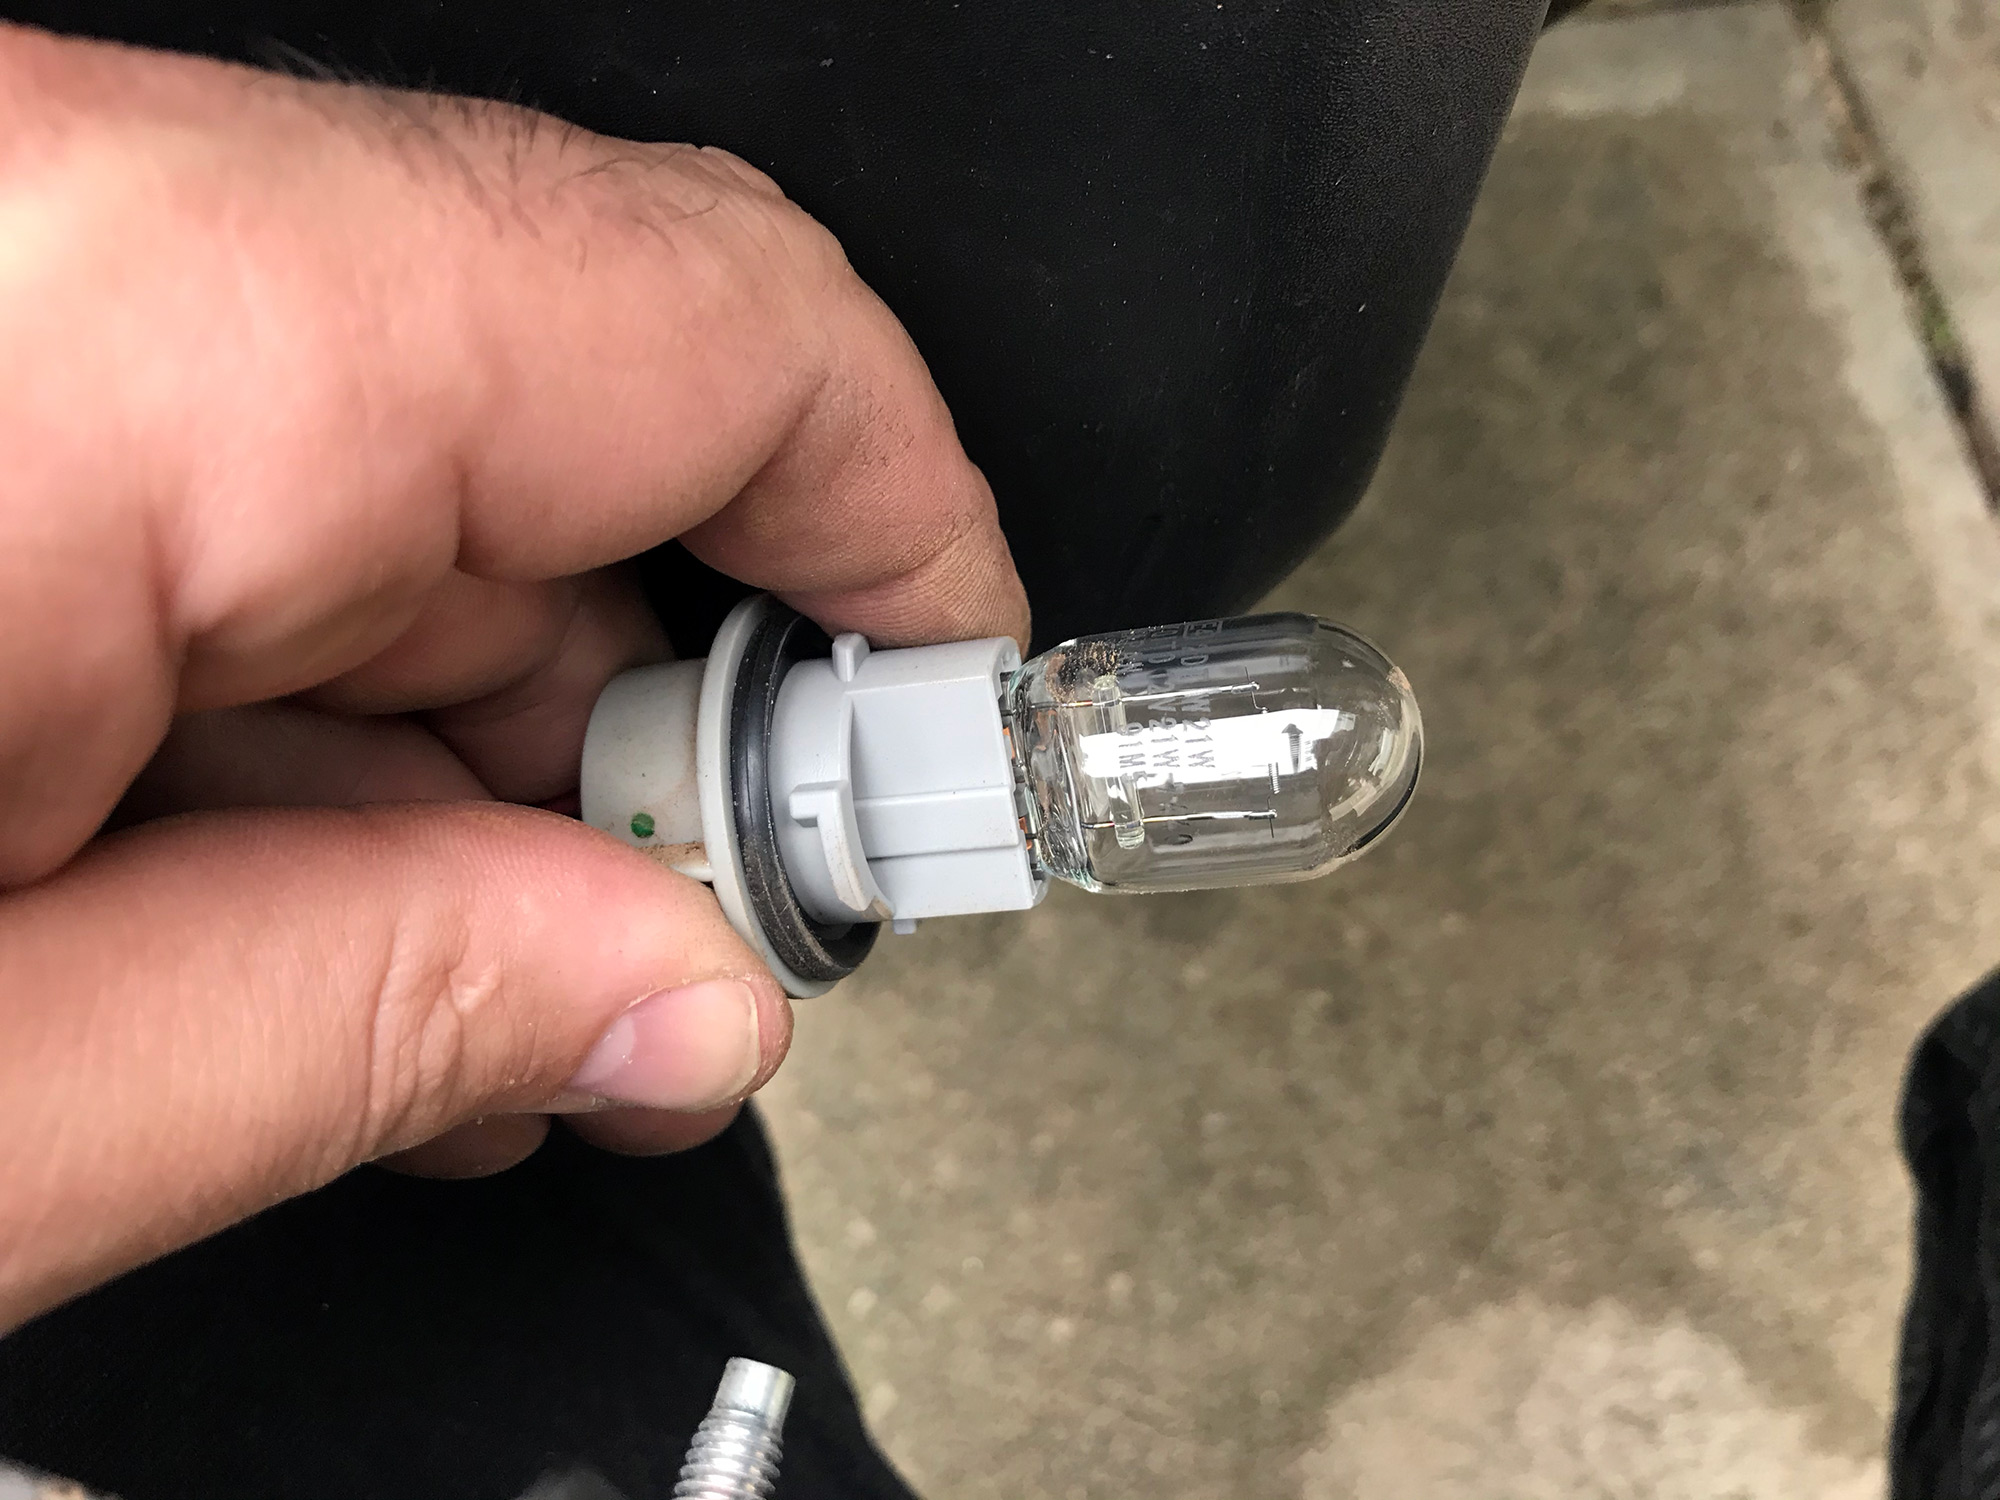
The globe just pulls out of this grey housing.
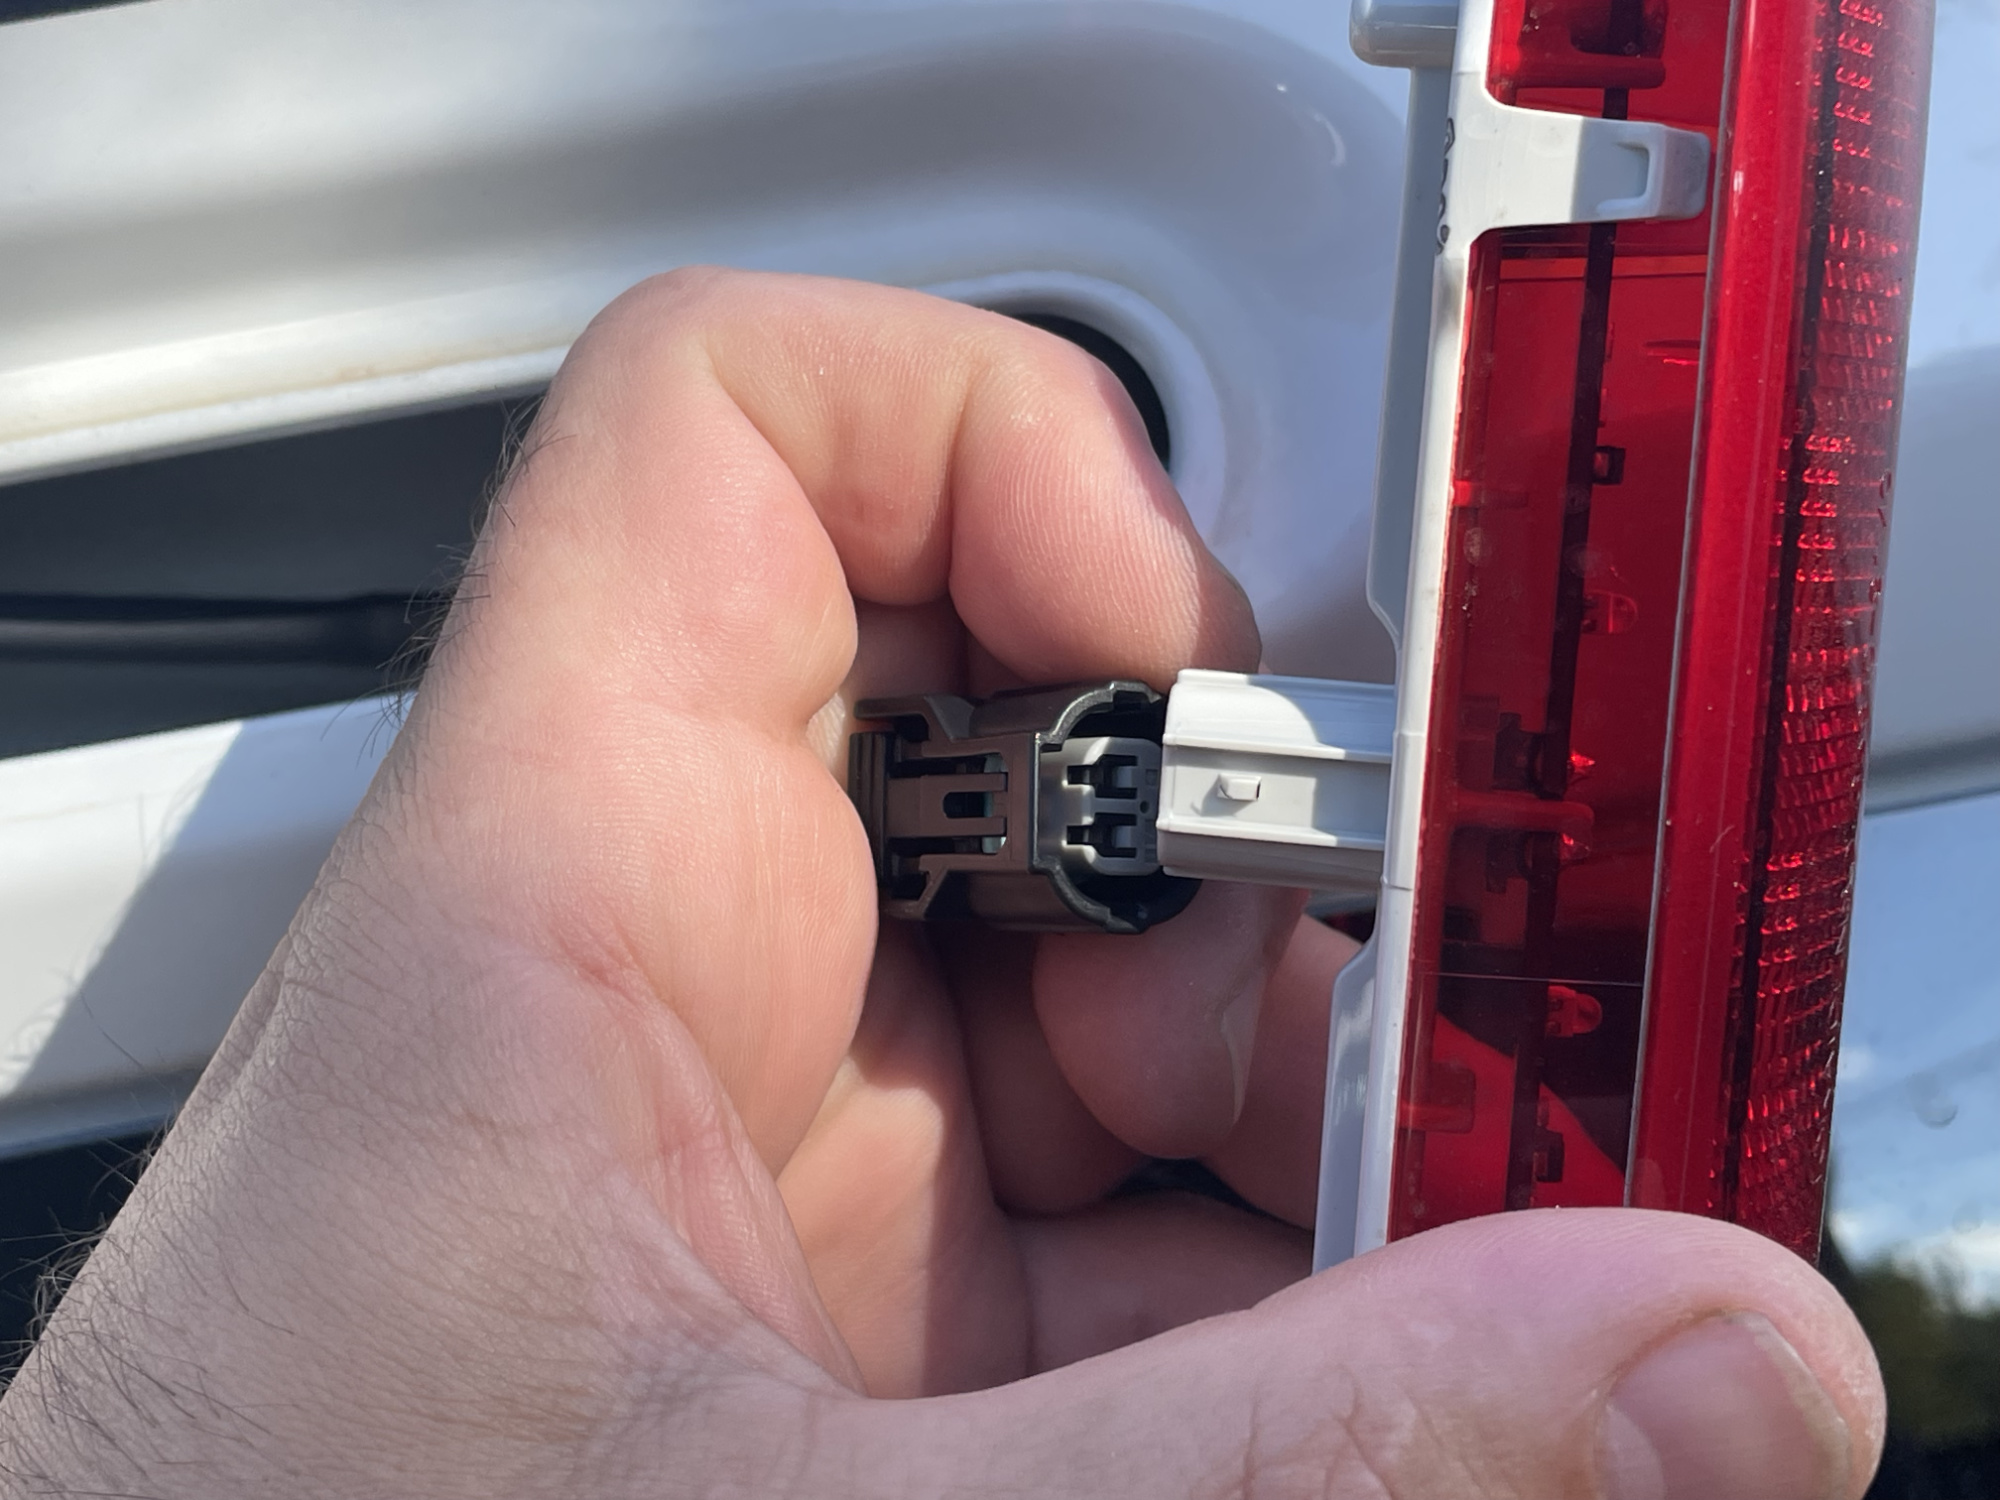
There is a bit of a size difference with these globes. The LED ones need to take into account the driver circuitry and also the heat sink needed.
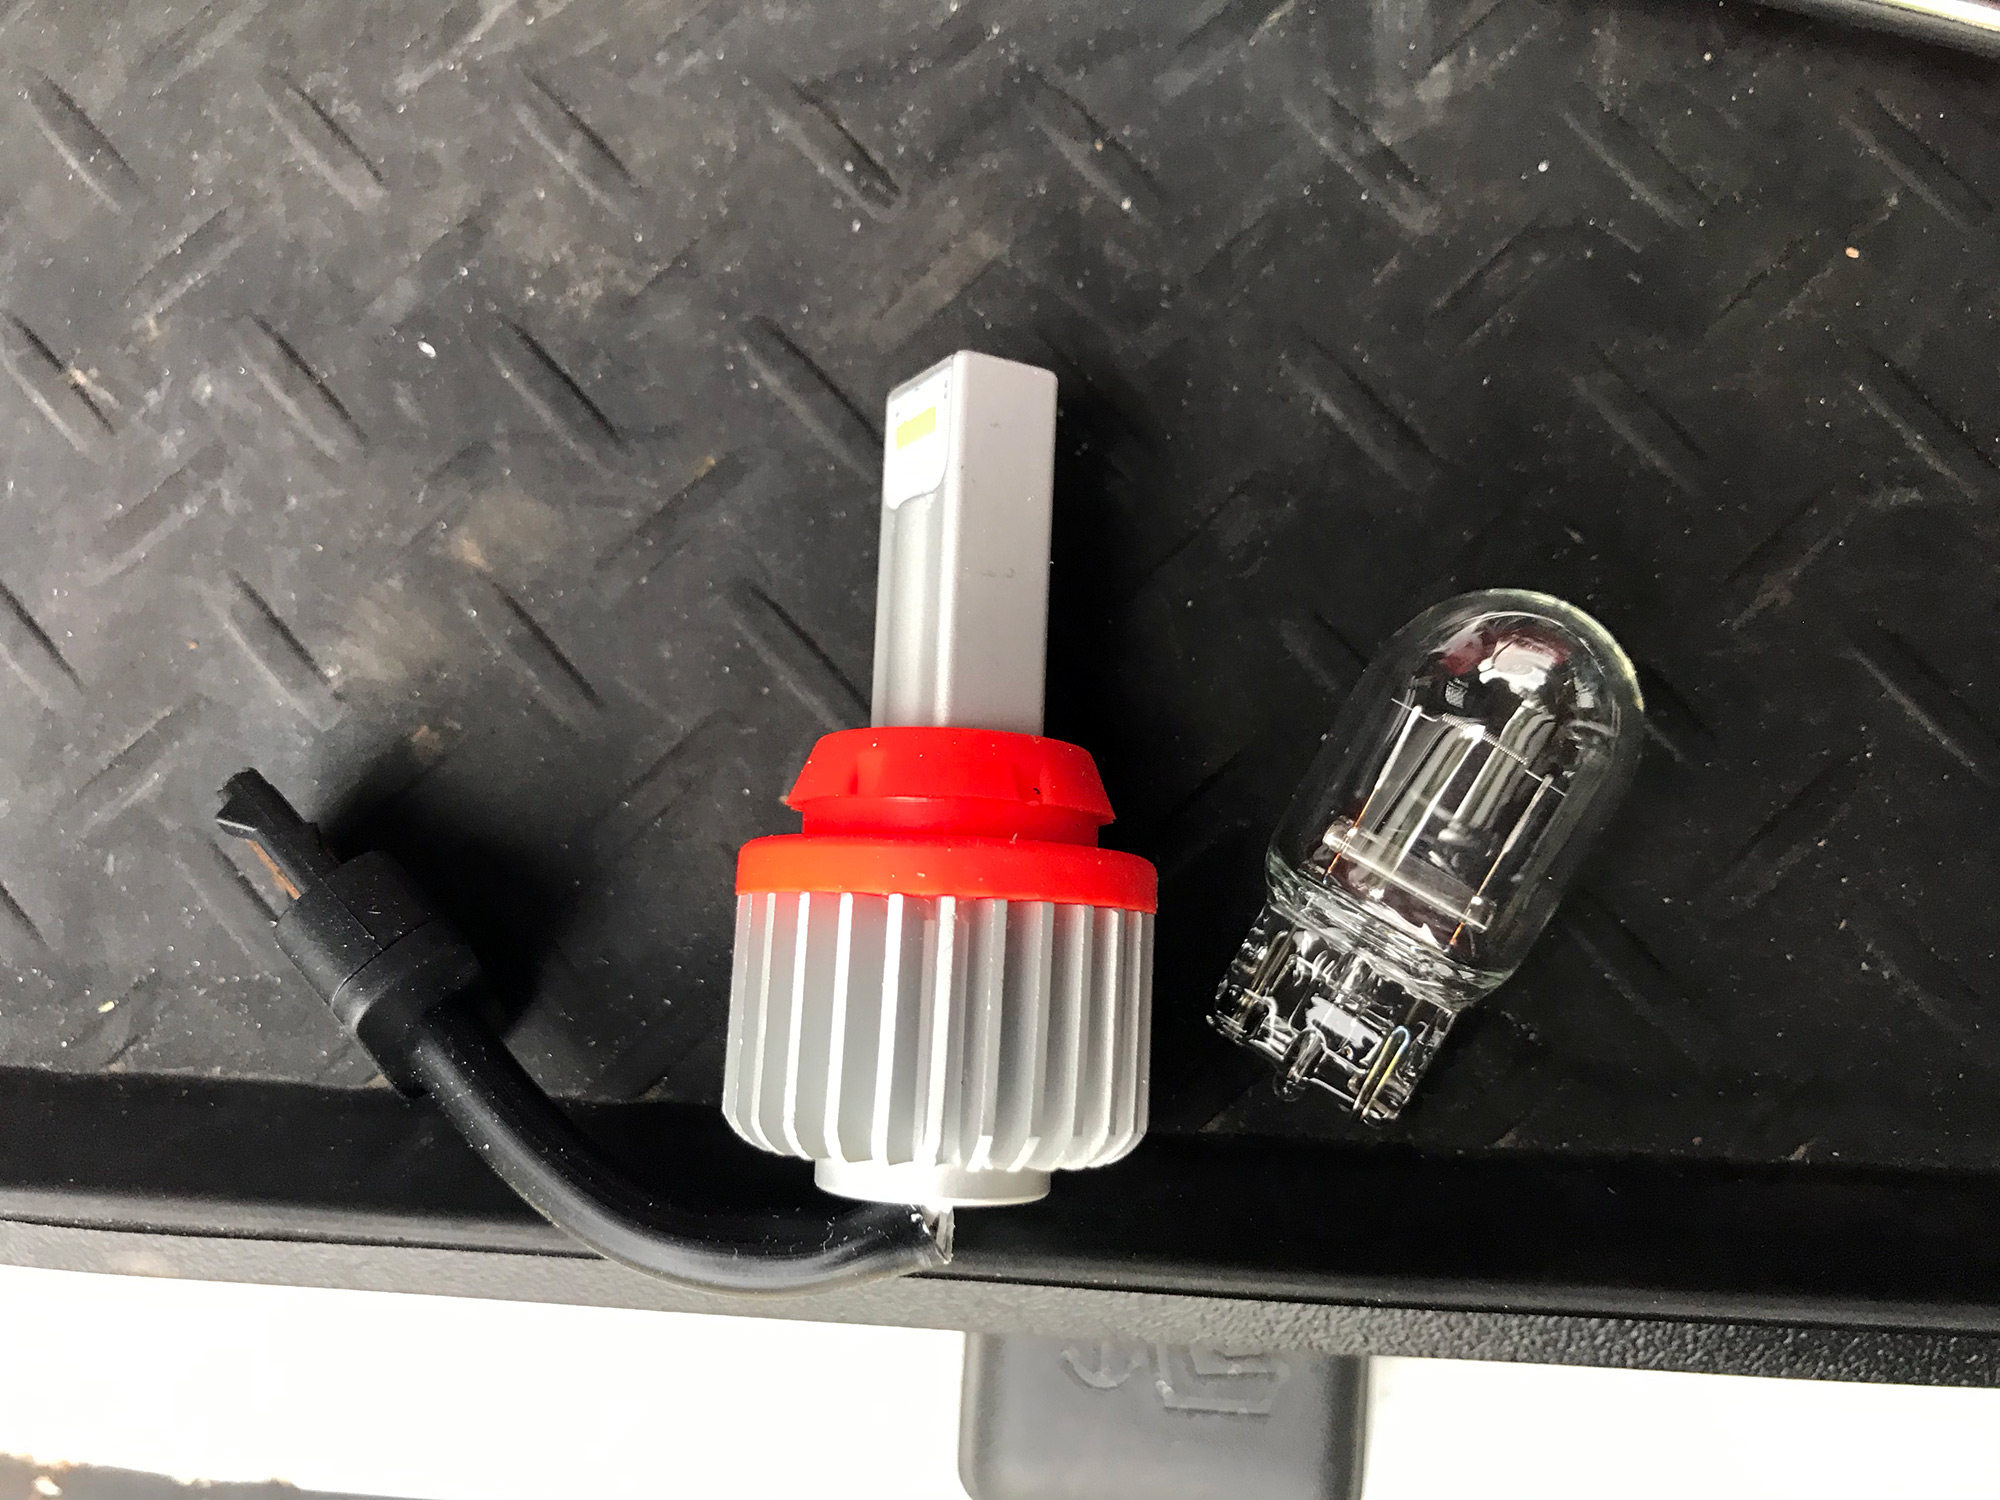
This means the globe does not immediately go back in the original bulb holder, instead, the old bulb holder is where the tail of the LED globe plugs in, and you press the new globe into the taillight housing itself. The little tail gives you just enough room to plug wriggle the old bulb housing around and make it all fit back in the bumper nicely.
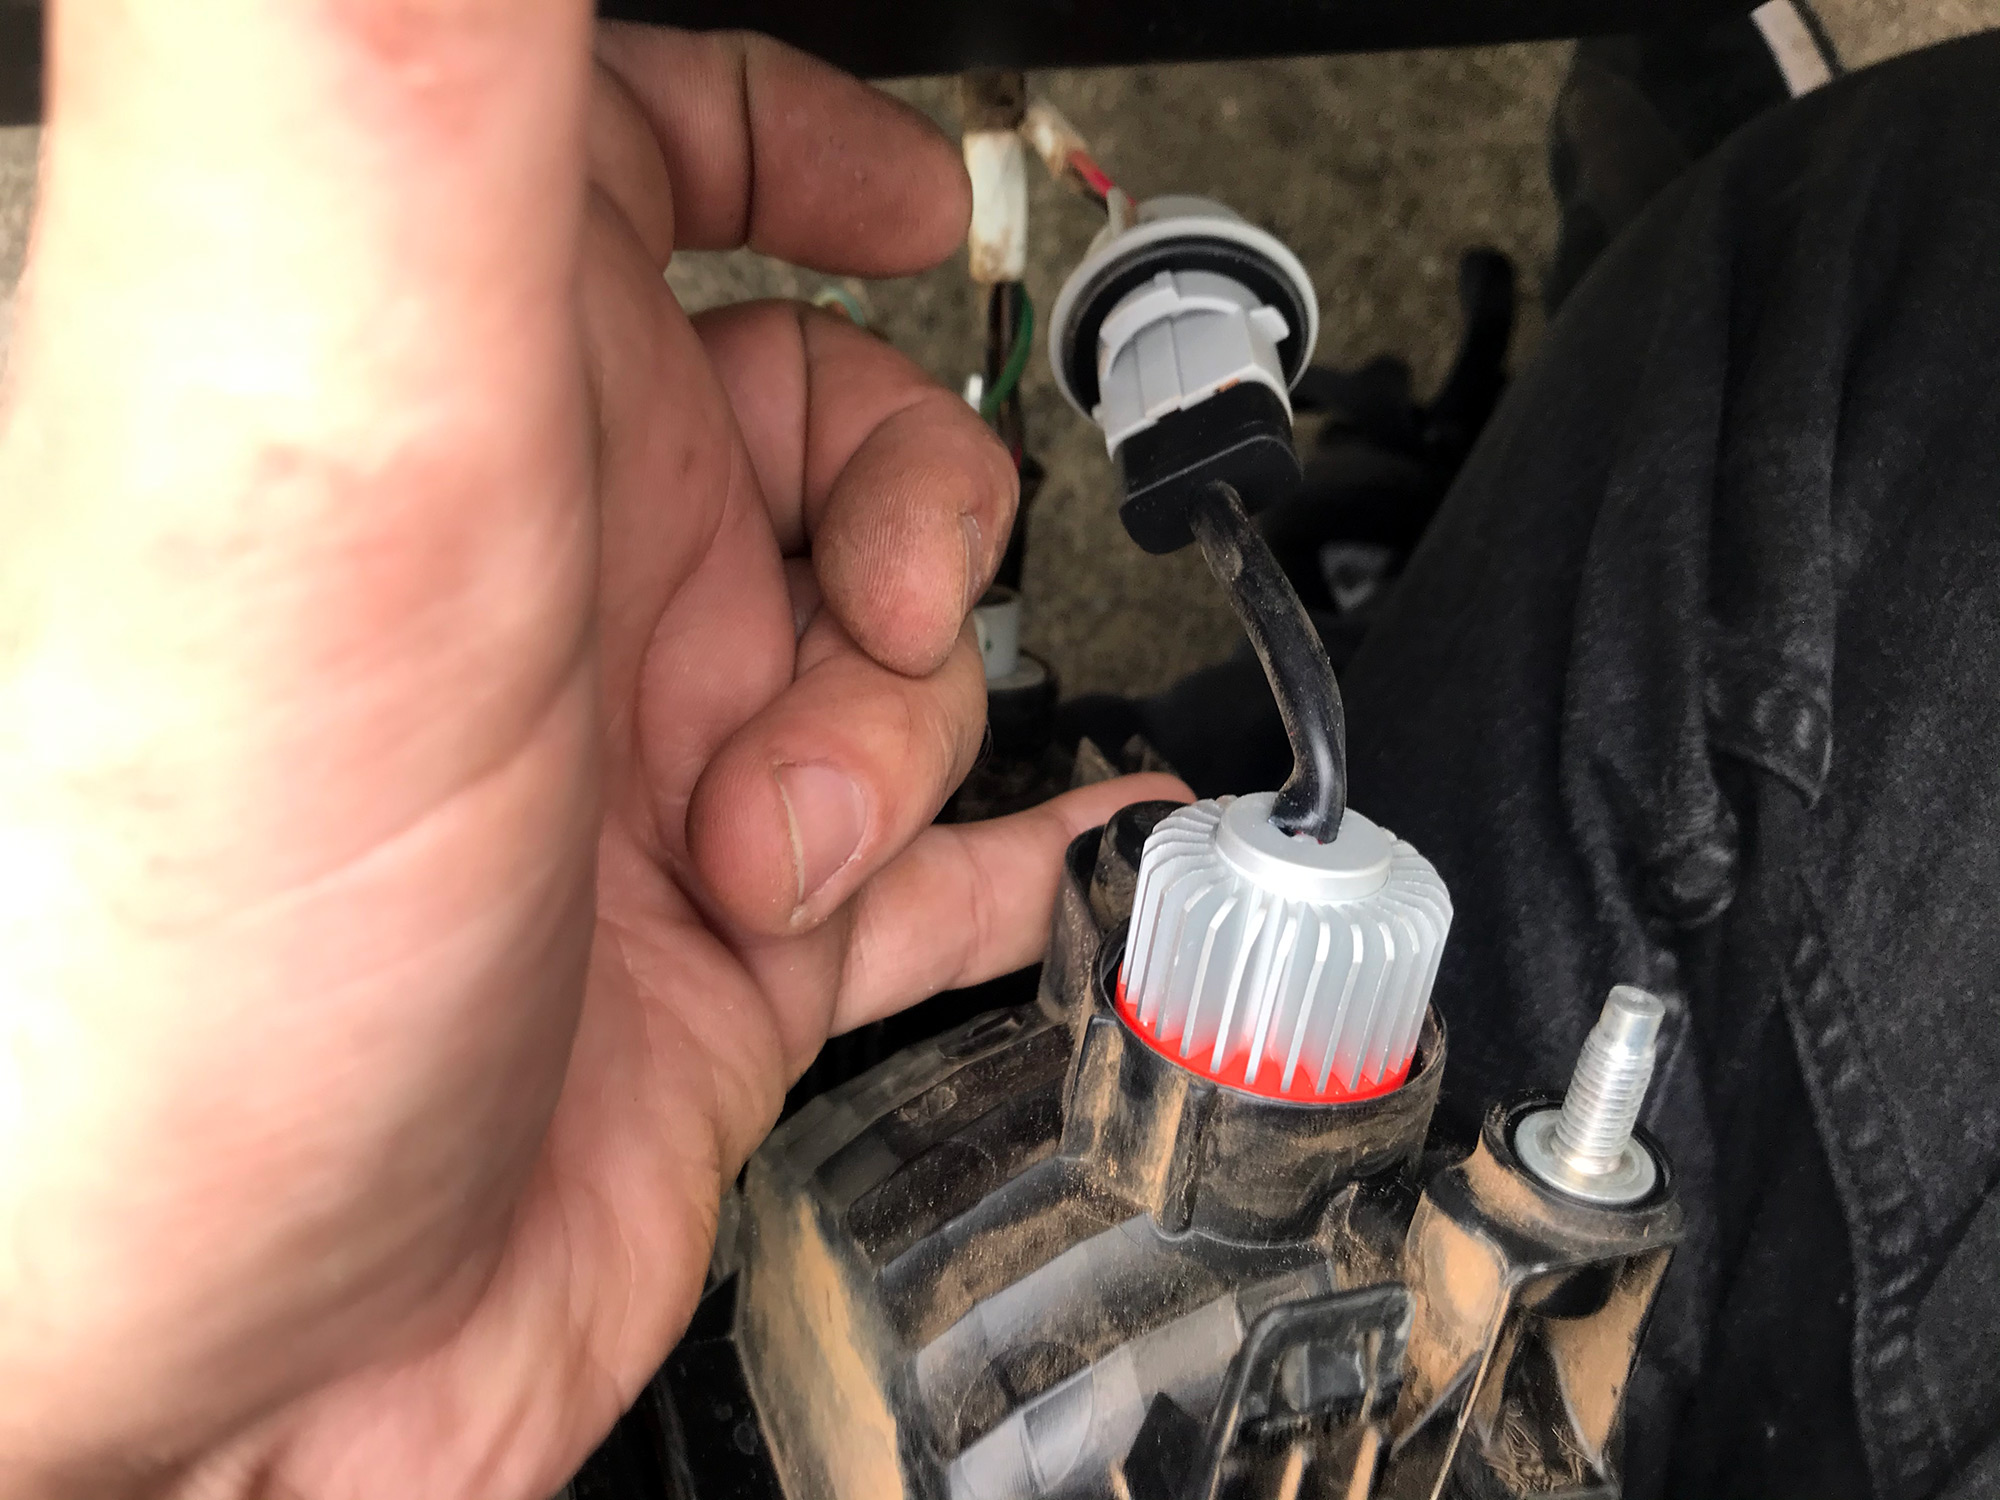
Put the taillight back into the bumper, repeat the process for the other side and then refit the bumper.
Here’s a comparison between the stock globes and the replacements to see the difference.
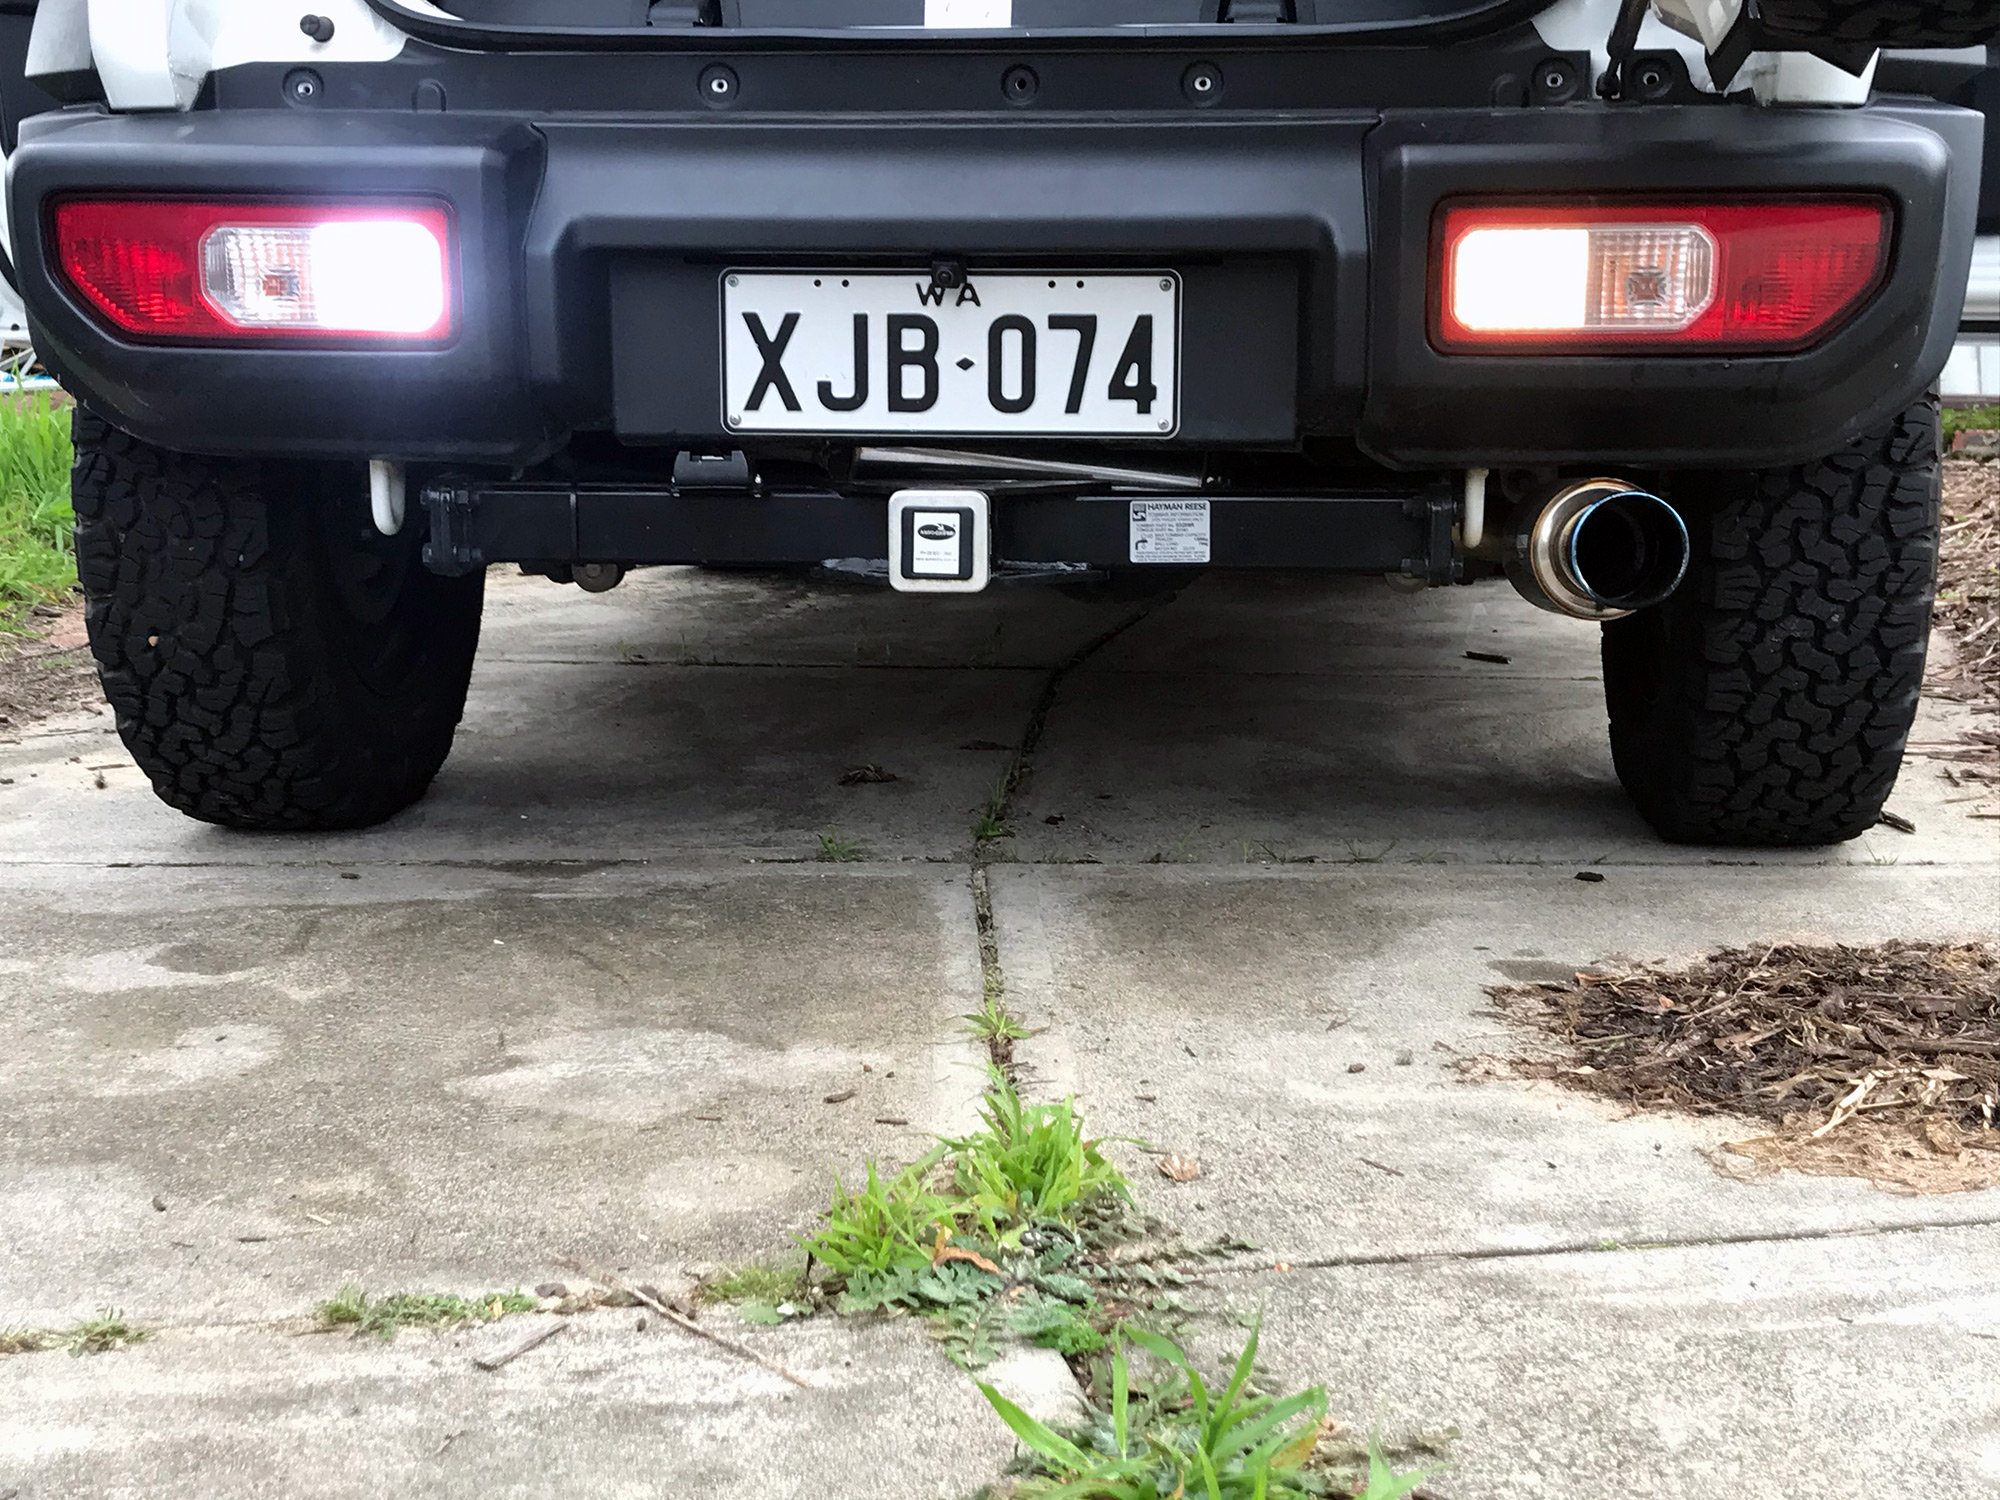
Much brighter!
With both done it’s a really amazing transformation as to just how much brighter it is now, especially offroad!

Brake/tail upgrade
Standard globes here are a dual filament T20 wedge globe 21/5W. There’s a lot of options out there, but I will try out the red brake/tail lights from the appropriately named LED Shop. Red in theory is a better choice with red lenses as it will maintain brightness, but we shall see.
Something to note here: if you buy some of the more large Australian ‘name brand’ LEDs you pay a reasonable bit more than buying either from some specialists or doing a bit more shopping around. For less than just the brake/tail lights from a particular brand I was able to get them and rear indicator bulbs and have express shipping for less than just the bulb price. It pays to do your homework here.
As per the reverse light upgrade, this is easiest taking the bumper off although with enough practise you can do the 3 10mm nuts and undo the two clips with the bumper still on. It’s fiddly enough that the bumper is almost faster to remove.
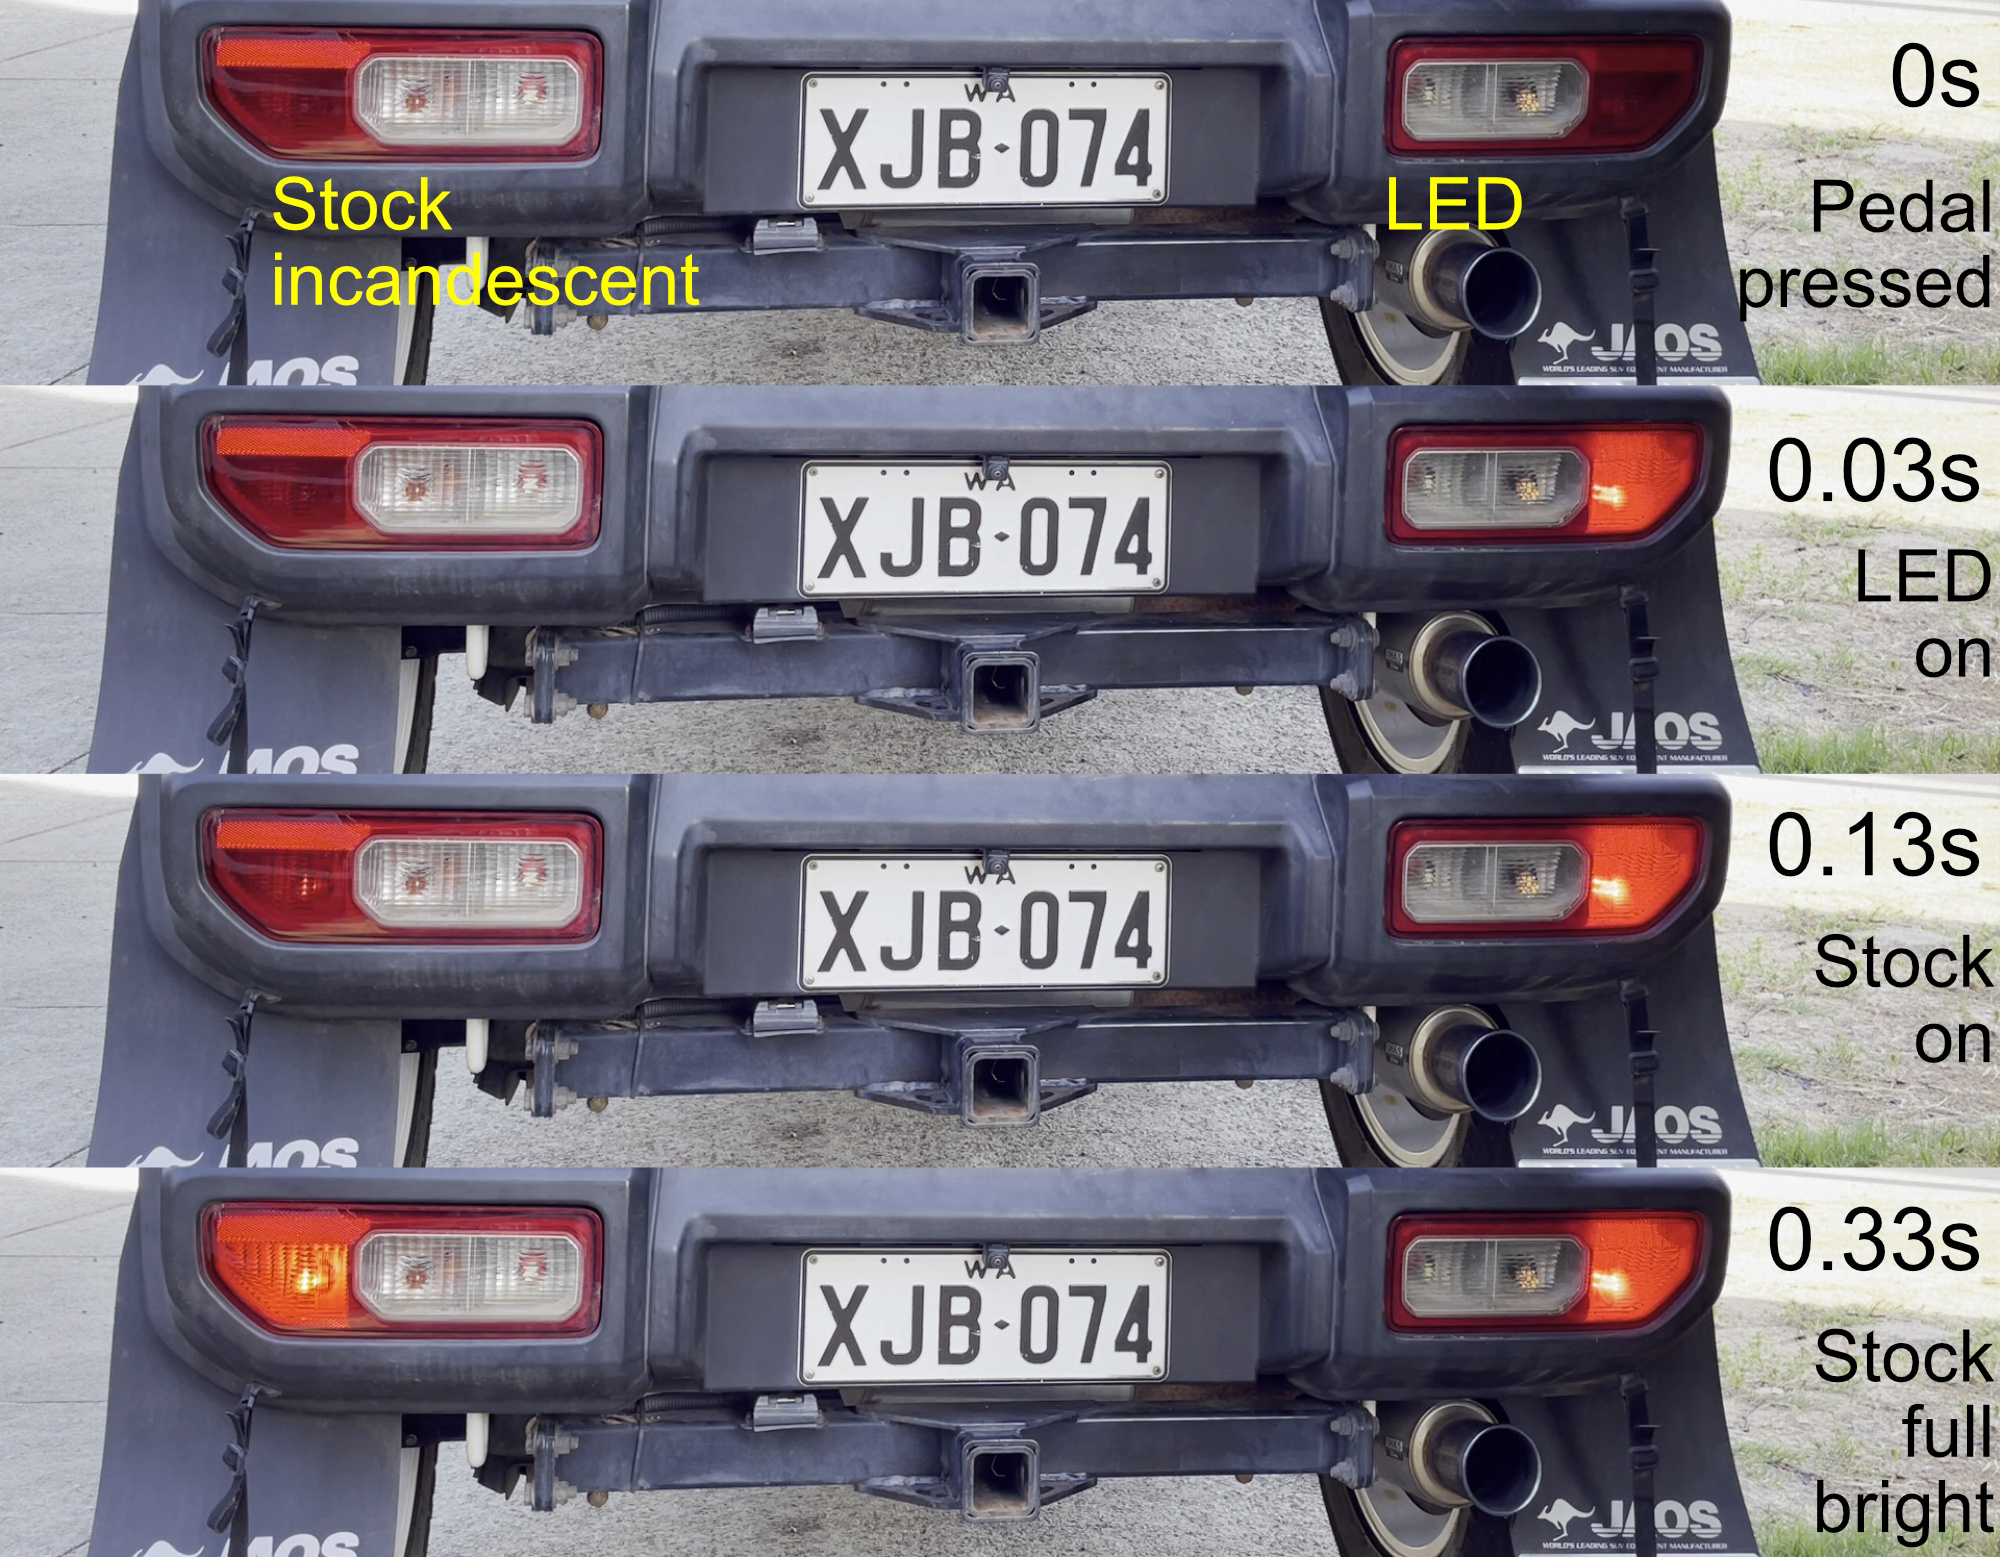
It’s always worth testing when you refit; here I’ve put the headlights on so I can see the taillight.
Checking brake lights solo can be trickier: my favoured way these days is to record a video on my phone to check. If you do this with only one brake/taillight LED installed you can see the reaction time difference between incandescent and LED globes. LEDs can respond faster than this, as the limiting factor is the frame rate I recorded it at; however, it’s also noticeable to the eye that the incandescent is slower.
Rear indicators upgrade
Rear indicator bulbs are a single filament T20 wedge globe 21W. Note that they are coloured bulbs, with the lenses themselves clear. For this reason I’ve gone with amber bulbs also from the LED shop. Many suppliers of good brake-tail light combinations do not carry amber LEDs for some reason, so it’s good to have found somewhere that has both options for upgrading the main parts of the taillights.
Although these globes were advertised as potentially not needing resistors (as they are ‘CANbus compatible’), they did result in hyperflashing indicators in my car. This allows me to illustrate one of the ways to fit a resistor. There are potentially better ways to do this, e.g. via making piggyback cables off the factory taillight fittings, but this is also an accessible way. You’ll want 21-25W resistors ideally to replicate the factory bulbs.
If you are going to modify any factory wiring the best bet is to always work on whatever is the cheapest wire to replace. In this case, the final wiring between bulbs and the bumper wiring can be replaced very easily, so what I’m about to do isn’t terminal for the wiring harness. You’ll be adding a bit of extra wire as well to make it easier to position the resistors out of the way.
I stripped out the taillight with the bumper still attached; this can be tricky to access but doable. I then unwound the tape on the two wires into the indicator bulb fitting.
Resistors go across the two wires i.e. one end of the resistor goes onto the black wire and one onto the green wire. Resistors don’t have polarity so either end can go onto either wire.
This is a good application for a wire splice where you just strip off the insulation midway in the wire. Make sure you do the stripping a little offset, which means the wire joins won’t be right against each other making the wires much wider when bundled back up together.
To make the splice, open up the wire a bit and poke some additional wire through the opened wire.

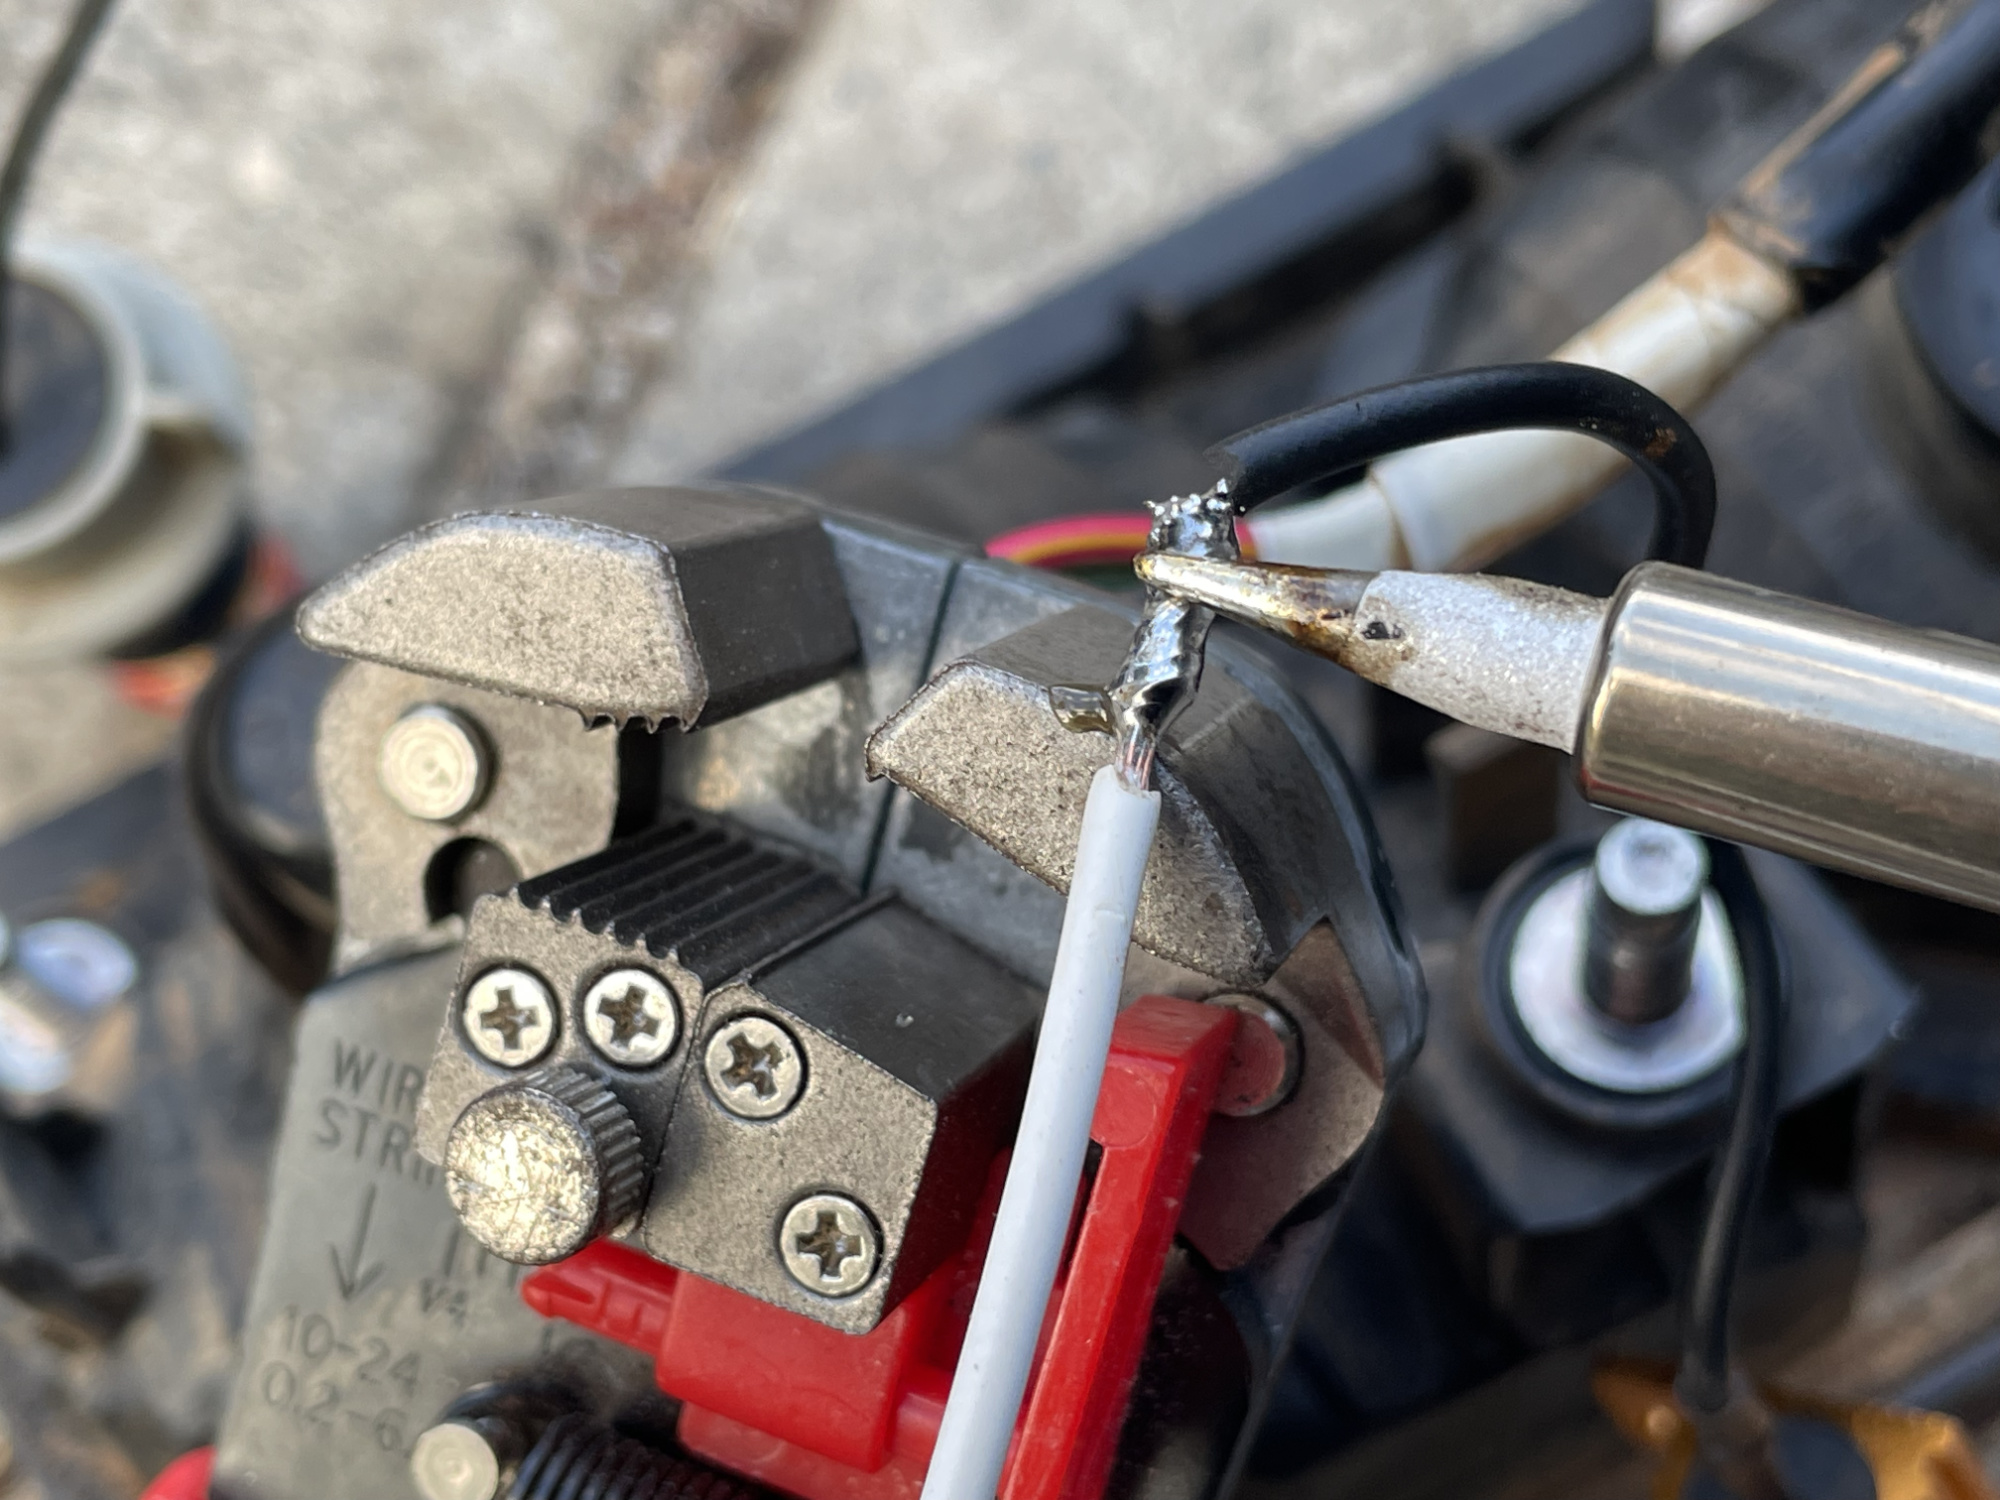
You now solder each of these splices.
Tape up the joins independently to keep them nice and watertight.
Then tape up both of the indicator wires to help support everything, and also the wires you’ll pull through into the back of the bumper for the resistors.
The other end of the wires you’ve hooked up go out to the resistor leads. Just remember to tuck the resistors up out of the way but also so they can’t melt anything: they can get hot if the indicators are on for a reasonable period of time so good to keep them out of the way.
Numberplate lights
This is one of the areas that really makes the Jimny look old, with limited brightness and quite yellow numberplate lights. Like many things, you can just upgrade the globes here or you can elect for entire replacements.
For this change I have gone with the lower effort option of the upgraded units out of JimnyStyle in the UK. While I could just replace bulbs, the style of housing plus how they need to radiate light means that probably wouldn’t be quite as ideal.
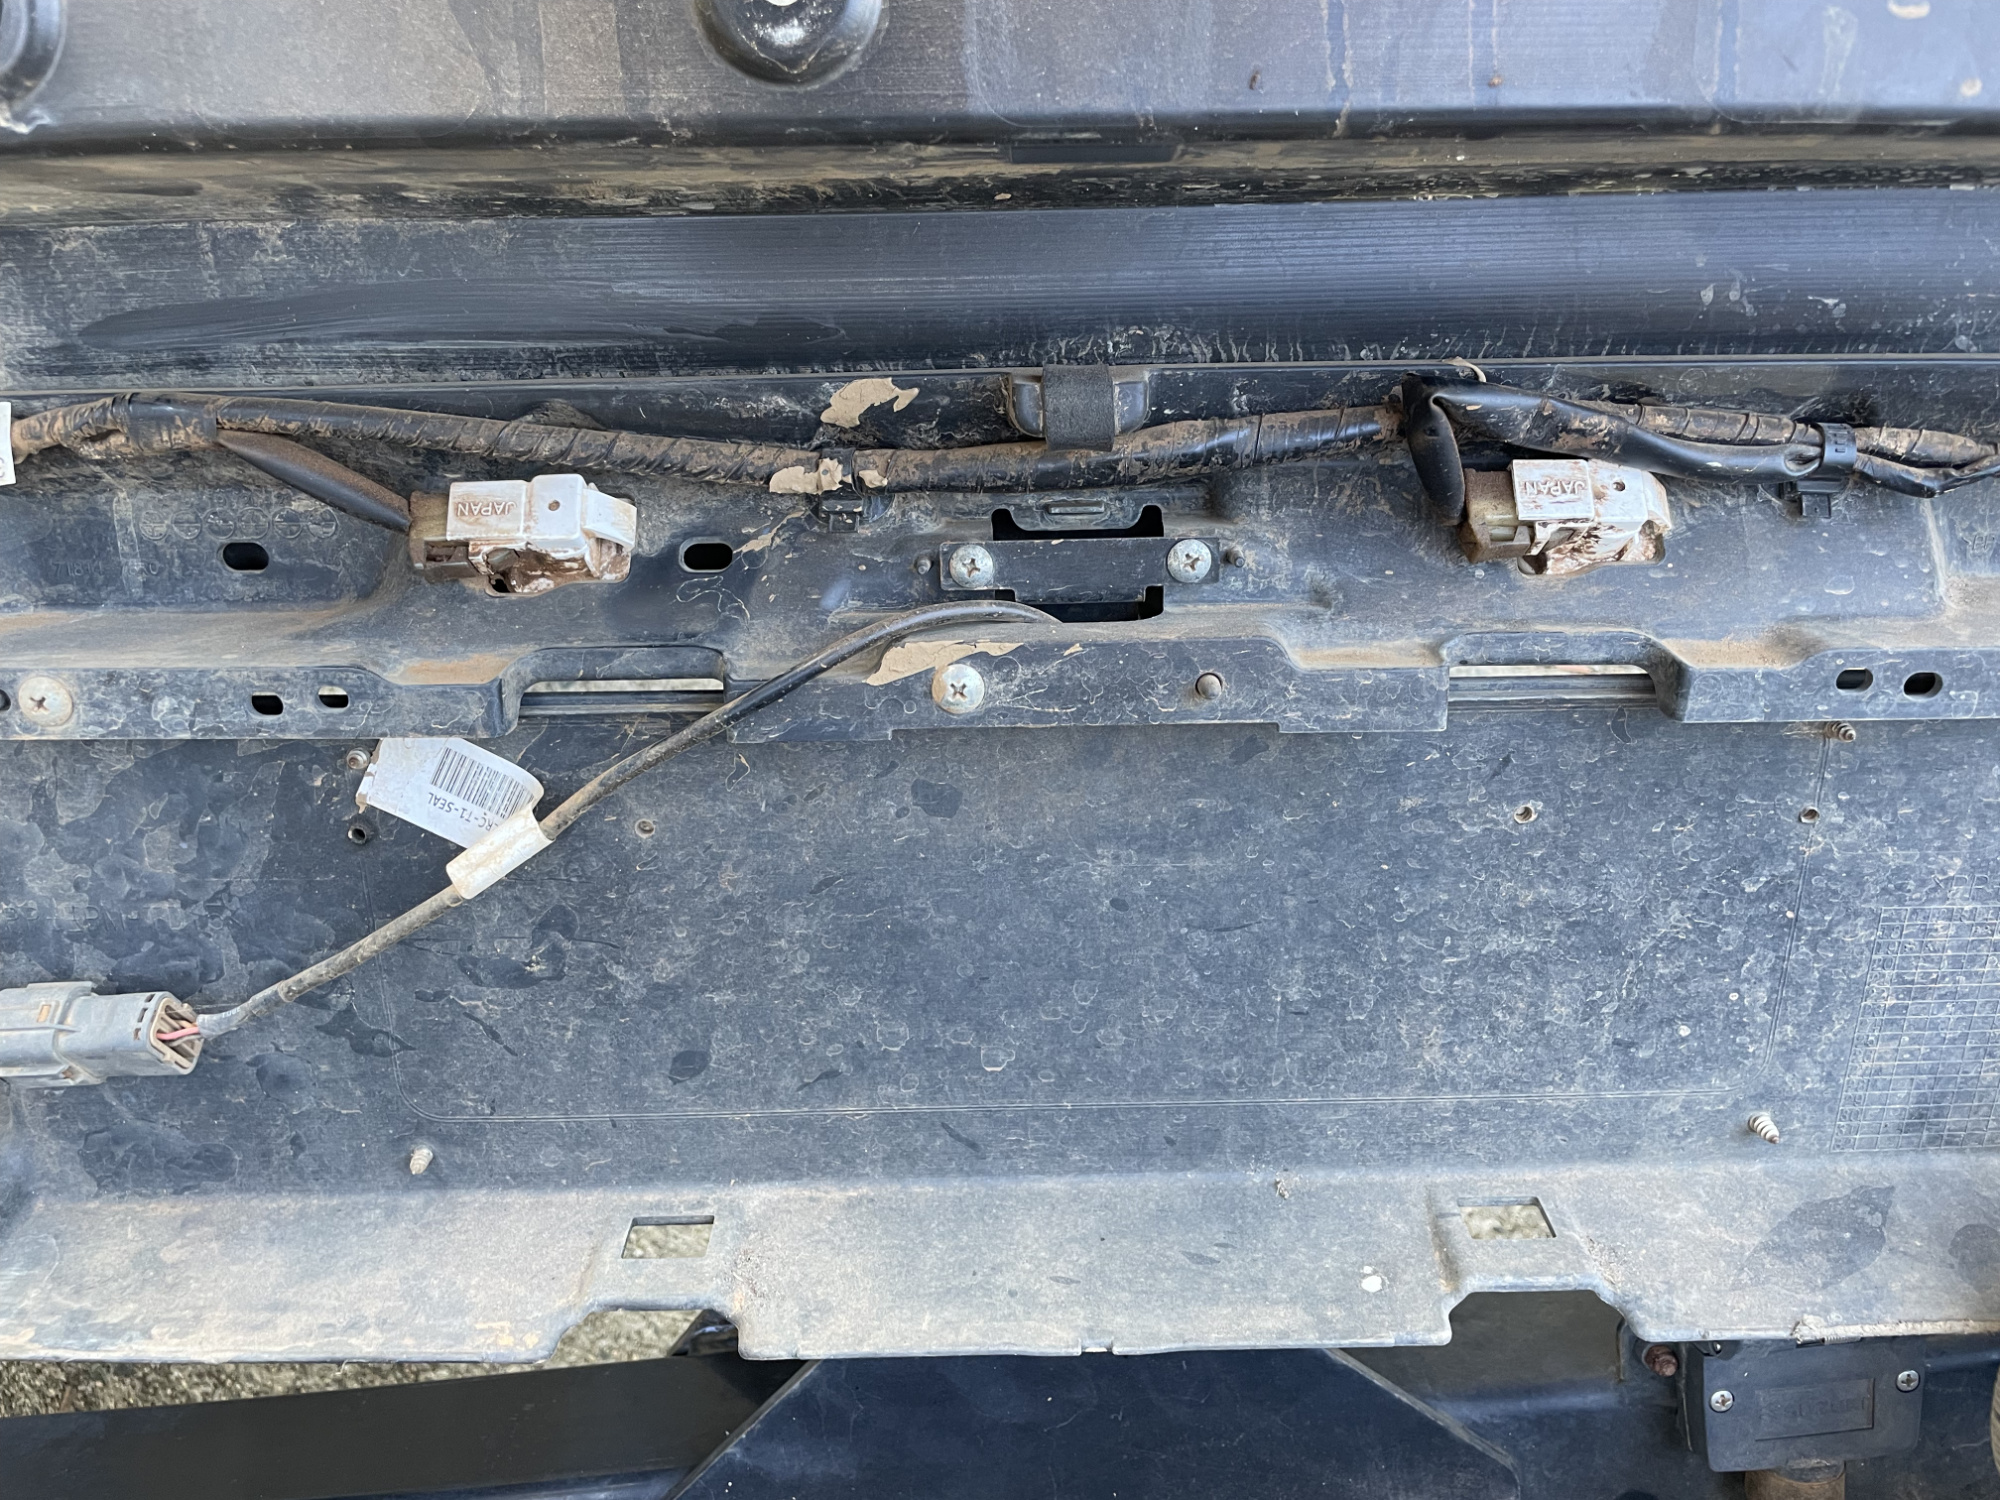
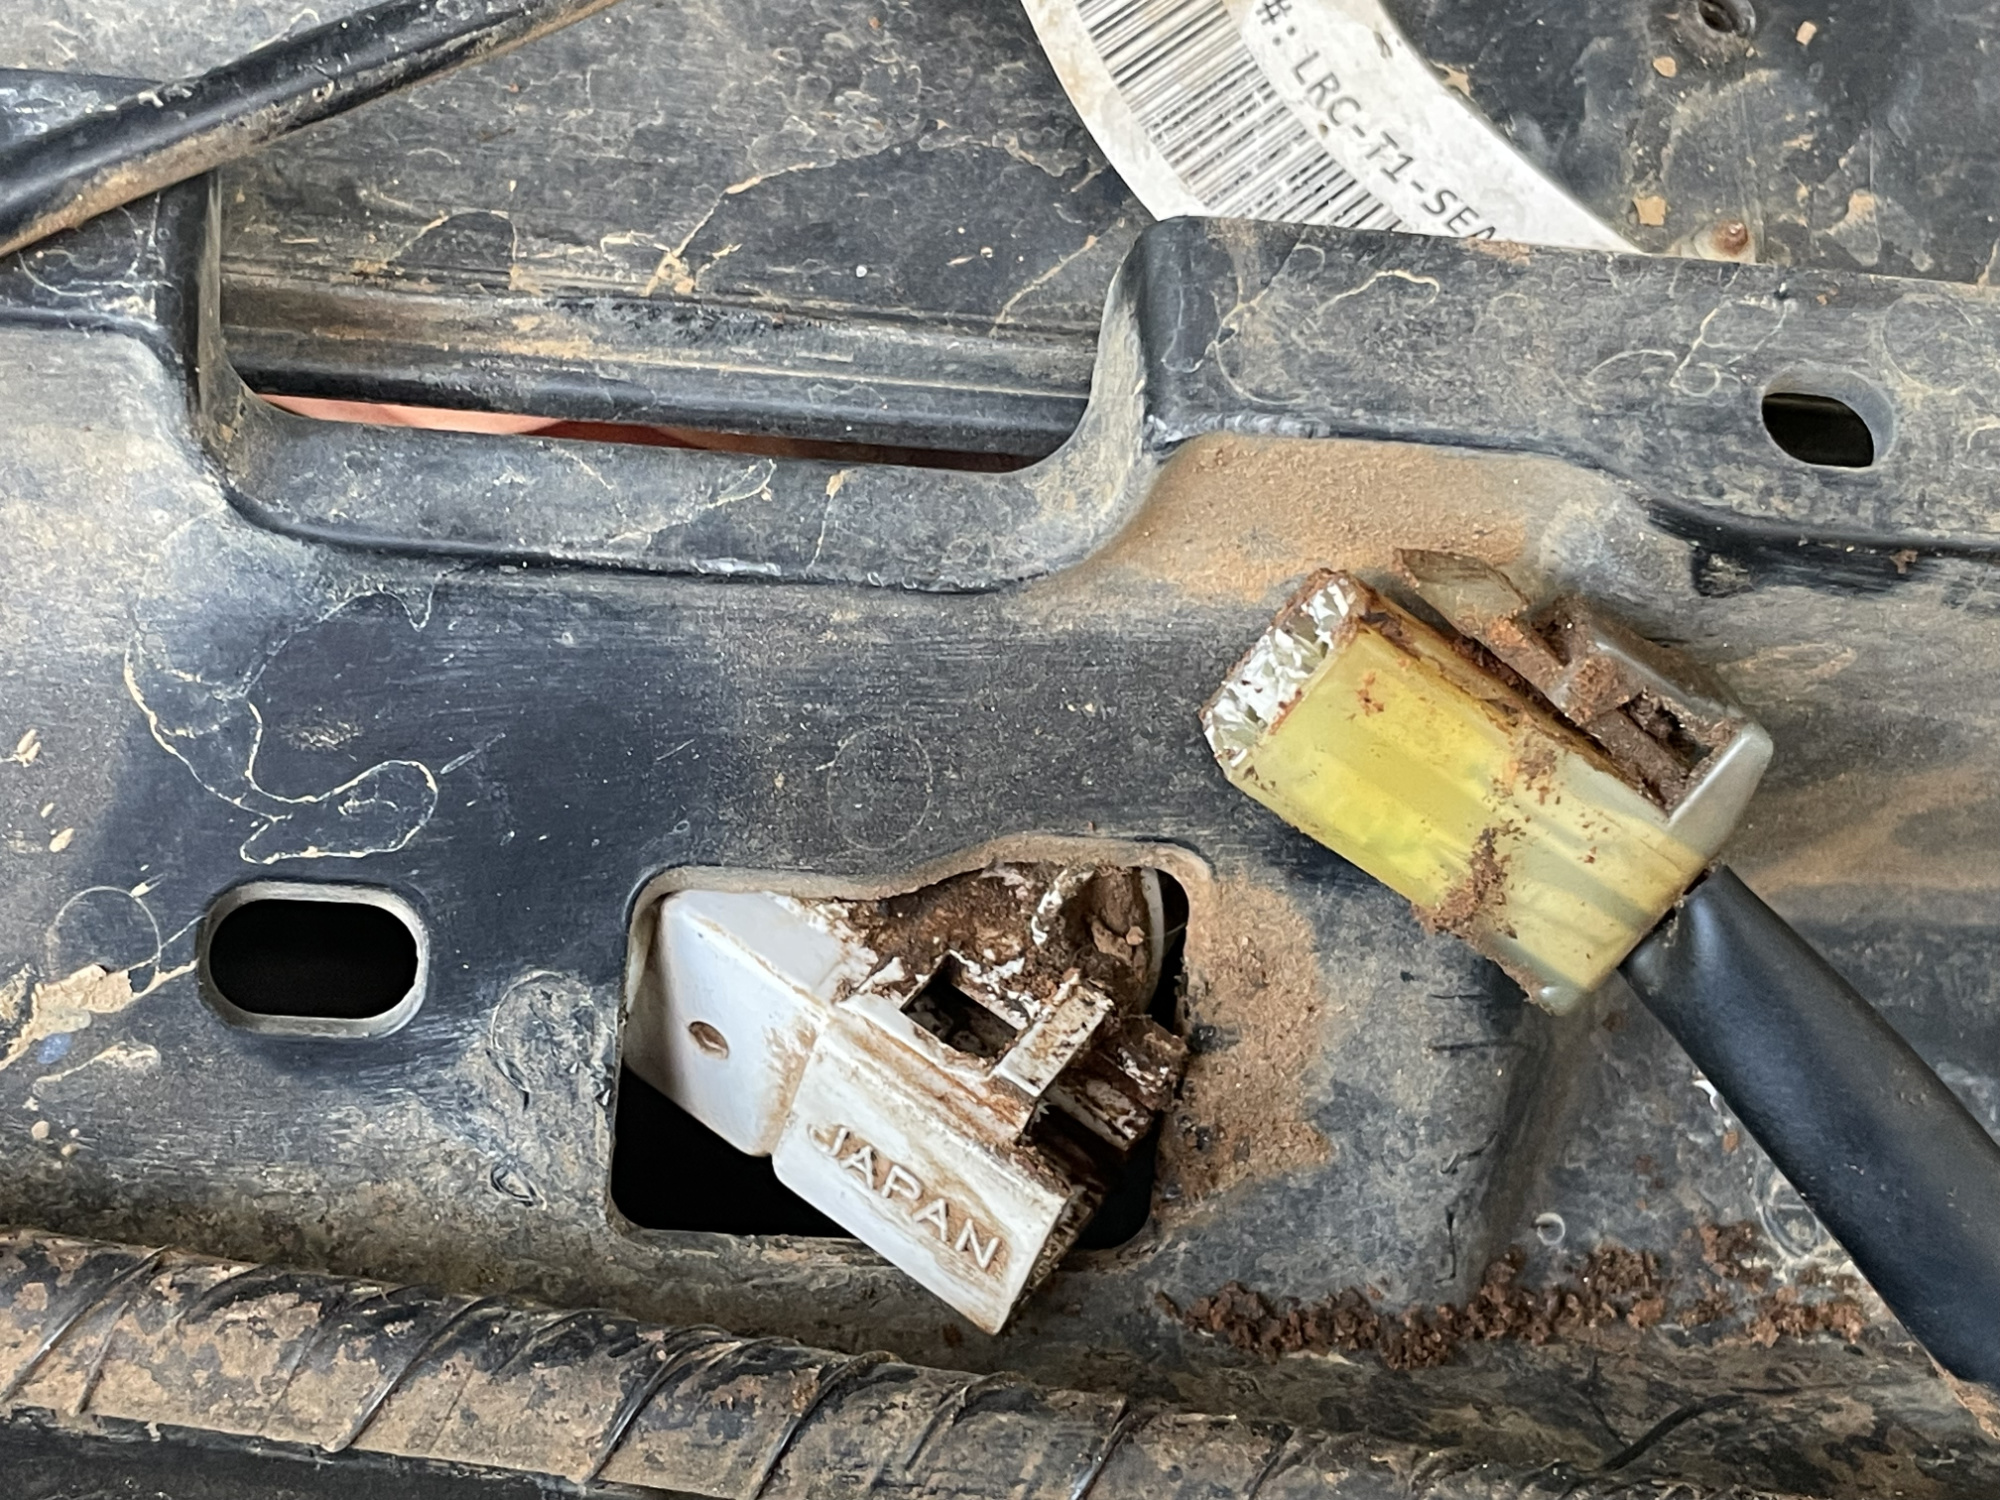
There are definitely a bumper off job, they are a bit of a pain to get in and out of the bumper. Here’s where they sit when you have taken the bumper off and you’re looking backwards inside the bumper, up near what would be the top.
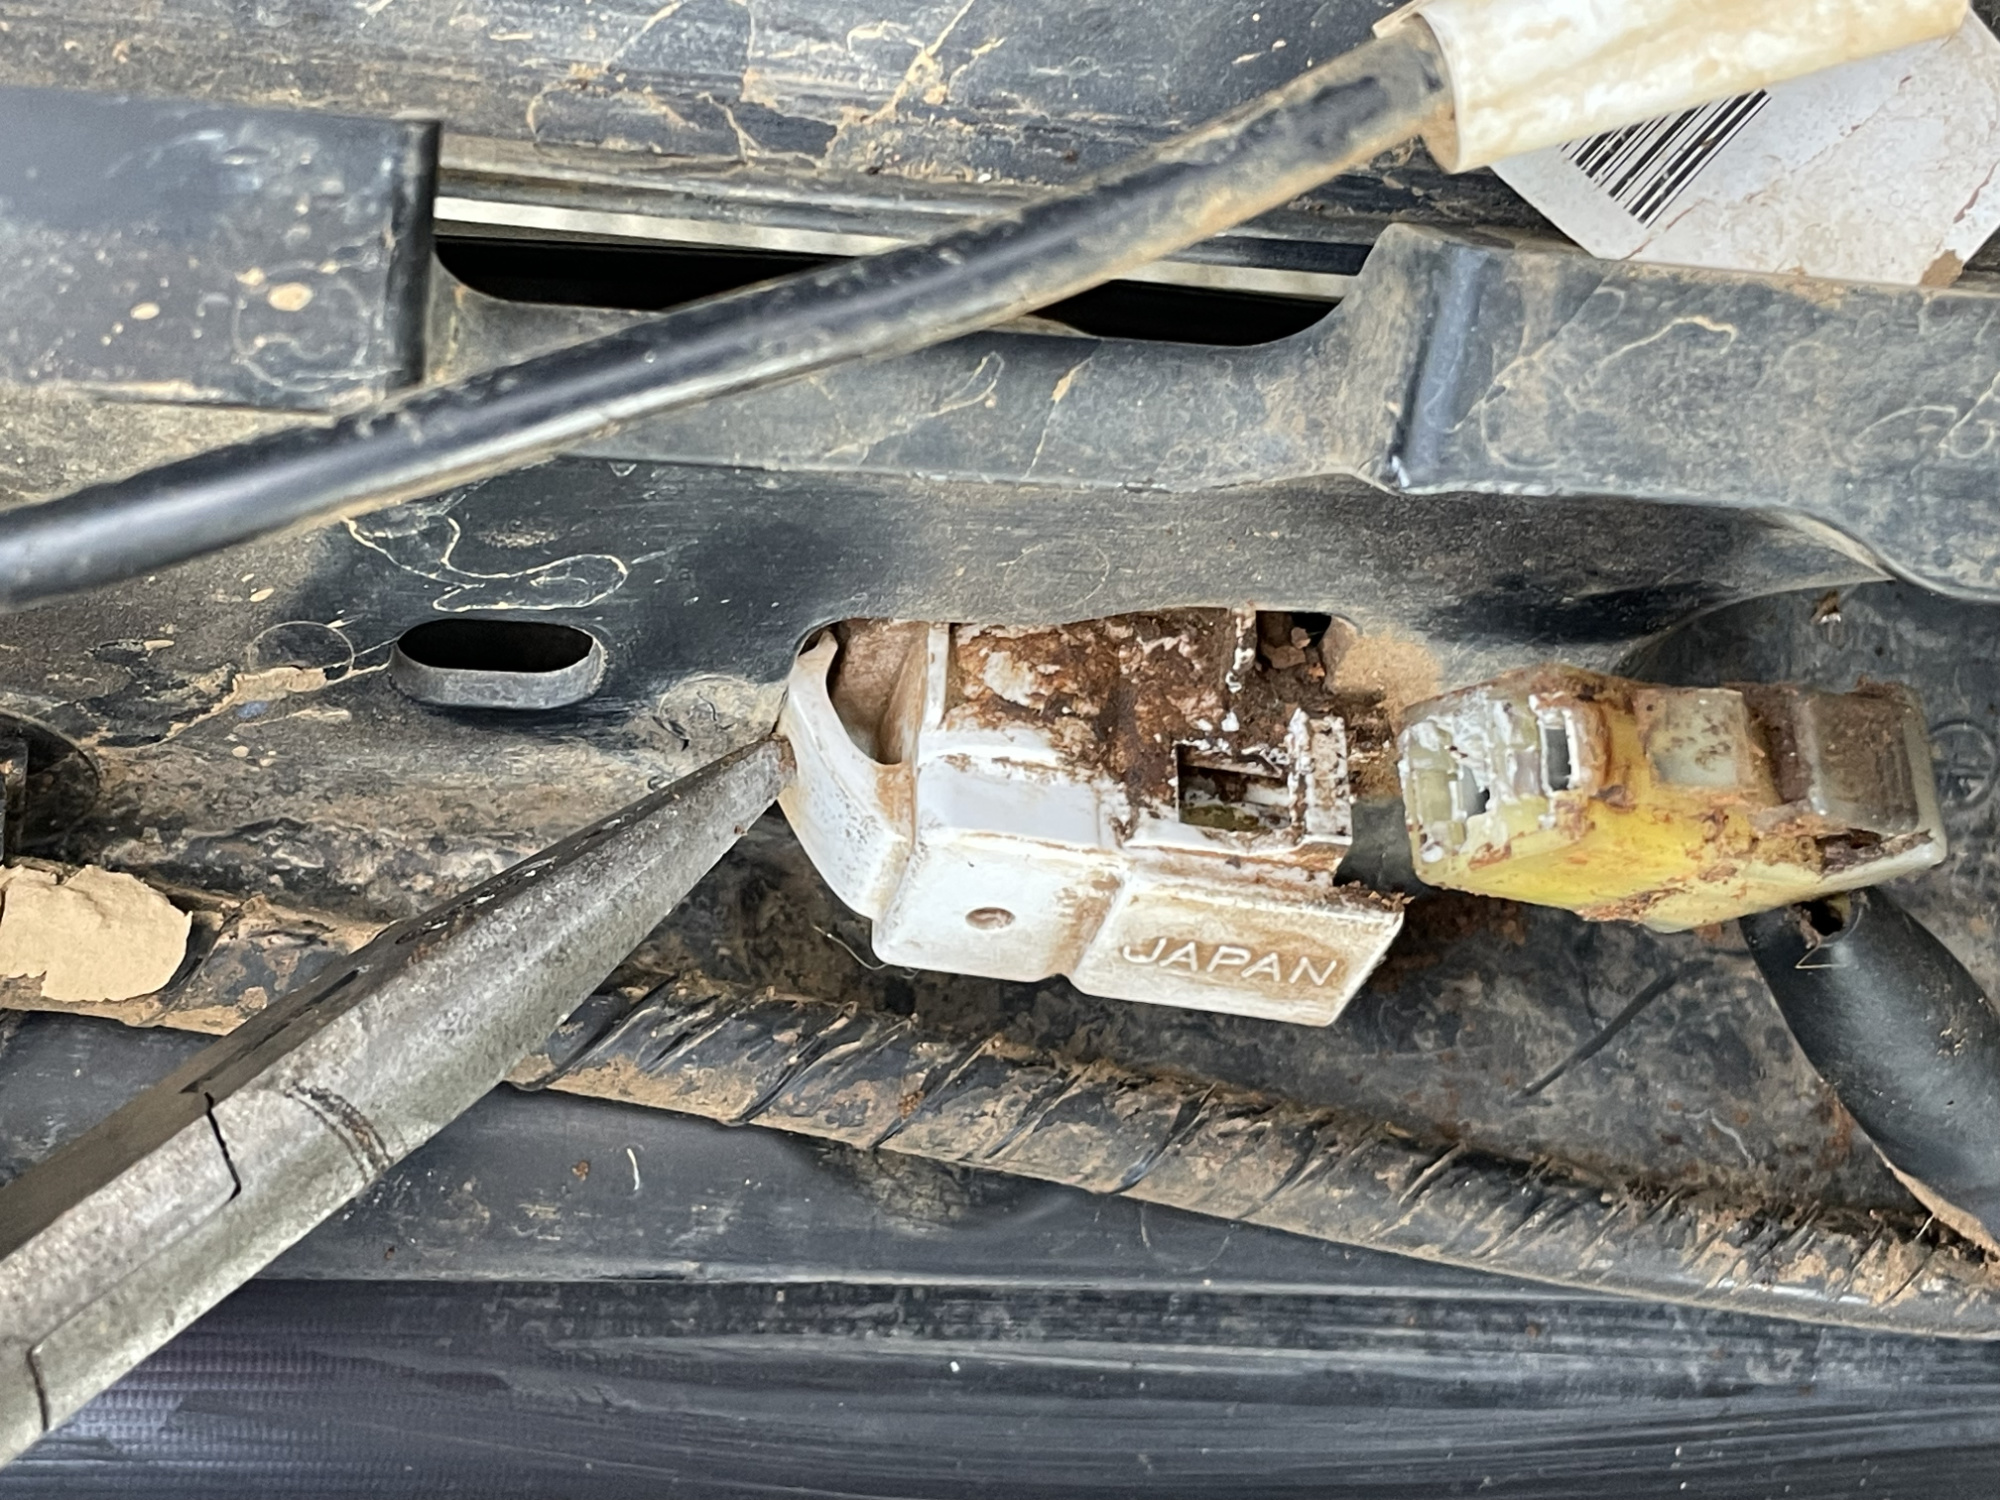
If you’ve used your car offroad for any length of time then the clips become pretty hard to release due to the amount of dirt and grime that ends up trapped up there. I had to press on the end of the clip with some pliers to be able to get it to shift and to be able to push it backwards out of the connector.

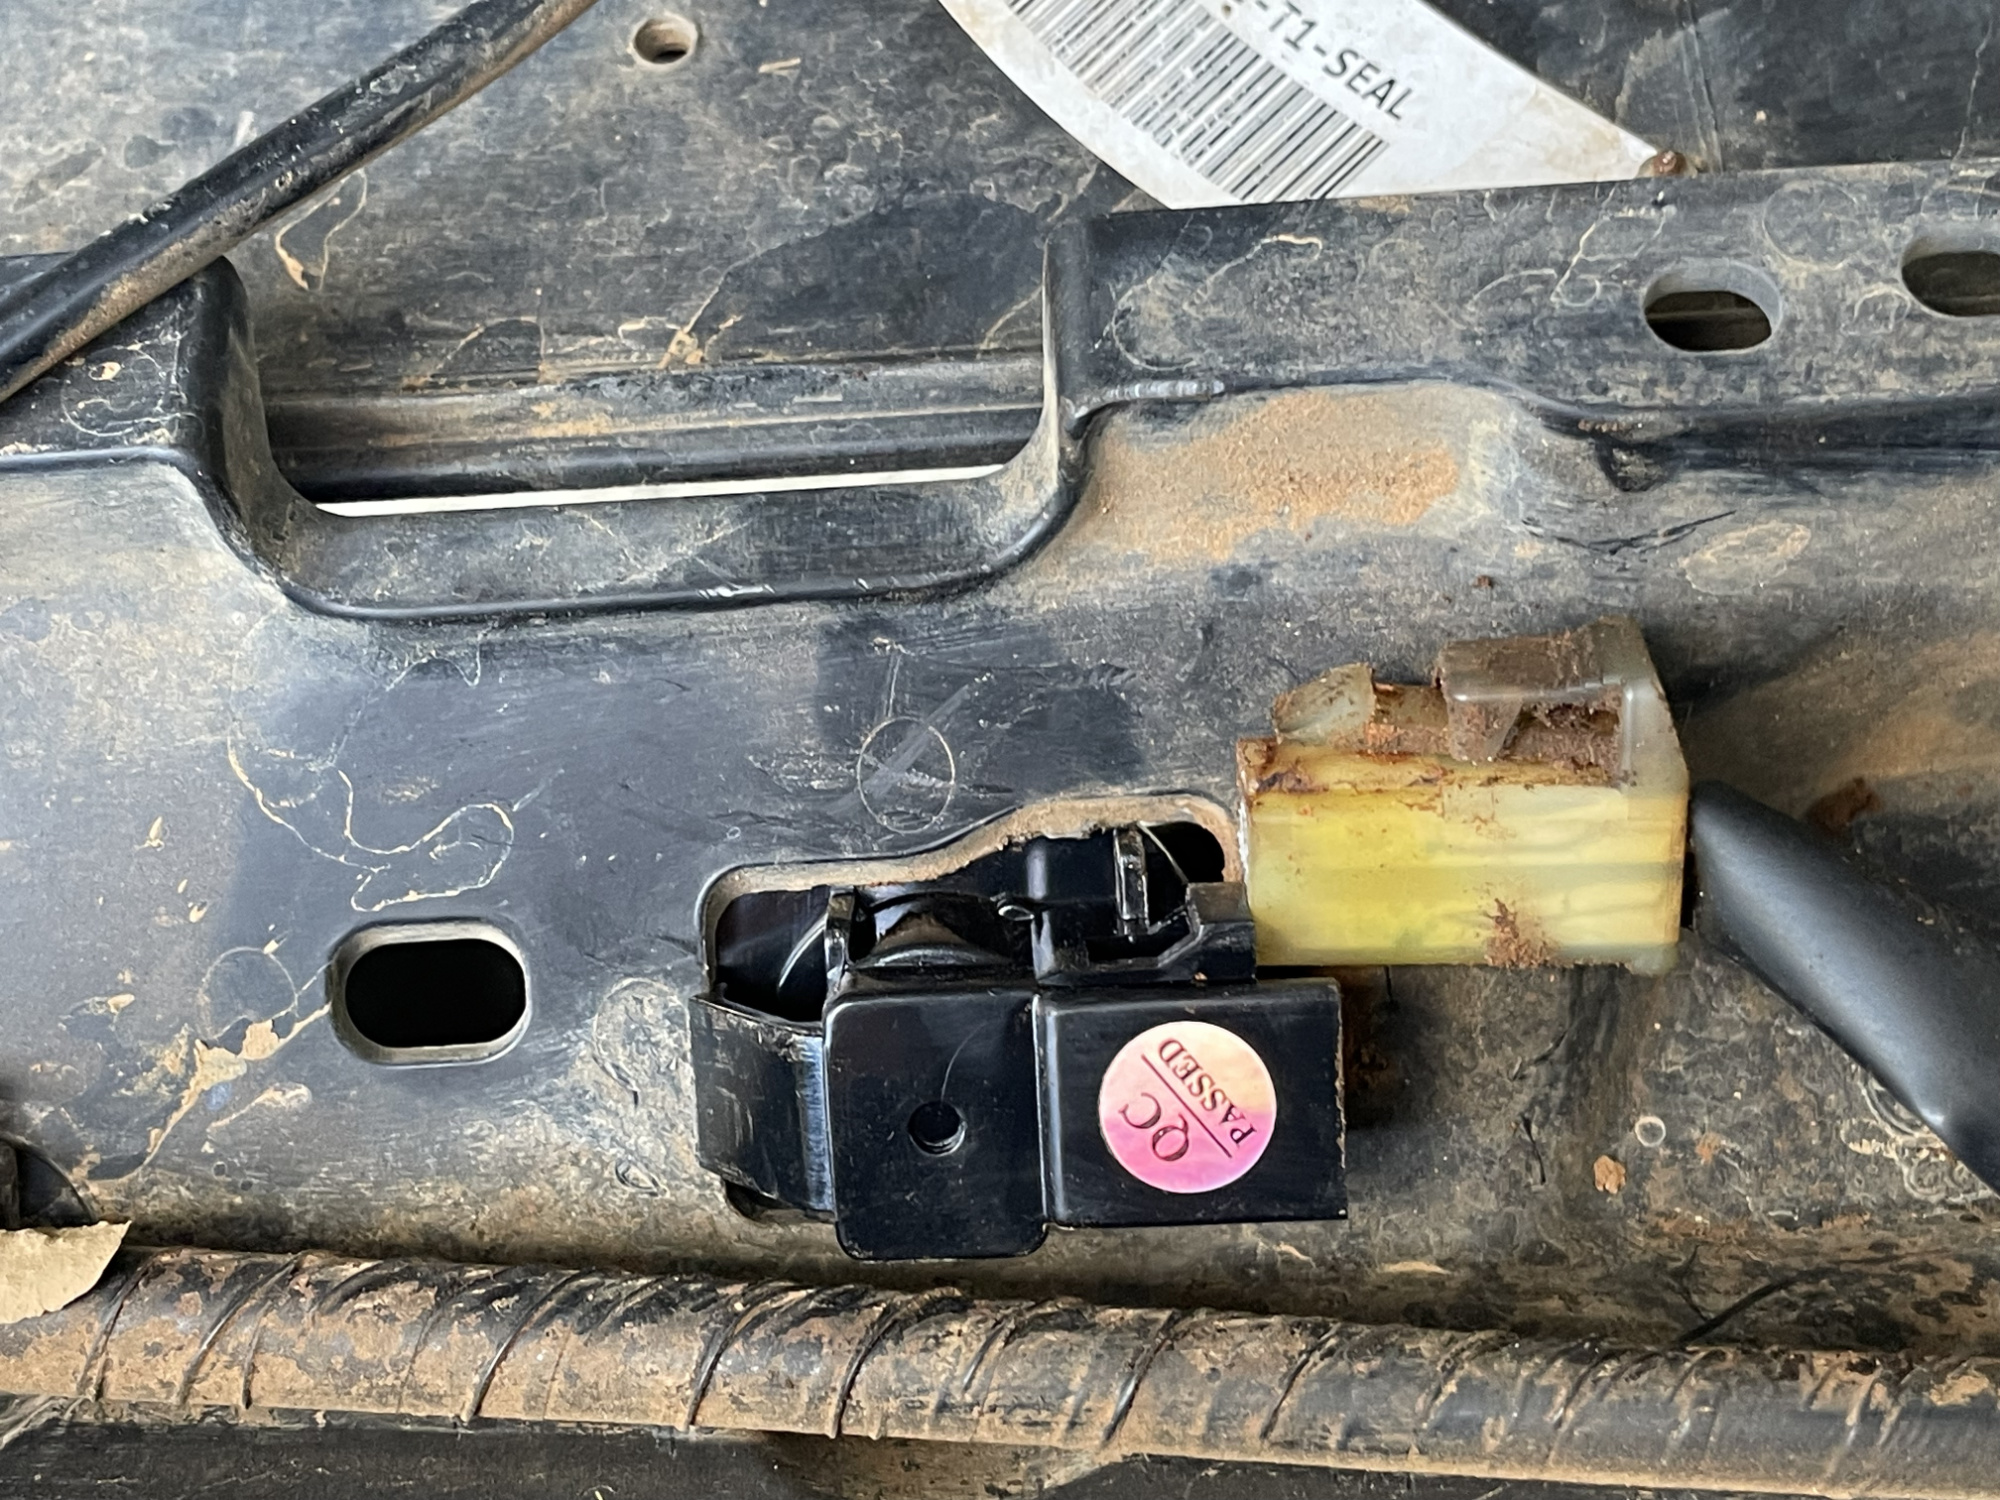
Once the wiring is completely removed from the connector then you need to release the numberplate light from the bumper by pushing on the retaining clip.
There’s no real good way to photograph it but you have to do a bit of wriggling and twisting in all 3 dimensions to get the light out of the bumper. It isn’t hard just requires a lot of pivoting and a bit of playing around to get it fully out.
The new one goes in pretty easily though, if anything easier than you’d think based on the weirdness needed to get the old one out.
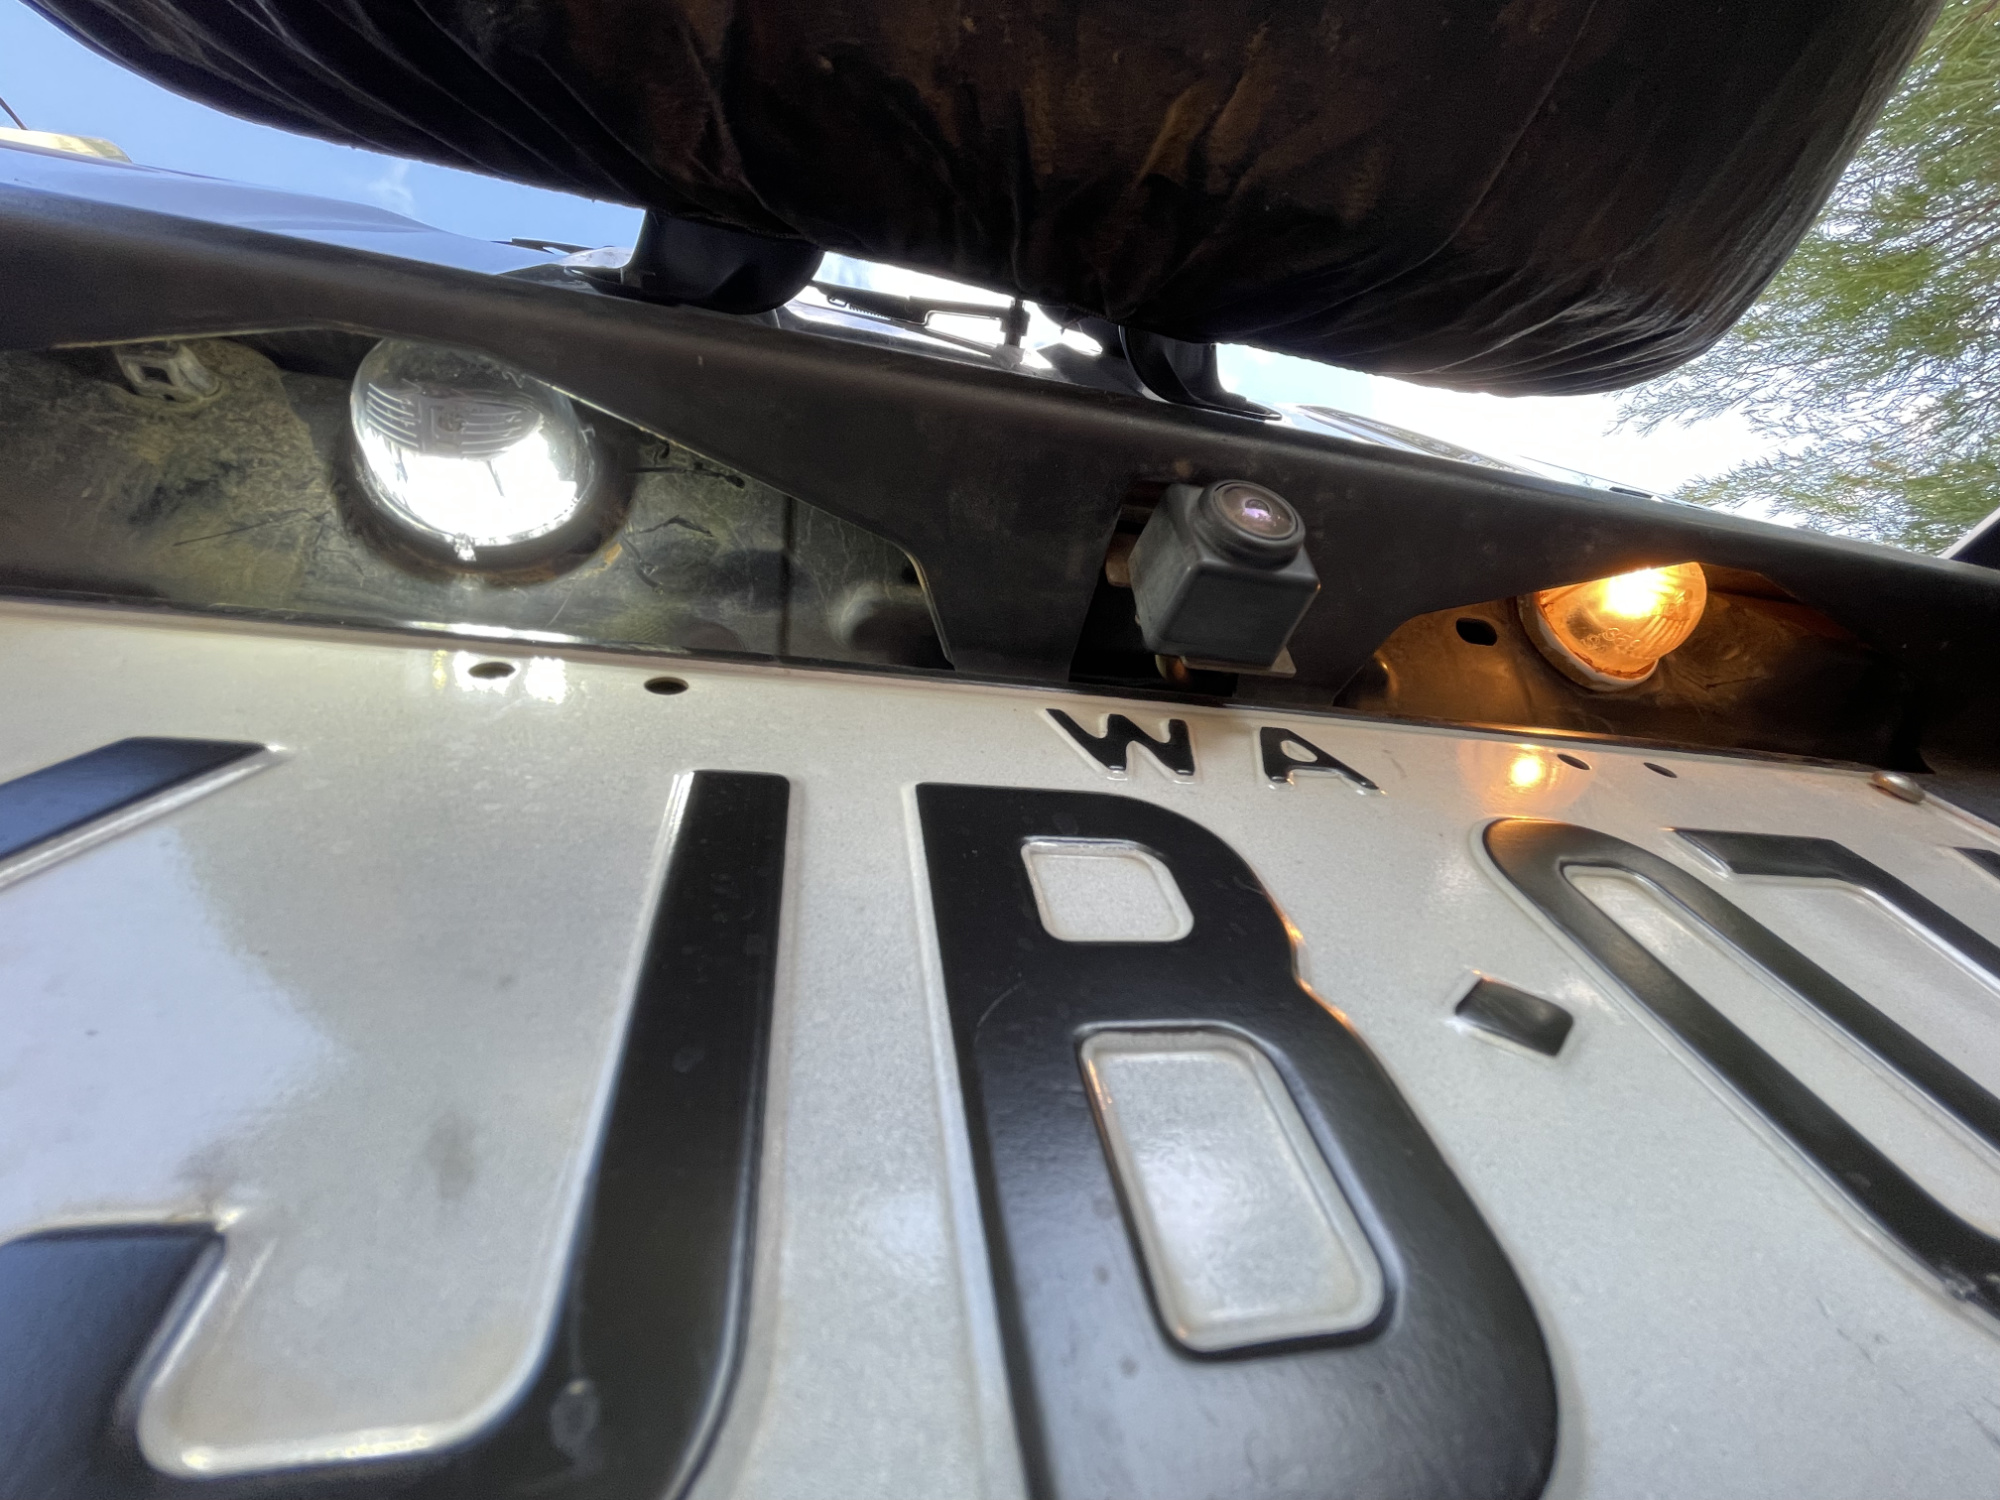
Hook it up and check it; this is a comparison looking up from beneath the numberplate to show you the colour difference between these LEDs and the stock incandescent globe.
Third (upper) brake light
I can’t exactly put my finger on it, but something slightly irritated me about the red upper brake light on the top of the boot; for this reason I ordered a clear replacement out of JimnyStyle in the UK. One good advantage, like many of their upgraded lights, is this is also E-marked and therefore road legal.
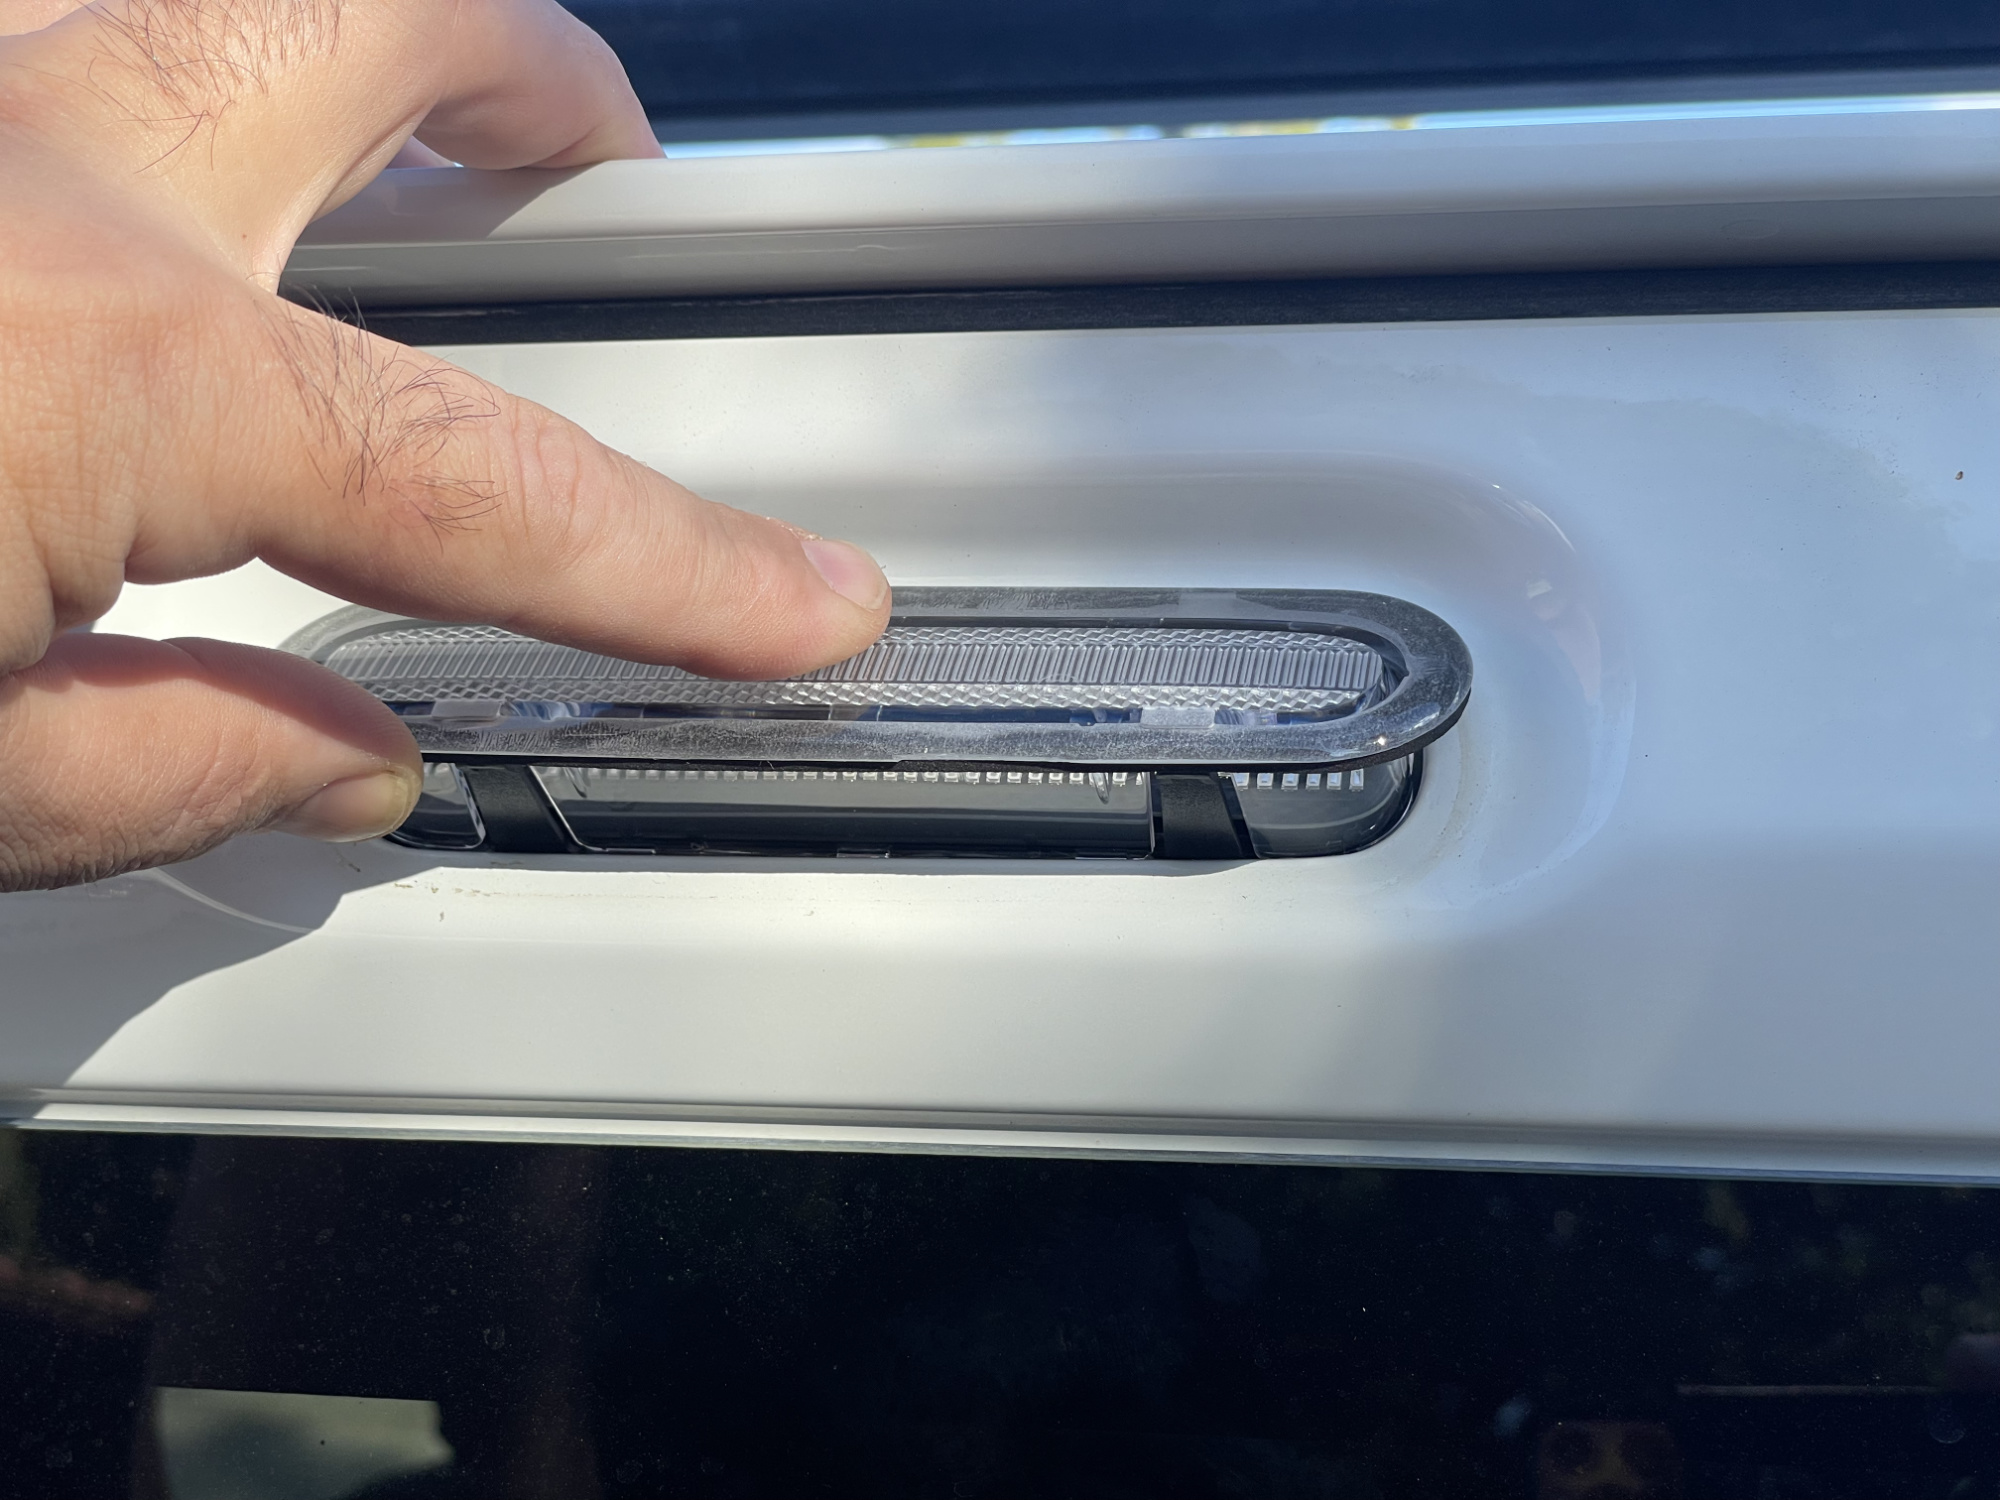
There are a couple of release tabs: two at the top and two at the bottom, but tackling the bottom ones releases the light enough that the top ones aren’t a problem.
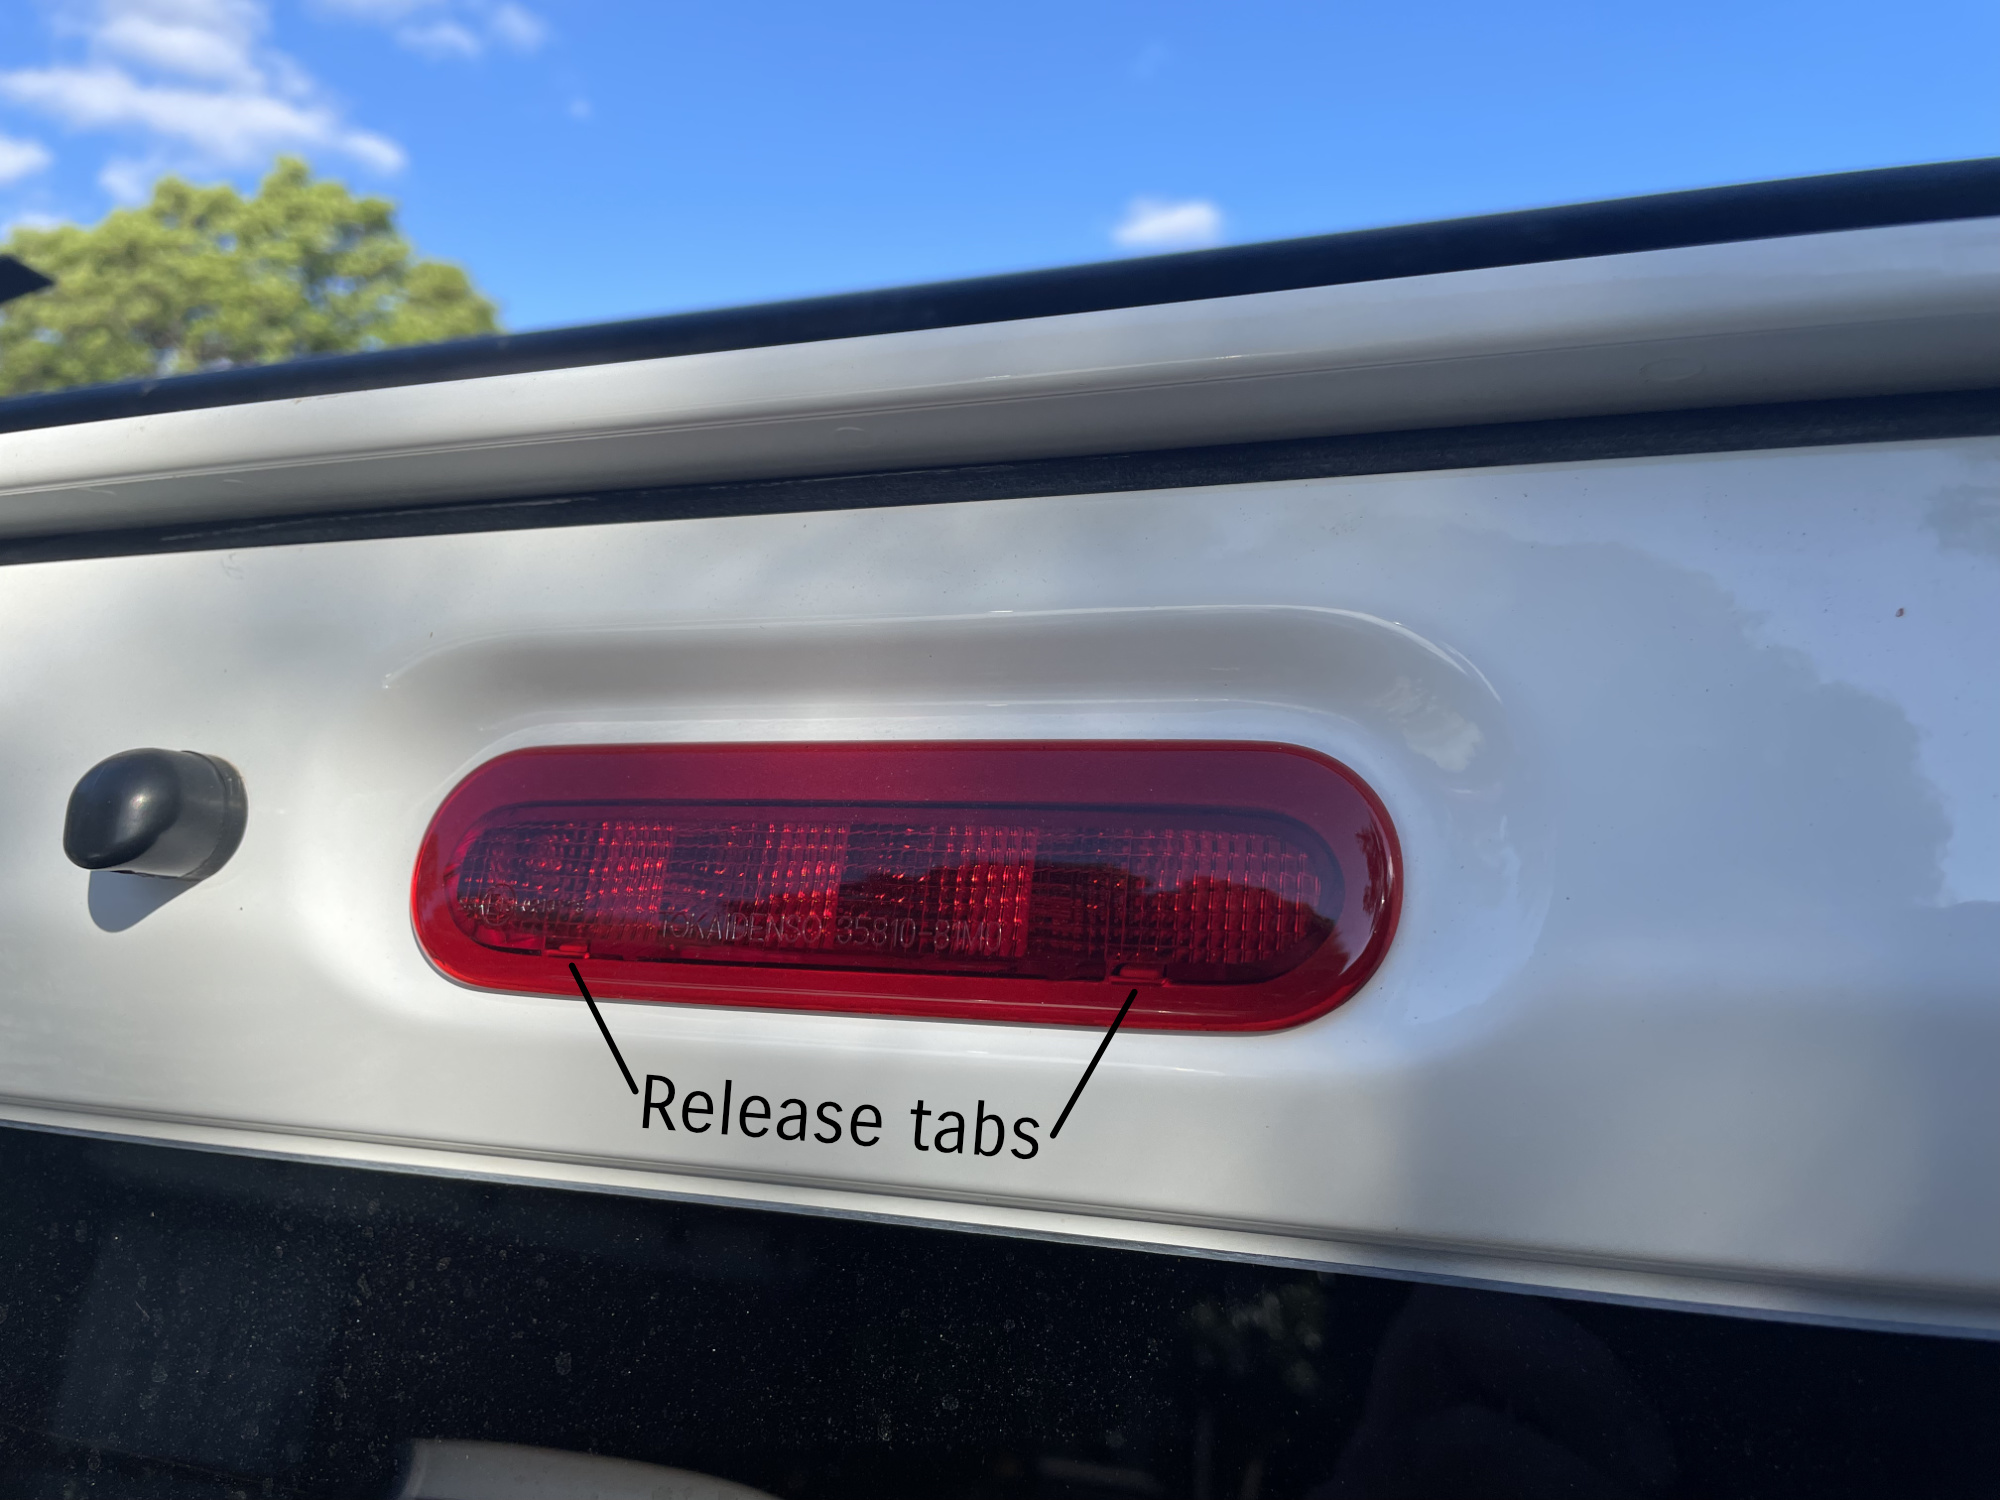
Use a trim removal tool to get underneath the weather sealing gasket and press on the tabs to allow them to release and lift up the bottom out of the light out of the bodywork.
Once you release both bottom ones you’ll be able to get the bottom of the light out from the car and then pulling it down and a bit out will release the top tabs. Undo the wiring connector and you’ve removed the old one.
Connect the new unit’s wiring, and put it in by putting the top of the light in first to engage its clips.
Press the bottom of the light in until you hear it click into place and you’re done. Note that a cheap one that doesn’t fit very well could cause issues with water ingress to the boot so bear that in mind when purchasing a replacement.

Done, and realistically (along with the side indicator repeaters) this is one of the fastest mods you can do to your car to change its look.