
Ultrasonic carburettor cleaning / Honda C90 Supercub

My newly acquired Honda C90 Supercub project bike/barn find thingo needed a bit of care and attention to get it running again…. here’s how I did it. This is a good guide on how to do an ultrasonic clean on carbs, too.
The basic steps for an ultrasonic clean are:
1. Tear down carburettor(s)
2. Separate o-rings/plastic/rubber bits from various parts
3. Select your cleaning fluid
4. Ultrasonic bath time!
5. Reassemble
Simple really.
1. Tearing down the carburettor/2. Separating rubber bits
First up, you gotta tear down the carb. These carbs are so simple there’s not too much rubber/plastic bits to separate away so no huge drama. With more complicated carbs, you want to get out all of the rubber etc especially if you’re using an aggressive solvent. If nothing else, the ultrasonic cleaner will vibrate all of the rubber bits out and it’s better to remove them yourself and know what goes where.
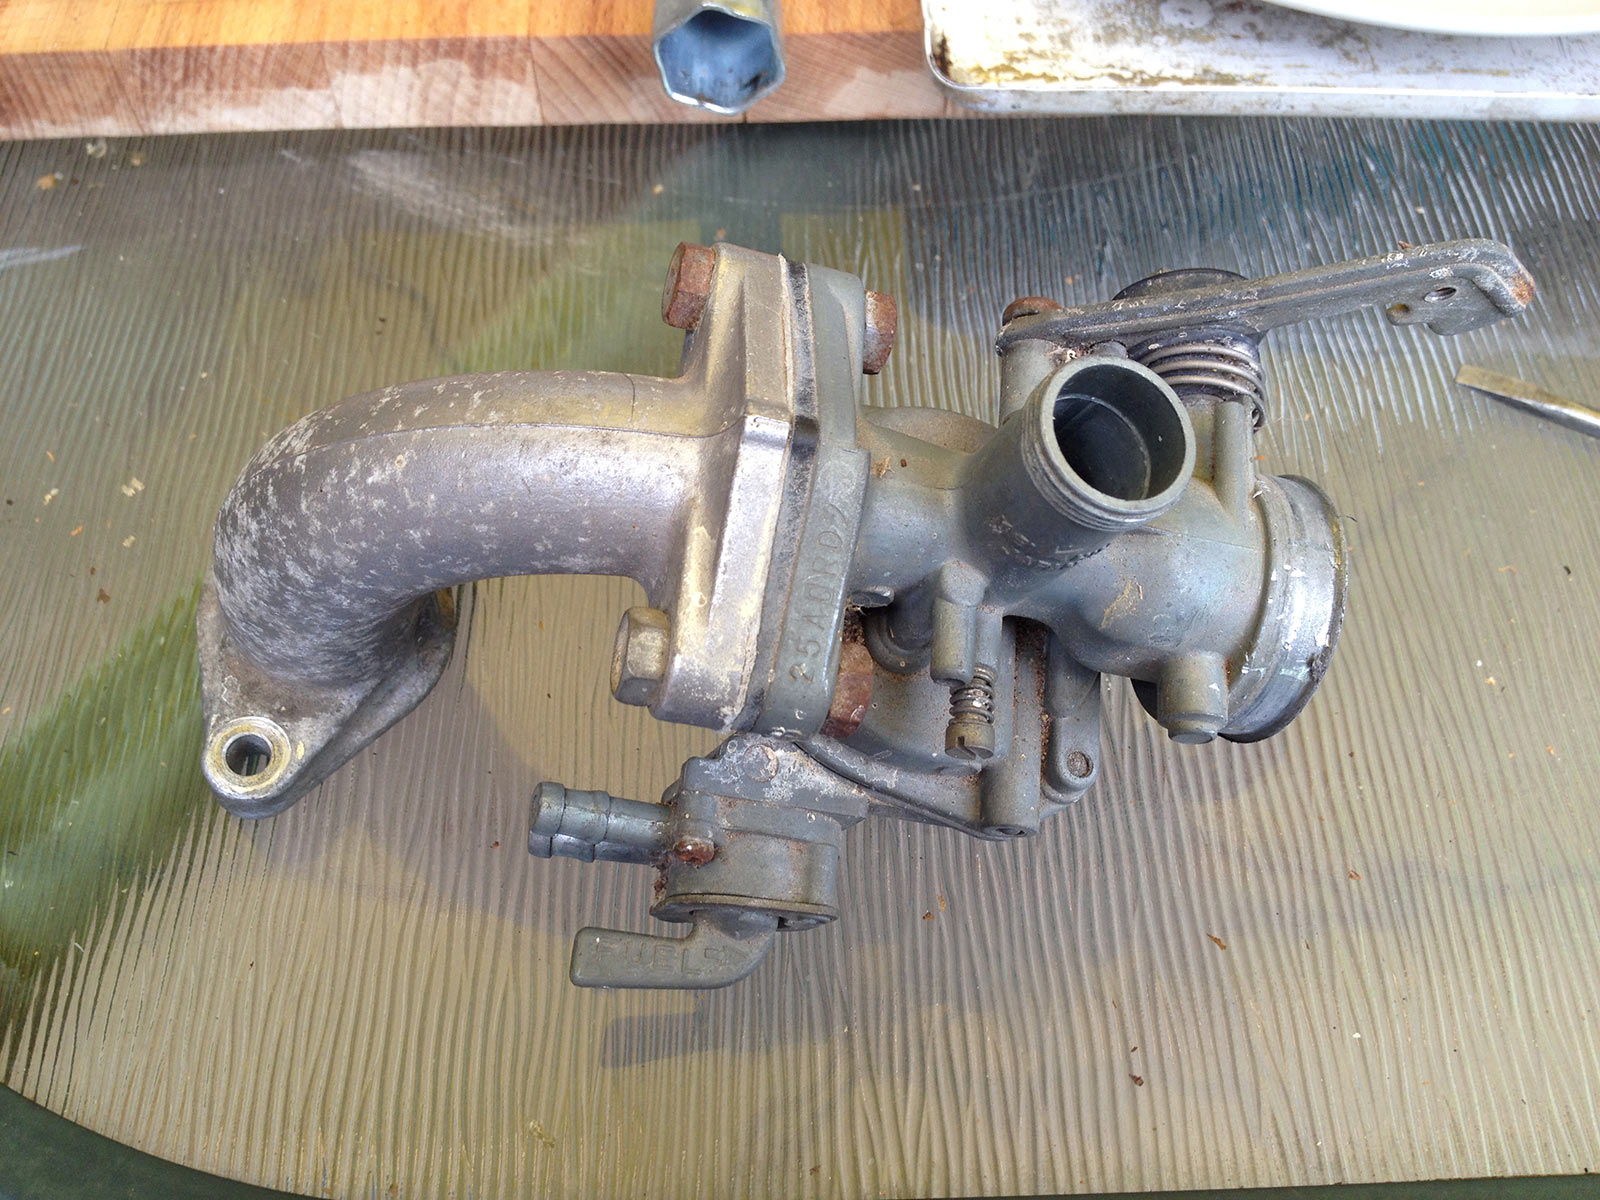
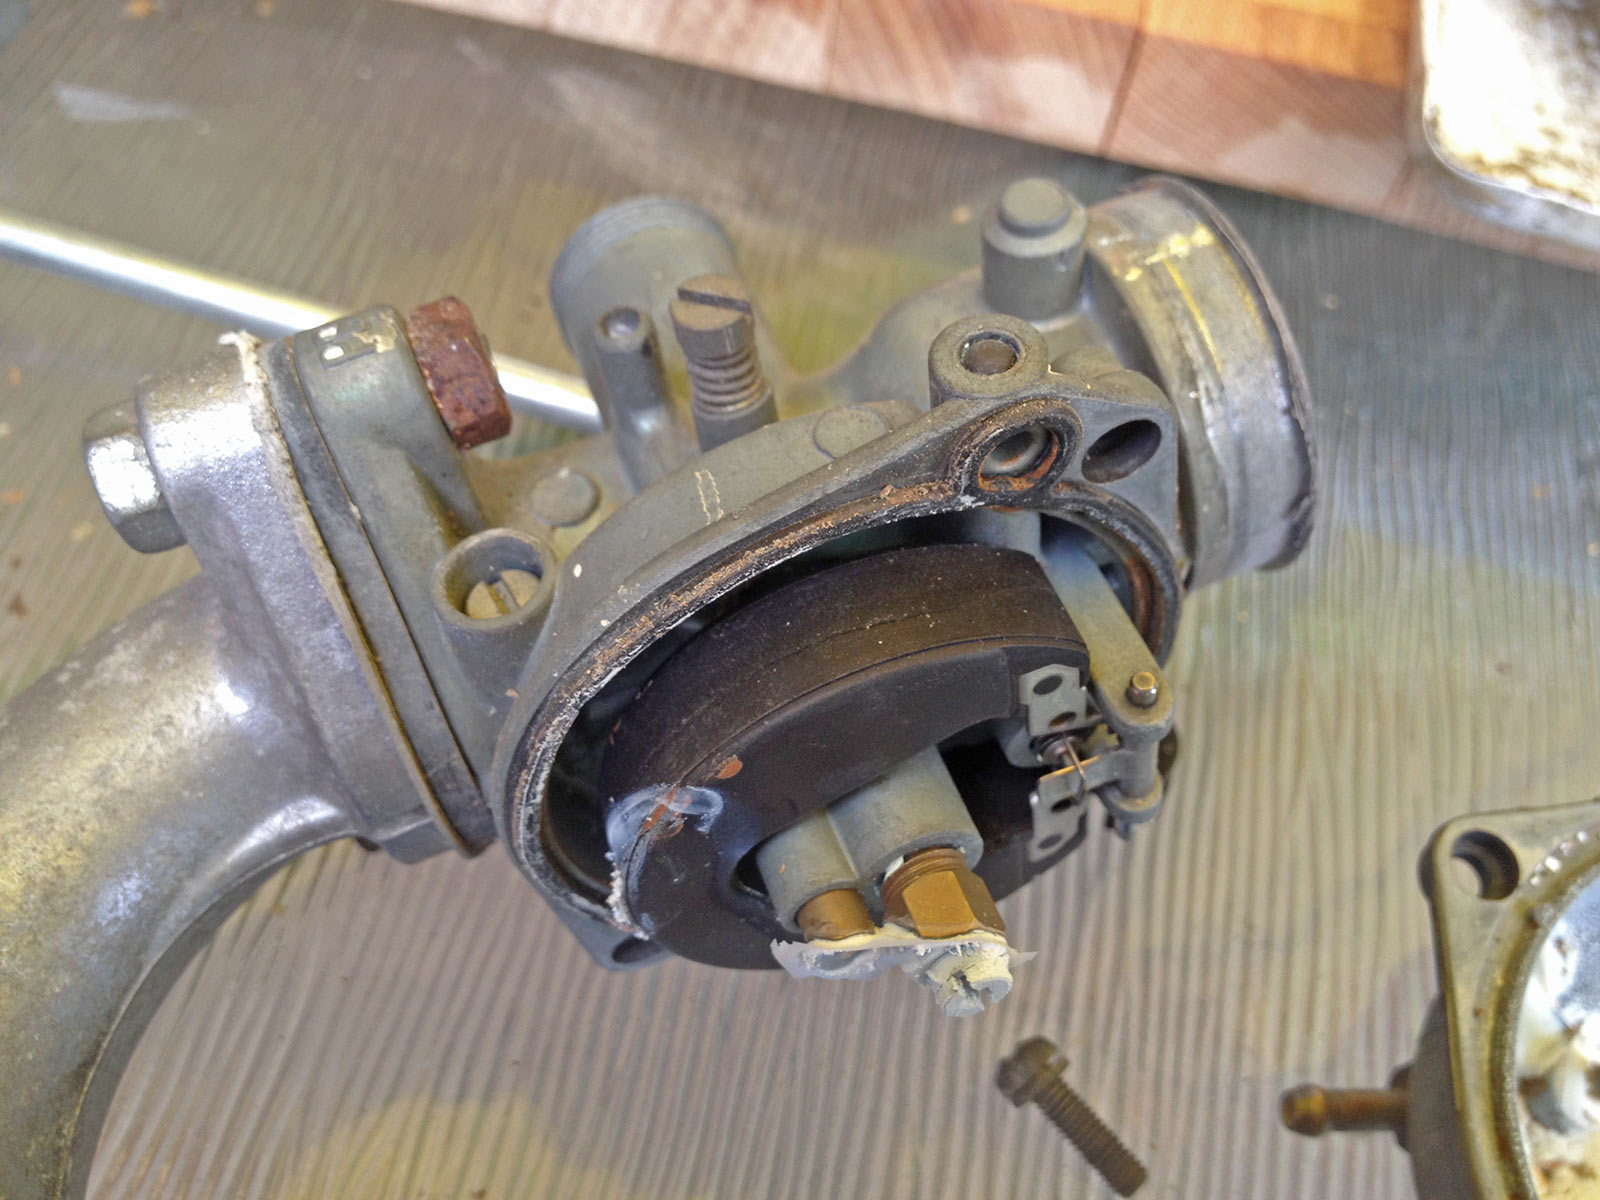
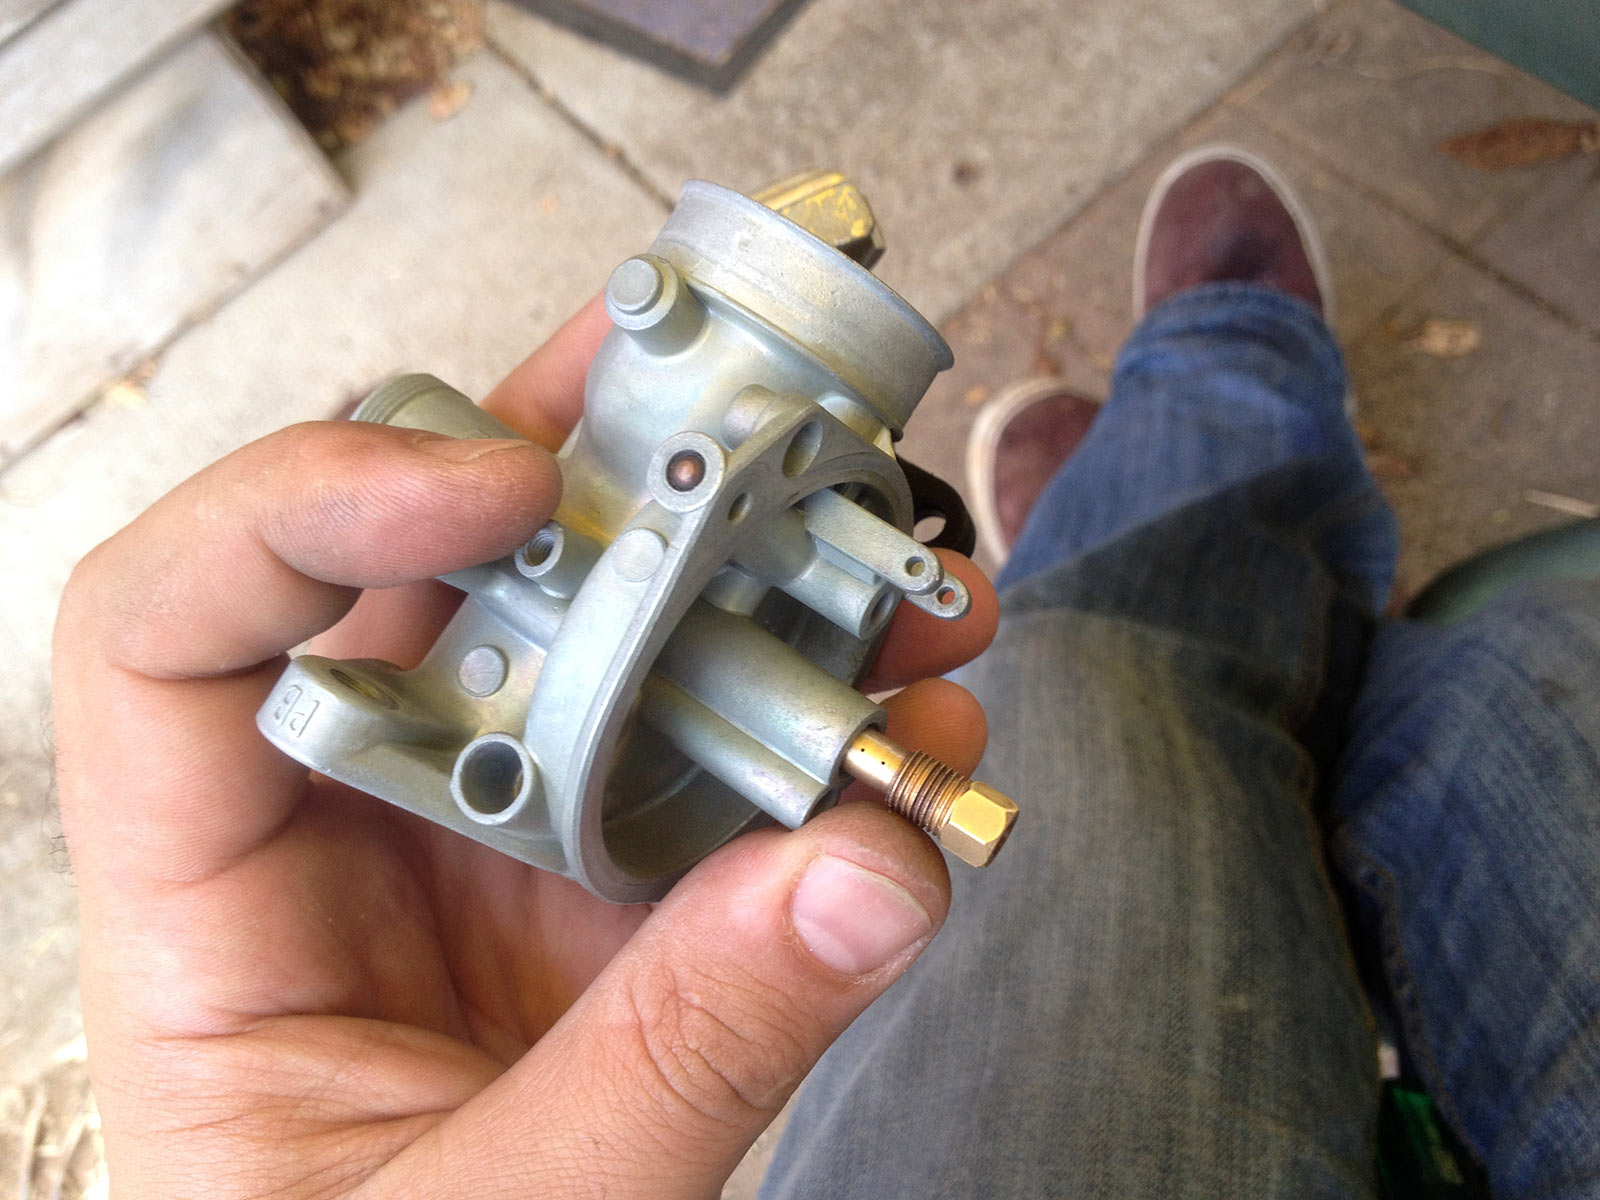
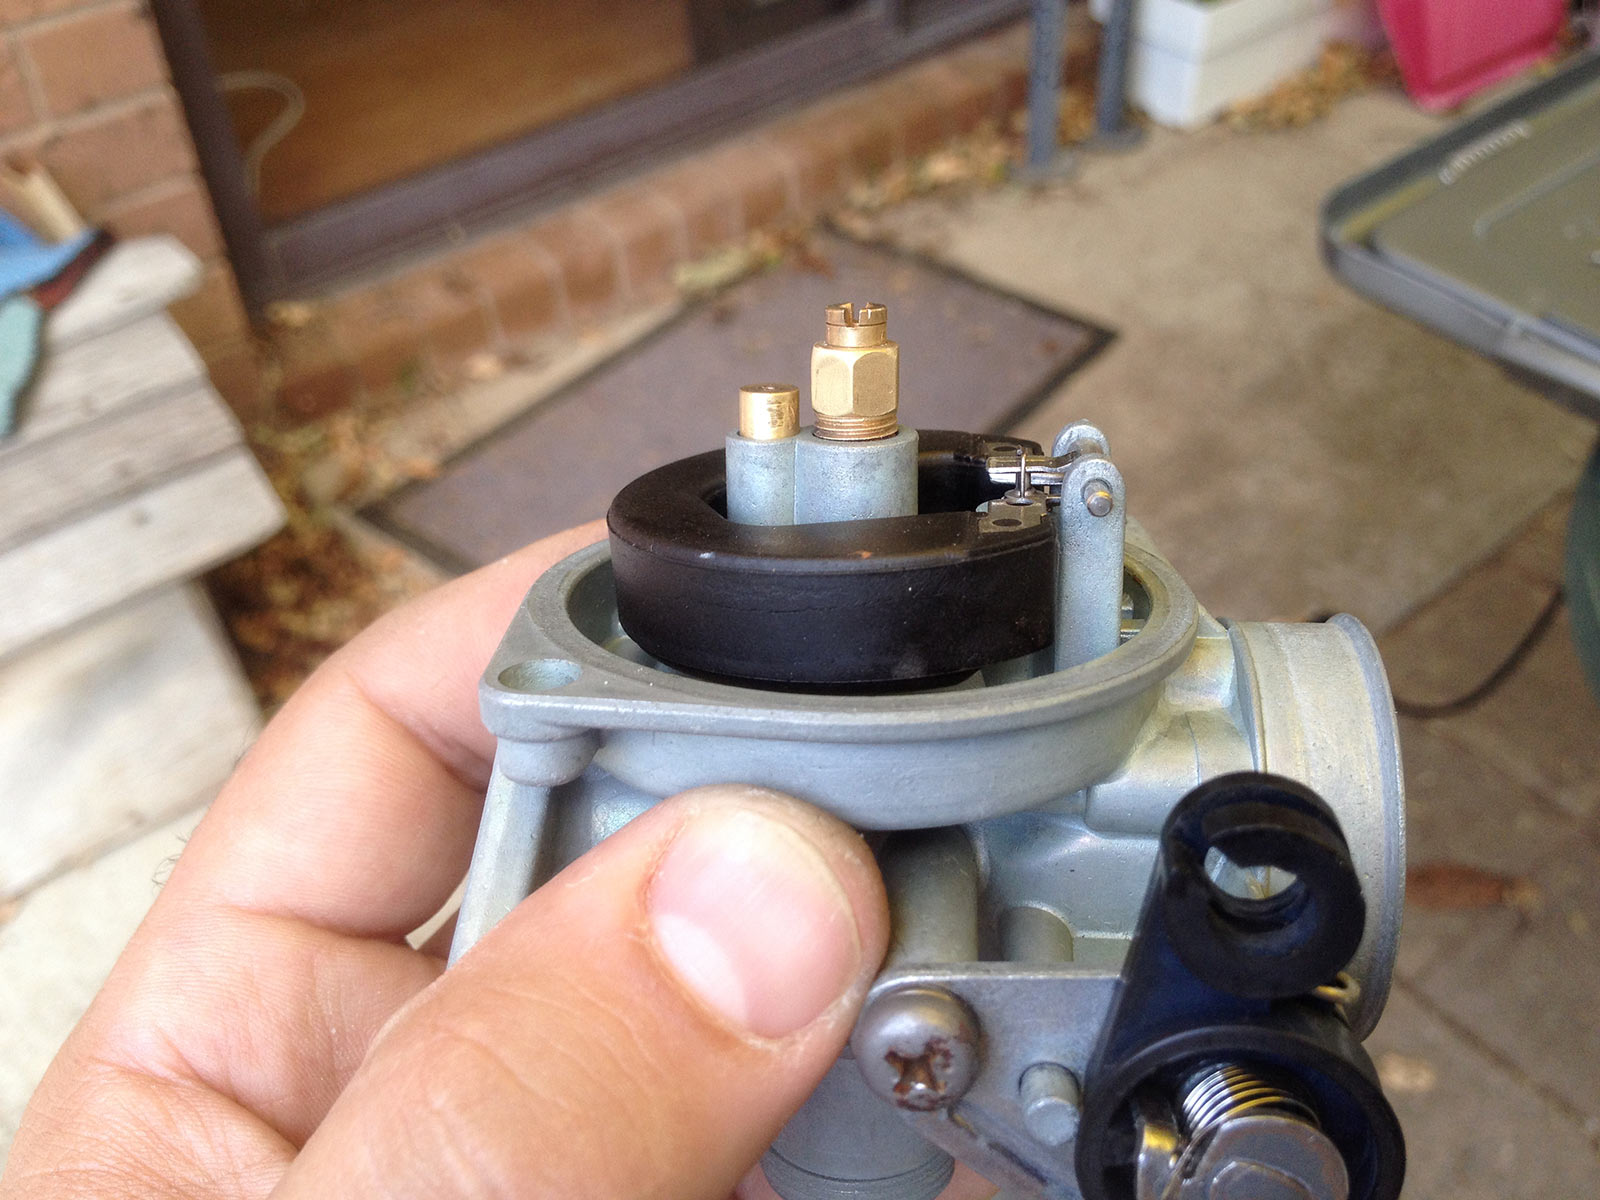
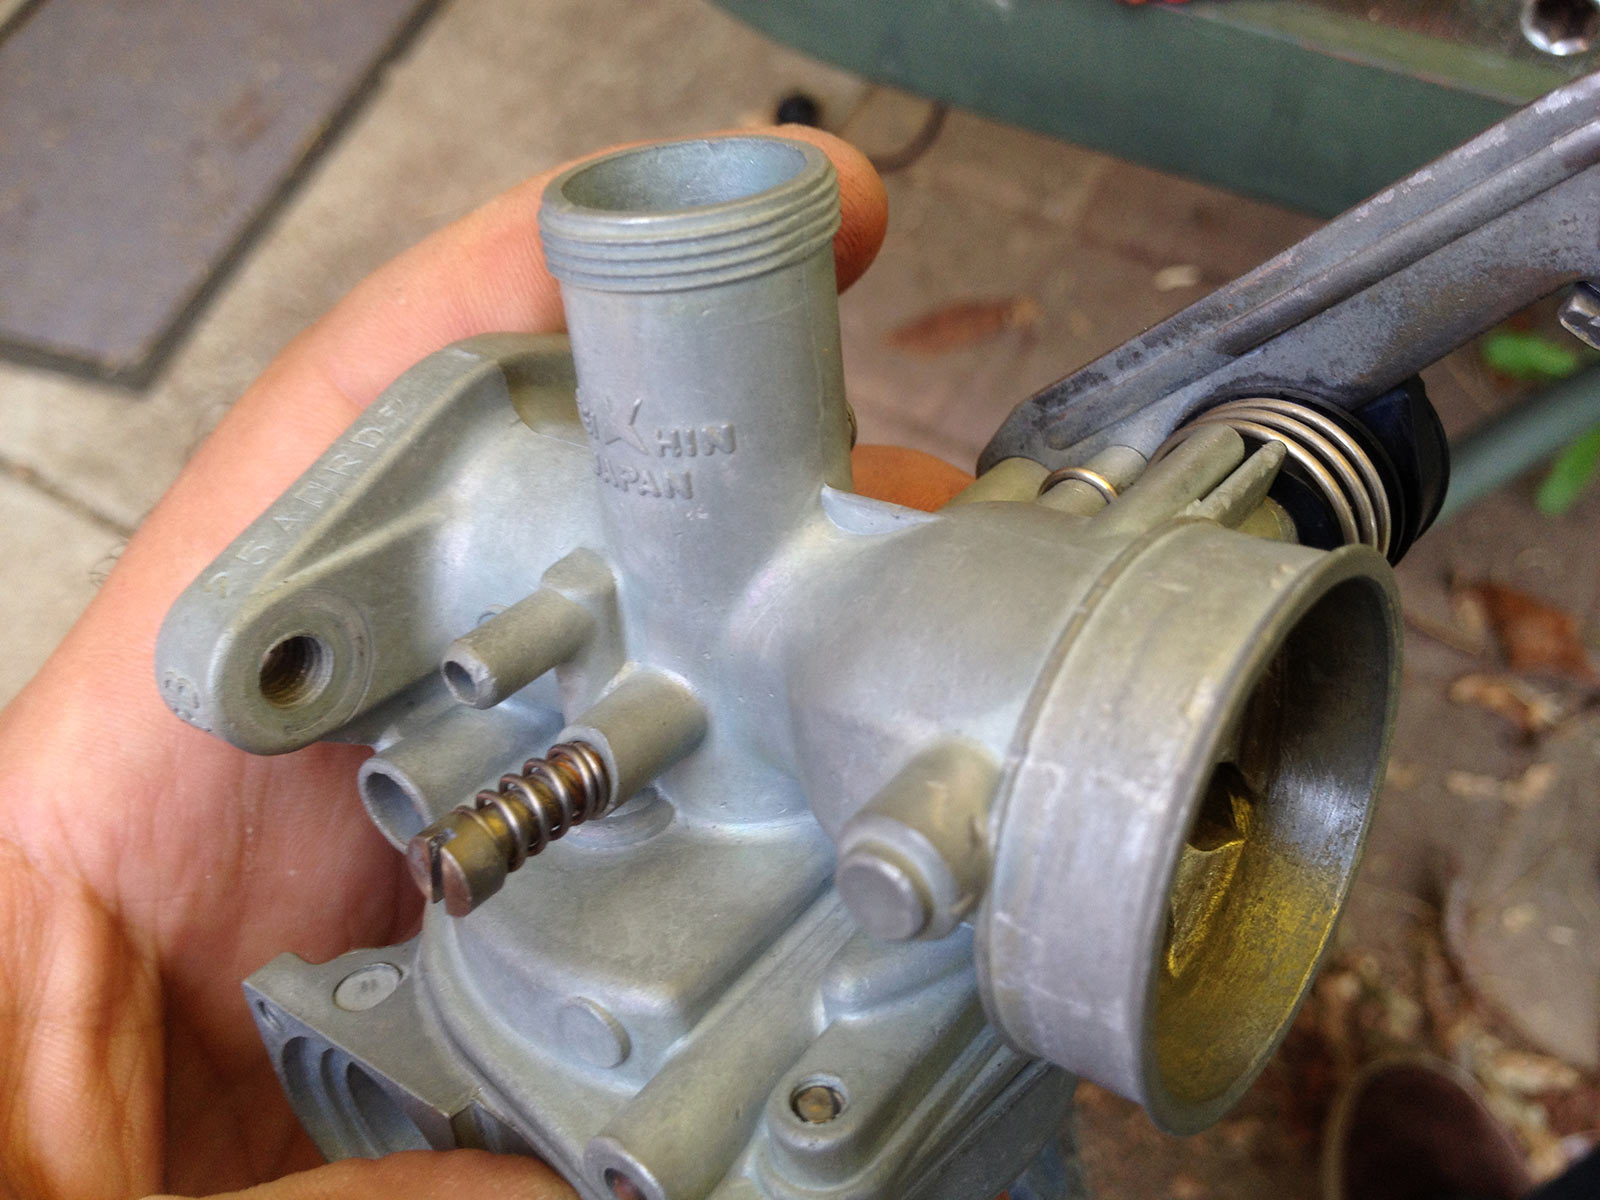
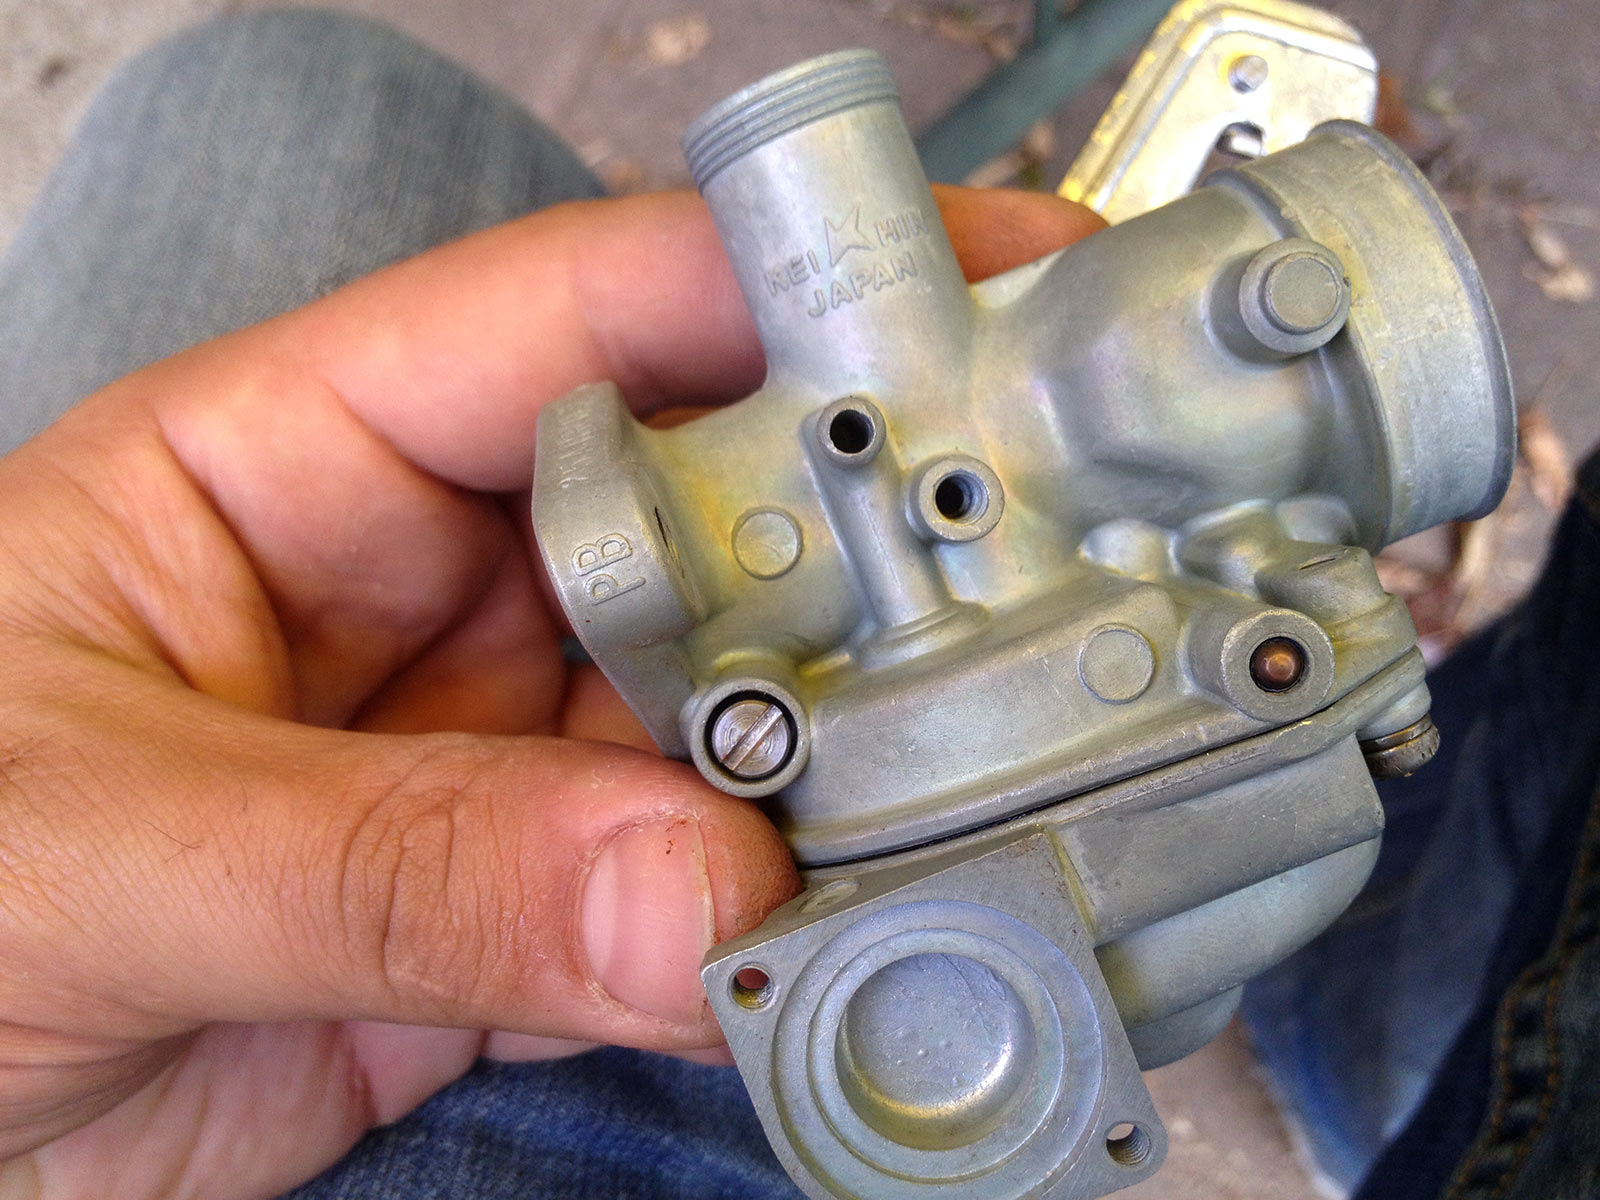
We start with a benign looking but a little grotty Honda C90 carburettor. These are little 19mm carbs (Keihin PW15? I think). Not particularly grunty, they do the job for the little 3 speed 90cc Honda.
This carb is generally a little grotty looking on the outside and completely filthy underneath/inside.
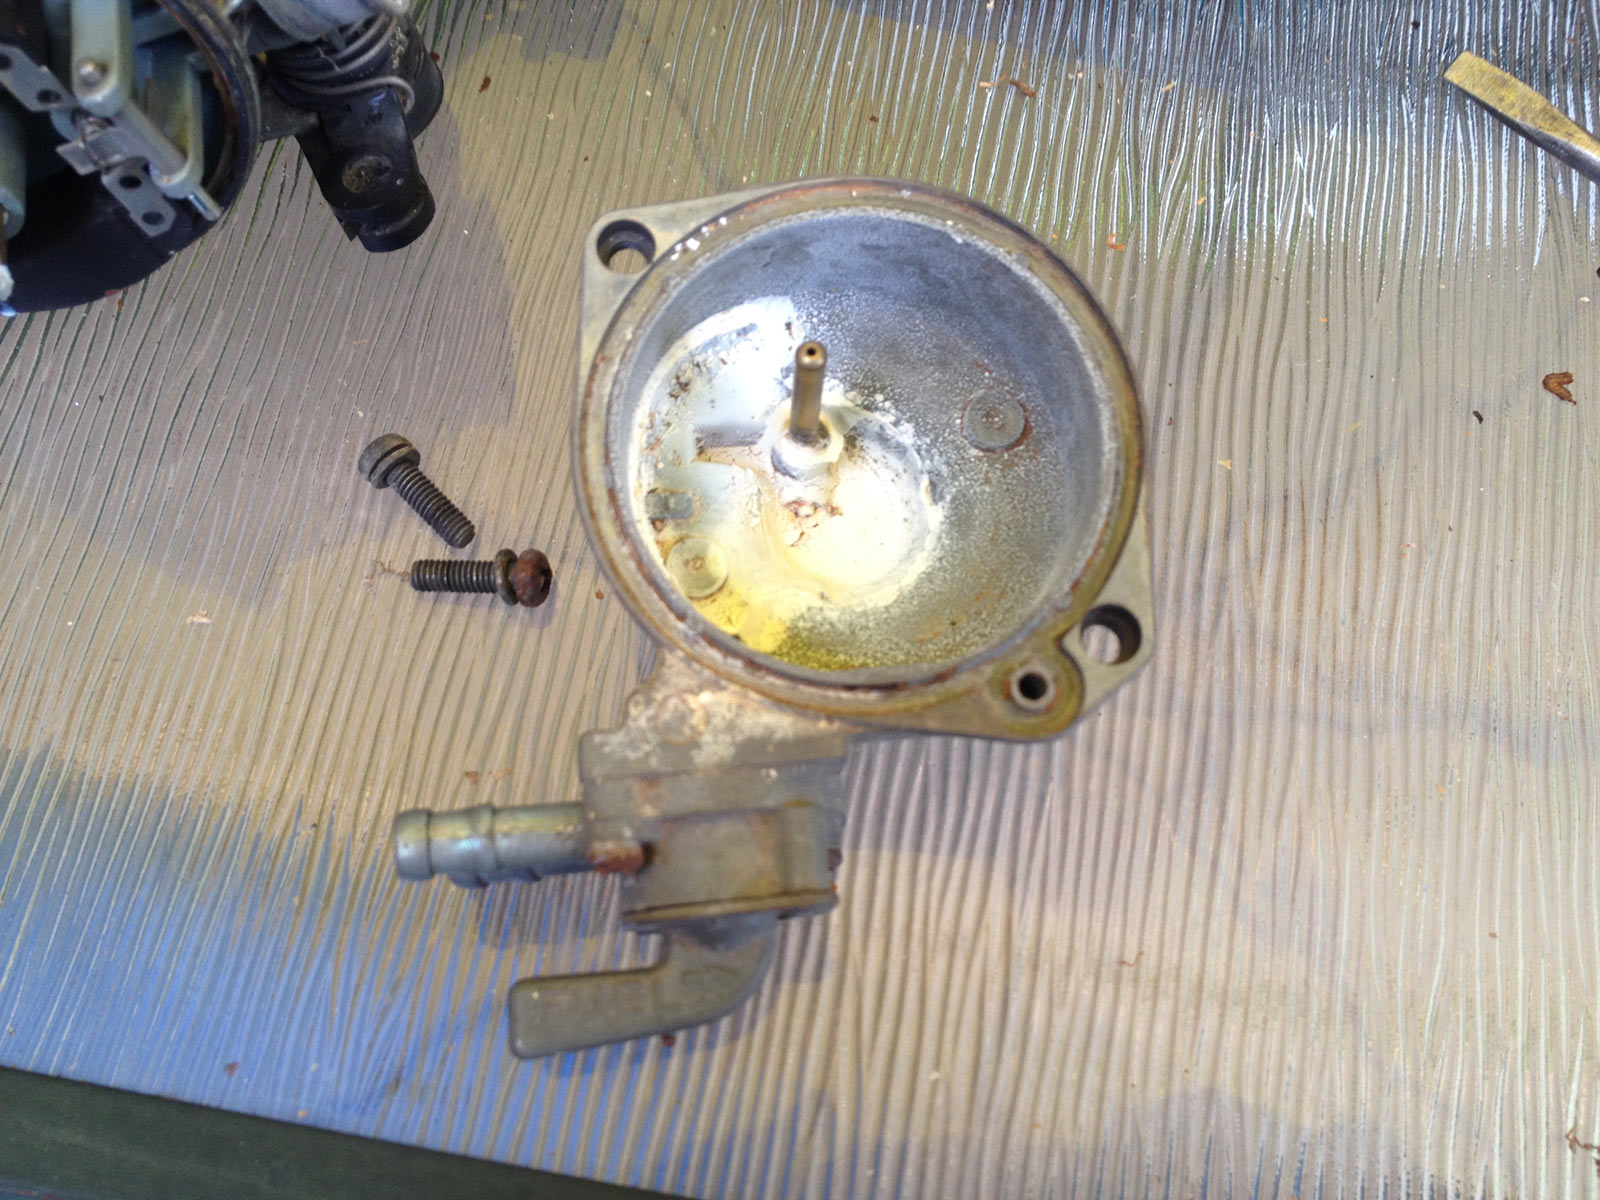
We start by getting inside. This necessitates removal of the float bowl. Two JIS screws here to confound those with only Phillips drivers.
The float bowl is looking very special.
The main jet, emulsion tube, float, and pilot jet more special indeed.
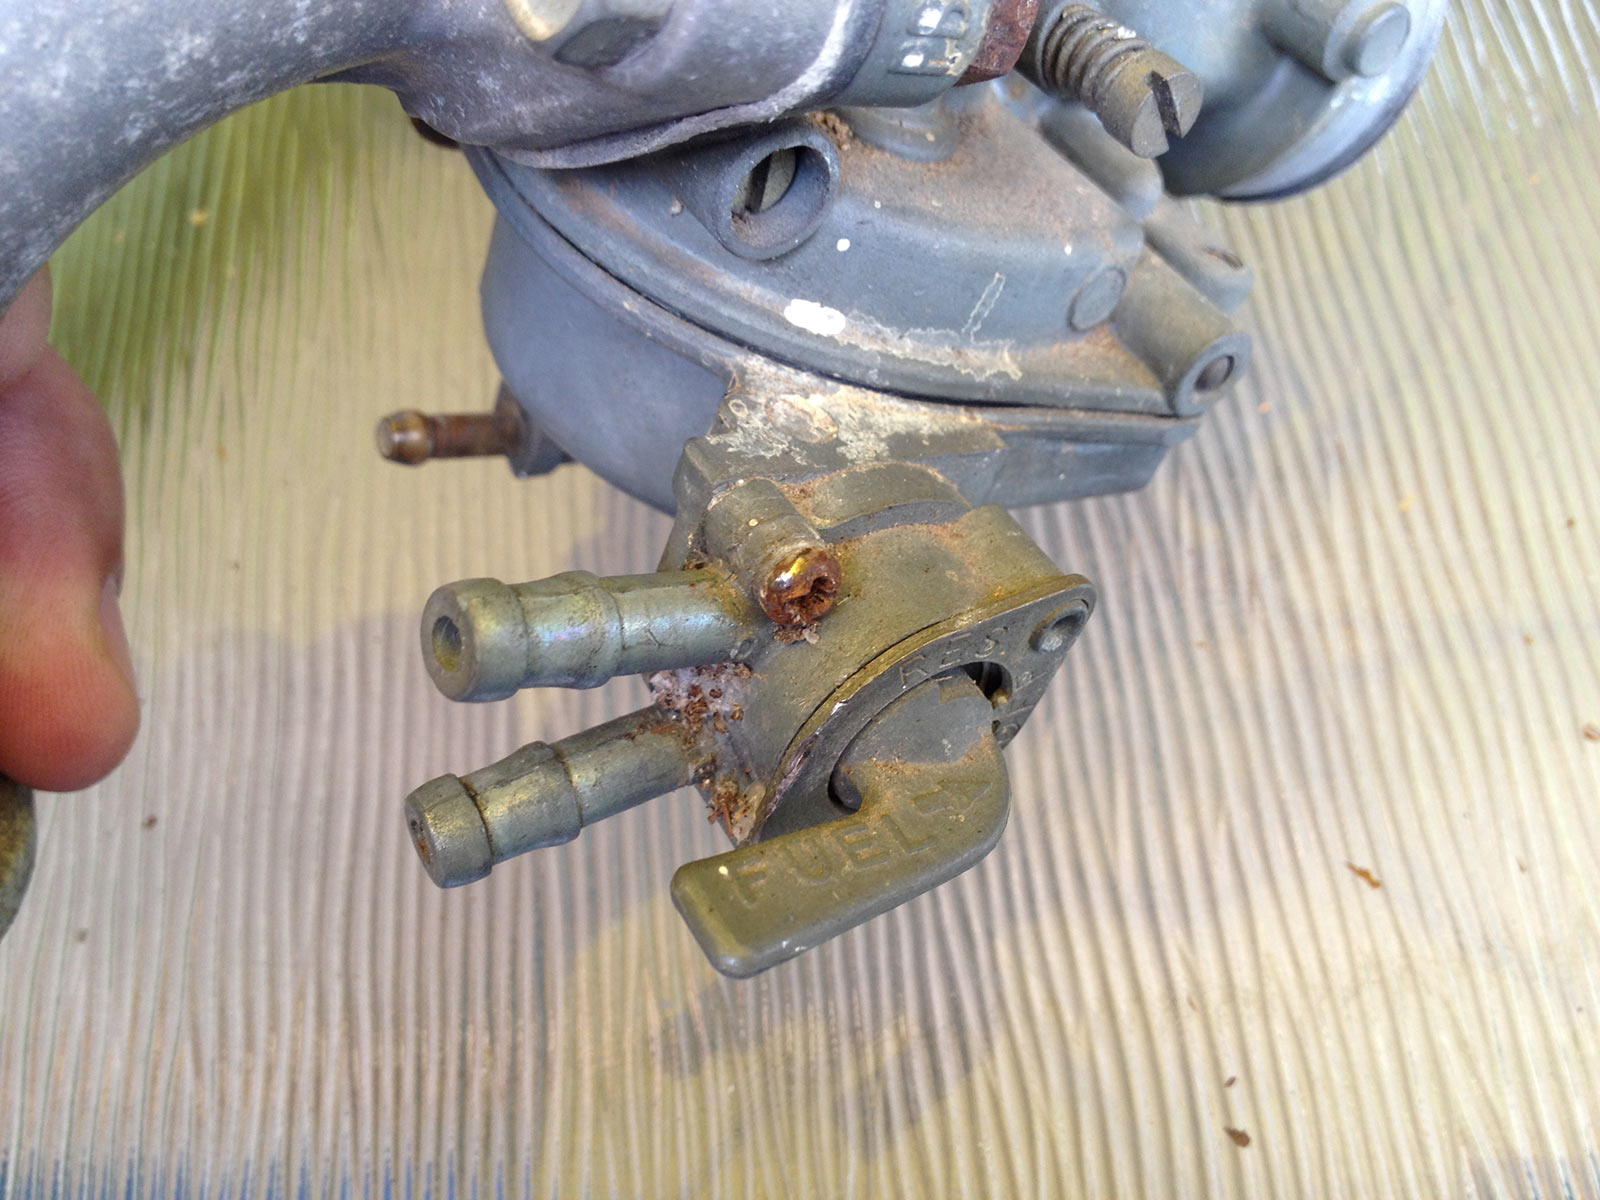
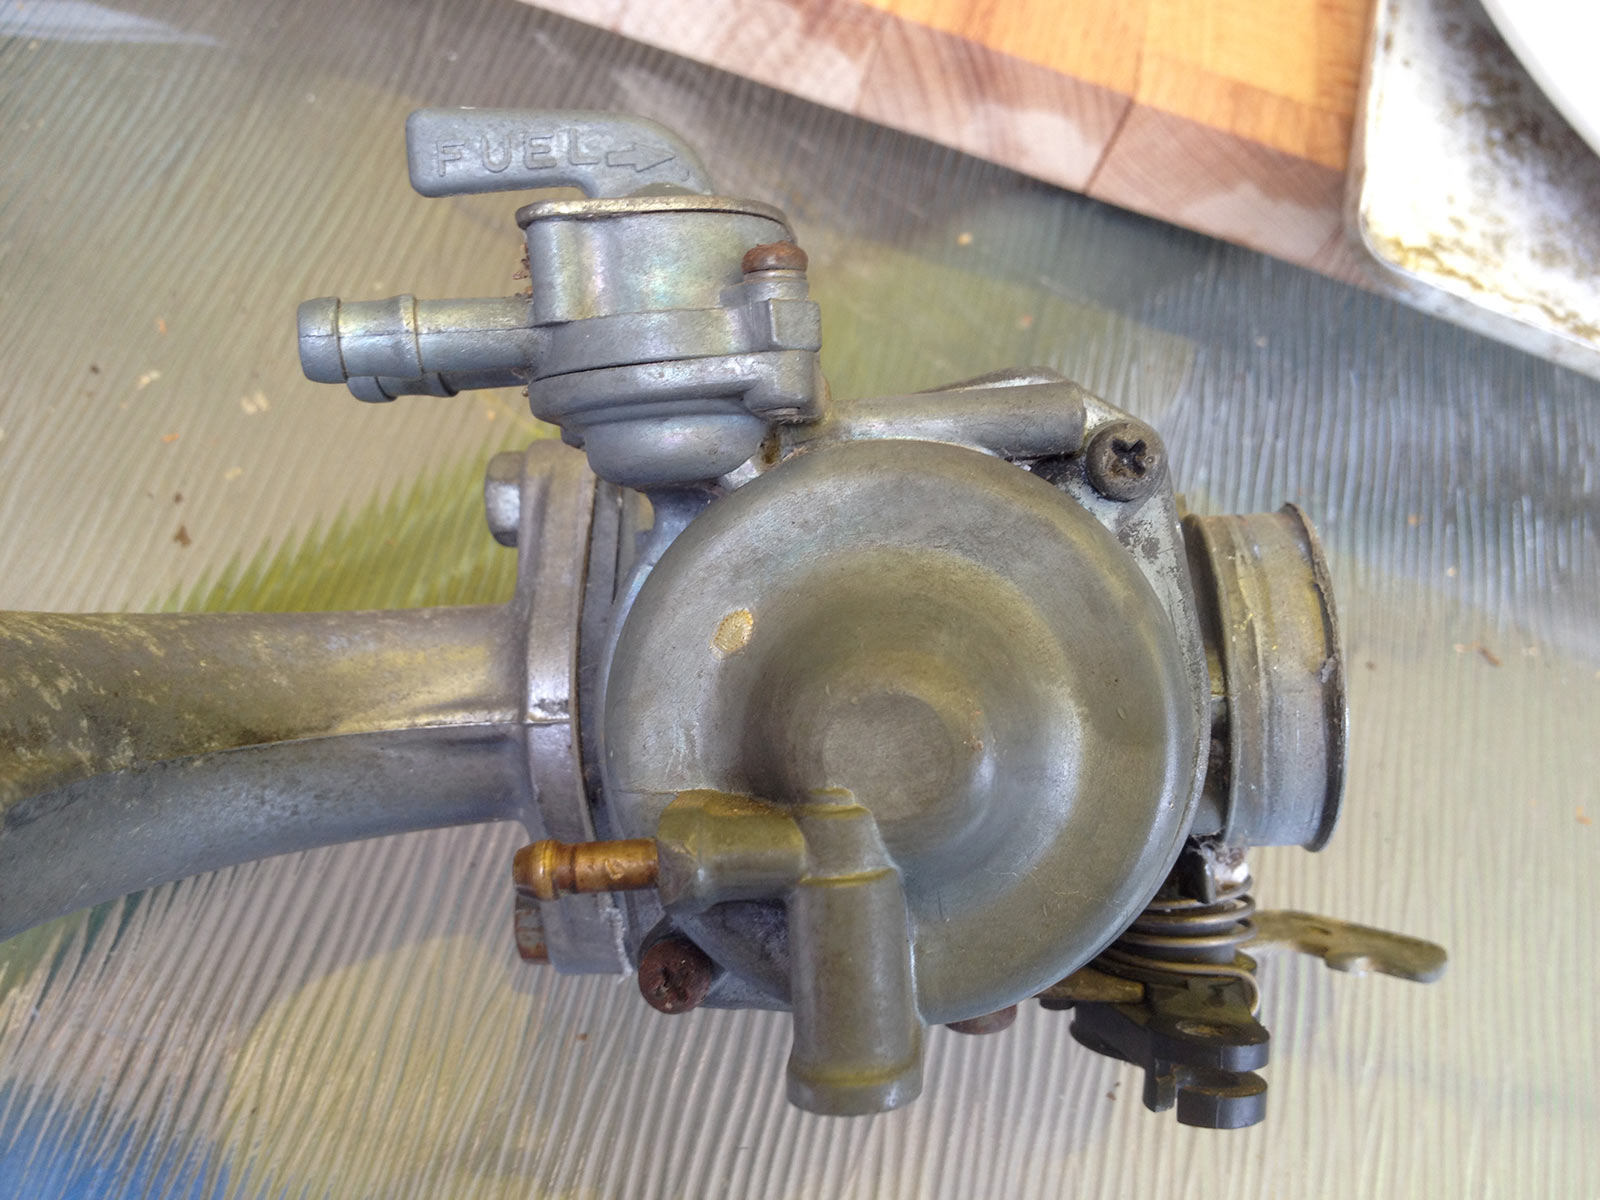
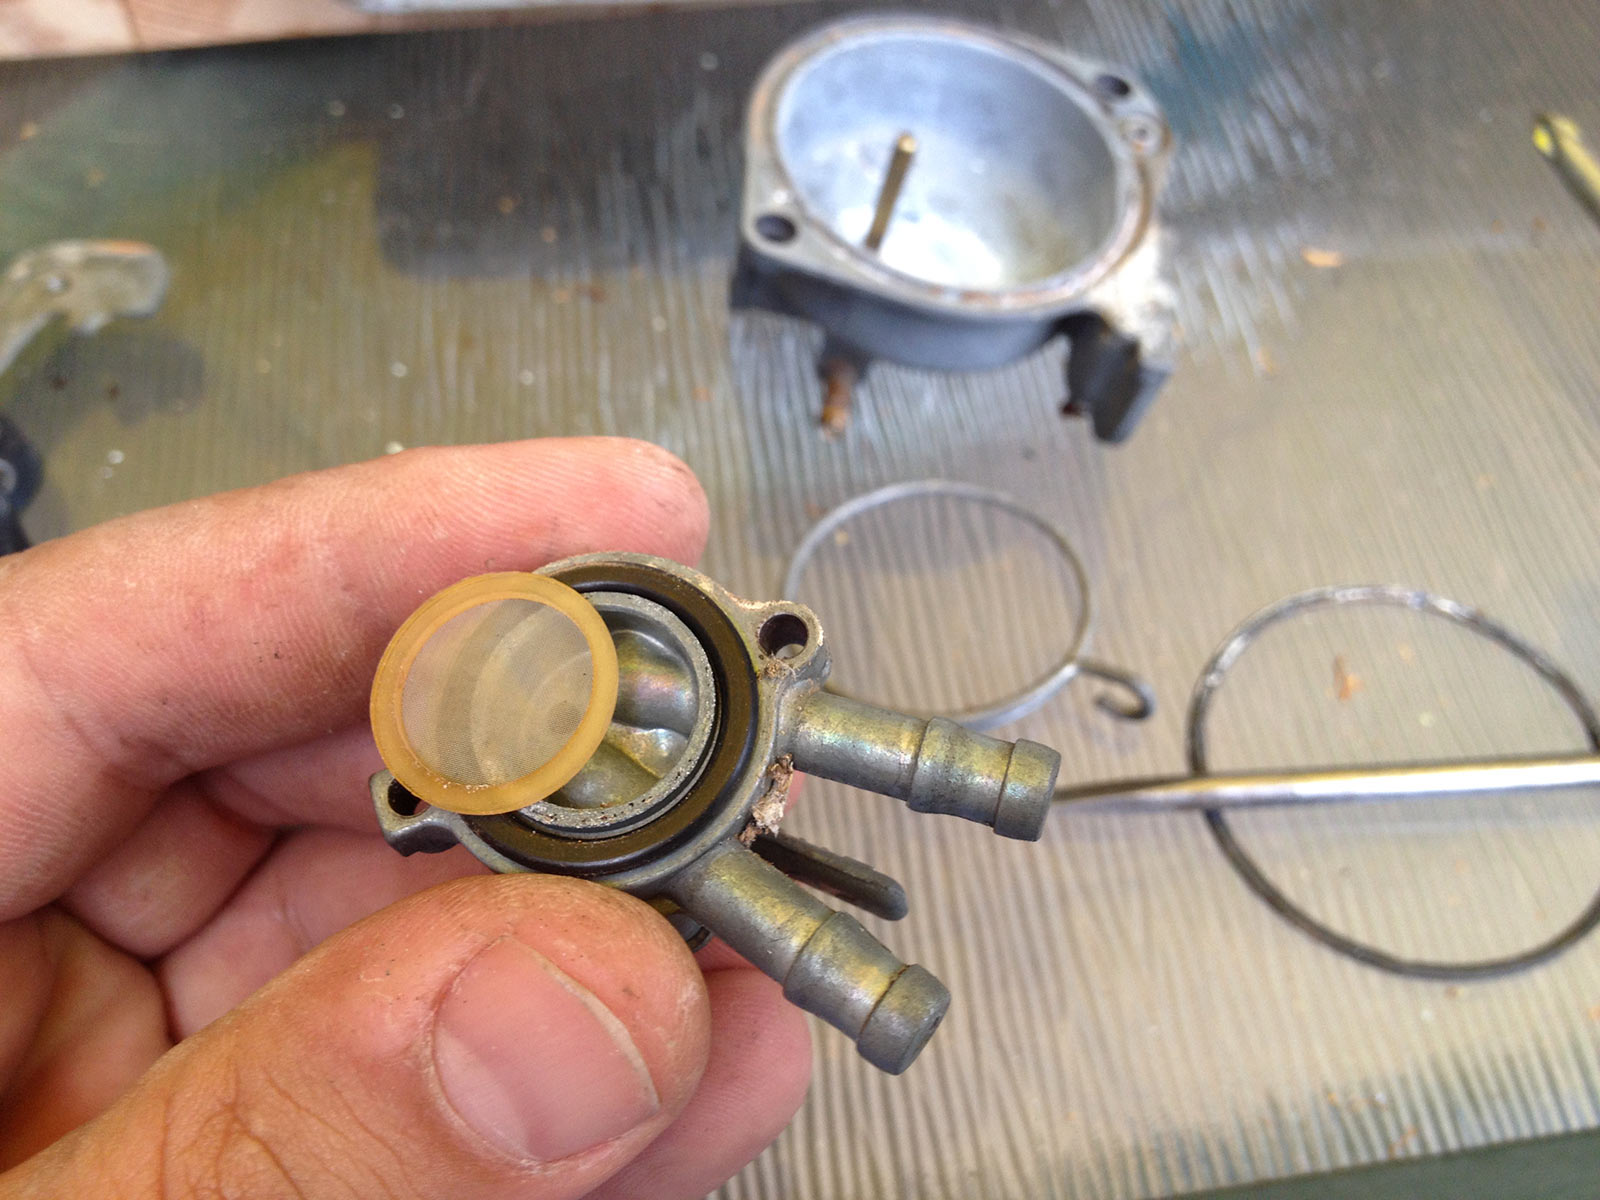
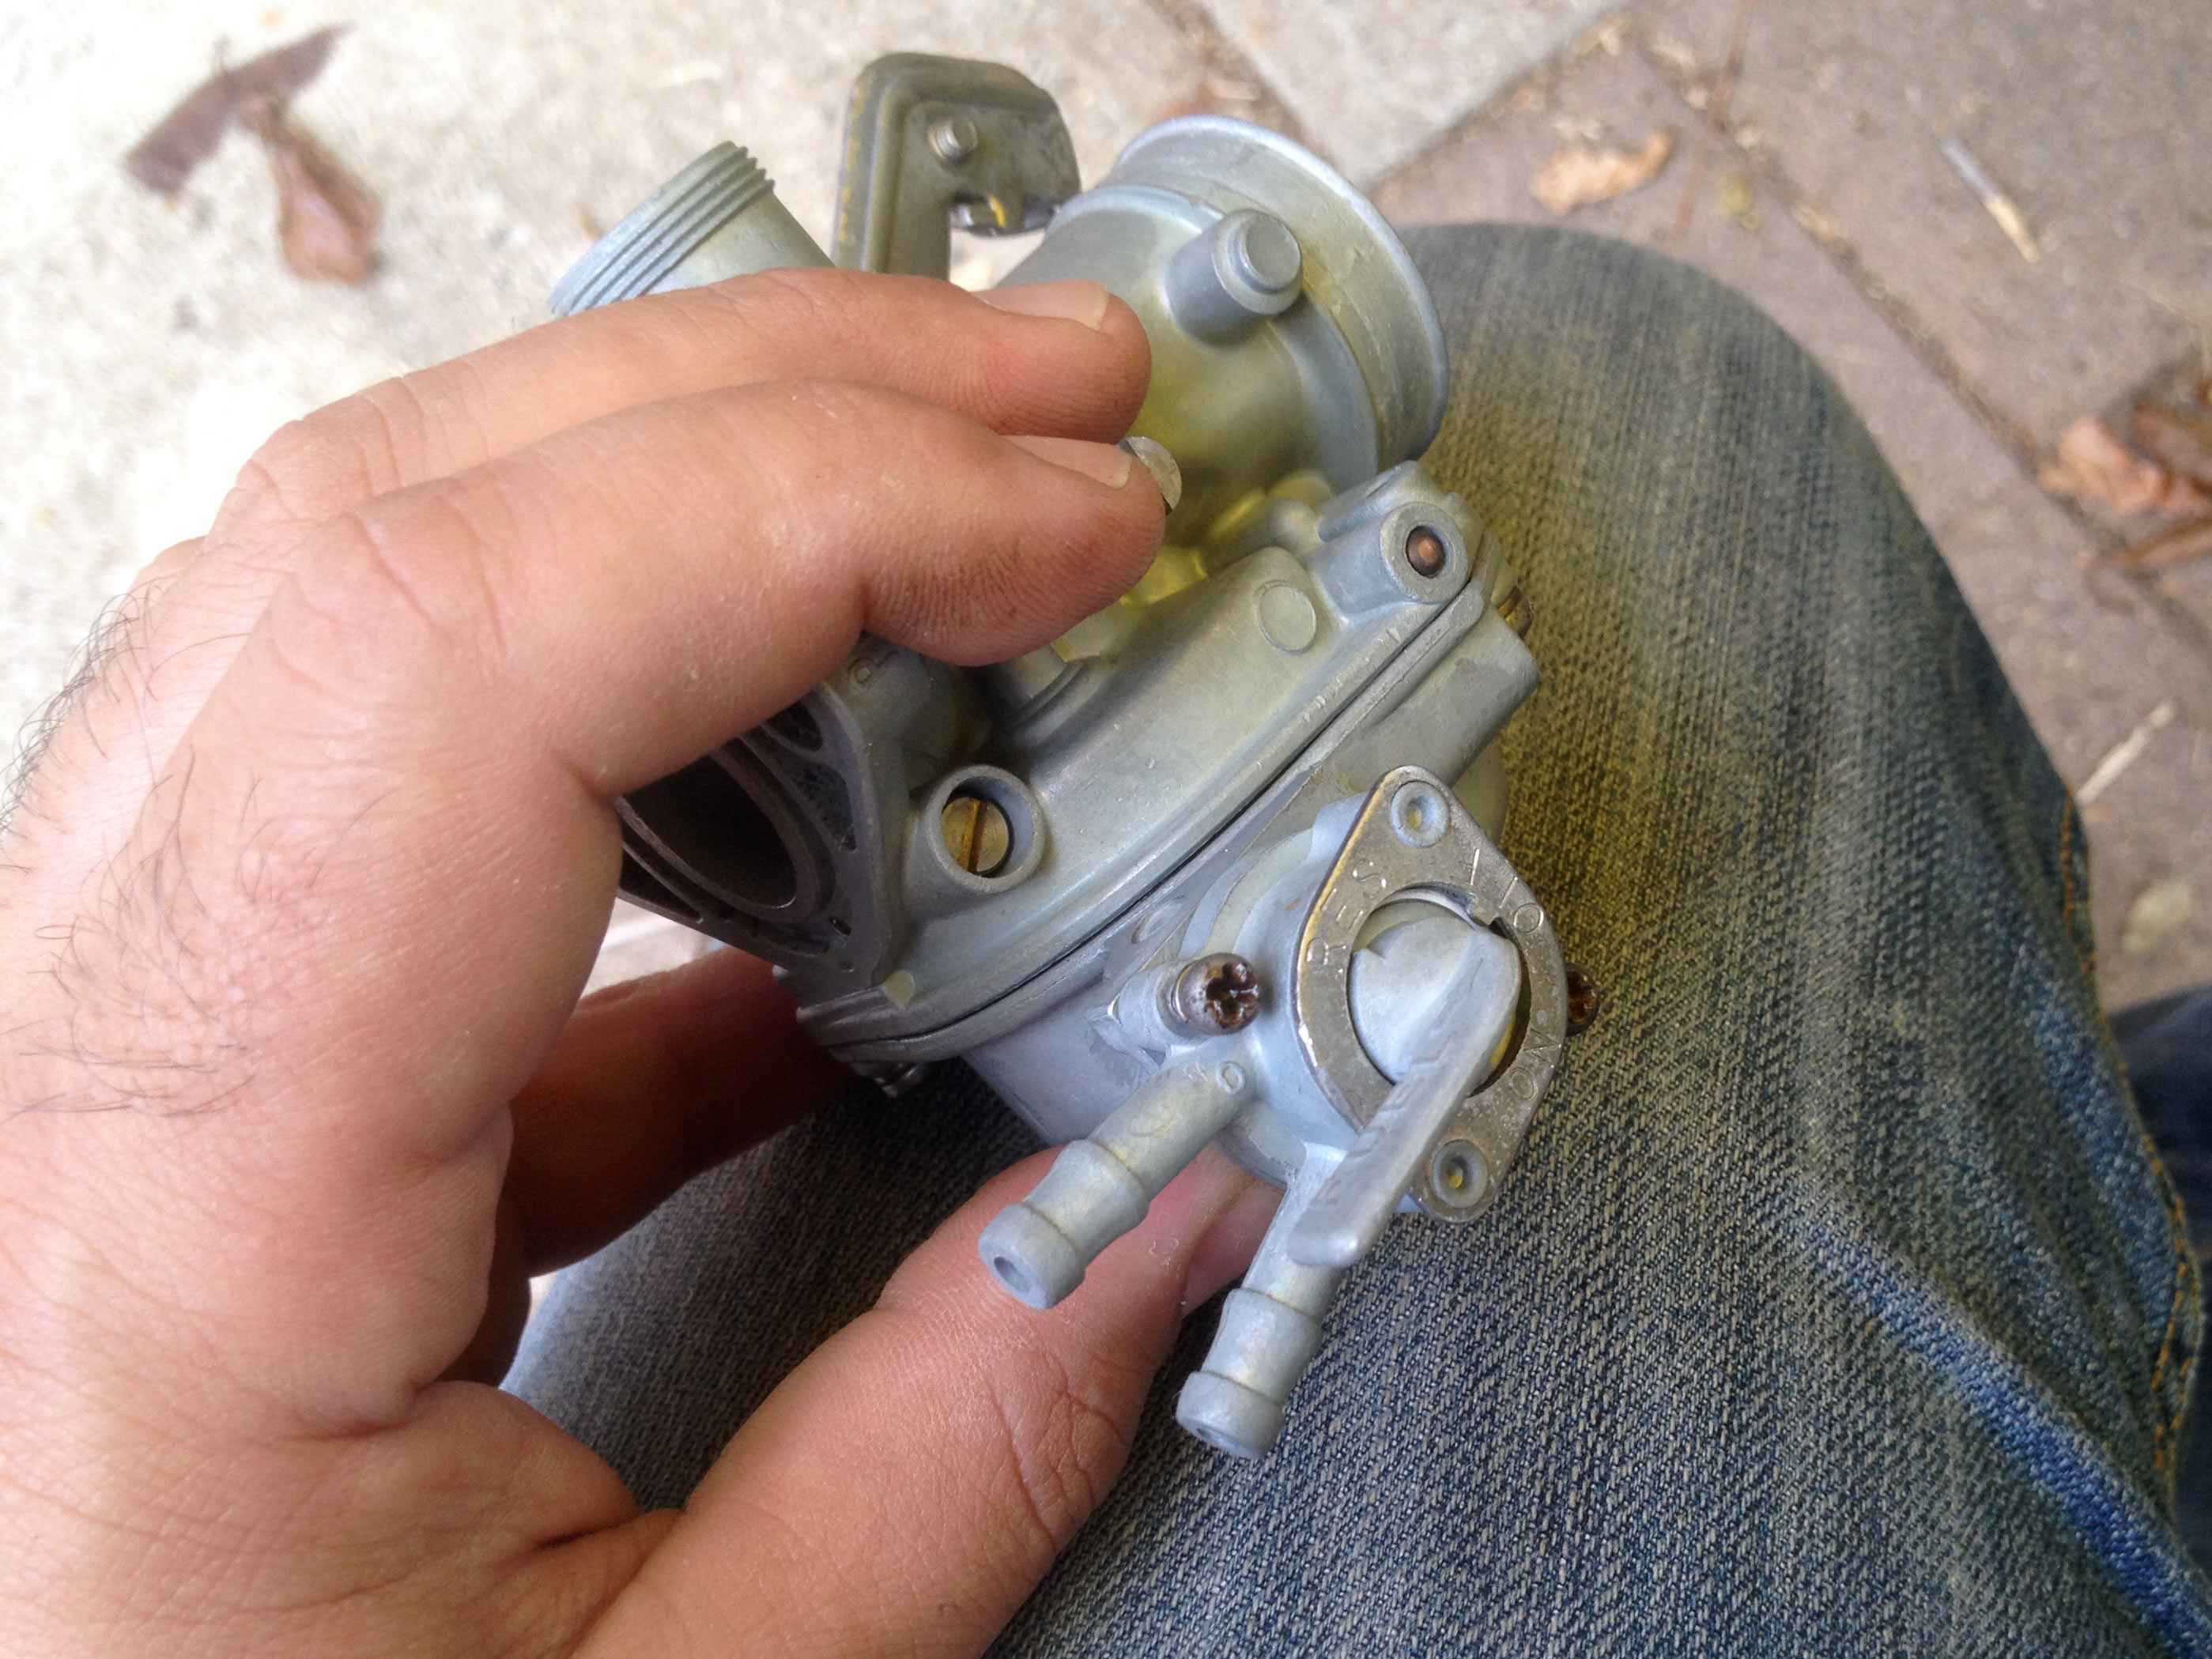
Surprisingly enough, the bike had some fuel in it and that mean the fuel tap was generally clean. This is a good sign, often the tank is super rusty and the fuel screen just gets completely clogged. Fuel tap comes off with two little screws.
Float bowl drain screw can come out now too. This lets you drain the bowls of the carbs – good idea to do this before removing carb from bike after the bike has been sitting for 15 years, though in this case no point because it was pretty dry in there.

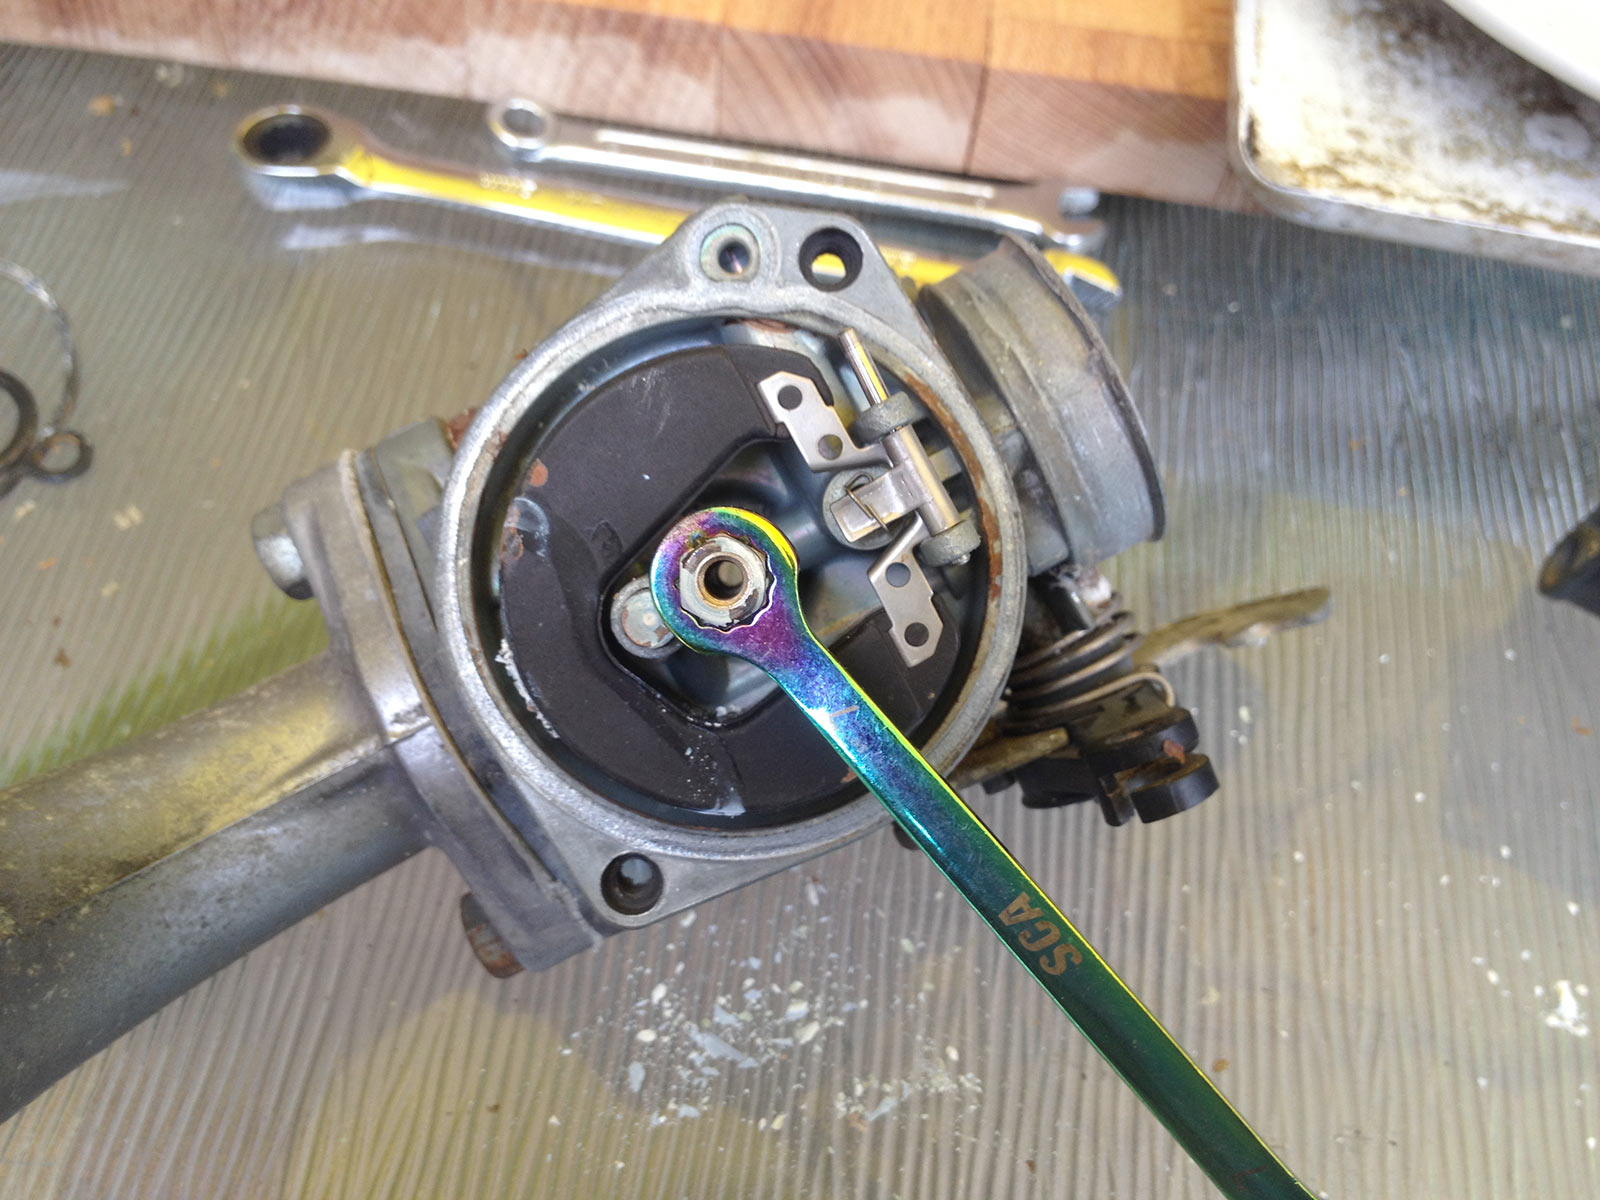
Main jet is removed with a flat-bladed screwdriver. After this, the emulsion tube comes off with a 7mm spanner out of my special ‘why the hell do I have these spanners again’ drawer.
This, too, was pretty awesome.
Pilot jet pulls out. Should be almost doable with a firm grip with fingers, but in this case some pliers were needed thanks to the yuck in there. After the initial release, it came out with fingers.
Float comes off by pulling out the pivot pin.
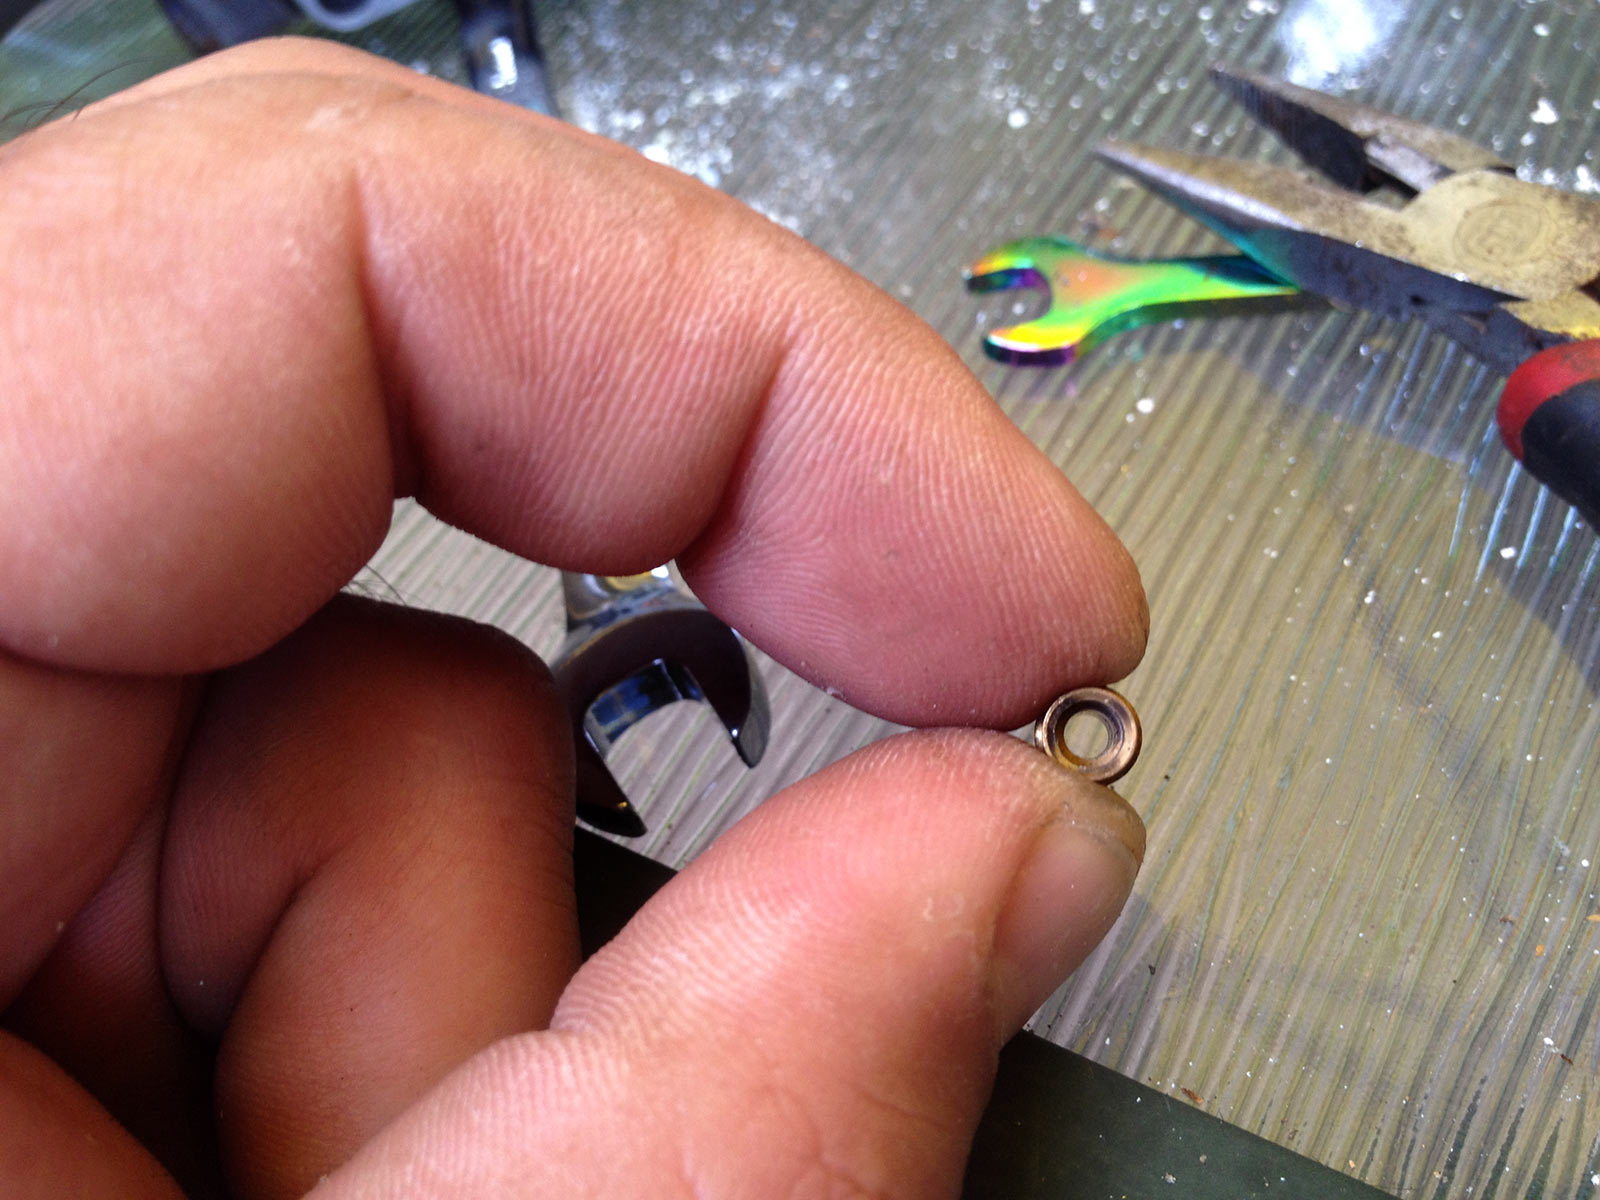
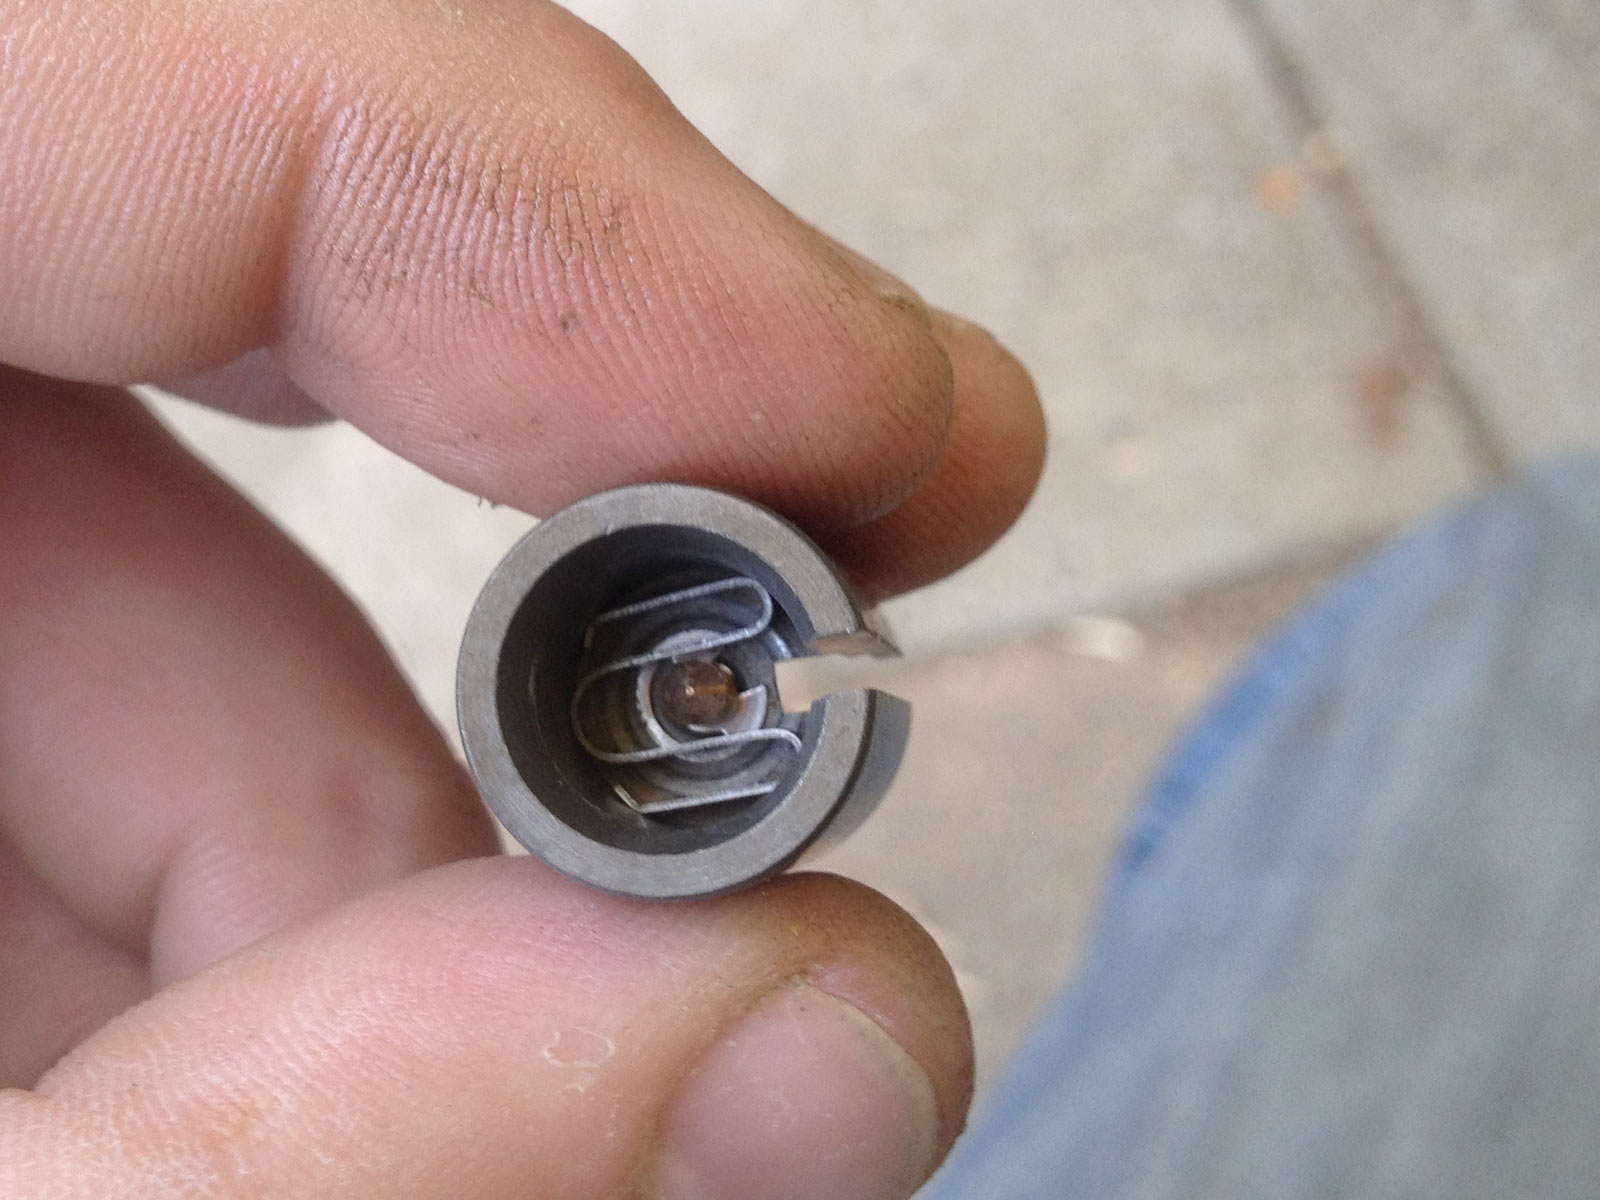
This reveals the float needle.
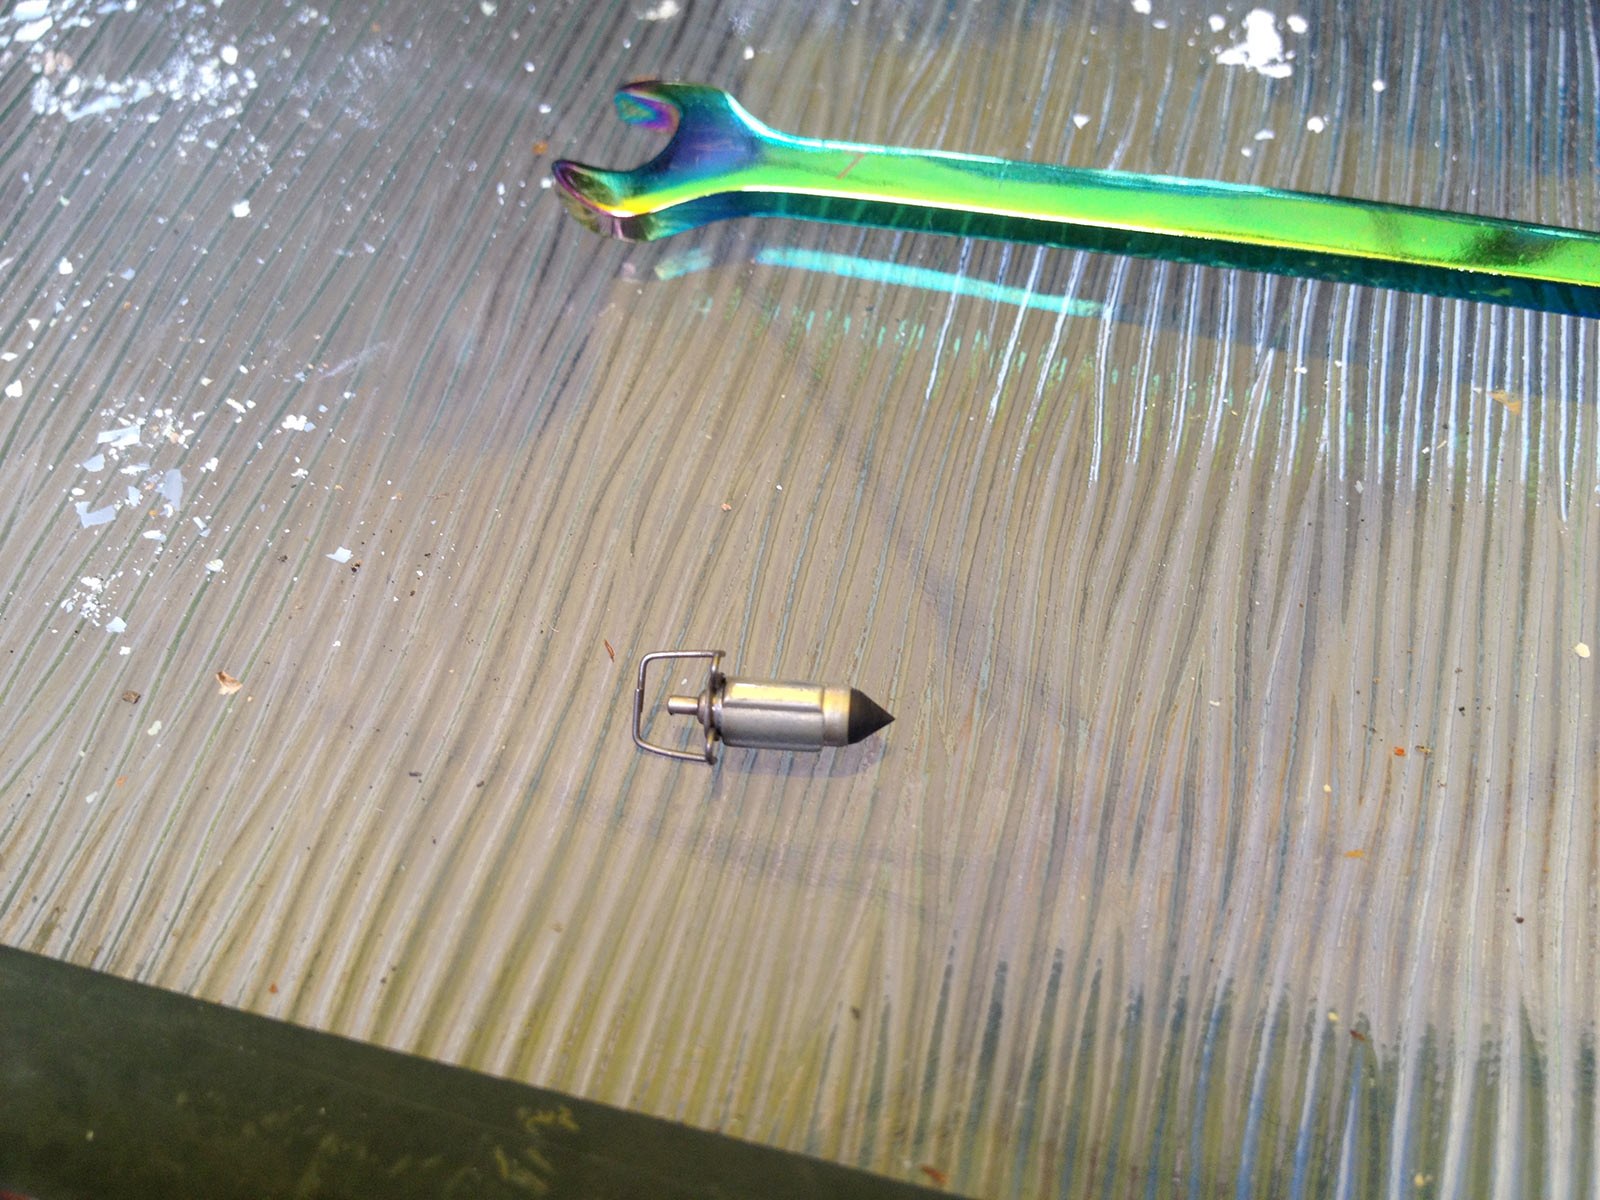
No score marks on the end means this is reusable. Good, cause they’re a pain to find and leaky floats suck.
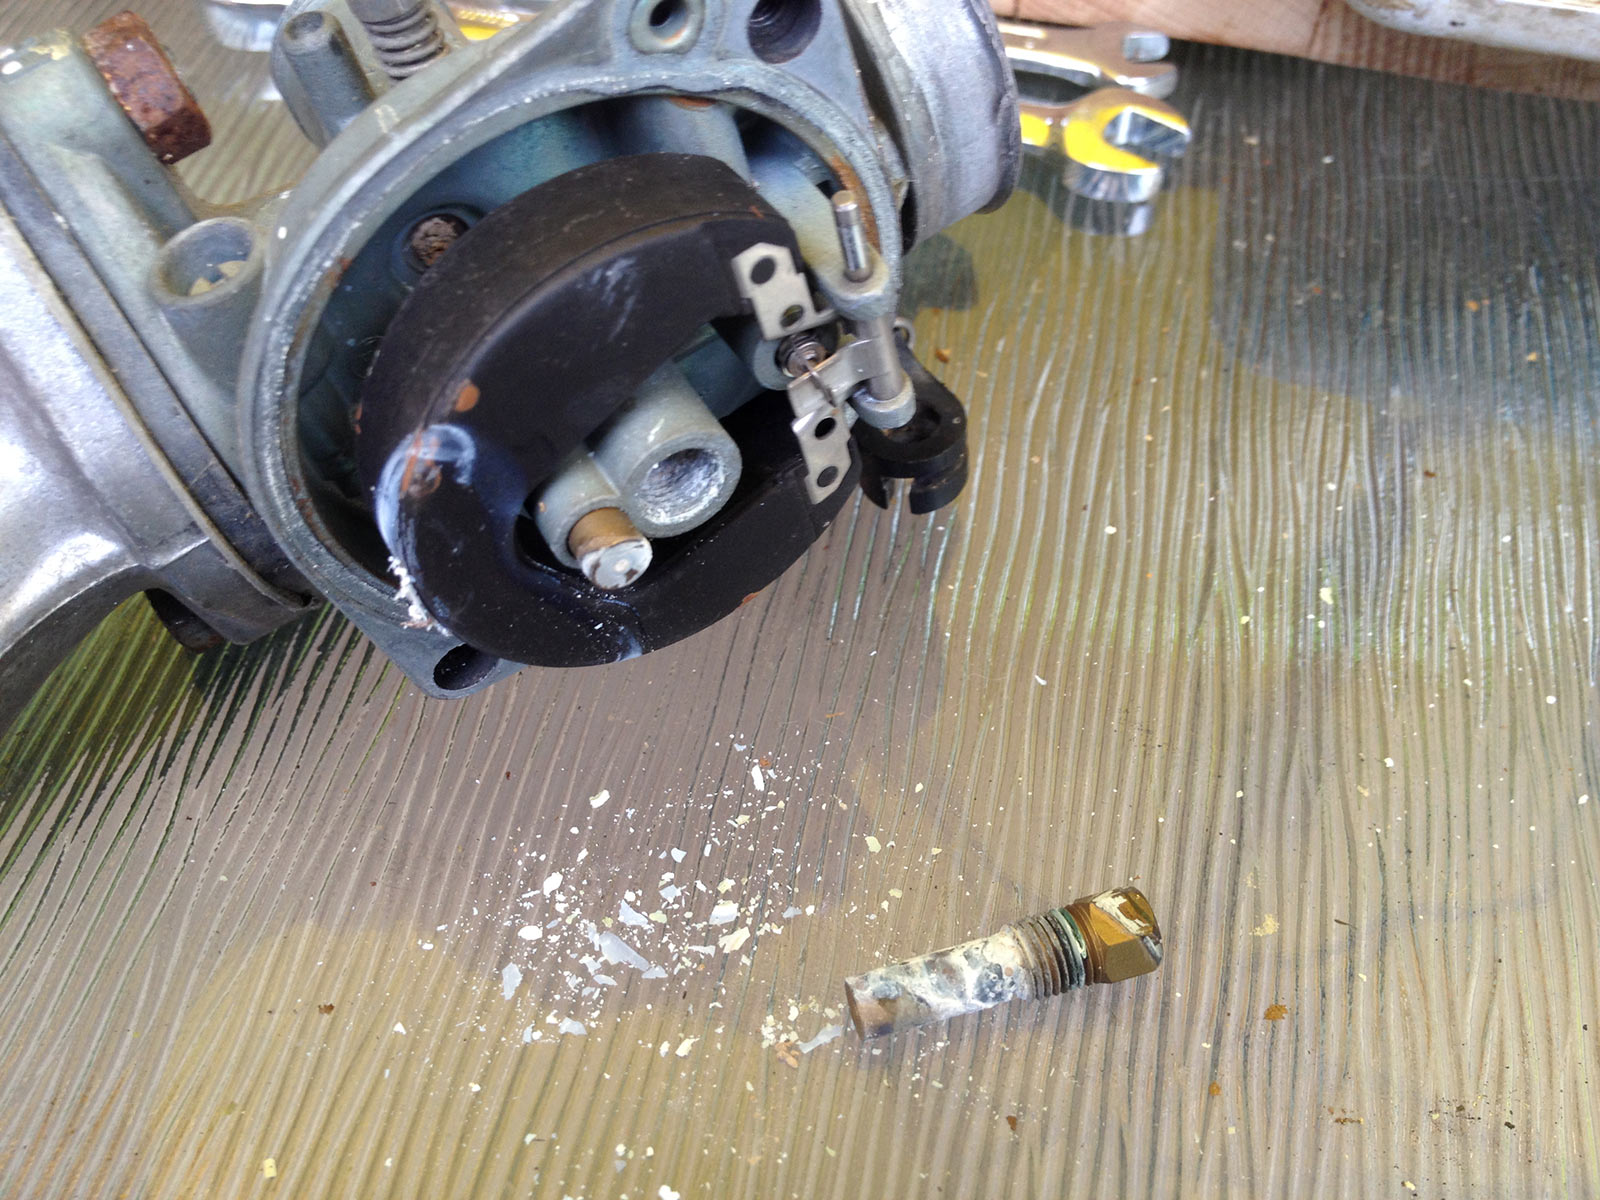
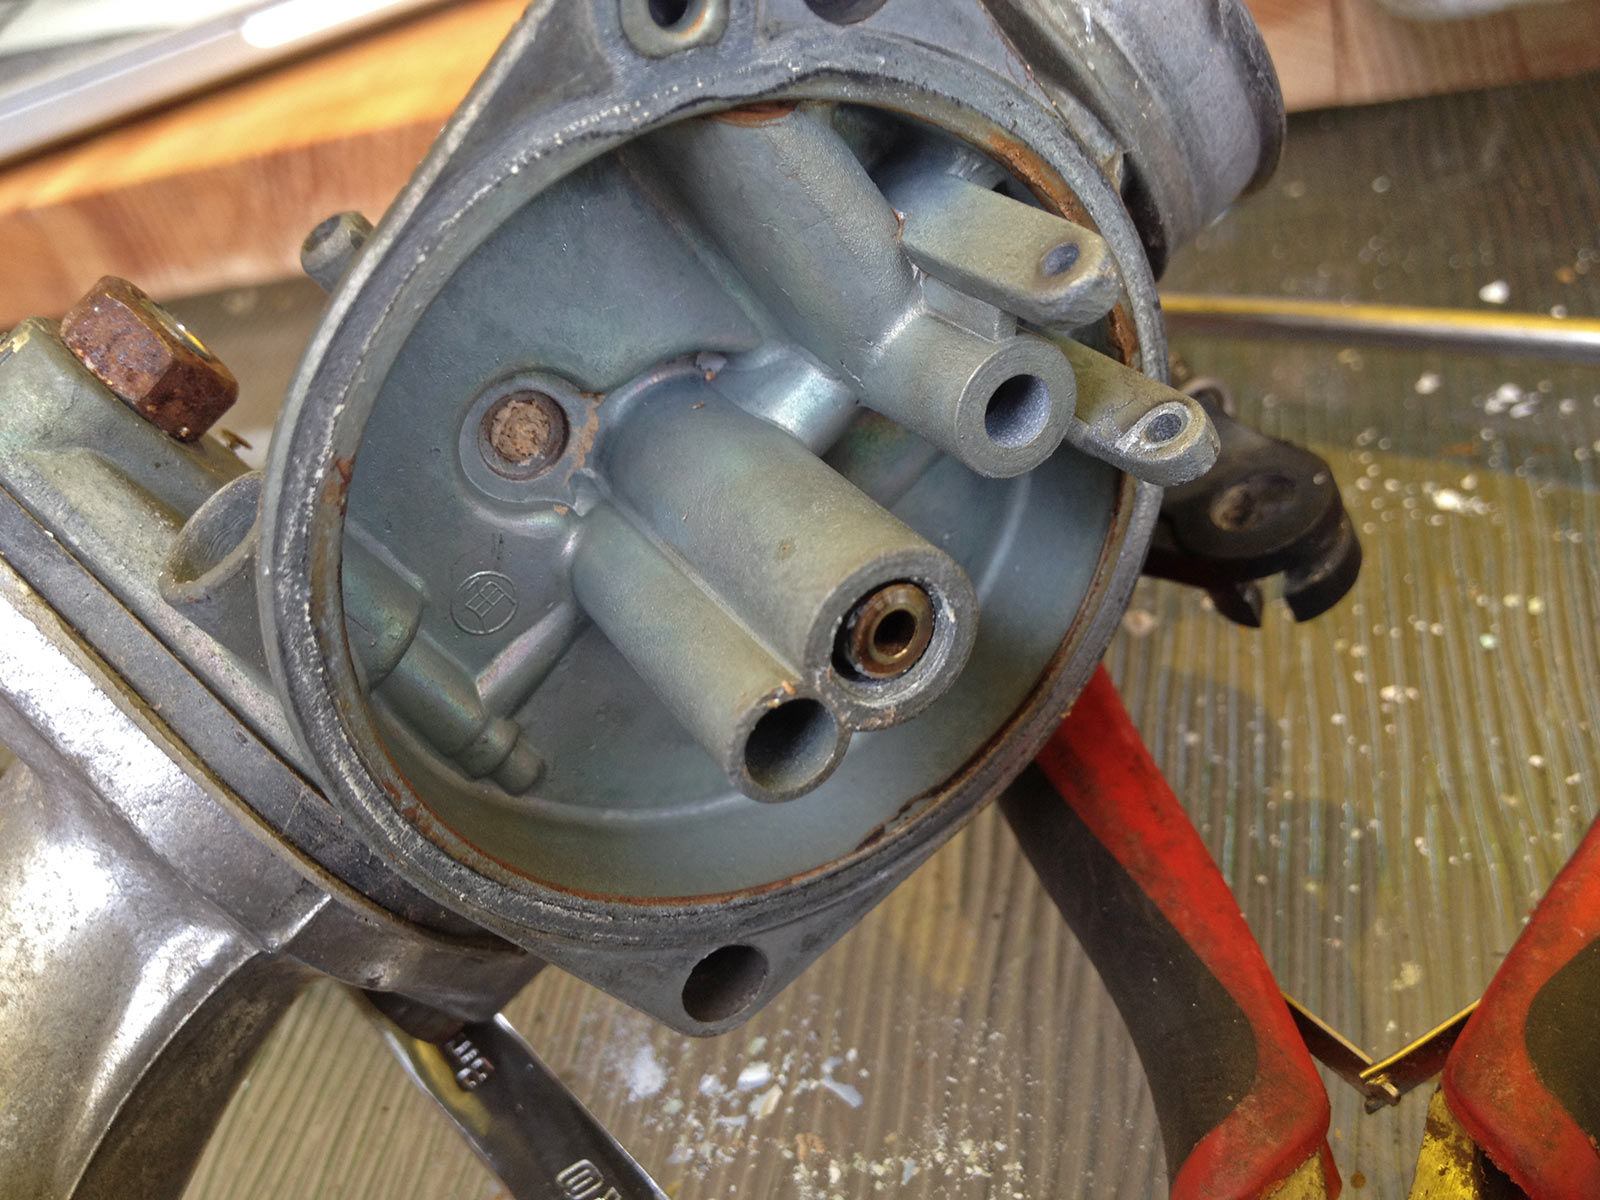
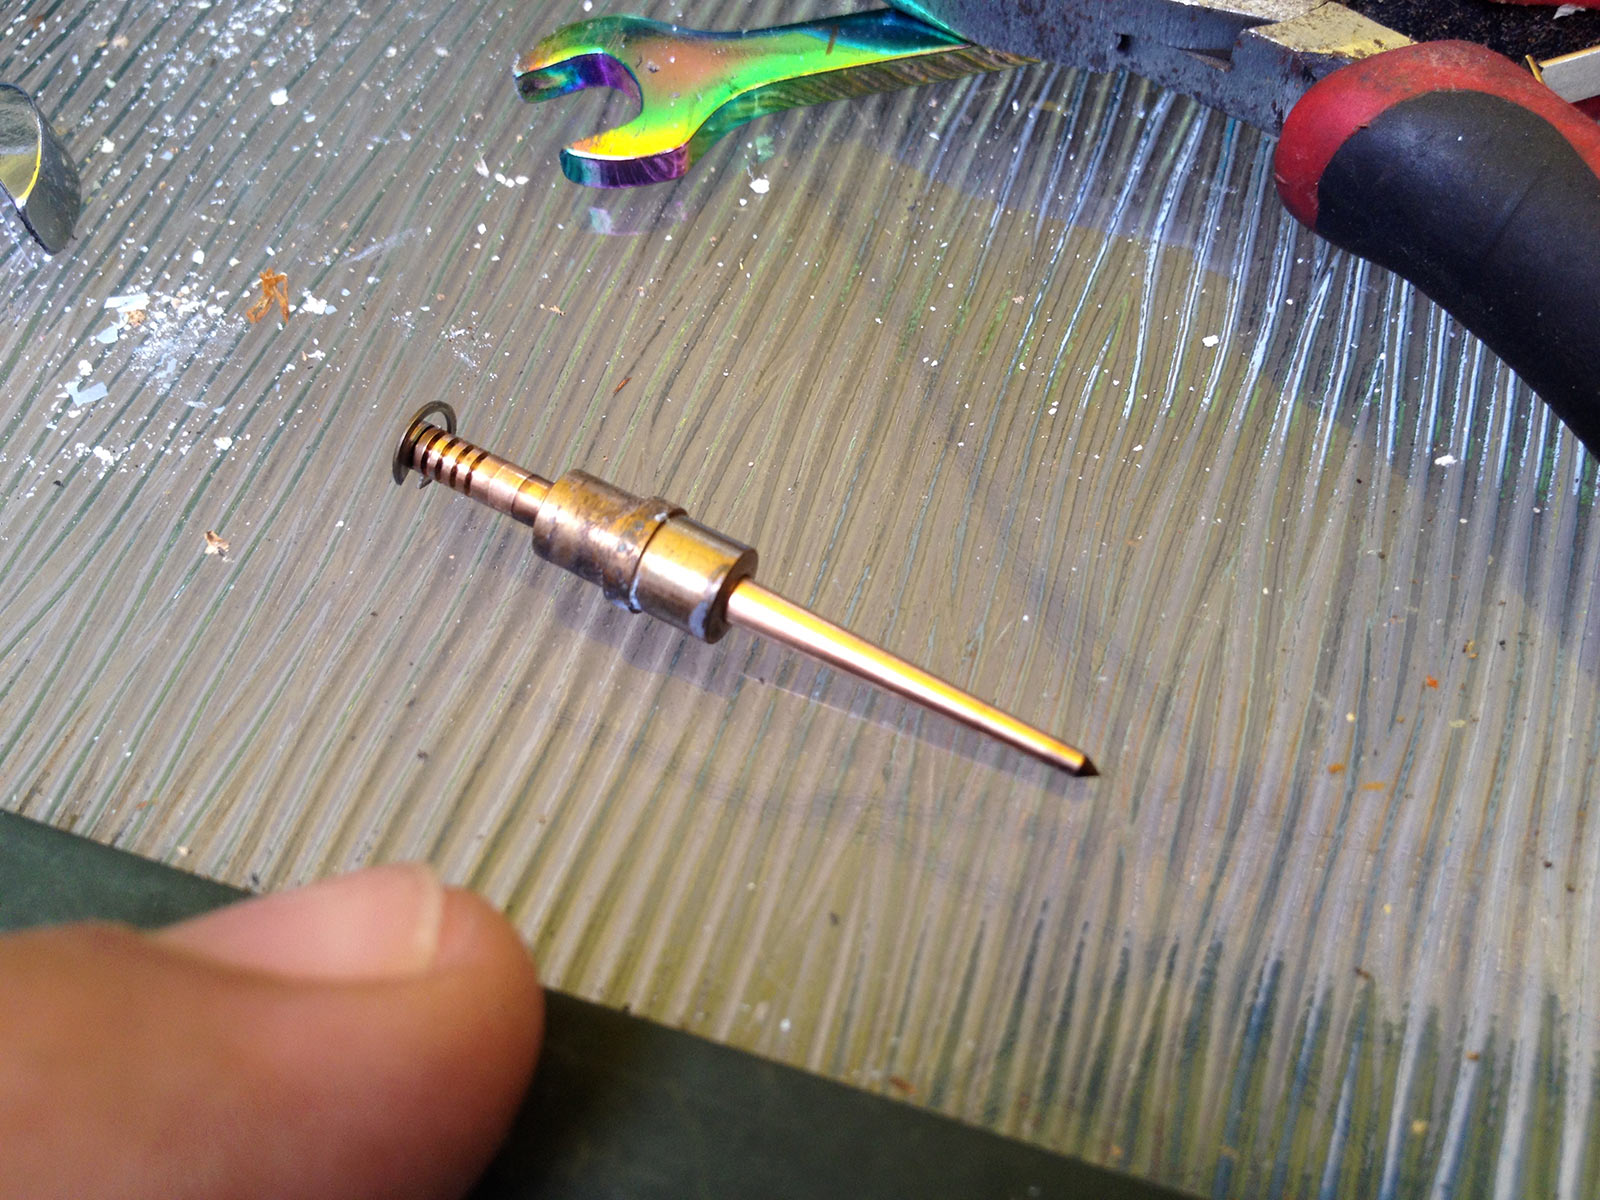
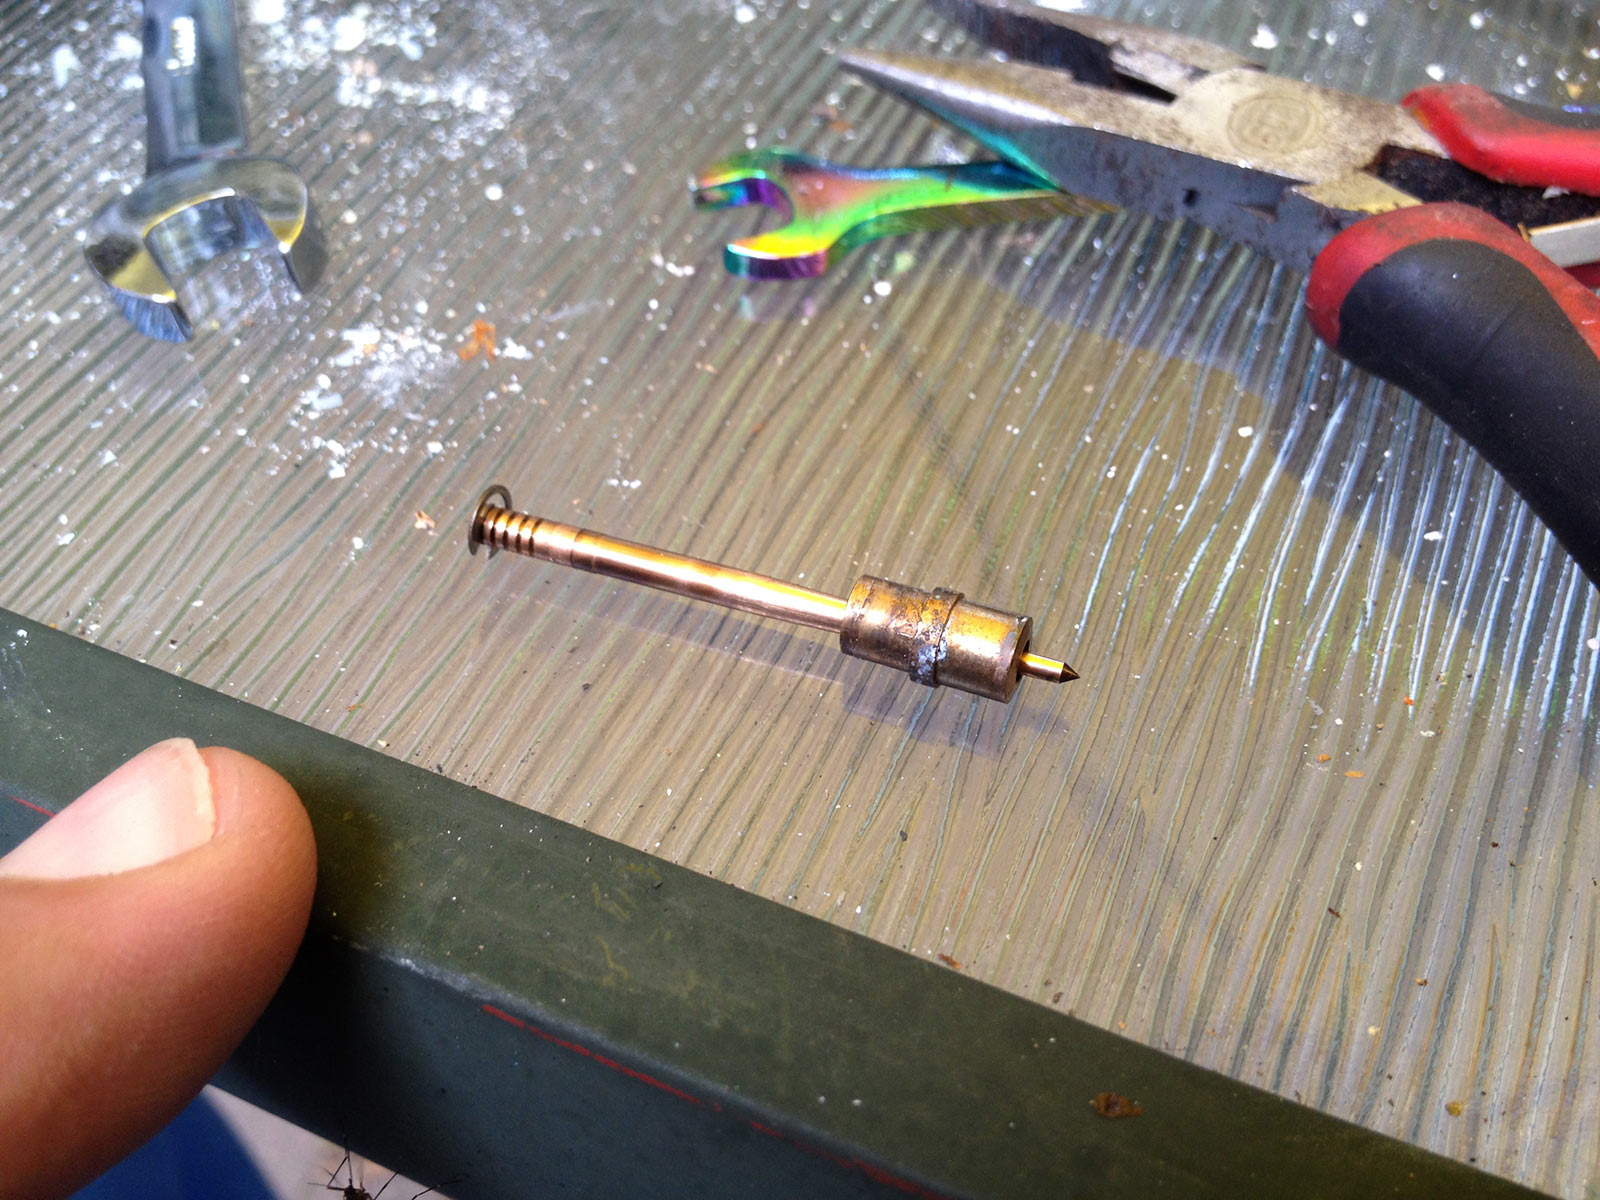
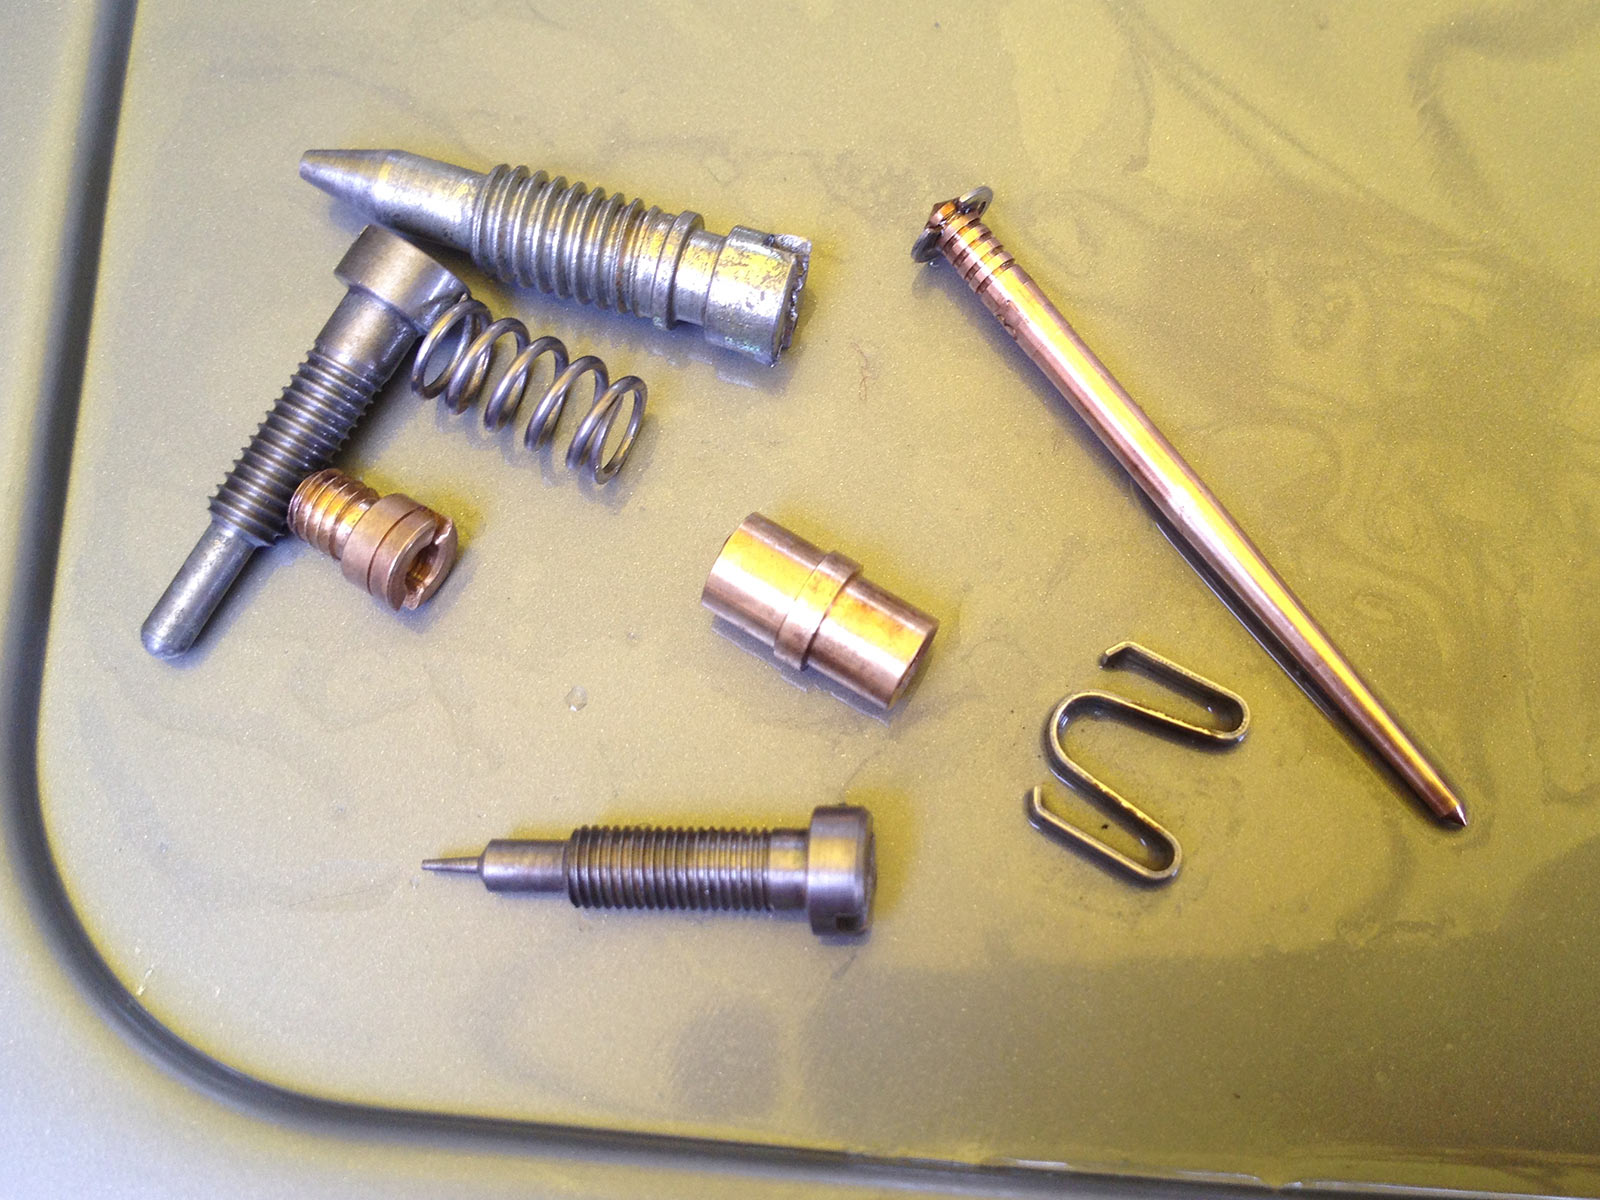
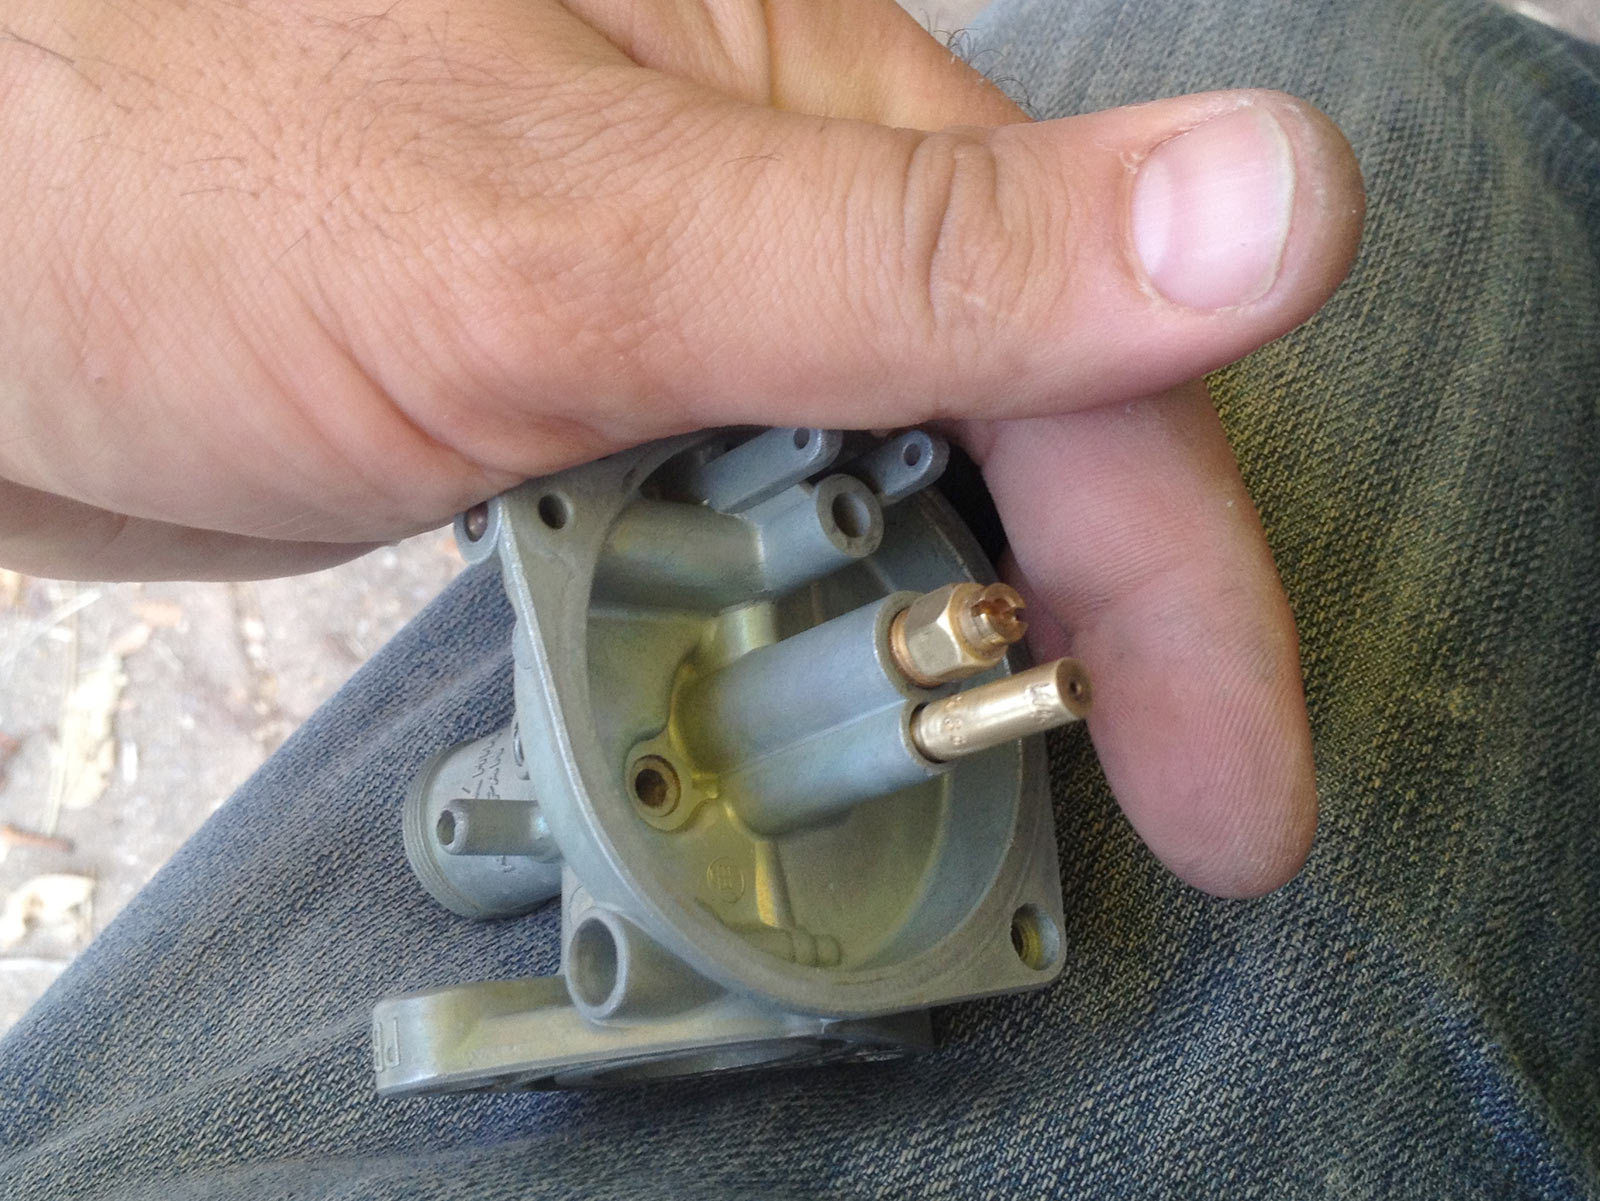
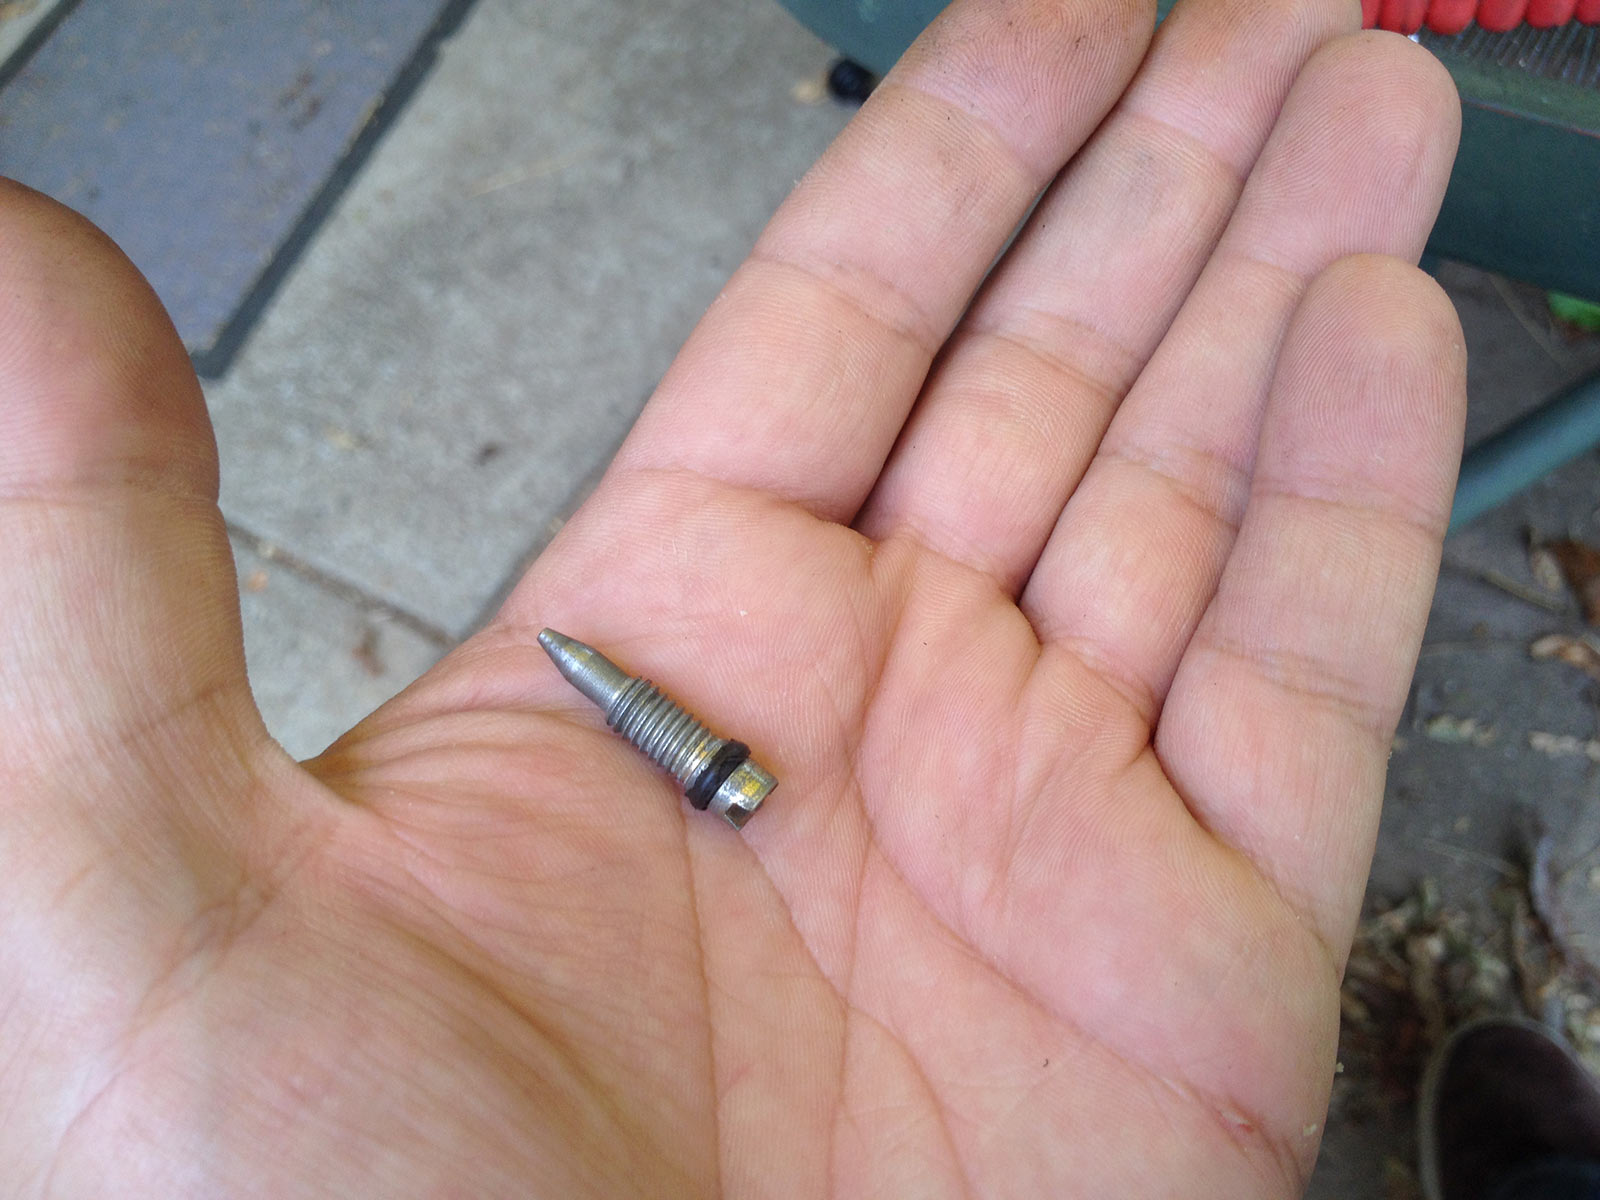
Idle mixture screw is the next to come out.
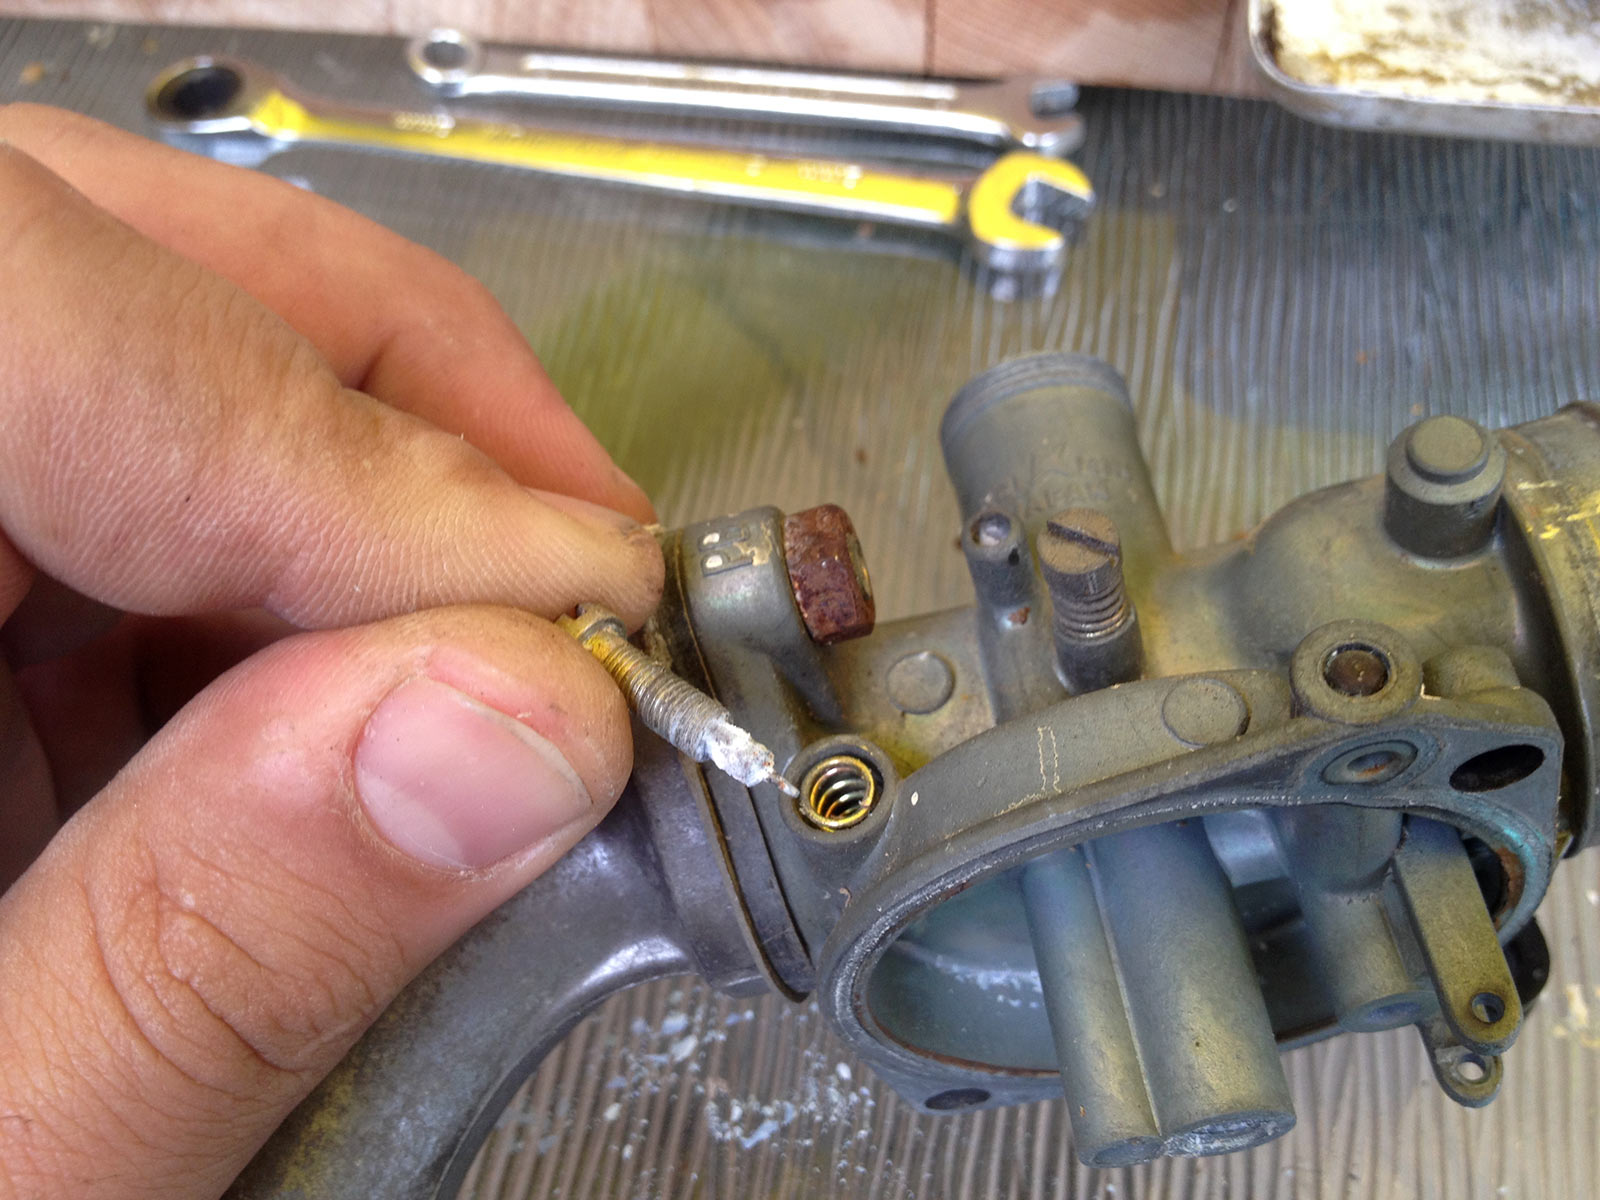
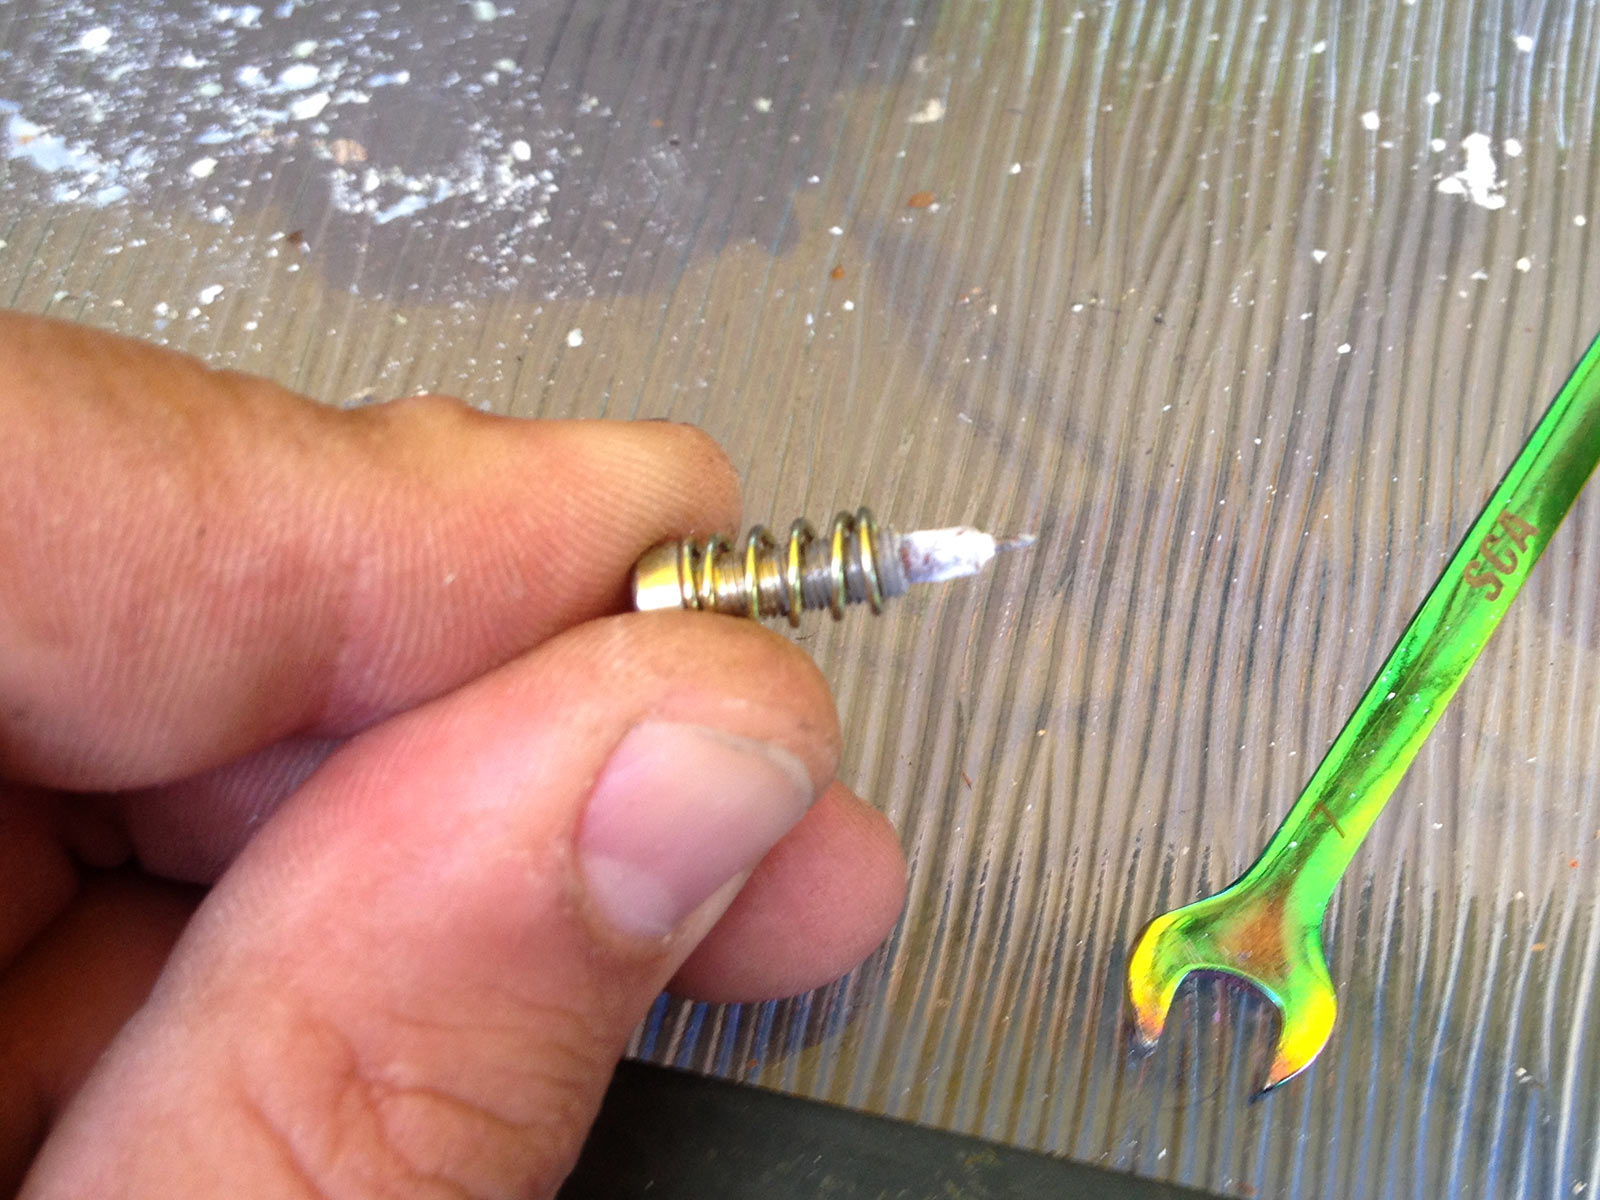
This yuckiness is essential to clean up perfectly. The little pin at the end of this screw is what controls the idle mixture (and is, along with the pilot jet, responsible for the baseline mixture of the carburettor).
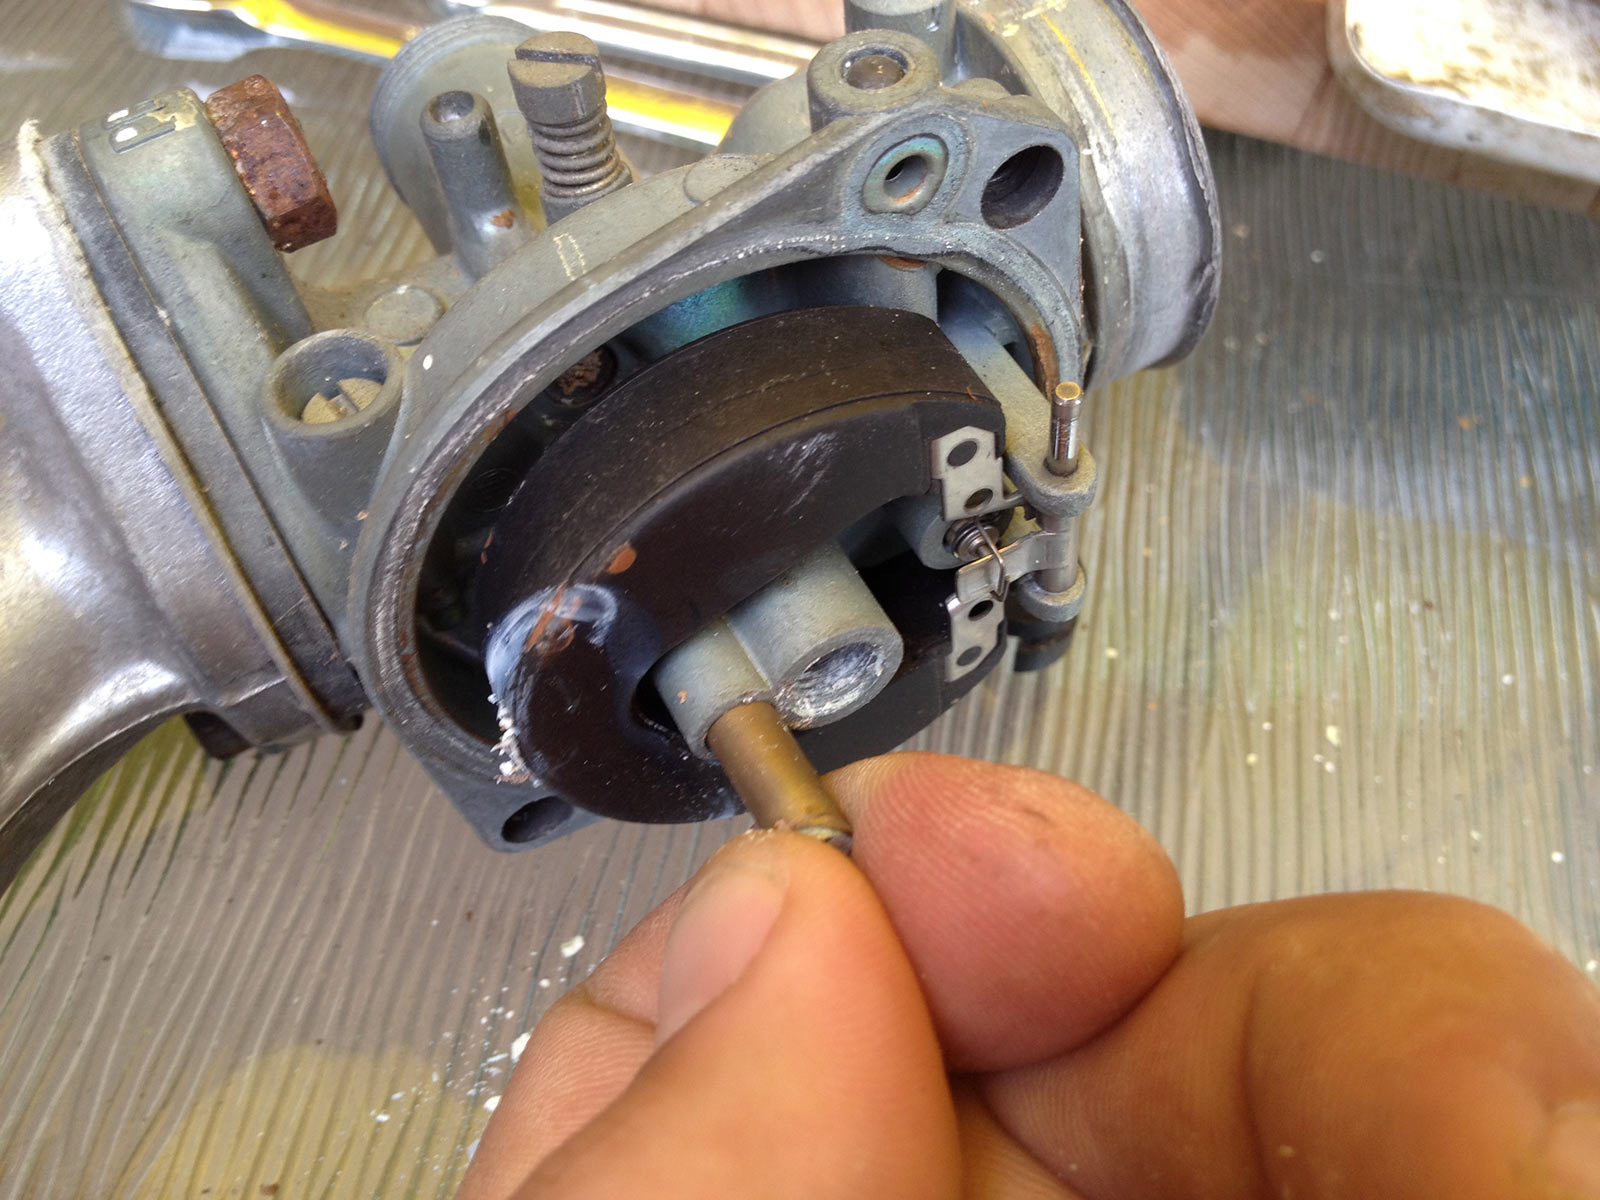
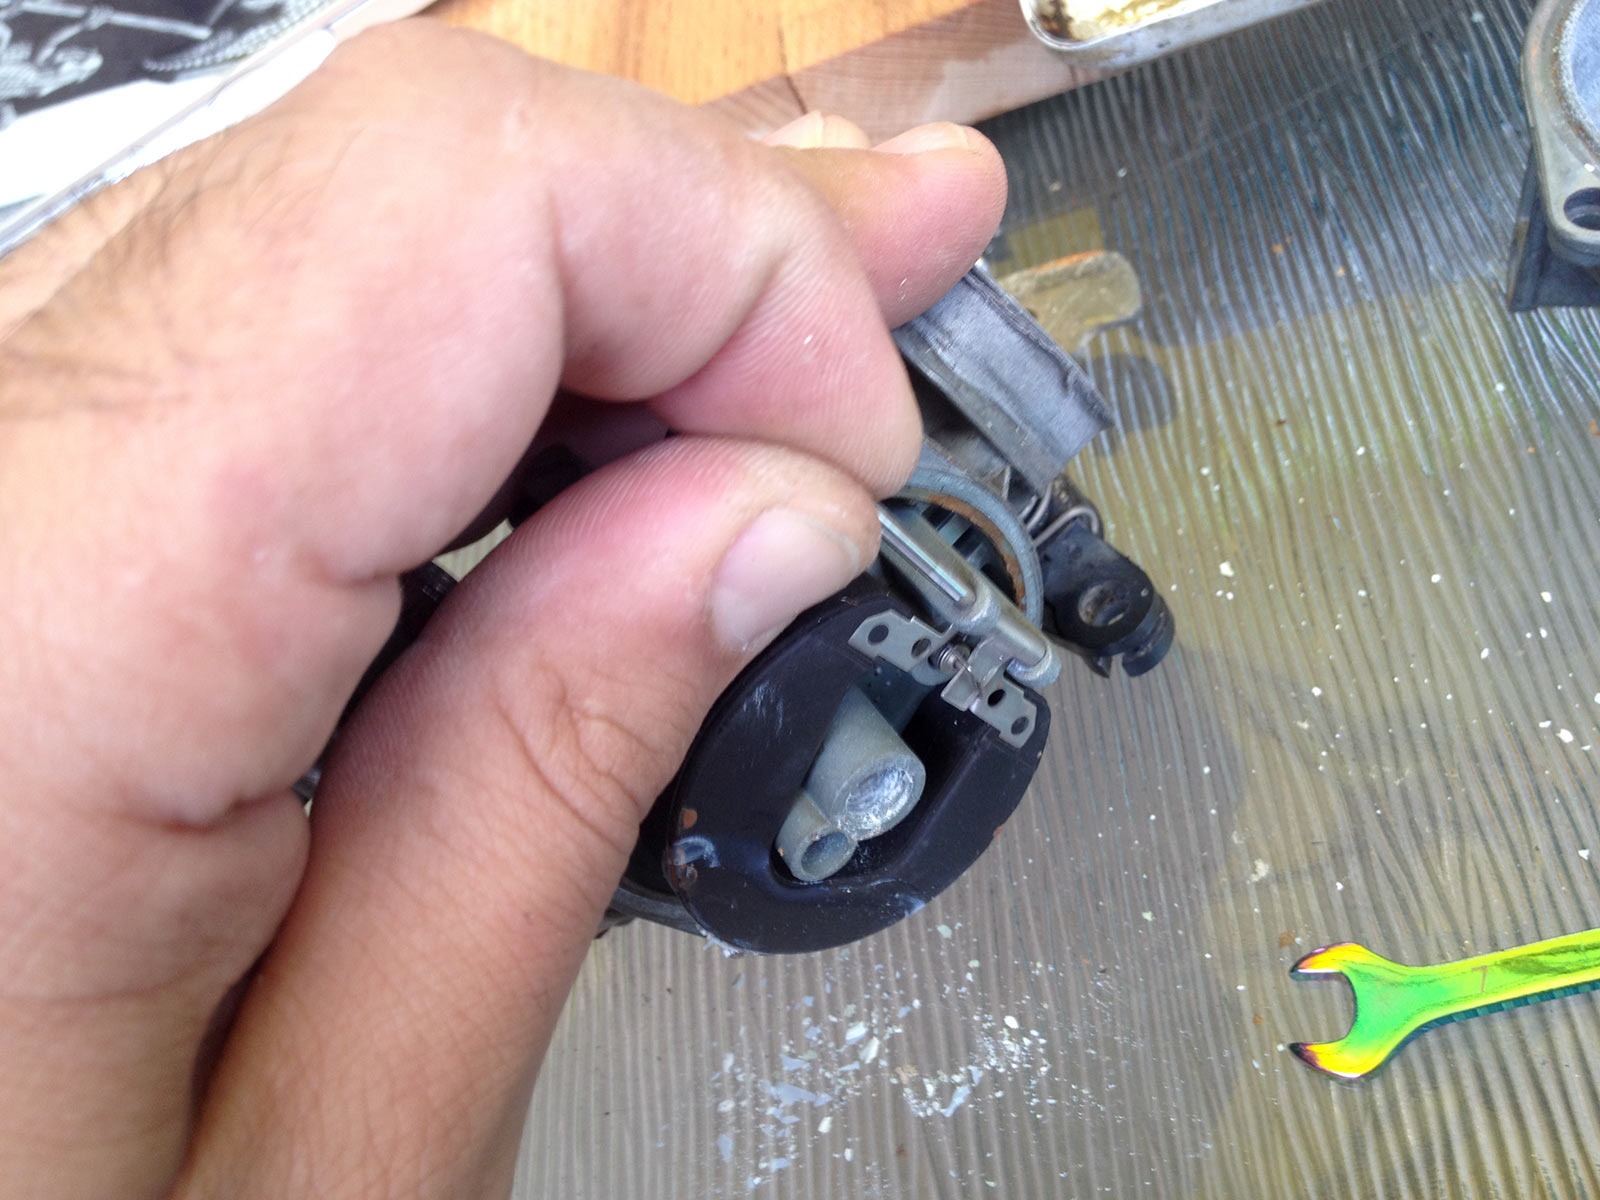
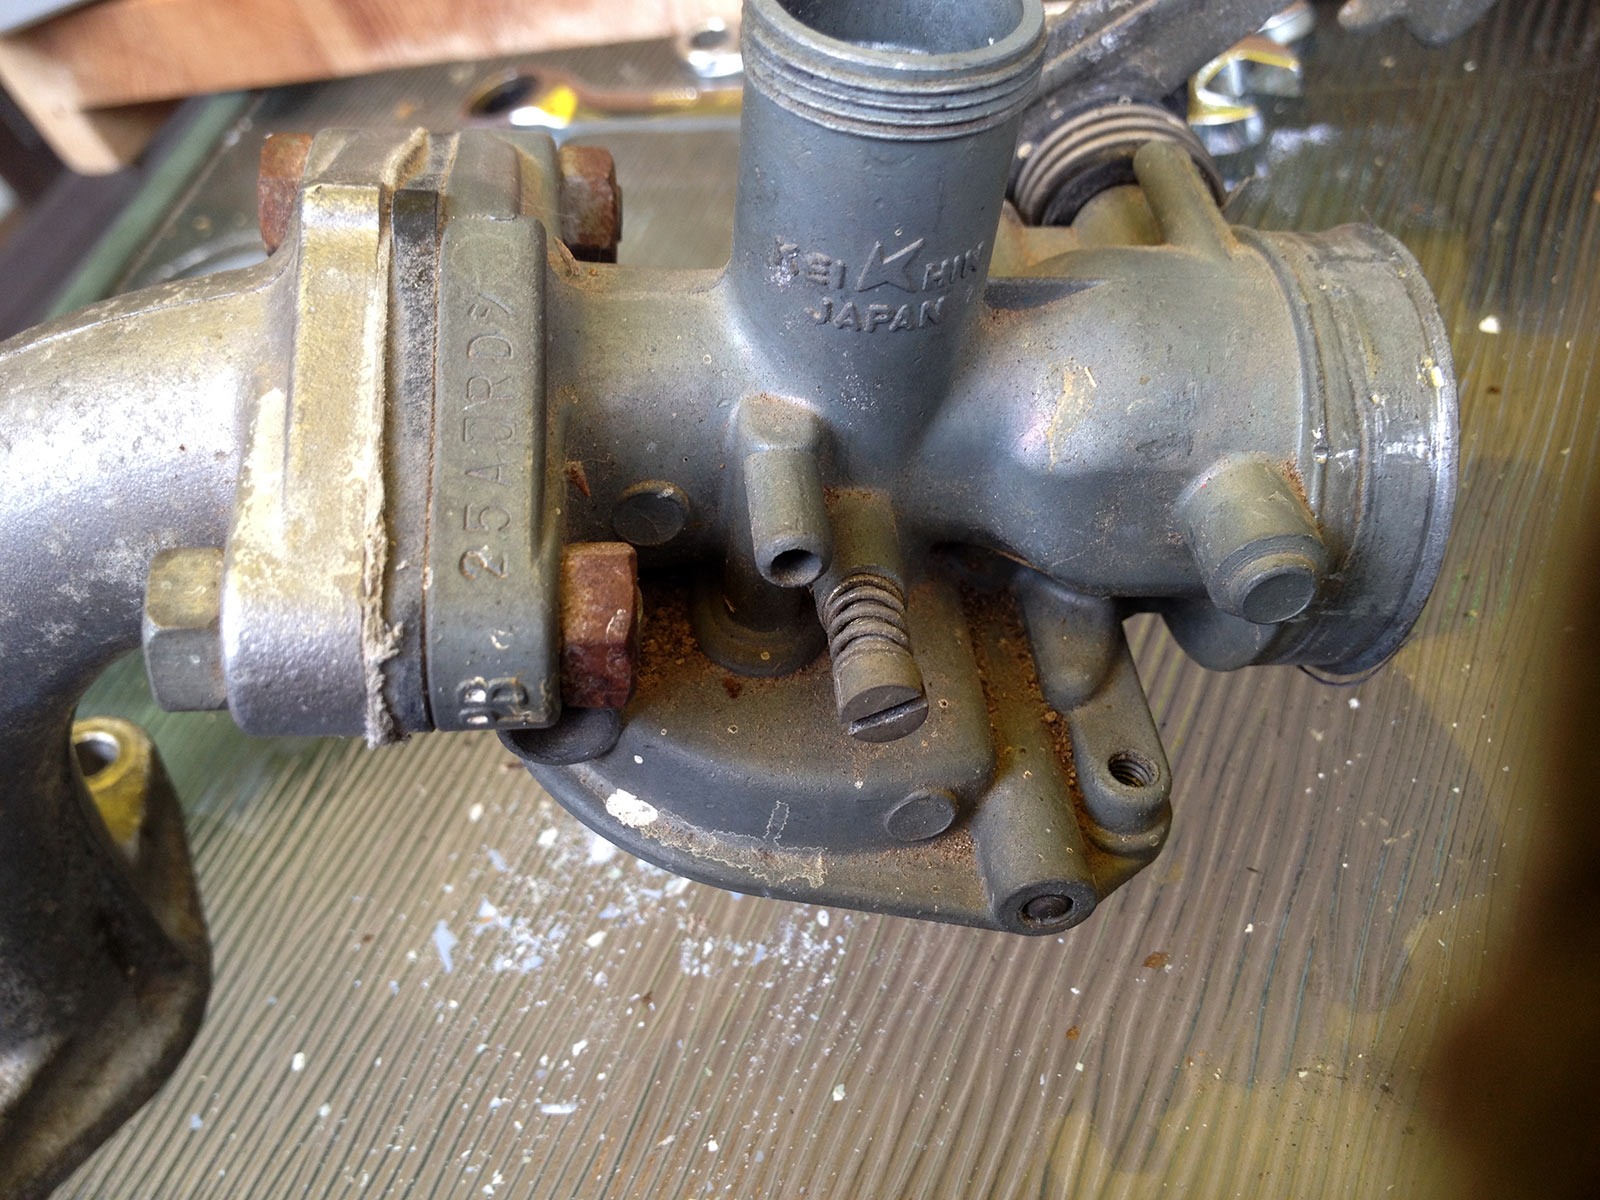
The other part of the idle system on these carbs is an idle speed control (it is really the throttle stop – turn it in and it opens the throttle more at the fully released end of the spectrum). This screw comes out now too.
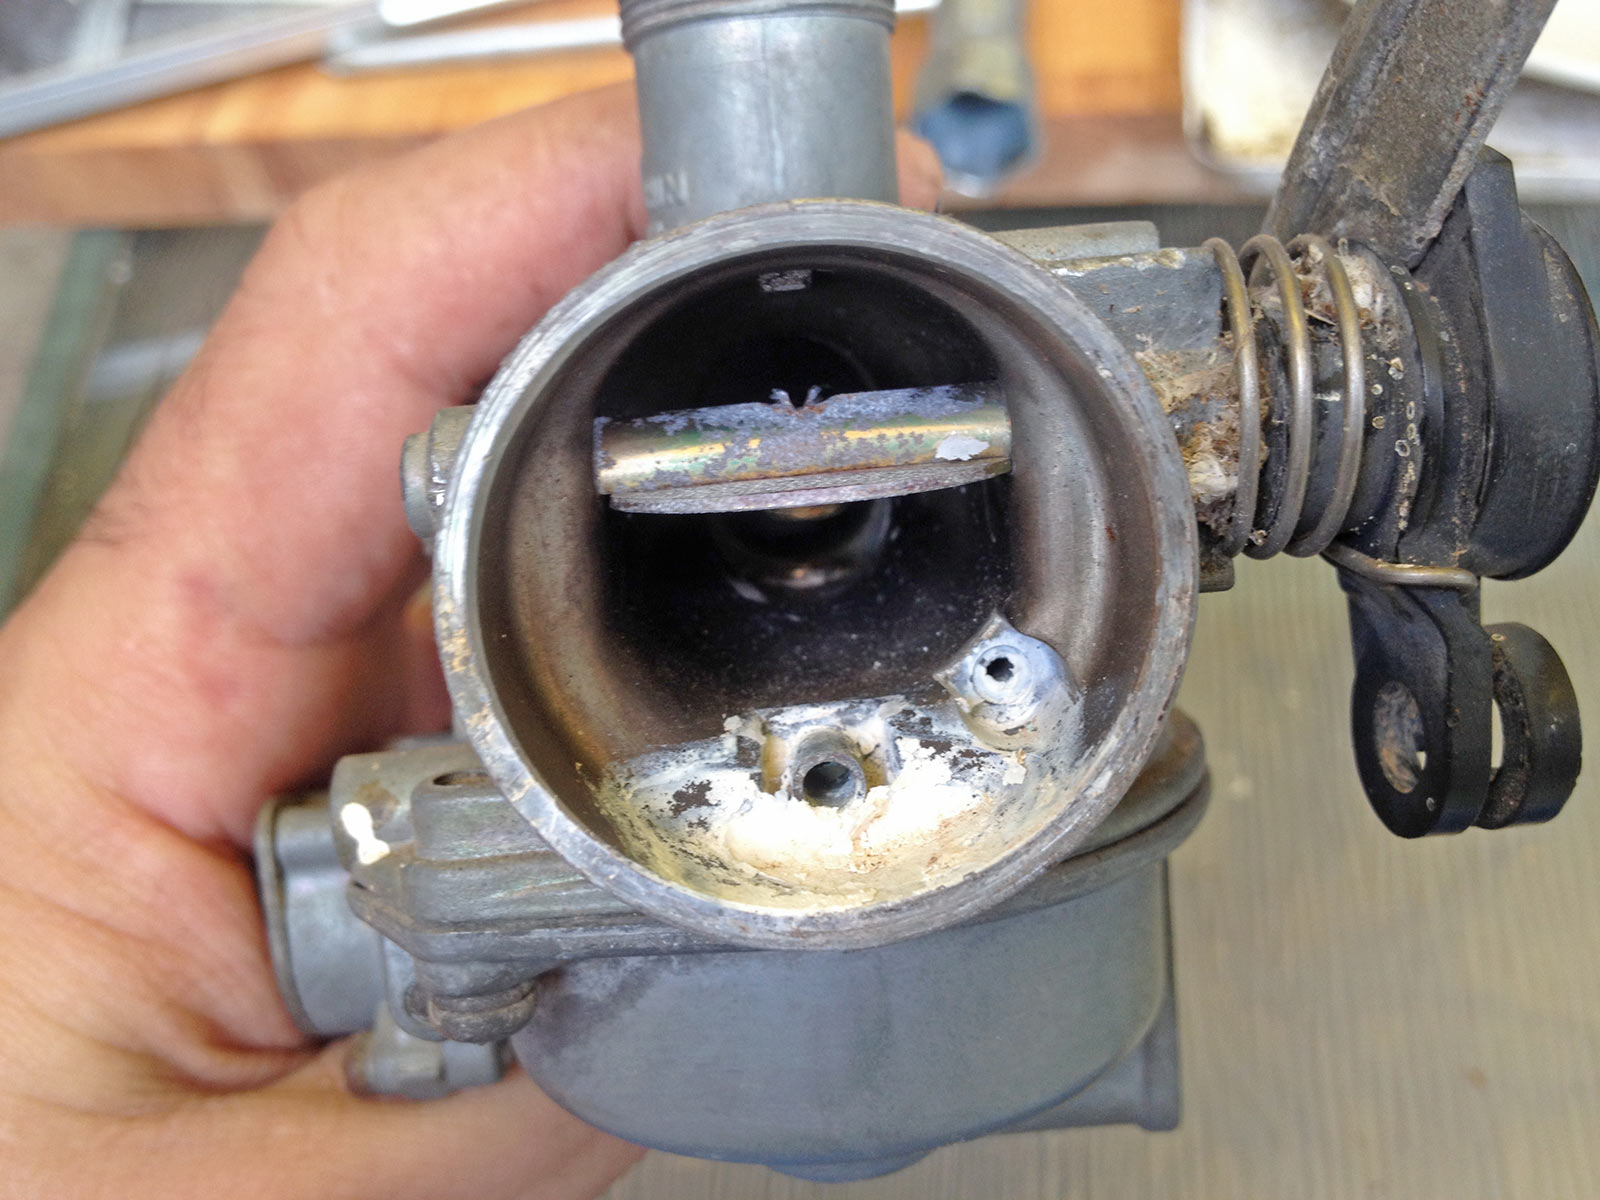
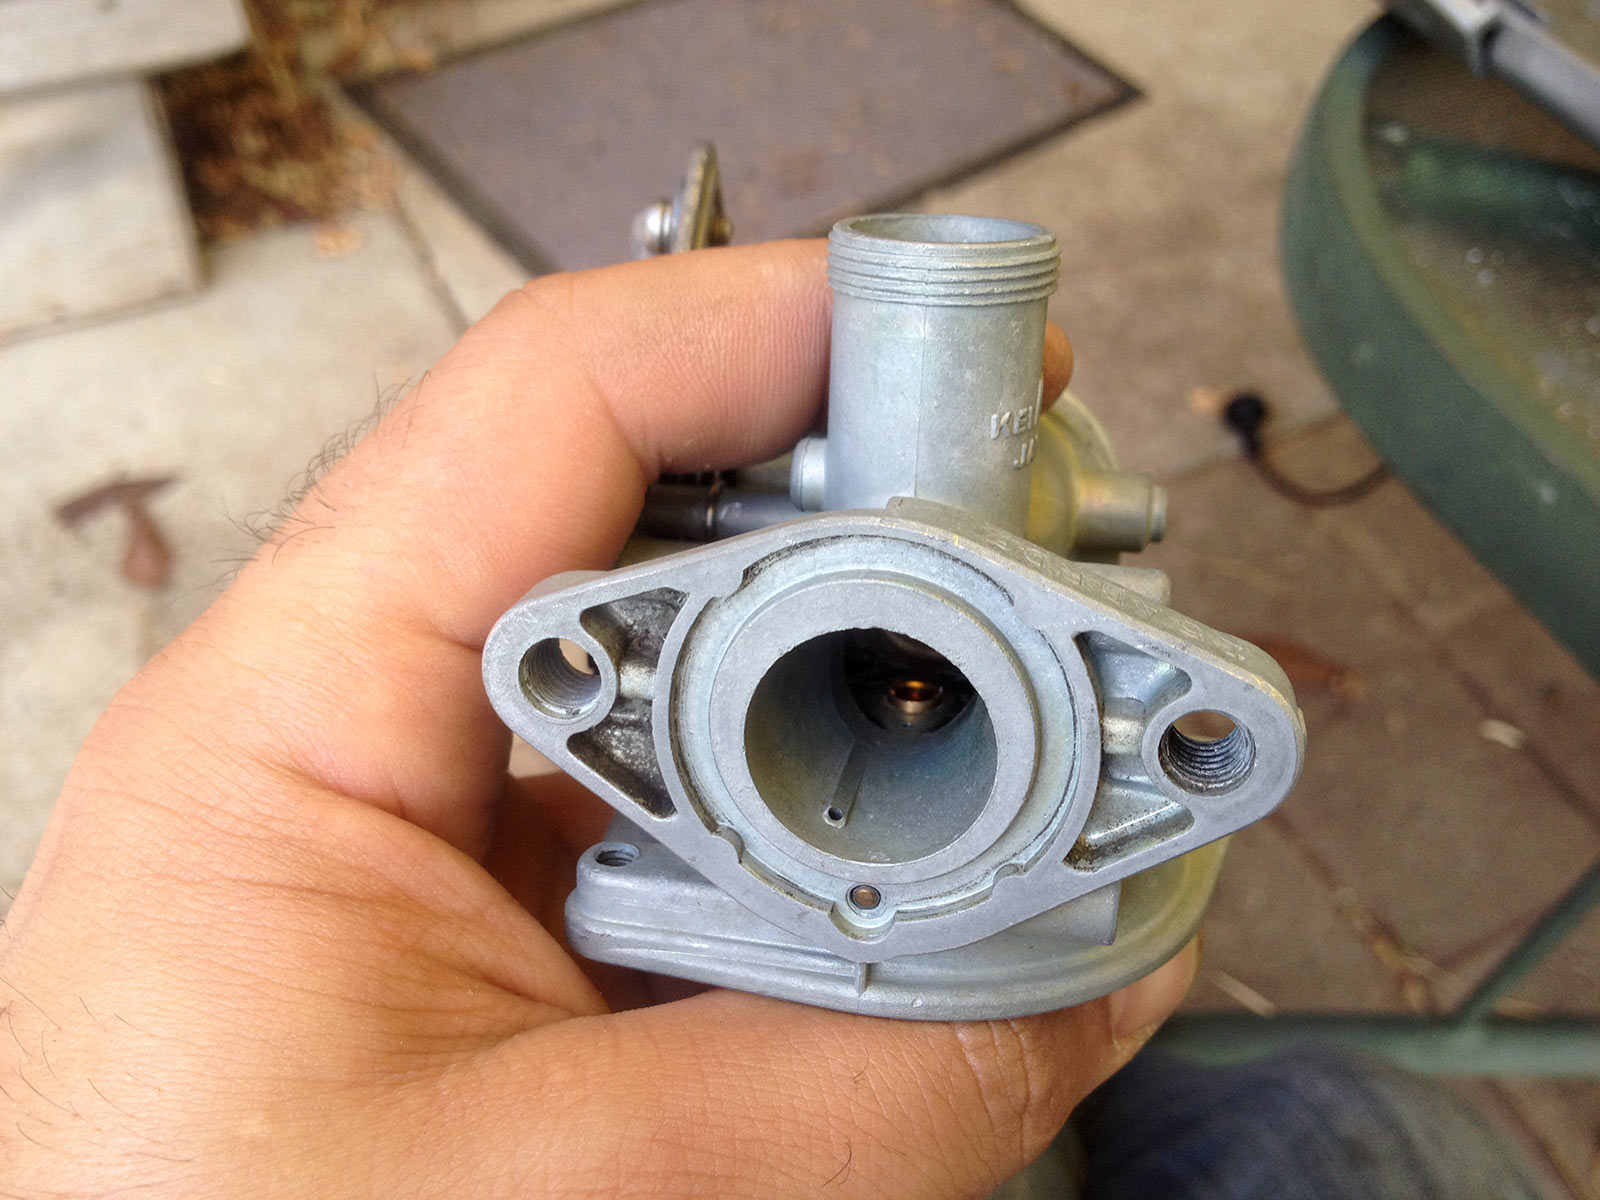
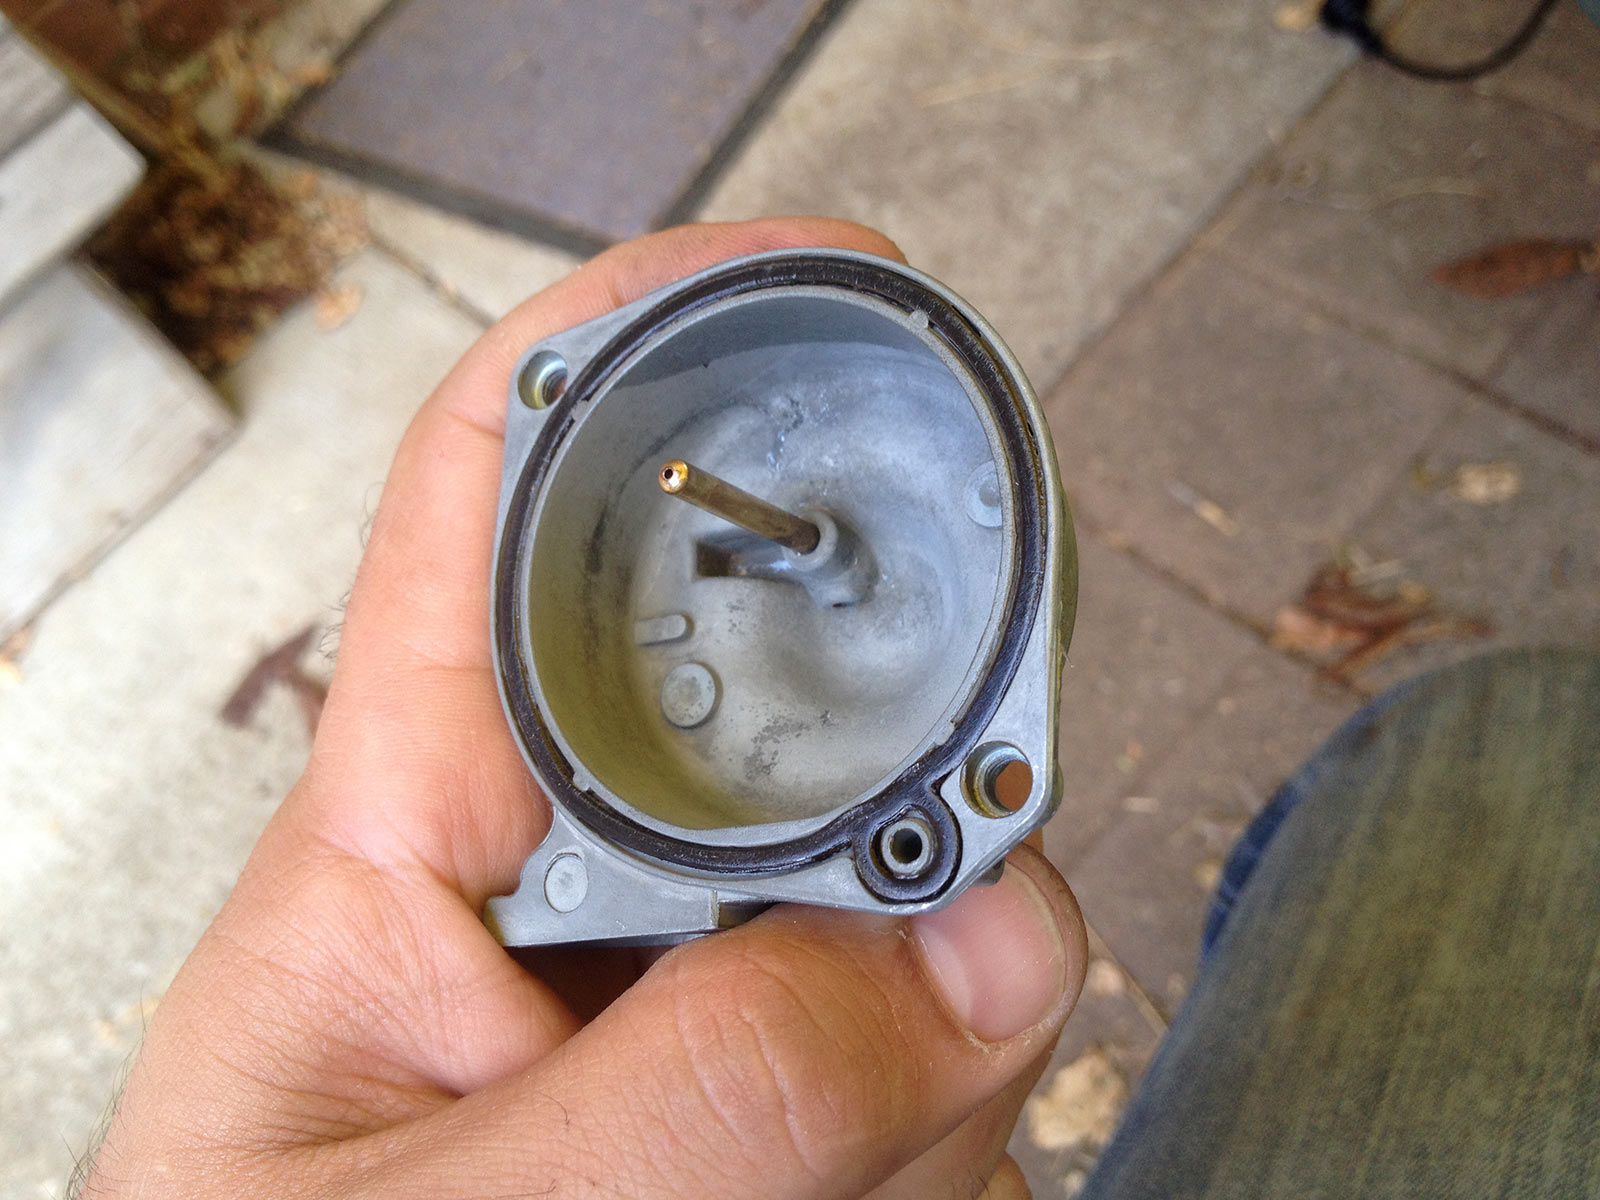
Universally it’s a pain to get a photo of the needle jet/throttle needle aperture that sits above the emulsion tube. Here it is, the little bit of light you can see when you stare down the throttle aperture from above.
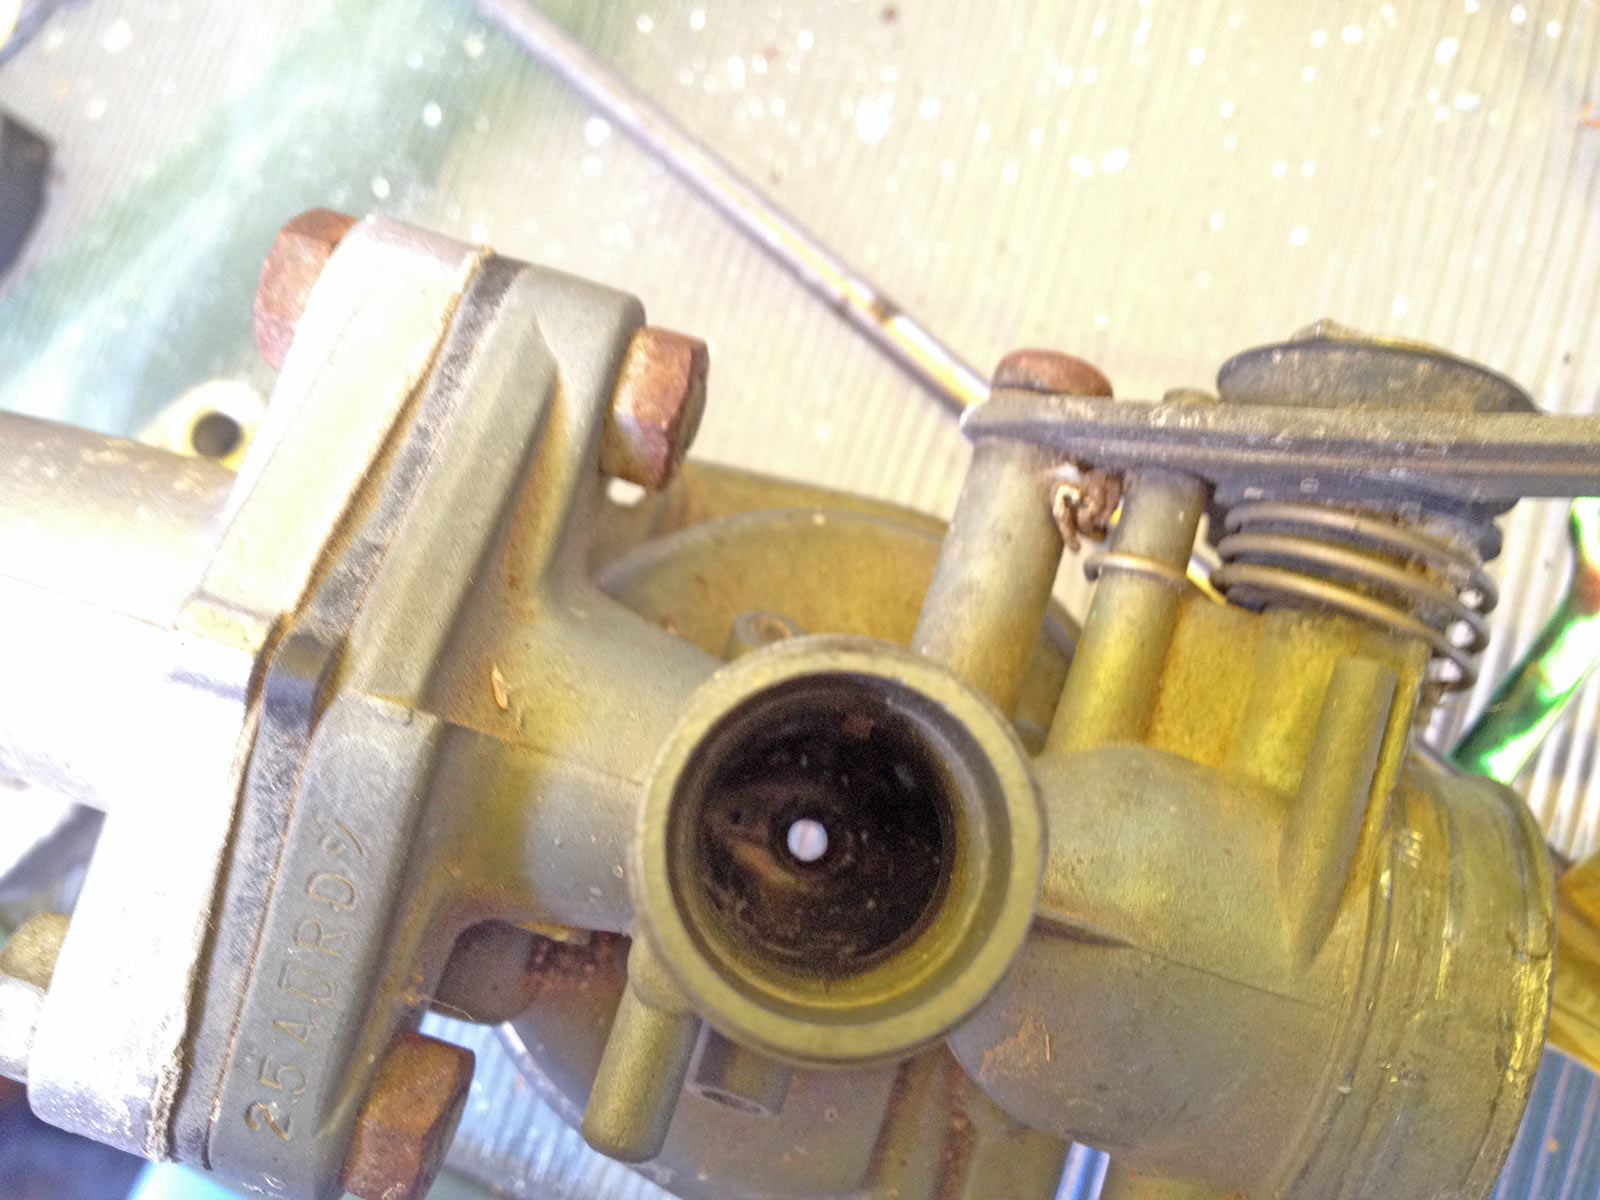
On these carbs this is a critical wear point: plenty of postie bikes go around wondering why their fuel economy sucks… it’s cause the throttle needle wears on this aperture, making the needle skinnier and the aperture wider. This makes the bike run rich at part and full throttle (the diameter of the aperture also controls the mixture out of the emulsion tube).
To remove it for inspection, it is pressed down with someone plastic from above AFTER YOU HAVE REMOVED THE MAIN JET AND EMULSION TUBE.
With it out, you can have a good look. This one is not ovalled and is nice and uniform, so it’s probably still good for a bit of time. Again, this is the number one reason why postie bikes run like shit as they get older. Replacing it and the throttle needle is a massive boost.
An interlude: how throttle needles control mid-throttle (cruise) mixture.
With the throttle at basically no throttle, the throttle needle sits almost fully into the aperture we’ve just removed.
Once you open the throttle a bit, say to mid throttle for cruising along, the needle is lifted out of the aperture. As the needle gets skinnier as you go down its length, more area is exposed for fuel to flow through. Nice. At nearly full throttle, the needle is fully withdrawn from the aperture and the main jet size is what controls the full throttle fuelling. Nifty.
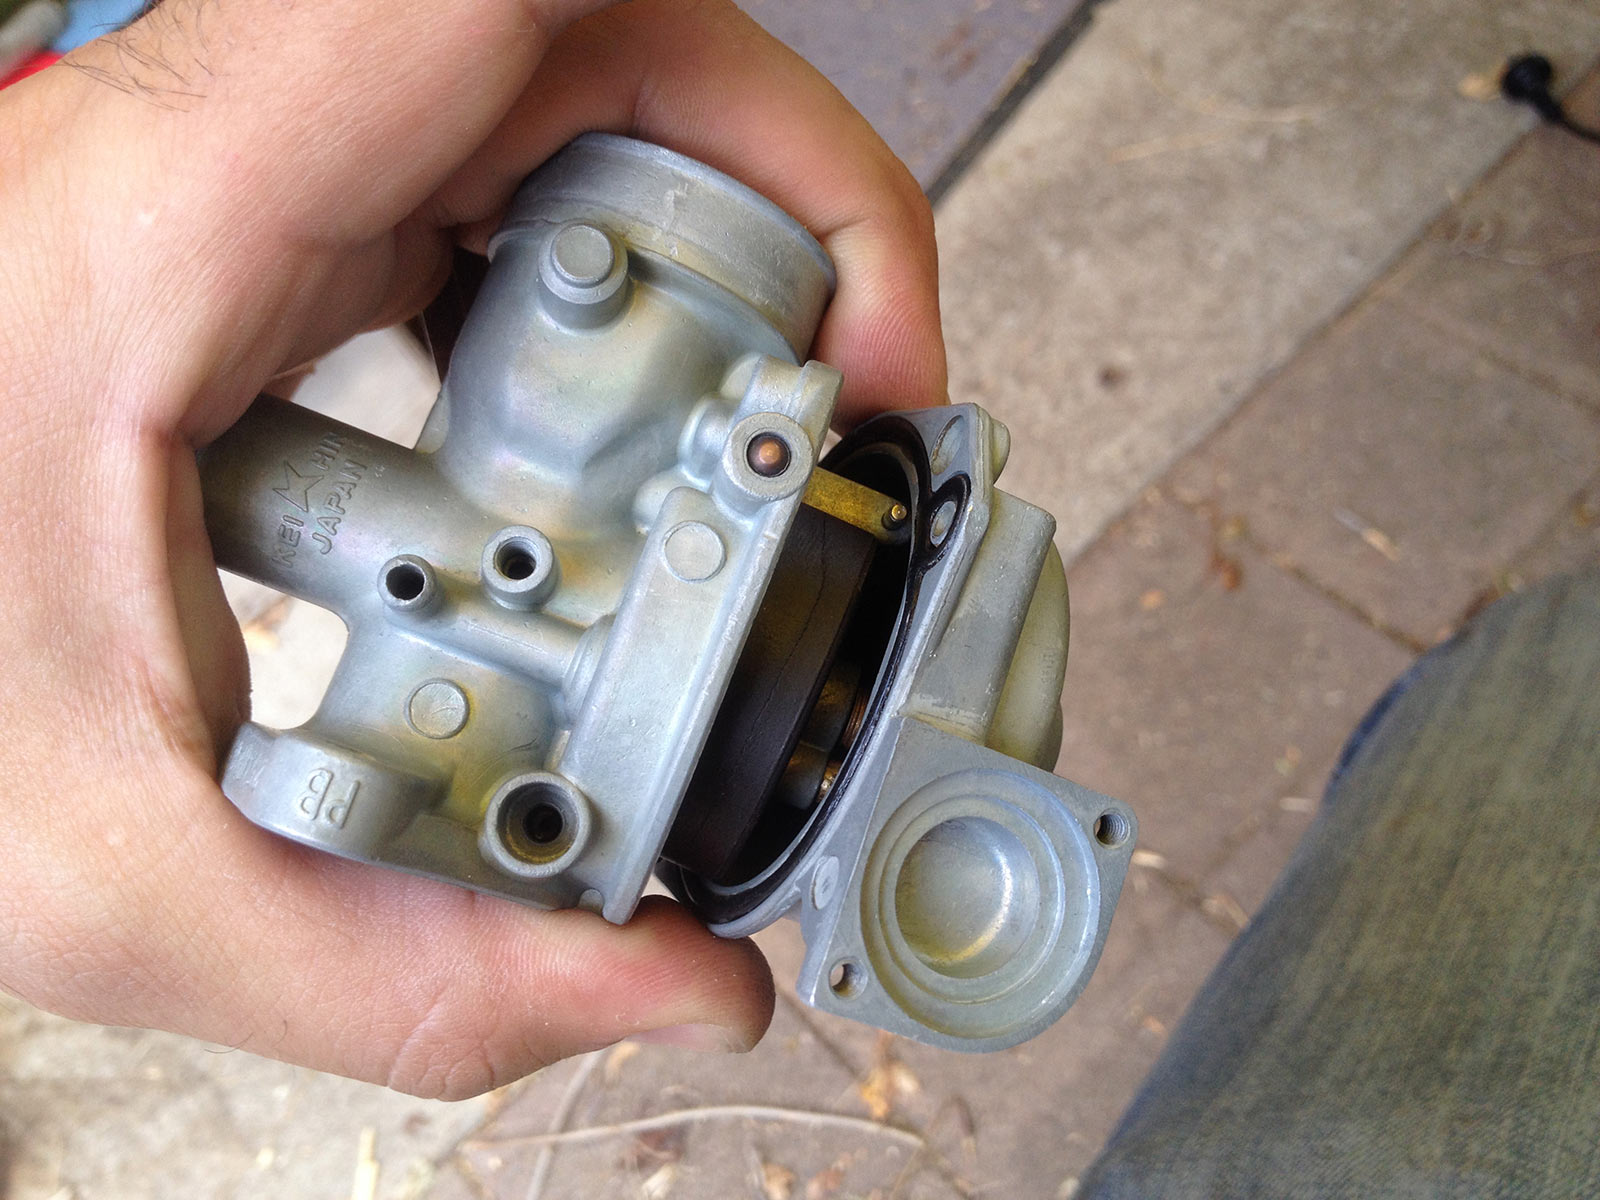
Time to remove the manifold. Not too hard, a couple of nuts that lock the bolts, then unscrew the bolts from the carb body.

3. Select your cleaning fluid
This is an important step, but also one that I think most people overthink. The purpose of an ultrasonic bath is to shake loose any dirt, rather than specifically requiring a harsh chemical. You can get great results in many cases just using water. Nevertheless, I think there’s a few other options that are quite useful.
Plain water is the least aggressive, and safest. No nasty smells, not bad on rubber parts etc. It potentially can corrode some materials, obviously, so you don’t want to leave things in there a long time.
Water mixed with degreaser is a great option and my usual go-to solution. I usually go for a non-caustic degreaser (simple green in the USA; Oomph! available from Bunnings here in Australia is much the same thing.
Water mixed with a corrosion reducing agent option: citric acid is a great one here. Citric acid is cheap from food supply places, and mix it about 20-50g/L for good results. Cheaper than lemon juice (which some people have used). Vinegar is another great DIY solution here.
Carburettor cleaner: great for cleaning out carbs, horrendous on rubber parts. Also not great to heat too far if your ultrasonic cleaner has a heating option — too many fumes. It can be expensive in bulk, though a 33% mix methanol/33% acetone/33% toluene is a common base for many carb cleaners.
Petrol: the ultimate in dodgy DIY solution, this can be great to remove varnish from carburettors. It isn’t great for the environment when you dispose of it, and heating it is not a great idea at all!
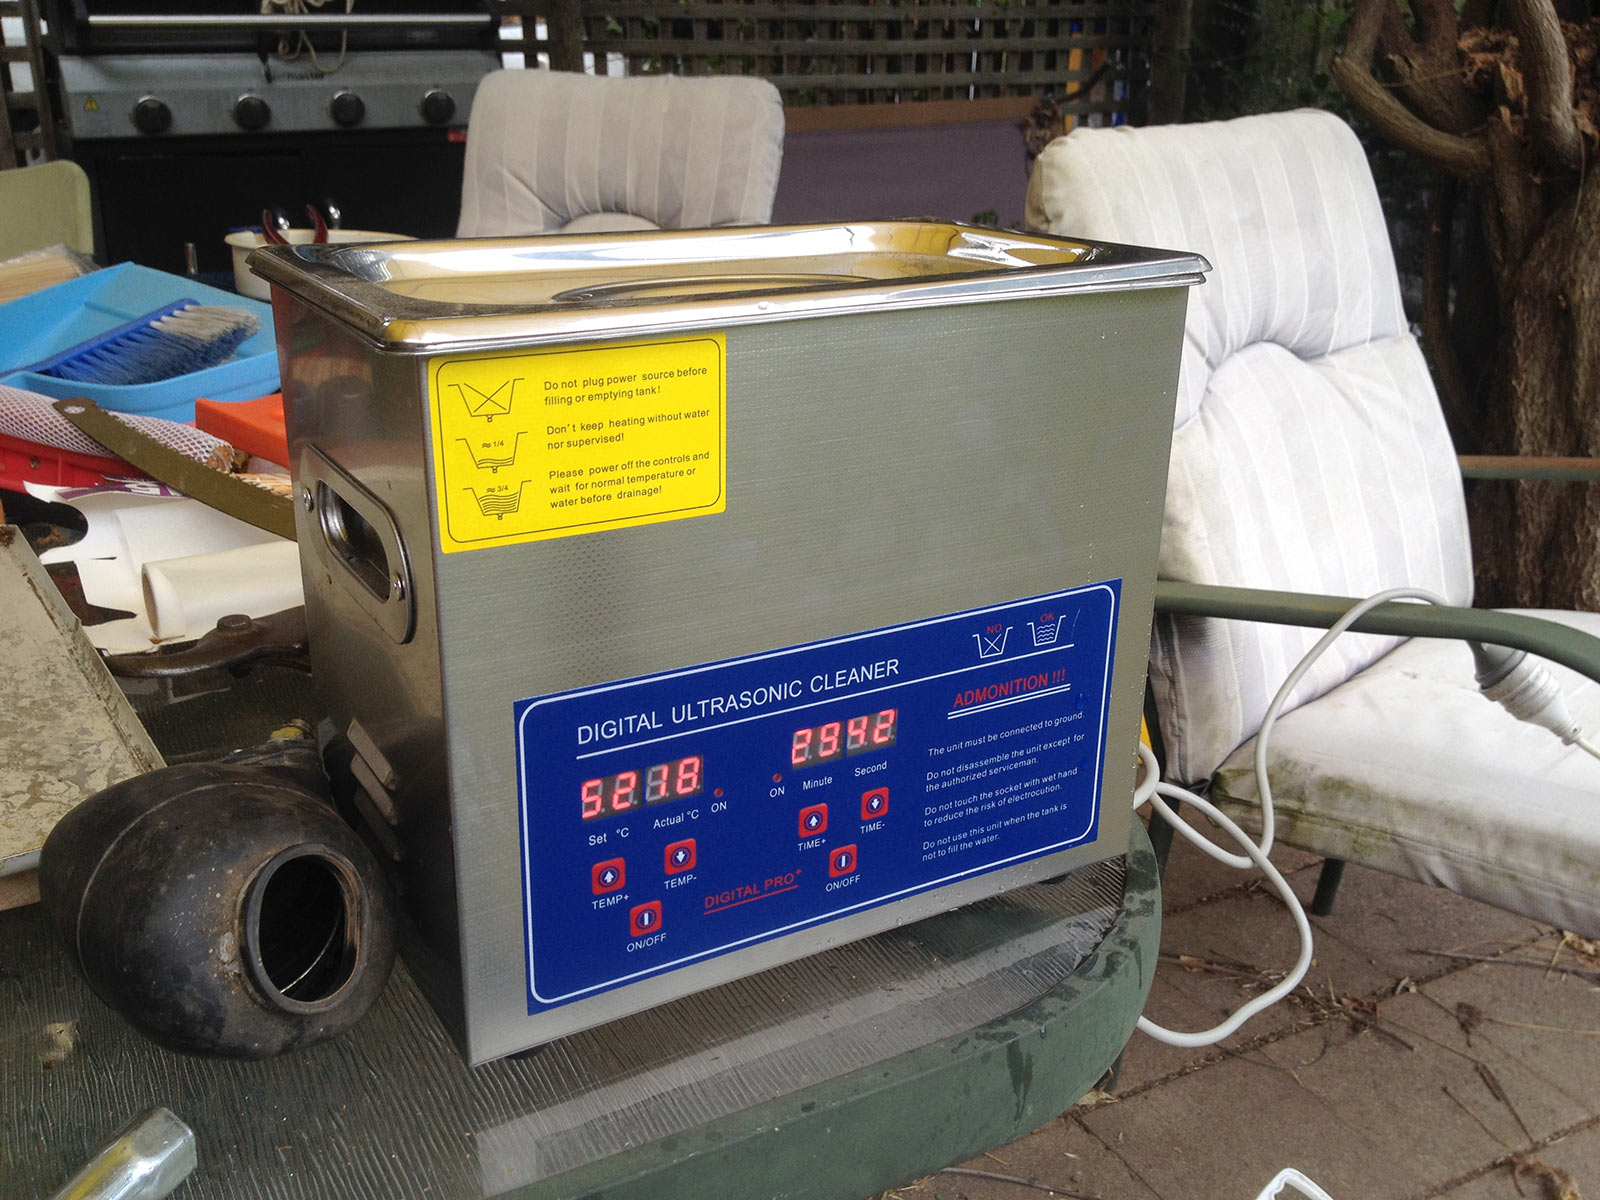
4. Ultrasonic cleaning time
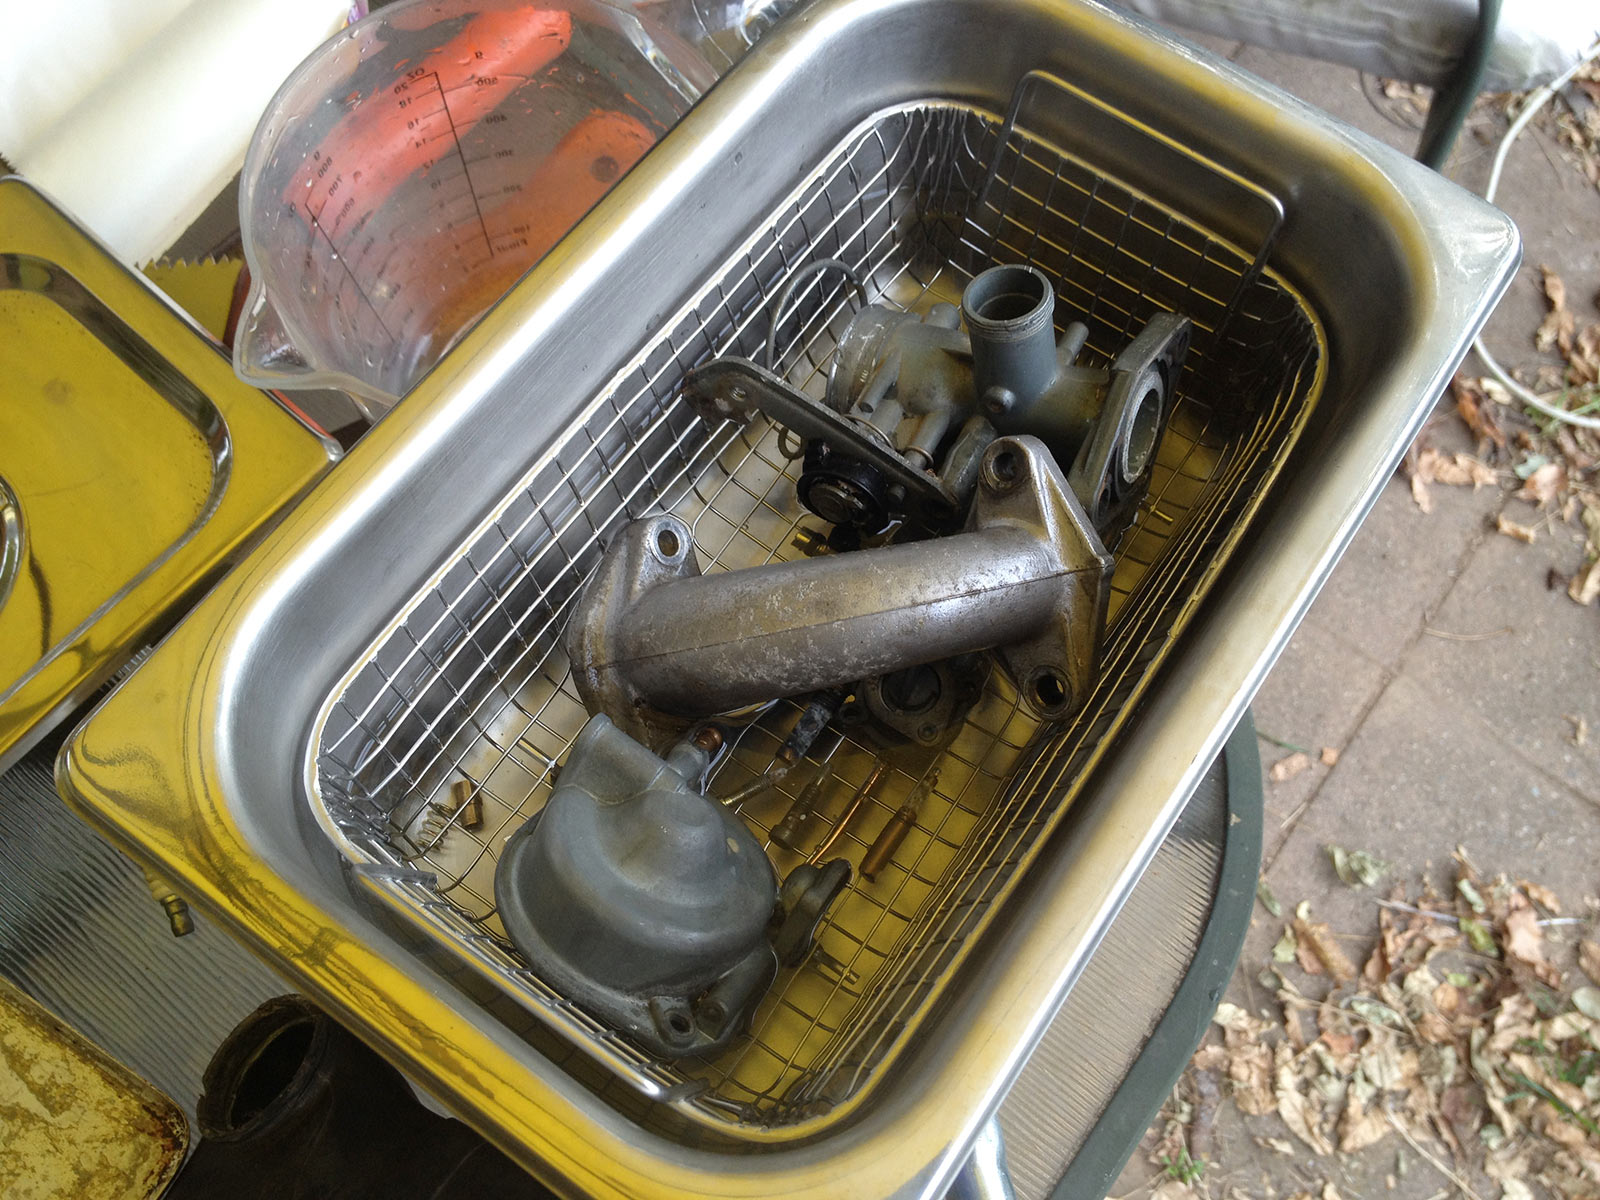
Ultrasonic baths are awesome. They used to be super expensive, now you can buy yum cha ones pretty cheaply on fleabay. The one I use was about $100 a year ago, the bath has a total capacity of 3.2L, and it also has a heater. Nice.
I can fit all of the bits, including the manifold, into this bath. Later on during this work I fitted a much finer mesh screw to the bath basket to make it easier to retrieve stuff like the jets etc… anyway, it’s not hard to pick them out with tweezers or pliers anyway once it’s done.
For most of the cleaning I used water at about 60ºC (initially I tried 50 but then upped it to 60) with a 50:50 mix of non-caustic degreaser from Bunnings and plain ol’ water. This worked great with a run of about 2 hours. Other options are discussed above.
For the final corrosion removal, I used a light citric acid mix. Citric acid is great, you can buy powdered sacks of it cheap as it’s used in making lollies and stuff. I used 25 g in 1.25 L of water for corrosion removal for this carb. I didn’t leave the carb bodies in long at all (less than a minute) as they are zinc based carb bodies & they can corrode really easily. You don’t want enlarged passageways!
In either case, I rinsed the carbs in cold fresh water first, then very hot water so they dried really fast.
The results, well, nothing short of amazing.
5. Reinstallation time!
With everything clean, now it’s time to reassemble.
Emulsion tube was the first thing I decided to put in. So much prettier than before.
One thing to note here – those little holes in the side? Yeah, they’re the bits that bleed air into the atomised fuel stream so you want to make sure they’re nice and cleaned out. A lot of people don’t and wonder why their bike runs rich after a carb clean. That’s one reason why – it’ll be horribly rich without some bleed air into the fuel stream out of the main jet.
Main jet goes on with a flat blade screwdriver, then pilot jet gets pushed in.
One thing to note here: main jet is a #78 round Keihin mini jet, and the pilot jet is a #38. This didn’t match any specs I have, but I also don’t have a definitive Australian C90/Supercub workshop manual/spec thing anyway.
Float and float needle are the next bits to go in. Hang the float needle from the float to make it easier to line up into the float needle seat…
… then lower it down and hold it in place ready to push the pivot rod through the carb body and the float.
Oh, lots of people go on about resetting float heights… unless I’ve bought a new float, mine have always been good. They do take some bending. Anyway, when people talk about float heights usually this is the height the float body sits above the flat part of the carb body when you hold it upside-down.
With no reference number to shoot for, I left it as-is.
Float bowl is the next bit I put on. Weird shade thing makes it look like I didn’t clean some of it!
When you reinstall the float bowl, you need to make sure that the little fuel aperture thingo lines up appropriately with the hole in the main carb body.
Next up – drain screw! Don’t forget the o-ring on this, they leak like a sieve if you don’t put it on.
Idle speed screw can go in.
Idle mix screw can go in, though I always like to do the float bowl screws up at this point. Tighten them up a little at a time so as not to warp or crack the float bowl.
Simple tip with the idle mix screw: turn it all the way in until it LIGHTLY (don’t smash it right in there!) seats. Unscrew it 1.5 turns. That’s a good spot to start with on a newly refurbed carb, though it’ll idle badly till you warm it up and set the idle speed and mixture correctly.
Fuel tap can go on. Remember the fuel strainer and the sealing o-ring here too!
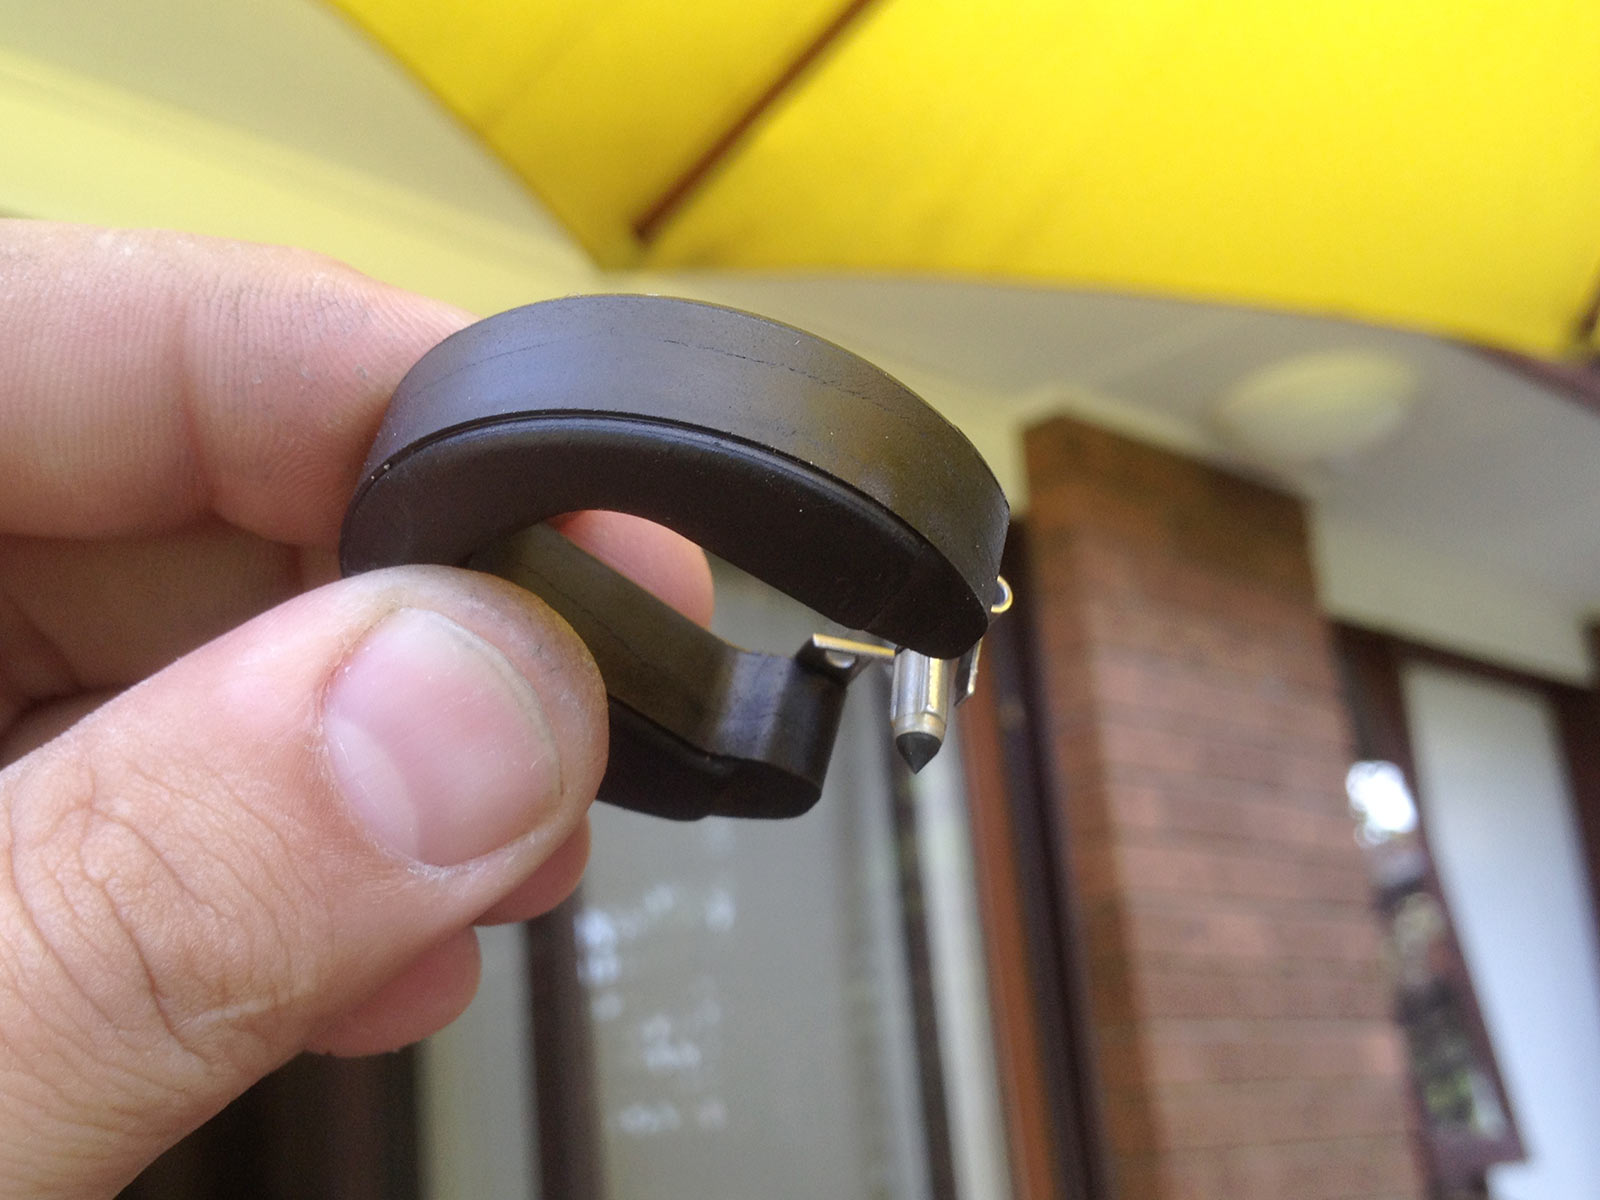
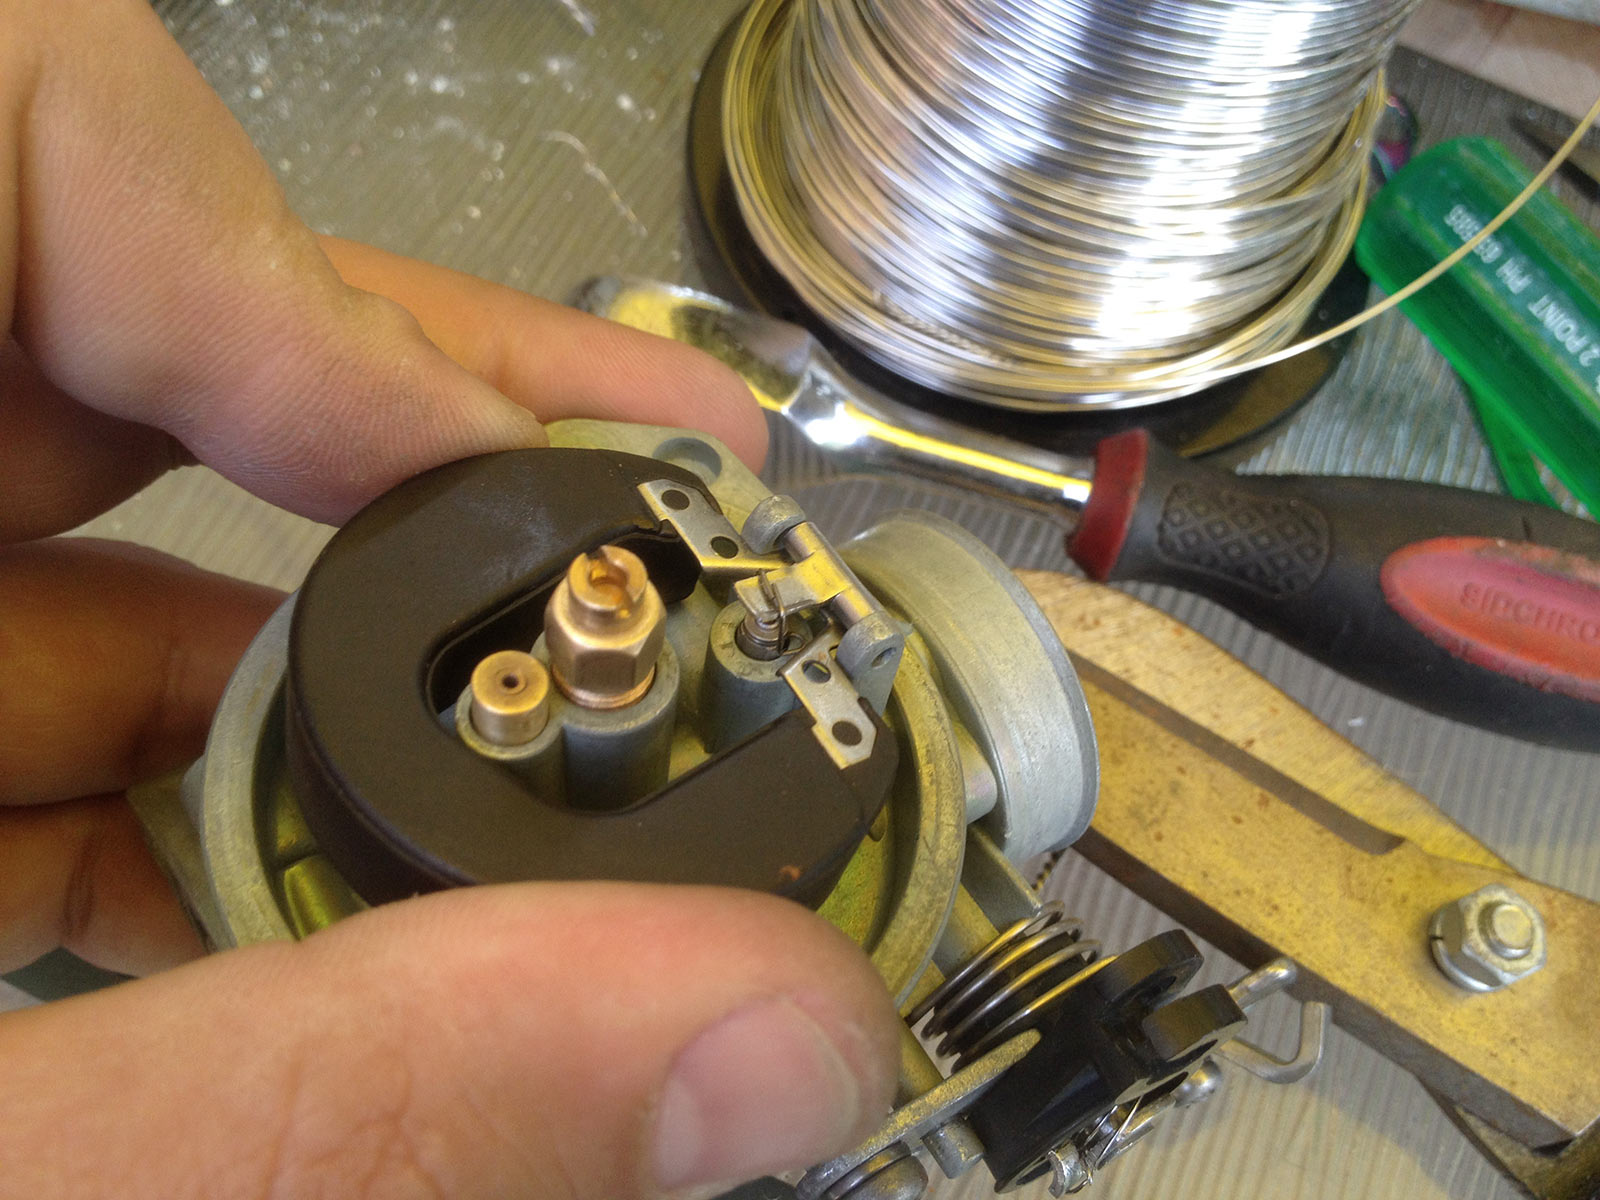
Final handy hint for the throttle slide/throttle needle. When you put the throttle needle retaining clip in, line it up as per the below pic to make it easiest to put the throttle cable nipple into the throttle slide. Trust me, it saves trying to turn everything around later on!
Finally, manifold can go back on and the carb can go back onto the bike!
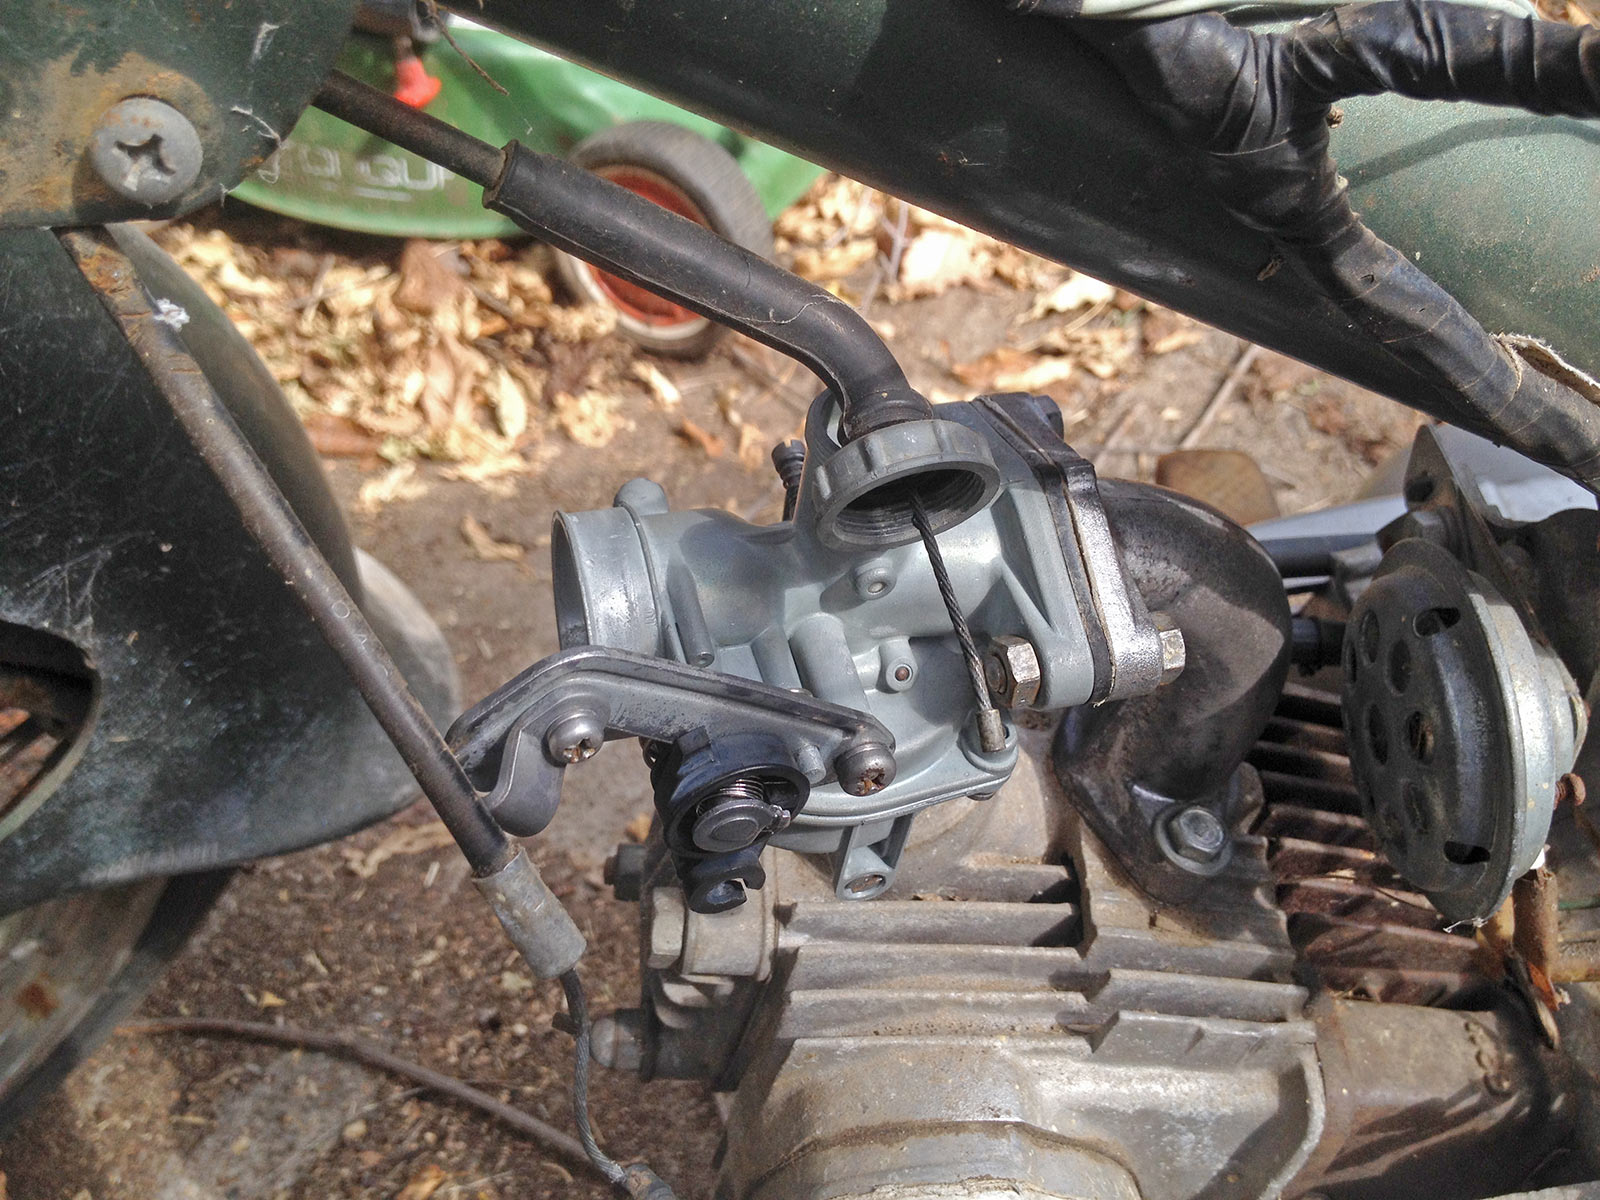
Lube up the cables, reinstall throttle slide onto throttle cable, reinstall choke cable, job done. (No pics of this, I had other stuff to do).
And, yep, with that all sorted out, the bike started first go. Basically like new… as you’d expect, cause I’ve refurbed the carb to as-new standard.
Now, obviously, people will ask “why didn’t you just buy a carb kit?”. Well, when you don’t have specs, aftermarket carb kits can be hit and miss with the jetting, needle jet and emulsion tube they provide. Often they are not exactly to spec, and then the bike never runs quite right. Other than the throttle needle and its aperture wearing on this particular carb design, carb parts don’t really wear out much. Especially main jets and the like. If you clean them properly, they can be reused no problems.
Carb kits are good for new gaskets and o-rings and I’ll be ordering one for this to replace a couple of the hardened o-rings… but for now, properly cleaning it is a great DIY way to resurrect a 40 year old bike hauled out from a backyard after 15 years of sitting in the weather.