
Do-it-yourself carbon fibre
(Mostly by Chops)
With the requirement for auxiliary crash protection for racing motorcycles in Australia becoming more common, an excellent (and cost-effective) solution that also looks appropriately race is to make your own carbon fibre covers. This is the TGR guide to making covers on the relative cheap that look great, work well and pass through scruitineering like you’ve bothered you properly prepare your racing motorcycle to MA requirements. They can look pretty trick on a road bike, too.
There’s a bunch of steps involved but I’ve tried to break it down as much as possible but bear with me, there’s a lot of detail here. I will also be updating this article with newer photos as I tackle some new jobs.
Supplies needed
Back when I first did this, there was a company that supplied nice kits. Unfortunately, they don’t now, so to do this you need the following:
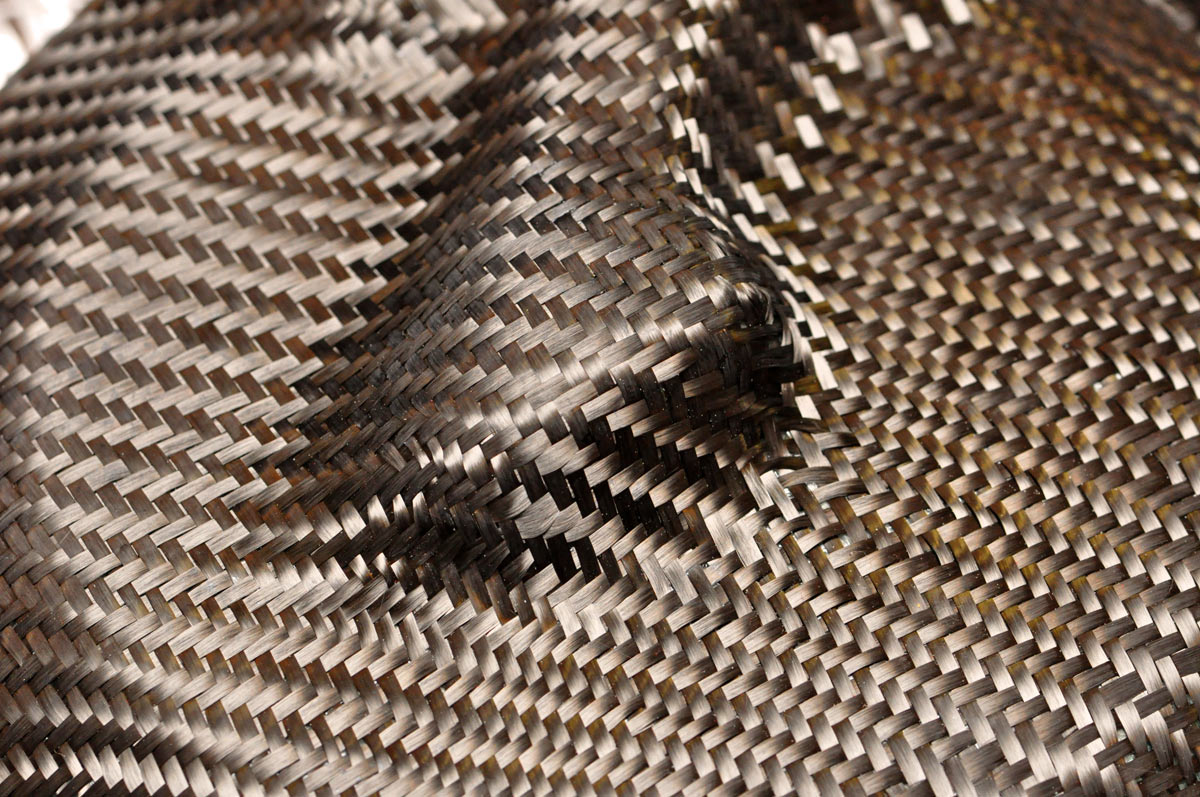
* Fabric
If you want to pull good smooth moulds to make repeatable covers, then get some woven (not chopped mat) fibreglass to make these.
For the actual covers, carbon kevlar or kevlar is recommended for abrasion resistance. Carbon is good for looks though.
I’ve bought my fabric either locally (ACT Fibreglass Supplies are excellent in Fyshwick) or from overseas suppliers. Lately, from about mid-2013 onwards, I’ve been using Composite Envisions as they have a great deal of different fabrics and are pretty quick to ship in most cases.
* Epoxy
West Systems slow hardening epoxy (105/205) is the business for this. They also do a UV stabilised one which is probably better for clearcoating, but I haven’t used that as these are for racing not for appearance with huge thick layers of clearcoat. I do go over them with a UV stabilised acrylic clear coat in an aerosol spray can. Generally ends up being VHT clear coat designed for wheels, as that’s moderate temperate resistance so it’ll be ok on engine covers.
* Mould release PVA
Fibreglassing supplies company usually. Apparently can make it up as a mixture of methylated spirits and pva glue but I’ve never tried.
* Modelling clay
Any art supply store or from ebay
* Sheet of glass or something to lay the covers on to make it easier to pop the covers off
Makes producing really nice covers that release easily much simpler. I actually buy cheap picture frames from a discount store and pilfer the glass from that.
* Icypole sticks and paper cups for mixing epoxy
Buy from a cheap $2 store. Test to make sure the epoxy doesn’t eat the cups. I use paper ones, as that’s simpler, but some plastic ones from the supermarket will cope. Others just turn a gooey mess. Haven’t bothered working out what plastic is ok and what isn’t.
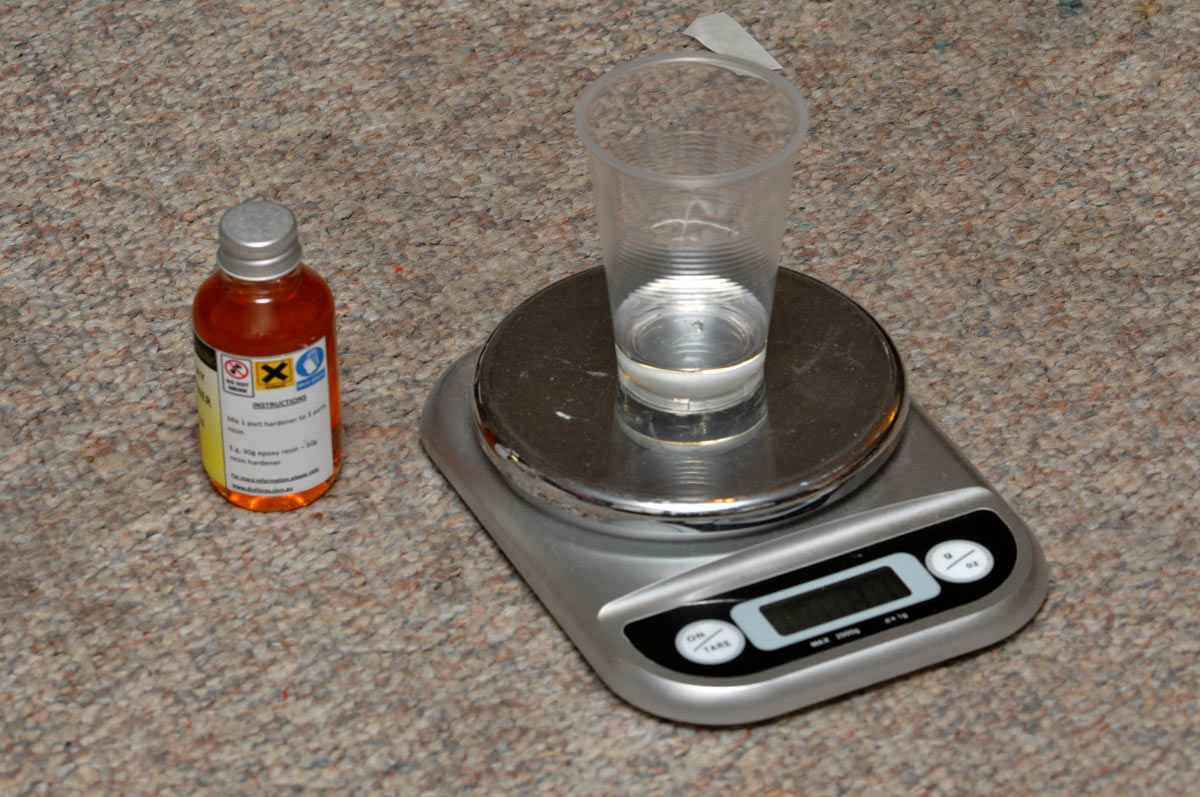
* Scales
Cheap couple-of-hundred gram scales from ebay.
* Titanium coated scissors, acetone, paint brushes
All from Bunnings/generic hardware store. Often it’s cheaper to throw out brushes than clean them in acetone. Takes about 100 mL to clean the brush properly, and that’s about $1 worth of acetone at current prices (unless you buy in 20+L bulk quantities).
* Pure carnuba wax
Any car detailing store
Example: RGV250 clutch cover in carbon fibre/carbon fibre-kevlar
This is the kit as supplied back in the day; nowadays I just make up my own with the above list of ingredients.
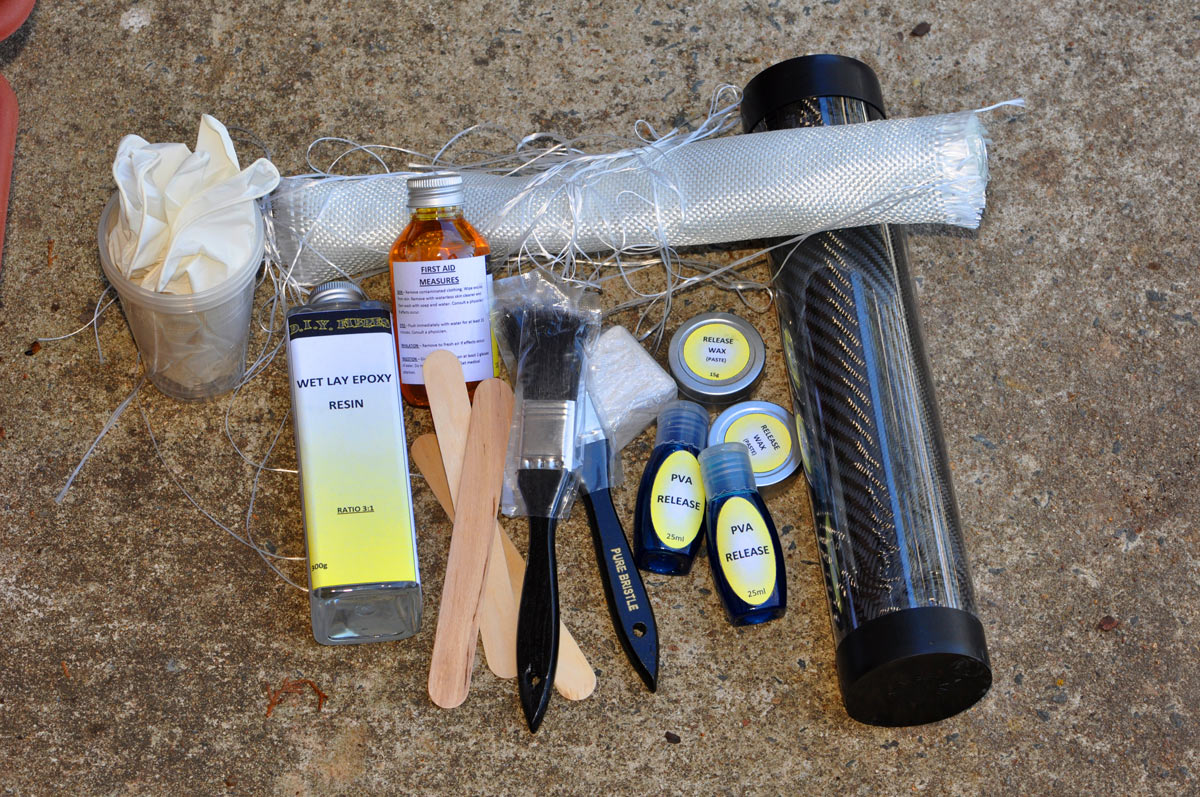
It contains some handy consumables like gloves, stirring sticks and cups to mix the resin it. It contains a wax and a release agent, so you can mould these onto engine cases — including cases still on the bike. It also contains some modelling clay which you use to smooth out sharp points. There’s also a roll of CF and a roll of woven fibreglass, and an epoxy plus a hardening agent.
Roughly this much will make two smaller (alternator sized) covers or one larger cover. I used it to make one larger cover, for a clutch/waterpump setup for a VJ21 RGV250. No aftermarket crash protection covers exist for the poor RGV, alas.
Preparation
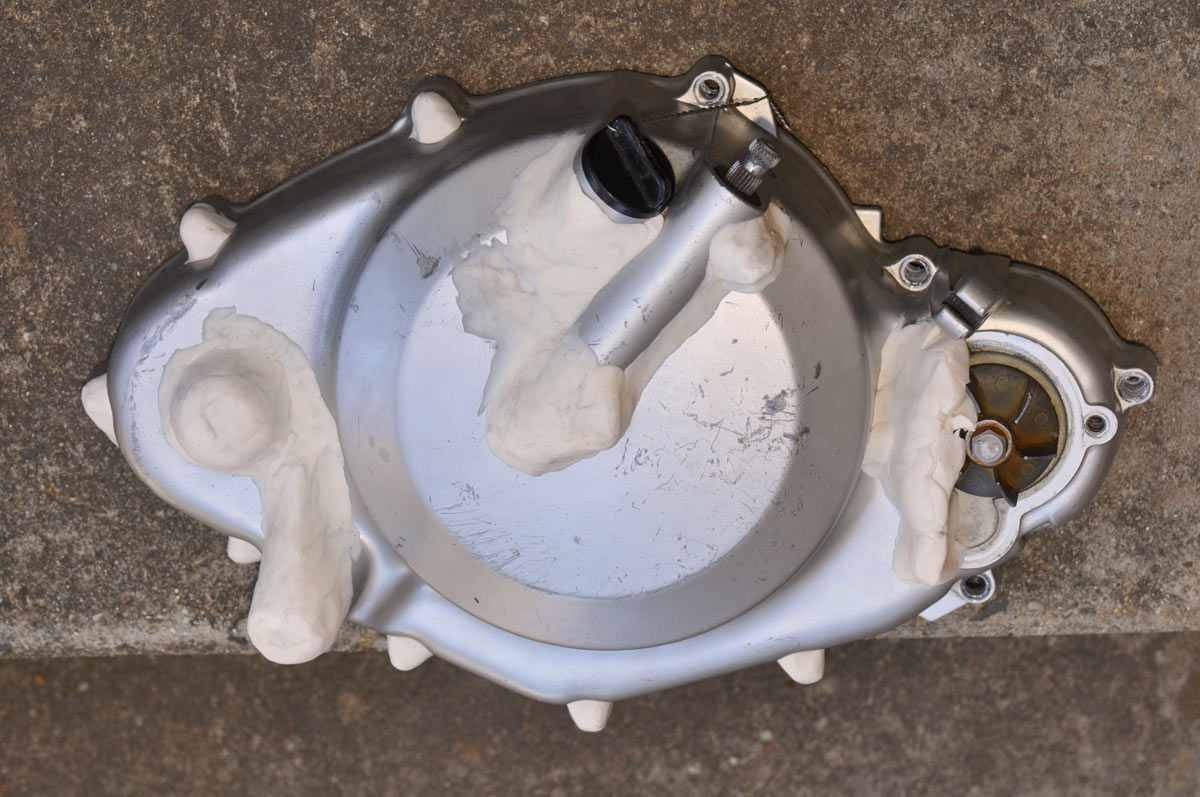
Here’s the case cover off the bike:
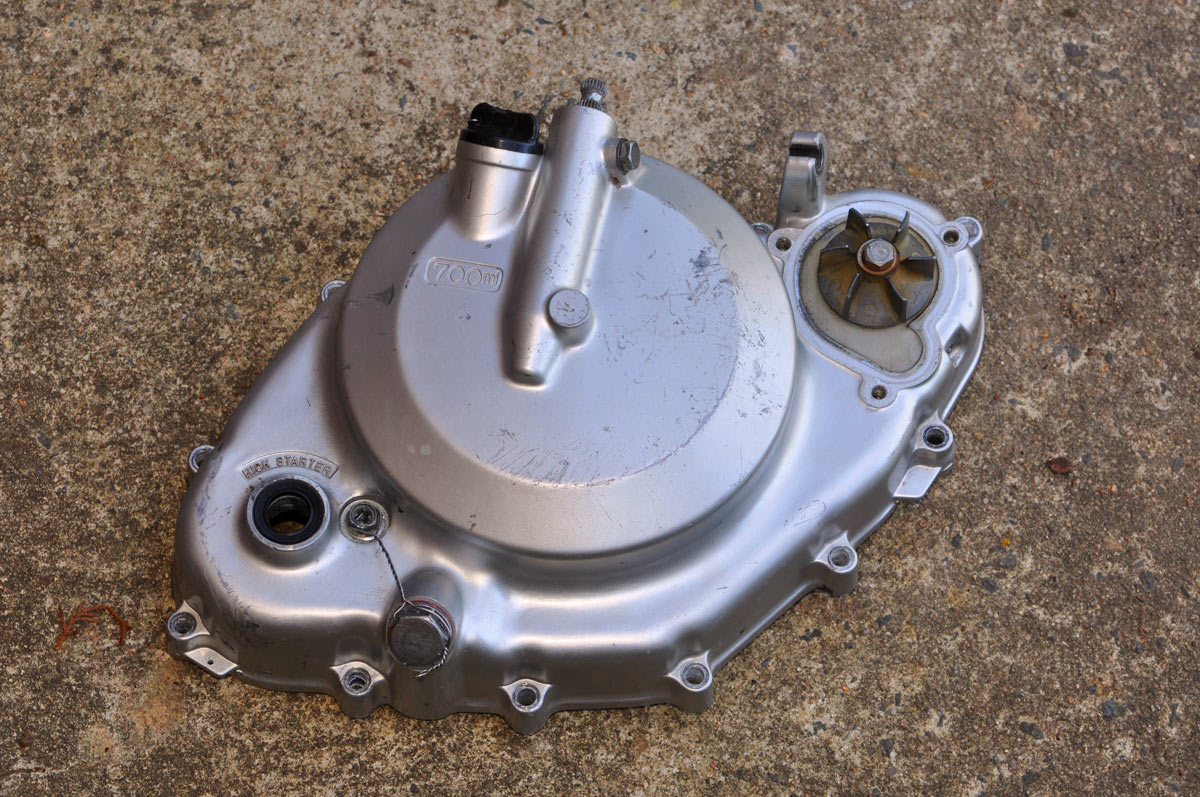
You can do this kit with the case on the bike but it’s probably easier to work with if the case you’re covering is off the bike. That cover has been completely cleaned with degreaser and wax and grease remover to get it as good as I am going to. I didn’t bother going all the way over to the waterpump cover (as it’s a long way inside the bike; the radiator will be gone before it hits the road) but I covered the waterpump impeller in modelling clay.
The important bit to get right are the sticky-out bits of the cover. Note the lockwiring: my first attempt to do a cover (shown here) covered the drain plug, so I had to mould it up with the lockwiring in place. The second one I did was designed with the drain plug exposed, which did make it easier to lay up. You live and learn.
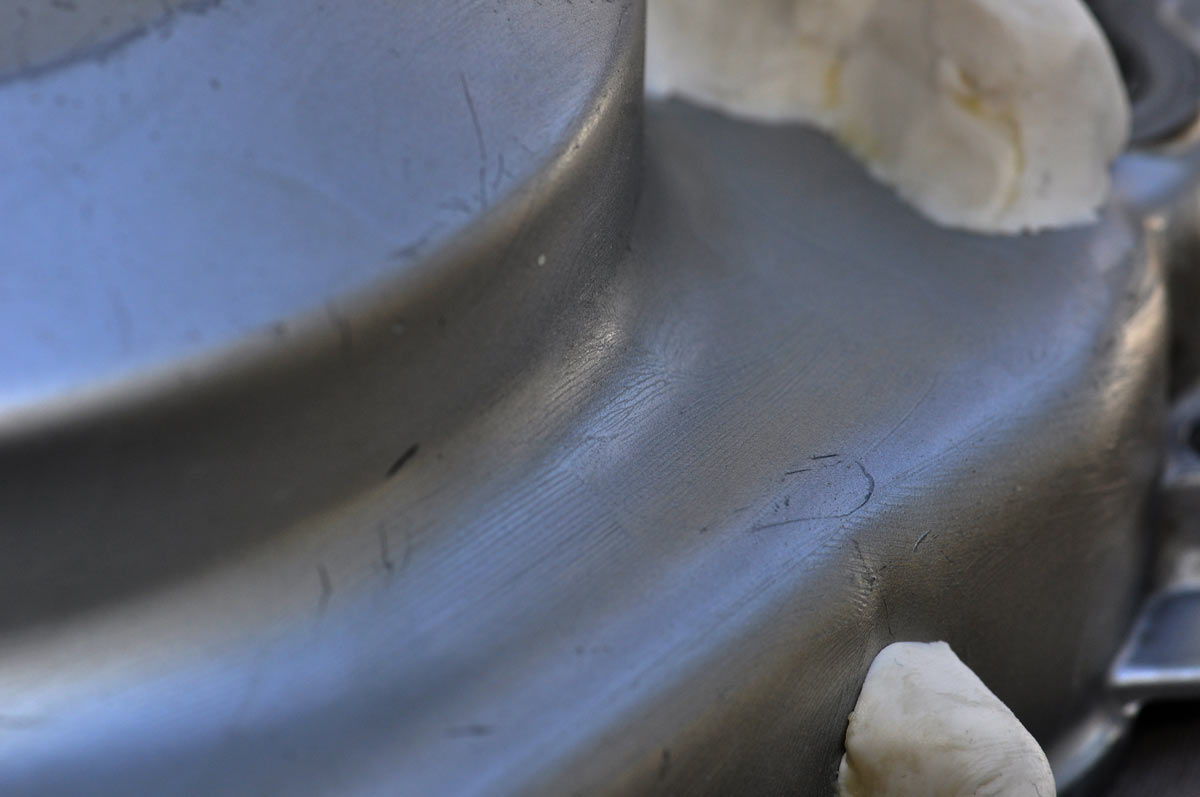
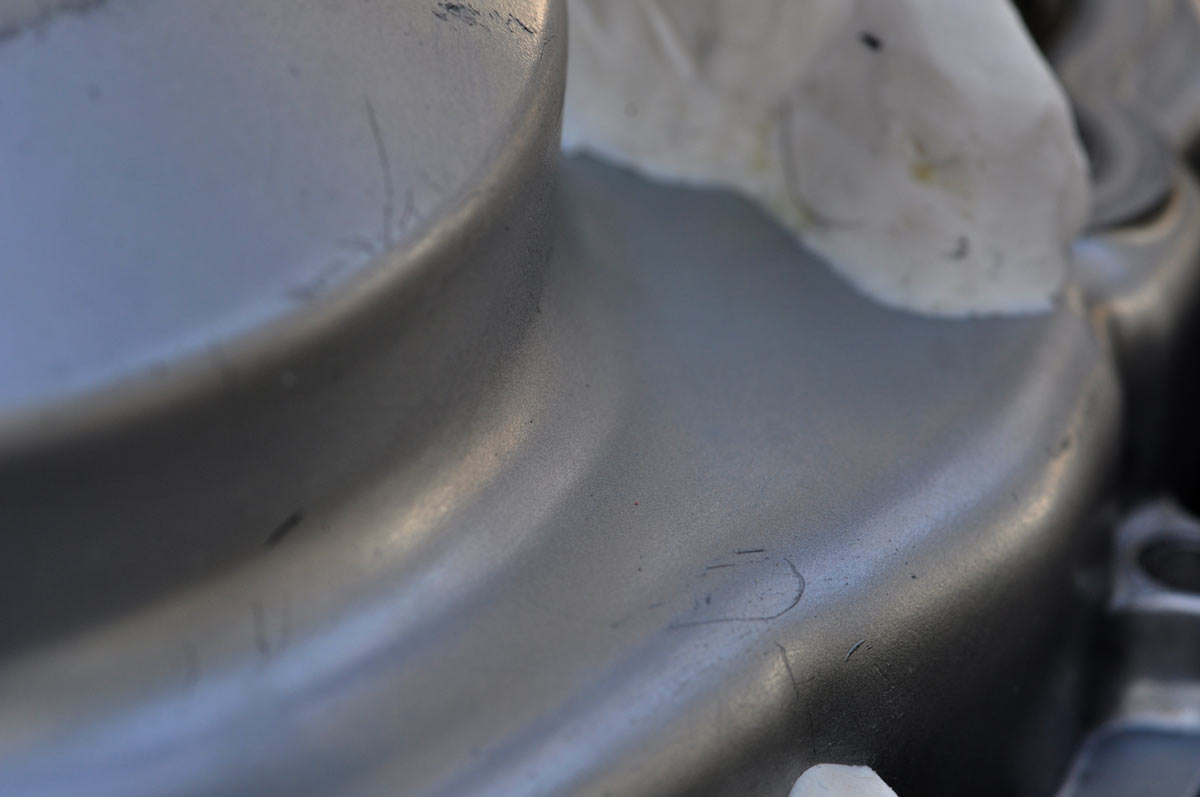
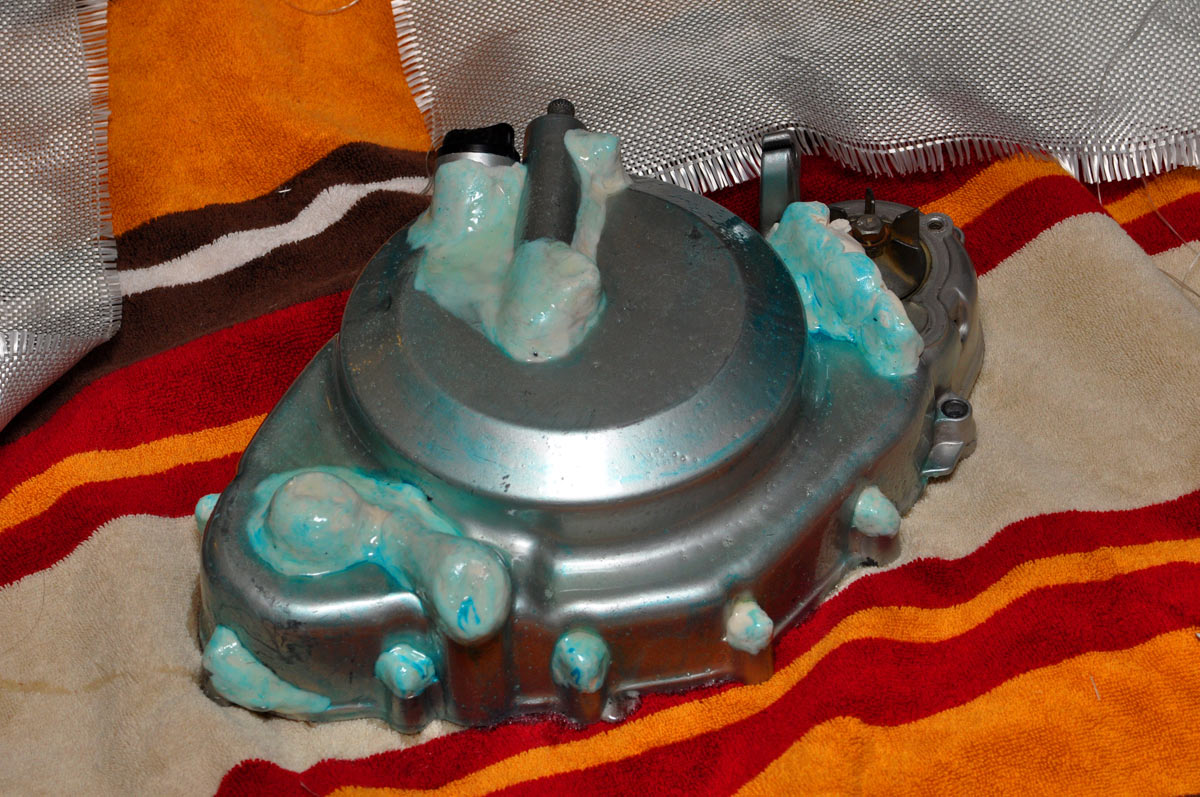
With a nice clean cover, we start by smoothing out the sharp bits or areas that resin would pool excessively with modelling clay. This stuff comes off with soapy water so it’s fine to use even on a nice new engine cover.
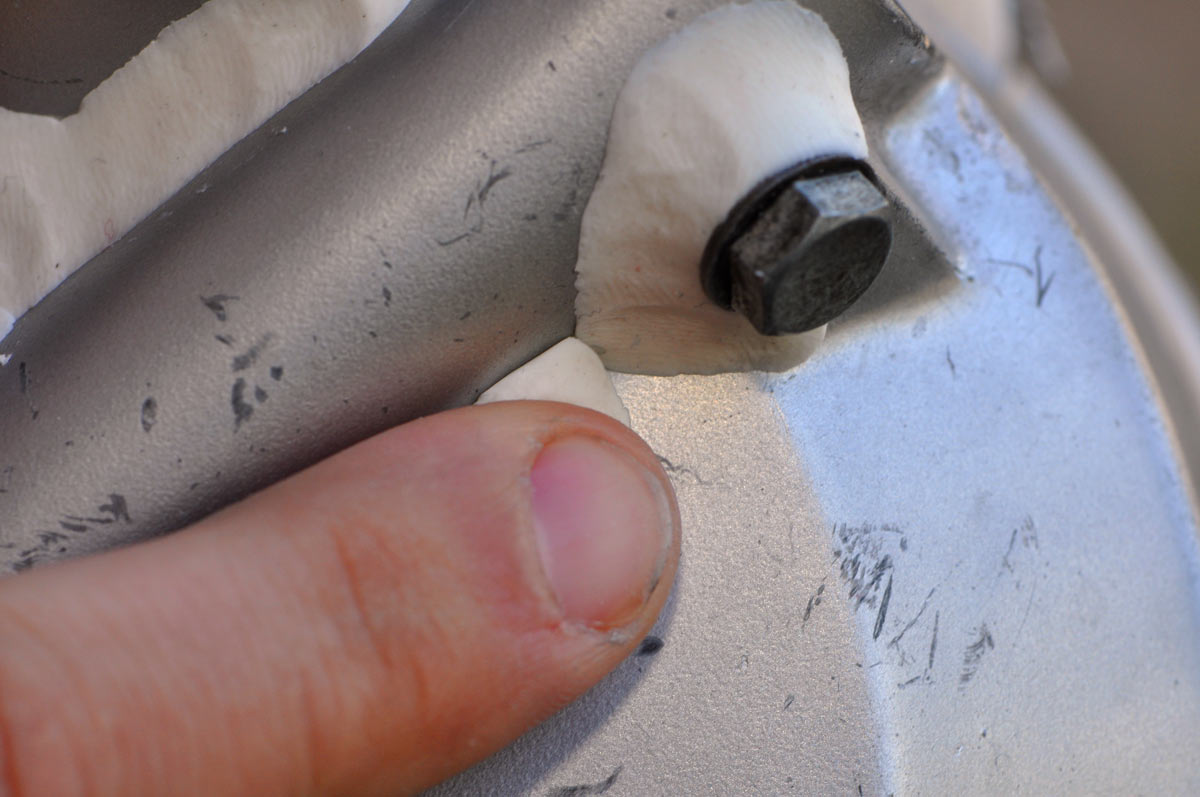
Work it gently to keep the surface of the clay smooth.
The final shape you see after applying all the modelling clay is the shape your cover will approximate. Water pump here is dodgy but it’s just to help keep some shape in that general area: ultimately it’ll be mostly trimmed off.
After prepping the case with clay, we now need to wax it. There are two supplied tins of wax: I used less than half of one to do this cover. You’re meant to apply it with a lint-free cloth then buff it off; I heated it up using my hands and applied it with my fingers. I did 6 coats: 3-6 are recommended. You want it nice and polished and smooth: filling in any small holes and also making it so less stuff is going to stick to the case.
Shiny case, all ready for release agent to be applied.
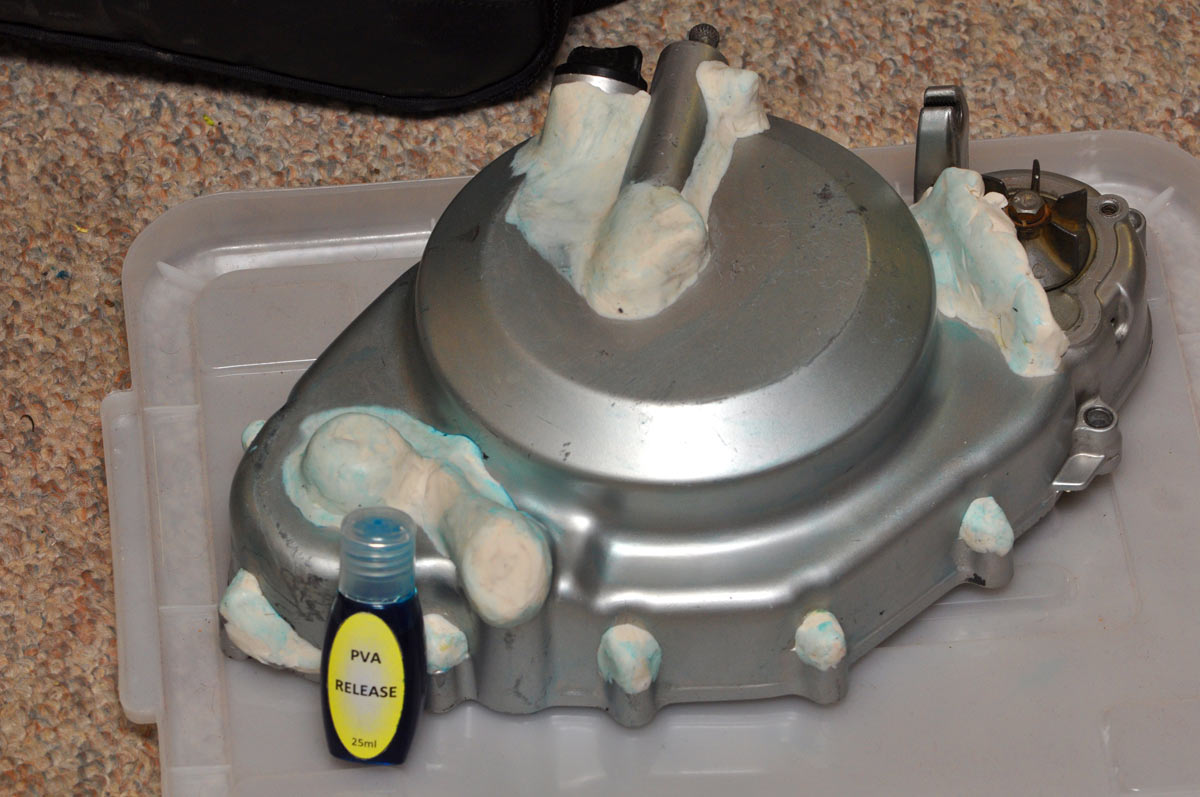
The release agent is a PVA-based agent and dyed blue so you can see when it is dry. 2-3 coats of this are applied using a lint-free cloth and ensuring nice and even coverage. Above is a pic of the first coat; let it dry before applying the next coat. 20 minutes or so between coats is about what I required at a temperature of about 18 degrees (I did it inside).
Laying up the first layers / pulling a fibreglass mould if desired
With the release agent fully applied, we’re now ready for some fibreglassing. This adds some strength to the protector yet costs less than CF, and you won’t see it on the outside. If you are pulling off a mould from the cover, this is how you do it: mould it up with fibreglass, pop it off, then do CF covers off this fibreglass. For this first one, I used it as added strength at the back (which turned out to be unnecessary).

Cut the woven sheet to size as required. Easier to do this now rather than when resin is on the cover… Speaking of resin, now’s the time to mix it up. The particular ratio of hardener to epoxy is noted on the bottle: in this case, 3:1 by weight. (West Systems 105/205 is 5:1, by the way) About 30 g of epoxy, thus 10 g of hardener, made a good batch that nicely covered this cover.
As you stir the resin, it’s really easy to agitate it a bit much and have heaps of air bubbles form in it. This is a bad thing, stir it gently and slow, though make sure it’s fully mixed.
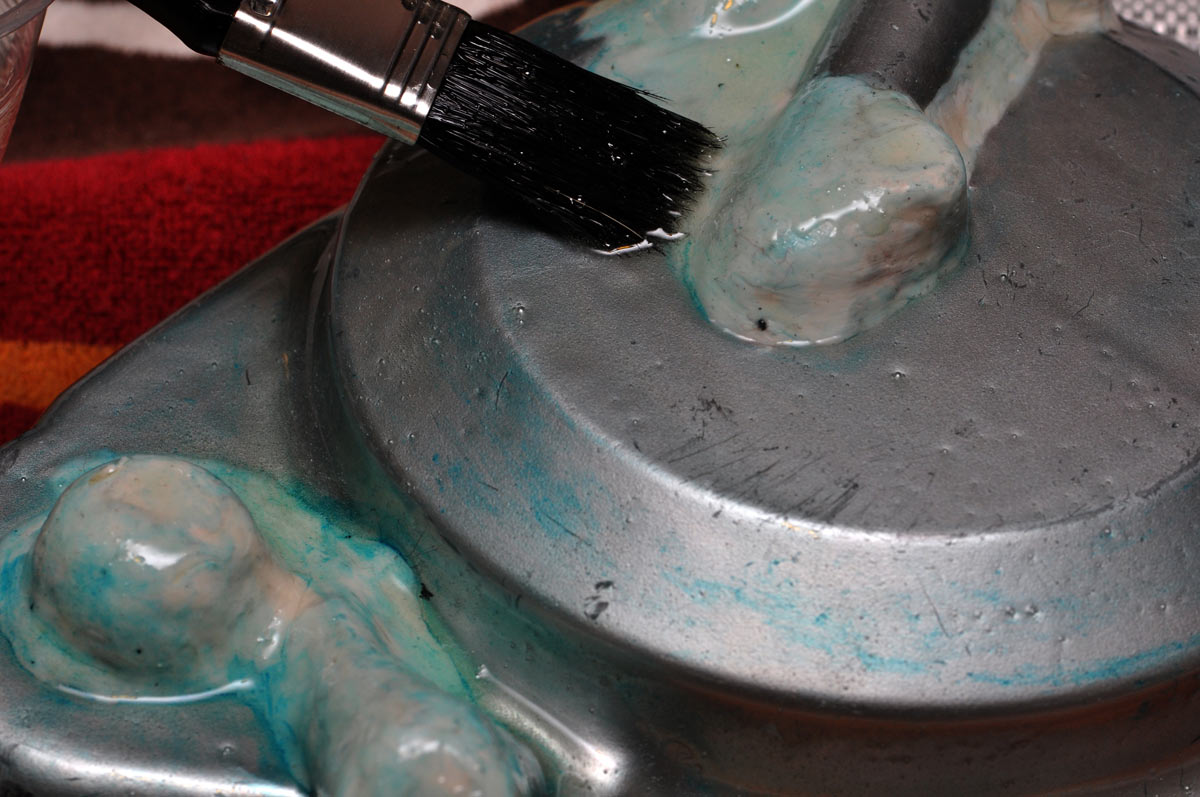
Resin goes on the case – brush it on. Note the air bubbles: to get these to rise to the surface and pop, use gentle heat from a hairdryer. If you do this, though, don’t overheat the resin, it goes super runny and goes everywhere.
Most of the air bubbles have risen to the surface here and pop as I let the resin cure a bit.
If you are doing this on a case which is still on the bike, I would let the resin go very tacky before putting it on the cover: it’ll stop it dripping everywhere.
Speaking of tacky: with the resin on the case, let it set to the point where you can still leave an impression in it with your finger — inside a surgical glove, I’m sure this stuff isn’t the best for your skin — but nothing sticks to the glove itself. Takes about 1 – 2 hours for this. Again, at 18 degrees inside, about 2 h and 10 m were perfect for it to go from the cup to being tacky.
The whole reason for the tacky resin is to hold the fibreglass (or CF) in place as you form it over the top of your engine cover.
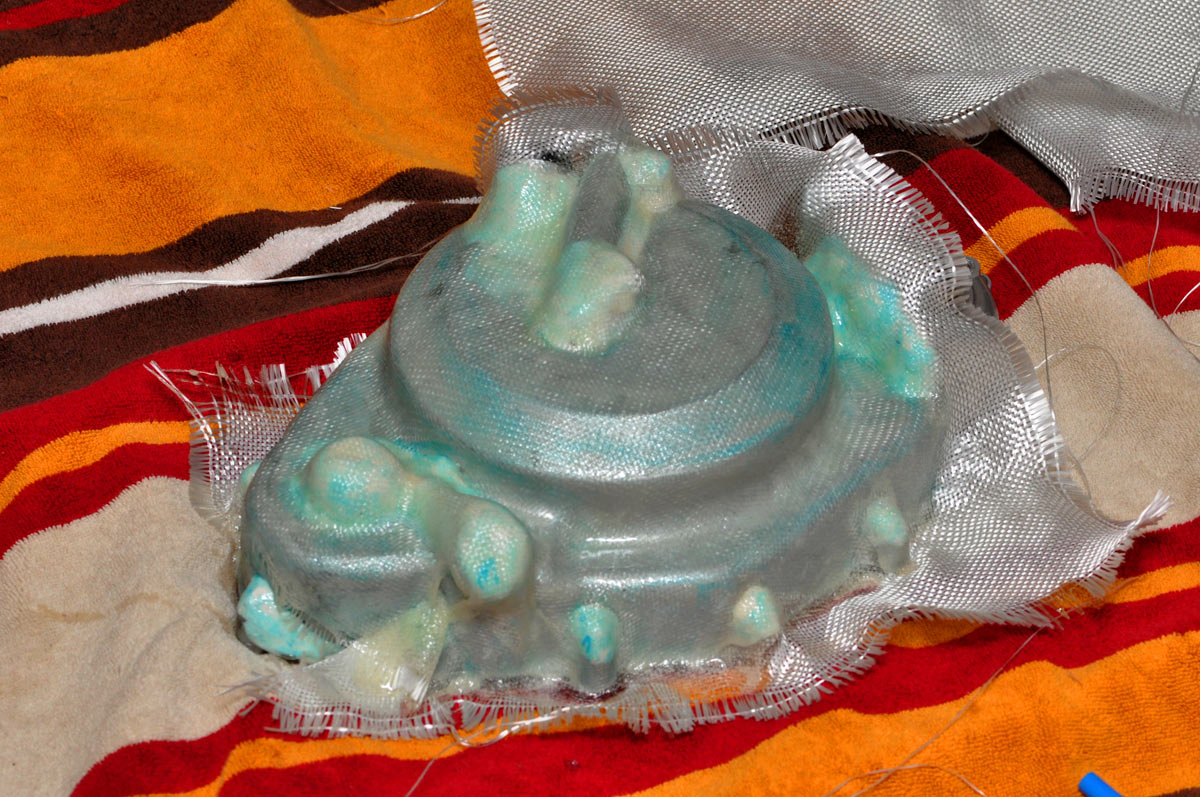
That’s the fibreglass stretched over the cover. This is not hard to do, just fiddly. Take your time and do it carefully. Work from the centre and highest point on the case, and make sure it’s firmly stuck before yanking away. This is a good time to practise how to lay it out without distorting the weave: much more important if you want a good looking CF part!
Now you wet your fibreglass: mix up another batch of resin and ‘dab’ it into the woven fibreglass.
Now is the point at which I deviate from the supplied instructions (to my detriment, as mentioned below).
In the instructions, you’re now advised to maybe do 1 more fibreglass sheet: again, get the resin tacky, chuck 2nd sheet on, then remove the fibreglass from the cover after letting it cure for at least 8 hours. Sand this fibreglass external mould of your cover and start laying CF onto a sanded version.
Laying up woven carbon/carbon-kevlar fabric
For this initial one, I decided to keep going with a sheet of fibreglass then sheets of CF. This made it harder to remove the final product, and I didn’t get it as smooth as I’d have liked… though the final product is ok. If you are really anal about it all, you pull a mould off using fibreglass then you pull the carbon covers off that mould.

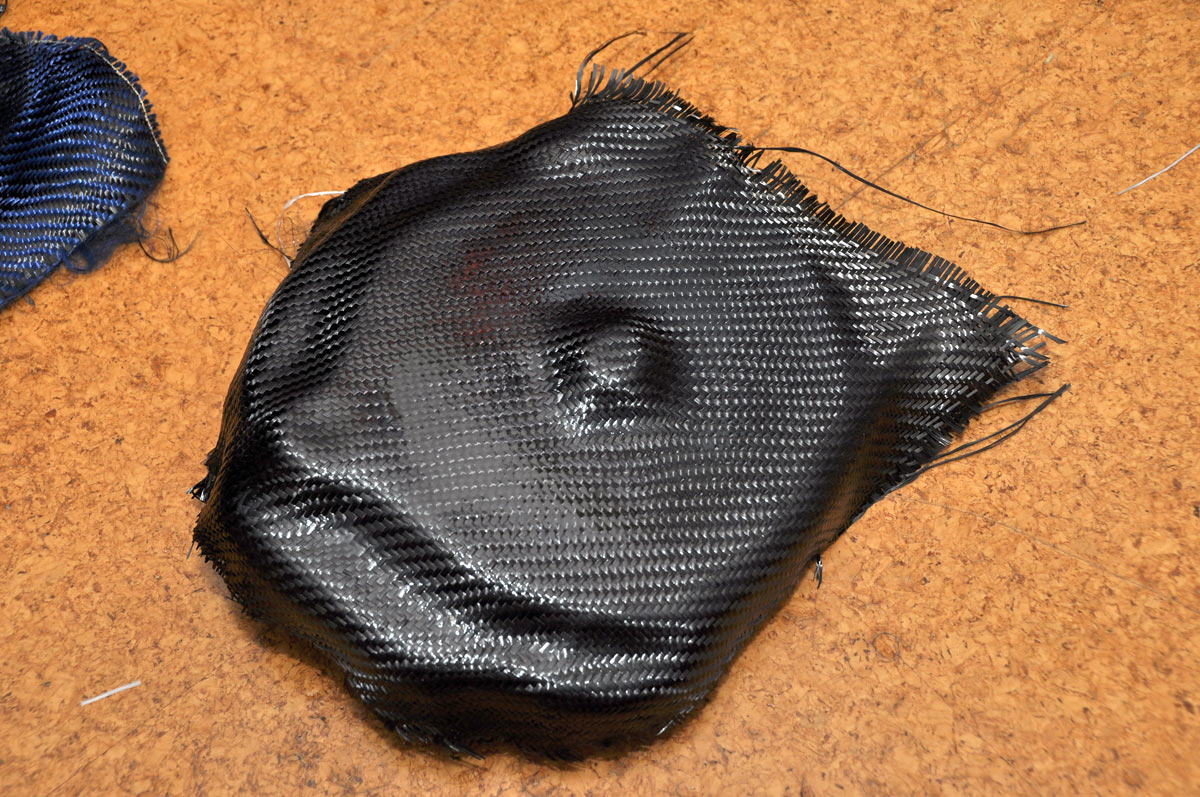
That’s the first CF sheet laid down. It’s a bastard to keep the weave straight, again, make sure you have nice tacky resin and take it slow and carefully.
Once the sheet of CF is laid down, more resin is made up, and VERY CAREFULLY dabbed into the weave. If you brush it in, you distort the weave and it looks like shite.
Let that resin get tacky, lay another sheet of CF on, etc etc.
In the end, I did 2 sheets of fibreglass and 3 sheets of normal CF (which you’re about to see) and 1 sheet of special CF (which you won’t see… just yet).
After a while, you get good at keeping the weave nice.
Above is a pic of the final cover with 2xfibreglass and 3xCF.
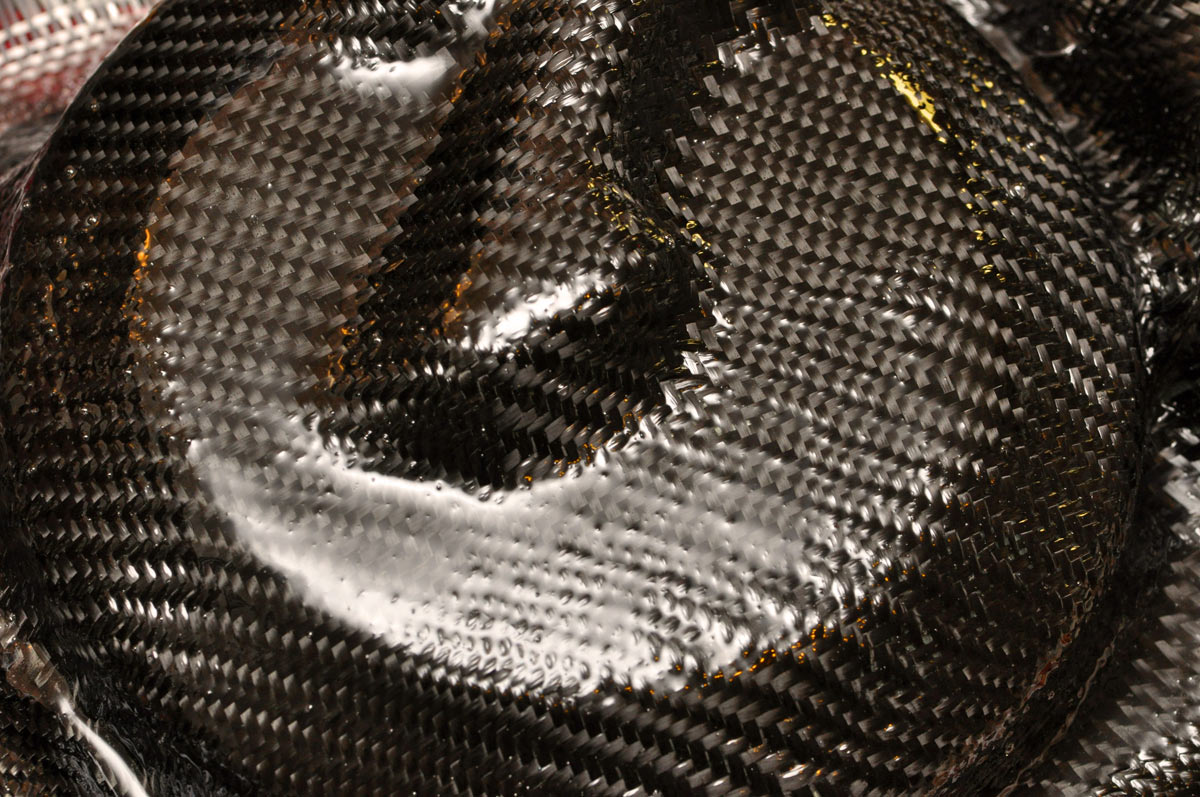
The resin isn’t perfect, but it’s good enough. We can sand it to get the perfect base for the final ‘presentation layer’ of CF.
Before doing the presentation layer, which is the most important and the one you don’t want to fuck up, I separated the cover from the case.
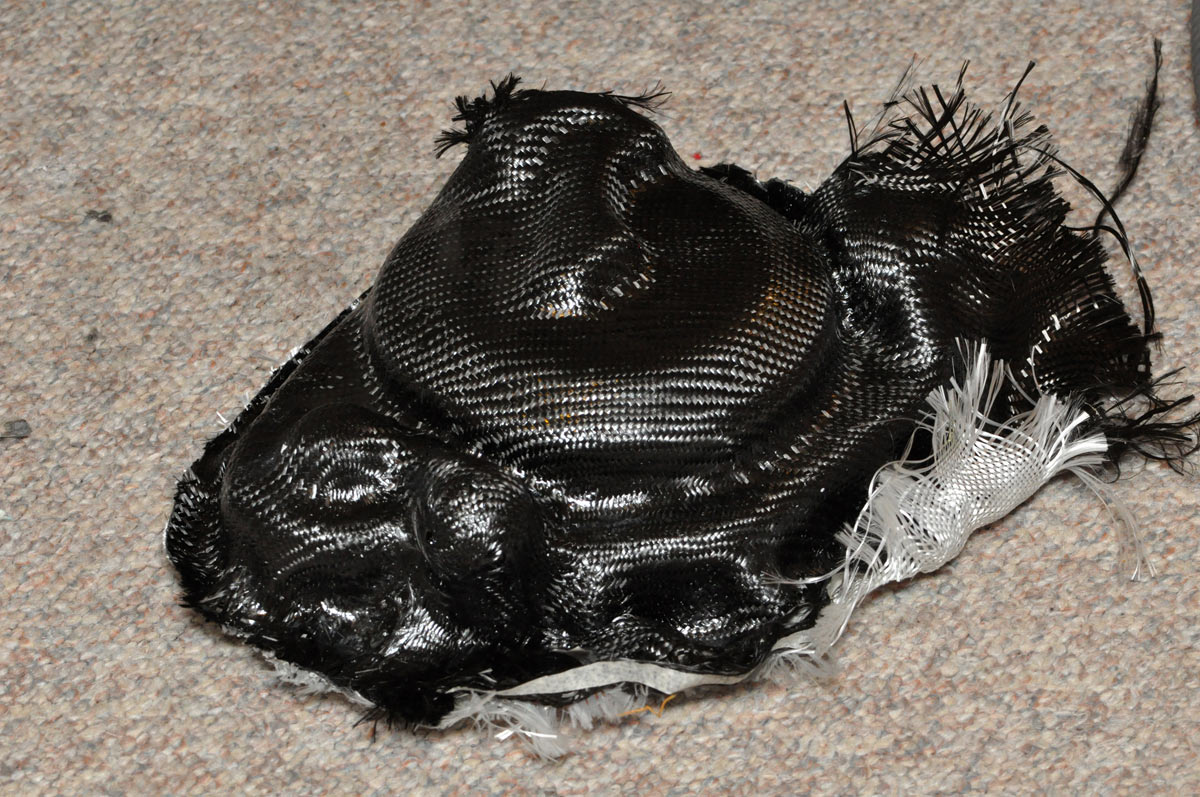
First I removed it from the towel. Well, I guess I kinda cut the towel away: who would have thought resin + cotton makes something about as hard as CF + resin? :lol
I needed to use a bit of force to remove the cover, just took it carefully and levered it using a couple of spoons from the kitchen….
The inside, as you can see, isn’t perfect. The white crap is the modelling clay. There’s a couple of voids, but nothing too bad: most are in areas that are going to be trimmed.
You’re probably wondering why there’s so many dags etc on the outside: that’s because they act as handles to make it easier to remove the cover from the case :).
Tidying up/final presentation layer
Now, I trimmed the cover to suit with a hacksaw. If I’d followed the instructions I’d have done this with one (or two) layers of fibreglass and it would have been much easier than sawing through 5 layers… At least I know it won’t be easily ground away!
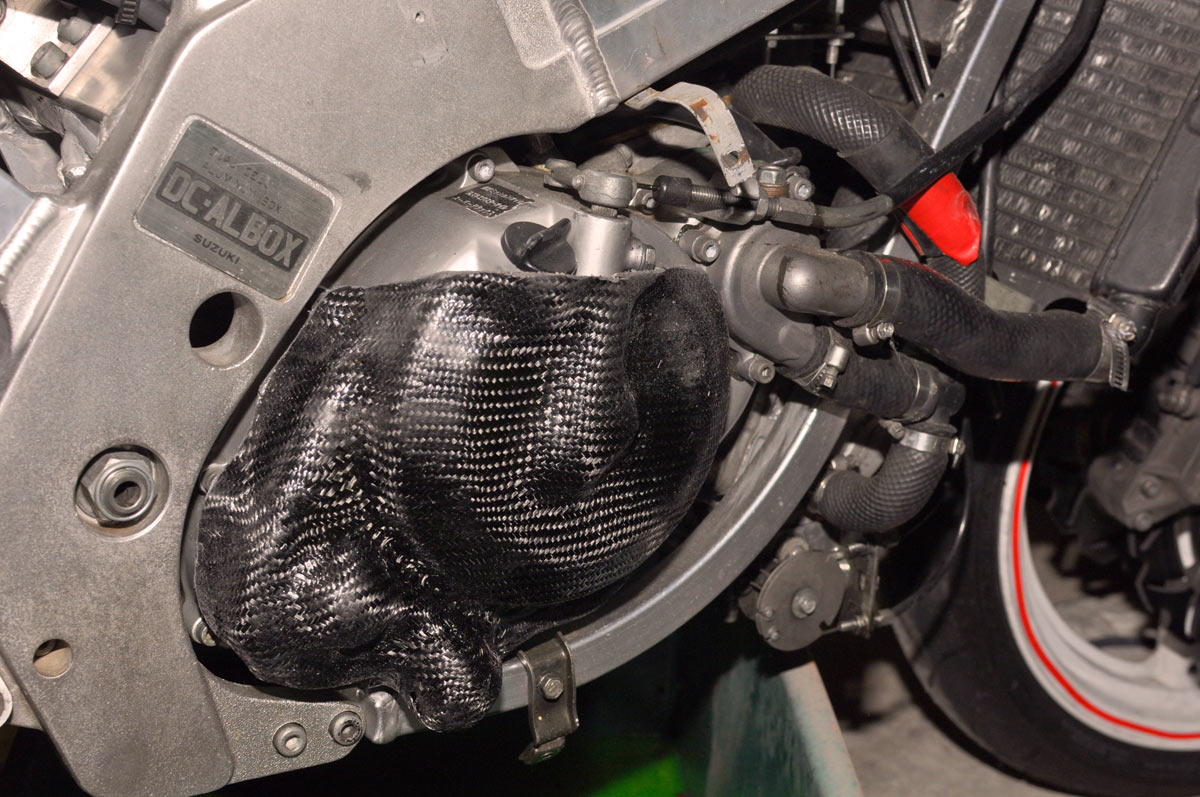
That’s the cover sitting on the bike. Note that there’s no kickstarter poking out: I still have to do the final presentation layer on the cover then lop off the whole bit that covers the kick starter hole/shaft.
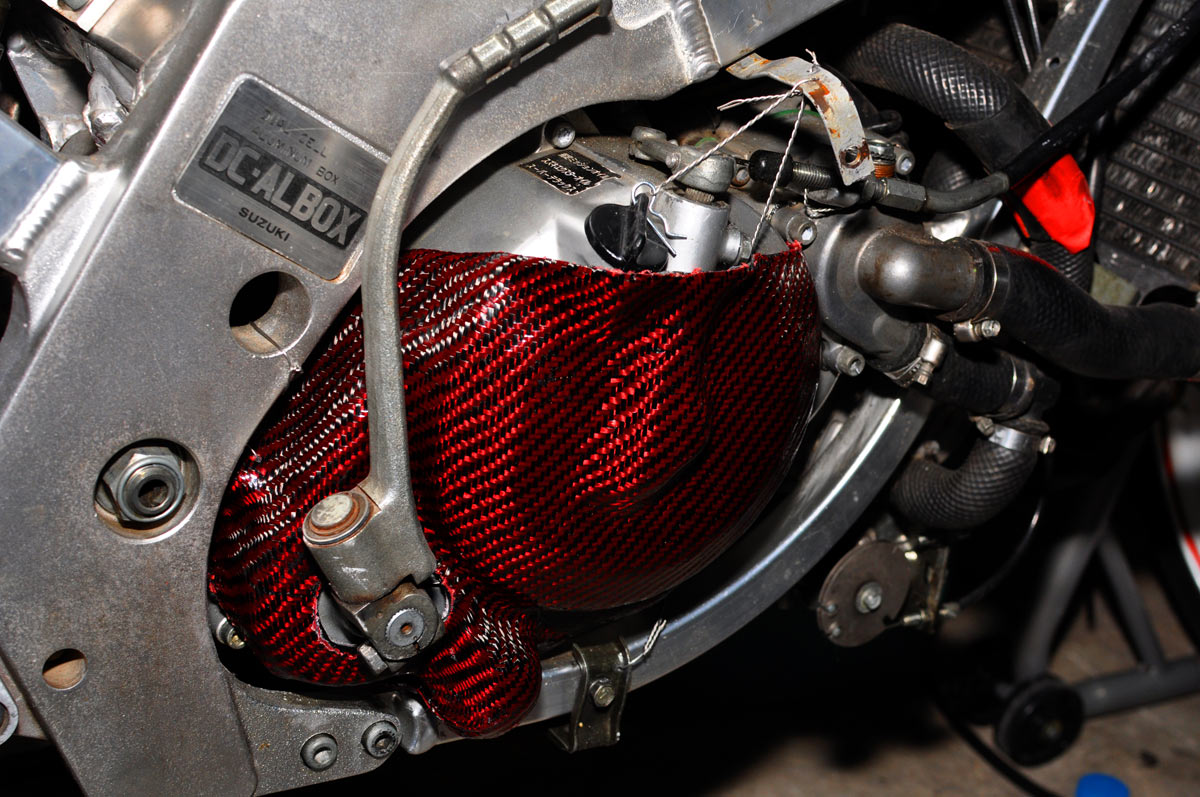
With a bit more sanding, more epoxy, a layer of red carbon-kevlar and then lots of drilling and cutting with a dremel, the final result for the RGV was:
Final words of advice
* If you’re going to do this, it takes time. You can do other things while the resin is setting to a level where it is tacky, but you have to be ready to put the fibreglass or CF on as needed. If you let it set, you have to mix up more resin and wait till it’s tacky.
* You can’t be slapdash about laying it on, or it’ll look shit. You need to take your time to get it perfect, cause small errors in one layer become huge errors by the end.
* I think it’s easier doing it with a case that is removed from the bike. If you were doing it on the bike, it would be easier let the resin set a bit more in the measuring cup THEN brushing it onto the case.
* Releasing it earlier and trimming it to size, then doing further layers on the removed cover, would be much easier to handle.
* The kit itself is moderately cheap and comes with everything you need with the exceptions of scissors, acetone to clean the brushes, and a crap and expendable towel or two. This is good: there’s not really any more to spend, no hidden costs. But there is a good deal of time required.
Examples of other sets I’ve done like this
Air-cooled GSX-R 750 clutch, starter clutch and timing covers

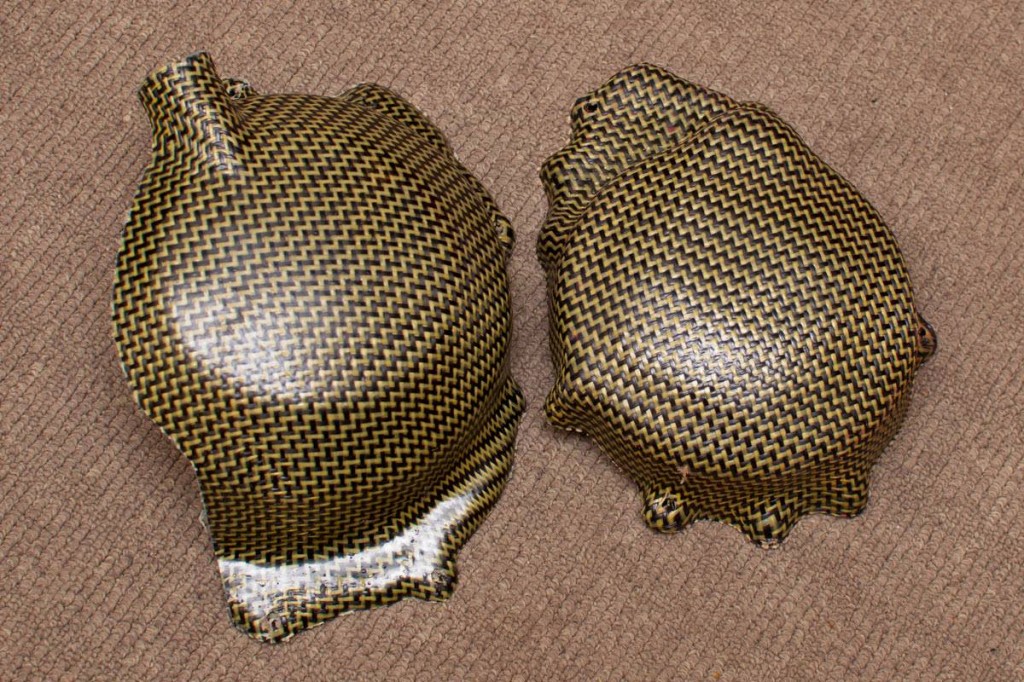
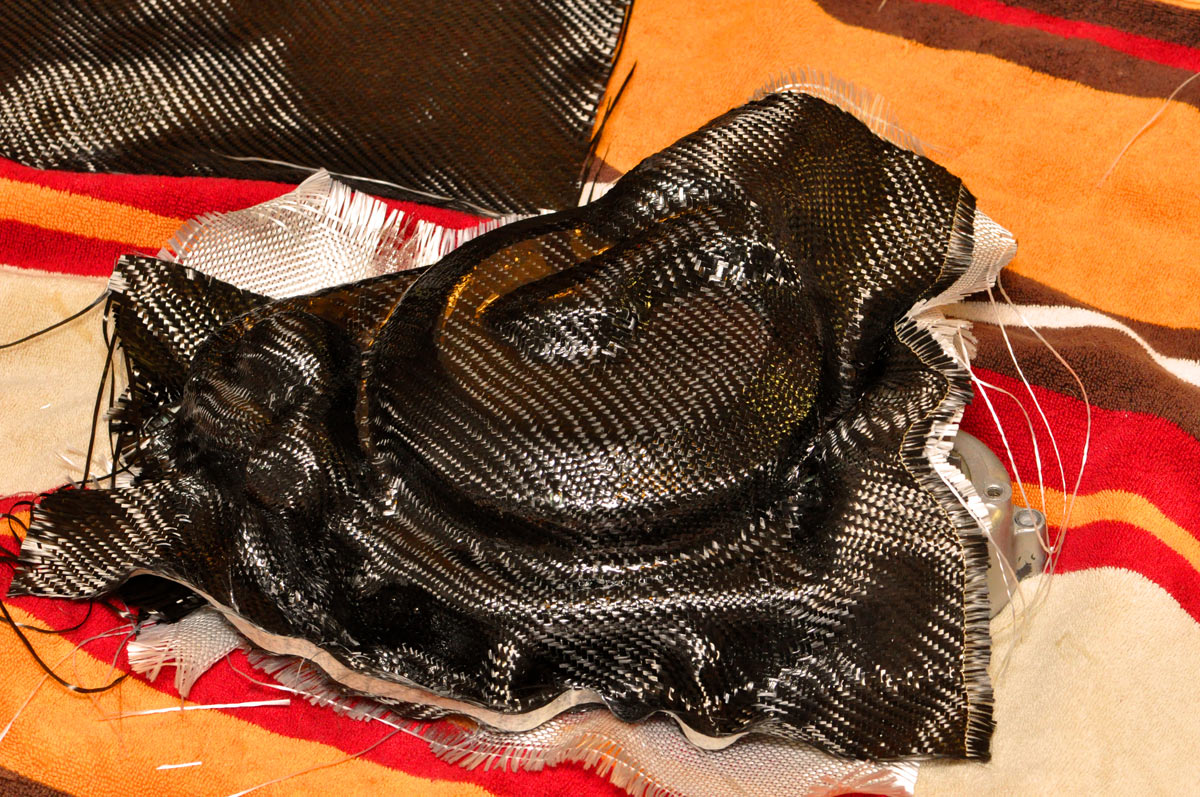
CF protectors for an oil cooled GSX-R (they should fit all of the 750 and 1100s I guess). All are popped off the plugs used to make them already, and are in various stages of completion. They’ll all end up with blue/black carbon-kevlar over the top and then trimmed and filed to size. Leaving tails makes them a lot easier to handle.
Mostly finished one in the background (with the blue/black carbon-kevlar over the top and the cloudy looking — half polished — epoxy) is the starter clutch cover for the gixxer. Starter cover on the gixxers pokes a long way out and is very vulnerable. Even if I keep it as a road bike, it’s a good idea to have this bit protected. Very thin case over the top and it lets very important fluids out with even a very slow drop.
Note all the big ‘runs’ of epoxy are actually on bits I’ll be cutting off, the coverage is a lot more even on the bits I actually am keeping.
I got a bit smarter with the way I laid these up. These are done so I can actually bolt them to the covers (will drill them as required and then epoxy some bushings into the cover so they’re fully secure). I also used a lot more modelling clay to give some clearance on the sides to make them a bit easier to remove. The RGV one comes off fairly easy with a couple of plastic levers and some compressed air; but, these should be much simpler as they’re also bolted on rather than bonded and lockwired (bonding alone not good enough).
Kawasaki ZX-6R Ninja (2005) model)
These were a rush job but came out ok.
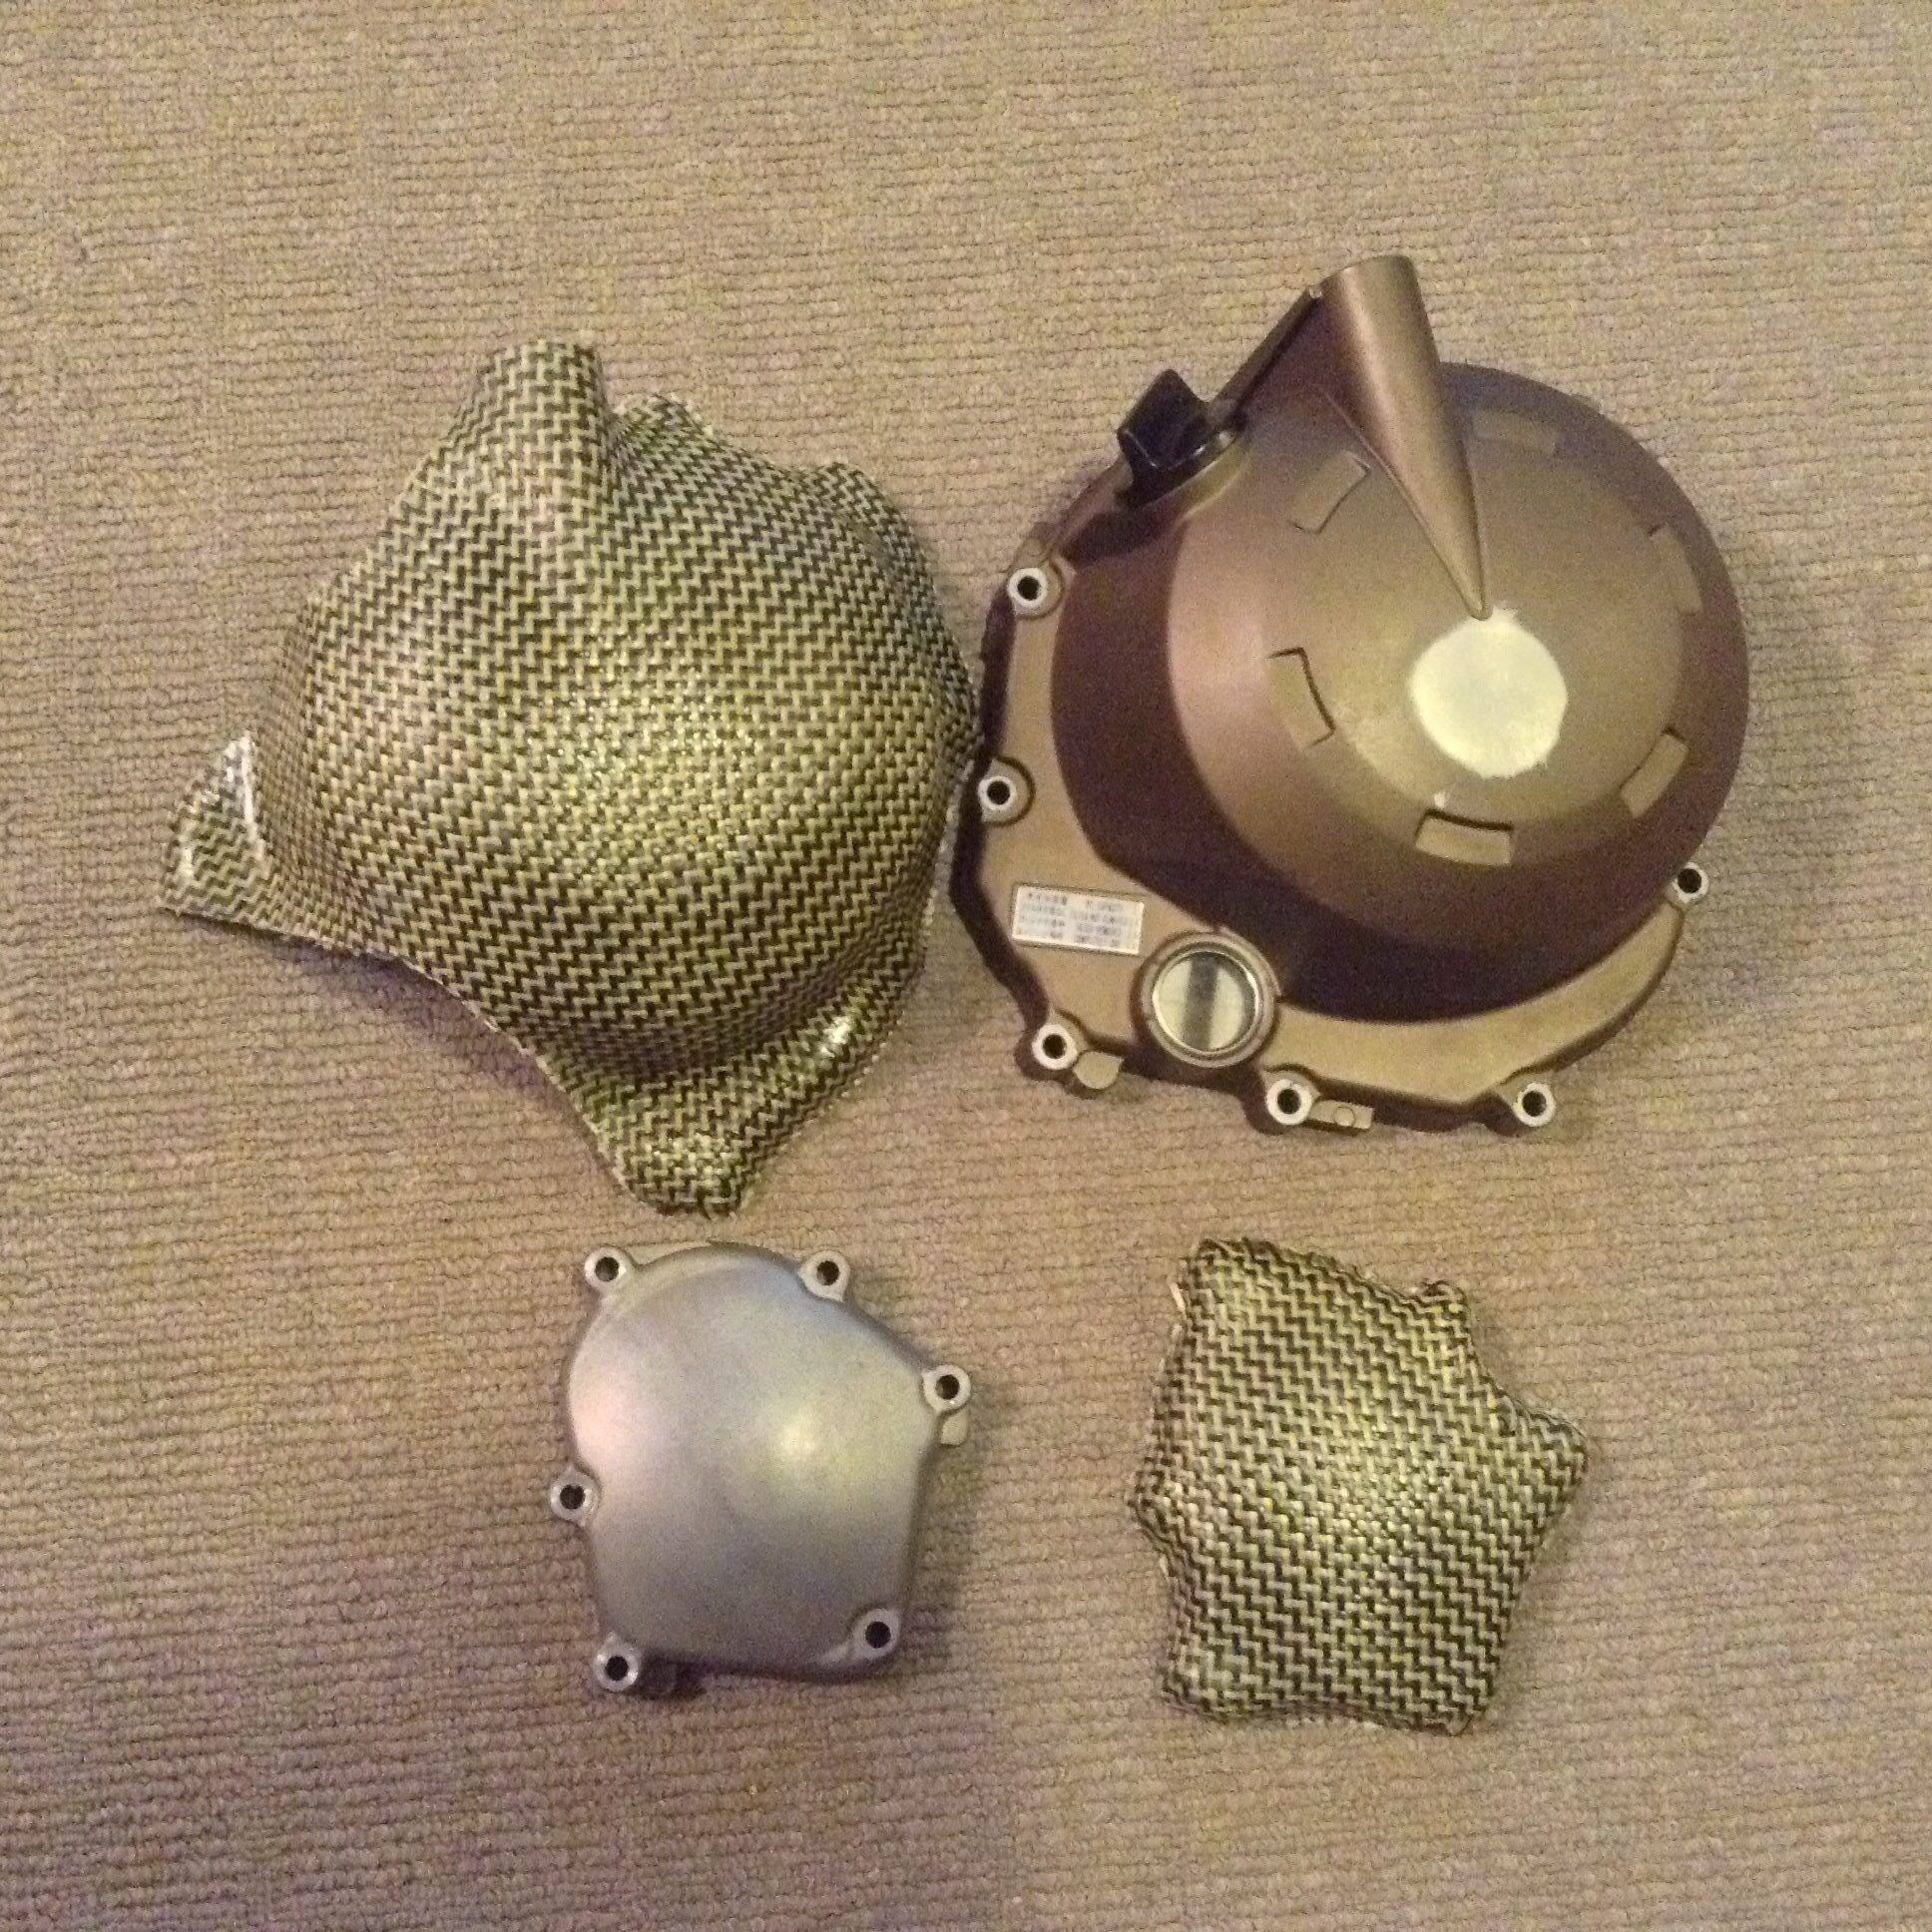
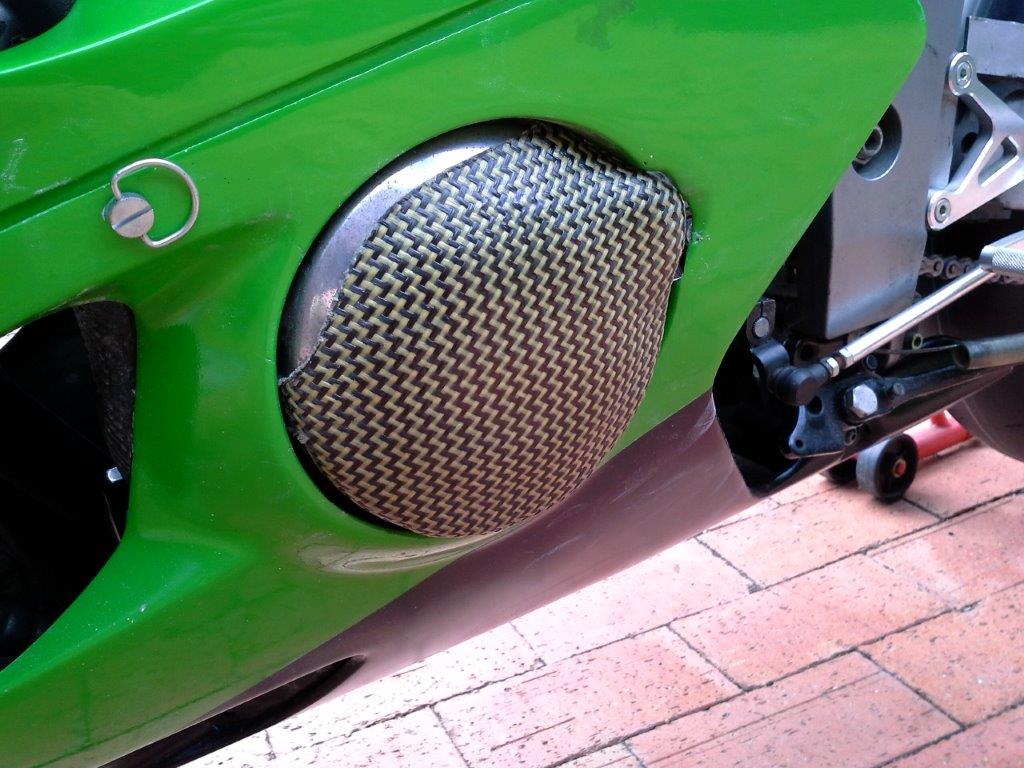
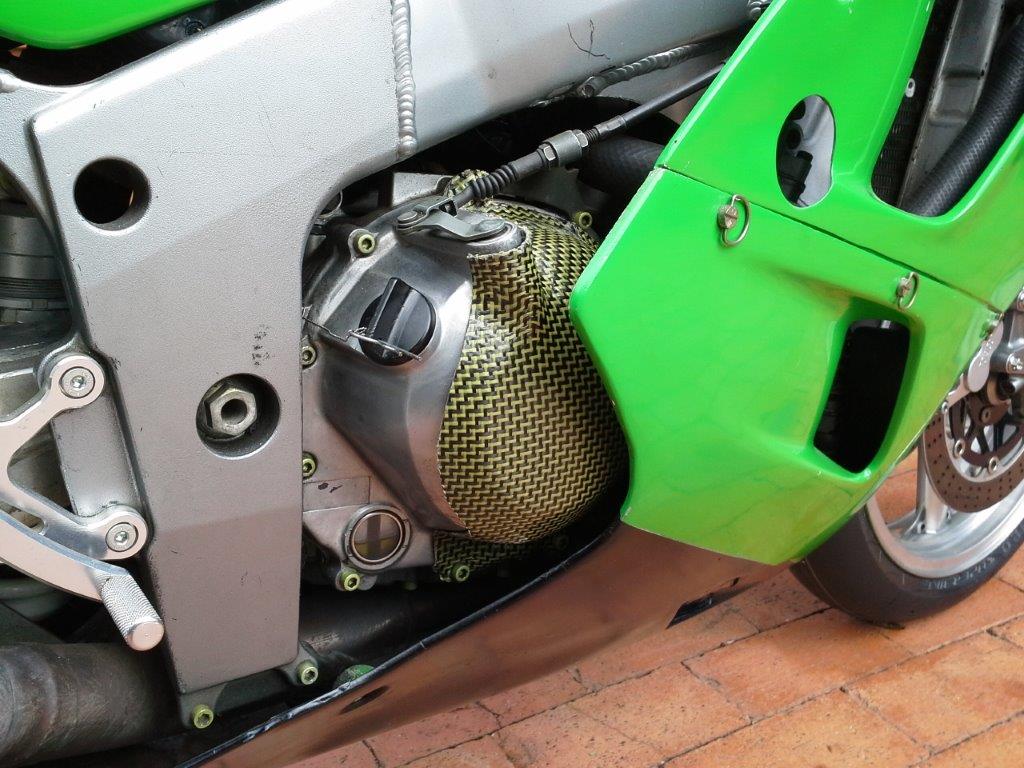
Kawasaki ZX-6R Ninja (1995-1997 model)
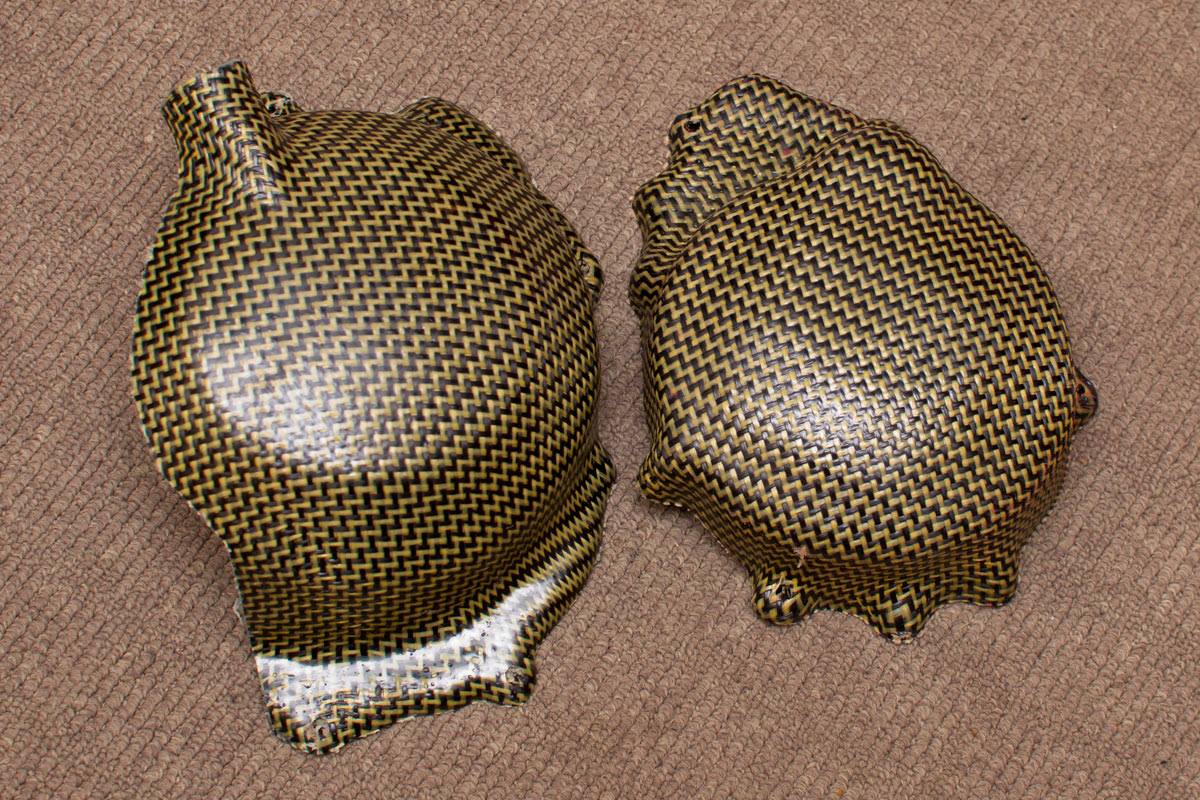
These are actually the covers for Mick’s 95 ZX-6R. The stator cover is hugely vulnerable on these so I layed up extra where it could hit the road. These are designed to bolt direct onto the cases, as (sort of) shown here. You can see the cheeky bolt at the bottom of the clutch cover :).
That’s all well and good, how well do they crash?
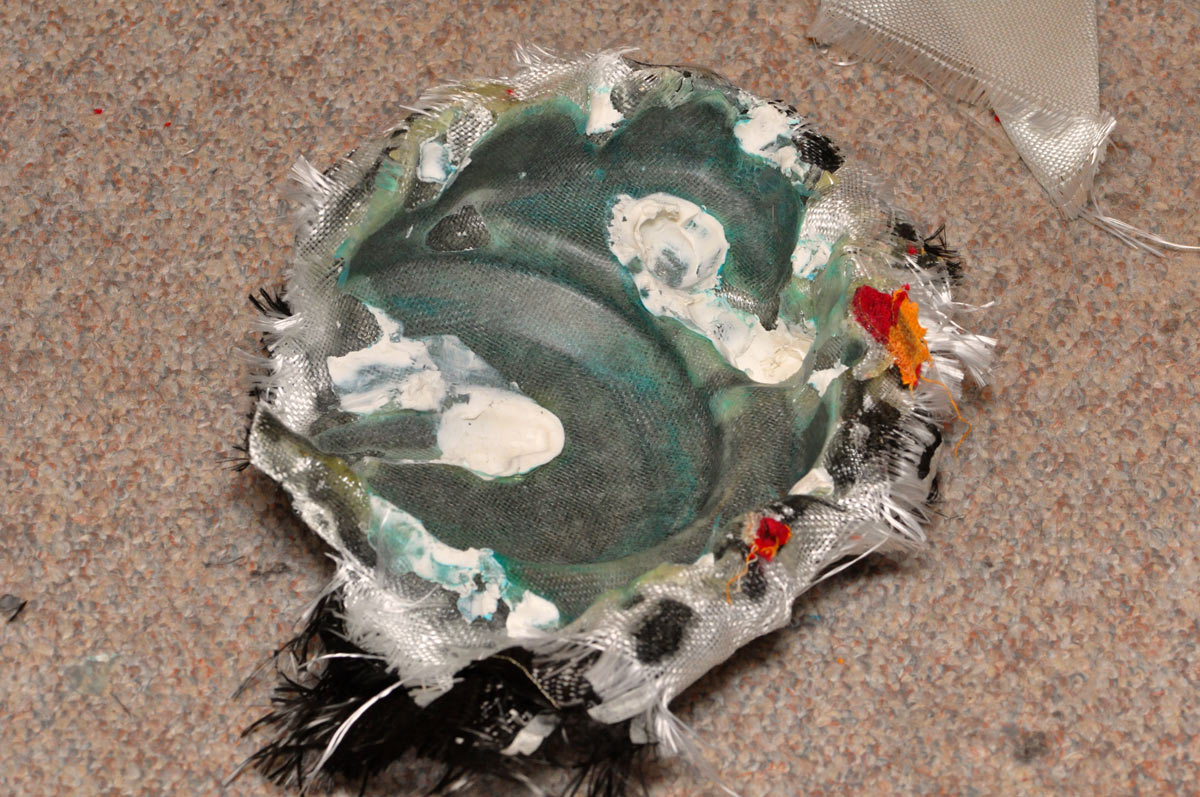
How well do they crash? Pretty well – here’s an example from an RGV250 that threw itself at the track hard on the RHS and then slid along for a good distance:
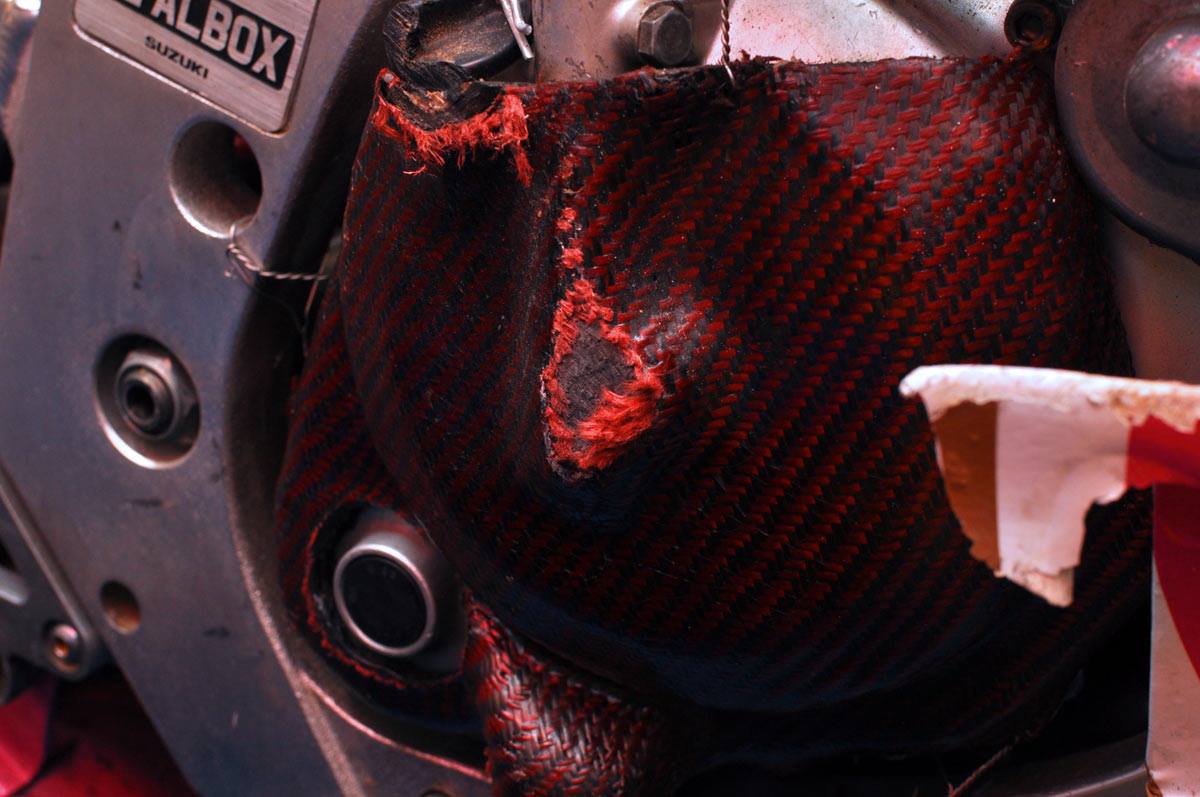
Kevlar gives the best abrasion resistance (but looks ugly), carbon looks the prettiest but is the lease abrasion resistance; for most cases carbon-kevlar all the way down is the way to go. Lots of comercially bought ones are layers and layers of fibreglass with carbon-kevlar over the top: bear that in mind when you consider the price for DIY covers usually includes doing it properly :).
In some cases, they wear through (they aren’t infinite strength), but that’s ok: we have also written up how to repair the cf covers when you wear through them.
How do I fit them and how do I remove them, and how much do they cost?
It all depends how you mould them up. The first sets that I did were purely held on with sikaflex and lockwire (which does meet the MOMS requirement that “bonding alone is insufficient”). The RGV didn’t move an inch when it slid along, however, if you don’t use enough sikaflex they can pop off. Later ones I’ve moulded up go straight to the bolt holes and bolt down.
Removal is a bit of a pita depending on how much you sikaflexed them on, but the RGV ones come off every oil change of the gearbox anyway (need to protect the drain plug on it) and it’s pretty easy. I’ve pulled it off maybe 8 times now and never had a drama, just takes about 10 minutes and a bit of patience not to just lever the thing off and ruin the cases or snap the cover itself. Takes another 10 mins to clean up the sikaflex I use to stick them on with, too (and for racing they’re also either lockwired or bolted on, depending on the mounting method).
Cost and time wise buying premade carbon-kevlar ones is much easier than making your own, and the bolt on ones made of metal by places like Woodcraft and GB Racing are probably better. The sikaflex is a bit of a pita to clean off the cases. These ones are pretty good for models where you can’t buy protection to let you go racing, but given a choice I’d buy other options first :). (And, for the record, for the Monster, I did just that).
Ultimate cost is about $100 worth of materials for a set (clutch + stator) at an absolute minimum, once you include all the other consumables. They also take a lot of time: there’s several hours invested (up to about 10 hours per set of actual work) which has to be spread over several days as you babysit the epoxy, lay it up, let it get tacky etc etc. Buying premade ones is therefore usually cheaper once you take into account your time (and I’d charge more than AU$100 per set just because my time isn’t worth $0 if I were making them for people).
There’s no price on ‘race’ though, and they look a lot more race than a bit of strap steel bolted over a cover :).